

Backwoods Blacksmith
-
Posts
297 -
Joined
-
Last visited
Content Type
Profiles
Forums
Articles
Gallery
Downloads
Events
Everything posted by Backwoods Blacksmith
-
I love that big stuff. I have 100's of hours on a 24 ft Vertical turret lathe. It had three heads. You could turn two od's and bore at the same time. I also have plenty of hours on a 30 ft chuck 60 ft between centers machineing steam turbine rotors. I have also turned big hydraulic cylinders 40 ft long and 4 ft in Dia. Plus years it seems like on smaller stuff. I have machined thing that went to war, outer space and the ocean deeps. But my stomach is torn up from the stress of tight tolerance and tight time so I don't do it anymore. Now I weld and fabricate and a tight tolerance is a 1/16 not .0002.
-
I am going to build a new gas forge and I need a source of Kaowool near Eugene, Or. Any information would be appreciated. I have Goggled searched with unsatisfactory results. Thanks
-
Adequacy between home forge size and item size to forge
Backwoods Blacksmith replied to Tifouix's topic in Gas Forges
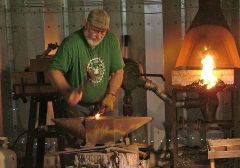
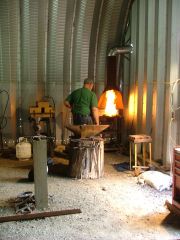
This is my large gas forge. 12" gas pipe 18" long. The ends are closed up using fire brick. This allows me to tailor the opening to fit the stock. I had used a 12 volt blower-burner but did not care for it. I have since added the 3 atmospheric burner set up from a NC Forge Whisper Daddy. It had been dropped when we moved and I have not gotten around to fixing it. There is a sliding rest in the front for longer stock. The stand is from Harbor Fright 29.99. I have welded stacked billets 1 1/2" by 1 1/2" -
Adequacy between home forge size and item size to forge
Backwoods Blacksmith replied to Tifouix's topic in Gas Forges
I think that the most efficient style I have made has been round with the blast coming from the side located in the upper third of the of the vessel. This seemed to cause the flame tocirculatee and spread. Thus no hot spot directly onto the floor. A point ofinterestt is that by putting a fire brick or refractory floor in the bottom the hot spot will spread and protect the softer Kaowool. I also use a dished stainless plate for fluxdrippingss when welding as the melted flux will eat the floor. Currently both of my gas forges [one square the other round] has the blast at the top and on center. the square forges chamber is 6in x 9in with a single burner and the other is round with a 10in x 18in chamber with 3 burners. The ends are closed up with fire brick so I can change the opening size to fit the work. If I need to heat a short section or make large scrolls or forms I still use my coal forge. This is what I started with in 1979 and am still most comfortable with. -
Adequacy between home forge size and item size to forge
Backwoods Blacksmith replied to Tifouix's topic in Gas Forges
I don't know that there is a difference. Once the chamber gets hot, it is hot everywhere. That is why it is important to have good insulation. To keep the heat even and on the inside. I am sure that someone has done tests to find the optimal shape, but I have made and used square, rectangle and round to good effect. I think that most of us use what we have available, but the commercial forges all seem to be square or rectangle. This may be for manufacturing purposes. Follow the threads on the forge forum and you will get more information than you know what to do with. My thoughts are to keep it simple. I still lean toward the NC Forge style burner design and I know that the blade makers really like them. -
Most, not all jackhammer bits a A-7 or similar air hardening tool steel. This is a fine example.
-
The bridge to nowhere
Backwoods Blacksmith replied to clinton's topic in Welding/Fab General Discussion
Boy, you have my abject sympathy. Here in Oregon, if you need 5 millwrights, welders, fabricators you need to hire 10. 2 won't show up, 2 will be fired by noon and 1 won't come back from lunch. They weld 7018 in the pouring rain. Oven? What oven? Most MIG is solid wire. .045 or 1/16 and it will rust between starting time and lunch. As far as fitting goes forget it. There will be no gap at the bottom of a vertical and 1/2 at the top. Pipe welds fail continually because of poor fit ups. Do you need any help? Good luck -
Adequacy between home forge size and item size to forge
Backwoods Blacksmith replied to Tifouix's topic in Gas Forges
A door can limit your oppotions. The use of brick allows you to make your opening the size you need not the size of the door. Yes, you get some heat loss but not enough to cause concern. With the small chamber and two inchs of insulation one burner will do it. Once it comes up to heat you can adjust the gas pressure to control scale. With brick on each end you can heat longer pieces by passing them through the spaces in the brick. If you build a forge with a 10 inch chamber or larger and 18 inch long than you would want two burners or even three. My pipe forge was made from 12 in gas pipe and is 18 inchs long. I only have 1 inch of insulation so I have a 10 inch chamber. I found that to get the heat I wanted and to control scale I needed 3 burners. But I can forge weld big billits of material. -
Adequacy between home forge size and item size to forge
Backwoods Blacksmith replied to Tifouix's topic in Gas Forges
Are going to use the forge only for blade work? I like the NC line of forges. No blowers and multipal burners. The Whisper Daddy is their large one, and they make a blade forge capable of welding with. A small single burner with a 6in interor and 12in long will work very nicely. Use two layers of Kaowool, altho one layer will work. Use brick to close up the back and front. I have made several of these and with mulitable burners. Run your gas pressure between 10 and 20 PSI. Once your temp comes up you will have trouble keeping up with more than three irons in the fire. Use your pressure gauge to control oxidation and heat. If you are not welding turn the heat down a little to keep the steel in the yellow range and not burn up pieces still in the forge as you work. I hope this helps -
Smoothing/refinishing an anvil?
Backwoods Blacksmith replied to wooginator's topic in Anvils, Swage Blocks, and Mandrels
Get a large smooth flat bastard file and draw file the face to remove the snaggy high spots. With a file you can keep the face flat and remove only the high spots. The only time to use a grinder on an anvil is when you radius the edges If the work is still picking up marks that cannot be removed, make a hardy plate and use it for your finish work. I think you will find that a hardy plate will be of use anyway for edge forming and packing. In time,without further abuse, the face will smooth out. I have taken whanged up anvils and used a large surface grinder the rework the face with good results. Most anvils with hardend faces are 1/2 in or better. Good luck and keep the hot end on the anvil. -
 250 lb Centurian I also have an 80lb Haybuden [?]
 -
 It is the same style but new manufacture. 34 ft by 65 ft 16 ft high
 -
Slowing Down a Drill Press
Backwoods Blacksmith replied to macbruce's topic in Drills, Post drills, Mag drills, etc
You have to change the pully size. Either larger on the spindle or smaller on the moter. Finding a slower moter is possiable. If the current moter is 1725 RPM you might find a 900 RPM moter some where. Match the HP or go bigger. Make sure the frame size will match your bolt pattern. Made that mistake before. Adaptor plates can be made. Just extra work Good luck -
-
Forge welding
-
What type, style, shape top punch are you using in your sinking operations? I am slowly dragging my way out of the "traditional" blacksmithing and getting into the [gasp]art side. I have done sinking with a hammer. Spoons, ladles etc but want to go deeper and bigger. I will be starting with a treadle hammer and then going hydraulic. Love your work
-
I think you will find that the bronze bushings will last a long time. While there is some side load, most of the action is vertical and unloaded. If kept lubricated, the film will carry the load. Babbitt bushing on LG last a long time and Babbitt is much softer and not nearly as tough as bronze. The side load on the LG is much greater than will ever be seen in this application. Very nicdesignhn. What is youClarencece between the shaft and the bushing? Is ioil litete or navel bronze? I hope to come see it soon
-
thinking of modifying my hammer
Backwoods Blacksmith replied to jimbob's topic in Power Hammers, Treadle Hammers, Olivers
I can't say that I disagree with any of the previous comments. But, if you add a solid block of significant size to the top of the anvil shaft it will certainly help. I have a Jere Kirkpatrick style hammer that I built several years ago. The anvil shaft is 4 in sq tubing with 3/8 wall. It is topped with a 1 in plate. I then added a 4 in by 6in spacer to be used with tooling. When not using tooling I use a piece of 50lb RR track and 2 in cutoff end of a 6 lb sledge hammer. These are both welded to 1 in plates. This set up really moves the metal. My tup without the hammer head weighs 65 lbs. I recently reduced the weight from 80lbs due to spring breakage and availability. If I had the chance I would certainly go to a solid anvil shaft of minimum 4in. But since I am in the middle if an air hammer build I don't see that happening. Adding a solid block 25 to 30 lbs to the top of the anvil shaft will really enhance your results. Good luck and happy hammering -
I took an old belt drive table saw and use a thin 8 or 10 inch carburundum blade to rip leaf springs. I have also used it to split RR spikes. I raise the blade all the way up and have very little clean up with the hand saw. Useing the rip fence sure helps keep things straight. Yuo could also make one by building a frame and table. Add 1/2 hp moter and threaded abaptor to hold the blade. Good quality Dewalt blade last a long time. Wear gloves as the material will get hot. Good luck
-
New Style Kinyon Hammer
Backwoods Blacksmith replied to gearhartironwerks's topic in Power Hammers, Treadle Hammers, Olivers
John, Thank you for the invitation. I am flying to Wilmington, NC Sunday for a short job. I will contact you when I return Gene -
New Style Kinyon Hammer
Backwoods Blacksmith replied to gearhartironwerks's topic in Power Hammers, Treadle Hammers, Olivers
John, Thanks for the info. I will try Google. The duel rod design shold give you the stability you want. I may do the same thing. Thanks again. Where are you in Oregon. I am near Roseburg. Later Gene -
New Style Kinyon Hammer
Backwoods Blacksmith replied to gearhartironwerks's topic in Power Hammers, Treadle Hammers, Olivers
I just watched your video. very nice, and the hammer seems to work well. I have the 1st plans that Ron made up that I got when a member of AABA. He was a member also and several members built that style hammer. It called for a more robust frame than your style. I like yours better. Your frame looks to be 6 in sq tubing. If so what is the wall thickness? I also like the thrust plates you made for the UMHW. What do you use for lube? I like yourstylee better than the one I have. Could you tell me where to get the plans? Thanks Gene Bland Oakland, Or