

2Tim215
-
Posts
471 -
Joined
-
Last visited
Content Type
Profiles
Forums
Articles
Gallery
Downloads
Events
Posts posted by 2Tim215
-
-
Nice.
-
If you are looking to apprentice as a bladesmith then Kevin Harvey of Heavens Forge in Belfast would be your best bet. I have heard that he takes on an appie now and then, though you don't get paid as far as I know - though being under his tutalage ensures that you get known and your stuff sells. He is the only Master Bladesmith in South Africa as far as I know. Tiaan Burger gives courses every now and then and is always willing and free with his expertise.
-
Nice. Real period piece.
-
Love it. A lot of work in there.
-
Hi
Nice to see another SA here. Good looking knife. But I see it's a full tang so have to ask did you anneal it and very NB did you normalise it? If you normalised it during and after the forging process you shouldn't have any cracks. But to drill holes for the handle the blade will need to be annealed. Feel free to ask if you need any info in your area. I know Tiaan Burger is always willing to assist new blacksmiths and Bladesmiths in the Pretoria region.
-
No it's Friday but it sure feels like a Monday! What a day!
I haven't forged in over ten months as the forge is too close to the house and not good for baby. I run a recycled veg oil forge and it's LOUD. So today, after two weeks of cleaning nozzles that stood for ten months and getting everything ready I light up the forge to do some desperatly needed creation and the compressor valve is broken. So I shut down everything, jump in the car and go to town to get new ones and when I get home I crack the regulator by tightening the nut to tight. So off I am in the car again to buy a new reg but no luck so I spend three hours trying to fined a CO2 welder to weld it, get it welded, get back and it's not leaking - all well and start forging again. Ten minuts later - POP - the regulator cap comes off - broken clean off. Back in the car - get a smaller reg with a reducer to make it fit - get home and put it all back together and it's 2H30 and the baby is sleeping - no more forging today.
When it rains it pours - all in all I spent 30 mins behind the forge today - men don't cry but damm I feel close to tears right now - all I can do is stare at my new post vice and plan my new workshop.
-
Nice find.
-
After a good clean up and some high heat silver paint - all I need to do now is make the spring and it will be part of my travel setup for blacksmithing demos.
Have made arrangments with the scrap yard people - they have pics of what I am looking for and will keep an eye out when they can - about all I can ask for.
-
This was hanging from the claws of the crane on its way to the crusher when I glanced up and saw it. With much waving and screaming I managed to attract the attention of the operator and save it from destruction. Sadly I know that two more were in the pile and have been destroyed.

I also managed to get half a wagon wheel but found out that two forges with working hand blowers were packed into the container two day before and sent to china/india as scrap.
-
Thanks - appreciate the comments. Been out of the forge for 10 months now - good to be back.
Heres the other one
-
Have been wanting to make one of these for a while - so this is the first of ten that I decided to make. Love the simplicity of the whole mechanism - think I will be doing more.

Steel is 1080 3mm with brass and Red Bush Willow
tx for looking
-
I have a book where I keep all the pictures of work I do - next to each picture is a beakdown of material, tips and how to's, time schedual, sundries and above all a costing breakdown as per current steel prices etc (this MUST be kept up to date) and this is what I use to price every item I make. I then add my labour cost to the time schedual with a 25 - 35% mark up for sundries.
I hate doing this but I learnt the hard way that a record of work done makes for less mistakes, losses and a quicker more efficient job.
But the above being said - all the record keeping and the most beautifull work in the world won't pay the bills - You HAVE to market yourself extensivley - and this can be harder than a whole month of full days behind the forge. Flee markets work best as there is always feet and they are not always the same people - they also don't cost much besides a small fee and your time selling.
Never sell cheap, rather sit on an item untill the person who wants it comes arround and always have stock of saleable items - people buy what they can FEEL and see not always only what they can see from a picture. Most sales are impulsive, give a person time to think about it and they won't usually buy.
Hope this helps
-
Over a year ago a scrap dealer I know gave me an anvil for a damscus knife - the baby came and time went by and this knife was always in the back of my mind. So on thursday I finally deliver it along with a S/steel one as an apology and he tells me that he has been keeping something for me for 8 months - it was dug out of the ground on a farm somwhere.
This was his gift to me.
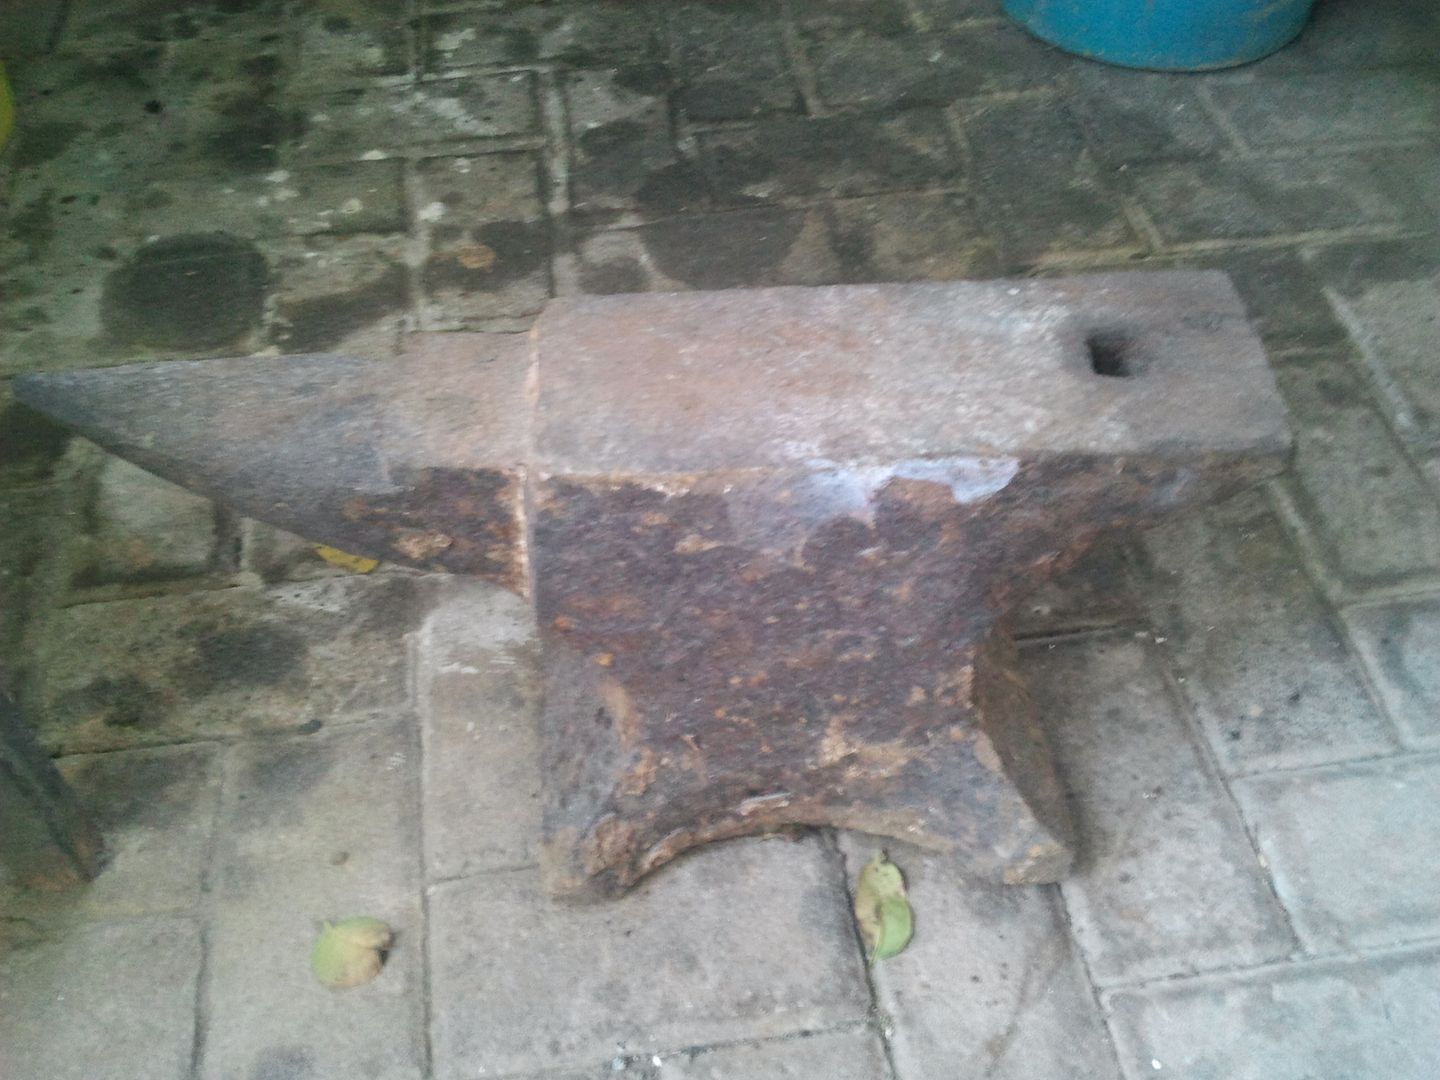
around 35-40 kgs and a quarter the size of my Brooks - Funny thing is I have been looking for a small one for almost two years to do shows. Funny how life works. She looks like she was under ground for over 20 years but with a sander and some tlc will work just fine.
-
One of the best pieces of "art" i have seen in a while!!!
-
-
There is a guy her in SA that takes Damascus knives and etches them deeply then sprays on high heat paint and dries in the oven just below tempering heat. He then sands the high spots lightly with 1200 # which leaves the color behind in the low spots - looks very nice if you are into that kinda thing. The paint he uses is the stuff they use on engine heads, etc. Wouldn't work on a plain blade though.
-
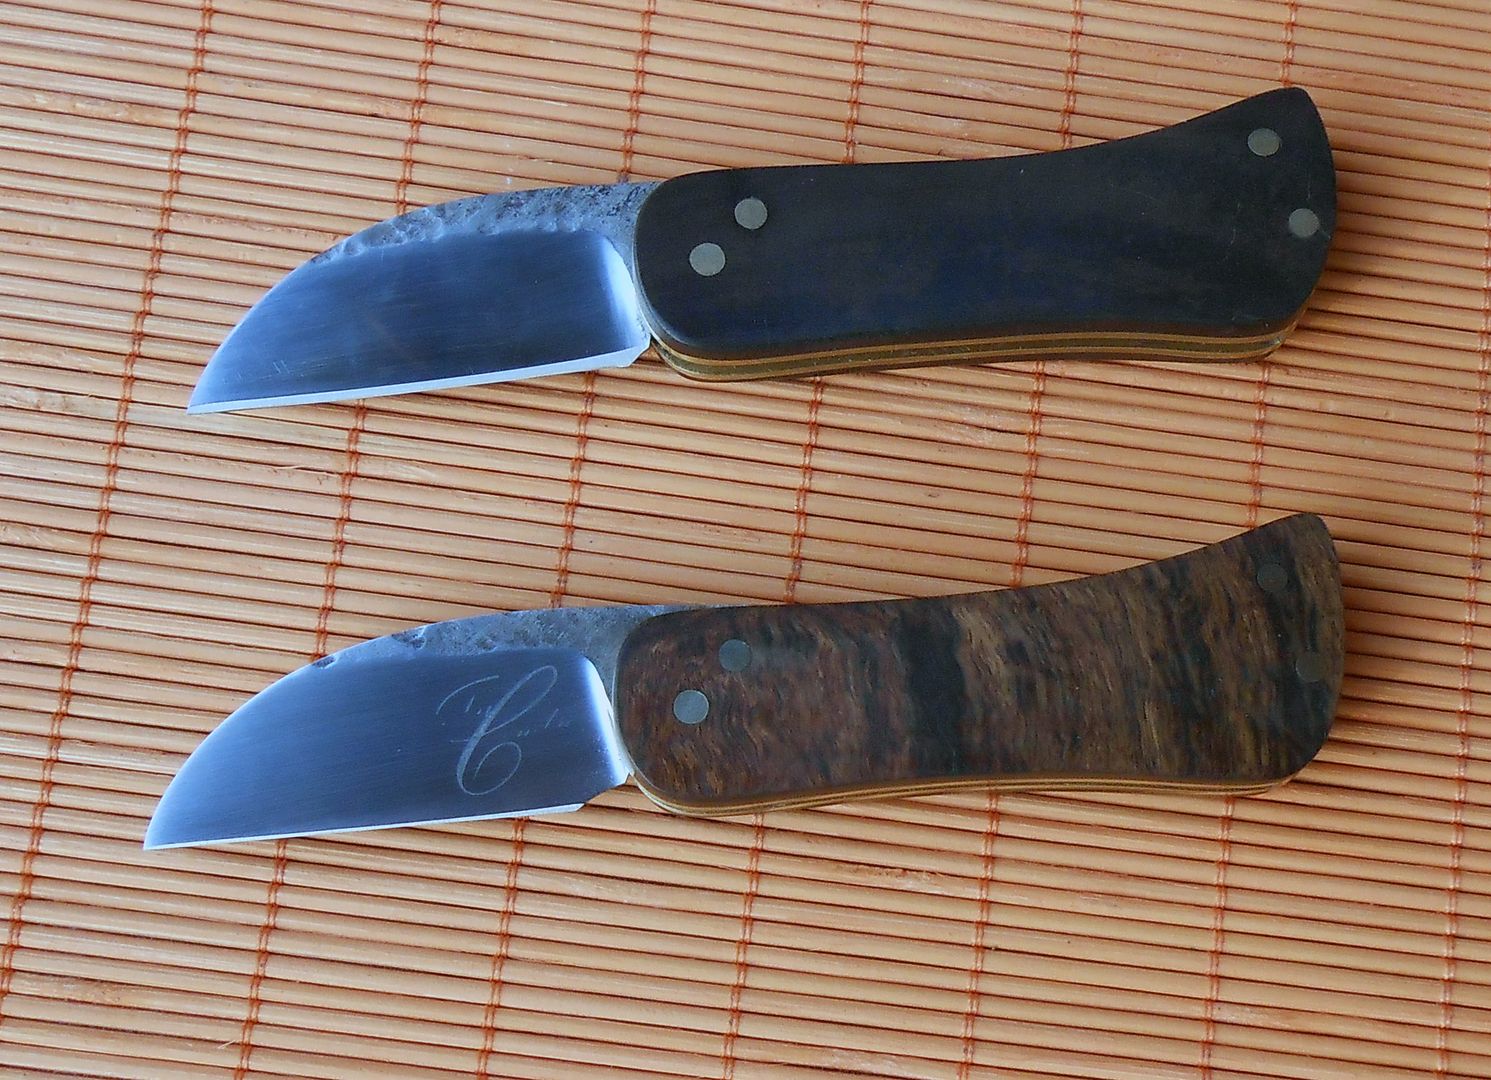
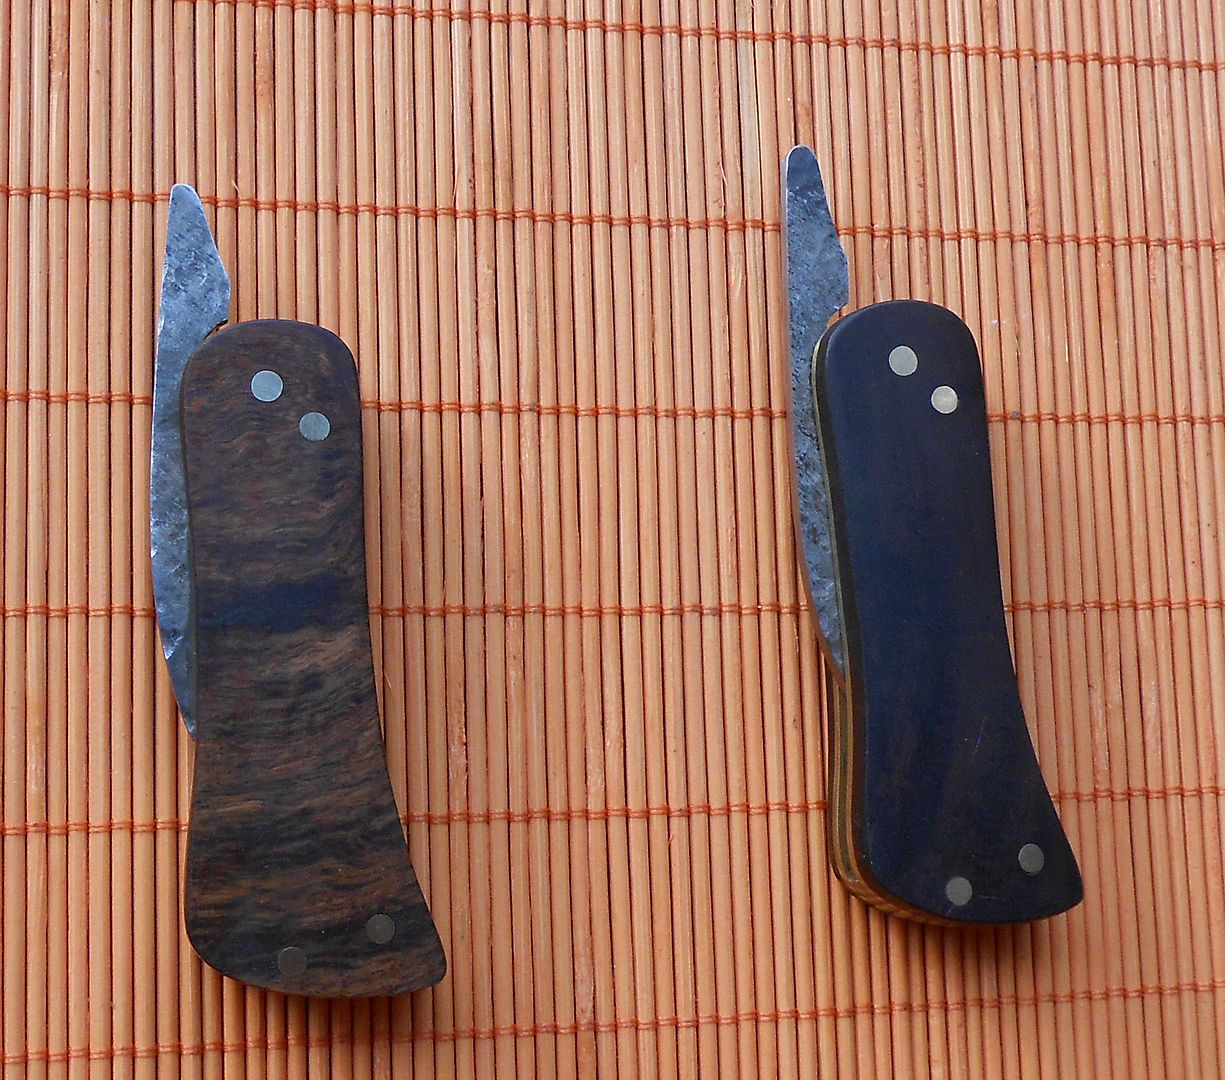
Thanks. Damascus is a low layer W pattern - used 8 mm 1075 and 2.5mm 15N20.
-
Finally found some time to finish something. A small 60+ layer Damascus hunter with Wild Olive root handle and Giraffe bone spacer. Wild Olive was a root I dug out some months back in the hills outside Eshowe.
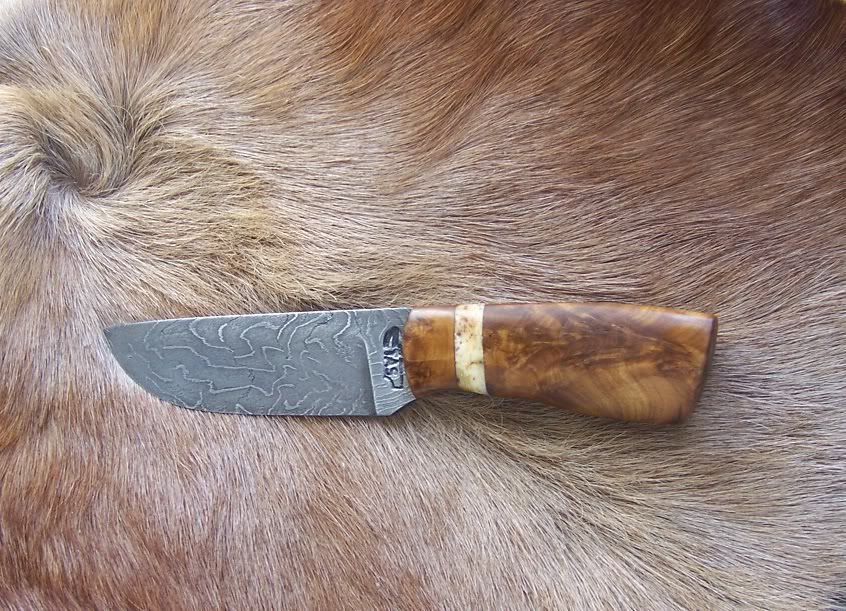
Thanks foe looking
Tim -
I live in africa and every hunter I know will use a cheap stainless knife for skinning and there nice custom for slicing biltong (jerky). Rich is right - go buy a cheepy and find out what works through trial and error.
-
Blind pinning is when you drill the hole in the bolster but not all the way through - about half way or better, a third of the way. You then cut the pin to size and it's important to note that the part the goes in the bolster must be slightly shorter than the drilled hole length. You do this for both sides of the bolster. You then flatten the tops of the pins lightly on both sides so that it is a VERY tight fit into the hole of the bolsters. You then place both bolsters on and press using a vice or lightly tap with a hammer. The flattened pin heads squeeze into the holes and are basically forced into place and you dont see them on the out side of the bolsters. Remember to protect the bolster with leather so to not damage them.
-
The reason is there is a much easier method - called blind pinning. Done right the bolster will never come off.
-
Congratulations, will you encourage her to learn & practice "traditional " skills and activities like the "reed dance"? :D
Not Likely!! -
Lovely!!
-
Subtle, ellagant and usefull - perfect.


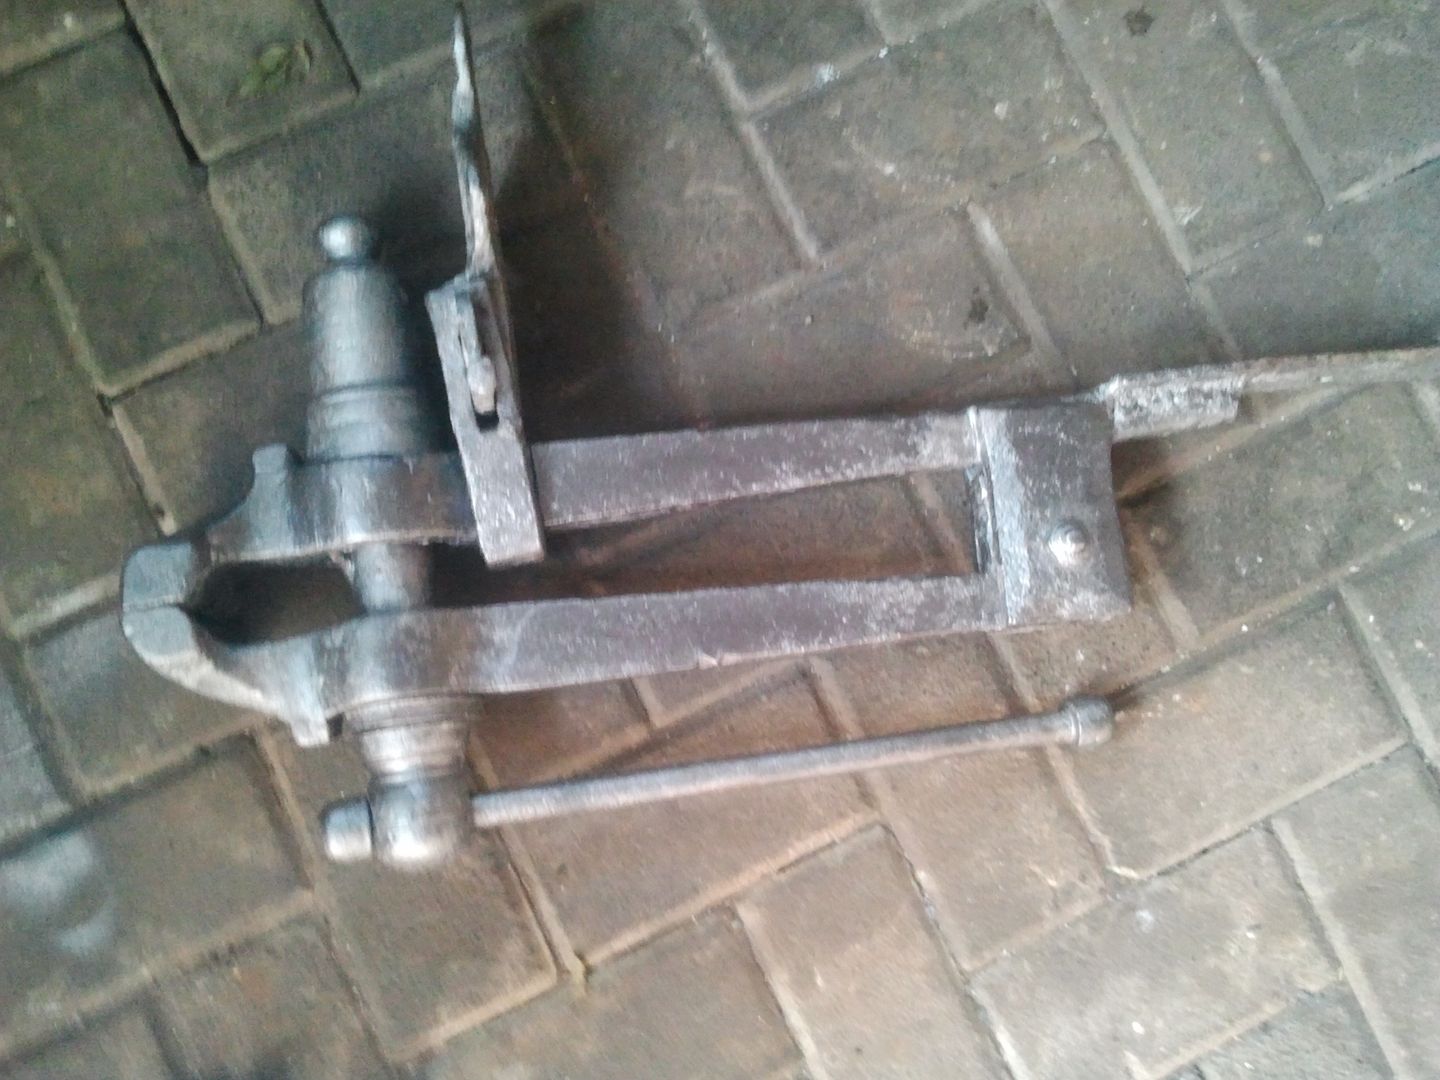
Tire hammer question
in Power Hammers, Treadle Hammers, Olivers
Posted
Hi all
Was hoping someone would know the hammer (and person) in below pic.
I am planning to build another hammer in the next few months and am perticularly interested in his use of a shock absorber instead of the normal spring arrangement usually used. My first was based on the little giant and I don't like it so am either going for the leaf spring or something else.
Any info on how this hammer worked etc would be appreciated
Thanks
Tim