

2Tim215
-
Posts
471 -
Joined
-
Last visited
Content Type
Profiles
Forums
Articles
Gallery
Downloads
Events
Posts posted by 2Tim215
-
-
Thanks Bruno
The ram is square welded to the guide sleeve. Will have to lift the guide by 2 inches and add a leaf in the spring. To much whip in the up swing and the big part of the ram is hitting the guide at full speed. But she hits hard!
-
@ VaughnT - no it's just part of the fly press that I might remove at a later stage.
@ Jacques - will try and take a few close up pics this weekend.
@ Windancer - vid posted rest to come
@ Bruno - Thanks - bolted to the floor and am using a 2.2 kw single phase motor at 1400 Rpm. Am planning adding more weight later. That's why the anvil has holes.
-
A quick test run:
-
Thanks. Yes the top and bottom dies will be able to change out. Also designed so that it can go higher for using tools. Am getting the motor tonight so will get a vid up as soon as it's running.
-
After many years of wishing, many months of collecting, 3 knives given as exchange and two weeks of very heavy lifting and some serious welding I present almost finished Frankenslam. Anvil weighs 226 kg's and hammer weighs 35 kg's. So looking at a about a 70# hammer.
Everything comes apart into 7 pieces for transportation if I ever have to move. All I'm waiting for now is the drive shaft to be turned for the motor and it'll be running in a week or two.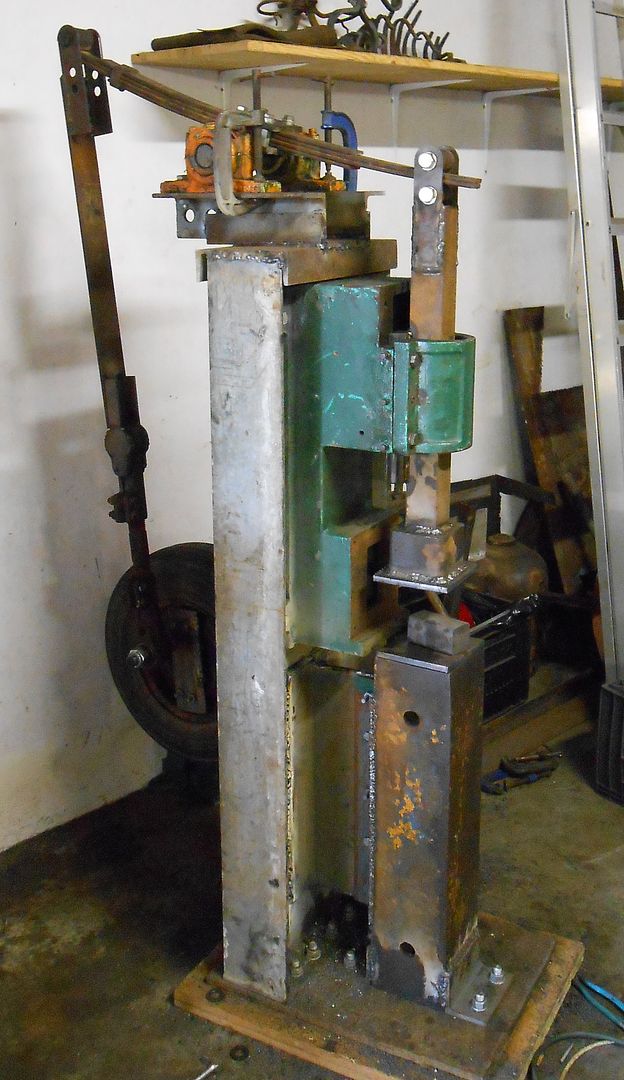
-
Nicely done! Would love to know if you feel what was paid for it was worth the time spent doing it? I know that personal satisfaction is payment of sorts but three weeks is a lot of work!
-
I know, I am only going to use the guide for a small helve hammer.
-
Very nice, but what do they plan to defend against? Those will do some serious damage.
-
Thanks for the feed back. It was originally a horizontal press and I think I'm going to strip it and turn it into a small power hammer. Otherwise I have no use for it and it goes to the scrap yard.
-
Nice corkscrew, not blacksmithing, no problem with grinding the point, lame forge, just use a hot cut with cold material next time to cut, use a smaller hammer, your ideas of case hardening are nonsense.
I posted the same in more complete form over on the thread you started at r/blacksmithing. You have some basic skills but calling yourself an artist is presumptuous.
Sorry, but every one has to start somewhere and this is just plain rude. Constructive crit builds but the above is just worthless drivel.
-
Was given this a while back and went to collect today. Not quite sure what to do with it so if any of you have any ideas on setting it up and dies etc I would appreciate it.
Tim


-
Thanks guys. What I have is a industrial air con fan - used to push a lot of air through ducting at the mall. Should do the job. I thought where it was placed was the problem and I was thinking today to put it at the elbow outside, I don't think this fan will handle the heat in the flu so it has to be outside so will have to fabricate a water proof box for it. Was hoping not to have to do that.
Thanks again. More work tomorrow :o
-
Uh, Charles - my profile does say Richards Bay South Africa and as far as I know I'm the only one doing this in a 400km radius. My attached pics show that a powered vent is what i am attempting but it's not working.
-
Very very nice.
-
Hi all
After two years without coal I managed to get my hands on 2 tons yesterday. Now I am having issues with my new forge. My first three forges had no problems but I am very limited to what I can do where I live now.


The attached pics show the only possible set up. I can not go up or bigger. Outside I can't go higher. I have a fan blowing into the chimney to create flow with a piece of steel to deflect it. But the problem is I still get way too much smoke for it to be safe for me inside the w/shop. If any of you cleverer people can come up with a solution I would be very happy. Really need to start forging now.
Tim
-
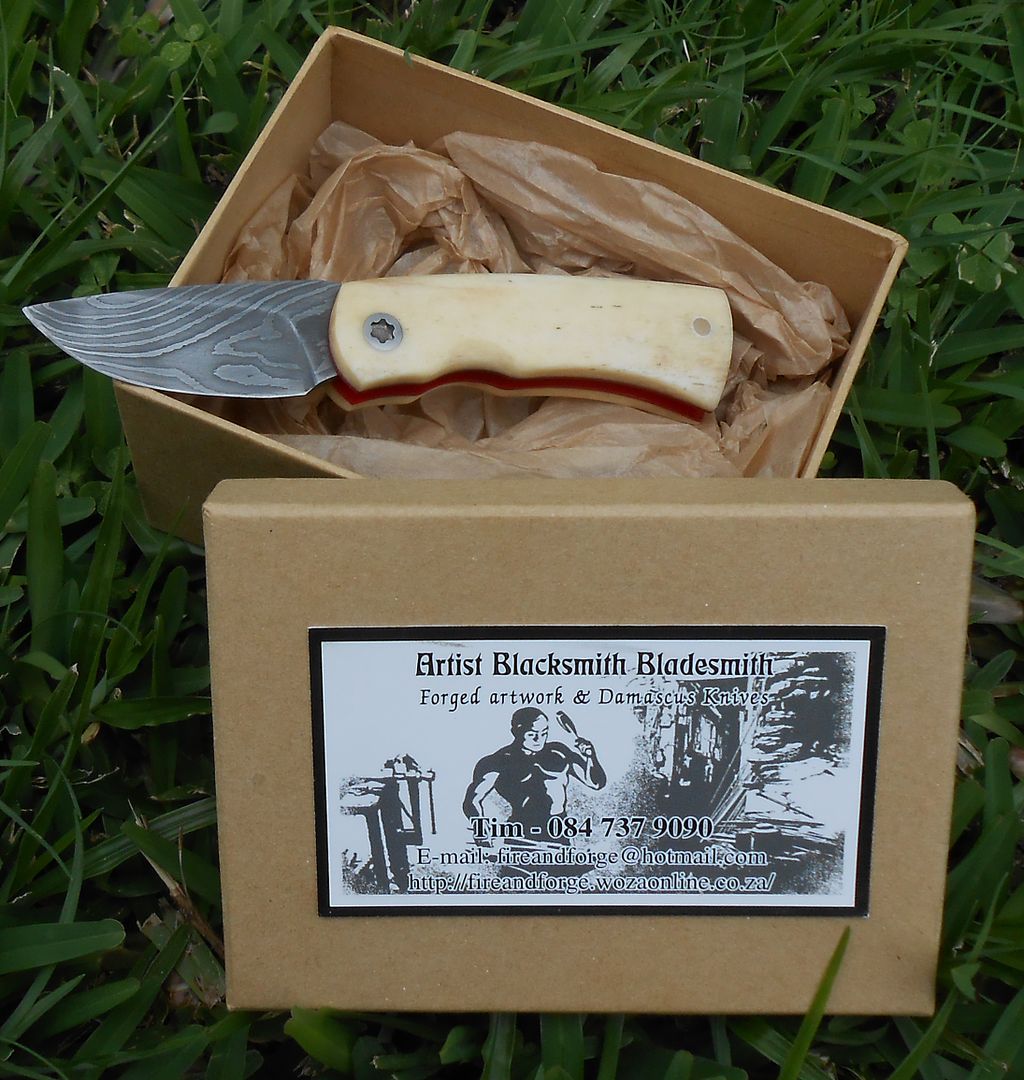
Finished, packaged and about to be collected. Hope you enjoyed.

-
That is just mind blowing. A perfect example of what talent and steel combined can come up with.
-
Sing asked how mine runs so I PM'd all the info and have also placed it here if anyone is interested. Mods - if you think that the links are inappropriate then pls delete.
Hi
First off - check out my web page with the oil forge info :http://fireandforge.wozaonline.co.za/Projects
This DIY burner worked well but didn't quite get the heat I wanted. I eventually imported some hago nozzles from the states. Here is a link: http://www.patriot-supply.com/products/showitem.cfm/HAGO_030L2160
This is the adapter that you need with it: http://www.patriot-supply.com/products/showitem.cfm/66720
This is how you set it up :

Here is a link to vid explaining it:
This vid is basically what I based mine on:
But I went my own way. He uses a set up that starts with gas then switches over to oil - I by passed that. I use a 350mm x 50mm pipe with a 2mm wall thickness. The pick of the nozzle setup is exactly like mine. My nozzle is inserted into the pipe with front of the nozzle just under 3" from the front of the pipe. It must be exactly center to spread the vapor right. Once the oil is vaporized I use a blow torch to light it - it's as simple as that.
The reason I use a compressor is that I run my forge at 2 bar pressure - I have found that this is optimal for the heat I need to weld Damascus with my burner set up and the nozzles I have. I can also lower the pressure and strangle the oil flow to cool the forge for HT. I can't recall, but I think I am using a .65 gallon nozzle which gives me about 2.5 ltrs an hour.
Here is a link to the different nozzles: http://www.patriot-supply.com/search_new.cfm?old_search=nozzle&q=siphon+nozzle&search=Go
I have used these nozzles with diesel, waste motor oil and veg oil and sometimes the two diluted at various ratios with diesel, but now I just use used veg oil and it MUST be veg oil - never palm oil - palm oil blocks the nozzle.
It does require maintenance - you need to keep the nozzles clean and your oil clean and you need to replace the o rings every now and then as they get hard and crack. The oil can be in a container at the same height as the burner, but I keep mine raised about 500mm above it. My oil goes through 100mm to 50mm reducing PVC fitting and is filtered through 3 old stockings before it goes into the container.
I have three stop cocks between the container and the burner for the oil inlet and a air regulator and shut off valve on the air inlet and though I have sometimes been stupid and have allowed oil to flow into a yellow hot forge without any air flow I have never had it set alight or any blow outs - this is by far the safest forge I have ever worked with. If you use a compressor then you don't need a blower or a gas lighting system. I use mine every day and have for over two yrs now.
hope this all helps.
Tim
Edit: You will note that if you read HWooldridge's post that waste veg oil has more BTU than propane so it's far more efficient and cheaper in my experience.
-
Thanks all, only a pleasure. Will try have the finished knife up tomorrow.
-
Hi
I have been using waste veg oil for two yrs now. Started with a home made nozzle and then upgraded. I use my knife forge to weld Damascus and though I am back onto coal for smith work I have designed three forges for smith work using waste oil. It does work but you need a compressor first, and then you need the right nozzles - My web has a whole breakdown of it with the BTU breakdown etc.
They work like a dream, can be free if you make friends with the local chip shop but require regular cleaning and some maintenance. I will never go back to gas and the only reason I am using coal for smith work is I prefer it's flexibility and the Zen like hand blower LOL
If you need help PM me.
Tim
-

Liners and slabs sanded true

Checking if it all works as plannned

Final check before starting the blade grind. I will do a HT on it tomorrow and the grind and etch. You will note that I have changed from using a Corby rivet to one of those fancy fandogo tork pins. This was given to me by a friend after he showed me how to drill the center hole using a rivet drill bit - am going to have to buy one of those as they make life much easier and you end up with a much neater looking knife which makes for a happy client and this leads to more clients so you can pay the bills and so continues the cycle.
Will post the rest tomorrow evening and I hope this helps those of you that want to make your own.
-
It's important to note here that it's good to check this with both liners in place to hold the pins in the vertical otherwise they will lean off to one side and this can trow you off.

Now I get the liners and slab ready to drill the holes for the blind pins. On this one I haven't decided if it's going to have a solid back piece or just open with pins but the holes usually stay the same.

Everything CLEARLY marked and ready to drill

Holes about to be drilled at only 1.5mm to 2mm deep

Holes drilled - you will note that I haven't yet drilled the back hole for the thru pin - I do this last.
-
I was asked by Scott to do a WIP on my friction folders. I have never done a WIP before so here goes. Hope it helps to explain what not do LOL

I have a template for the blade and handle that I cut out of 3mm perspex signage board - here I am only showing the handle template with the blade already ground to shape - I always cut a new handle template if the blade changes slightly coz the center pin hole can move - this way I can make sure the hole is where it must be before I cut the liner material.

This shows the G10 liner with holes drilled having made sure that it all fits nicely on the template first. I always use the pre ground blade with the plastic handle template, never a blade template to do this coz when you mark the blade things can move.

Liners have been drilled, slab has center hole drilled only.

Checking if it all fits in open position

Then closed position.
-
Thanks Scott and it just so happens that I am busy with an order for an 80 yr old gentleman, so will try and take some pics of the process today.


3D printed and cast bronze guard and pommel
in Knife Making
Posted
Very nice. It's amazing what modern technology can accomplish, but being a traditionalist myself I prefer handmade and would rather have one of these -http://www.indiegogo.com/projects/if-only-i-could-see
hand carved the traditional way than something machine made. This is a friend of mine and he doesn't have a web page so the only link to his work is that one. The problem with 3D printing is where does it leave being handmade. A very touchy subject in the knife making world.