
marcusb
-
Posts
556 -
Joined
-
Last visited
Content Type
Profiles
Forums
Articles
Gallery
Downloads
Events
Posts posted by marcusb
-
-
I am not a fan of grinding, but that face looks like it needs some attention. I agree with some others, only knock down the shallow stuff, once its off its heck to put it back!
-
Picked up a like new pair of flat tongs today for $2, In the bottom of a pile of junk tools
Keep your eyes peeled -
Looks like one that was on dearborn craigslist for 300 or best offer, so my guess is centralish Michigan
-
A person can get a great start with the proper equipment on the cheap "IF" they are persistant and have patienece. Places to look, locally at auctions, flea markets and craigslist.
Ive never paid more than $12 for any tong or hammer,
Post vises are cheap in the right places,
Anvils, craigslsit or word of mouth , requires cash in hand and quick reaction
It can be Done -
I second Jim,
Growing up in Appalachia myself, strangers are not welcome, usually want something and up to no good. Going back is an option, but the best way to deal with those folks is to be humble and respectful. just my .02
To expand, we own a large farm, had plenty of trespassing, theft and genral attitude from people to make you rather curt to strangers who show up on your doorstep. -
Looks just like mine, I paid 150 but it was rusty. Great blowers, plan to canniblize mine when the brick forge is built
-
Im am suprised you did not try a simple chain drive. Parts from Bicylces would be readily avainable and cheap, could last forever with only a few drops of oil, and could make it in about any ratio you would like.
-
I also owned an HB with a name and city stamped on it. Took awhile but found out it was large tool dealer back in the day. Sounds like they marked anvils like the do car bumpers now. Little free advertising
-
I sold those 35 tonners for several years, great splitters, imagine it will squash metal very nicely
-
Heel sure looks to thin for HB, much more trenton in shape. Very odd theres no pritchel hole
-
Ever try chalking it? how I made out the HB stamp on my old anvil
-
How many forges should I plan for? I have a Champion 401 rivit forge currently, it seems to be a good match for small projects. If I build a large sationary forge with additional capacity, is there another type I am not aware of?
-
Thomas,
I would like to have the capacity to weld large stock if needed. I already have rivit forge to frustrate me, I would like to build a forge that have the capability to handle all my shop needs as I grow it. Stock size will increase as I add a power hammer etc. -
Ok, thanks for the advice. I did happen on to a little info in a book I am reading today I will run by here hopefully it may help others with similar ambitions. It said for welding with charcoal, build the fire at least 12" deep and cover it with metal to trap the heat. SO it sounds like I need to design something with a deep trough like firepot at least 12".
-
I am currently outfitting my shop and have decided to construct a permanent forge attached to my chimmney. The problem I have ran into is that there is tons of info on coal forges, both in construction and operation and almost nothing dealing with charcoal. Is there anyone on here that uses charcoal on a large scale in there forge? I am wondering if I should just scale up a coal design by the density factor to achieve similar results. Thru experimentation I have found my fire must be both larger and deeper. any info would be much appreciated to save me mistakes.
-
Kroil
If there is any hope of penetrating oil working, it will be this one
Free'd JD handclutch that had been laying in the mud of a field for decades
It really is that good, amazing stuff -
I did not calk, still had a ring, placed a magnent under the heel, that helped alot
-
And they didnt even get a pritchel hole!
-
Very nice work, those RR spikes are about the handiest things for general everything. Keep up the good work
-
That stocks had the crapped sanded out of it, see how proud the metal is.......pass
-
Hello, I recently picked up a nice HB and it needed a stand. I had no logs large enough handy so I made it from scrap I had available. I used 3/4 CDX for the base to provide a nice flat surface. Then on the corners and centers I used oak 4x4's. I boxed it in, filled with sand then capped the top with 1.5" oak board. I added cleats between the feet. I tried to think of a simple hold down and chain filled that nicely. I wrapped it around base then lagged the screws in at an angle so it tightens as you screw in the lags. Very simple and effective. Anvil has no movment and chains are tight. I built this stand in about 1 hour, and it has greater mass than a wood stump. Dont let the lack of a "Perfect" stump stop you from putting that new anvil into service!

-
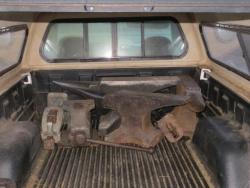
That poor anvil!
One on the right no doubt -
I probly dont want to know what you paid for it :D
how much do you want to sell it??? -
How much?????

Information on a large charcoal forge
in Solid Fuel Forges
Posted
Update!
Picked up nearly 40 Refractory brick from a memeber on here, trying to decide if I should build a steel or wood frame.
Currently plan to lay up corners with cement block, but to span/contain the brick im not sure