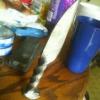
August 12, 201213 yr So I finished my first steak turner. It's pretty simple, I drew out a long taper and bent the end, of coarse . The tricky part was consolidating the head. I attempted to weld to get rid of the grooves and failed on 2 sides. Put a twist in the handle and I'm calling it done. It's far from a master piece but I learned allot. Rome wasn't built in a day and neither are smithing skills so I will keep at it and keep the pictures coming. Any and all advise and or comments are appreciated
August 12, 201213 yr Have you tried it out? How it flips a steak is what really counts. It looks good. It can be tough putting a finial on a twist but you did well. Frosty The Lucky.
August 14, 201213 yr Author Now that I've finished that, the next project is to make a grill fork. There will be a bit more planning going into this one, steak turner just kinda happened. I'm doing this cause I'll probably get to use it first, a forge cooked brat sounds wonderful. The plan is to draw out a long taper like on the steak turner but leave the end a little wide so it can be slit for the prongs. Other than that everything else will be the same. I may try something more decorative with the handle, if that works out I might change the steak turner to match. If there is any advise on how to make the fork end that would be great, other wise it looks pretty straight up. I was thinking after I slit the end to open the prongs and upset to get rid of the v although a small one won't hurt my feelings, then taper the prongs before bending them into the finished fork. I've already consolidated a rr spike back to square, this time a bit closer to success with the weld. Pictures coming soon right here.
August 15, 201213 yr I make forks by drawing the end out flat sort of like a longish screwdriver blade. I use a hot set to cut the tines and a veiner driven between the tines to round the fork where the tines meet. Then I spread the tines just enough to fit over my anvil bridge. The anvil bridge is just a piece of heavy wall square tubing with a shank on one side and one side of the end ground to a rounded edge. This allows me to forge the tines without having to bend them 90* away from each other to forge. Once the tines are finished and rounded to my taste I widen the round bottom of the tines over the horn to maybe 3/8" - 1/2" and flatten it a bit. Oh yeah, I do the fork as the final step, the handle gets first billing and if I'm making a back pack model (I call the pig tail toasting fork) the pigs tail gets final billing. That's it, simple in principle just takes practice and some DRATS! pile donations. Frosty The Lucky.
Join the conversation
You can post now and register later. If you have an account, sign in now to post with your account.