Haasum
Members
-
Joined
-
Last visited
-
-
Mine is 104 pounds, just weighed it today after I got home from work. Cleaned some of the dirt off it too but didn't uncover anything new. Going to work at it a little more tomorrow. Looking into getting a stump from a friend who just cut down a tree. Anything I need to be worried about with a green stump as opposed to a weathered and dry stump? Any extra precautions to take to protect the anvil from the stump moisture?
-
-
norrin_radd I am digging the crank shaft stand, that's an awesome idea and it looks nice! That anvil is nice looking too, make sure you secure that thing down it looks a little top heavy but maybe it's just the angle in the picture.
-
I see what you're seeing in the picture, and I went to check again just to be sure. I can't see anything on the anvil in that location, there is some heavier uneven metal in that area but it doesn't look like it used to be anything. No more so than anywhere else on the anvil, aside from the obvious markings that I have pointed out.
-
I see your point Thomas. I'll play around with it and see what I can do, or what I can find. There's enough trees up here there should be a stump somewhere I can get. Black Frog, cool it's neat knowing that my anvil has a long history behind it, even if I don't know exactly what that history is. Anyone know anything about the other markings I found on it?
-
I couldn't find any indication of an Arm and Hammer logo. I looked close, I cleaned it up, I felt it, I chalk rubbed. Doesn't look like there was anything that used to be there. If it was there at one time and someone removed it, they did one hell of a job removing it. The face looks like it's really thin, I don't have a ball bearing to use for a test, but when I hit it (lightly) with my hammer, it seems to rebound only to about 40-50%, but I could be misjudging, or affecting it somehow without my knowing.
-
Hey everyone! So I spent all of Sunday driving through Washington to get down to SE Washington for an anvil. It looks like a Vulcan to me and what I found online indicates that that's probably what it is, but naturally more opinions than one makes for a more accurate diagnosis. I paid $180 for this guy and I estimate it weighs around 100# I did chalk rubbing on anywhere I thought likely to find some additional stamp or markings but I didn't find anything. All of the markings on it I found are in the pictures. I found (it looks like) LL&B Co. under the heel, the number 10 under the horn, and near that on the base I found what looks like 104 (the third number is hard to make out but its definitely 10_). I also noticed under the face, on both sides there is what appears to be a square bar that possibly runs through to each side, I'm not sure, I haven't really seen that before and I was wondering if anyone knew what it was, why it's there etc. I circled them in one of the pictures. You can see in the pictures that I have an "old" ammo can, if I turn it on it's end and set the anvil on it, it's almost perfect working height, so I was wondering how well you guys thing it would work as a stand if I filled it with sand, closed it up and turned it up on it's end? I put a $20 in two of the pictures for a size reference. Anyone know anything else about it?
-
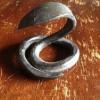
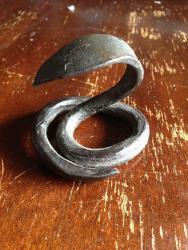
Seconded. The braid is mesmerizing.
-
Okay so I went with a smaller ammo can in order to save fuel mainly. So here's what I have. However I got to thinking, this ammo can has a rubber seal to make it water tight. Should I pop out that seal or should it stay cool enough to not melt or combust? Right now I'm leaning toward taking it out just to be safe. Putting my burner together tomorrow then I just need a way to secure it to the forge, probably part if a pipe with set screws. Sorry for the awkwardly angled pics I'm on duty and don't have a way to change my picture orientation.
-
Well I have a smaller ammo can I can use. Maybe I'll make that one a forge and save my large one for another day.
-
Well I'm just starting out so ill have to experiment a little I suppose. I don't recall if we have talked about my being on the rock or not. I'm in the coast guard and spend a lot of time at sea. I've been here for just over two years now and have about a year actually on the ocean when I add up all the days spent underway. I won't be visiting mainland Alaska for quite some time as I have leave and back underway coming up. I recently did some math on my box and its a bit too large for one burner, so I'm probably going to have way more insulation than I need in order to get it down to a smaller size. I'm just starting so I don't mind waiting a little longer for my metal to heat up and I don't really need forge welding temps right away. But as it is with the double layer of insulation the forge would be 672 cubic inches which is well into the two burner size. I'll probably try it as is and then I can always adjust it later! Thanks for the reply Frosty.
-
Hey everyone. I'm about ready to put my forge together but while I was looking at it I got to wondering about placement. Should the burner be angled from one of the top 90 degree corners. Or should it be straight down over where the metal will sit? Or straight in from the side? With a round forge I always see them angled at about 45 degrees but that proves more difficult on a box like I will be using. For those concerned about toxic vapors from paint on the crate I have asked and tried to do as much research as I can and most of the guys I work with don't think it will be toxic, however the forge will be in open air anyway so it shouldn't be too big of a deal. It is an ammo can that held 25 mm rounds originally. That being said I have still considered removing the paint.
-
So I got out the tape measure and made some measurements and did some brain storming for how to cut and weld together the tines. My first thought was to have it like this.... Some notes on the picture, the 17 inch bar on the top, is one whole side of the tine. The 11.3 inch bars coming down are from cutting up the remaining portion of the tine into thrids. The tines are 3 inches wide and 1.5 inches thick, the way I have these lined up is so they lay with the 3 inch wide face, facing each other. The 9 inch bar on the right hanging down I put there because I wasn't sure what else to do with it, it was from the 17 inch length on the second tine, that I cut in approx half so I could get some feet (shown as the cubes at the bottom) to help stability. That was the first design I thought up but then I was thinking that I am unlikely to need a 17 inch working face, and the weight is spread out. So I thought up a second design to try to put more weight directly under the working face. As you can see this one is similar in design but more compact. I cut the 17 inch leg in half for the working face, using the remaining as the feet. The long leg I cut in half and lined them up so the 3 inch face was pressed together. There wouldn't be much over hang, although perhaps if I made the working face a couple extra inches I would have room for a hardy and pritchel holes. I like the second design a lot more, but I figured I would get more opinions on it . Any opinions or advice that might help improve these?
-
So I went down to the dump today to drop off some junk and when I got there I noticed their metal section. I have been trying to find something to use anvil wise for awhile so I figured I would take a peek and see if I could find anything worth while. After scrounging around for about 15 minutes I came upon a forklift, tines still in place. I know forklift tines are good metal and can be cut up and welded into a usable anvil so I naturally got really excited. All that stood between me and these two tines was a cotter pin. I didn't have my multi-tool on me, but I found an old bolt that I used to pry the sides of the pin, the pin was so old and rusted simply bending it caused it to break, so I started pulling the bar holding the tines to the rest of the forklift out. I needed something hammer like (which I also lacked) to hit the bolt to push the bar out of the first slot, so I wandered around the dump some more and I found yet another glorious sight. One 55 gallon drum of 1" bar stock and two 55 gallon drums of round stock, 1" and 1/2". I took one of the shorter pieces of bar stock and started using it to hammer the bolt against the bar holding the tines on, and made slow progress. Once I got the bar far enough I started to try to slide off the first tine, but encountered a problem, the bar had a slight bend in it. When I went to pull the tine off, the bend caused it to stop. So I thought I would just put the bar back in the hole and pull it out the other end, since that end had no bend to it. But the bend made it so that I was unable to put it back in the hole so I was stuck with trying to pull the tines off the bent end. So I did what most people would do, I hit it. I hit it hard and repeatedly with the bar stock and sure enough the tine made it past the bend! The first one dropped off and was free! After that the next one was easy enough, I had enough of the bar through so that I could just lift the tine and pull the bar and it slid out fairly easily, I think I only hit it a few times to get it through. There was a second forklift right next to the one I took the tines from, it had smaller tines but the way they were attached I felt was going to take way too much effort to get them off, and I'm not sure anything short of cutting them with a saw/torch is going to get them off. It looked like the tines were welded to the bar. So I went to the dump to drop off crap, and came back with two forklift tines (I weighed them once I got home they are 70 pounds each), and a location for all the bar and round stock I could need for the near future. I don't know what type of iron the stock is and it is badly rusted but I figure there is enough metal in it that the rust will come off and wont do too much damage to the rest of it. I'm going to call up some welding places tomorrow to see how much it costs for them to cut and weld it up for me. The tines are about 3" width and 2" thick, I'm not positive how I wanted to have them welded up to get the most out of them. I know they should be vertical but how exactly to align them, I'm unsure of.