BoardMoreThanUsual
-
Posts
90 -
Joined
-
Last visited
Content Type
Profiles
Forums
Articles
Gallery
Downloads
Events
Everything posted by BoardMoreThanUsual
-

Makeshift solid fuel forge
BoardMoreThanUsual replied to BoardMoreThanUsual's topic in Solid Fuel Forges
fire clay was not available from the big box stores around me and as i saw on you tube cat litter was a suitable substitute. at any rate that part done now its wait and dry time. i have no idea if it will work or if it is good enough i shall see.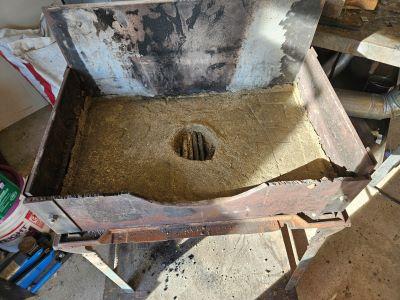
-
Makeshift solid fuel forge
BoardMoreThanUsual replied to BoardMoreThanUsual's topic in Solid Fuel Forges
i am in the process of grinding up the cat litter to make it less course. how fine should/does it need to be. i am using a 25 lb round of stainless rolling and crushing on a steel plate. is this even necessary?
-
Makeshift solid fuel forge
BoardMoreThanUsual replied to BoardMoreThanUsual's topic in Solid Fuel Forges
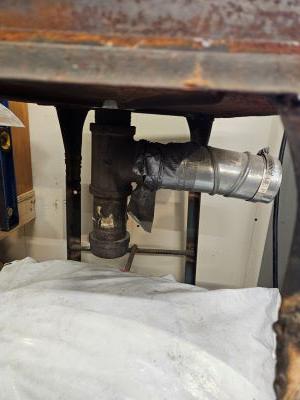
Just got back from the stores and got natural clay cat litter 50lbs , 50lbs all purpose sand tractor exhaust cap along a regular switch and box. This should keep me busy for a while ill post progress or questions as i go. Thanks again all. Side draft hood will come in time want to get this forge fuctional 1st and see if i can manage working in a solid fuel forge before i go deeper. I always have my little propane forge to fall back on. -
Makeshift solid fuel forge
BoardMoreThanUsual replied to BoardMoreThanUsual's topic in Solid Fuel Forges
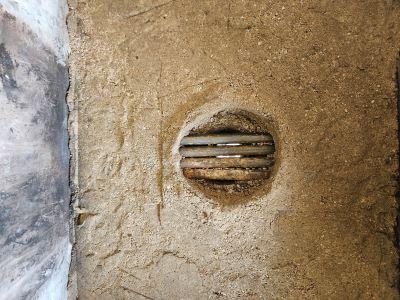
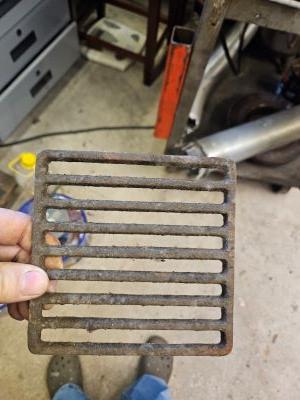
Thanks for the replies. Been trying to read forums here on the clay sand mix.., so many broken links, but i think i found what i need. I will take advice and use some round bar for the grate. Life would be easier if i could weld but for now i ll jst have to make do with what i can bolt together. If i get it fuctional ill post pics and steps i used. Thanks again -
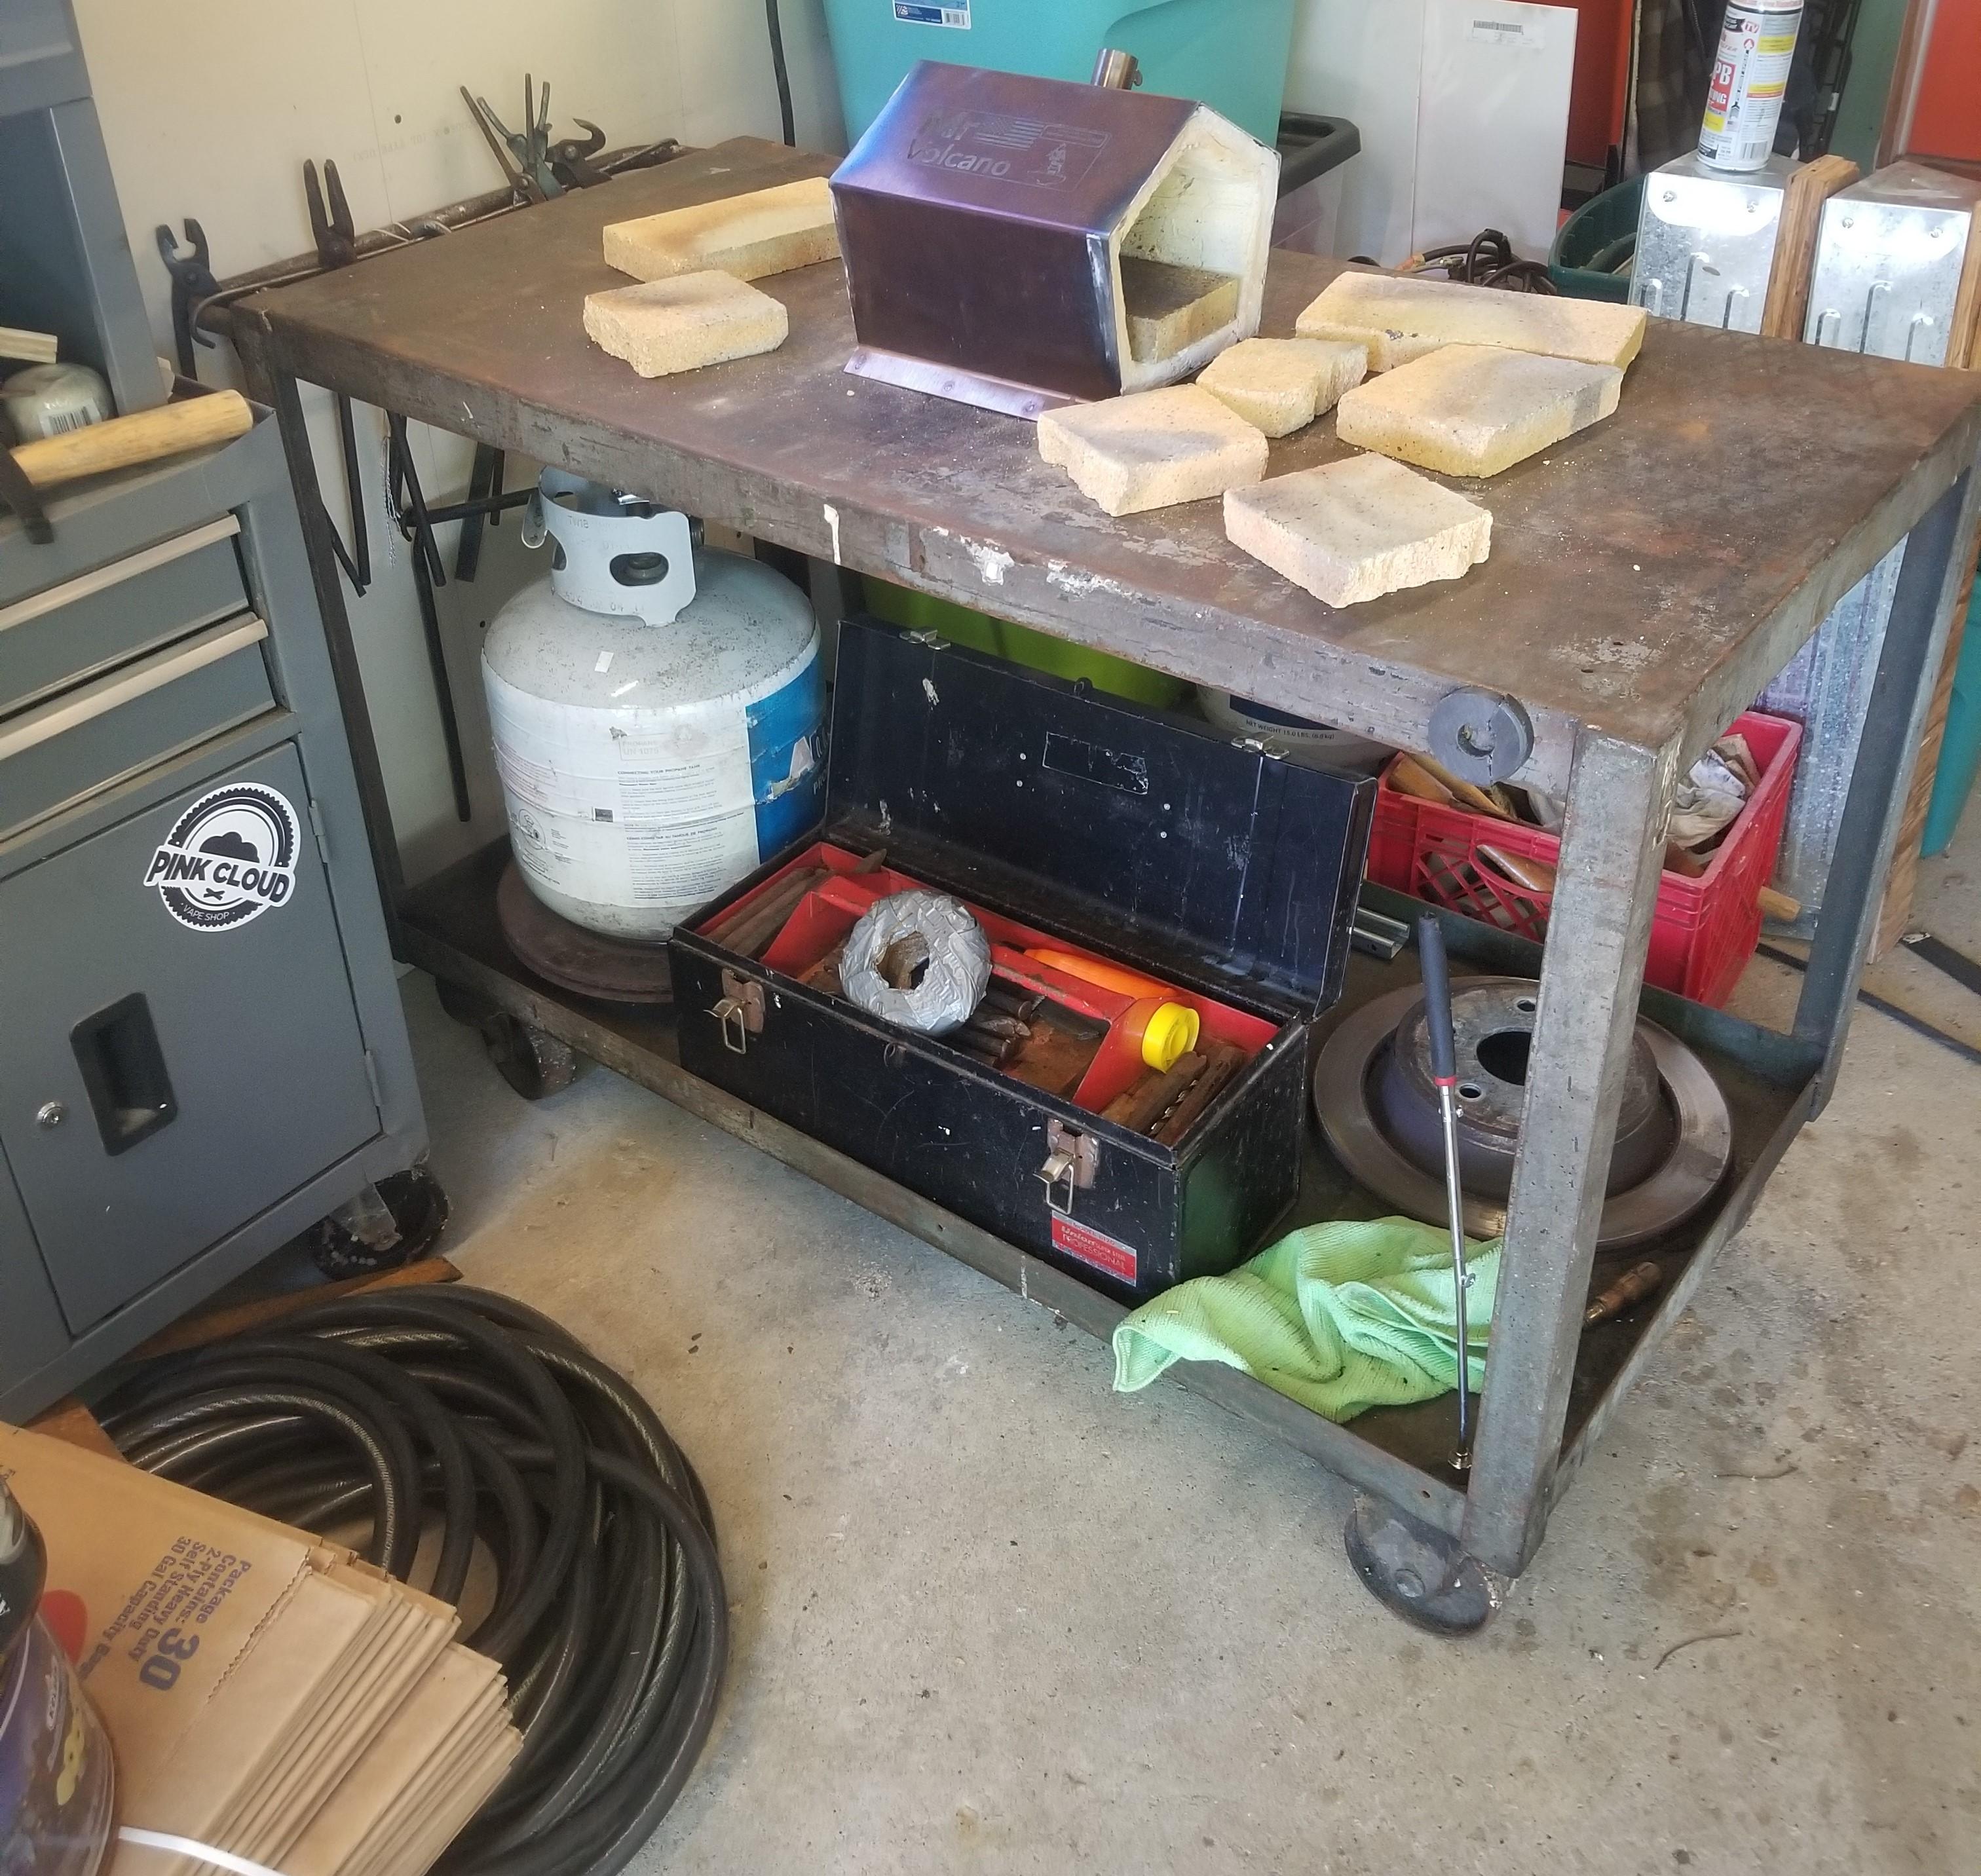
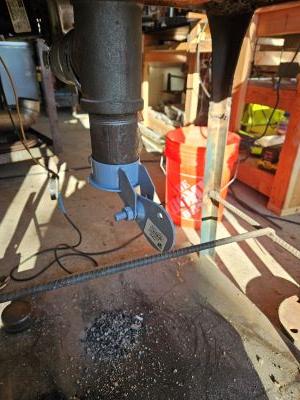
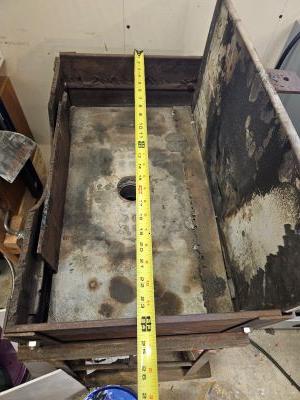
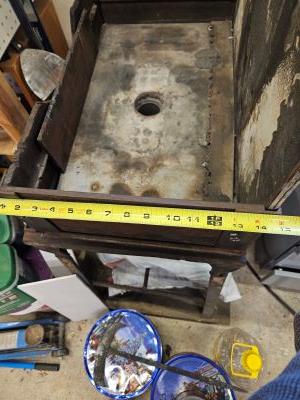
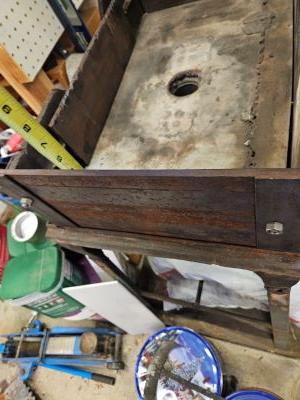
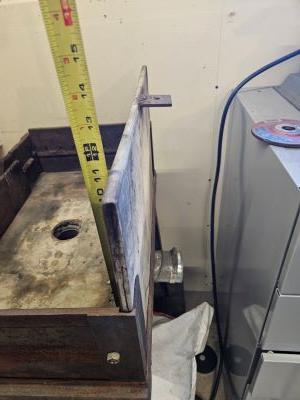
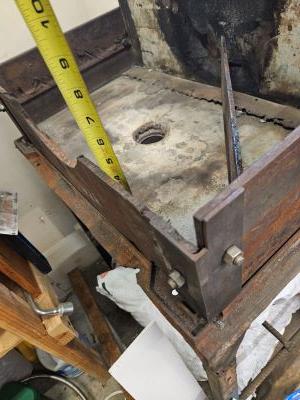
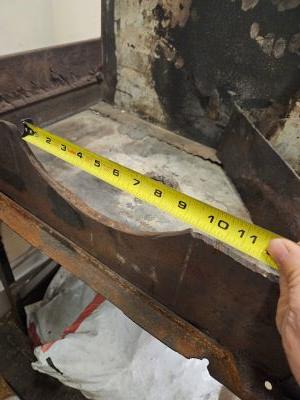
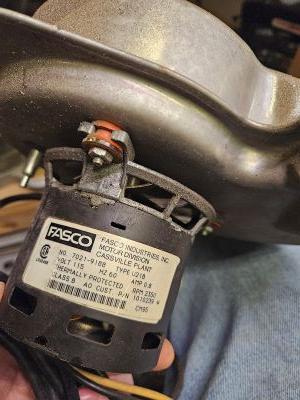
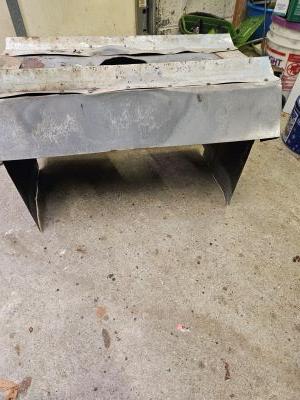
Hi again all, recently i picked up this make shift forge off FB. when i first saw it i was going to pass on it but figured for $40 bucks even if i cant use it I could used the metal for something. the guy i got it from was a hobbiest knifemaker and said he jut filled it with coal and used it that way. i am hoping to improve on that plan but looking for some ideas to make it more functional, reliable and give me a better feel for a coal forge before i spend real amounts of money on a proper forge. my 1st thought was just fill it with dirt make a "bowl" form and then cover it with refractory cement at about 1/2 way the depth of the sides thus leaving room for coal around the sides to feed the fire. there is a sheetmetal "hood" that came with it that covers the whole thing but unsure if that is needed or should be used as atm it will be used out side as always in my driveway. the blower that came with it is shown as well plan on just hooking it up to a dimmer switch if it works that way unsure at the moment. as always any and all advice/input is wanted and appreciated.


-
Thanks all for the ideas, i will experiment with them and figure out what works best for me maybe a mix of both ideas. Ill keep you all posted what i come up with. Frosty i see your point now with the hook, i try this one out when spring time comes. Moving forward ill make mounting longer with screws more spead appart
-
Origin backstories
BoardMoreThanUsual replied to George N. M.'s topic in Blacksmithing, General Discussion
It was way way back in May of 2023 when i went to the mrs family house in NYC to help her bring some stuff home from their basement that was being cleared out. Her father was an artist and sculptor so there was a lot of cool stuff down there. The sister asked me if i could carry this old anvil up to the curb for the junk/trash/ collector. i thought it would be cool to keep it clean it up as a display piece and memory for the mrs of her time as a child with her father helping him in the basement. i came across this forum while looking for direction on identifying and cleaning up the anvil. within a few short responses i was talked in to trying my hand at the craft/hobby. After 100s of you tube videos and yard sales , local artisan blacksmith group, super informative and friendly forum members even one local to me that invited me up to his shop (thanks Stash) i am in the beginning stages of my journey into blacksmithing. i have not had any formal classes yet but i am on a local mailing list for when they start this years classes so hopefully that will come soon enough. -
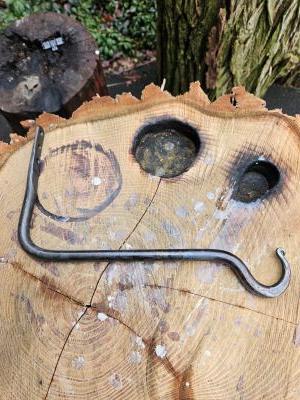
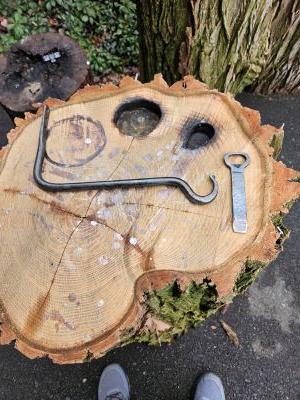
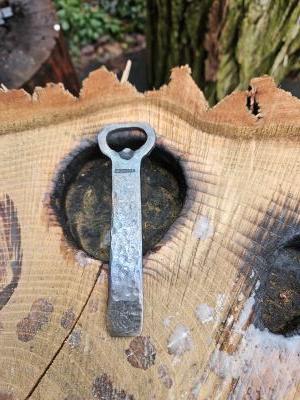
played in the forge yesterday. made a couple items that i am happy with. a bottle opener with a can tab starter on the end and a hanging basket hook. the opener was made from 1/4x3/4 and the hook was 1/2 round. All in all a successful day. Now to the reason for my post today. It may be a stupid question but i ll ask anyway. Can i run a gas forge in the rain. i dont have the space or adequate ventilation to keep the gas forge in the garage on rainy days. if i keep garage door open and the forge close to the opening it will melt the vinyl garage door as the door would be to close above the forge ( less than 4 foot above). same problem with an easy up tent i believe would not want to find out the hard way that its not heat resistant and have the thing melt while forging. was just worried about rain hitting the gas forge while up at forging temps. any input would be appreciated. i have picked up a makeshift coal forge from FB marketplace but i have not yet set it up or figured it out yet. that does have a top hood so everything would be covered by metal sheeting. i could try and figure out that but right now my limited time i have on weekend i like to get right to it and get someting in the works Thanks again all for you input and advice
-
Thanks guys, probably the too cold situation while forging as I was getting frustrated an bit so I kept hammering trying to get it right. Frosty thanks for the heads up, I'll let the hook continue down before bending it back if I am understanding what you said. As far as the steel used, I only use what I get from a local supplier or get on the jobsite who I assume also gets from a supplier but it's good to know about big box stores I'll keep that in mind. And as far as the mig welder.. alas some type of welder is in the future but I don't own one of any kind atm.
-
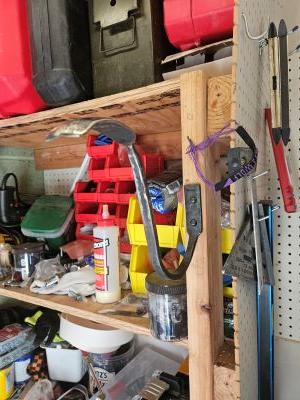
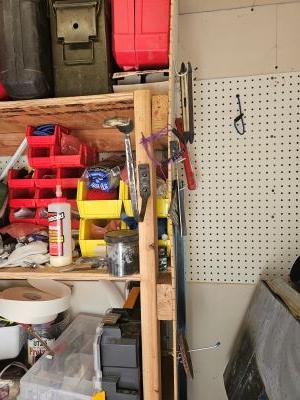
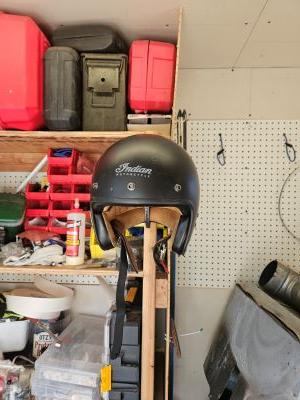
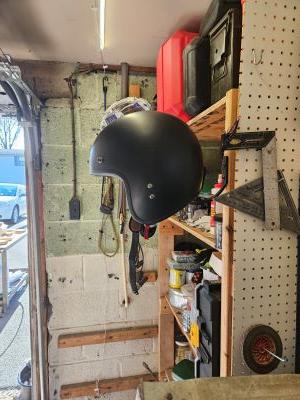
well back to day work this past week so my sleep schedule is back to normal so i was able to attempt something new today. Something i saw on BBF you tube a hat hook. I will use it for my motorcycle helmet. As always it isnt perfect, but functional. started with 1/4x1 flat stock used a guillotine tool to isolate the ends drew out the middle section. as i dont have a bending jig that was big enough for the bend i needed i tried just pounded it around a piece of pipe i got from the job site clamped in my post vise. sideways was not the easiest way to do it and so it is not exact. Absolutely need a welder to make some bending jigs for the vise. i picked up versa jig and guillotine tool from an online store (yesteryear forge) that will work fine for average hooks but with out a welder i cant think of a way with what i have to make bigger hooks more reliably. the hook did end up developing cracks at the "cap" and i dont know why any insight would be appreciated. as usual pics to follow and any and all feed back is welcomed

-
Yeah Billy , 4 10s as well. Just not a fan. I'll keep that in mind about a welder. During my apprenticeship many moons ago we had a basic welding course for a couple days, but I don't remember much, maybe I'll pick one up and see what the gray matter remembers
-
Thanks for the input guys, I really had to try forge welding. Took a couple of heats but I am glad I did it. Frosty I am assuming you mean spot welding with some type of electric welder.... not in my arsenal at the moment but in the future I am sure. I'll give square stock a shot next time I try it, thanks again. On another note I picked up a makeshift coal forge off the fb sale page for 40 bucks. It is a guess a riveters forge for lack of a better term. Just a steel box bolted together with an electric blower. I have yet to use it but looking forward to trying solid fuel smithing. I'll post about it when I try and fire it up.
-
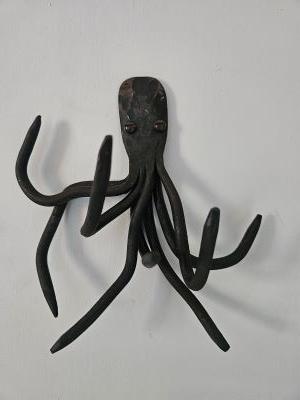
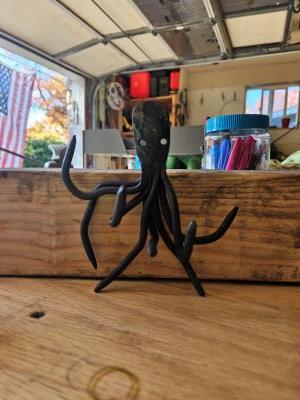
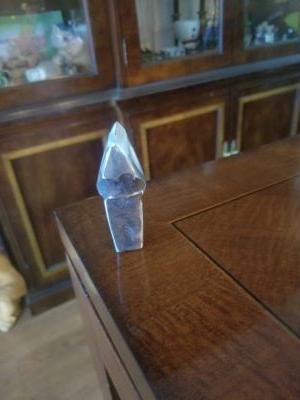
Hi All, Again its been a while, night shift stinks. i got out in the garage today and wanted to try something different. (forge welding) and also make something i have not watched a video on. i am sure they are out there but i just wanted to use my brain. An octopus, the mrs loves them and i figured it would be a challenge. nothing to compare to just whats was in my brain. i used only 1/4" round . forge welded 4 lengths together tied with bailing wire. did this 2 x , then forge welded those two sets together. then folded over the end to give me more mass for the head and forge welded that as well. Hindsight being what it is i prolly should have worked on the tentacles prior to forge welding them but i was excited to get started. that being said 1 of the tentacle cracked away but did not break off while forming. well here is Hector the Octopus. He is attached to the mrs art studio door,

-
I see, so I guess they will sit in the bin for a while as I dont see me forging down 1" material for steak flippers. Thank you very much
-
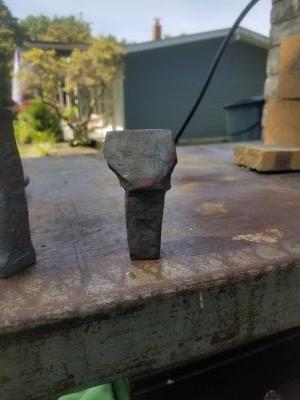
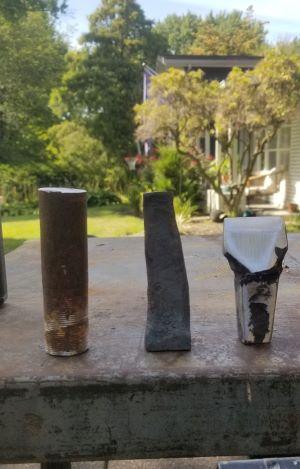
Frosty, Was afraid I paid to much but figure was there saw them so paid the convience price I guess. But there is enough steel there I wont need it for a while till I atleast run into my neighbor and ask him what they do with their old stuff. While on the topic of materials, as I have stated before I am a Union carpenter and I am currently working a job remodeling a big box grocery store and come across something I thought would be good to grab. Not 100% sure of what type it is but pretty sure its 1" x 8" round stainless. They were the post to mount the bumper guards infront of the freezer boxes in the concrete. They mounted into stainless sleeves so aside from some discoloration and some being stuck in the sleeve they are in great shape. I have read stainless can be forged but into what I have no idea. Grabbed 8 of them for now so what ever I can make from them I have a good start. Any input would be appreciated.
-
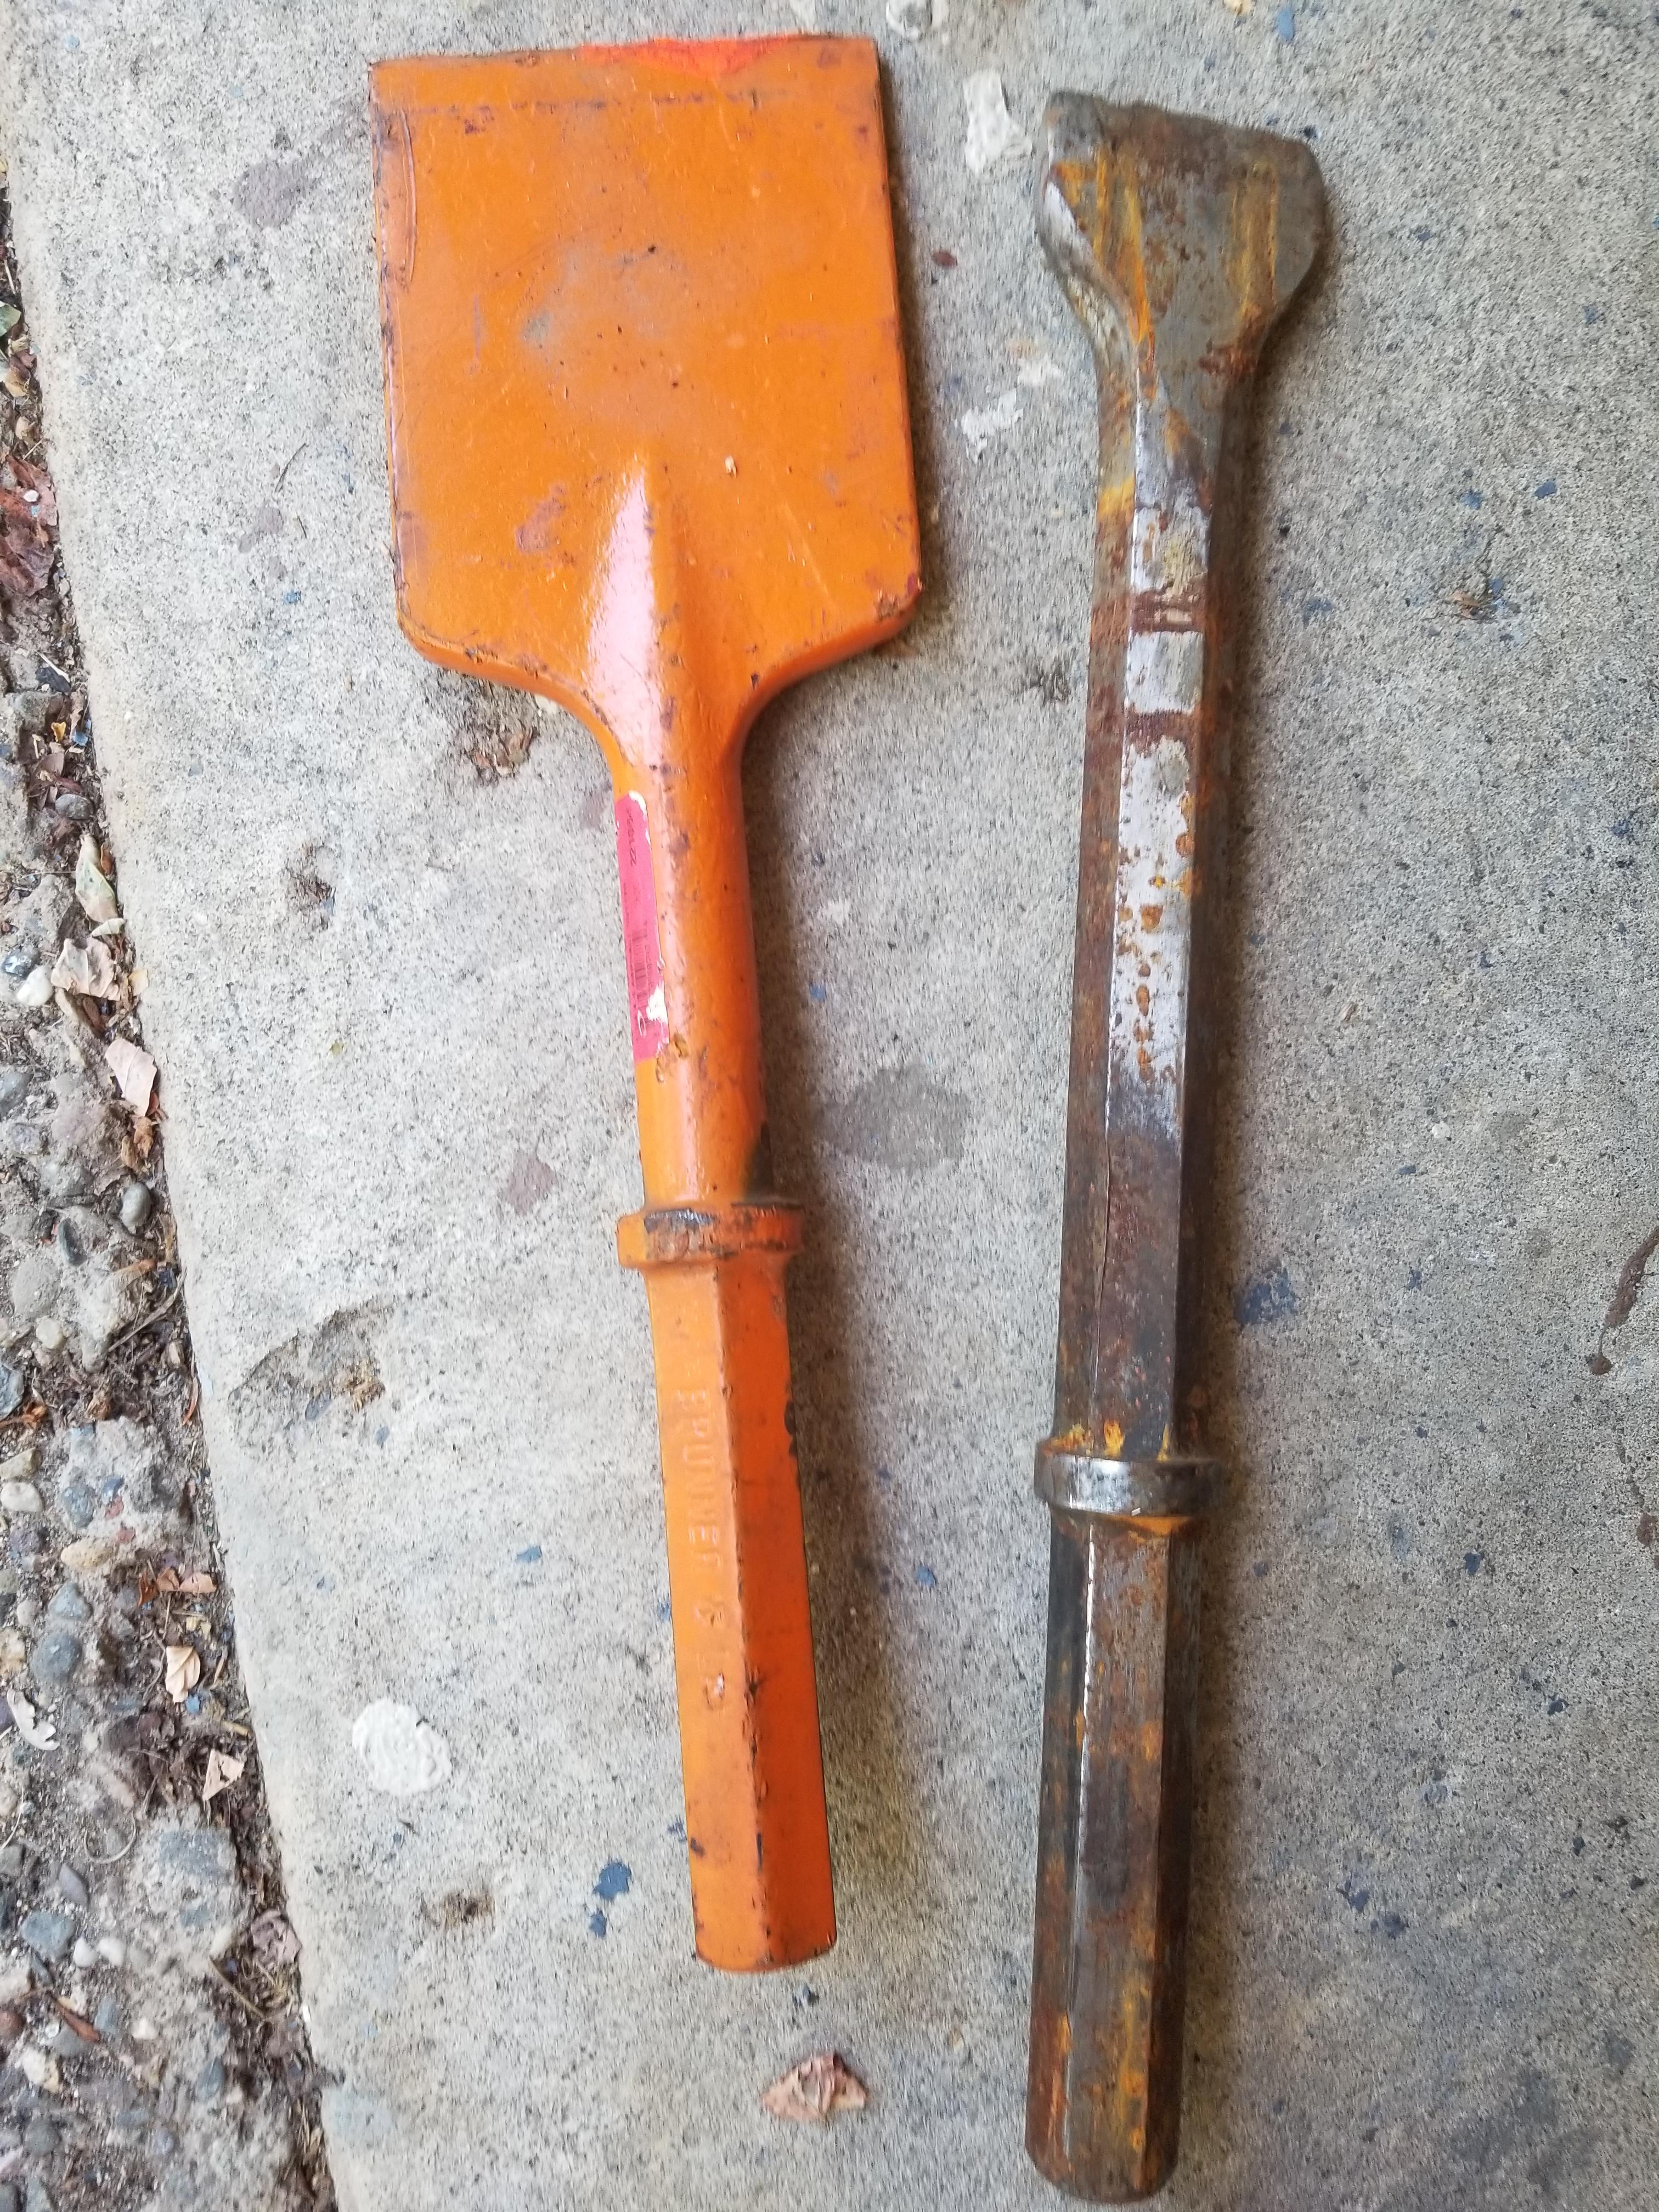
Thanks Hefty, I watched some videos again on ways to help my problem, also I picked up 2 used 1-1/4" jack hammer bits at a local flea market for 17 bucks, starting with thicker material will help with the need to upset, drawing out easier for me at my level of experience. I have not given up on the axel but will need a better idea of what I am doing . I disnt get out there today a bit hot n humid here so maybe tomorrow. Thanks again to everyone on their input ,experience and support so far.

-
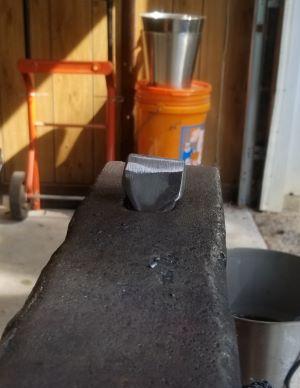
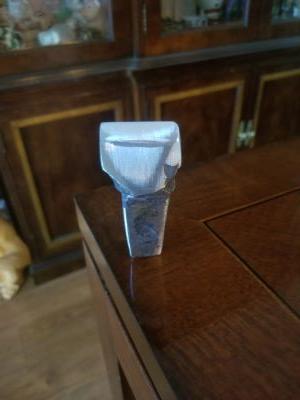
Back at it today, trying for a hardy hot cut. Sigh, ran out of three things, gas, energy and talent. Learned a bit and will be better the next go around. Upsetting was harder than i expected, this was the thickest material i have tried to forge and it was exponentially harder , at least it seamed to be. i got mixed up on a comment here so i thought i couldn't dip the hot steel in the quench tank to isolate the heat in the bar so it would upset where i wanted. ( just read that mistake now, was for jack hammer bits not the material (possible axel) that i was using. So it will be easier next time. i ran into major fish mouth when i was forging the cut end but instead of starting over i just cut it off with the angle grinder and cut off wheel to salvage the hours of work i put into it. the belt grinder helped salvage the piece and i have what almost looks like a hardy I didnt heat treat or temper as i have never done that and not 100% sure i need to for this piece will do some test cuts this weekend with is and maybe attempt another on now that i saw my error with the isolating the heat. so with out further babbling heres the pictures that you all are waiting for.
-
Yeah Steve, got it down and mounted by myself, still have to make the work space more "flowy" but works there for now cn always move things around. Thanks for all your input.
-
Good point Frosty, as I have not finished them that's something I can change, guess that's a good thing about smithing you can always correct or change things by throwing it back in the fire.
-
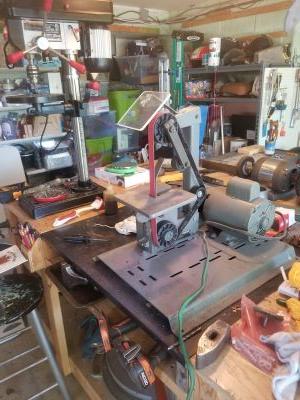
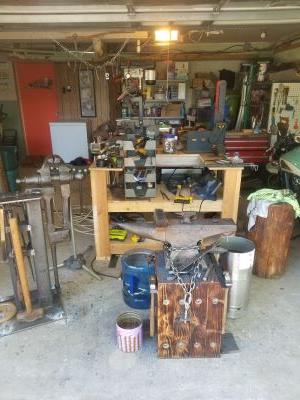
ok Goods you talked me into it. Honestly had to wait to post pics till i got on laptop. posting from my phone the files are to big and i dont know how to resize there, the mrs showed me how to do it on the laptop so i stick with that. i have added so photos of the garage to show the cluster i am working in cause i dont have the focus to organize the chaos yet. i do bring the forge cart out into the drive way when actively forging as well as move the tank away so dont be concerned. i take about 10 mins to move things around before working out there the only thing that stays put is the vise/stand. i also bring the motorcycle to the street to avoid flying sparks and dust from grinding and such. And Frosty thanks for the info. i will look into that, my neighbor works for a heavy equipment ( commercial heavy highway machines) rental shop so ill talk to him. For now i have what some one told me was what seems to be some type of axel i picked up at a yard sale for a dollar. Hoping its usable for at least beginner hardies.


-
Hey again all, Been a while since I have posted, went back to work but night shift so time has been crazy to get used to. Been going to the local artisan blacksmith meet ups and that has been informative and productive for picking up some tools. Also yard sales have good too. A proper leg vise to replace the tongue vise and a 1x42 old rockwell/delta sander/grinder to name a few things. Had to order new wheels for the belt grinder but even with the 100 dollar cost of those wheels I am only 110 dollars into it so that's a win. Got to forge some stuff yesterday did steak flippers again getting better than my 1st attempt. A little decrotive snake out of 3/8 square as well than I am pleased with. Still have to finish sand the flippers and season them but all and all a successful day. Want to make some hardy tools soon if not next as it's kind of awkward hot cutting with hand held chisel for me but that will get better with more attempts I am sure. I'll post pictures of my "acquisitions" and work later today but wanted to get a post on here to let all you waiting on my every word, (joking ofcourse) that I am still trudging along on this journey.
-
Thanks for this post David. As you see I have it mounted on a 2x attached to my work bench. Did they continue to make these after that time period (if you are familiar) or is my vise from that time period. I am happy with my set up other than needing to get a thinker piece of wood or a spacer as it is set up for what I am guessing a true 2" not the nominal 1-1/2 " 2x Thanks for the info and pictures
-
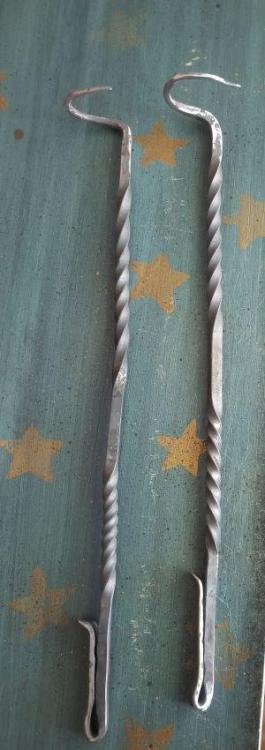
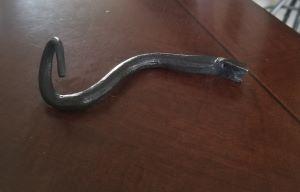
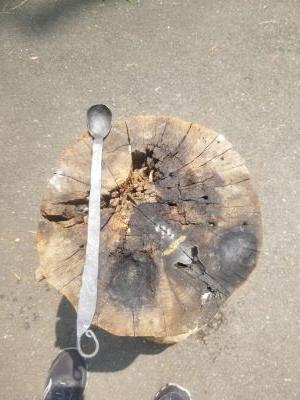
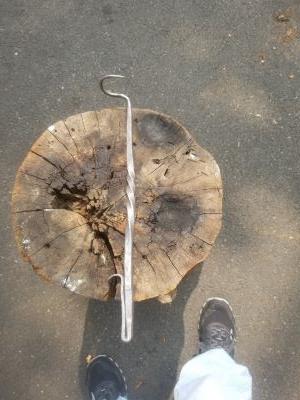
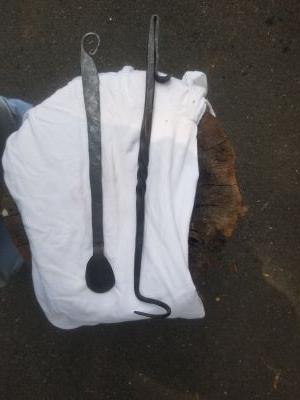
Sorry i miss a post, Billy , those hooks are very cool took me a few minutes to figure out the hasp hook, its really cool. i have all my hooks on a chain on the garage door and there they will stay till i need to hang something up. Today i did 2 things for the 1st time and learned from my mistakes but they were a success. on both projects i worked backward i think ill watch more videos and see if it was awkward just cause it was my 1st time or i in fact did things out of order. i made a "flux" spoon and a steak flipper. the spoon was made out of 1/4x3/4x7-1/2 inches. i did the handle first and not sure about that i guess it doesn't even matter. i used a wood stump for a swag block not the best just beat it with a ball peen hammer to make a concave area, file rough areas and coated with minwax. finished around 12" the steak flipper out of 1/2" round x 12" +/- . here again i forged the hook 1st then the handle. i drew a taper to a point then made the hook, then i squared the remaining stock out square and then drew out a flat taper curled it and folded it back on itself. did a twist in the middle section that i squared up, kind of went wonky cause it wasnt a true 3/8 and my twisting wrench didnt fit so had to used an old pipe wrench, coated with EVOO. The handle is too short where your hand butts against the curl the hook to small finished 14" but all in all a success and a win. thanks for the suggestions and the inspiration. side note idk if i should continue posting my stuff here on in what did you do today.
-
Steak flippers are one of the things I absolutley want to try. I am a huge BBQ guy and one of the main reason I want to forge. Cooking utensils for gifts for friends and family. I am starting small and working my way up. Thanks
-
Thanks Frosty, Flux will be on my shopping list this weekend when I go out. Hopefully it's something standardly stocked locally.Hot and muggy today think I'll focus on shop organization today. After I try your suggestion I'll post results here success or fail. I am really enjoying this hobby so far, collecting tools at yard/estate sales is almost as much fun as smithing. But I have to stop that soon as I'll have more things I dont know how to use properly.