Justawelder
Members
-
Joined
-
Last visited
Everything posted by Justawelder
-
Have you tried McMaster? they carry a good selection of tool steels, ship *very* fast and their prices aren't terrible. Much better than most online suppliers. I'm about half an hour from one of their warehouses and I get orders placed before 11:00 am same day, usually at my door around 3:00pm.
-
So I got this Acciaio anvil a couple months back, it was a great gift and I'm generally really happy with it, but its got a squat horn and from my little previous experience on other anvils, I really prefer to work on a round one. Well, I'm not going to spend six hours with an angle grinder to make the horn narrower, so If I want something more conical to work on, I'll have to make a bick. Or two. So these are what I've come up with... two bicks, one tapers from 2 1/4 down to 1 1/8 and the other goes from 1 5/8 down to about 1/2" The larger one was a lead screw that came out of a cylindrical grinder (thus the bearing journal and big fat collar at the base of the cone, and the other is a drop left over from a job. Both are 4140 and both will go out for hardening when I have accumulated a few more things to go in one batch. I haven't cut the shanks for the hardy hole yet, which on this anvil is 30mm or a little over 1 1/8" On the smaller one that won't leave me much of a shoulder to distribute hammer blows into the surface of the anvil, so I'll probably weld on a small collar, maybe 2" around. Next to the bicks in the hardy hole is a little fuller I put together the other night while I was playing around making some leaves, nothing special, all just HRS but it did a nice job. Any thoughts or suggestions (other than where I can stick those bicks) are greatly appreciated!

-
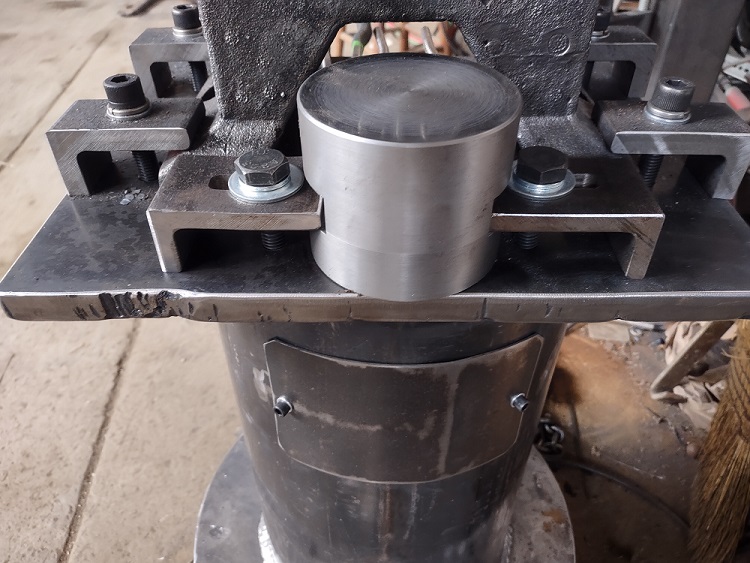
Here's a little update on how my anvil stand is progressing... I found a piece of 4140 to make an upsetting block. Its only 3.75" dia. so I put it up on the same deck as the anvil rather than down on the base. I'll still probably add the lower block at some point. The upper bock is held down with toe clamps made from angle iron (just like the anvil). Note that I haven't sent it out to get hardened yet. I'm waiting to get a couple other things to get hardened so I'm not paying the minimum batch price over and over. The block is round so if the top surface ever gets too rough, I can just unclamp it, put it in the lathe and face it and it'll be like new again (but a couple thousandths smaller, of course!) Next up: loops for hammers etc, which I was going to put all along the front face of the top deck (far side from this picture). But I've been throwing my tongs and chisels under the anvil between the legs, which is pretty convenient, so I'm only going to put loops on either side. That way I have hammer stowage to the left and right, maybe two on either side, but I can still throw tools between the legs. As a side note, below the block on the column, you can see the window I cut in the pipe to add sand later down the road, but I'm planning to send the stand over to the grinders to get the top deck blanchard ground nice and flat. After it gets back the sand will go in.
-
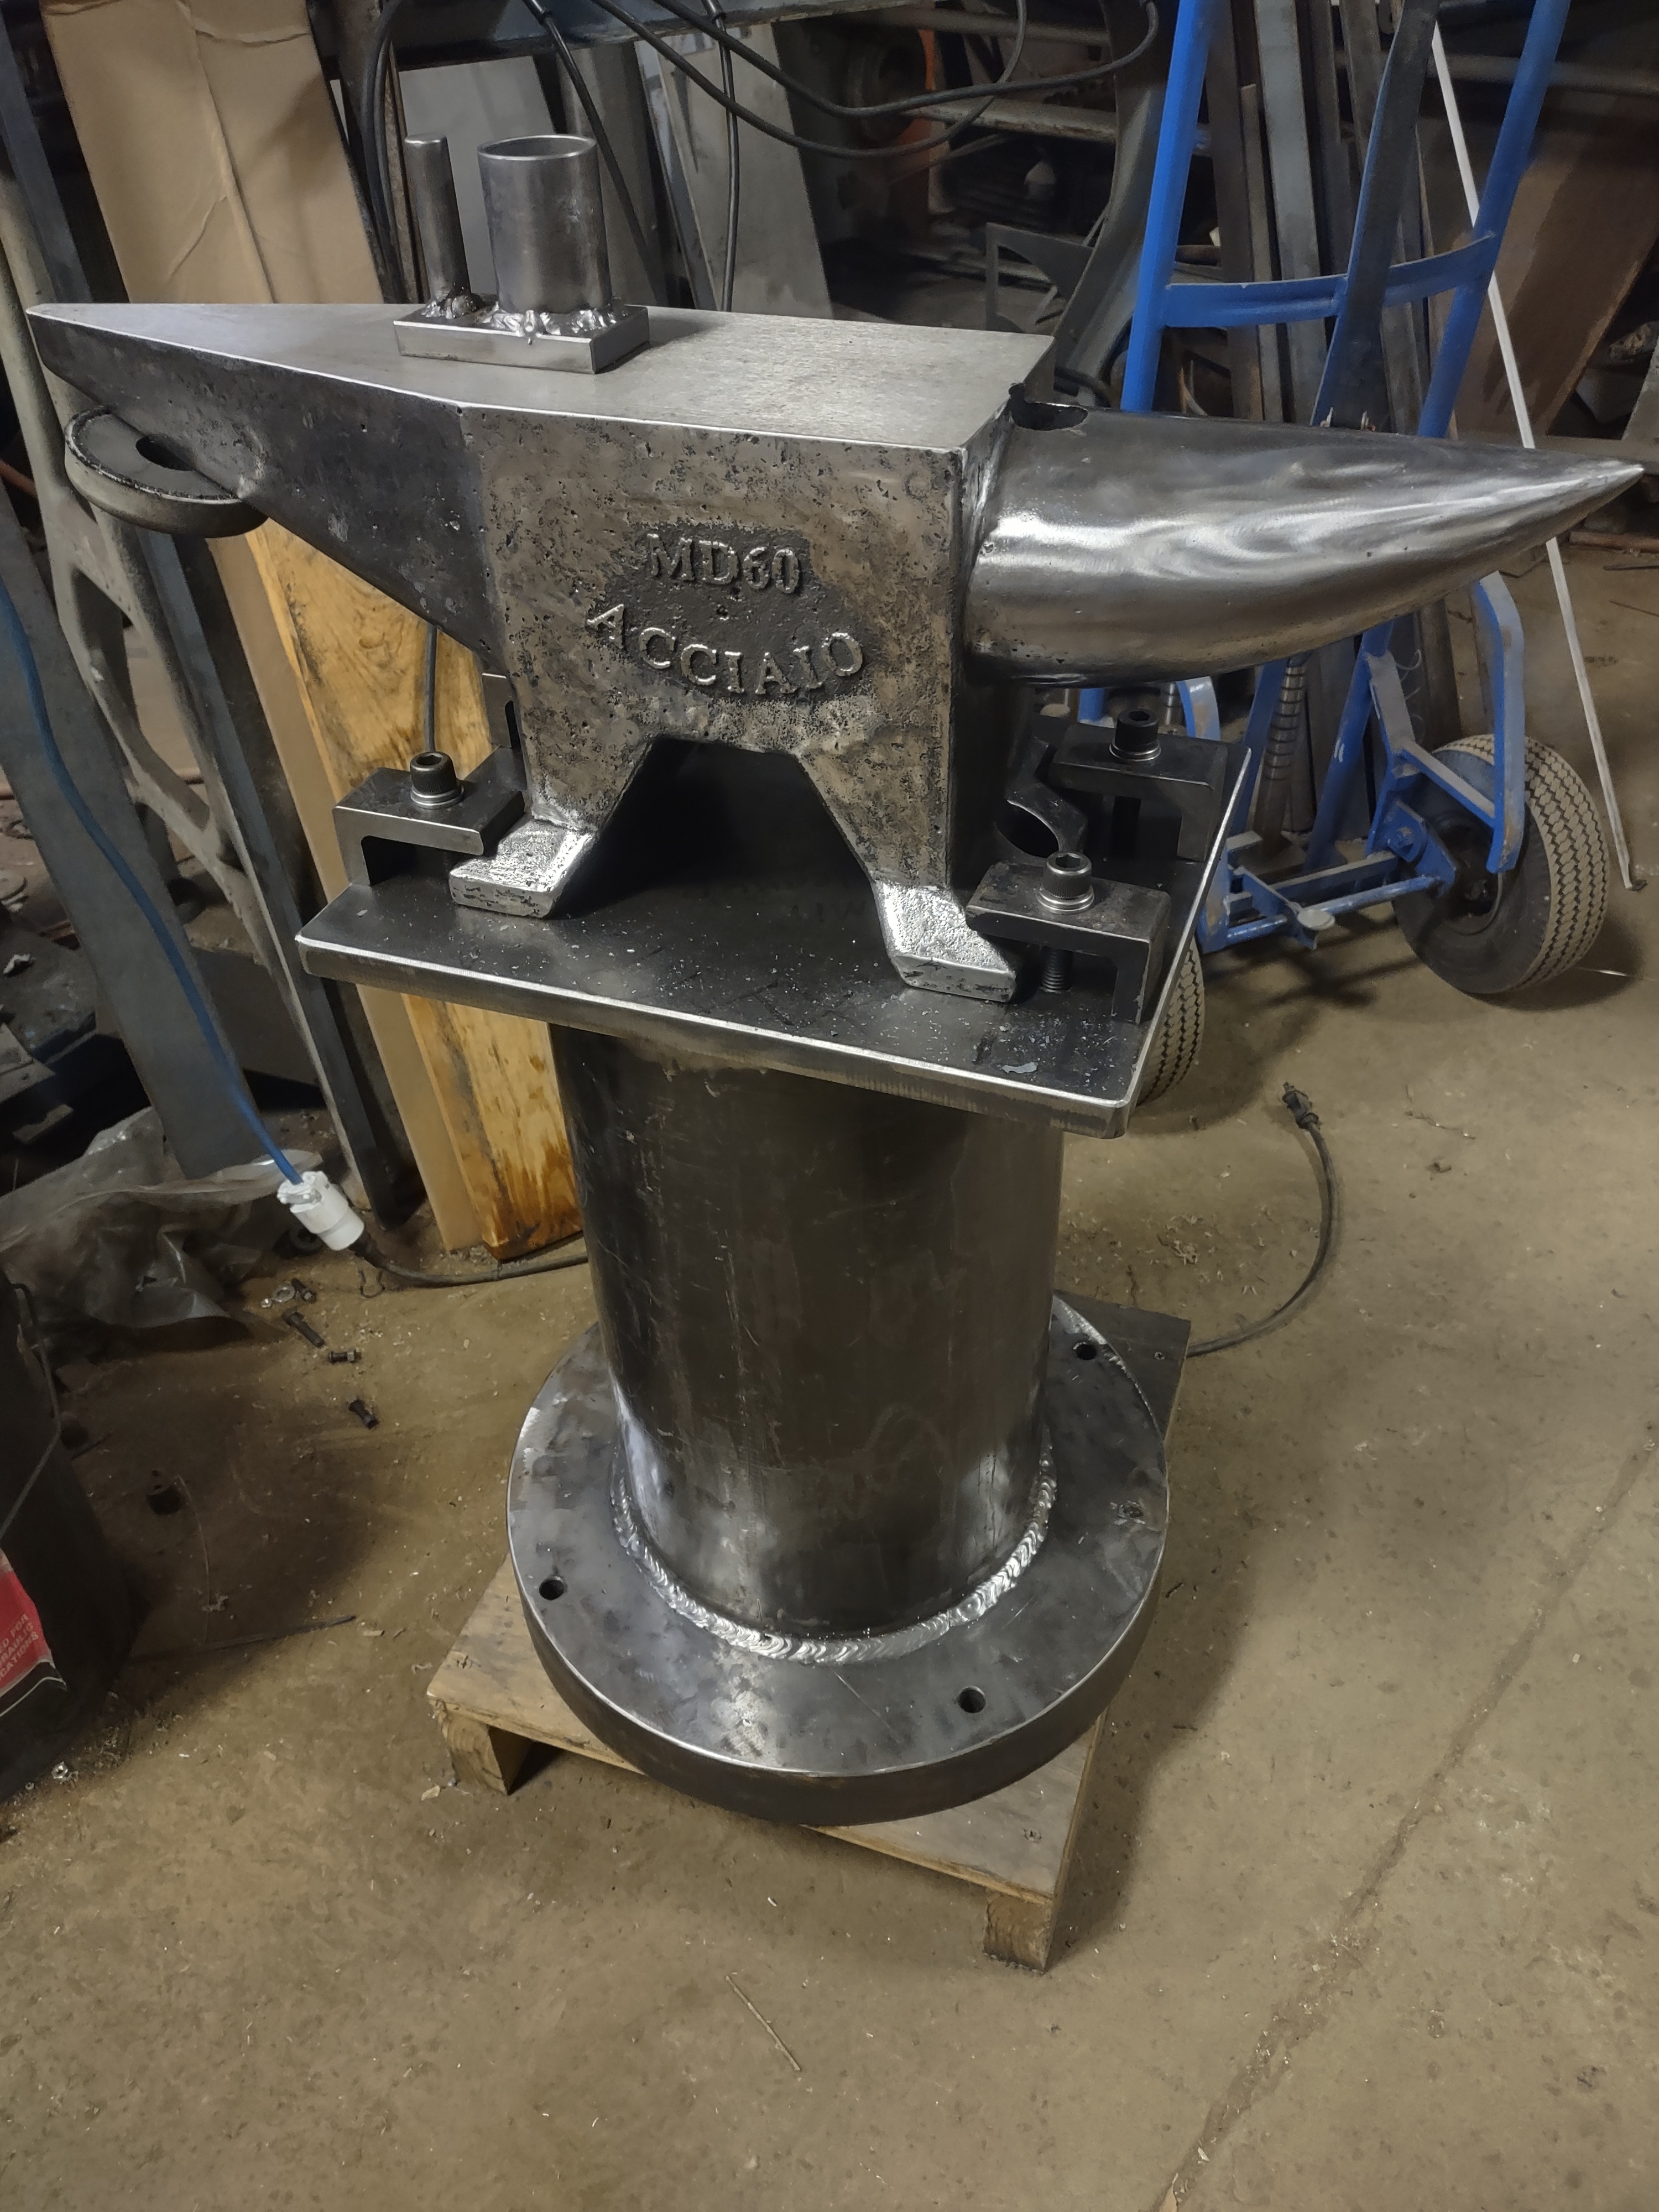
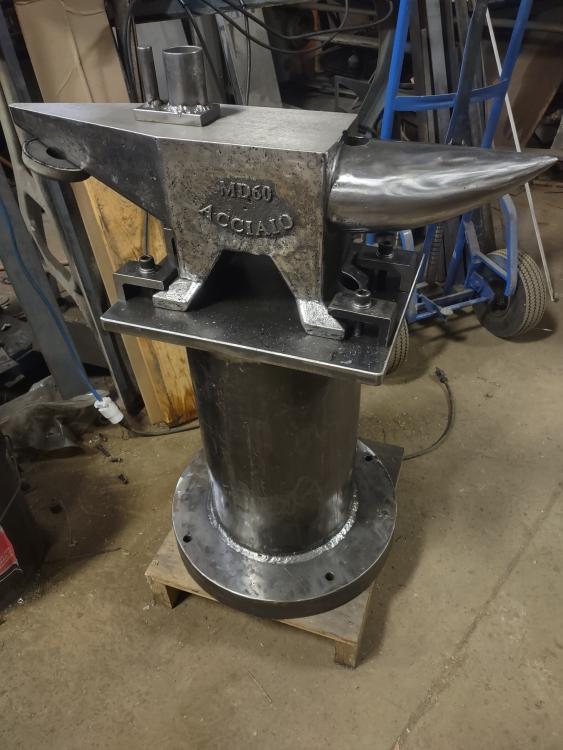
Here's the semi-finished stand, with anvil attached. Some of the material I had planned to use was taken by a job - gotta pay the bills before playtime - so the 17 x 2 round went on the bottom and a 12 x 18 x 7/8 rectangular plate became the top. I haven't welded on any hammer rings yet, I want to put some miles on the anvil before I start adding things The anvil is held by four toe clamps which seem to do a very good job. I haven't detected any movement, though I haven't used it more than about an hour or so. The wood pallet underneath is a temporary thing, mostly because I don't want to go outside to fetch any wood for making the actual wood blocks, and of course its not anchored to the floor yet. The only thing I'm not happy about it that there's a slight ring, more like a reverberation, from the round pipe. I burned a hole near the top on the back side to pour in sand if needed and I think I'll take that option to deaden the vibration (yes, I made a sheet metal cover to screw on over the opening and seal it off.) The sand will wait until its in place and anchored to the floor though, in the mean time a little extra sound isn't going to kill me.
-
I never thought abut the end grain vs. side grain, thanks for bringing that up. You can't see in the picture too well, but there are two 1/2" thick ribs attaching the upsetting block to the pipe and the base - I'm definitely not relying just on the wood to keep them together. Thanks Frosty
-
Thanks for your insight, George! Height is set to the height of my knuckles with my arm at my side, someone told me that was the rule of thumb for working surface height. The block on the far side is for upsetting longer parts. Its a chunk of 4 x 5 x 5" 1018 that I have left over from a previous job. it's just collecting dust, and seemed like a useful addition. I was planning to anchor the whole thing to the concrete floor to keep it in place. Is that a bad idea? (after I use it for a week or two and make adjustments) Should the need arise in the future, I can lower the anvil by putting smaller pieces of wood underneath... or eliminating them all together, of course.
-
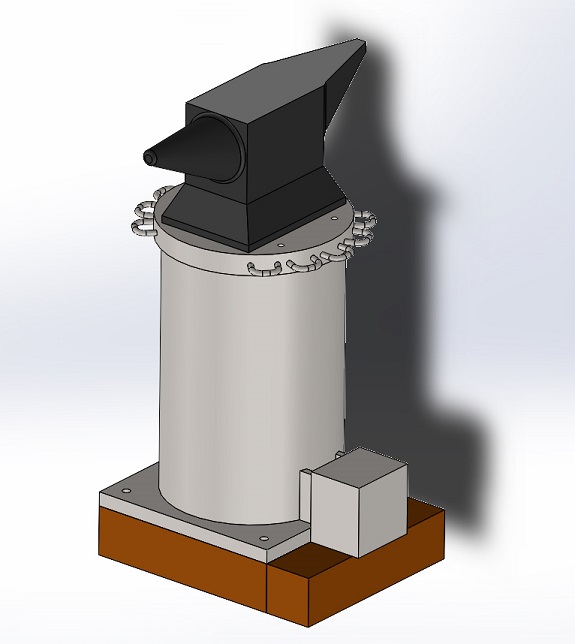
Ok, so reading through all your posts and suggestions, I made up a quick design. These are all materials I have laying around, so that had an influence on what I came up with. SO this is all steel, except some 4x4s at the bottom (which give me a place to put my toes when I come in close, and also give me some height adjustment later on if I get a different anvil. The base plate is 1" thick, 14x14" The column is a 3/8 wall, 12" dia pipe and the top is 1.5 thick, 13" around. Holes in the base go through the wood to anchor to the floor. Holes on either side of the anvil are for securing it in place, the bracket is not shown. Estimated weight (excluding the wood) is 375lbs with 130 being the anvil itself. And suggestions? I think I'll put a hatch in the bottom so I can add sand inside the pipe should it need it - but how would I know if it does or not? Thanks guys!

-
OK, fair points, so let me expand a little in hopes of making more sense of my original post... A lot of stand designs are compromises... compromises for portability, compromises of material availability, compromises for 'what can be put in my garage,' and so on. I get that, we all have to live in the real world. But here's the thing... I own a machine shop, it has only industrial neighbors some of whom make far more noise than a hammer and anvil could ever make, I have free access to tons of steel drops, another business in my complex is a landscaper, so I have free tree stumps for the asking, I don't have to fit anything in my garage, and I can move heavy items either with the crane or the forklift. I will likely be the only person to ever use this anvil, and anchoring to the floor is no problem at all, I wouldn't even have to rent a Hilti gun or buy any anchors, they're all here already left over from previous jobs etc. So with all those constraints lifted, what are the characteristics of an 'ideal' anvil stand from the viewpoint of efficient energy transfer from hammer to workpiece? Whatever I make this stand out of, it will be essentially free, or the cost of my free time. I've been thinking about fabricating something out of some 12" dia x 1/2 wall pipe and some 1" and 1-1/2'" plates for top and bottom. (some people talk about filling cavities with sand, and that's a possibility, but I'd like to know the actual purpose before I went down that road), but then it occurred to me, what if there are advantages to using wood, what if that dampening is desirable and rigidity *isn't*?
-
I'm just getting into blacksmithing, but I've been in machining and fabrication for 30 some years. Which means I know almost nothing, but you can't convince me I don't know it all... So my first question is about anvil stands. It seems 95% of anvils are mounted to either tree trunks or fabricated tripods. The wood mounts seem as though they could add mass, but wood is naturally spongey (compared to metal) so it seems to me that these mounts would absorb some energy from each hammer blow. That's bad, right? The metal ones are usually pretty spindley at the legs, so I can't help but think the mount is adding a spring constant of its own to the assembly, and they don't add much mass. Double bad? Now, what is the best primary attribute of a mount? Do I *want* it to absorb some energy, or would it be better if it were 'perfectly' rigid? Would a theoretically perfect mount be a solid steel tree stump, lagged into the concrete floor? It seems to my thinking that that would be: 1. completely rigid 2. totally stable 3. add hundreds of pounds of mass 4. wouldn't move around *at all* Is this right, or am I thinking about this all wrong? Is there benefit to the compressibility of softer mounting materials?