

Shainarue
-
Posts
639 -
Joined
-
Last visited
Content Type
Profiles
Forums
Articles
Gallery
Downloads
Events
Posts posted by Shainarue
-
-
Welcome from NW Missouri. Looking forward to following your journey into this addictive hobby!
-
Looks like it'd do the job!
-
Arthur, those tongs turned out really nice!
David, in my shop, those "crude" tools would look nicer than anything else I made, and look as good as something I'd purchased.
-
Yeah, I love looking at all the stuff in antique stores even if I would rarely pay the prices they try to ask, lol
But I've learned that if you look carefully, you'll sometimes find a gem.
-
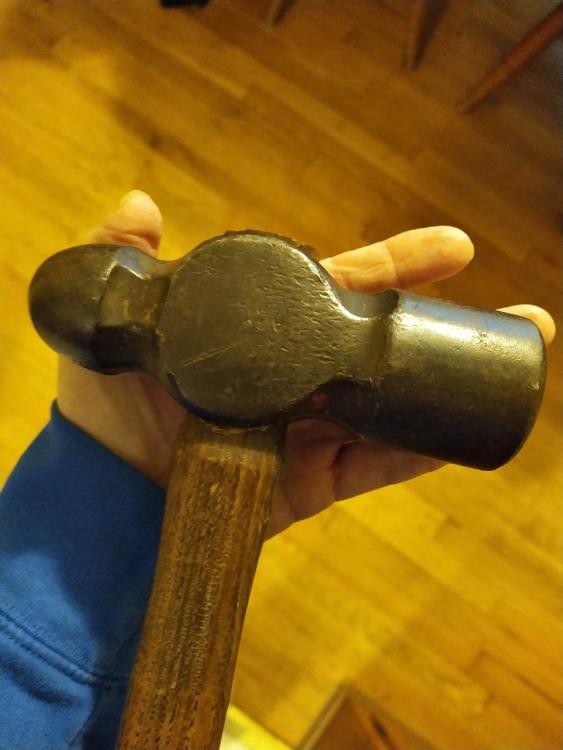
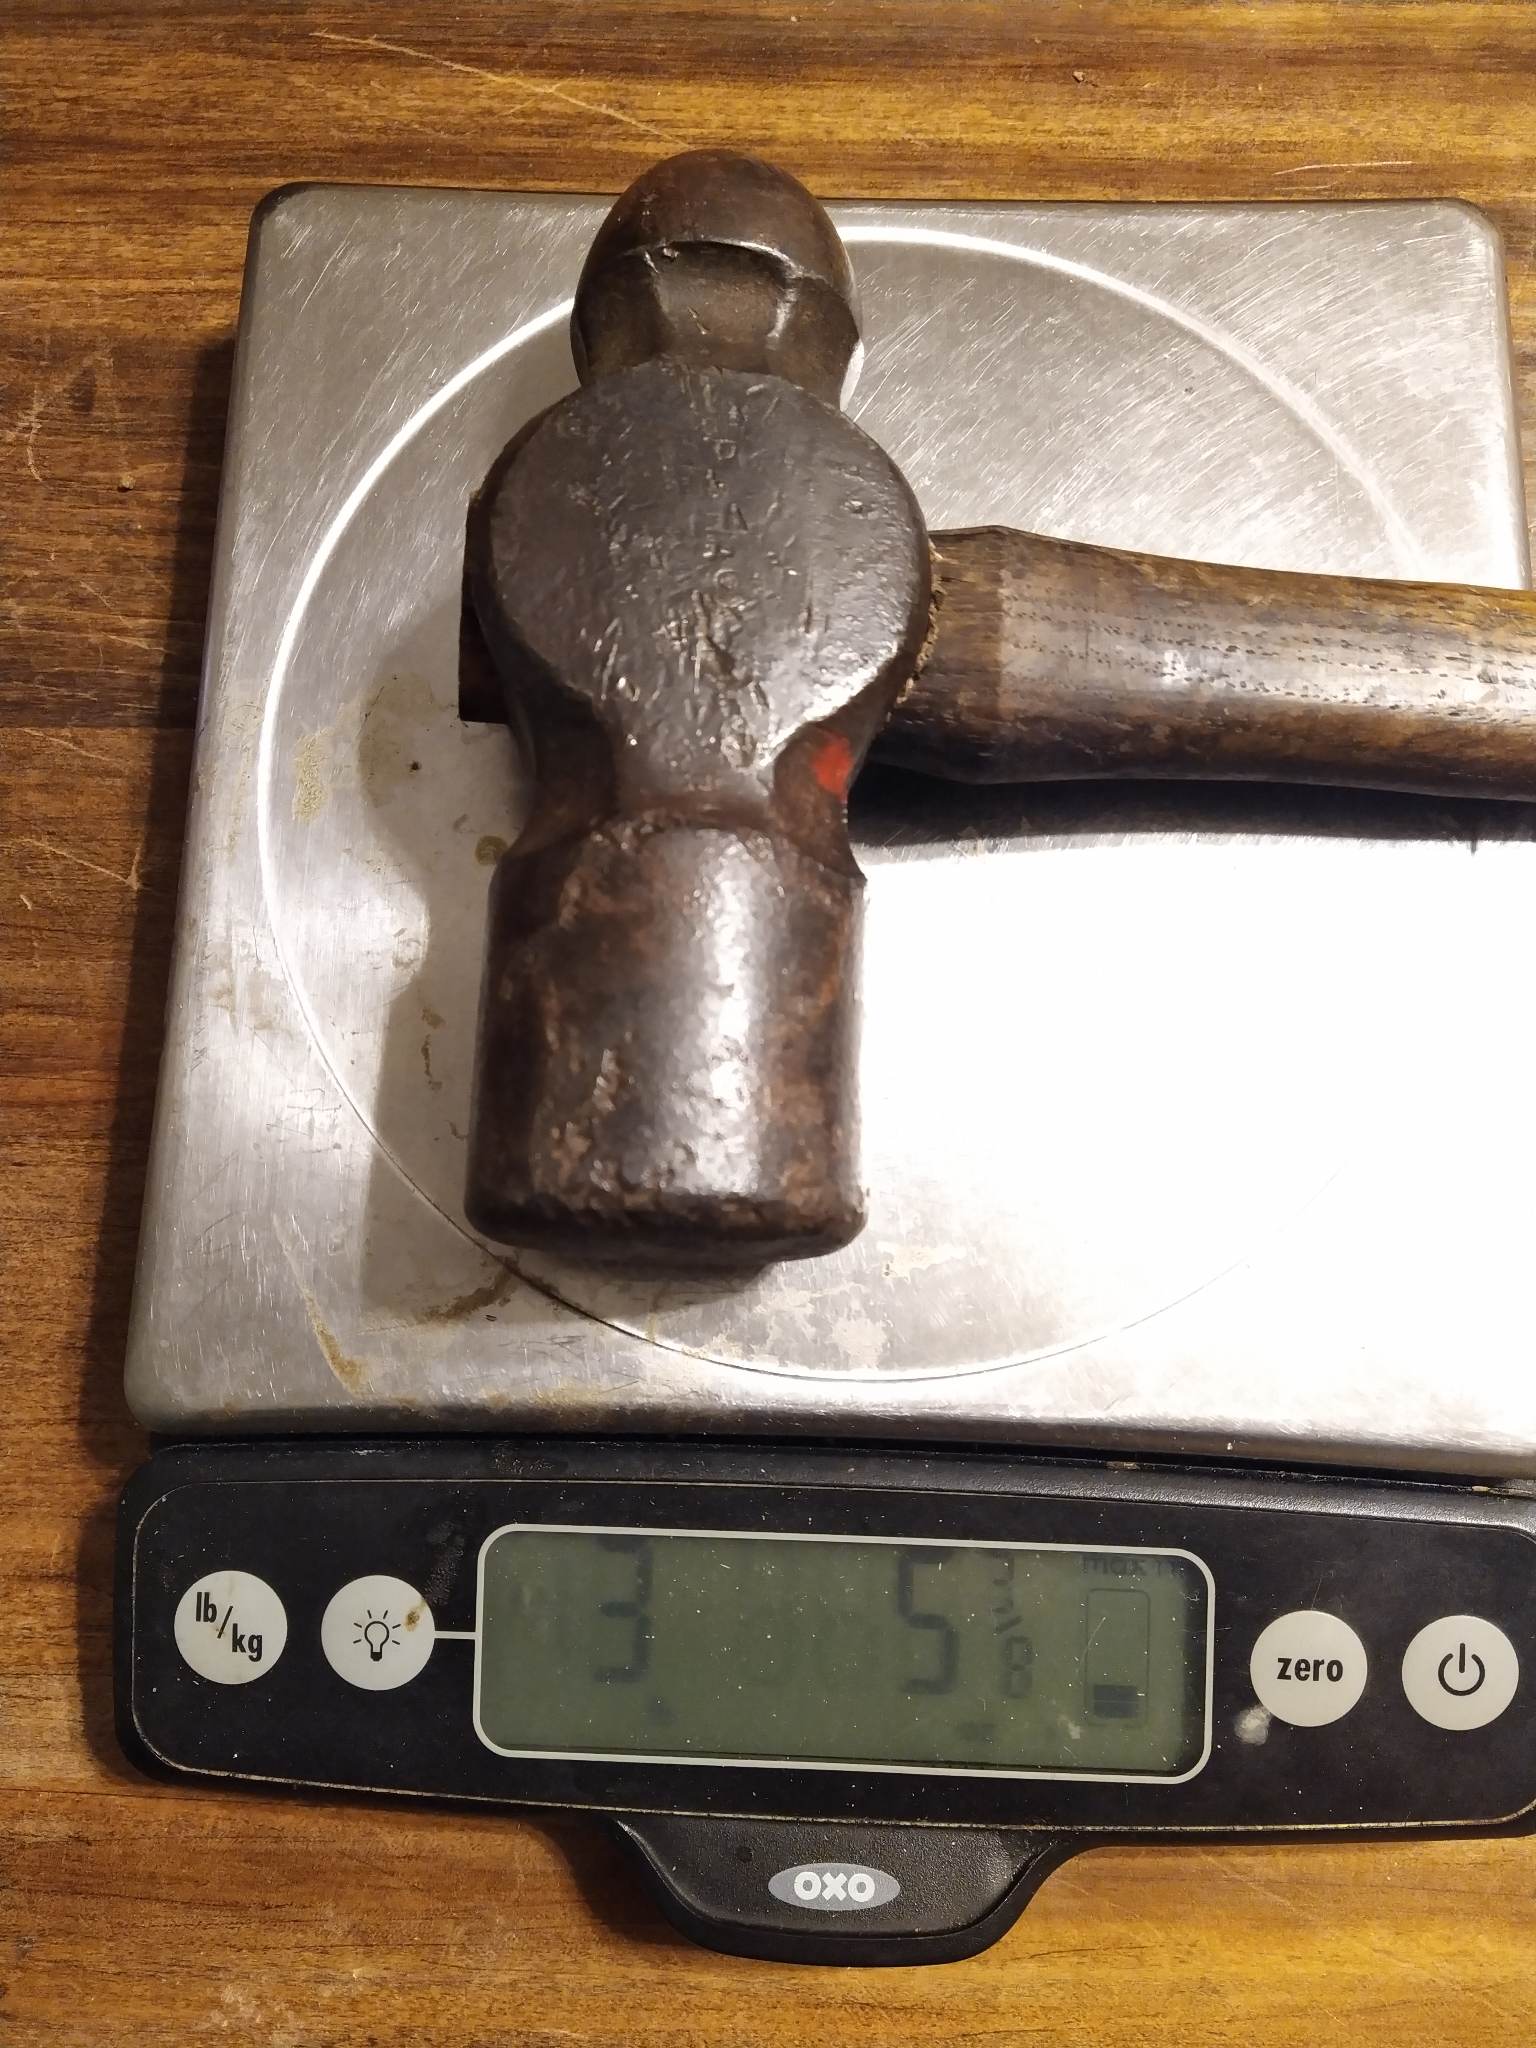
Looks like probably 3 lbs since this weight includes the handle.

-
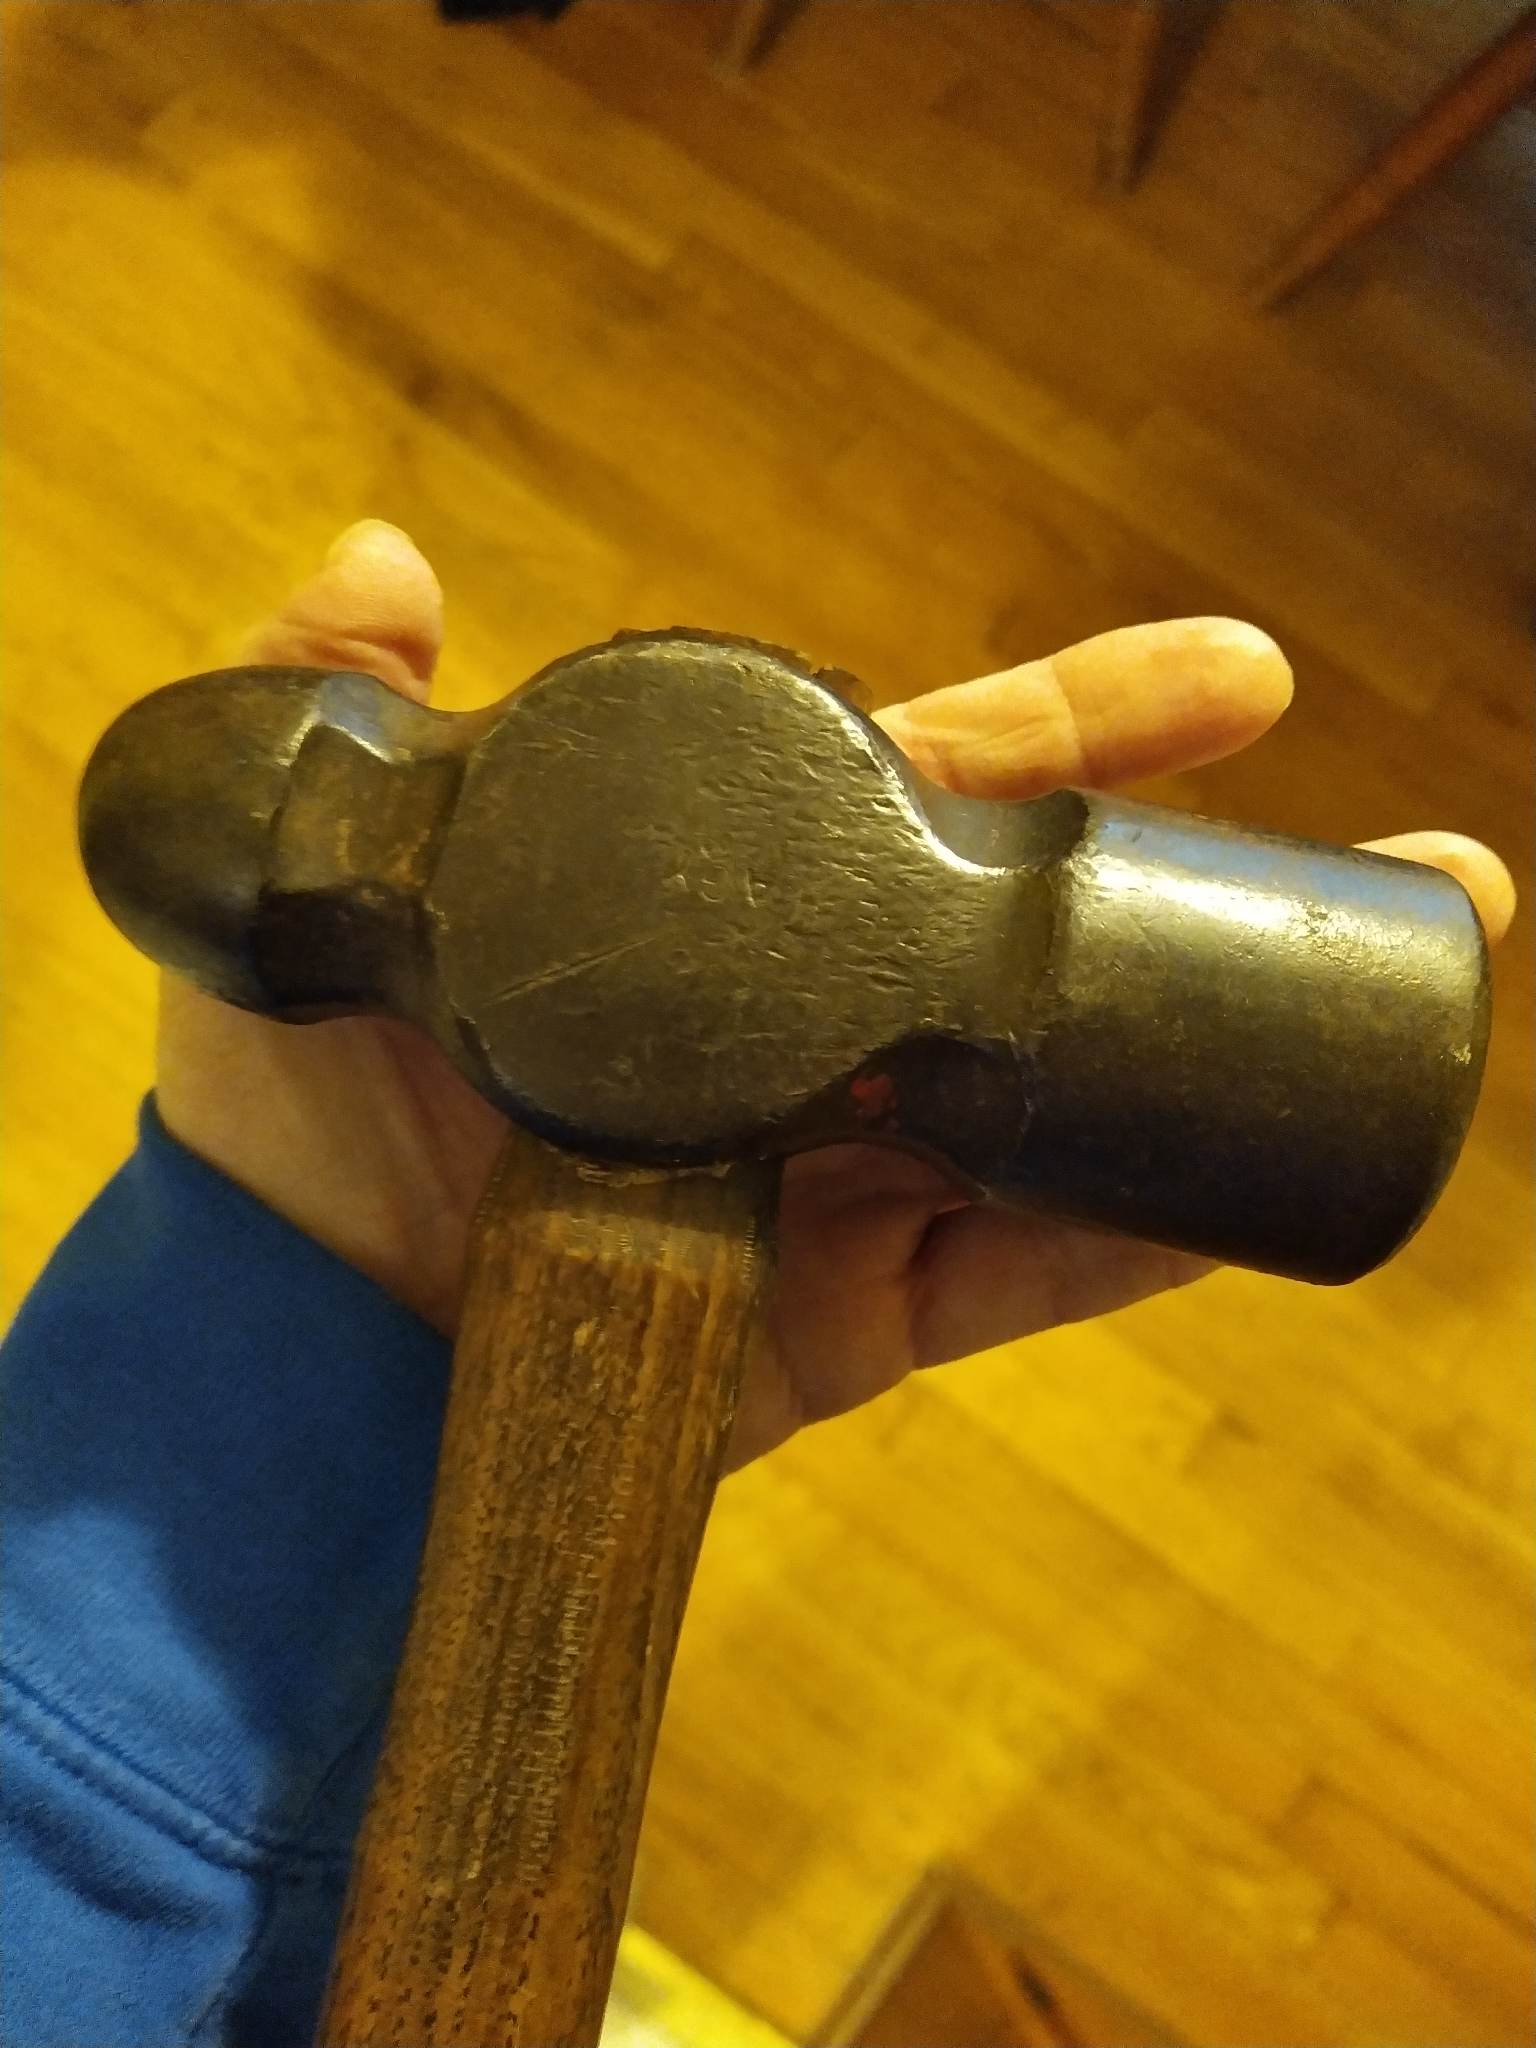
Came across this beast of a ball peen hammer at a new antique mall that opened nearby. Got it for $7.50!
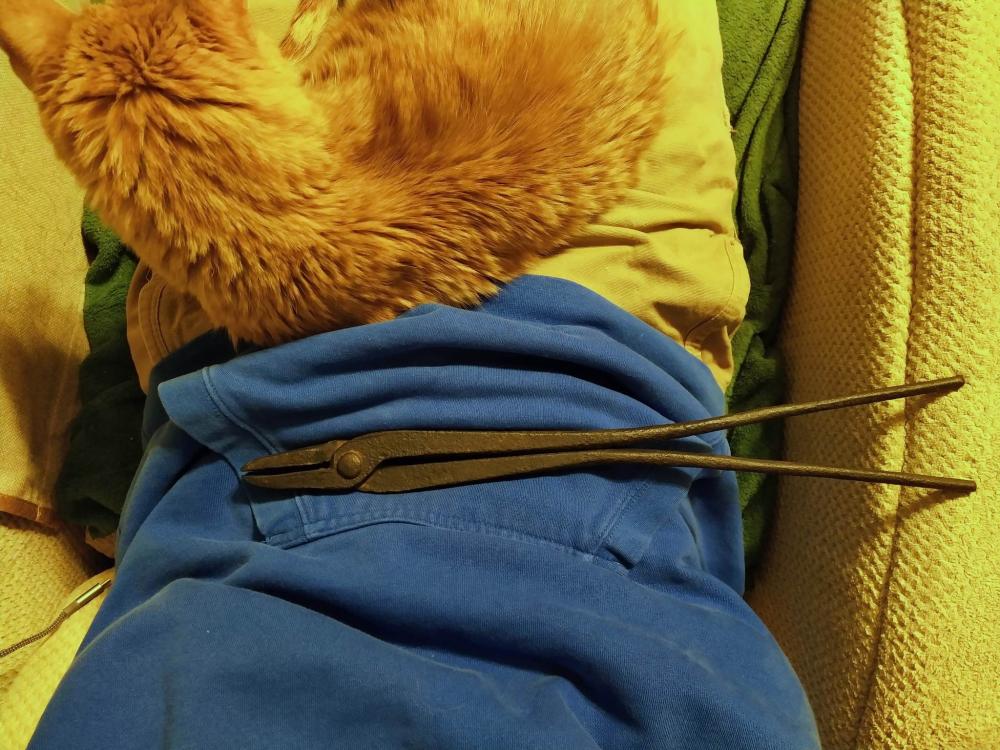
Also picked up these lightweight tongs for cheap. No cracks, no slip, seem to be in good condition!
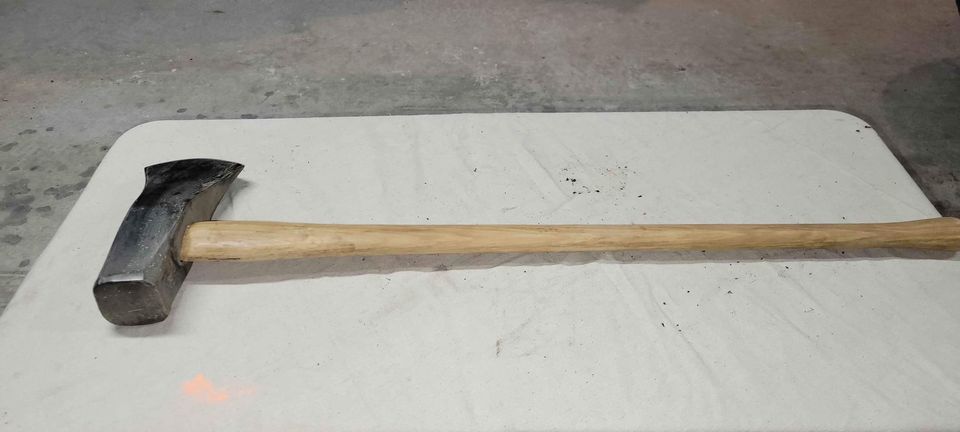
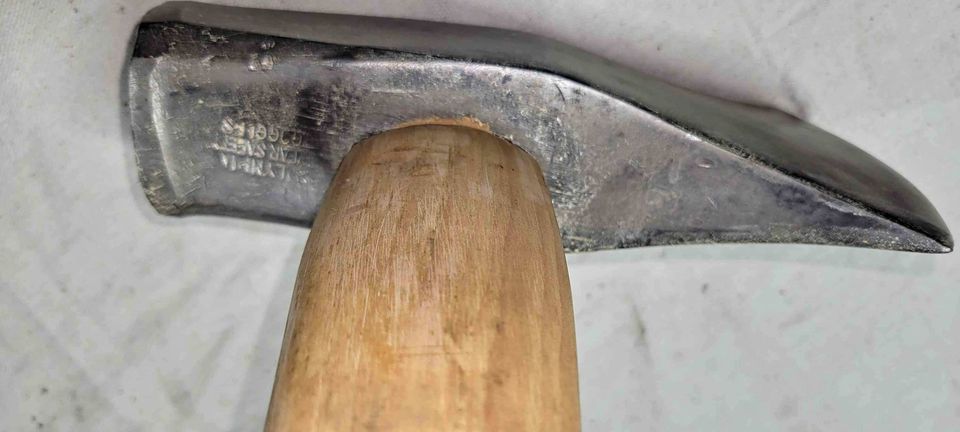
Then purchased a 12lb maul with new hand carved handle from someone on FB for twenty bucks. Not a bad haul overall!
Been feeling pretty ucky all week so haven't done any forging. Felt good to do something shop adjacent today, lol
-
I've only had a few that sent me to the basement. So often we get sirens just because a tornado was spotted in the county. Our county is huge. So I check to see where, which way it's heading, and hang out in the living room where it's comfy, lol
Twice in the past decade I've gone to the basement because I felt the pressure change inside and the storm stilled. The most recent time, the basement door was hard to open, felt like something was pulling from the other side. I definitely wanted to be in the basement for that one.
-
You mean you don't hang out on the porch and watch until it gets close? Are you really from here?

-
Thank you Frosty for your experience based insight. As fate would have it, after more discussion with Daniel it looks like I'd be more likely to be working on 3/8" anyway so that's really good to know your experience with the same size. And mine is about 1.25" on each end of the bar with 1.5 empty space in center. So I need to be careful not to go too far. I'm thinking the jig is likely going to be the winner here. I might just save my dies for the butcher set I need for creating the shoulder of the staple for the tenons in the Level 1 class coming up.
-
Thanks everyone for the input!
I finished punching and welding two tools today. One being the guillotine frame and the other being an adjustable holding jig that will hold my bar in place between two pieces of angle iron while I chisel on it.
I'm gonna try the jig first. I still have to grind the dies to shape so the guillotine isn't ready for testing.
-
TwistedWillow just kept throwing stuff in my car when I went there to buy an anvil and post vice! Super appreciated.
Regarding the masonry chisel, I use one as my hot cut since I didn't already have one made. Mine is a bit wider than yours but yours would do fine for smaller stock! Also would work as a hot chisel for making grooves for fancy twists or whatever.
-
Omg Thomas Powers, I LOVE that brain beanie! Glad to see you out in the shop.
-
Anvil, I had noticed the spring fillers jump when I see others use them. I had not noticed it on the guillotines though.
Natkova, I did also consider a spring fuller with the matching fullers but the guillotine dies are more versatile for future projects where the spring fuller would be a one-use tool.
-
Haha, I actually use a brick chisel in the hardy hole as my hot cut. It's too long to use as the cutting tool for this project though.
But what I'm asking is about a two sided tool so I can make the groove on two sides in one heat. I already have the scrap to make the dies, and wouldn't have to purchase anything.
But if there's a reason it wouldn't work, then I'll use the die blanks to make a butcher for the tenons I'll be making in class in a few months.
-
I looked around on google for a bit and didn't find anyone doing it - but not sure if it's because it's not useful or if it's because no one has talked online about it.
So here's my situation:
I'm practicing doing pineapple twists on both ends of a 4" length of 1/4" bar stock. Ultimately, this will serve as the guard for an Arkansas Toothpick knife my local buddy is making for his coworker. He reached out and asked to collaborate and have me make the guard with a pineapple twist since he mostly does just knife work. He didn't have any exact measurement guidelines for me yet so I'm guessing with the 4" by 1/4" and figure if I can get it pretty consistent with that then it should transfer relatively smoothly to different dimensions.
It takes SO LONG to fuller in the grooves 8 times twice! So I got to thinking if there was a way to do it faster. I don't have a treadle hammer nor do I want to make one right now. I thought maybe I'd make a die set for the guillotine which has a top & bottom matching fuller. Add a u-shape of stock against the frame to act as a fence that positions the bar stock at center under the fuller die. Slide the bar in, whack the top. Flip 180, whack again to keep it even - since guillotines rarely push metal the same top & bottom. Then I'd end up with a groove on each side in the same time it took me to do one side. And probably faster since I'm currently using the hold fast and hand-held (vice gripped) fullering tool.
I did also consider a spring swage with the matching fullers but the guillotine dies are more versatile for future projects where the spring swage would be a one-use tool.
Anyway, can you think of any reason this wouldn't work like I'm expecting it to?
-
Welcome to the forum! I also devoured quite a few books as I was diving into this craft. I borrowed from the library first (sometimes had to use Interlibrary Loan) to see if I liked the format and if so, then I would order the book for purchase. Then I joined my local blacksmith association and found out they have their own little lending library! So I highly recommend checking for a local association and see what all they offer.
FWIW, every time someone on the forum talks about hammer handles, I remember that I need to address some of my newer hammer handles to better fit my hand. Does the hammer work without doing so? Yes, which is why I keep putting it off. Would my hand muscles appreciate a better shape and not tire as quickly? Quite likely. I will confirm that (with wood handles anyway) removing the poly finish they come with completely eliminated the blisters I was getting from longer forging sessions! So if you notice you are getting blisters when using the fiberglass handle after longer forging sessions, then just know that switching to a wooden handle will 100% help that.
-
Aw, my heart goes out to your family & McFadden! We are unable to take him since we have a similar dog that on top of the startle response is quite resource guardy and we don't have the desire to work on/manage two dogs, lol. But I shared this info with someone else who's 'plugged in' with dog rescues all over - hopefully they'll find someone and get back with me.
-
14 hours ago, Paul TIKI said:
broke two of them at the stem before I quit for the night
I have this video saved in my Blacksmithing playlist for when I get going on leaves again because I also frequently had them breaking at the stem - the logic is sound.
-
That is stunning!
-
6 hours ago, Irondragon ForgeClay Works said:
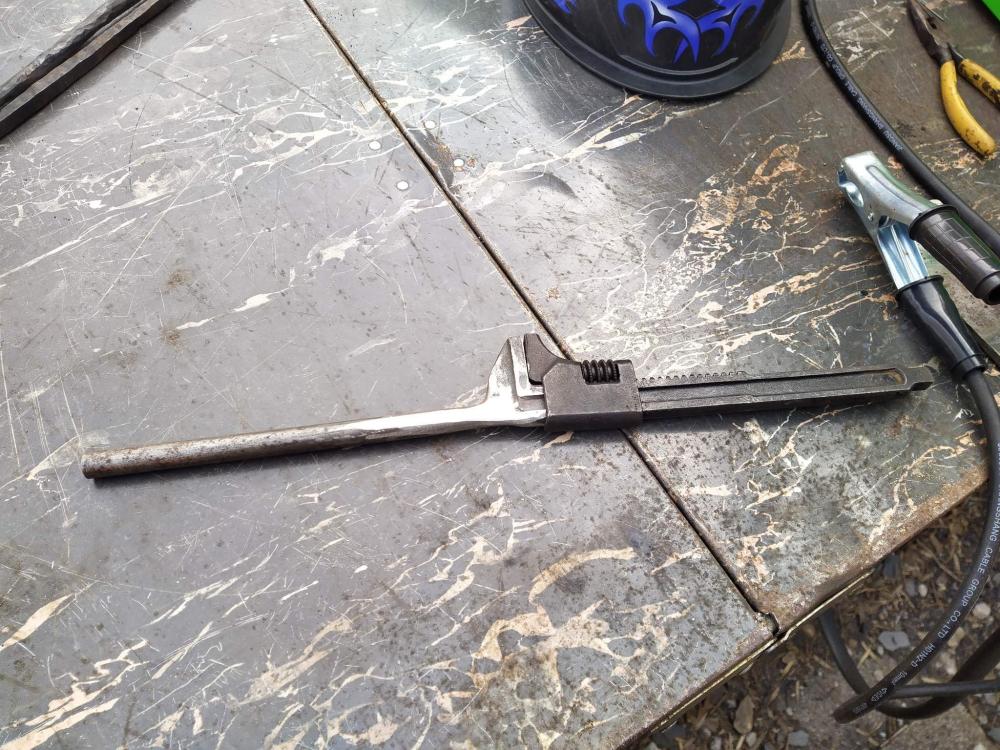
great looking twisting wrench
Funny you should mention that. I was using it today to tighten bolts on the post vice, it slipped and smacked me in the face HARD. Wrong tool for the job, totally my fault, but dang! Why do my life lessons have to hurt so danged much?!
-
I 100% recommend the blueprint of Easy Tongs that IFCW shared above. Those were the first tongs I made and they really are that easy. I made mine for small stuff - 1/4" or smaller - and I still use them when working on that stuff. I never even dressed the ends of the handles. Every time I use them, I think - "Yikes, that's kinda sharp. I really need to dress the ends of these." and then finish my project and forget all about it, lol
-
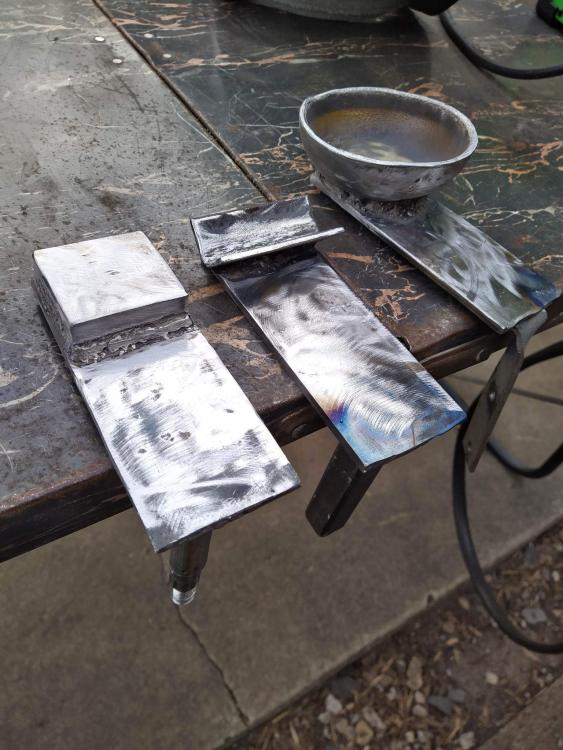
We had an uncharacteristically warm day (around 60°F and sunny!) so I got some welding work done.
I might look up how to appropriately weld a bowl shape to a plate. That was messy. I ended up removing the bowl, laying 4 lines of weld to form a square, then setting the bowl inside that square and welding the lines to the bowl. Got me a little extra room for the tip but still really ugly.
The post vice stand had a BEAUTIFUL first layer of weld. The 3 layers above that weren't as pretty though.
I'll need to screw new holes for the mounting plate on the post vice stand because my derp brain positioned the post backwards and didn't notice till it was fully welded on!
Oh, and I'll have to cut a hole for the leg or add something to the top plate to raise it.

-
I emailed and asked when to expect a materials list. They replied that the instructors do intend to send a materials list but they did not specify when.
-
That's beautiful, Duckwalk


Show me your anvil stands
in Stands for Anvils, Swage Blocks, etc
Posted
Nice tripod stands Billy!
Every time a small hot piece I'm working on falls into the sand part of my sand stand, I swear I'm gonna make a tripod, lol