
Tooln
-
Posts
45 -
Joined
-
Last visited
Content Type
Profiles
Forums
Articles
Gallery
Downloads
Events
Posts posted by Tooln
-
-
Antler is very hard. Also stinks like crap when drilling or sanding.
-
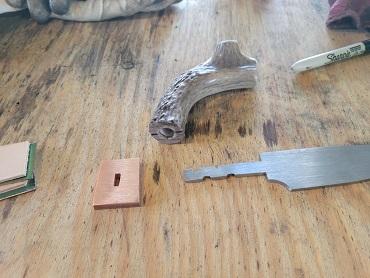
I drill holes in antlers all the time for hidden tang knife handles. Frosty's advise above is spot on. If you have a steady hand and good eyes just clamp your piece in a vise and eye ball it. If your handle is not finished you don't need to be perfect. You'll need to be more accurate if using antler as you won't want to sand any of the antler away. Here's a antler I used for a handle. I just found center and eye balled it.
-
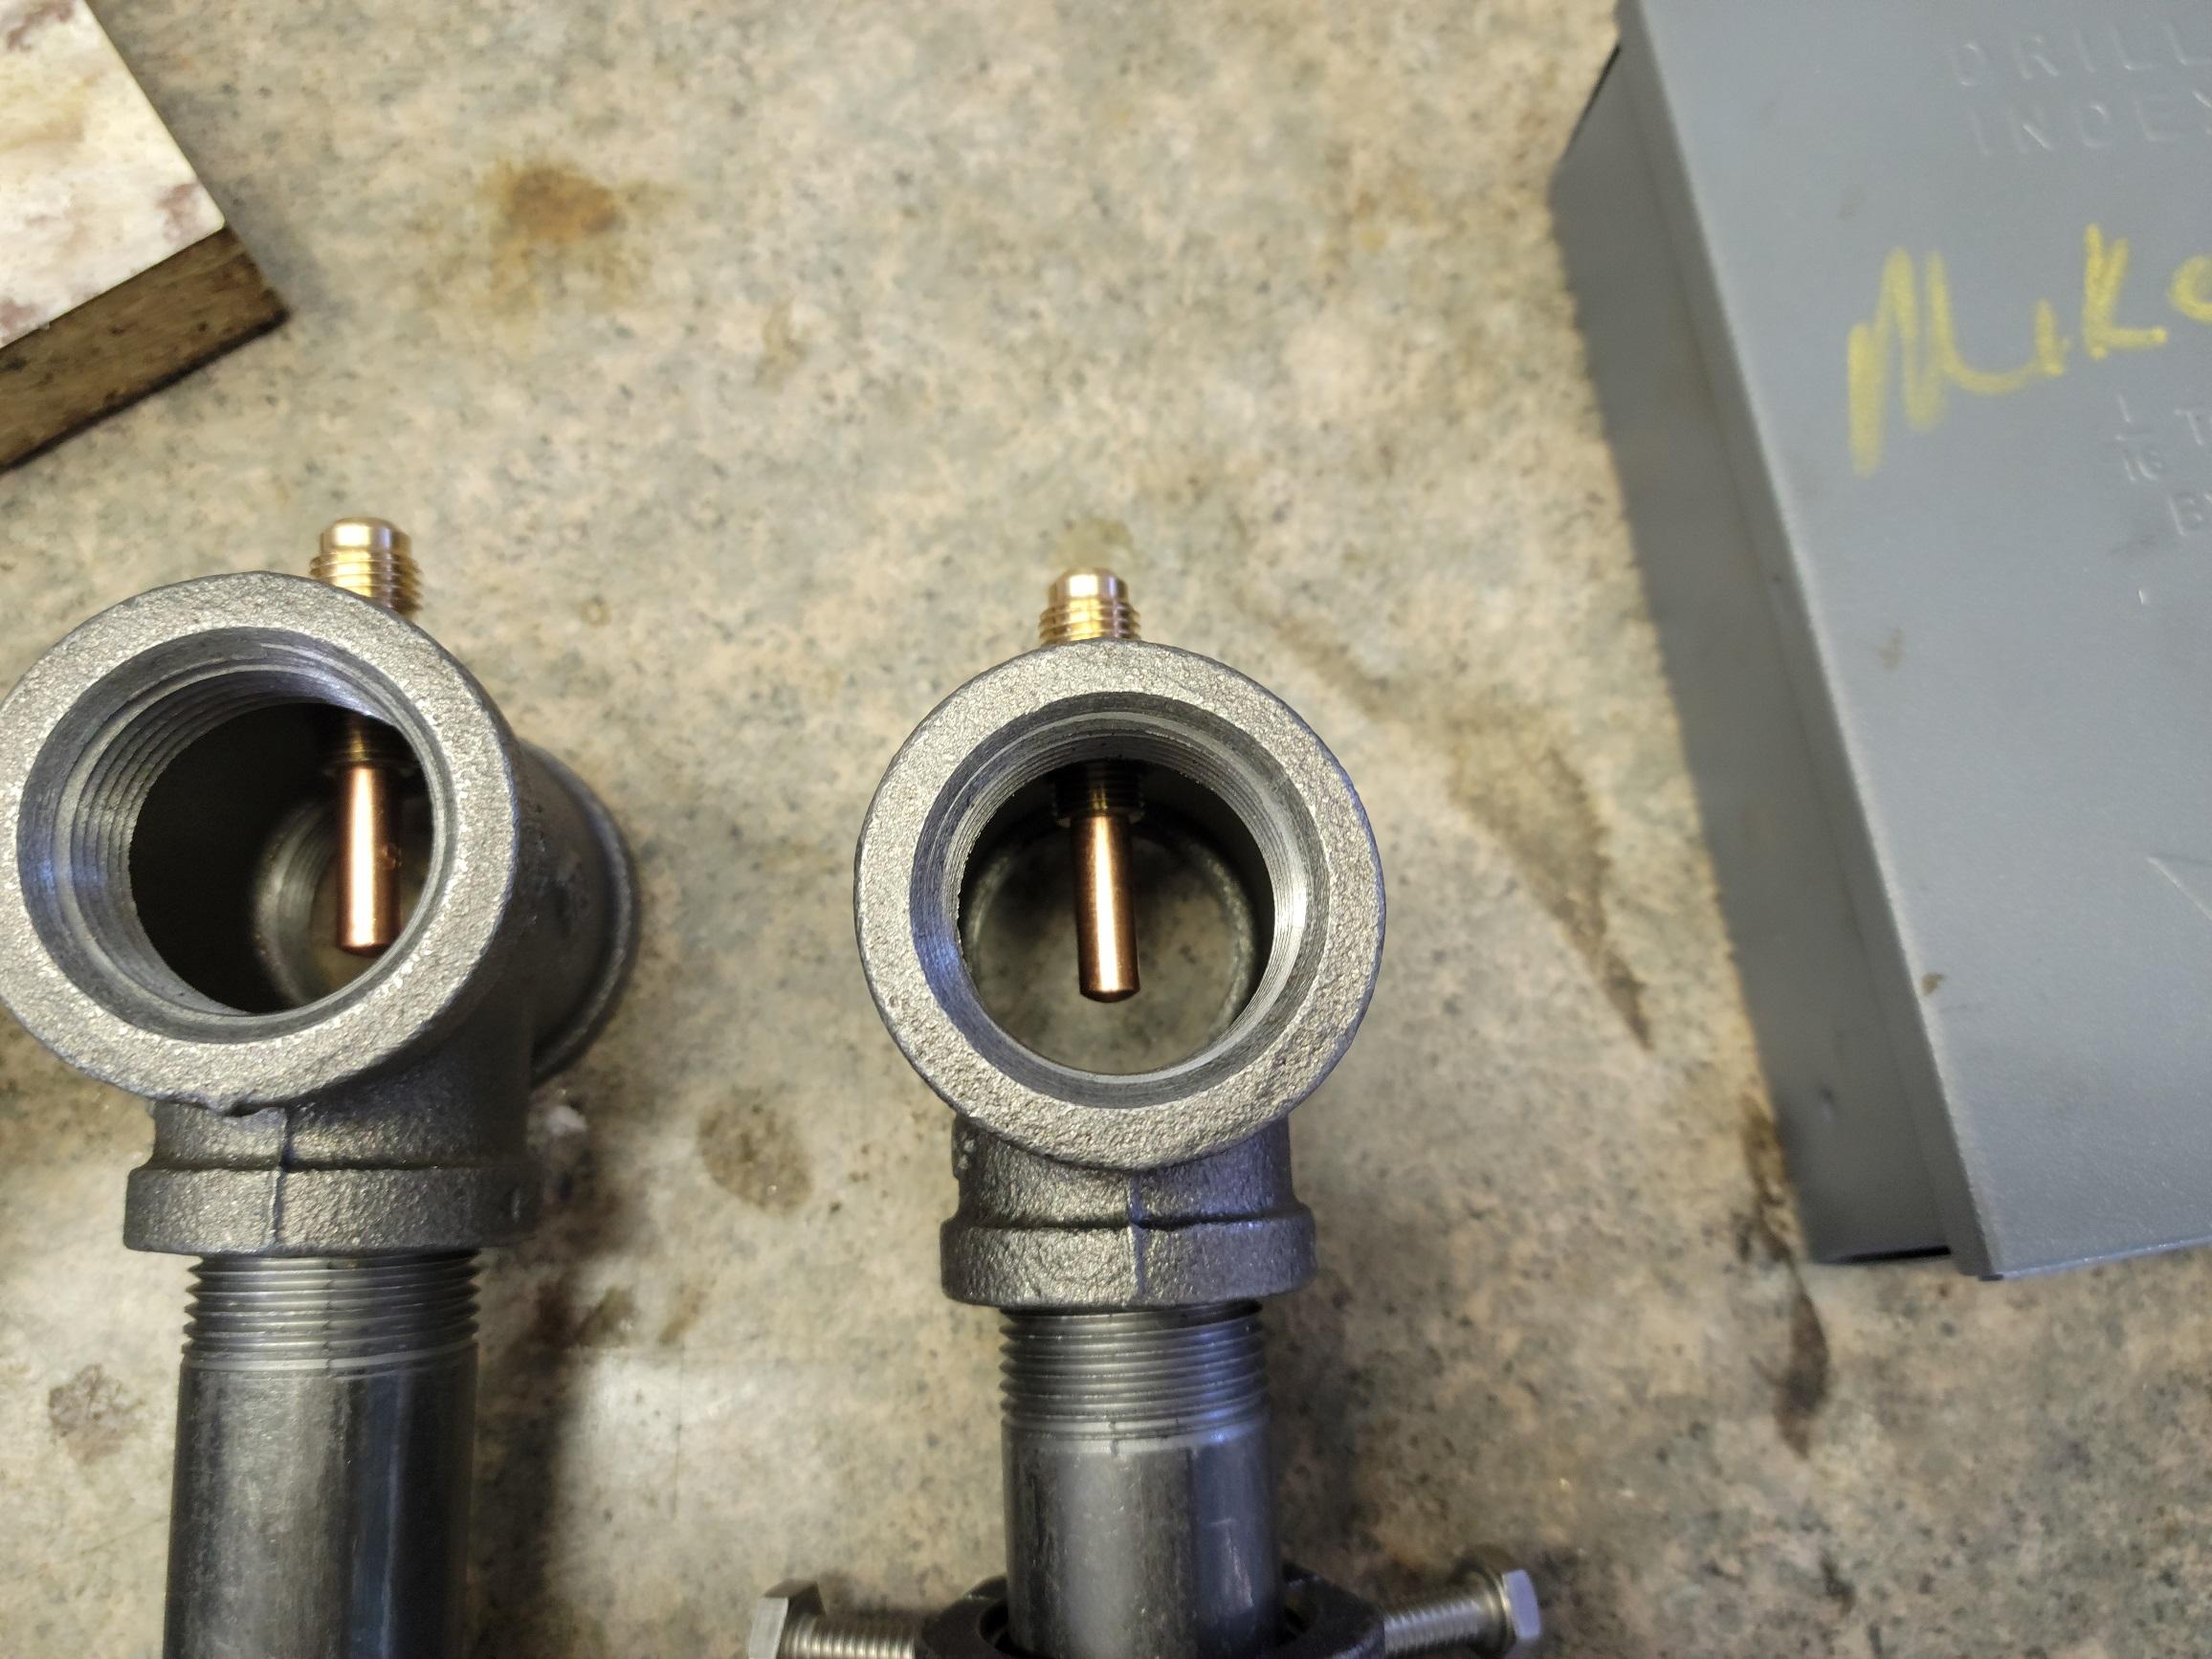
Mickey98118 good catch on the one might tip not in good alignment. Sharp eye to catch it on the pics.
-
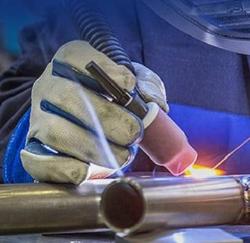
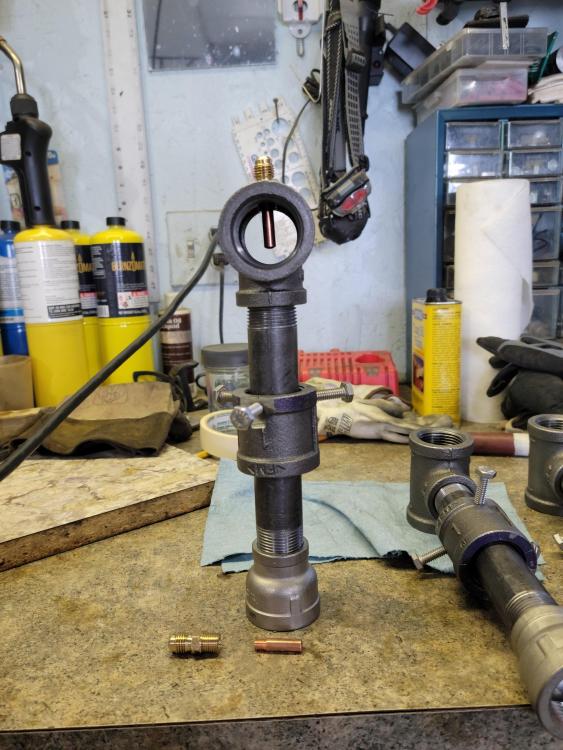
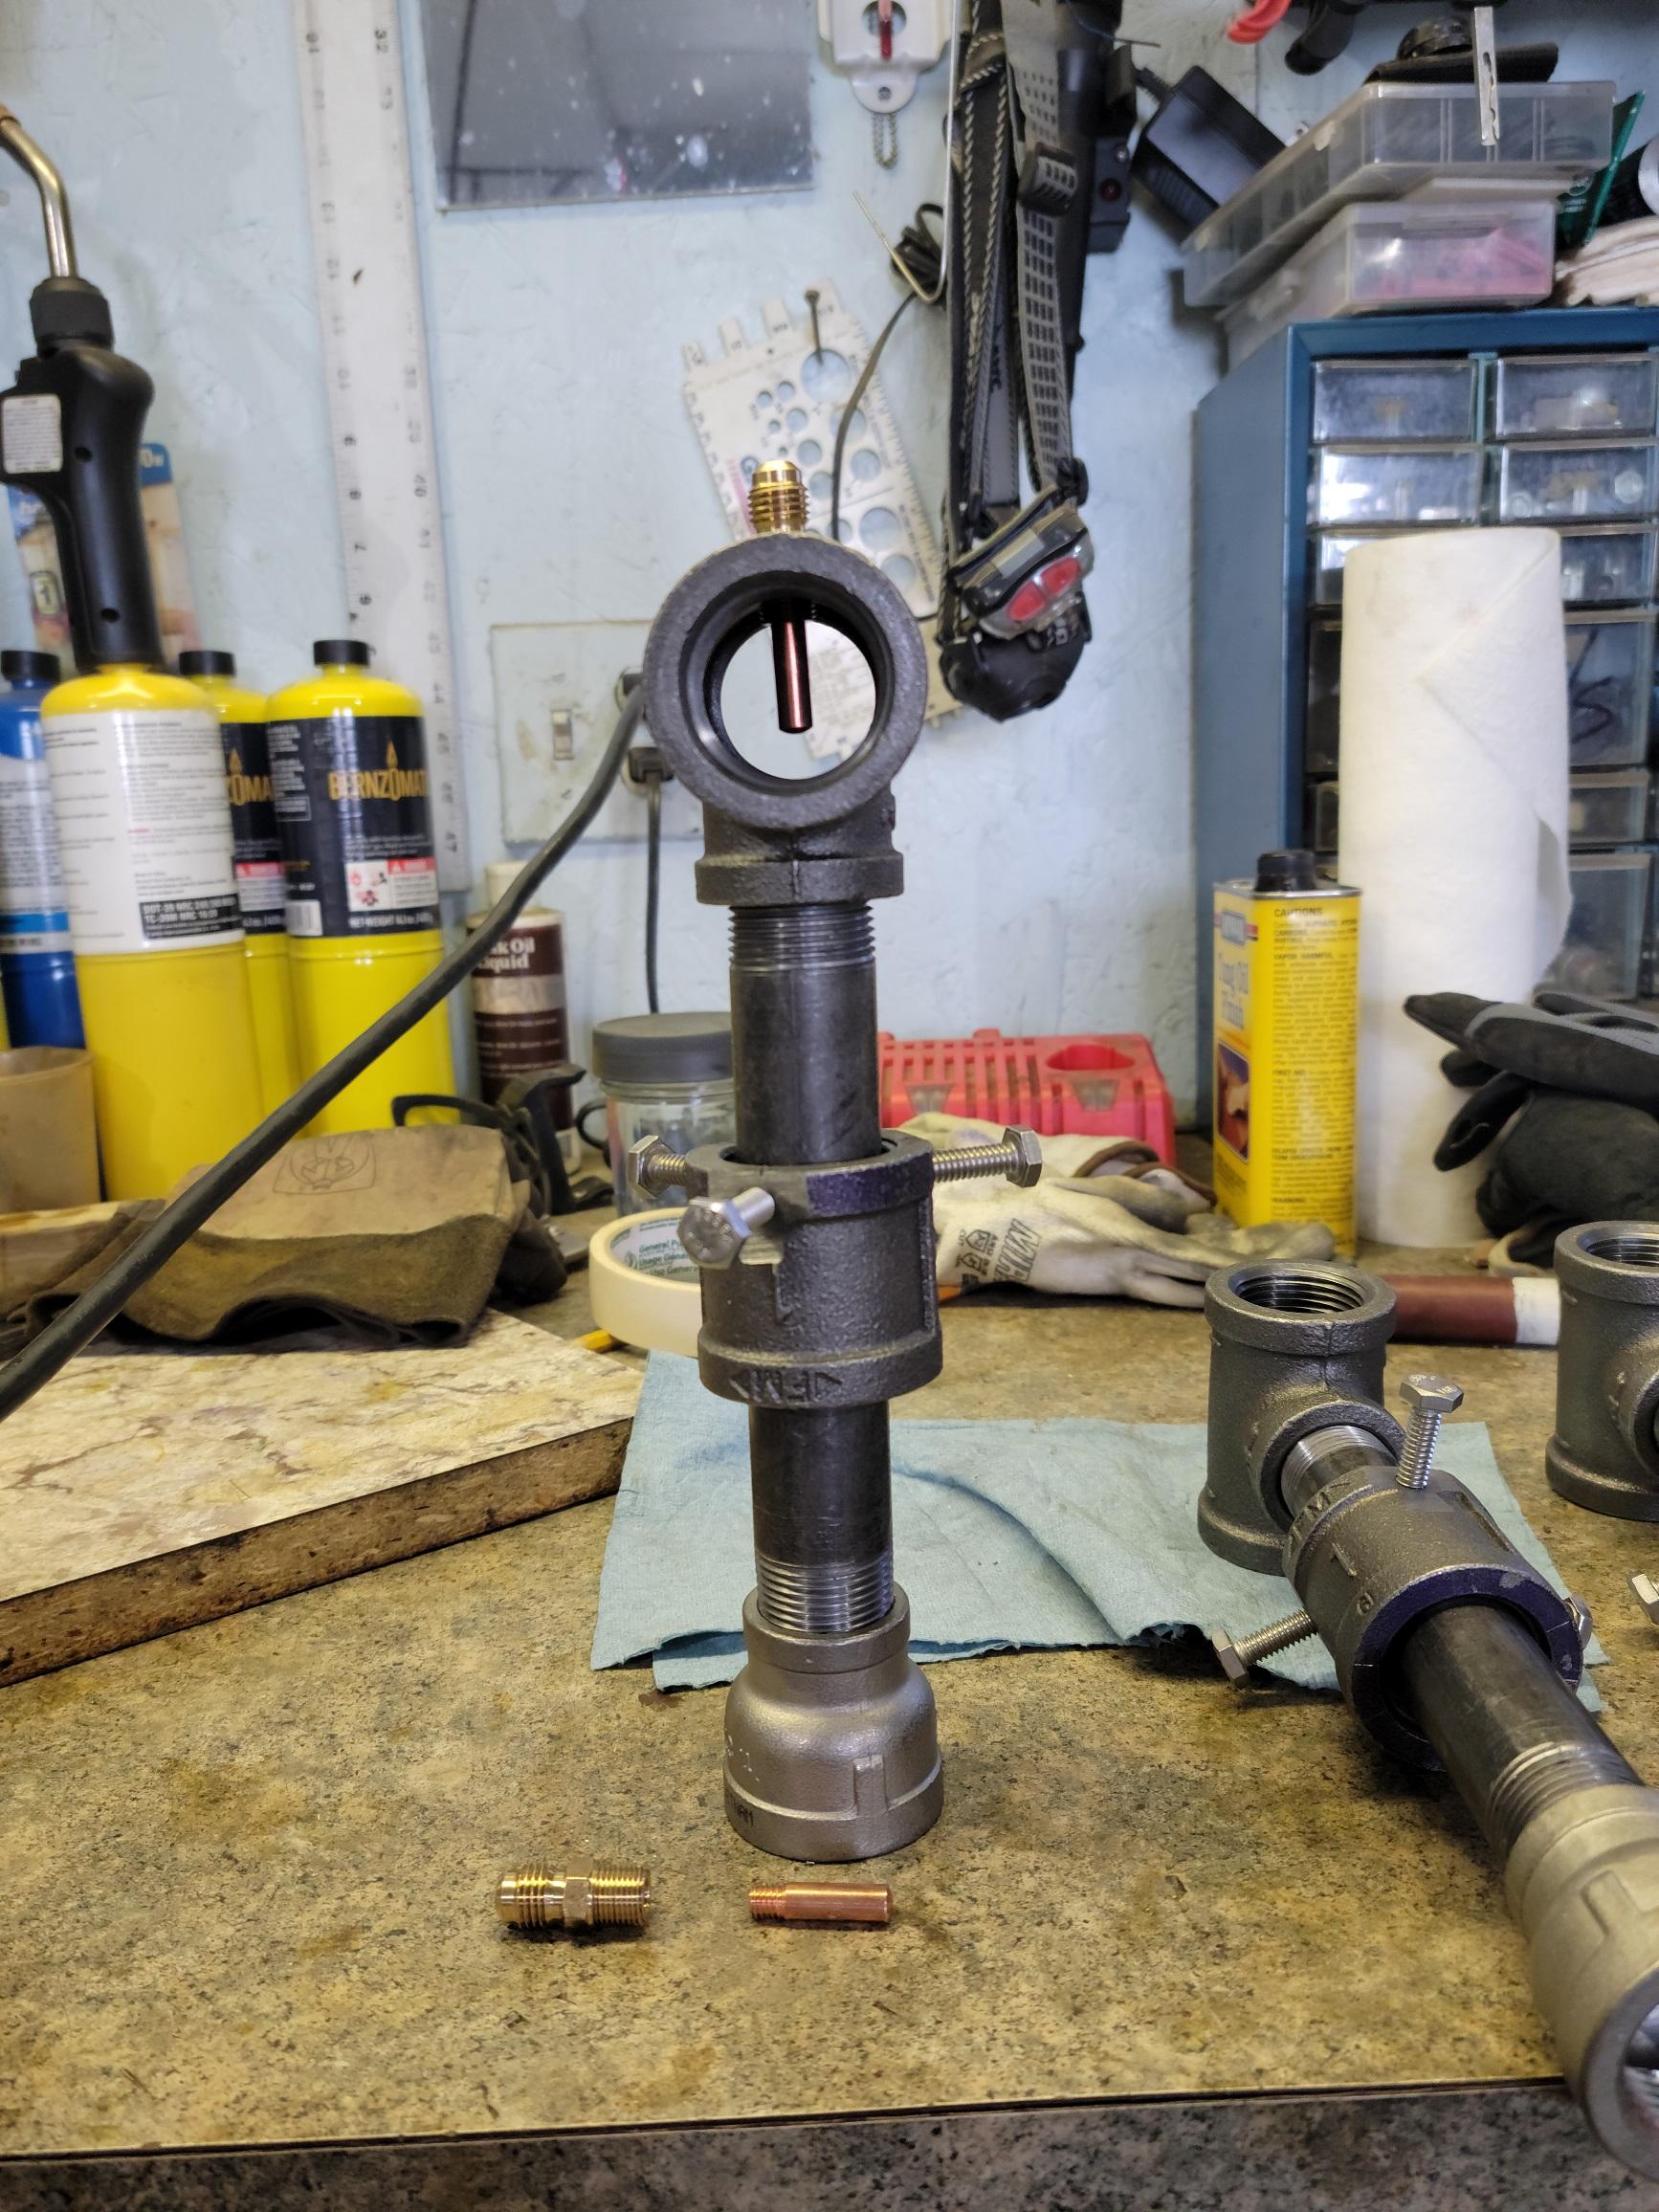
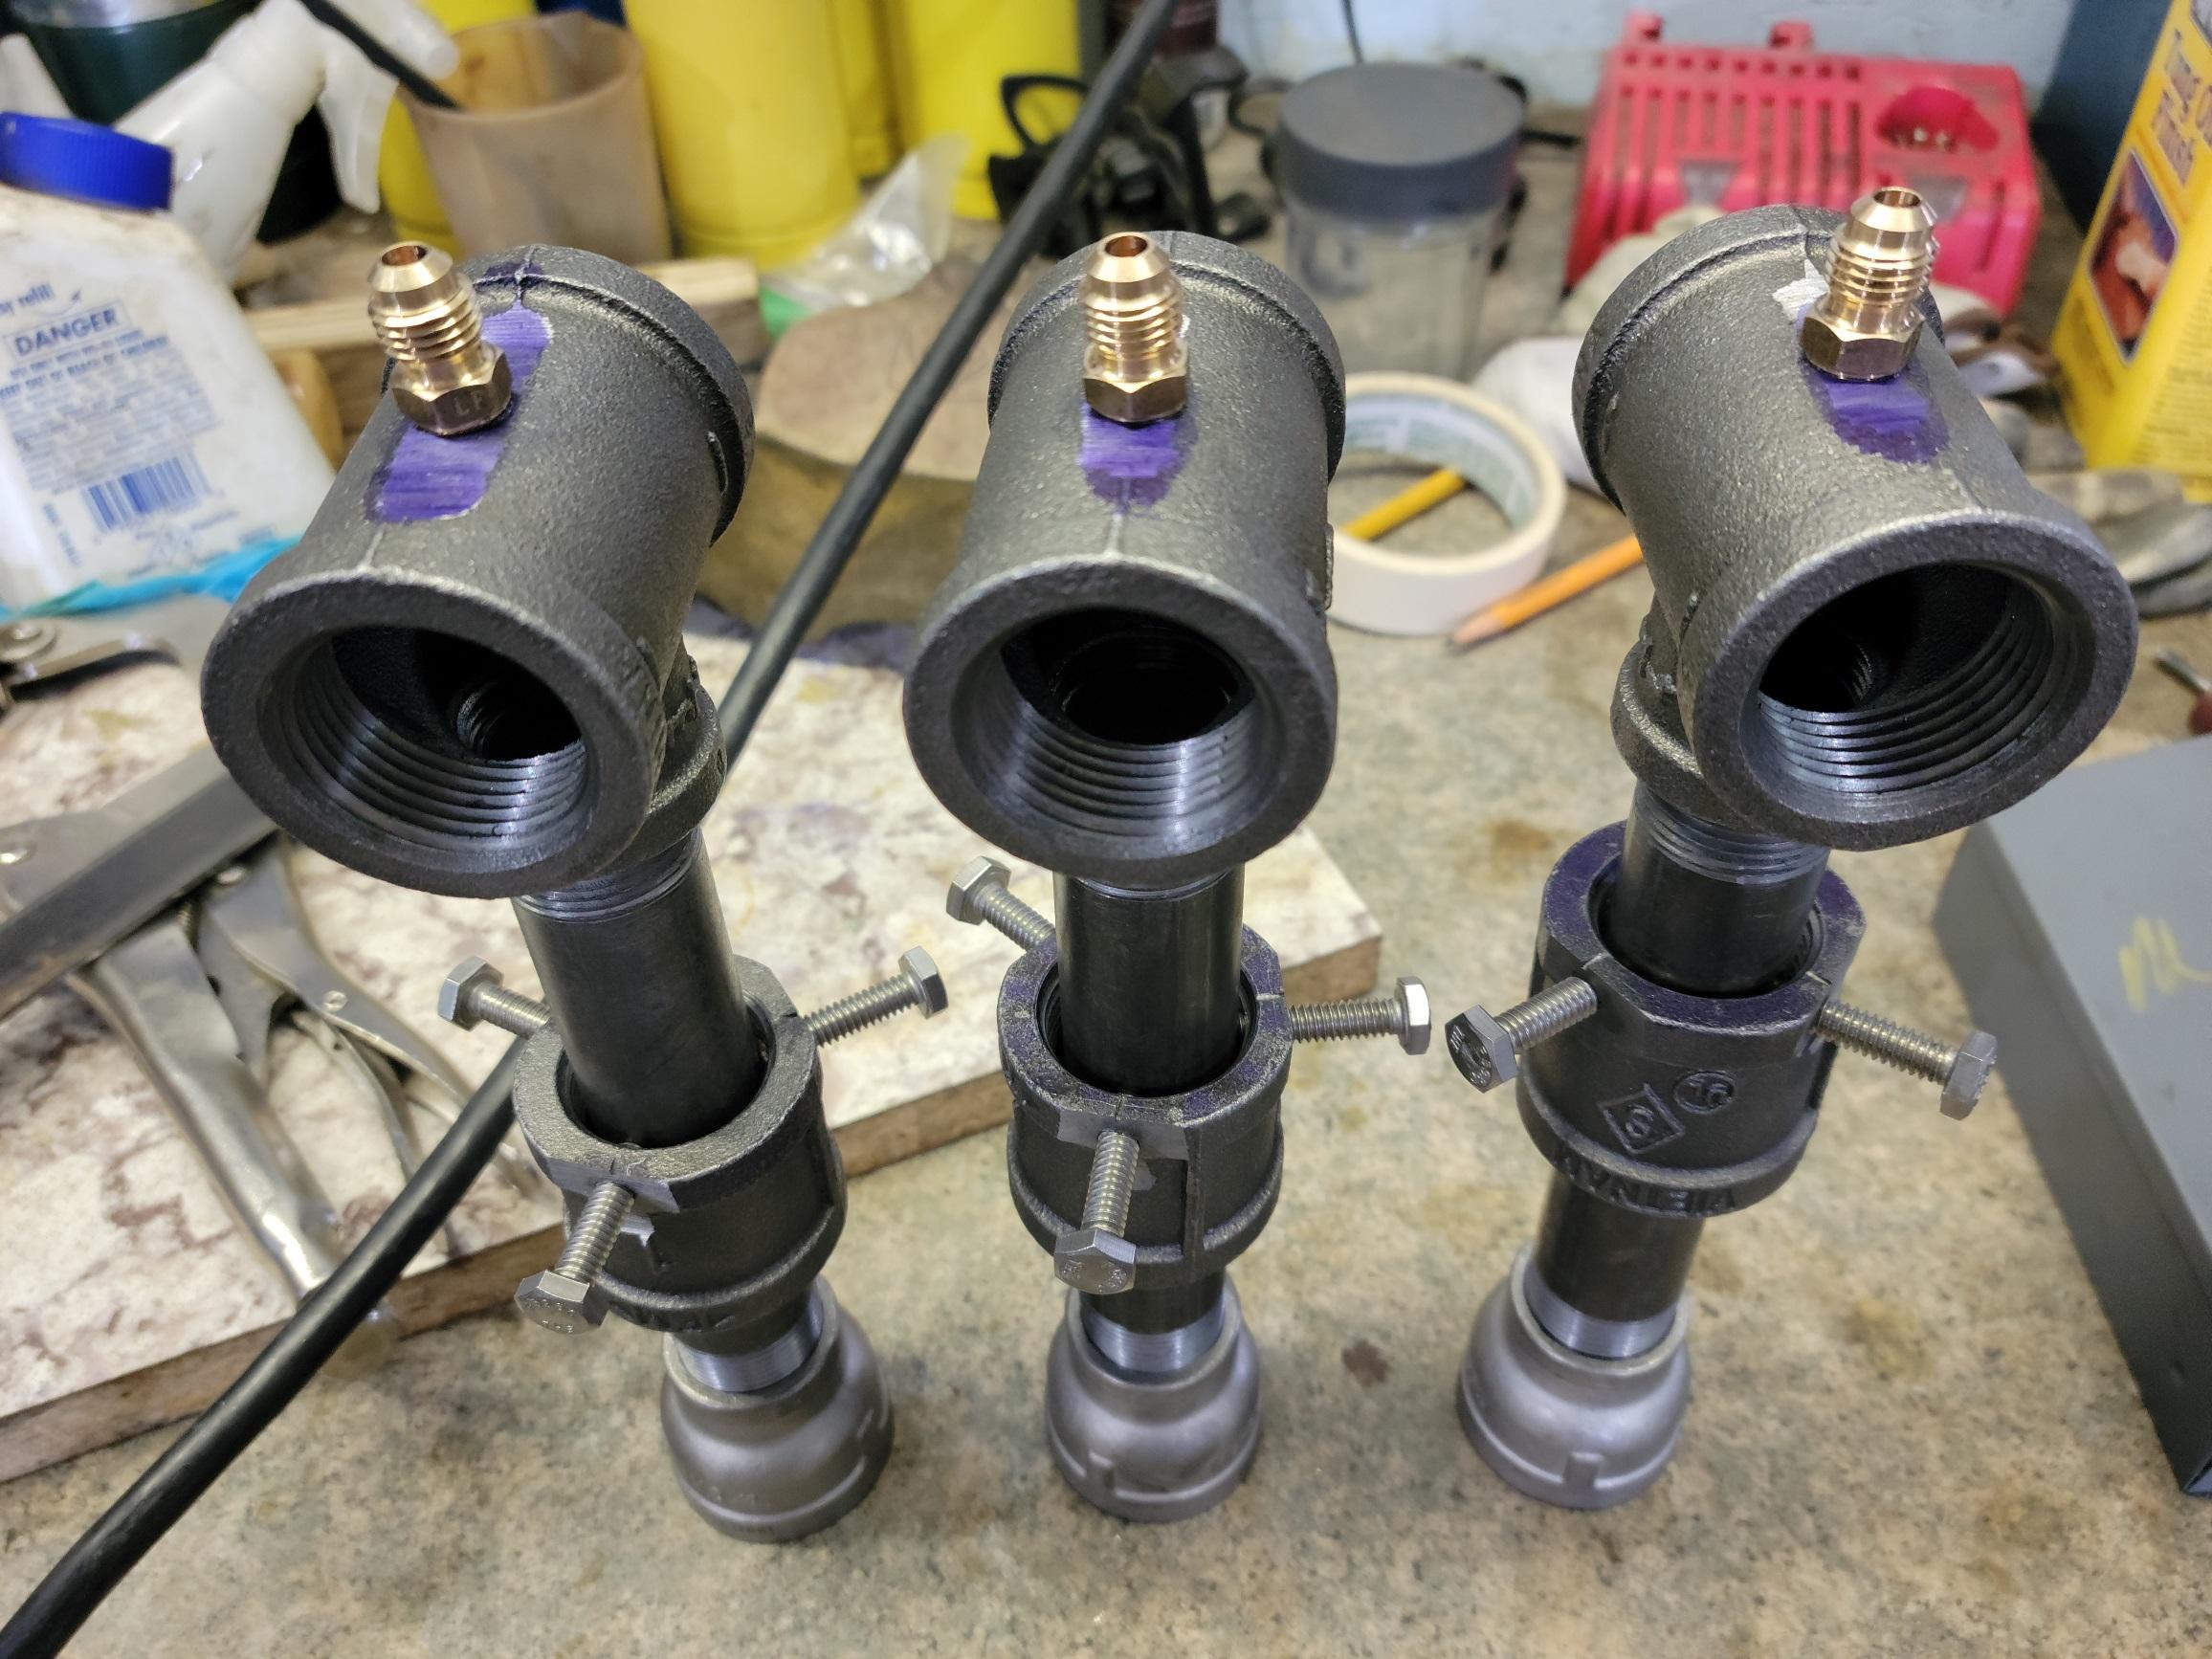
I'm not sure if I'll use the bell reducer. I may just flare out the liner to form the nozzle. I'd be able to unscrew either the T or brass fitting. I have a .035 mig tip. I'm open to suggestions for anything.
-
I plan to put the burners in the forge body soon. I want to put it off center so I get a swirl out of the flame. Looking for suggestion on how many degrees off center . Thanks in advance.
-
I do plan on putting a door on the other end also, just haven't gotten that far. Wife's projects you know.
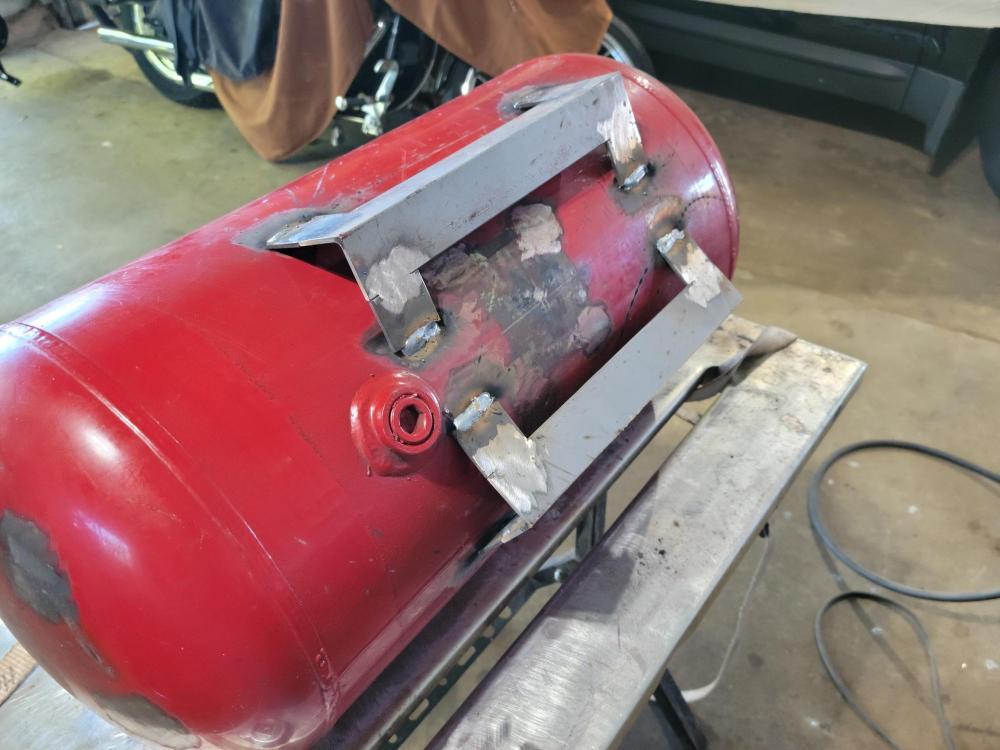
Worked on burners today. I don't think I need to explain to you guys, here are some pics.


-
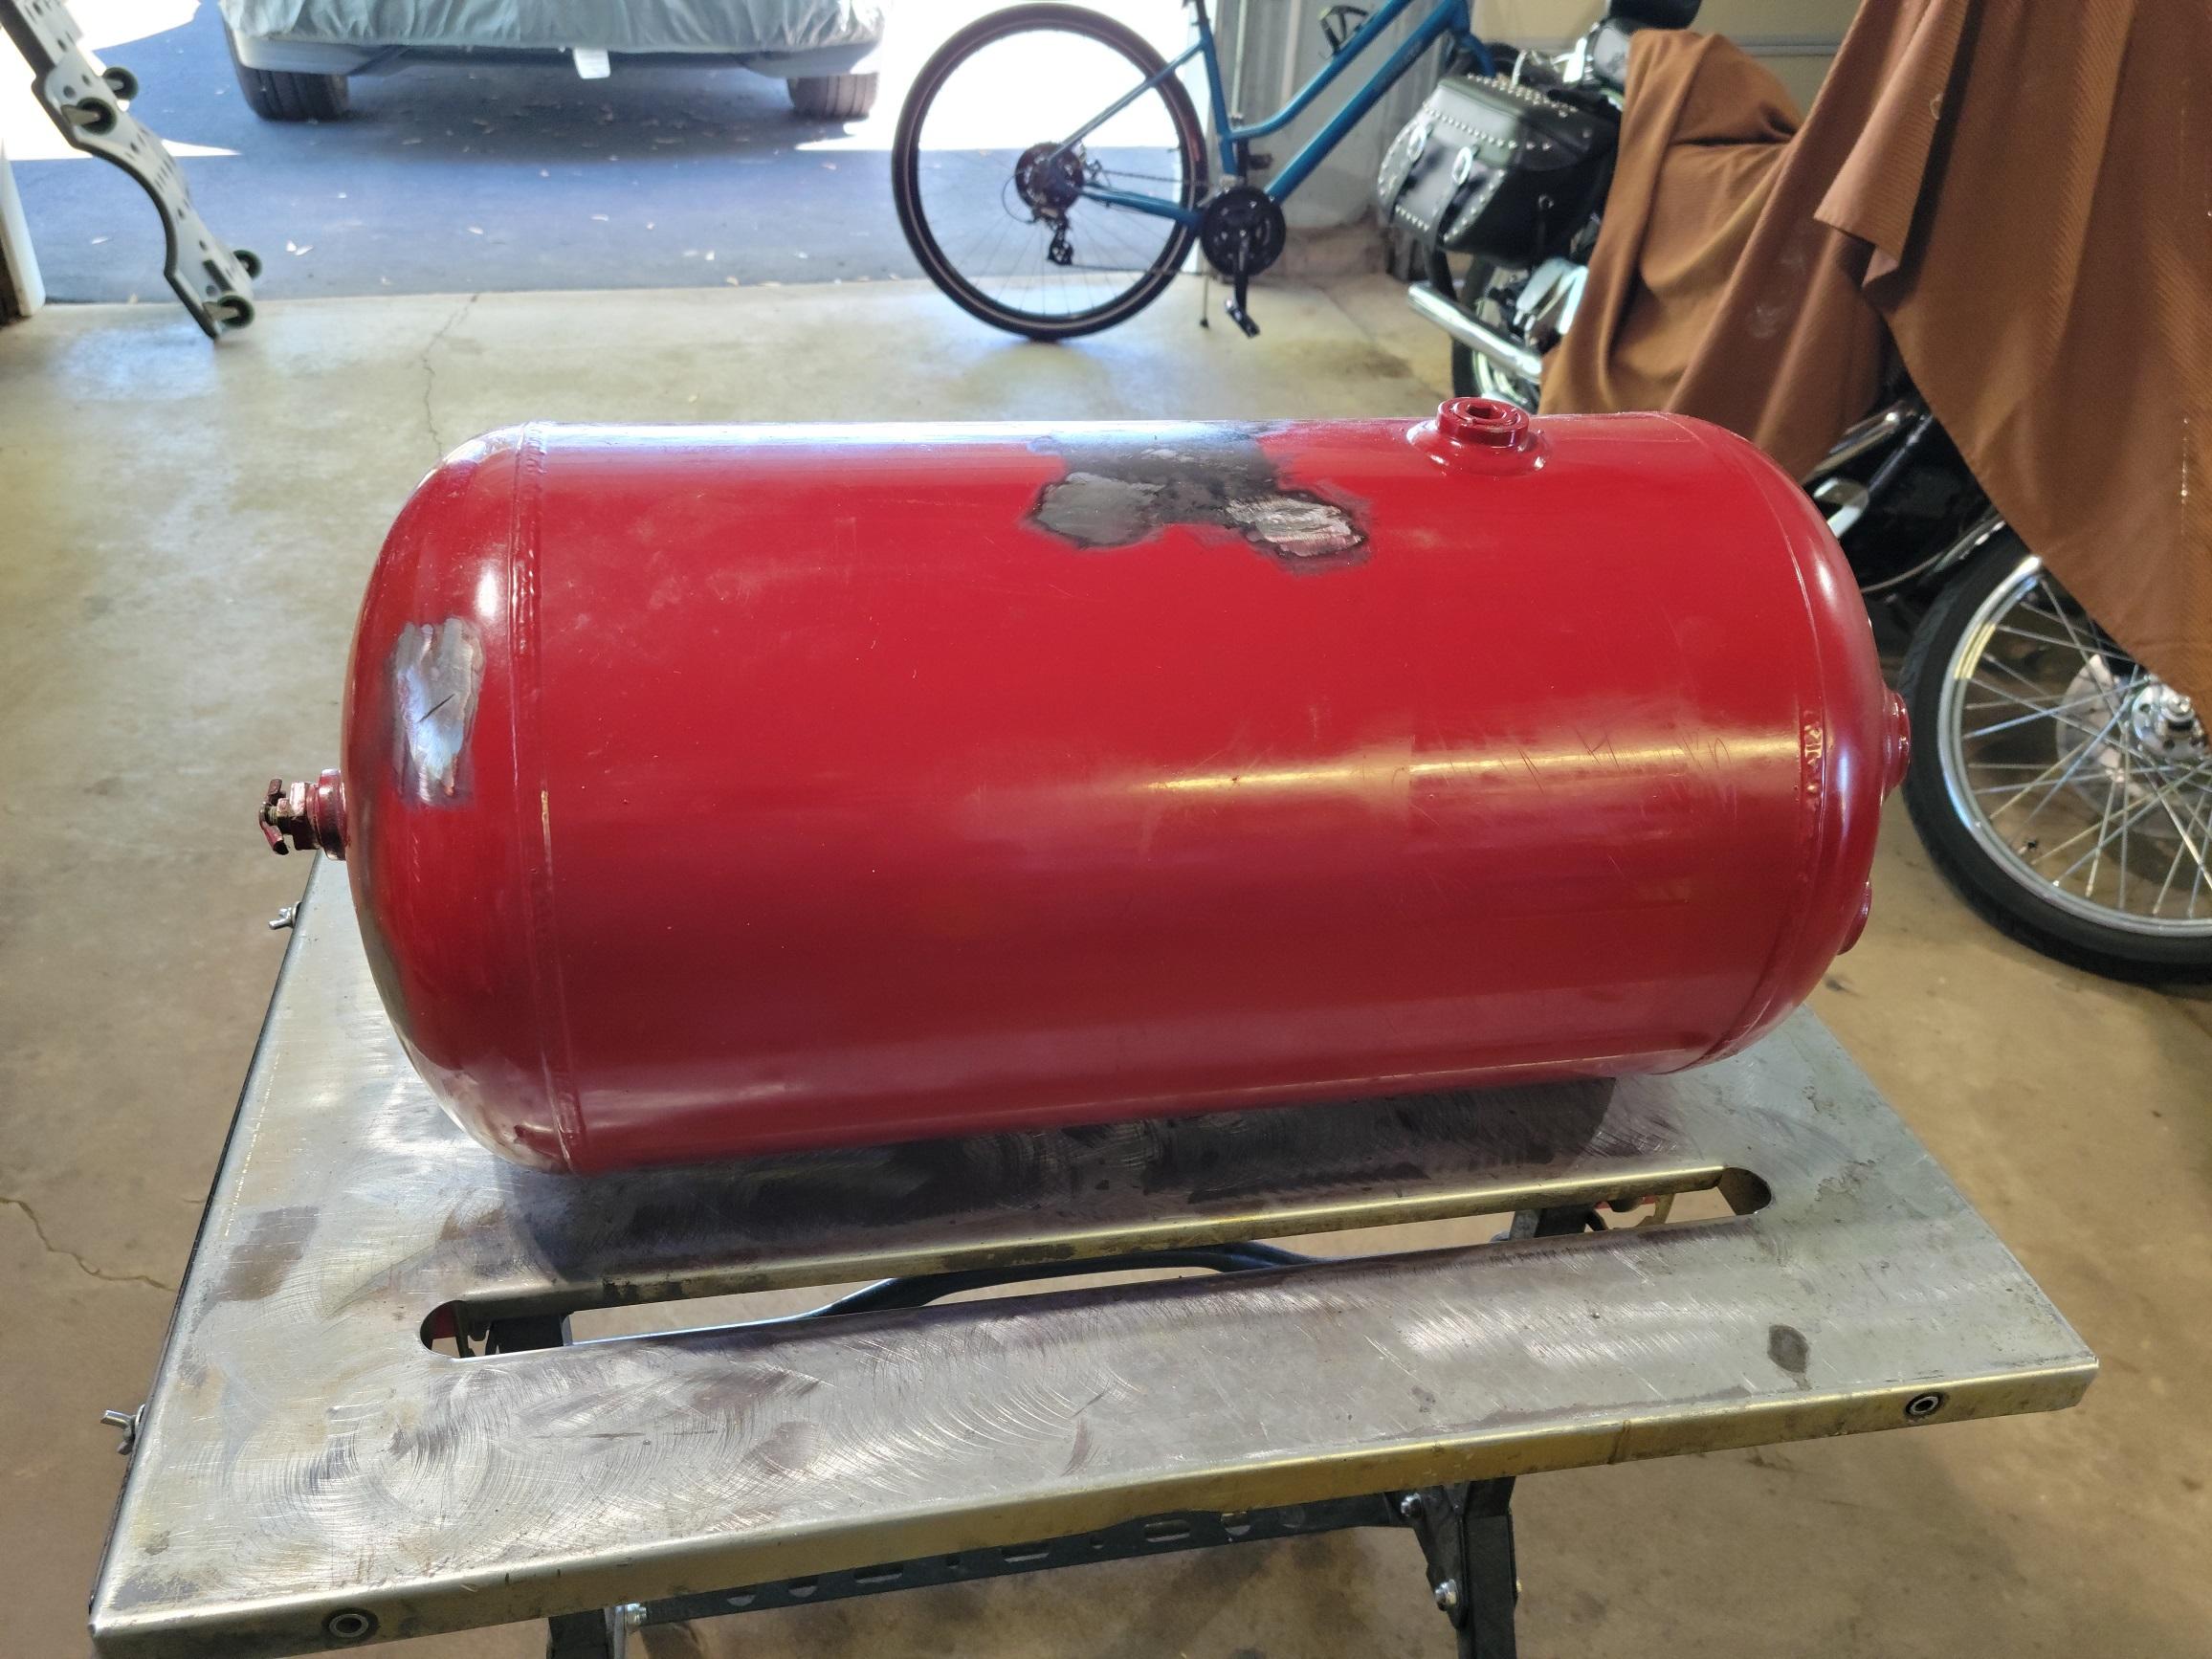
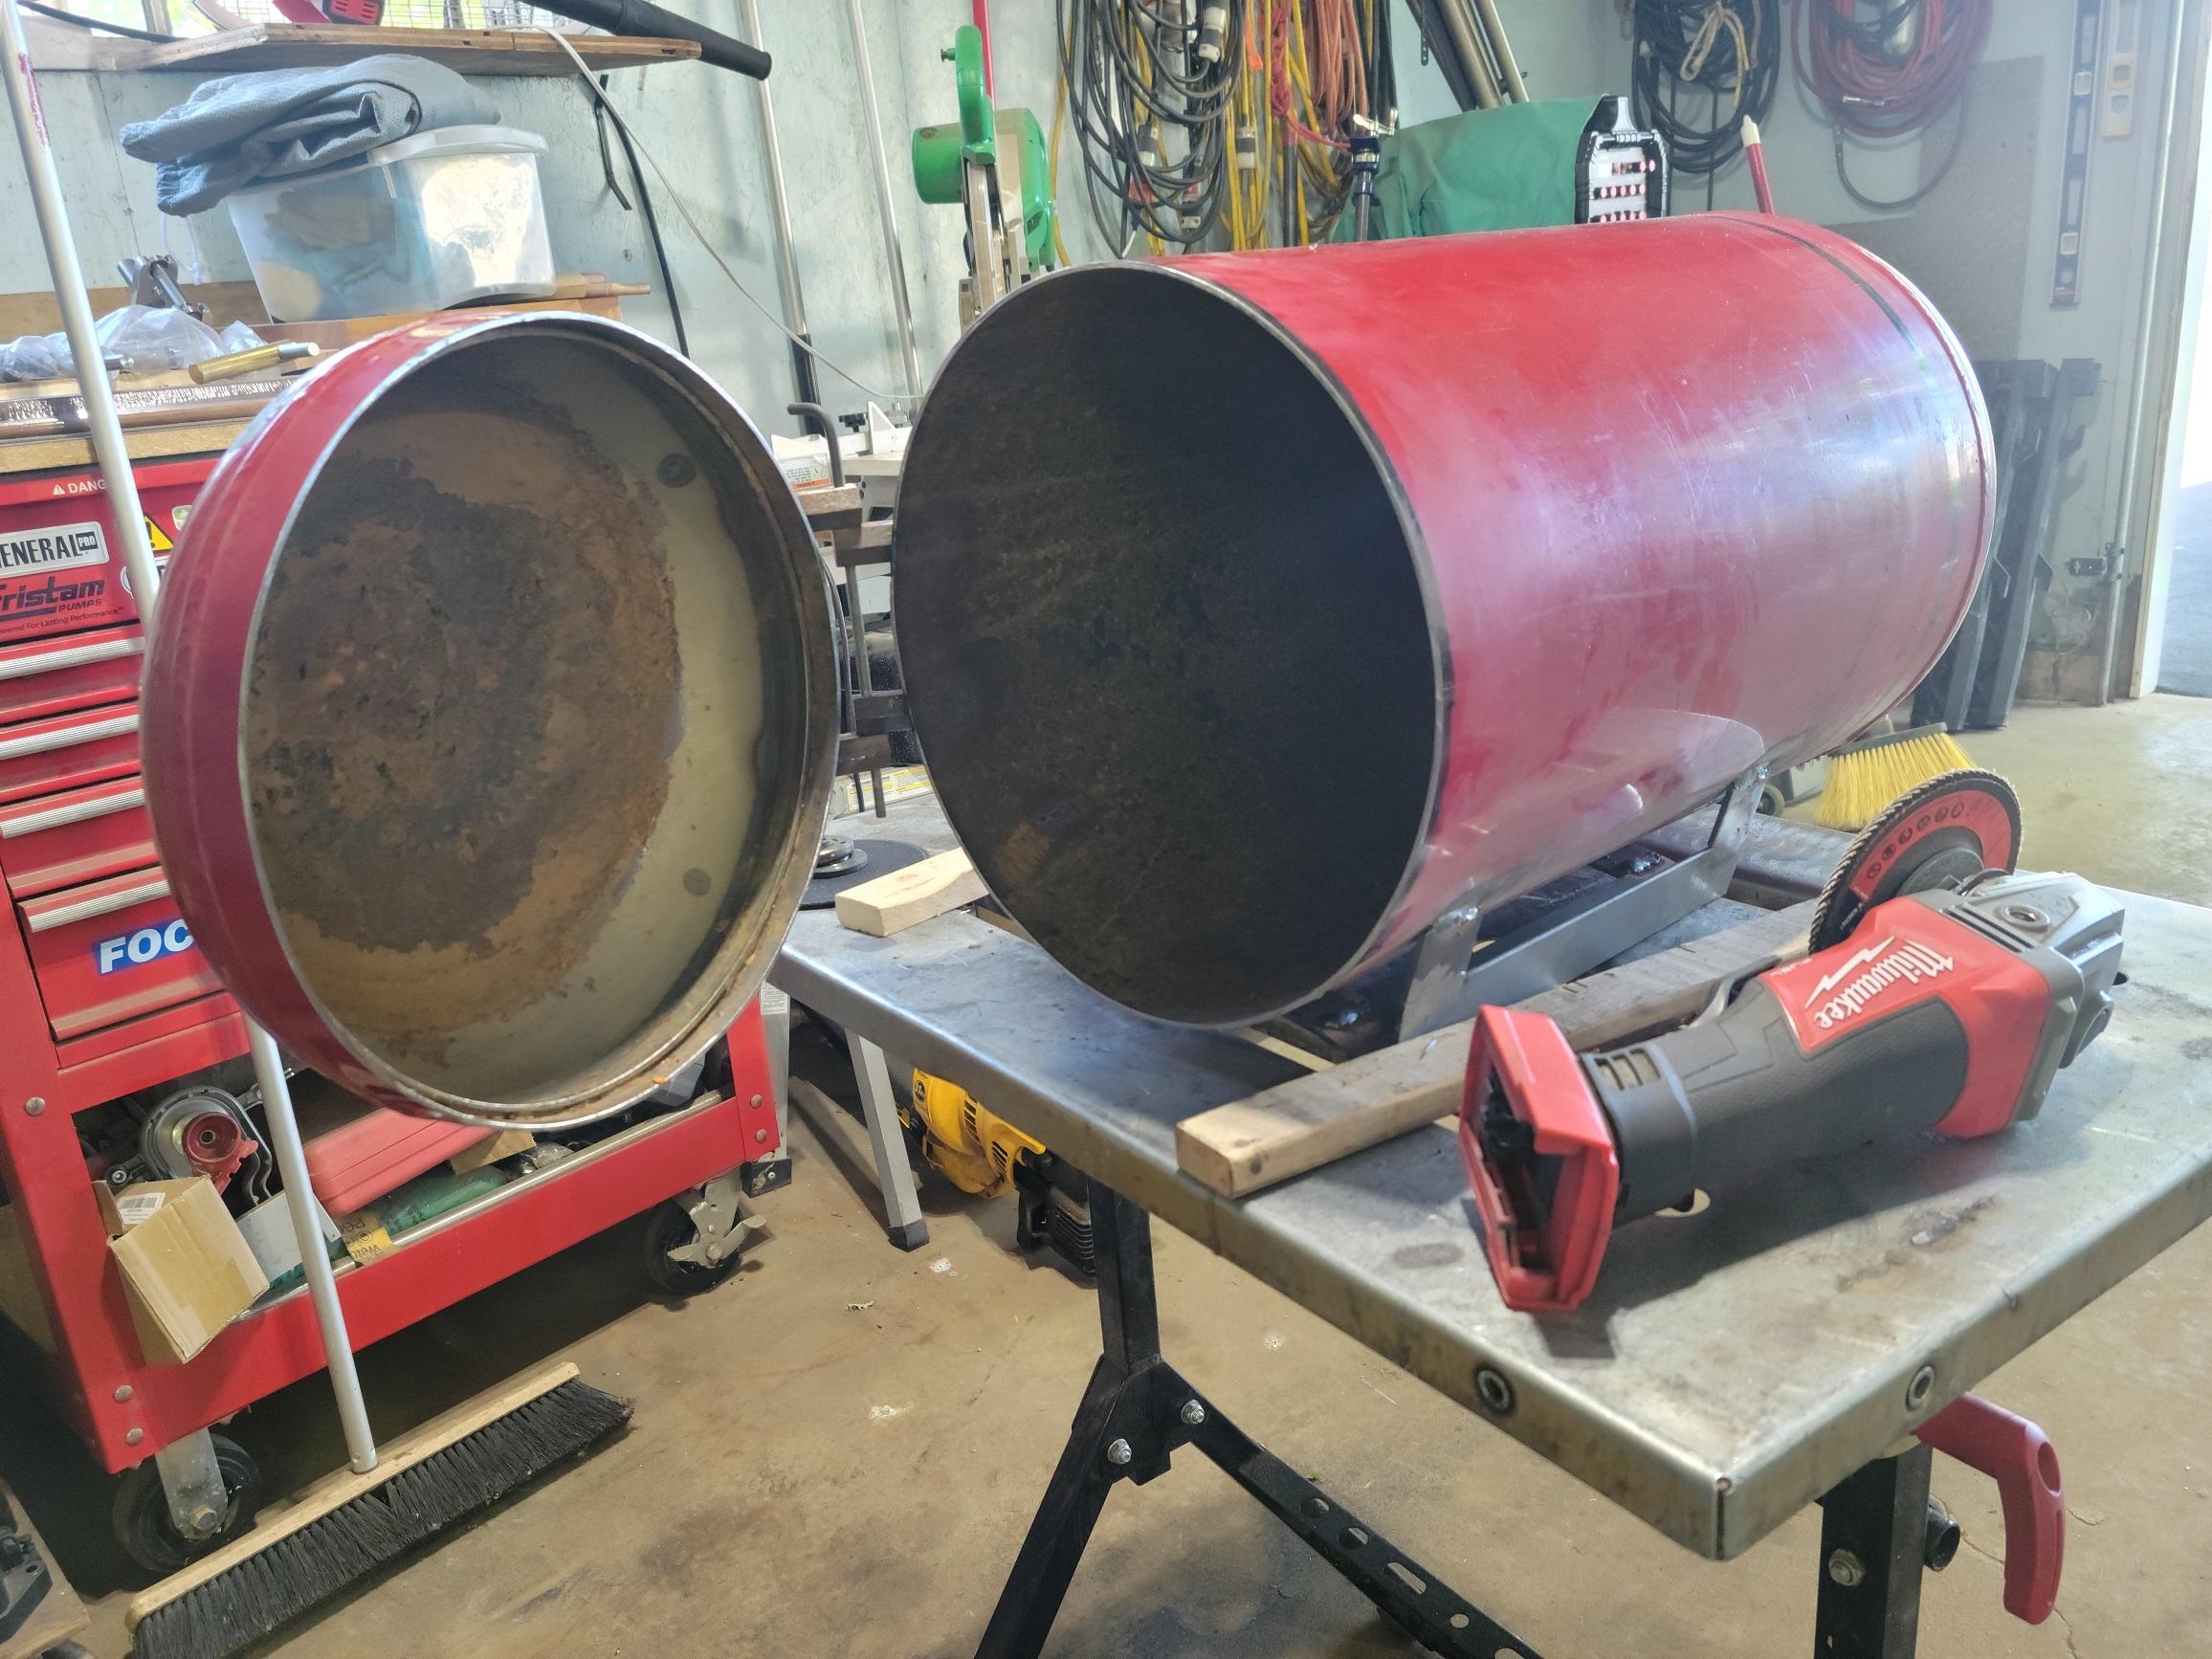
My original intent was to use an old freon tank. But then this became available. I plan on more than knife making and this way I know I'll have something large enough.
-
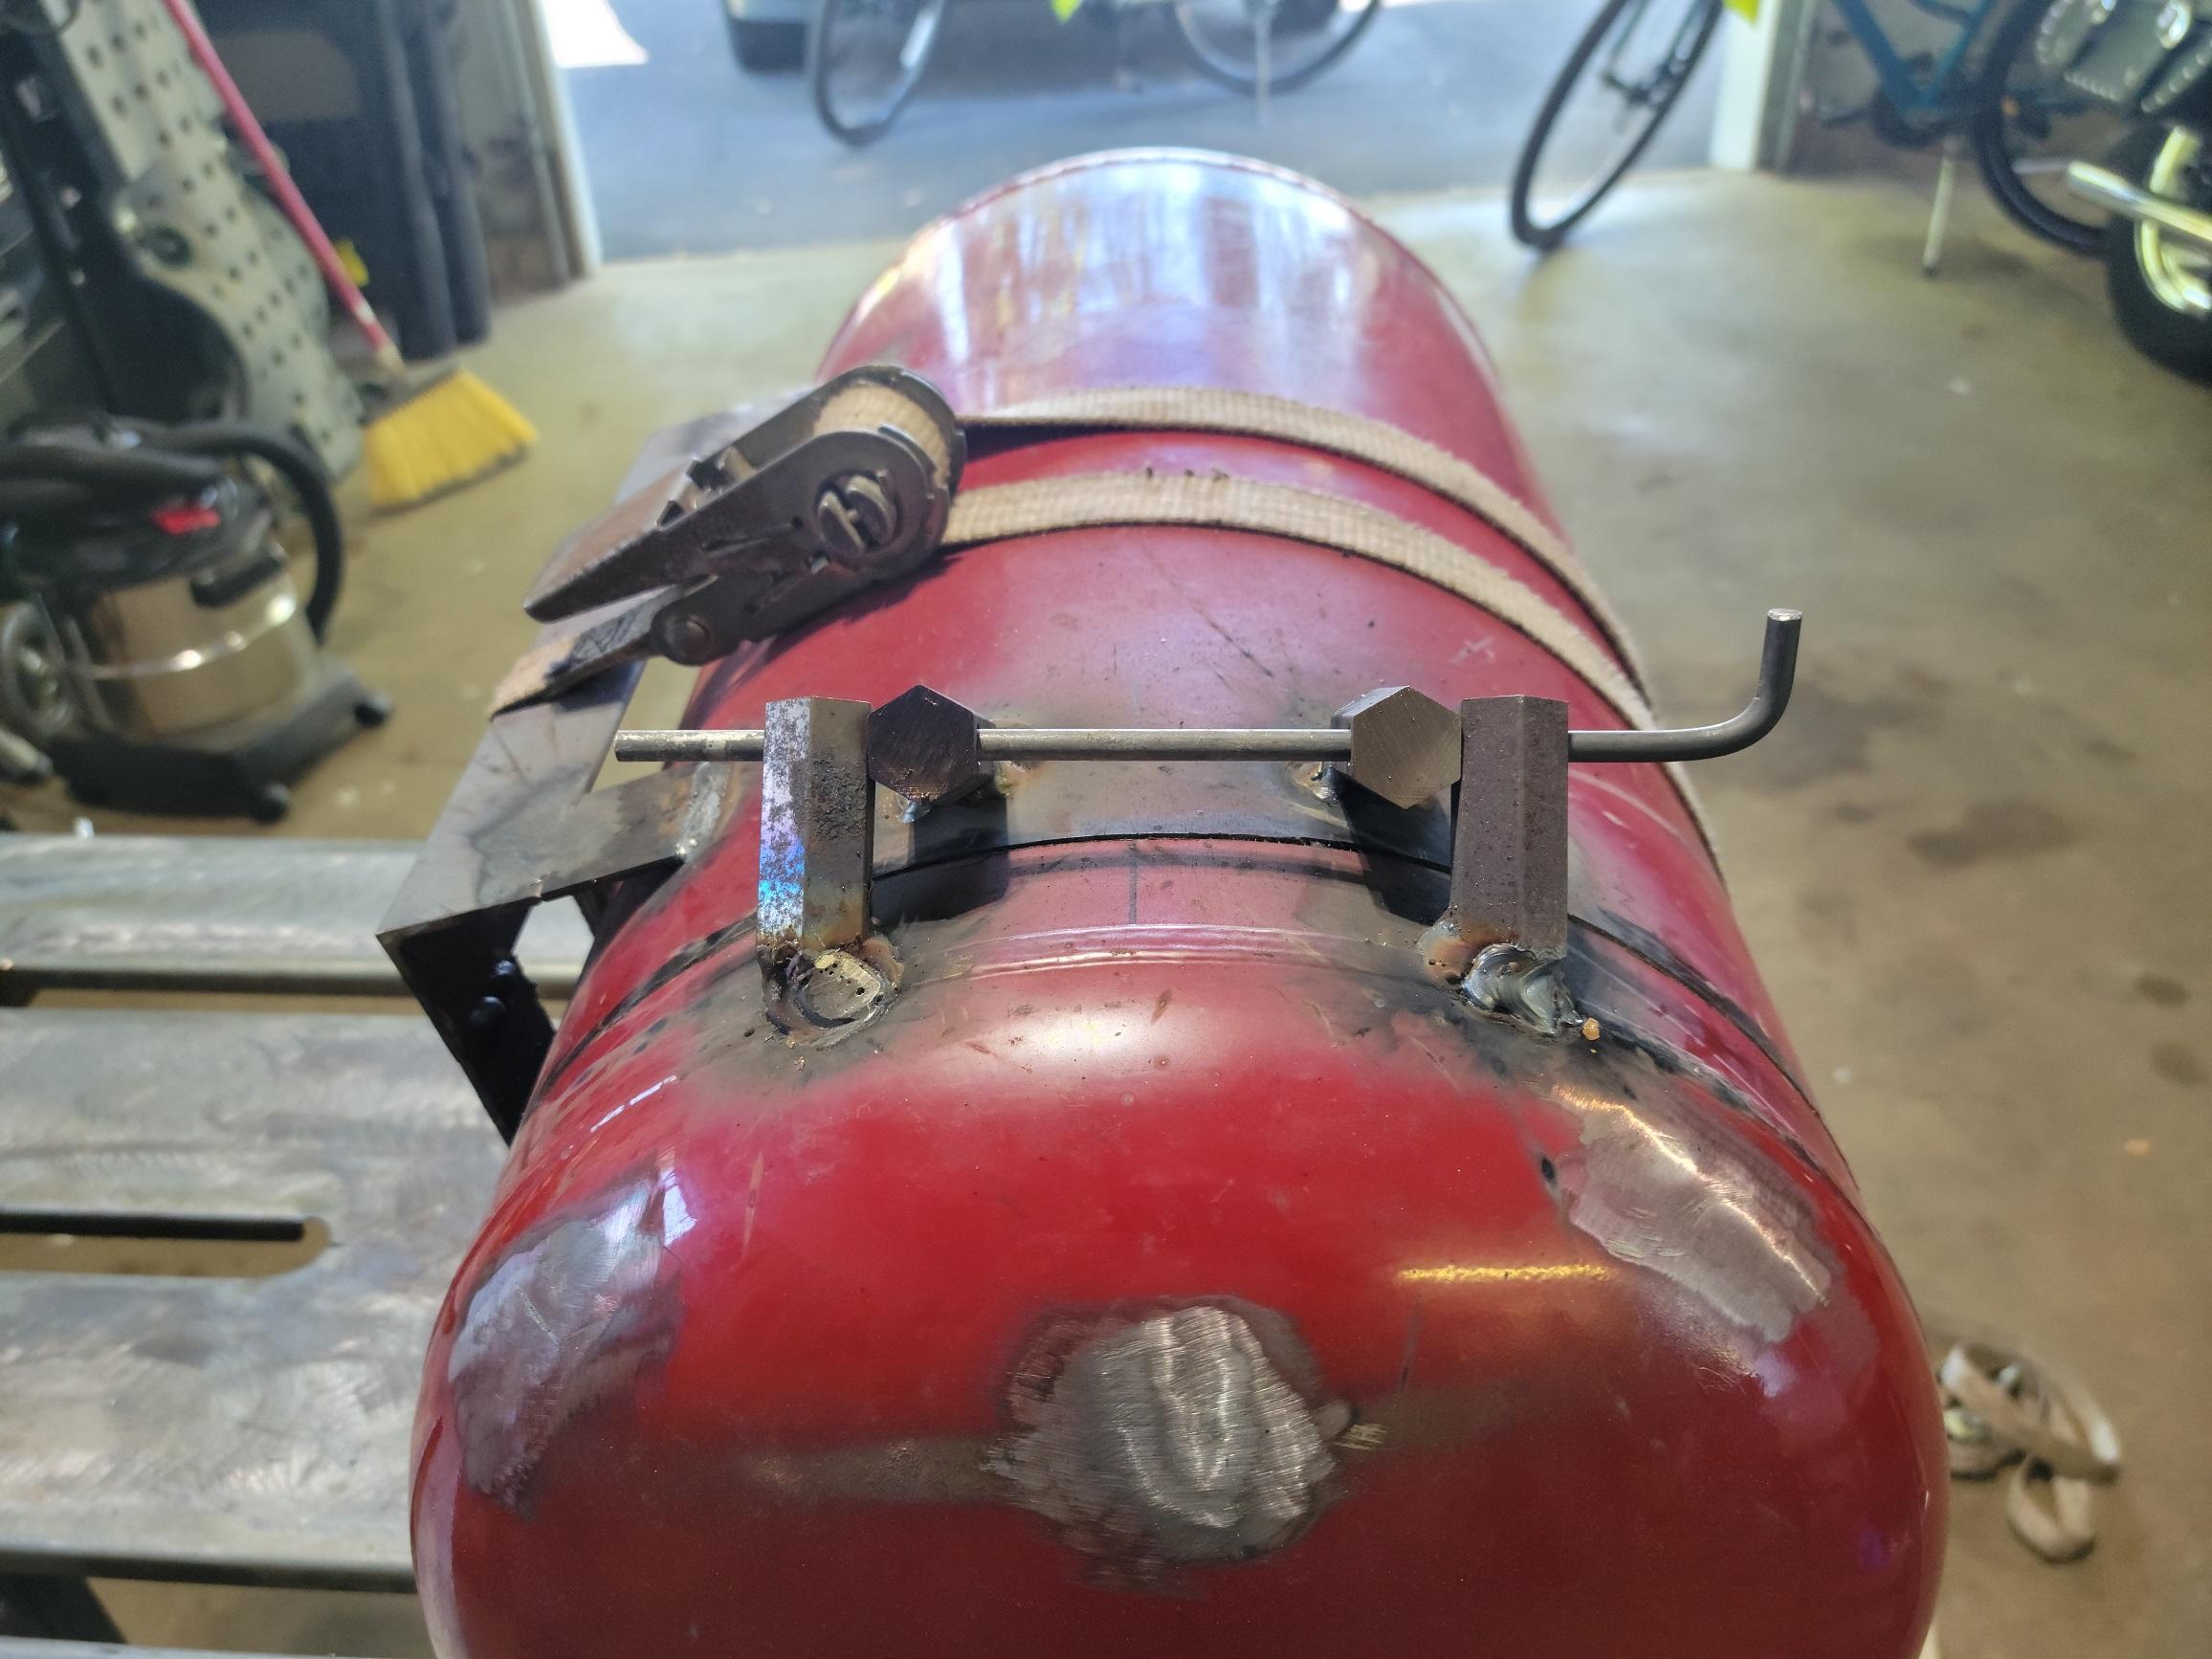
I don't post as often as I should mainly because I don't have much to post. However I have read and learned a lot from you guys and want to say thanks. Anyway a little more back story about me. I've been here about a year and retired about the same time, since retiring I've taken up knife making using a firebrick forge. I've been collecting parts and learning and finally started to build a larger forge. The body is an old air compressor tank 12" diameter and 21" long, I plan on 3 burners. I've most the parts for the burners and started on the body. I've yet to source interior materials for the forge but plan on doing that soon. It may take me a while to get it done but here's what I have so far. I'm open to comments good or bad.
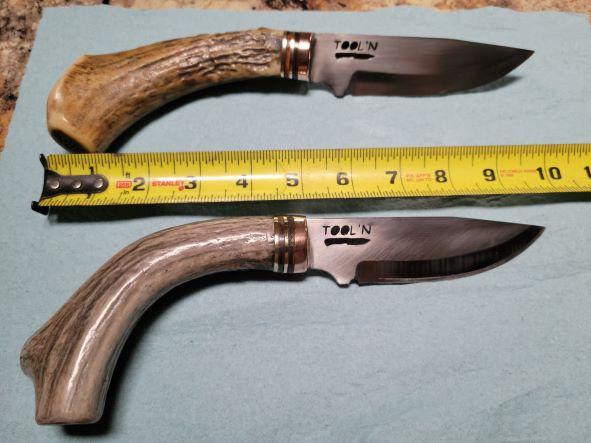
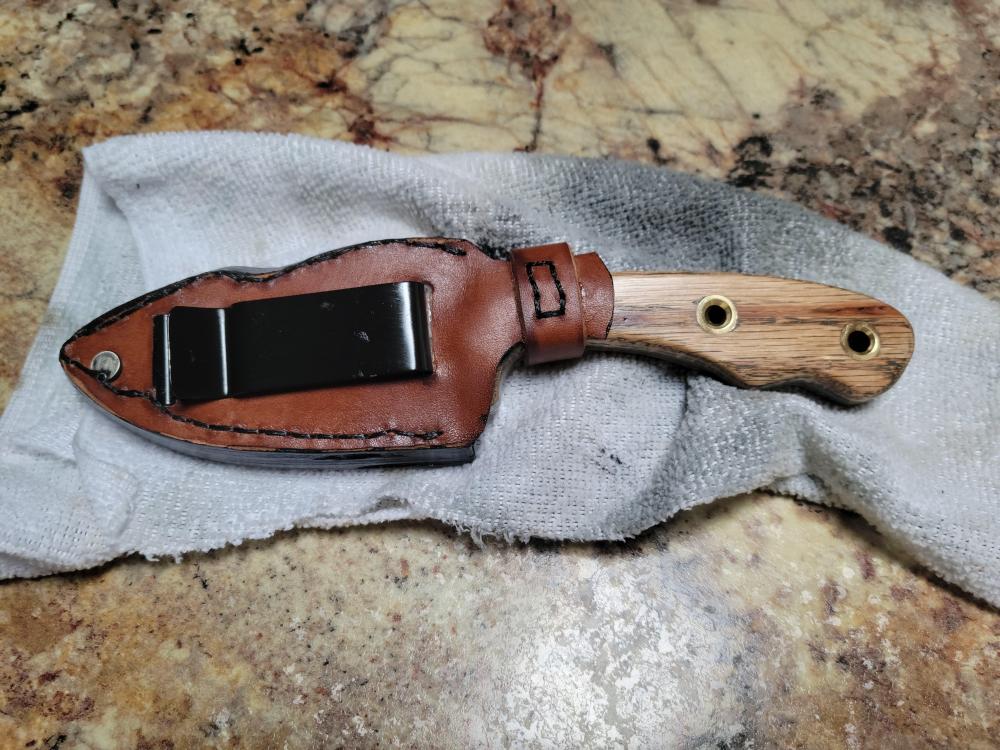
I'm also posting a pic of the latest knife I've made. 1095 stone washed blade, white oak handle, and python inlay in the sheath.
Thanks


-
Thanks everyone for your input. Tinkertim the drawing helps make thing clear. It may be a bit but once I get started on this build I'll post some pics. I'm currently trying to get caught up on a few knife orders. With the sub zero weather I have been having lately it doesn't pay to try heating the garage so it maybe a month before I start building. Now I'm doing R&D so to speak.
-
14 hours ago, Mikey98118 said:
See there, Frosty? You're now a special old fart. I'm just knit-picking old fart. Still, any name in a storm
")
I didn't mean Frosty was the old fart. I was referring to me being the old fart. I'm just another old dog trying to learn a new trick during retirement.
-
4 hours ago, Frosty said:
I barely extend burners through the shell and use the forge liner as a flare. That means I have to cut a larger burner port through the ceramic blanket, rigidize and coat with hard refractory and lastly kiln wash it. It serves two good purposes though, First it gets the burner out of the crazy high temperature zone in the forge and secondly it gives you a nice smooth long taper nozzle which enhances induction making the burner more effective.
Rigidize both layers of wool, only apply refractory and kiln wash to the flame face.
Frosty The Lucky.
I think I understand what your saying. Would you have a pic to make it perfectly clear. The burner I'm making is from your design and your name keeps popping up on the web so it is clear you have forgotten more about this subject than this old fart will ever know. Thanks
-
Thanks, I am thinking of a rigidizer.
-
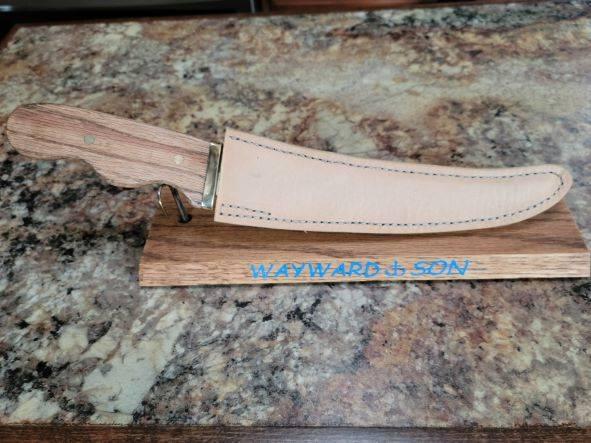
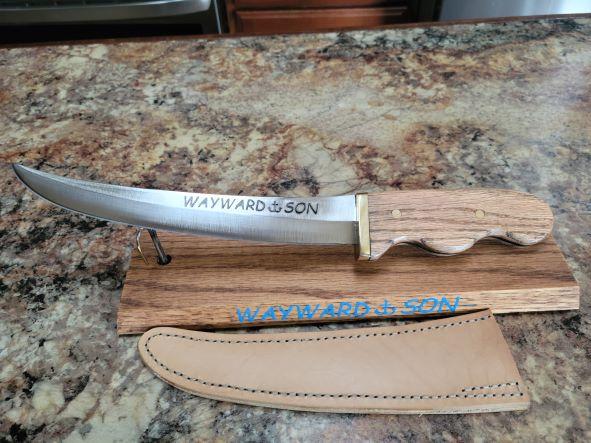
Hey everyone, I don't get here often so bear with me if the question is dumb. I'm building my first forge as the firebrick I use now isn't large enough. I'm using an old air compressor tank and have that figured out. My question is with the burner. When installing the burner into the forge I plan to make it adjustable so if I change thickness of wool I can adjust accordingly. My question is how far past the wool should I have the flare (end of burner)? Also I plan to use 2 layers of 1" wool. Is there any benefit to coating the first layer before putting on the 2nd. Here's a pic of the latest knife I've made. It's going to a guy in NJ and he'll use it on his Tuna fishing boat. Thanks in advance.
-
6 hours ago, Mikey98118 said:
If you read through the Forges 101 Thread you might at least get some more concrete questions that we can answer?
Thanks for pointing me in the right direction. I've gone through a lot of the 101 thread, very good reading. I'm still getting use to the layout here so give me time. I'm not use to so many categories and subcategories.
-
18 hours ago, Steve Sells said:
Since you didnt post your forge question in the forge section, which is subdivided into solid fuel/gas etc sections I have no idea what you are building. Scrolls may not fit a small gas forge. but I figure that may be gas anyway, so I will relocate you post to where it belongs.
Thanks for moving the post. I'm still trying to learn the layout here.
-
I'm new and still learning and researching. I don't get here as often as I should but do when I can. I'm hoping to get some insight from anyone who has some experience or an opinion. If I purchase or build a forge what internal shape would be best? From what I've learned so far if the body is round and if the burner is set up right it will swirl the flame/heat making it more efficient than a square body. My main use will be knives but also plan on some scroll work. Thank in advance for any help.
-
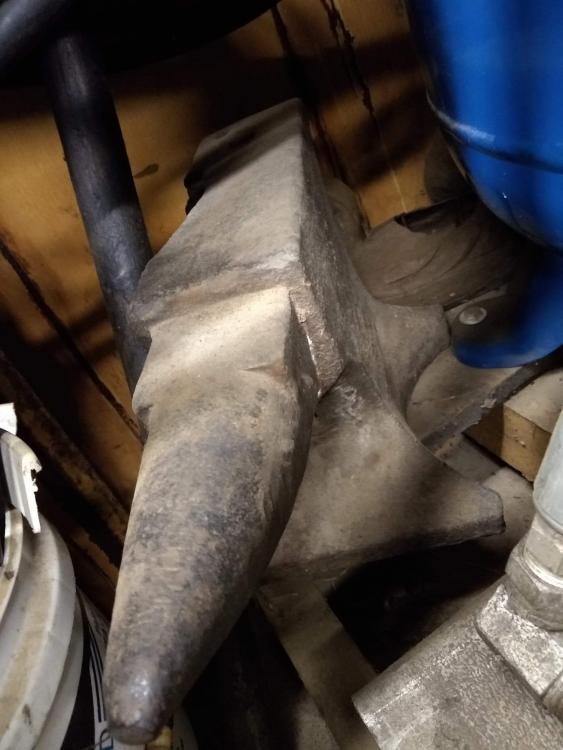
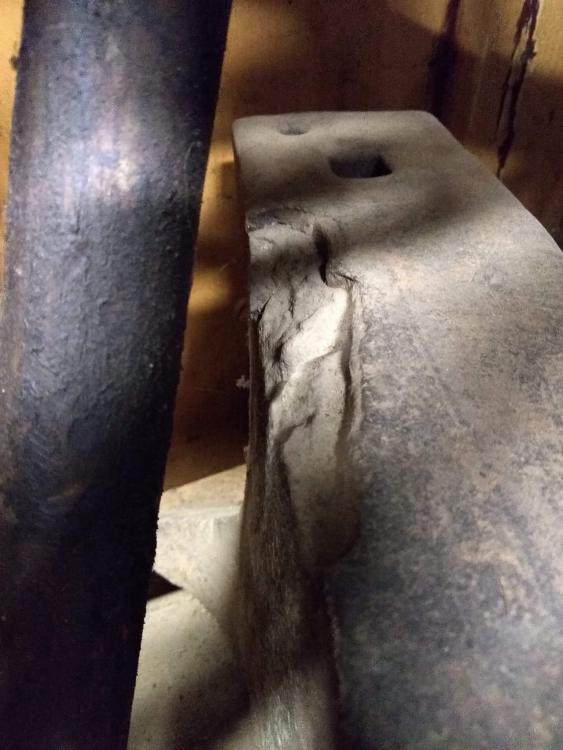
New guy here looking for some help. I'm just getting started setting up for forging. One of the first items on my list is an anvil. I'm retired so funds are tight. A gal I use to work with has this laying in the shed. I haven't seen anything but the picture. Is it salvagable? My thoughts were to fill the chip with weld and then put a plate over the top. Looking for suggestions. Thanks.
-
4 hours ago, Daswulf said:
What do you plan to forge and what fuel are you planning to use?
I plan to use gas and start just heating and pounding. Maybe some coat hooks or something small. Then try my hand at a knife.
-
Hey everybody I just signed up. A little about myself. I was born and raised on a farm and have been turning wrenches my entire life. Farming wasn't for me so I did a stint on construction and the some metal fab shops. Moved into the dairy/cheese/butter industry for over 30 years as a lead mechanic. I'm a card carrying journeymen recently retired. I love welding and looking to get into forging. I don't yet have a forge but looking at options build vs buy. Also looking to learn hoping to do it here. Anyone else from WI hang here? Later guys


Tooln's Forge Build
in Gas Forges
Posted
I apricate everyone's comments as you have more knowledge on this than I will ever have. After reading through the forge & burner 101 threads till my head hurt here's my plan. Feel free to pick it apart and make suggestions. I haven't ordered any thing for the liners as of yet but have been in contact with Glenn on pricing. Here's my plan for the liner and burner placement, again I'm open to suggestions or criticisms.
2, 1” layers of ceramic wool each rigidized.
A coating of refractory 3/8” Kast O Lite 30 or equivalent
A IR coating ITC 100 or equivalent
Kiln wash the burner flare
The board is about where the floor will end up I was thinking of aiming the burner at the #1 position. Thoughts?
As always Thanks.
PS any members here for WI?