

Paul TIKI
-
Posts
448 -
Joined
-
Last visited
Content Type
Profiles
Forums
Articles
Gallery
Downloads
Events
Posts posted by Paul TIKI
-
-
Terry Pratchett had a wonderful story about Rodents, they weren't of unusual size, but were were of unusual Intellect. "The Amazing Maurice and his Educated Rodents
-
M J . Watch black bear forge on YouTube. He has a great video on it that makes a lot of sense. I also did a mock up with play dough and a tack hammer to see how his technique actually works. It turned out to be easier than I thought with the exception of chiseling in the veins. The piece kept trying to jump off the anvil
-
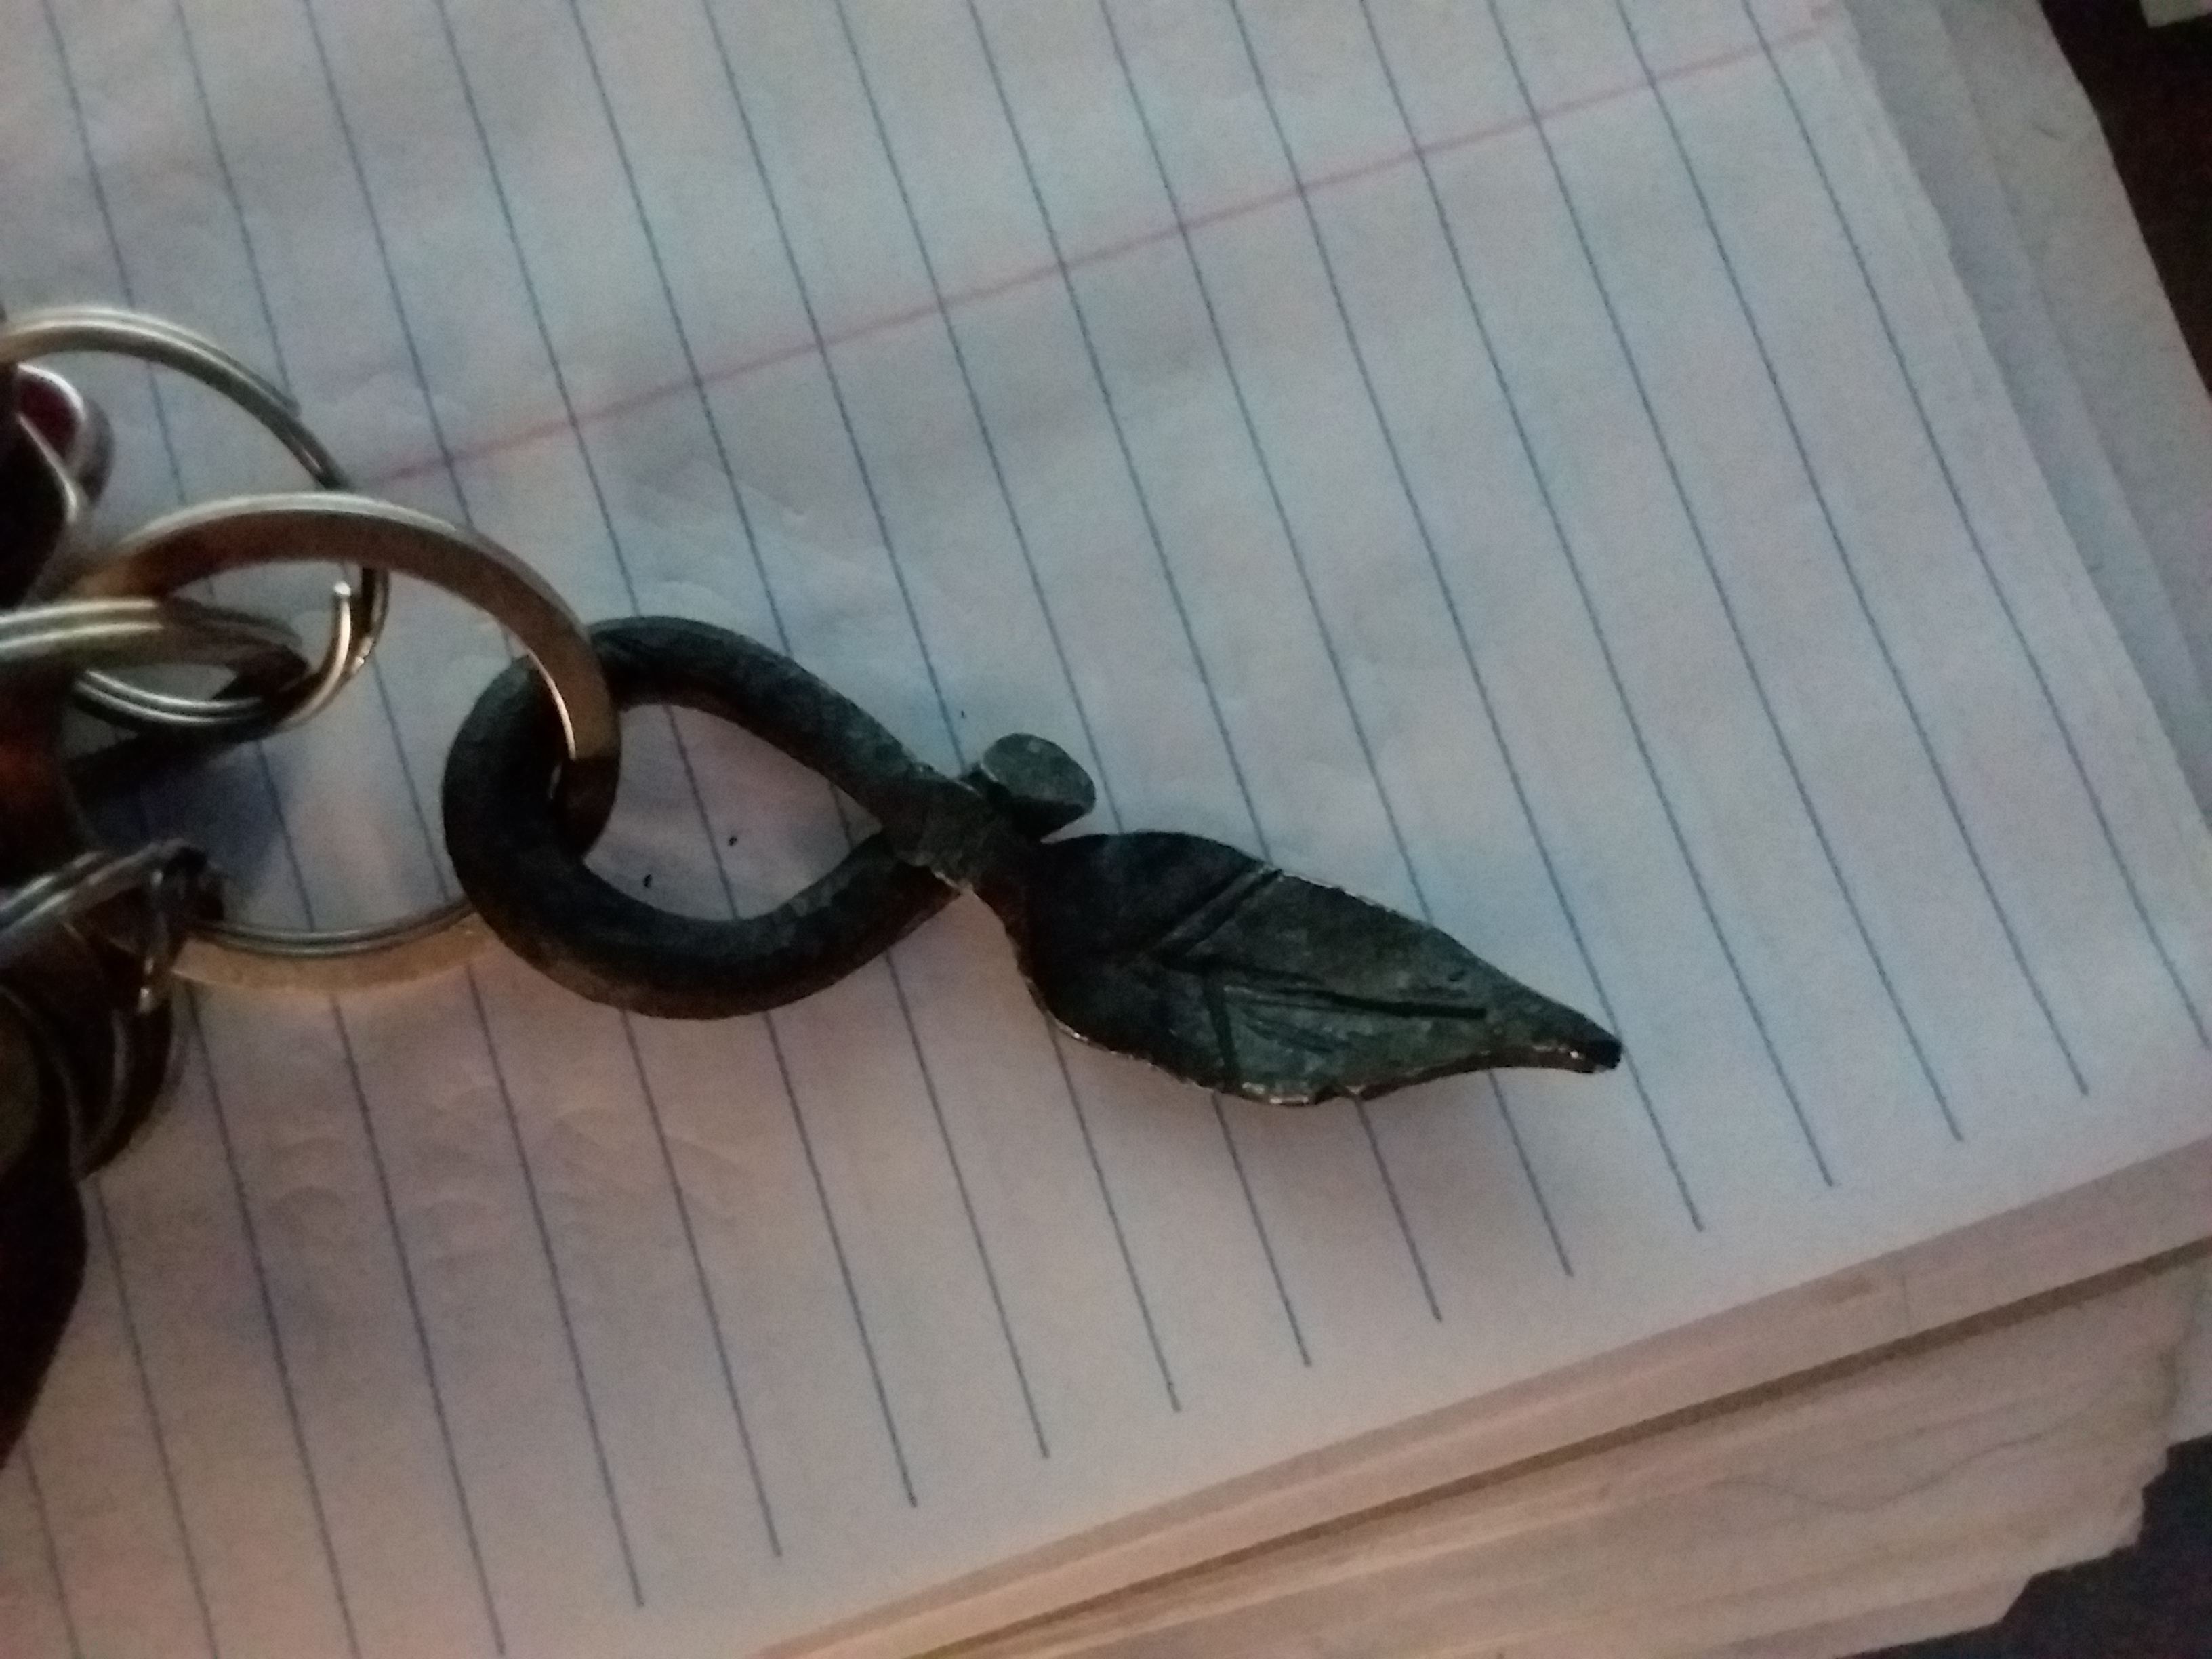
Yay, I got a leaf to come out looking almost leaf like. I need lots more practice.


-
Mr. Powers, as it happens we do have a Nerf mitrailleuse in the house, one of the belt fed ones. the downside is it takes a while to reload and it eats d cell batteries. I prefer the Nerf single shot, as it is nore reliable and is more accurate.
(and yes, I had to google the translation)
-
To be honest, they had a model catapult and a model trebuchet. I had a nerf gun.
-
I usually responded with a catapult of my own.
-
Got another old gas grill with the tried and true "drive around the neighborhood and see if one is sitting with the trash" method. We learned some things with the last one and can meek this one better
-
I have 2 or 3 ideas
I think I have an engraver in the pile of dad's old tools. thanks for that tip
-
I guess it wouldn't be a horrible idea to get a touchmark for my work when I get to the point of making something for sale. Right now I'm just amusing myself, but I have goals...
-
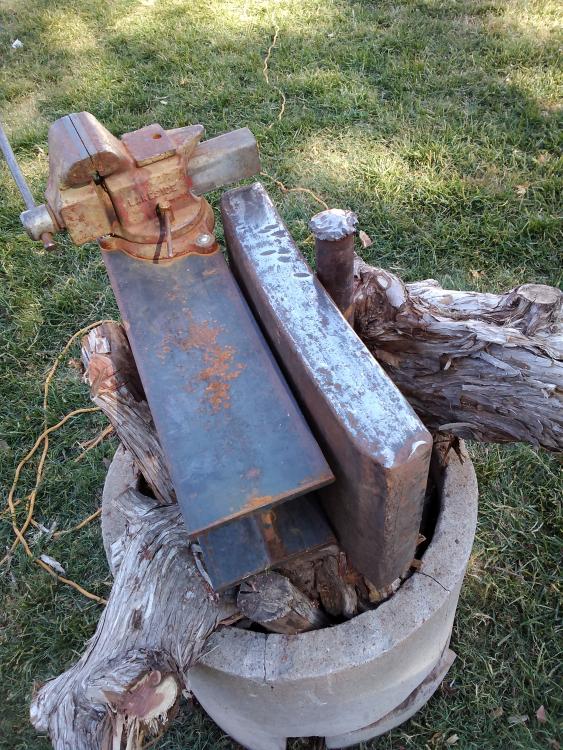
The problem with standing it fully on end is that those two particular ends are really ratty, and the curve is such that all the mass wouldn't be under the work surface., the way I have it gives the most mass under the hammer.
I can make it do for a while I guess.. I have to shuffle things about to make stuff more comfortable I suppose, and just get used to working on that narrow area
-
So I have been playing with my anvil for a couple of months and I'm not really thrilled with the width of the face on my anvil. It just feels too narrow for me. It could very well be my inexperience because I have seen on here folks using very small anvils that make the hunk of iron I have look enormous, and they do fantastic work, so tell me to quit whining if that's what I need to hear
")
Anyway, I currently have it sitting so that I have this. The i beam does not get hammered on, it's just what the vise is bolted to. Next to the I beam is what I hit things on. Pig Iron according to dad, but it's probably some sort of wrought iron in reality. I may have been rolled through some sort of rolling press at some point because it has that slight curve. It's a couple of inches wide there, maybe 2 1/2. Its on its side giving about 10 inches of mass underneath. It's about 19 inches long.
What I'm thinking about doing is cutting it in half and putting the chunks side by side, fitting the curvature together to gain a wider surface to hit. I'd have to totally rework the stand, and that's ok
An alternative would be to just flip it on it's side, convex side up. I would lose the mass under the hammer, but would gain a substantial amount of work surface. I might also be able to drill out a pritichel hole and I might even be able to figure out how to get a hardie hole in there. This would also mean having to do things to my stand to get it back up to the correct height.
A third option would be to move the I beam with the vise on it . As it sits, I have to partially reach across it to work, or take a couple of extra steps so that I am facing it length wise.
So should I mess with it or learn to deal with it?
-
As long as he doesn't kidnap metallurgists and such while making stupid racist jokes from a steam powered wheelchair.
Should we let Artemis Gordon and James West know?
Also, keep an eye on his coal purchases, He may use steam to power the devilish contraption.
-
Soooo, you are building a barn for that Daddy Long-Legs on the side of your shop then
") Nice. I hope you don't have to move all that monstrous machinery again though.
Nice. I hope you don't have to move all that monstrous machinery again though.
-
I can imagine. 10 years ago even small jet engines the sort of which drive turboprops cost several hundred thousand. Aircraft companies don't even make their own anymore. Most come from Pratt & Whitney, GE, Honeywell and even Rolls Royce. Lots of titanium and titanium coated parts in there. I remember seeing some large bolts in our inventories for those things. 1 inch thick and 8 inches long, solid titanium. More than a hundred bucks a piece at our cost IIRC. I do know that a big part of the cost comes with the little piece of paper from the poobahs at the FAA.
-
so, same tests in reverse order. that makes a certain amount of sense. I need to learn more about heat treating.
See if you can get the bearings out of the jet engines. Anything that can stand up to those rpm has got to be tough. I have seen the results of a bearing failure, not up close, but it was a subject of a safety thing at my employers a few years ago. imagin being the guy in the cockpit running up the engine on a jet that is vlose to certification. suddenly boom and a 3 foot long hunk of glowing red shrapnel punches through the wing barely missing the fuel cells and lines.
-
Beautiful as always, Alexandr
-
So from a practical scrap hound point of view and not for precise identification, would some of you curmudgeons weigh in on a testing sequence shown by John from Black Bear Forge in one of his videos (I admit, I'm Hooked)
He does a spark test first and show to compare against test coupons but he stresses that the spark test is useful but it is also somewhat subjective.
Then he does a file check, followed by a heating the test piece to critical temp and then letting it air cool. Then he file checks it again. If it is hard to file you might have air hardening. He also puts it in a vise and give it a whack to see if it got tougher. Then he repeats with oil, and then water..
I know this is not super precise but do you guys think this would be pretty useful way for a beginning smith to be able to categorize the scraps they have harvested? Do any of you curmudgeons have a different process for dealing with scrap that doesn't get into to more precise comparisons? And if I missed it in another part of the forums could you point me the right way please?
Thanks again!
-
Was that review written by a guy named Norman? It was a pretty Frank review. The other guy gave it Teuton thumbs up.
-
It was a long woad to get to that one BillyBones!
Flatliner, I know what I will be doing next fall!
-
I love those wreaths. They would have the added bonus of probably not breaking when the dog inevitably knocks them down
-
amazon has one copy of "country knives" for 19.99 use their search for "gene chapman country knives"
-
As another newb here, the Square, Octagonal, Round method works very well and is easy.
-
I have been waiting for better weather to get back out to the forge, but in the meantime I watched some videos from Black Bear Forge. He seemed to have the most clear example on how to get the leaf shape and the video shows the hammer blows and how he turns his wrist and stock so it makes sense to me. I'm itching to try it but snow and an outdoor forge...
-
So these different varieties of fish being huge ambush predators makes me really want to move back to the desert and never ever visit Louisiana again. I don't care if they aren't there, just the though of them gives me the willies
 .
.
What did you do in the shop today?
in Blacksmithing, General Discussion
Posted
Beautiful pattern you got in your billet hornet!
Weather has been playing merry heck with me. Can't forge because it's raining. Oh well.
TP, I took your advice and started a forge notebook. I've been fascinated with some of the bending jigs and I'm trying to think of a way to use different sockets to get different diameters out of the same jig that will go in the vise.