M.G.
-
Posts
229 -
Joined
-
Last visited
Content Type
Profiles
Forums
Articles
Gallery
Downloads
Events
Posts posted by M.G.
-
-
I saw that note about screw jacks in one of the previous threads, i just hadn't gotten too deep into looking yet.
Definitely not interested in its "antique " qualities. I want usable tools. Not garden decor. There is a nice looking leg vise about 2 hours from me for just under the $400 mark but I haven't reached out to him yet. Because that is just about the cost of a new one.
The gentelman with the 6" is teasing me with the prospect of "many more old blacksmithing tools" so I may have to make the trip just to see what he has laying around. Maybe toss him a lowball offer if its looking like there are any hidden treasures in the pile.
-
Not necessarily wanting a "big" vise, this one just happens to be the cheapest on the list in the two state range im willing to drive. Everything else is more around the 400 or 500 range.
I probably suck at welding. Its been years. I care more about functionality than I do looks.i did a search for all thread, but wasn't sure what I was looking for. And I skimmed a couple of the repair threads on ifi, but without pictures I was having a tough time getting a read on how labor intensive a job like this would be.
-
He was asking 200 for the vise in its current state, and when i started to question the condition of the screw, he started saying stuff like "im in no hurry", "make me an offer"
Thomas, what would you consider "cheap enough" to rebuild?
Is there a simple alternative to having a machine shop, like say acme all thread?
-
I'm looking around at post/leg vises, and have found one semi locally. The gentleman who is selling it, was kind enough to disassemble it and take some in depth photos for me.
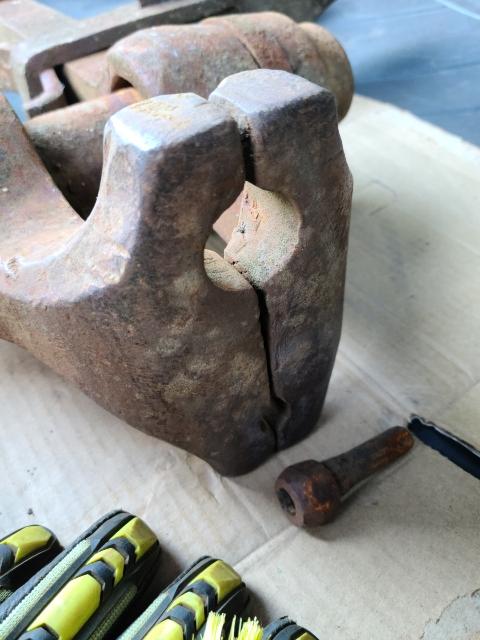
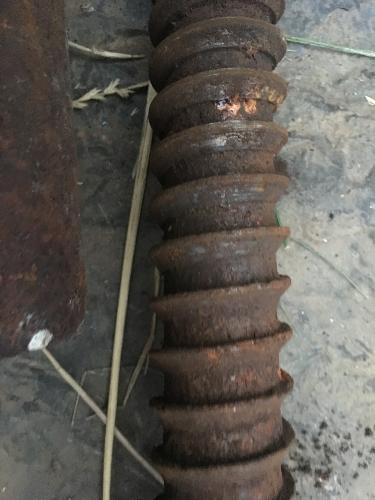
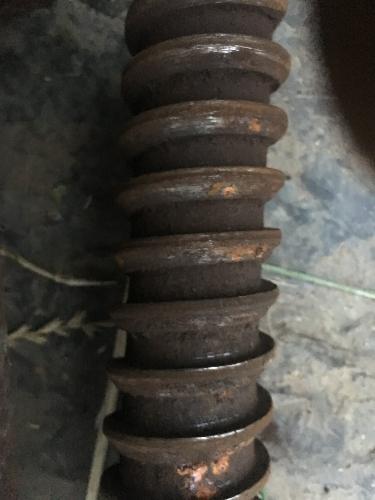
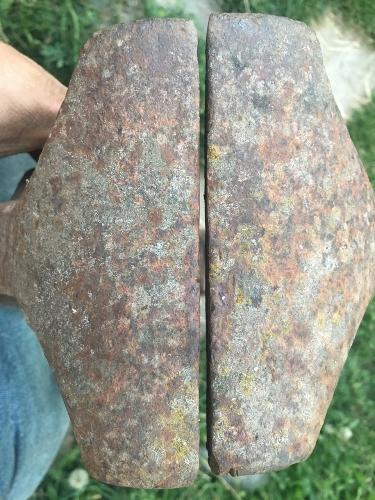
To my untrained eye, it looks to be in pretty workable shape for a project to refurbish. But the only thing I am slightly concerned about, and looking for input on, would be the condition of the screw. It looks pretty rough and thin in a few spots. The gentleman claims it to be at about half life, and that it is not a difficult job to replace a screw if needed.
Also i noticed it is missing the mounting plate. Not my biggest worry.
The vise is a 6" jaw. And weighs about 110lbs...not sure the make of it.
But here are the photos. Let me know what you guys n gals think. Thanks in advance!!!
-
Haha, yeah the straps are temporary, the old green one above the heat is not nylon, so it should be fine for a fire or two, but they will get replaced with screws bolts exct. When I weld up a proper trolly to put the forge on. Straps are just to secure it to the stand for now.
Definitely gonna process down my wood when I get to rolling for real.
I'm already churning over plans of how to build version #2, but ill work with this one until it becomes too burdensome.
Likewise on the lava rock. I was super pumped to find that piled up under the sticker bushes.
Thanks everybody for the great advice!
Really looking forward to many a days of hard work ahead.
-
Thanks Glenn! Great tips. I will be tweaking the controls form now to forever im sure. I also have some lump coal that I will use when I want to start doing some work. These scraps were about 3 inches maybe 4, but they were just laying around so I threw em in to see how it went. Hopefully I won't have to resort to dimensional lumber for fuel, but its good to know it works in a pinch.
-
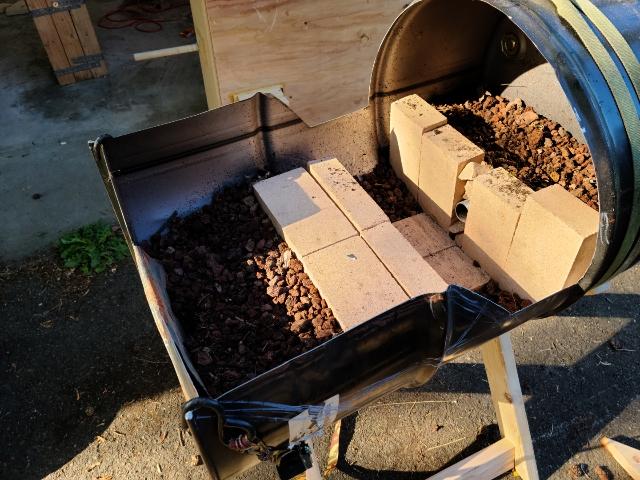
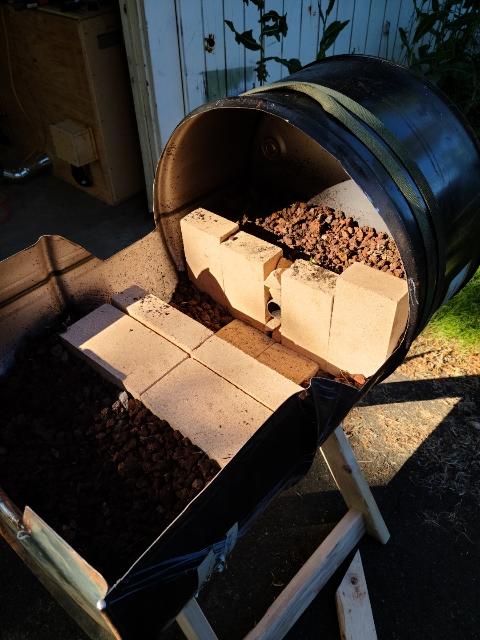
ITS DONE!!!!!!! I'm super stoked and a little proud, I have birthed my first fire in my box of.... well rocks.(JABOD?)I got out of the tattoo shop with some daylight left, and decided to get a fire built. But first I needed to set up some plumbing for the bellows and finish putting together the forge.
I found a pile of red lava rock on the property under some blackberry bushes while I was digging around for some spare scattered red brick and terracotta hunks to use as bracing for the tuyere and fire brick. So i decided to use the lava rock for fill being a nice temporary insulation and back fill for the forge. It is lighter than the wheelbarrow of dirt I had just dug up, so it seemed like the way to go for the moment. But it did the trick well enough for "proof of concept" on this build.
Then I builta fire from some of the scrap dimensional lumber laying around and started pumping. After I saw that everything was operational I dug through my tool boxes and picked a piece steel to throw in the fire. Found a broken alen wrench to sacrifice to the gods and kept pumping......
Next time I start a thread hopefully it will be me asking how to make better tongs!
Not sure why the last post loaded the same clip 2x. But this is the one i wanted to post. -
Well, actually sorry to say. I just got the memo that had committed to being at work on my day off today. So it may end up being another week before I can start a fire.
-
Hopefully by this evening I'll be pumping a fire, but i have some plumbing to work out first. Next time I build one of these, it will be built more or less upside down, to put the exhaust port at the top, more of a straight shot to the plumbing n g if the forge. But hey, its all about knowing more than you did the day before.
-
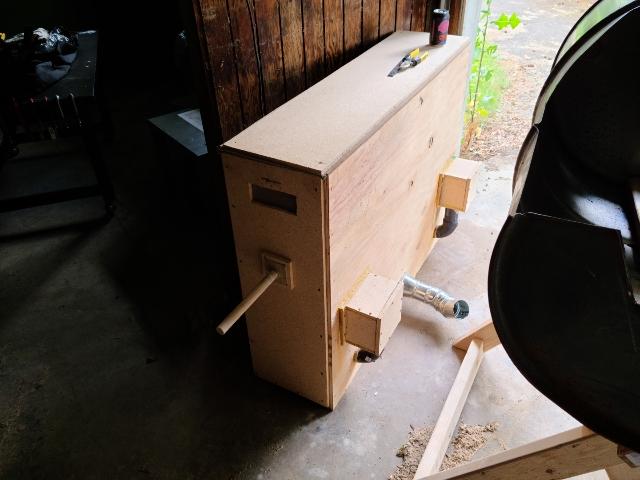
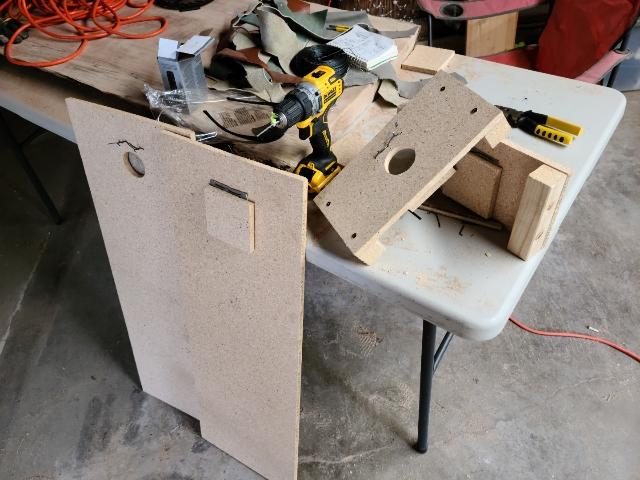
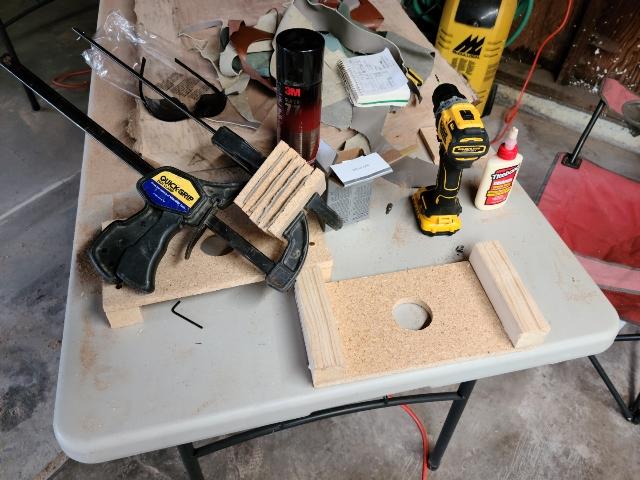
Alright guys I got the inlets and outlet sized up, and I went ahead and took the time to build a set of externally routed inlets to the inner chamber of the bellows, it over complicated the design and build a bit, but it worked and I did not have to tear down the entire build to access the ports on the inner chamber to up scale them. I still want to make a handle for the pushrod. But tomorrow I will shift the focus back to the forge. And hopefully by the end of the day I will have a nice hot fire.
-
Will do. Only spot would be the pushrod.
-
Glen, yeah losing a little around the rod, I was thinking of making a gasket from scrap leather. But its not too bad. I'll keep it in mind, ive got some old tunes laying around somewhere.
-
Without a lid I could go all day and night. That makes perfect sense thanks Frosty!
-
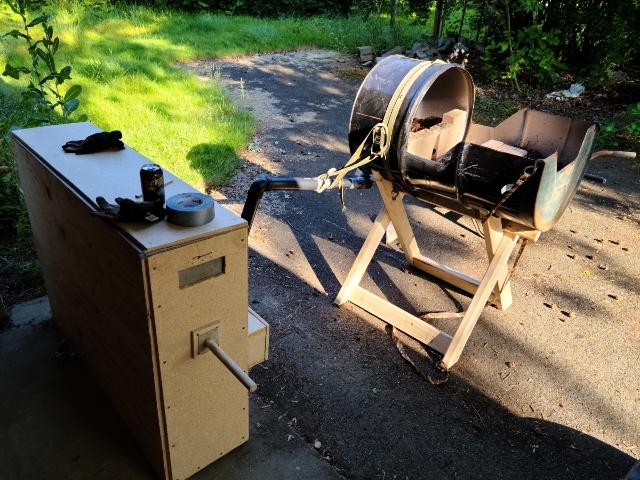
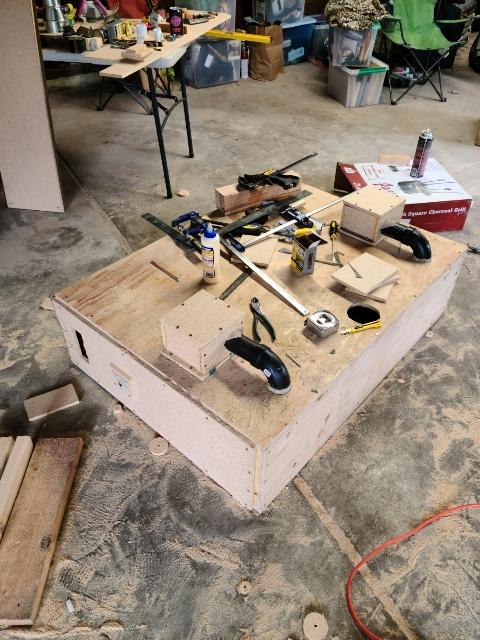
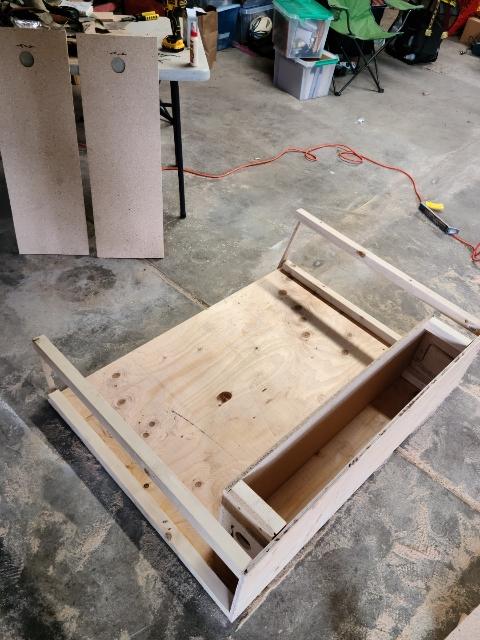
so i built my bellows this week.... everything moves well and is sealed well.
But the back pressure is gnarly to push against.
I'm wondering if my outlet is too small or my secondary chamber is too small or if the inlets to my secondary chamber are too small.
If anybody has good experience with these or even a Japanese style box. Please feel free to chime in.
The box is 48"×36"×12
Inner chamber is 36"×11.5"×6"
All valves are 1.5"dia.
Here are some pics of the build sorry I missed photos of a few steps.


-
Ok so I got the bellows built.
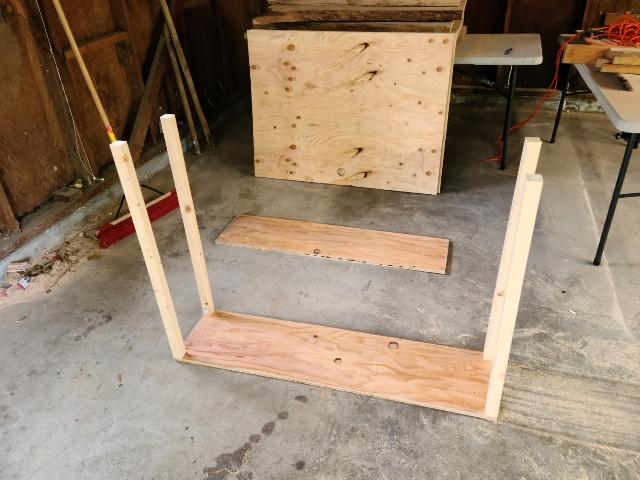
Still going to do some cutting on the forge body, before I set up the firepit.
Wood stand is just a temp, for mock up purposes. I will be welding one when loaner welder gets here.
And the anvil does not live or work where it stands. I still have some sorting out of layout of the space to do before I commit to placement of my components.
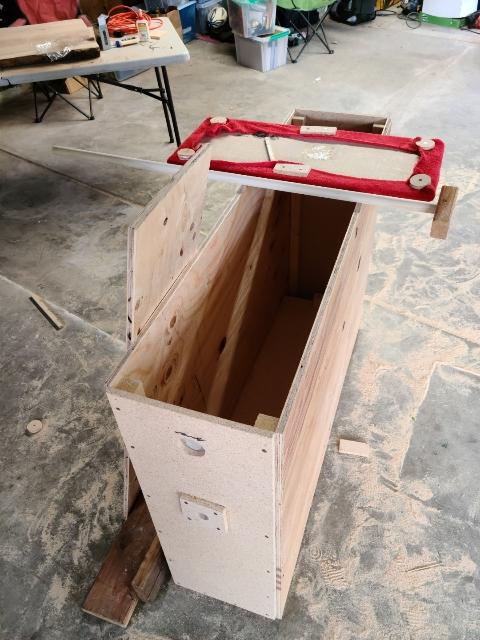
Now back to the bellows, I know this is a thread in the JABOD board, but without bellows I would just have a barbecue.
So... i linked the interior with smooth plastic wall panel and the piston moves pretty fluidly, and the box is pretty well sealed, using wood glue and scraps of leather to seal any air gaps.... but i feel like I am getting gray too much backpressure causing lots of resistance while pumping. And I'm not getting g what seems like enough air pressure out of the exhaust port. Im wonderingif maybe my exit is too small of diameter.
The air inlets and the inner chamber valves are 1.5"dia. And so is the single exit port....
I will post in the bellows board when I get a chance, but I thought I would update the process here.
-
I think as long as I don't let it get soaked in the rain it should be fine. It definitely has a little play. But I may have issues with the piston rod hanging up in the bearing hole. Ill have to take that into consideration. And may be up for a change in materials down the road...
-
Yeah I was wondeeing about that too. That would be much more durable than the contact film. And I could just use some super 77 to stick the pieces. Ill look for some.
-
I wonder if just using some clear contact paper, used for shelving liner would be enough to break surface tension.... its nice and smooth and would not effect my fitment at all.
-
Hey Frosty, i like the idea. I was considering how to build a gravity powered bellows, but decided to go with a proven design this time around. And as Thomas was saying that this likely won't be my last or only forge, this won't likely be my last or only bellows, so i will likely be trying to make a gravity powered bellows in the future.
Thomas, I hadnt considered that the particleboard would be considered high friction, ill try sourcing a "bearing" material to line the inner walls and floor with. Thanks.
-
Sorry the inner chamber is really 40"×12"×6"
-
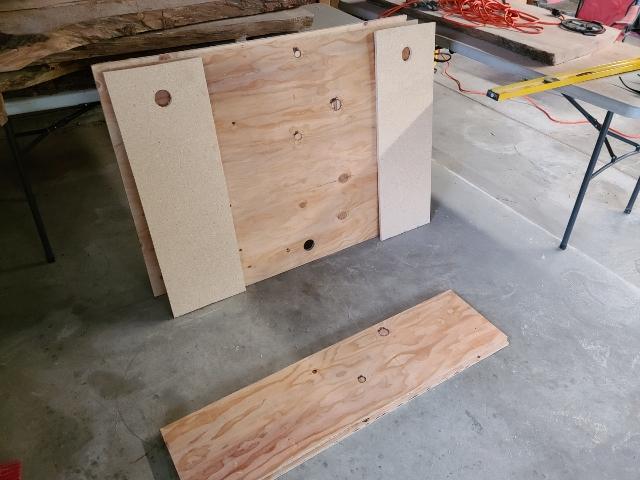
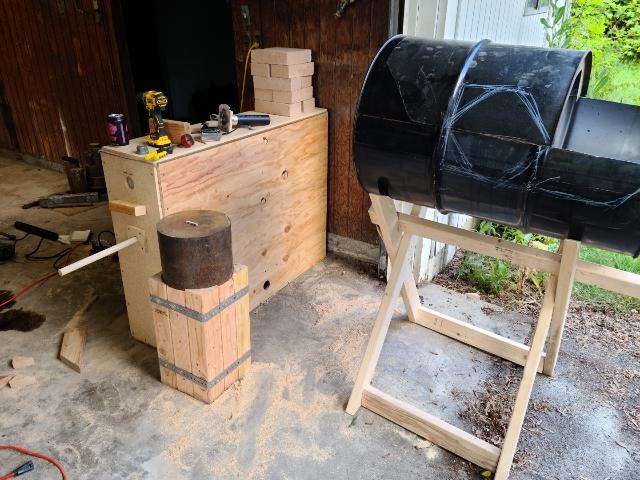
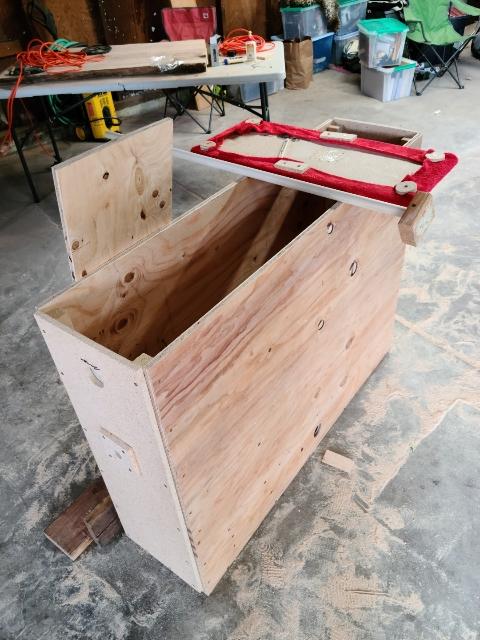
Well, took a step back from the hot side of this build to work on the cold side. Started to build my box bellows today, i was unable to finish it out before I had other engagements to handle. Im sure most all of you are familiar with the design and build process, but here is the build so far...
its a 3'×4'×1'box, with a 30"×6"×11.5"inner chamber.
I should be able to get back over to the shop at some point in the next few days to finish it up.


-
Awesome, thanks guys. These are the things I was hoping to learn from this thread. I am taking all into consideration.
I think my next step is to build a box bellows, and a stand for the forge body. I want to be ready to start a fire when I fill it and build the fire pit.
Ill keep you guys updated as it comes together. I am out of town for part of this week but hopefully I can get to it when I'm back home.
-
I am definitely not going to say you are wrong. In fact, you may have hit the nail on the head.
Which brings me to a couple more questions.
Assuming that a bottom blast extention system would be less efficient using charcoal as fule. Could it be able to get a thinner workpiece such as a long blade to reach critical temperatures for heat treating?
If a smaller forge can be used to do the same thing by painting the blade through the hot spot, I think my only hang up would be working larger stock materials.
And if I understand correctly, up scaling a charcoal forge requires a multi tuyere sideblast system.... so where do I draw the line as becoming over kill?
I am more likely to be making hammers rather than swords this year. But will likely not always need the heat and fule required for this type of job, in which case, I would want to only run a single tuyere sideblast.
should I build a multi tuyere sideblast and run extra fule(charcoal) or should I be able to make a single tuyere sideblast work just hard enough to efficiently heat 3lbs. hammer billets when I occasionally want it to?
Man I wish I had a few of you guys locally, sure would make things easier. I am grateful for you guys taking your time to share your hard earned experience and expertise.
Thanks.
-
Sorry im not trying to discount your input, just trying to understand the ideas and apply them to my design. I am trying to avoid a bottom blast situation. Which was why I was thinking of basically 3 side blast forges stuck end to end fed from the same air supply with a restricted of some sort. Still trying to come up with a concise drawing to run by you guys, but it has to happen between work at the day job.
In search of some advice
in Vises
Posted
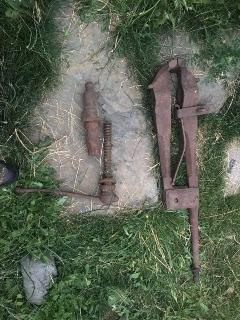
So, I drove out to take a look at the aforementioned vise, on my way across his property to take a look at the 6" with the chewed up screw, I had to step over another post vise laying in the dirt this one had 5" ish jaws but had had a couple of holes cut into the jaws so I kept walking to see what I had come to see. After taking a closer look and determining that he was wanting way too much for a non working vise he pricieded to show me 4 or 5 more smaller 4" postvises he had laying about. All of which were basically a pile of parts waiting to be married. Was asking 40bucks each. I was like well thats a pretty good deal if I get all of em and marry em in to one. I think i would have still had to build a spring for the Franken vise idea....sorry this is getting long winded. But..i promise there are pictures coming.. I decided to ask if I could maybe check out the one laying in the dirt back there, he said no problem....
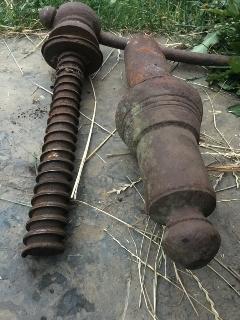
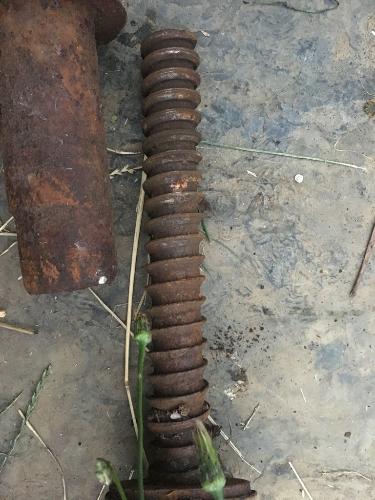
So i pulled the screw, and as it unwound I had to hide my excitement a little, the screw was clean with about 90% thread life left. The box looked pretty good too from what I could see through the grease. And this one was complete. Only hang up was that it had holes cut in the jaws.... still has a clean 3ish inch section in the center of the jaws but definitely has been defaced. He said he would be willing to let it go for a little more than the 6" that needed some serious work. I told him I would sleep on it and maybe get back to him in a week or so... took a look through his pile of tongs and top tools and hammers. And still walked away with a few treats.... a tiny buffalo forge hand crank blower. Some tongs a cross peen hammer a flatter and loose handle and a short little 8lbs. strikers sledgehammer.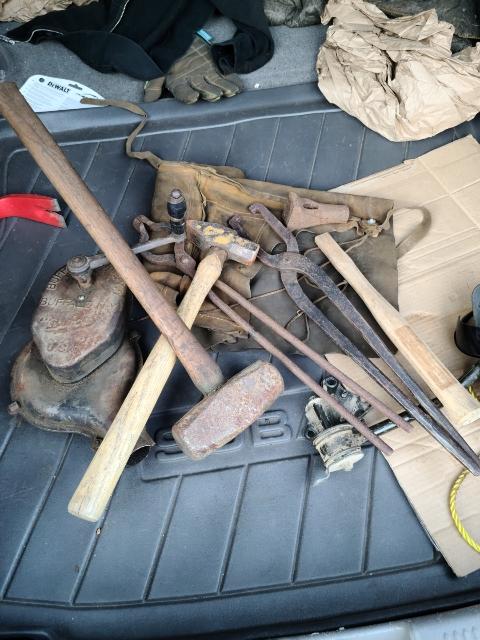
But that night I was telling my wife about what I saw that day, and she asked me, of all things.... she asks me "so why didn't you bring it home?"
I about died.
But I went back out today and talked him into selling it to me near his price, but he threw in a 12lbs strikers hammer that I need to re handle.
I figured i can over look the defiled jaws for now, and due to the fact that I am working from a makeshift anvil with no hardie hole or pritchel hole I can do lighter work that calls for bottom tools in the vise. And when the right vise with nice 5" jaws and a blown out box and chewed up screw comes along, I have a match made in heaven.