Panik
-
Posts
66 -
Joined
-
Last visited
Content Type
Profiles
Forums
Articles
Gallery
Downloads
Events
Everything posted by Panik
-
I’d like to throw in an observation as someone who us just now trying to learn about flame composition and color. I find interesting all of the questions about whether a flame is the appropriate color or if the “fluid” dynamics of any particular flame are appropriate for the task at hand. By and large sight is generally taken for granted as an objective sense… if one person sees a square, then chances are another observer will also see a square. The reality is that paradigm falls apart quickly when people start comparing observations about fine detail. What appears to be blue to one person may appear to be light violet to another person. This is compounded in online discussions with the filters and the programming used to render photographs on cell phones. While I don’t know much, I can certainly say that the pictures I have taken of my experiments with burners show something very dissimilar to what I observe in person. The part that fascinates me in all this is exactly what you two have done and are planning to do…. Parse through your experiences to develop a common language in order to normalize/standardize describing what is observed. At one point in my life, I did a little bit of wet marine mammal biology. The state lab I worked for was responsible for generating 95% of the manatee necropsy reports in the state of Florida and the data those reports contained directly drove state level policy. When I first started, I was blown away that the data reports we were producing were based entirely on a rigid reporting language, built entirely on a slowly shifting oral tradition; developed over 20 years of biologists dissecting manatees in each others’ company. As an example, there’s no truly objective manner in which to repeatedly describe the rugosity of different manatee’s stomach lining…. yet we had to figure something out. It is fascinating for me to see much the same here.
-
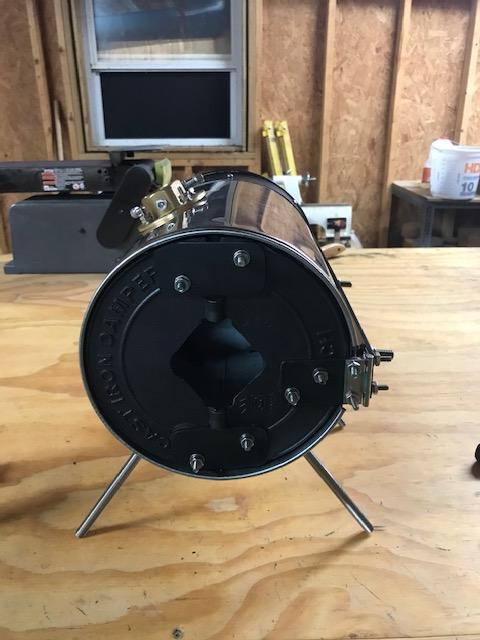
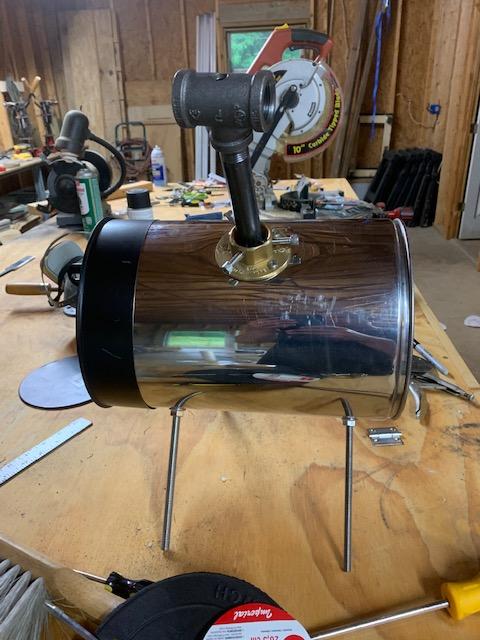
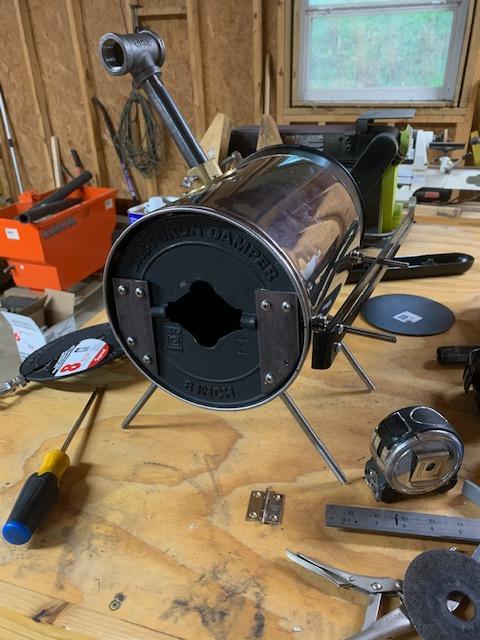
I'm honored and appreciative... let's not put the cart before the horse. I have yet to finish construction, see if it actually holds together and whether I can get a burner to play nicely with the back pressure and interior volumes involved. In the near term: For anyone reading, please understand that I am feeling my way along here. I have no experience in forge construction/operation and claim no knowledge, so it is all experimental and subject to wild failure or moderate success. General run down: - Small Hardware: Everything bolt/screw related is stainless. It is more expensive, but in my case, I figured that overkill might appropriately substitute for experience by ensuring that I didn’t accidently use plated-items in a high heat area and create exposure issues with toxic fumes. - Forge Body: Selkirk Metalbestos/Metalbest double wall stove pipe. Contrary to what I first posted, I believe the piece I have is advertised as a 6”X12” section, with the first number referring to the diameter of the inner pipe. That number would only be relevant in sourcing a similar sized piece as the inner sleeve gets removed. After removing the inner sleeve I ended up with a pipe that about 9” in diameter and 10.5” long (end cap to front lip). Google and some estimating gives me something in the range of a little over 100” cu for interior volume. You can purchase double wall stove pipe in larger dimensions and longer lengths. In my area a piece of double wall similar to mine retails around $45.00. I was lucky in the piece that I have has a significant dent on the male connector. As a result, I was able to get it for about the price of similar sized black single wall. (It helps to have a good relationship with your local Ace Hardware) This double wall stove pipe is constructed from an inner sleeve and an outer shell that are joined using roll crimps. This makes things easy to remove the inner sleeve. That operation consists of making a circumferential cut along the female end of the outer shell, just medial of where the inner sleeve joins the outer body. (In making this cut you will catch and spray rockwool bits everywhere, so care and a respirator are required). After doing this, the inner sleeve and insulation slide out with a bit of assistance. At that point you are left with a shell that has a stainless lip on one side. The lip end seems to be a natural place for the door and exhaust port - Forge End Cap: Interestingly, you can buy 8” nominal dia. stove end caps. They are in actuality maybe 1/16” or 1/8” smaller in diameter than the forge body. These caps are also held together at their butt end with roll crimps and then two rivets on their columnar aspect. If you carefully grind away the interior aspect of the outermost rivet, you can just get the cap to slide over the outside of the forge body. Unfortunately, roll crimps are not the strongest, so if you aren’t careful you can do what I did and pop the butt plate of the cap off in the process of sliding the cap over the stove pipe. To help rectify this, after I replaced the butt plate, I spread a very healthy bead of Rutland Hi-Temp Stove and Gasket Cement on the inside of the joint between cap’s butt plate and wall. Once that dried, I also applied a very heavy bead of the gasket cement to inner lip of the cap where I estimated that it would meet with the outside of the forge body. I then slipped the cap over the end of forge body and further secured the joint by running screws from the outside through both the cap wall and the forge body. Whether this holds up remains to be determined. Given I have read about forges that are held together with wire I do think it has a shot. - Burner Portal: The burner portal is a 1” brass termination flange I found at Home Depot and picked up because I like shiny things and because it looked like it would serve the purpose. Fair warning it was not cheap at around $20.00. I drilled and tapped three set screws to hold the burner’s barrel. Unfortunately, I don’t remember the specifics, as I grabbed whatever was closest at hand…. but then it’s not mission critical information. I’ll be dead honest, I ported the forge for the burner before I installed the end cap referenced above and eyeballed the burner location. As a result, it is a bit forward of where it should likely be and I am fairly certain I missed the angle for optimum circulation in the forge. The hole in the stainless body was made with a 1” knock out bit. - Door/Exhaust Portal: The door is a cast-iron nominal 8” damper I picked up at Ace Hardware. I modified it by using an angle grinder to cut away the handle and enlarge the center opening that the handle formerly ran through; creating an exhaust port. The steel plates are present to provide a hinge mounting flange and to cover the channel that remained after removing the damper handle. The diameter of the exhaust port is somewhat arbitrary and based on the preexisting holes in the damper. Whether it is large enough, or too large remains to be seen. If necessary, I figure I can enlarge it or partially plug it, as necessary. The door is designed so that it both swings open and can also be pulled forward of the forge body using the track mounted to the side of the forge body. With the amount of heat involved and amount of seat-of-the-pants engineering I’ve done thus far I’m not sure if there will be binding issues. As a result, I thought that if the door is able to move on two axis it might be easier to operate. Fair warning, I have been accused of over engineering things. - Insulation: At the moment, I am planning to use 2” of rigidized Kaowool, topped by Satanite and coated with Metrikote for the forge body. The door insulation and exhaust port are up in the air at the moment. Forward of the lip on the forge body there are a series of “teeth” that are meant to dog one portion of pipe to another. These teeth cause about a ¾” gap between the door and the inner, raised lip. As a result, I have been considering a number of different solutions for sealing and insulating the door. It could be as simple as putting stove gasket around the inside lip of the forge and attaching to the door a cored plug of 2” Kaowool cut to fit both the exhaust port and the interior diameter of the forge. I’ve also had thoughts about casting a plug that is attached to the door as well as casting ring along the inner lip of the forge and going from there. As an aside, I managed to snag a section of kiln shelf off of a friend. I am hopeful to be able to section it at very least to have a strip to lay on the bottom of the forge as a floor. If there is enough room and not too much back pressure I am going to play with using a piece to act as a flame face; protecting the sidewall of the forge.

-
Can do and thank you for the compliment! ....we'll see if this works out. Give me just a bit to get some thoughts down on paper in a semi-coherent manner.
-
My sincere thanks! I had read that thread and apparently skimmed over the idea of using Zircopax/Collodial Silica slurry. It can tend to happen when I am reading large volumes of info on forums - it's impossible to absorb everything even after multiple read throughs. I think doing a DIY Zircopax/Colloidal Silica might be bit beyond my abilities at the moment.... but it is something to contemplate. However, between that thread and a couple of others I have found I think I am getting a game plan together.
-
Sounds good - I have recollection of reading somewhere about a person tapping the shoulders at each end of the t to accept a small set screw that in turn could hold an adjustable restrictor plate controlling air intake. We have a couple of welding supply companies locally so I am sure I can get my hands on a tip cleaner - I just haven't made it that far yet. I do have a question regarding covering the kaowool after rigidizing. Most of my reading has indicated that people mix matrikote up somewhat thick and apply it with a brush or by hand, smoothing as they go. Has anyone ever experimented with mixing it up thinner so that it can be applied in a manner similar to slip casting with clay or porcelain? (Using multiple washes that get poured in to coat all interior walls with the excess poured out each time). I am sure something like this been tried, I just haven't been able to find a record of the success or more likely failure.
-
Yup, I appreciate the reminder in regards to patience. While I would like to hurry things along I’m fortunate in that I do have time and she is not going anywhere - so I actually do have control over the speed of things. I have been doing a bit of playing here and there with burners and fittings during this process, but that’s been primarily to gain a rough overall understanding and to practice drilling and tapping holes that are in plane with the correct orientation of the T fitting. Even with a drill press it can still be tricky. You mentioned shrouds for the air intakes.... Is that for reducing the effects of wind gusts on air entering the burner, or is it for for fine tuning the amount of air entering the burner once the mig tip length is nearly correct (i.e choke control)? Or something else I am missing completely? At the moment I have been using a fine scribe tip to clean the orifice after cutting down a mig tip.... with the understanding that it’s just fiddling and I may be altering/disrupting the path of gas flow.
-
JHCC - That's great to hear! Latticino - The proximity of a valve near the burner make a great deal of sense in terms off lighting. I've definitely got other aspects I can work on at the moment, so I am going to table the decision and let it bounce around in my head for a while. Thank you for the input! I'm waiting on Satanite (tomorrow, now, next week - who knows at this point), but I'm hoping to have the rest of the construction up to that point done by the end of the weekend. I got a gift in mind for one of my staff when we get through quarantine. She's been a rockstar and I would like to get the forge up and running as soon as possible for that I can finish it for her.
-
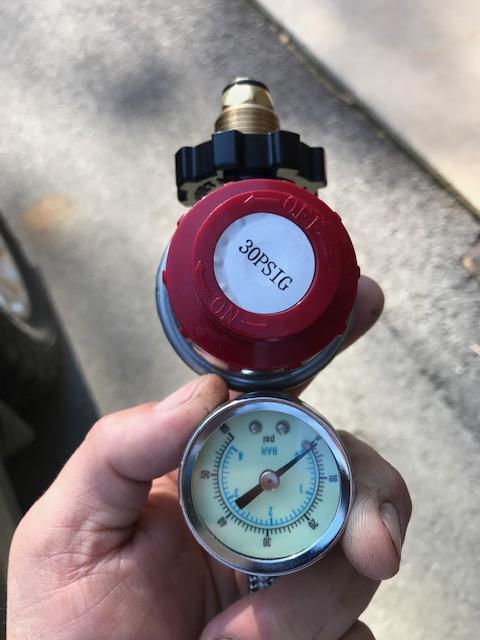
I unfortunately know all too well! We're in the county and between our place and mainly the neighbor's land they have about 100 acres to room, all of which is huntable. Our female golden retriever regular either find deer pellets or dead things to roll in.... Thank you for the reassurance. Regardless, it looks like I may need some more to get 2" depth, and if so I will use the "pre-treated" bat as the first layer and the newer one for the 2nd layer so things look more even. Sorry, the close-up was an attempt to show the joint in question. Unless I seriously missed the mark, I believe it is an adjustable high pressure 0-30 adjustable regulator. In my excitement I did previously make that mistake before to doing sufficient reading though. If the risk of damaging the regulator or stripping threads is too great, I will put a cutoff further down the line towards the burner. I was just aiming for have all of the controls/gauges centralized and away from the point, hot end if possible.

-
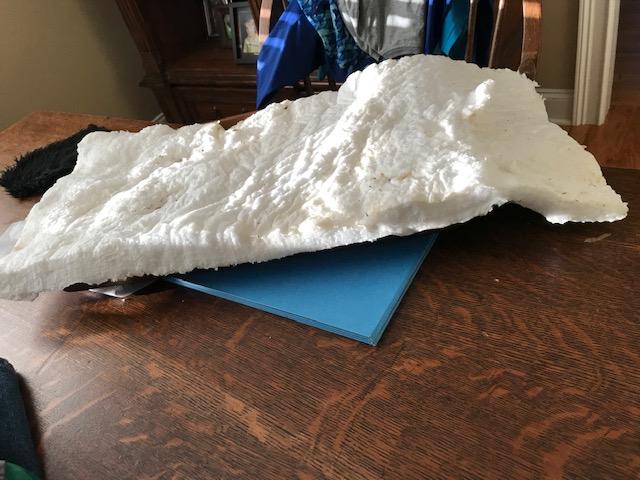
Good morning! I unfortunately woke up to a couple snags that I was hoping to get some guidance regarding: Due to the vagaries of shipping these days the Kaowool that was supposed to arrive tomorrow actually arrived in the middle of a rainstorm on Weds. Thanks to our dogs excitement over having a forge, the kaowool has been very well buttered using rain and dew, as shown in the picture below. The shepherd was also nice enough to compress portions (no holes) of it so that it would fit better in my forge. In all seriousness, y'all's thoughts as to whether this sheet is still usable after it dries, or whether it would be better to get another sheet and start fresh would be appreciated. In slightly better news the regulator, pressure gauge and 12' of stainless jacket hose arrived in good condition. Rather than having an emergency cut-off valve at the burner, I would like to insert that valve between the between the regulator body and the brass manifold of the gauge. It would appear that there is some type of material (solder?, sealer?) that was used on the threading between the regulator and manifold. Before I destroy a brand new piece of equipment, I'd appreciate any suggestions about dealing with breaking that joint... (ex. gentle heat before un-threading) This forum has been an awesome resource during this process and I am greatly enjoying all of the knowledge and humor that been shared by the members.

-
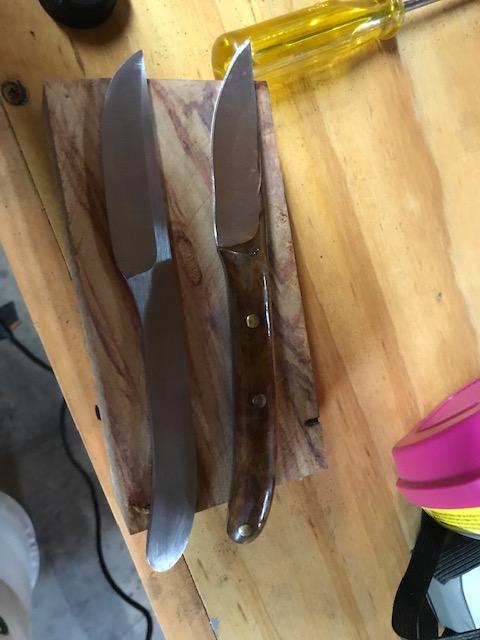
Well fortunately the inner liner and the wool are no longer a part of the stove pipe. Cut that out and did a bit of mock-up with the shell to see how things might look when I am able to finish up. I also started working on a door layout. It may be an exercise in frustration, but at the moment I am thinking it may both swing out on a hinge as well as be able to be pulled forward of the entrance to the forge...... we'll see how that works out. Supplies should be shipping here shortly and in addition to insulating material also include a 0-30 high pressure regulator with 12' of stainless sheathing. I'm getting kinda impatient to start building instead of doing prep and layout work. I also have a knife blank that it ready for heat treating and then final work if and when I can get everything running. It is based on a knife made by a gentleman that went by the name of Red Royal. That reference knife at the top of the attached picture was purchased by my father in the late 80's/early 90's
-
I won't quote you on it, but I have no doubt that you are correct and that I was in error on my identification of the insulation. My thanks!
-
Irondragon, thank you for the words of encouragement. With the reading I have done, I've been a big fan of all the different experiments and successes you have had. I am also kinda jealous - At work I had my director convinced to pull the trigger on a buying a Crealty Ender 3 when the quarantine hit. It would have allowed us cheap in house manufacturing of certain overpriced life support systems parts. It also would have given me access to a 3D printer for personal use as long as I provided for consumables. I've enjoyed reading about the different 3D printed/cast nozzles and flares you have attempted. Last night, after posting and reading some more I realized that a 3/8ths would likely be more of an appropriate size. Apparently, in the process of trying to edit my post to reflect that I managed to quote myself in another post. It appears admin has removed that inadvertent double post. I've got the parts for both a 3/8ths burner and 1/2 burner. In fact the 1/2" is assembled and will maintain ignition in the stovepipe for very brief tests; however that doesn't take into consideration the additional thickness of the insulation and final reflective coating. Nor does it take into account closing off one or both ends. Regardless, it is and will be fun to experiment. Latticino, from brief research the insulation is fiberglass based. Given that line of pipe is referred to as Metalbestos, I figured it might be a good idea to do at least some double checking about the insulation used. Beyond being aware that it is a hard pack fiberglass insulation, I really don't have any more information and could only make bad guesses at the R value. Regardless, the 500 degree discrepancy between your liner temperature figure and the rated continual operating temperature is pretty significant. Your assumption about the mixing nozzle is correct in that currently it does punch through the outer shell, insulation and liner. Concern over that and the potential proximity of the insulation to the flame ignition zone is what makes me lean toward the removal of the inner liner.
-
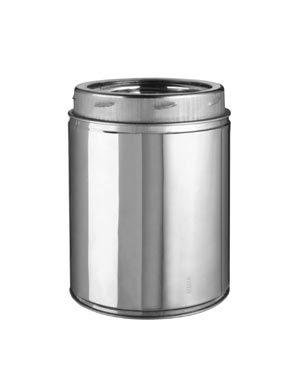
Good evening! I don't do well with relaxing and/or slowing down.... and given I work at a natural resource education facility there has a been a lot less work to occupy my time, given we are closed to the public. So of course this somehow led to random googling to learn new things which landed me at iforgeiron.com. That led to a LOT of reading, with more to come, and budding interest in constructing a very small forge for my shop....This in turn lead to some creative acquisition of different items that could be utilized in the building of a small forge. (The construction and learning process involved in building a forge being of about equal interest at the moment to eventually doing hot work) One of the things that came into my possession and that peaked my interest in this process was a shorter piece of new Selkirk Metalbestos stainless stovepipe that was basically given to me at a ridiculous discount by the local owner of our rural Ace Hardware; it having a dent in the male coupling end that renders it unusable for it's designed purpose. I'm not in the shop at the moment but I believe the dimensions are roughly ~6" ID, 9"OD X 14" My first though was to cut out the internal sleeve out of the pipe and remove insulation present between the internal sleeve and external jacket and replace all of those materials with 2" of Kaowool + rigidizer, Satanite and then matrikote. (Removal of original insulation to be done outside and wearing an N95 cartridge respirator) in order to have a small hot space. In appropriating items I managed to snag a small piece of kiln shelf from a friend to cut down and use as a hot face and floor. The thing that keeps popping into my head is that the unaltered stovepipe piece is supposedly rated at 1000F continual operating temperature. I keep wondering if the addition of 1" of Kaowool and accompanying finishing materials laid inside the inner sleeve would be efficient enough insulation. (I realize that there is an implied lack of understanding here....efficient enough for what? Heat treating and maybe playing with some forging depending on the temperature required. I am learning and am pretty far left from the learning curve.....there is stuff percolating through my head that hasn't necessarily settled into coherence) In any case, I am aware that the internal volume of both directions lead innately to quite small internal chambers (it's a little late at night for volumetric math right now, but I believe we are talking in the 150 cubic inch range) . It's hard to explain, but there is a bit of perverse/obstinate amusement involved in my interest in building a smaller forge. I am leaning towards trying to heat it with a 1/2" Frosty T Burner and am planning on closing off the far end with with a 9" non galvanized cap, insulated with 2" of Kaowool. I am still thinking through with what and in what manner the mouth can be reduced in size as/if necessary. At the moment and as I said, I am looking to heat treat smaller knives and maybe grow a little beyond that as I learn. I am also comfortable building a larger forge should this take off as a hobby. Any thoughts and guidance from folks who are farther right on the curve than I would be gratefully appreciated. My last experiences with forges/furnaces/kilns was back in college and the best compliment the professor could come up with for me was that my clay pieces were structurally sound. Thanks! (While it's not the piece of pipe that is in my shop, attached is a representative image of what I got from the hardware store)