Cast and Forge
Members
-
Joined
-
Last visited
Everything posted by Cast and Forge
-
Thanks for your answers so far! The steel was not heated too much before dipping. I had a good heat on it, brushed it to get all the loose scale off and dipped it. Maybe it was too smooth to stick properly... I also thought about putting borax on before but not sure if it will work as a flux with aluminum. With brass it should work better as it is basically like brazing.
-
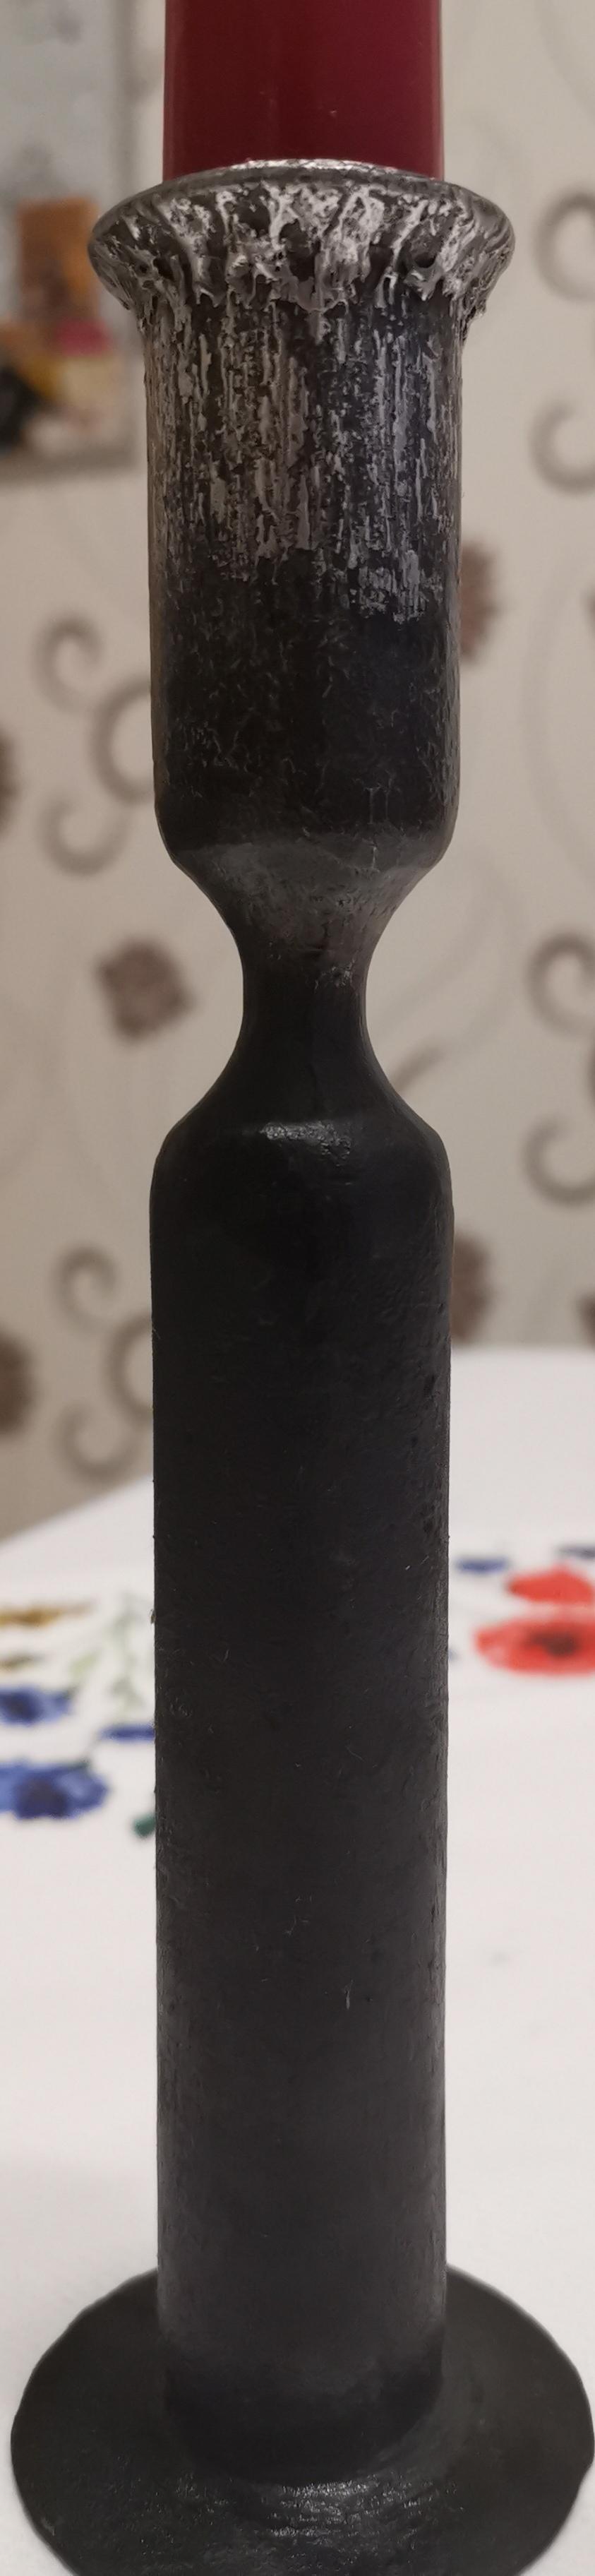
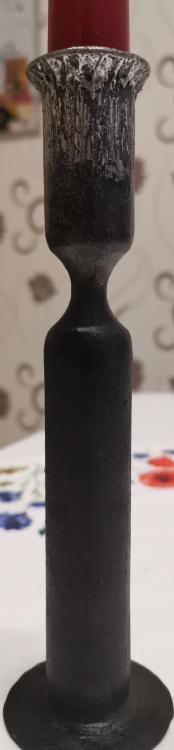
Hey everyone! Yesterday I experimented with forging a candle holder from a piece of pipe. To give the upper part with the candle a little bit of a outstanding finish I tried to dip the hot and brushed forging in molten aluminum. Unfortunately the aluminum did not adhere to the steel as I thought it would. The wetting of the steel wasn't very uniform. So I tried brushing it after dipping which gave a nice effect too. Even though I'd like to have a uniform coating. Are there any tricks to achieve this with aluminum and steel?
-
Thank you JHCC!
-
Thank you George. Nothing wrong with your answers regarding safety. Molten metal is nasty, especially aluminum so its always good to point that out clearly. I just wanted to clearify the intended use of the tongs.
-
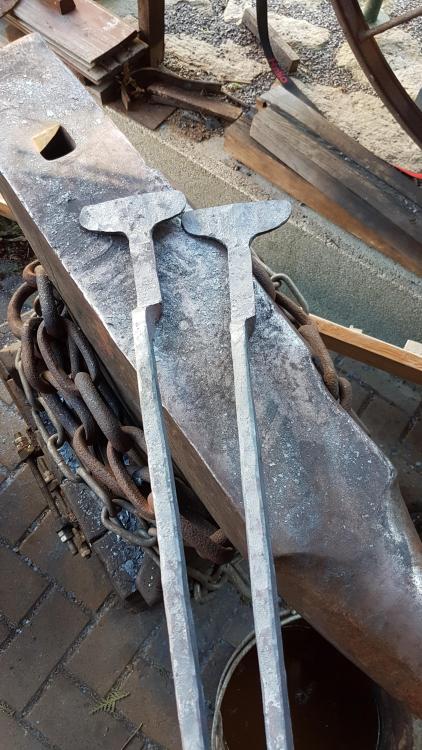
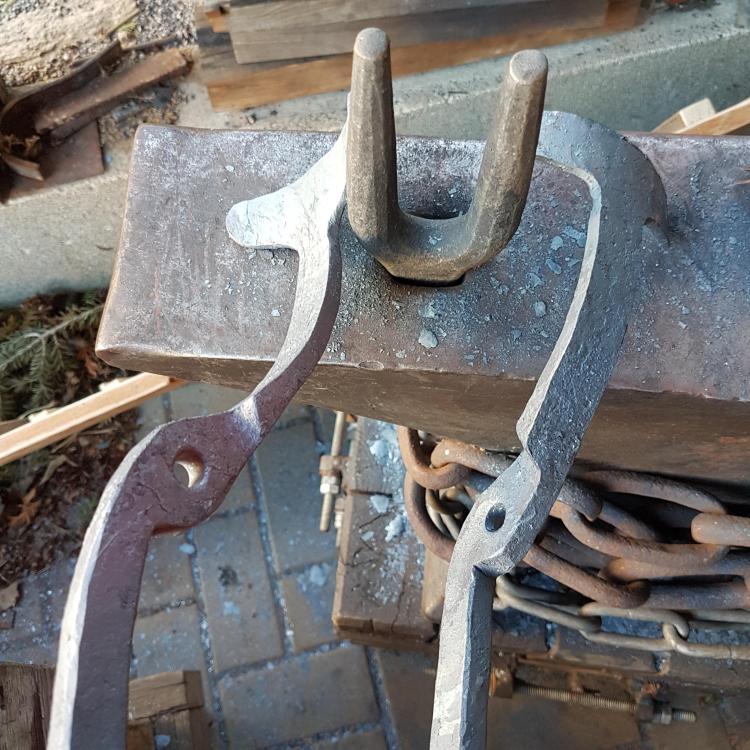
Thanks for your feedback guys. George, swede: Those tongs are not intended to perform the casting task. They are just used to lift the crucible out of the furnace. For casting I use a horizontal shank. Those tongs are used for fairly small crucibles that can be handled by a single person, but use with a crane is also possible.
-
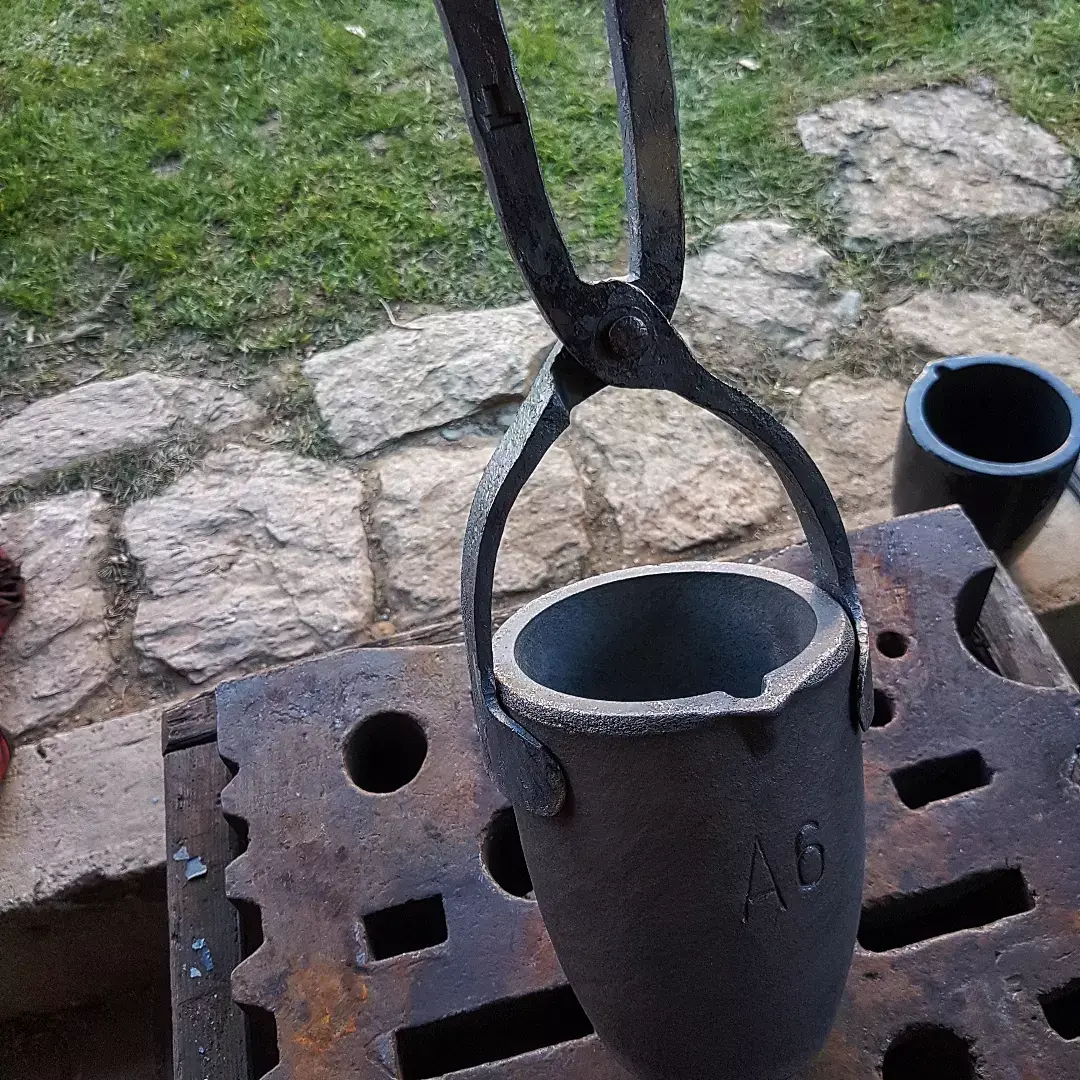
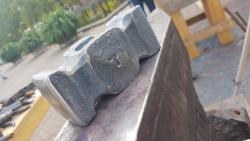
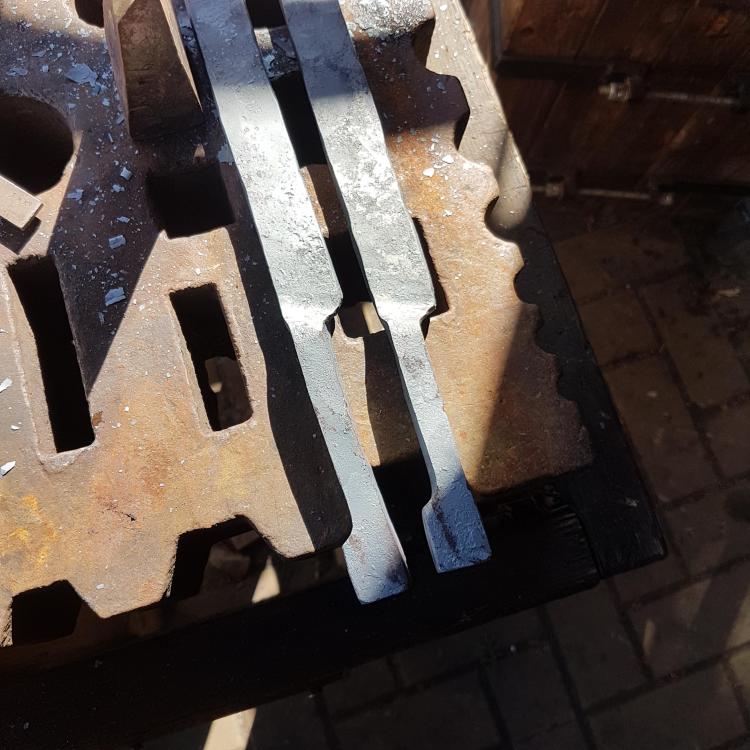
Last weekend I forged a pair of crucible lifting tongs for a A6 sized crucible. Starting stock was 20mm square mild steel. I just want to share the result with you here.


-
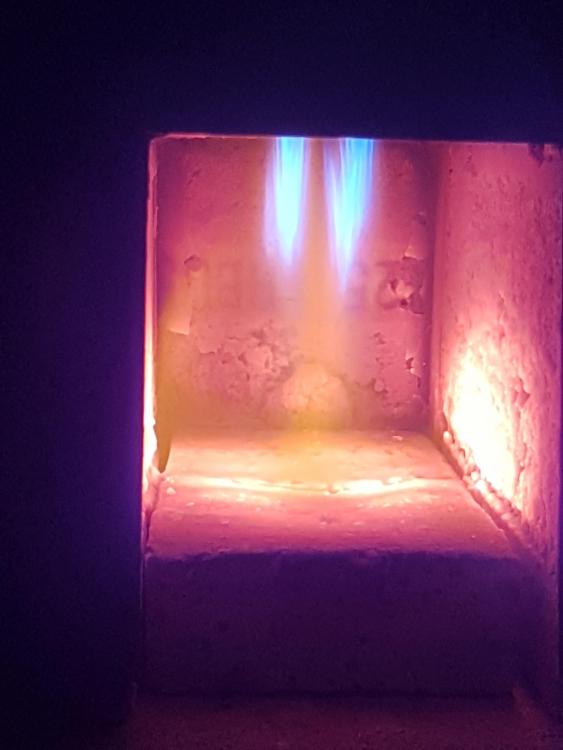
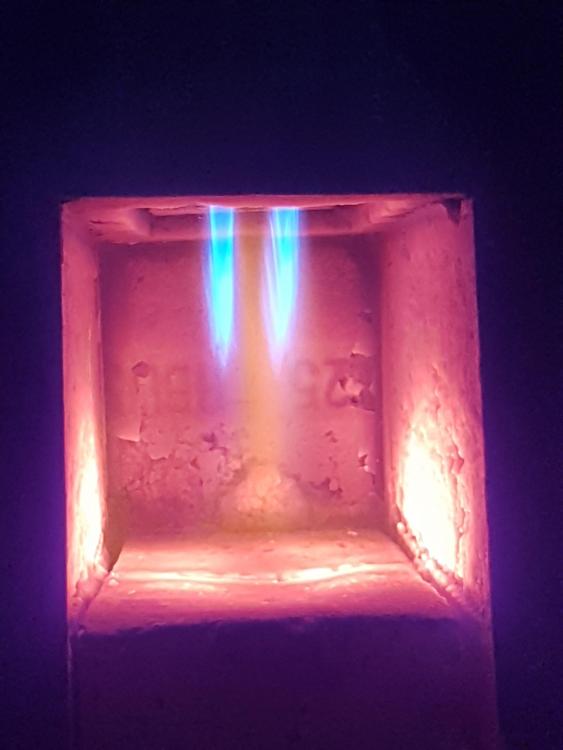
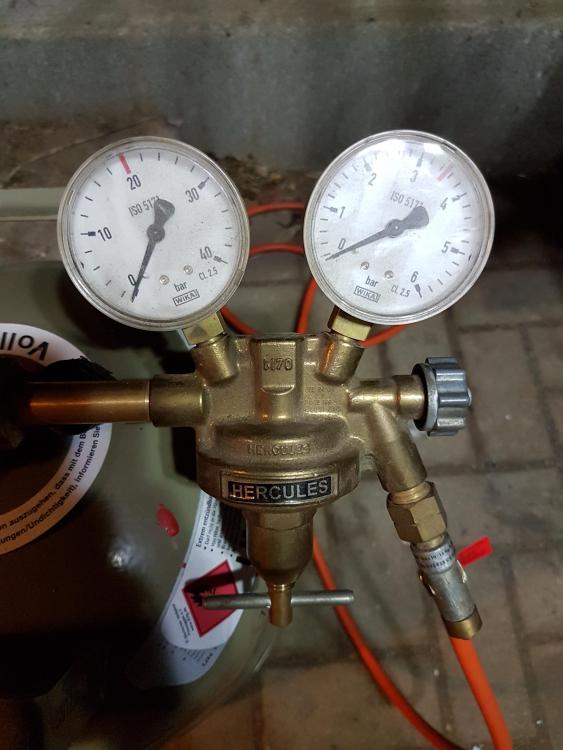
Alright. I first built the ribbon burner with a gas injector made from a copper tube with 3 1mm holes drilled in it. Iam using a regulator with a needle valve. As I first fired the burner it worked well. But I noticed that the gauge on the outlet side of the regulator shows 0,0 bar regardless of how far i cranked it up. I reduced the 3 holes to just 1. Just a slightly difference on the gauge. I switches to the 0,6 mm mig tip it was fine. The thing is when I use a big diameter gas orfice that there is not really back pressure building up. So you cant really judge how efficient your burner is running. When using the 0,6 mm tip i can compare it to my venturi burner which also uses the same diameter tip.
-
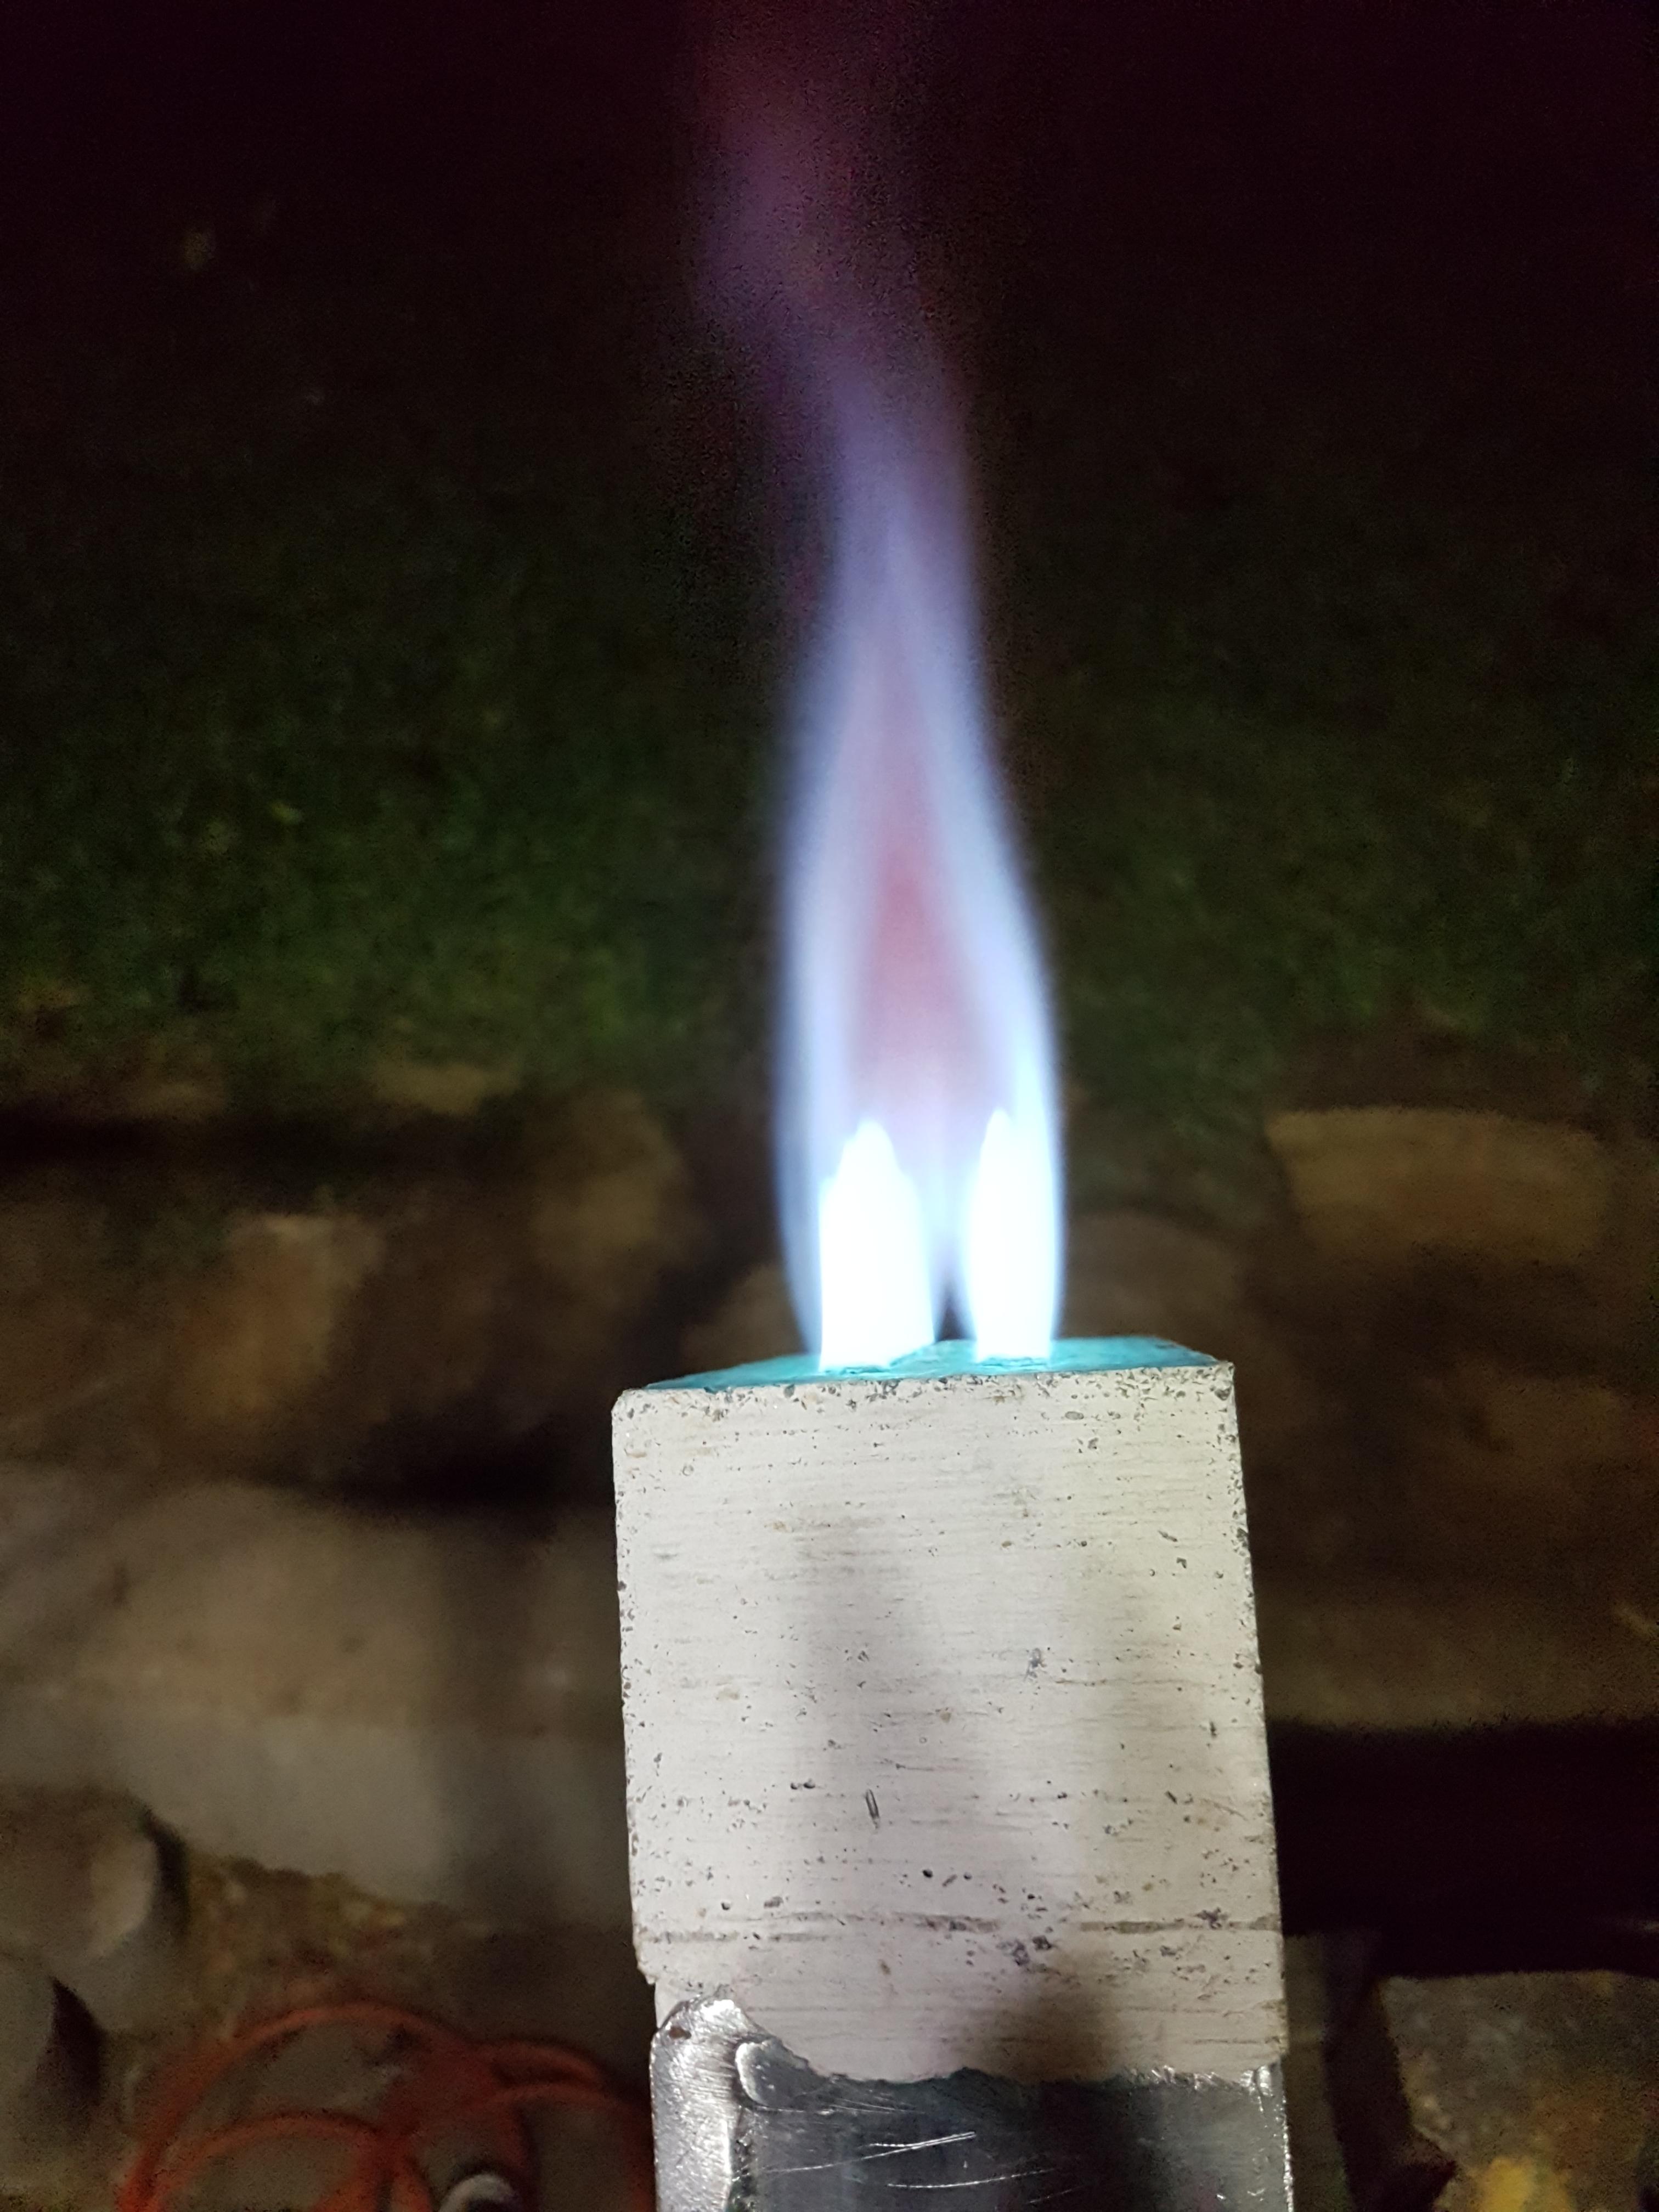
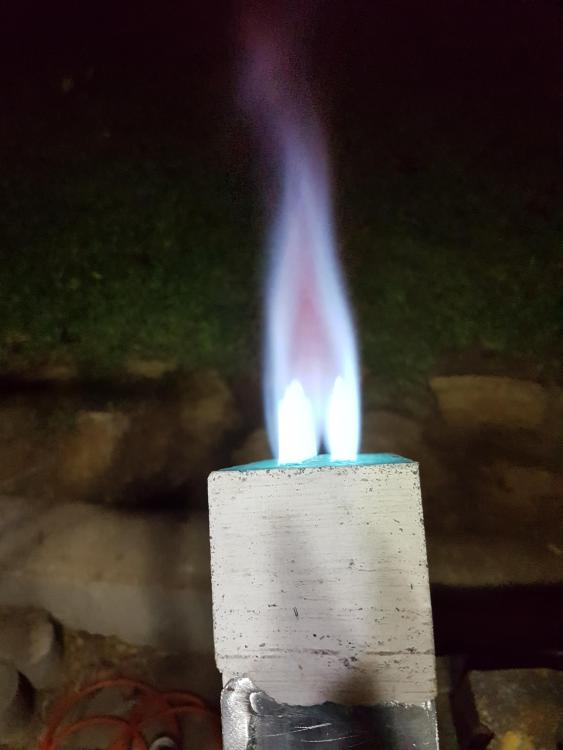
Hey community, I often read in here that the size of the gas orfice should be 1 mm in diameter or even bigger in blown burners. Doesnt this contradicts with the whole "blown burners are more efficient" theme? Furthermore its often adviced to use larger gas orfices when experiencing burner problems like not getting up to temperature. I run my blown ribbon burner with a 0,6 mm mig tip on about 0,2 bar (propane) for general forging. I encountered backfire problems due to overheating of the burner block (hope to solve this soon and coat it with itc100 as adviced here) but besides that it runs perfectly smooth. So where does that "bigger is better" attitude come from? Dont get this as an offend. Iam just curious. Tim
-
Thanks Thomas and arkie! This forum is just great! So much knowledge Tim
-
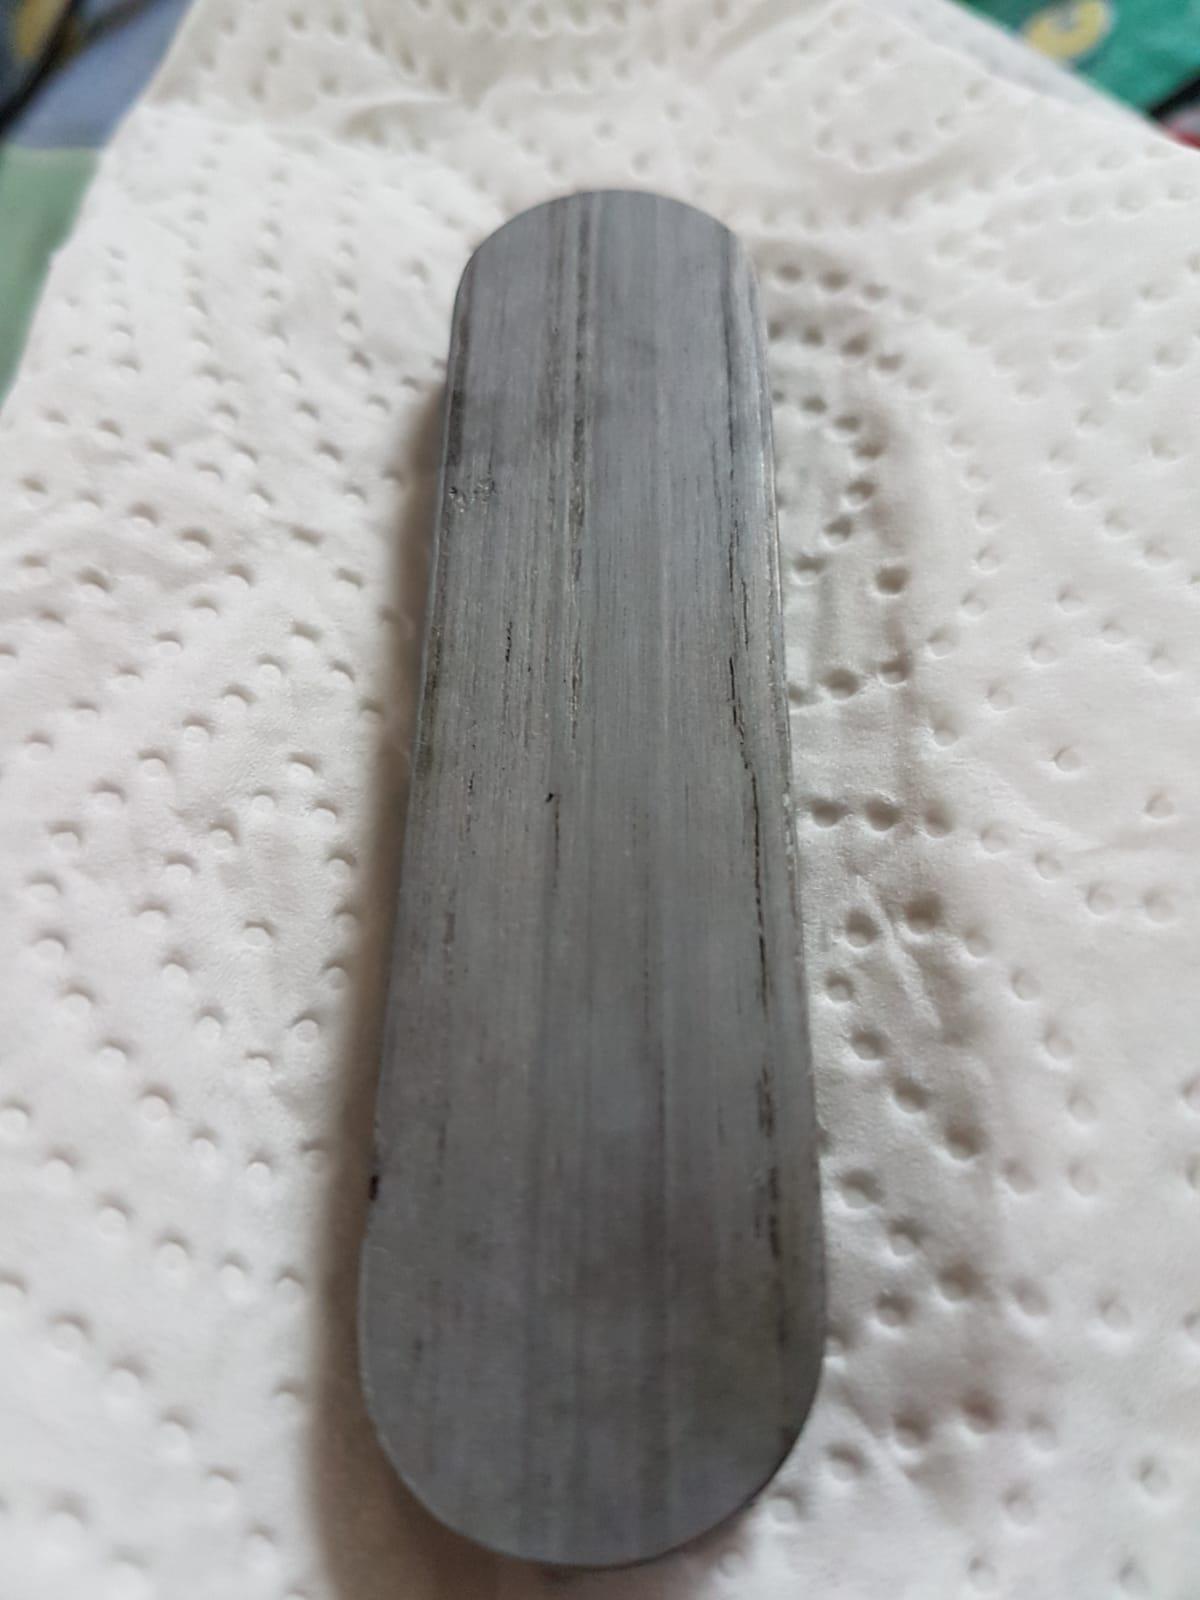
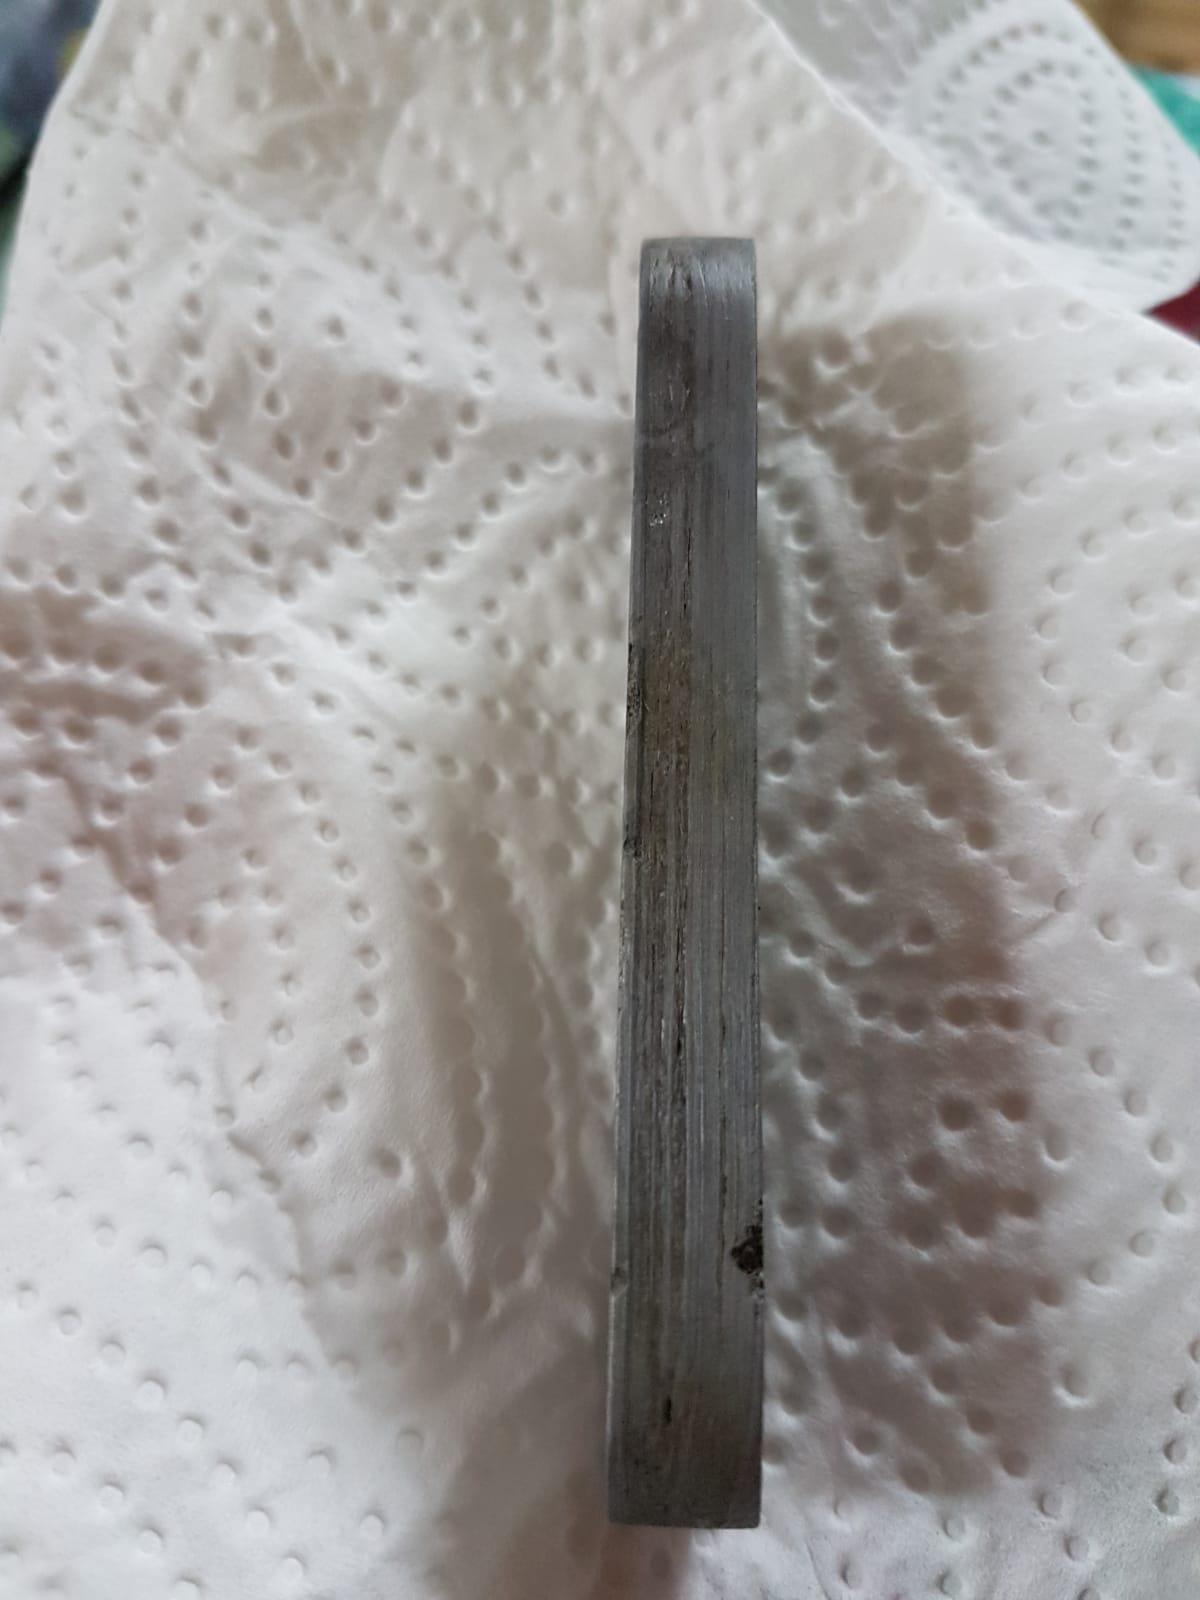
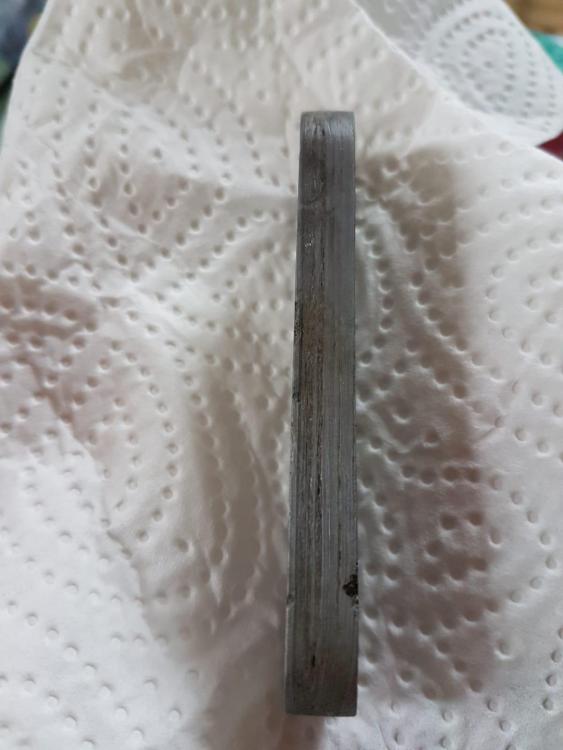
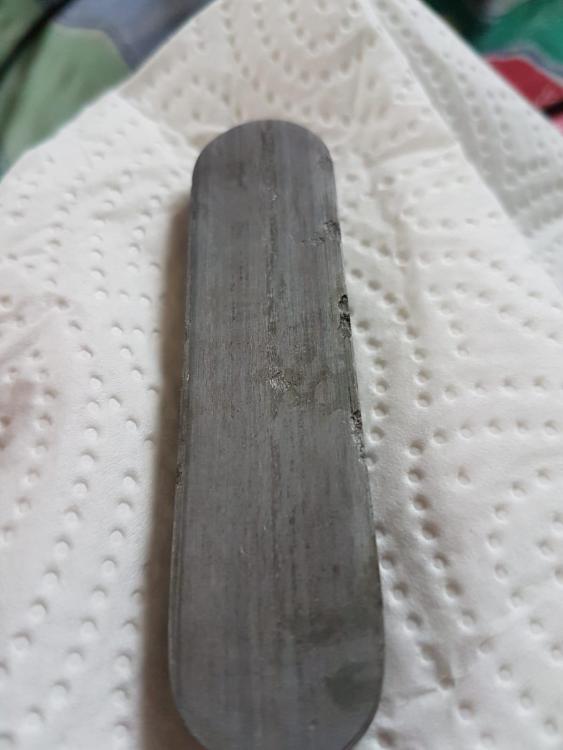
Thanks pnut! I broke a piece of the bar off before and saw the WI grain. But after the etch I wasnt that sure anymore.
-
Hey guys, I etched this piece of what I think is wrought iron in ferric chloride (30%) for 3h. The grain is not that spectacular but this is still wrought iron isnt it? Its gonna be used as a crossguard for a knife. Thanks Tim

-
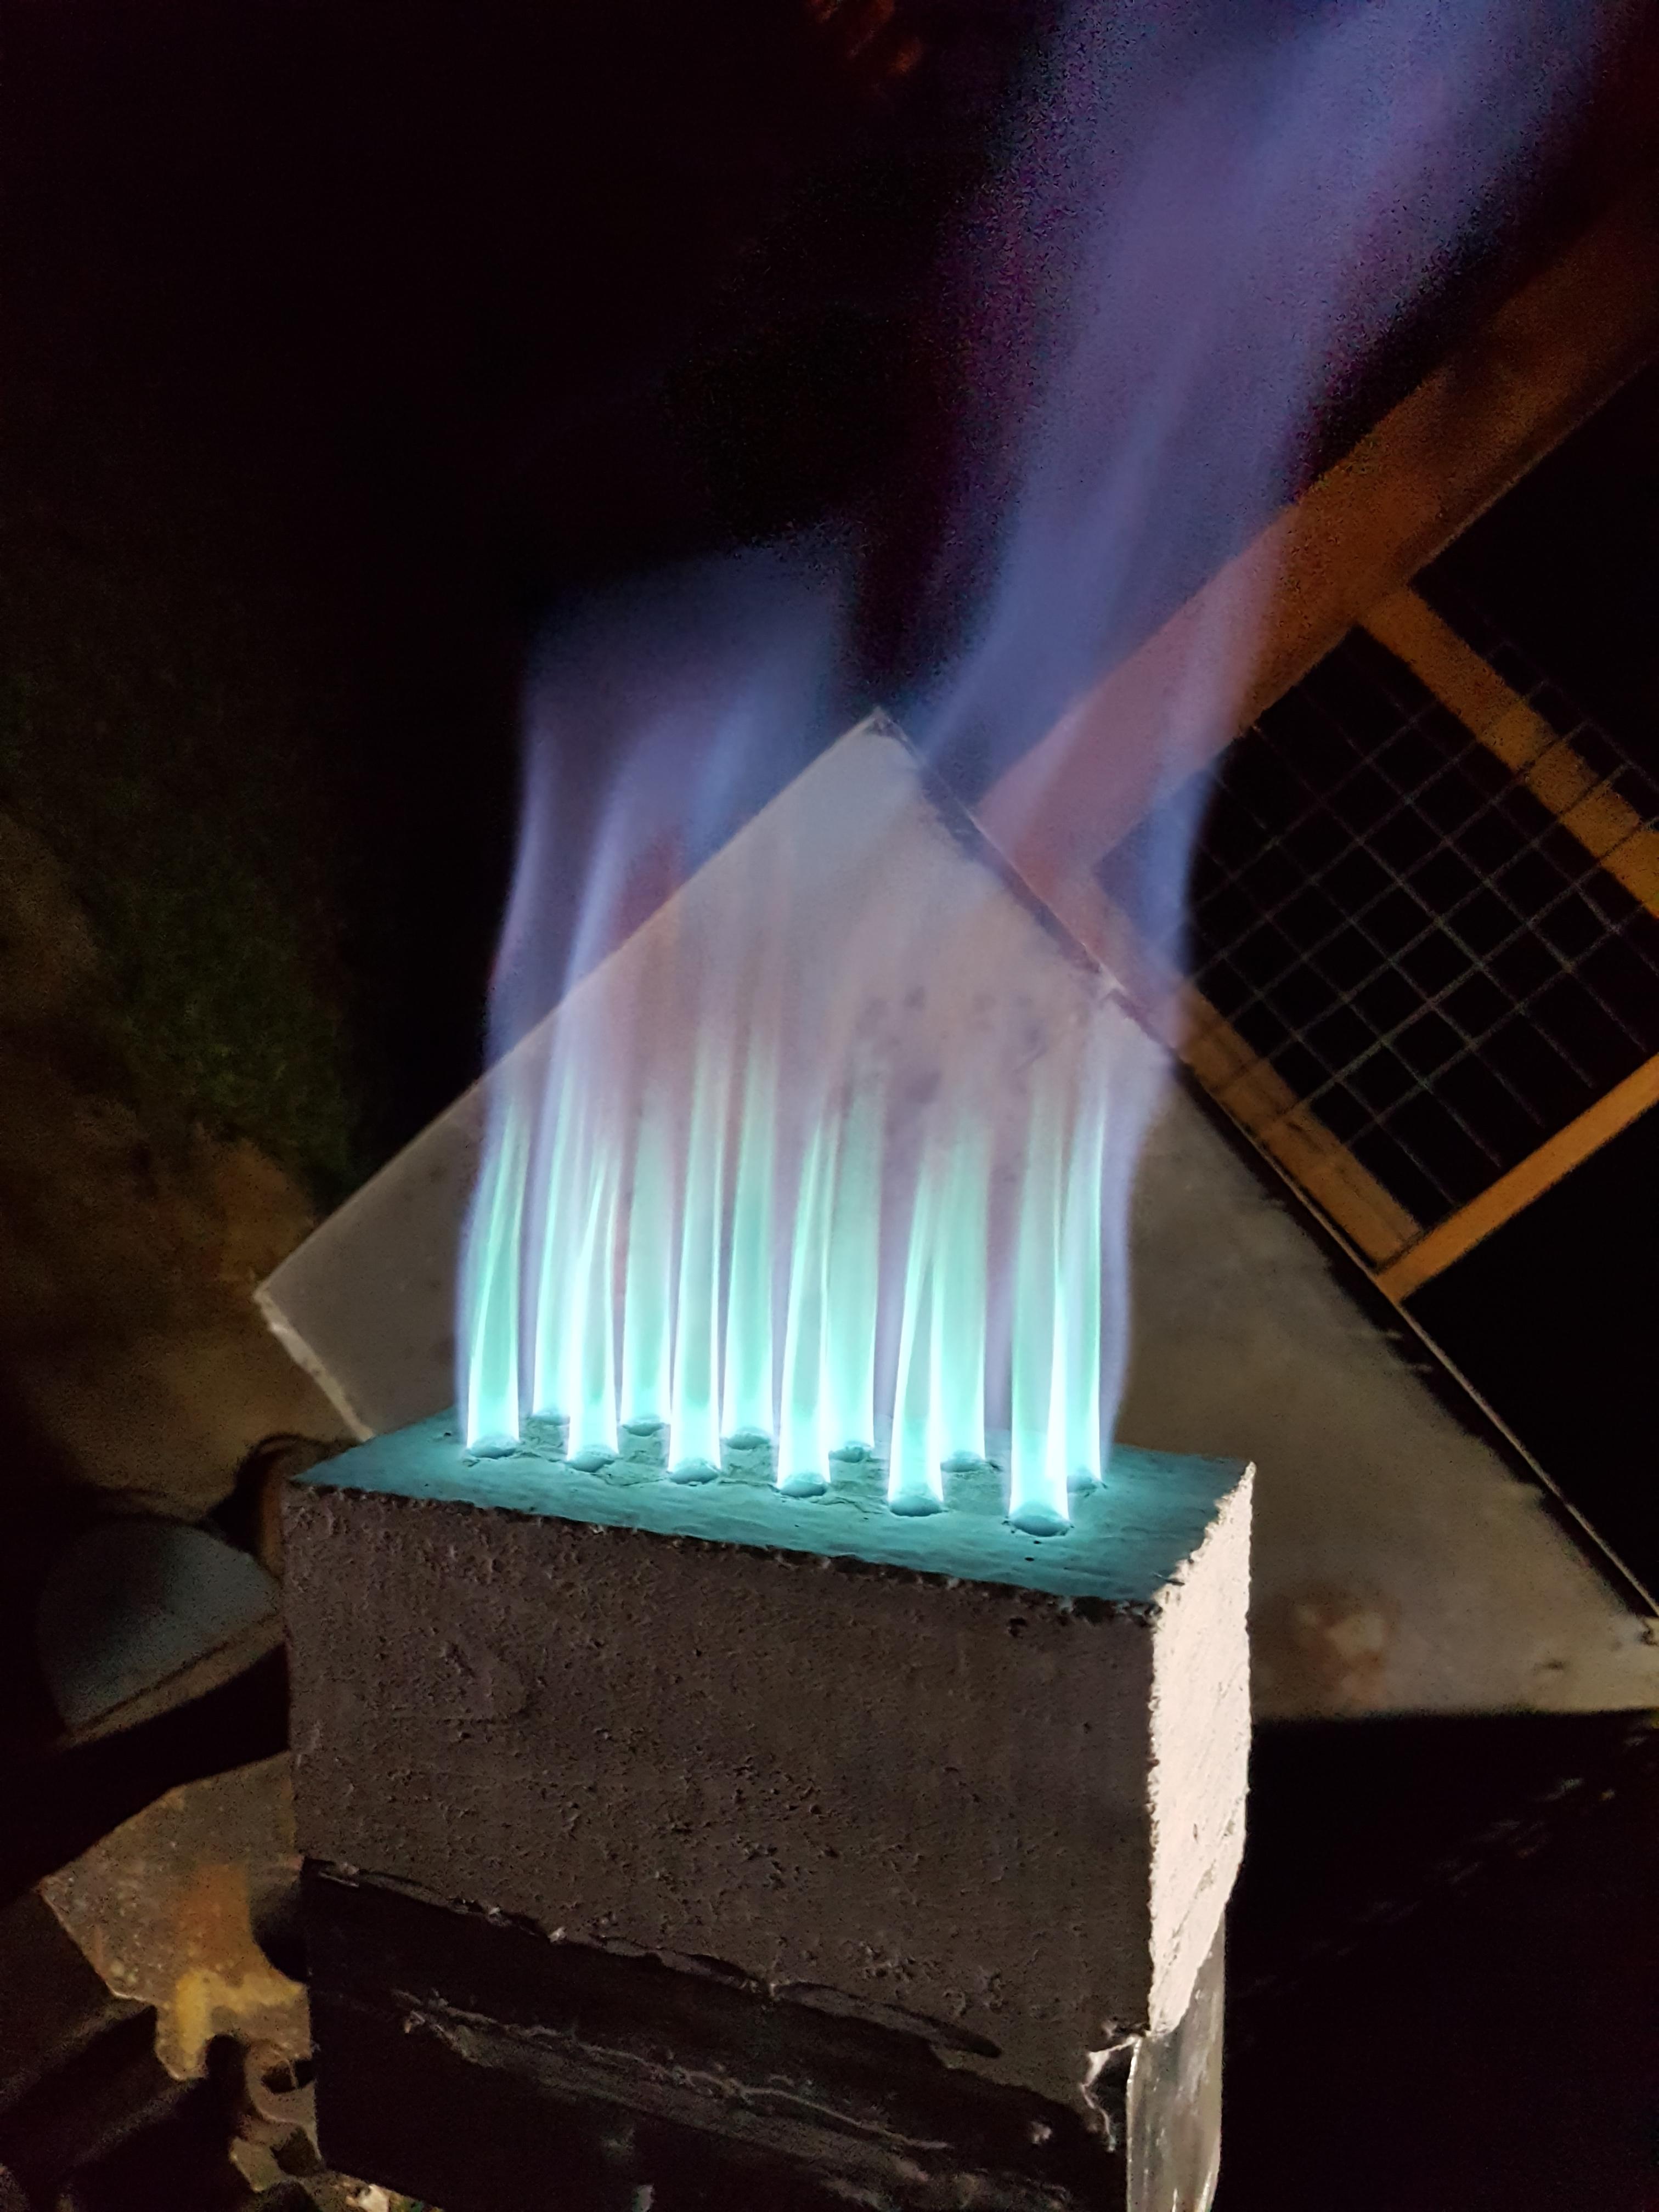
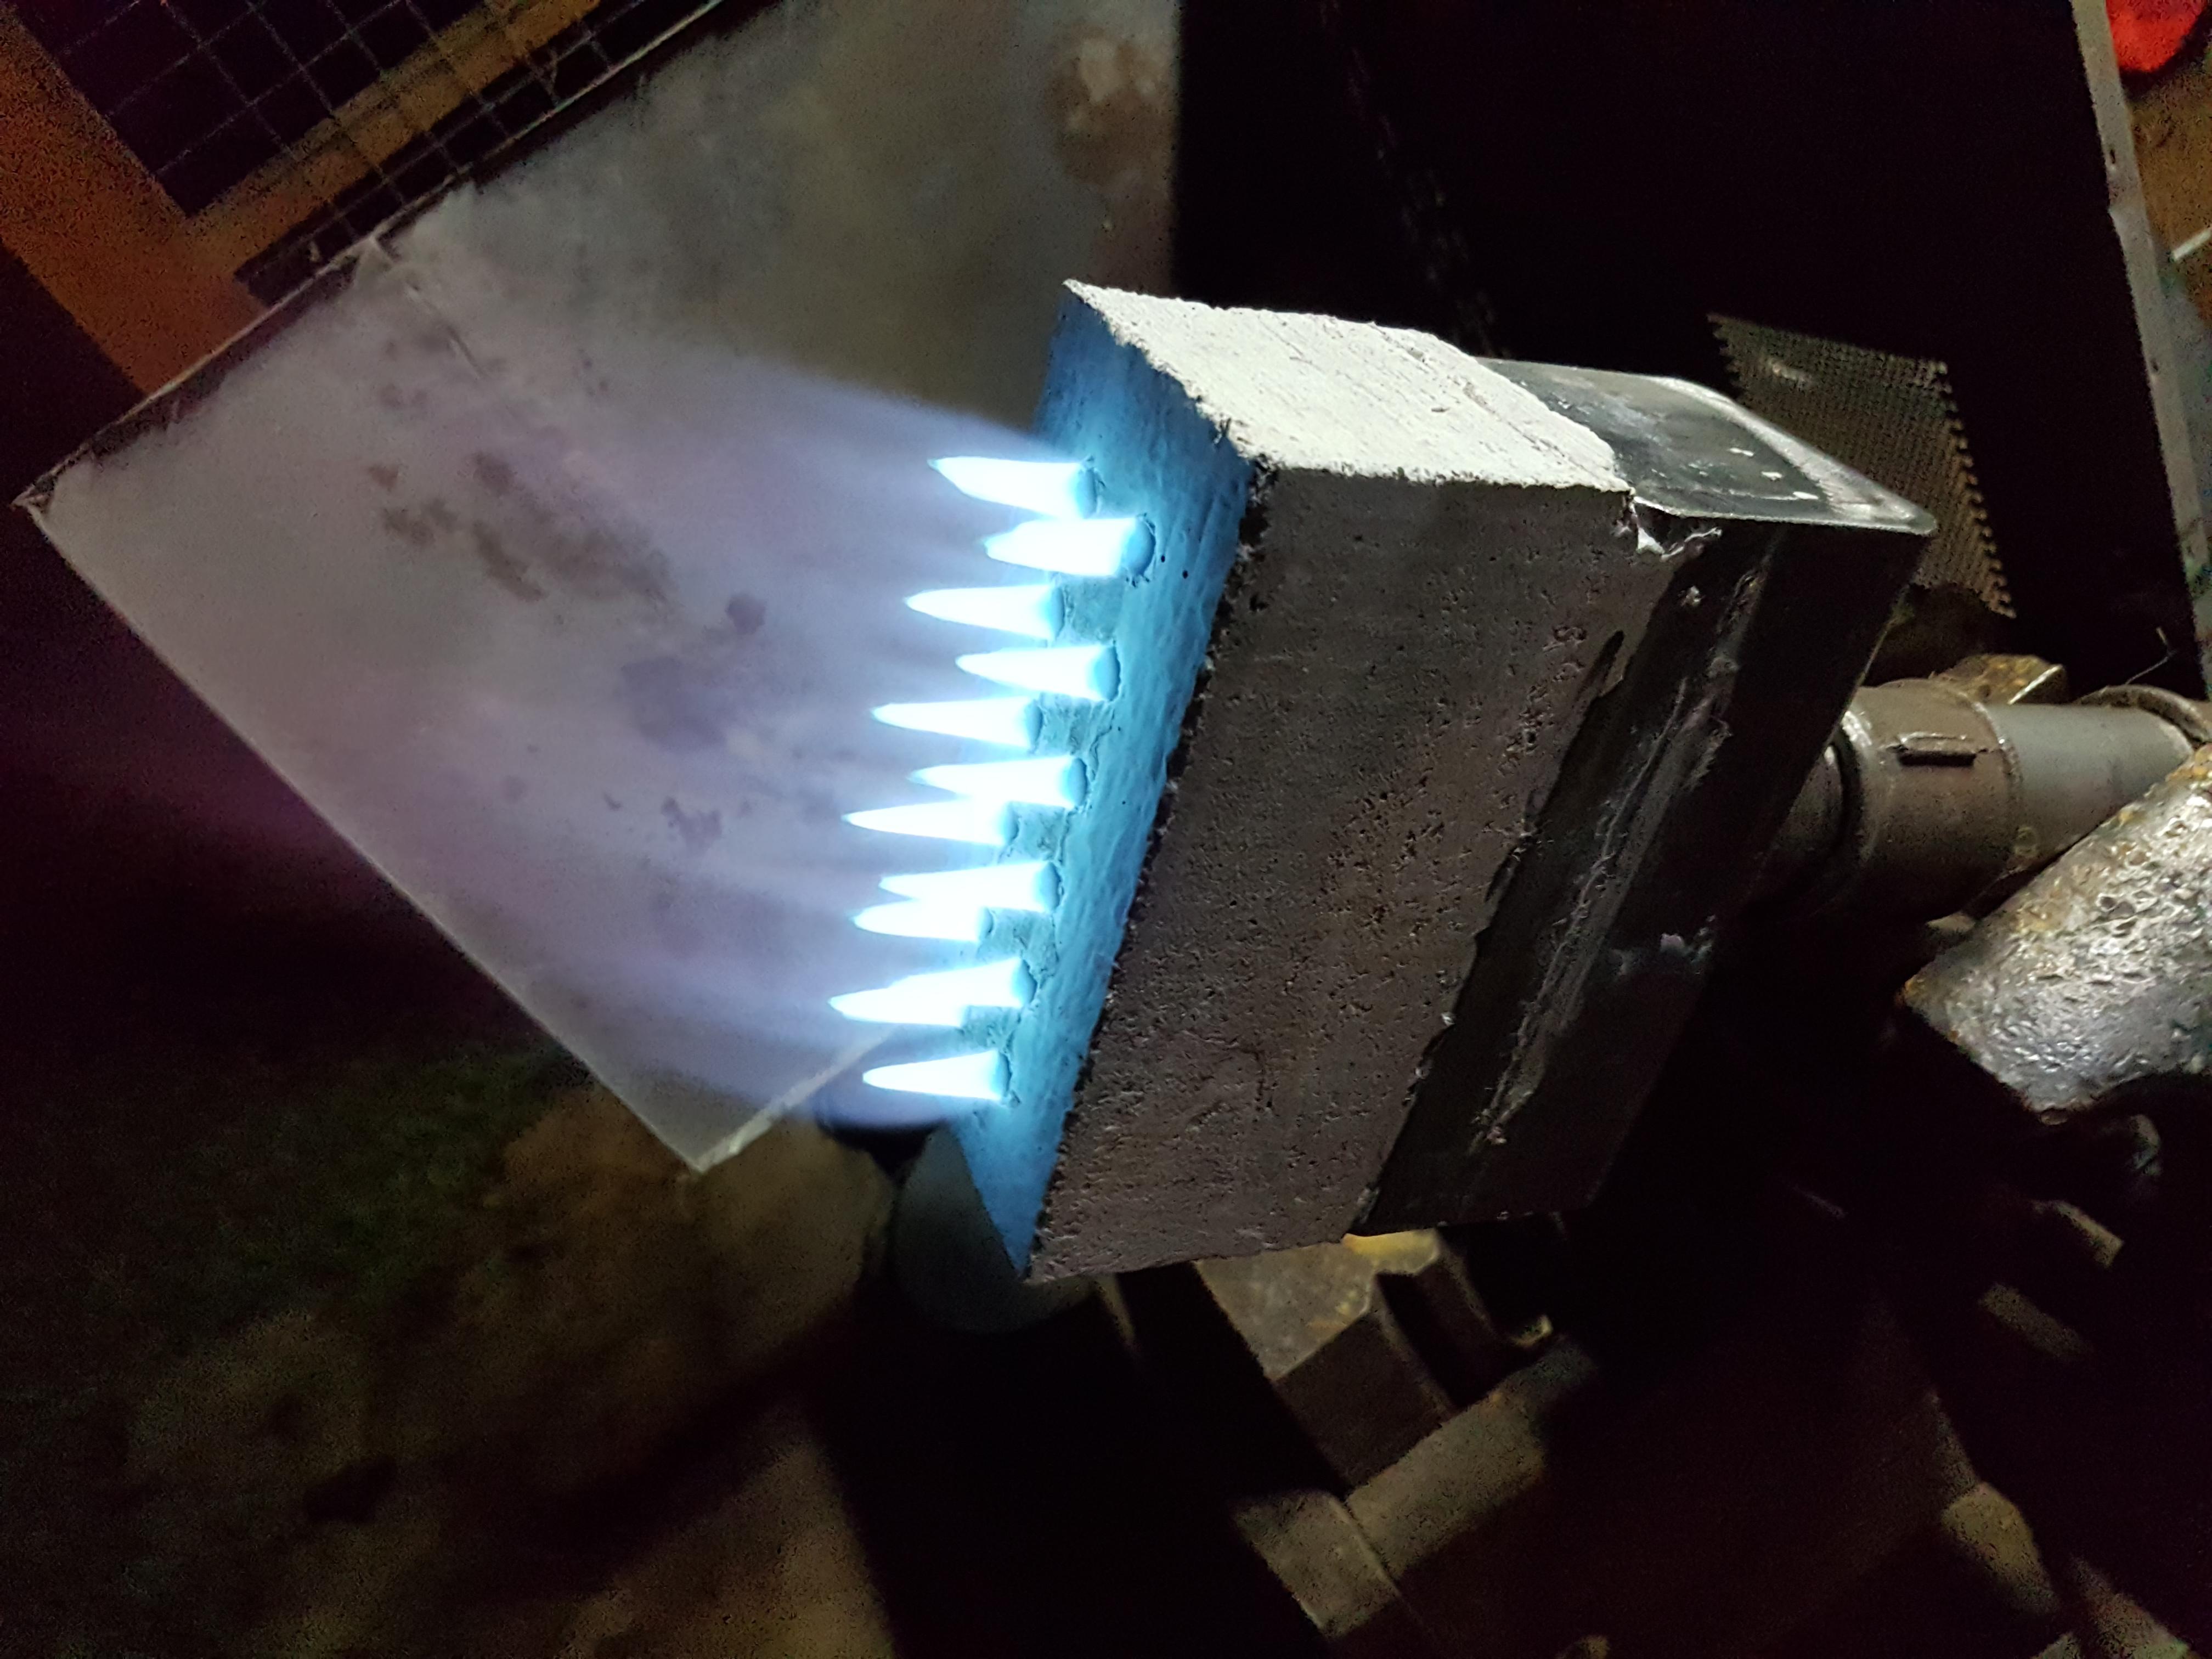
Thanks for your answers so far! Its a burner with a 600m3/h blower, speed controlled and with a ball valve for fine tuning the air. The burner comes in from the top of the forge. The burner ports are 8mm in diameter, formed by plastic straws. The inside was nearly like a mirror when i pulled them out of the block after casting. The material of the block is a medium desity refractory with stainless steel needles inside to act as reinforcement, rated for 1400 °C Any idea where I can find ITC100 in europe? Pottery stores got some kiln wash but its never stated for which temperatures its rated.
-
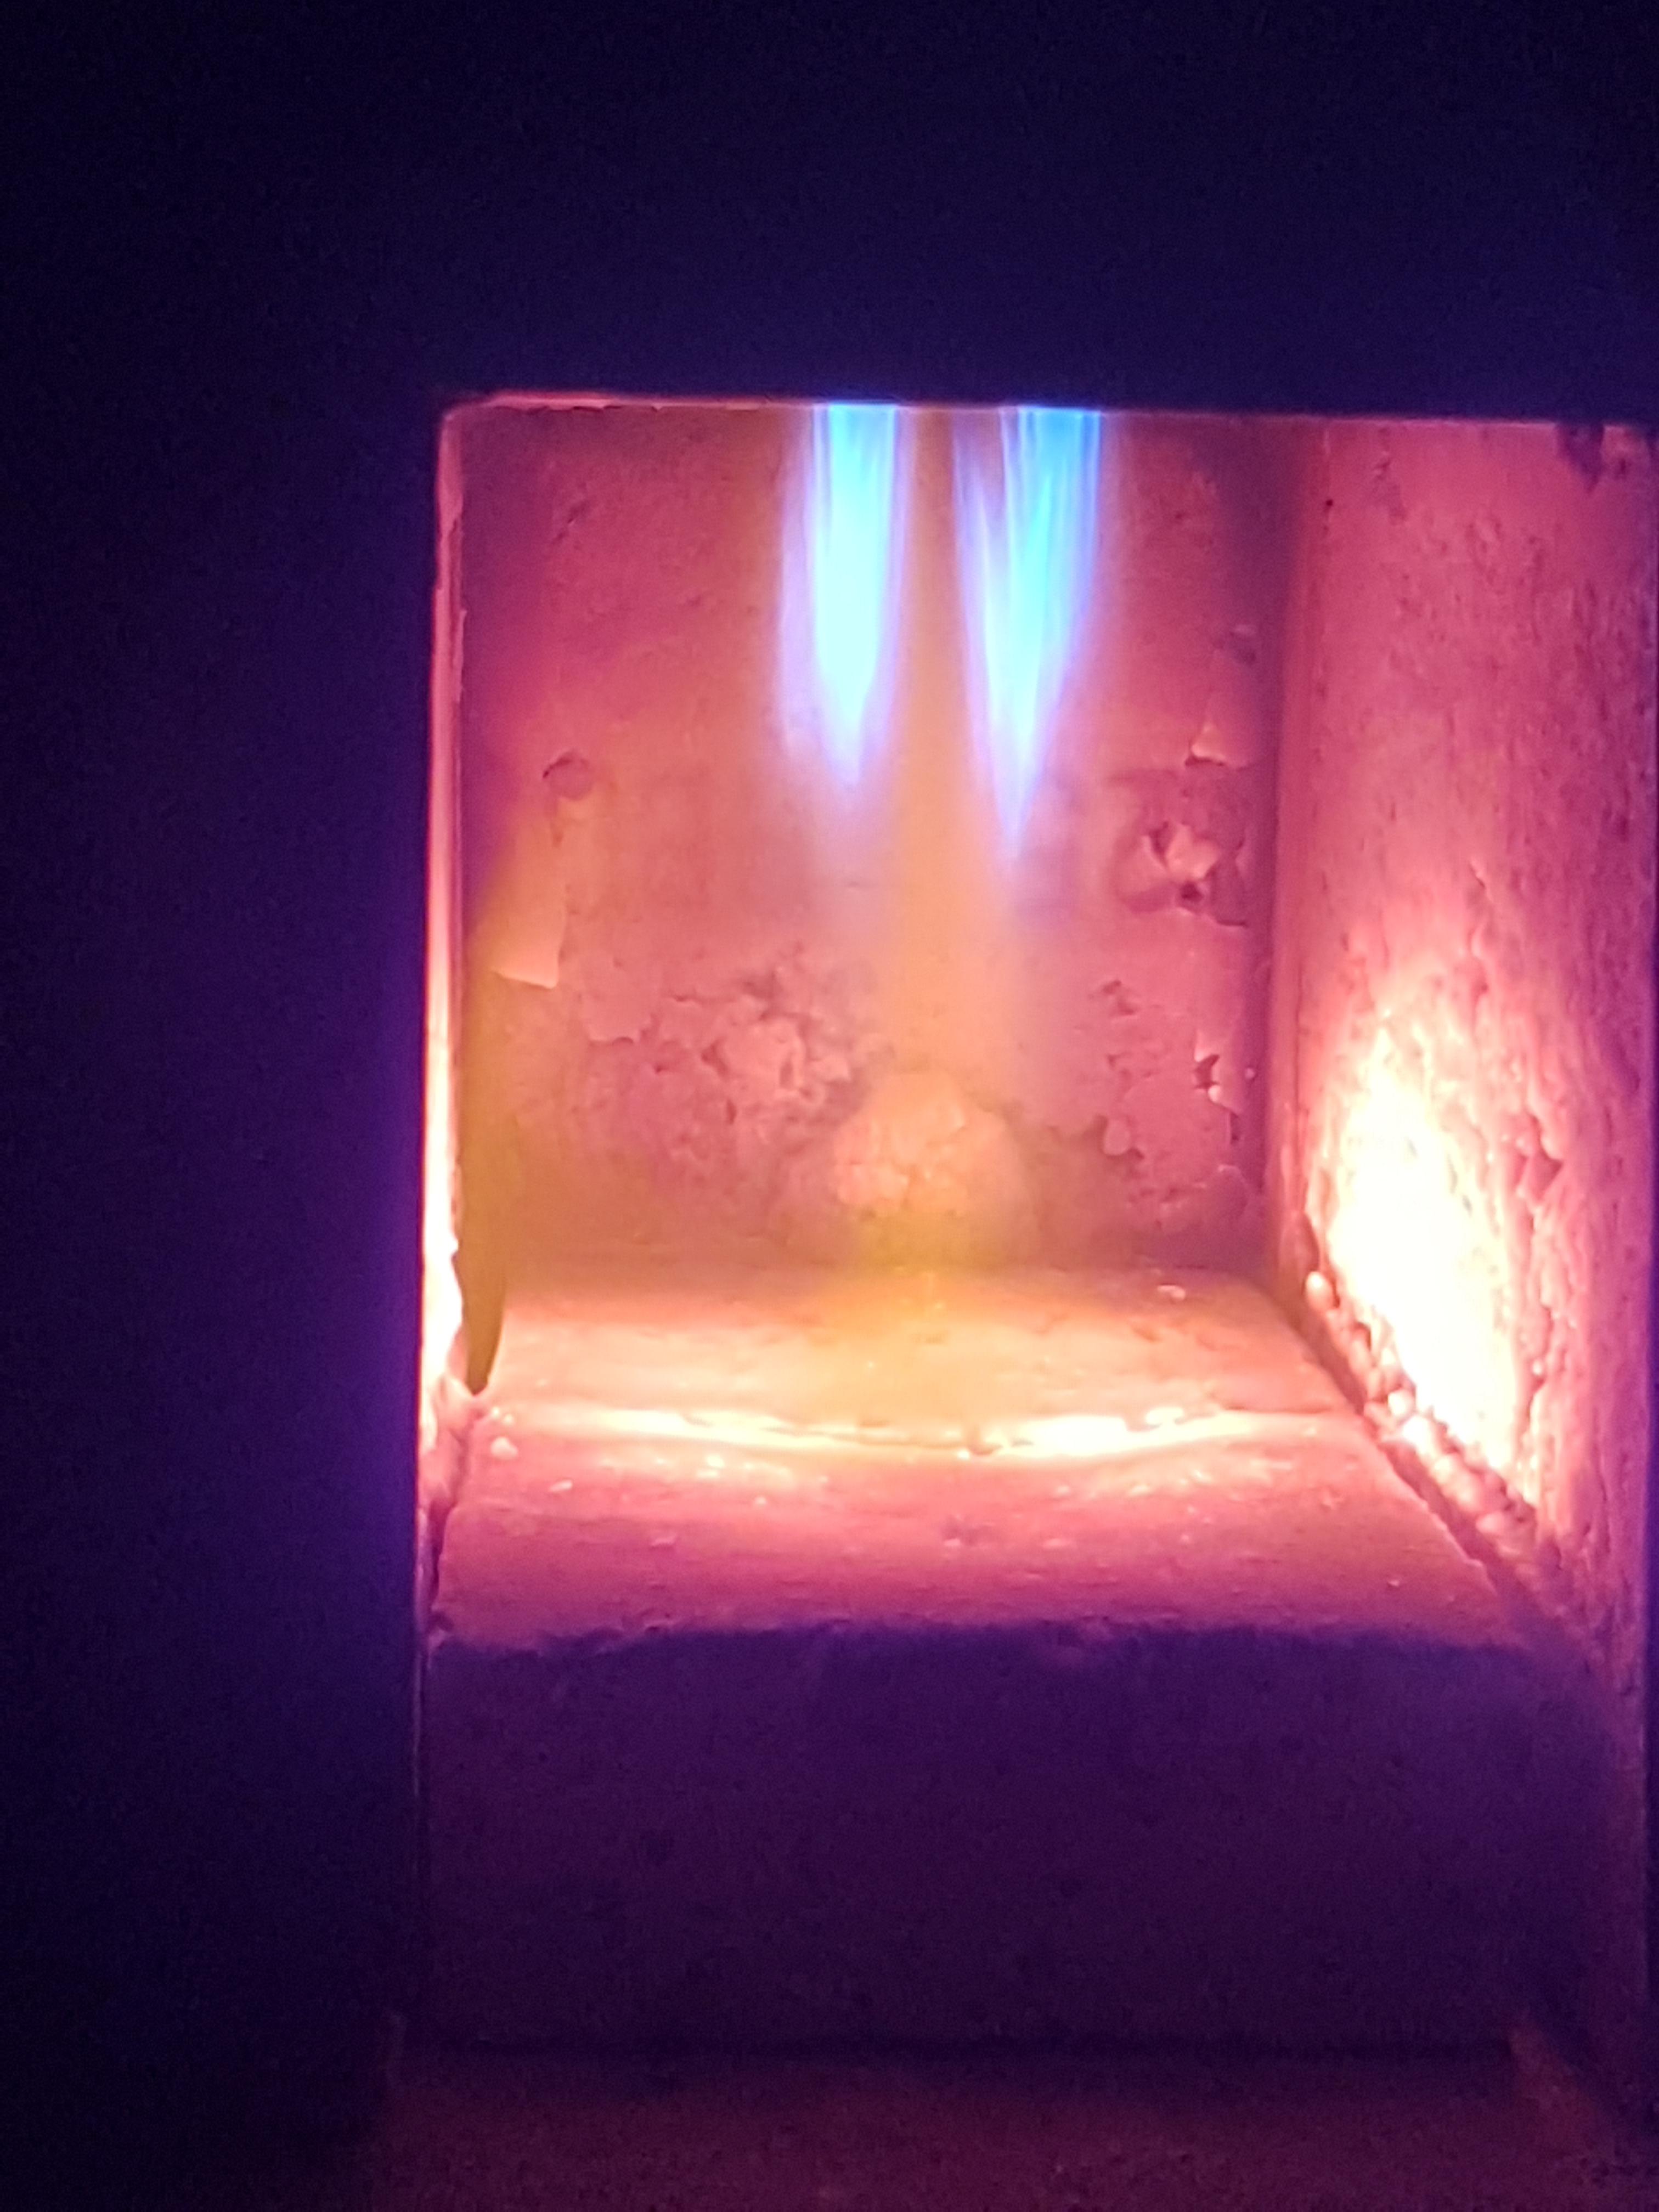
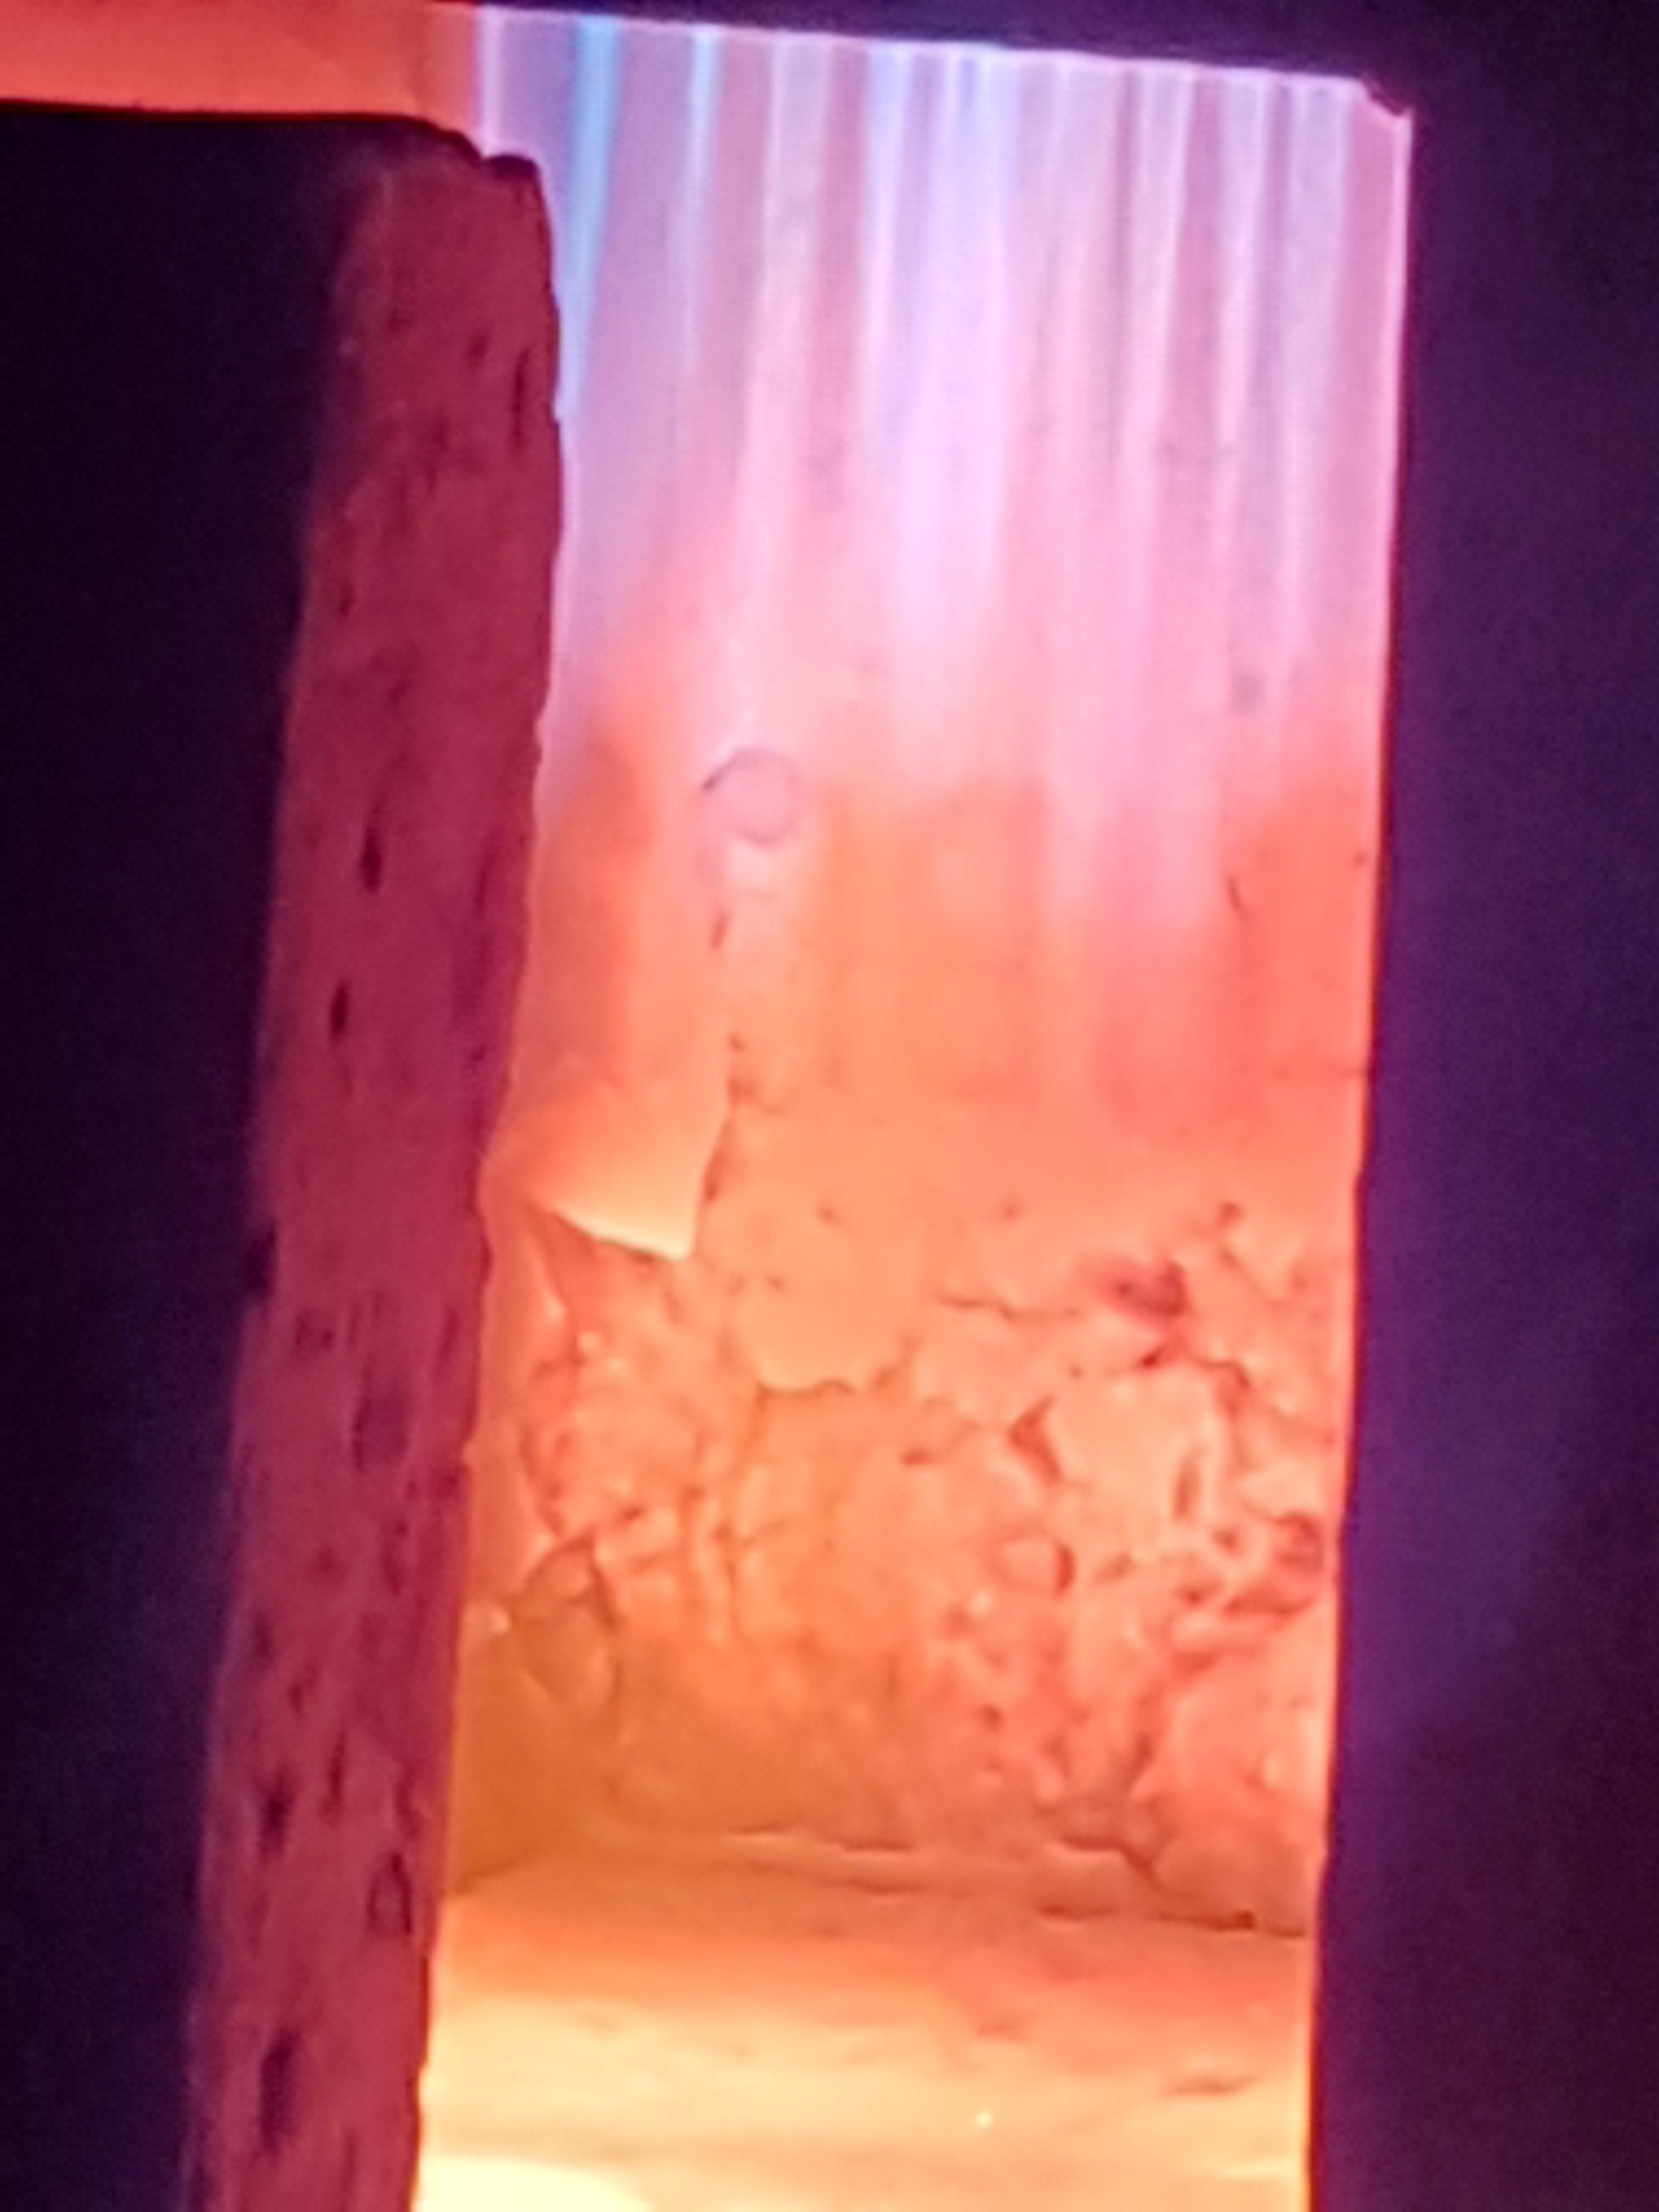
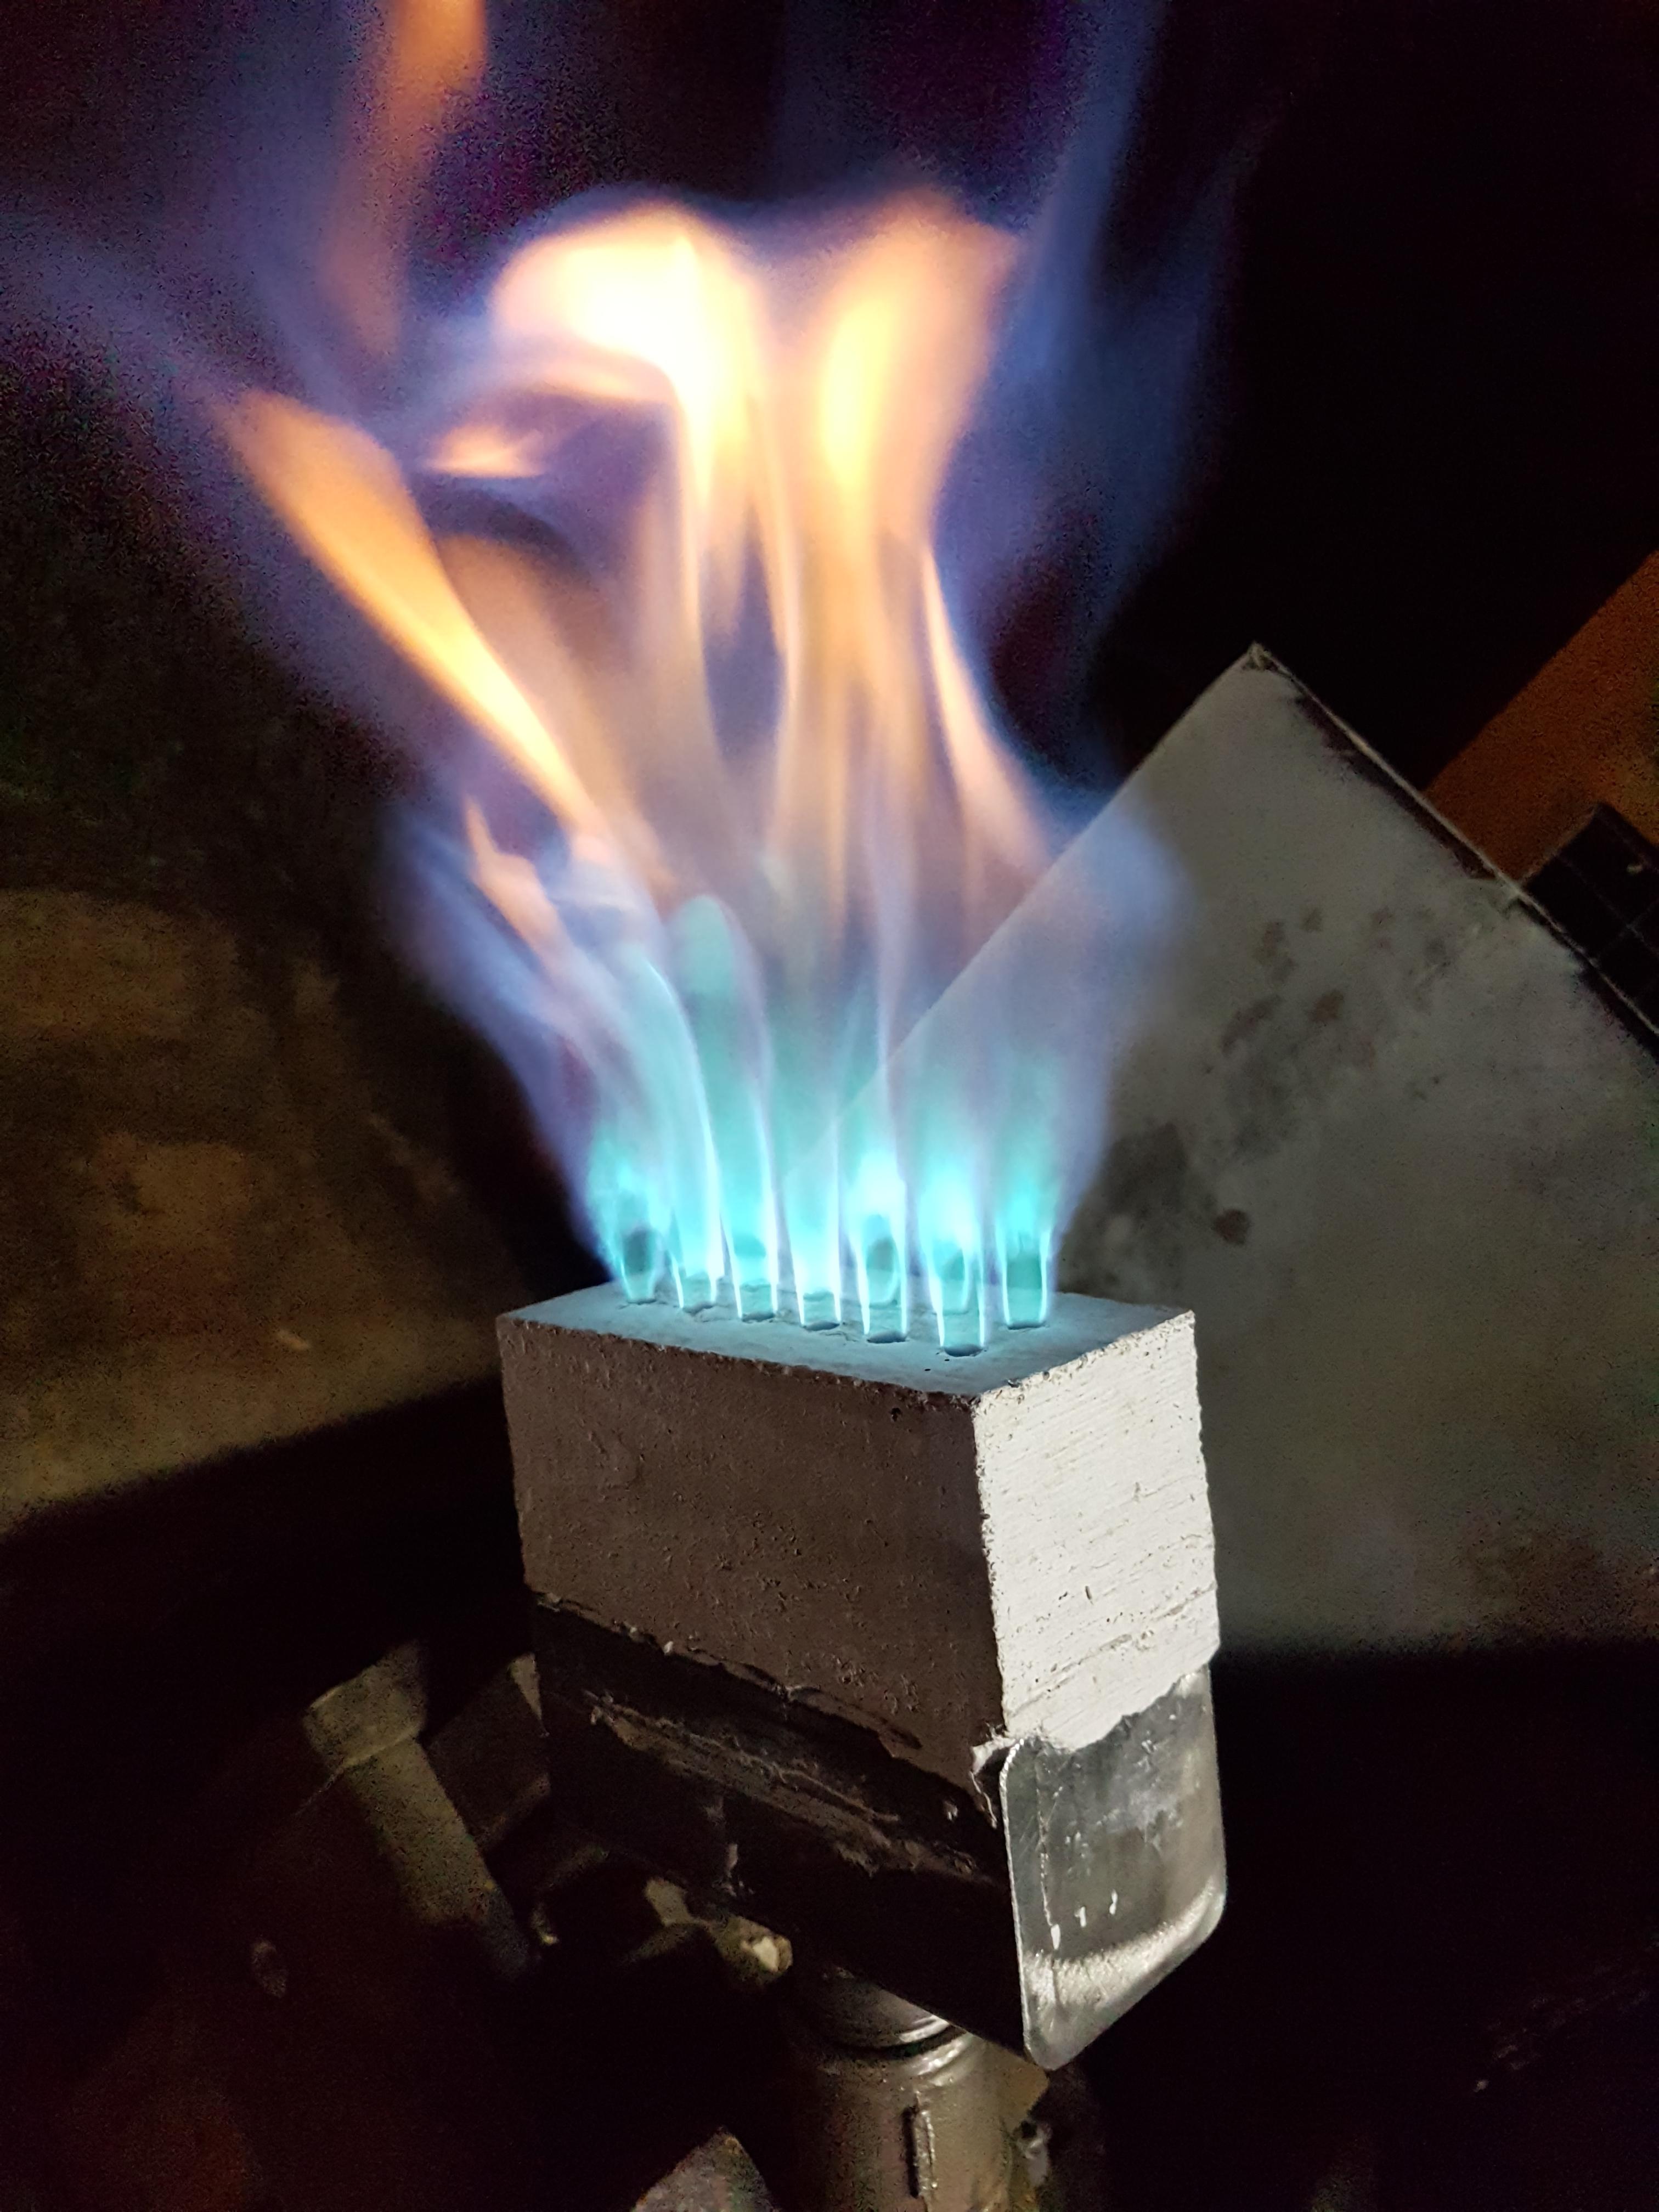
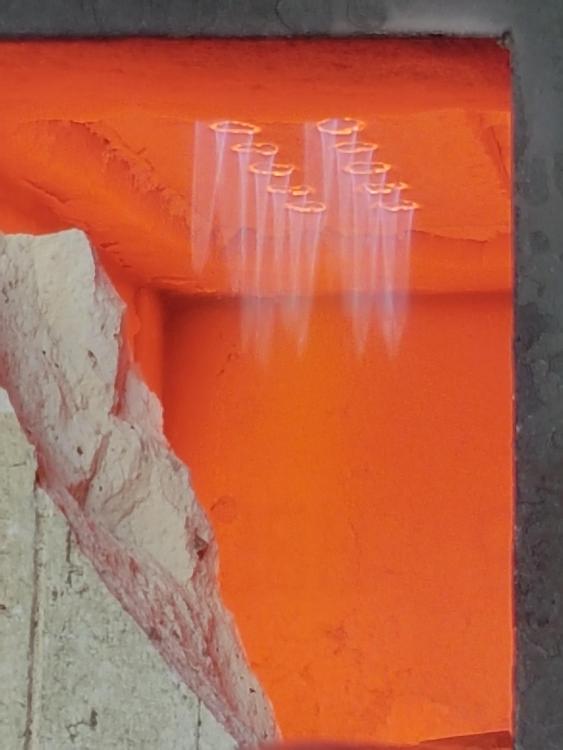
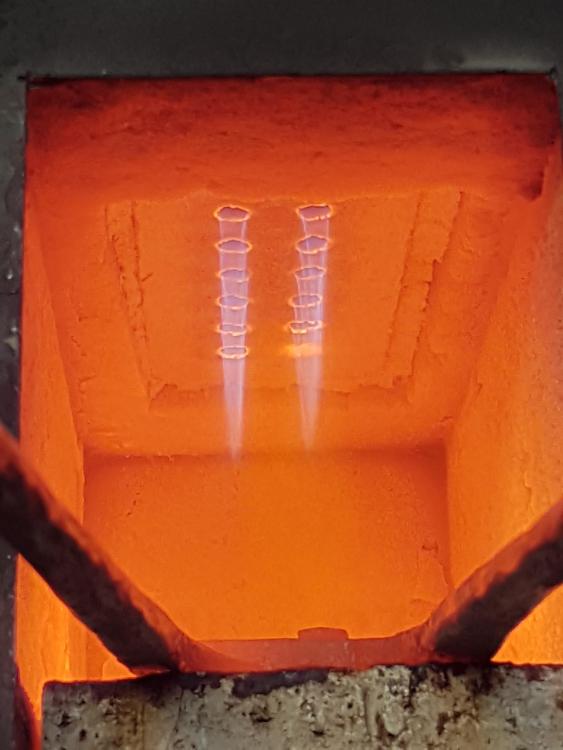
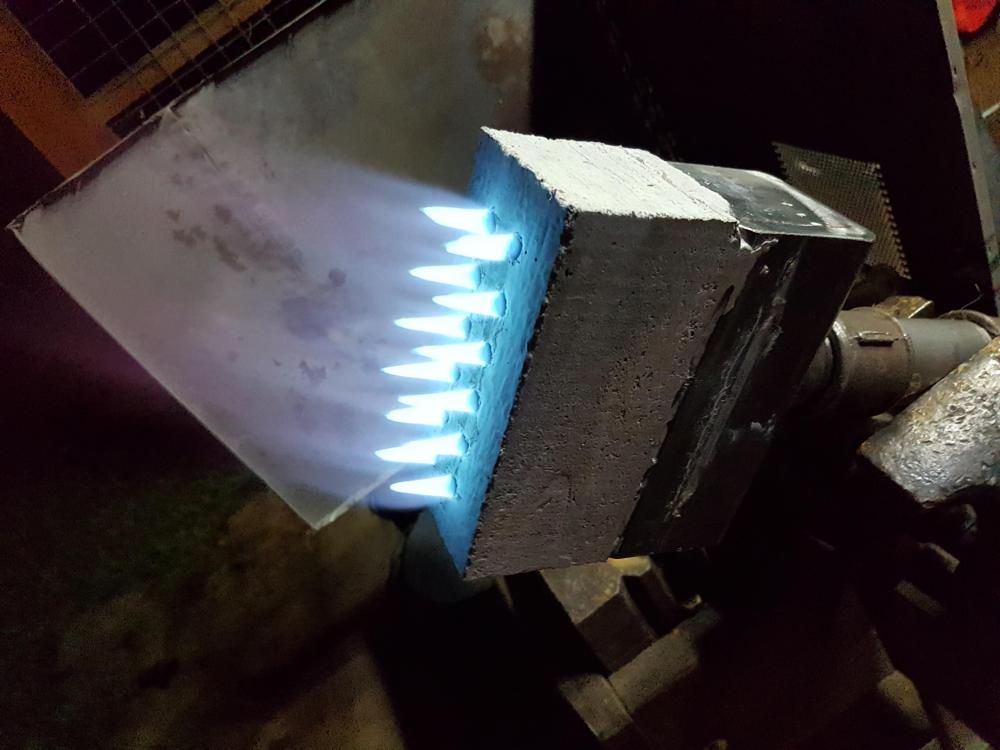
Hey forum, My first ribbon burner forge gone through some action the last weeks. I experienced backfiring of the burner for the first time and it scared the heck out of me. I ran the burner between 0 and 0.1 bar of propane. After the backfiring I experimented a little bit and found that the burner wont backfire if I dont use below 0.2 bar of pressure for several houres of forging. I noticed that the outlet ports in the burner block starts glowing right at the face after some time (see picture 1). After about 3 to 4 houres of forging at 0.2 bar I noticed that the a single flame burned inside of one burner port. (Picture 2, right side, last port). In fear of backfire I shut off the gas. Is there anything I can do to prevent the flame from burning inside of the single port? Is it even a problem? I want to run the forge at a craft faire and backfiring wouldnt be that nice for the audience I think. Thanks in advance!
-
I installed the burner in my forge today. The forge is probably too small for the burner but it worked out very nice. I started slow on the air and gas mix and cranked it up further as the forge heats up. A bright yellowish, nearly white heat was no problem! I just need to get used to the tuning to reduce scaling a bit more. Thanks for all of the replies. You helped me very much. Tim
-
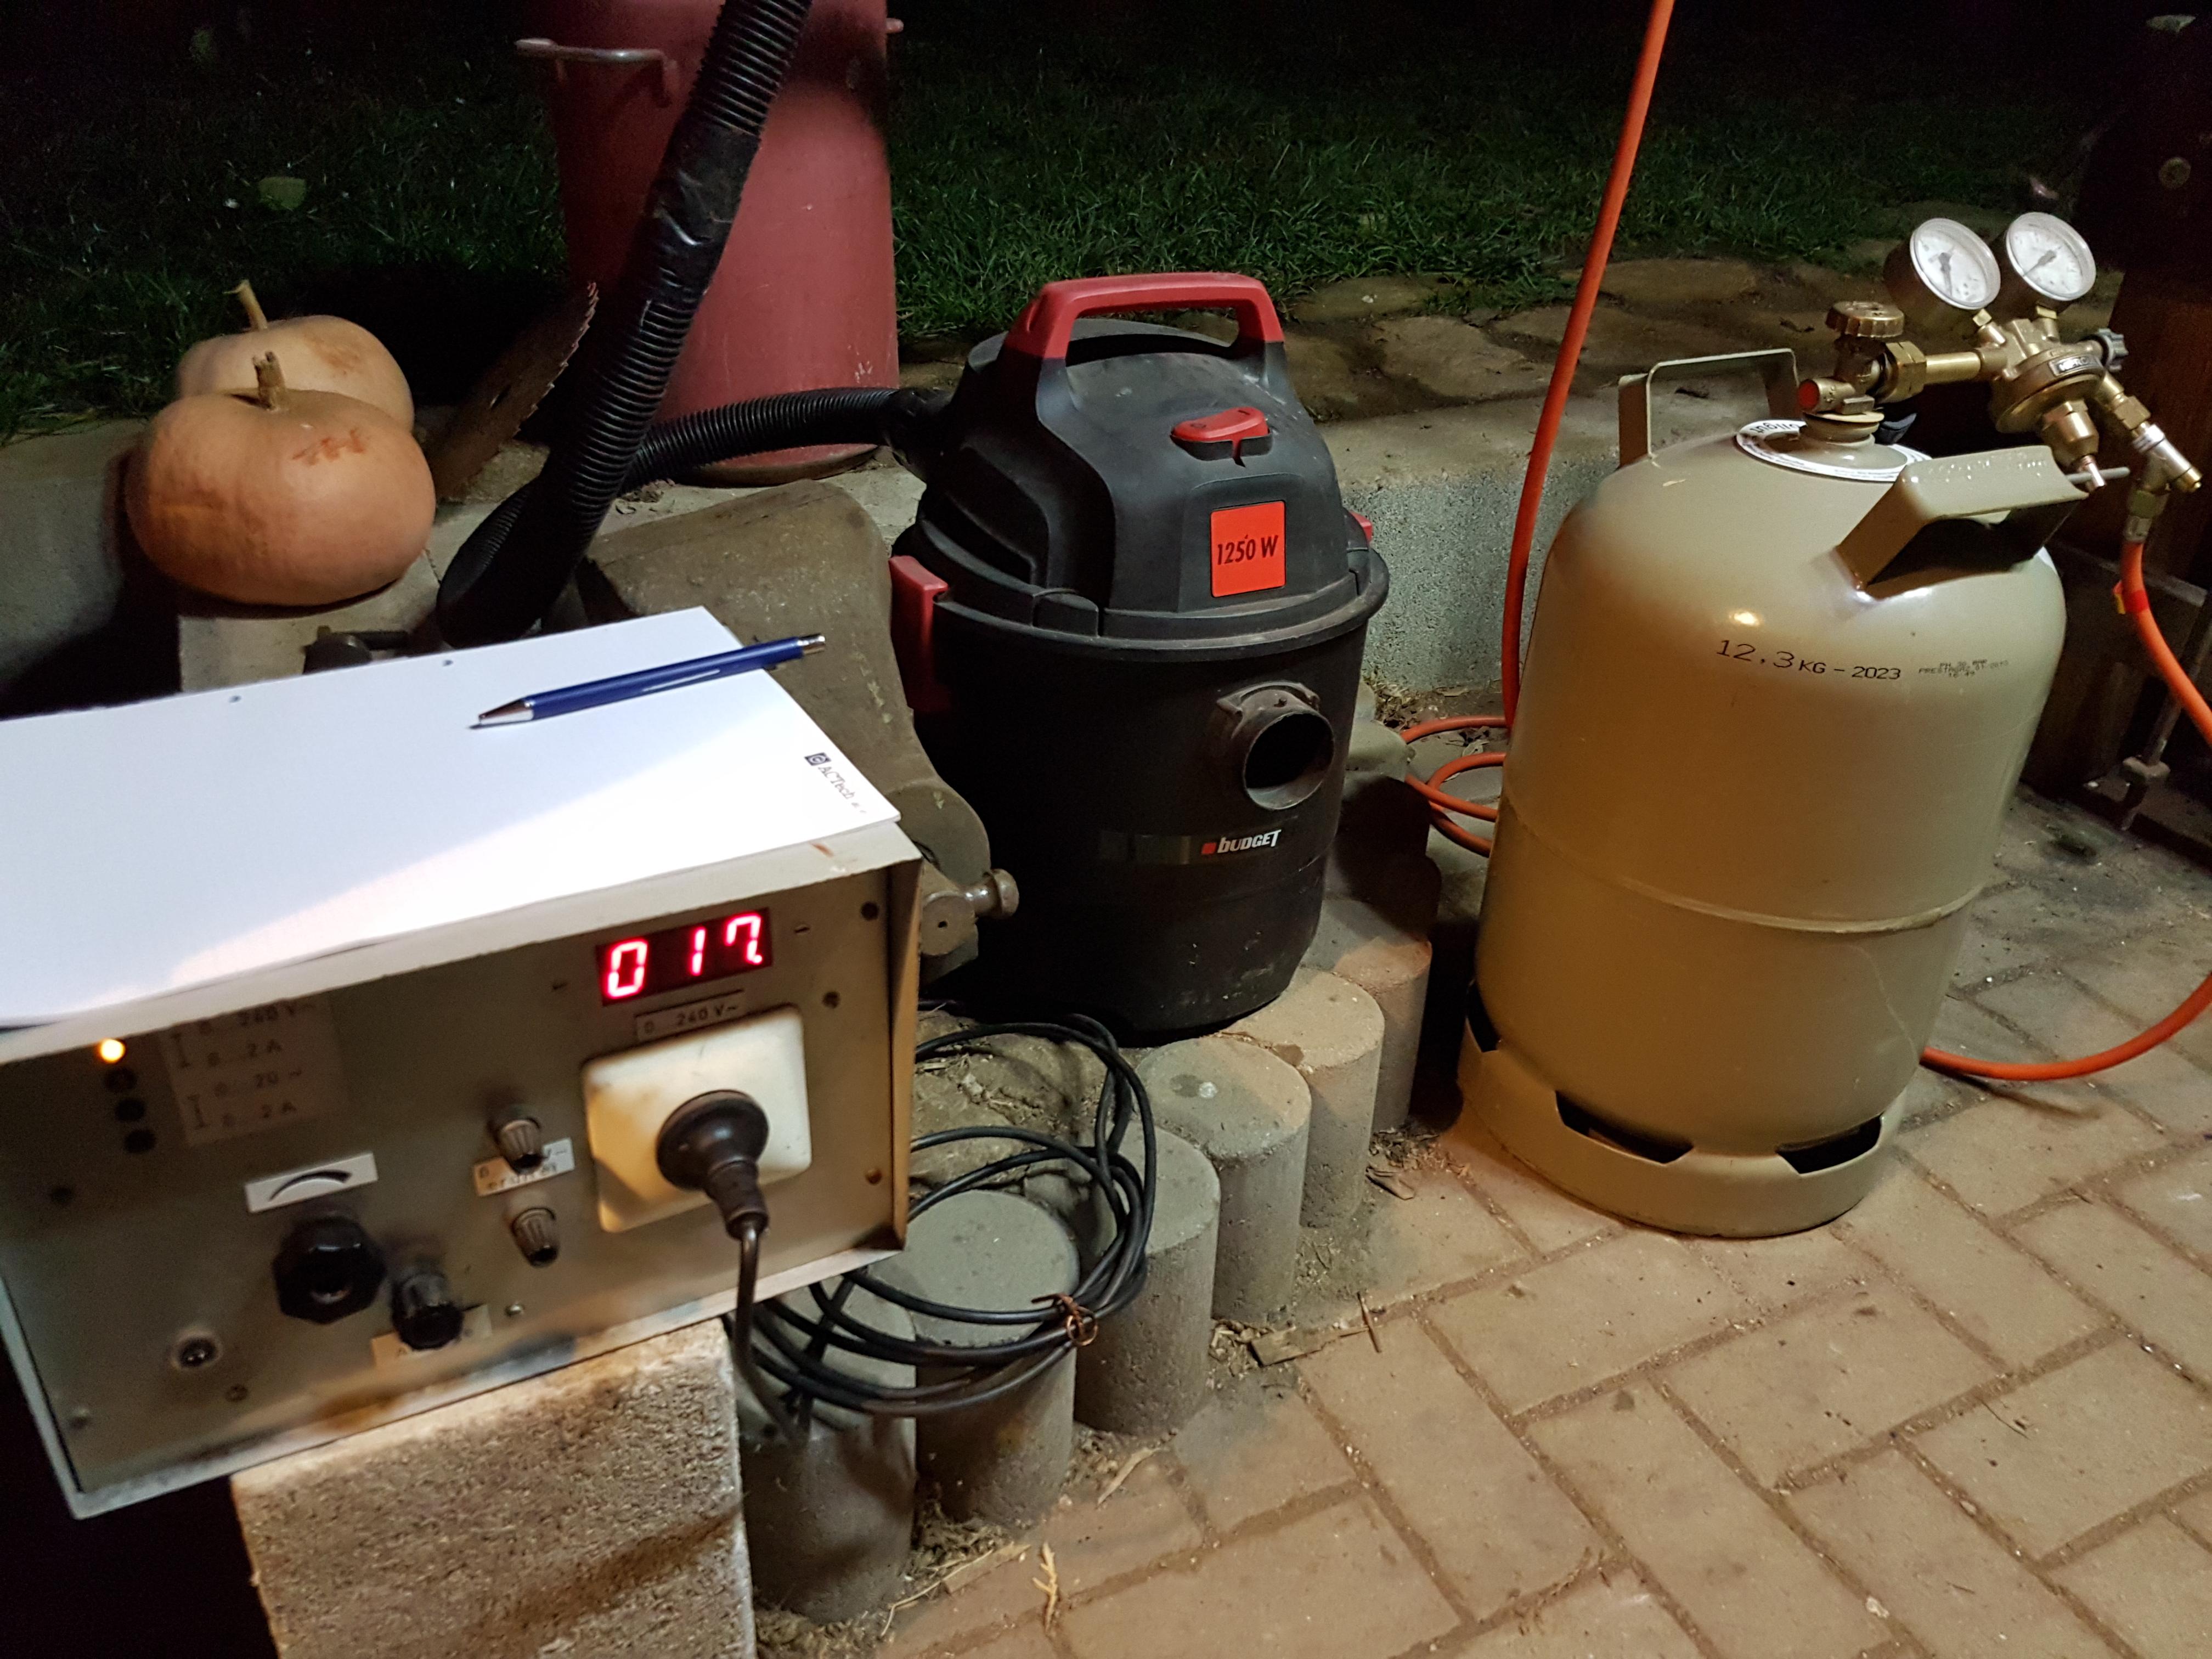
Thanks Frosty and Buzzkill for the input, I experimented with the burner todSee the picture below on my setup and my regulator. I think theres still a needle valve on the regulator. The blower is regulated by a power supply unit. I turned on the blower and tuned the burner to a bright and rich flame. Then I slowly reduced the gasflow. I just adjusted the gas, not the air. I tried this procedure with several air/gas configurations. But it seems that the flames wont stay near to the burner head, if I turn the blower up more to some point. See below the pictures of the blower configuration which will just hold the flames near the burner head. From there I turned down the gas to a point, where I cant turn it down anymore without the flames dieing. The flames are burning stable and quiet but are fairly small. I really dont think they can bring a forge to welding temps. So what are you thinking about this? Tim


-
So I think you just pointed out the problem here. My gas inlet is a copper tube soldered into a fitting. I drilled 3 1.5 mm holes in the tube. I think this is way too muchafter reading your thoughts.
-
Thanks Buzzkill! Dumb me didnt built in a baffle plate. I thought for such a small plenum it would be alright. I dont think i can get one in now without casting a new burner block. So how bad is this for the burner performance? Problem is my regulator is to rough. It shows 0 bar and i can still turn it down. But i dont know how much gas is going through. I will get a new one. I will test some more gas/air combinations tomorrow.
-
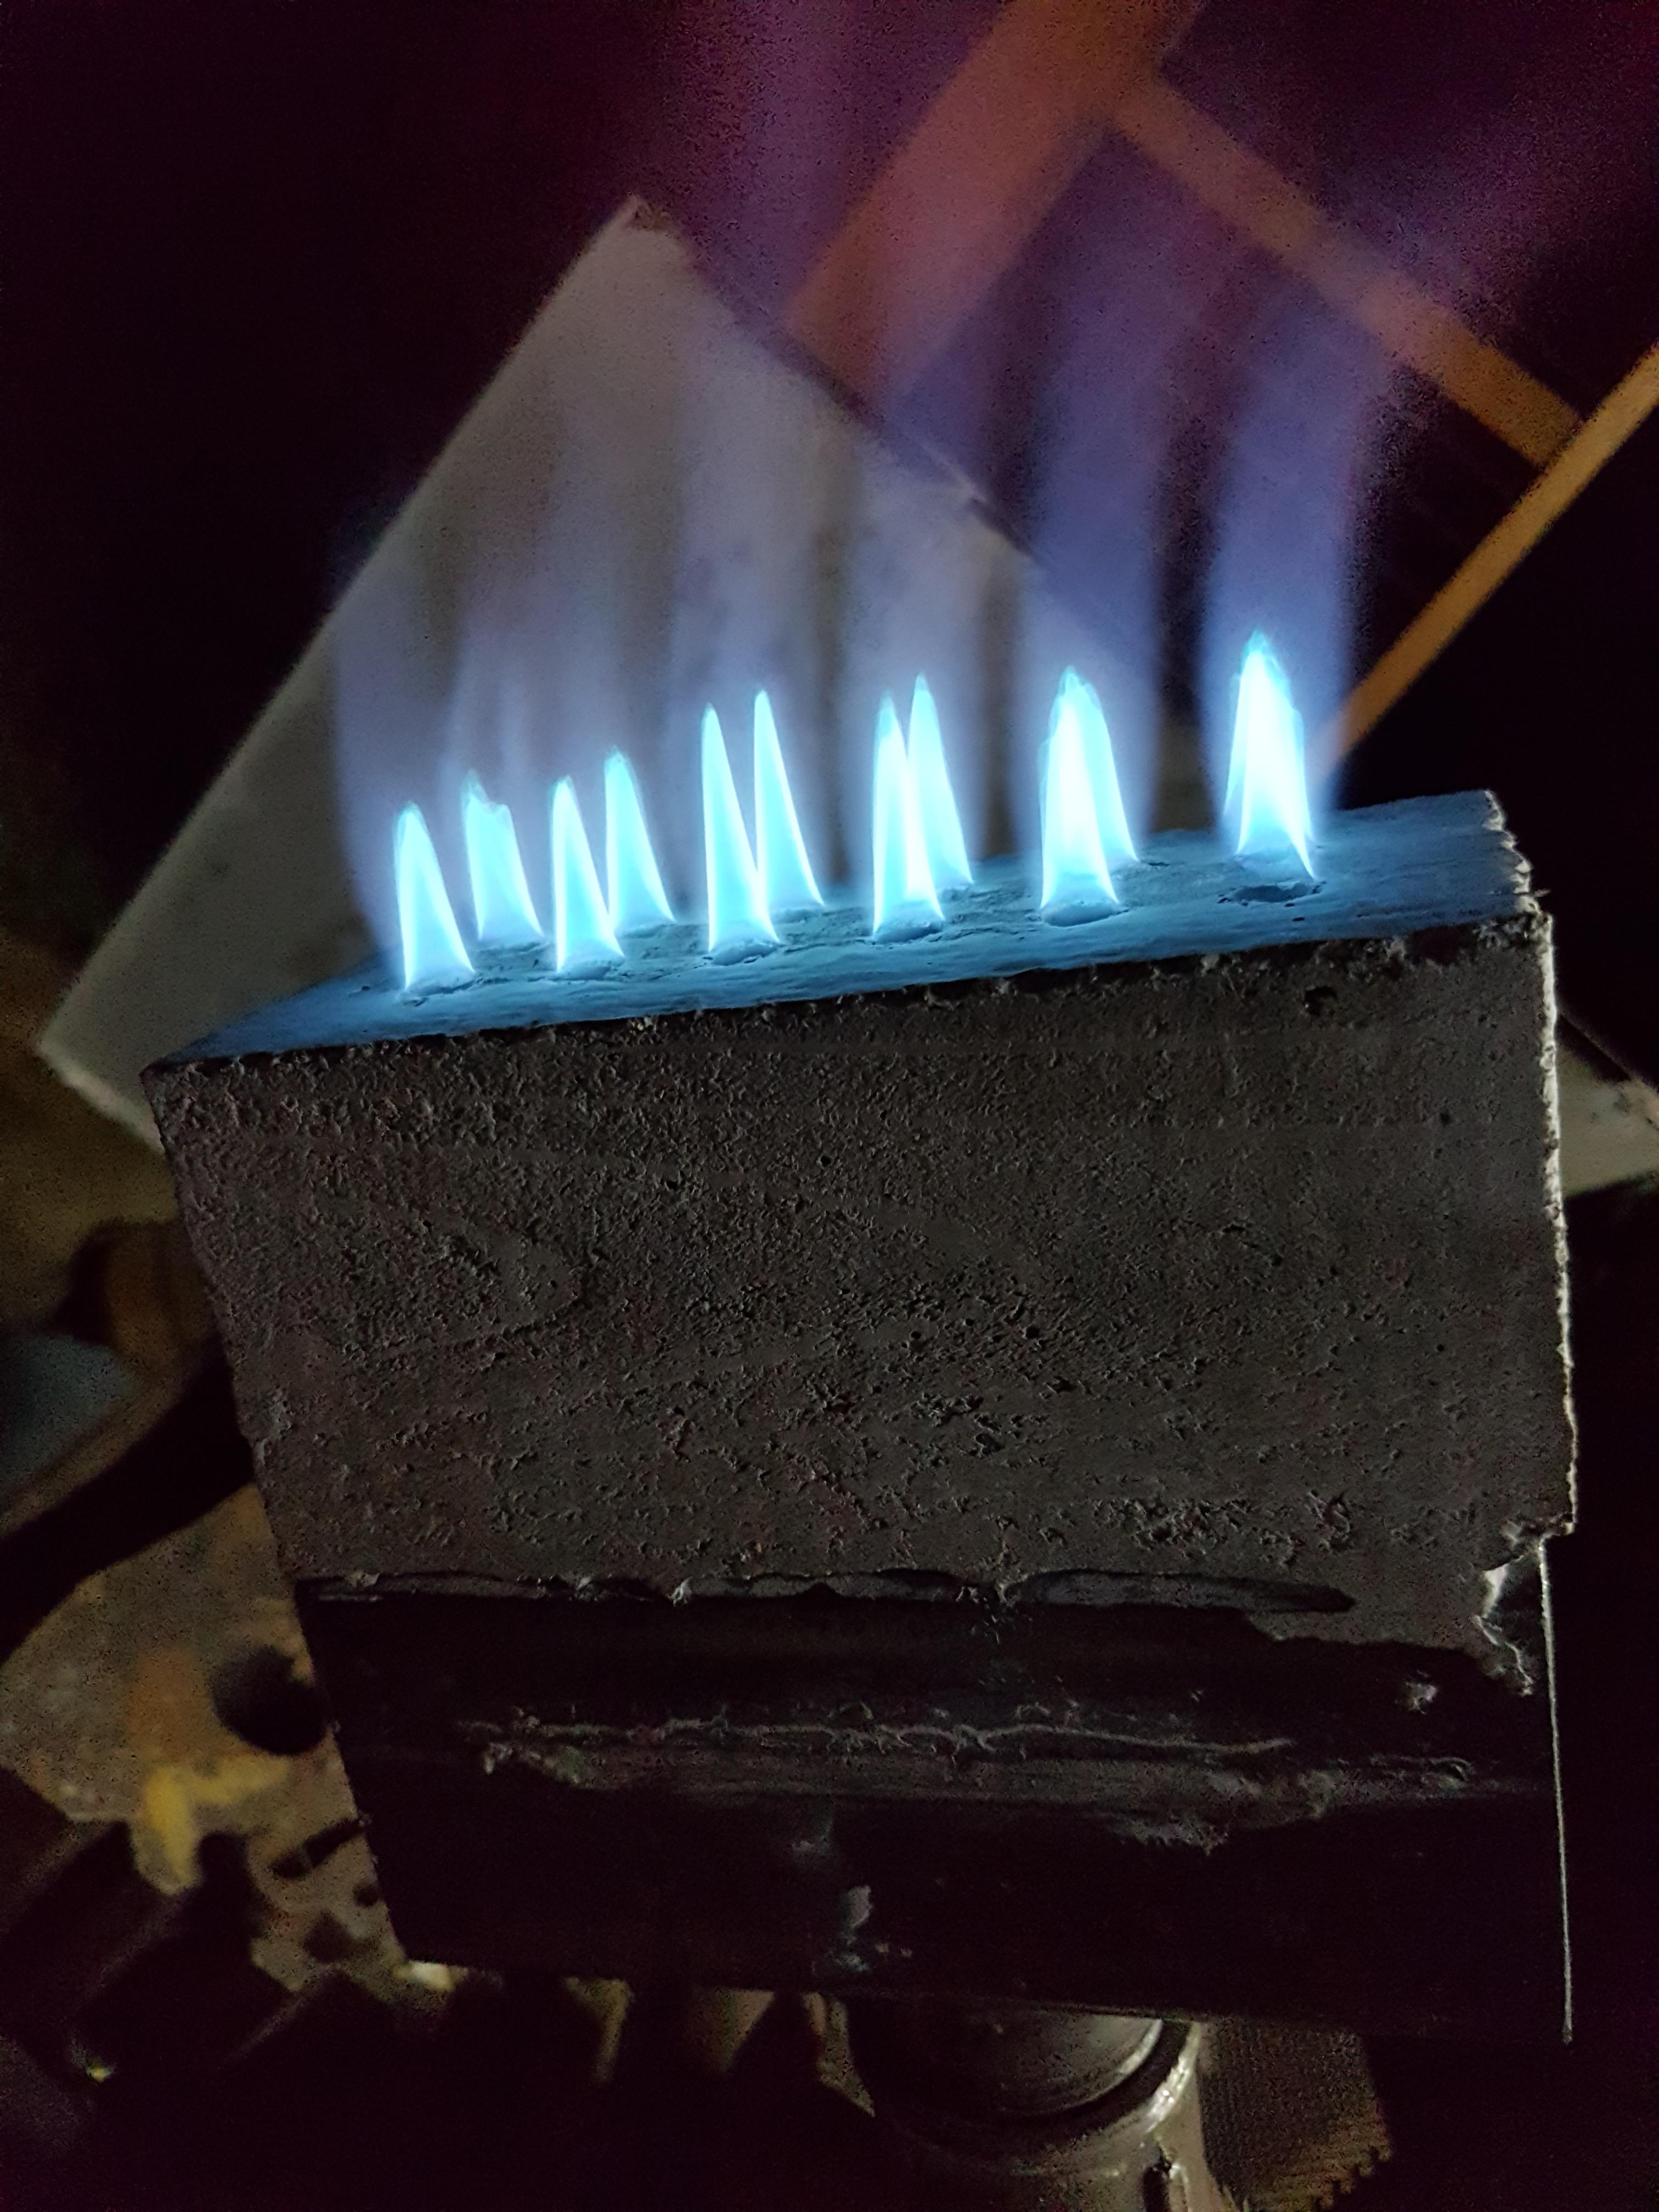
20191121_180550.mp4 Hey folks, See attatched some footage of my homemade ribbon burner. Iam a bit concerned about the flame being so far away from the burner block. The burner is also very loud. Is there anything I can improve? Did I do something wrong? 20191121_180550.mp4 20191121_180550.mp4 Thanks Tim
-
Hey guys, I am looking forward to buy a 16 kg airhammer, similar to the "Anyang 33". One big questionmark is the foundation of such a small hammer. I've read that the weight of the foundation should be around 50 x the hammerweight. So this would be 800 kg. Is this formula ok? I would pour the foundation with concrete with steel inside. I am working in the garden with neighbours all around the shop. I am a bit concerned about vibrations from the hammer. Is it adequat to isolate the concrete block with some rubber mats from the rest of the ground or should there be any other steps taken to avoid vibrations to be transferred into the ground? Tim
-
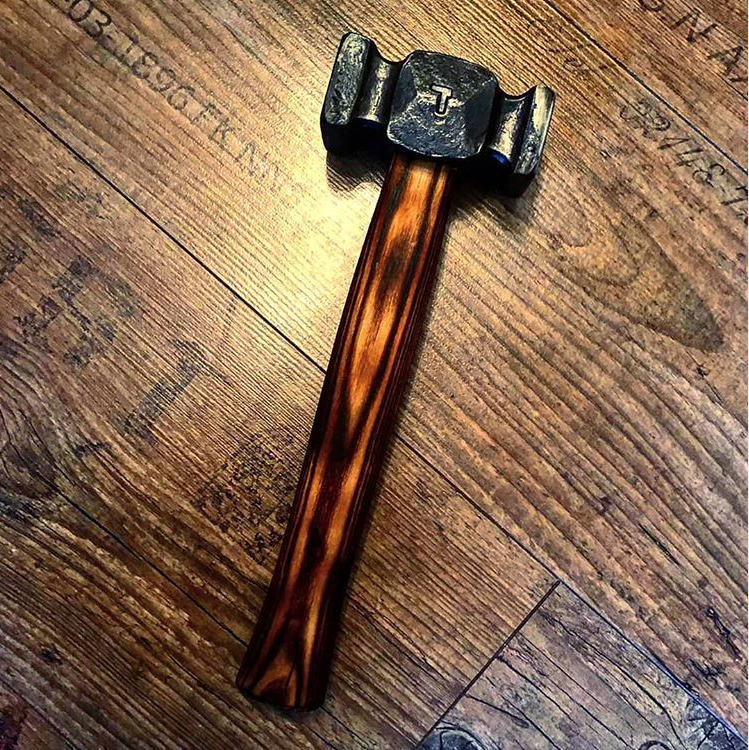
Alright guys, I successfully hardened 2 hammers I forged again. I followed the charts for material thicknes and heating time that I found and it worked just fine. I assume it was a thing of getting used to the different heating rate in my gas forge. The picture shows a hammer I made for my striker, He was in need of a good hammer at work for setting up machines Thanks again for your support!
-
Actually Iam here to to get my mistakes pointed out so Iam not upset at all. Frosty the Lucky I actually found a formula that says for a unalloyed steel the soaktime should be 5 minutes for every 10 mm diameter/width and 10 minutes if alloyed. Thank you Irondragon Forge & Clay. It was intended as a hammer for my striker. "@" tagging removed.
-
So I see what I messed up on the small part now. I hope the hammers will stop cracking if I get the soak time and heat management right. I guess all I can do is to forge more hammers and keep trying. Being on that learning curve is nice but also kinda depressing sometimes. Iam glad I singed up to this community.
-
Thank you Frosty. That totally makes sense with the contact and radiation heating. Should have known that. So I will look for those charts and adjust my heating time. All hammer heads were allowed to cool down in the shut down forge after I finished forging. But no normalisation cycles between several heats or something. The cracks in the test piece for the guillotine still confuse me. Its a piece of 25 x 30 mm and cooled down in air for like 10 minutes before i dropped it in water.
-
-