DWH
Members
-
Joined
-
Last visited
Everything posted by DWH
-
I did something similar to what timgunn1962 suggested. I use a brass gate valve to control air to the burner. I think I got it at Moorlane Sutton Supply in OKC. The rest of the air goes to an air curtain. Haven't had much time to play with the forge but I'm retiring in August and when the weather cools this fall, I'll be spending a lot more time forging. Good luck with your build.
-
When I asked Charles Correll (the current owner of Pine Ridge Burners) about a burner for a forge with my dimensions, this is what he said: "The Mini won’t do it. Not enough holes. You will want the 4” x 8” burner. These burners were originally designed for glassblowing. Only relatively recently have they been used in forges. I am a glass blower myself as well as a furnace builder. I acquired this burner business from Tom Ash a few years ago, and have learned a lot about forging since. Tom’s literature is for glass weenies who run their glory holes at 2100 while you guys go 2400 plus for welding. So your idea of the 8” burner for your forge is correct. I have found that forgers need to go a size or two up on burner size relative to forge volume. I have built a forge the same size as yours using the 8” LP290 burner and the 3 water column inch blower on the Correll glass website with 2” piping and a two inch mixer. My customer uses it for scorching up rather meaty steel billets and pounding them out into blade stock." I have not used my forge enough to know what its upper and lower limits are. I think with the needle and gate valve, I'll be able to adjust the temp to whatever I need. I asked Mr Correll what distance he recommended from burner face to floor and he said at least 8". Again, he is primarily a glass blower and his answers may or may not apply to forging. I listened to his recommendations, did some research of my own on Iforgeiron and other sites, then made my own decision. So far I'm happy with how my forge turned out.
-
-
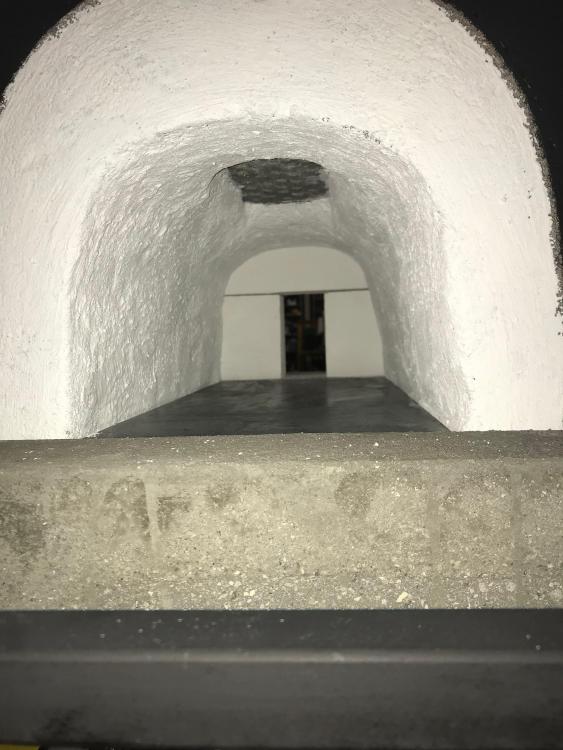
Finally lit the forge for the first time. Left the bricks off the back so I could see it better. Checked the temp of various parts to see how well the insulation was working. The shell got about 140 degrees but the rest was about room temperature including the actuators. https://youtu.be/oIzo_RY74m0 Guess I didn't get the video embedded. Oh well.
-
-
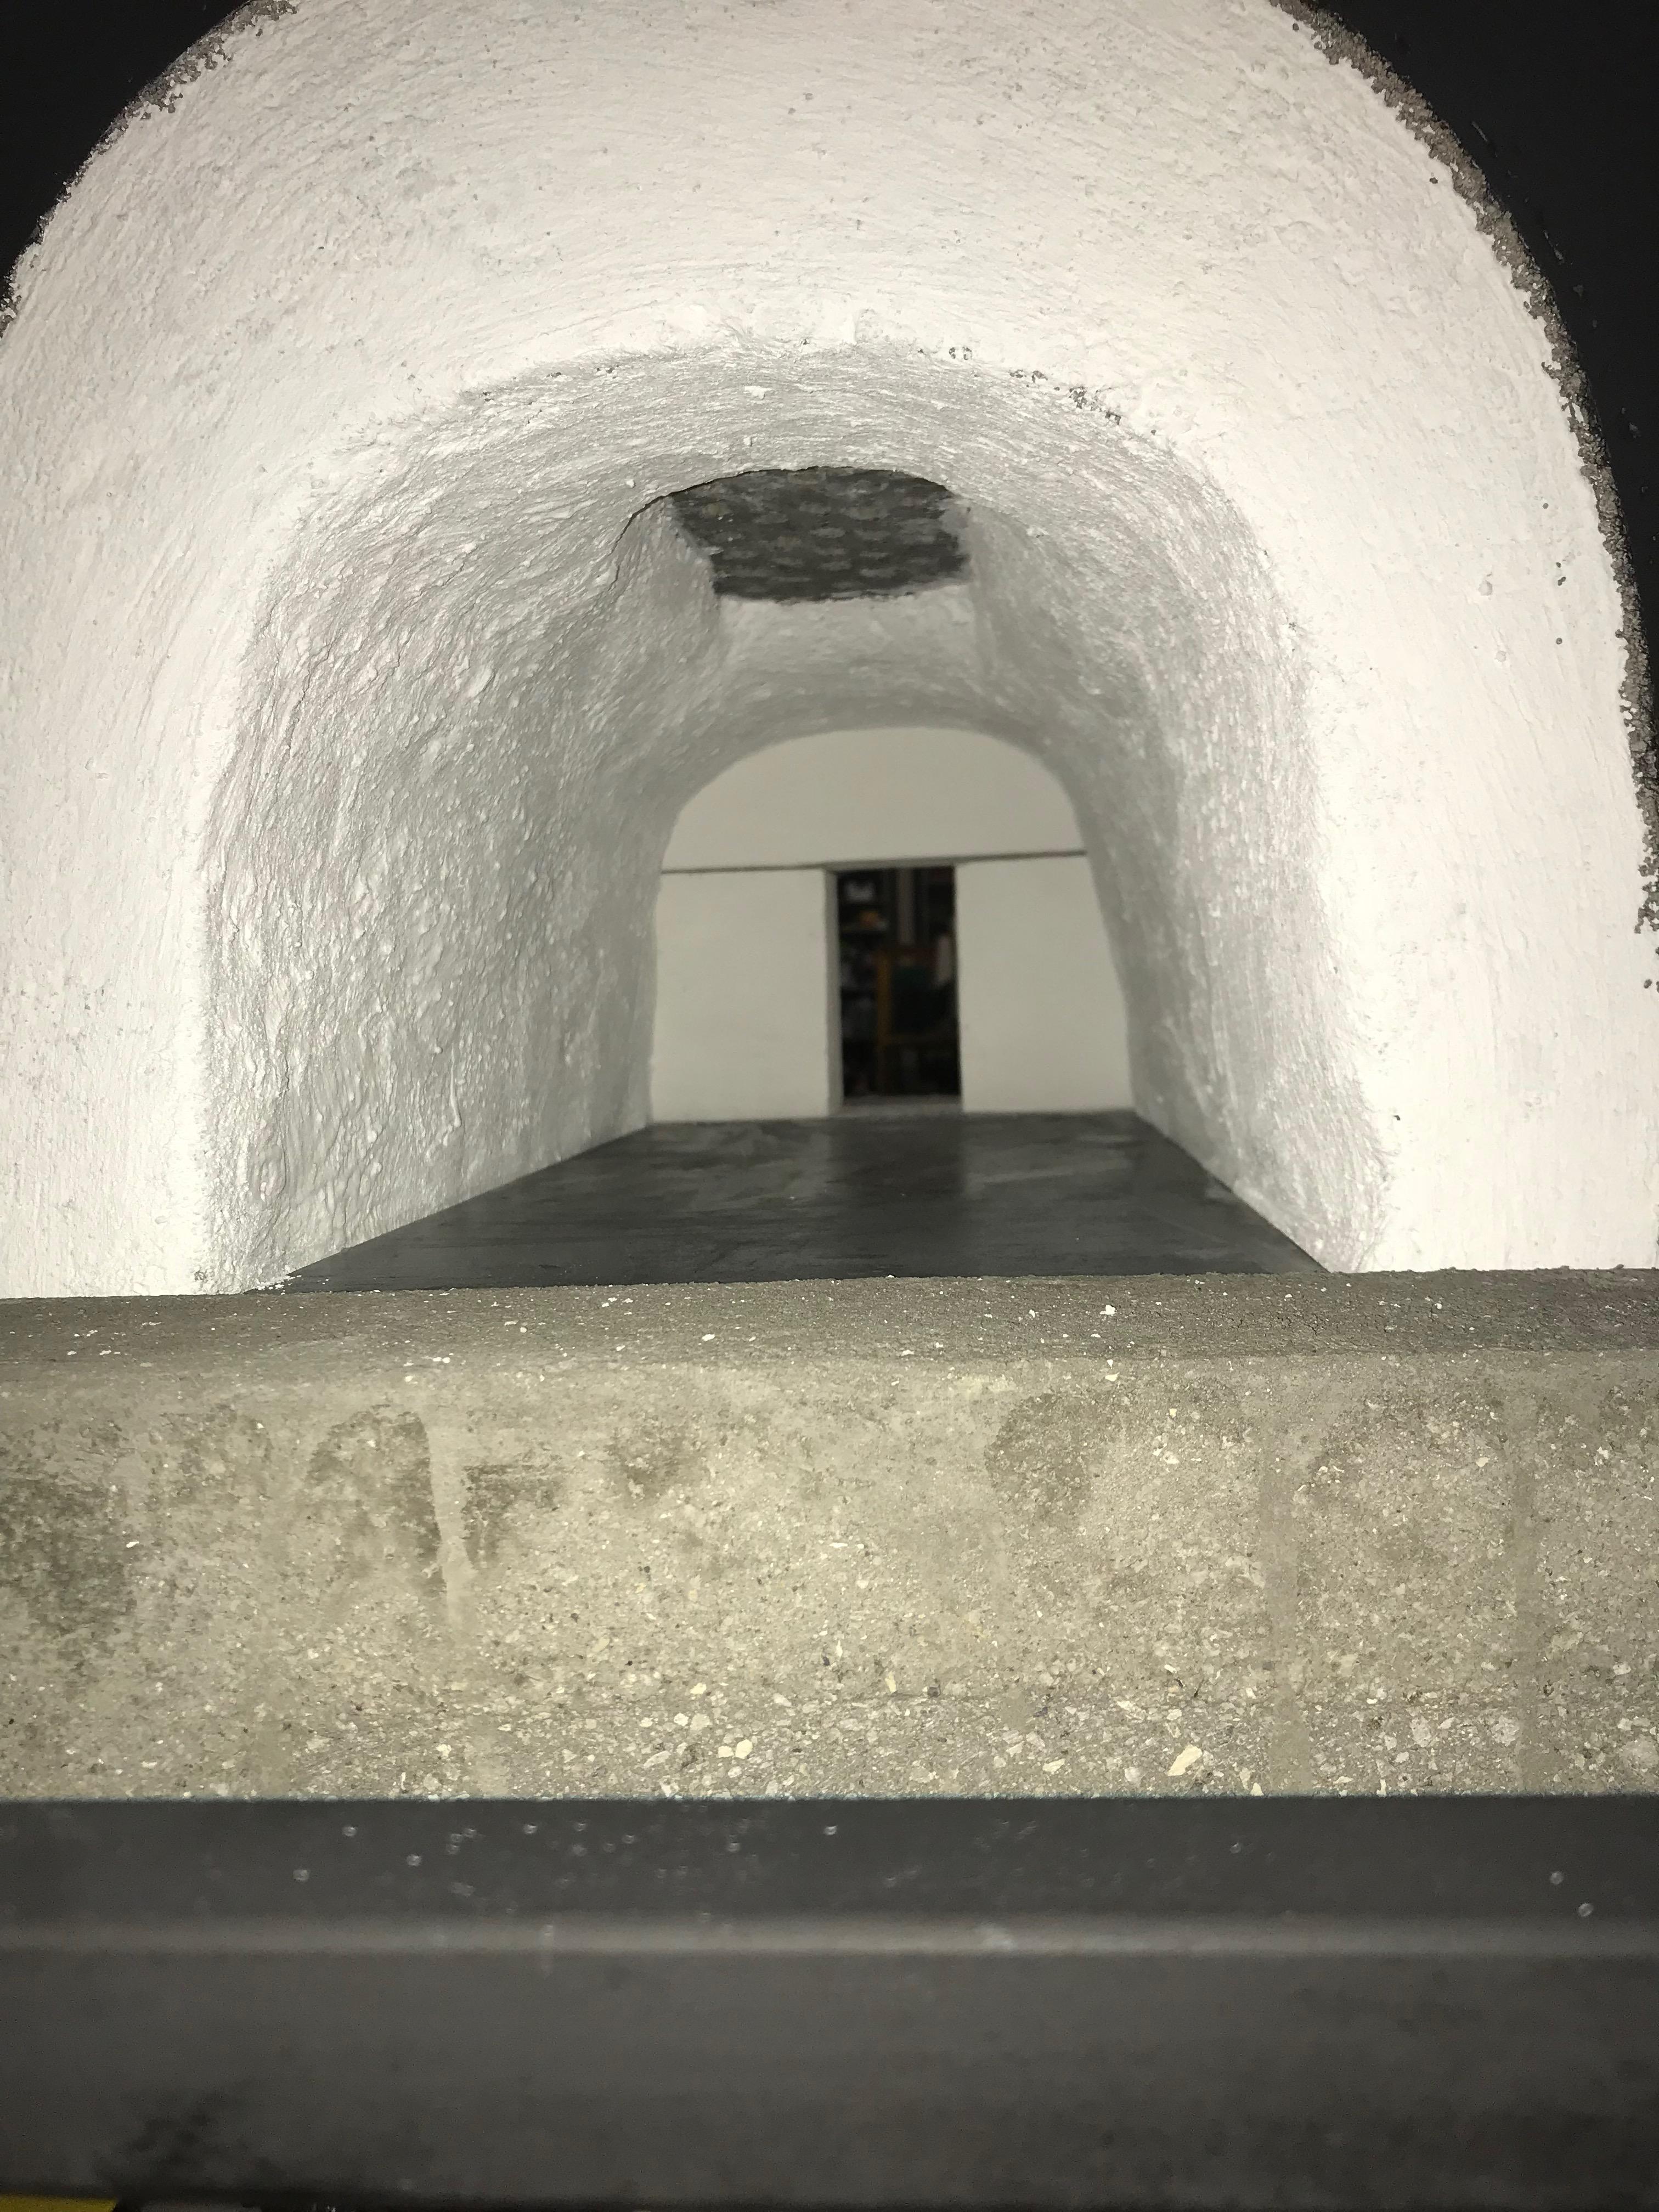
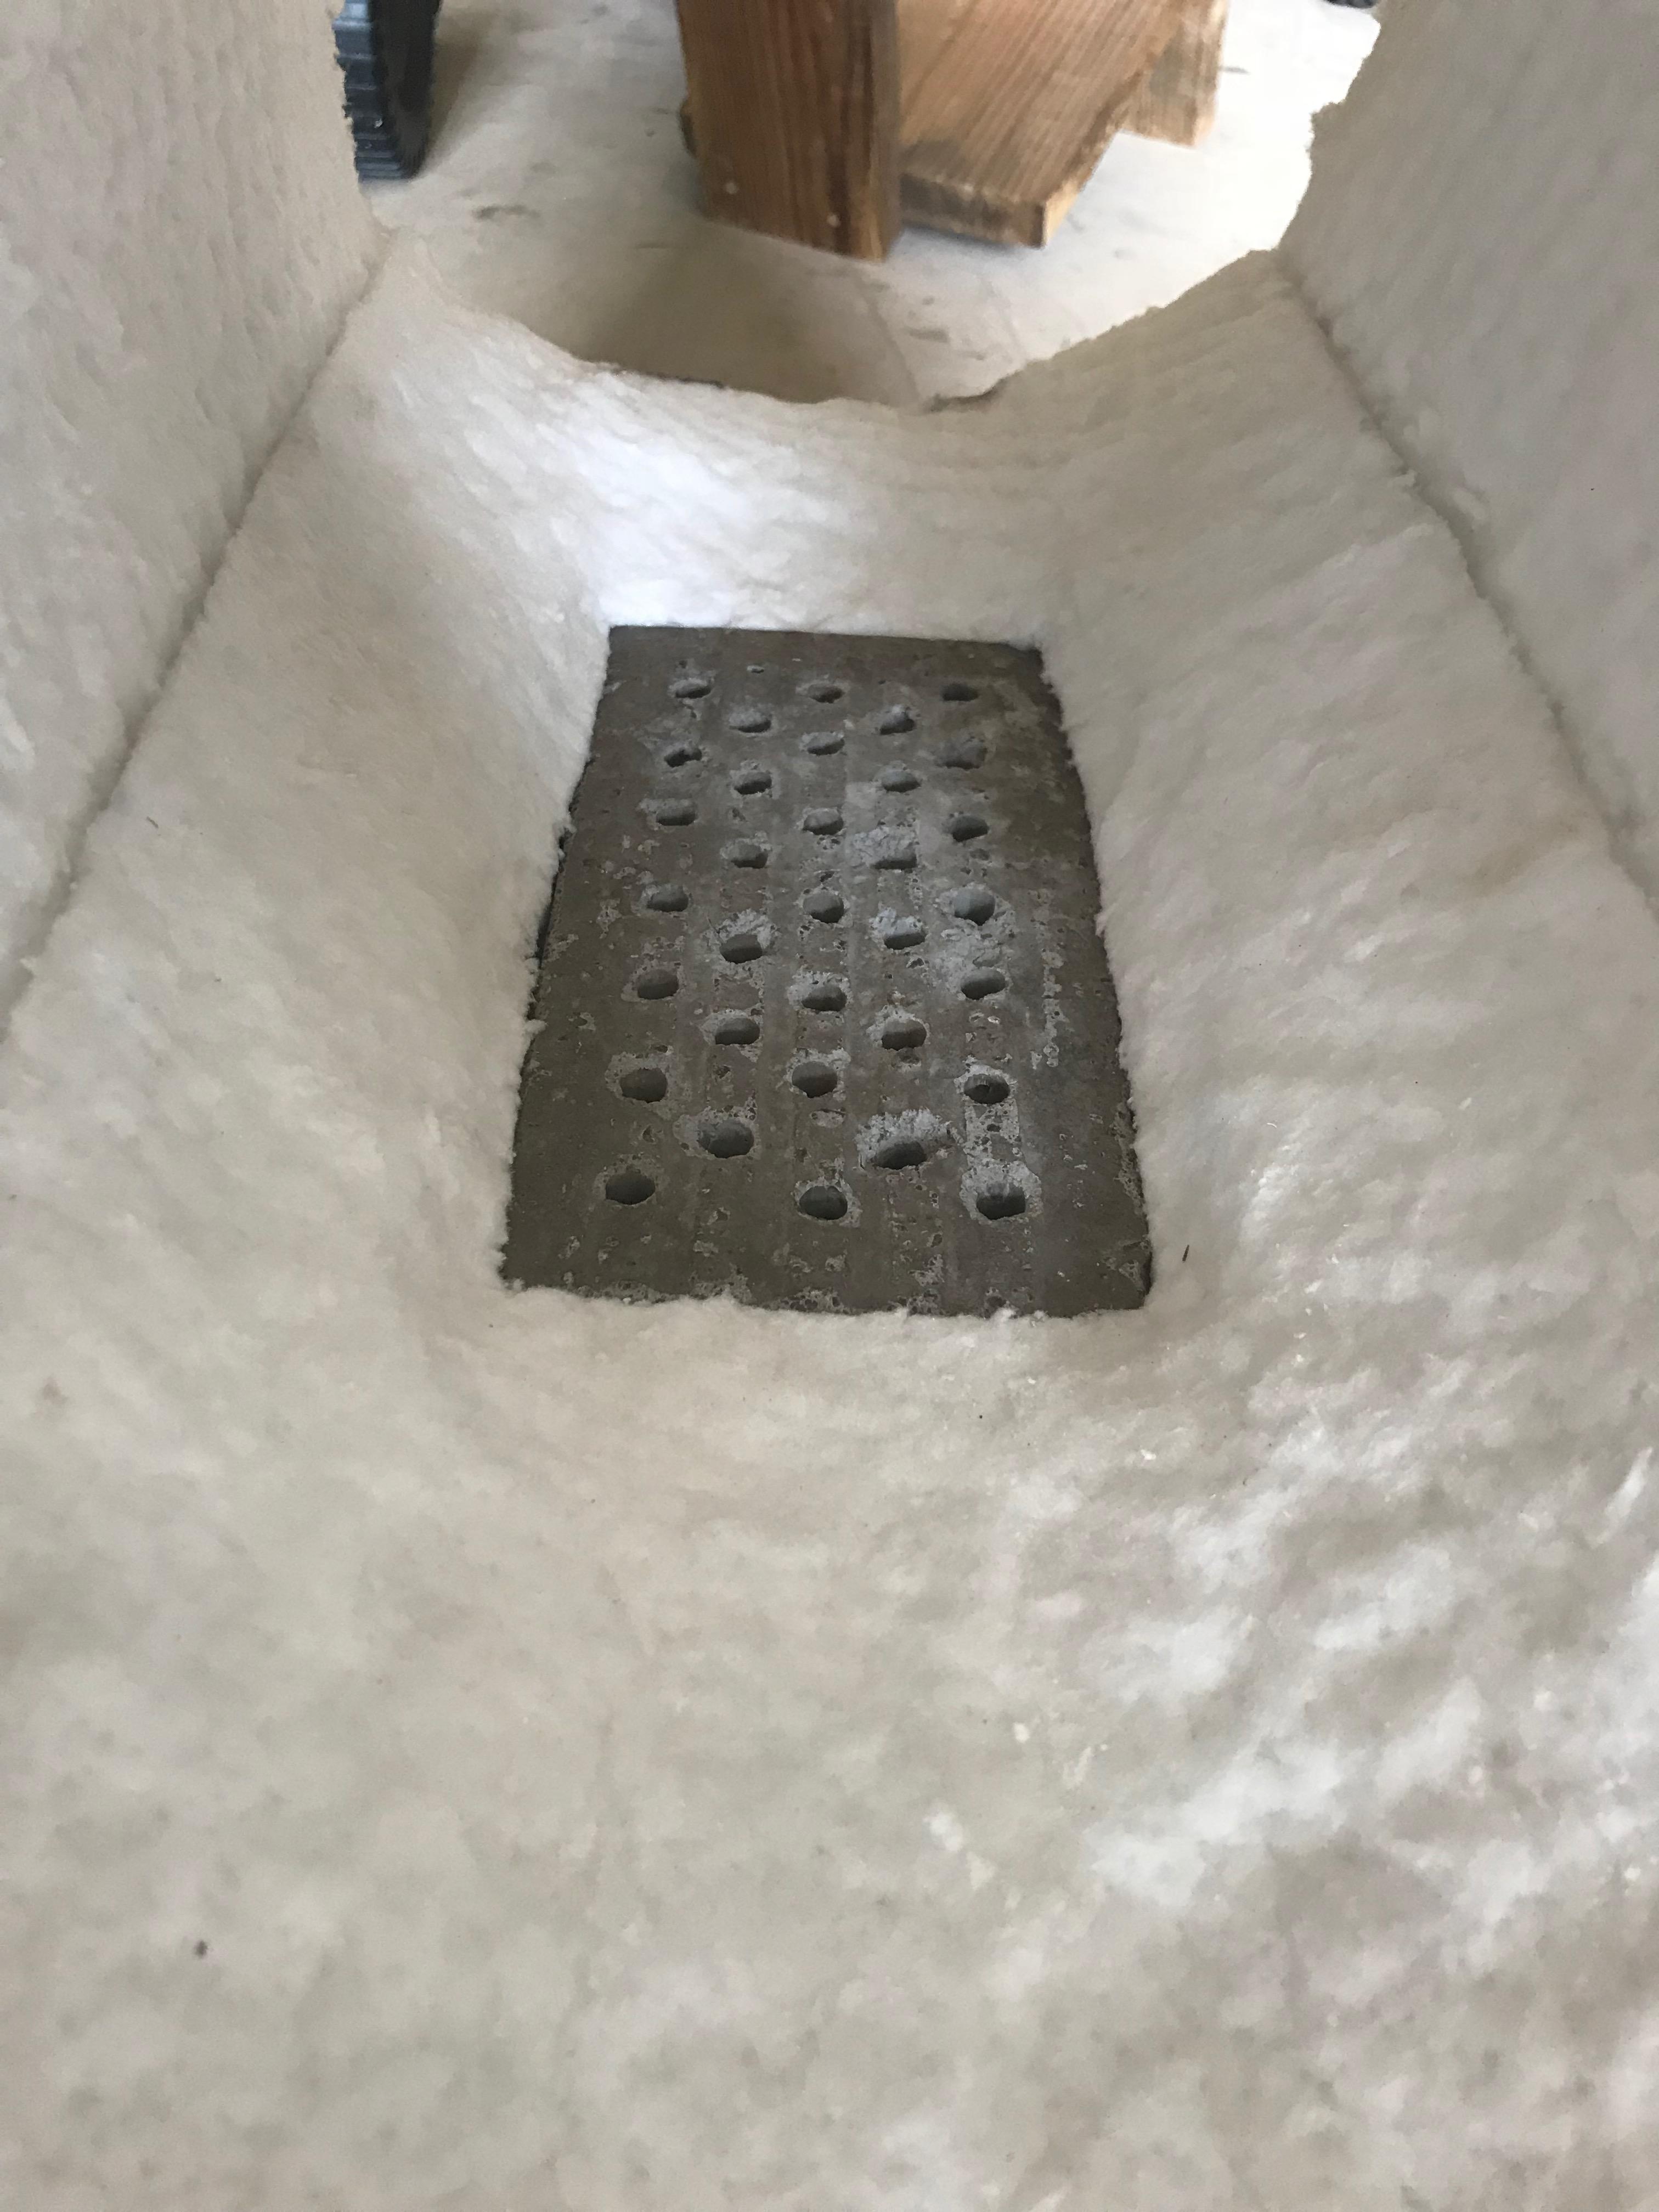
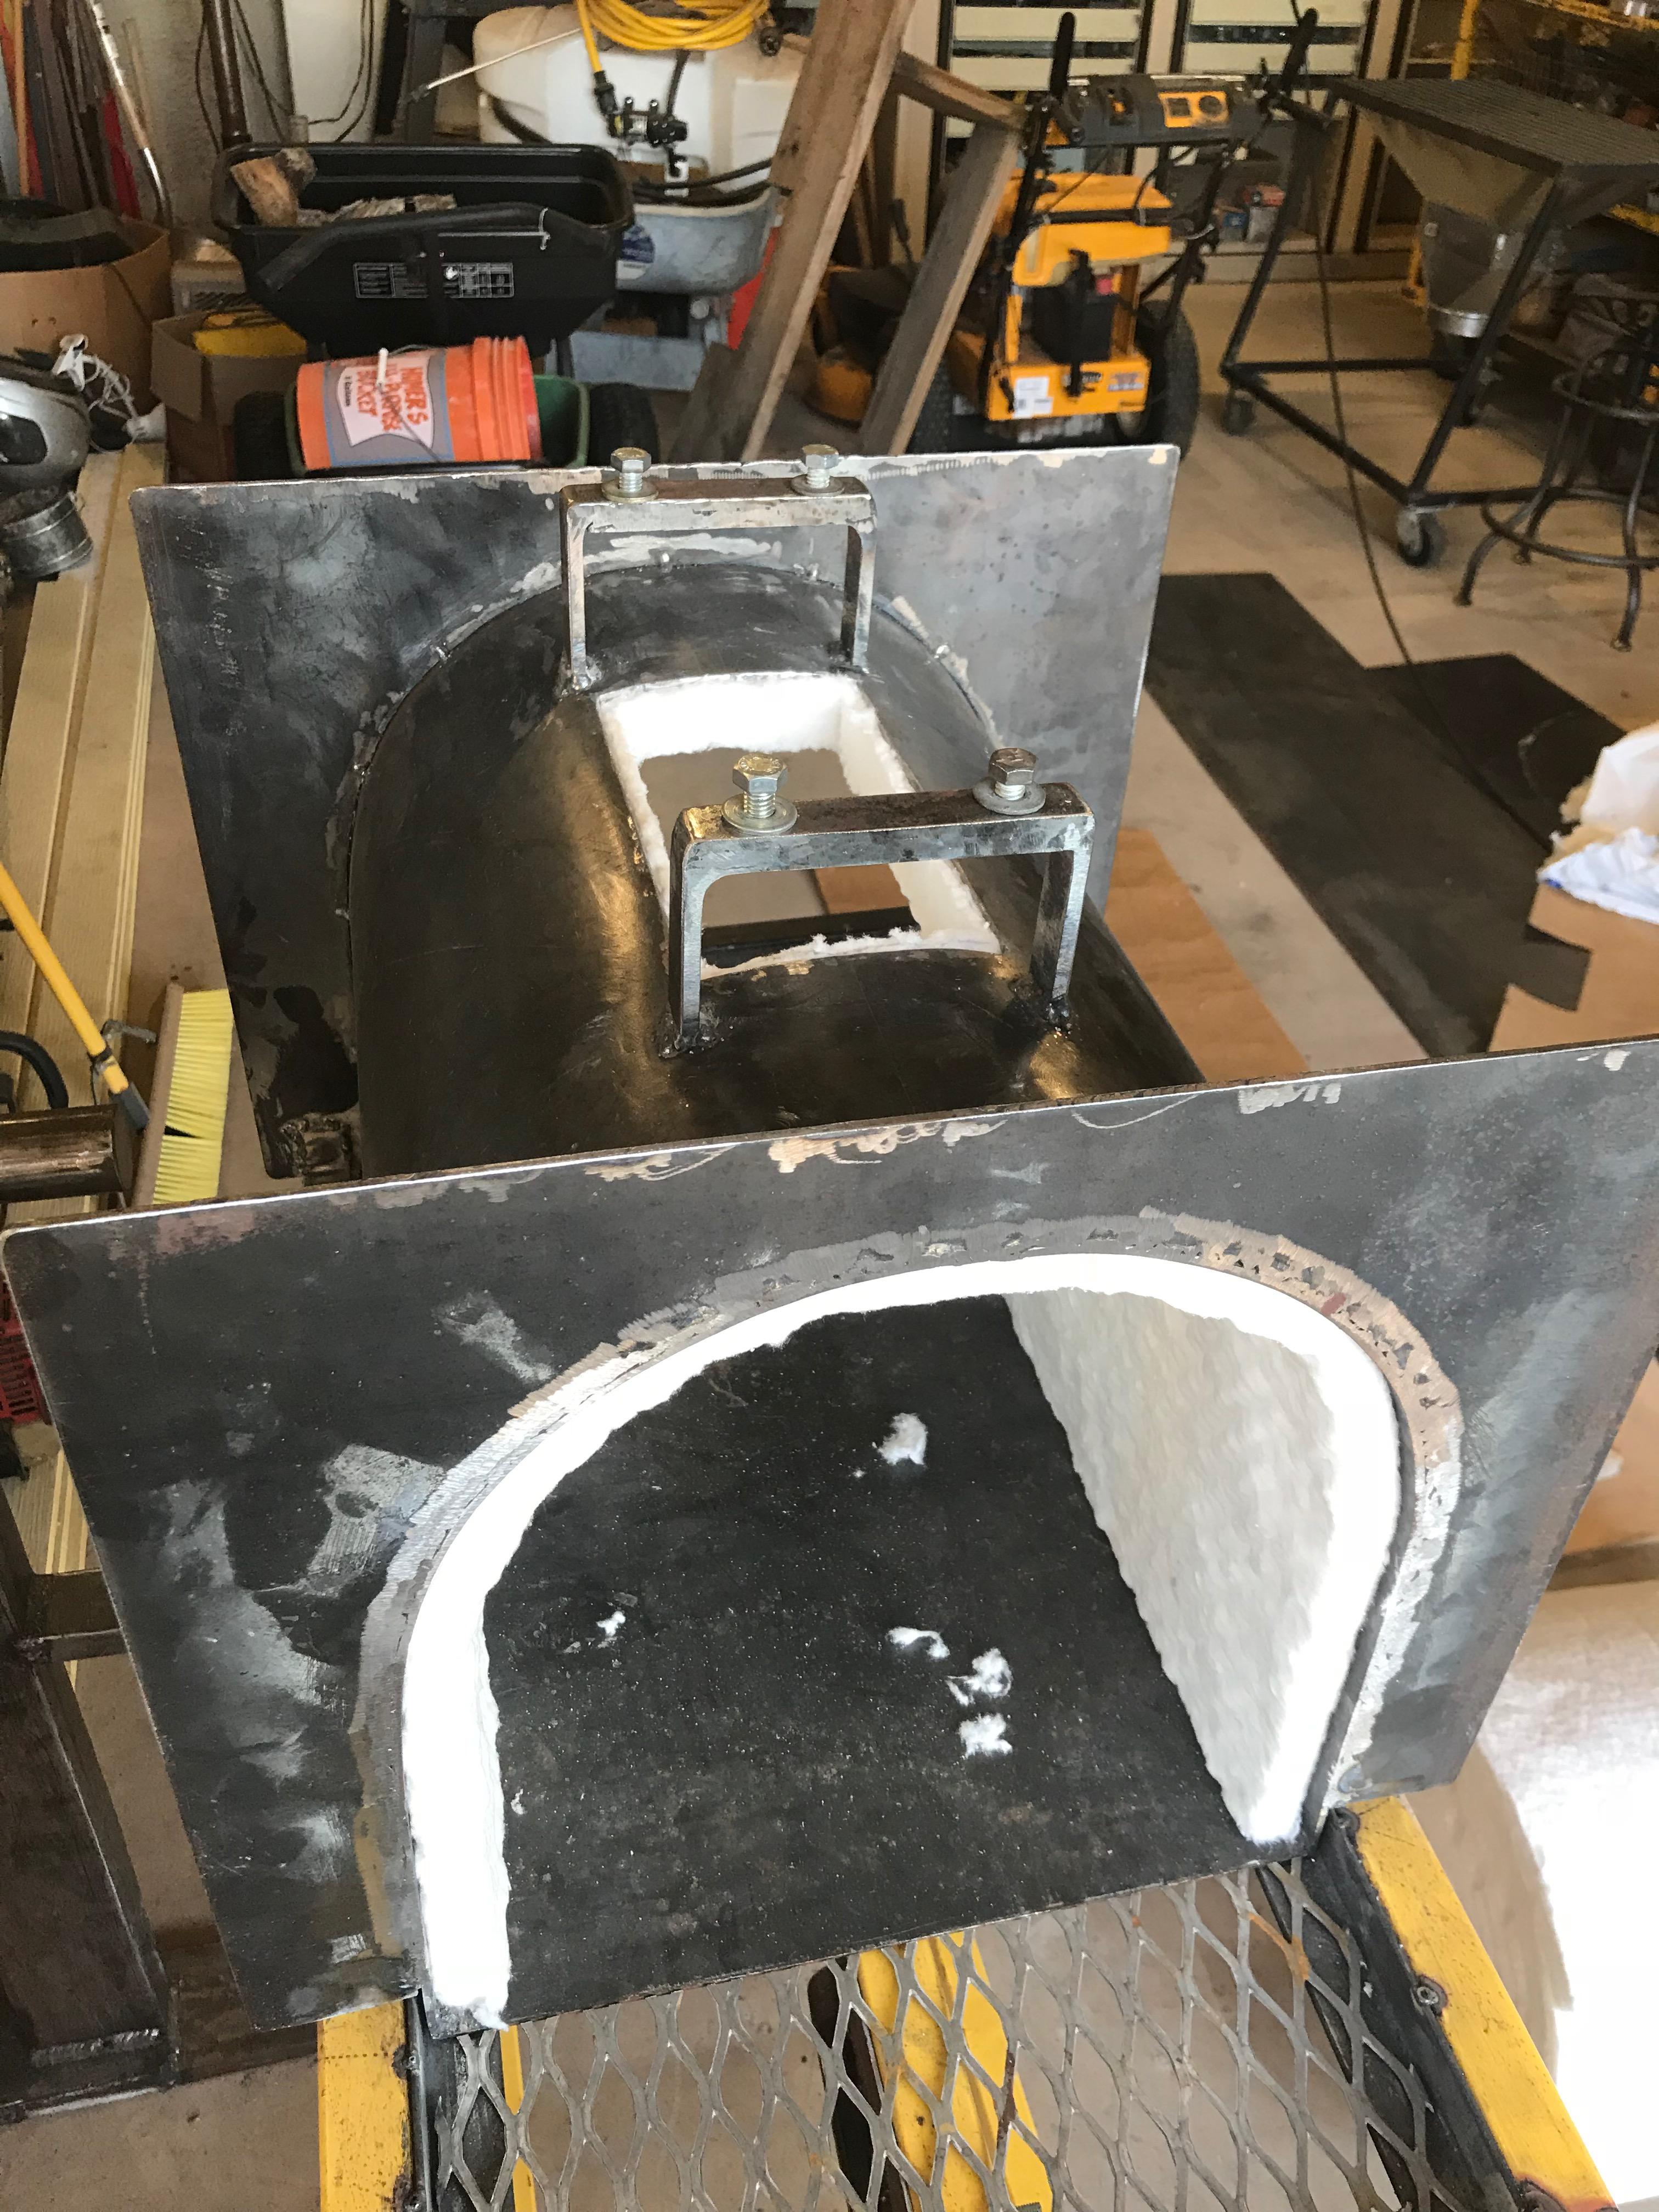
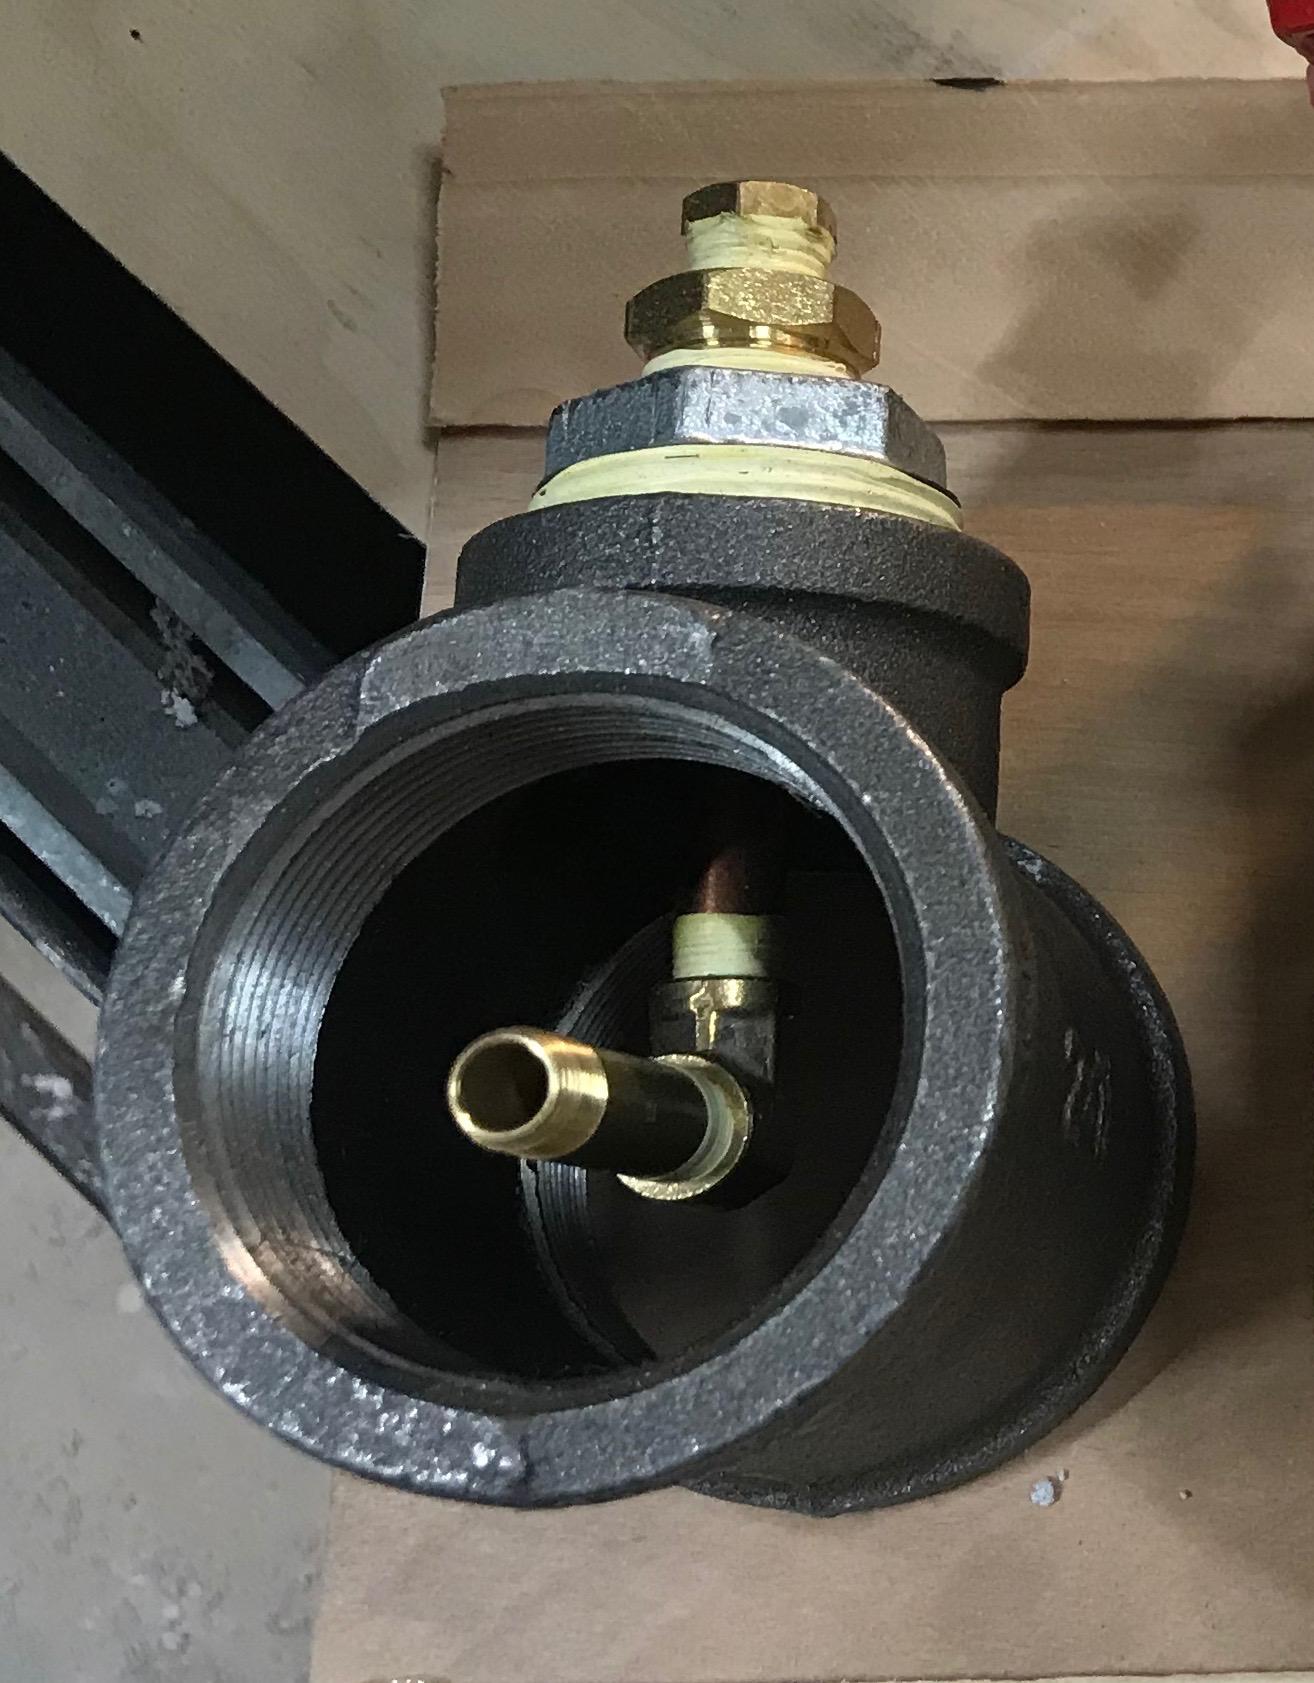
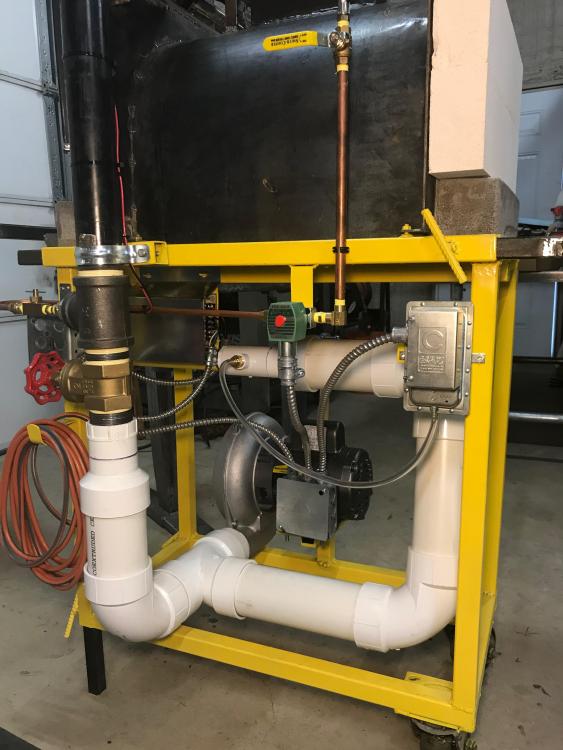
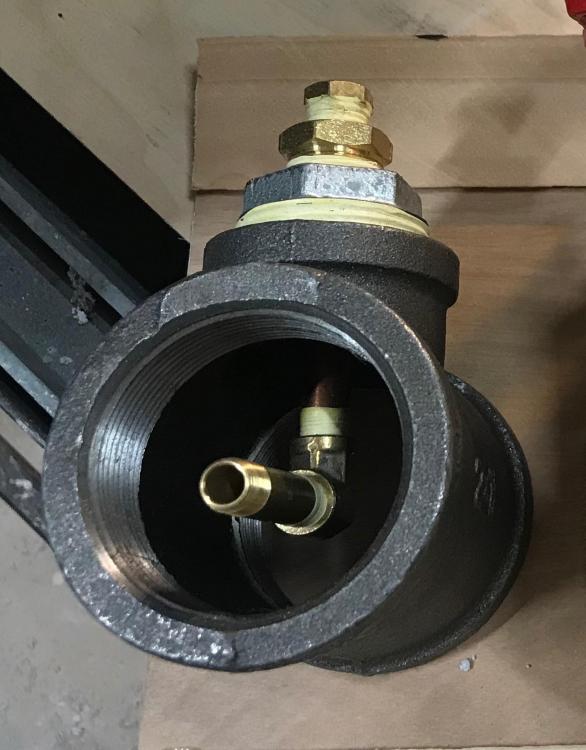
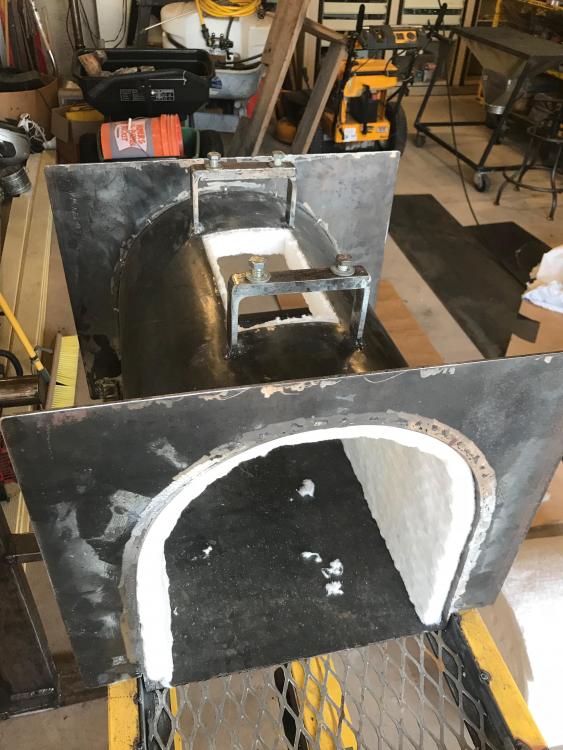
Some construction pics: 1st layer of insulation. 3" of durablanket on top cut close to the burner. Walls have only 2" of insulation so I tapered the edge of the 3rd layer on top to get a smooth transition. Mixer View from the back without the insulating brick. About 1/2" of Kastolite and painted with Matrikote inside. Dark grey floor is the silicon carbide kiln shelf. Power supply without the dust cover and a view of the air curtain from underneath. Drilled a small hole in the pipe under the center of the power supply directing some air to help keep it cool. A view of some of the plumbing, pressure switch, gas solenoid and shut off. I still need to secure the rear brick better or I'll be picking up pieces off the floor.


-
Latticino: Idler circuits and temperature controllers are not in the plans. Its time to stop playing around and start smithing. I think the size will be fine. I have a friend that will be using it at the same time so we need some space. I think the light weight brick will hold up long enough for me to get familiar with the forge. I may make new doors from Kastolite once I settle on an exhaust opening size. The actuators will handle 25lbs so the extra weight of the castable shouldn't be a problem. Steamboat: I paid $35 for the pair. The guy bought a pallet full of stuff at an auction and the actuators were the only thing he had left to sell. I think he thought he'd never get rid of them. I'd been looking at complicated linkages, cable/pulley systems and other ways to open and close the doors but never found anything I really liked until I saw the actuators. I wish they had 3" of travel instead of 2" but I can't complain for the price. There's nothing fancy about my burner orientation. It is centered in the top and points straight at the floor. If I were doing it again, I might have mounted it at an angle but I think it will be fine as is. I do have some construction pictures. I'll add some in a bit.
-
Almost finished with my first propane forge. The shell is 11 gauge sheet metal I bent around a 12” diameter pipe to form the vault on top. The bottom is flat. I bought a Pine Ridge LP 290 burner which is fed by a 2” black pipe. I thought about making my own ribbon burner but liked their burners and decided to put my time into other parts of the build. I used 3” of rigidized 8lb Durablanket on top and bottom because the burner protrudes 3” inside the shell. I only used 2” on the sides to maintain the inside width I wanted. I added a ½” Kastolite liner and a nitride bonded silicon carbide kiln shelf floor. I cut the insulation carefully so that the burner fit snuggly. The Kastolite slightly overlaps the edge of the recessed burner so I shouldn’t have any leakage around the burner to the outside. I painted the inside with some Matrikote I bought from Wayne Coe. Inside dimensions are 19” deep, 8 ½” tall and wide. The doors are insulating firebrick. I made a brick from Kastolite but it was heavy for my use so I decided to stick with the light weight insulating bricks for now. The upper bricks in front are held in place by compression with a bracket on each side. The lower bricks slide open/closed using a pair of 24v linear actuators I found on Craigslist by accident. An example of finding something I didn’t know I was looking for but knew what to do with when I saw them. I bought a 24v power supply and a double throw center off momentary rocker switch from Amazon. The back is closed off with fire brick but can be opened for pass thru as needed. All metal is well outside the flame zone so I don’t think I’ll have any problems with warpage. Not sure if I’ll like the actuator controlled doors but it will be fun to see how they work and if they survive the heat. I’ll leave the front bricks apart a bit for the exhaust and can open to a max of 6” with the actuators. I can easily work at the back end if I need more than a 6” opening. I have a 100lb propane tank with a Harris 25GX regulator. From there, I run a ¼” braided stainless hose to a ball valve, then a Red Hat normally closed solenoid valve controlled by a Cleveland Controls pressure switch and then to a needle valve. You can hear the solenoid valve click open in the video once I turn on the blower. The propane enters the airstream thru a mixer made from a 2” T and some 1/8” tubing. Air from a Centaur PB50 blower is controlled by a 2” gate valve. The needle and gate valves are near the front of the forge so I can see the flames as I make adjustments. I removed the variable speed control from the Centaur’s motor because it seemed redundant with a gate valve and slowing some motors can overheat them. I have multiple uses for the blower and can use all the air it puts out. I wired in a 25’ 14 gauge extension cord. All 120 volt wiring is protected by FMC. The 24 volt wiring is not encased but is held out away from the forge body by zip tying them to the 2” black pipe which should never get very hot. I made adjustable tool rests and castable refractory porches for the front and back. I made a 10” wide air curtain using some thin sheet metal and a 1 ¼” T. The T allows me to clean out anything that falls in. The air curtain uses the burner blower’s excess capacity. I don’t have a valve on the pipe going to the air curtain and don’t think I’ll need one since the pipe reduces to 1 ¼” but I can add it later. The pvc pipe to the air curtain has a barb with attached clear tubing that goes to the pressure switch. I also drilled a hole in the metal pipe to direct a small amount of air to help keep the 24v power supply cool. A dust shield helps keep the power supply clean. The forge stand is yellow only because most of the scrap I bought at the local salvage yard was already painted, in good shape and I didn’t want to spend the time to grind it all off. I just cleaned up my welds and touched up the paint. I kinda like the yellow now. The propane hose is held up out of the way with an adjustable support. The stand has casters at one end and adjustable legs on the other. The adjustable legs allow me to make the forge stable and level on most surfaces and prevent the forge from rolling off on its own.
-
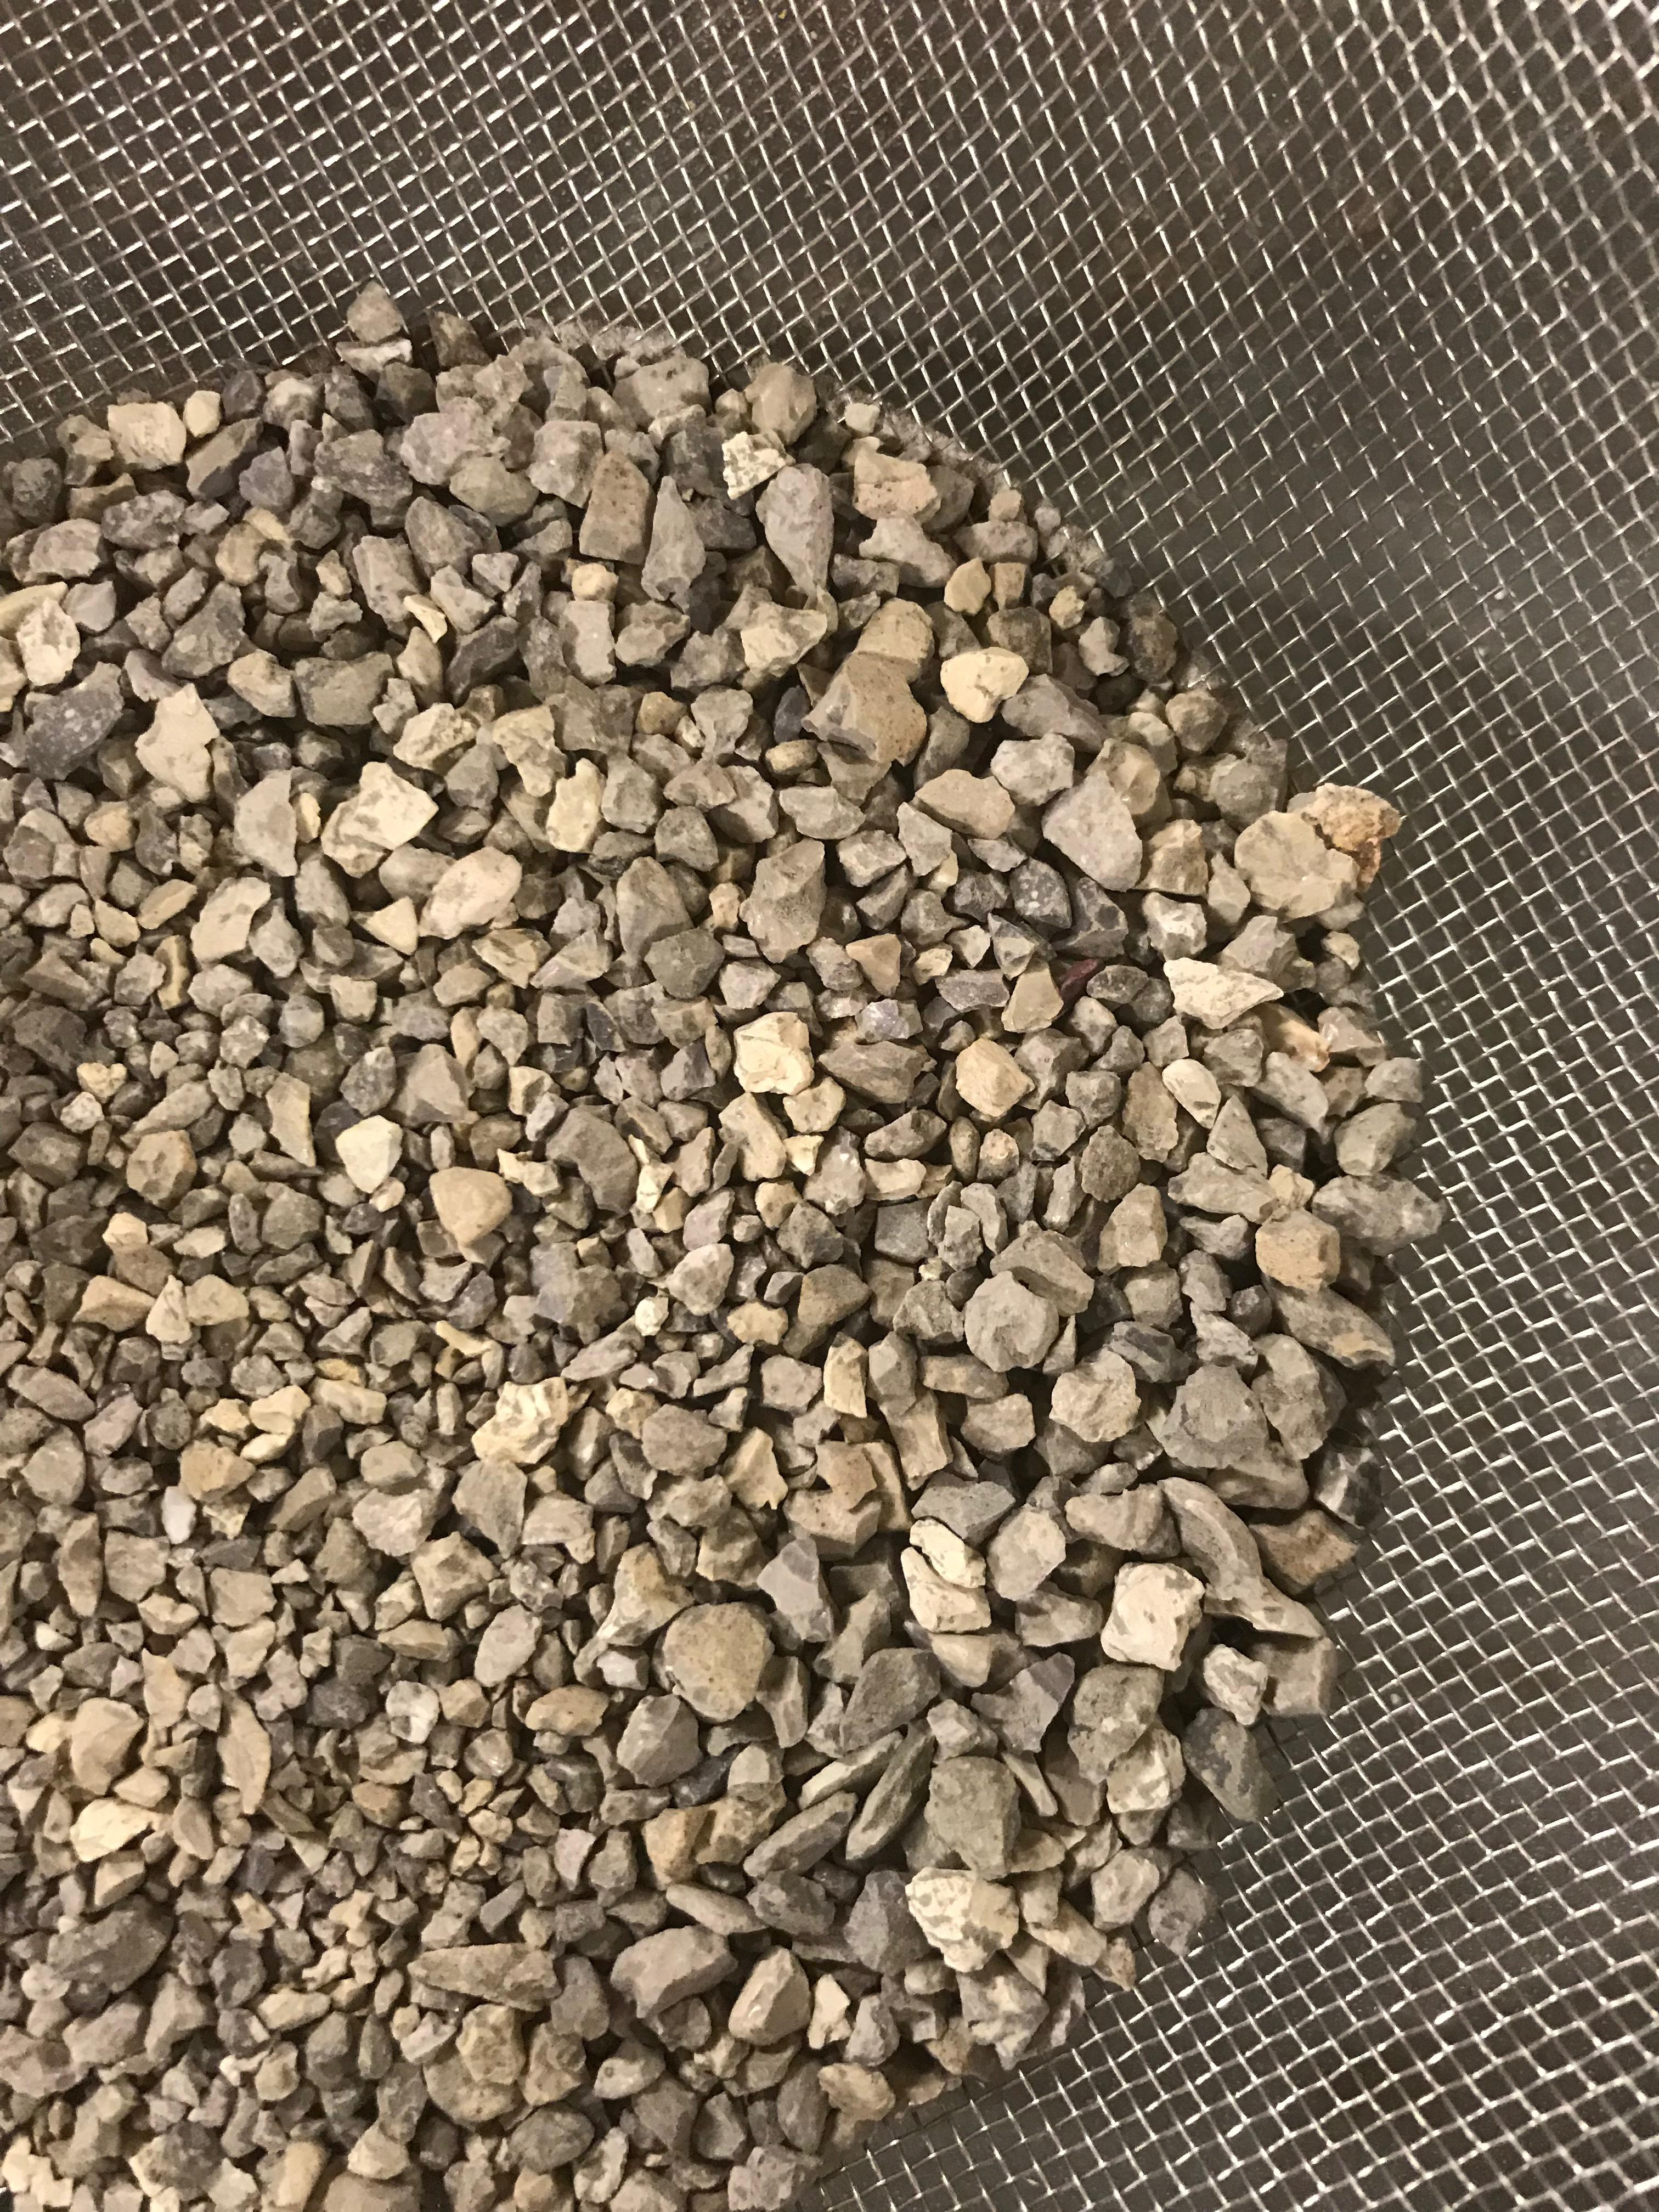
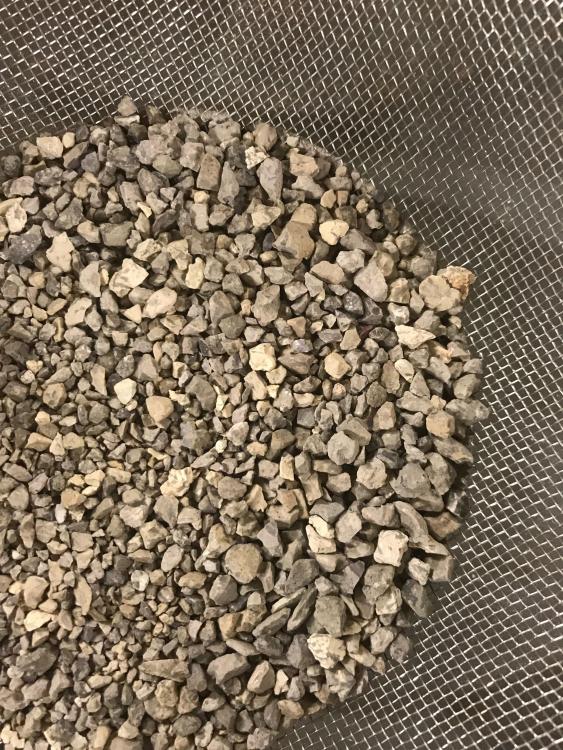
I've used a castable refractory that has gravel in it. Its called Tex Kast HS made by Wesco. "HS" stands for high strength. Its rated for 2700 degrees. I used it originally to make a wood fired pizza oven. I formed my 2" thick dome over a 30" yoga ball and it turned out great. I had no trouble smoothing it with a trowel. No cracks after 4 years of use. I've also made some blocks that sit just outside my forge and are flush with the forge floor. I didn't use it inside my forge. I used Kastolite 30. Here's a picture of the gravel after screening out the fine particles. I wouldn't remove the gravel. I think all refractory needs something for strength. If you run Kastolite thru a screen, you'll see a lot of fibers.
-
I like the Harris 25GX regulator. It is a little more expensive than the Fisher but I like that it is "Made in the USA" and "100% tested, 100% of the time" according to their website. A regulator is the only thing keeping your system from going to full bottle pressure, so worth spending a little money for the extra safety. According to the publication NFPA58, a tank with 20 lbs of gas at 105 degrees would have 235 psi. That kind of pressure at the forge would be scary. It was 112 degrees (in the shade) at the shop just a couple weeks ago.
-
Cms3900: makes sense. I plan to have my tank outside and the regulator at the tank. If your regulator is at or near your forge it would be convenient to skip a needle valve and just use the regulator. My needle valve and gate valve are near the front of my forge so I can see the flame when making adjustments. i’ll look Into a Harris regulator. thanks
-
If I understand correctly, adjusting the regulator psi merely adjusts the capacity of the line. The higher the psi, the more propane that can be delivered. The regulator is also used to maintain a consistent pressure. The needle valve is what actually controls the volume of propane that gets to the burner. Setting the regulator psi above the psi required by your burner is not a problem. Setting the regulator psi below the psi required by your burner would be. I don't see a need for a regulator to go to 0 psi. A regulator isn't designed to be a shutoff devise. That's what the valve on the tank is for. Unless I'm missing something, a regulator with a minimum psi of 3 should not be a problem if you're using a needle valve.
-
-
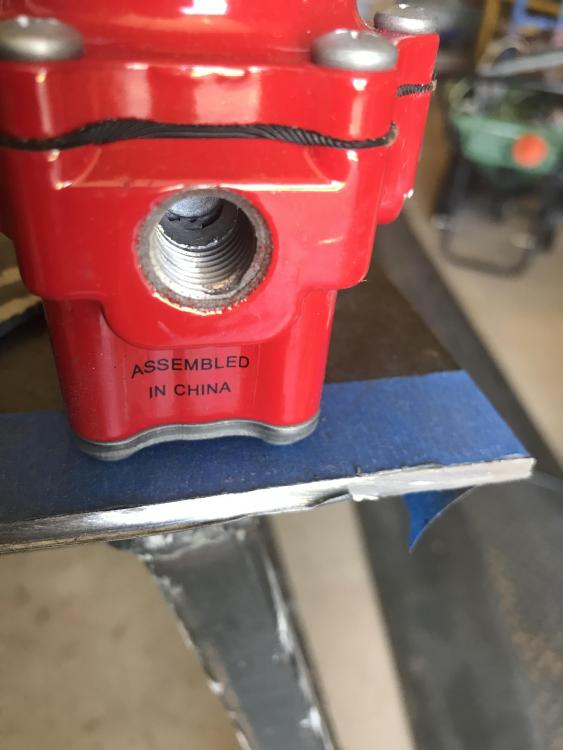
Thought I was buying a decent quality regulator. Maybe I just got the one that slipped past the quality control inspector while he was in the bathroom. I can only catch the obvious defects. Who knows whats one the inside. Any suggestions for a better regulator? Or do I order another and hope its better? I notice the regulator is rated 3-35psi. Is a 3psi minimum a problem? Fisher 67CH/743
-
I bought a Fisher regulator off Amazon. When I opened the package I noticed loose metal at the back of the inlet and 2 broken threads. I’m wondering how much metal fell inside the regulator during its trip from China? I was able to remove the loose metal and the broken thread pieces. It seems to thread ok and I think with a little pipe dope it should seal fine but am thinking about returning it for another. Anyone think I should keep it and use it?
-
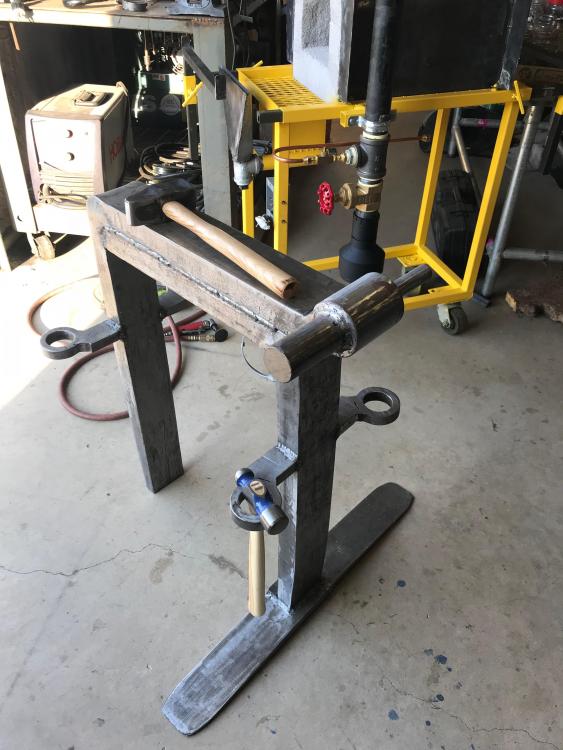
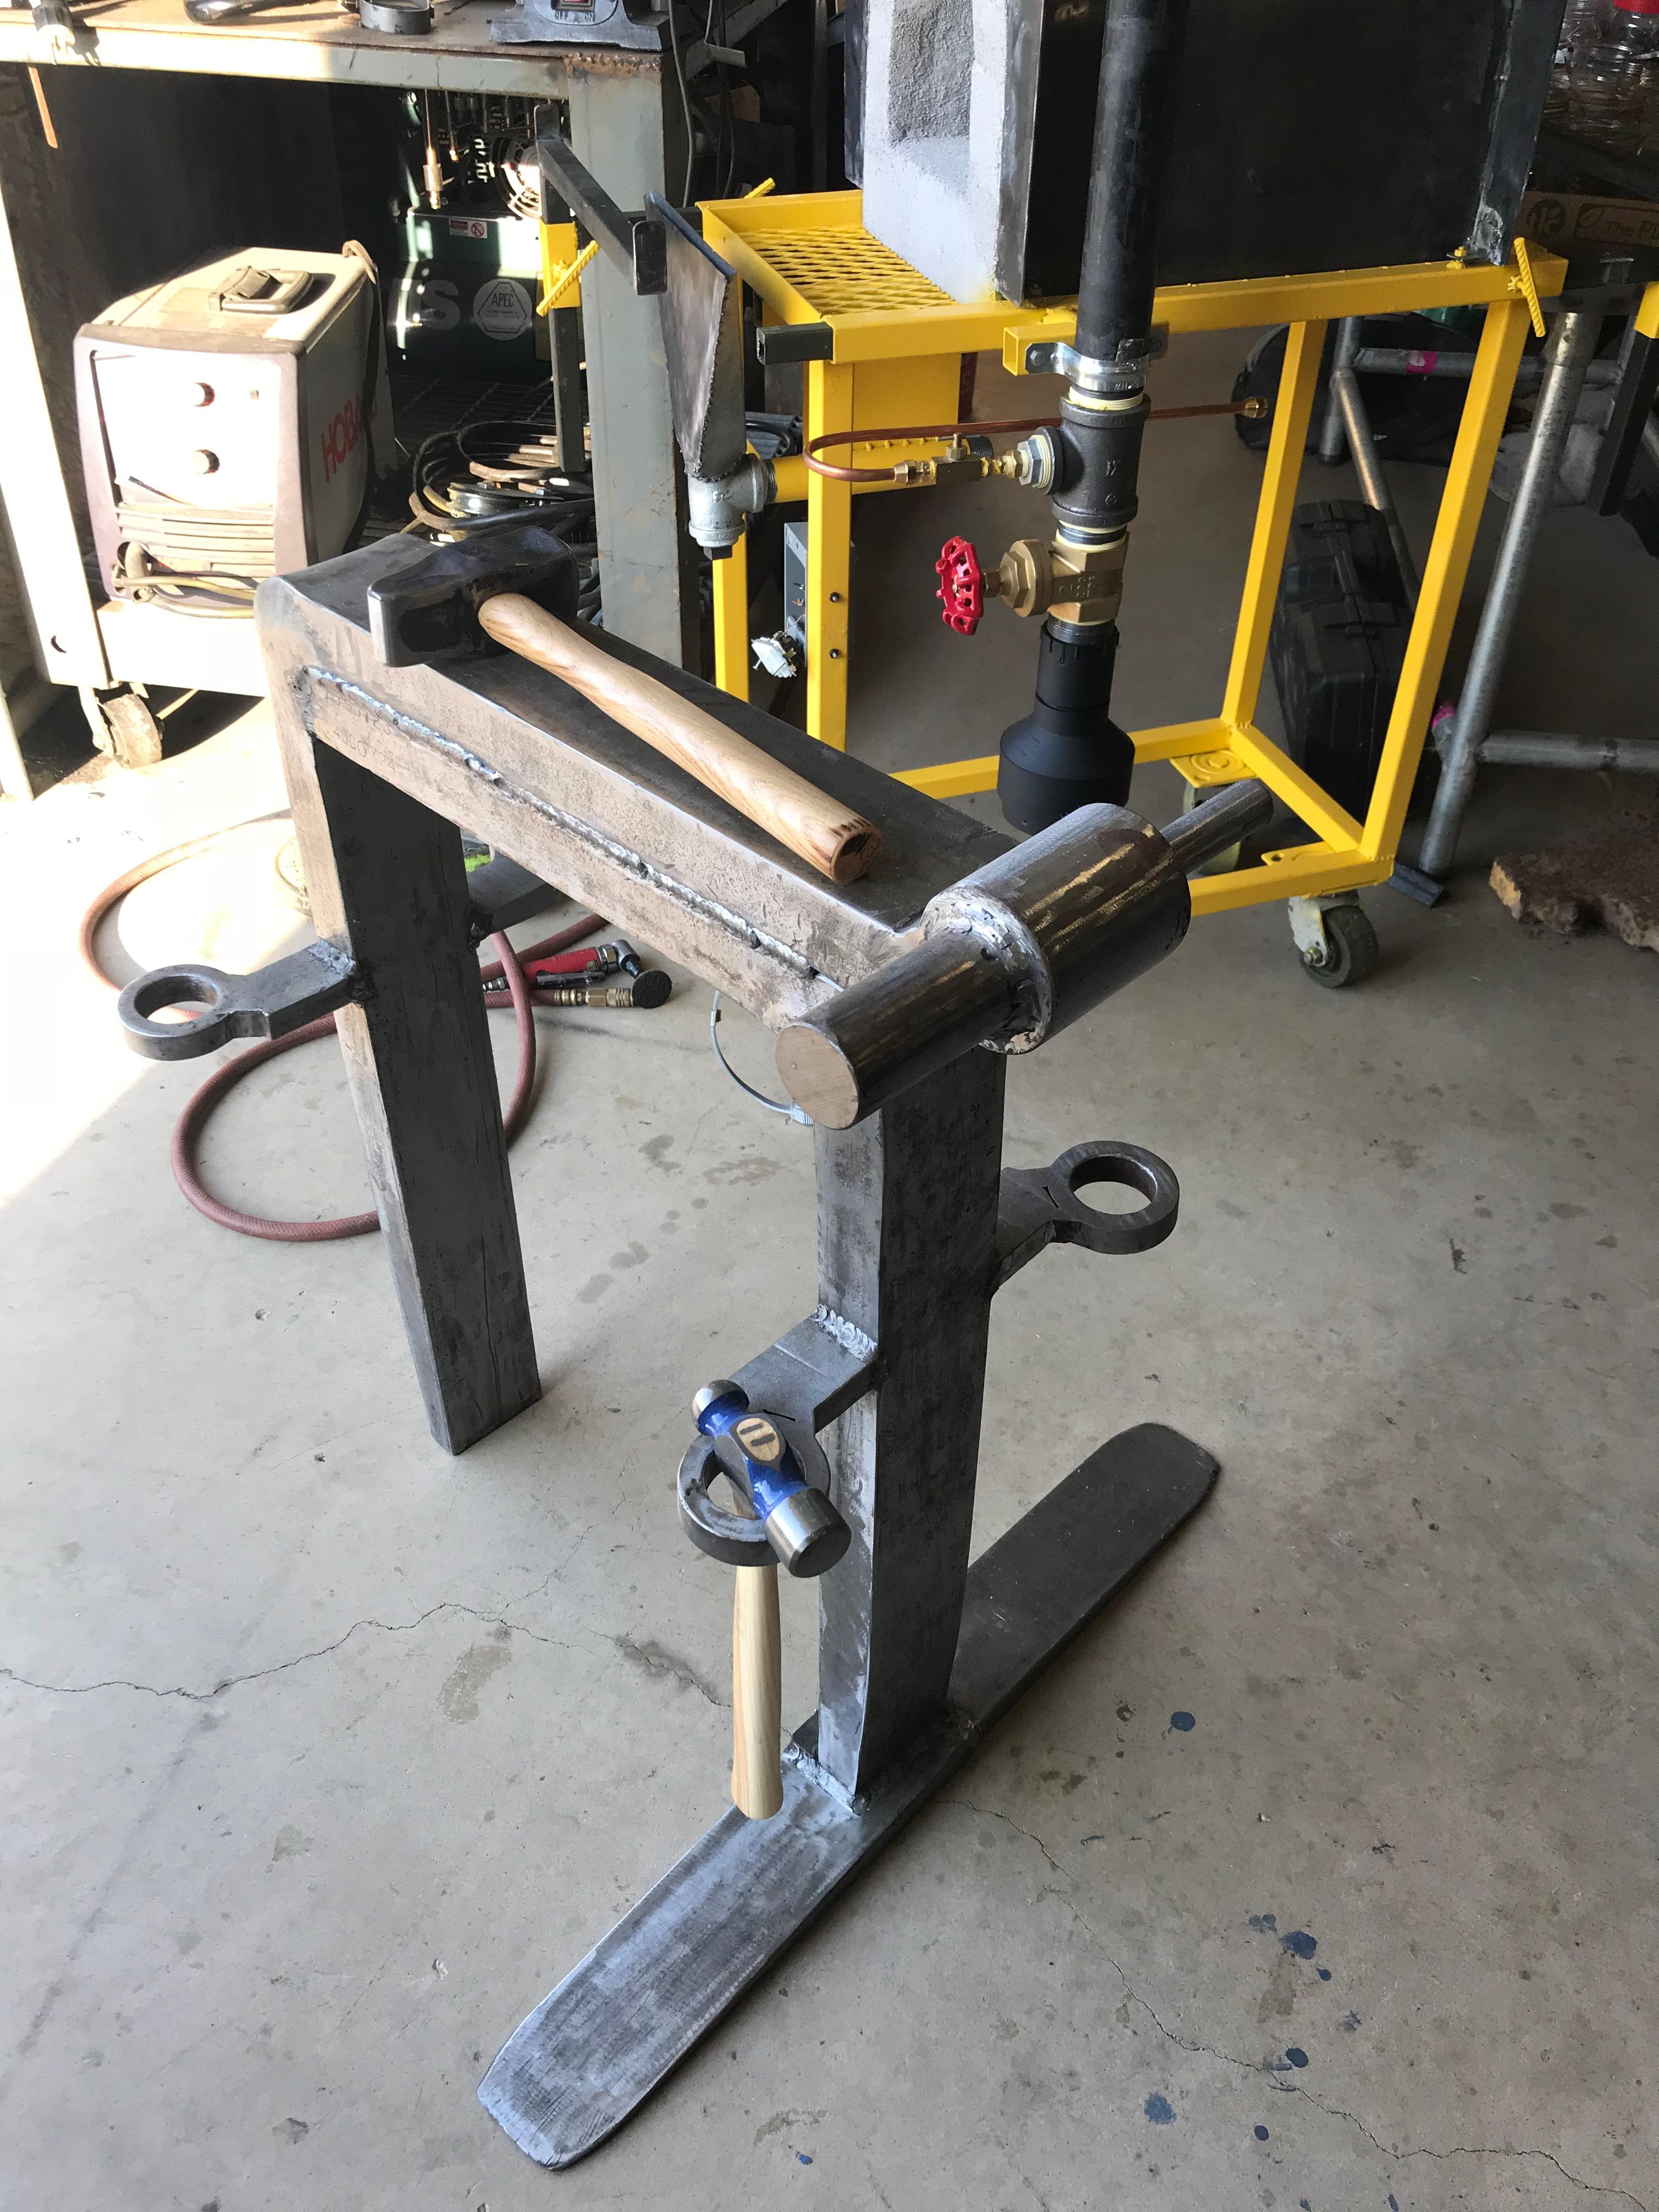
It's very stable even on my slightly uneven concrete floor. If I'm hammering hard, I can keep the piece over one of the legs but I don't really notice a difference when using the middle. I like the 3 round profiles. They're easier for me to use sometimes than a tapered horn. It doesn't have a hardy hole yet but I'm thinking about how to add one. I tried the ball bearing test and it averaged about 75% which I'm happy with. Altogether, I have about $110 invested (plus my time - but I work cheap).
-
I think it will hold up but we’ll see. Before welding, I drilled 3 holes thru the top and bottom pieces and threaded just the top piece. I used 3 big bolts to pull the top and bottom together really tight.
-
Just joined a few days ago and found this topic. My local scrap yard had a big pile of forklift tines so I bought 6. First project was this anvil. Total weight is 265 lbs. Used 3 lbs of the left over pieces to make the cross peen hammer. I know some may give me grief for the perimeter weld or not just making a post anvil, but I like the bigger work surface.