

Daguy
-
Posts
87 -
Joined
-
Last visited
Content Type
Profiles
Forums
Articles
Gallery
Downloads
Events
Posts posted by Daguy
-
-
On 10/2/2018 at 1:51 PM, Frosty said:
Ah HAH! You live by your skills as a trouble shooter so this build was a piece of cake for you! Without Jacks of All Trades the masters would be out of jobs when their widgaroony twirlers break.
And all kidding aside, yes I may have been able to figure this out (or not) on my own. My background helped me differentiate between good advice and , shall we say, not so good, ut the success of the build is definately attributable to the knowledge gleaned from this forum.
-
4 hours ago, Frosty said:
What tune on the pipes and will there be drums, in a mini kilt and blingy sporan?
Well of course it would have to start with a salute to Scotland. I’m thinking more along the lines of Scotland the Brave than Flowers of Scotland, the National Anthem. It’s a little more up tempo. I’ve always liked Ye Banks a Braes and then after that various jigs. And I stick to a utility kilt in the forge/shop. Can’t be havin’ with a lack of pockets. And I just ordered a utility sporran to go with it.
It seems, though, that forges are a lot like cigarettes. After you’ve been tempted to start your first one, if you’re not actually building one, you’re thinking of the next one. I’m already looking at a Freon tank that’s about 2/3 the size of this one and thinking about my leftover build supplies . .
Oh yeah, and I think drums would be nice touch.
-
9 hours ago, Frosty said:
I HATE videos with music unless it's necessary, say a dance video.
Maybe I'll post a link to a video of me making the pizza cutter with a Klezmer Band or maybe Bagpipes overdubbed. Of course then I'll have to dance while I work.
-
That's a good idea! Maybe I'll try to make a scaled up pizza cutter just for future builds. a 1/8th inch thick disk punch a rivet hole dead center and put a bolt through it, chuck it up in a lathe and use a 4" angle grinder to get a true or at least usable circle blade edge, thenafter attaching it to a handle just store it in the box with the cerawool.
-
I notice as I read through this that a message has been lost. I don't recall all of it, but the pertinant part is: an Ulu works wonderfully to precision cut the Cerawool.
-
Missou - yes. And as for annoying music, it would mask how quiet the ribbon burner, built pretty much to your specs, ran.
To tell the truth, People I work with tell me I'm clever. I make a living as a Machine Maintenance Mechanic. You can read that as Jack of all trades, Master of none. But it is only because of the brain trust I found on this forum that I was able to accomplish the build. Many thanks to all contributors!!!
-
I know youtube is not necessarily respected here, but I figured out I could post the video to youtube and link it here. Check out the link below and let me know what you think. I welcome ANY feedback. It's how we learn.
-
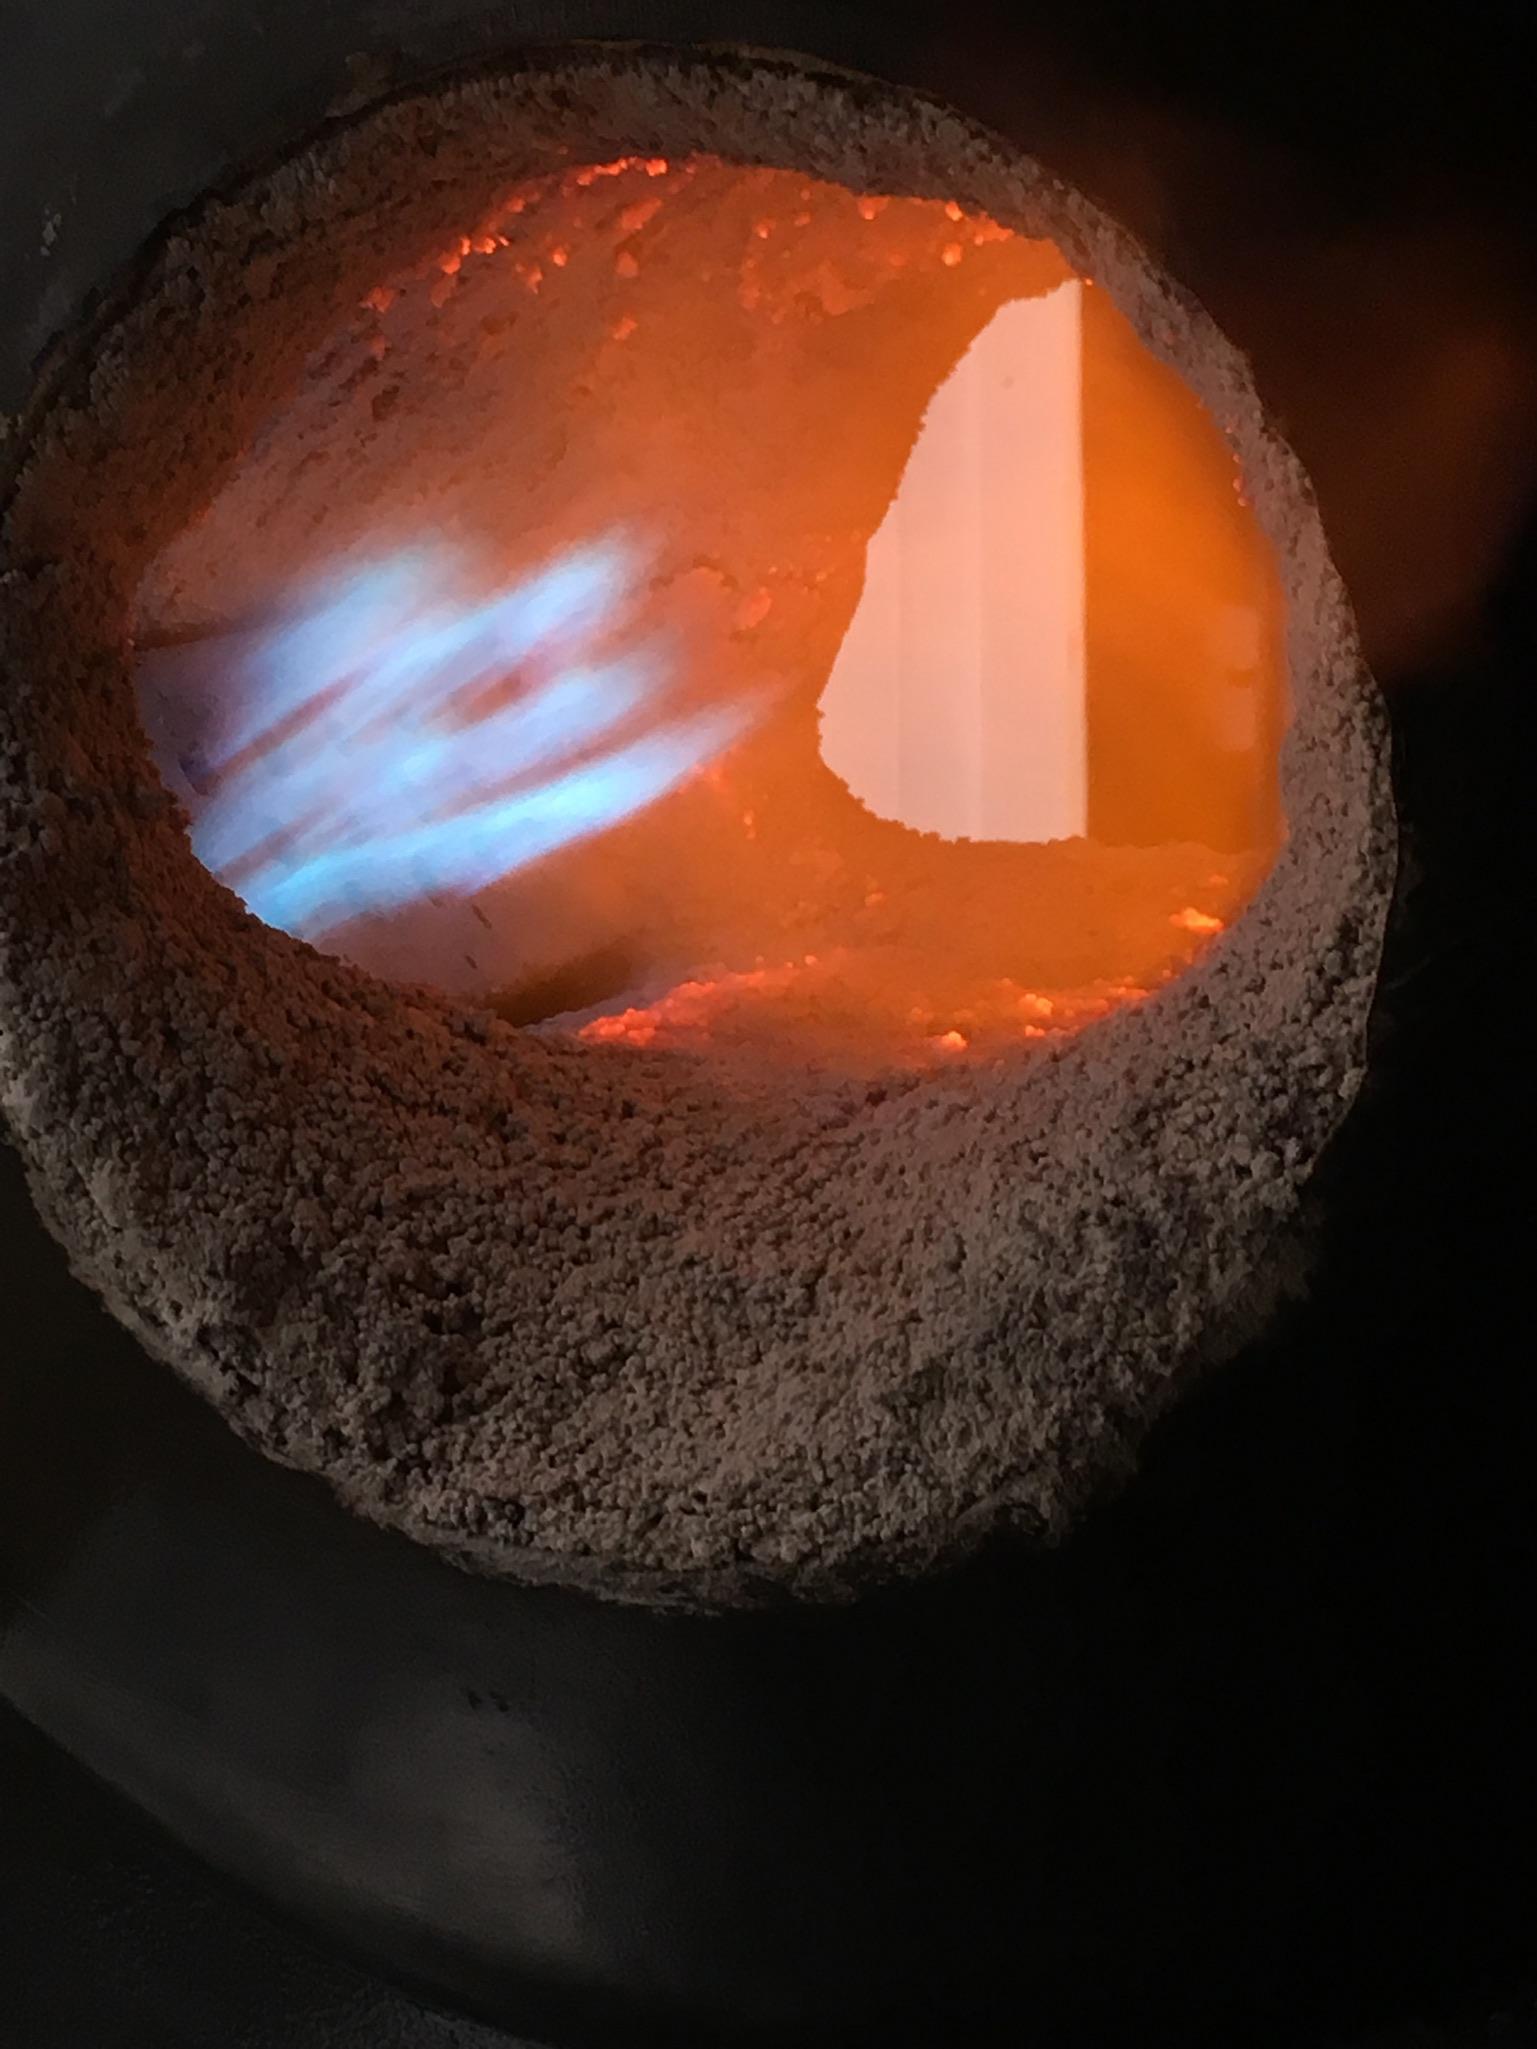
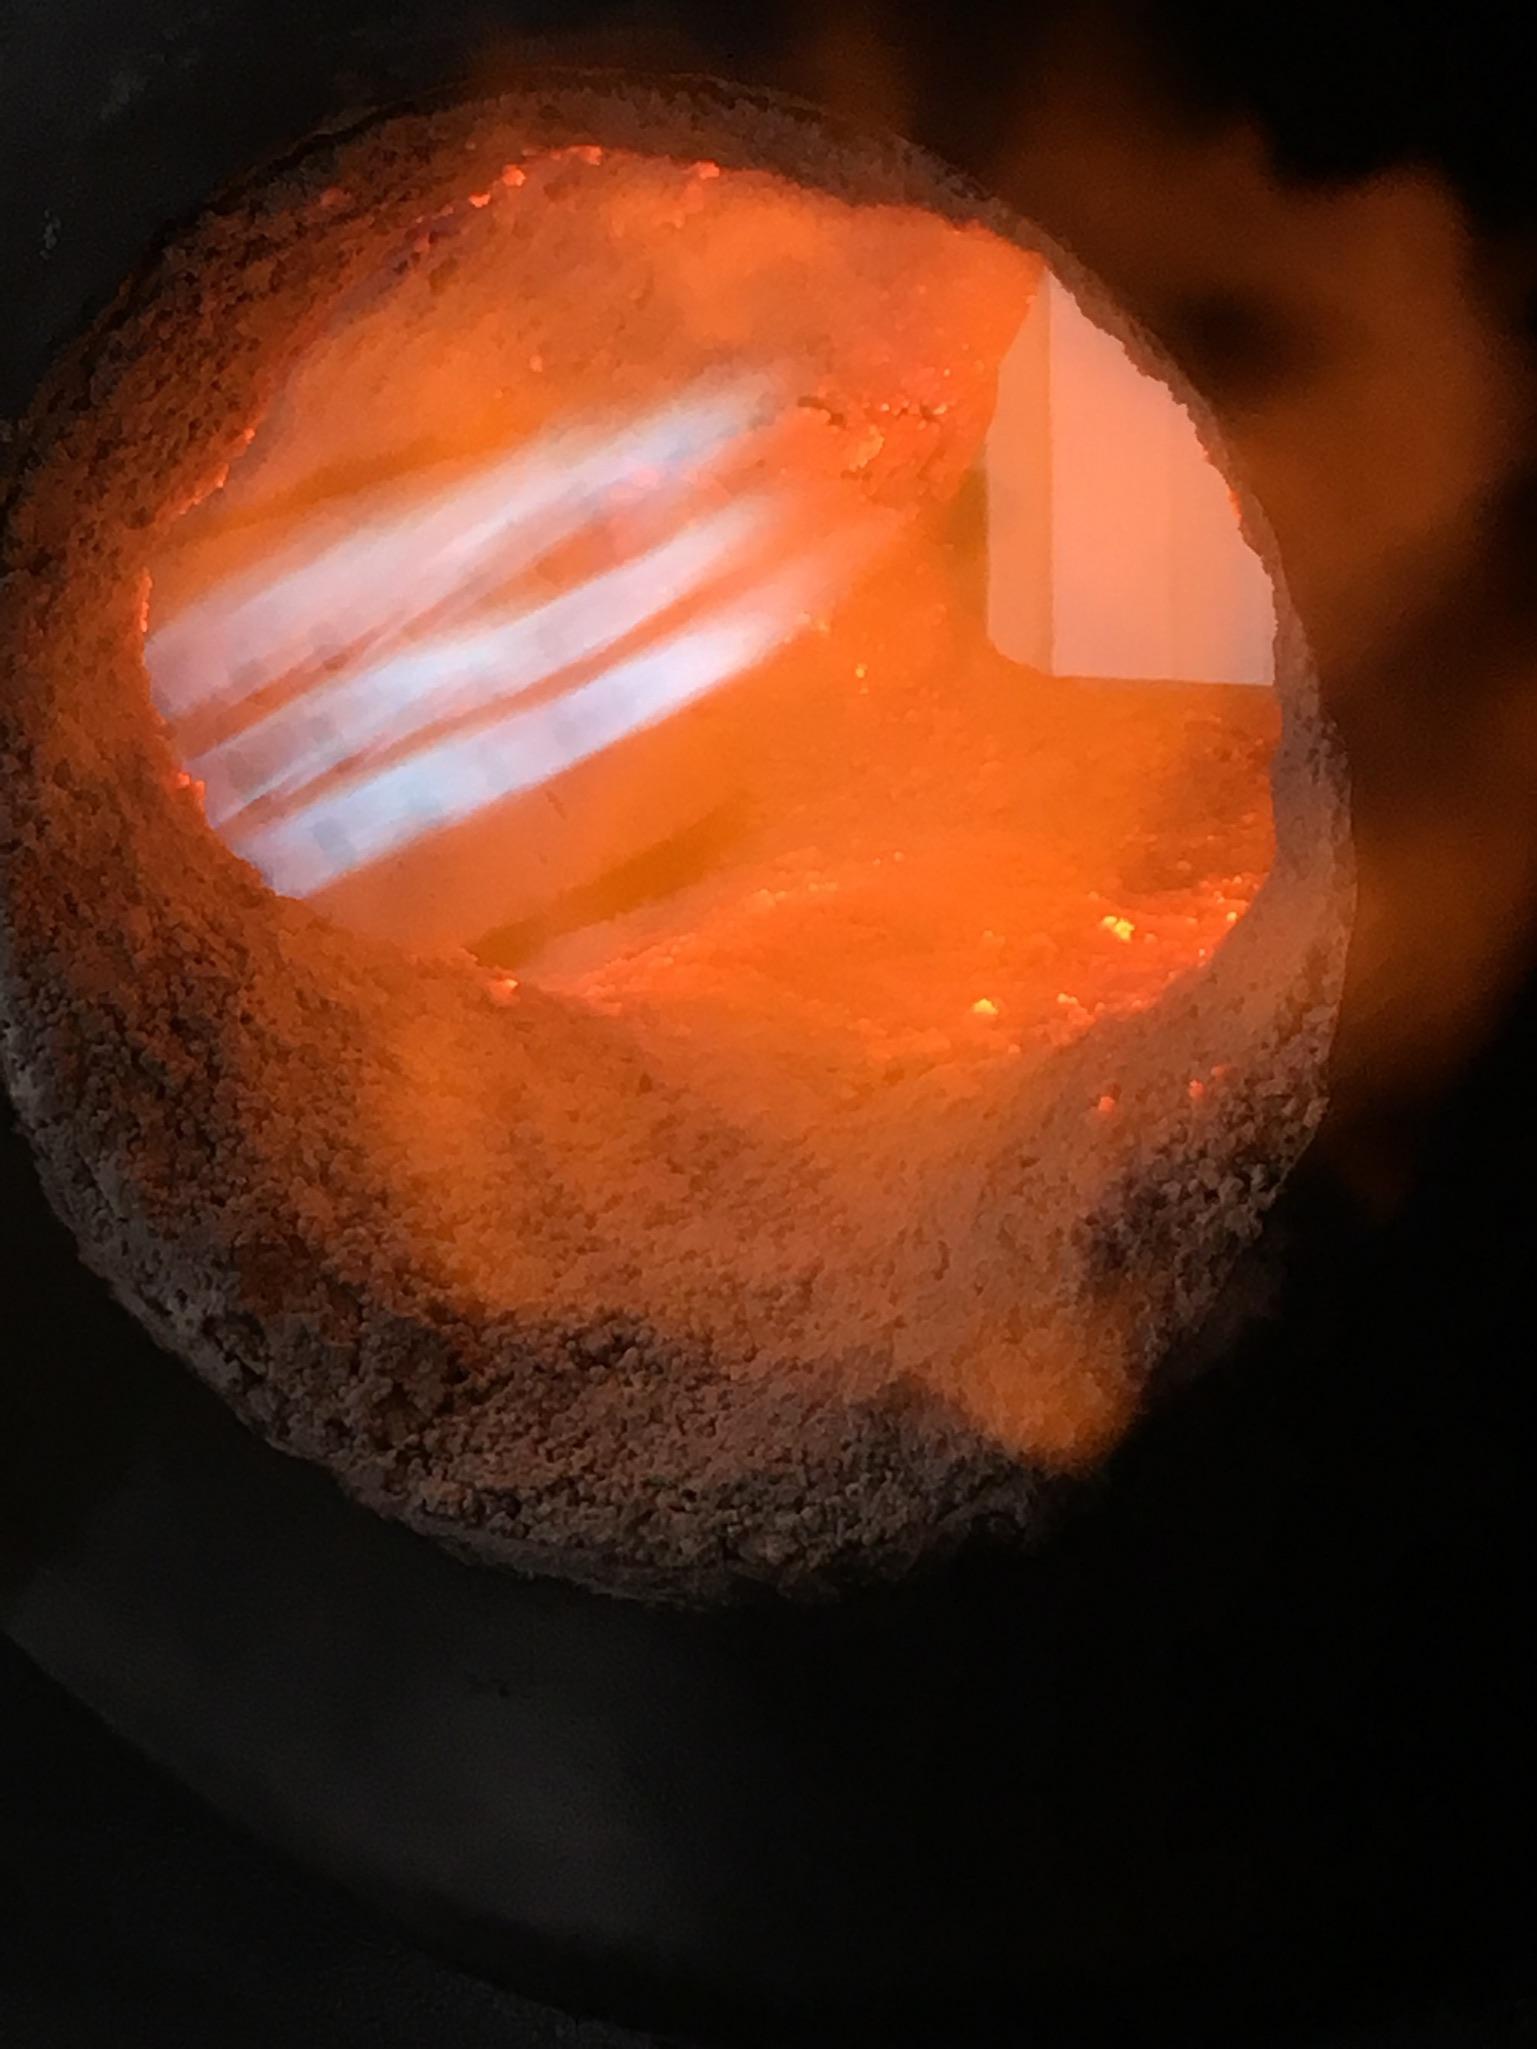
Thanks, Buzzkill. it has an awesome "swirl". If there was some way to post a short video, I'd show one that I didn't know my phone would do. But I haven't figured out how. I hit "Slo-Mo" and it took a video that runs less than a minute. When I viewed it, it has about a second at either end of normal speed but the rest of it shows the burn in slow motion. I'm hoping someone who views this thread will give me a little help on posting a short vid.
-
I don’t want to add any personal pages to this already long thread, but ya’all are invited to check out my first forge:
My First Build - completed 10-2018
A special shout-out of thanks to Frosty, Mikey, Wayne, and everyone for all the great advice. Truly could NOT have done it without you.
THANKS
-
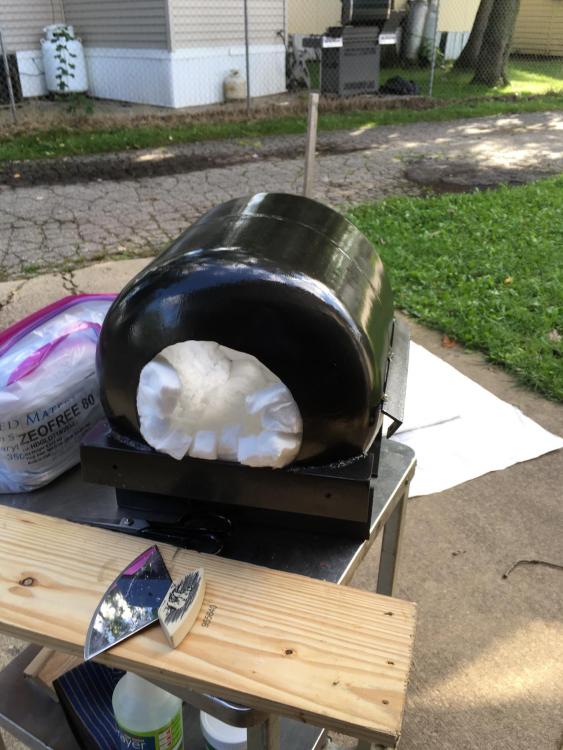
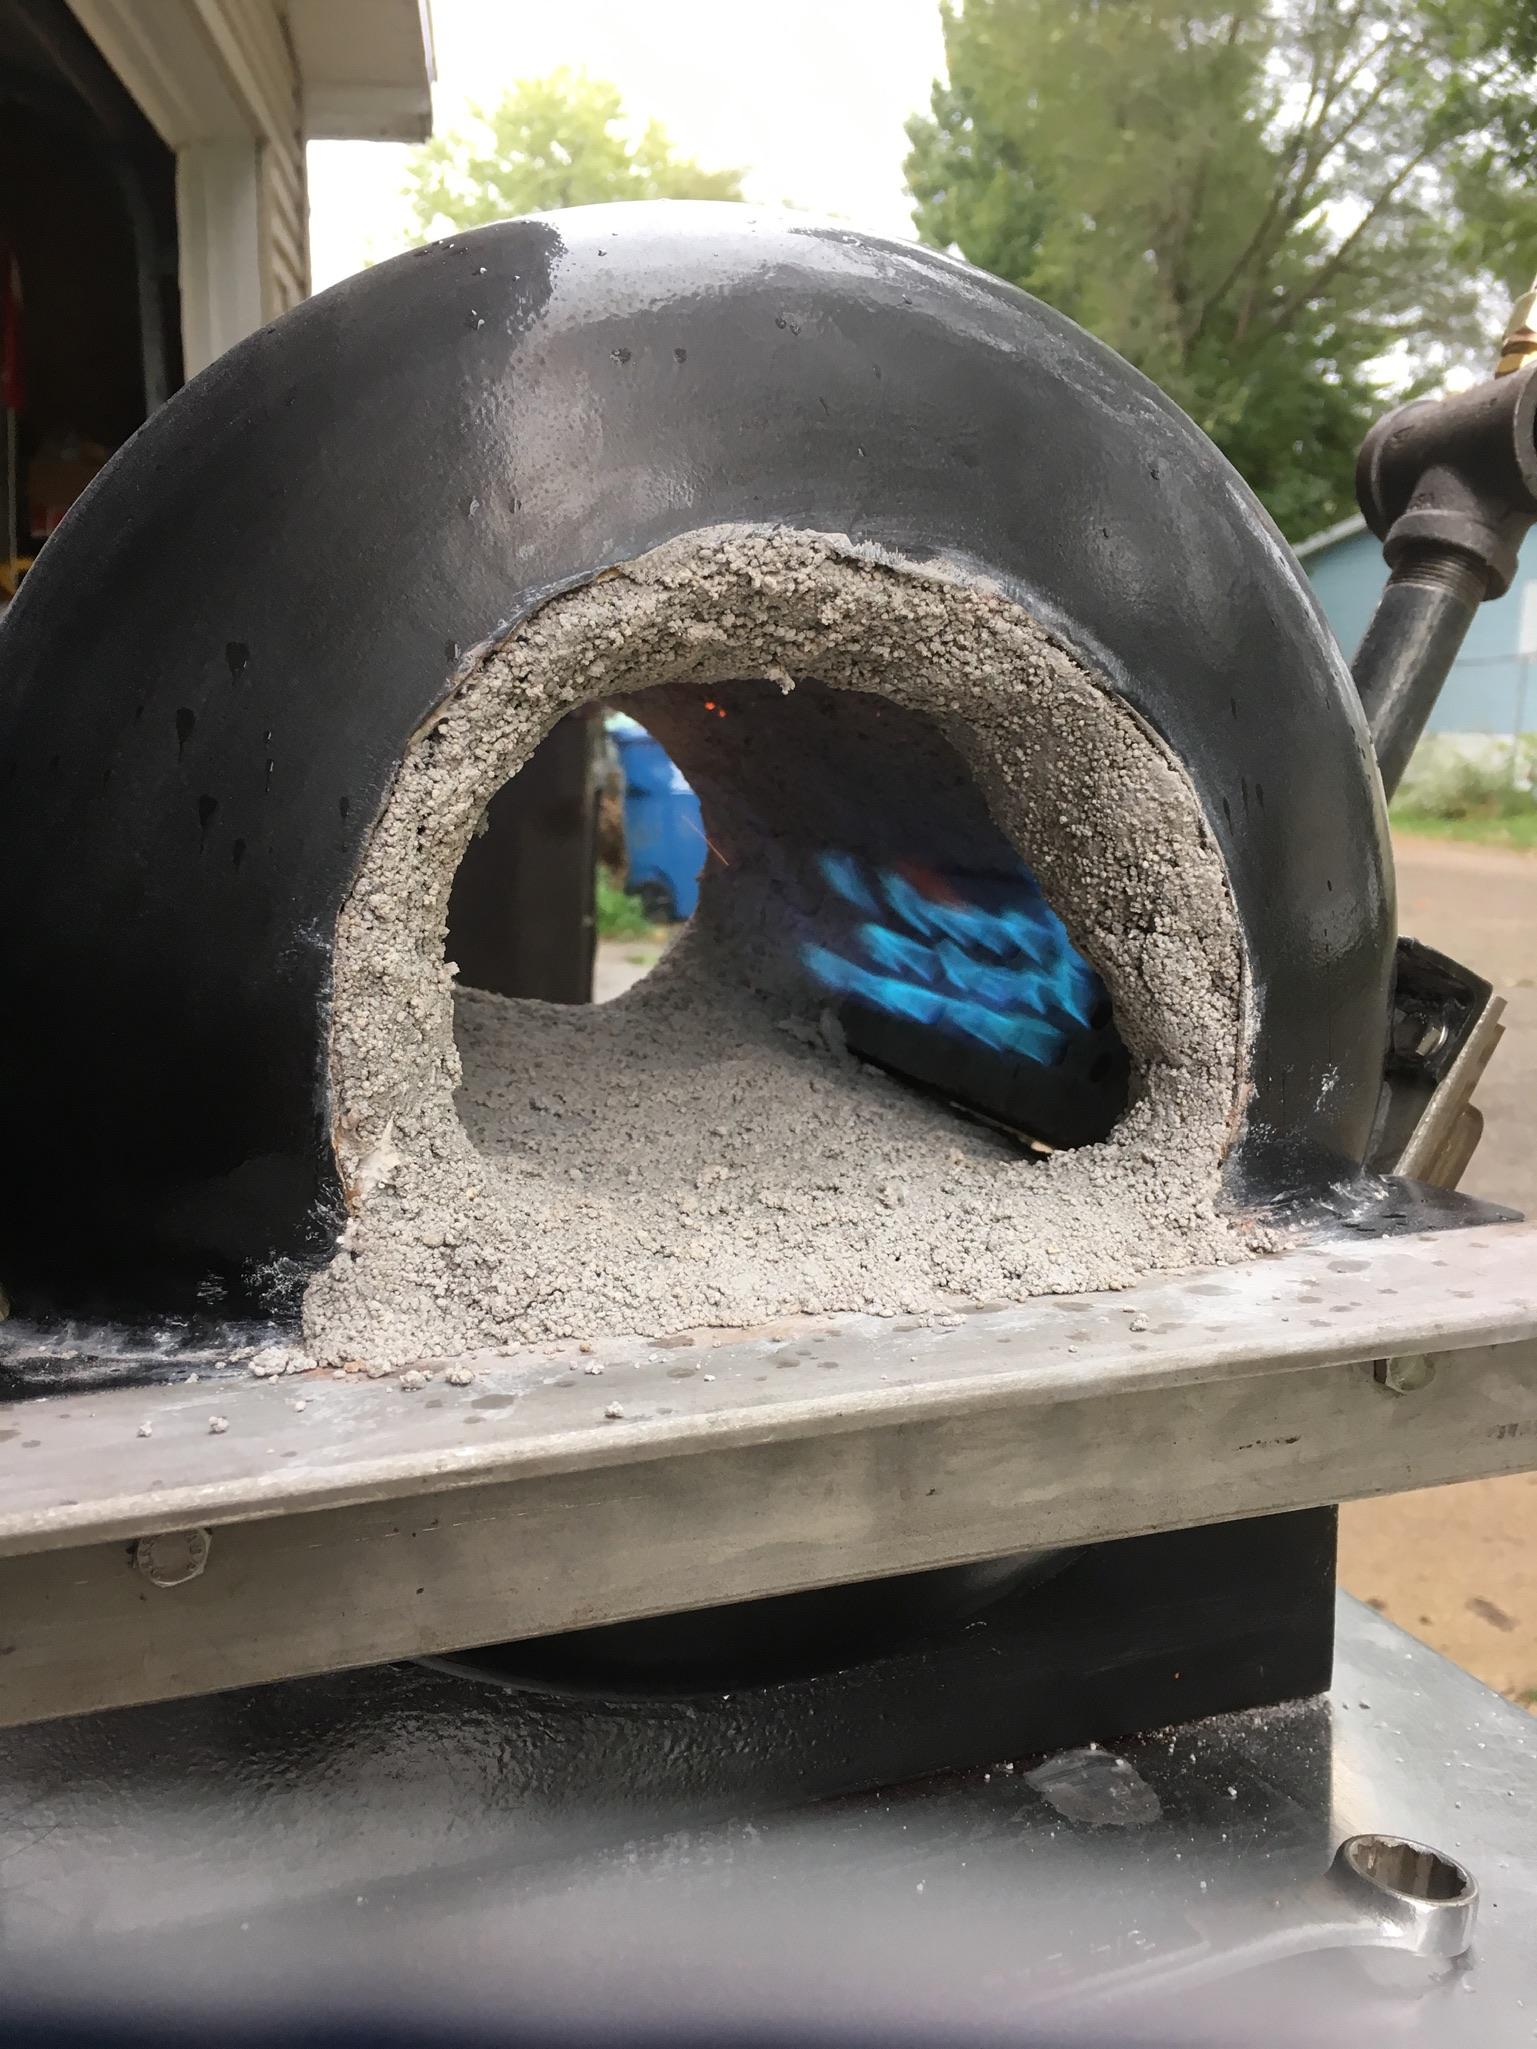
And a few photos/videos of it all fired up


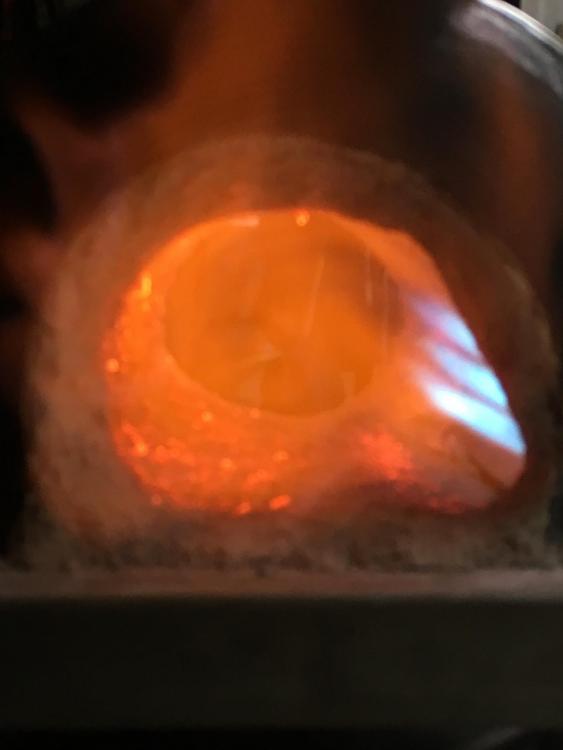


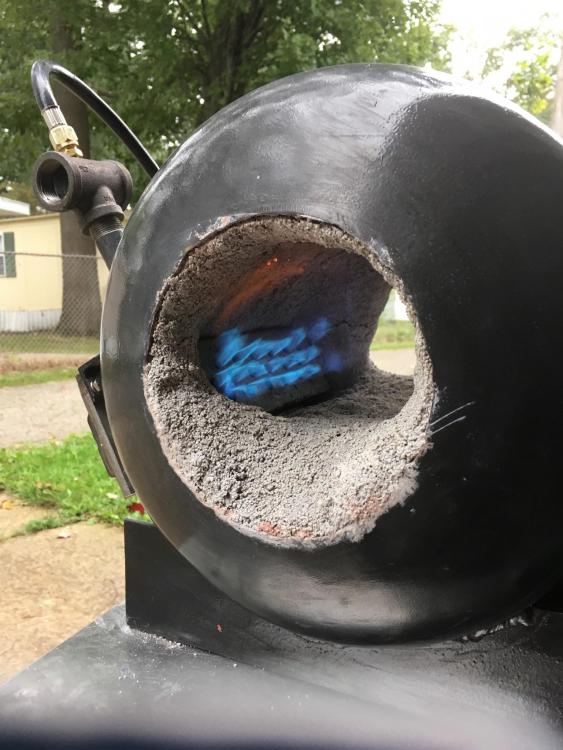
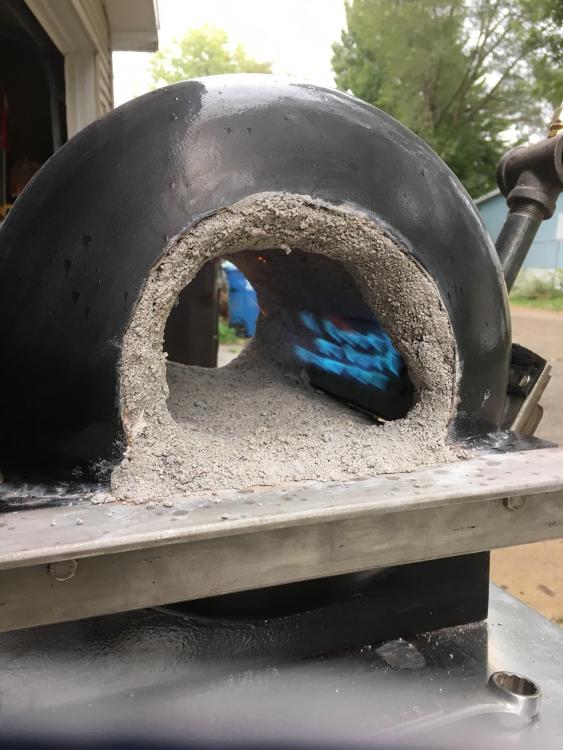
I do have a few video clips of it running, but I can’t figure out how to attach video here. It has a very nice “swirl”, which is what I was after when I mounted the Narb where and in the orientation to the chamber that I did. Overall, I’m pretty happy with it.
It seems, though, that forges are a lot like cigarettes. After you’ve been tempted to start your first one, if you’re not actually building one, you’re thinking of the next one. I’m already looking at a Freon tank that’s about 2/3 the size of this one and thinking about my leftover build supplies . .
-
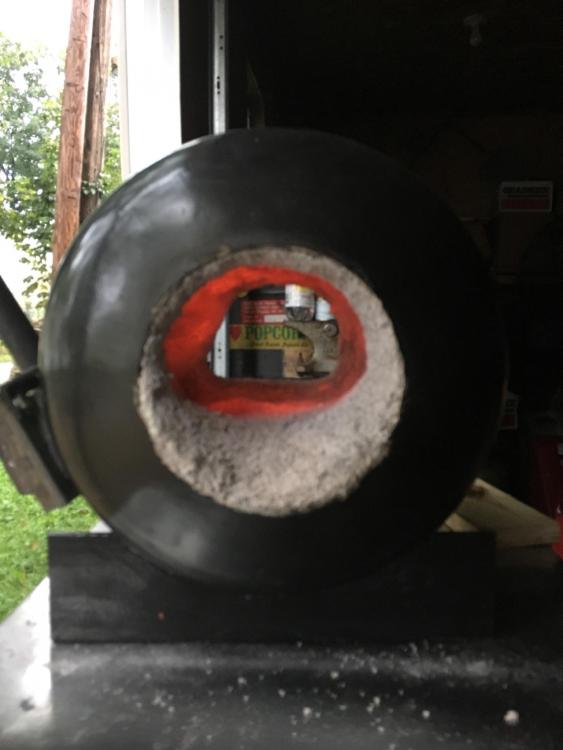
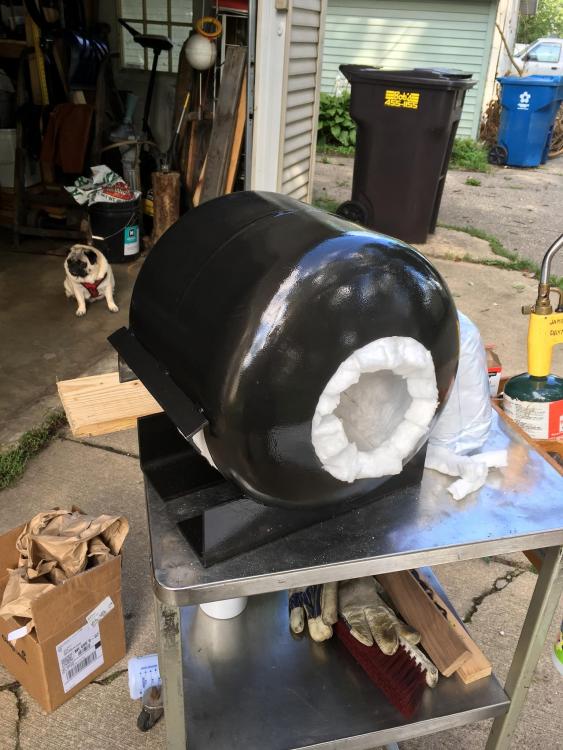
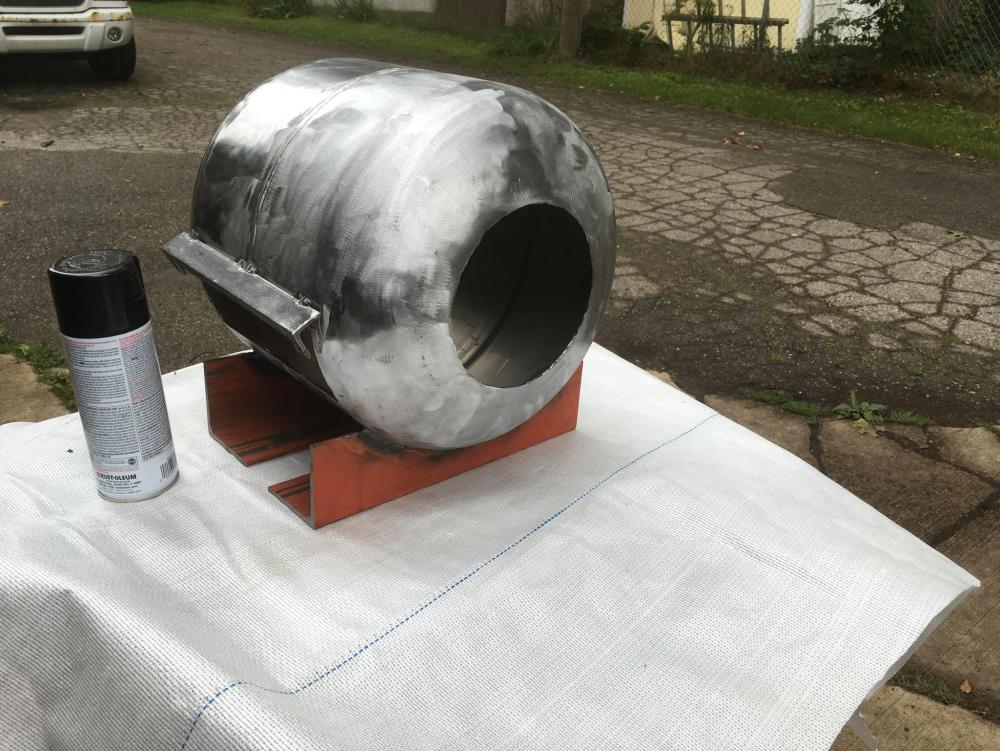
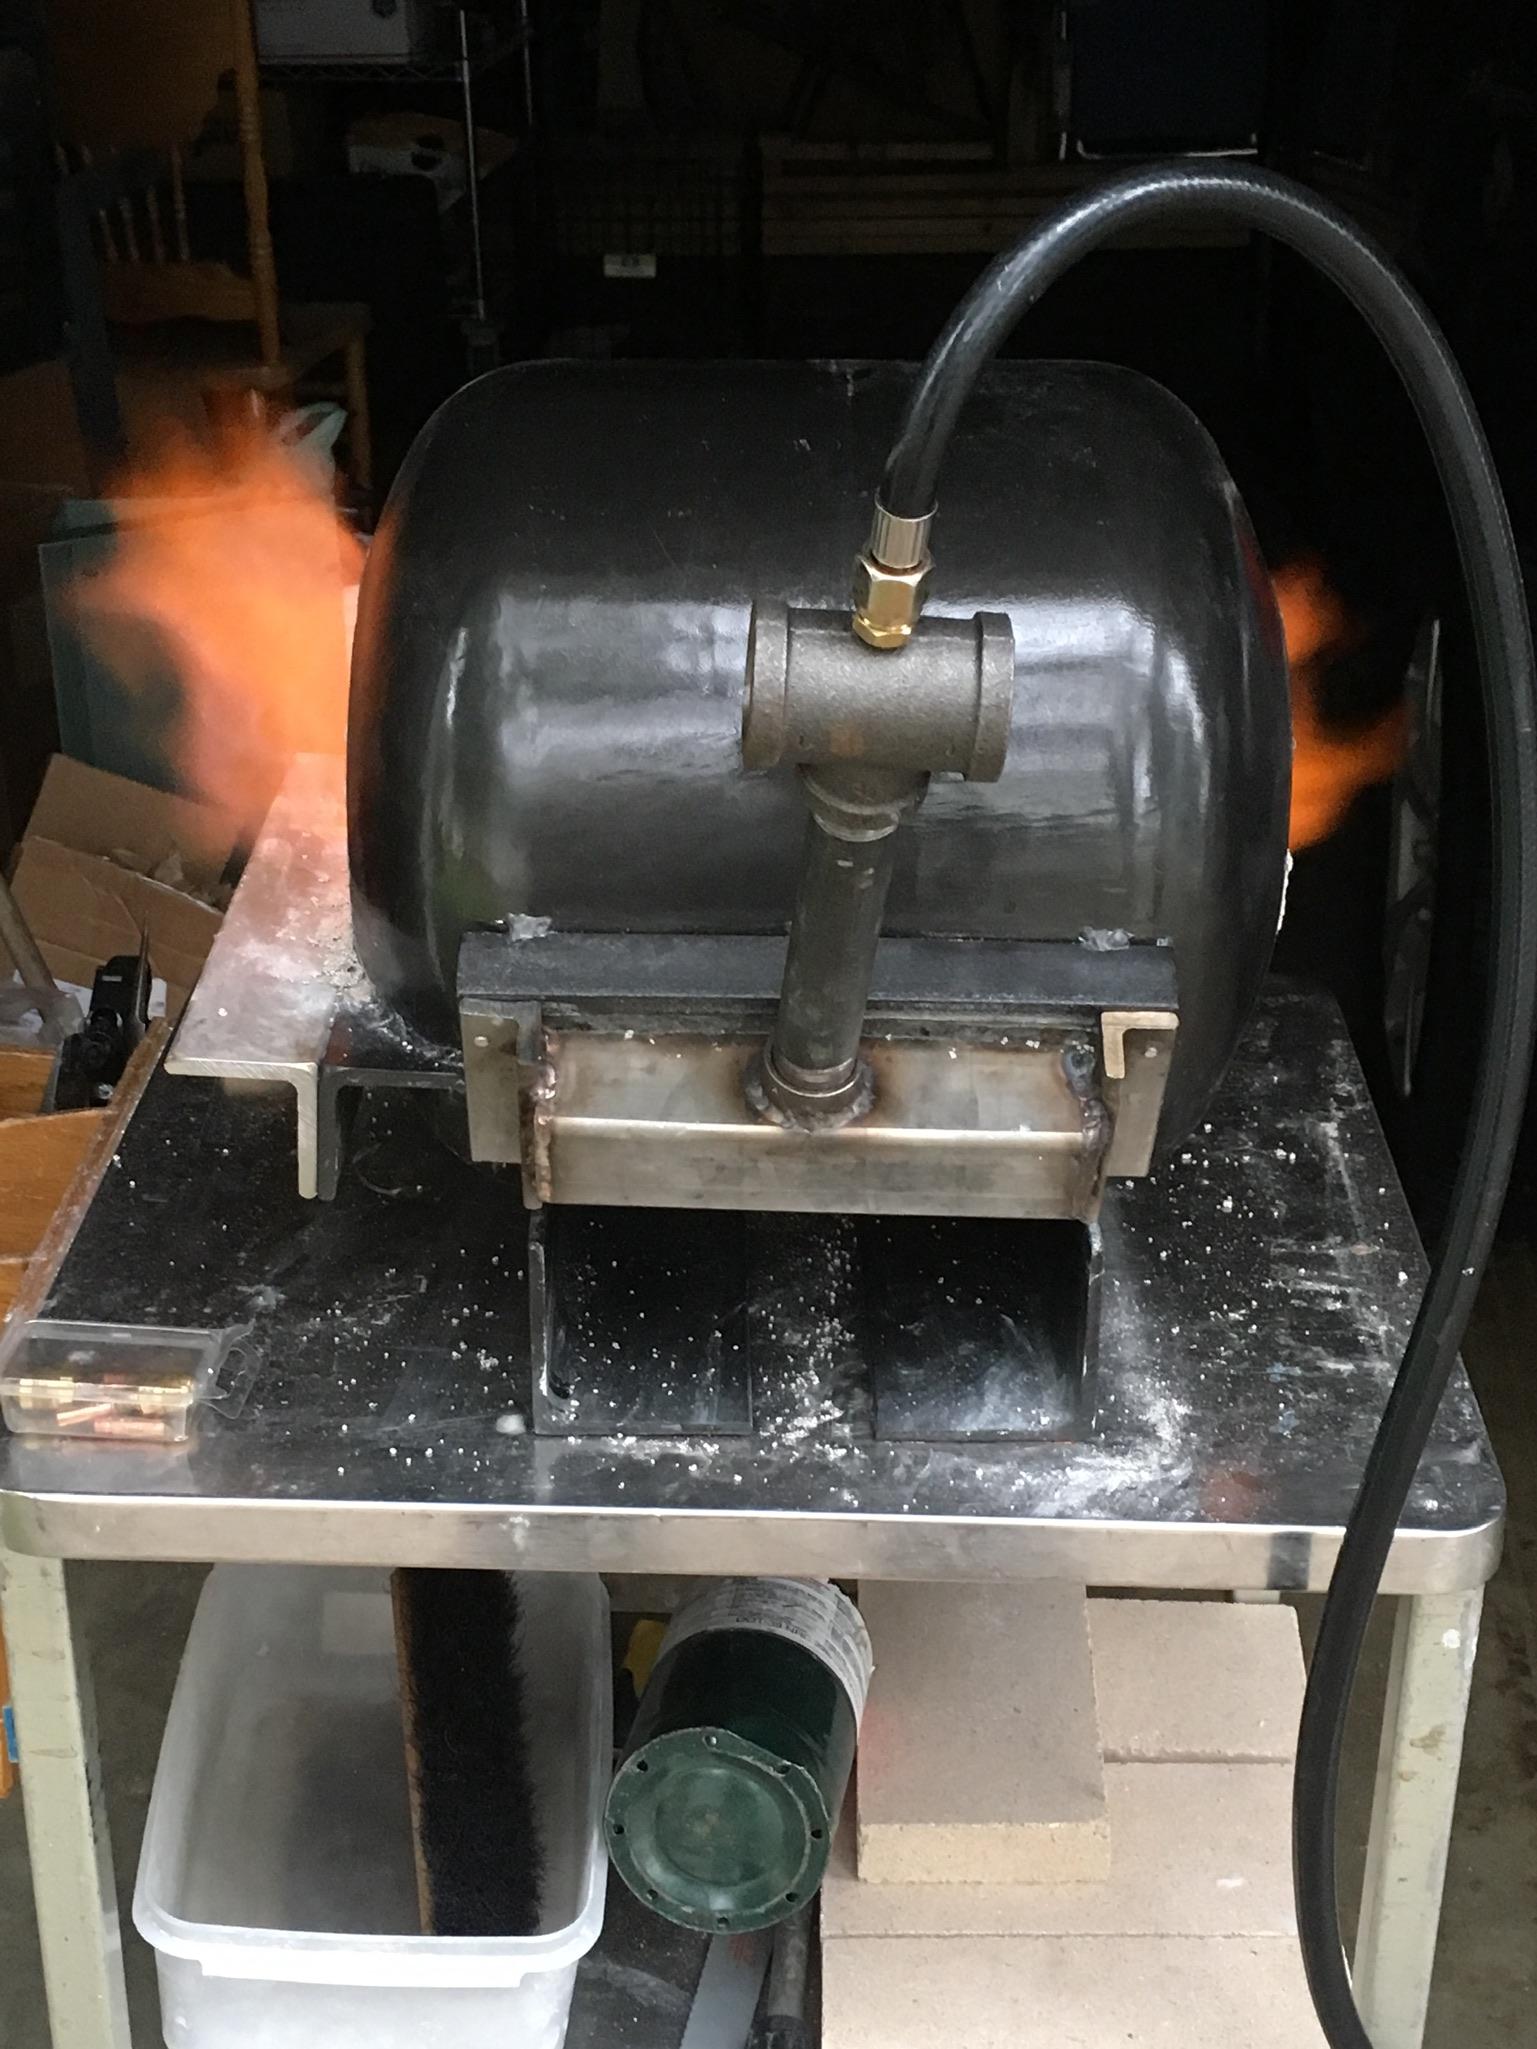
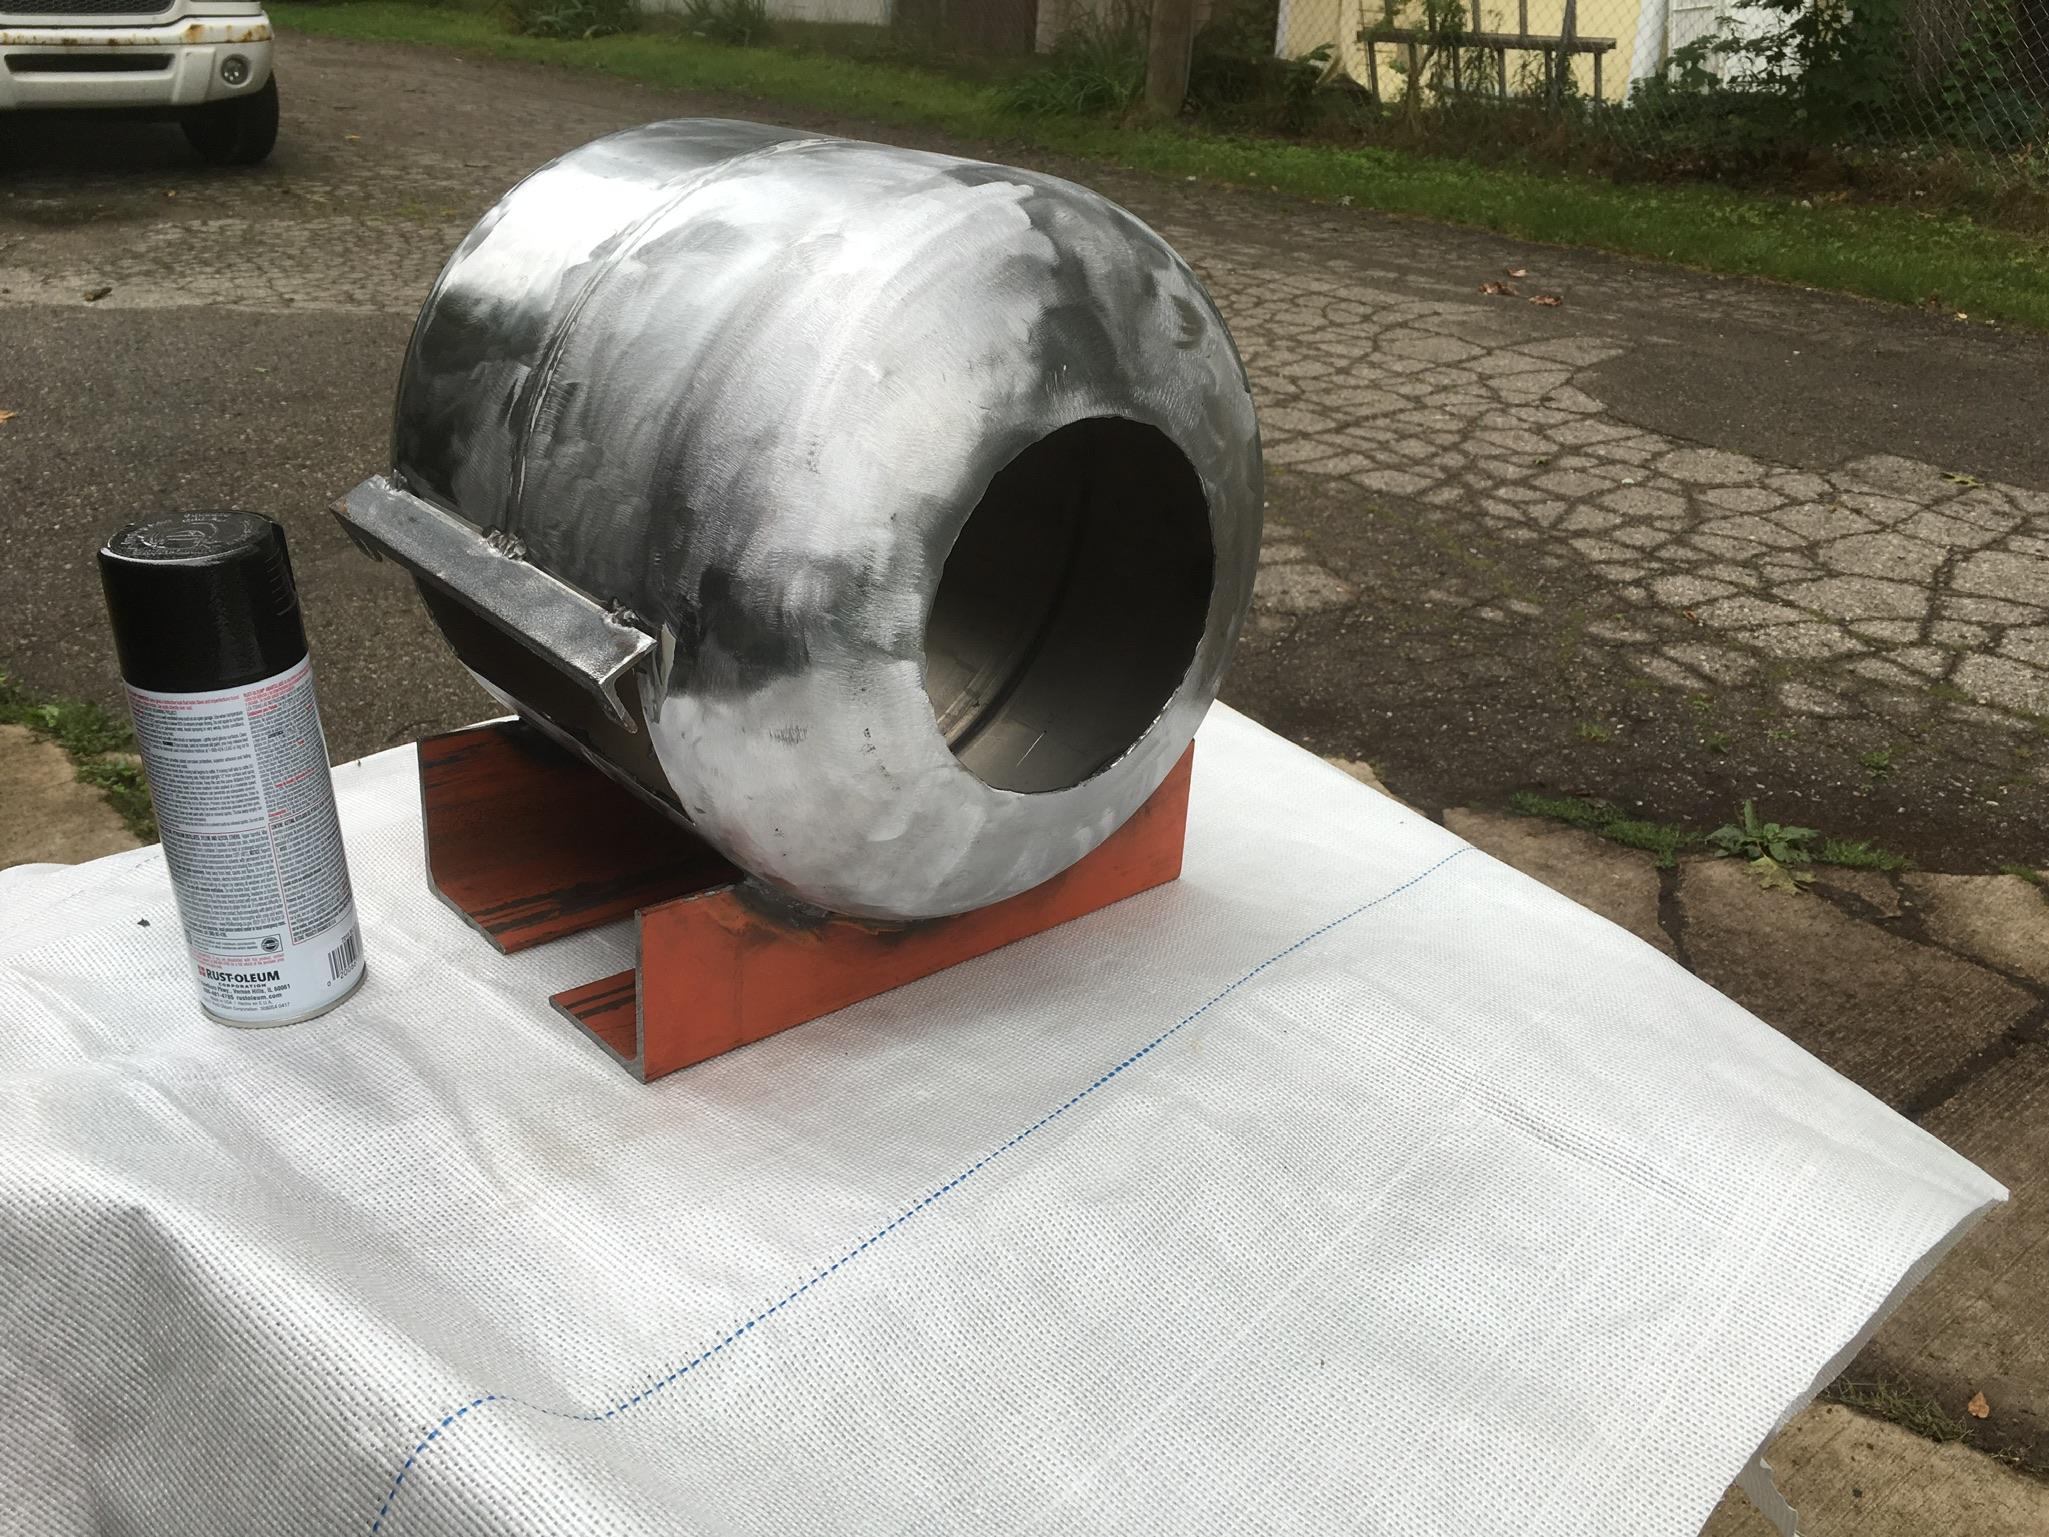
I used Rustoleum black “hammered” finish paint, because it seemed fitting, but dang! It turned out looking good, too! As you’ll note in the background, I was properly su”pug”vised throughout the entire build
-
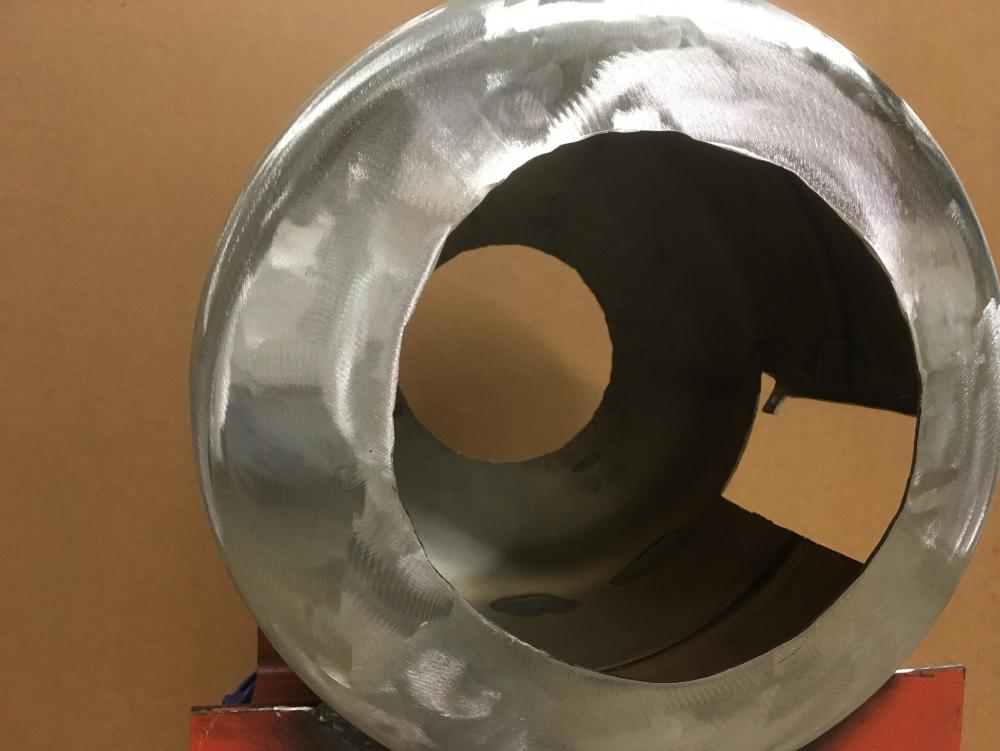
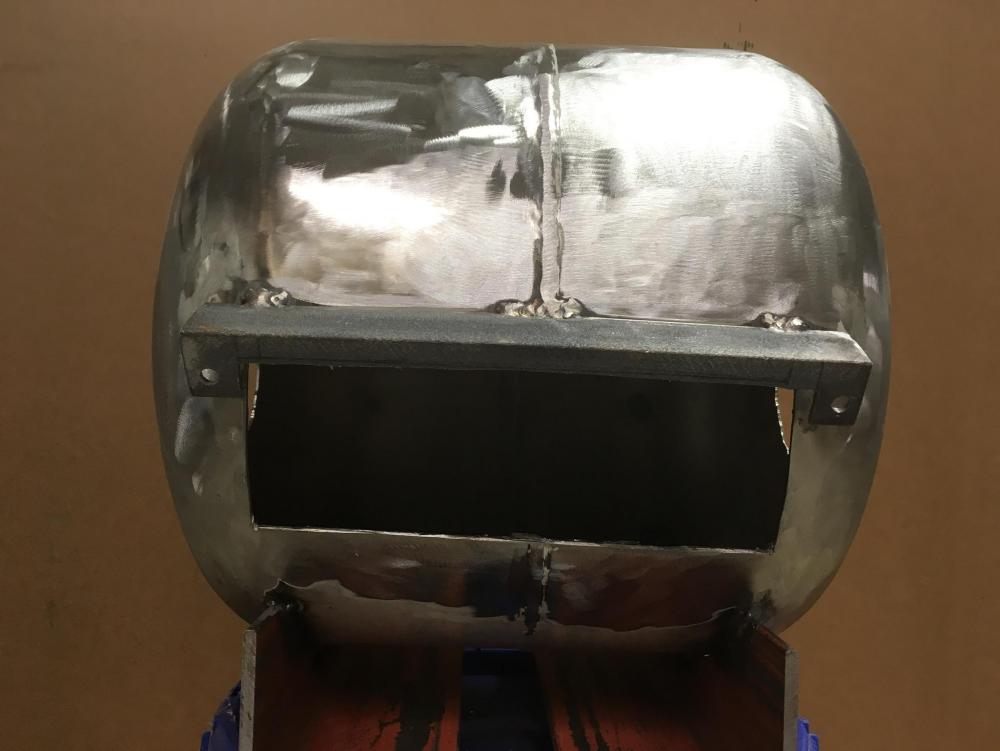
It’s taken a while, but my forge build is finally complete bar the IR reflective coating. Many thanks to all who gave advice.
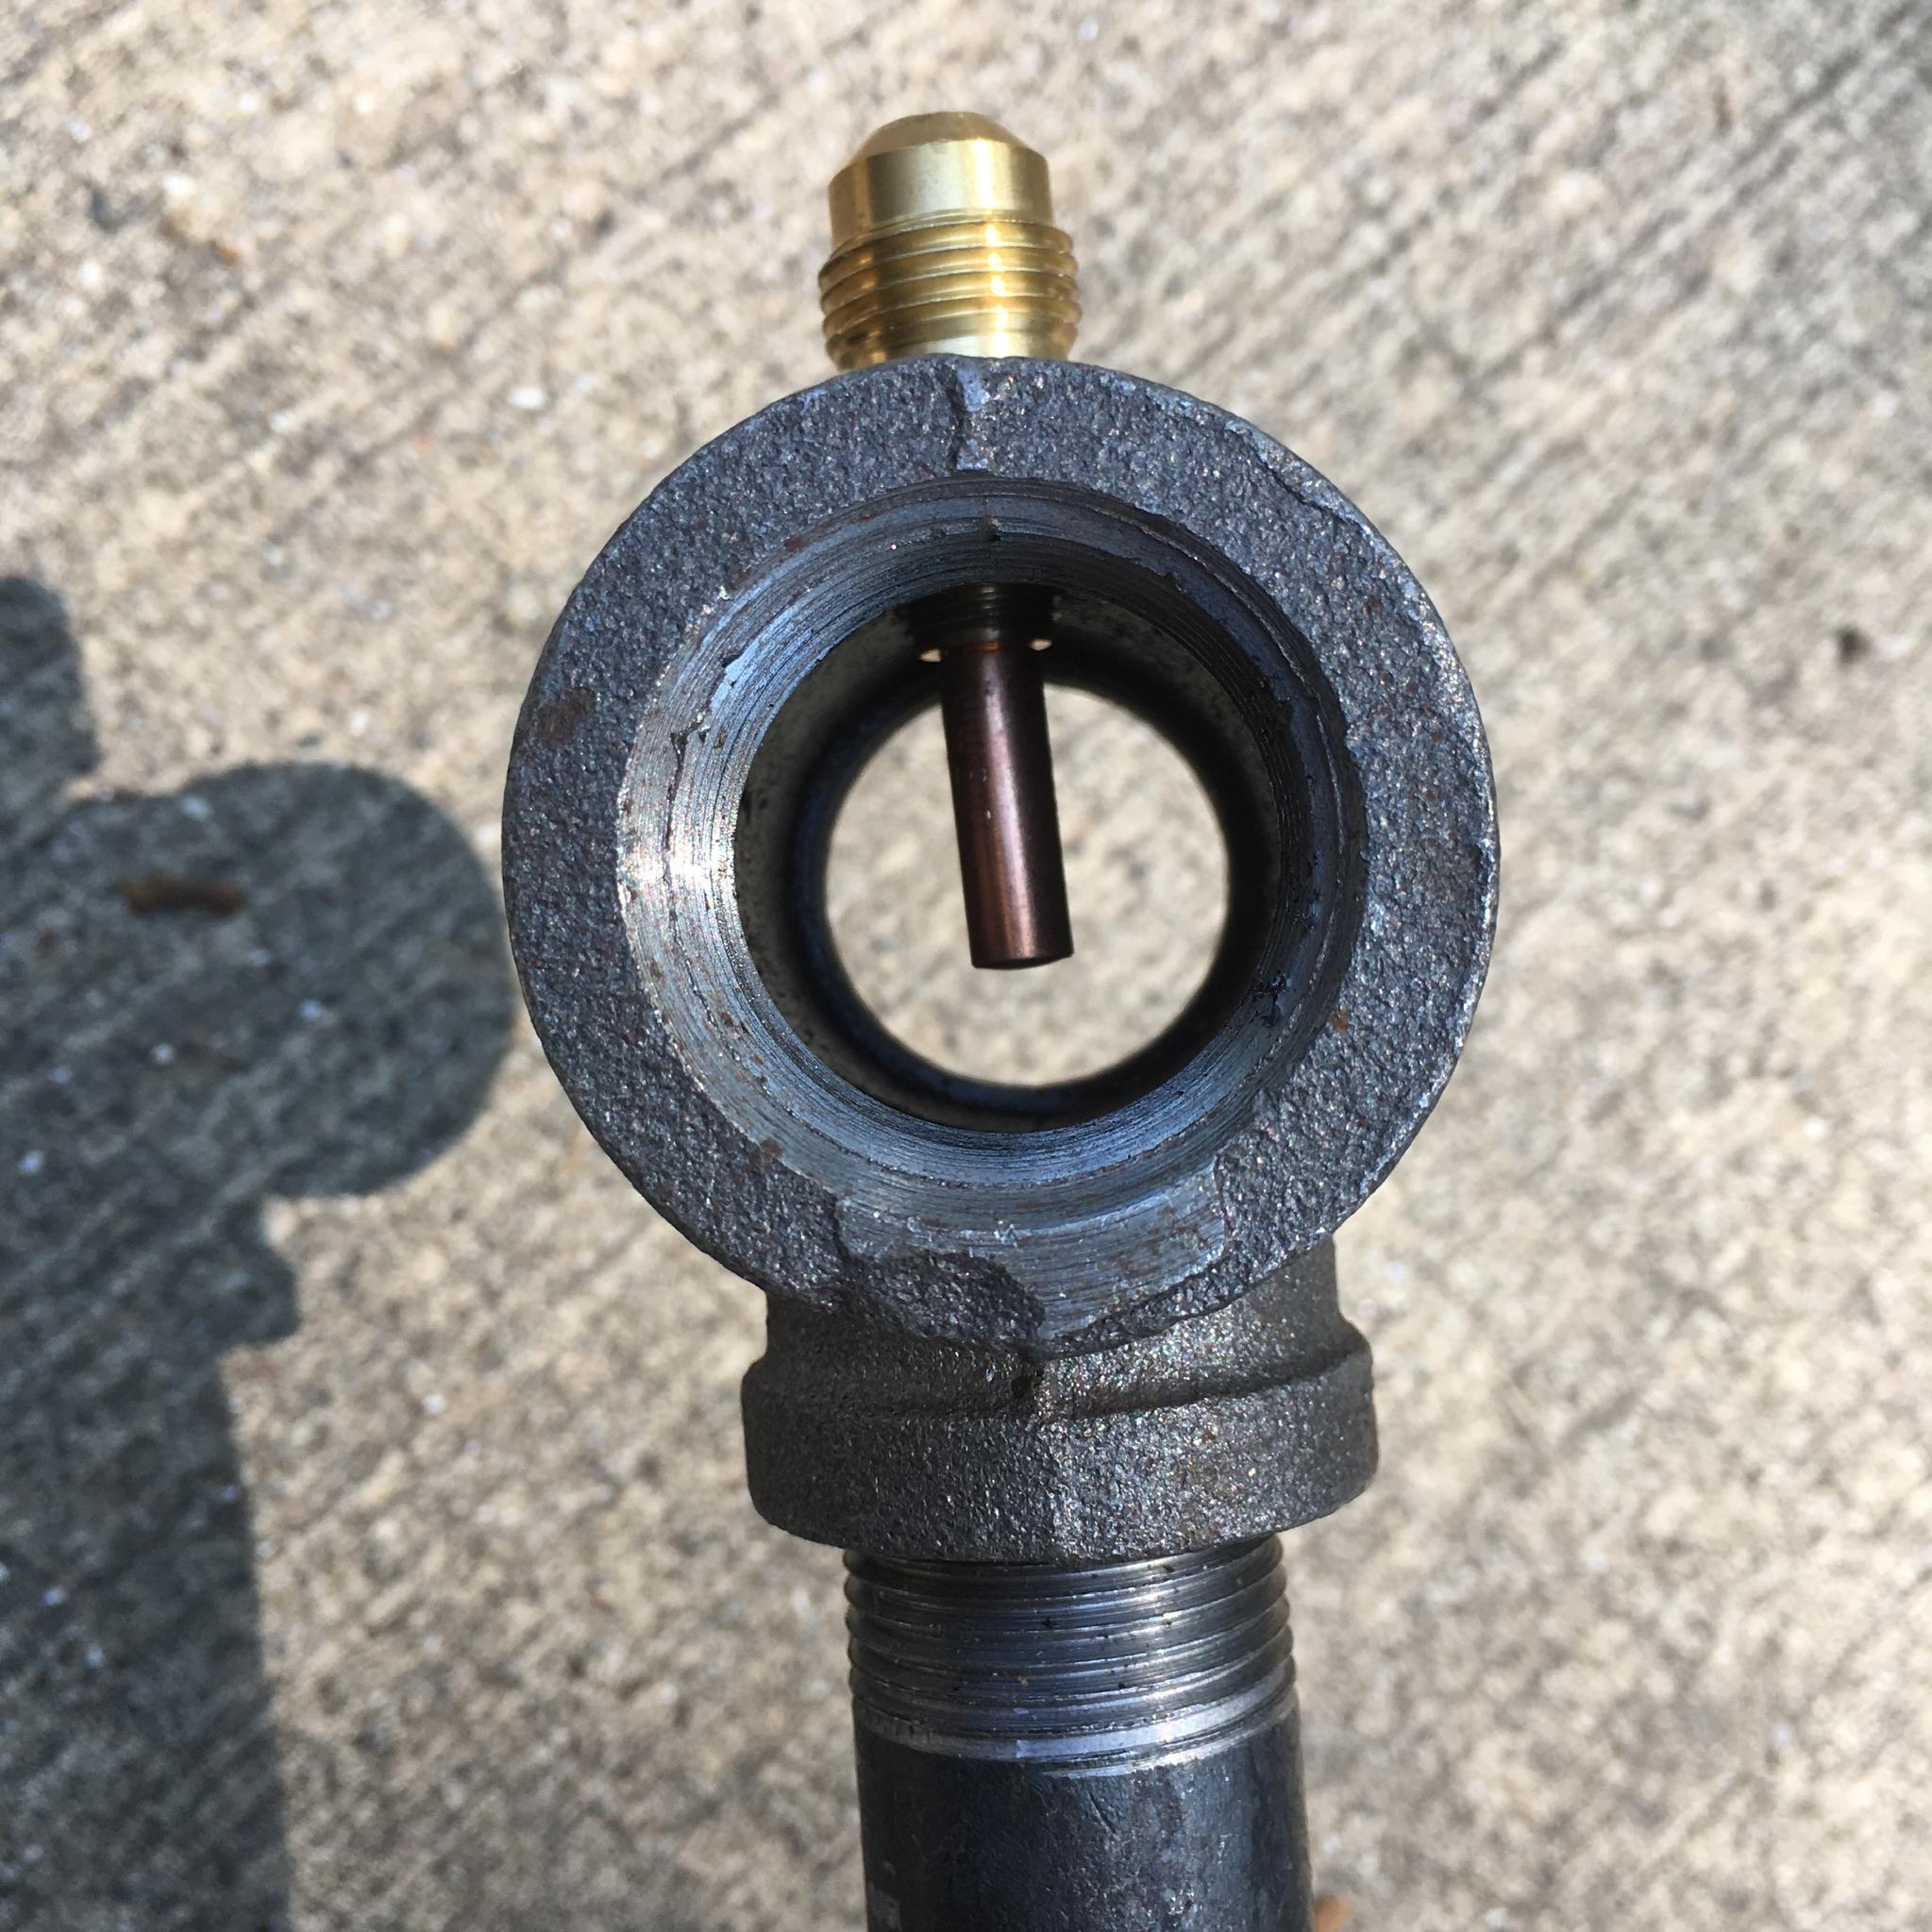
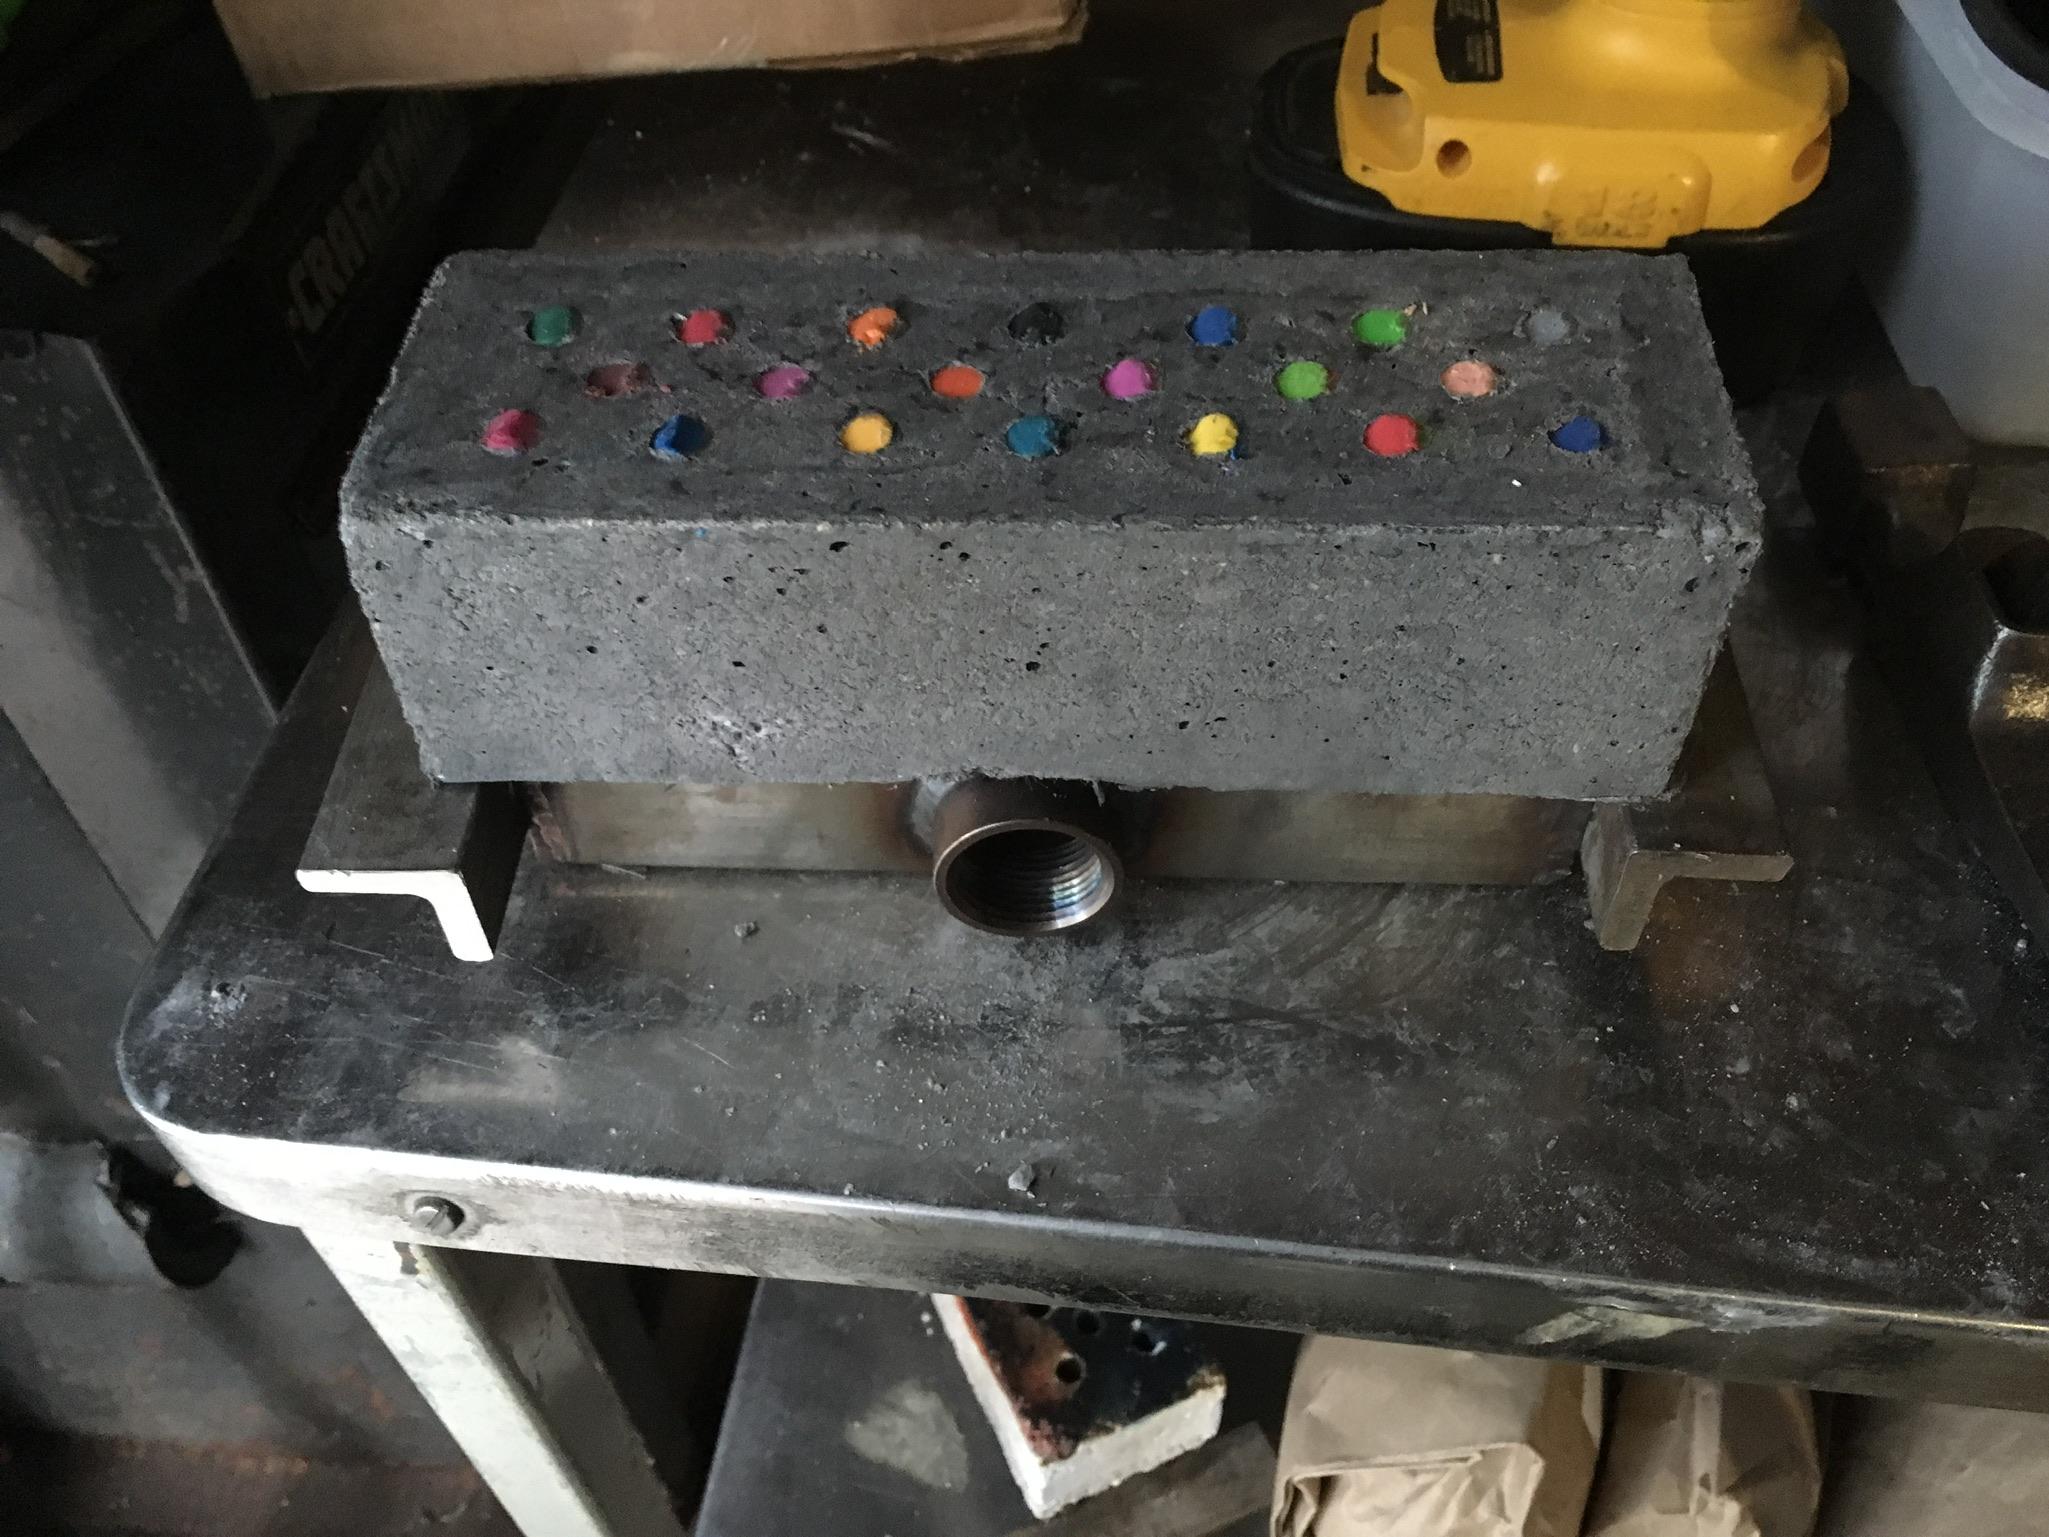
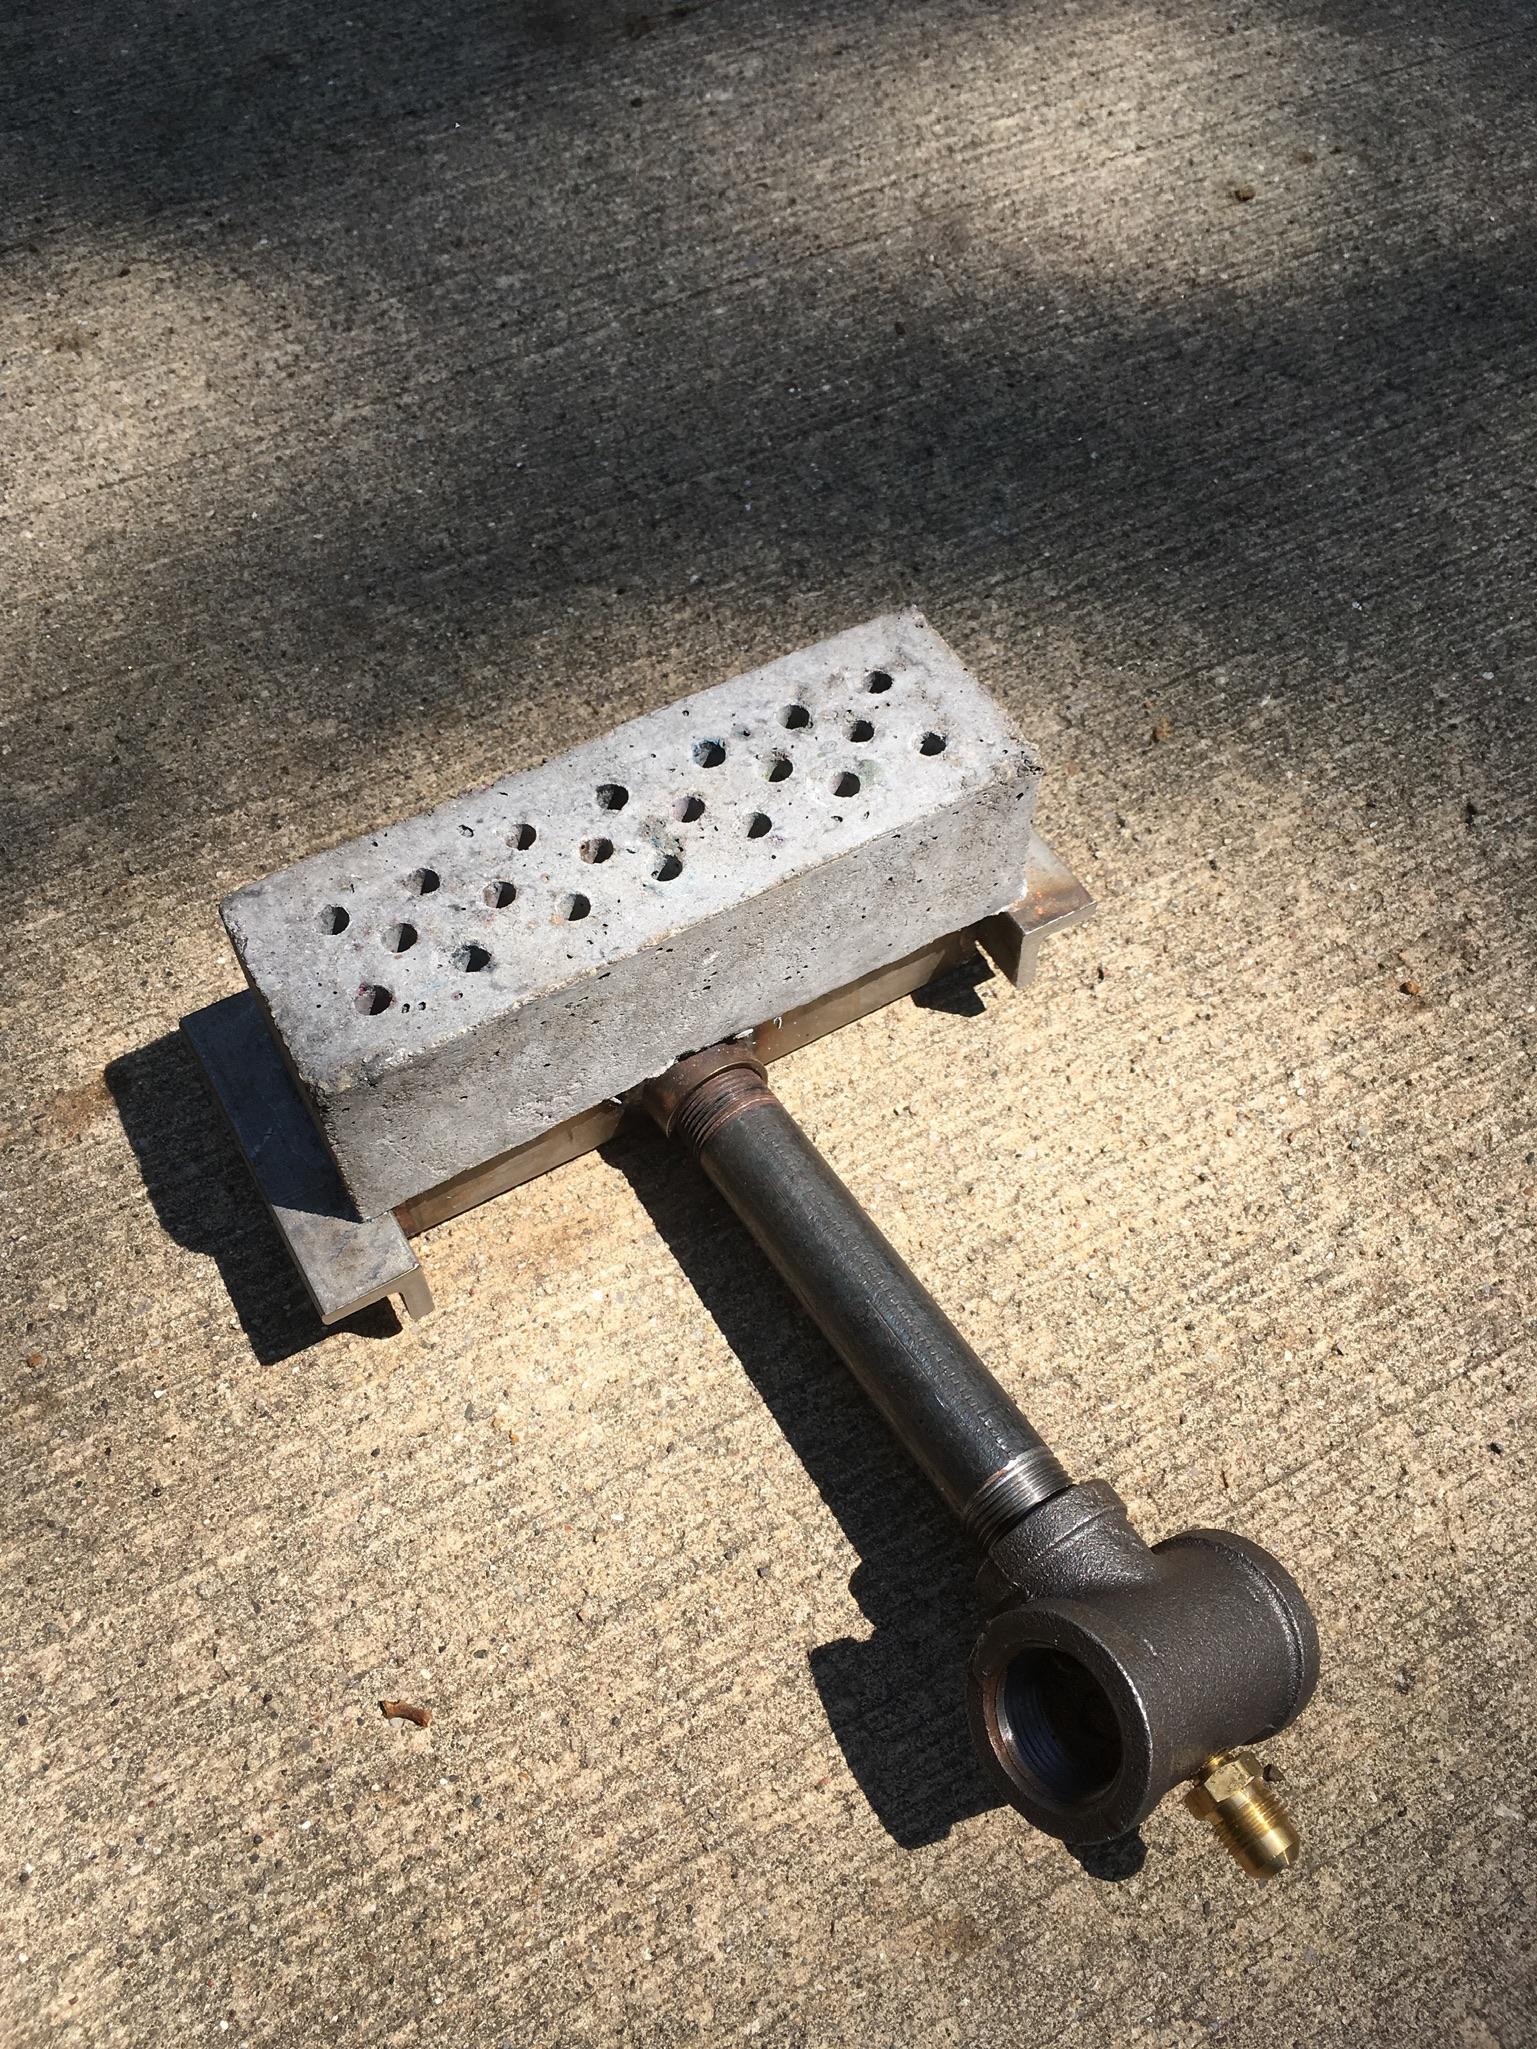
I started by building a naturally Aspirated ribbon burner on a 3/4” Frosty T-burner mixer. I built the frame for the castable from scrap wood and put shipping tape, the type used to tape boxes shut, on what would become the interior of the form before assembling it, punching holes in each crayon socket and coating it with Crisco (butter flavored, for the curious) before inserting the crayons. This combination worked like a dream as a release agent. I highly recommend it.
The mix chamber was built from 2X2 square tubing, 1-1/2 inch shorter than the length of the flat portion of the shell. I just used a couple of pieces of hardwood to vibrate the Mizzou I used for the port section, but that rocked quite well. I could only push the reinforcing wire about halfway down into it, but by vibrating (hitting) it with the sticks, it settled in nicely and when the form was removed, no voids.


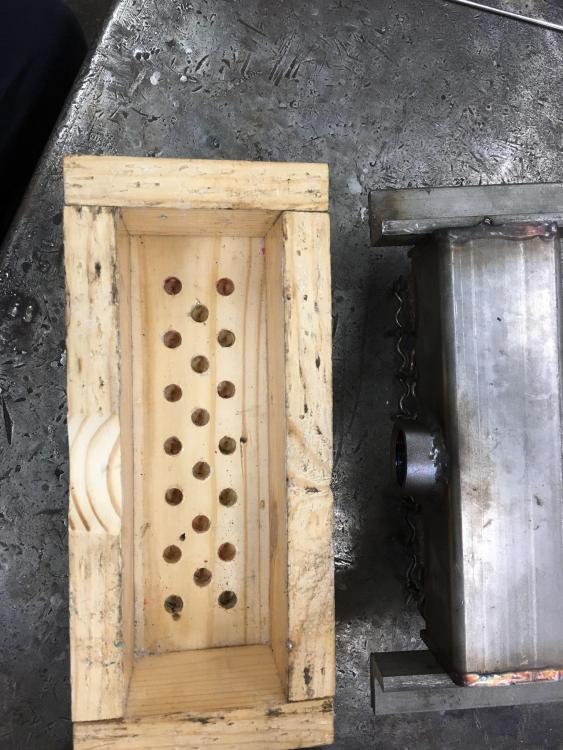


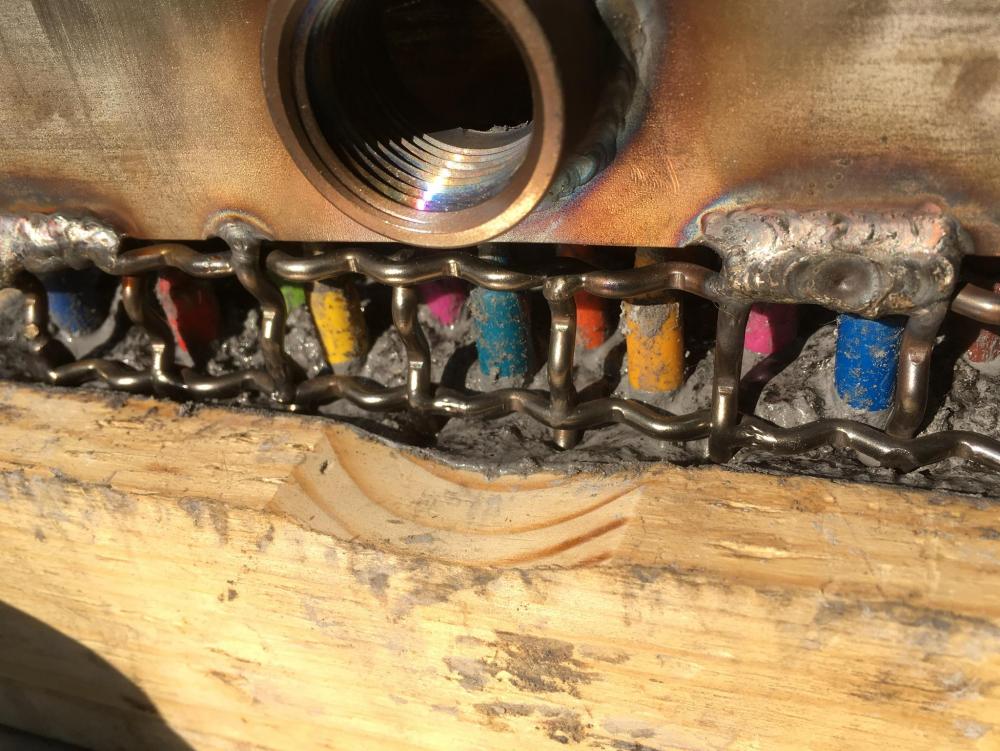
I had greased the crayons, and tried to pull them, but broke all but one or two . So I drilled them out with three progressively larger bits and pushed the last little bit out with the flat end of a bit one size smaller than the holes. The hardest part was getting the crayon residue out of the air mix chamber.
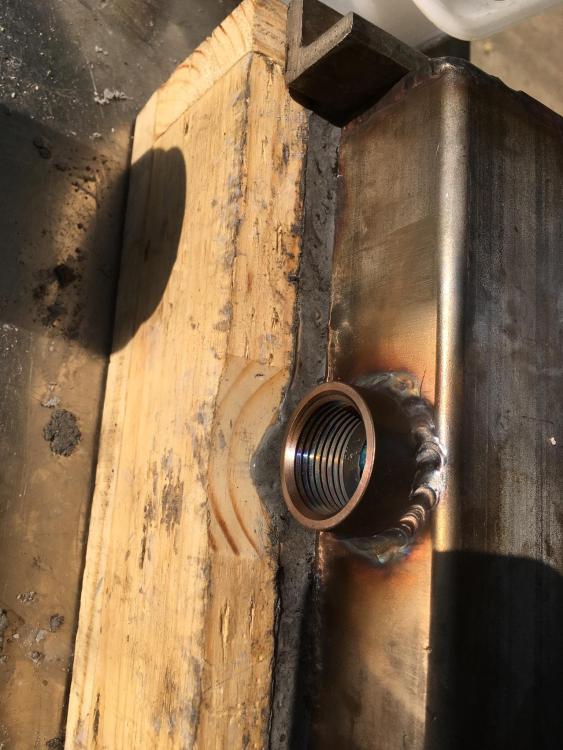
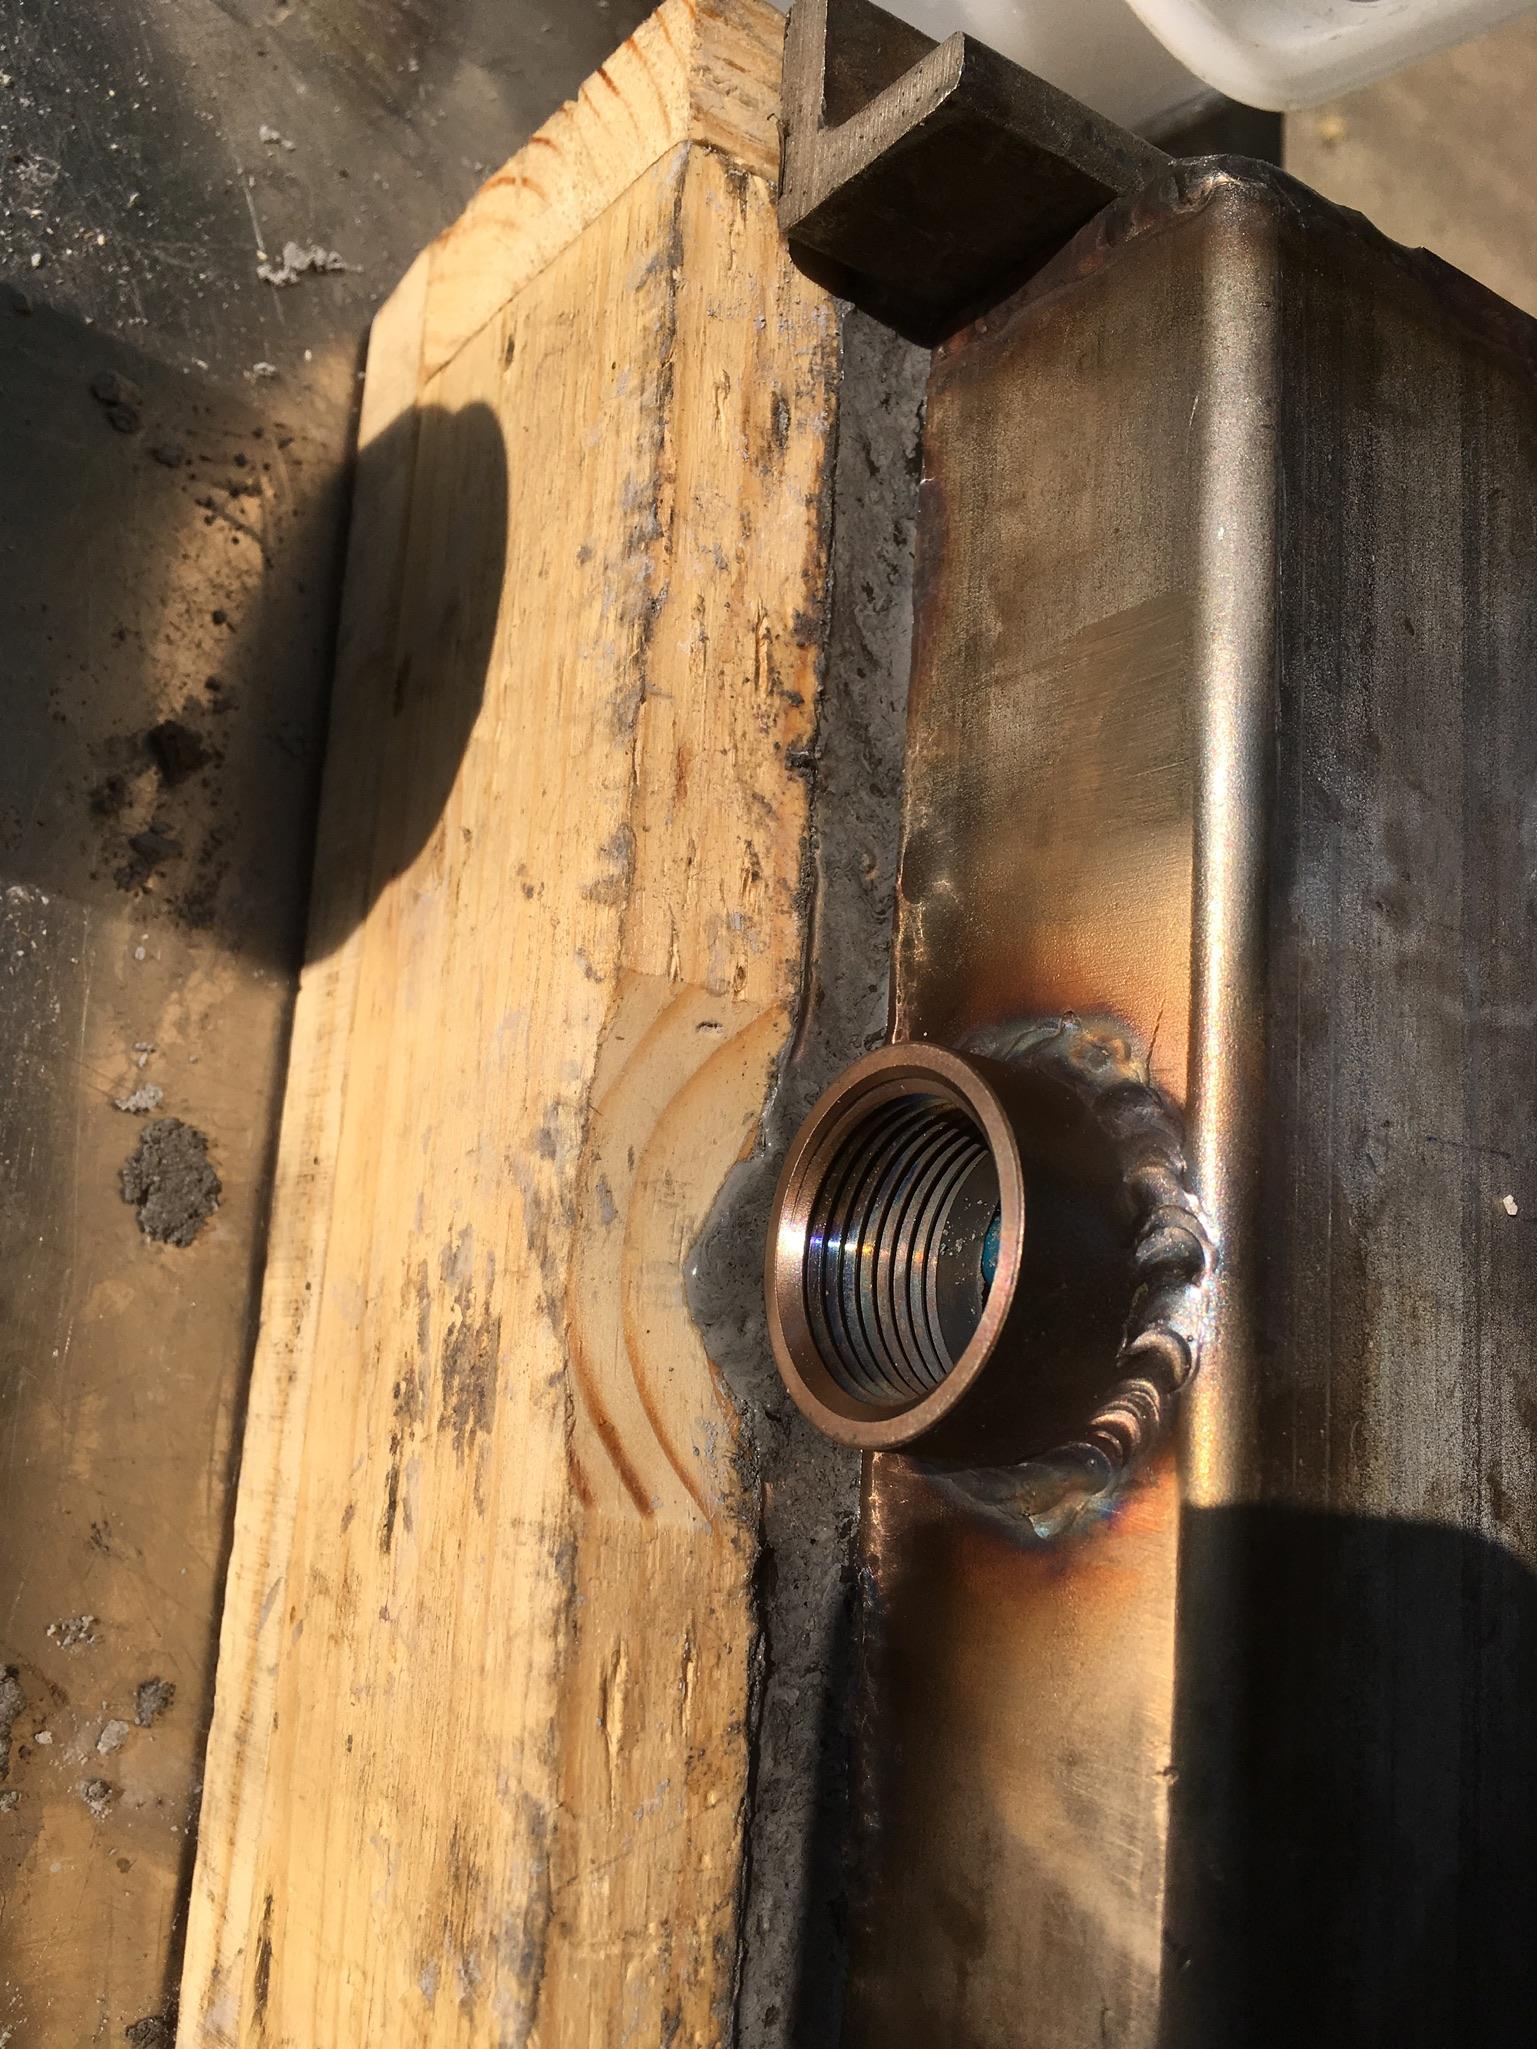
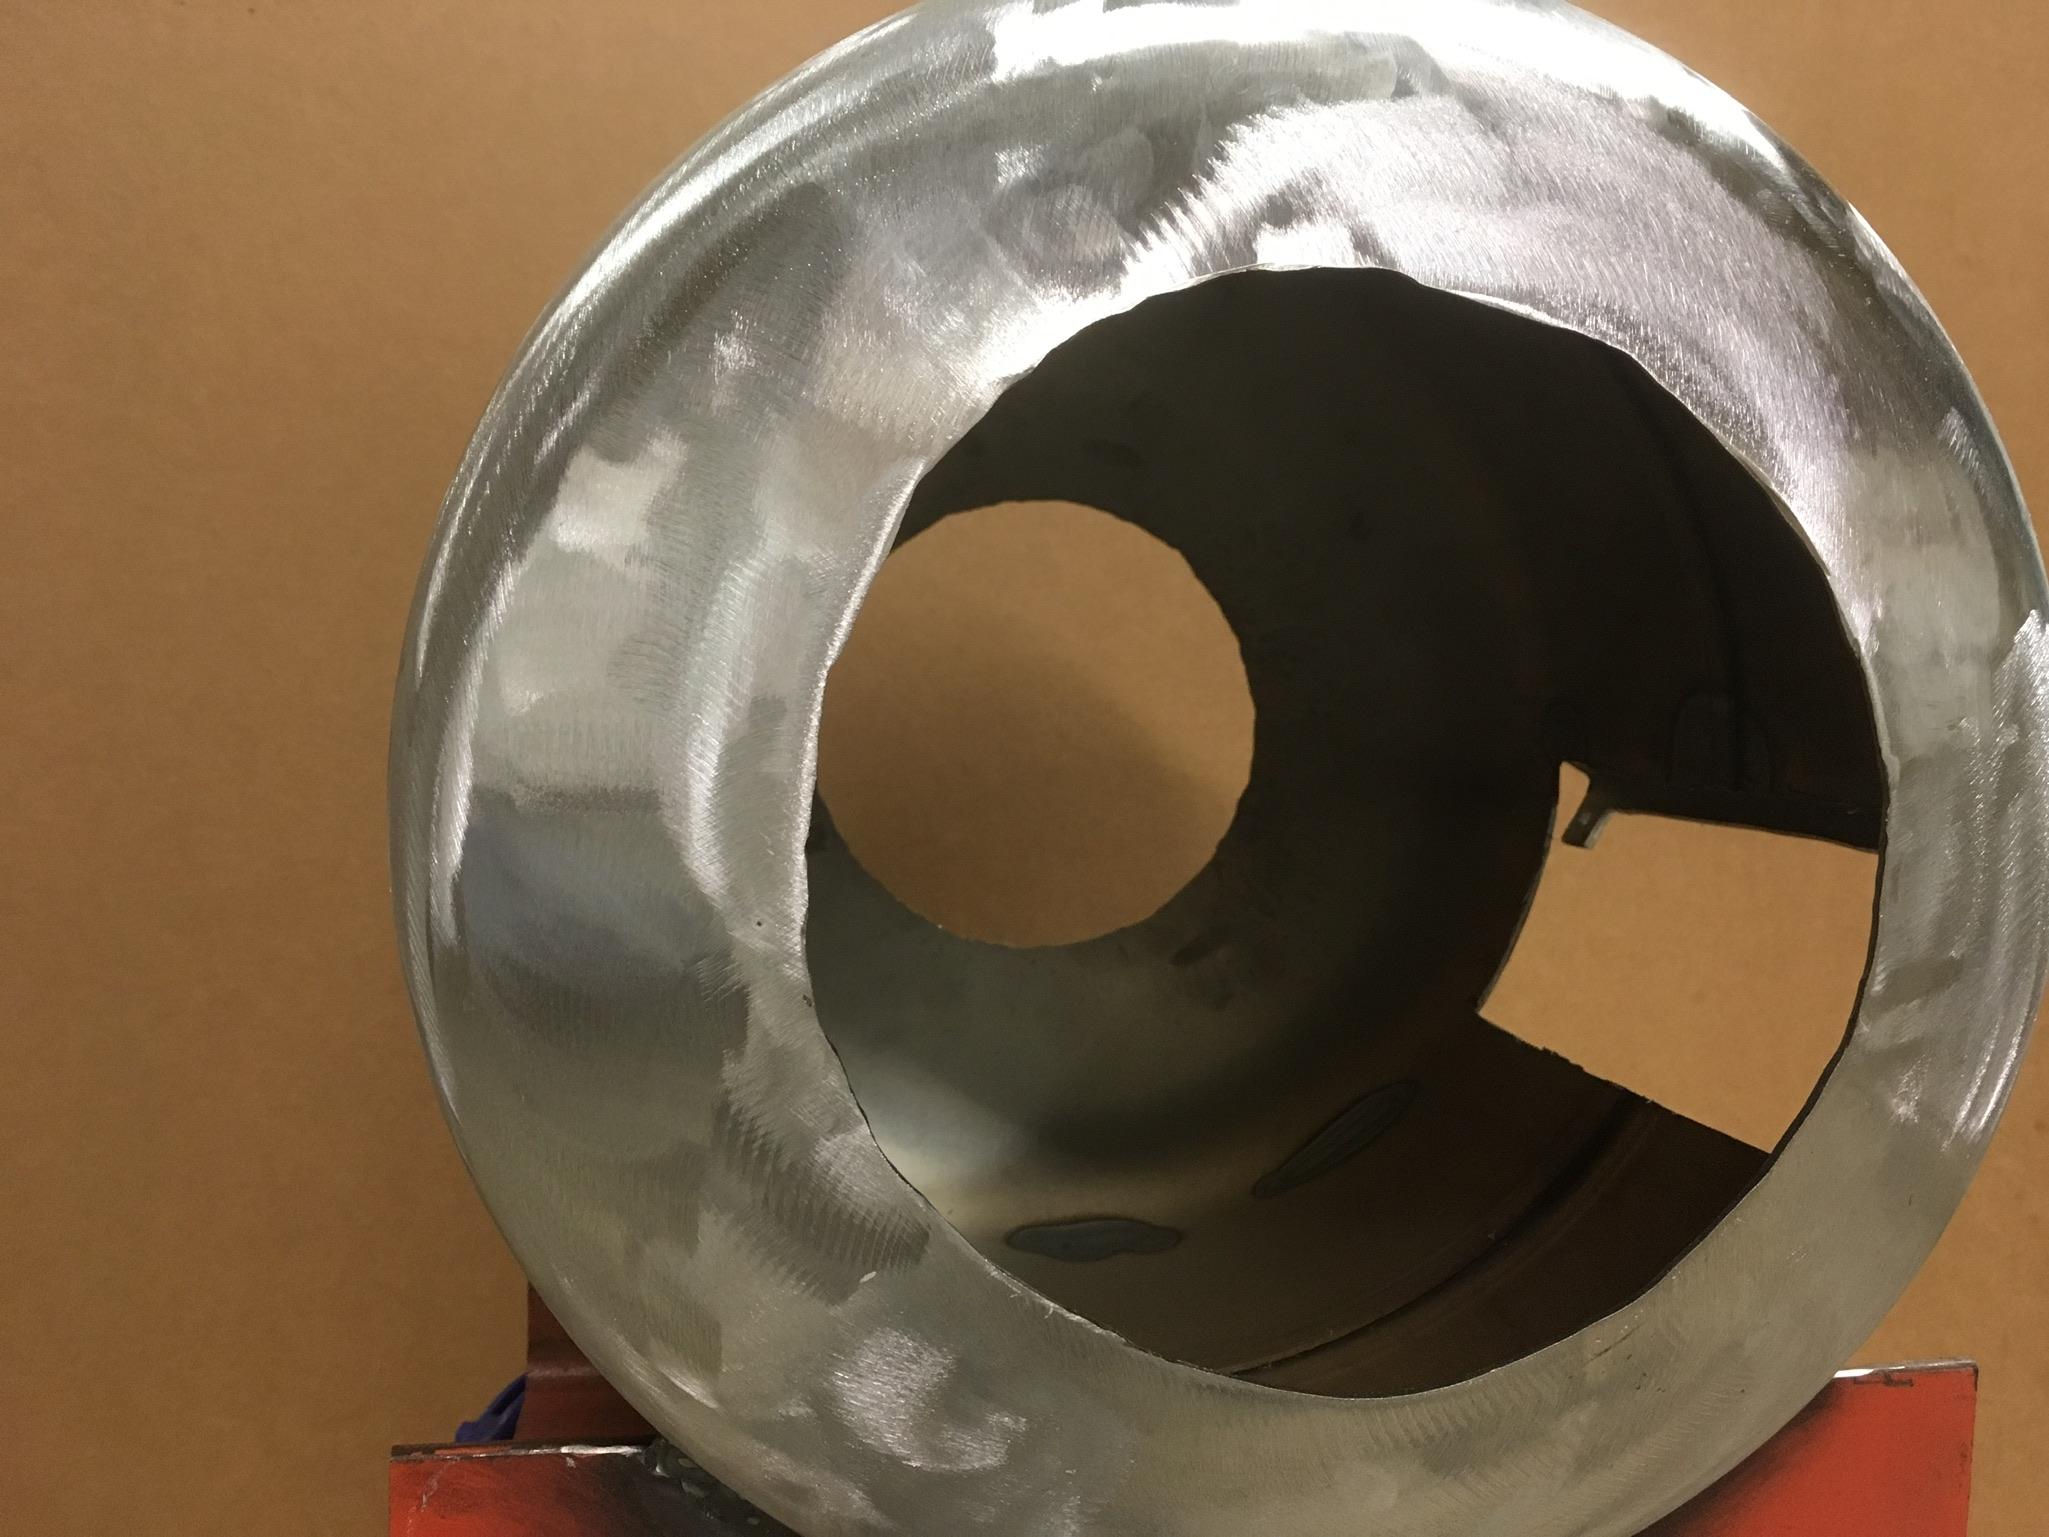
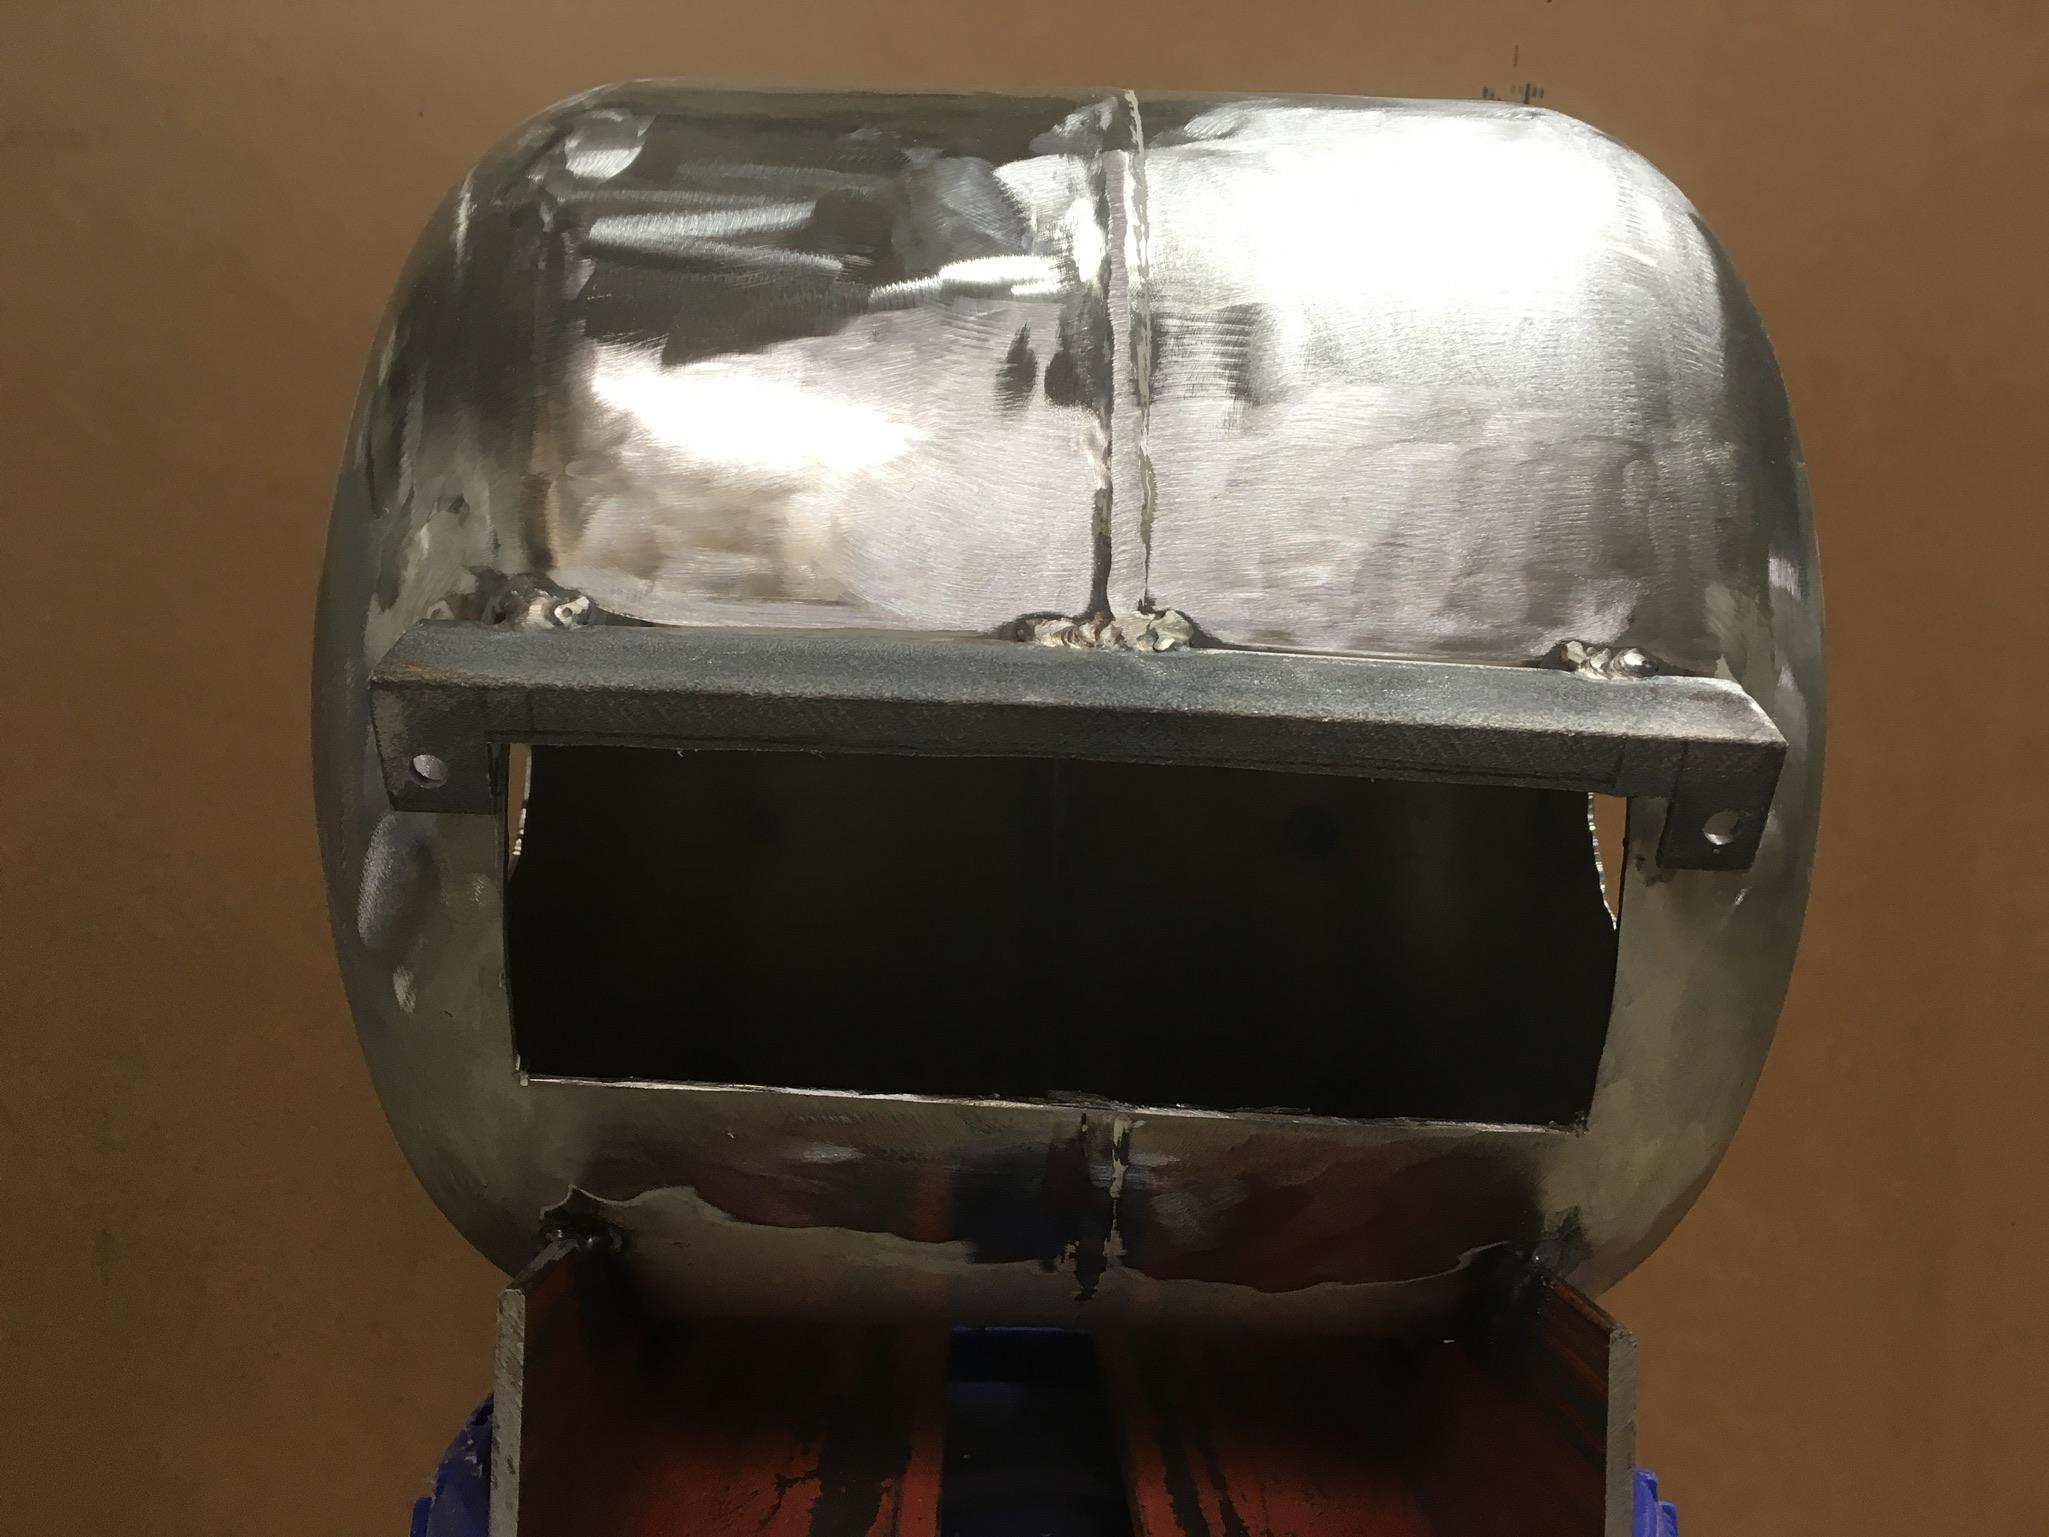
next it was time to get the paint off the shell and attach legs. I used some warehouse rack angle iron that had been scrapped off of a rack that lost an argument with a Hilo at work (no casualties other than the one piece of steel), cutting a semicircle the size of the forges O.D. out of one side of angle on each “leg” and welding them to the shell. A similar method was used to attach a work support piece to the front and a straight piece of stainless angle was welded on for a burner mount and it was time to paint!
-
9 minutes ago, Mikey98118 said:
I also recommend rigidizing and curing the ceramic fiber before applying the refractory layer; can you skip doing this step? Yes, but why would you? I believe in setting up a job as well as possible, to ensure good results.
I actually rigidized and cured both layers of Cerawool one at a time with Zeofree 80 as I laid them. I was kinda surprised that a 5 minute cure with a small propane torch (1 lb canister type) not only cured it but turned the wool back to white. the food coloring burnt right out.
-
OK, so time for a couple of "Show your ignorance" questions for the more experienced Forge Tipplers and Tricksters. I've built the shell (Turkey) and insulated it with Ceramic wool (Duck) of my Turducken forge and it's time to stuff in the refractory (Chicken). How in the heck do I line it with a cement-like substance 360 degrees against gravity?
I thought maybe turn it on end (sitting on one of the openings) and just apply refractory from the bottom end up. Would this work? Or is it possible to coat the bottom 1/2 and let it dry, turn it over and do the other 1/2, and have a durable seal between them?
Those are the first two ideas I came up with. Would either of them work? Or is there some other obvious technique I'm missing?
-
On 8/17/2018 at 2:16 AM, Glenn said:
Peter Ross shows how to make a log dog and peavey hook.
Link to several of the blacksmithing episodes, including the Holdfast and the Log Dog / Peavey Hook
-
Great info, Dynamic Duo! Simple and to the point, without a bunch of extra info to wade through. You've come through again.
Frosty, I don't think I've run across that info on the fluxes before. I will be getting some Boric Acid to mix in for sure. I am intrigued by the removable SS floor pan idea, which I know I've never heard before. Wouldn't forge temperatures warp or melt one almost immediately? Or is that another one of "those" questions that reveal a little too much about my lack of experience?
Mikey, I remember running across the Hot Face / Cold Face info earlier in the thread but I either didn't remember or else forgot it in relation to refractory chosen to use. The good news is, I bought Kastolite 30 and ITC100 (Before I'd read about Plistex or Matrikote being less expensive, quality alternatives) with my first order of supplies for the build, so fortunately I don't have to buy something else. I'll coat the entire interior with IR Reflective coating and maybe take out the insurance of procuring a kiln shelf or, depending on Frosty's answer to the opening paragraph above, a SS pan
-
On 7/2/2018 at 2:57 AM, Frosty said:
This is from a post I made a while back regarding Kastolite 30 and forge welding flux. As it turns out I must have already kiln washed my forge before running the above test. Results other folk here have experienced with it and flux caused me to retest as their experience was much different. As it is Kastolite 30 is NOT proof against borax containing forge welding fluxes. Evidently %30 high alumina isn't a high enough % to be very resistant to hot flux, it dissolves Kastolite into a rather sticky paste.
If it's available I'd love to hear how one of the Kastolite refractories with a higher % of alumina tests against fluxes. Now though you REALLY need to kiln wash it to protect it against hot flux.
Frosty The Lucky.
So I'm about ready to insulate, then cast a refractory and as I review this portion of the thread (The last few posts from this post on page 30), I'm now assaulted with a bunch of questions that can boil down to a few. Is Kastolite 30 good for the floor or not? Should I coat the floor with something like Greencast? And/or would an IR Reflective coating over the floor provide protection lacking in the K-30? And as long as I'm asking stupid questions, is there a practical difference between 20 Mule Team Borax and the fluxes touted as "Forge Welding Fluxes"? Sorry to bring it up if it's been discussed elswhere, but I can't remember reading about fluxes in any thread. Then there's the fact that my memory sucks and because it's time to actually put the water in the refractory, I'm nervous when I was sure about the K-30 thing and would just like a little reassurance from the people who used to be perts. Could someone, anyone, just tell me that everything will be all right?
(Because this post is public on the internet and not face to fac, I feel obligated to point out that though it started out serious, I kinda got sarcastically humorous towards the end. Please answer the questions and laugh at the humor)
Daguy
-
So the Narb is complete and burning like a champ. I cut the burner port in the shell and just have to figure out how I want to attach it to the shell at the angle I want and Ill be ready to insulate, cast a lining , and start bragging. Pics as I proceed.
Lots going on so the build has to be fit in around the edges, but I'm having a lot of fun and learning a lot..
-
Kozzy,
Thanks for the info. I did a search and was able to download a pdf of the entire 1875 catalog, pics and all. Interesting reading in the blacksmith section.
Funny , though, when I did an image search for "S.D. Kimbark Drill", the fourth image was my Gill-Man avatar. ROFLMAO
Daguy
Also, 'round about the 20th image is an advertisement to order the catalog and there are two drills and an anvil pictured. The drill on the right looks pretty much exactly like my drill.
-
I recently acquired a post drill that has “Kimbark” molded on the main body. Under that is ”Chicago”. Anybody have any background on the company? Maybe could tell me where to get more info? Idea’s on how to figure out a model or it’s age or value before I start tearing in to it to restore it and mount it in my shop? Any ideas on how I can pursue details is appreciated. Googling didn’t get me too far.
-
Snork supervises Everything I do at home. The smithy, the yard, the garage, everywhere. But ESPECIALLY the kitchen!

-
On 7/23/2018 at 3:01 PM, Frosty said:
The volume of Kastolite actually decreased with the added water rather than increasing like a Portland cement concrete mix design. It still cures like Portland cement for maximum strength and requires no flame cure cycles
Would you expect the same to hold true for Mizzou? It arrived this week and I have the next couple of days off, so if the missus doesn't have too many chores lined up, I may get around to casting the replacement soon.
Daguy
On 7/23/2018 at 3:01 PM, Frosty said:It's the shape and angles of "penetration"(?) that matter, not a specific material. Welding short lengths of welding or brazing rod to the edge at angles should do the trick nicely. Welding them to the inside of the plenum might work better but I'm not sure if the refractory extends beyond the outside margin of the plenum.
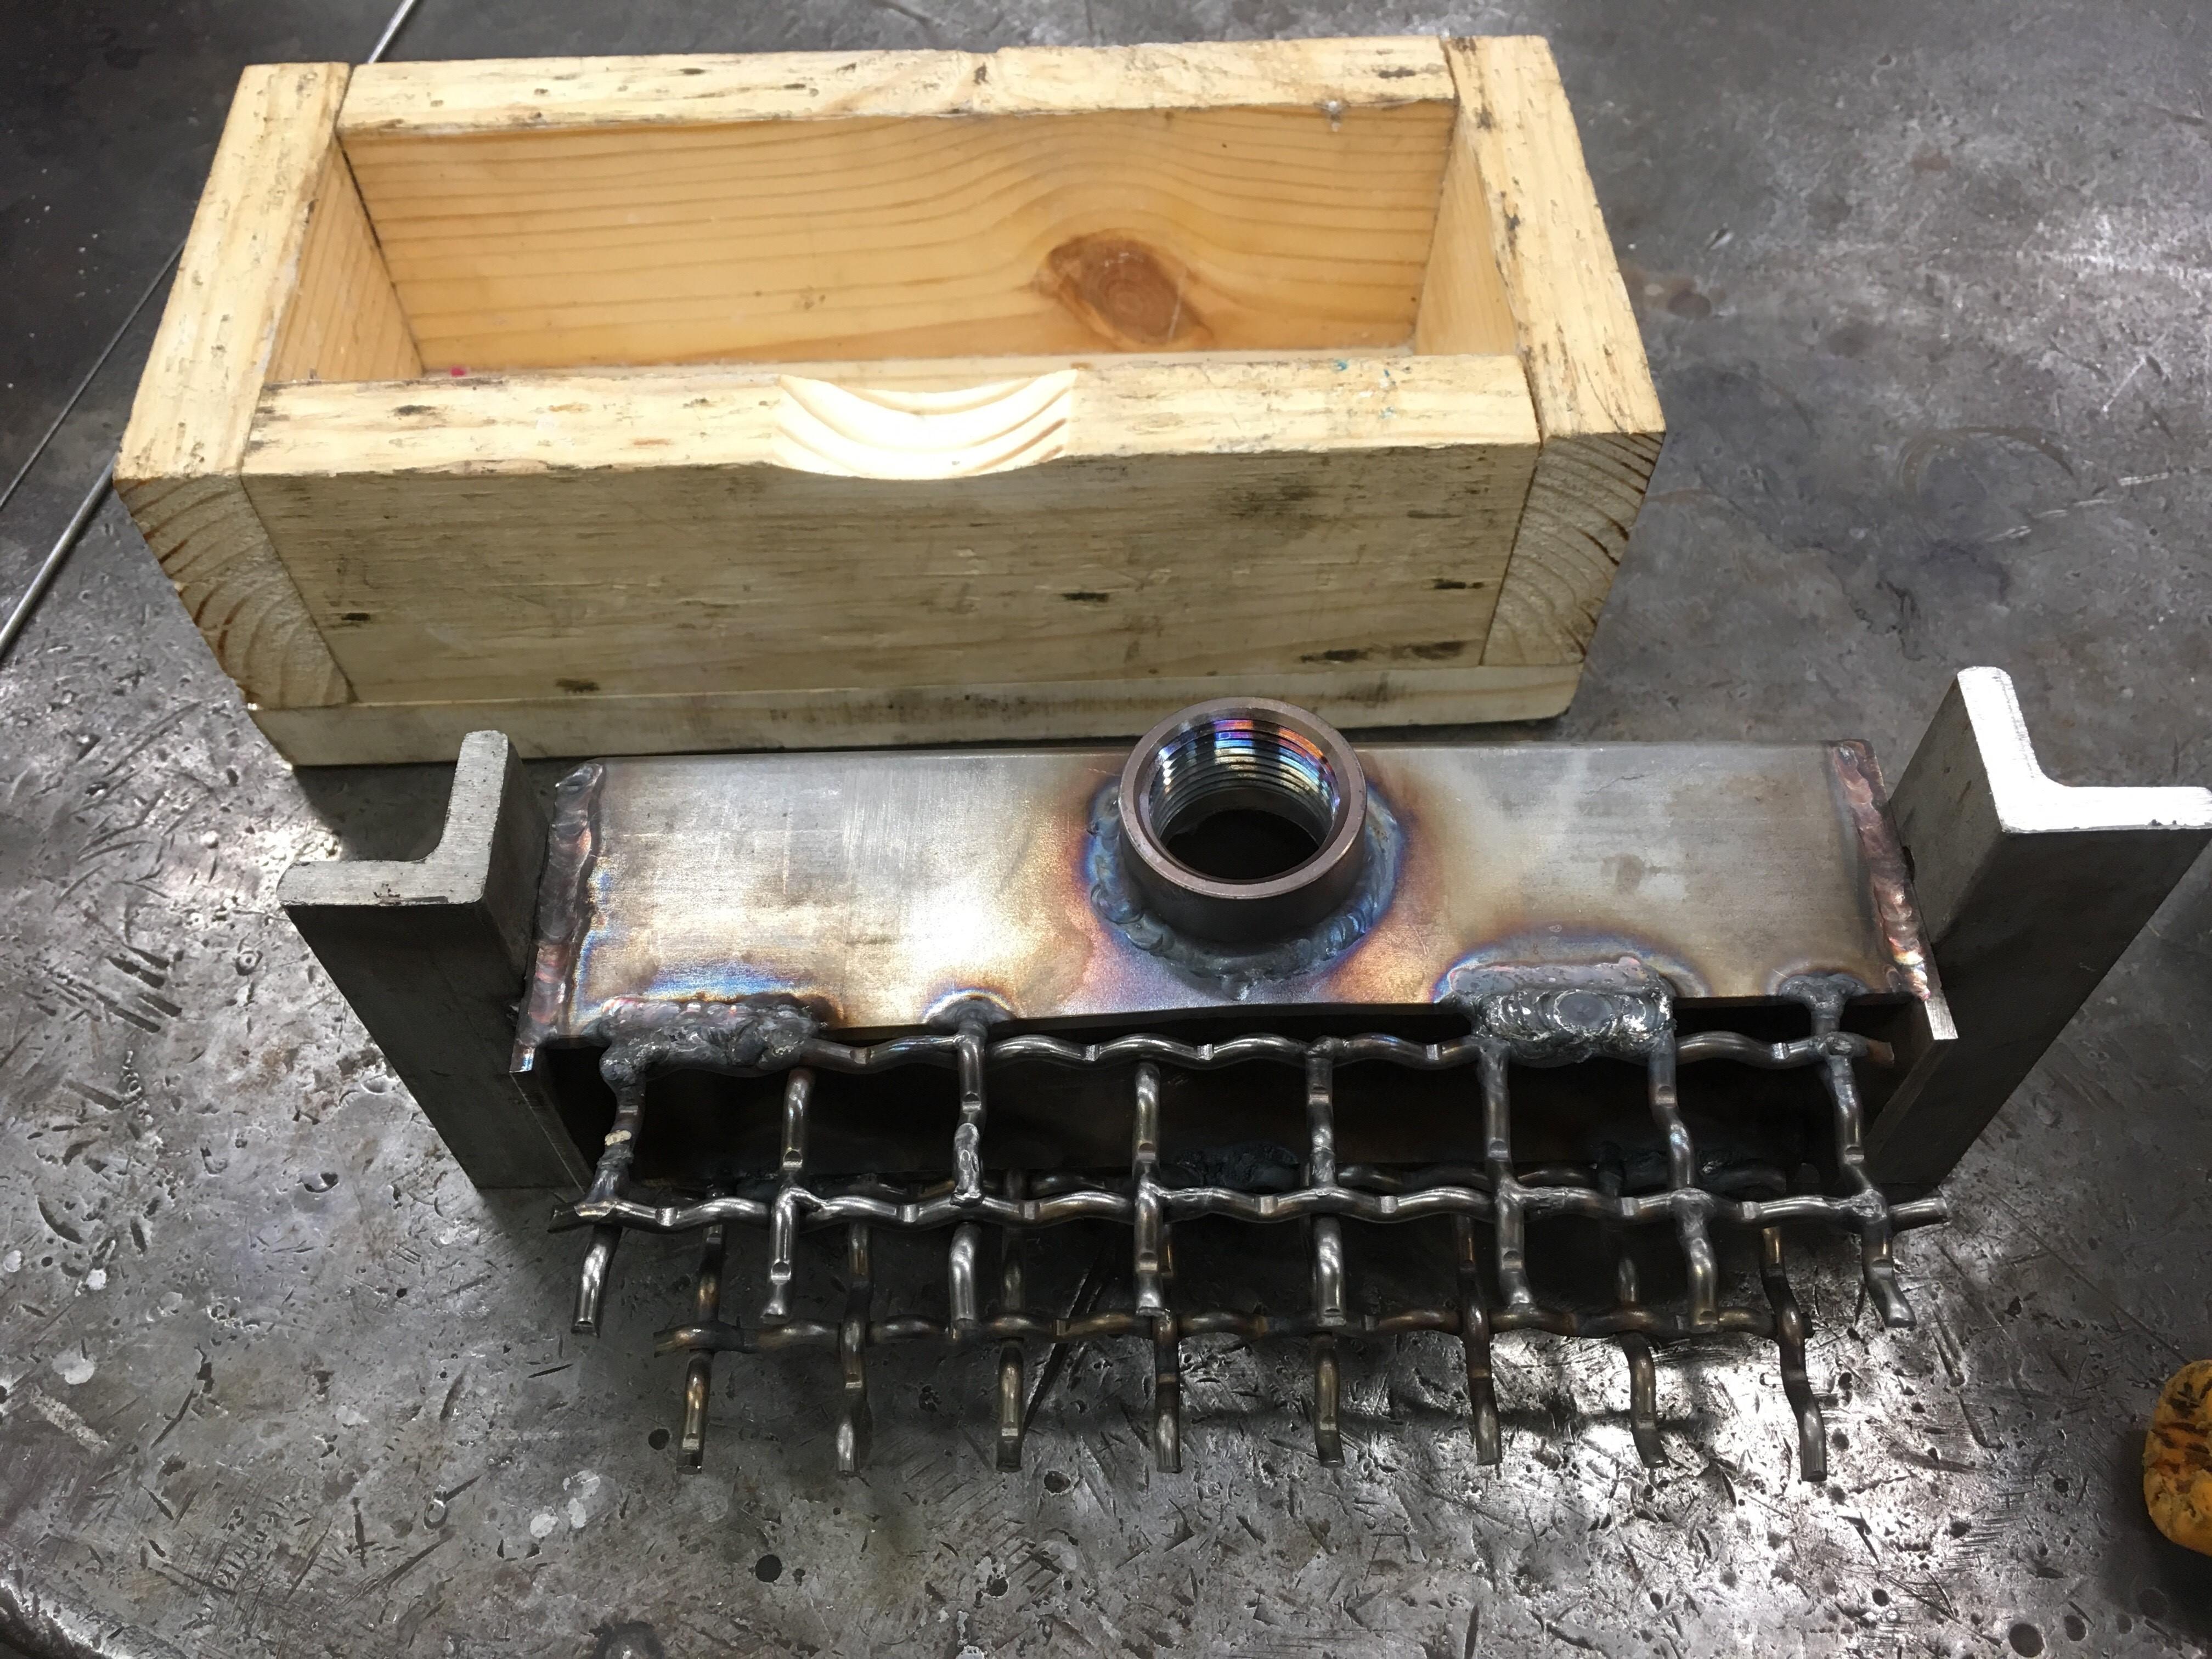
I actually went with an 1/8" woven stainless. after welding all the cross sections in place, I cut it and welded it in line with the plenum walls. I built my form so the finished burner would be about 1/4" larger all around than the plenum.
Daguy

-
23 hours ago, Frosty said:
Daguy: When you say, "made up the top . . ." do you mean you added it as a layer on top of the other refractory? That's inviting a failure along the joint, mixing them together in the pot should work alright if not ideally.
Yeah, that's exactly what I did. I realized at the time it was a dicey move, but I just didn't have enough of the other castable to fill the mold, and I'd already used up what I had. I tried to poke the second material into the first to avoid a straight layering of different properties, but I suspect more disaster awaits this ribbon. SOLUTION: I have 20 lbs of Mizzou on it's way, and I'm building a new mix chamber with straight sides and expanded metalas per your original post, though I only have a smaller mesh expanded available in the scrap pile at work, but that should just provide more material and angles for the castable to grip.
Thanks for the heads up on when to remove the crayons (or I might use small glue sticks if they're close to the same diameter). I'm a metal working guy, not into concrete, so it's a total Newb huge learning curve for the NARB. I'm actually totally geeked at how well the first one turned out. I decided to just make a new one from scratch and maybe keep this one as a wall hanger to remind me from whence I started. I'll also read a lot on the proper pouring and curing procedures for Mizzou
Thanks for the input and I'll keep updating the thread with my progress.
Daguy
-
I also think I mixed the refractory a little dry because I was Hyper-Nervous about putting in too much water after reading the threads and the manufacturer's instructions on pretty much ALL refractories I read up on. So when I vibrated the mold it may not have settled well.
I used a seven inch long 2X2 square tube for the mix chamber and didn't have enough of the refractory #2 to fill the mold, so the top 1/2 - 3/4 inch was made up by using some refractory #1, Which has more voids in it, and this was where the mix chamber met the refractory. That's another reason I'd like to buy the ribbon burner refractory by the 55lb bag rather than by the pint. I'd rather have too much than too little.
Daguy


It’s Finally Burning - a first build story (photo heavy)
in Gas Forges
Posted
Agreed used NARB as an acronym because the one I built actually was.
And as for “other fora”? You may be a smart cookie when it comes to science, Frosty, but it’s a pleasure to exchange ideas with a man who knows how to communicate and has a good grasp of the English language.
Daguy