

Trevor84
-
Posts
168 -
Joined
-
Last visited
Content Type
Profiles
Forums
Articles
Gallery
Downloads
Events
Posts posted by Trevor84
-
-
Thanks Mickey. I'm definitely thinking an easily replaceple floor would be ideal. I don't have slots built in this forge but swapping a 1/4" thick tile in and out would be fairly simple.
I am not planning on welding big billets or anything crazy with this forge so I don't need a thick cast floor and soft bricks take a beating regardless of flux so I figure I'll try out your recommendation of the shelves.
-
Ok, I'm still curious about the kiln shelve but I found some more reading material regarding re-emisve and kiln washs to read before starting another conversation here about it.
-
I'm no chemist and haven't played with creating refractory coatings but I'm just curious if there's any way "calcined alumina" be beneficial in making a kiln wash/adding to a refractory product or would you just be running the same issues as the bentonite/veegum cracking up?
I know this is sn old subject and admittedly I'm not up to date with the latest out comes. I just happened stumbled across this when searching for kiln shelves.
-
Good morning all.
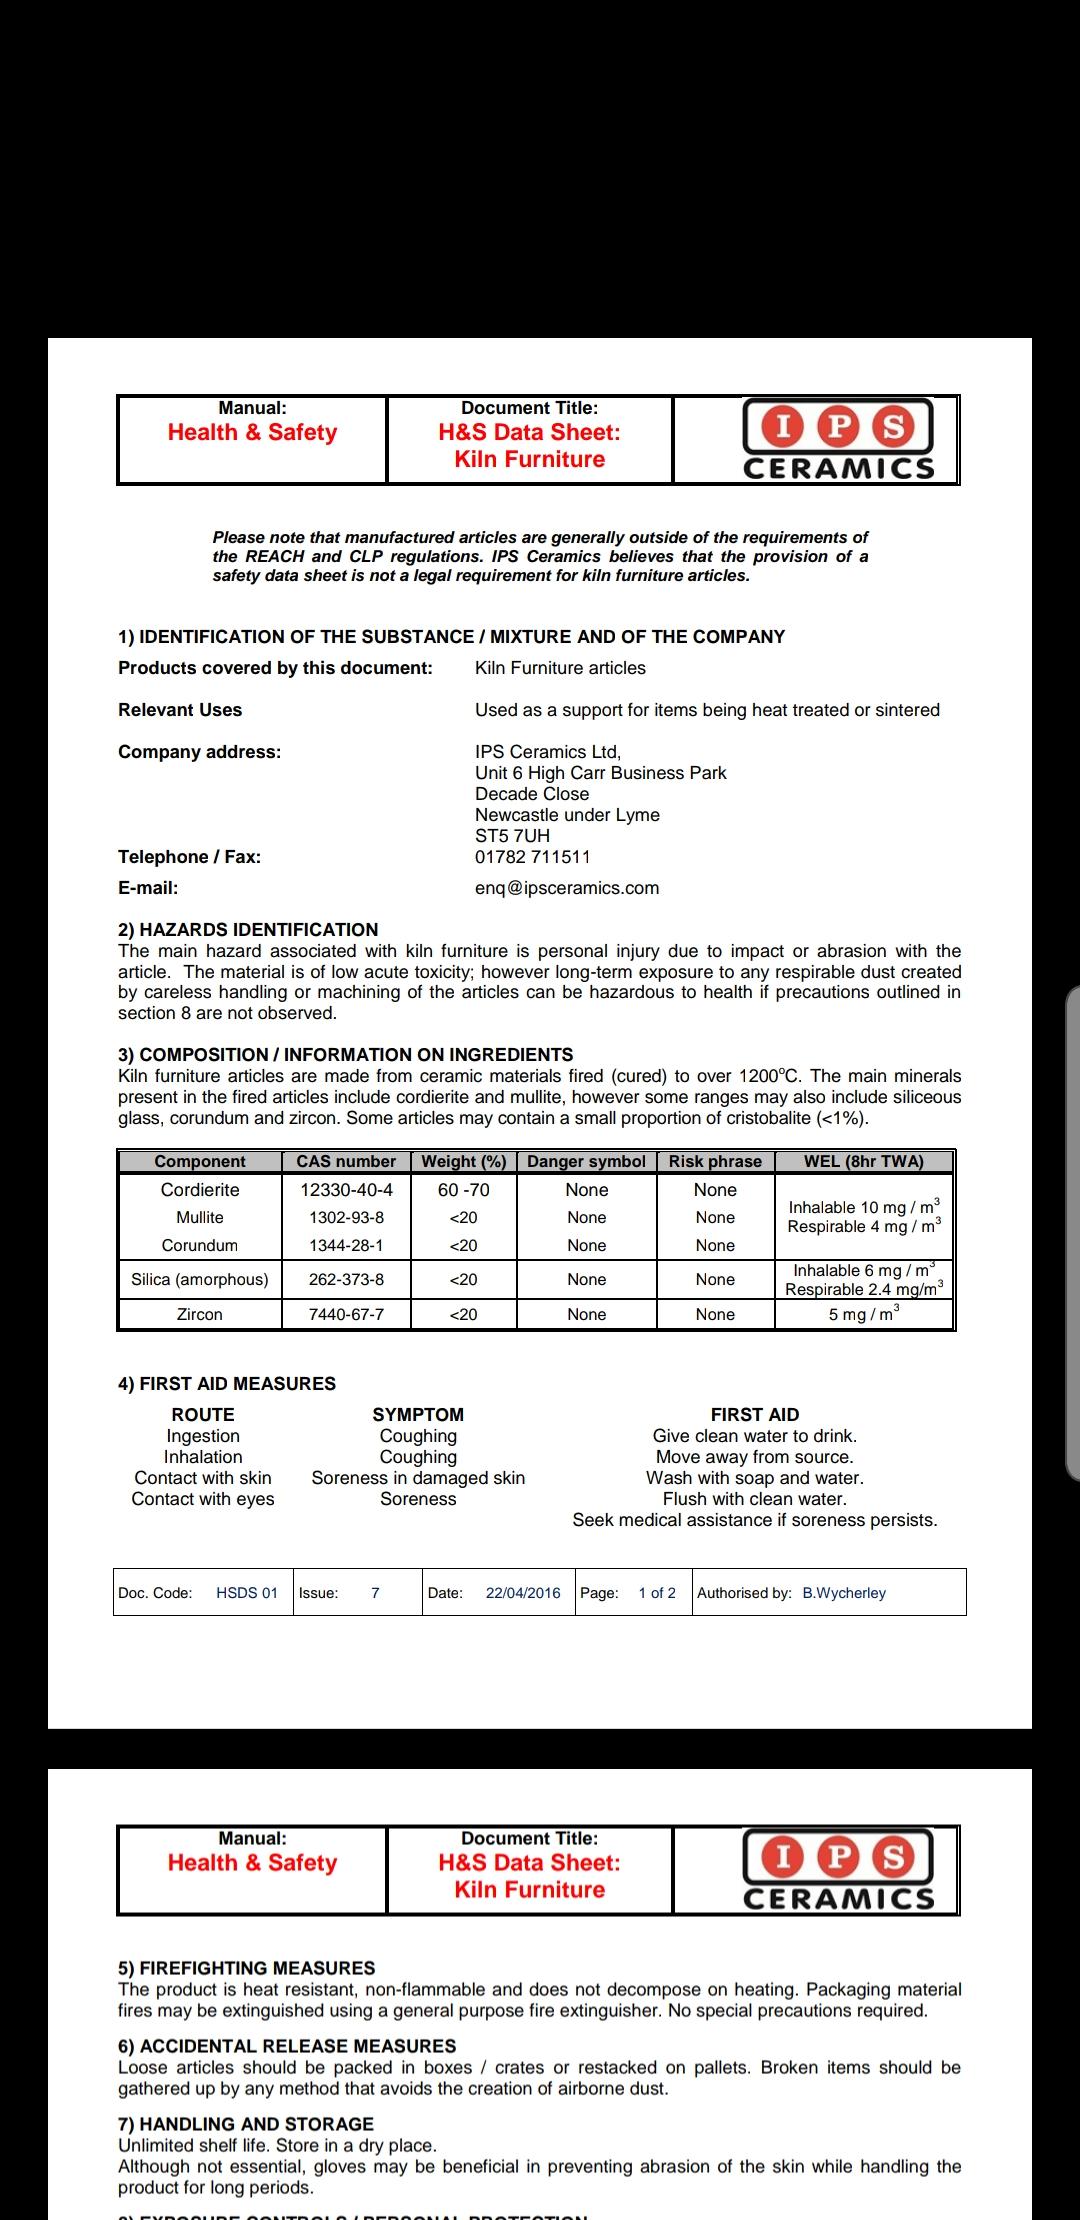
Mickey when it comes to kiln shelves I am wonder how flux resistant they can be, it sounds like you tend to use them alot. I can order these kiln shelves, this is the sds
I know "good enough" isn't an appropriate question moreso my question is how long do you think 1/4"would last? I have the choice of 1/4" thick or 1/2", I like the idea of having a removable/replaceable floor but don't want to create more of a heat sync than necessary......
This company is in Canada "pottery supply house"
-
Bustapepper I'm not sure if you've found him yet But Shawn at Front Step Forge in Edmonton stocks some of that at a pretty decent price. I bought 2' of 1045 2" round for $60, my local supplier quoted me $1,000 for 4' of the same, I understand some mark up but seriously wtf

-
Melvin, thanks for these now I have more formulas to look at and wish I could decipher them :(. Seriously though thank you I try to gather all these links I can in the hopes that if I read enough of them they'll start to make sense one day.
-
"I try and I made it" William Kamkwanda (movie "the boy who harnessed the wind")
It may not be a blacksmith quote but fits in this craft. If you start with a positive mind set you can accomplish a lot.
This kid cobbled together a windmill from garbage and saved his village during a massive drought.
-
Well thank JHCC thank you for this and I really like that bottle opener. I will be making a set of these tongs soon I had been trying to think of a new tong for these openers, also I'm glad I have finally seen a set of reverse opening tongs. I've thought in the past that there has to be a use to this type of reverse opening now my mind can rest....... for a little bit.
-
Oh boy, Frosty please tell me you copy and pasted that and don't have that memorized
 I don't think I could handle the jealousy of the knowledge you posses. Seriously though that's a great run down and example. I study what I can when I can but I am not the best at it so I really appreciate the little blurbs like this you and others share here. Ok back to reading I go
 ")
-
You know, you guys helped me and I then trickled that knowledge down to help many others over on FB. Lots of guys don't listen and take the easy route but then there's a few guys that listen and solve their problem be it forge, burner, other project. I'll spend plenty of time communicating back and forth and then when they get where they want to be I give them a "like". You could have done the same and I would still be happy with my results but you went one step further and validated the time and effort in a way that put a smile on my face. It may sound sappy but that meant a lot, we all can do that for others, it took what 45 sec to type out but I'll remember that every time I light my forge. If we all did the same the world would be a much happier place. I will try and carry this message forward
-
If you like watching videos better you could search Habermann tongs and there's a video from Joey van der Steeg that is what I tried to copy when making these, so if you're on here THANKS Joey.
-
Good day folks, I've been here awhile but have contributed little to date so going forward I'll try and work on that.
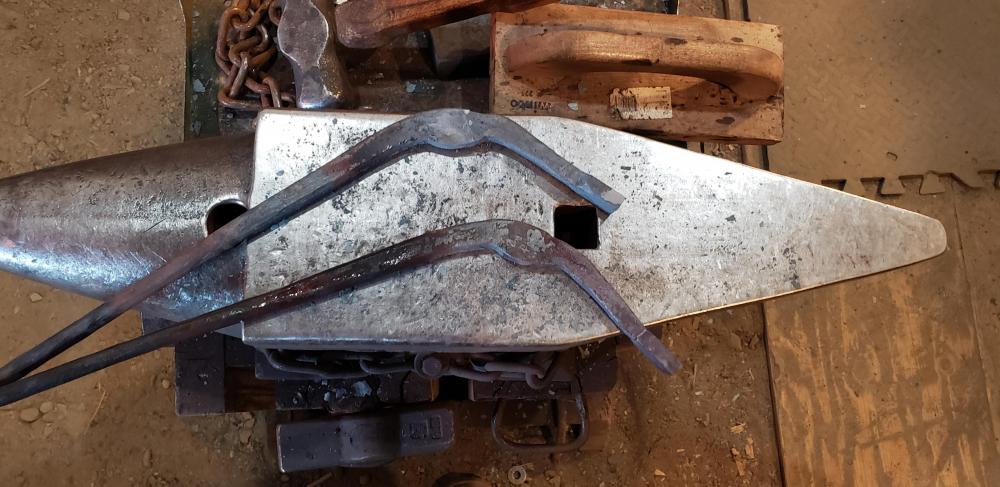
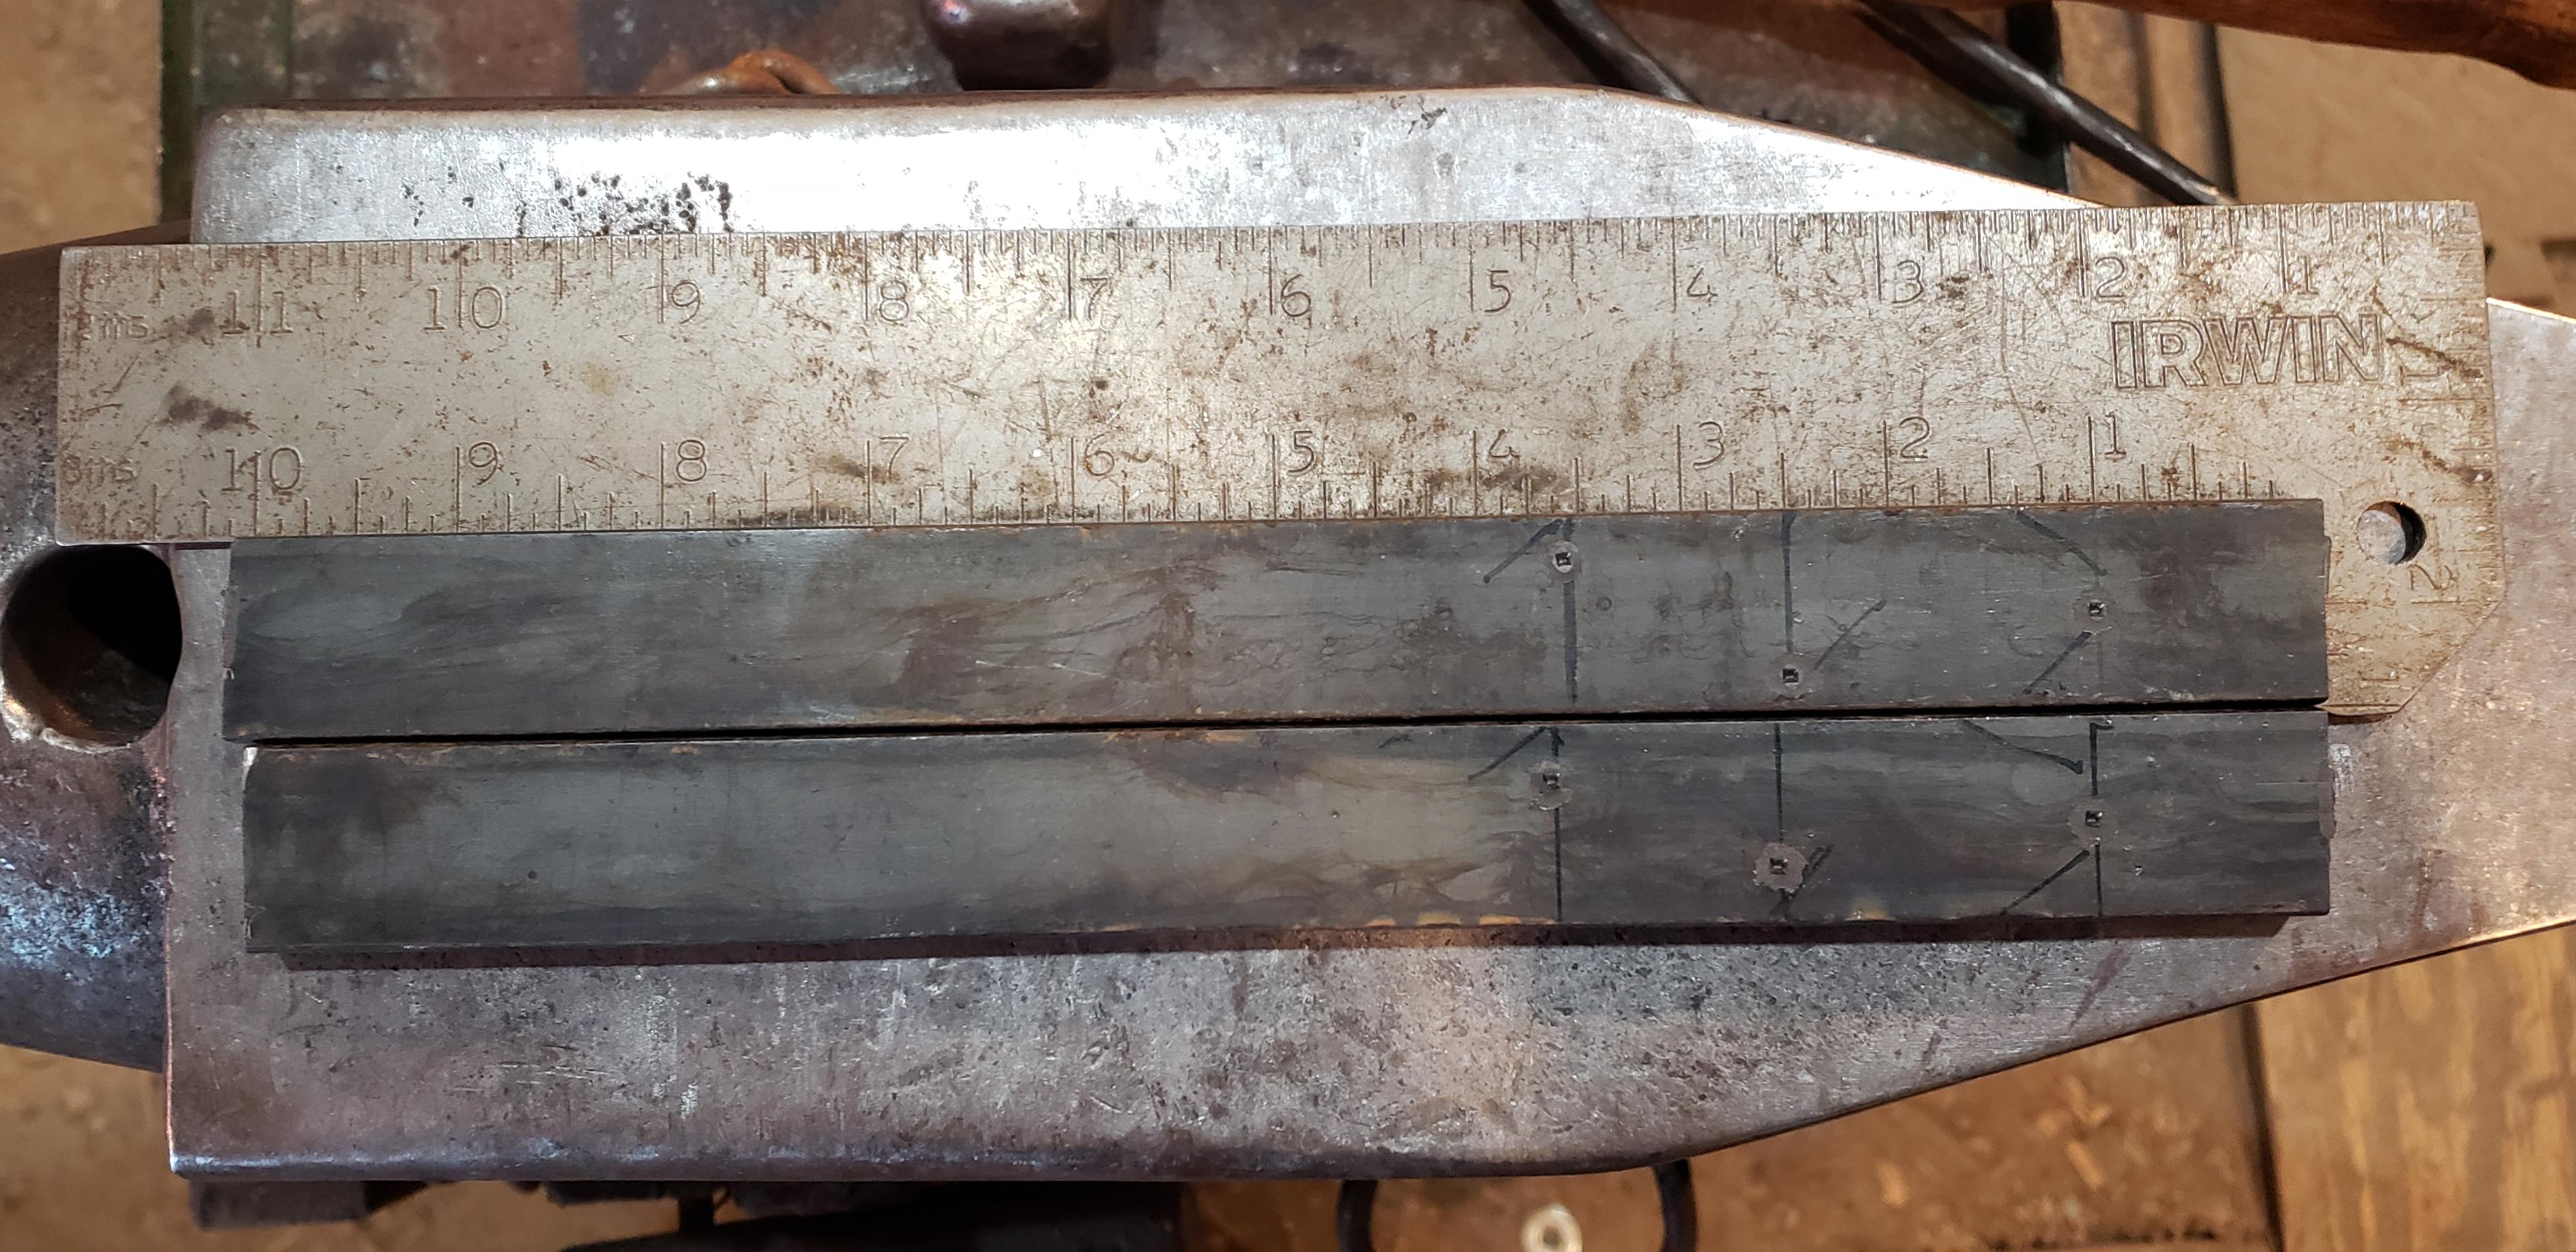
This is my second attempt at this style of tongs and I managed to snap pics of most of the steps I took to forge these so I figure I might as well throw them up here and maybe someone will benefit. I warn you that this may not a perfect how to but it may give someone enough reference to muddle through their next pair of tongs. Also if anyone has pointers on what I could do better next time regarding the build or the "how to" I am open to advice.
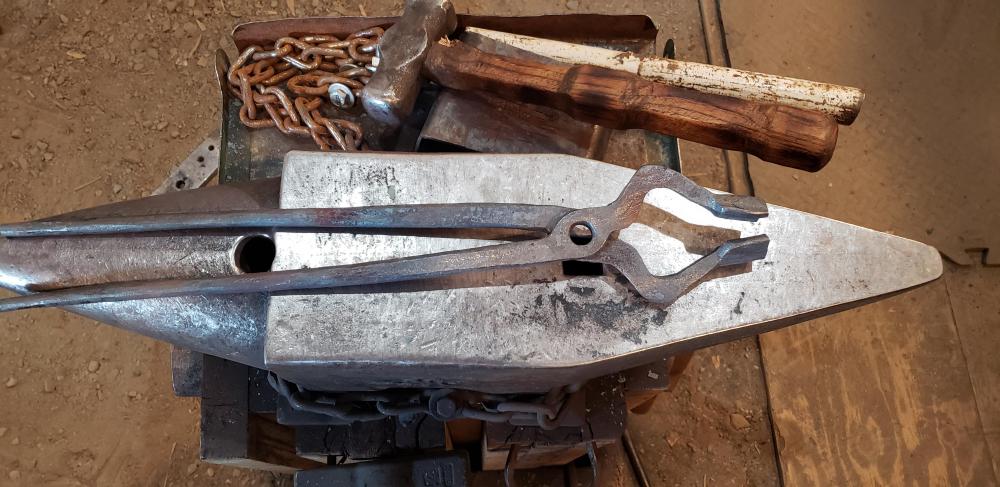
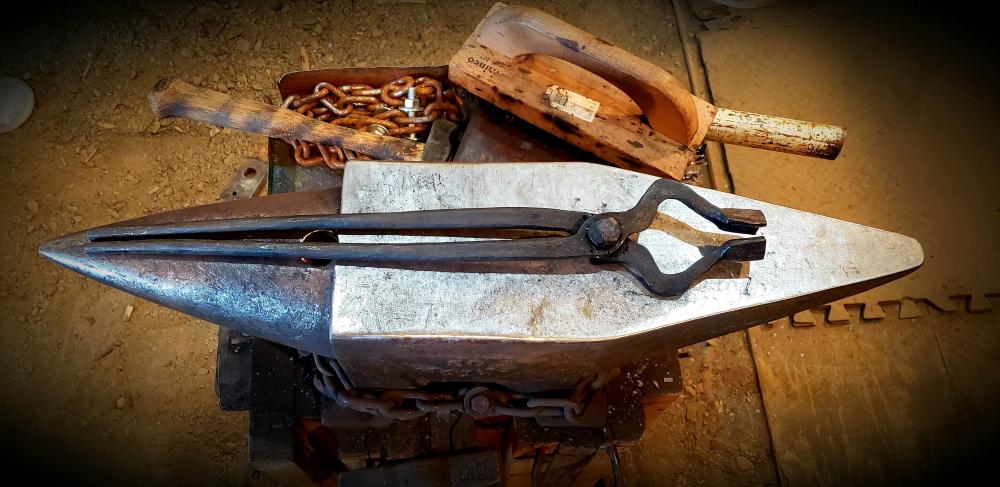
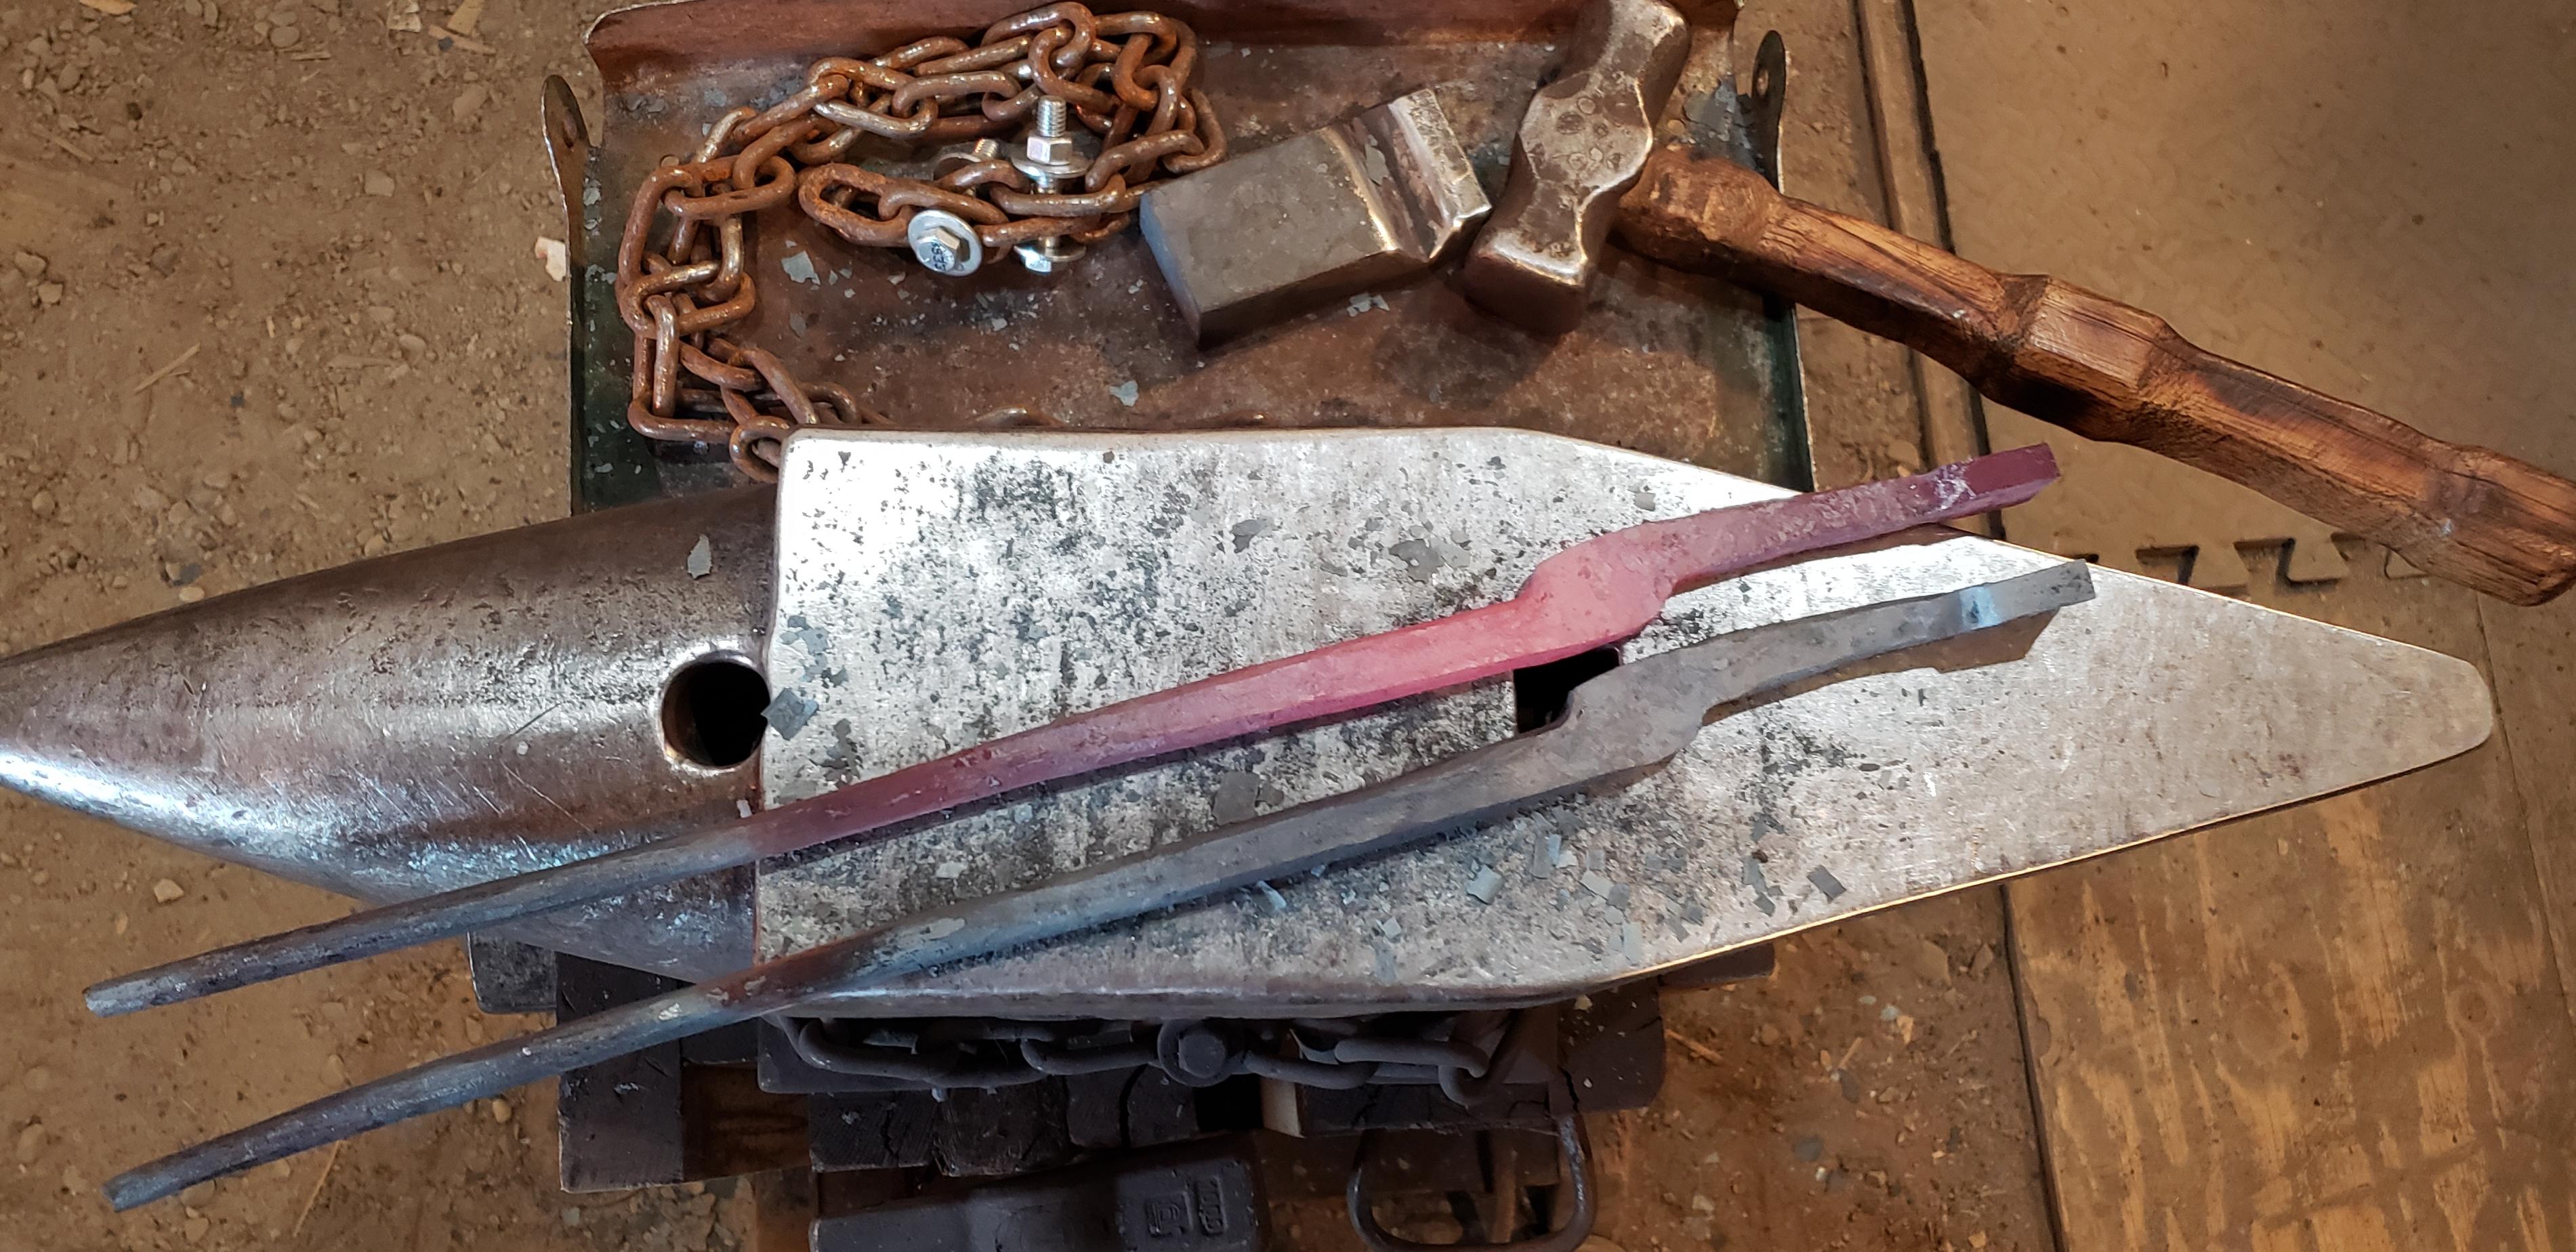
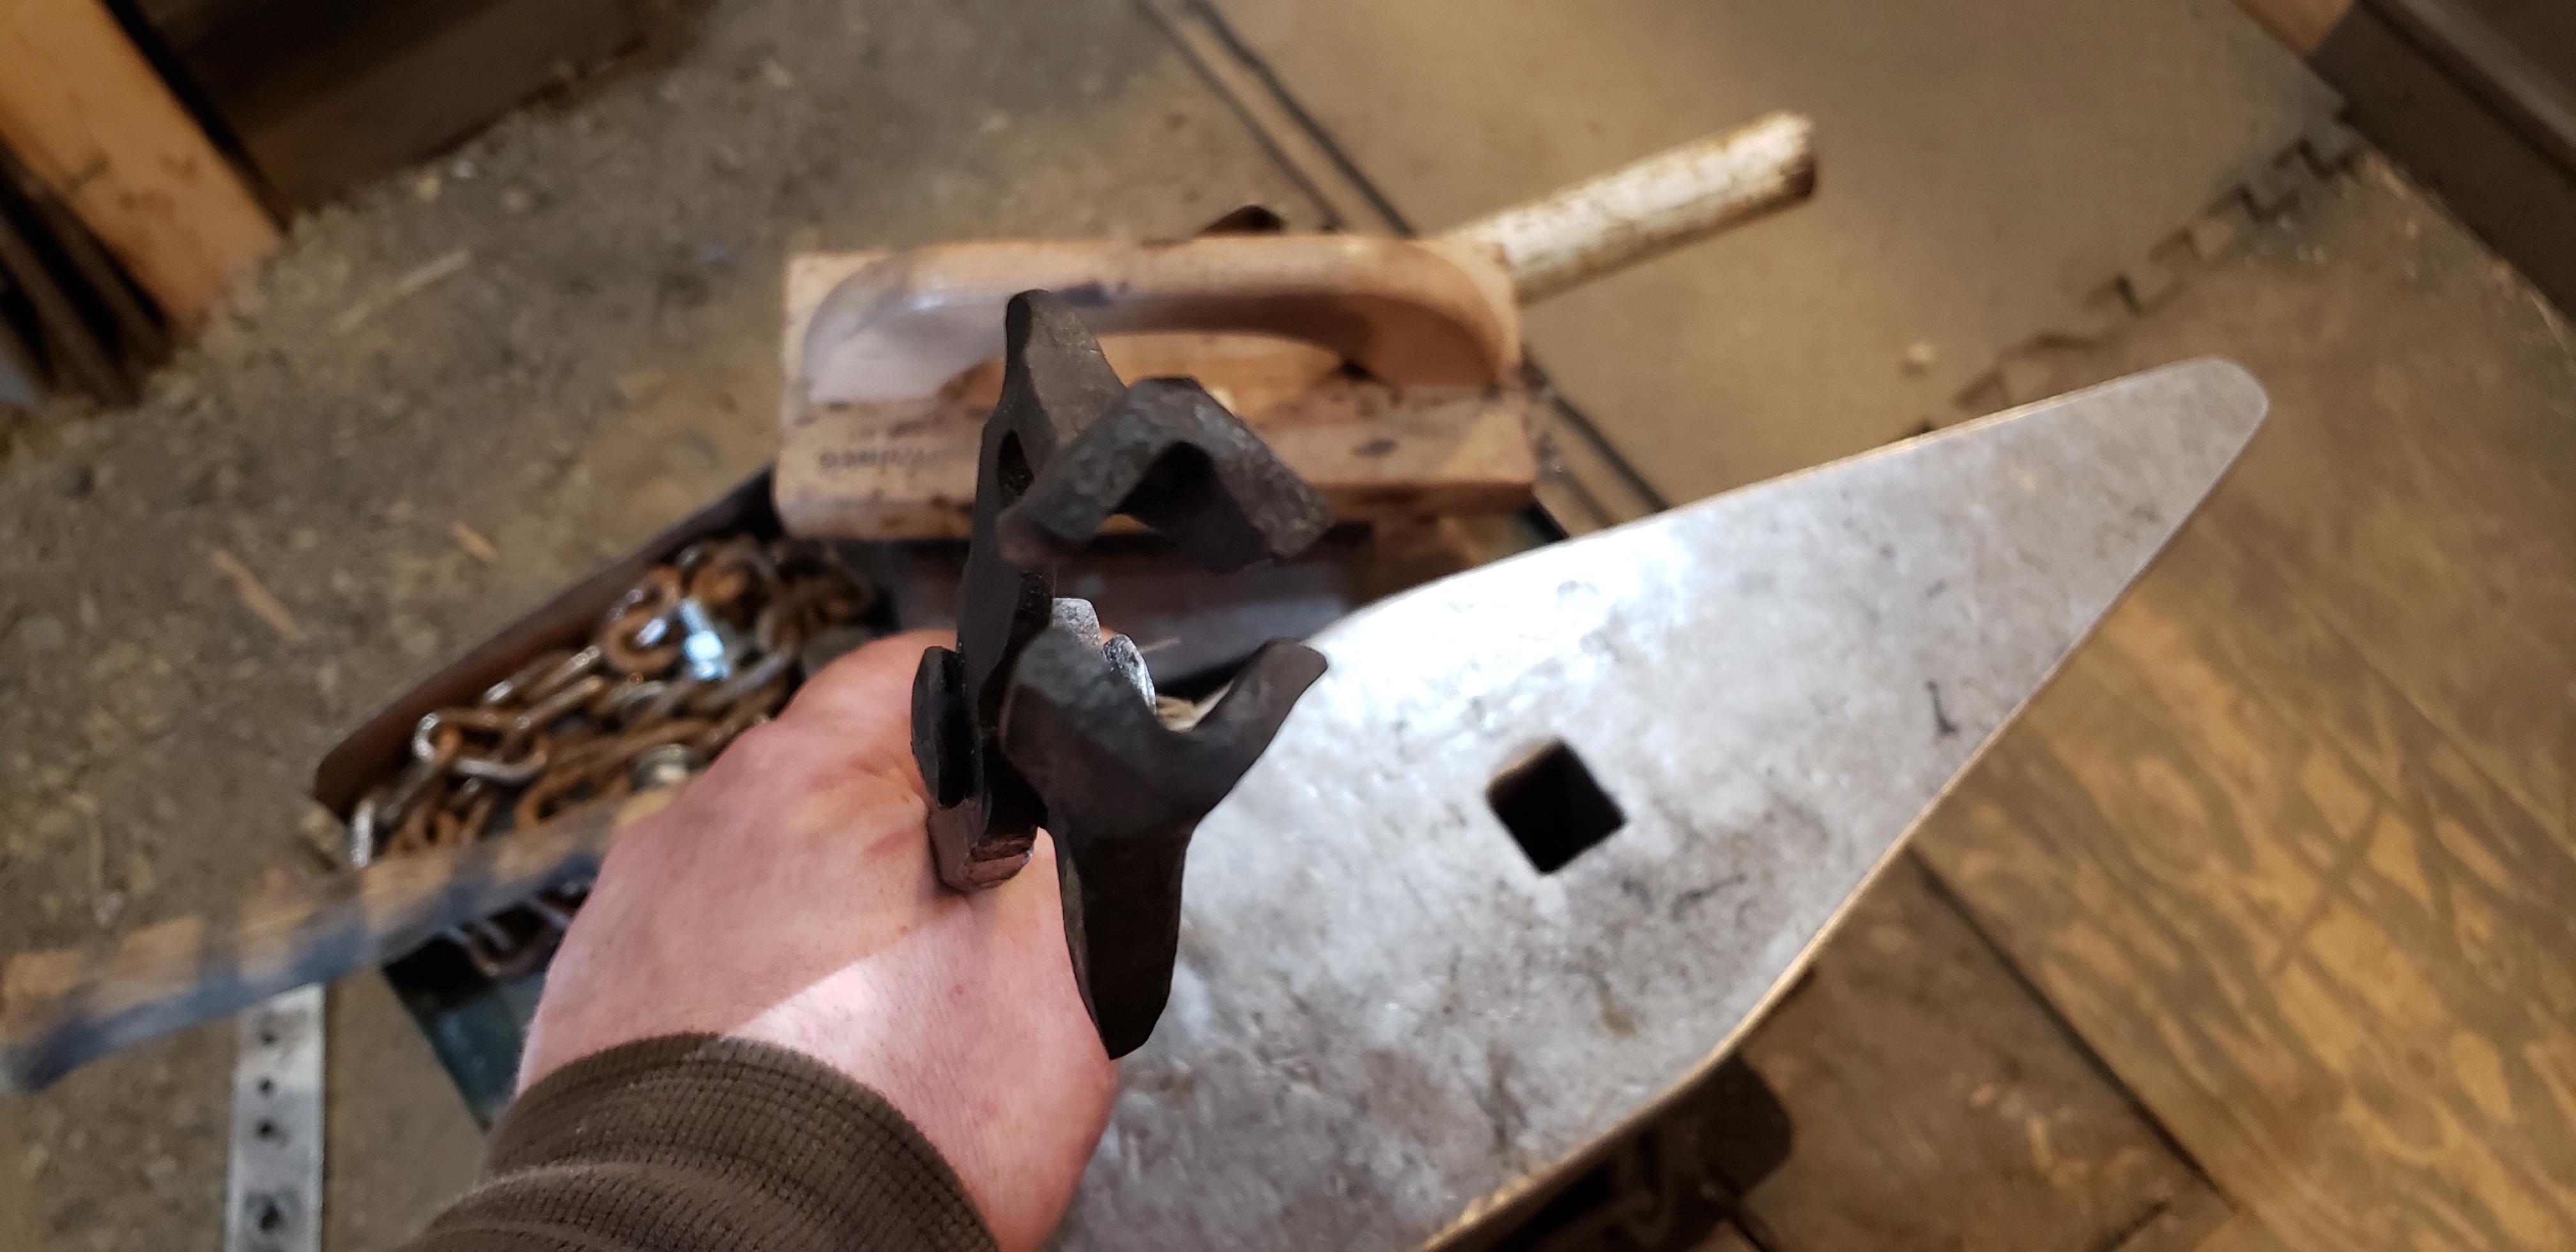
I think these are deemed Habermann bolt jaw tongs but I can't vouch for that title so let's call them 1" bolt jaw / V bit tongs. They'll hold 1" square and round, 3/4" square and round and 1" flat stock
Material:
two 10"x1"x3/8" mild flat stock, 2 1/4"ish mild round for rivet
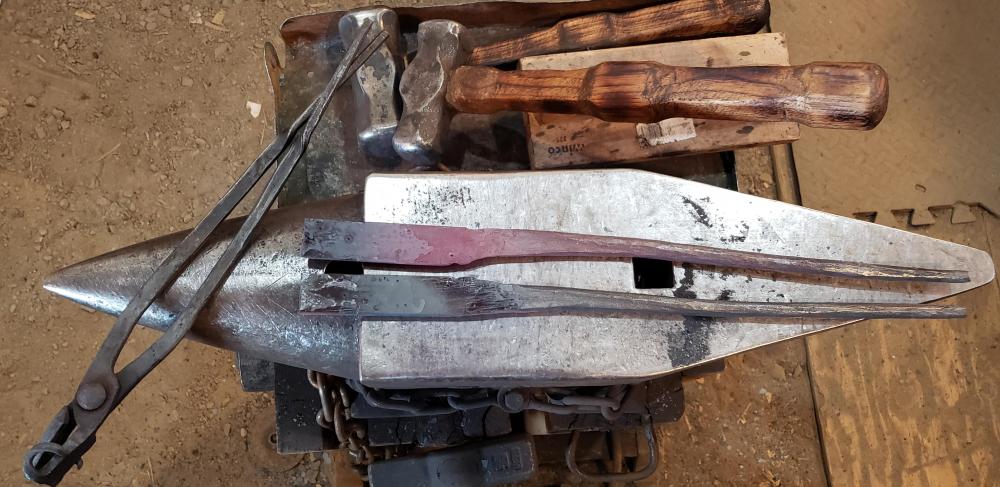
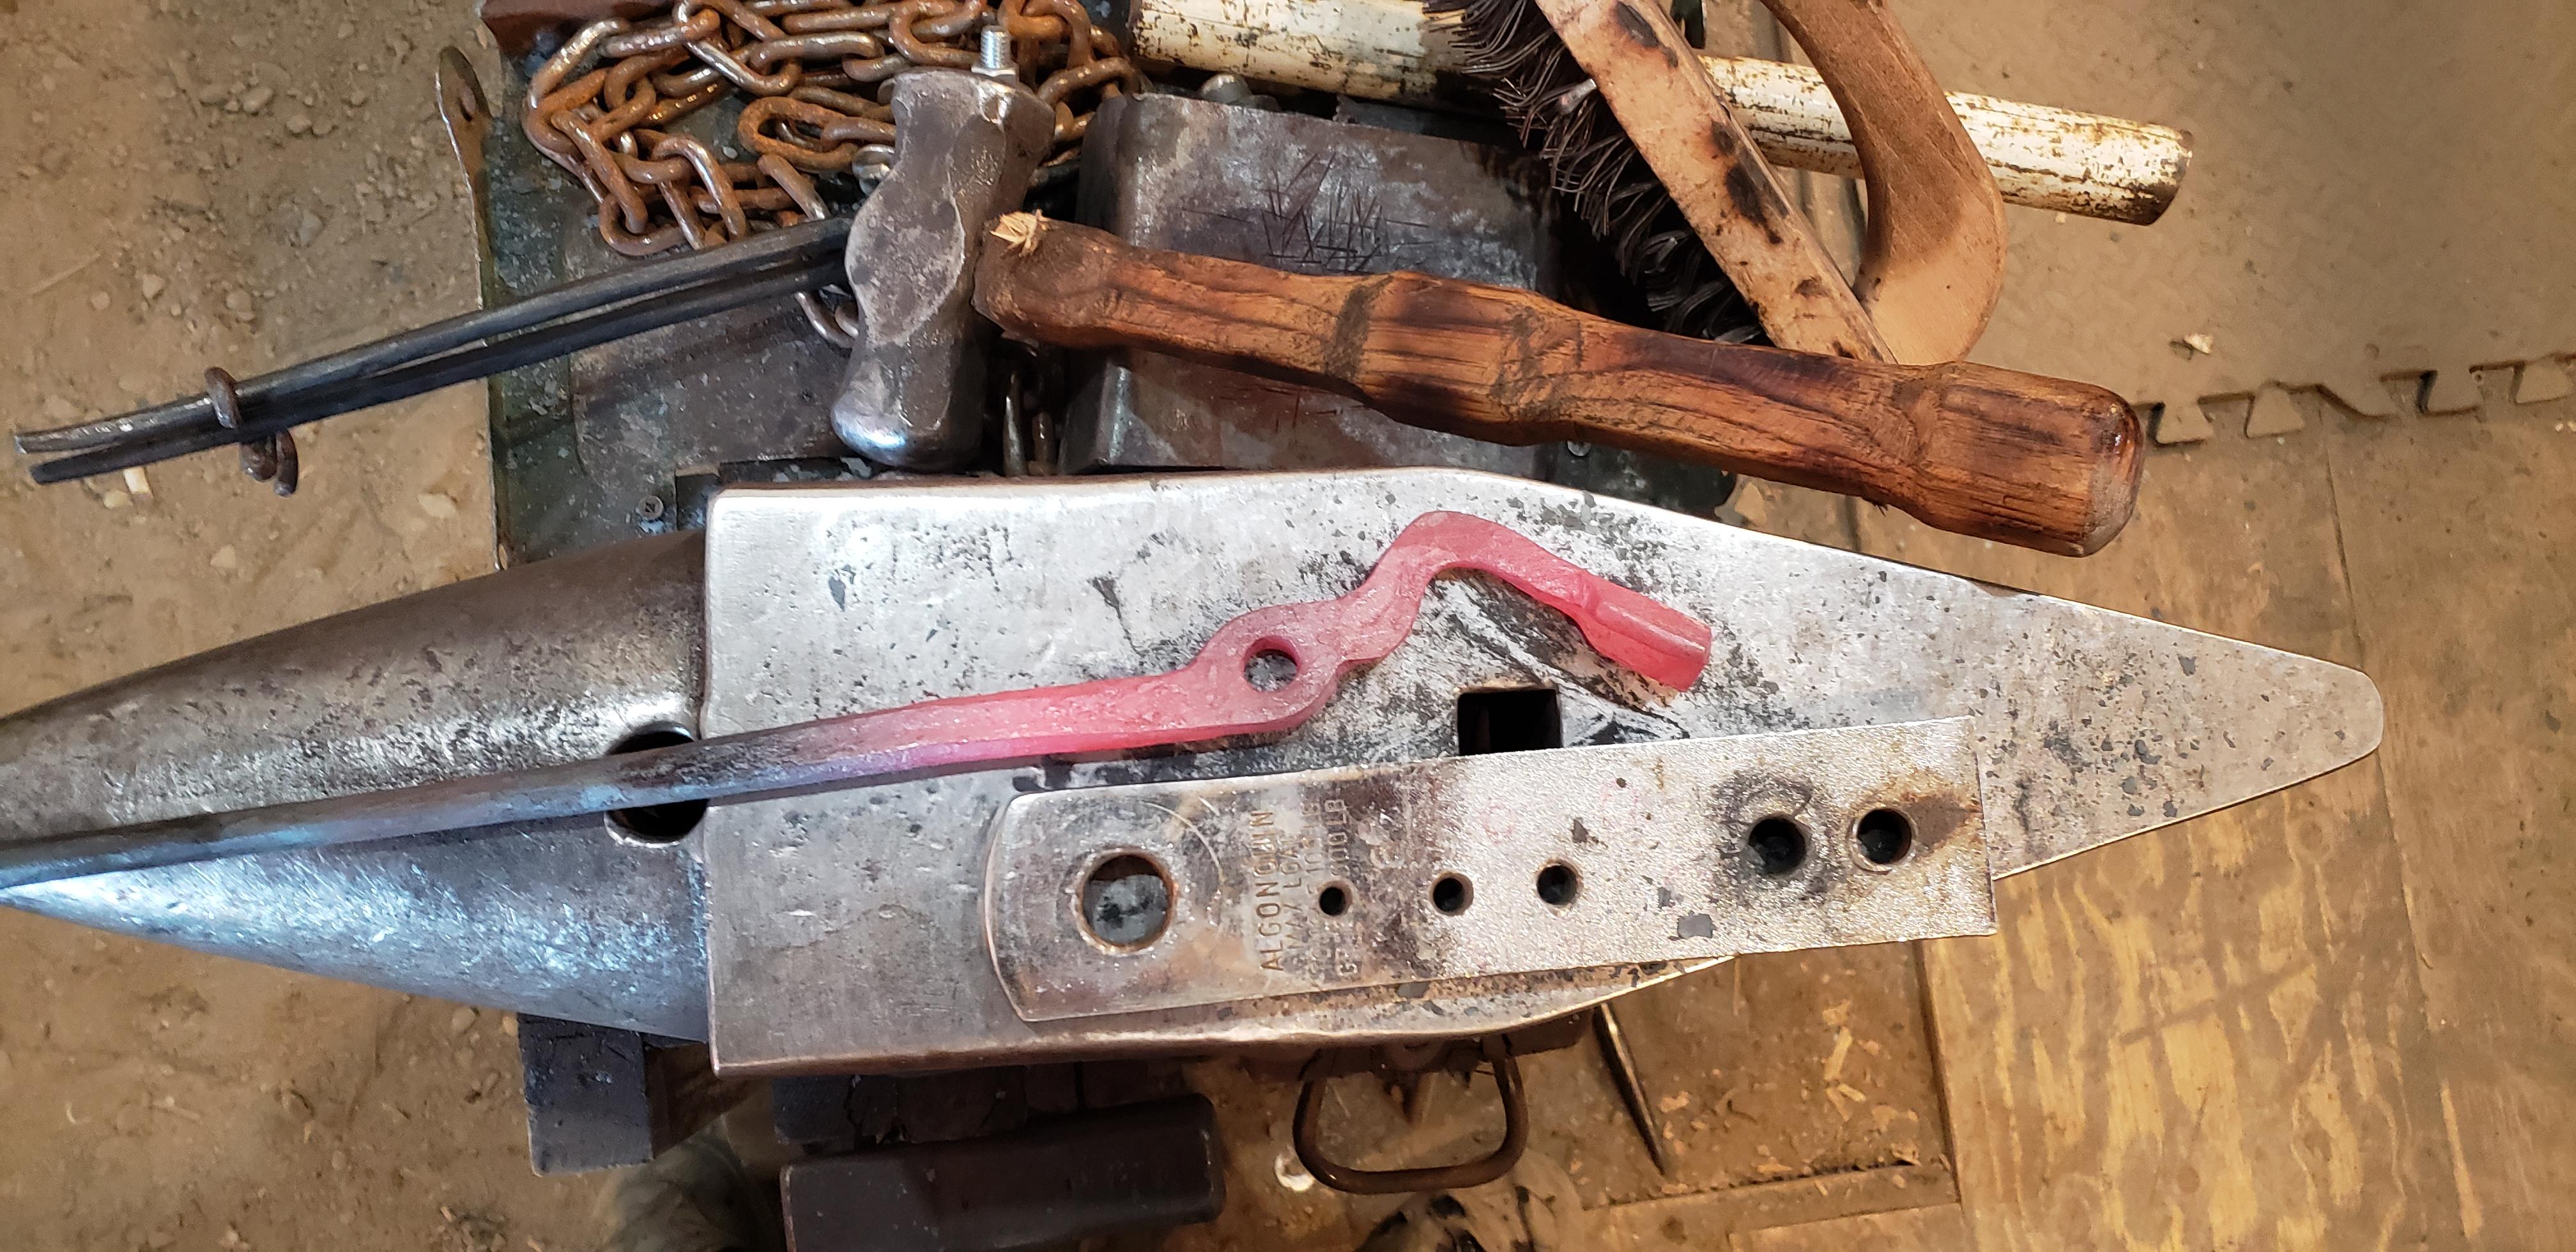
Tools: (I used)
hammer of choice, guillotine with butcher dies, 1/2" slitter, 5/16" round punch, 1/2" drift, top and bottom V swage and for the rivet I used a bolster to upset one end before hot fitting in the tongs.
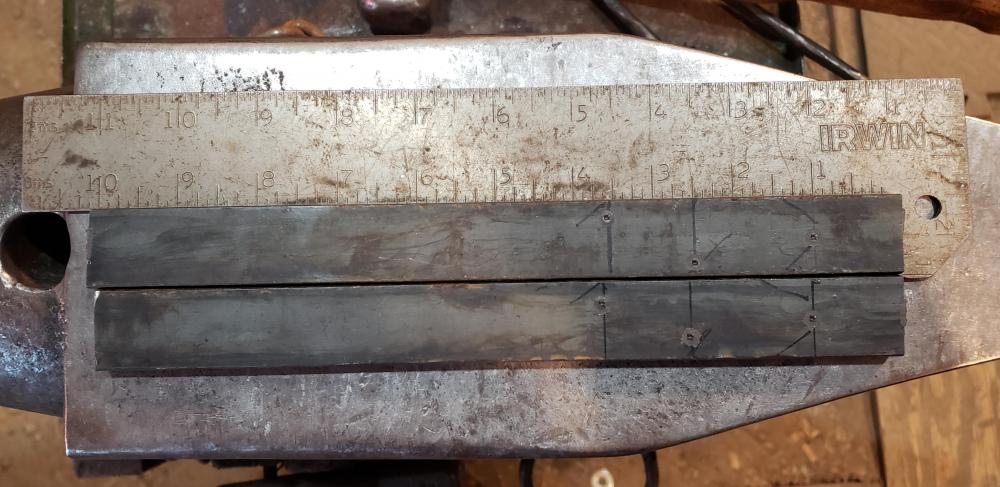
Mark at 1" 2.5" and 3.5"
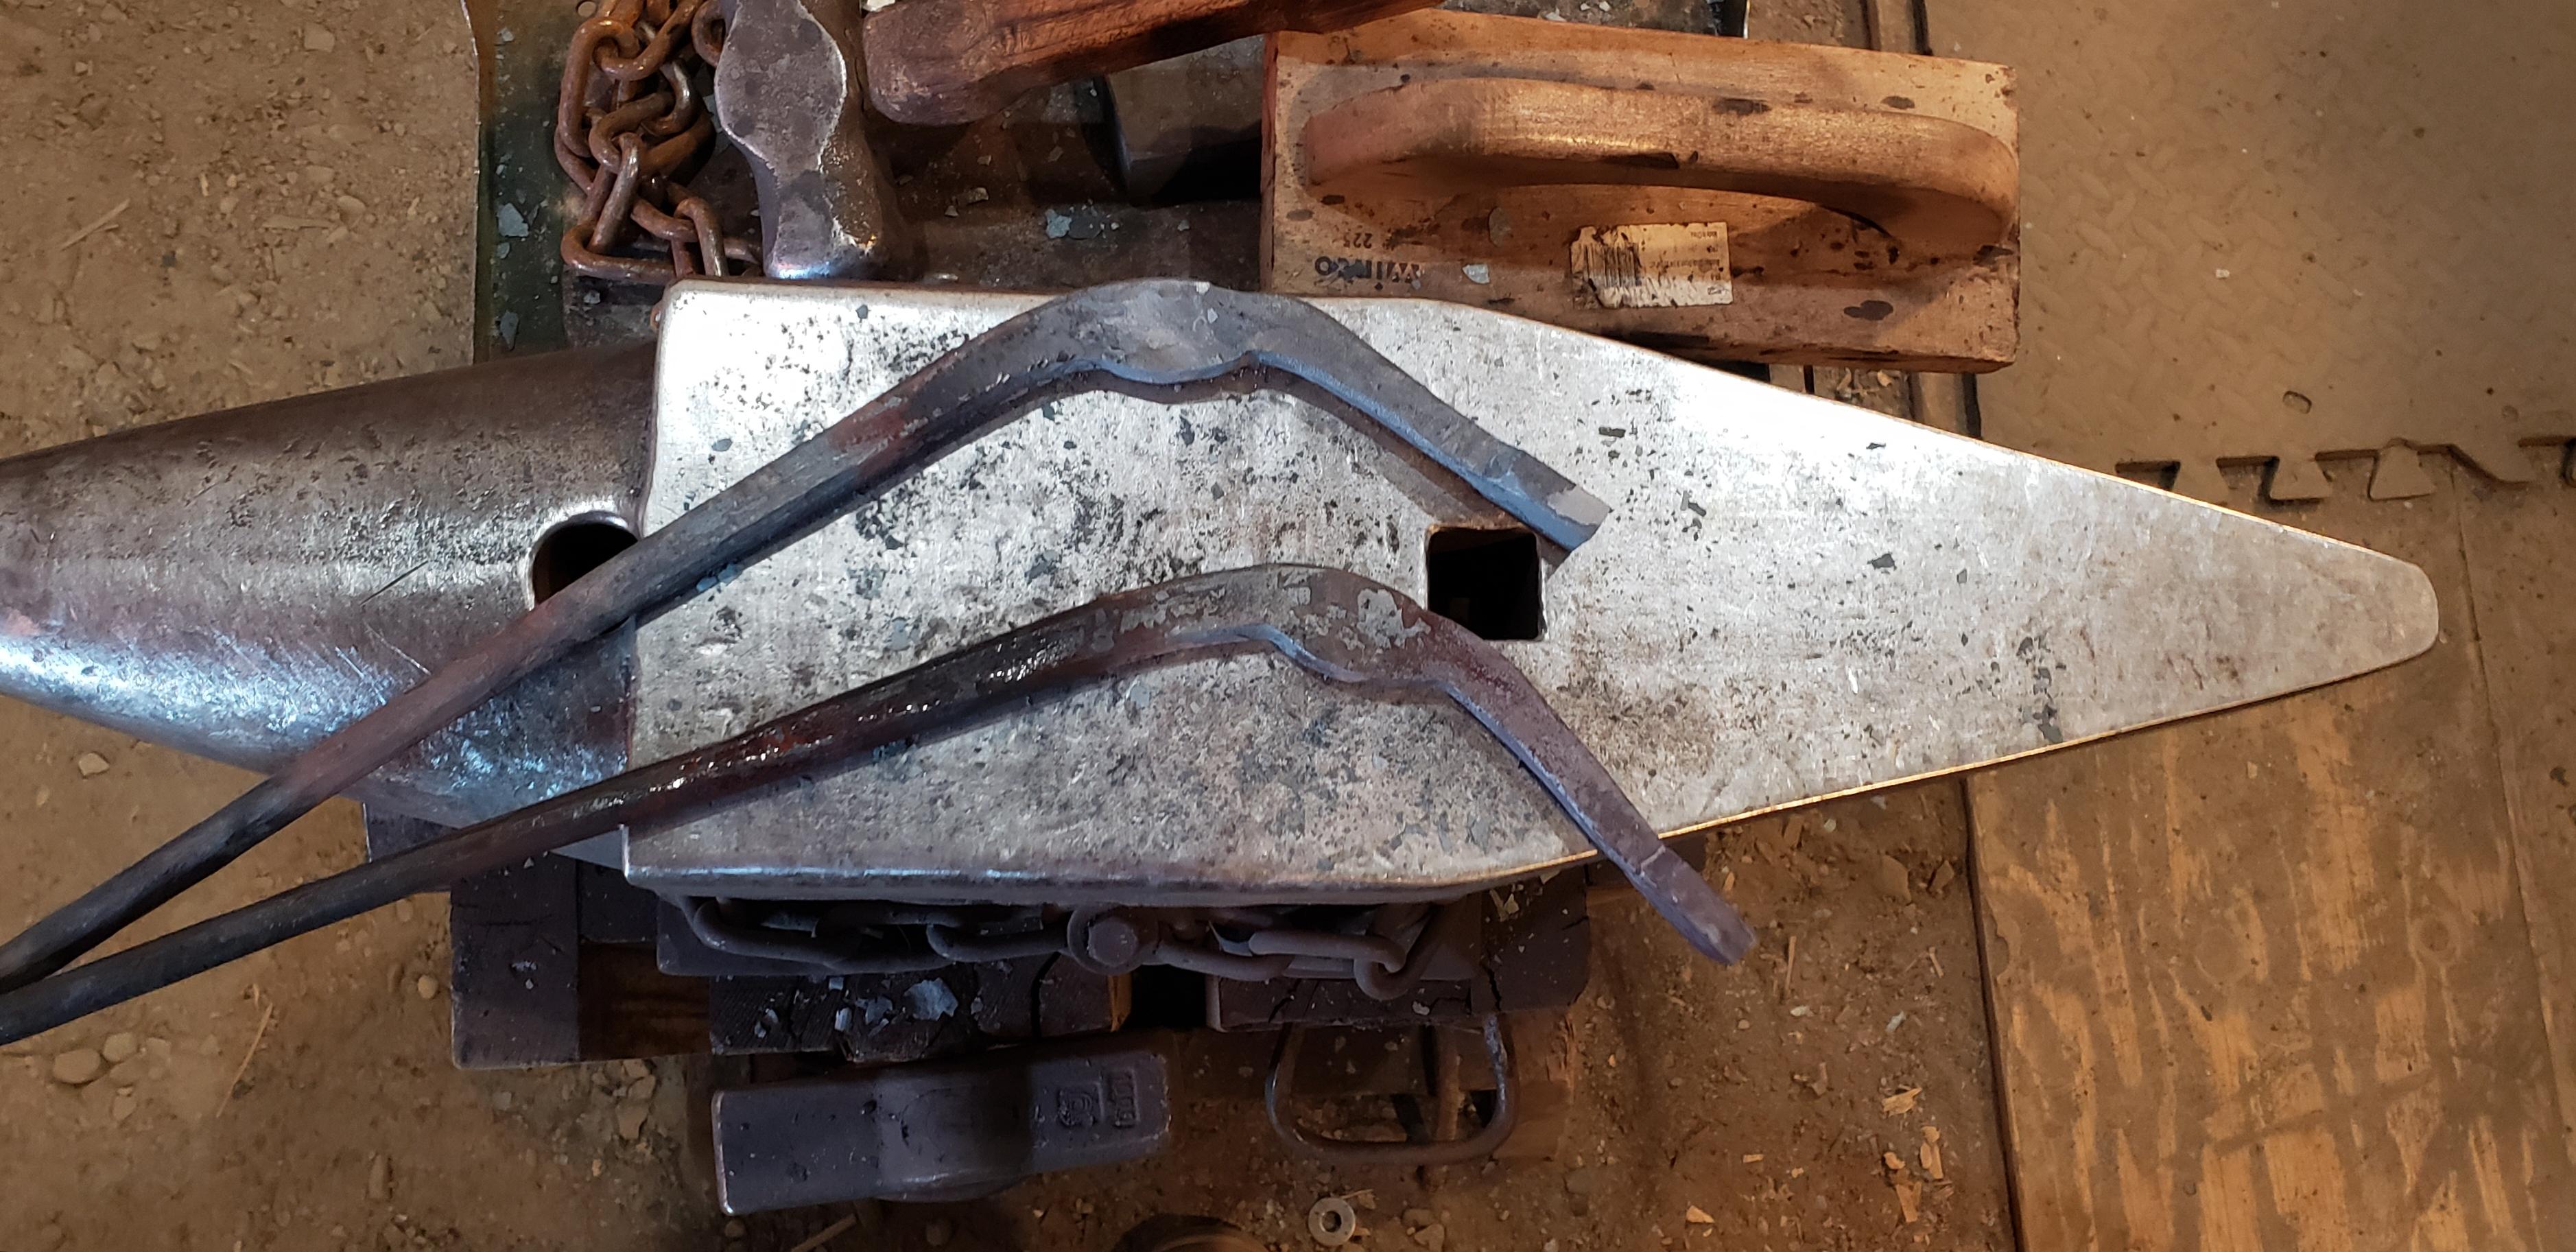
Draw out reins to desired length and thickness but stop when you're 1/2"-1" away from boss. (mine are 12-14" and terminate at 3/8" round)
Isolate 1" sq

draw out and round the edges of this section just enough that you can get a clean 1/4 turn/twist
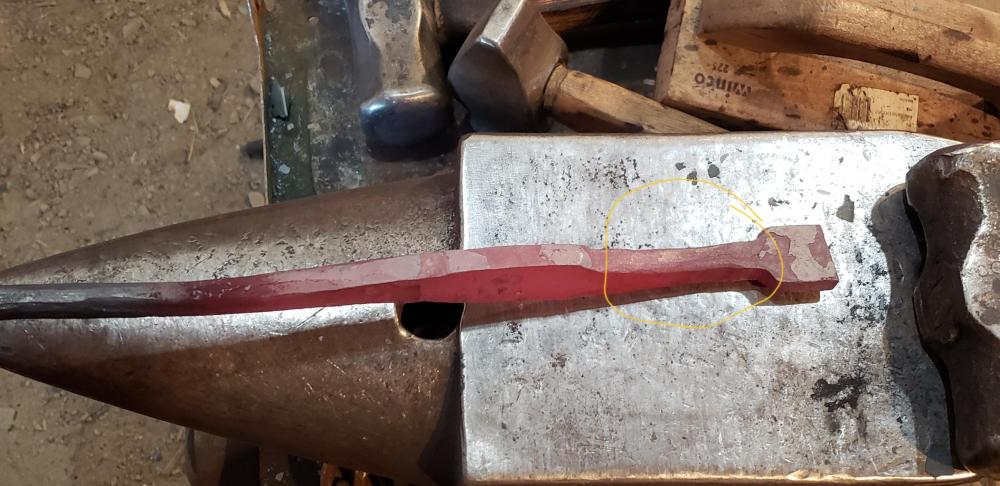
Now you need to chase and forge down the ridges left by the twist be careful to avoid cold shuts while roughly squaring this up

you can see these are still only roughed out, don't get carried away here yet

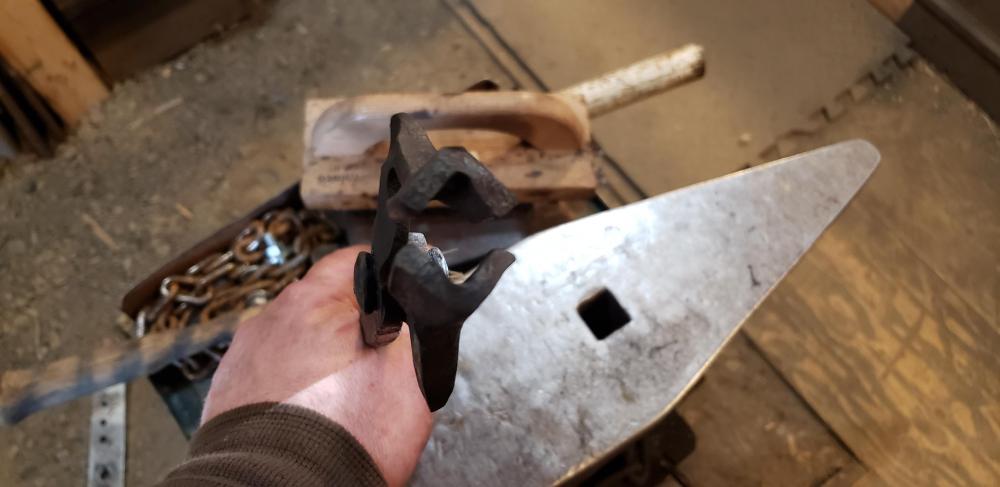
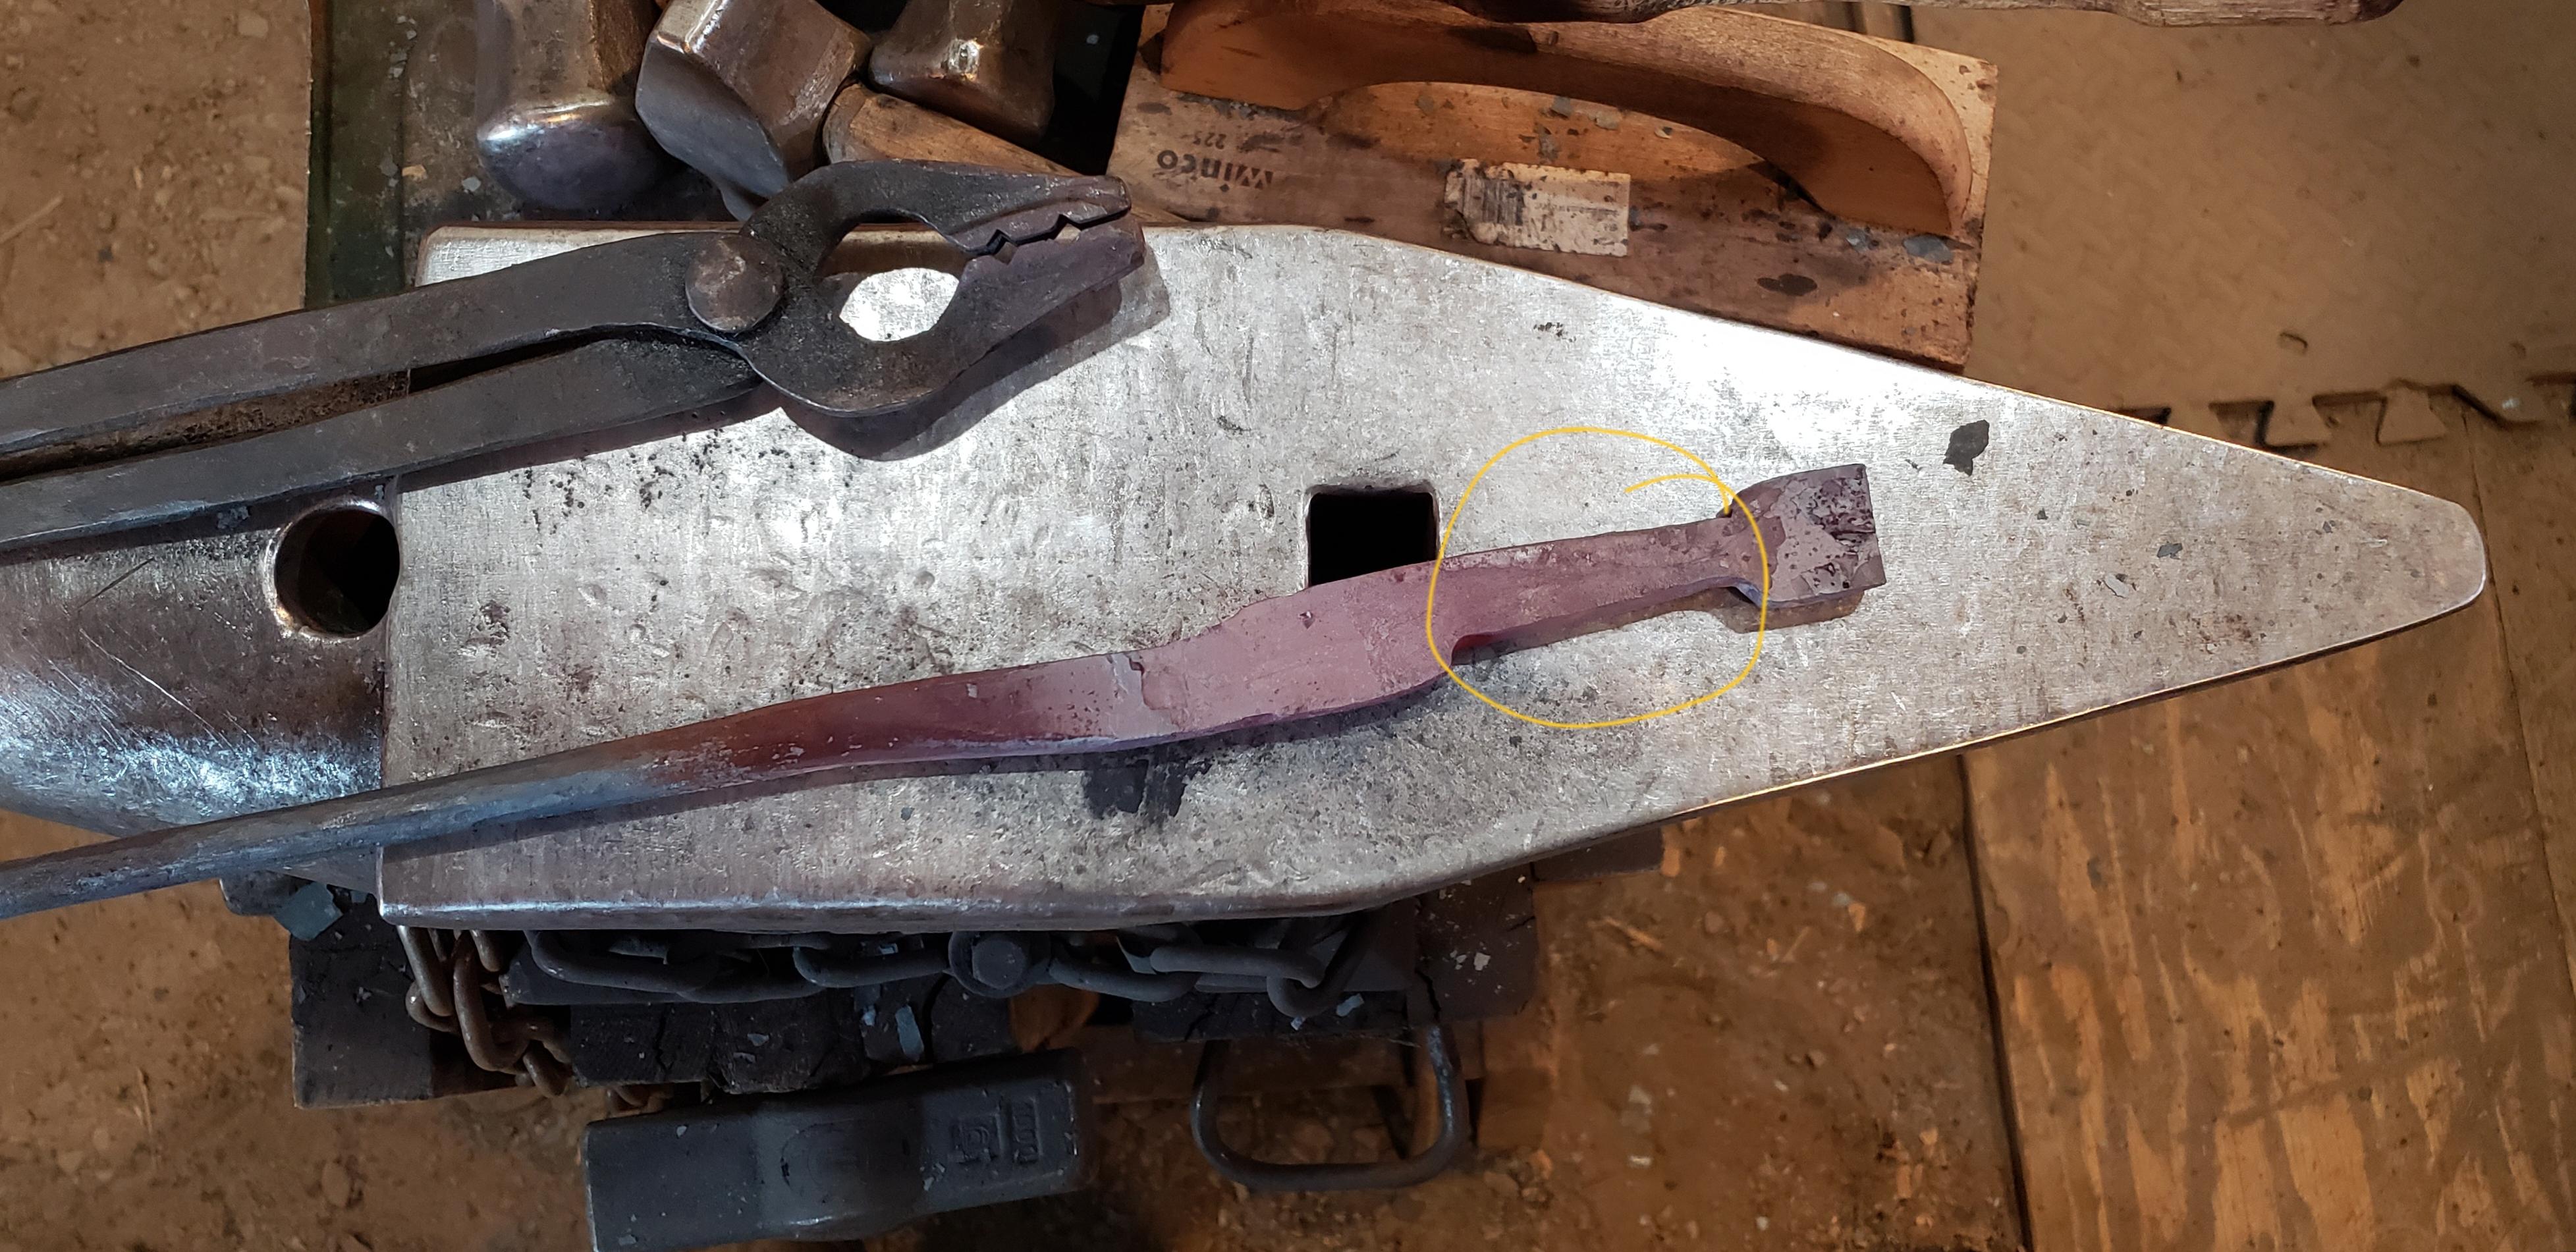
Isolate your boss but only set down 3/4-2/3 again don't get carried away

Forge the opposing corners into the boss, let the boss upset a bit
Bend backwards just after the boss, say 30deg
kinda nip the backside of the bend, this helps tighten the bend and I believe it helps reinforce the bend as well

Bend the remaining 2/3rds forward and nip the back again
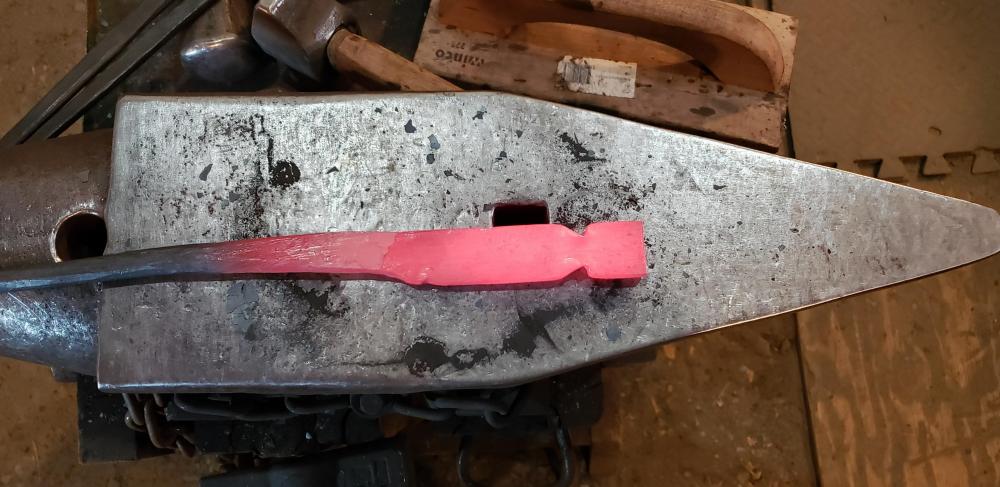
Forge your nib into the swage

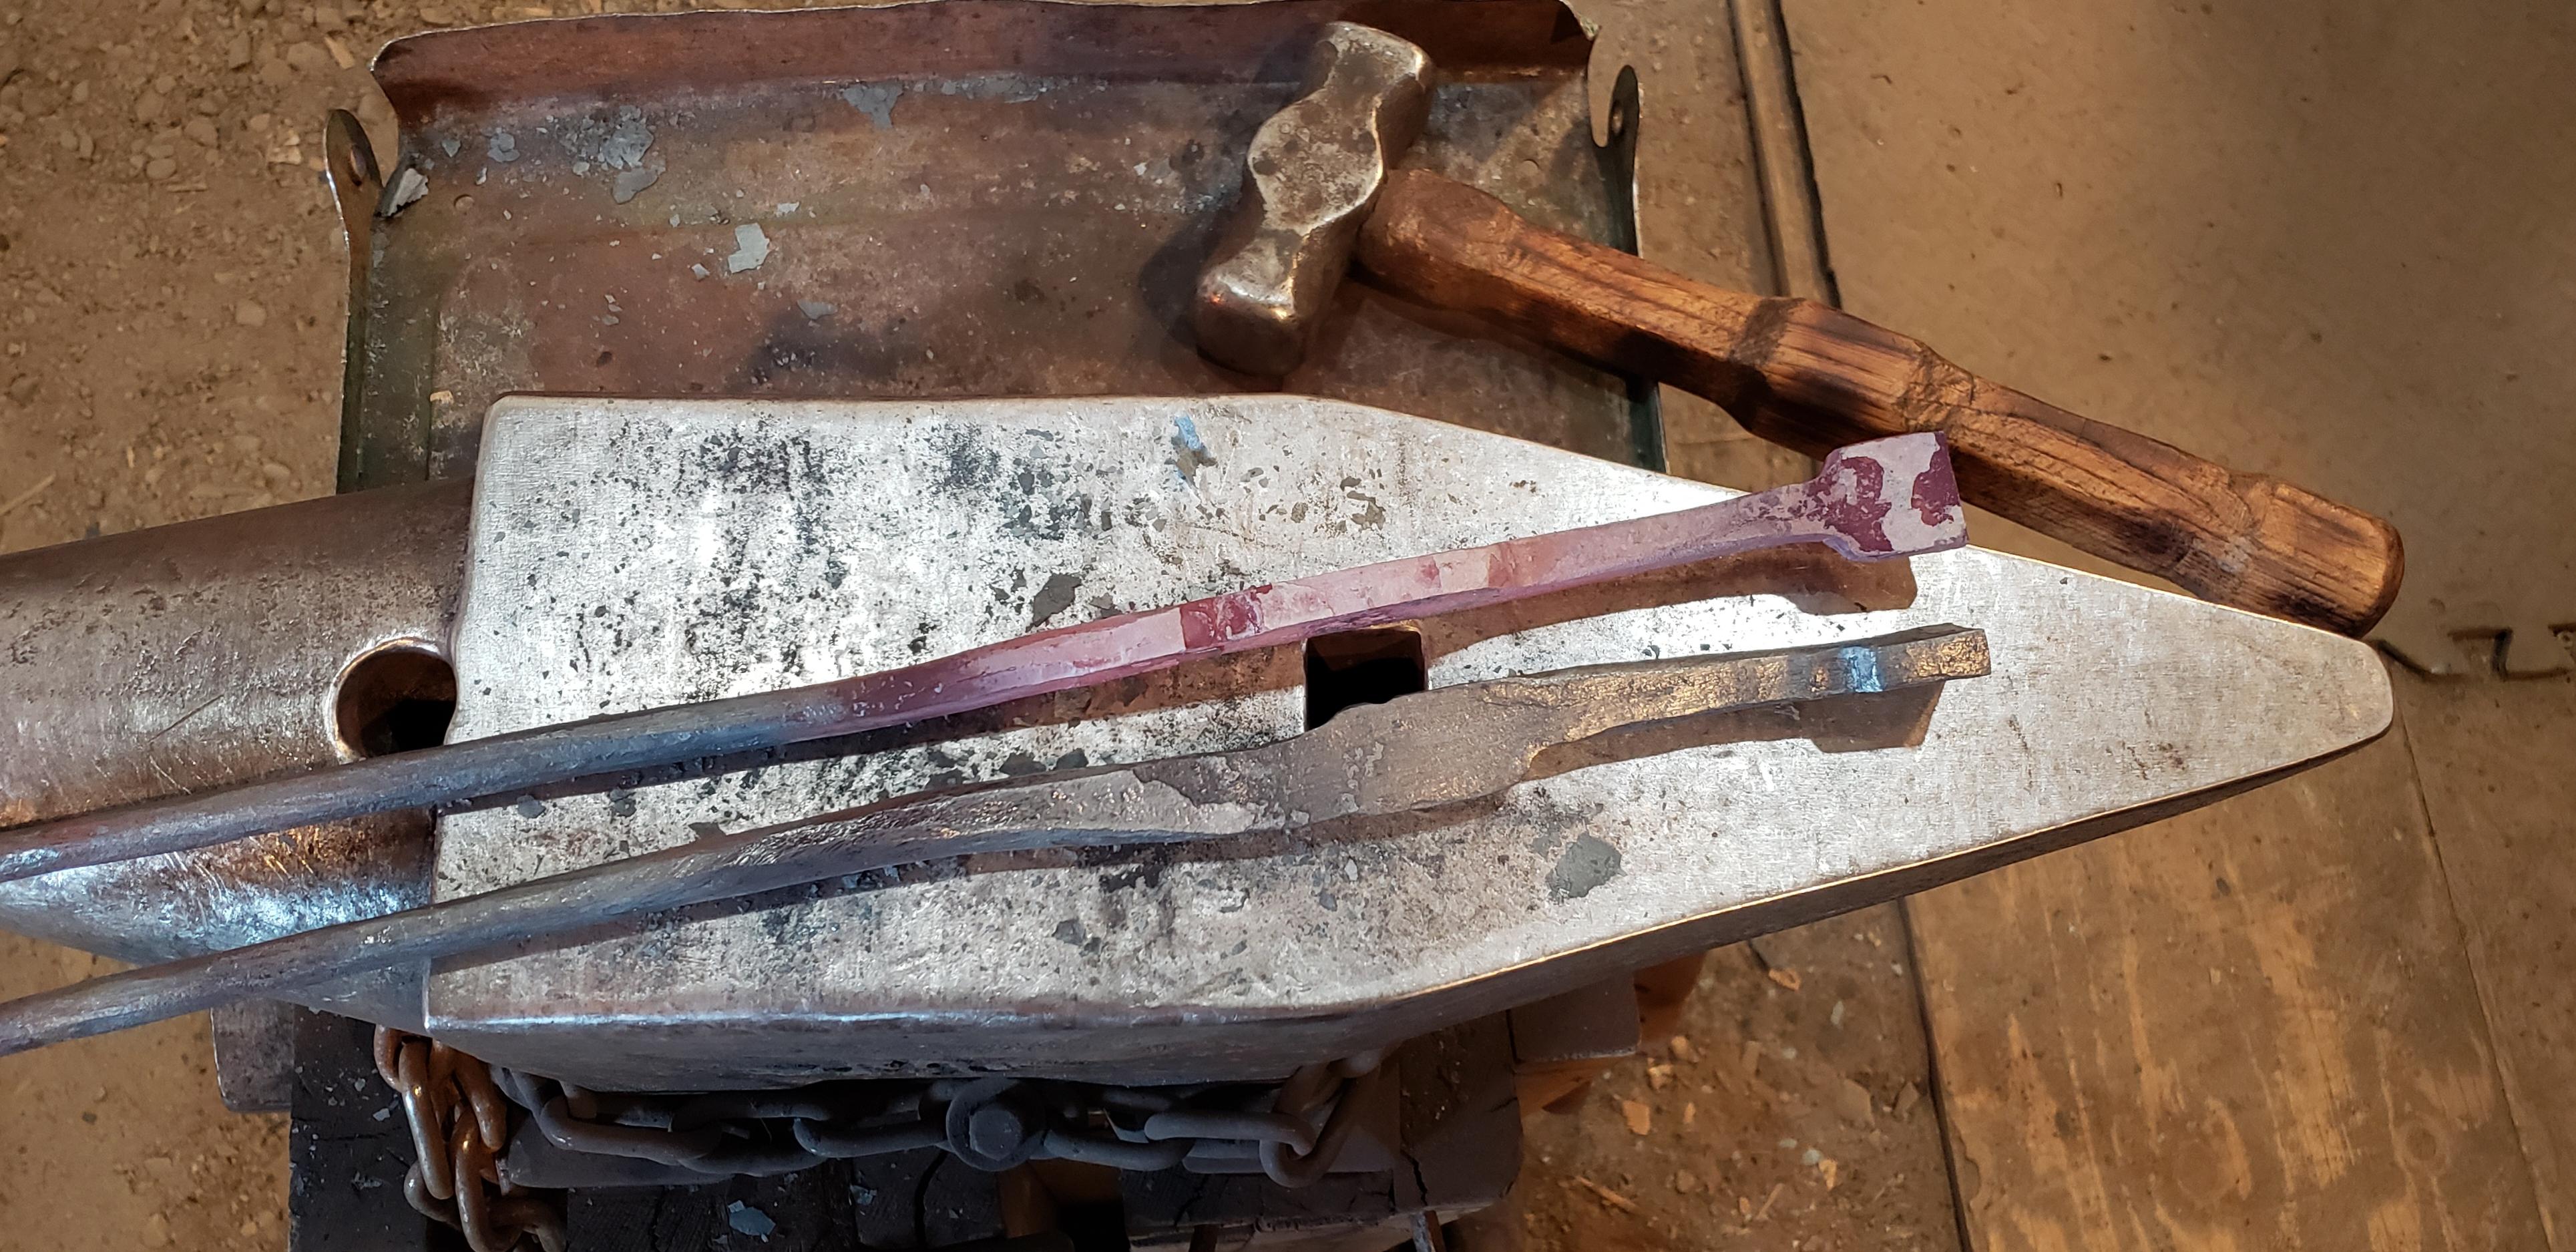
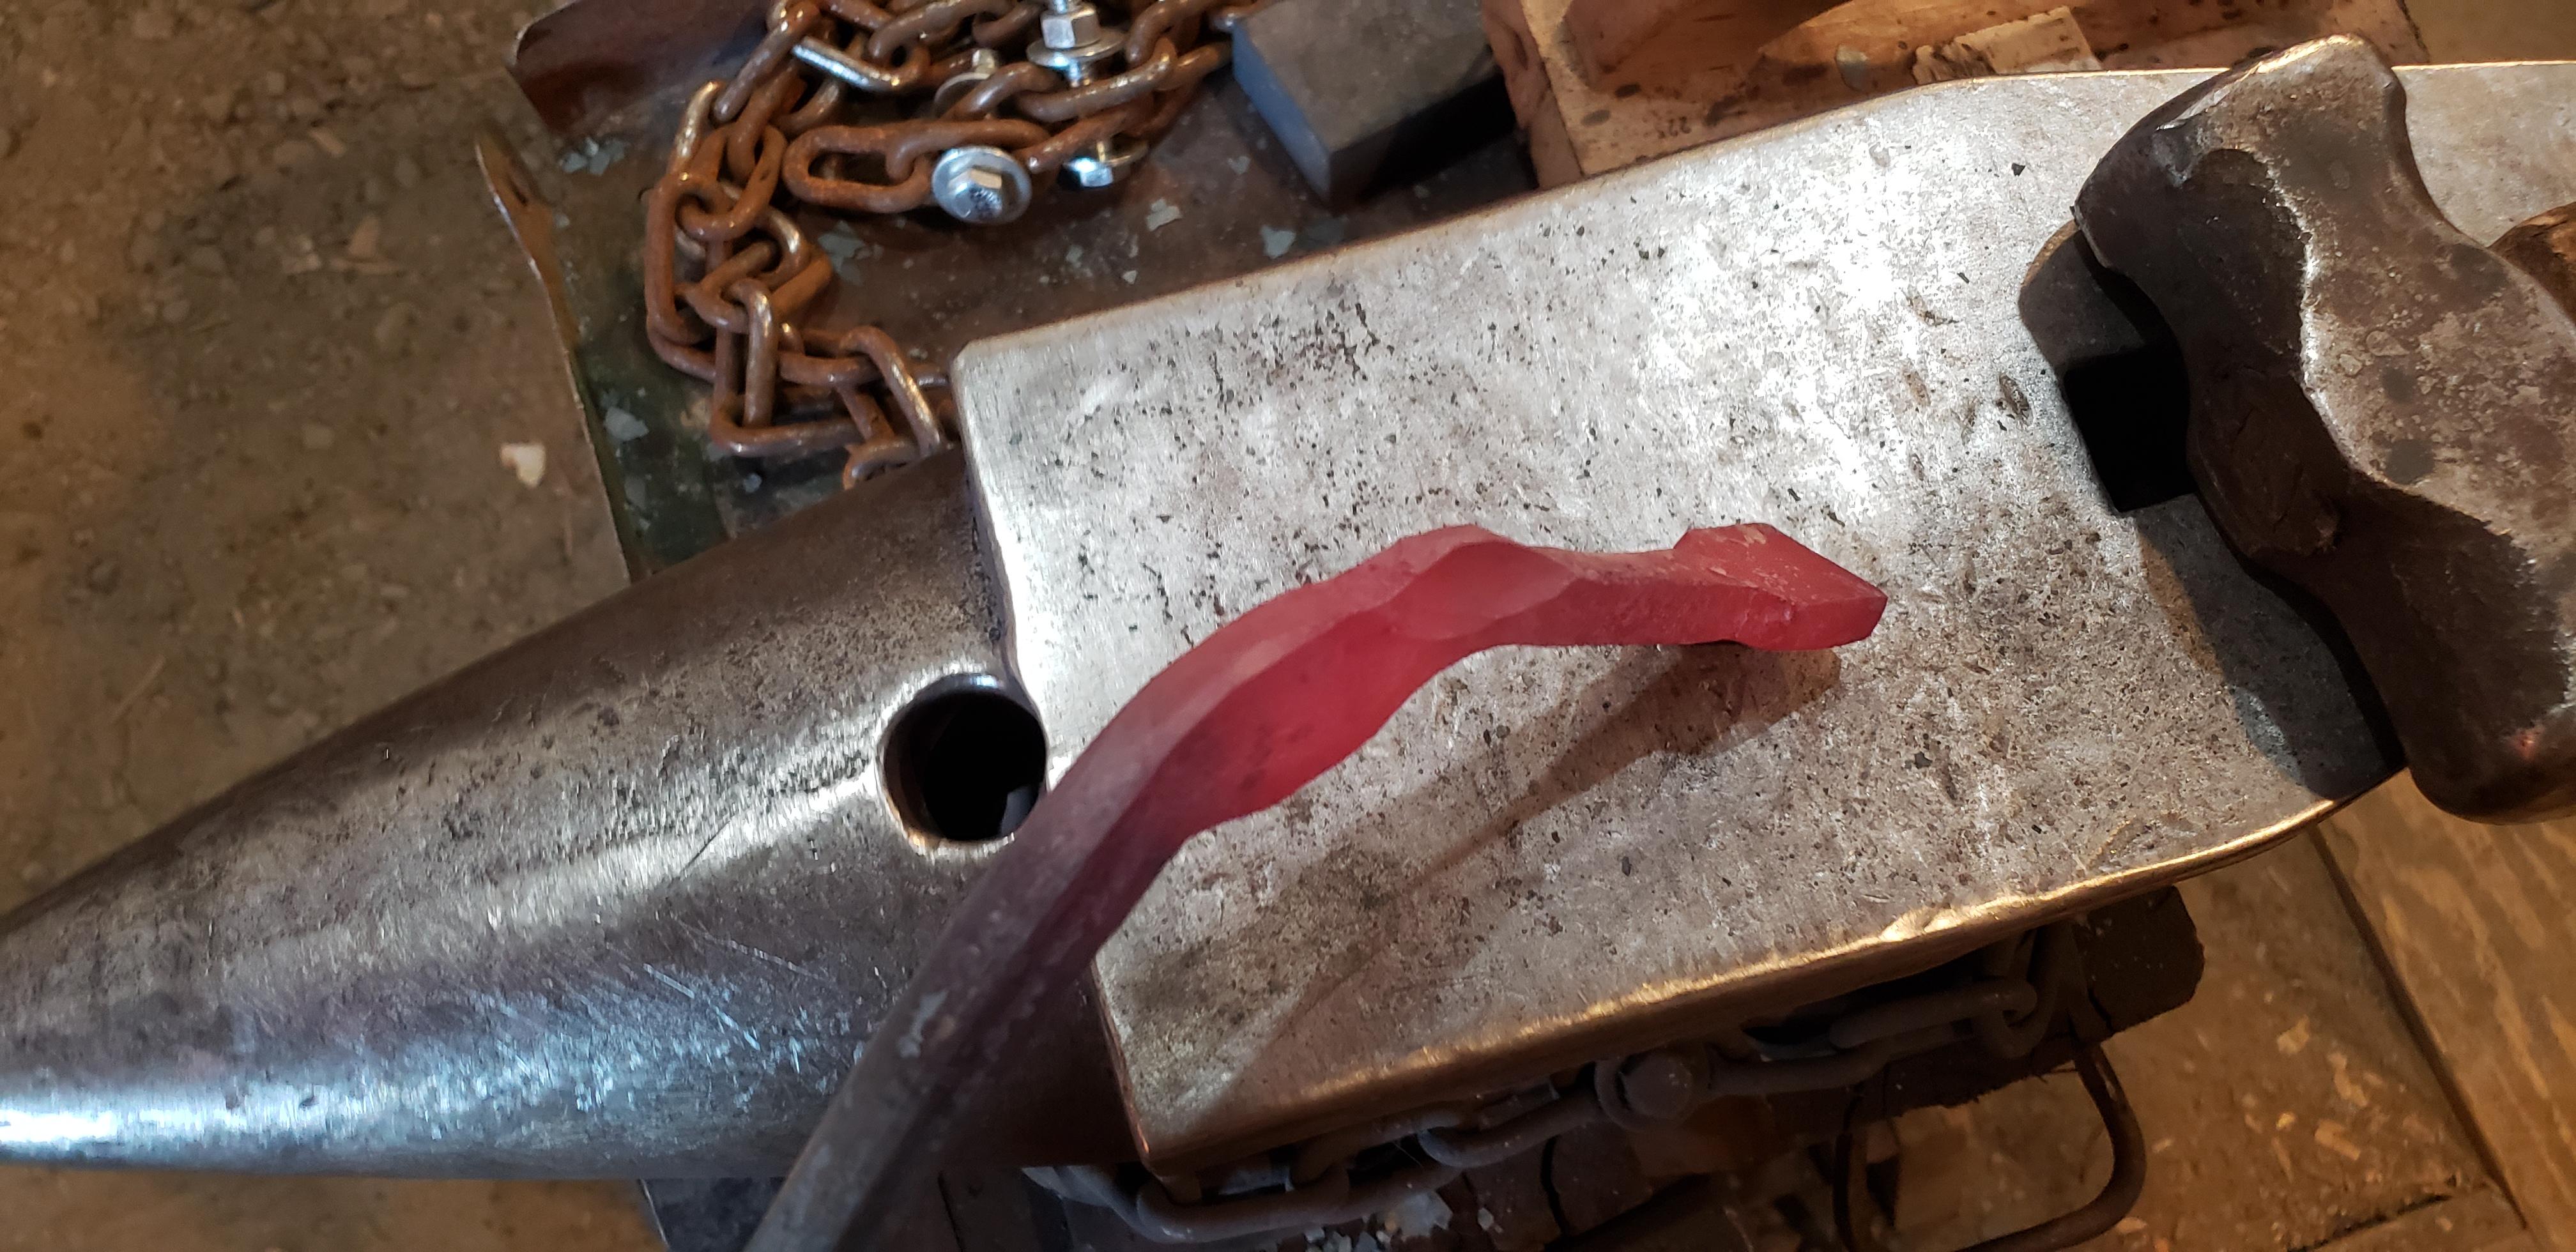
I skipped a pic here but before opening up the boss take a heat and tweak the angle of your reins so the nibs kind of line up with the inside of the reins and bend the nibs backward a scooch as seen in the next pic, don't focus to hard on the angle as you can adjust that once the rivet is set and you're hot fitting to stock size.
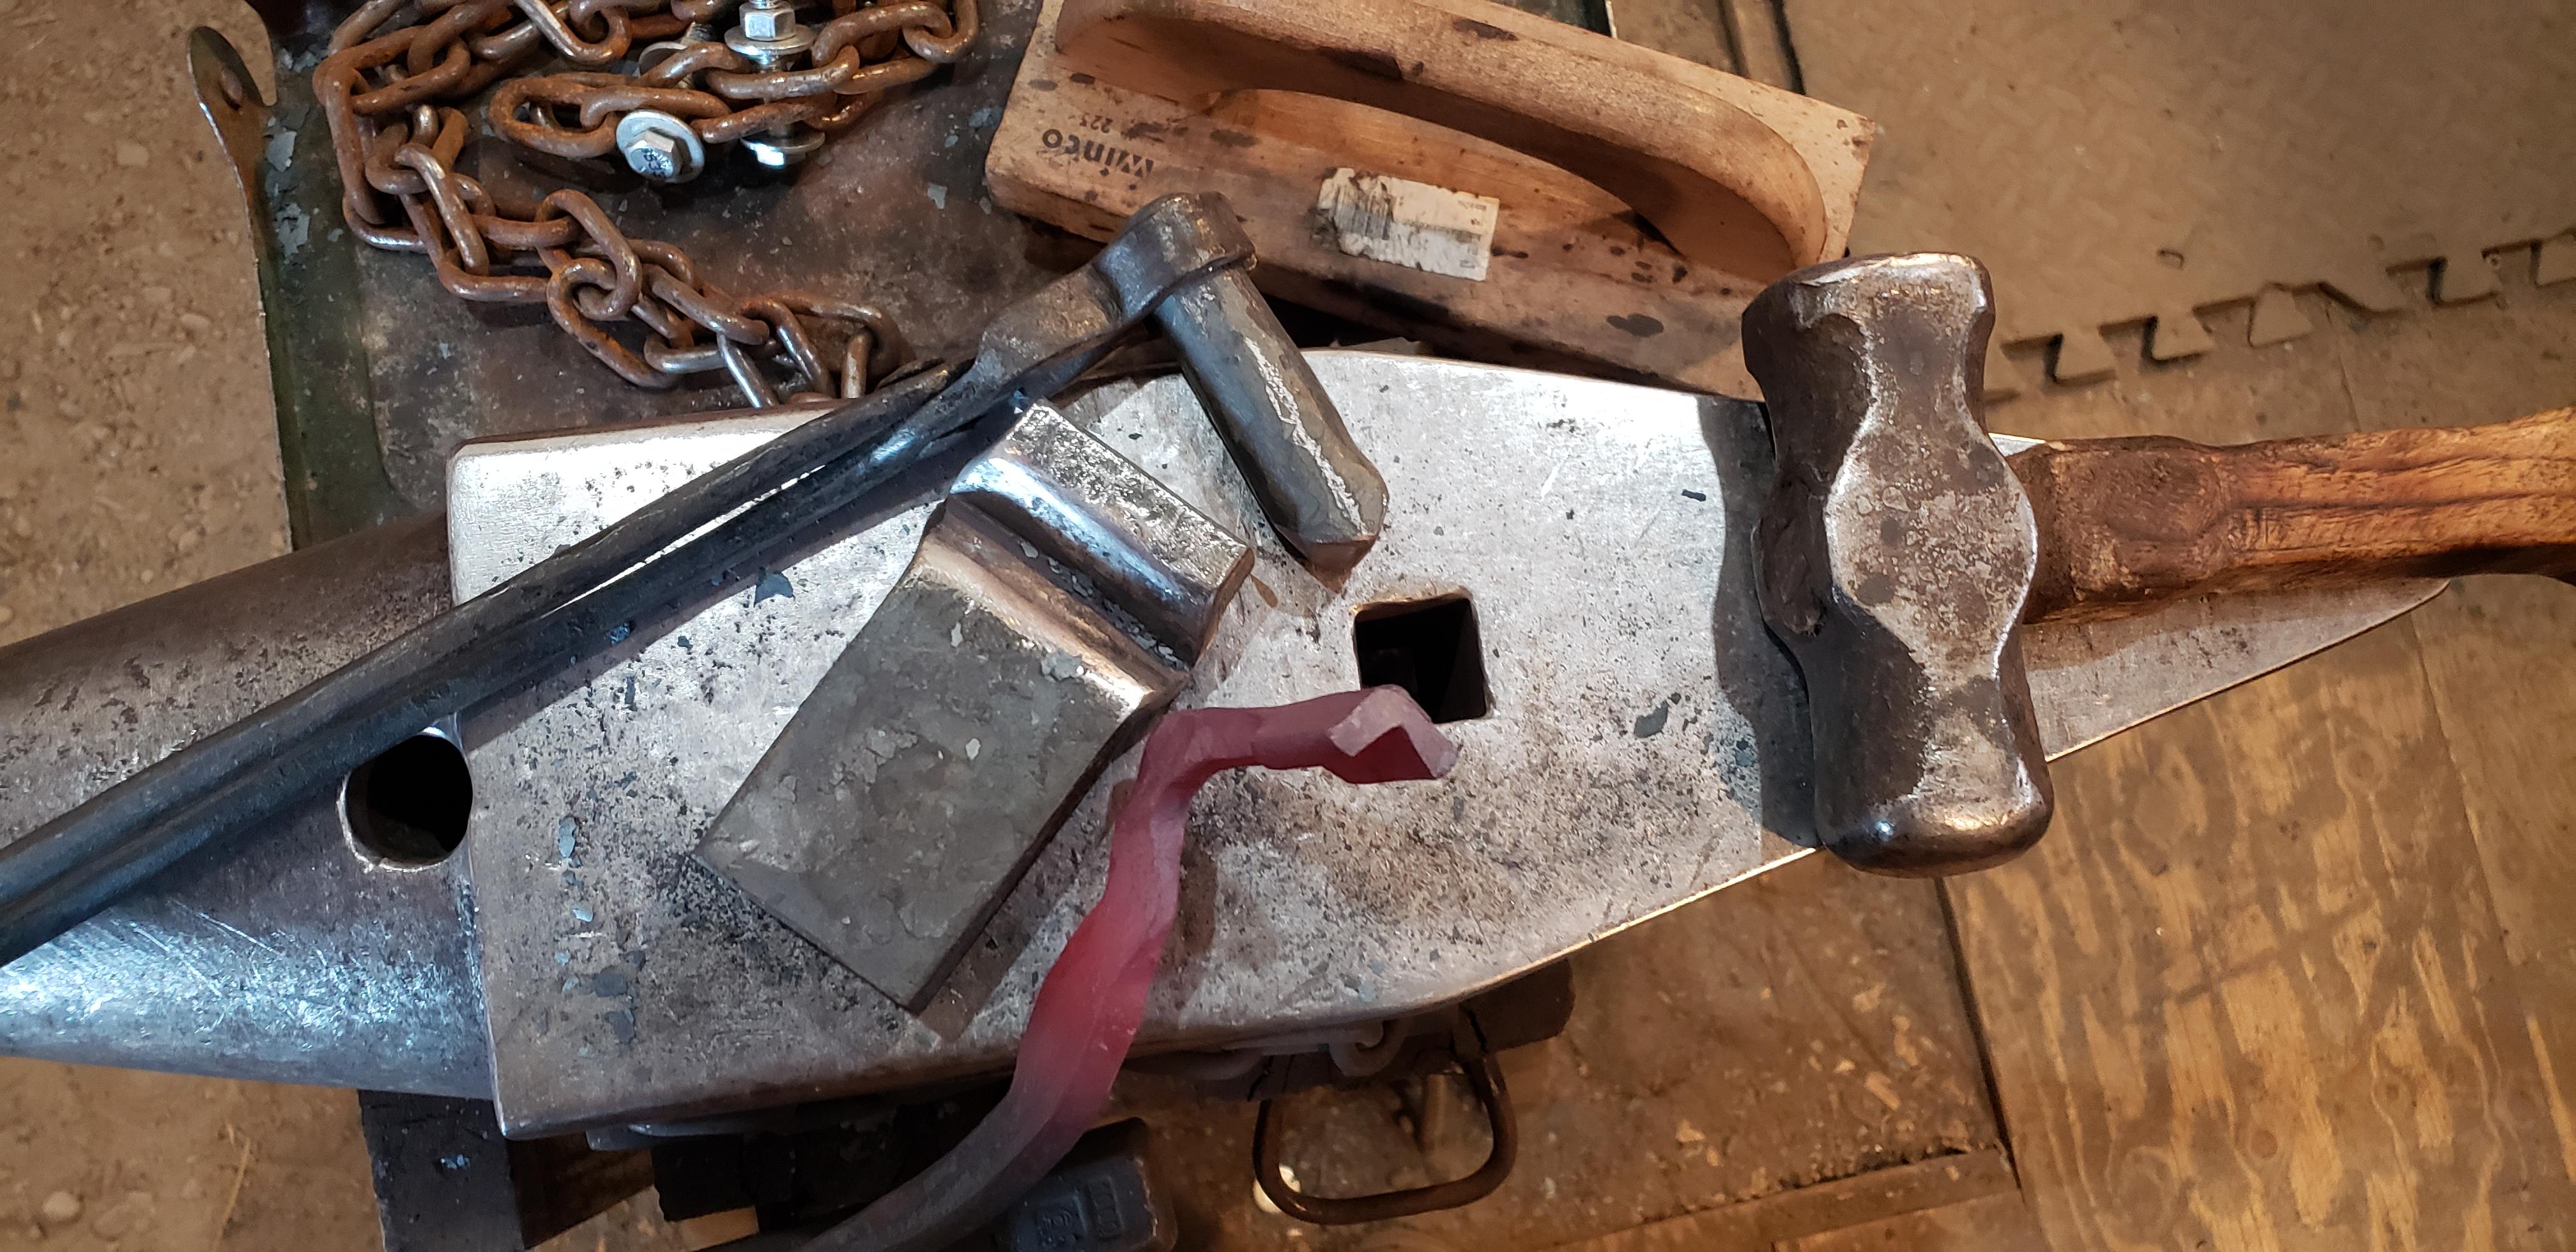
I put a 1/2" slit inline with the boss, punched out the rag, drifted to 1/2" then used the punch to countersink to 9/16" (the 1/2" rivet will go in easier when hot and then upset itself to the 9/16"
Check alignment with a cold rivet

Set your rivet but don't finish it yet and then with the tongs laying on their side tap the jaws back and forth at the second bend to center the offset (if that makes sense)
Offset centered
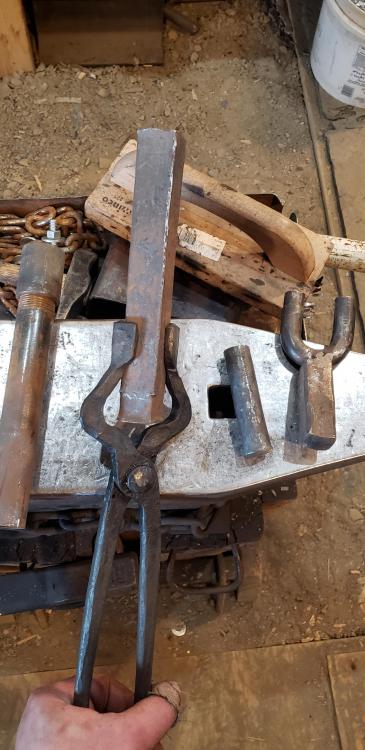
Heat the jaws and boss, grab your desired stock and clamp the nibs in a vise and then squeeze your reins together to the desired spacing. Pay attention to where your reins are in relation to the jaws, you want them adjusted so the stock is inline and centered between the reins. (this is where the nibs get their final tweak as you clamp them in the vise)
This may take more than one heat to get them where you want them but once there finish peening your rivet at heat and work the tongs open and closed to keep everything tight but moving freely.
BOOM done easy as that
")
(When it comes to hot fitting the tongs and adjusting the reins just do this the same as any other tongs (I'm struggling with how to explain this part))
One of the hardest lessons I learned when making any style tong is to never finish any one part until you know you won't be touching it at heat again. Take the section between the nibs and boss, if you finish that section 100% before isolating your boss then every time you straighten or tweak it you will be getting thinner and thinner. Same goes for that section of the reins that blends into the boss, if you finish that last 1" and then go back later to work on your boss you may find that section has been set down too far and you're left with a week spot. In short try and have each aspect complete at the same time as the others......
-
Well said and thanks again. Next I am going to take a crack at your burner, not that I want to replace mine but I just like building these things it makes me feel like a mad scientist
-
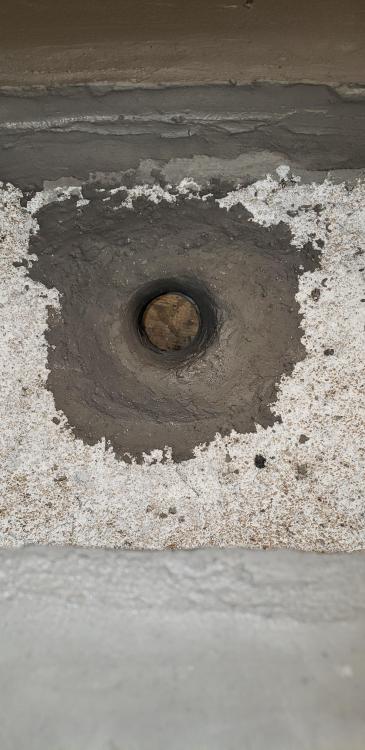
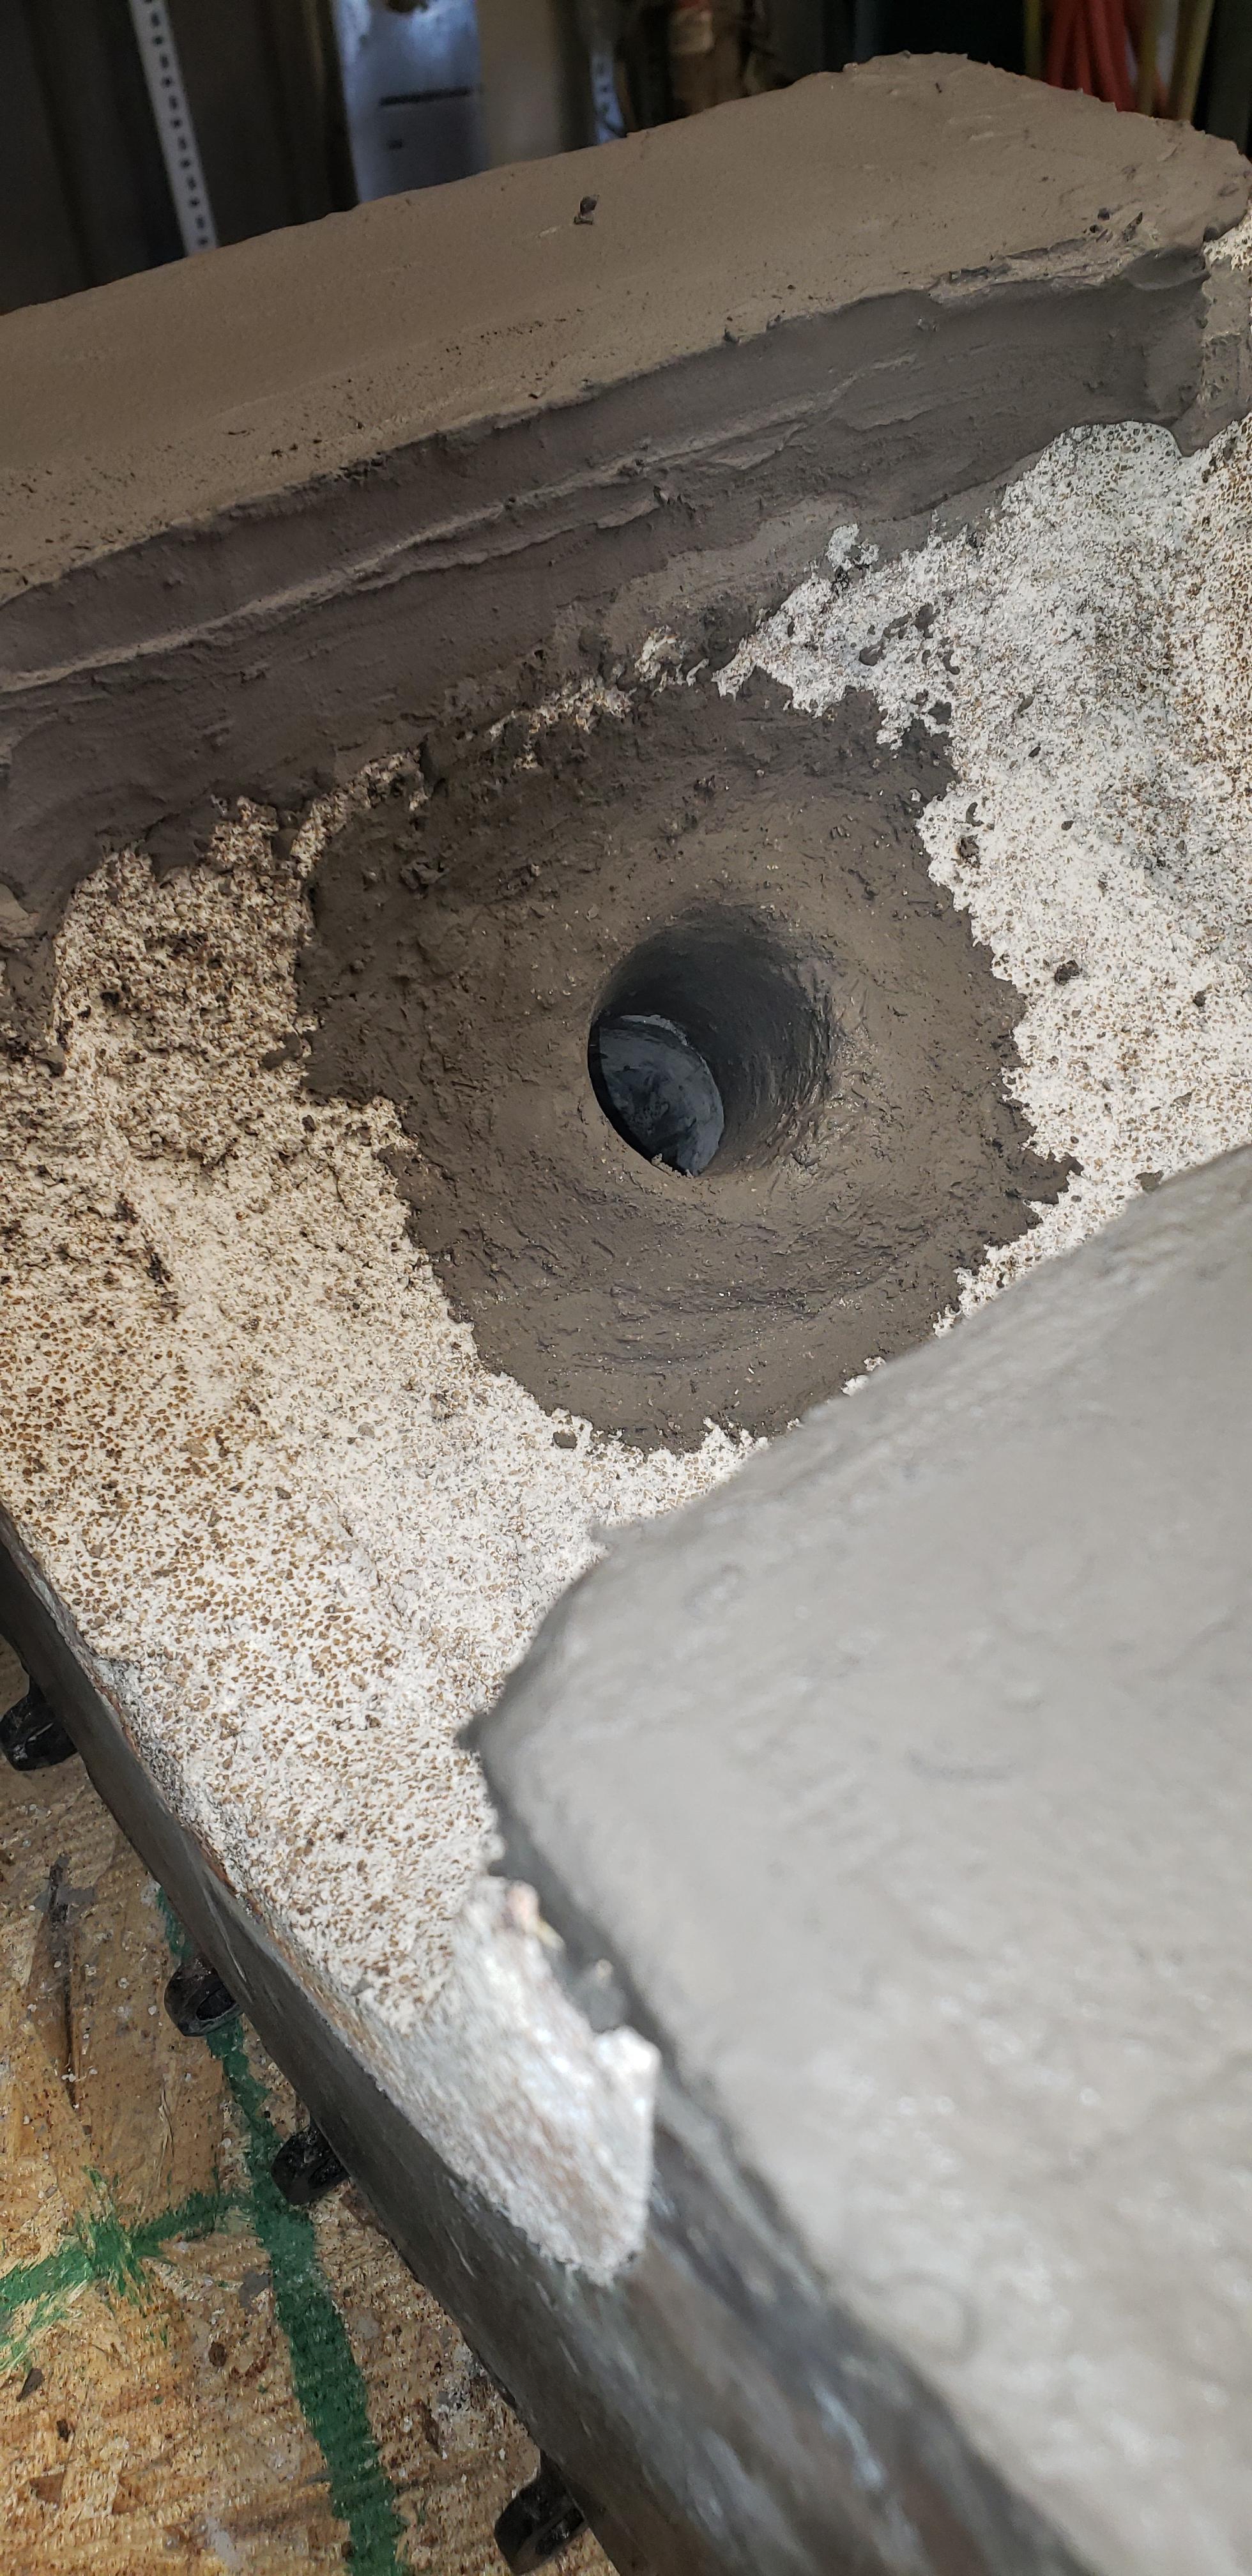
Thanks Mickey I was pretty excited when I seen this shoot out that hole, with no way of knowing exactly how it would react was a little nerve racking since you don't get an easy adjustment when it comes to cast refractory. I should try and order something like if not that sooner than later, I would have by now but things are just a scooch harder to source in Canada I'll contact Glenn and see what happens thanks for the tip.
-
You know I said last time I was here that I was going to do just that....... I failed thus far
 Now that I have this burner and forge running well I'm starting to plan out my next build, I get as excited about building forges and burners as I do forging. I'll try my hand at a write up and create an actual post here not just throwing pics onto FaceBook, FB is good and all and there is some good info on there but when I need to learn I come here and creep. I guess I should finally join the party and maybe give not just take
I've spent most of my time here in "the past" reading through old posts mainly on burners and forges, I'm going to start cruising the active threads and seeing whats's what I think I have a few recent projects that I could share.
-
Thanks Frosty. The first 3 pics are new the last two are old/original.
This is an old pic of the burner I threw in for reference, I moved that gauge back when I was first building this based on your advice. I don't really use the gauge anymore like you say the sound will tell you where you're at, I did like having it for reference in the beginning and I only use the numbers for description to others but point out the orifice I use too. More often I describe my settings by percentage instead again for other peoples reference's. I'll run around 30-40% throttle for warm up and heavy stock and general forging between 15 and 20%
After learning about burners here the whole PSI thing has kind become a pet peeve TBH. People are like FA is the way to go, I weld at 3psi when I had a venturi I had to use 20psi" they forget to mention that they tripled their orifice size and that they are actually using more gas

-
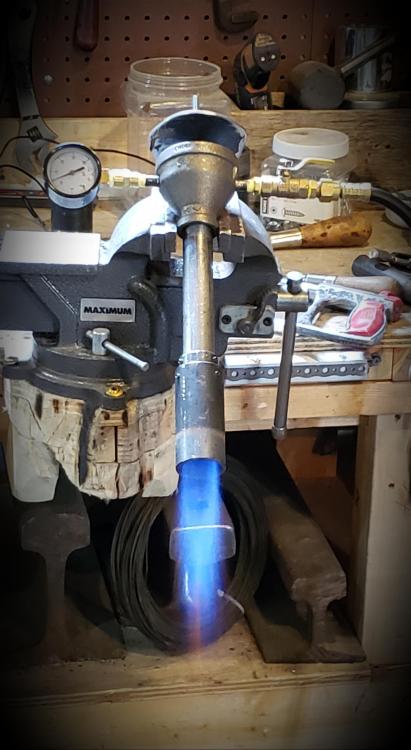
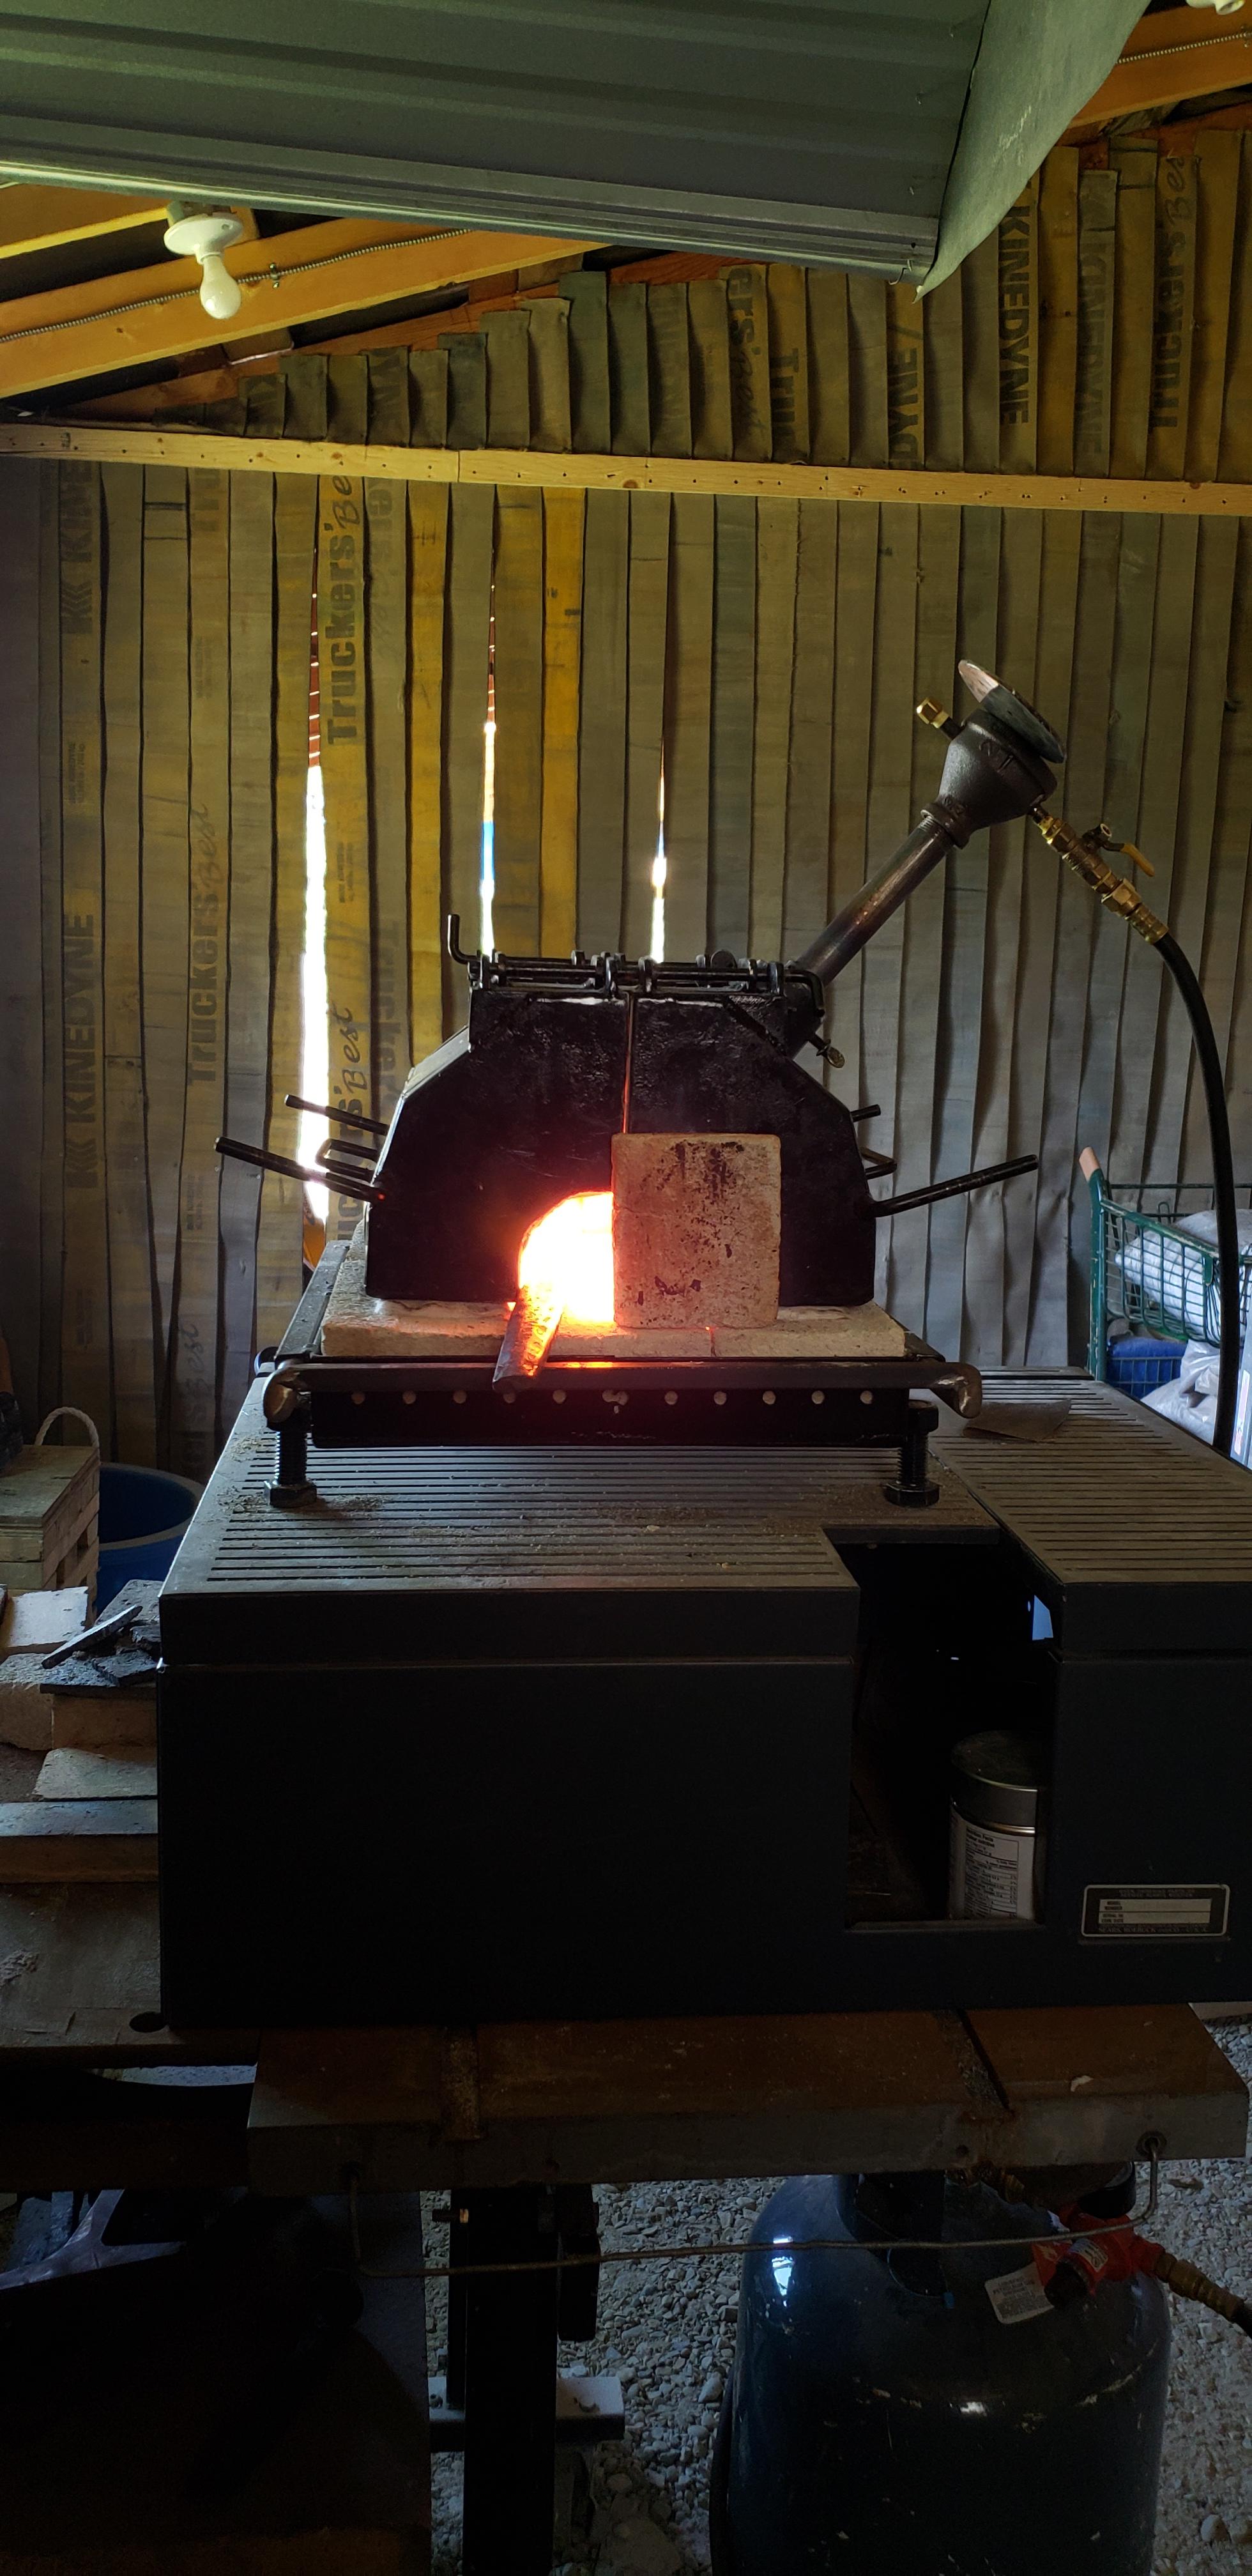
Hello again, it's been awhile. I got some help here with this mig modded Reil burner 6mth back. This has been one great burner, and I would recommend it hands down.
2"-3/4" reducer with a brass T tapped for an 0.035 contact tip. 8" mixing tube and a step nozzle to 1 1/4" with 1 1/2" over hang. I could turn down to 1psi and up to 30 psi. General forging done at 5psi and heavy stock 7-10 psi. I would get 15-18hrs from a 30# tank.
My nozzle finally burnt out (slow flame so it sat inside the nozzle a scooch) so I pulled the burner and reshaped the port into a flare with some more kast-o-lite, as it set I ground my nozzle into place from the outside so it has a shelf to butt against and then made the kast-o-lite flush to the inside of the nozzle. Once set I used some mortar to smooth the voids left from the pebbles and finished it off by sanding smooth as the mortar firmed up.
I have the 1 1/4" step nozzle over hanging the mixing tube by 1/2" then the port in the liner goes from 1 1/4" to 1 1/2" over 1 1/2". I think that simulates a 5 deg ish flare ish shape.
I've been able to drop down to a 6" mixing tube and my flame starts in the cast part of the flare/nozzle instead of in the steel and holds the flame nicely too. (also much quieter)
I'm thinking this is a decent flame and the closest to neutral I've made.
Thank you for all the help you guys gave and this page in general.

This is the forge and the original burner before these last changes.
Oh ya and with the shorter mixing tube and refined burner port I have almost no DB at general temp (5psi) and let's say 2-3" of DB at heavy stock temp (10psi)

-
I tell you what Frosty, if you're ever in my neck of the woods I'd be more than happy to let you tinker-tune my forge.
-
Yes Frosty, welding them in place would definitely inhibit adjustments.
 self imposed subconscious impediments can be a blessing and a curse.
Next time I light it I'll see how much I can get that angle to change and see what happens.
-
Thanks Mikey, so far so good.
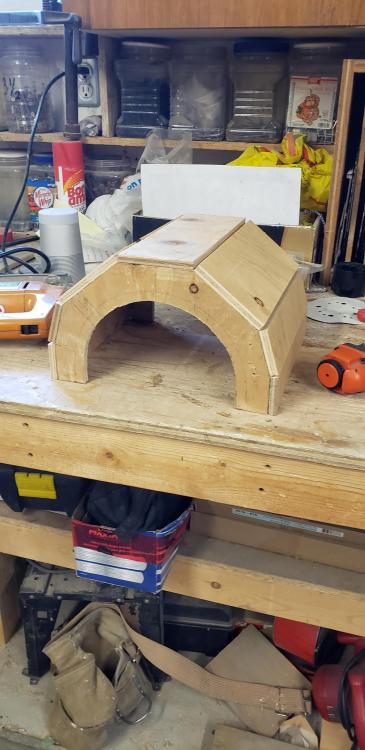
I definitely understand the tweaker/tinkerer. I already see many things I could tweak with this design on the next build. I still have my wooden middle so reproduction of the body will be easy but the next will probably be bent out of thinner gauge metal instead of welding plates together.
"tinkering": I've been taking things apart since I can remember. Them remote control cars go fast when you wire a stack of battery packs together. They also start to smoke real quick too
(sorry mom)
-
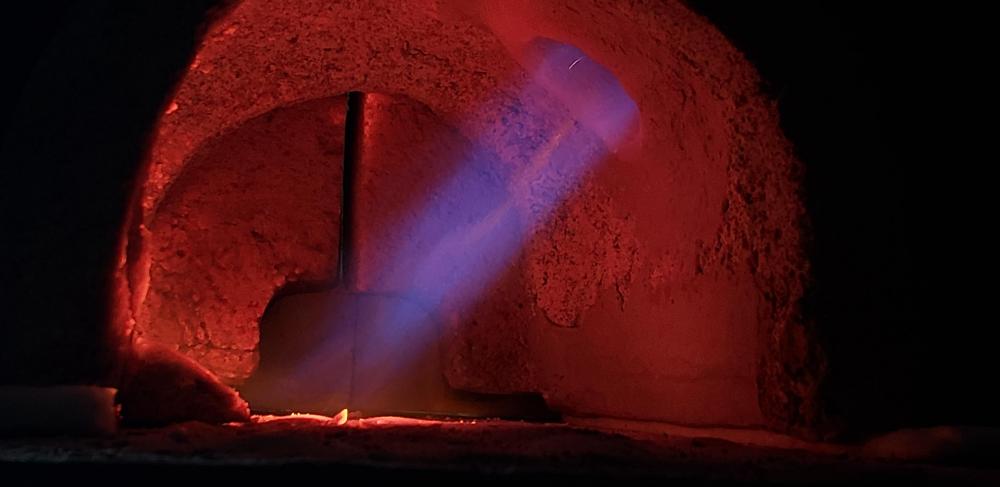
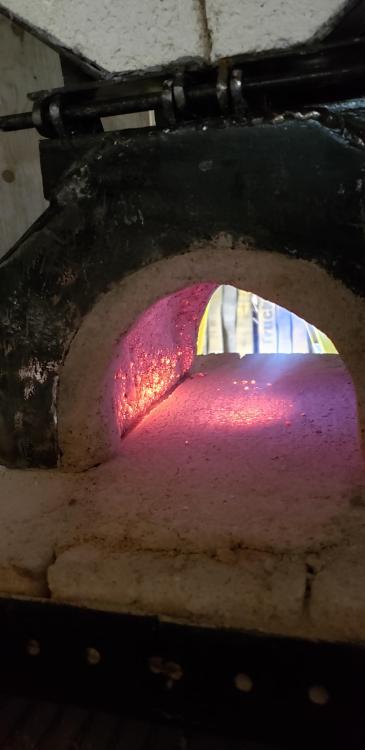
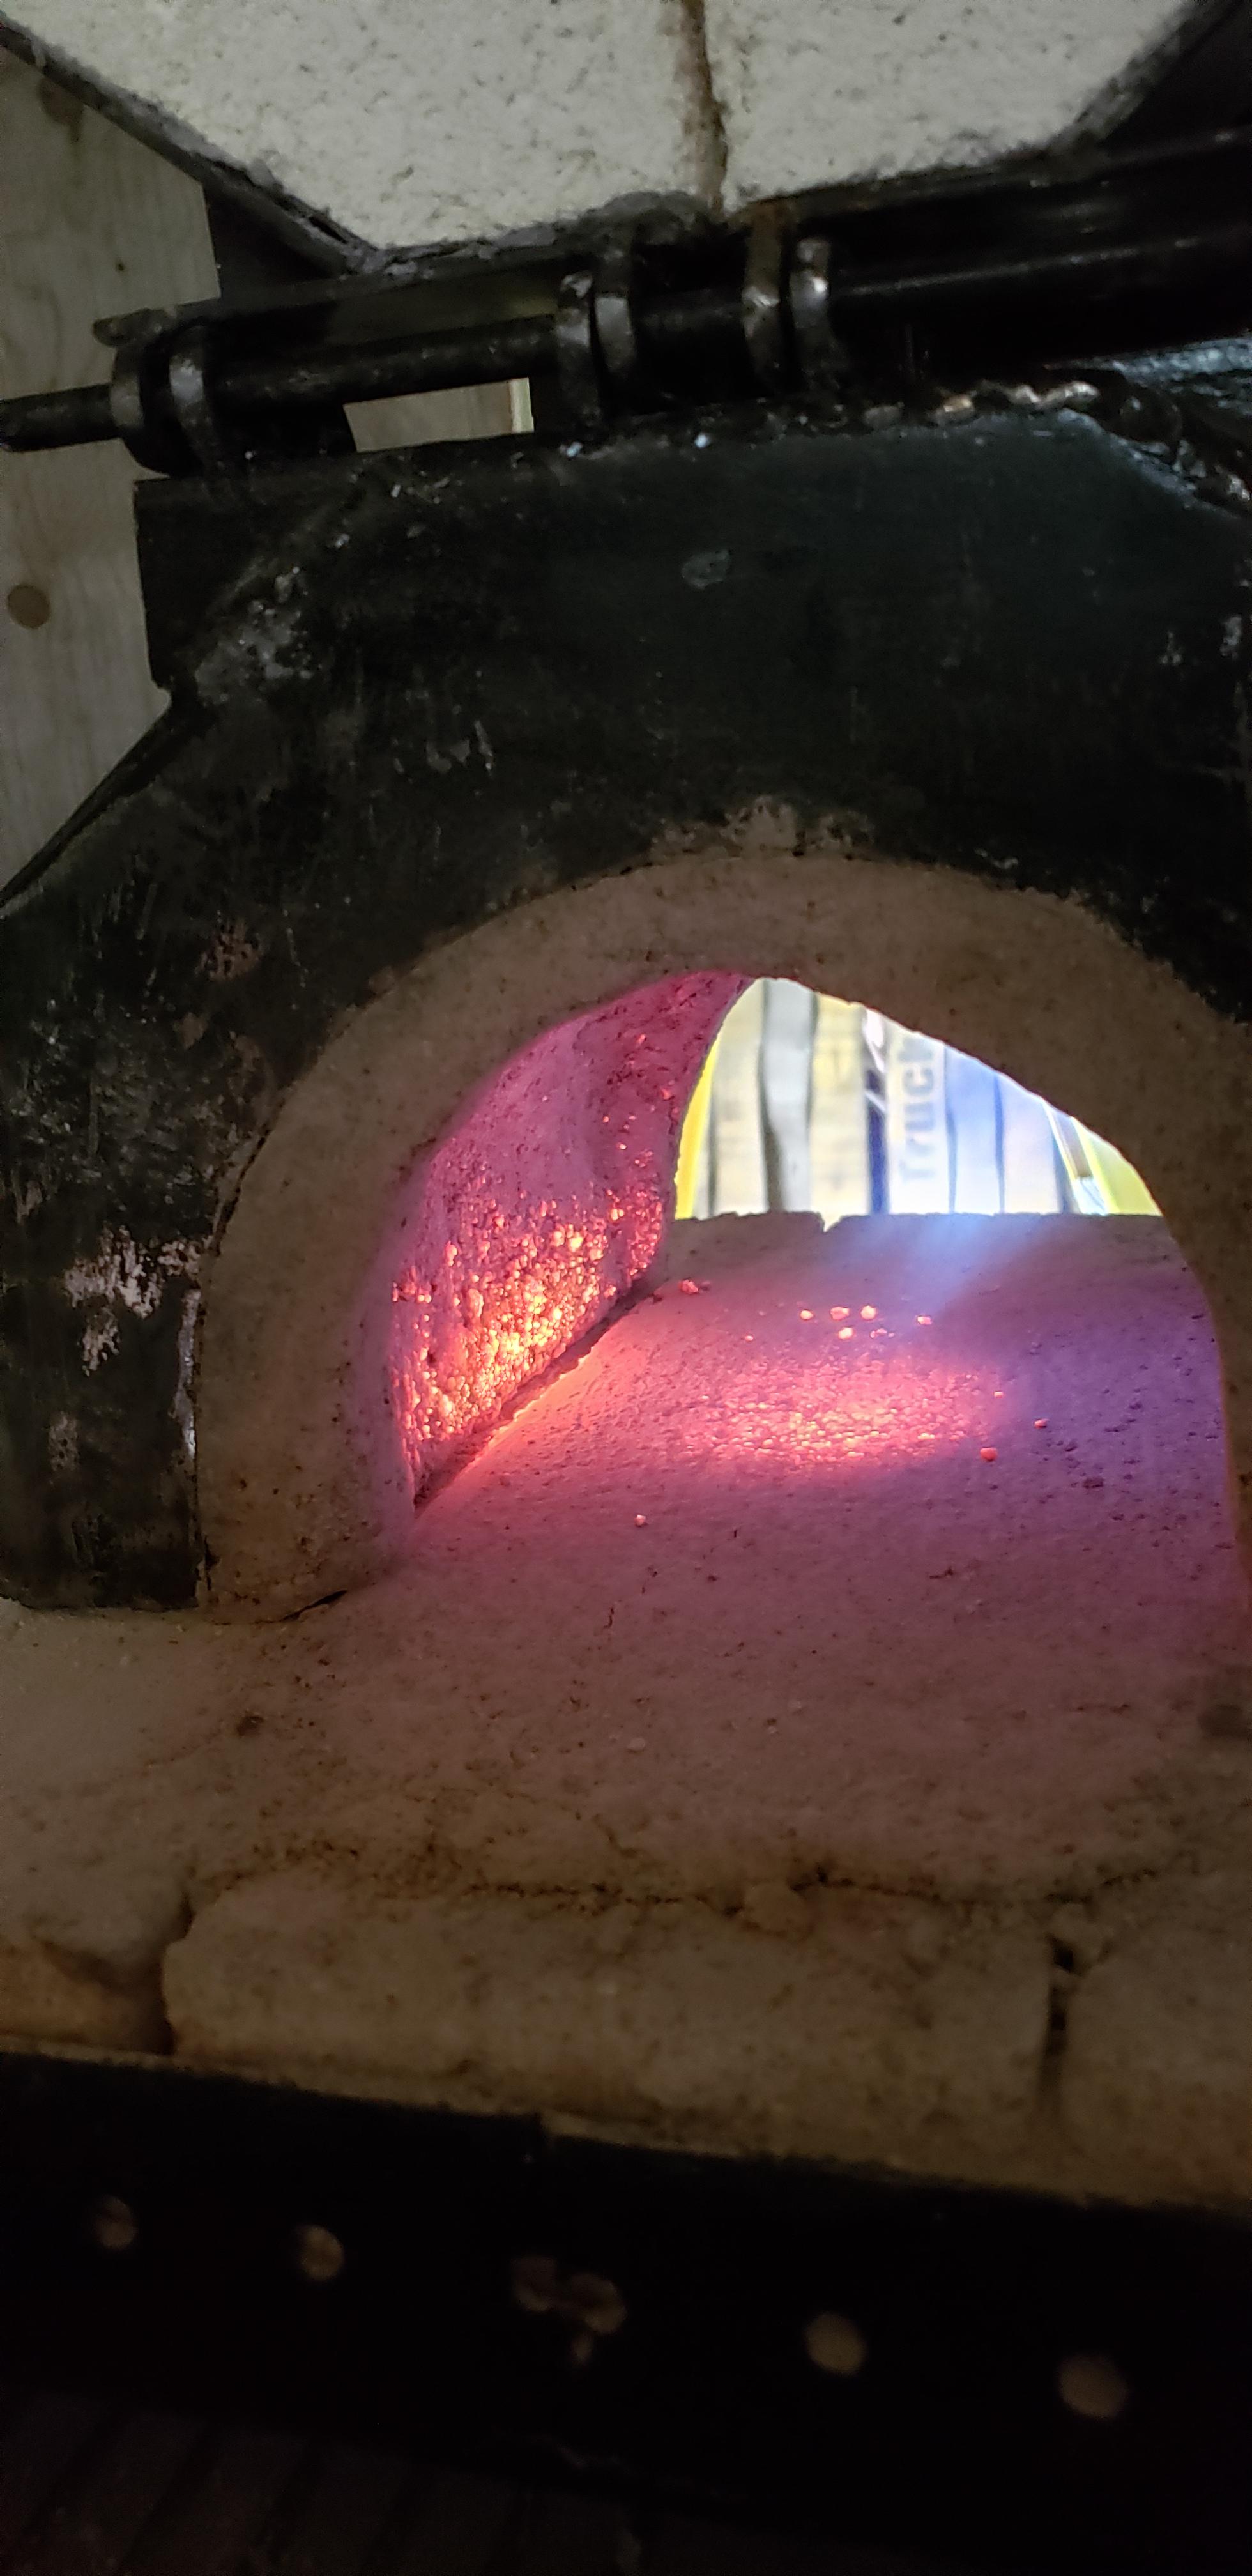
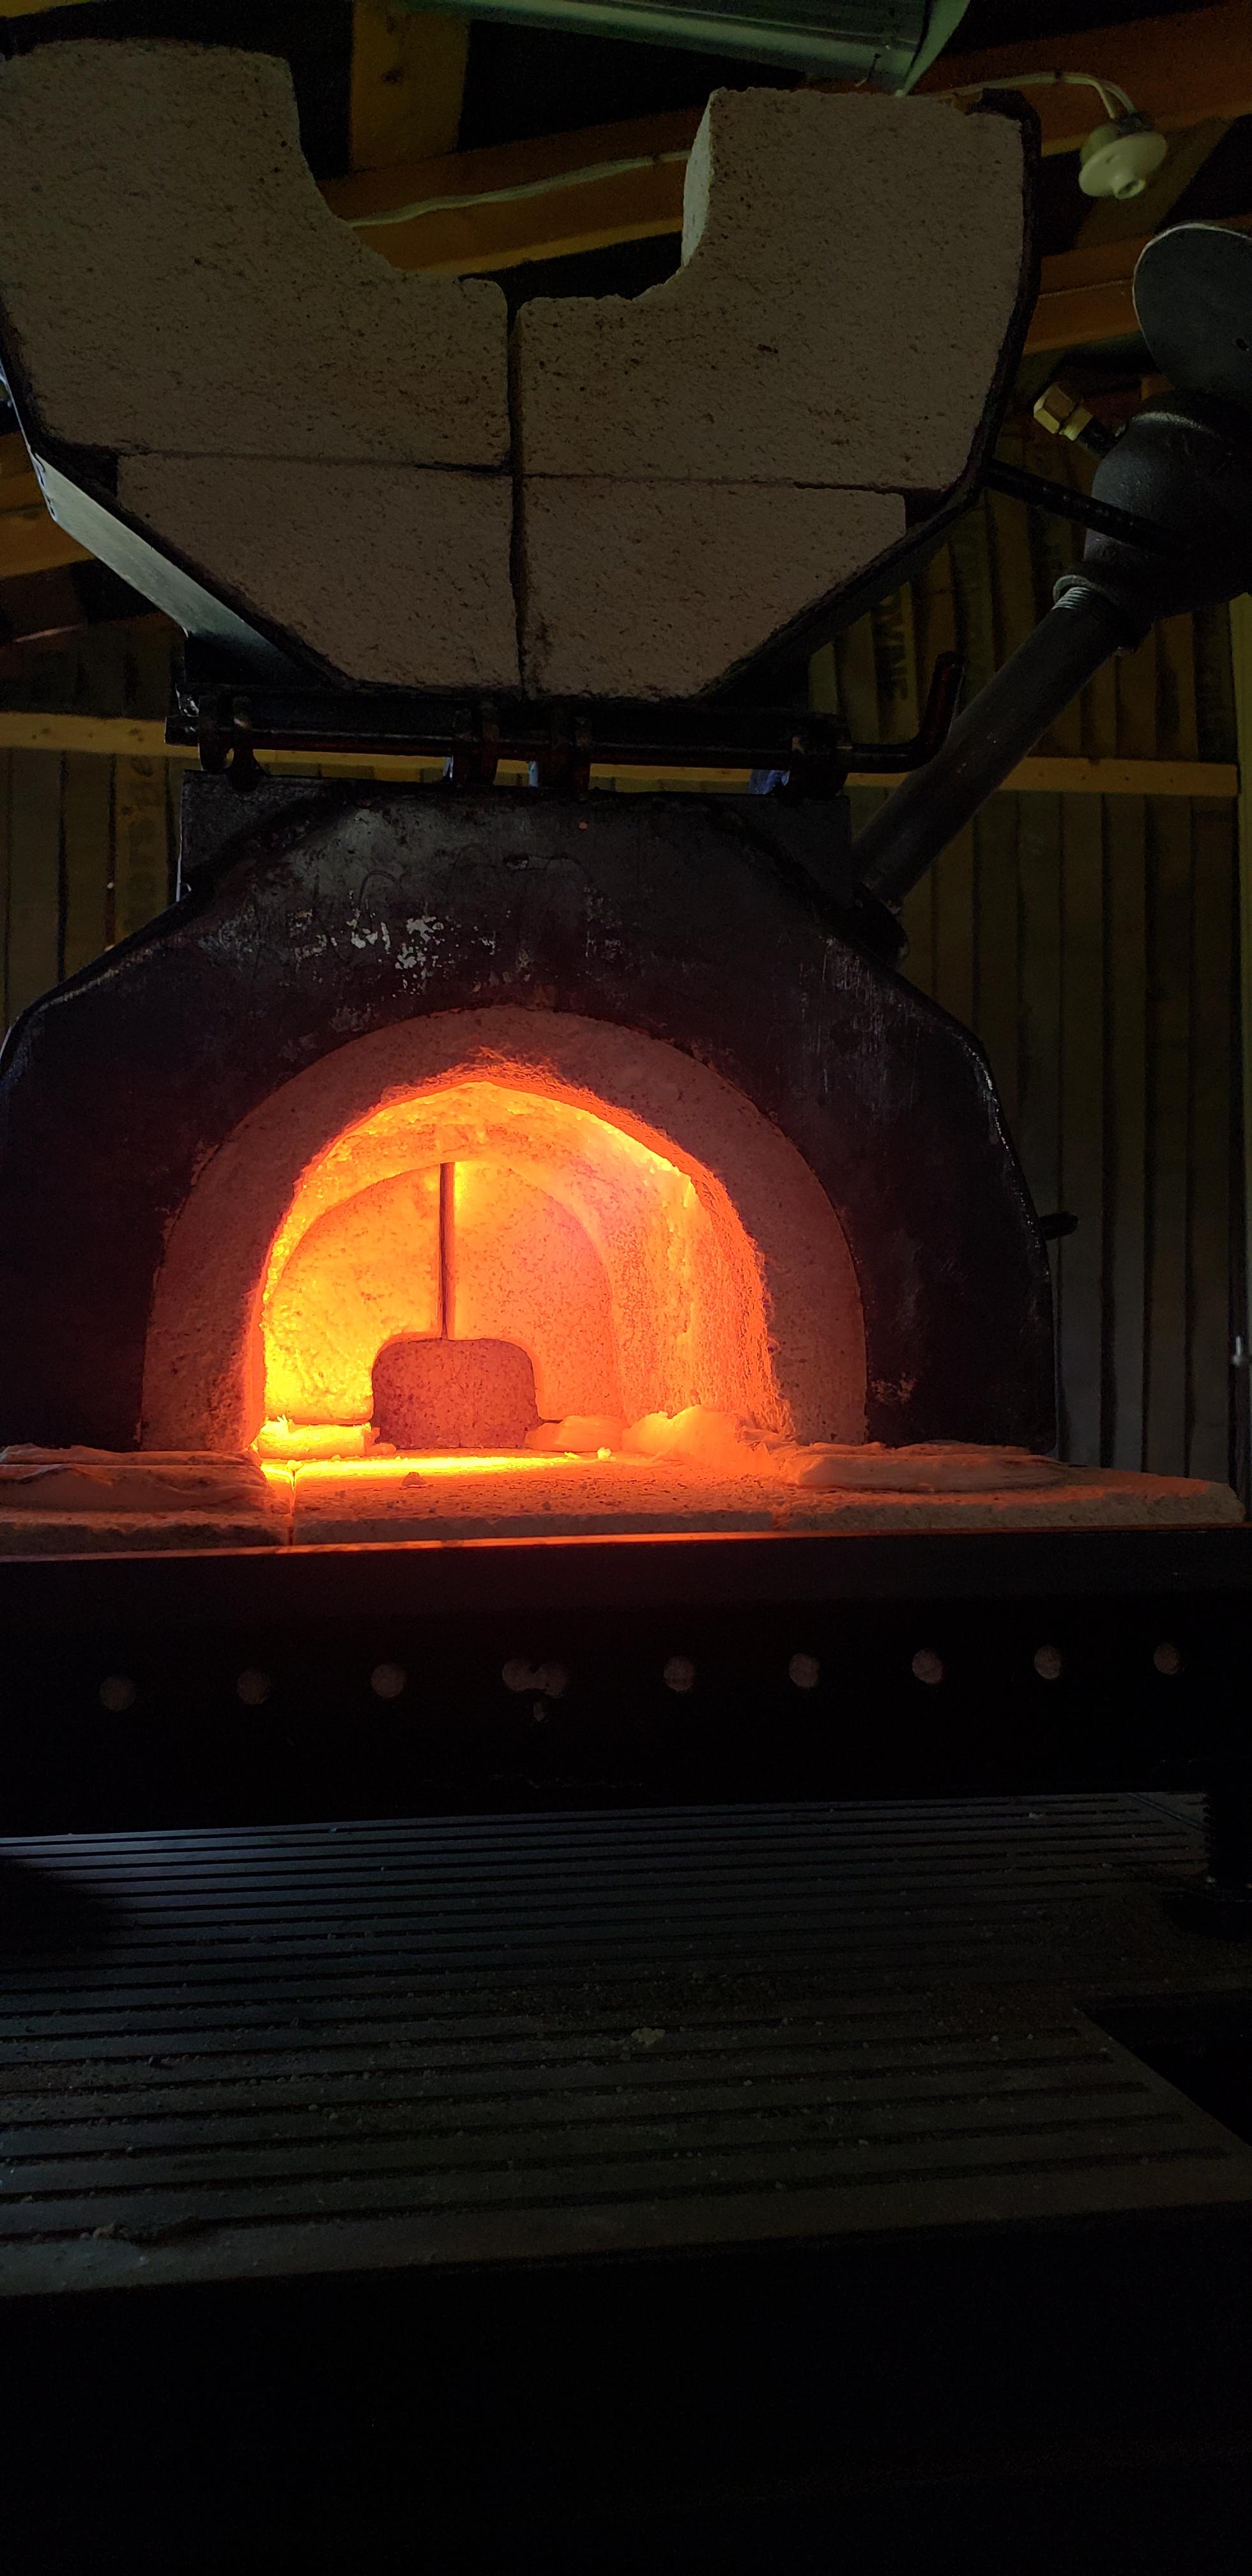
This shows how the flame glances off the floor into the wall with a bit of the swirl. If I built this again or re line this I'd give myself more room to angle the burner. Other then it impinging at the joint? I do have a nice area out of the direct flame face.
-
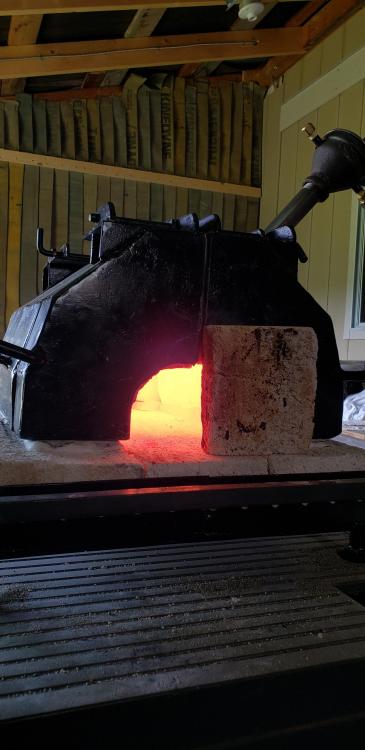
Hey frosty, if is any consolation I did make a new handle to fit my meat hook
After refractory in the entry port I was left with limited ability to change the angle of my burner unfortunately
The flame hits just past center kinda then swirls up the wall, this pic shows it a bit better.
Yes I radiused the corners, there not perfect ovels but not square either.


Mr Moose, I was worried at first at how hot the outside was but it's seeming to be a non issue. General consensus seems to be, "they're forges, they're hot in and out".
-
Well I used a couple strips of wool ridgidized between where the forge meets the floor. I've put a few hours of "work" on this setup and the outside gets hot but the stovw paint is still good so I know I didn't reach 600f so that's good
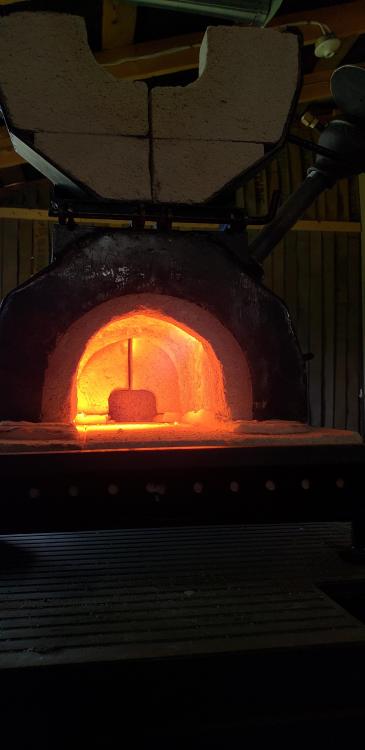
I don't have individual videos but I tried a few different burner combinations and the 8" mixing tube and 0.035 contact tip seem to work best. I get a nice thick stable flame at all psi from 2.5-30. With THIS FORGE I run 5-7 psi for basic forging temp and 10psi for warm up. With the choke wide open I'm a little lean with a just a little bit of orange dragons breath, half choke gives me a little reducing and a bit of blue dragons breathe with orange at the tips. And since the flame is basically invisible once the forge is up to temp as seen in the pic below I have limited photos of the actual flame.
(I make reference to the psi just because that's how I've been taking notes so I can duplicate apx temps)
My review so far, this forge is hot and heats up fast (10 min to YELLO interior) it is relatively quiet and holds heat quite well once warmed up, between heats and after shut down. There's minimal dragon breathe so more hair left on my arms
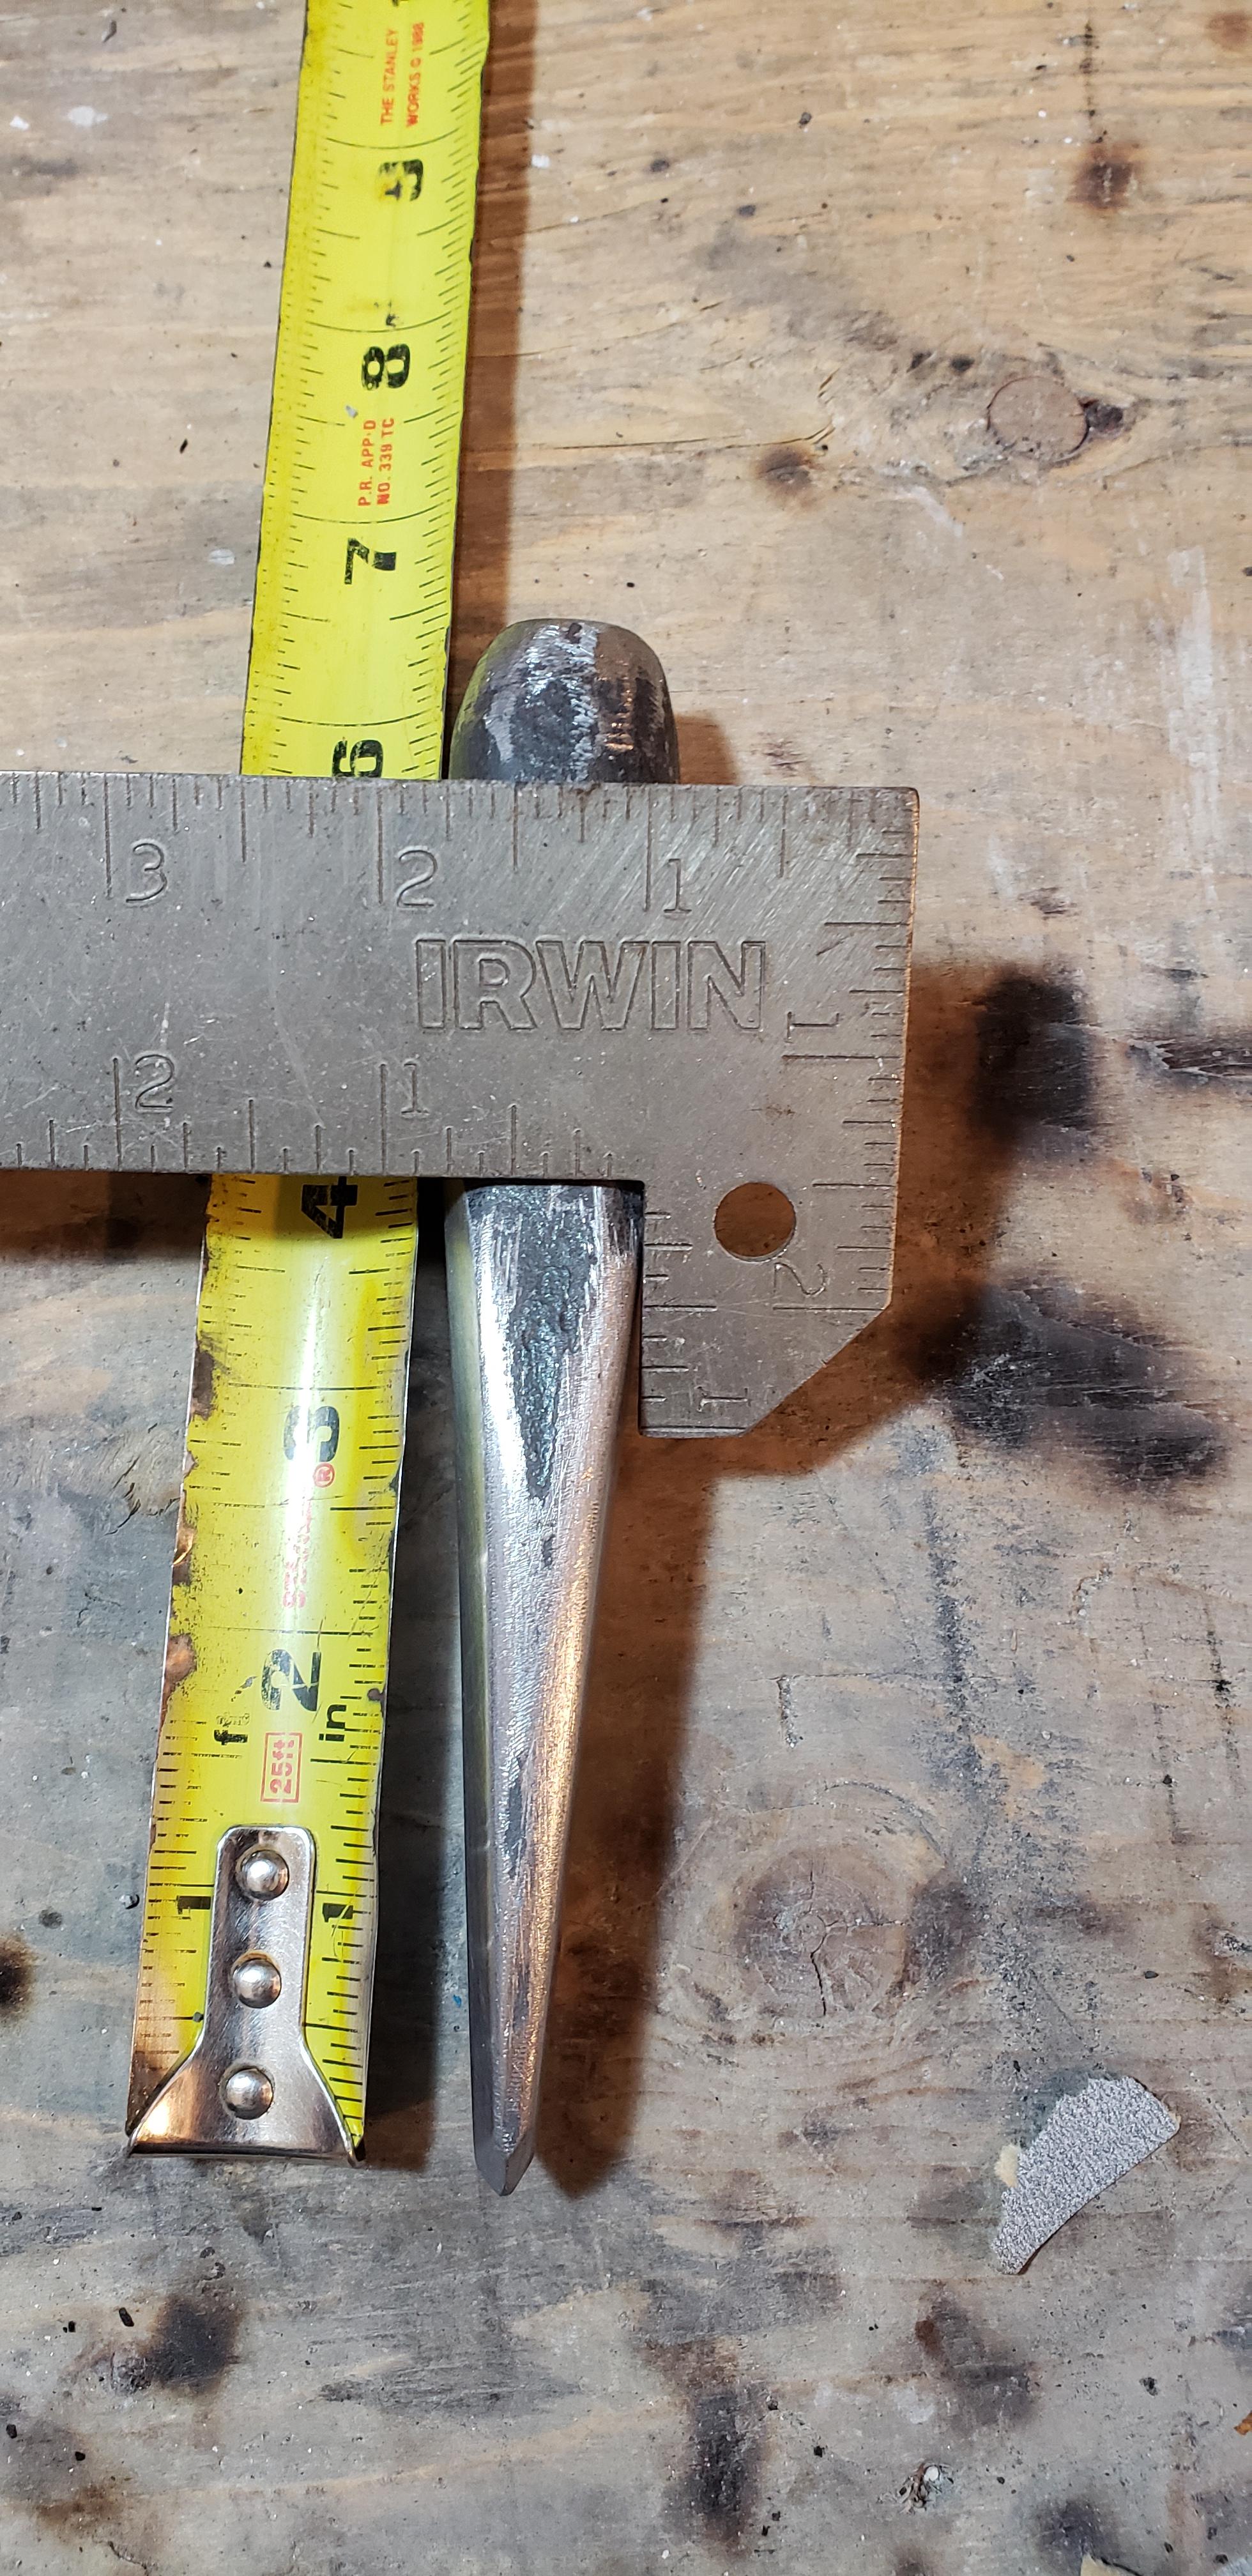
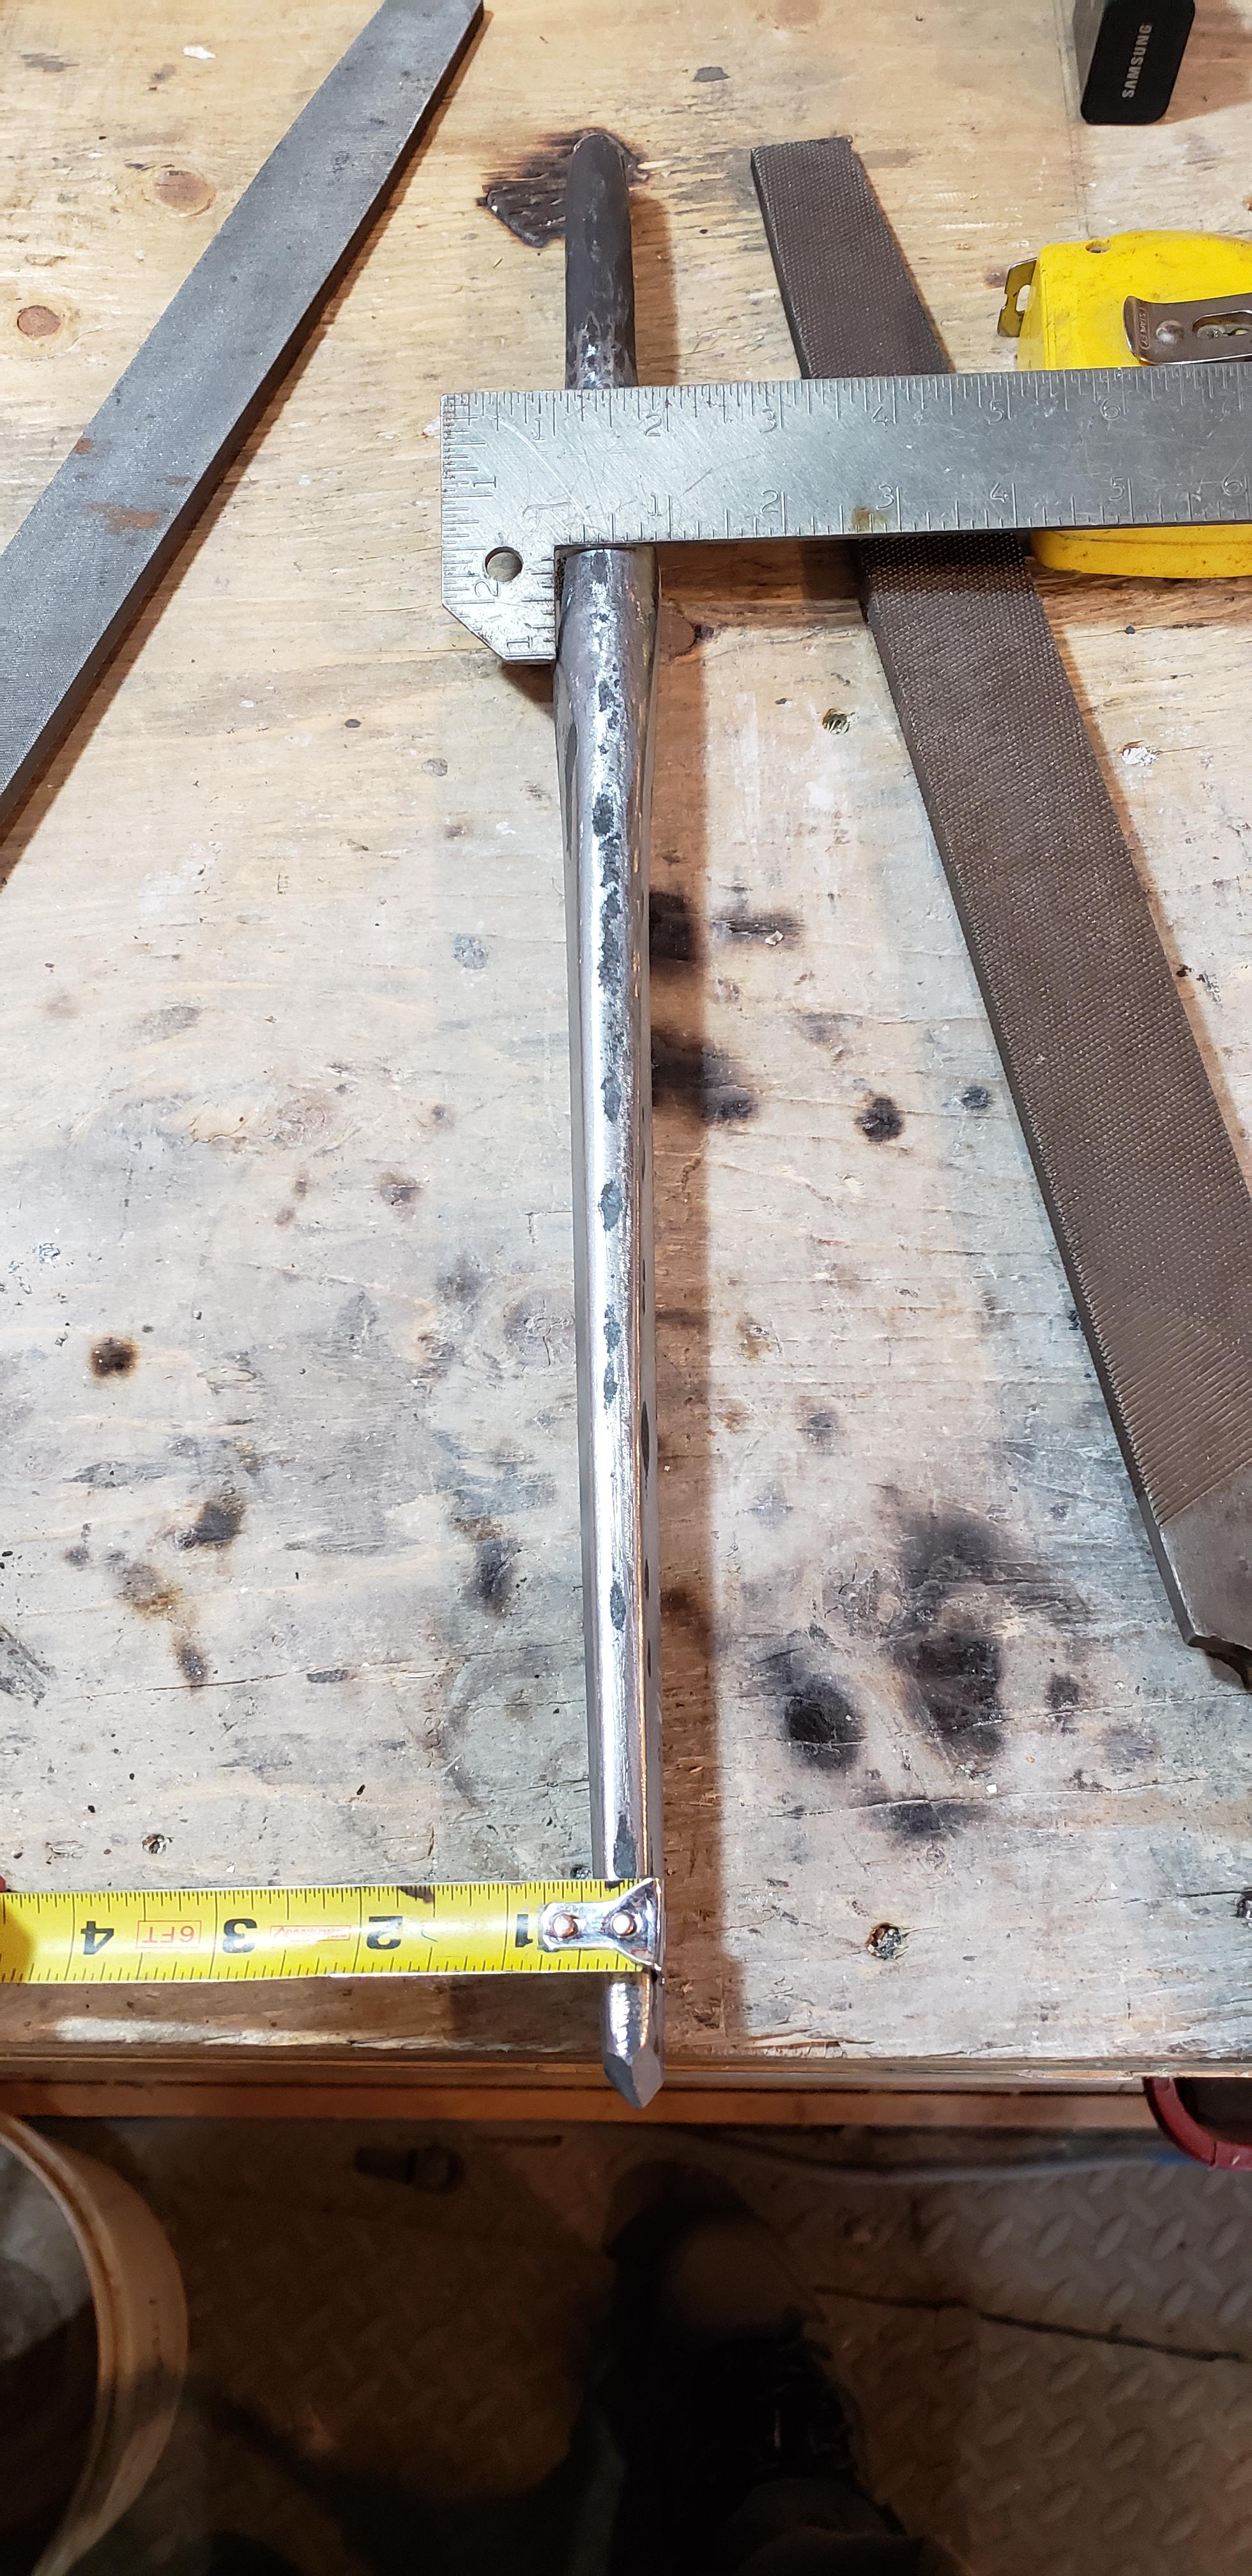
I wanted my first project in this forge to be a hammer but with most new projects you have to make new tools first eh so I started with a punch and drift (made from a big A$$ 1976 Chevy tie rod end)
Thank you all for your tips and help, I think this forge is a WINNER.
This video was taken 5min after start up, any later and you can't really see a flame just a goast outline of it.
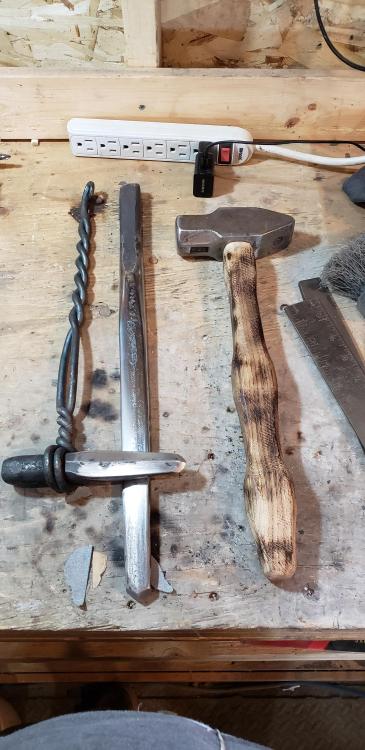
This hammer is store bought just the punch and drift are new.
-
I hear ya Mike, I wasn't sure if there were many concepts like this or if was worth talking about in this thread. I will definitely share my results and thoughts as I attain them


Forges 101
in Gas Forges
Posted
I'm waiting to hear back from the company as this is the only sds I've found, I'm not sure if you can read it but it doesn't look very high in alumina. However they say they sell "high alumina" kiln shelves by the piece so I'll wait to hear back from them and let you know.