

sfeile
-
Posts
358 -
Joined
-
Last visited
Content Type
Profiles
Forums
Articles
Gallery
Downloads
Events
Posts posted by sfeile
-
-
1 hour ago, Mikey98118 said:
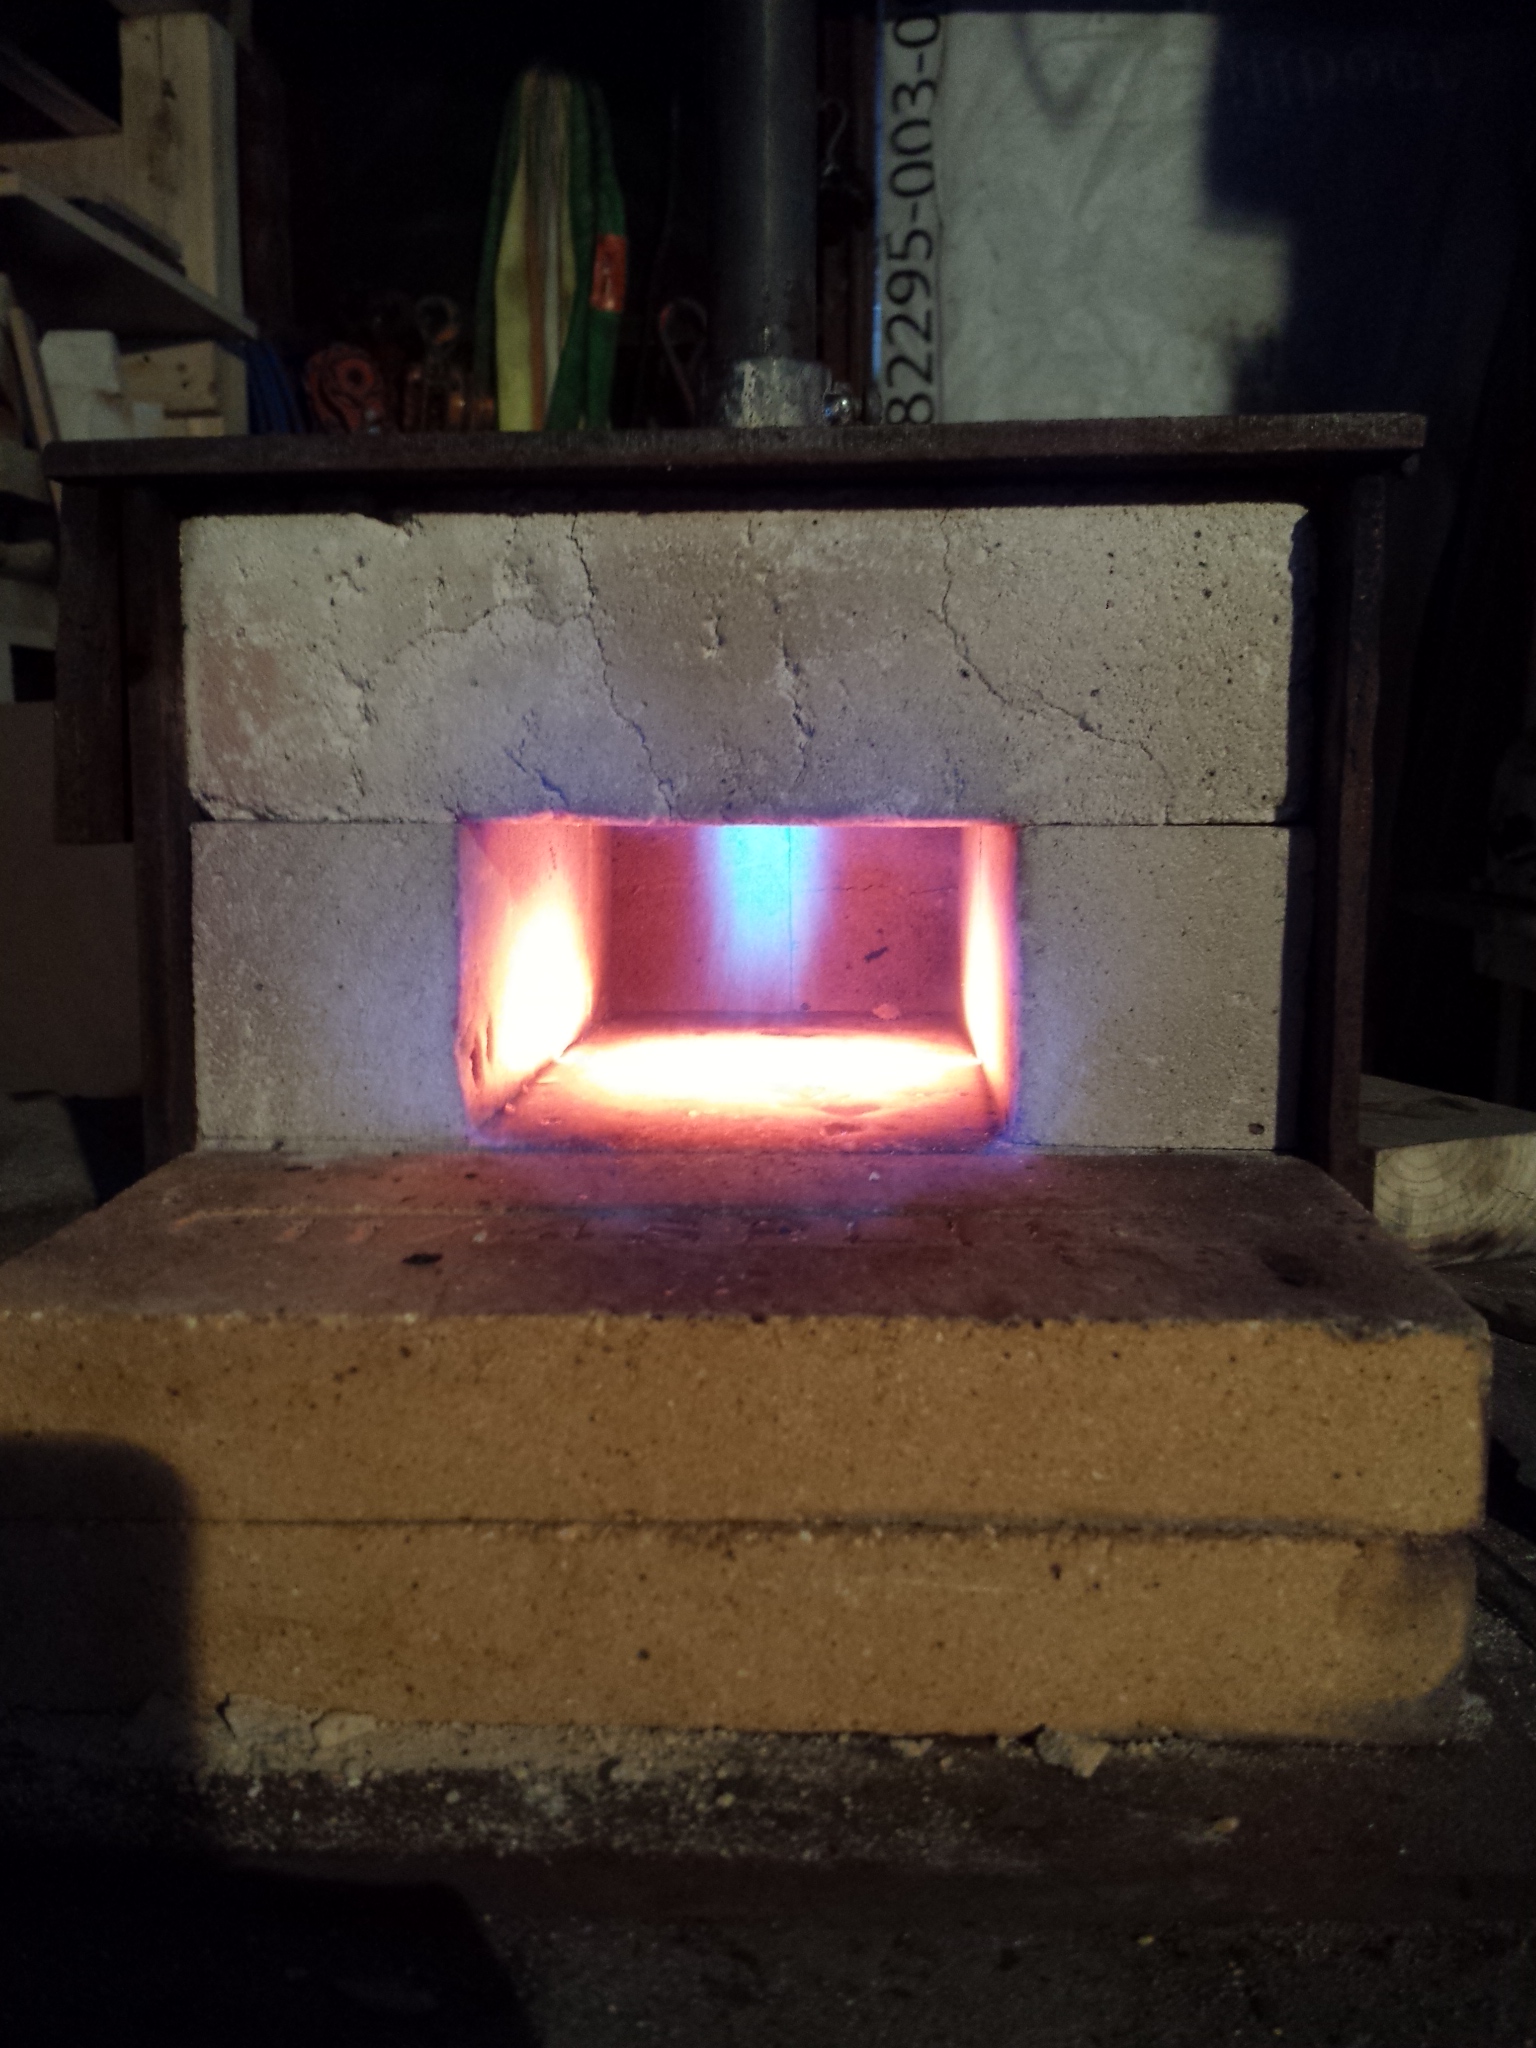
The flame looks good; the forge looks hot. Looks like it's going to be another short thread. Do you understand baffle walls?
Becuase a brick wall in front of the forge is about all you need now. A little later you will need to fix your crumbling forge, and we can discuss protecting that brick from heat damage.
Thanks!
Not sure what you mean by baffle walls.
I do have a hard firebrick I use as my "door" if that's what you mean. I have soft brick lining the back, but because it seems to crack so easily I use hard brick for the front since I'm moving it all the time. This is the old lining, but I still do the same thing. The flame doesn't come out the top now with the new lining though. That was due to the arch I had in the old opening.
I am very interested in hearing ways to preserve that firebrick. I was thinking it is cracking from thermal expansion going from single digits to forging heat. I wasn't sure if there was anything I could do about that.
-
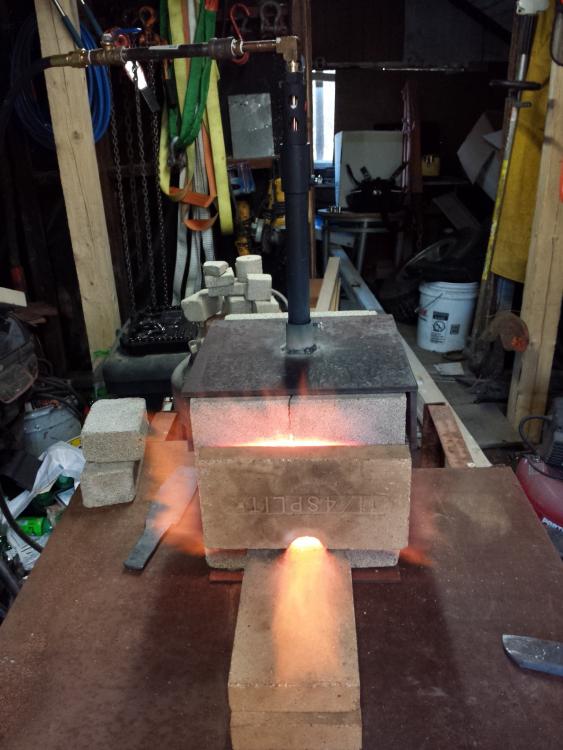
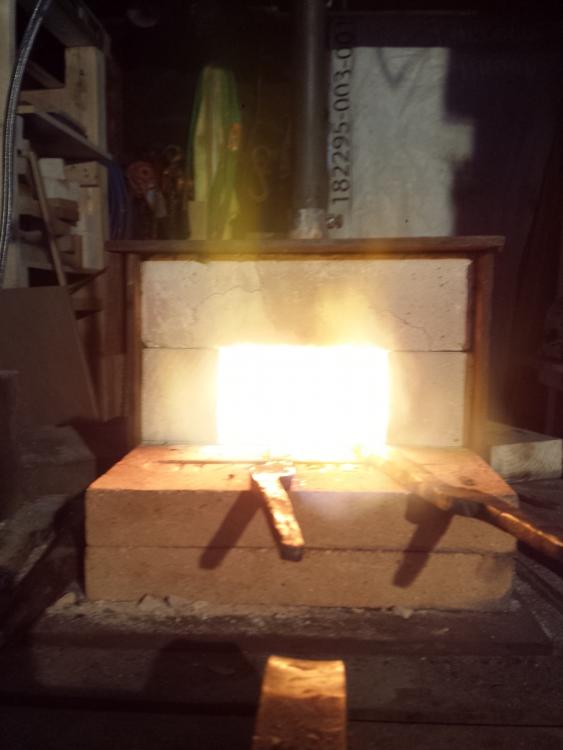
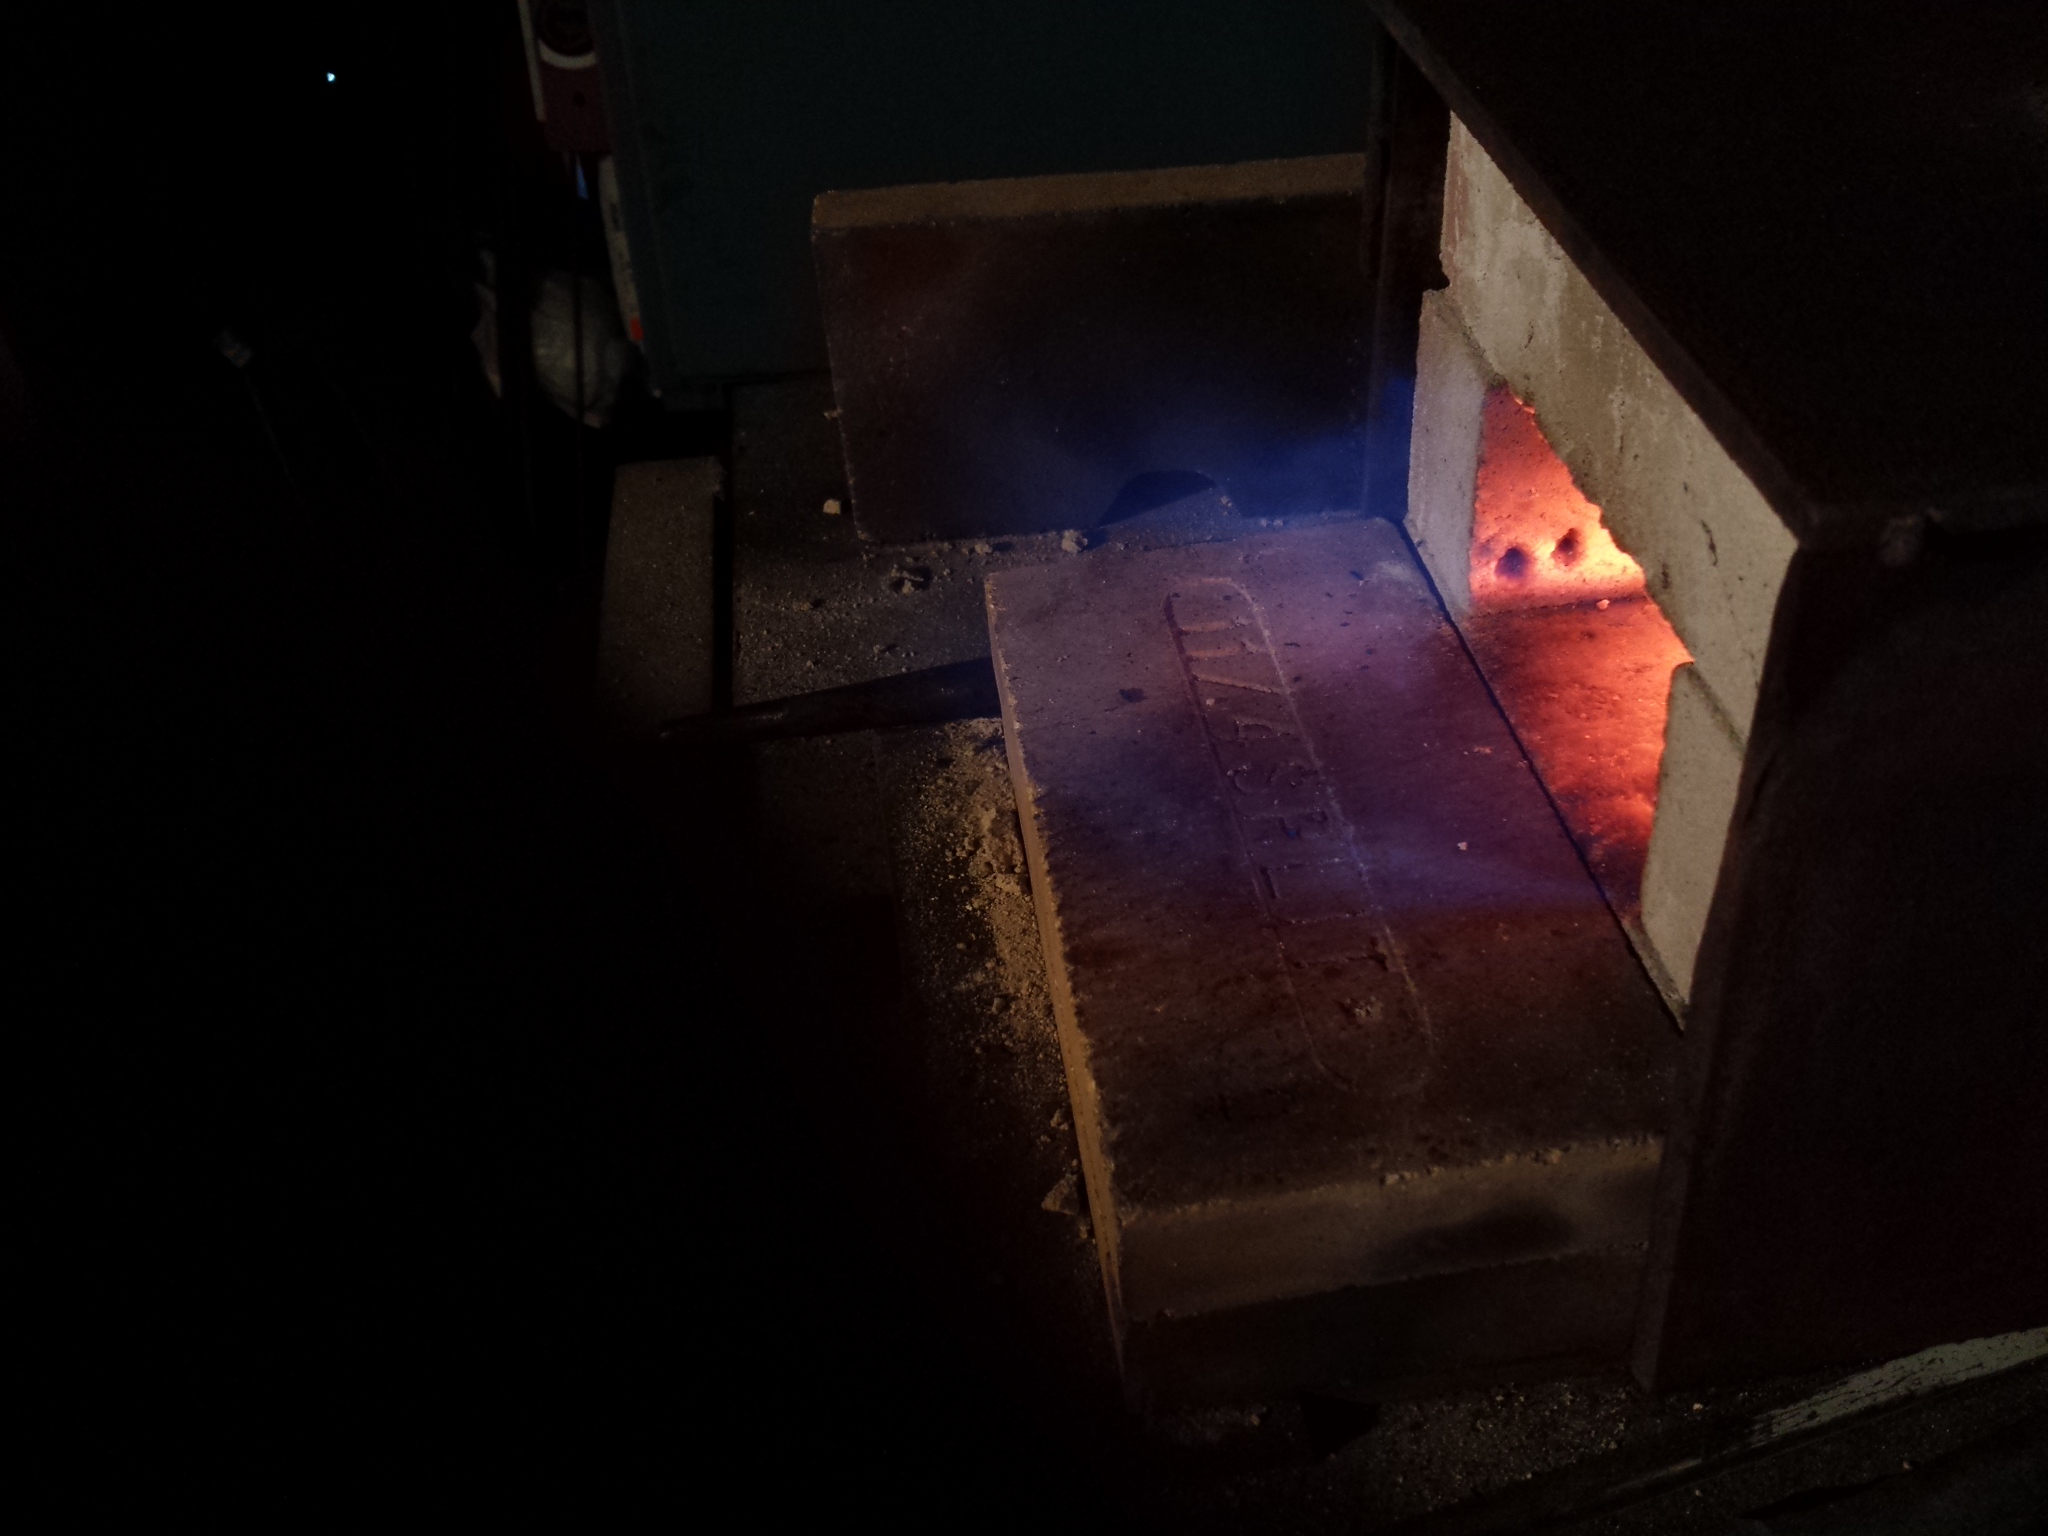
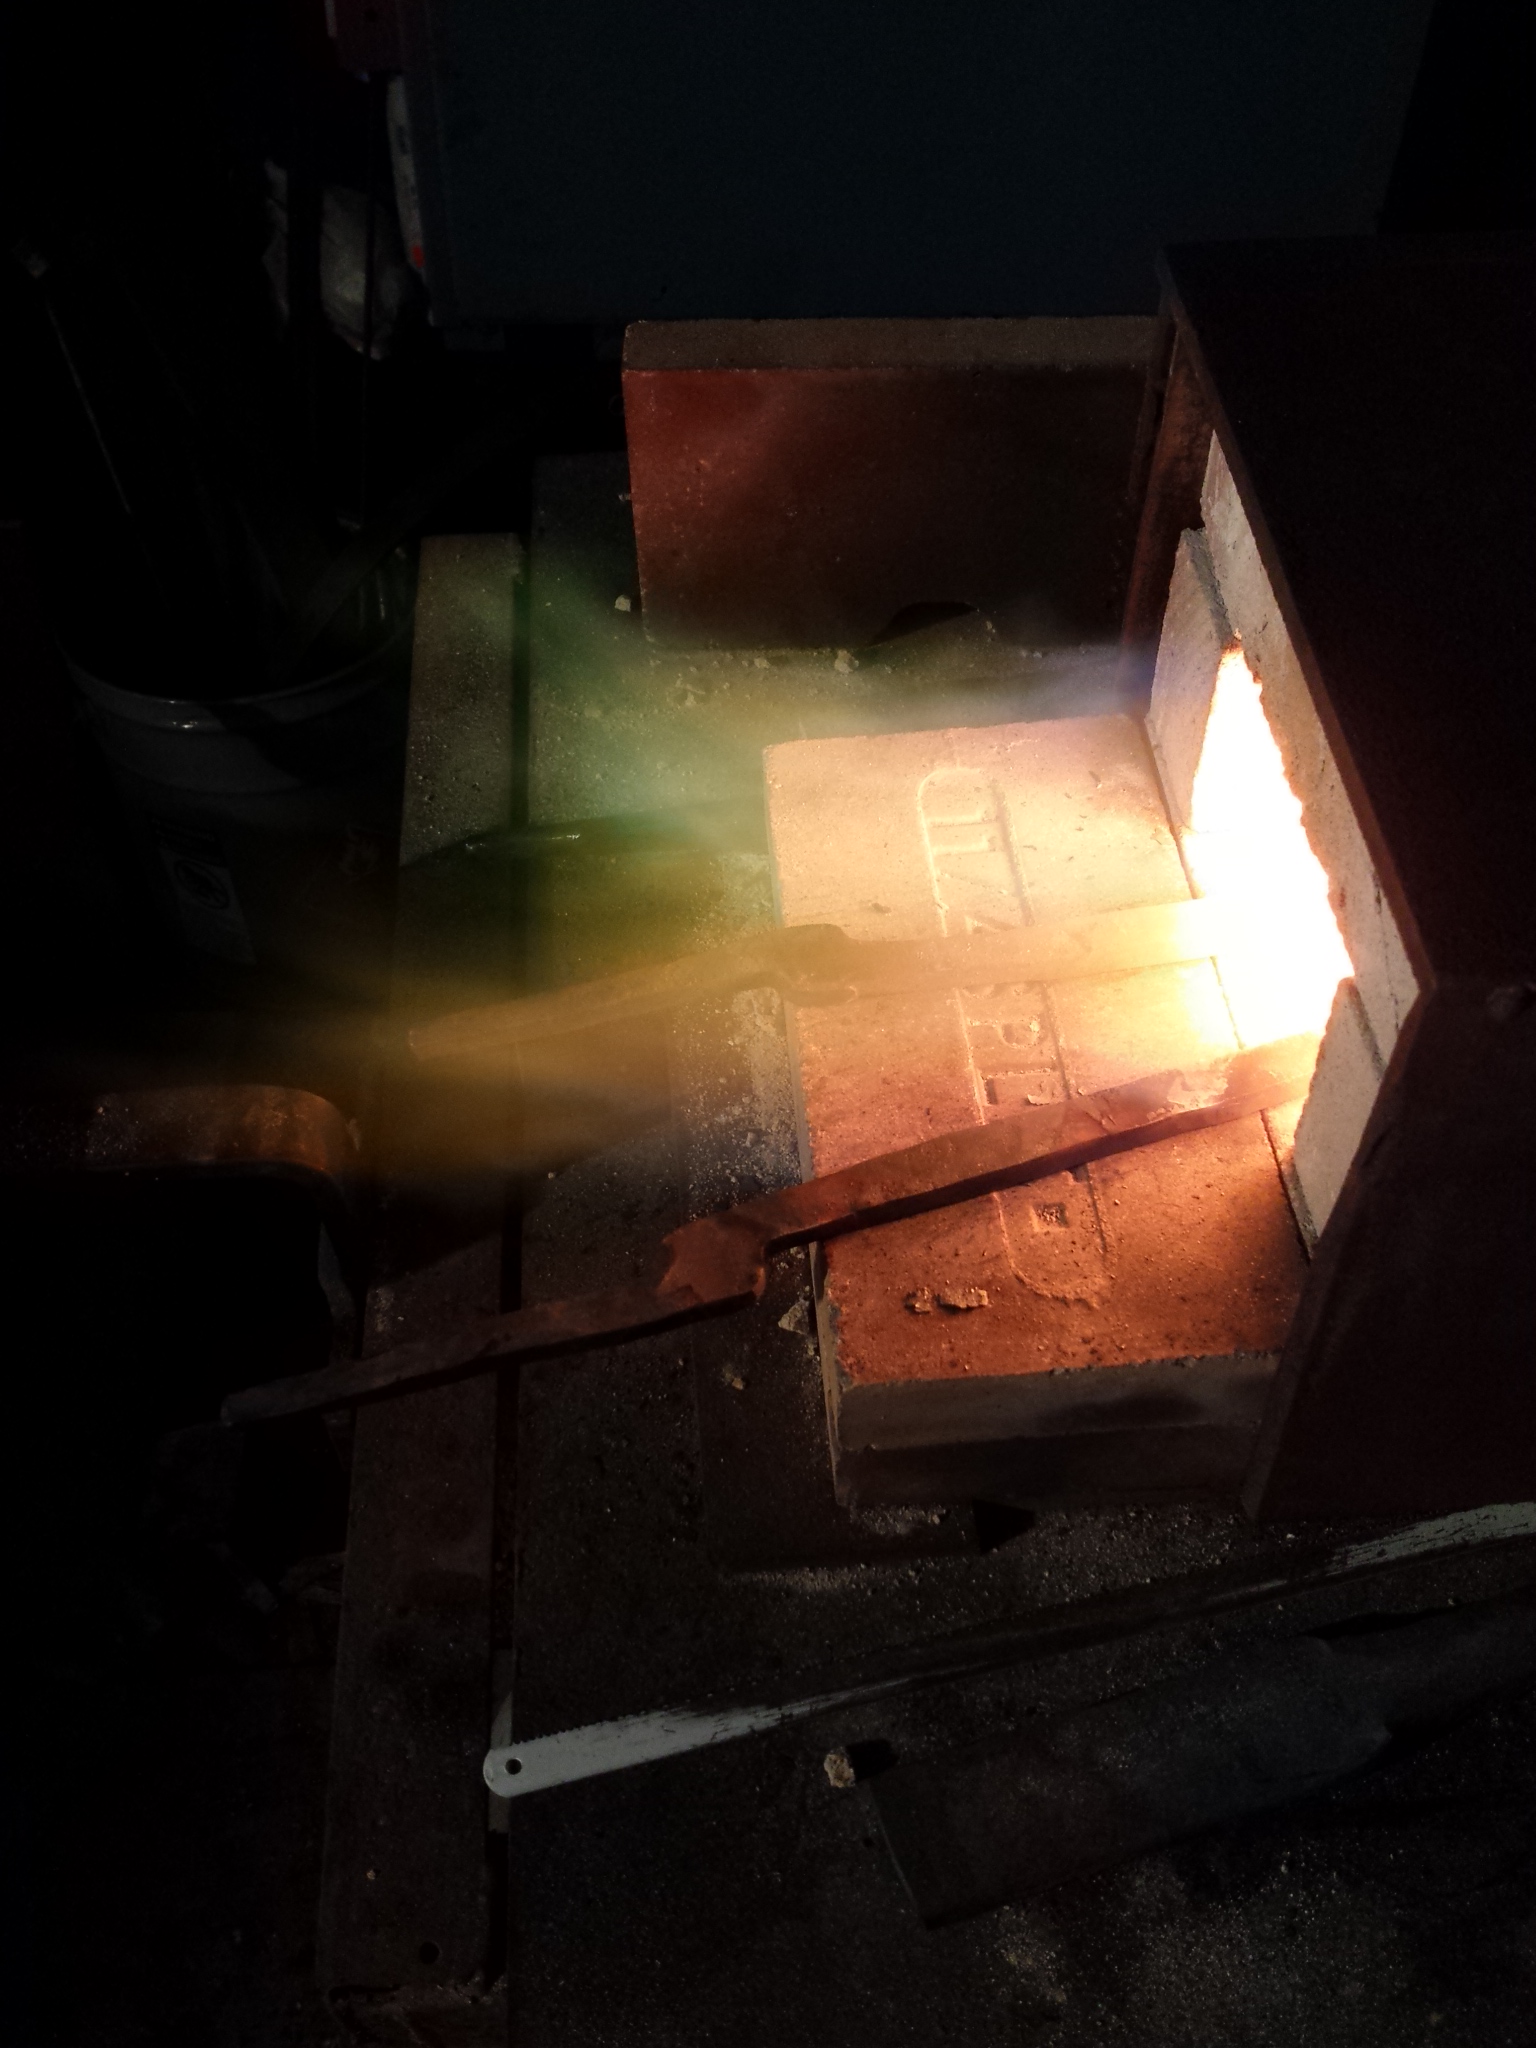
Does this look like it's burning correctly to you guys? I think I finally have it positioned correctly to be the most efficient but would like some more experienced input. Any advice is greatly appreciated.
I have 2 inch thick brick at the top. The burner nozzle extends into the brick about a quarter of an inch. I made a tapered "cone" on the inside of the forge roof about half way through the brick. So there is about 3/4 of an inch of straight side past the end of the burner cone before it starts to taper away.
Just after lighting at low pressure. (Maybe 5-ish psi)

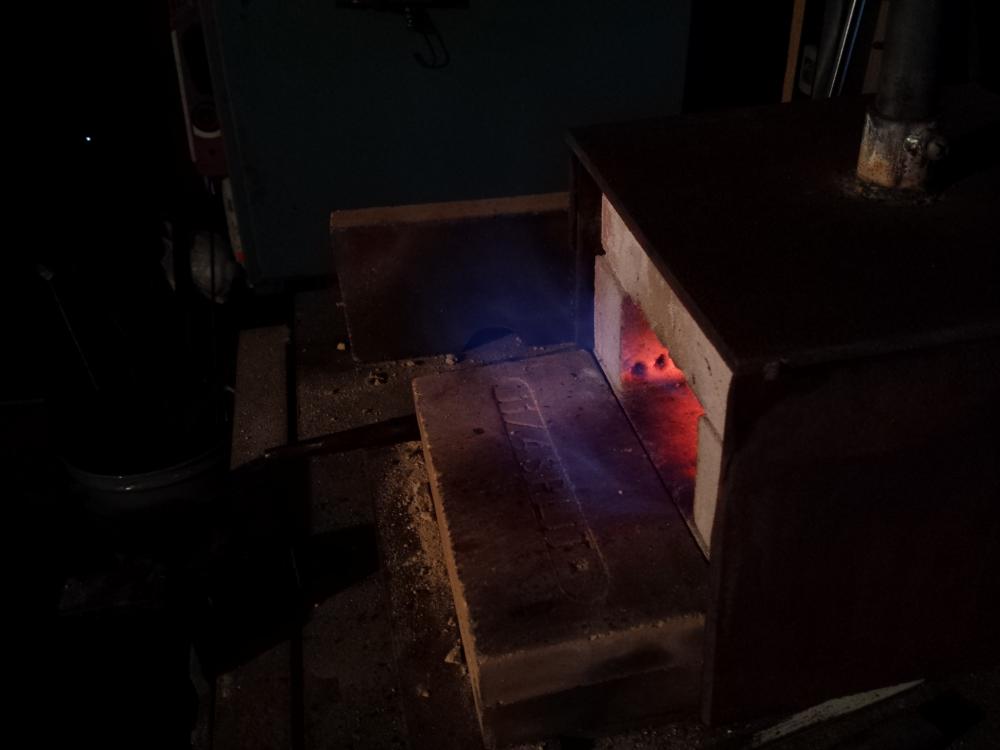
After warming up a few minutes with the pressure up a little. (Probably about 10-ish psi.)


Where I run it when I'm forging. Somewhere around 20-25 psi.

-
Helped a friend of my dads by fixing his garage door so he could get his backhoe out yesterday. He gave me two of these. Guess I have no excuse when the weather warms up a bit to try making a coal forge now.
-
Came here to see the octopus and leaving thinking new fuller tool and where's that extra trailer ball at.......

Nice work on the octopus Das!
-
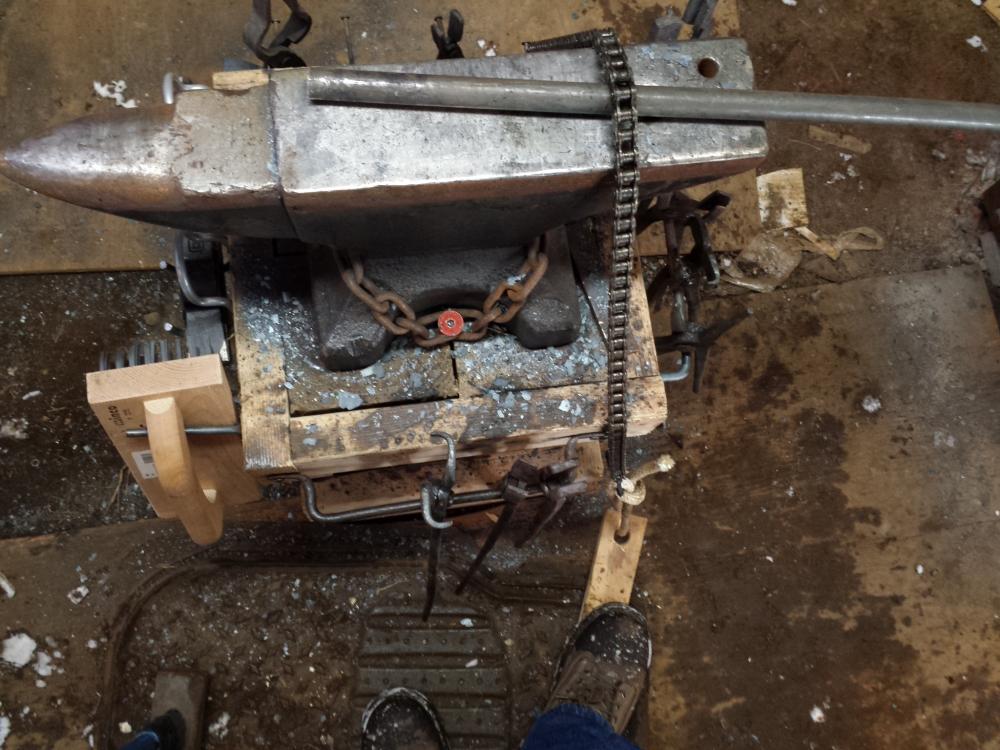
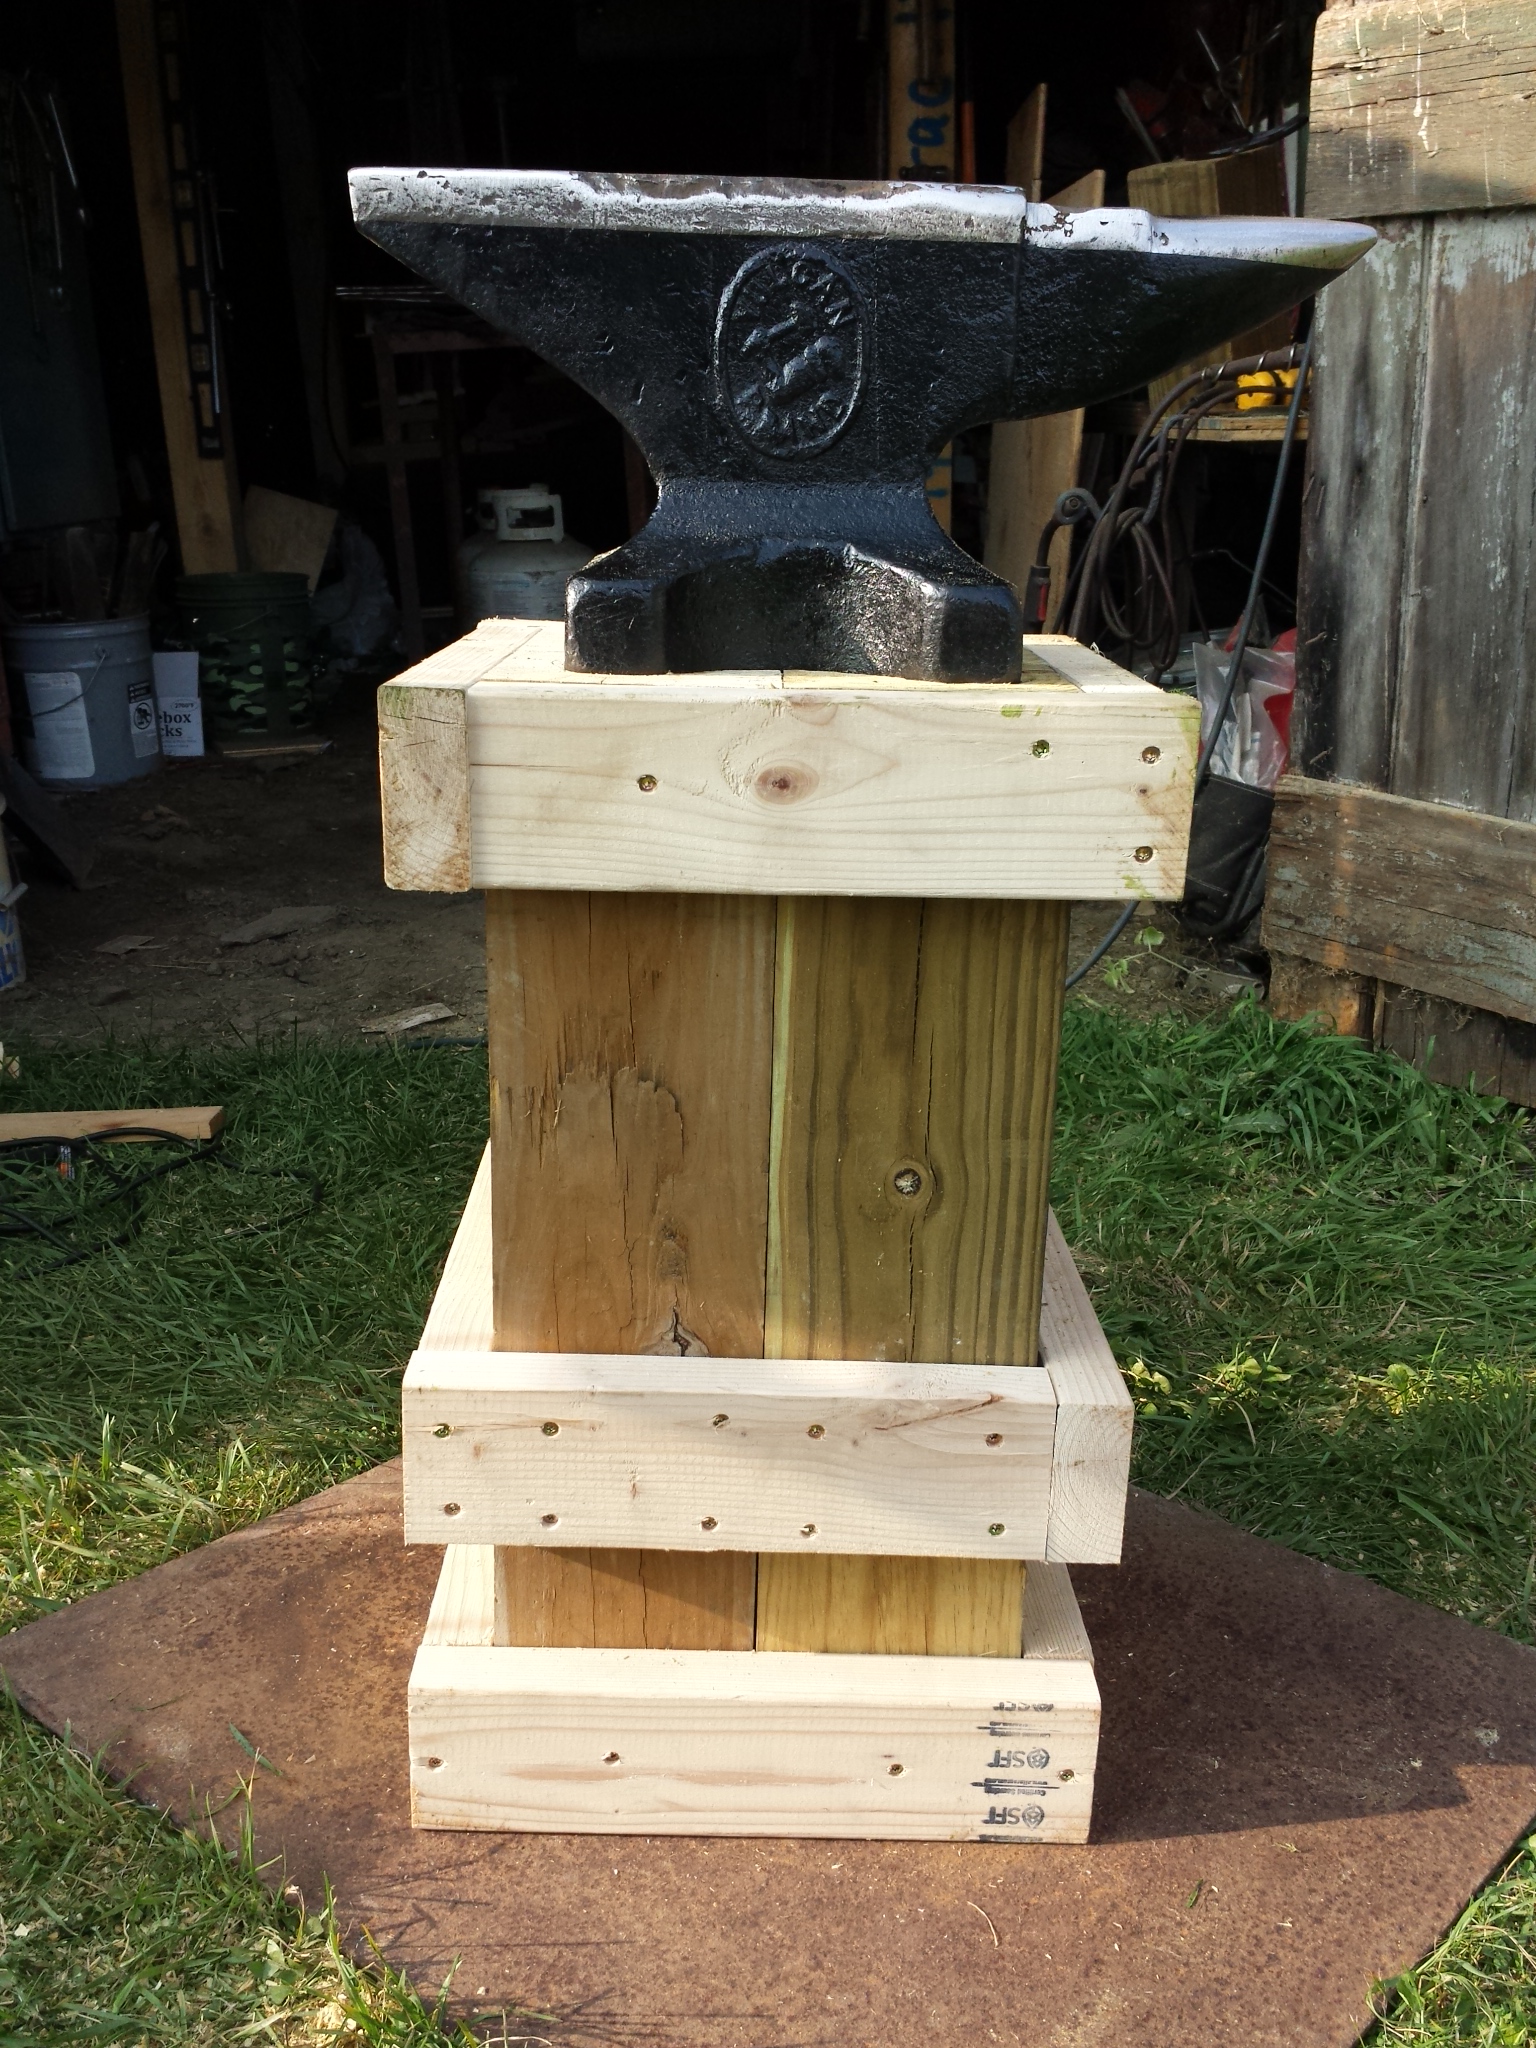
Gotcha. My thought was just trying to get it as solid as I could. It didn't make sense to me to move from a rail anvil to a real anvil and not have a good base under it. Kind of defeated the purpose. That's also why I put the plate under it. Being on dirt, I wanted to spread out the impact area as much as possible to make it more solid. At least it works that way in my head haha.
-
5 minutes ago, ThomasPowers said:
Vertical orientation of the wood!
Is that a good thing? My thought was that it would be strongest and most resistant to flexing that way. Not that you are really going to "flex" that short of a 6x6, but it would resist the shock from hammering more than laying it on it's side.
-
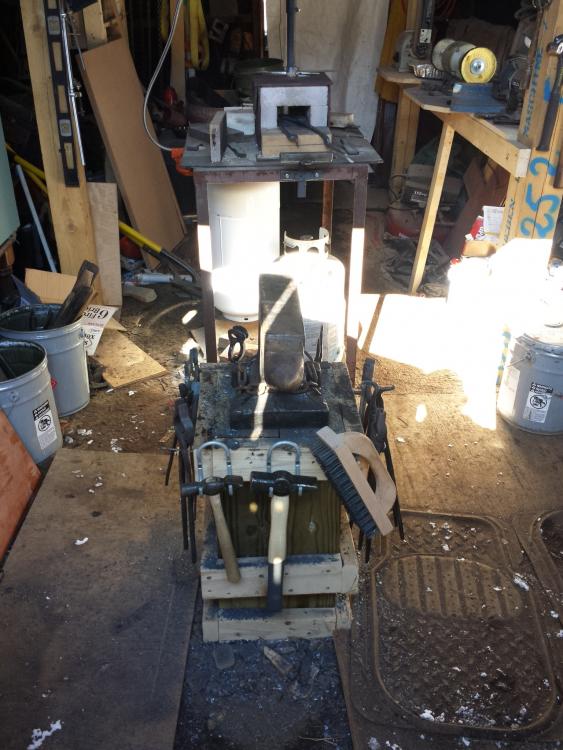
There are some seriously nice stands in this thread. Mine is pretty basic. A few pieces of 6x6 held together with some 2x4.
I did rout out a recess about 3/8 of an inch deep for the anvil to set in. Then I lag bolted it to a 3x3 foot piece of plate that is buried in the dirt floor of my "shop".

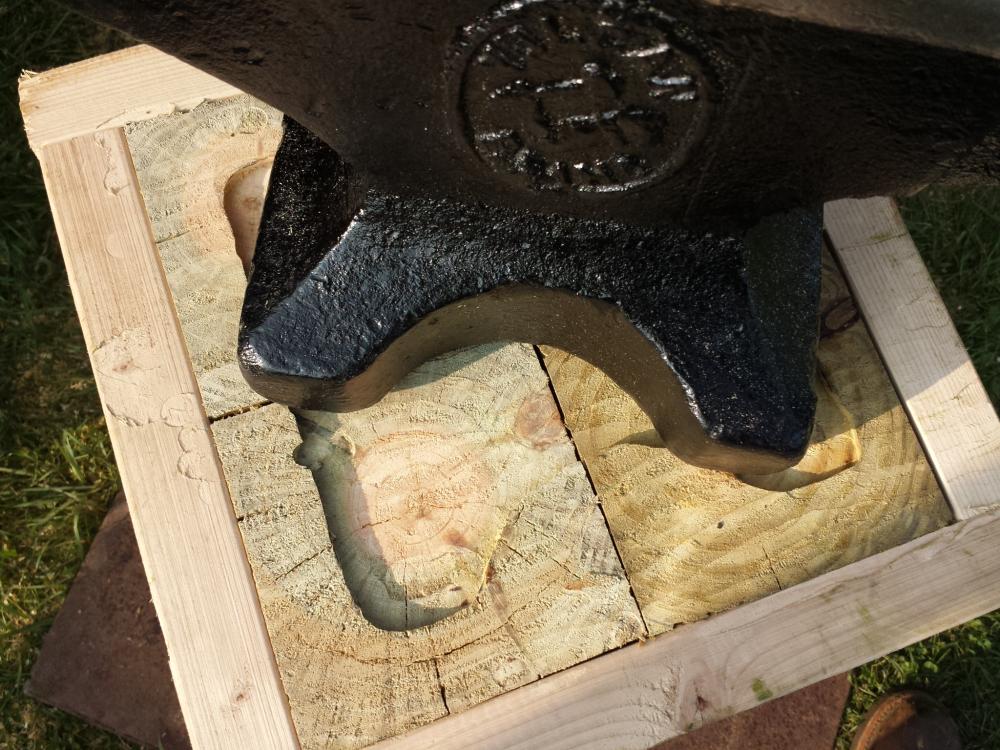
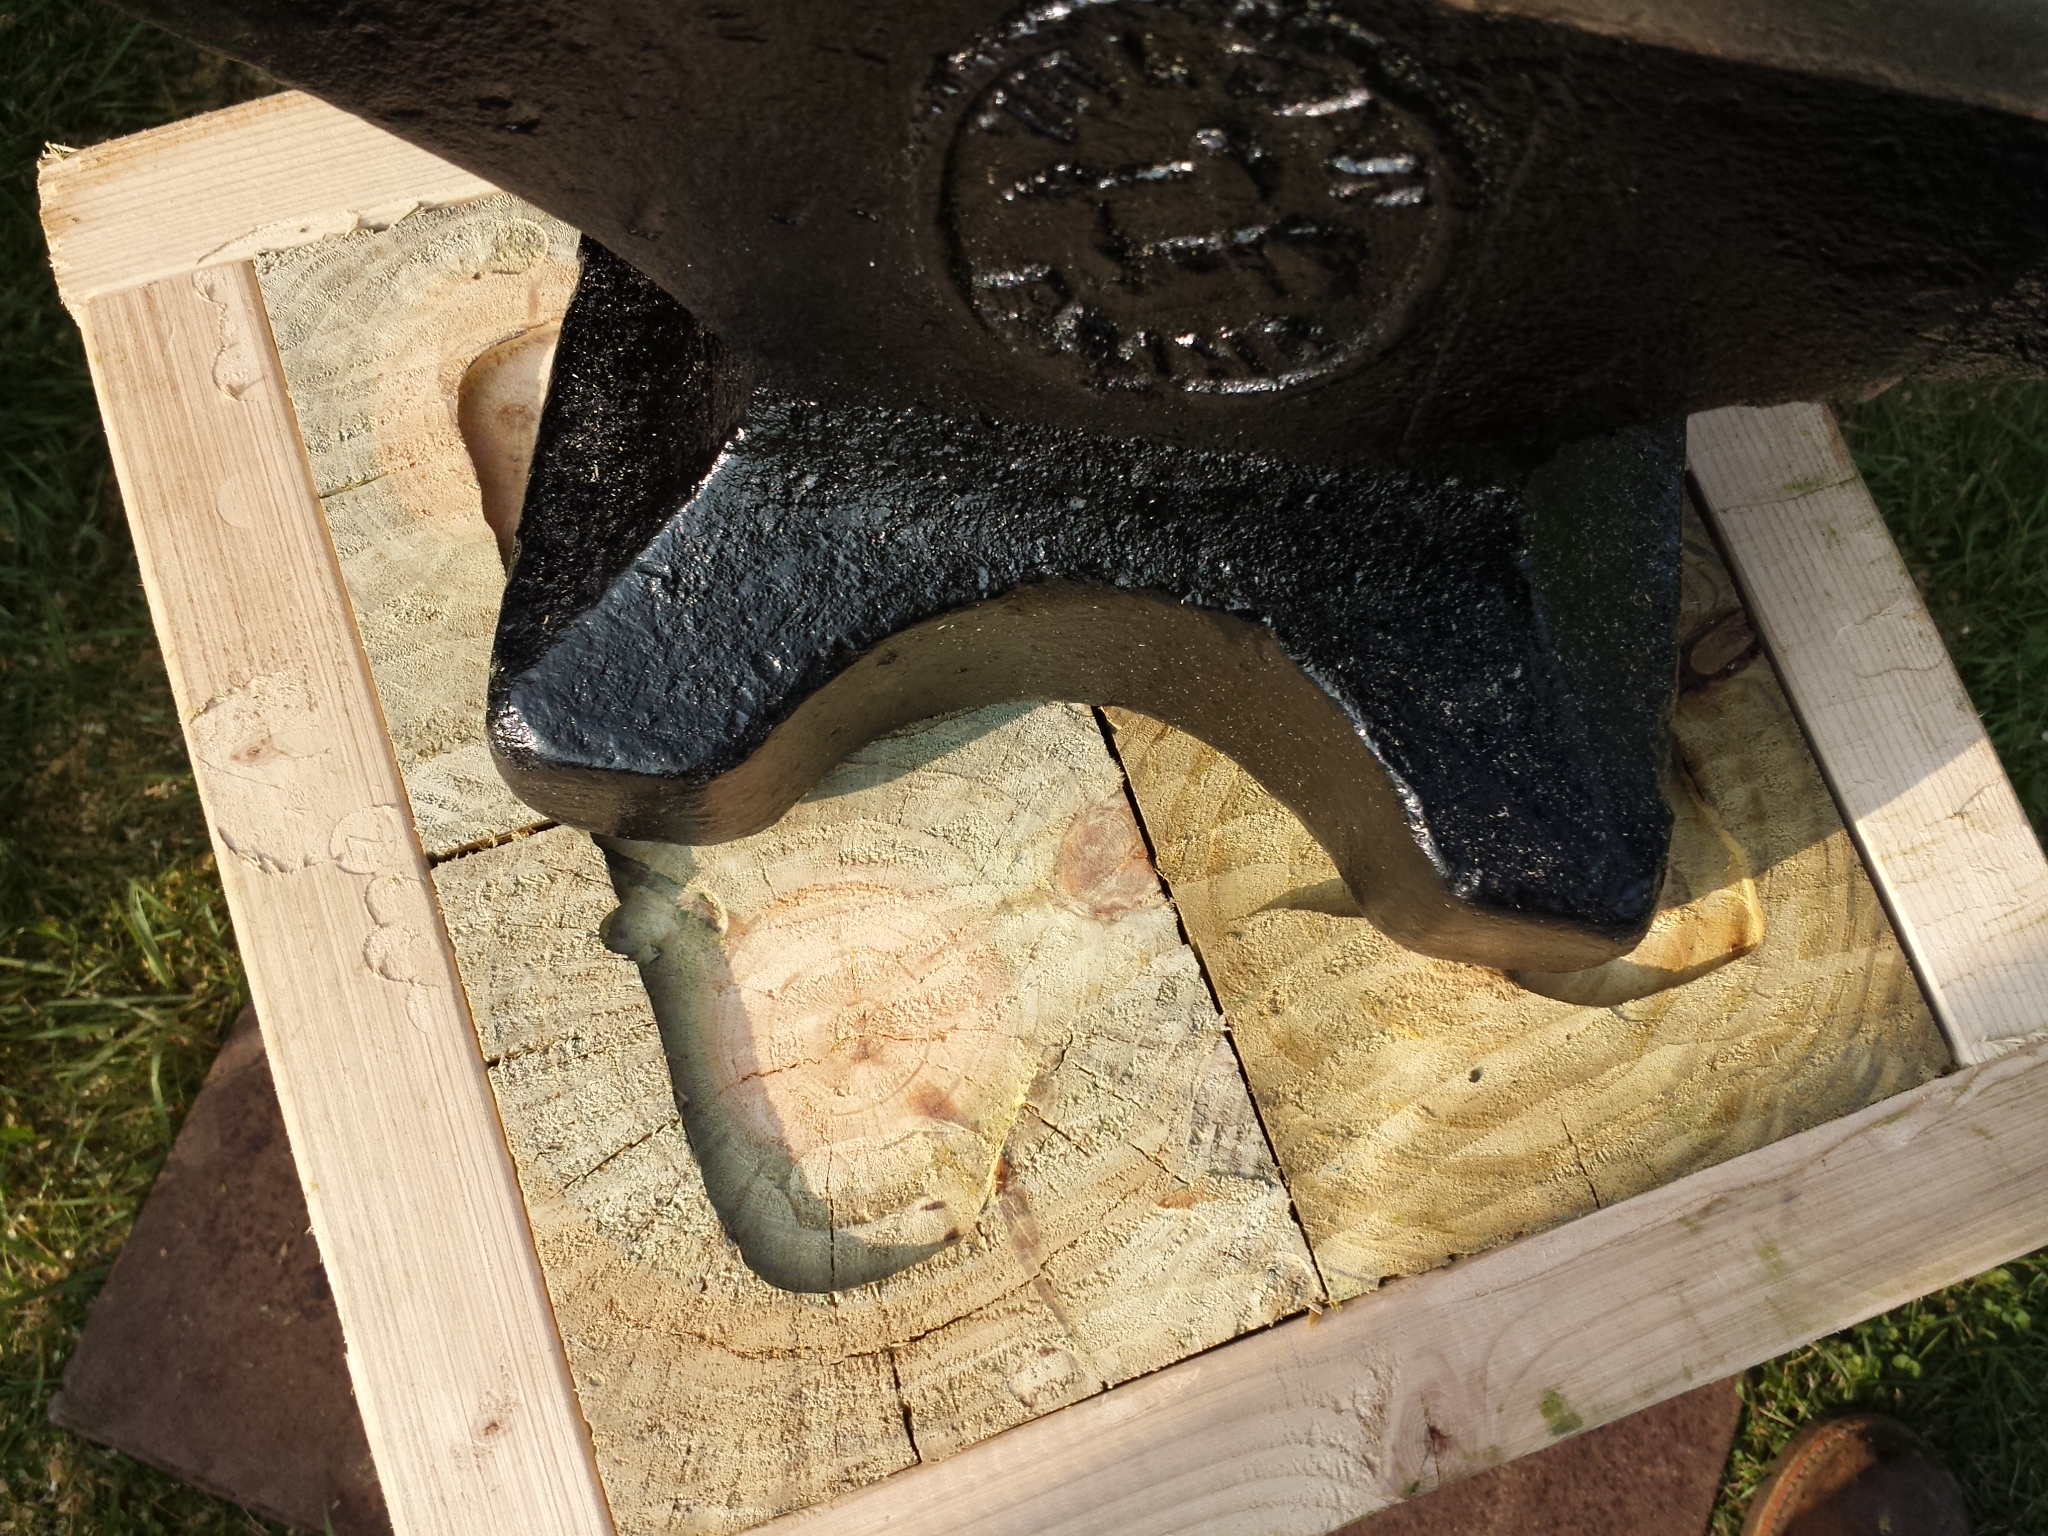
Here it is after adding some chain to keep it down tight and a few months use, and some repair to the anvil face.

-
4 hours ago, Tock said:
I was a 12 bravo which was not fun. I got blown up in 2010 I am all good with a pimp limp and a wicked short fuse.
First let me say thanks. The after effects of that job are not pleasant. I lost a very dear friend of mine when his PTSD got out of control.
As for your initial question, I have always been interested in knives and metal working. My dad was a welder and I struck my first arc in 4th grade. My great grandfather was a blacksmith by trade and I was always fascinated with it. Now that I'm 45 and have settled down a bit with my own house and a job that doesn't require me living out of a hotel room, (and a hip surgery that slowed me down quite a bit....) I decided it was time to give it a try.
I do find it very therapeutic as well. No PTSD, but I am bi-polar, so there are times that just beating on something is great. Then you start to see something actually forming and it gives you focus. Before you know it, you actually have something useful out of all that beating and hammering and it turns a bad day into something better.
-
you mean a plate that sits on top? or a sleeve that fits inside? It's only a 3/4 inch hardy to begin with so I don't want to do a sleeve. If I use a plate on top, won't the cone will still come up crooked? The face is level, so anything made somewhat true that goes into the hole will still come out at an angle won't it?
-
1 hour ago, Glenn said:
The cone does not have to be oriented with the square of the hardie hole. The cone is circular.
Right, but I wanted it to be somewhat perpendicular to the face of the anvil. The hardy hole isn't. It goes in at an angle where the bottom is closer to the horn than the top.
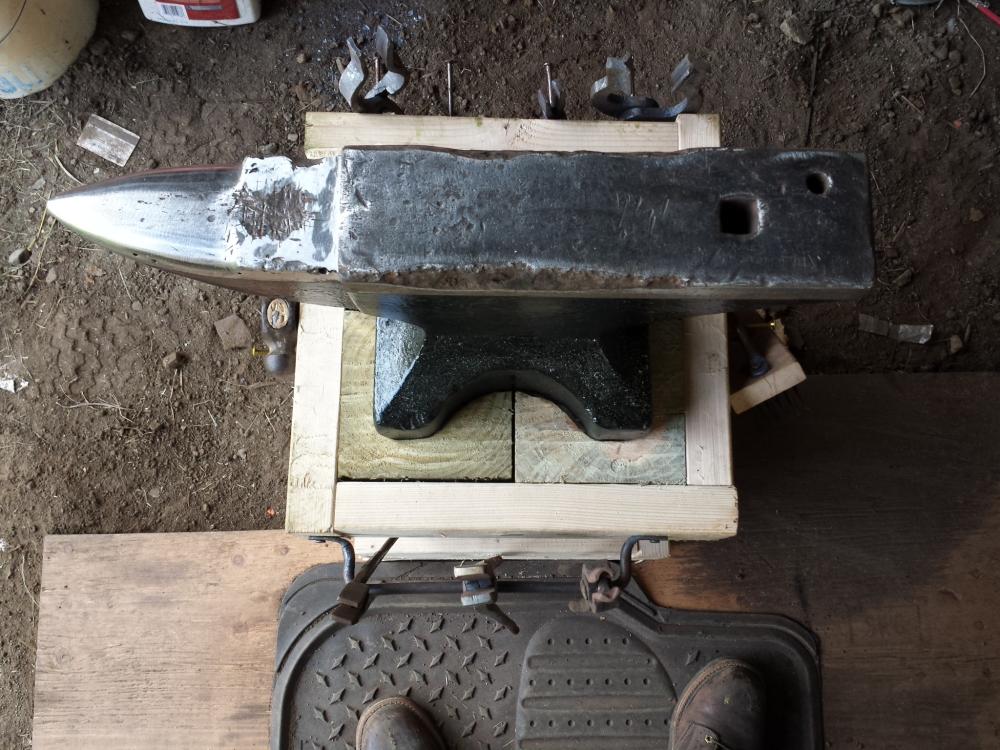
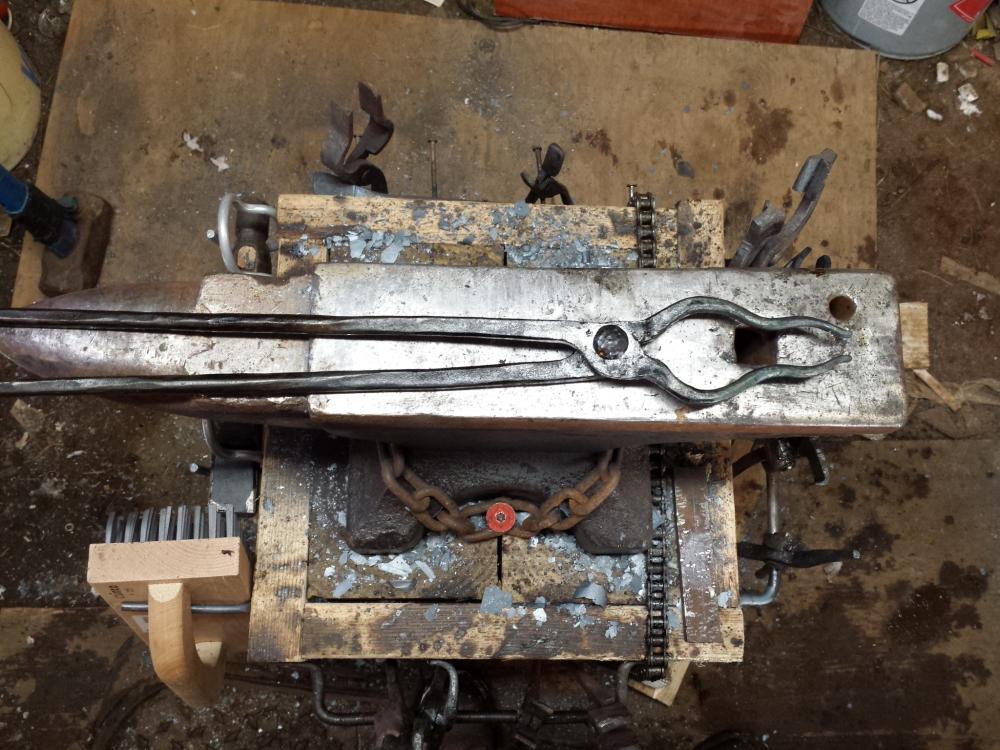
I made a sort of bottom fuller type tool for putting a radius in the edge of flat stock for ease of isolating the area for the hinge plate when I make tongs. (I just laid some 5/8 round on the end of a piece of square and welded it to make a "T".) It will only fit flat one way. If you put it in backwards the "pin" on it will be off the anvil face almost 3/4 of an inch towards the horn but touching near the heel. So it's probably about 3/8 of an inch out of square.
I know I could still use it that way, I just wanted it to look better.
-
I still end up doing some of the car work, I just have to do it outside. I hate working on cars though, so I don't do much.
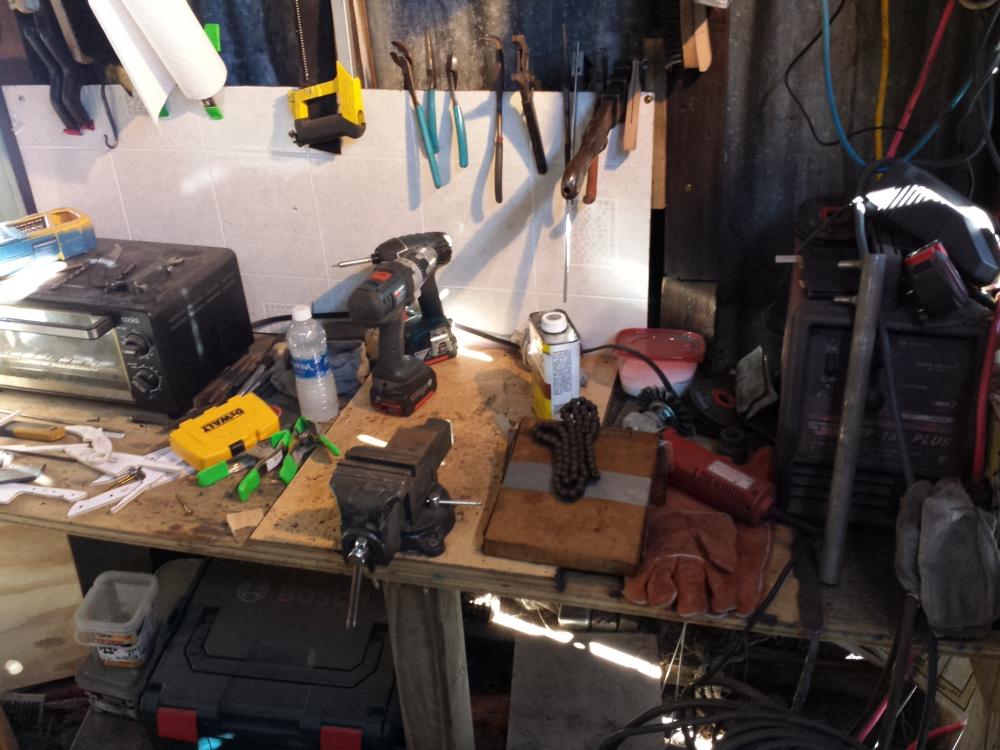
I've actually got a shelf over the workbench, a vertical cabinet on the left side and where the board is leaned up in the back there are shelves there too. And stuff hanging off the walls all over. Also a ladder and 2x4s and such stuck up in the rafters haha.
-
That's on my list. Been looking at those little propane torpedo heaters actually. $75 or so from tractor supply.
-
Yes that's snow on the boots. We only have about 4 inches of snow right now, so that's not too bad. Our frost line (how far down the ground freezes) is 6 feet, so my dirt "floor" is pretty darn cold. I tried going out a few times when it was down around 4 degrees Fahrenheit, but that was just too cold.
1 hour ago, Daswulf said:sfeile, the cone doesn't have to be perfect to be functional. The tongs look like they turned out nice.
Thanks Das. I know it doesn't have to be perfect, but since my hardy hole is a little crooked and weird, I'll just clean it up as I customize it to sit straight.
-
On 2/2/2018 at 7:07 PM, Daswulf said:
I try to keep mine at a step or two. Well, the bench is there somewhere. I know because the post vise is attached to it so it must be there. Guess that's on the list to clean off.
A couple days late, but here is my massive shop haha. The metal bucket on the right in the first photo is actually sitting right against the leg for the workbench, so it's that close.

-
Warmed up to about 22 today, so I went out for a while until my tank started freezing.
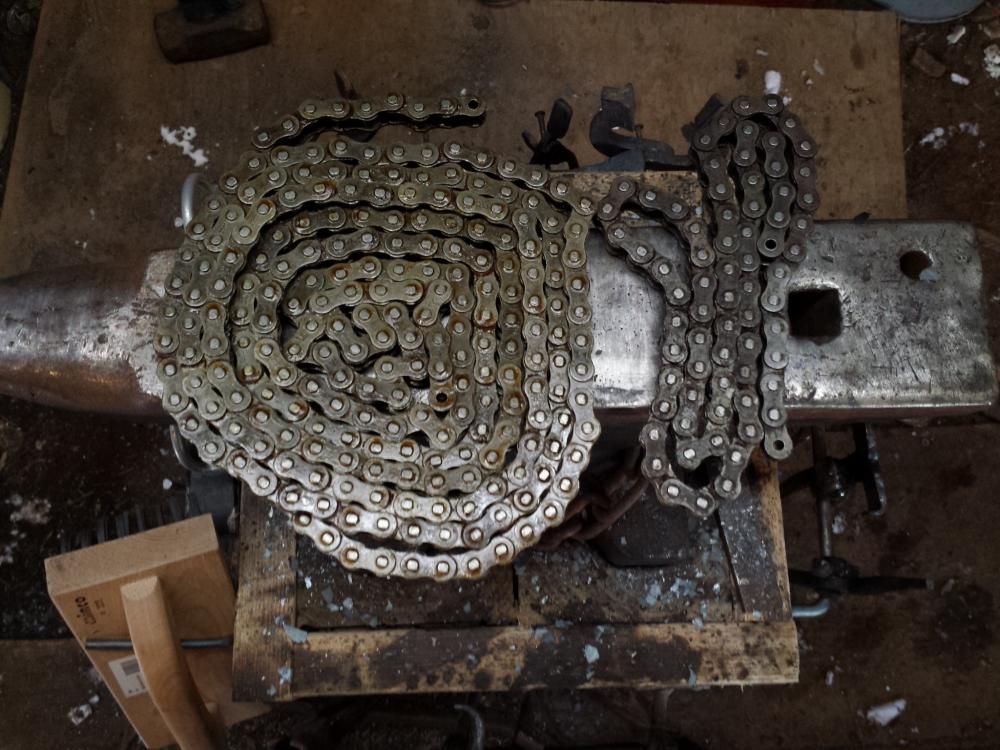
Made a hold down out of some motorcycle chain, made a pair of pickup tongs (admittedly from blanks), and did most of the heavy hitting to turn a bullpin into a hardy cone. It's not even from side to side because I used a 2 pound sledge as a "flatter" and struck with an 8 pound to move it quicker. When I clean up the shoulders I'll grind a little more off those sides to make a shoulder there. In hindsight, I probably should have placed a piece of plate under it to do that while I was striking.
But at least the hold down worked well!

-
Got some nice motorcycle chain. Used one piece to make a hold down, and may try to forge-weld some. Maybe....
-
On 2/3/2018 at 12:04 AM, bajajoaquin said:
There seems to be a lot of enthusiasm for that band saw. What’s the functional difference between that and a 4x6 saw other than portability? What’s the difference in price?
Small storage is one thing. If you don't have a lot of room, a band saw that you can store on a hook under the workbench and use pull out to use as needed, is more practical than one that needs a dedicated floor spot. Portability is another. Say you have a 20 foot piece of stock sitting outside and you need 2 feet of it. You throw a cord out the door and cut off what you need instead of knocking over your coffee trying to swing that big piece around to get it in and out of your shop. Or if you need to cut a bent stake off a truck bed. Instead of throwing sparks everywhere with a torch, you just cut it off with the portaband.
They are very handy for any sort of awkward position or piece because you can just move it to where you need it instead of trying to figure out how to position the piece in the saw or even get it to the saw in some cases.
I have the Milwaukee deep cut, and they are about $280ish. The Bauer like Das has is between $99 and $130 depending on where and what sale you find.
On 2/3/2018 at 12:11 AM, MotoMike said:@sfeile, I need a lot of things. collecting parts for my grinder build
That would be good for cutting your grinder parts haha.
-
You need one Mike!

-
I was always out in the field trying to cut with crappy blades in a portaband. They did keep a few good ones for the big saw in the fab shop, but a cheap portaband blade will not cut much 6 inch schedule 40 pipe. Takes up half your gang box just filling it with enough blades for a couple days. And you are always upside-down in some mud hole when they break too. Makes for some colorful language echoing out over the generator haha!
-
10 minutes ago, Daswulf said:
It's going to get lots of use.
") she got the 2 year warranty as well thankfully. Hopefully it holds up to many more years of use then that tho. I kinda like when the manual has a parts list. Just wonder IF you can buy those parts.
she got the 2 year warranty as well thankfully. Hopefully it holds up to many more years of use then that tho. I kinda like when the manual has a parts list. Just wonder IF you can buy those parts.
The main things to wear on them (other than blades) are normally the rubber drive wheels, and the guide rollers. Milwaukee or Dewalt "should" fit for those. The threading on the guide rollers may be different though. I'll look and see, I think I have extras I could send you one of to know for sure.
When you get more blades, go with Lenox or Milwaukee. Don't skimp on them or it will just frustrate the heck out of you. Company I worked for supplied most of our consumables like 4 inch grinder wheels, portaband blades etc... They always bought bulk junk and you end up using 3 times as many to do the job.
Use the work stop guide on it. It will act kind of like a sawzall and jump on you if you don't. Quick way to snap a blade.
-
That's a nice addition. I have both the Milwaukee deep cut and the same size cordless version. Extremely useful tool. I've even used them on 6 inch pipe when I was fitting.
-
Once the weather is a bit more travel friendly I'll be down. 6 years of second shift, I'm not a morning person either.
-
I think my whole shop is about 12x16. I've got an excuse for a bench, forge, anvil, 2x4 foot gang box, another tool cabinet, grinder, sander, buffer, 2 chainsaws, another truck box with tools, toaster (tempering) oven, more miscellaneous tools than I can type in the next hour...... My mower is mad at me because it got moved to under a tarp. If it's somewhat decent out tomorrow, I'll get a pic.
-
What's a good time? haha!


Opinions on if this looks right
in Gas Forges
Posted
That's pretty much what these are from what I understand. They are a K25. Supposed to be good to 2500 degrees. I can touch the metal body at full forging heat, so they insulate pretty well. I will look into matrikote and plistex though. Anything to help prolong them is good by me. Thanks!