the2ndcashboy
Members
-
Joined
-
Last visited
Everything posted by the2ndcashboy
-
I always thought it was "if it ain't broke, fix it til it is".
-
Ok, good to know. I kind of suspected it was a combination of me leaving too much opening on the forge and also my lack of experience forge welding. I just wanted to make sure it wasn't a FAM issue so I didn't chase my tail excessively. I've known since I built the forge that it gets plenty hot enough to weld in. The pics are after less than 10 minutes of run time, it gets much hotter. Like I said in my reply to Buzz, I took the pictures at a lower heat because the flame is pretty much invisible at full heat. I'll put the shortest mig tip in and do some testing next time I get a chance to actually do some forging.
-
The color is pretty accurate, at least on my phone. YMMV of course. That's not completely up to temp, probably 1800-ish degrees. It will easily peg a type K thermocouple (2300) at a very bright yellow color. You can't really see the burner flame anymore at that point though, that's why I took the pics at a lower heat.
-
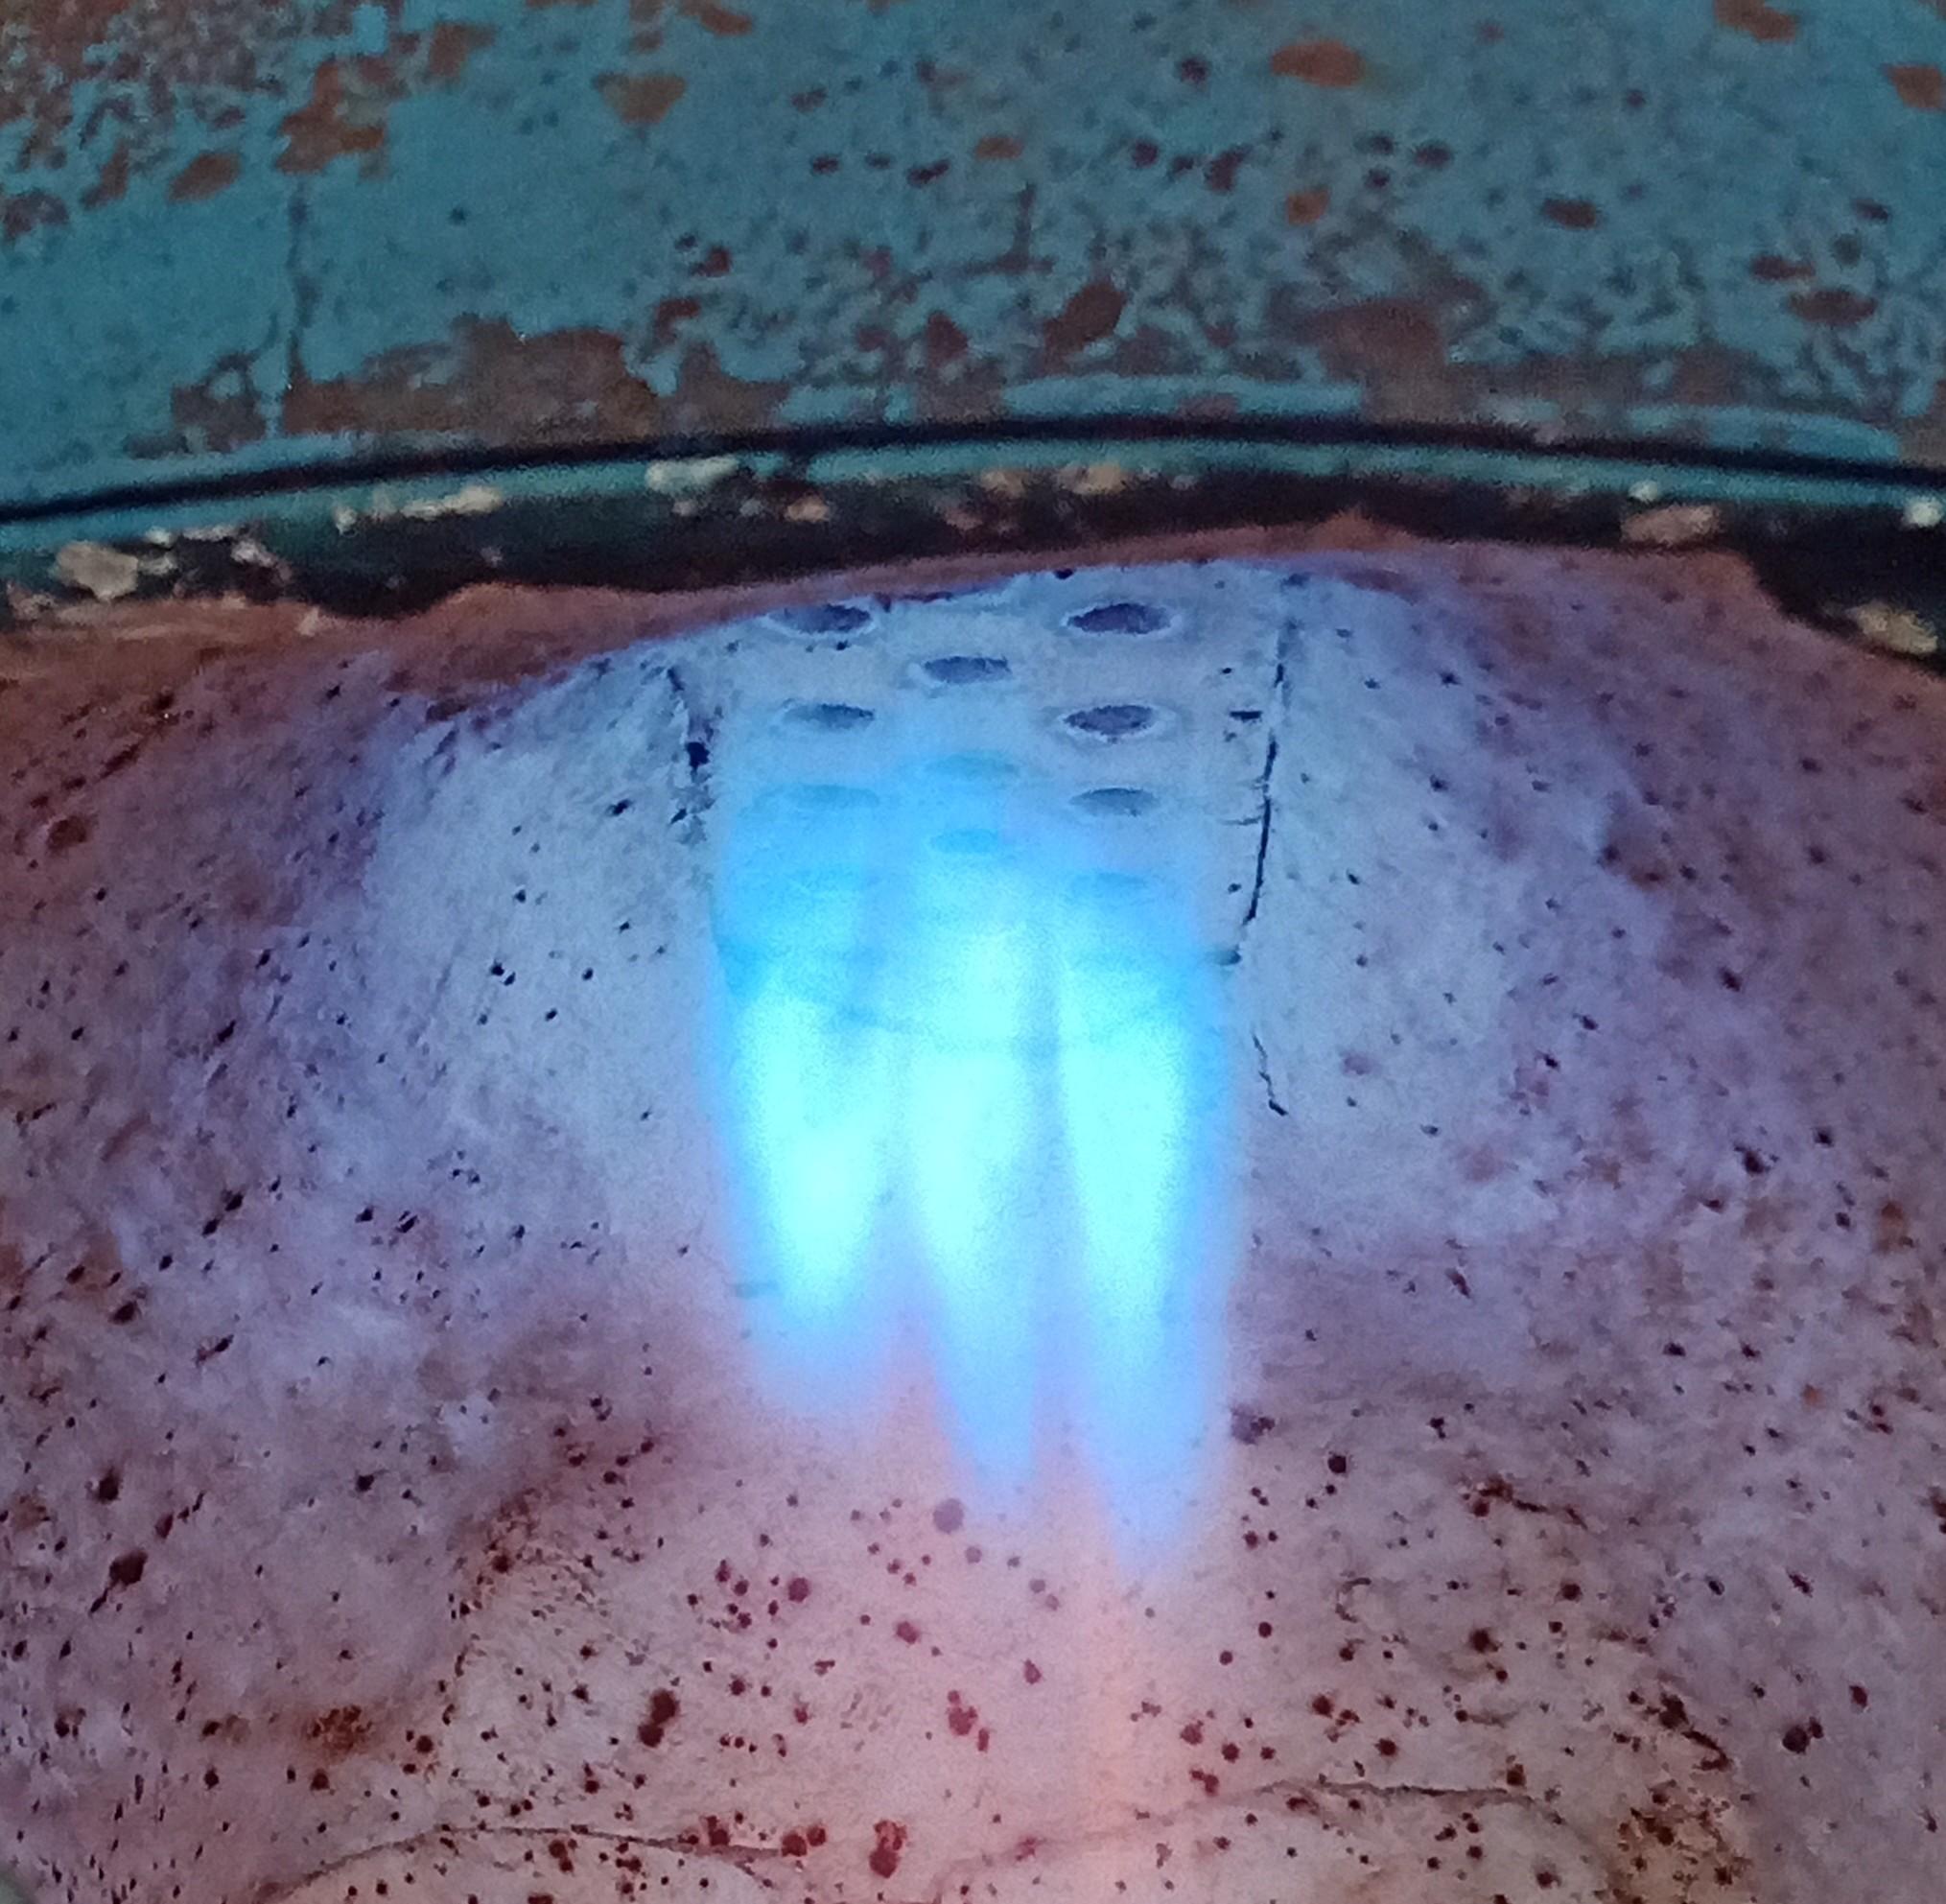
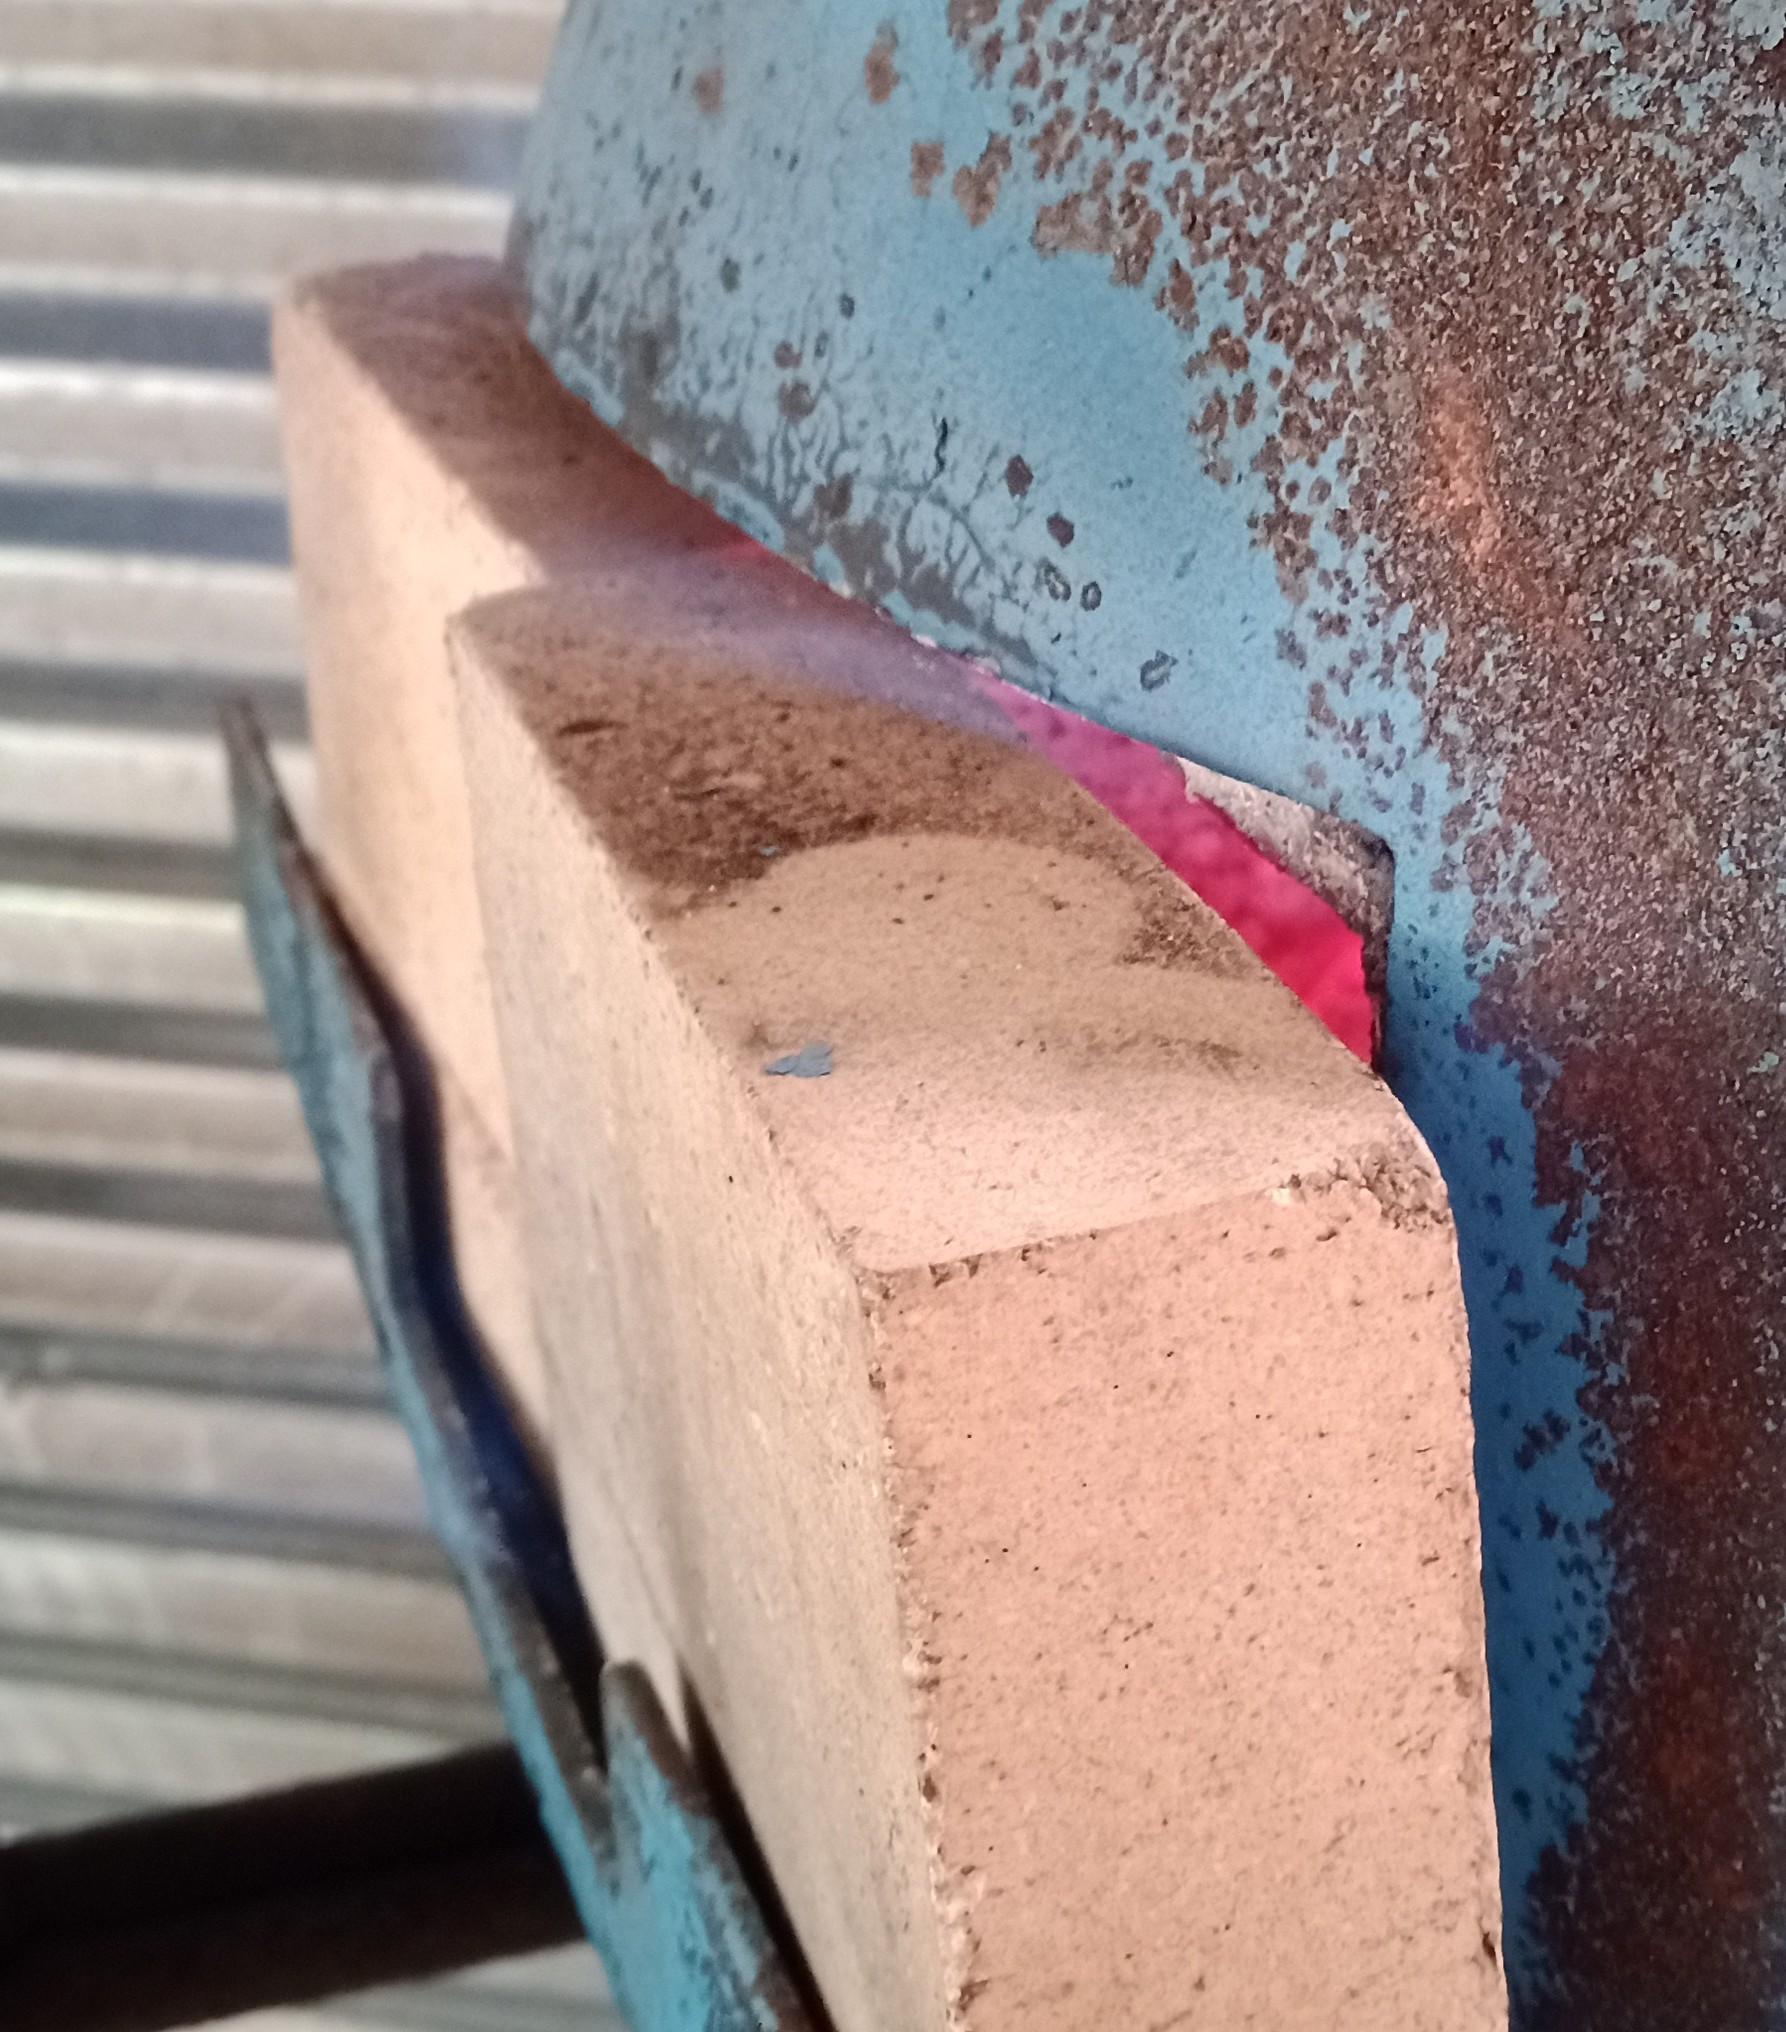
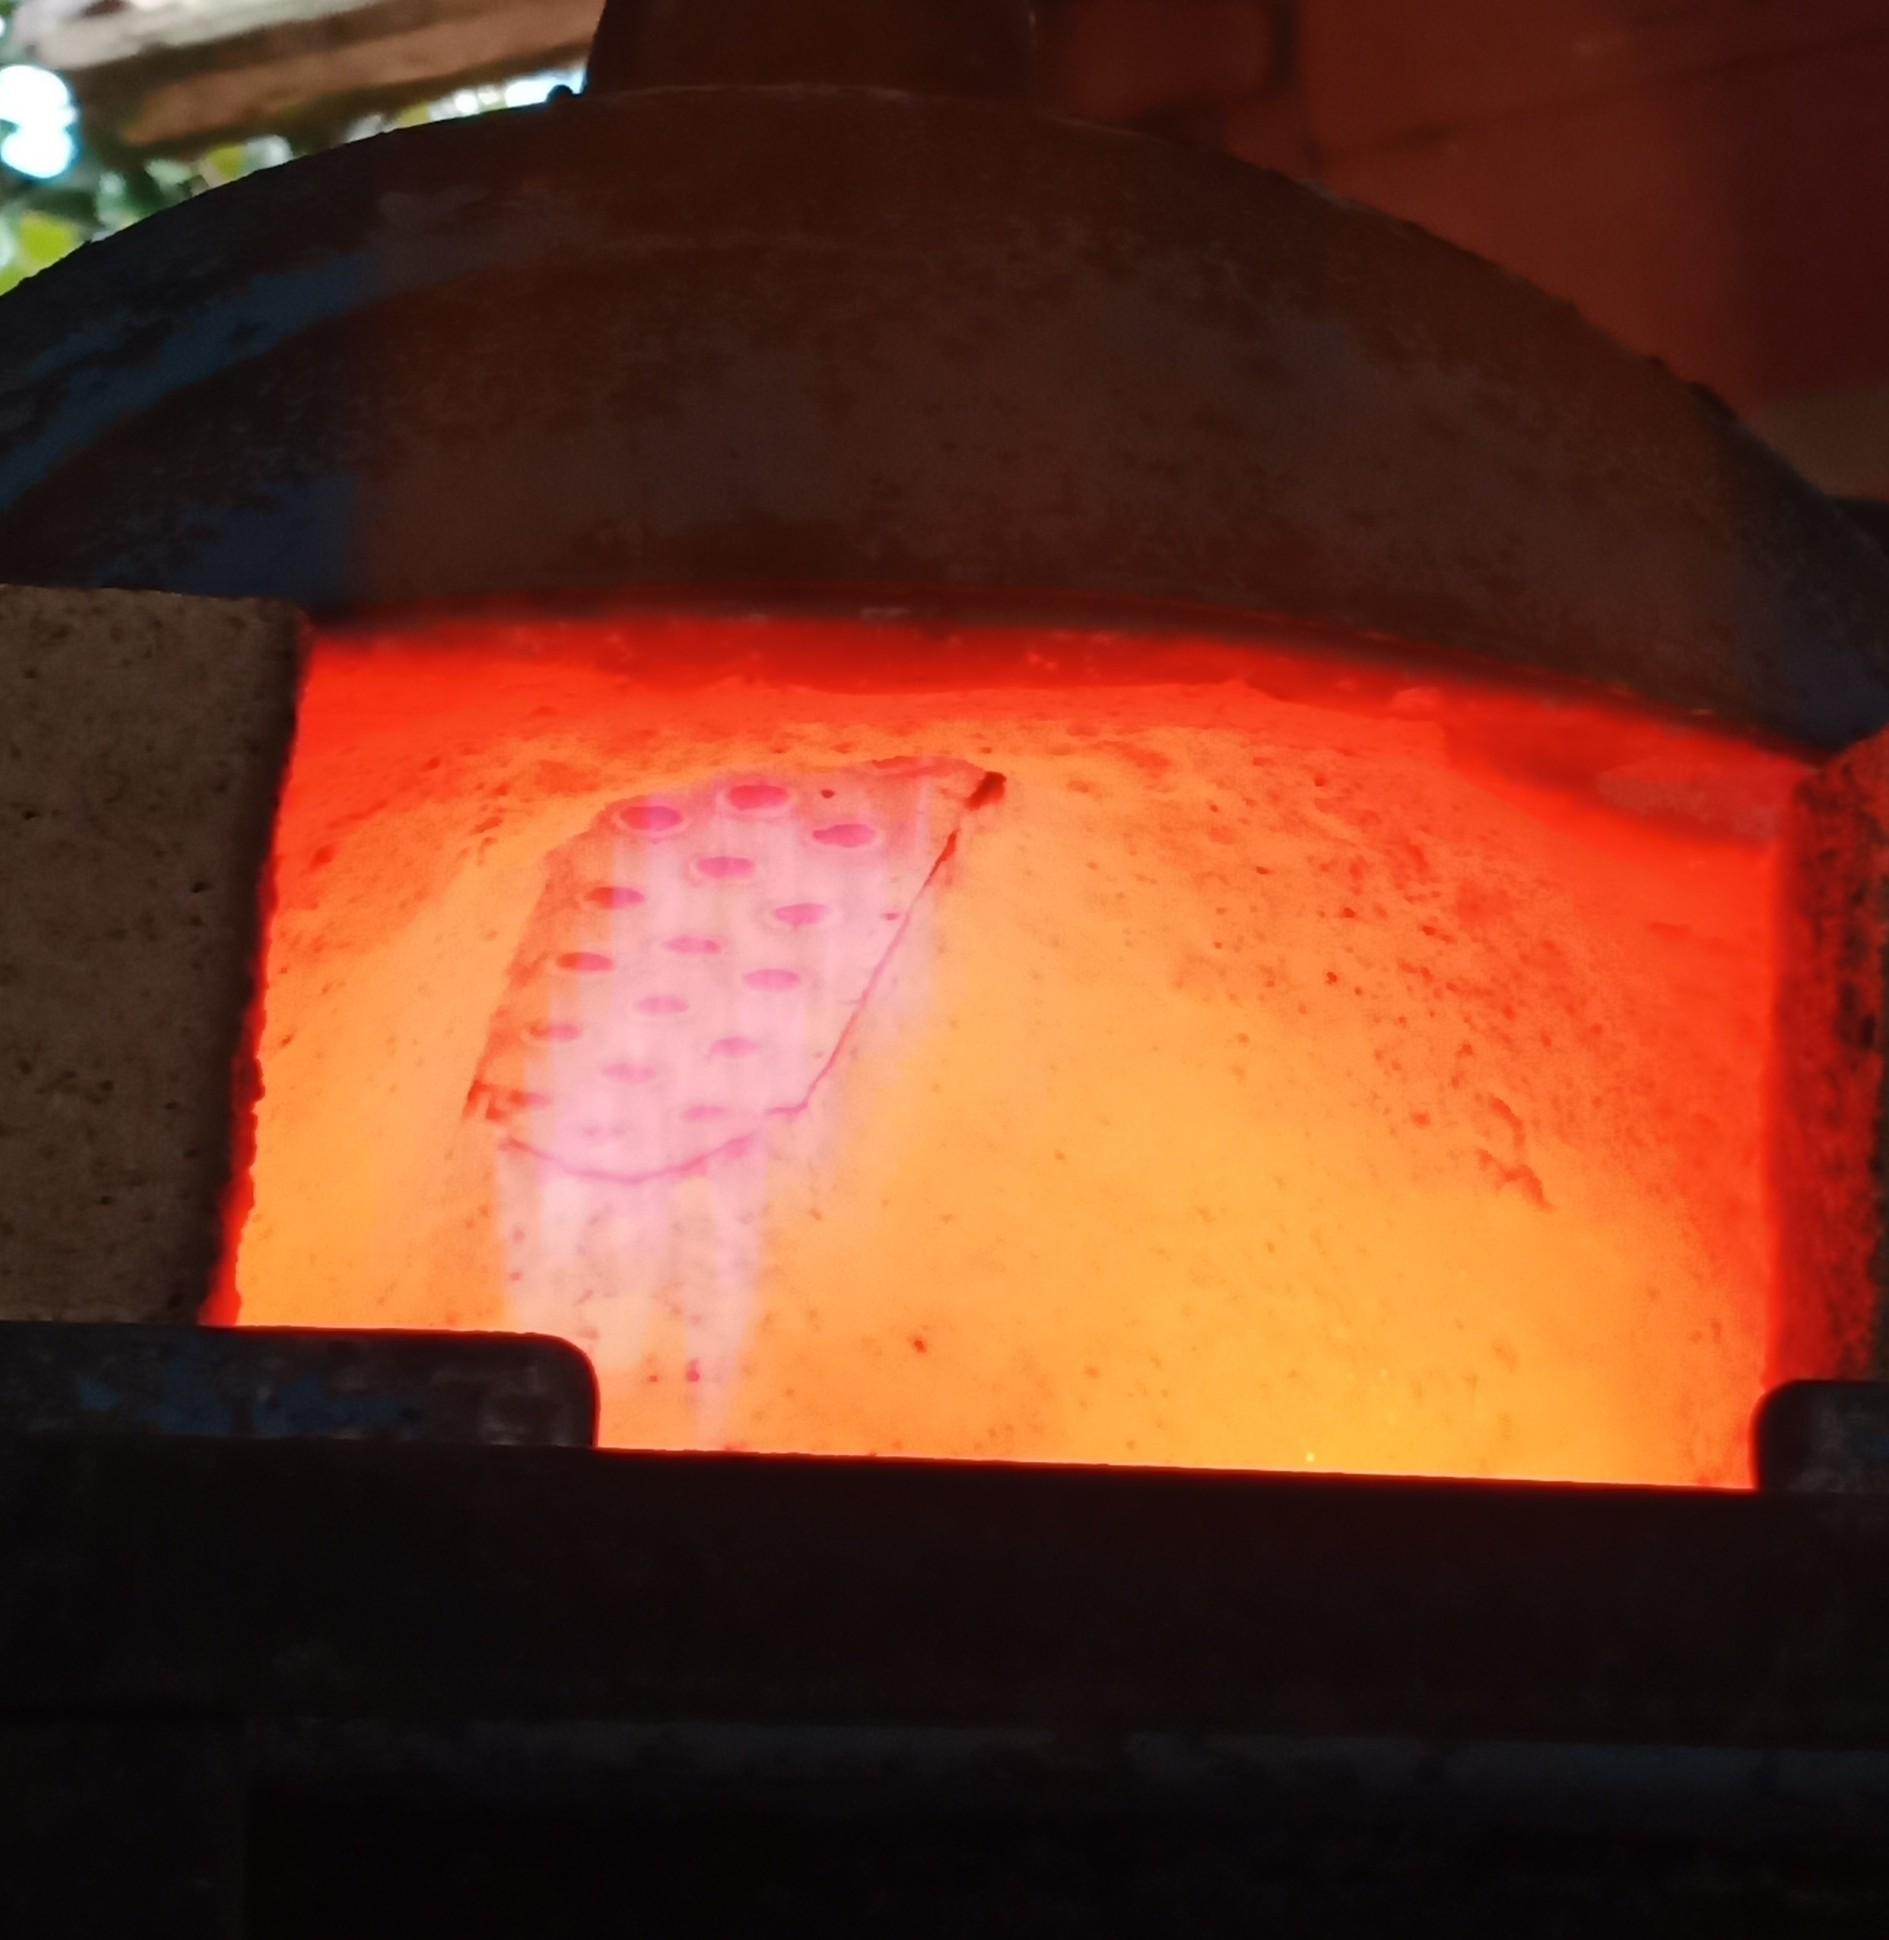
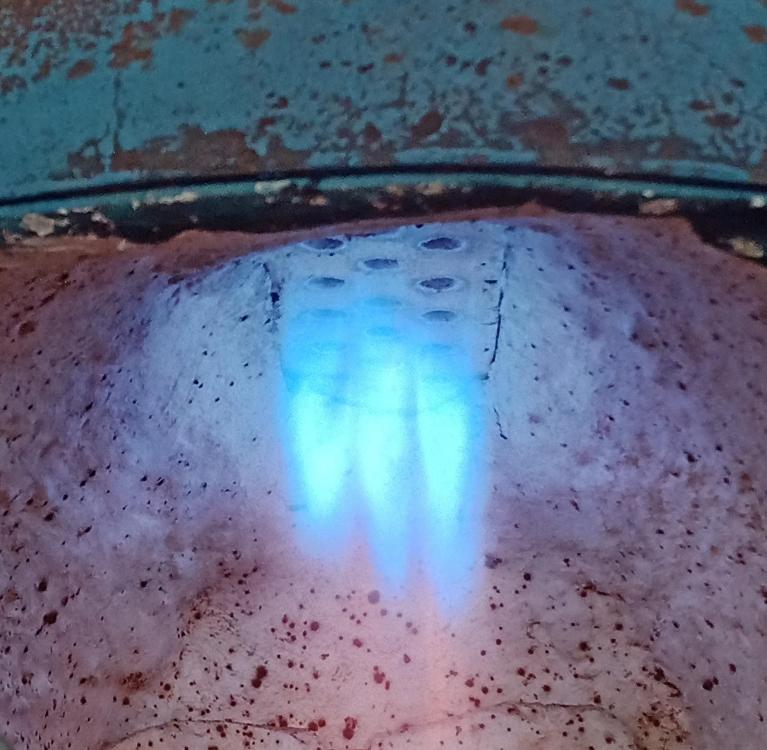
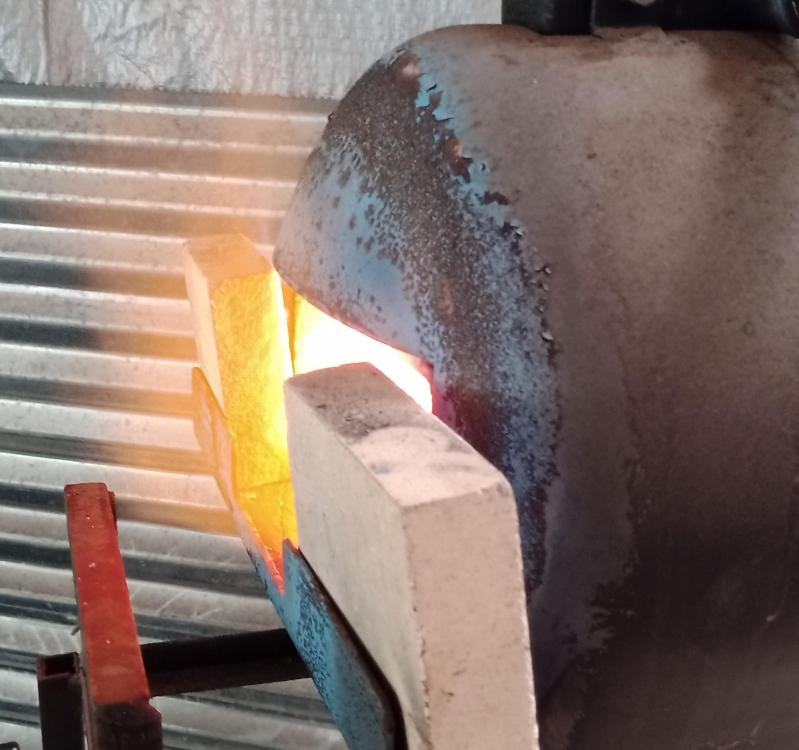
Ok, I took some pics after work this morning. This is a 3/4" Frosty T with a standard length .035" mig tip, 19 crayon-sized holes in the burner block. I couldn't get any dragons breath with the forge cold unless I closed the doors completely, and even then it was faint. There was a bit more with the forge up to temp. The standoff on the burner pretty much goes away when the interior starts to glow. 1st pic: Cold start, 10psi 2nd pic: Cold start, 10psi 3rd pic: Most of the way up to temp (low orange), 10psi 4th pic: Most of the way up to temp (low orange), 10psi.


-
I have seen scale form on the stock while in the forge, but it's mostly when I have the doors open all the way I think. Its not something I've been particularly concerned about until I've started forge welding. I've probably hijacked this thread enough at this point. My on-topic original question has been mostly answered (FAM on the NARB is primarily determined by the interaction between the size/number of outlet holes, and the hole size of the mig tip. Mig tip length has little to no effect). I probably should make a separate thread for tuning my particular setup.
-
I'm not assuming rich or lean at this point, I'd just like to know what it is so I can work from there.
-
I'll get some still pics when I make it to my weekend. I work nights, and pictures of the forge taken during the day won't tell you much due to all the ambient light. As far as the flame liftoff, I don't know if its as bad as it looks in the video. I still get the below-10psi "flutter" when the forge has been running awhile, and from what I've seen in this thread, the solution to that issue is to plug outlets and get air speed up. It also seems like if it's too restricted, I'd get a richer mixture as I increase psi (like buzz was saying), but I really don't seem to. The thing runs remarkably consistent no matter what variables I change. I guess all this is just the hazards of learning something new in isolation. I don't really have anyone in my area that I can go to and say "how does this flame look to you" and trust their answer. The internet is great but no substitute for in person experience. I appreciate you attempting to help me bumble through.
-
I built the burner using your original as a pattern, I don't recall the number of holes right offhand. There does appear to be some flame standoff, but I can crank it straight to 20psi on cold start without blowing it out, so it must not be too much of a problem (the forge is basically stone cold in the videos). I don't get much visible dragons breath unless it's running near max pressure. At 10psi there's basically none visible unless I turn out the lights at night, then there's 6" or so of blue flame visible. If I choke it down enough to affect the flame color, the burner gets a lot quieter due to reduced airflow, leading me to believe its not going to put enough mixture into the forge to maintain welding temps. I might just be chasing my tail here anyway. The burner/forge combo work well enough to peg my type K thermocouple at only 10psi, so it's probably just my lack of experience that's messing with my forge welding. I was just trying to eliminate the FAM variable when I ran into the tuning oddity. I actually noticed it when I built another frosty T for my brother with a different type of fitting for the mig tip that moved it deeper into the T. When I ran the new burner in my forge to test it, I noticed the flame had a very slight greenish tint, which I'd never seen out of my NARB unless I choked it almost all the way down. I screwed that burner into my NARB and the flame looked exactly the same as it had with my original inducer. That's when I started digging deeper. Oh well, since the burner doesn't seem to be adjustable, I'll work on the other variables instead.
-
Hopefully these video links work. I need to relearn how to post multimedia to the interwebz. Videos are in order from shortest tip to longest. https://drive.google.com/file/d/1Q0SGQ5LSS1cao6wt2BN406LUIdq51d27/view?usp=drivesdk https://drive.google.com/file/d/1Q2G35cGZorZnYDv87s6zoy36YH0RzTSE/view?usp=drivesdk https://drive.google.com/file/d/1Q4DeqM2dZKfy93QWpn8PT0ZSIt8cANKz/view?usp=drivesdk
-
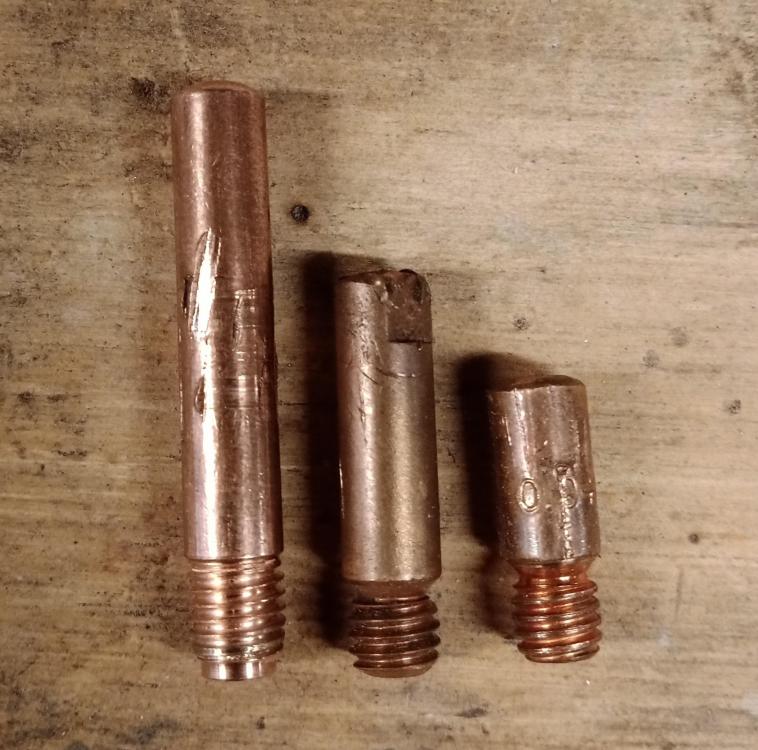
So I've run into an interesting issue with my 3/4" T NARB. I built it to the original plans some time ago, and it works great. It will run from <1psi up to the 20psi max on my regulator. It does start to burn back after about an hour if I'm running at less than 10psi, but that doesn't really bother me enough to apply the fix. My issue is that it doesn't really respond to adjustments of the mig tip length. I was trying some forge welding for the first time and I was struggling with scaling. Part of the problem was me leaving the back of the forge open like an idiot, but I've kind of suspected all along that I'm a little on the oxidizing side of FAM. I started experimenting, and so far I've ranged from a standard .035 mig tip cut down to about half its original length, all the way up to a double length mig tip that protrudes down into the throat of the T a ways and the flame doesn't seem to change at all. Now, if I take that same burner and lay it in the forge without the ribbon outlet, I can get a wide range of flame colors (FAMs) by adjusting mig tip length. The only way I can get the flame to change on the ribbon is to block about 75% of the inlet area. Even completely blocking one side of the T makes no difference at all in flame color. I'm baffled.
-
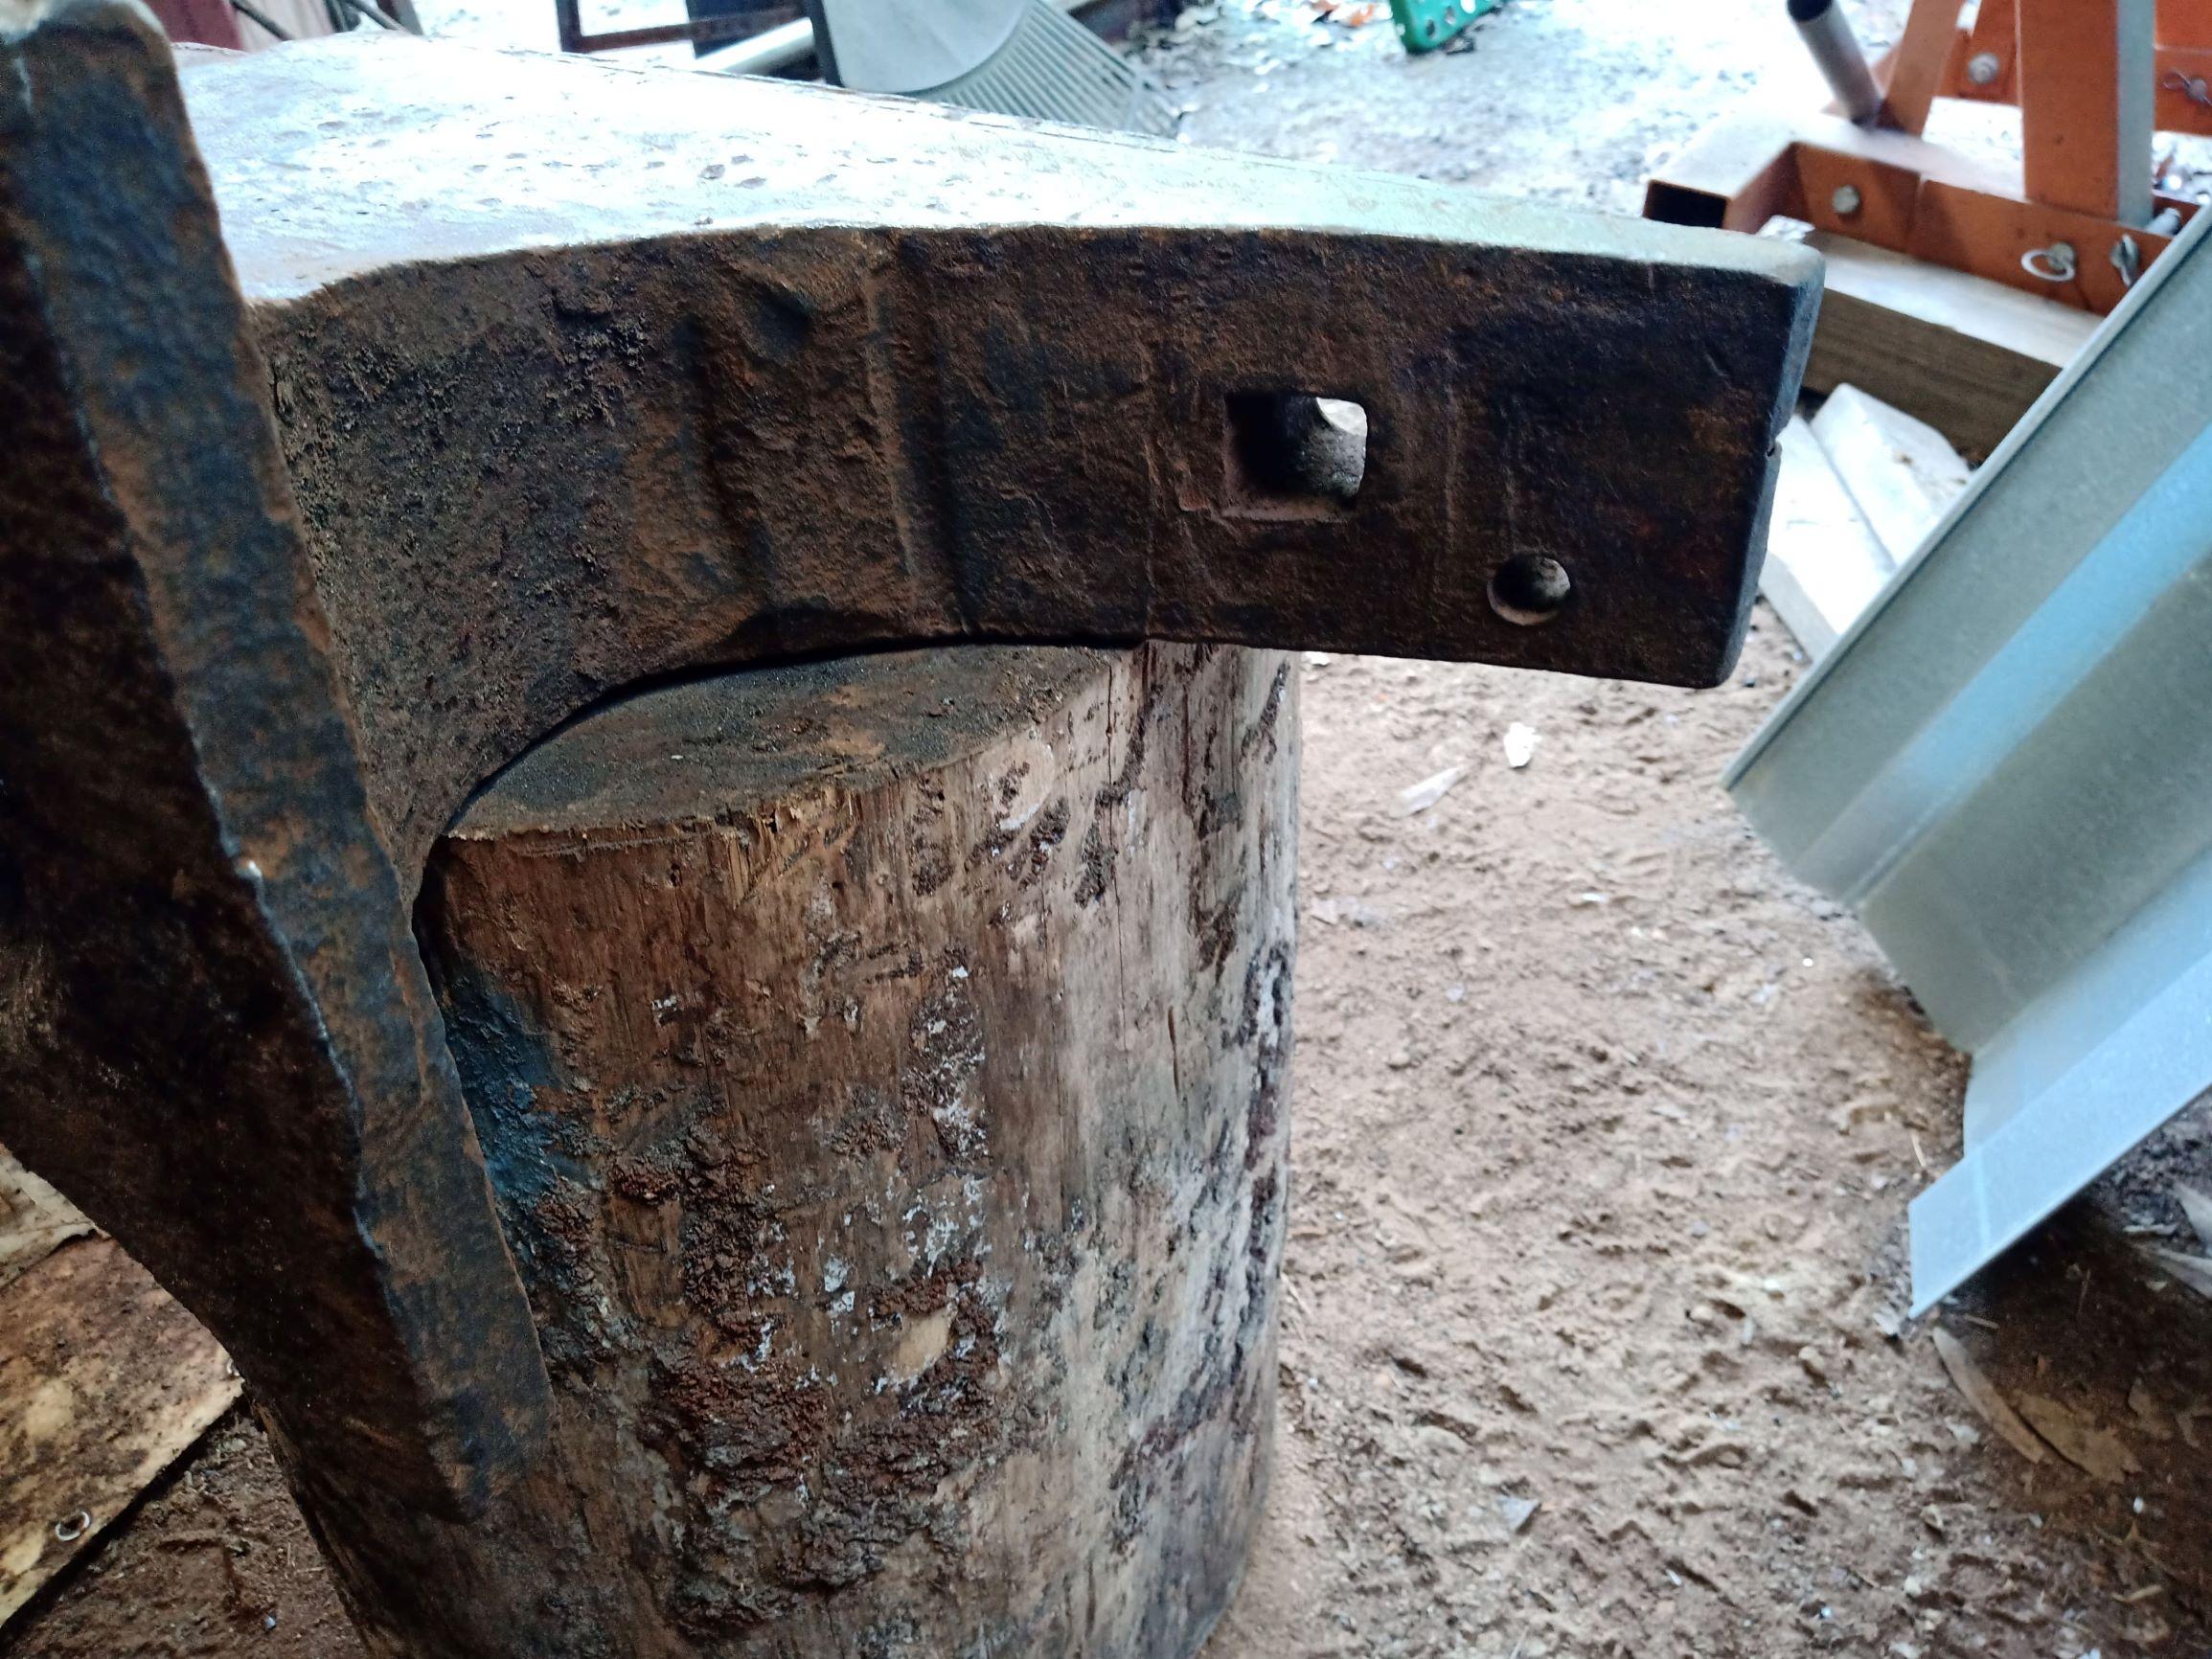
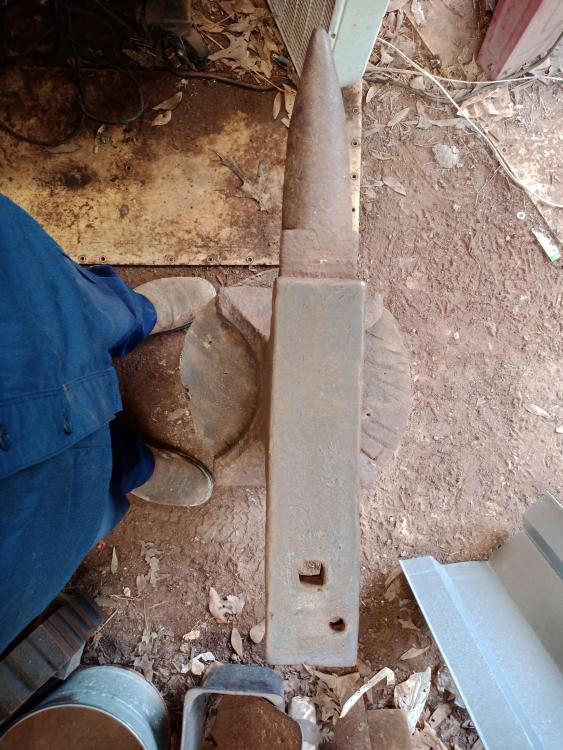
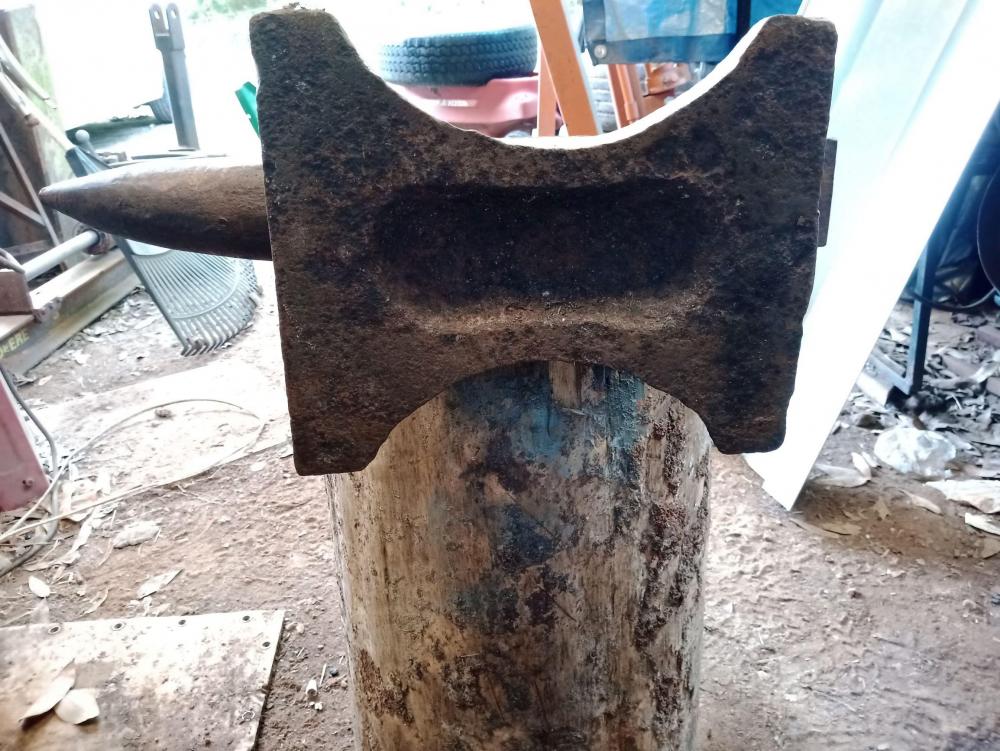
No, the base was rusted pretty heavily. Nothing that will hurt function, but it's pitted too deeply to see any numbers.
-
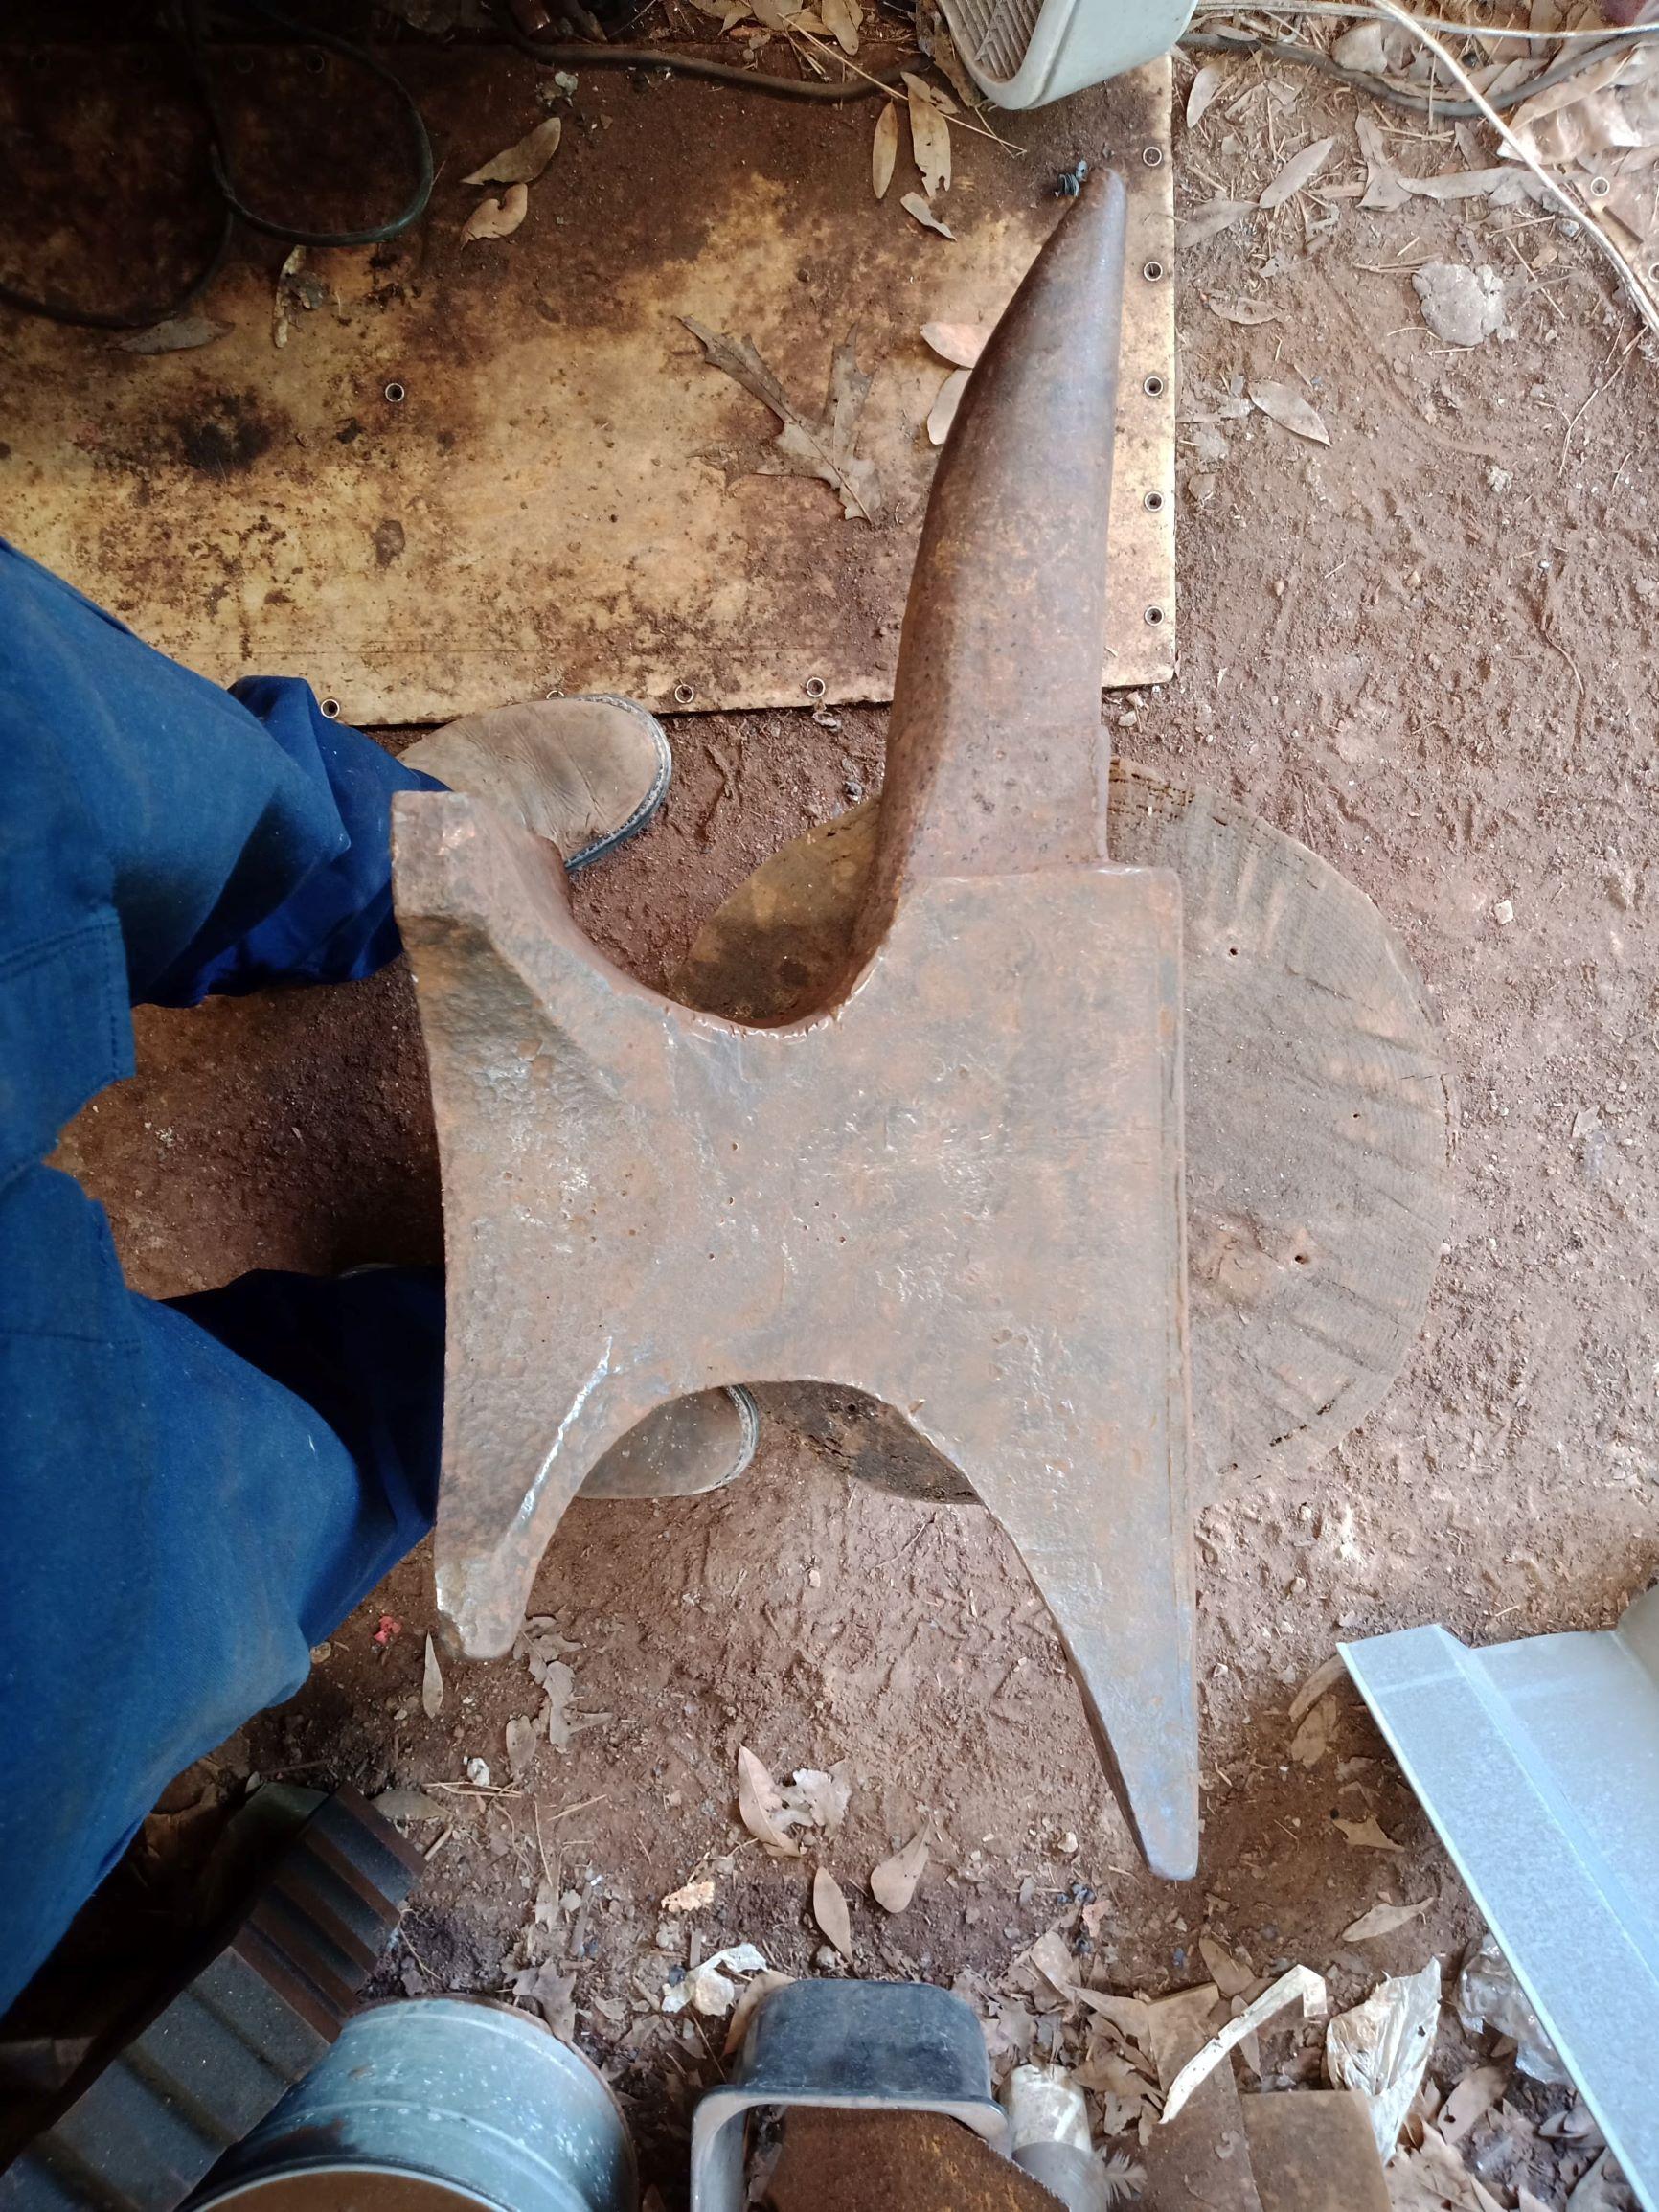
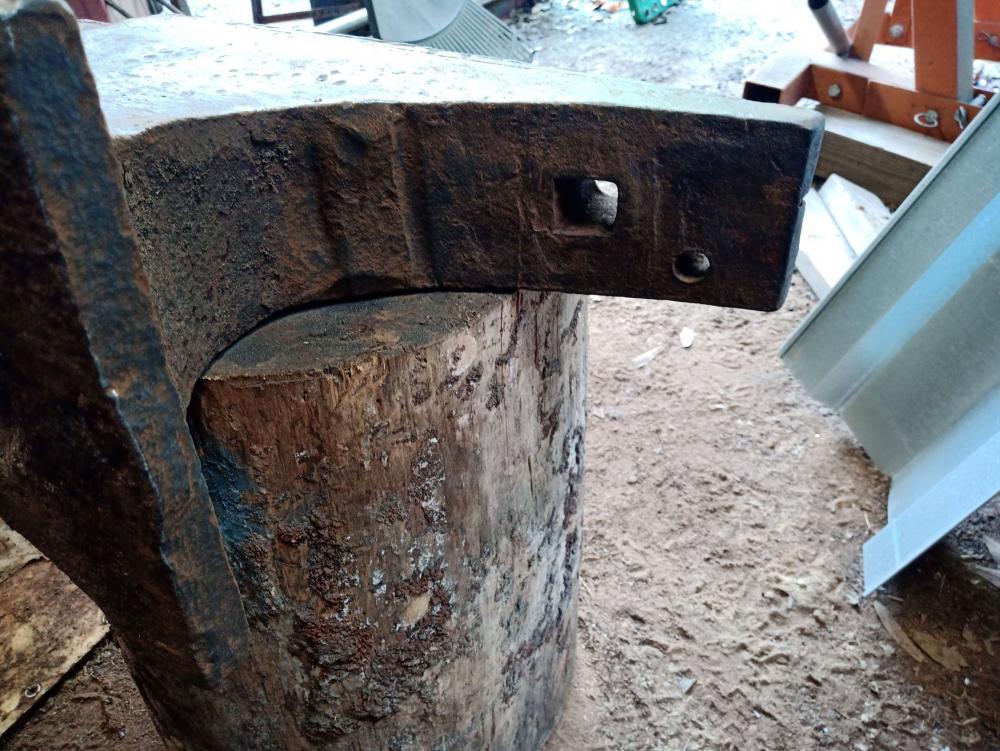
Sorry, had to go to my desktop and edit the post to add pics. Yeah, the indentations under the heel are what makes me think its an A&H. I'm not that knowledgeable about anvil history though, so I thought I'd get more learned opinions.
-
Picked up this anvil the other day. I believe its an A&H, but there are no remaining markings at all. The sides have been beat on quite a bit and the base has lost some metal to rust (looks like it probably sat in something wet for a few years or decades). Dimensions are: 120lbs, 3-5/8"x15" face, 25-1/2" overall, 1/2" pritchel, 7/8" hardy (I think. It's a hair under 1" so I'm guessing with wear it was originally 7/8".), 10-3/4" height, 9-1/2"x11" base.

-
That looks a LOT like the presumptive Badger I picked up awhile back on the cheap to repair. Badgers are supposed to be better than Vulcans, but this one didn't weld very well, even with the special cast iron rods ($$$). Lots of fizzing and burning in the weld puddle. That one is still functional, but I wouldn't pay 375, and don't count on being able to repair it in any way.
-
My NARB would run at 5psi for about 30 minutes and then start popping. At first I turned the gas up, and that worked, but then I got smart and just opened the doors up all the way. Now it runs @ 5psi for hours at a time, at a nice yellow heat.
-
Yes, I've already signed up with littleblacksmith for a class this fall. I might check into Lyle Wynn as well. I grew up in the county Brazeal is based in, and still have family there. Wynn is in that general area as well.
-
Ah ok, so he's still in Kenya eh? I noticed one of his pages said he was going there late last year, but there was no timeline.
-
Is Brazeal still doing classes? Everything I can find on the internet is outdated, and I emailed him with no response. Is he ok? I haven't heard that anything happened to him.
-
I don't think I'd want to use Matrikote as a finish coat over fiber in a forge. At least not anywhere that might get bumped or poked. I suppose you could do a hard floor of some sort and then coat the rest with matrikote.
-
Sounds good. Do you have a schedule for the classes yet? I'm interested in hammer and tool making.
-
So I've been lurking for awhile. And finally started posting a few weeks ago. Perfect time for an introduction, right? I'm an aircraft sheetmetal/structures tech by trade, and a rank newbie at blacksmithing. Got started doing stock removal knives 10-15 years ago. Made a few off and on over the years, then finally made my first forge 2 years ago to heat treat some steel. It was just a brick charcoal forge, but I discovered I really enjoyed forging. After a hiatus to remodel/sell our house in the suburbs and then buy a house/farm out in the boonies and get that up and running, I finally got the project list worked down far enough so I can start into blacksmithing in earnest. Put together a nice gas forge last week and am getting my work area squared away. Haven't made much other than some leaves out of 1/2" stock so far. I'm really looking forward to learning the craft. I've spent my first 35 years trying out a huge variety of different hobbies (mostly involving metalworking), and I think it's time to settle down and really dig deep into something. IFI seems like a good place to hang out and learn.
-
I just hope the data I got is helpful to people, even though I should have done quite a bit more "before" testing I think. I may make a smaller knifemaking specific forge sometime this year using the same materials and a 1/2" NARB. I'll do more "before" testing if so.
-
I don't know what Wayne's castable #1 & #2 are, but I used Mizzou in my burner. It's what the ribbon burner plans floating around out there recommend. Supposedly Kastolite isn't tough enough, but I think it's what Frosty used in the original NARB (strengthened somewhat). Seems to me the expanded metal on the edges is almost required in these smaller size burners. There's just not enough room for a decent lip on the cutout and 3 rows of holes. My mold was 2x2x7, and 2lbs of mizzou was pretty much exactly enough to fill it. I used the mixing instructions from Hard Luck Forge. I've fired it to full temp a half dozen times so far and it seems to be holding up well. There's one hairline crack across the face but it's only about 1/4" deep. I used an old toaster oven for the initial heating/crayon melting. Just took it to 250, 350, and 450 for an hour each (cooling between each cook) after letting it air cure for 24 hours. As far as buying the refractory in larger amounts, it's probably not worthwhile to get a whole 55lb bag of mizzou unless you're going to line some forges with it too. At 2lbs a pop, that's a LOT of burners. Hard Luck sells mizzou in 5, 10, and 20lb bags. A 5lber would do 2 NARBs. In your case, I'd say most of your issues came from mixing refractories, rather than the amount of water you added. Different castables will have different heating and expansion rates. You might get away with doing that on, say, a forge liner that's only 1/4" - 1/2" thick. A 2" thick block is gonna have problems.
-
I ran the test again today, just to see if the coating reacted any differently on the 2nd firing. The warm up curve was much more uniform this time. No weird pauses or anything. Actually tracked pretty closely to the uncoated test, with the exception that it was still climbing at the 10 minute mark, and the liner itself was obviously not heating up as quickly. It was still about 2175f @ 14 minutes though. I took the TC out at that point and let it run to 20 minutes, then put it back in and let the temp stabilize. It was at 2280f when I took the TC back out @ 22 minutes and put the stock in for the timed heat. The liner looked like it was pretty close to uniformly high yellow heat, so I hoped the stock would heat much quicker this time. It took right at 4 minutes this time, which is much better than the first coated test, but still not as good as the uncoated. I'm thinking I'll have to run the forge for a good 30 minutes to get the liner to full heat soak, and that would probably get it to heat the stock the same as the uncoated. That's kind of disappointing. I've always heard that the kiln wash will drastically cut stock heating times, but I didn't get that result at all. My guess is that the people that had the large heating improvement either didn't have a layer of castable over the wool, or were heating to a lower temperature. Or both. The stuff really does provide an insulating effect, but that may actually be somewhat counterproductive in a forge with a decent heat mass like mine, at least in short forging sessions. After I finished the stock heating test, I turned the burner down to 6-7psi to see how long it would run without backfiring. After about 10 minutes it was still running fine, so I stuck the TC in to see what the temp was. It very quickly ran up over 2300f , so I snatched that thing right back out of there. Good to know it will run that hot even lower than 10psi. I'm excited to see what it does once I get the doors done and the burner mounted properly. Overall, I'd say the Matrikote was probably a good addition. It definitely increased the overall temp. It also should make the lining more durable, and with its increased insulating effect, I should be able to run the burner lower without backfiring. I do wish I'd done some more testing with the uncoated forge first though. If I had it to do over, I'd have tested the uncoated forge at more of a variety of burner psi levels, so I'd have more points of comparison with it now that its coated. I wasn't expecting the poor stock heating results after coating. I was aiming more to check the max temps and warmup rate. The stock heating test threw me for a loop.
-
This was the first firing with the Matrikote. From my understanding, there's not really a burn in process like refractory. I can stick the TC in next time I fire it up and see if anything changes. I'm definitely going to try the stock heating test again, probably after the forge has had more time to heat soak. It probably would have been better to run the uncoated test a bit longer, but I was fairly confident it had stopped climbing. Uncoated, the temperature rise was fairly consistent, it didn't really "pause", just climbed steadily until it stopped around the 9:30 mark. Coated, there were several points where it stopped climbing. Especially once it hit about 1900 the rate slowed way down. It hit 1900 @ 5, and then actually dropped a couple degrees before it started climbing again @ 6 minutes. I let it run past 10 minutes because of that, and because the forge still hadn't reached that bright yellow that it had uncoated.