
Josh Foran
-
Posts
38 -
Joined
-
Last visited
Content Type
Profiles
Forums
Articles
Gallery
Downloads
Events
Posts posted by Josh Foran
-
-
So I've been pretty busy with a big race each month for 3 months and haven't been able to do a whole lot. But have done a few things here and there.
For mothers day I made her a Trivet. Please excuse my terrible photos, but it was scrolled with leaves:


I used square stock to make this, however, in hind sight next time I'll use round.
Also did some practice on the same square stock making a knife:

Just some practice forging and grinding, still have a long way to go, but I'm having fun and that's all that matters. Not looking to be a super awesome knife maker, just want to be able to.
I've had a lot of people ask me about my propane forges I make dubbed the Widget Maker. I've made them for 3 people so far and they've all sold before I could really play with them. I've had three more people ready to buy some, so I started building 4 so I could have one as a demo when I go to forge meetings so people can see them.
Here the are after the wool and brick had been fitted:

And here they are coated with refractory:

Probably the question I get asked the most is, "Can you forge weld with them." I had sold all my forges before I could try them out and my answer was always, "They should." Well I finished my demo forge yesterday and took it to the Cullman forge today to test it out and give it a run for it's money.

Here it is during the forge welding process and the piece I welded. This was only the second forge weld I've ever done and I messed up the part you see that didn't weld just by not knowing what I was doing. Eventually some of the veterans at the forge came over and set me straight, but I had already messed up the part the didn't weld. But you can see past that point it's solidly welded! So now, my answers can be a confident, "Yes, if you aren't an idiot like me and do it the right way!" haha
But I was proud of the little forge. It got super hot, I learned to forge weld with the doors open otherwise they will melt... good to know. Also it was stable from just barely on <1PSI all the way up to full throttle. I started with a practically empty propane tank and got about an hour out of that, then I got it filled and went the rest of the day with plenty left and that's running all out for forge welding. I even would up leaving it in too long and leaving some metal on the forge floor.
Also did a little more practice on some knife making. This time with some spring steel. A friend of mine is a chef and requested a paring knife, so I'm practicing to make him one.

I wound up getting to this point and stopping. It was about 90 degrees out and I was standing in front of the forge all day and started getting really sloppy with my hits so I decided to call it a day.
Thanks for taking the time to check out this update.
-
@JHCC thanks man! I can't wait! Hopefully this weekend if no rain.
-
Hammer update!
Went to the hardware store and picked up a handle that I had to shape to fit the hammer and the hand:

Then I burned the handle, sanded it and oiled it:

While I was at the hardware store, the guy setting me up with a handle asked where I got such a "unique hammer head". I told him I made it. He got all excited and grabbed it and proceeded to show it off to everyone working at the store. So I showed him some other things I've made and he said if I ever make another hair piece to let him know. So that my be my first project with this hammer...
Then I went back to the cullman forge for heat treating. There I was informed the smaller peen I had made would be next to useless for forging. So I took the advice and went with a more rounded peen.
I hate I didn't get pictures of the hardening, but when I got home, I cleaned it back up a bit and it went into the toaster for tempering:


Then after temper:

Had I fully polished it back, I would have left the coloring. But alas... my favorite color is shiny:

From there it was just setting the handle!

I'm super proud of this hammer. I'm sure there were a bunch of things I could do better, but for my first one, I'm quite please with how it turned out. I'm looking forward to wearing it out!
HUGE thanks to the Cullman forge for putting on this hammer making deal. Since before I started blacksmithing, I always thought making a hammer would be awesome. I had a blast and am looking forward to making the tools I need to do everything at the house so I can make more!
-
sfeile - my walking the cup needs more practice
Micheal Cochran - I wouldn't mind helping as long as I can get mine finished up!
-
JHCC - yeah I kinda figured, but the way I look at it is I could use the practice haha
Motomike - it's the one I made. The scale was heavy with this one... Lol
-
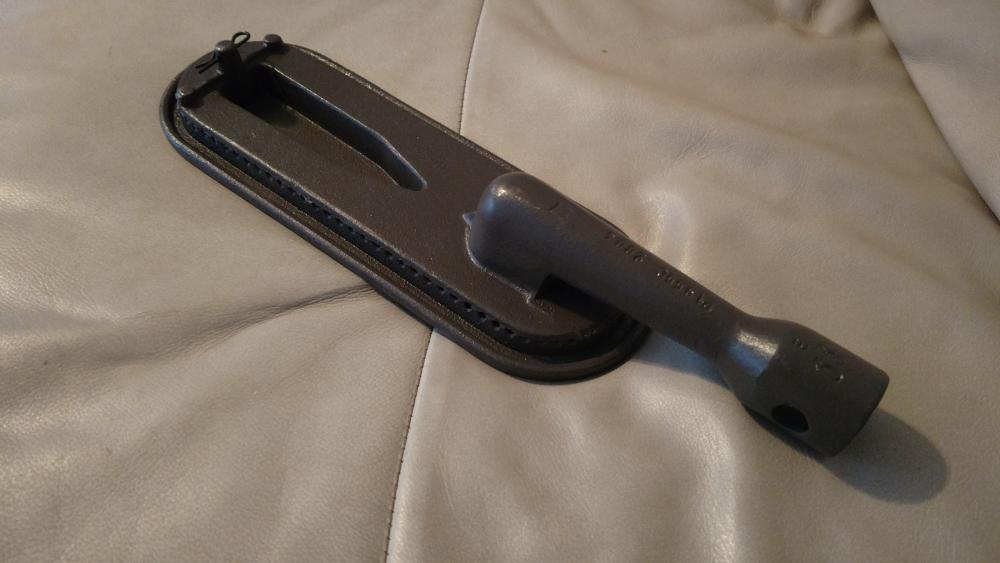
Got some new belts today and cleaned up the hammer head. I made it a crosspeen rounding hammer.

Wound up being just over two pounds:

I did the rounding on the belt grinder since I don't have a die. Then I hand sanded and polished from 150 up to 3000 grit and then some good old never dull:

Next is heat treat and handle!
So far, pretty proud of it for my first hammer.
-
Haven't posted in a while, been quite busy.
I'm still here and still learning!
I've been building forges for people I work with, spreading the joy of blacksmithing to all!


And the Completed kit!

Then I started on a few more...

Then my work sent me up to Lincoln Electric in Ohio for some weld training. Which was pretty neat. Did some 6010/11/13, 7014, 7018, and 7024 Stick, MIG/(Technically MAG) Welding, and some scratch start TIG.
Some slag peel with the idiot stick:

And kinda got the hang of 6010

And of course, some TIG practice:


My wife wanted to build a rocket stove, so we built one out of the post of our mailbox that got run over:

Then at the beginning of the month, I went up to Cullman Forge for some hammer making!

I worked on cleaning it up a bit today, but tore up the belt on my belt grinder and need to get another one:

Sadly my blacksmithing and forge building is taking a back seat right now. I'm on a race team at my work, and we are in the final push to get the car built before the end of March when we race in Austin, TX at Circuit of the Americas. Once we finish the car, I'll be able to play again.
We work at Honda and the team is run and funded out of the plant. Here is last years car:

The one with the numbers is our new car at it's shake down at Barber Motorsports Park to get a stock baseline:

Got it caged up and painted:

We got the engine and trans out to add some go fast goods:

Then had to do some machining for some control arm spacers

So that's what I've been up to. Got a lot to do with the car in a short amount of time before March 24th! But once the car is good to go, I can get back to doing some blacksmithing! I still need to finish my skinning knife!
-
May give it a whirl later in heat treating capacity.
-
Well messed around with the fleshing knife, but when I hammered in the bevel it put a heck of a curve in the blade and I'm having a rough time straightening it. So I moved on to practicing my forge welding. Nothing special, just folded over the metal on itself and got it hot, flux, hot, hammer repeat until it was one piece. Pretty neat. No picture because it's not much to see, but it worked!
Also my mail box was run over while we were out of town and our neighbor was kind enough to fix it while I was gone. So I made them a leaf key chain.

-
Frosty - sorry if something like this has been asked, but I was gifted a cast iron grill burner. What are the odds of using it like a ribbon burner? Or am I way off base?
-
It's alsey pilot 3000. I talked with a ceramics engineer and he got me my materials and a few pointers. I agree with you on the size. The one inch burger is probably too much for this size of forge. The burner was super stable but I didn't run it that long. I made this forge with that burner for a friend and he hasn't had the time to use it yet.
I appreciate your help!
I have a few more of these forges to build for a few people to get them going down this crazy road. Once those are done, I'm going to try the NARB with this venturi setup.
-
Frosty Thanks for the input! I plan on trying the narb you made at some point! Here is the picture of the dragons breath when I was curing the refractory.

-
Frosty thanks man! I forge outside for just that reason! Thanks for the advice on the flame, what about this one?

Thanks!
-
At least it's fun!
-
Haha! It really is! I'll get there
")
-
Did you mean attach? Wayne used rivets. He cut them a bit shorter then hammered them flush on the inside of the pan. I never riveted anything so I just TIG welded it then sanded smooth so it just looks fused instead of a weld bead.
-
So now that the gifts have been gifted here are a few of the gifts I made for friends and family:
Key chain for sisters friend:

Leaf necklace for my sister:

And last but not least, a skillet I made for my Mom. Inspired by a demonstration put on by Wayne at the Cullman Christmas party!

-
Those look cool! I need to try some feathers!
How is your ribbon burner forge build going? I think after I get my forges built for my friends, my next adventure into forge making will be something similar.
-
@Michael Cochran I could go for 4ft maybe. I don't know... @Jasent how long should it be?
I did a little more work on the knife trying to get the bevels in.

I probably could have made it half as long...
Oh well, live and learn.
-
Michael Cochran - How long is the 6x6? Just so I know if I need to bring a truck or not haha I'd be more than happy to take it off your hands! I plan to be at the Cullman meeting and should have two friends coming as well. I won't be able to make the Tanehill one because I may have a track day that weekend. I hope to make some leather!
Jasent - Do you have a picture of your knife? I may try to radius the 6x6 I get from Michael and then I can match the blade to it later. It's got a curve now, just from shaping the bevel. I plan to straighten it out once I get the the bevels roughed out. We have the hides salting right now and I scraped them pretty well with just a knife. I guess next step is the tanning process? haha Like I said, I'm learning as I go, trying to watch videos, but mostly trial and error... much like my blacksmithing haha.
-
Jasent - I don't have a beam. I do have a plank. What would you recommend? I don't know what I'm doing so I'll take any help!
-
Hey Everyone,
Just thought I would create a post here to track my scrap pile collection and miss-hits. It's a fun learning process for sure. I'm stealing this first part from my intro post:
My first experience with blacksmithing was the first weekend in November, I went up the Cullman chapter of the Alabama forge council and they let me hit on some hot metal and gave me a really good introduction to blacksmithing.

He taught me how to make S hooks!

From there I went home and built a cheap propane forge (Not perfect and I have since read a lot and am going to be making a V2 soon)


I wasn't sure if I had enough air going in so I upgraded the inlet:

The flame on the left of this next picture is with that cross and the one on the right is with the valve:

For you burner experts, which one looks better? (I know nothing)
Then I went to to the Tannehill chapter of the the AFC for their Christmas party and was gifted a piece of rail road to use until I can get an anvil. No worries, it will be used properly (vertically). Just need to get around to setting it up. Using a vice till then.
From there I made a mistake with a shape:

Then I wanted to build a small coal/charcoal forge out of a brake rotor... so I did:


Used a $14 dollar fan from home depot as a blower and it seemed to work pretty well.
I had modified a chisel to make a little fuller and decided to use this forge to take another crack at making a leaf.

Then the wife asked me if I could try to make a knife. I don't care about making knives yet, but figured I'd give it a shot. Here it is in all it's poorly ground glory. I wasn't going for anything in particular, just a KSO (Knife Shaped Object).

From there I made another leaf for the Cullman chapter Christmas party:

First one failed twice. When I tried to twist it, I twist it in two. Then when I tried to draw out what was left, the leaf fell off. So I have a nail, a messed up looking bolt extractor, and a tiny piece of elvish armor for a chipmunk.

My wife liked it so I made her another one:


Not pictured is another leaf key chain I made for one of my racing buddies.
My misadventure into this whole blacksmithing deal has encouraged about 7 other people to make this same poor life decision I have. They liked my forge setup, so I have set to making them forges of their own. Starting with the burner, I modeled after the Gameco burner:

Video of it running:
https://www.facebook.com/josh.foran.92/videos/10101214131637788/
And here is the building process of PROTOFORGE!!!! AKA The Widget Maker. I used 2 layers of 1" inswool coated with 3,000 degree refractory cement.

Hoping to improve upon the short comings of my first all hard cheap fire brick forge:

The forge running to fire the refractory:
The completed forge:


From there I set to making Christmas gifts. I can't post all of them yet, since I use Facespace as my image host and they will see them. But my wife and I exchanged gifts early so I can show you hers:

My lovely wife loved it. She has also slain two deer this season and we are tanning the hides for the first time and I decided we need a fleshing knife. I started on it today and have no idea what I'm doing... which makes it fun! Hoping to have the forging done before Christmas and maybe grinding if I'm lucky.

And that gets me to here! Hope you guys like it. I'm always open to suggestions for improvements. I'm learning and having fun.
I'll post the skillet I made for my Mom, the Key Chain for my sisters friend, and the leaf necklace for my sister as soon as I give them their gifts. I may try a bottle opener next.
-Josh
-
Welcome! I have family in Cookeville and have been to Red Boiling Springs a few times. Pretty area. There are a few blacksmithing groups in Tennessee. I don't know names off hand, but may could find out.
-
@Laughing Bodger Thanks man! Can't wait to see what you make!

Josh's misguided musings in metal manipulation (Photo Heavy)
in Member Projects
Posted
Practiced a bit yesterday making a few kiradashis from a coil spring. Goal was three. I learned a lot. Really good hammer practice as well as understanding how the metal wants to move. I also learned that blisters hurt way more after they pop haha. It got to a point where I was struggling to do a taper so I called it quits.
So here are the three in different stages. The top one is straightened and cut from the spring with what I'm calling a "flat taper". Probably wrong terminology, but instead of angling the stock at 45° while forming the taper on the "far side" of the railroad track, I'm leaving it flat and only hammering the taper on two sides. This gives me two straight sides and two sloped.
From there, the second one has the cutting edge formed from the tapered side, then I flattened the rest of the stock and shaped it. I also hammered in the bevel.
The third I tried to have a hammered look to it but after putting in the marks on one side, when I flipped it to do the other side, the marks I put in went away when I hit on the other side. I think it's just too thin? So that didn't look as good as I wanted. I ground the bevel and did some edge dressing on the grinder. Next was hardening, then clean up and final edge and sharpening. Will temper when all three are done.
It's a fun project and will make good Father's day gifts!
Thanks for checking in!
-Josh