JoeThePro
Members
-
Joined
-
Last visited
-
I made one where I followed the directions exactly; it didn't work well because I tapped the fuel fitting at a 5-10 degree angle from shooting straight down the pipe. This is a good design because it spells it all out, just like a baking recipe. If you are going to tweak things (especially many things!), you aren't going to get the same result.
-
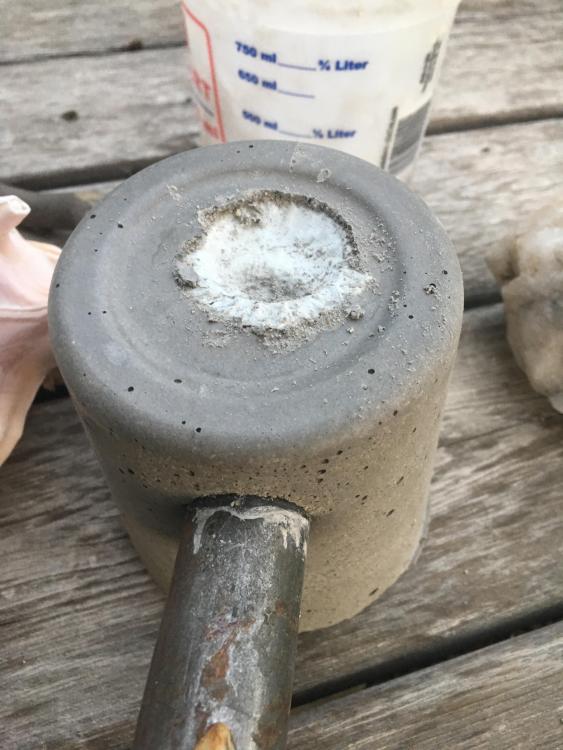
Looking good. I gave mine a rub on some concrete to smooth off the top and take the loose spheres off, but I don’t think it’s critical. Happy thanksgiving! Before: After:
-
Looks good. Did you do anything to attach the castable to the elbow? I was considering a hose clamp around the elbow and some wire in the cast.
-
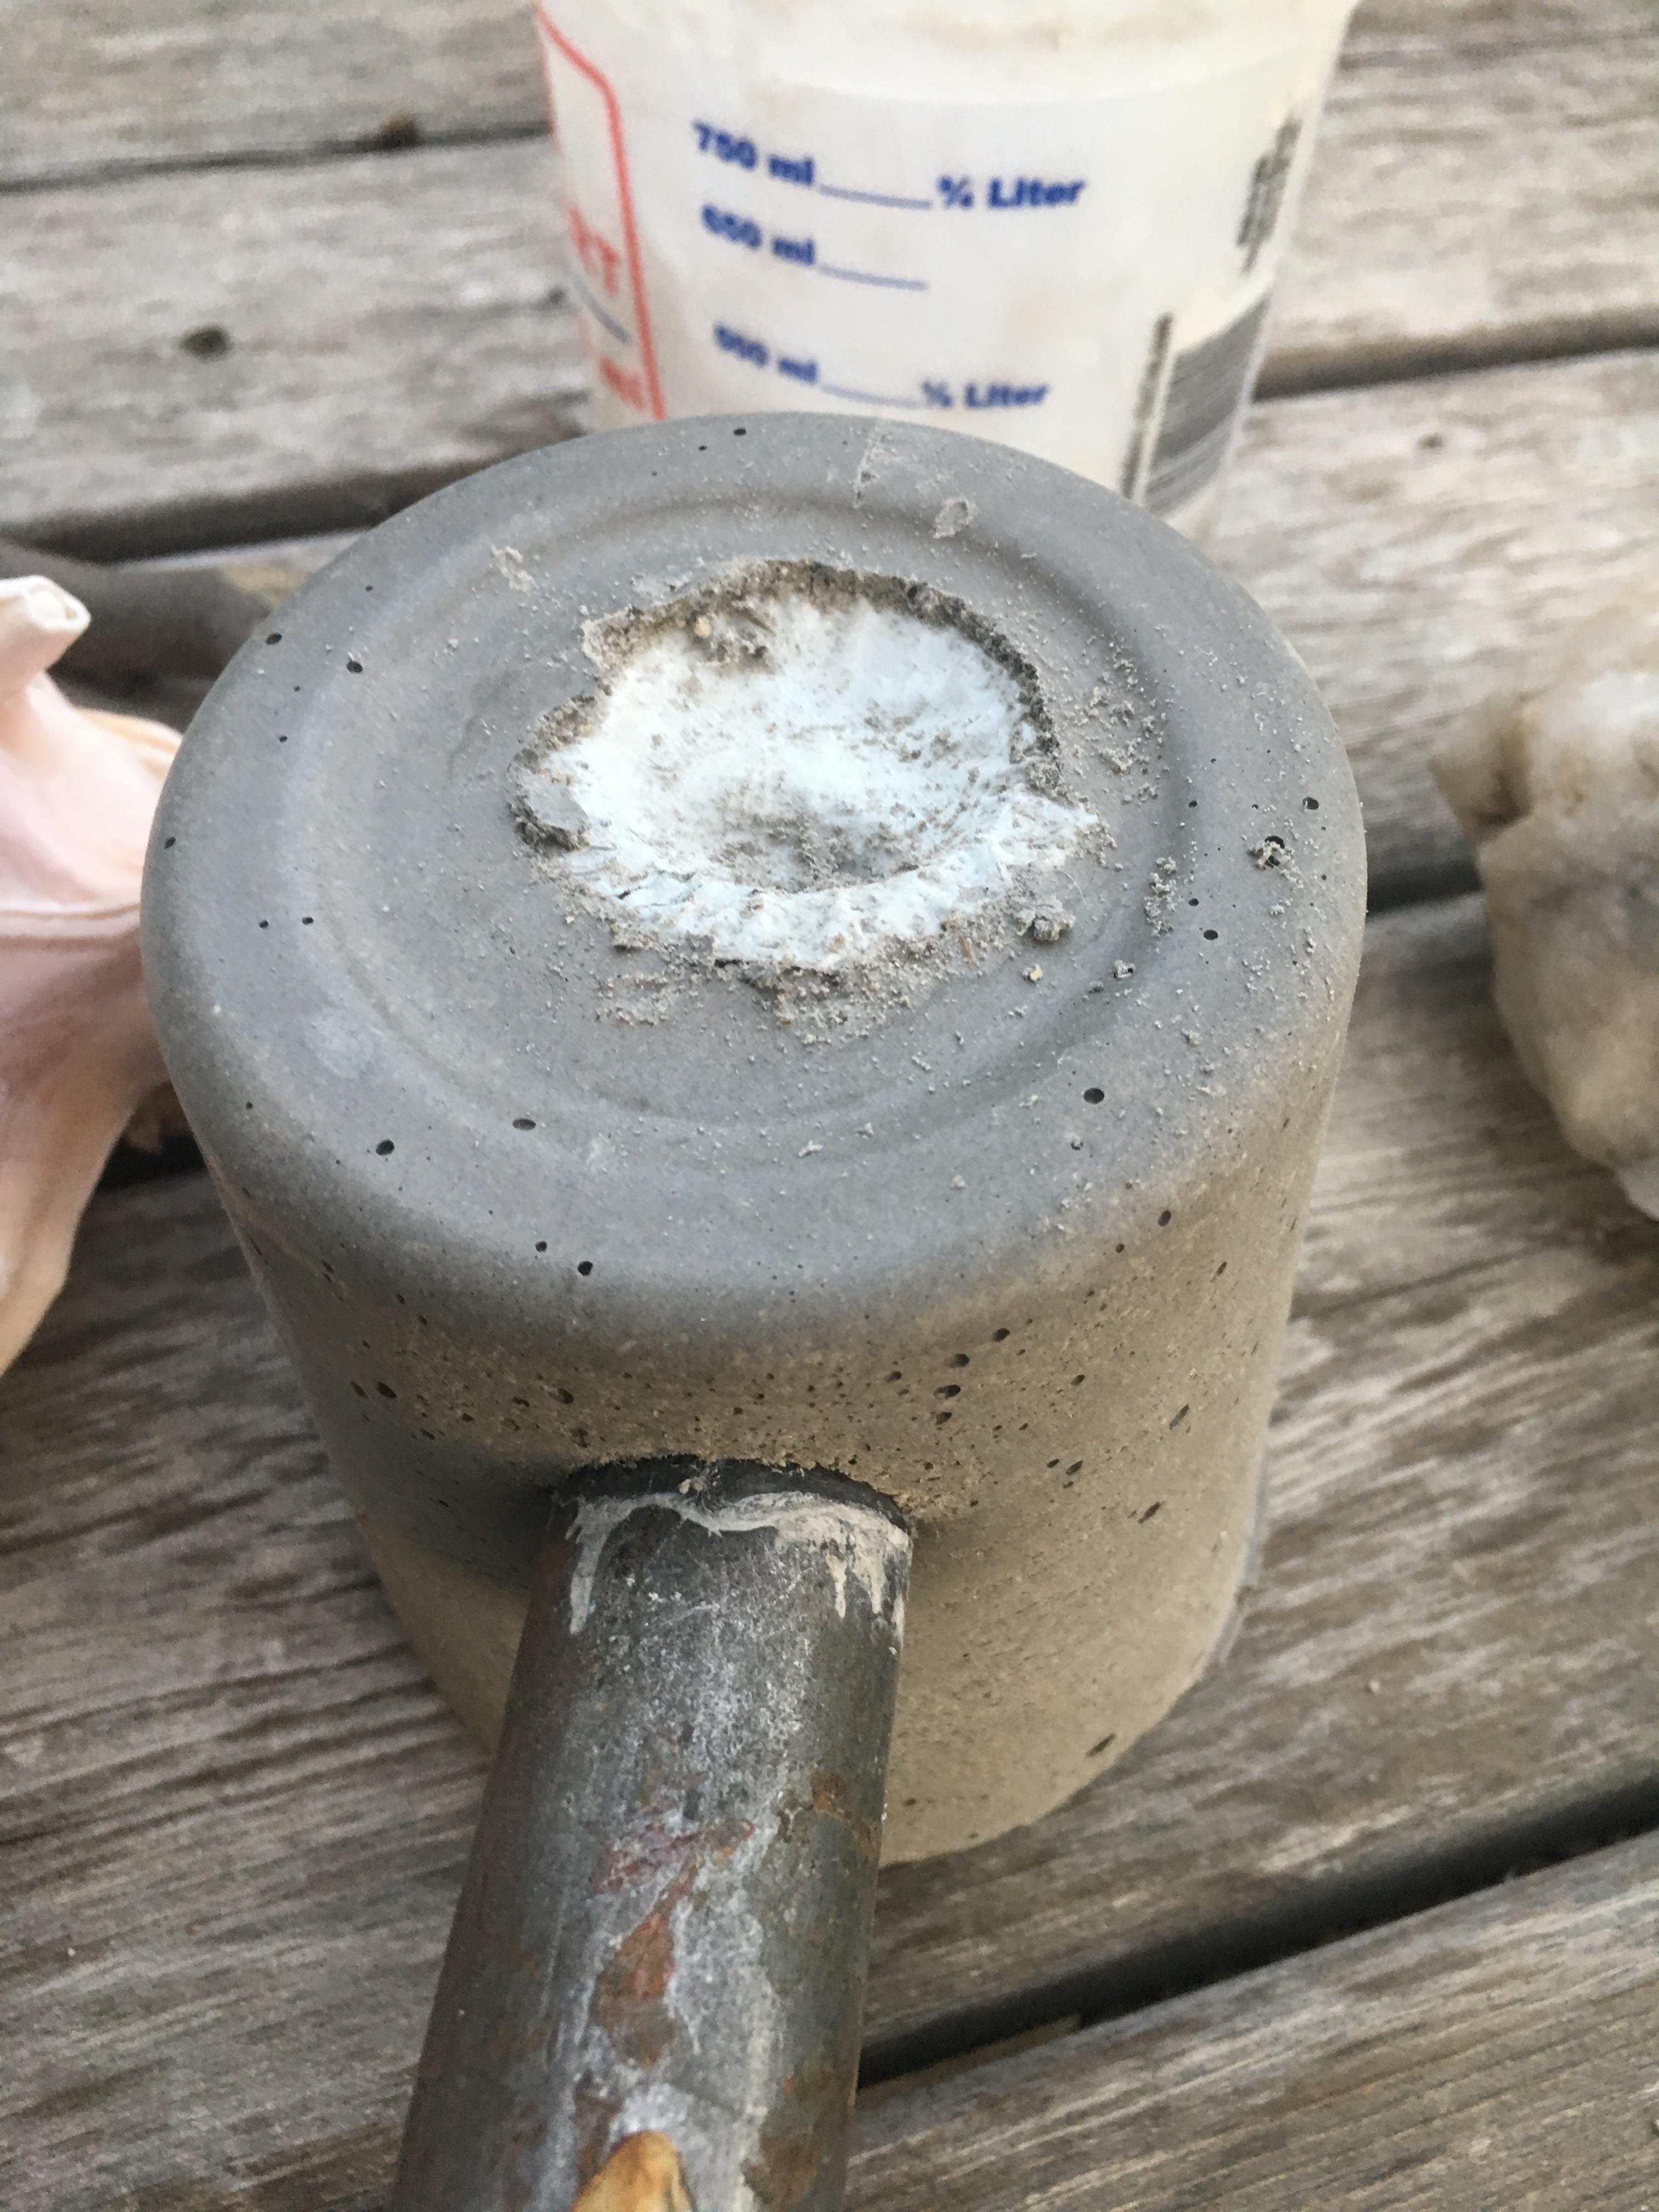
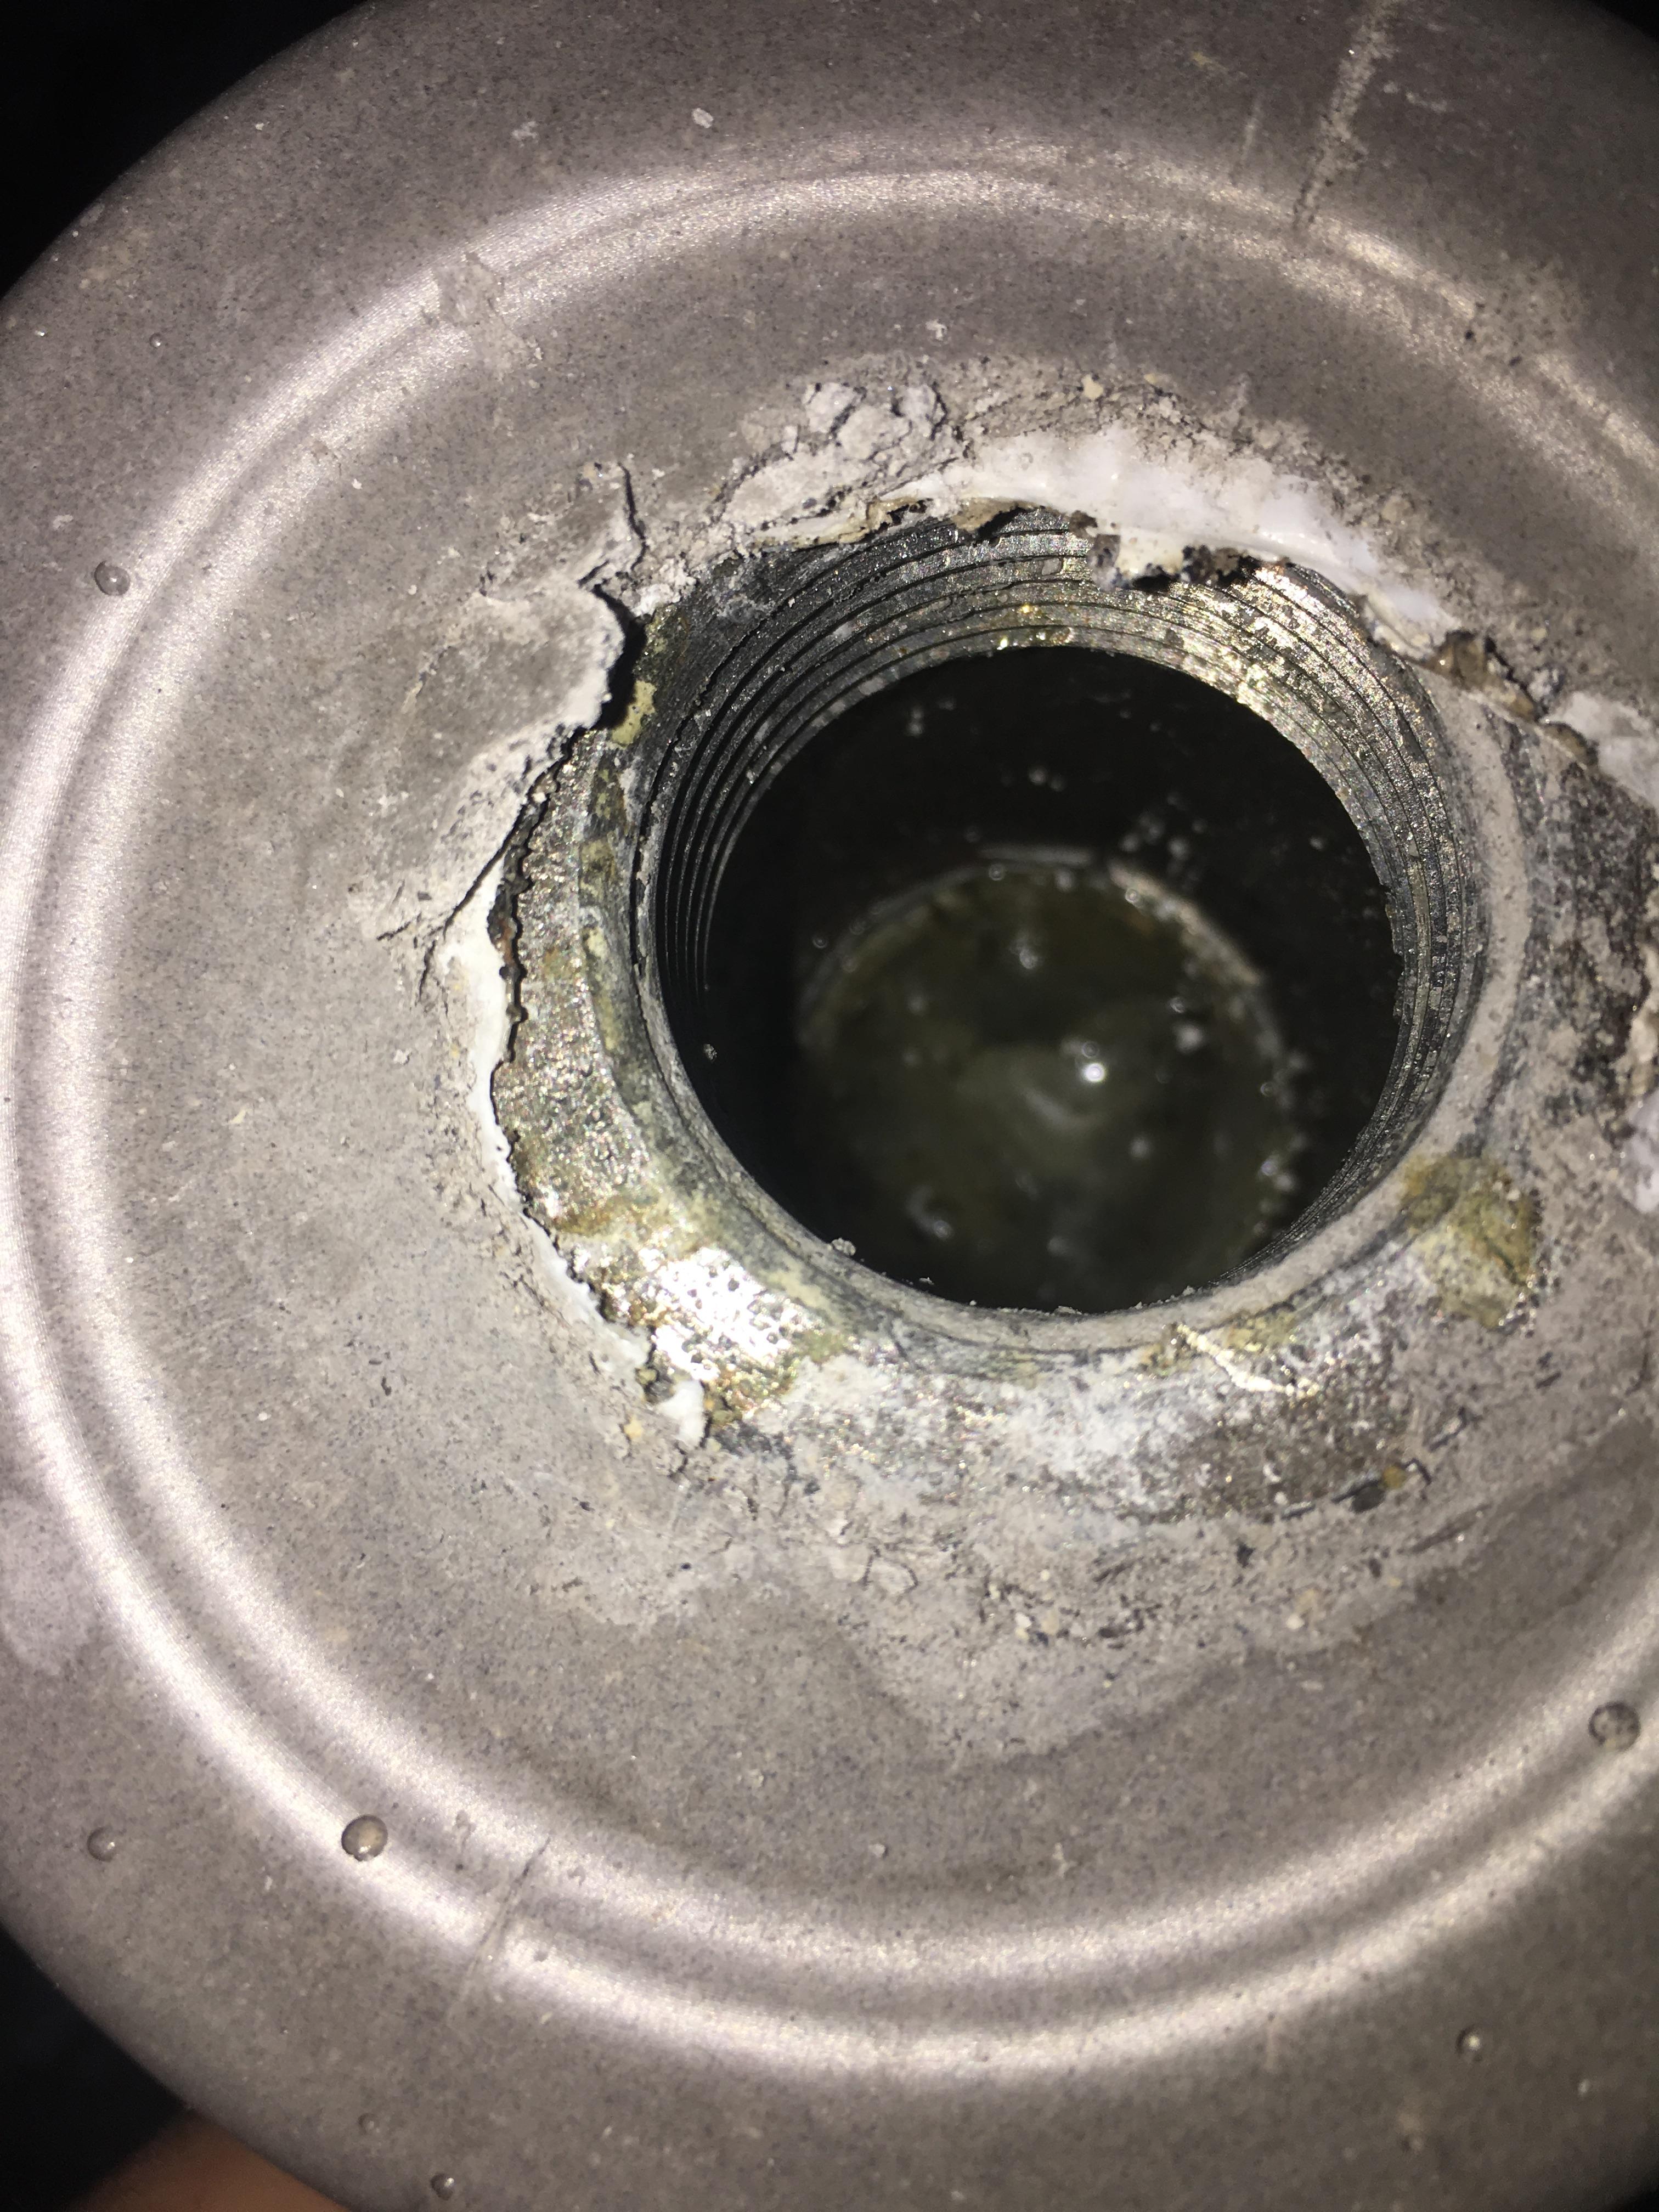
I actually did a 1 1/4” elbow, and an adapter to 3/4” in one side. I prefer this, the tee makes it weaker. Edit: I put the whole elbow inside as it makes the casting easier, and is quite strong it seems. Edit 2: it was a 1 1/4" elbow used. I cast it inside so that I didn't have to worry about it separating into 2 pieces.
-
Actually yes, finally had a chance to today. The mold is pretty big and took a lot of kastolite. The new glue stick pulled out great for the most part. I tried to fire it but the forge floor was still cooking moisture out. The low flame is 1-2 psi, and the high flame is 25 psi or so.


-
I've had needle valves and regulators act like that before. Also be sure you aren't triggering the safety in the tank by cracking open the pressure too fast on start up.
-
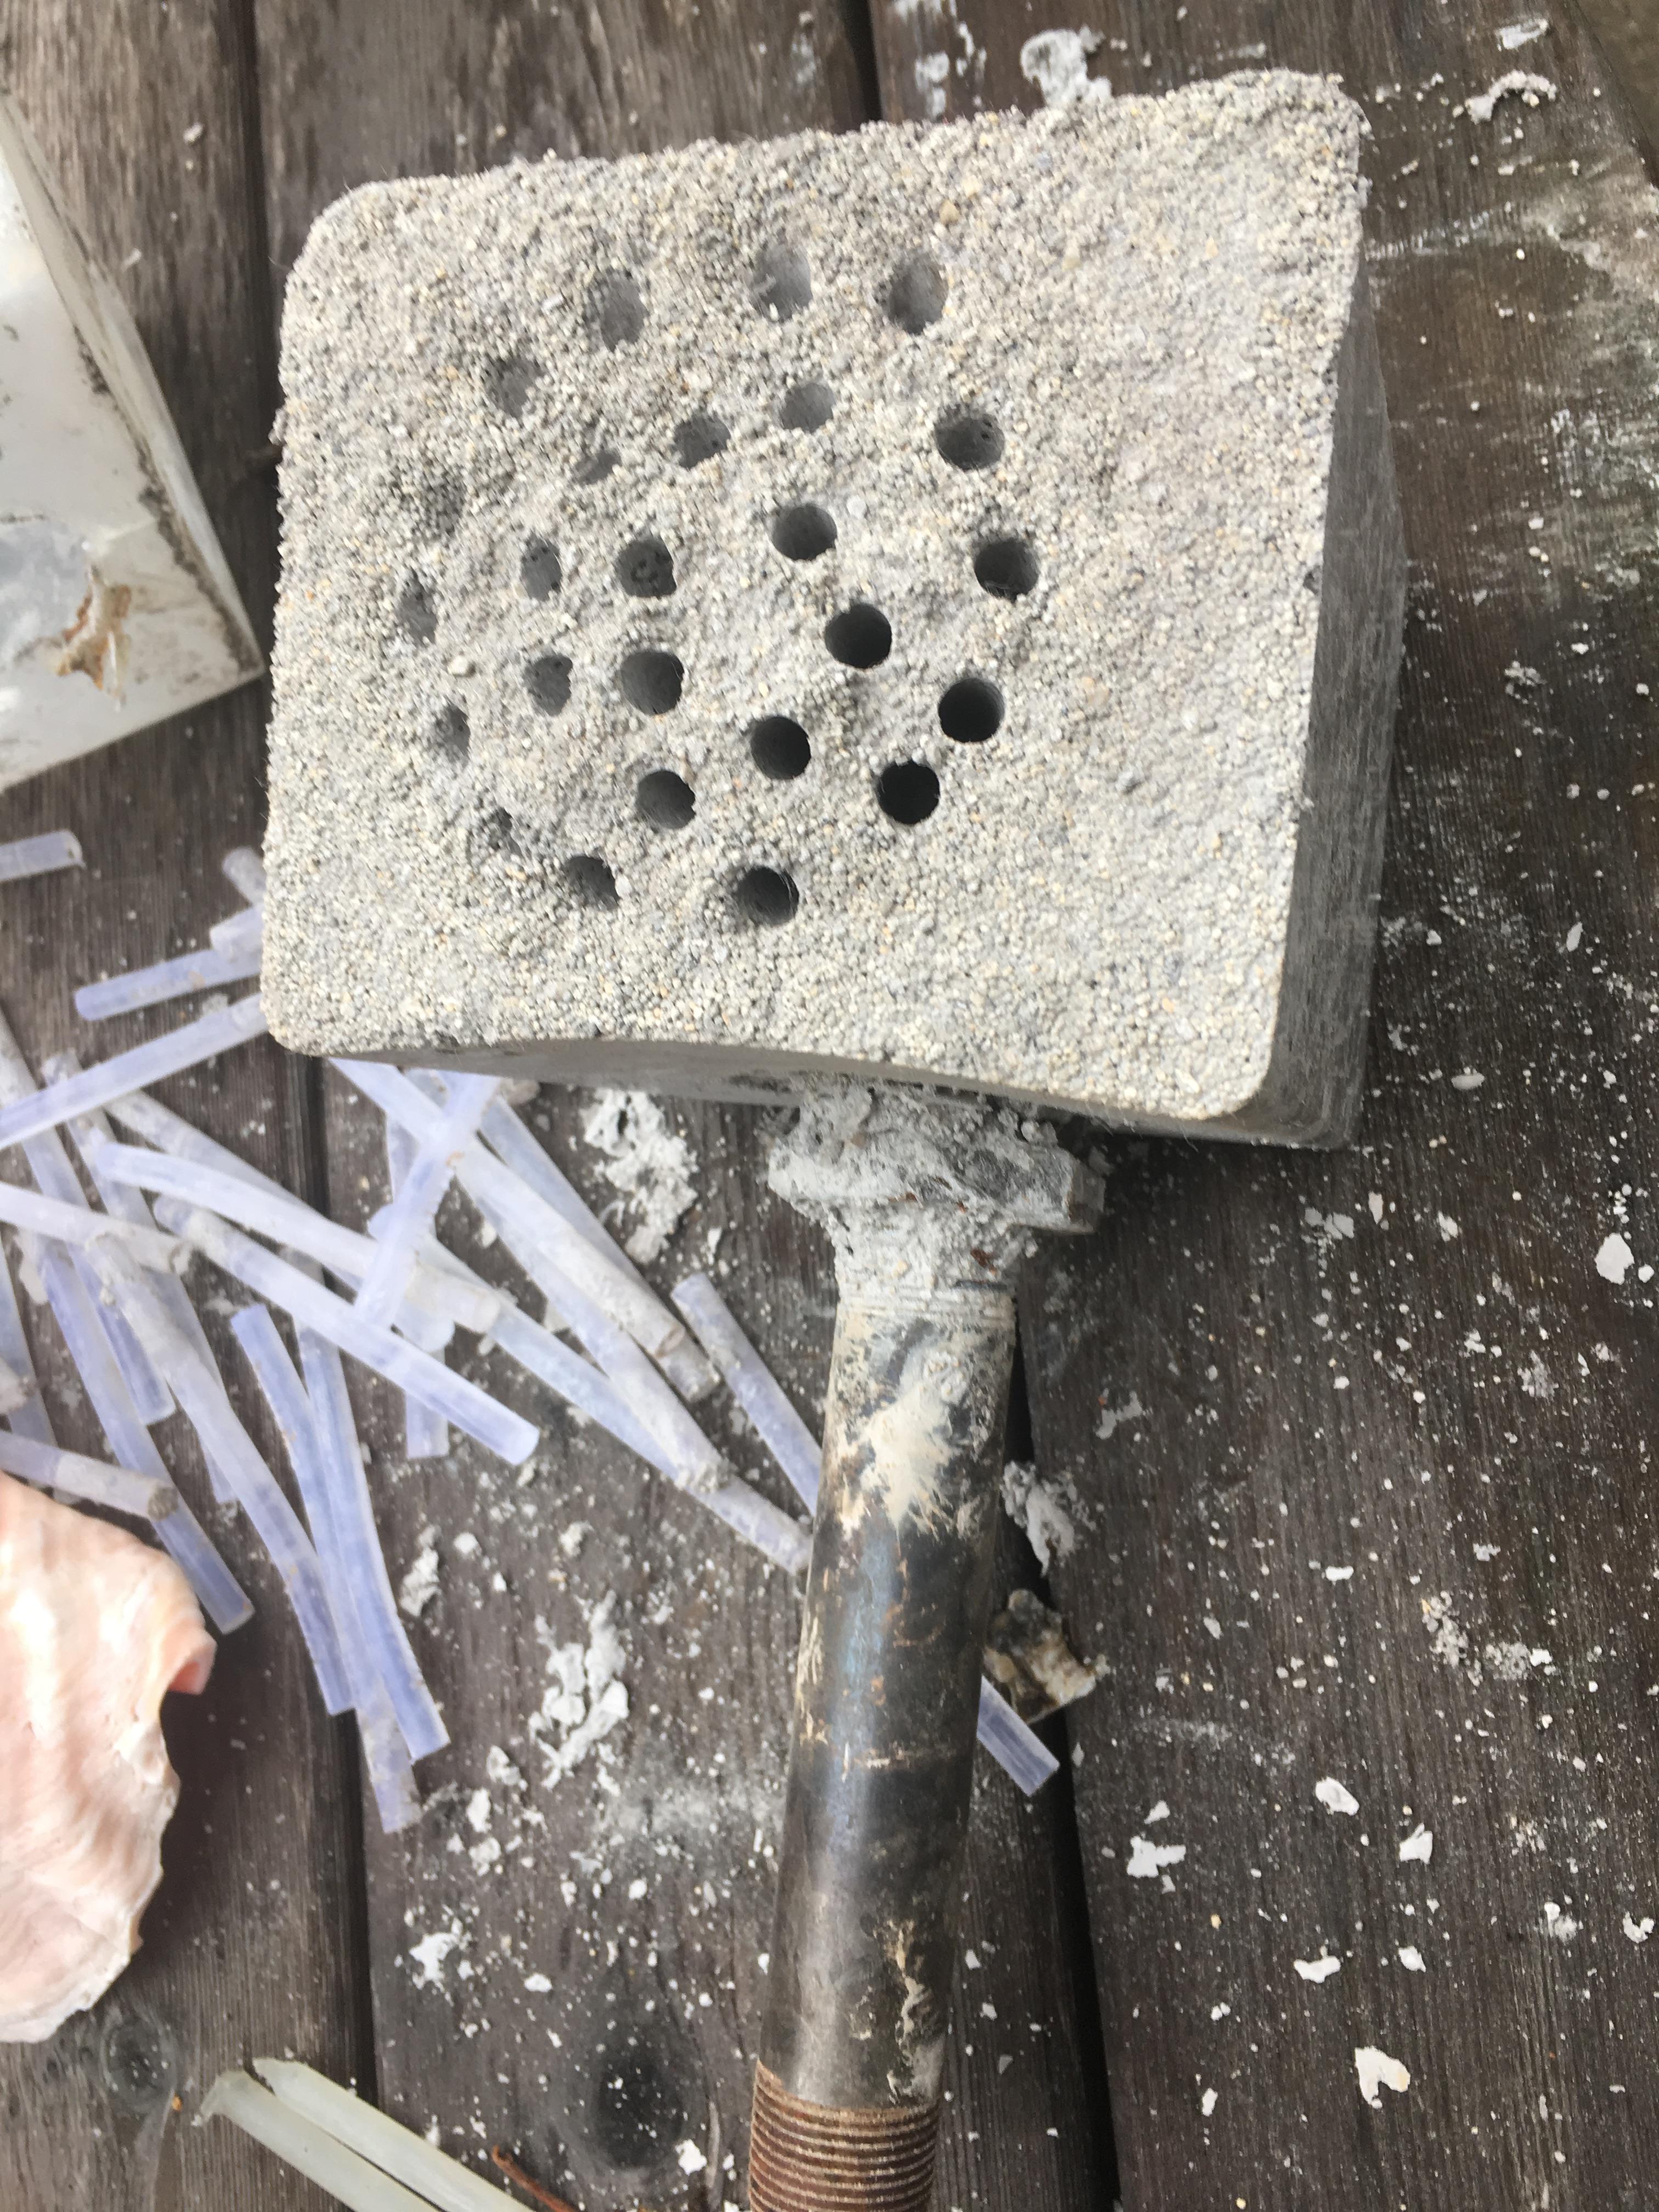
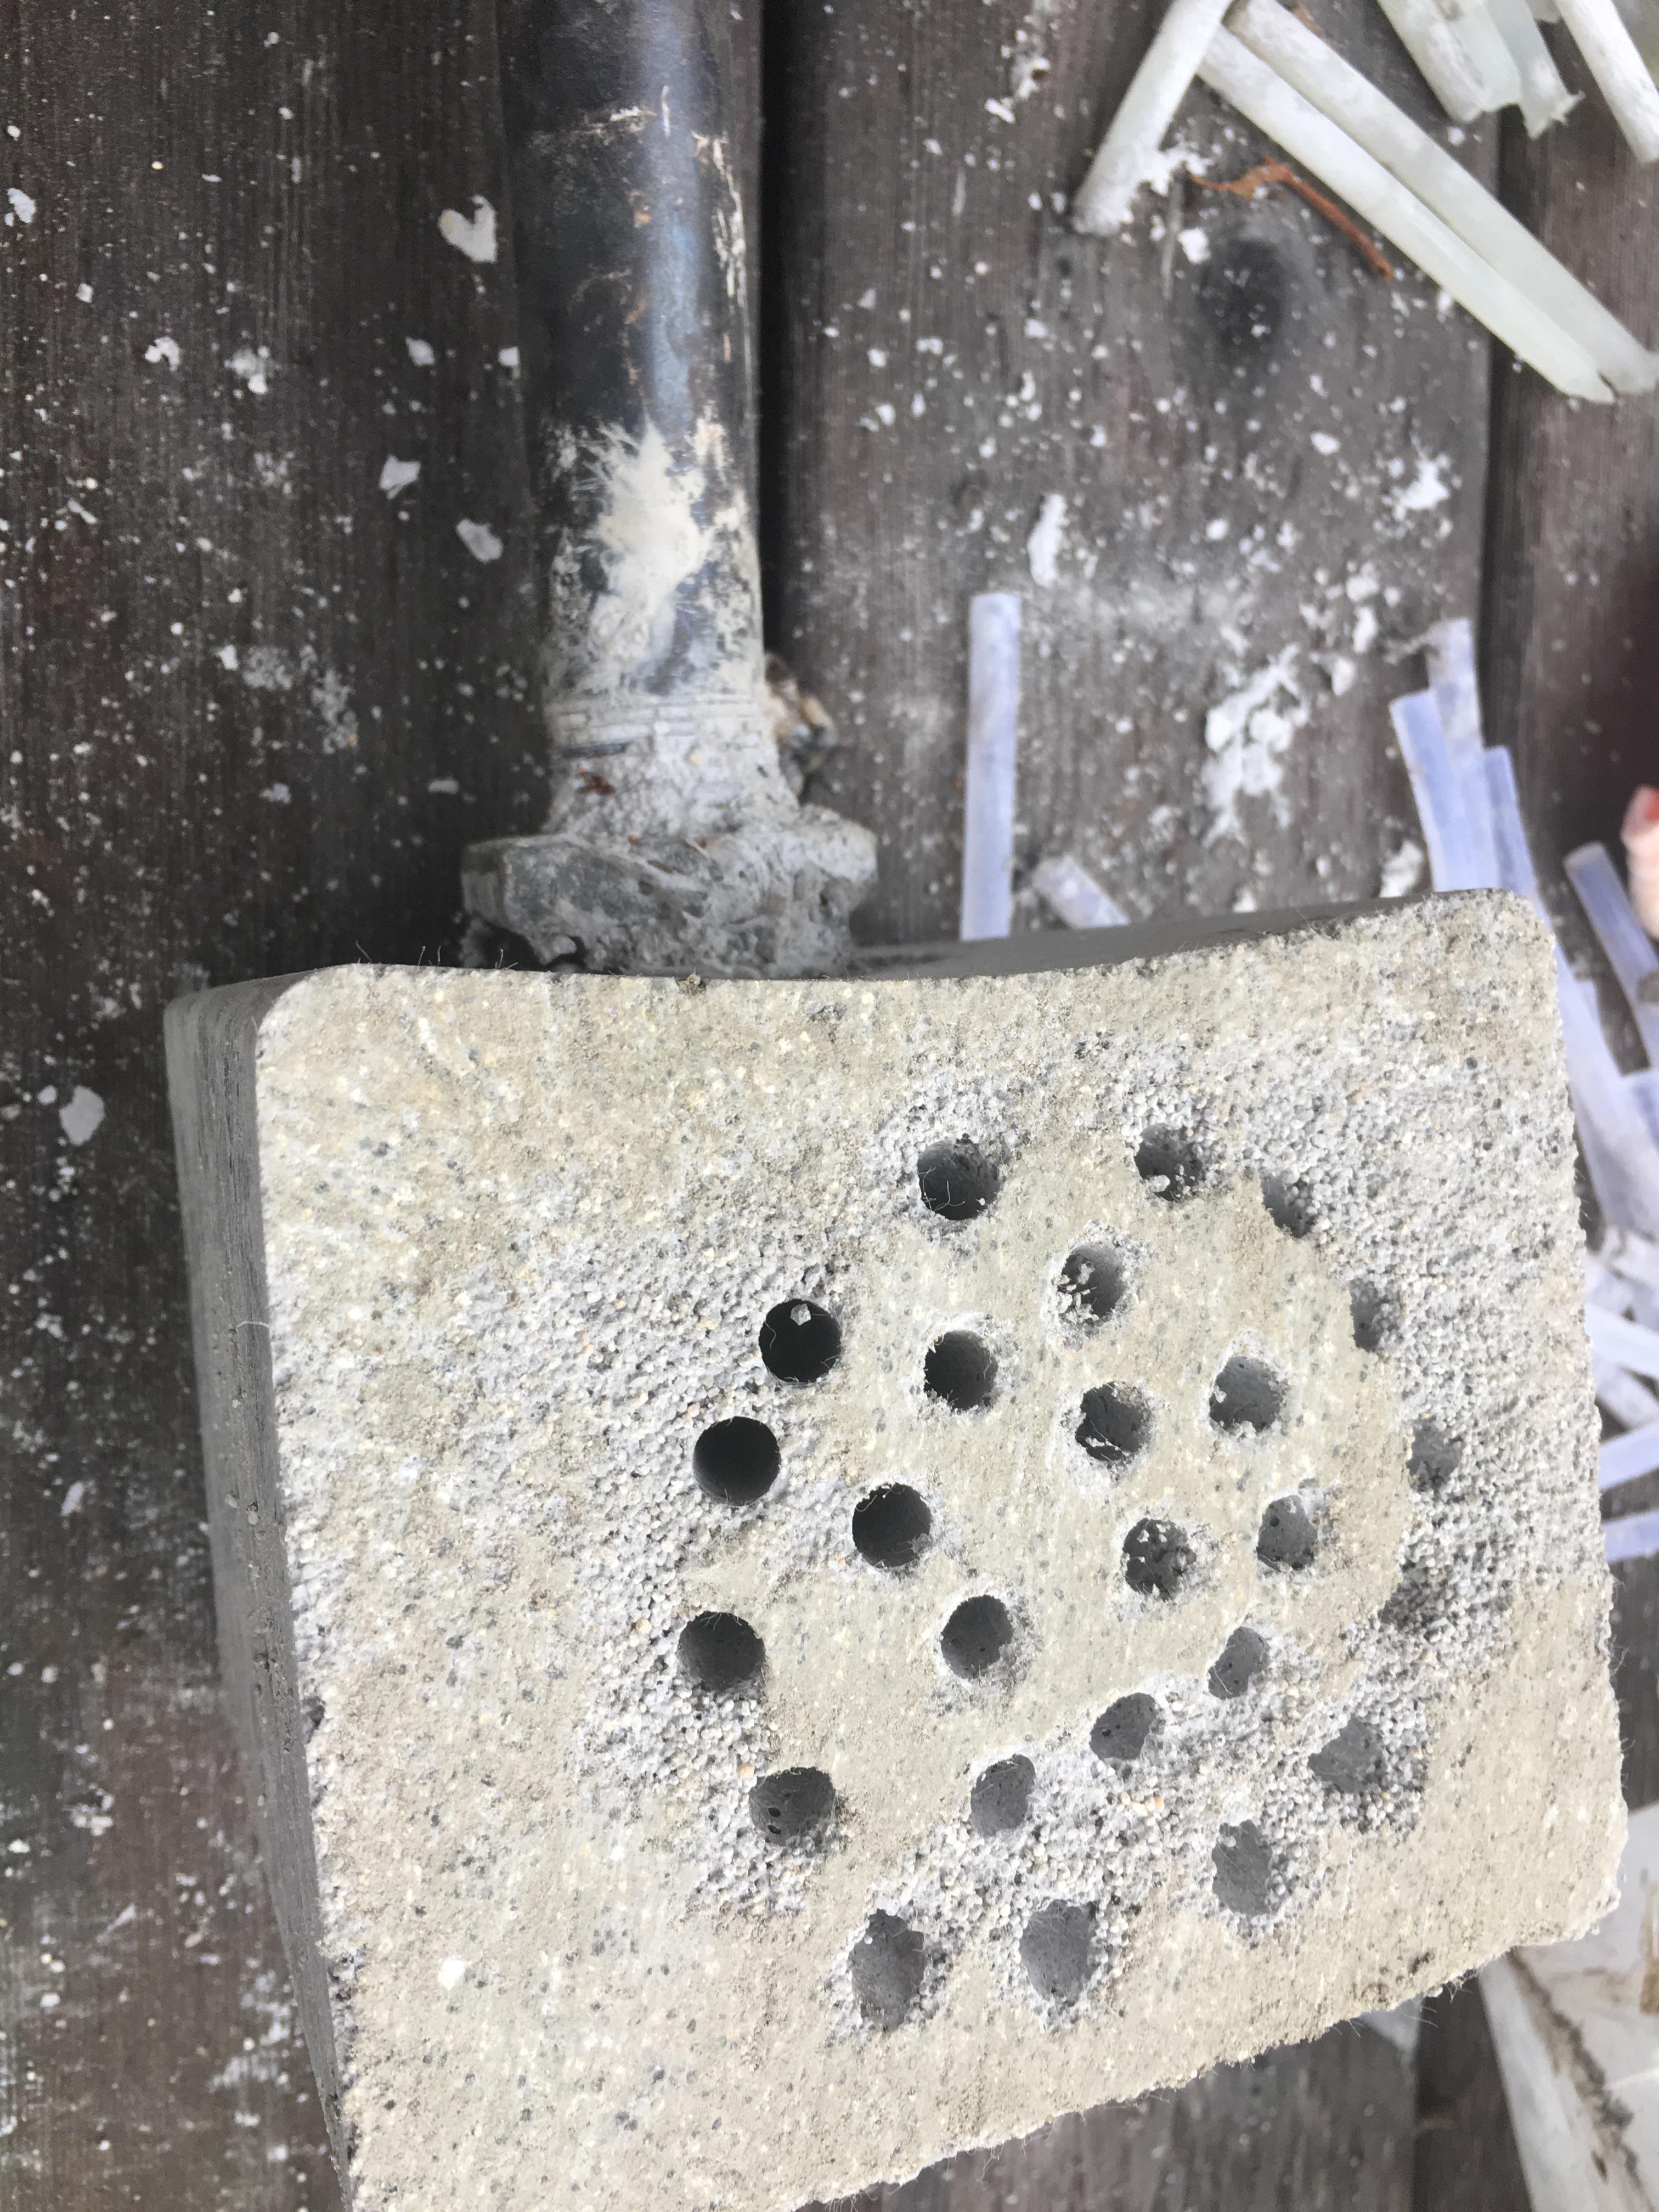
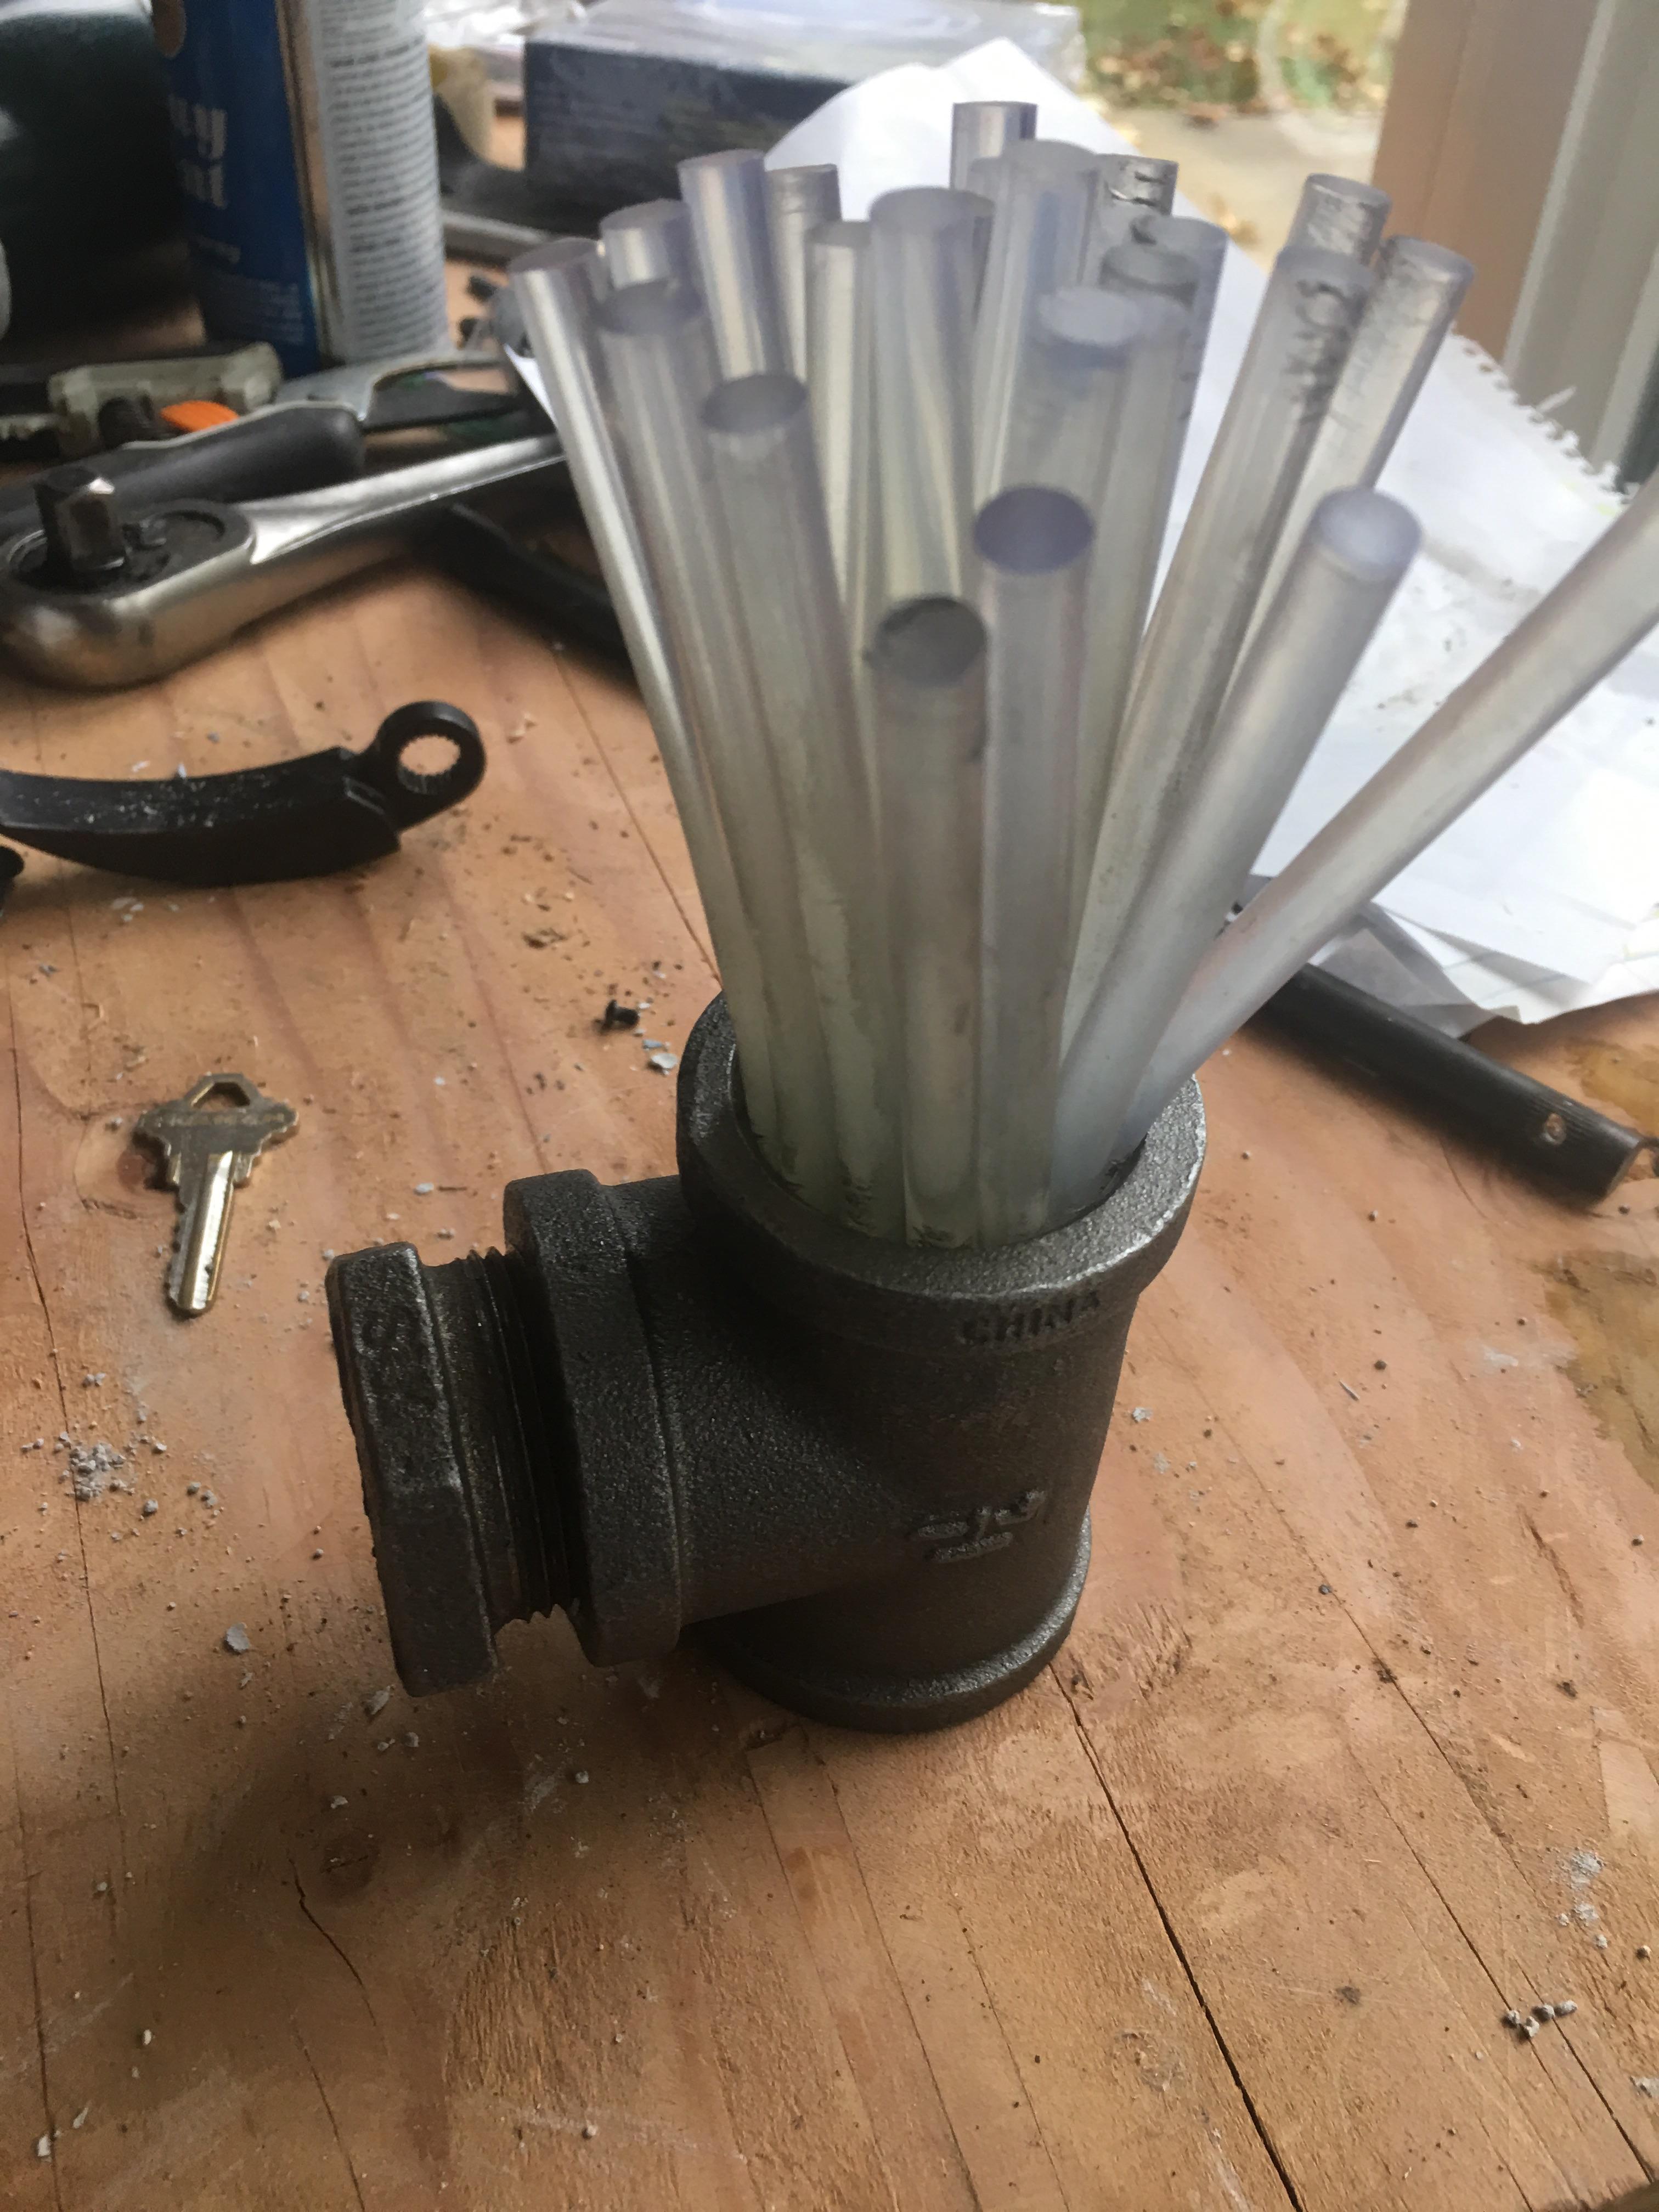
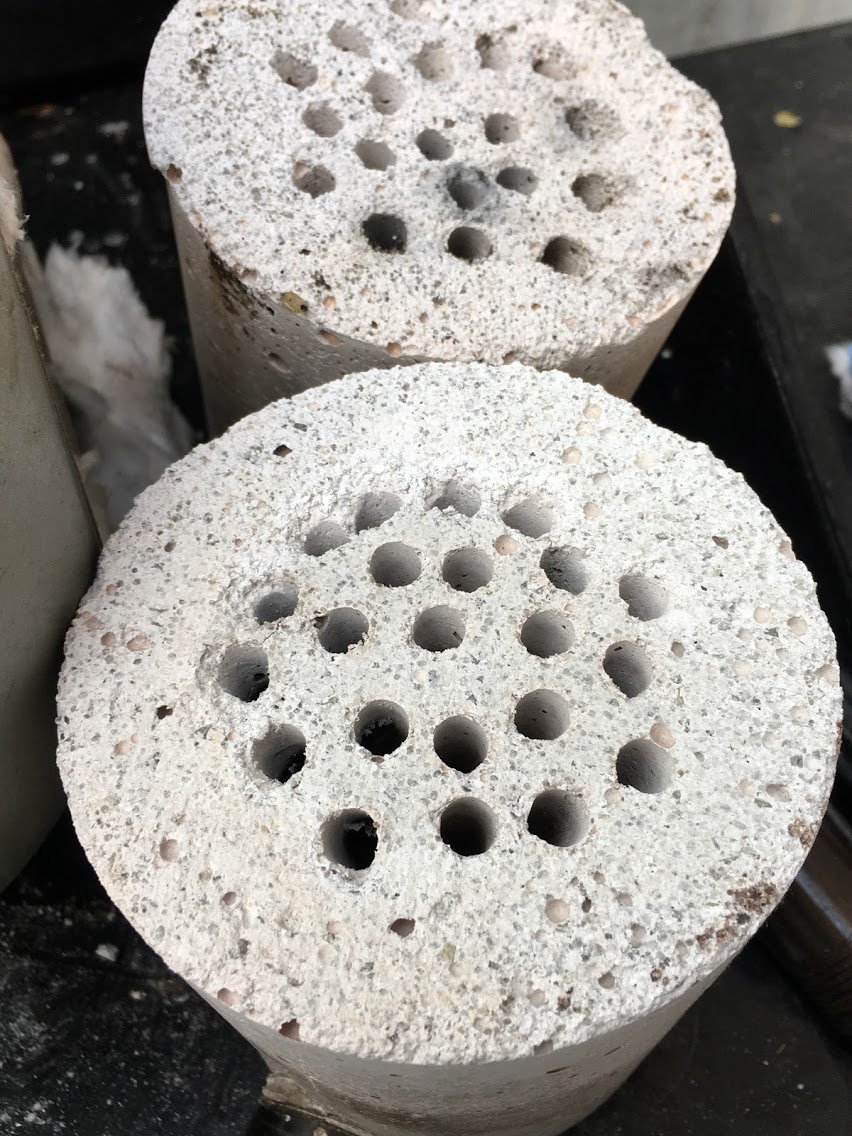
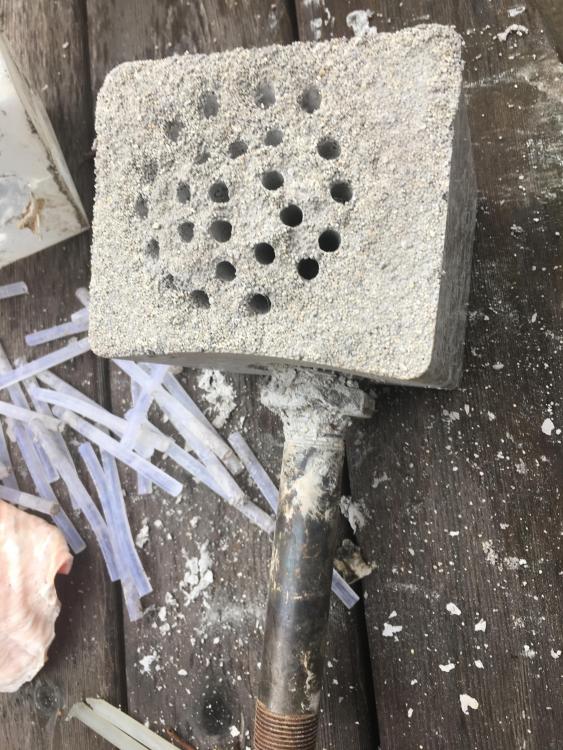
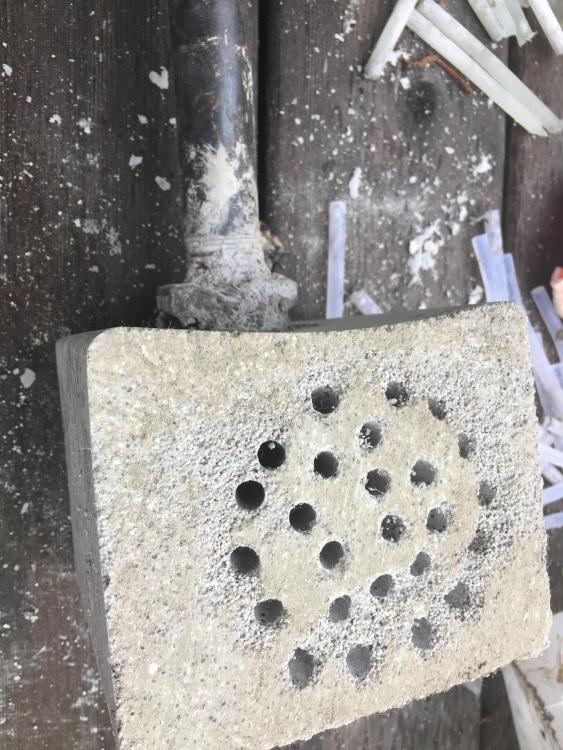
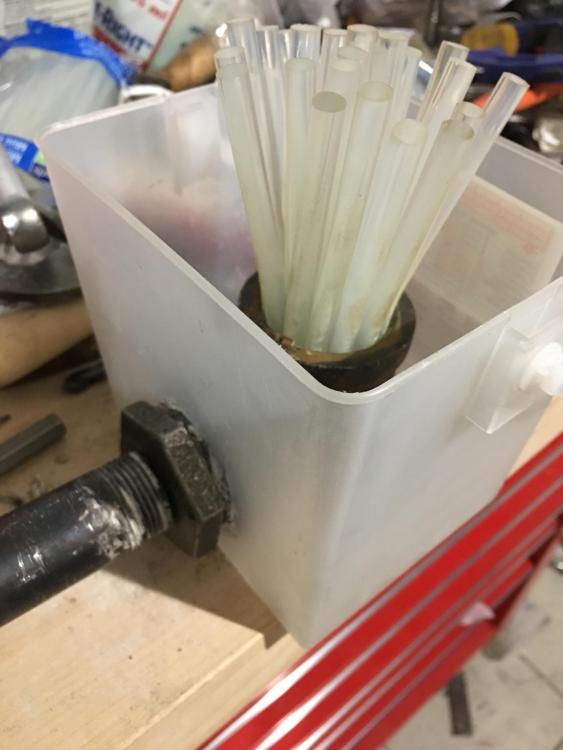
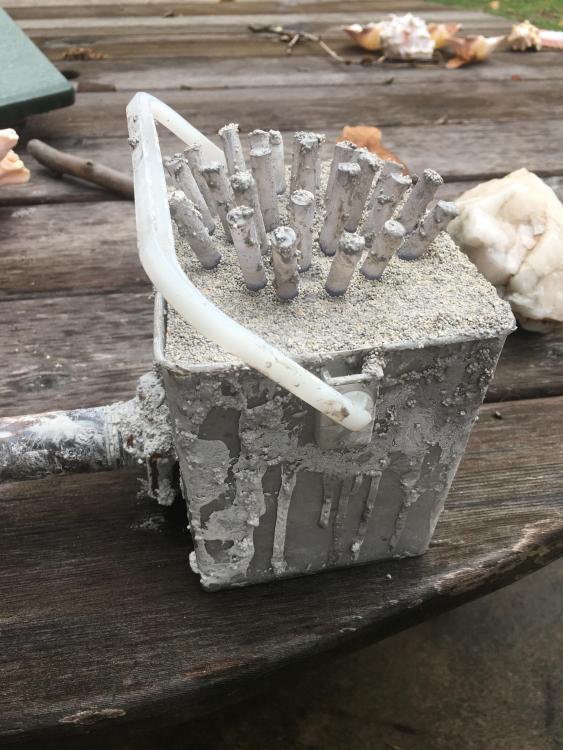
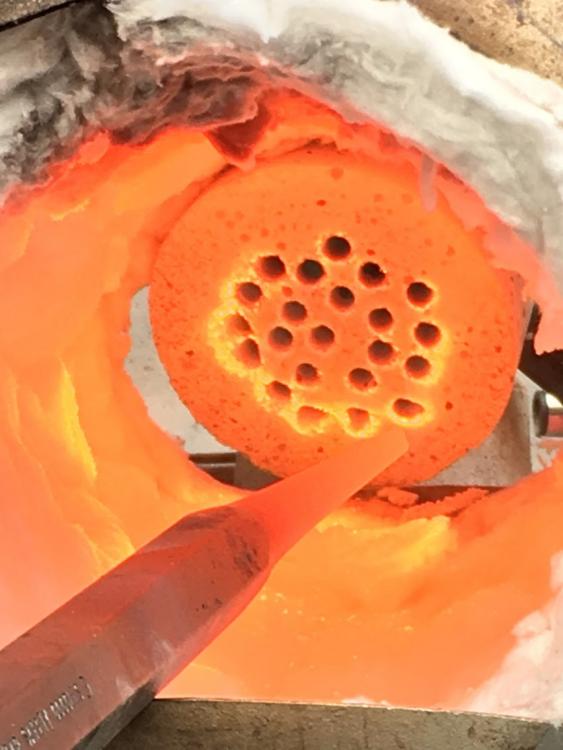
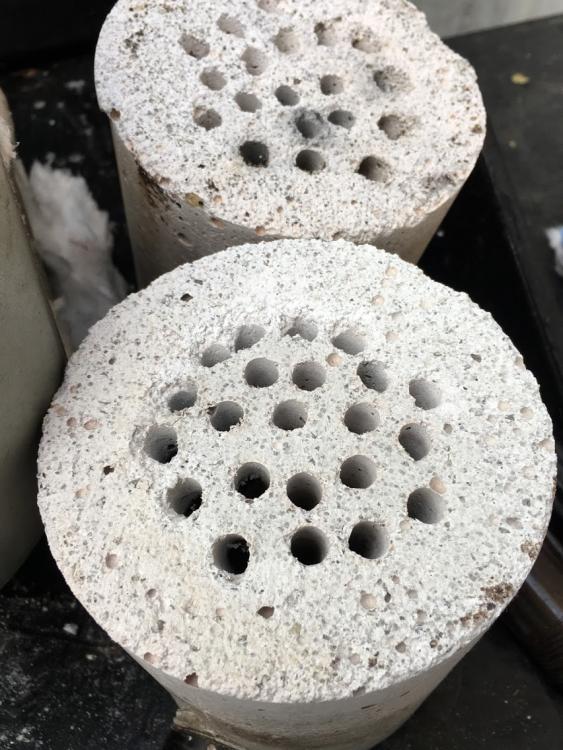
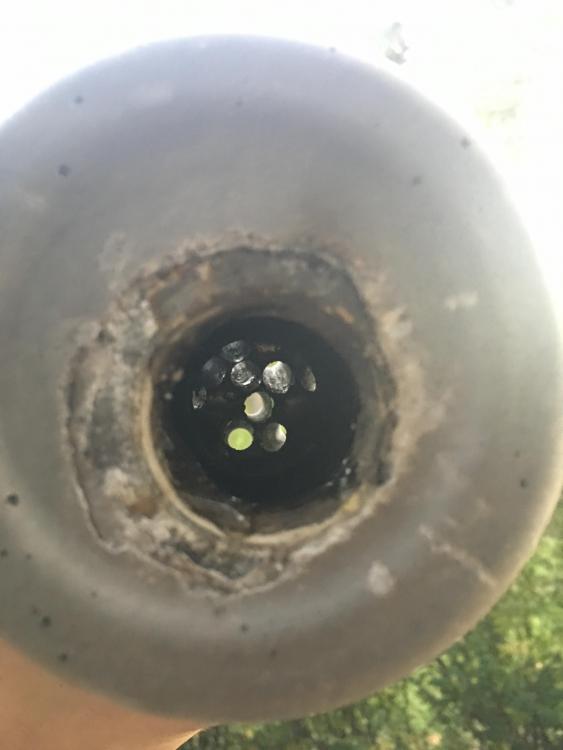
Here’s 25. I had to pack in 23, then push 24 & 25 in with a nail set / punch. I like this configuration as they aren’t spilling over the edge, and I didn’t have to melt the sticks at all. These are new sticks too, all the other ones I had were old ones that I had inherited from my mother in law so they seemed stickier and may have been harder to pull out. No melting should mean that there’s nothing to burn out too. Another thought I had when making this - I could wrap some reenforcement around the outside of the tee and clamp with a hose clamp for added structure, although these things seem tough. I actually dropped one from about 4’, with the frosty t burner attached and it survived.

-
The one that was fired up in the pictures was 22. My next cast will use a 1 1/4" tee, and a 1 1/4" to 3/4" reducer. That will give me a lot more room to add in nozzlets, so I'll max it out and plug them up to find the magic number. I think the glue stick is a good idea, as we can get it to flex, allowing for the nozzle to "bloom" out like a flower. We will be able to build this in 10-15 minutes of work time too, so very low skill and low tool needs. I would have been fine if I tried to melt out with a little bit of charcoal as you did; I just didn't have any, or an appropriate fire pot. For mixing the Kastolite, I just use hands covered in disposable gloves and a larger mixing cup. No tools to clean! OH, I forgot to mention: these have zero roar. They are extremely quite.
-
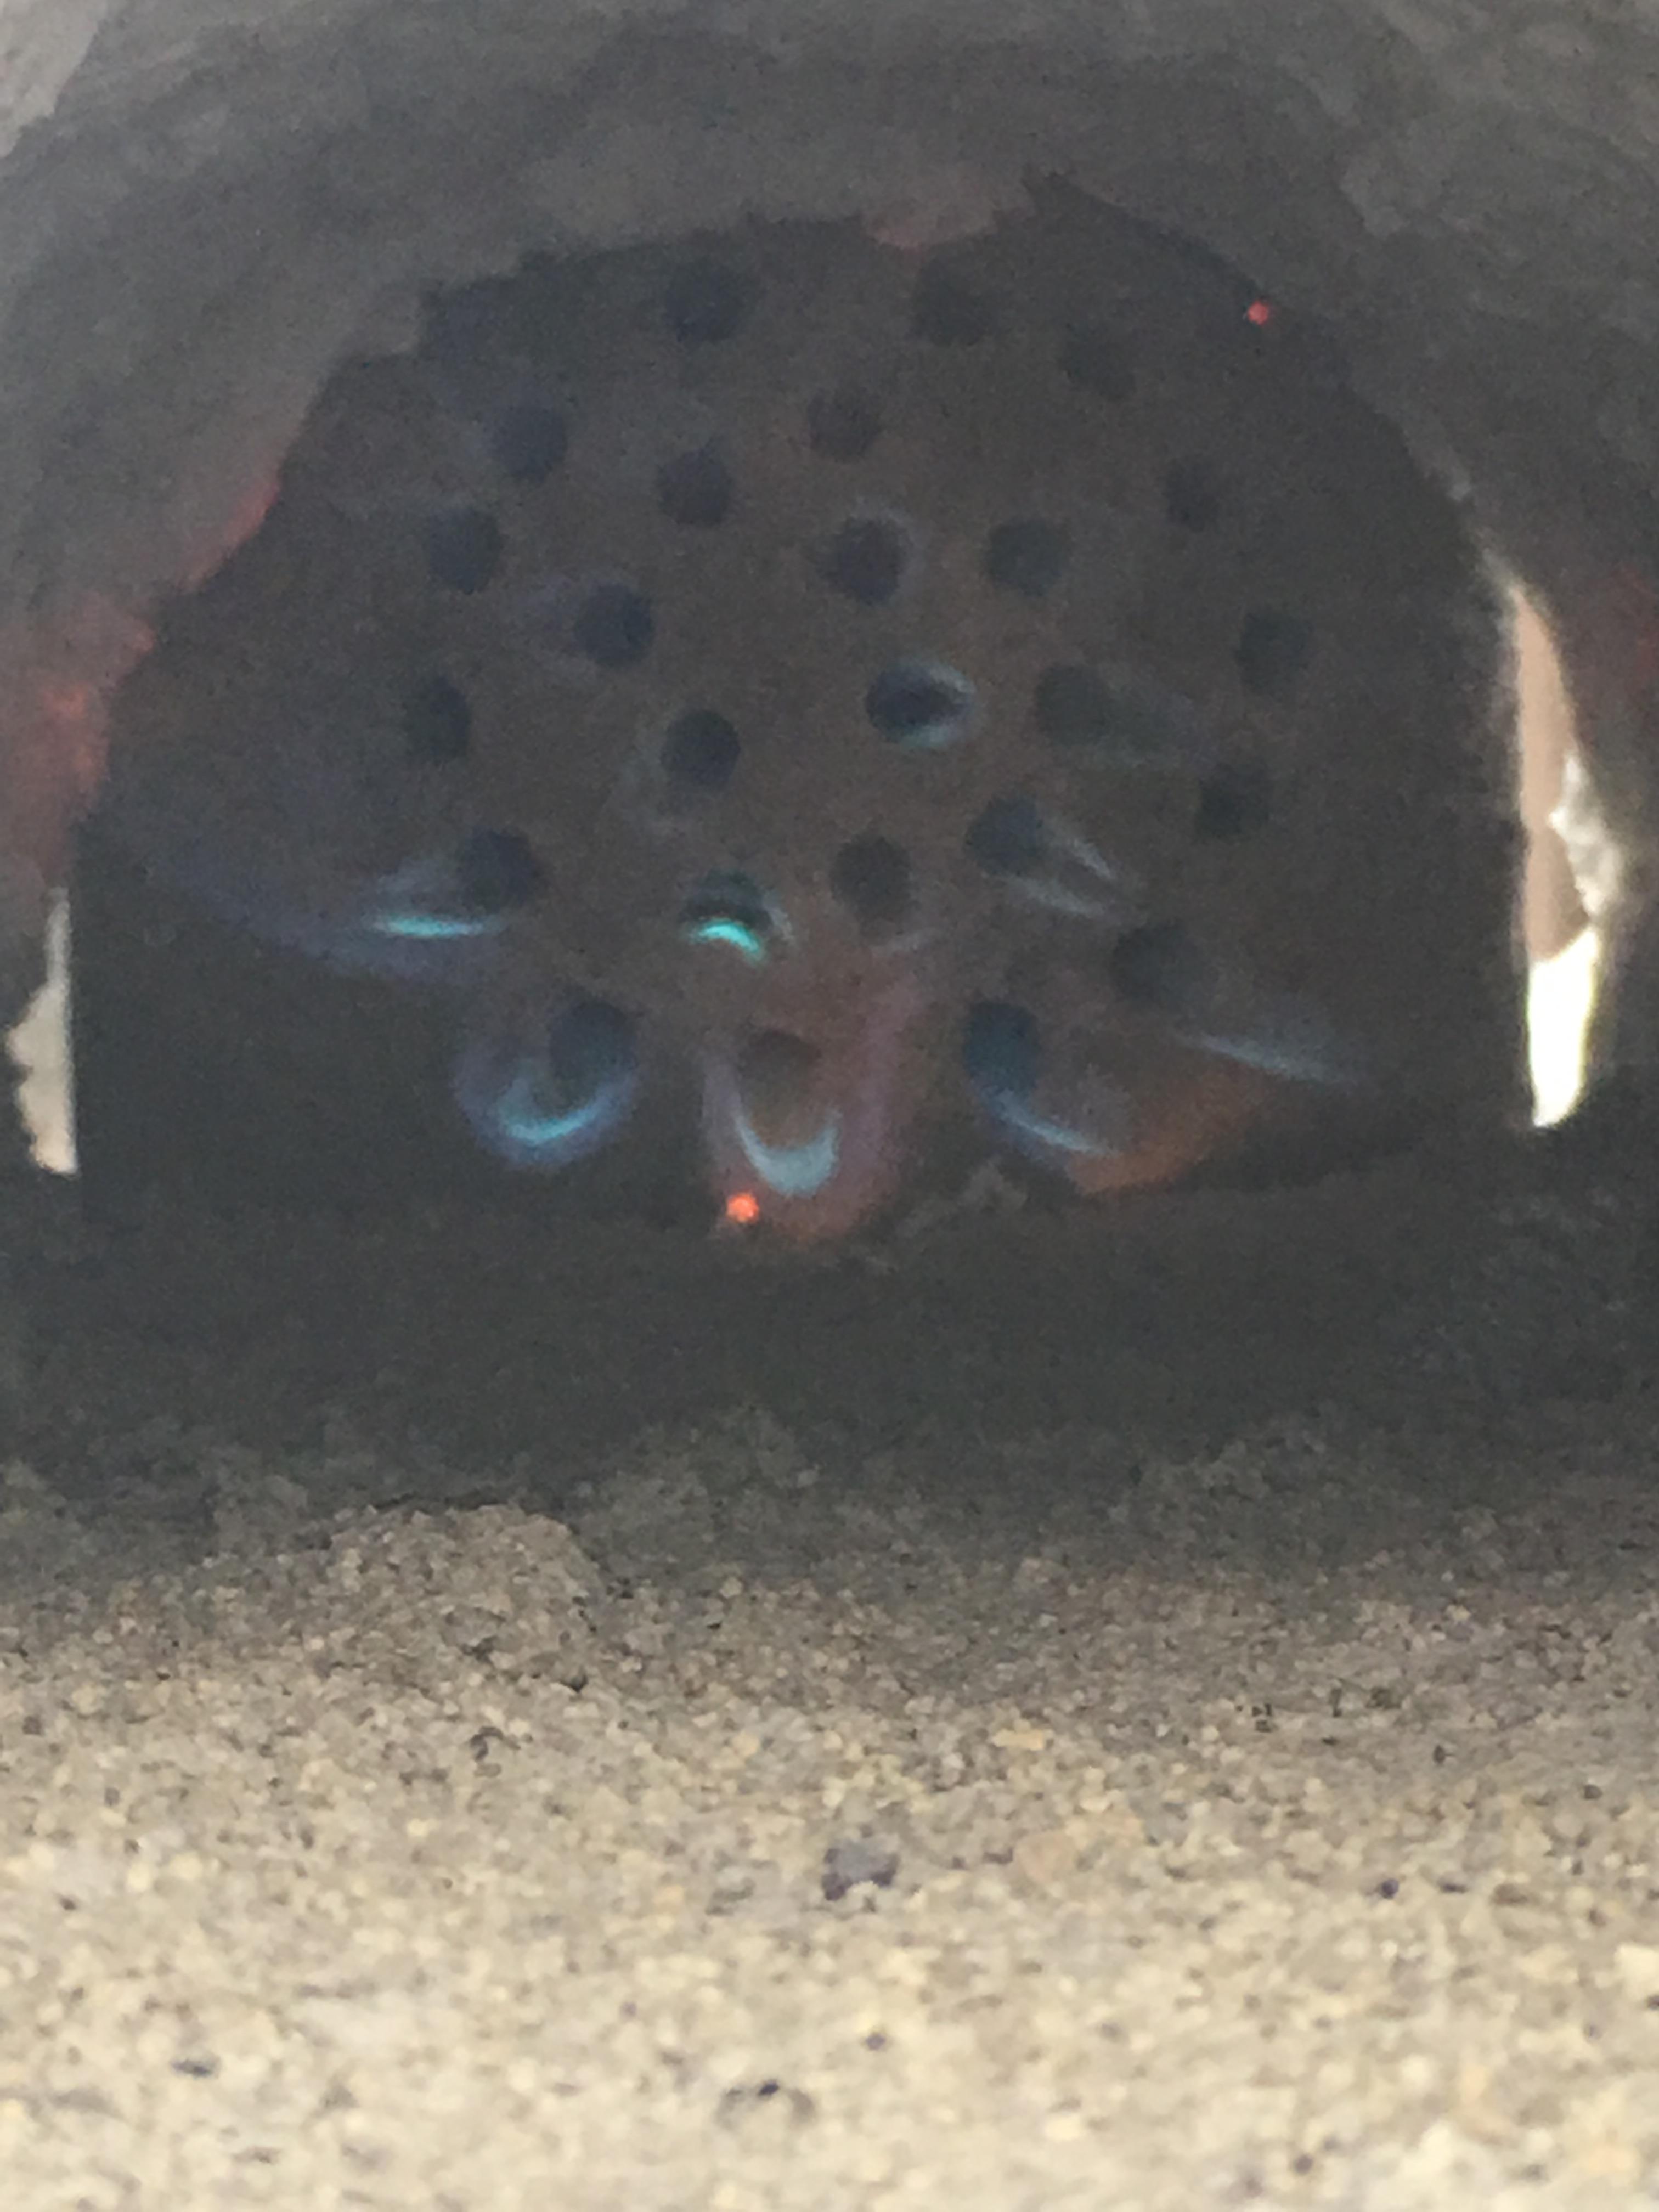
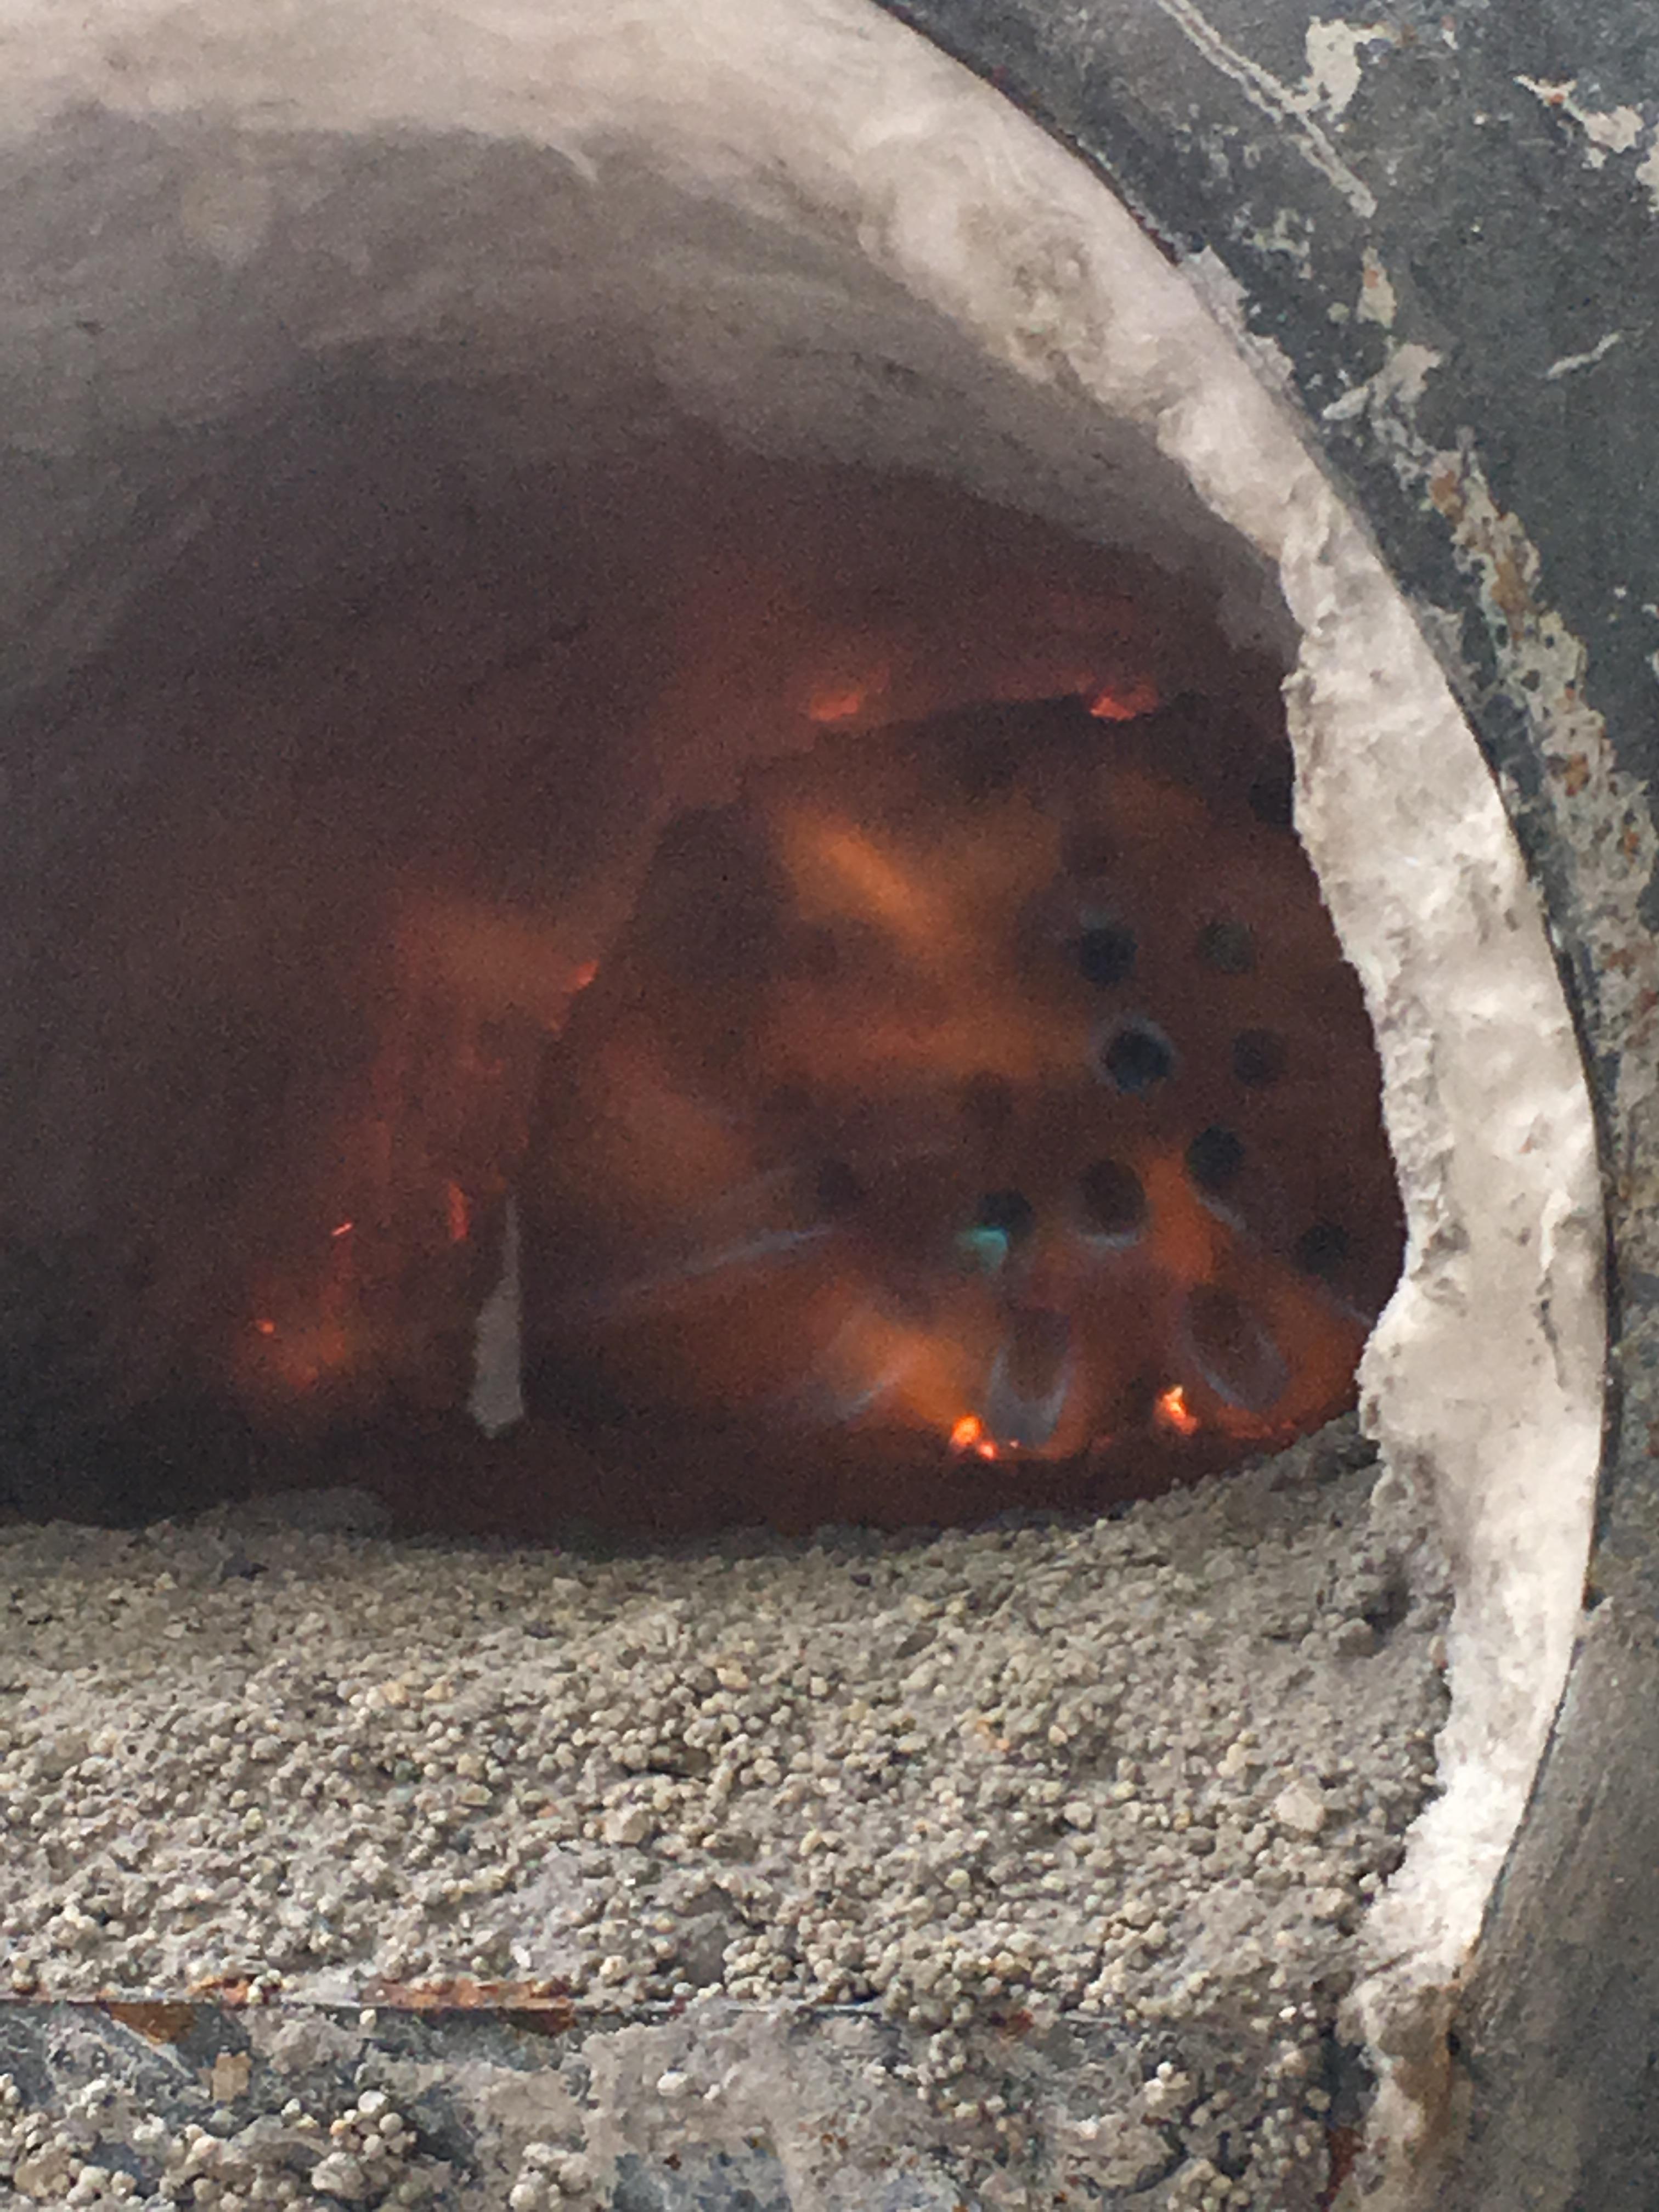
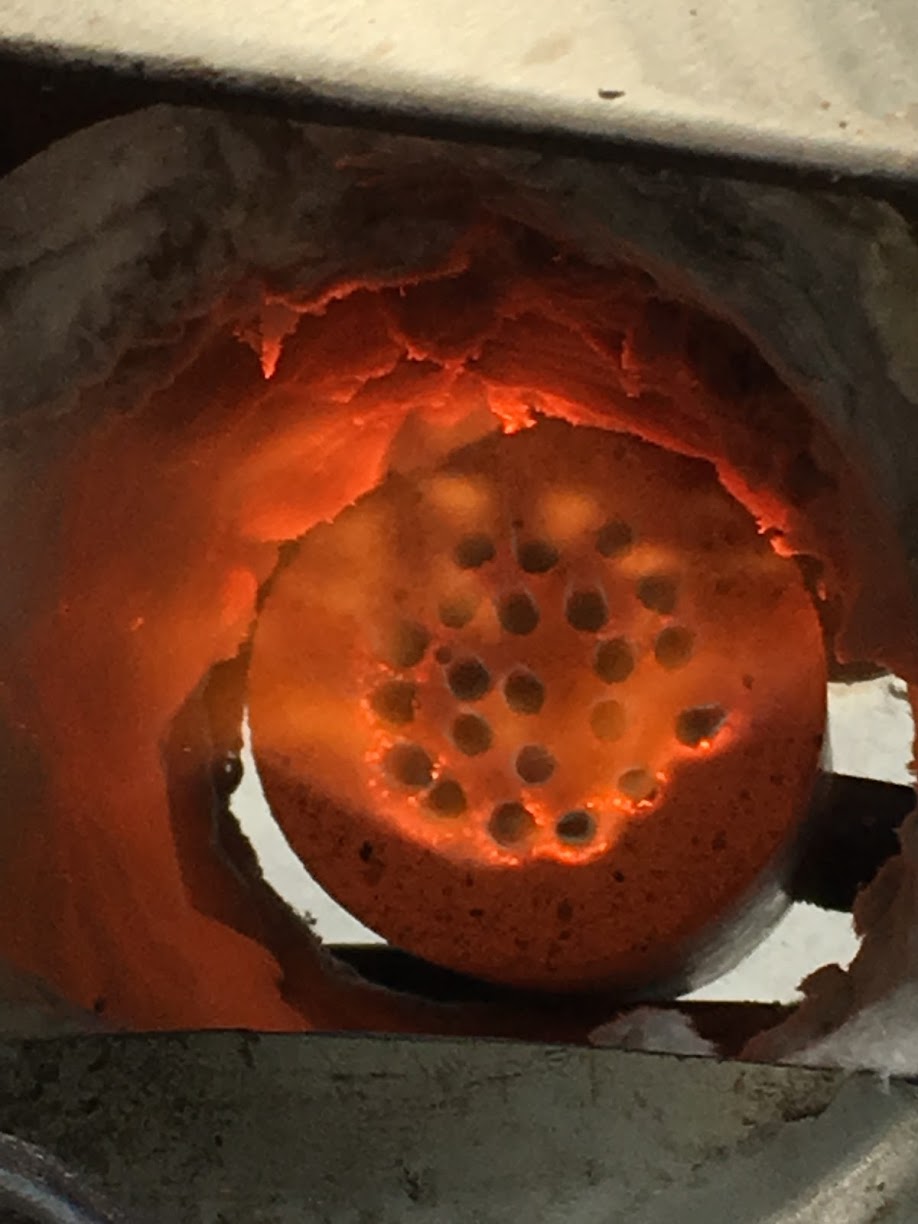
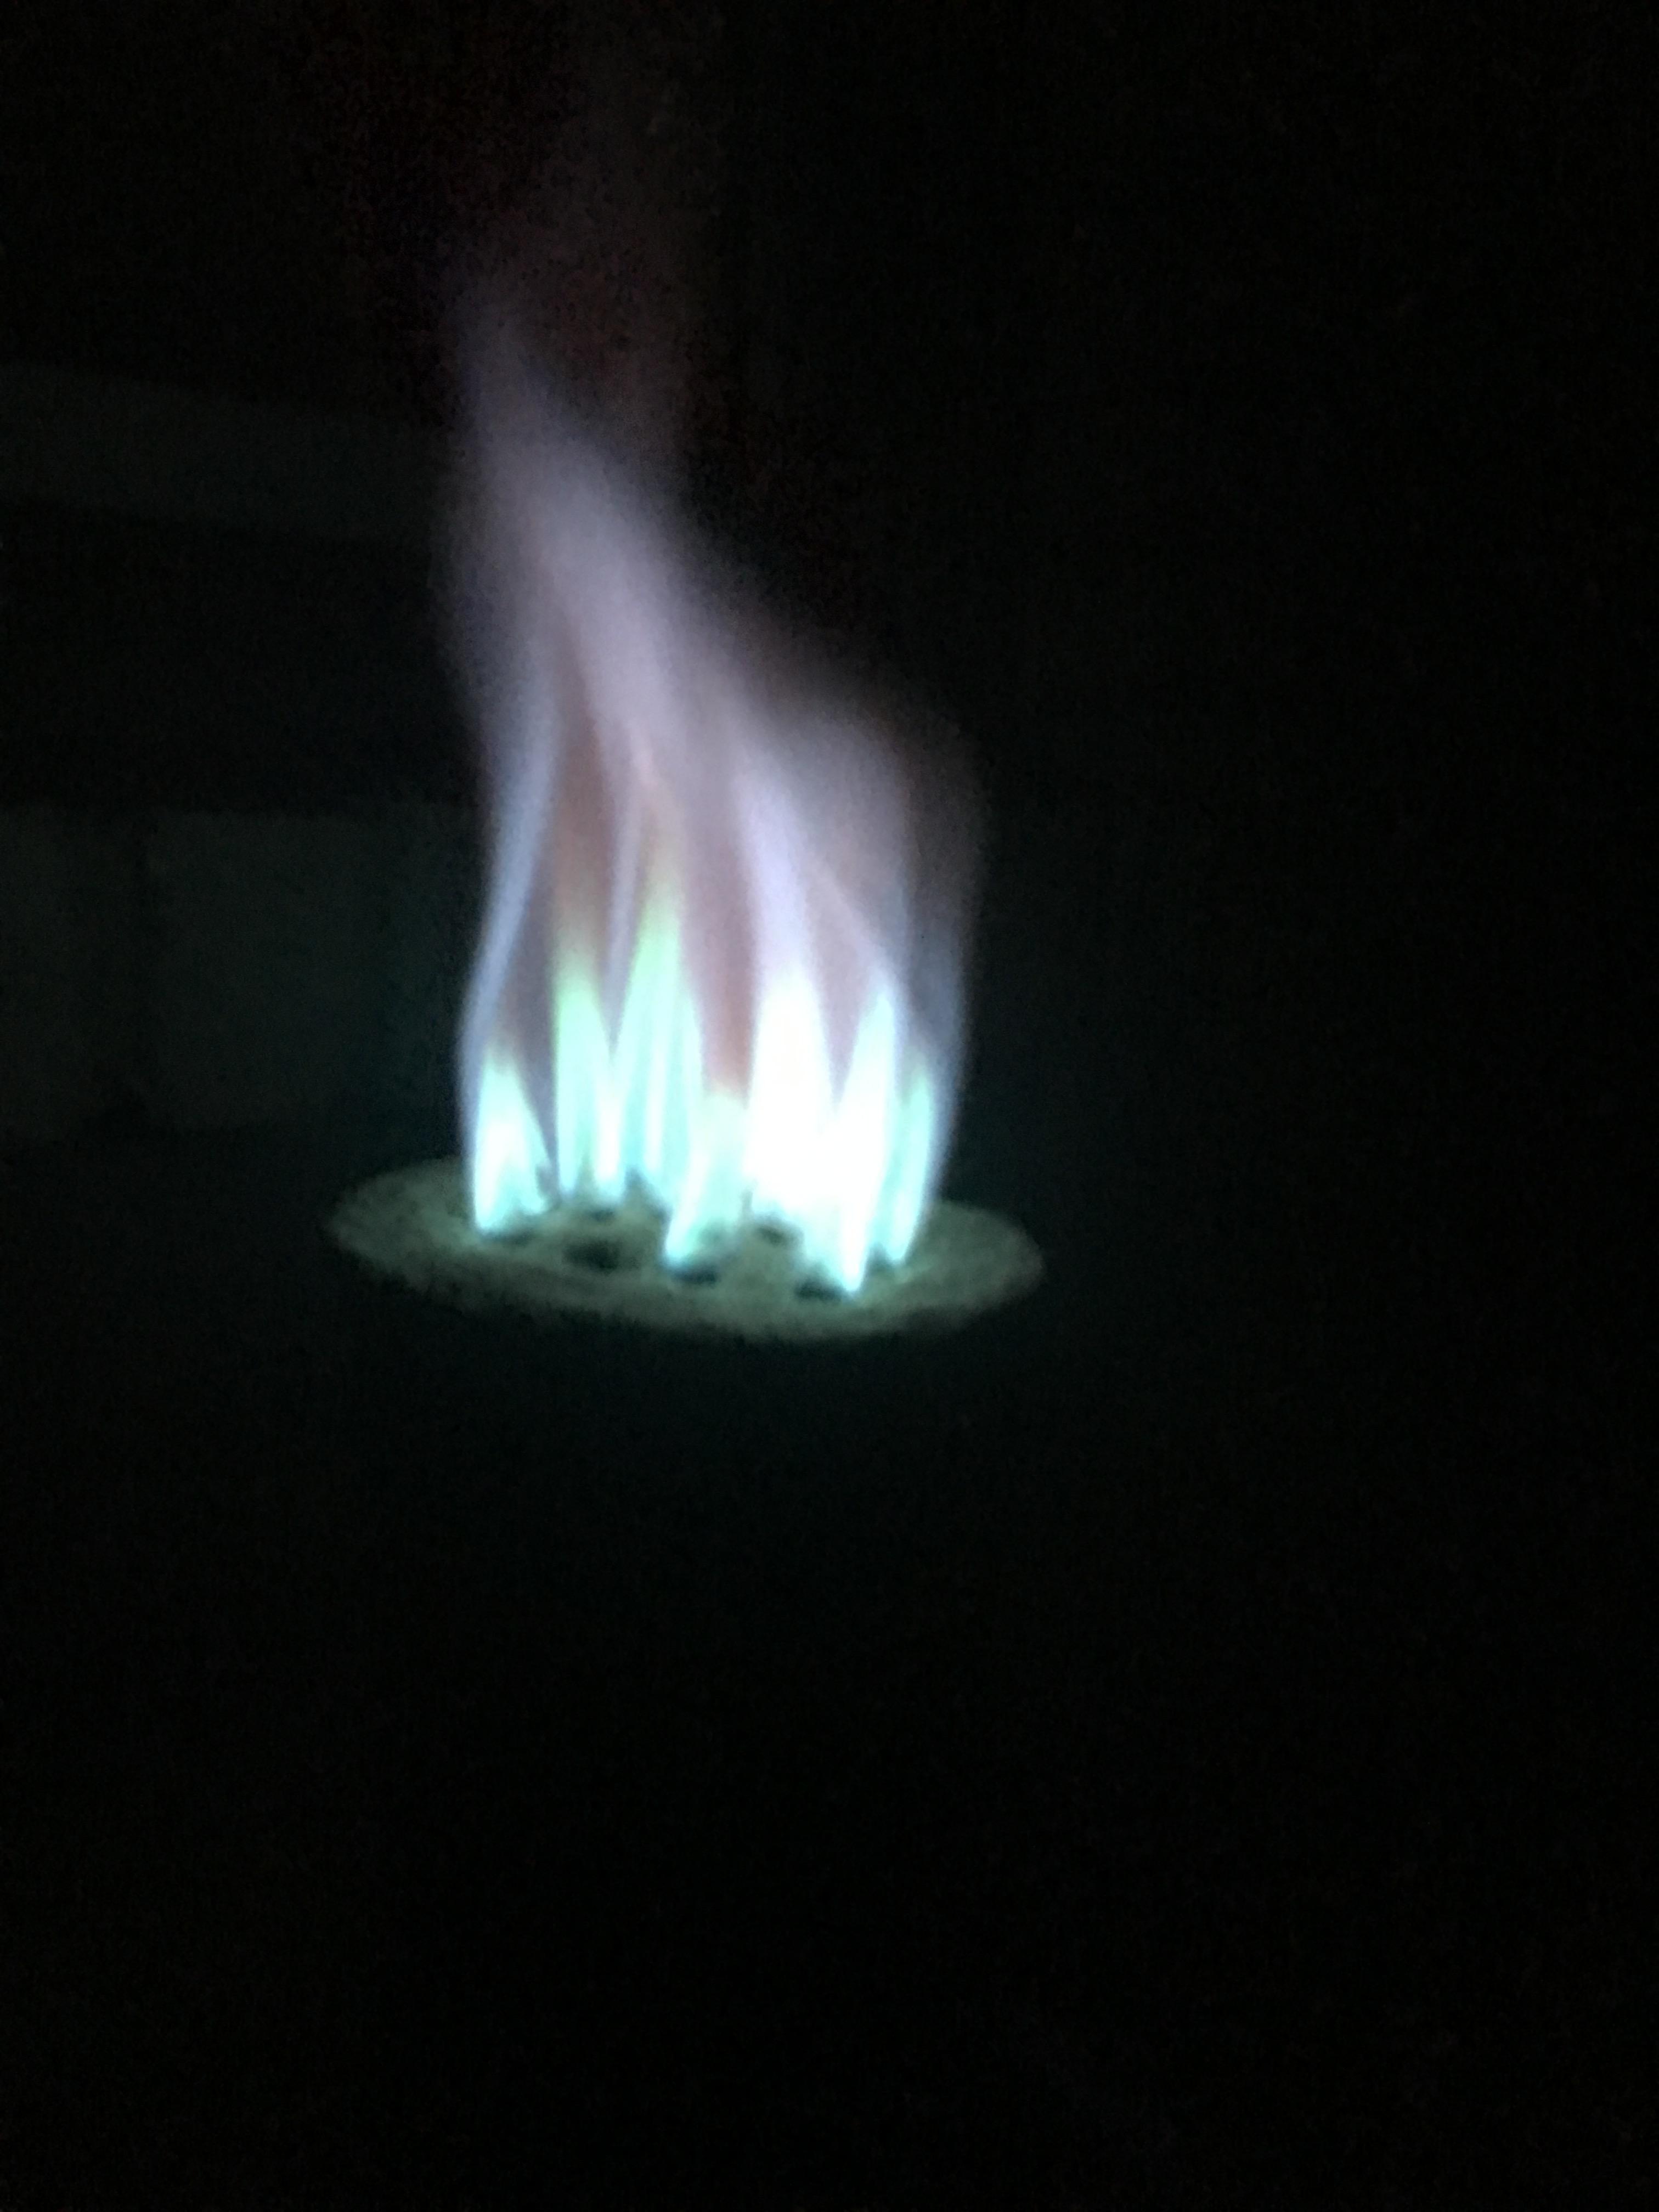
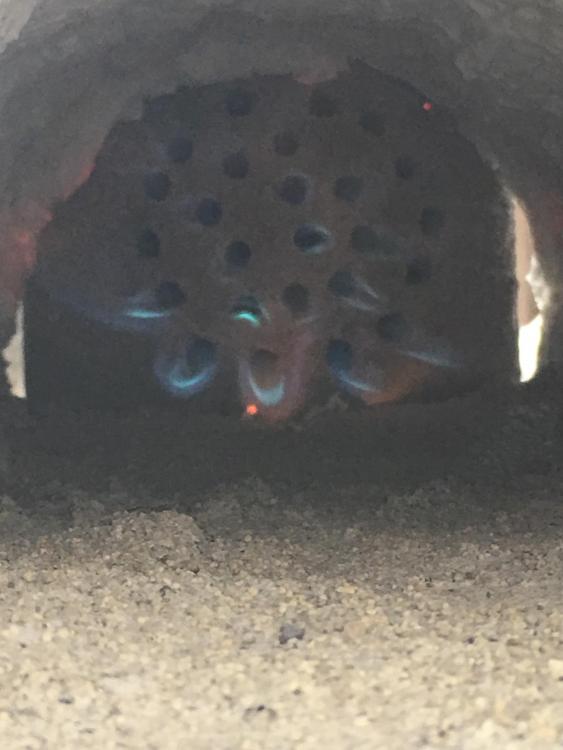
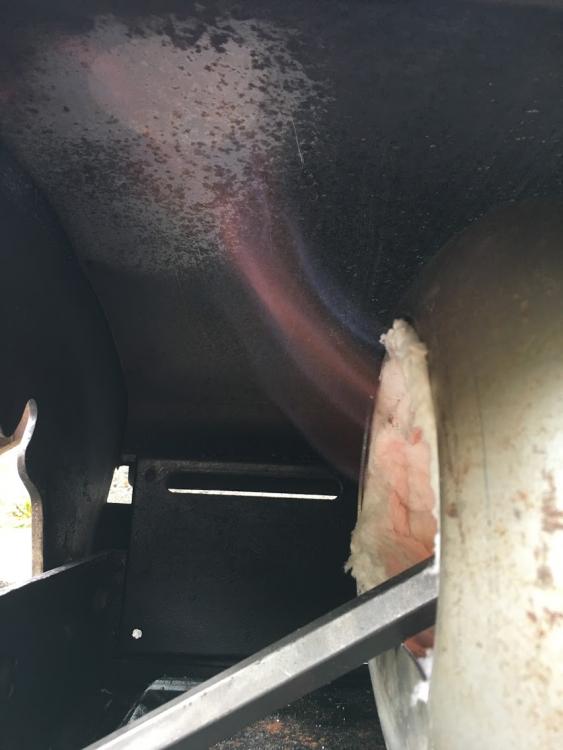
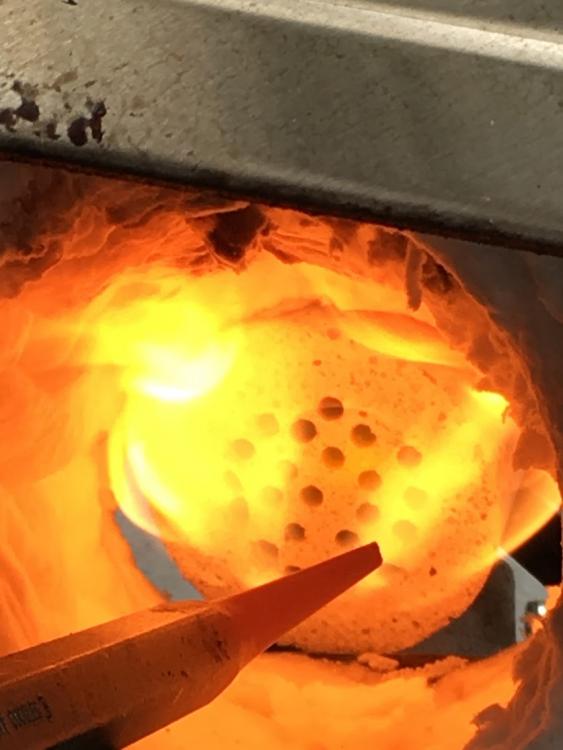
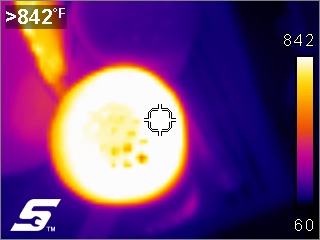
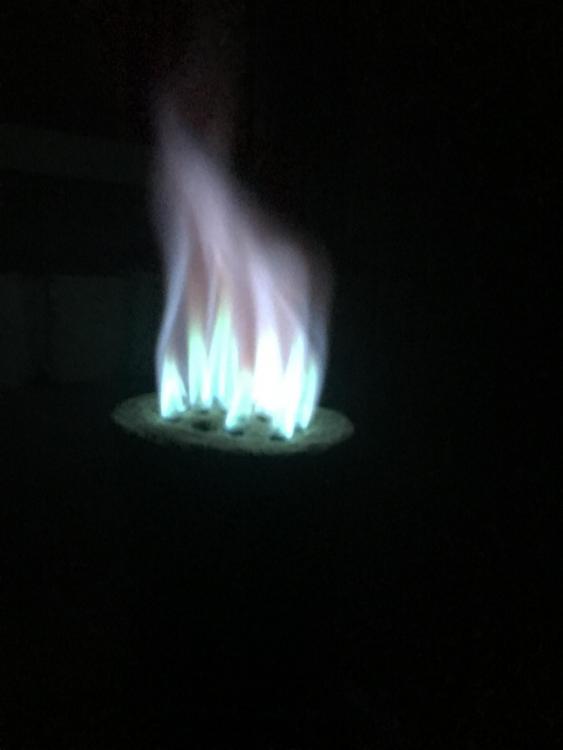
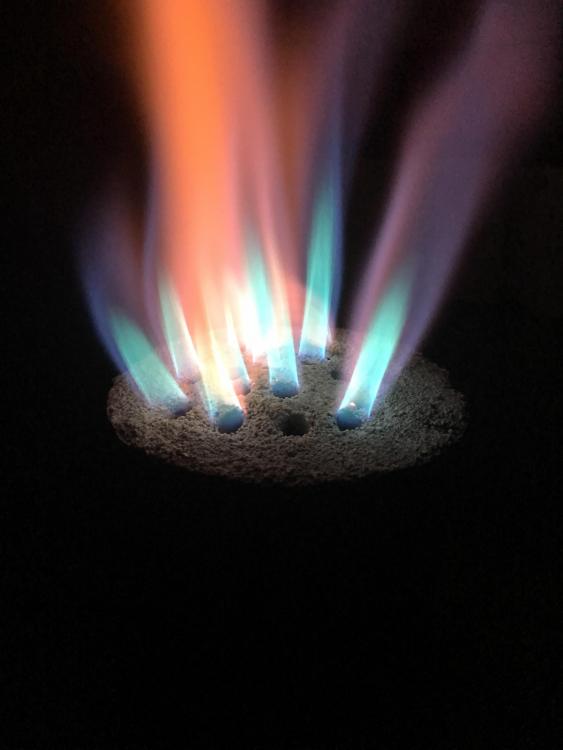
Well burnout didn't go quite as planned - I only had another NARB to use to try to melt the adhesive out of there, so I put one in the middle of a makeshift forge, and fired one up and placed in one end, expecting cracks from the one in the middle. Some small ones did develop, and the insides didn't get as hot as I hoped (xxxx insulating refractory!), so the glue didn't burn as well as I wanted. After messing with that for awhile, I grabbed them both and put them on a baking sheet, with crumped foil "rings" to raise the flame face off of the baking sheet, and gave them 450° for about an hour, using a skewer to poke through all the holes to help it flow / drain after that hour. If you have a hood fan running and wipe off excess glue it doesn't stink too bad. Ideally I think 350° for a few hours to melt out the adhesive (and help cure), followed by a coal or charcoal fire would be ideal. I'll be using something like that on my next experiments. Next I went and placed them with flame faces touching at bottom, and 1/2" opening on top, and fired one up. Flame chases all the way through to the inlet of the other burner, and this helped clear out any remaining glue. After that I placed it back in my forge, and it runs well from 1 PSI to 20+, very stable even though it's pretty windy today. Attached are some pictures - it's difficult to see the blue flames from the nozzlets on the pictures, but it shows in person. 15psi without much time heating up, can see some of the blue jets: 15psi after heating for awhile (there's flame, but you can't really tell!): 1psi: Immediately after testing, face still over 850 degrees (top of my thermal range):

-
#1 is that a forge created to be big enough for everything will likely fail at being really good at most things. The majority of forging is going to be performed over 7-8", and a forge closer to those sizes is going to be better in the long run.
-
As someone also getting started, I would advise that you start much smaller before building a larger forge. Think coffee can or disposable helium tank, as I’ve learned quite a bit in the construction so far that I’m glad hasn’t been learned on a larger scale yet.
-
You made me curious. This is without burning it out, and without a forge, and on very low psi - like 1-2. And it’s a bit windy. And I need to tune this burner as it’s the first I’ve built If I go higher I start smelling gas around the intake, so the NARB is restrictive right now.
-
NARB update! I pulled the glue sticks from cast #2 - 4 of them remained partially in. On this one I glued it to a tee, and used quite a bit more glue so I’m not surprised it had some “stick”. I demolded it and chipped a little away so I could see the duct tape and then inside the tee. Then, since I was a bit impatient and excited, I stuck a MAP pro torch in it to burn out a bit of glue (not too bad of odor).


-
-