

GrumpyBiker
-
Posts
276 -
Joined
-
Last visited
Content Type
Profiles
Forums
Articles
Gallery
Downloads
Events
Posts posted by GrumpyBiker
-
-
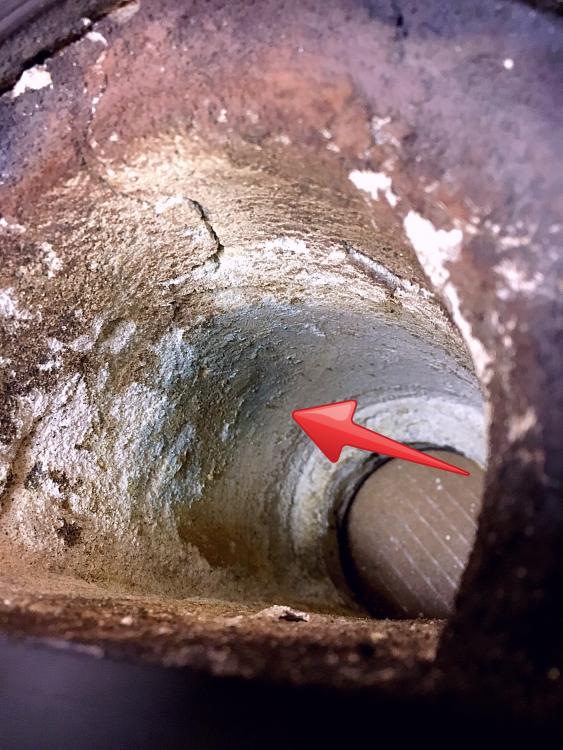
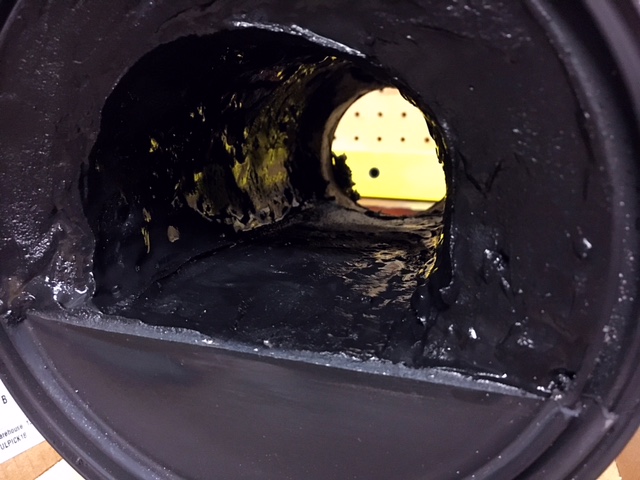
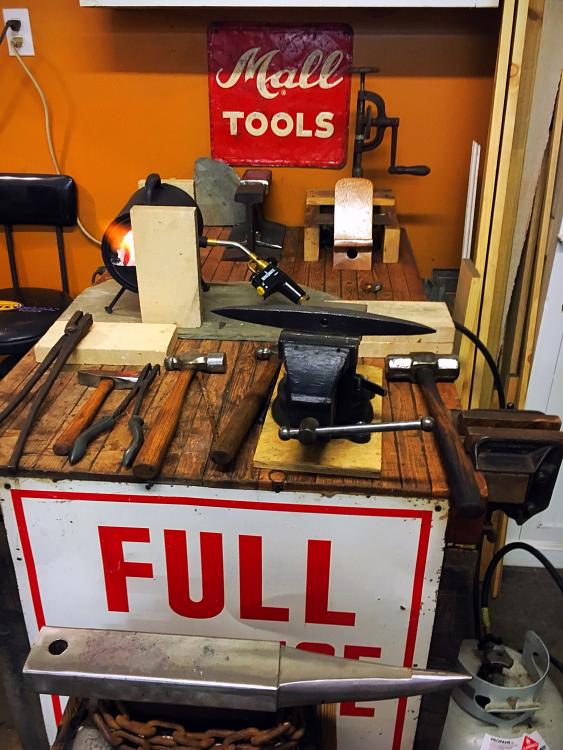
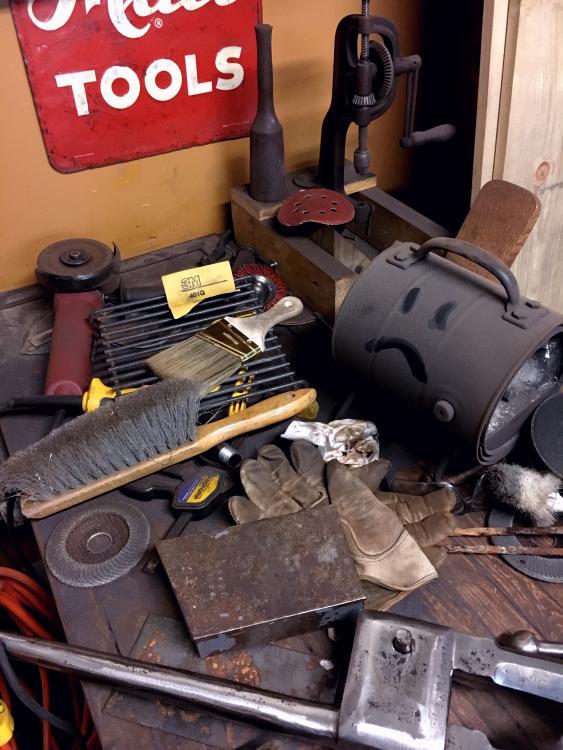
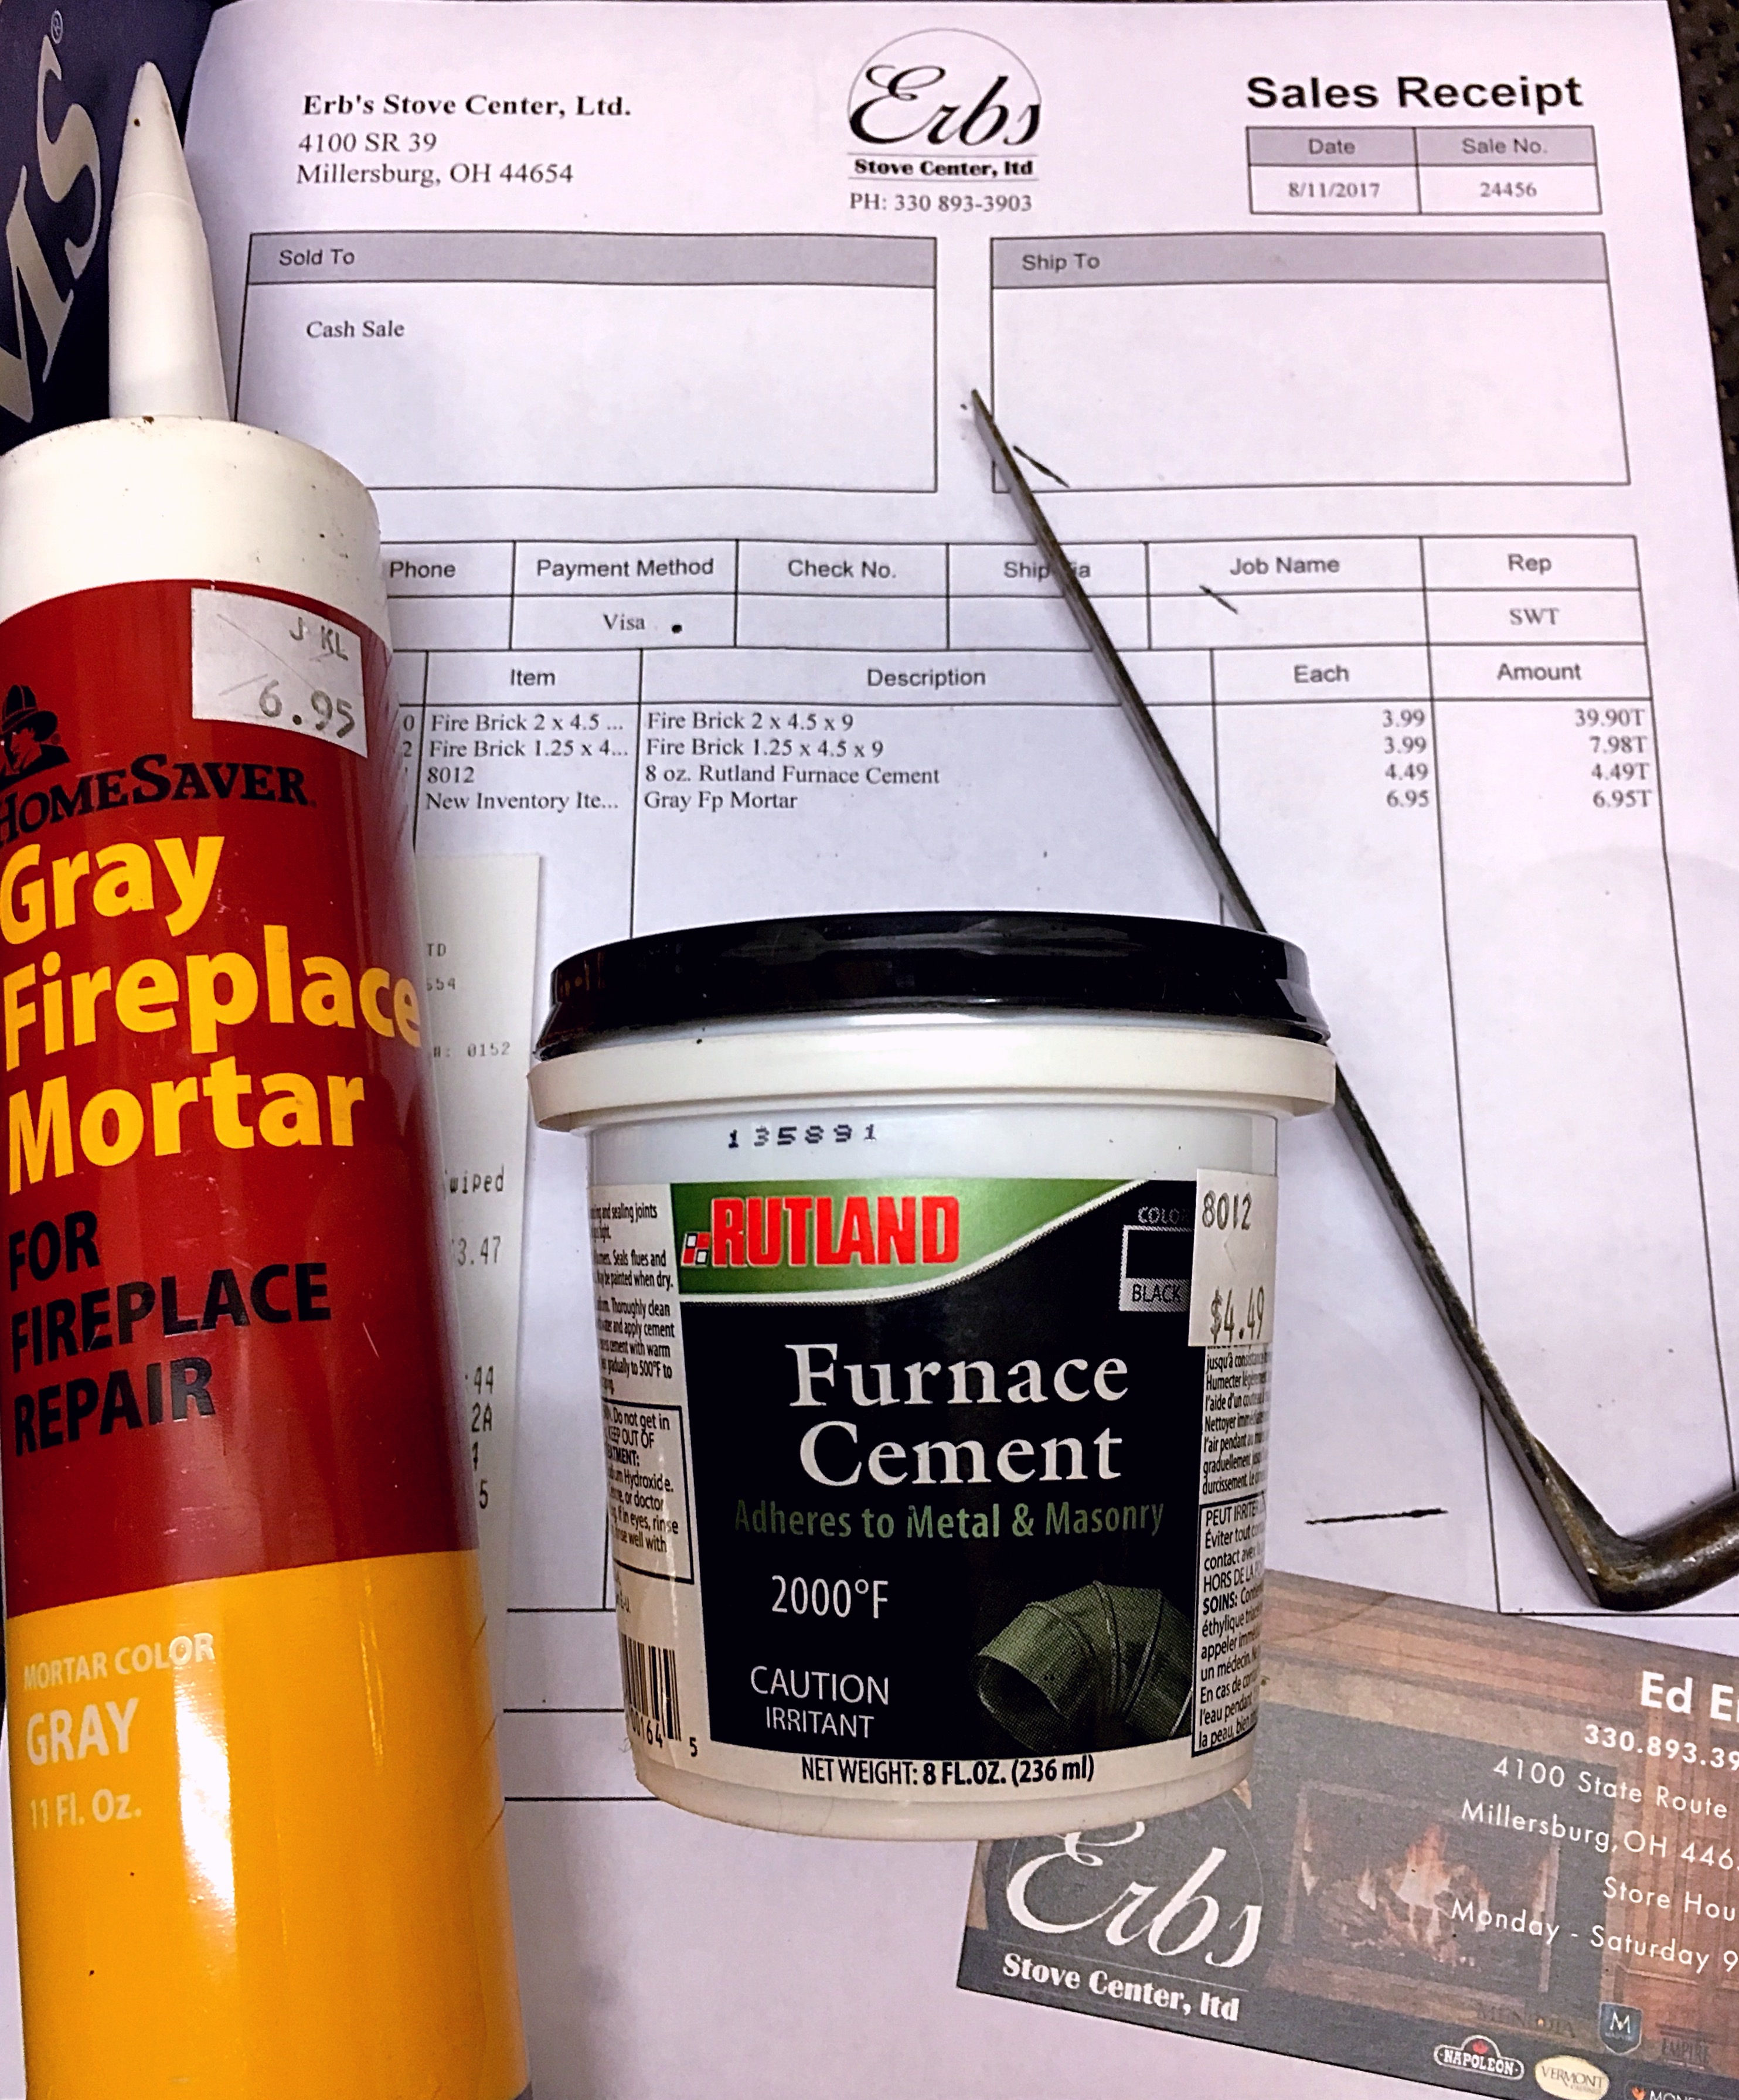
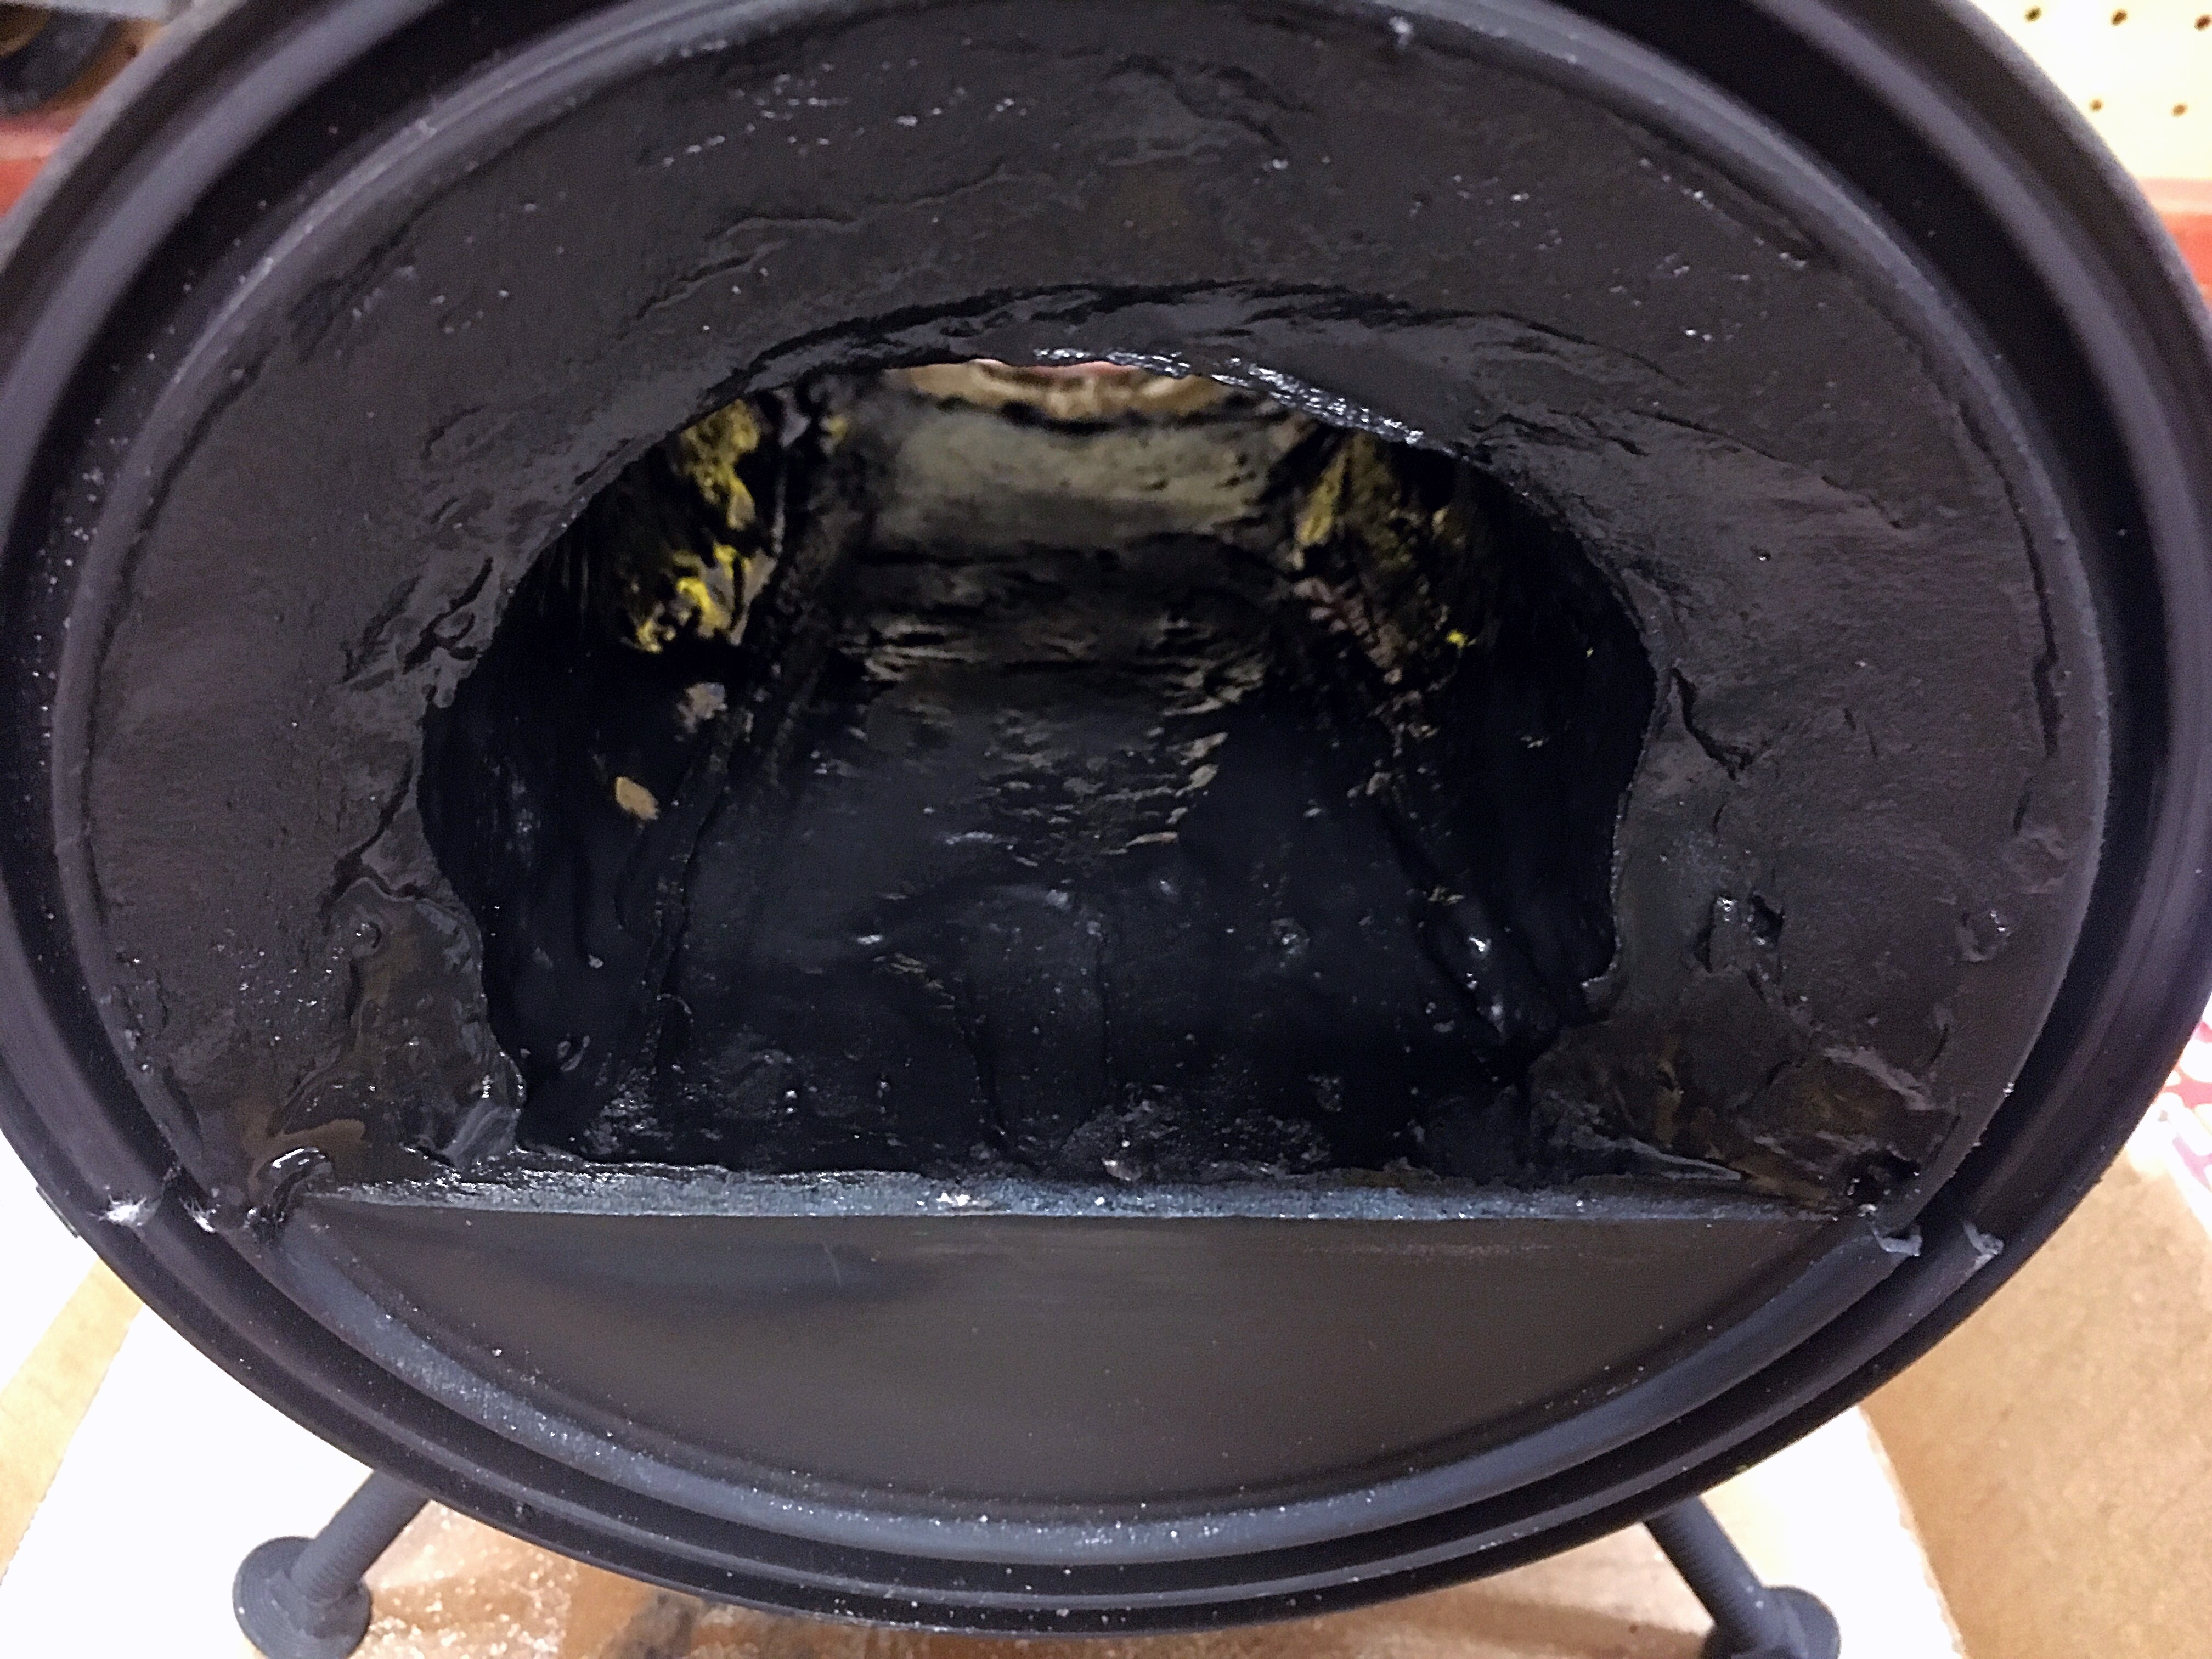
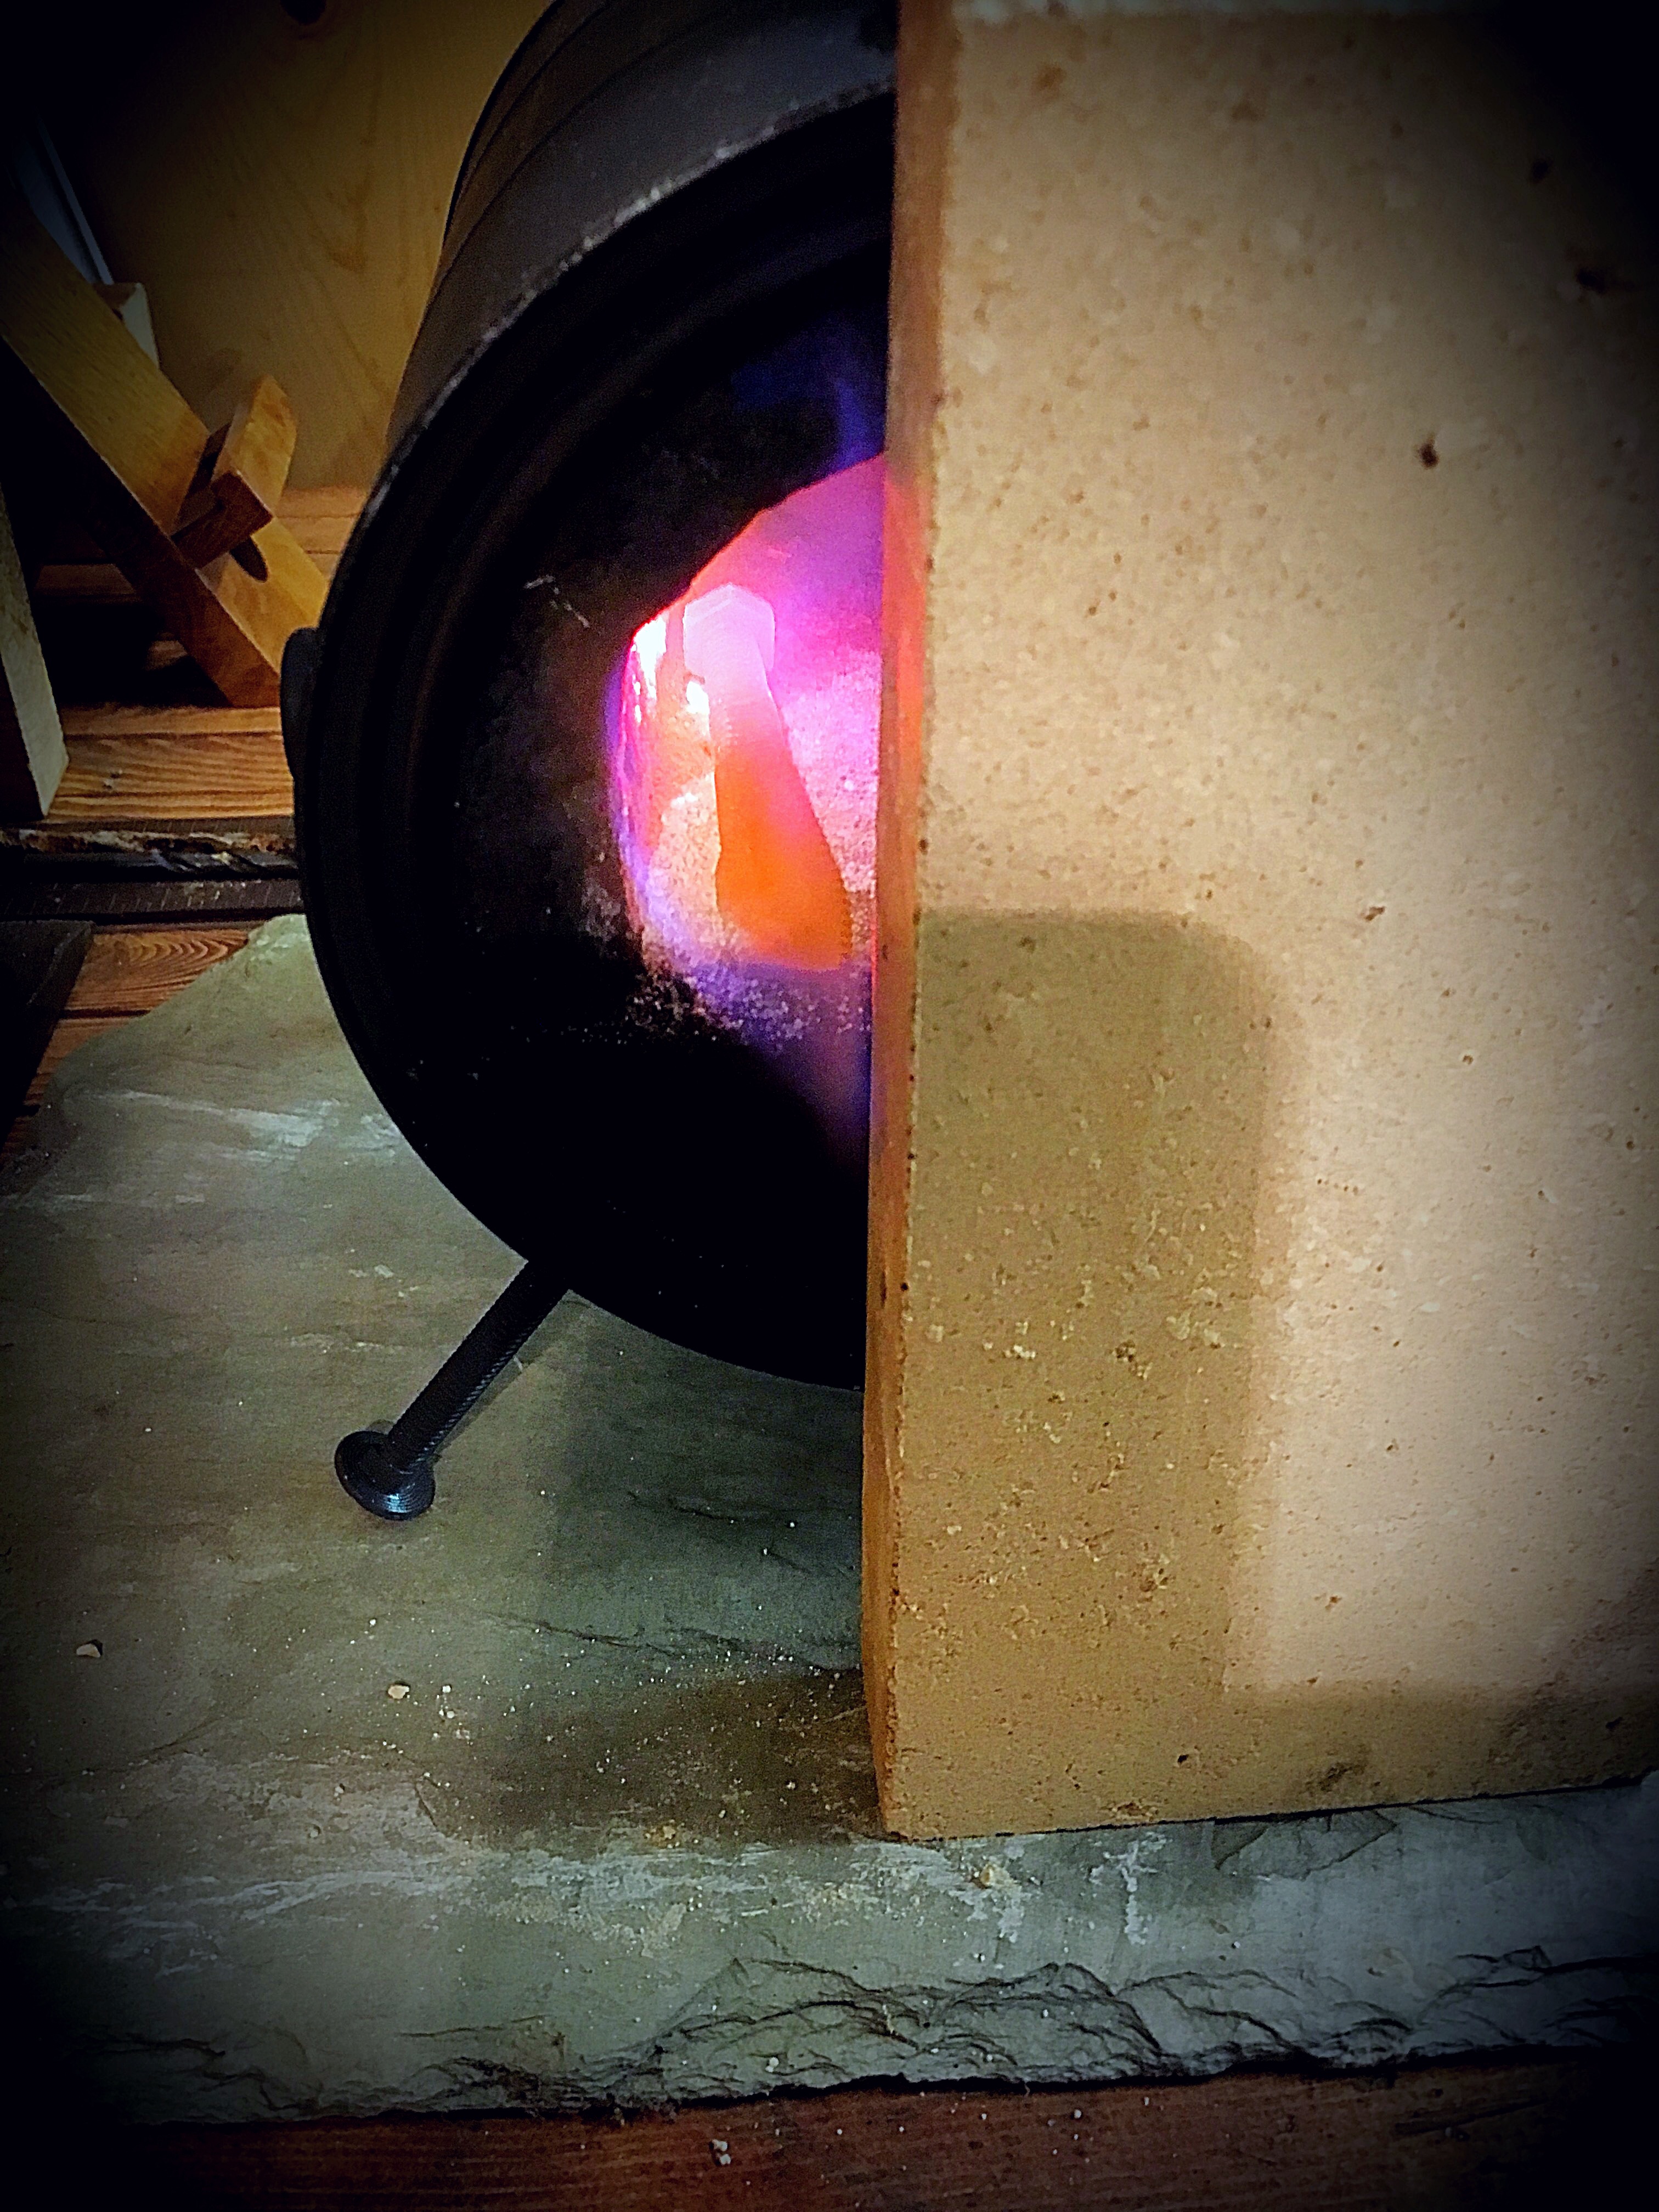
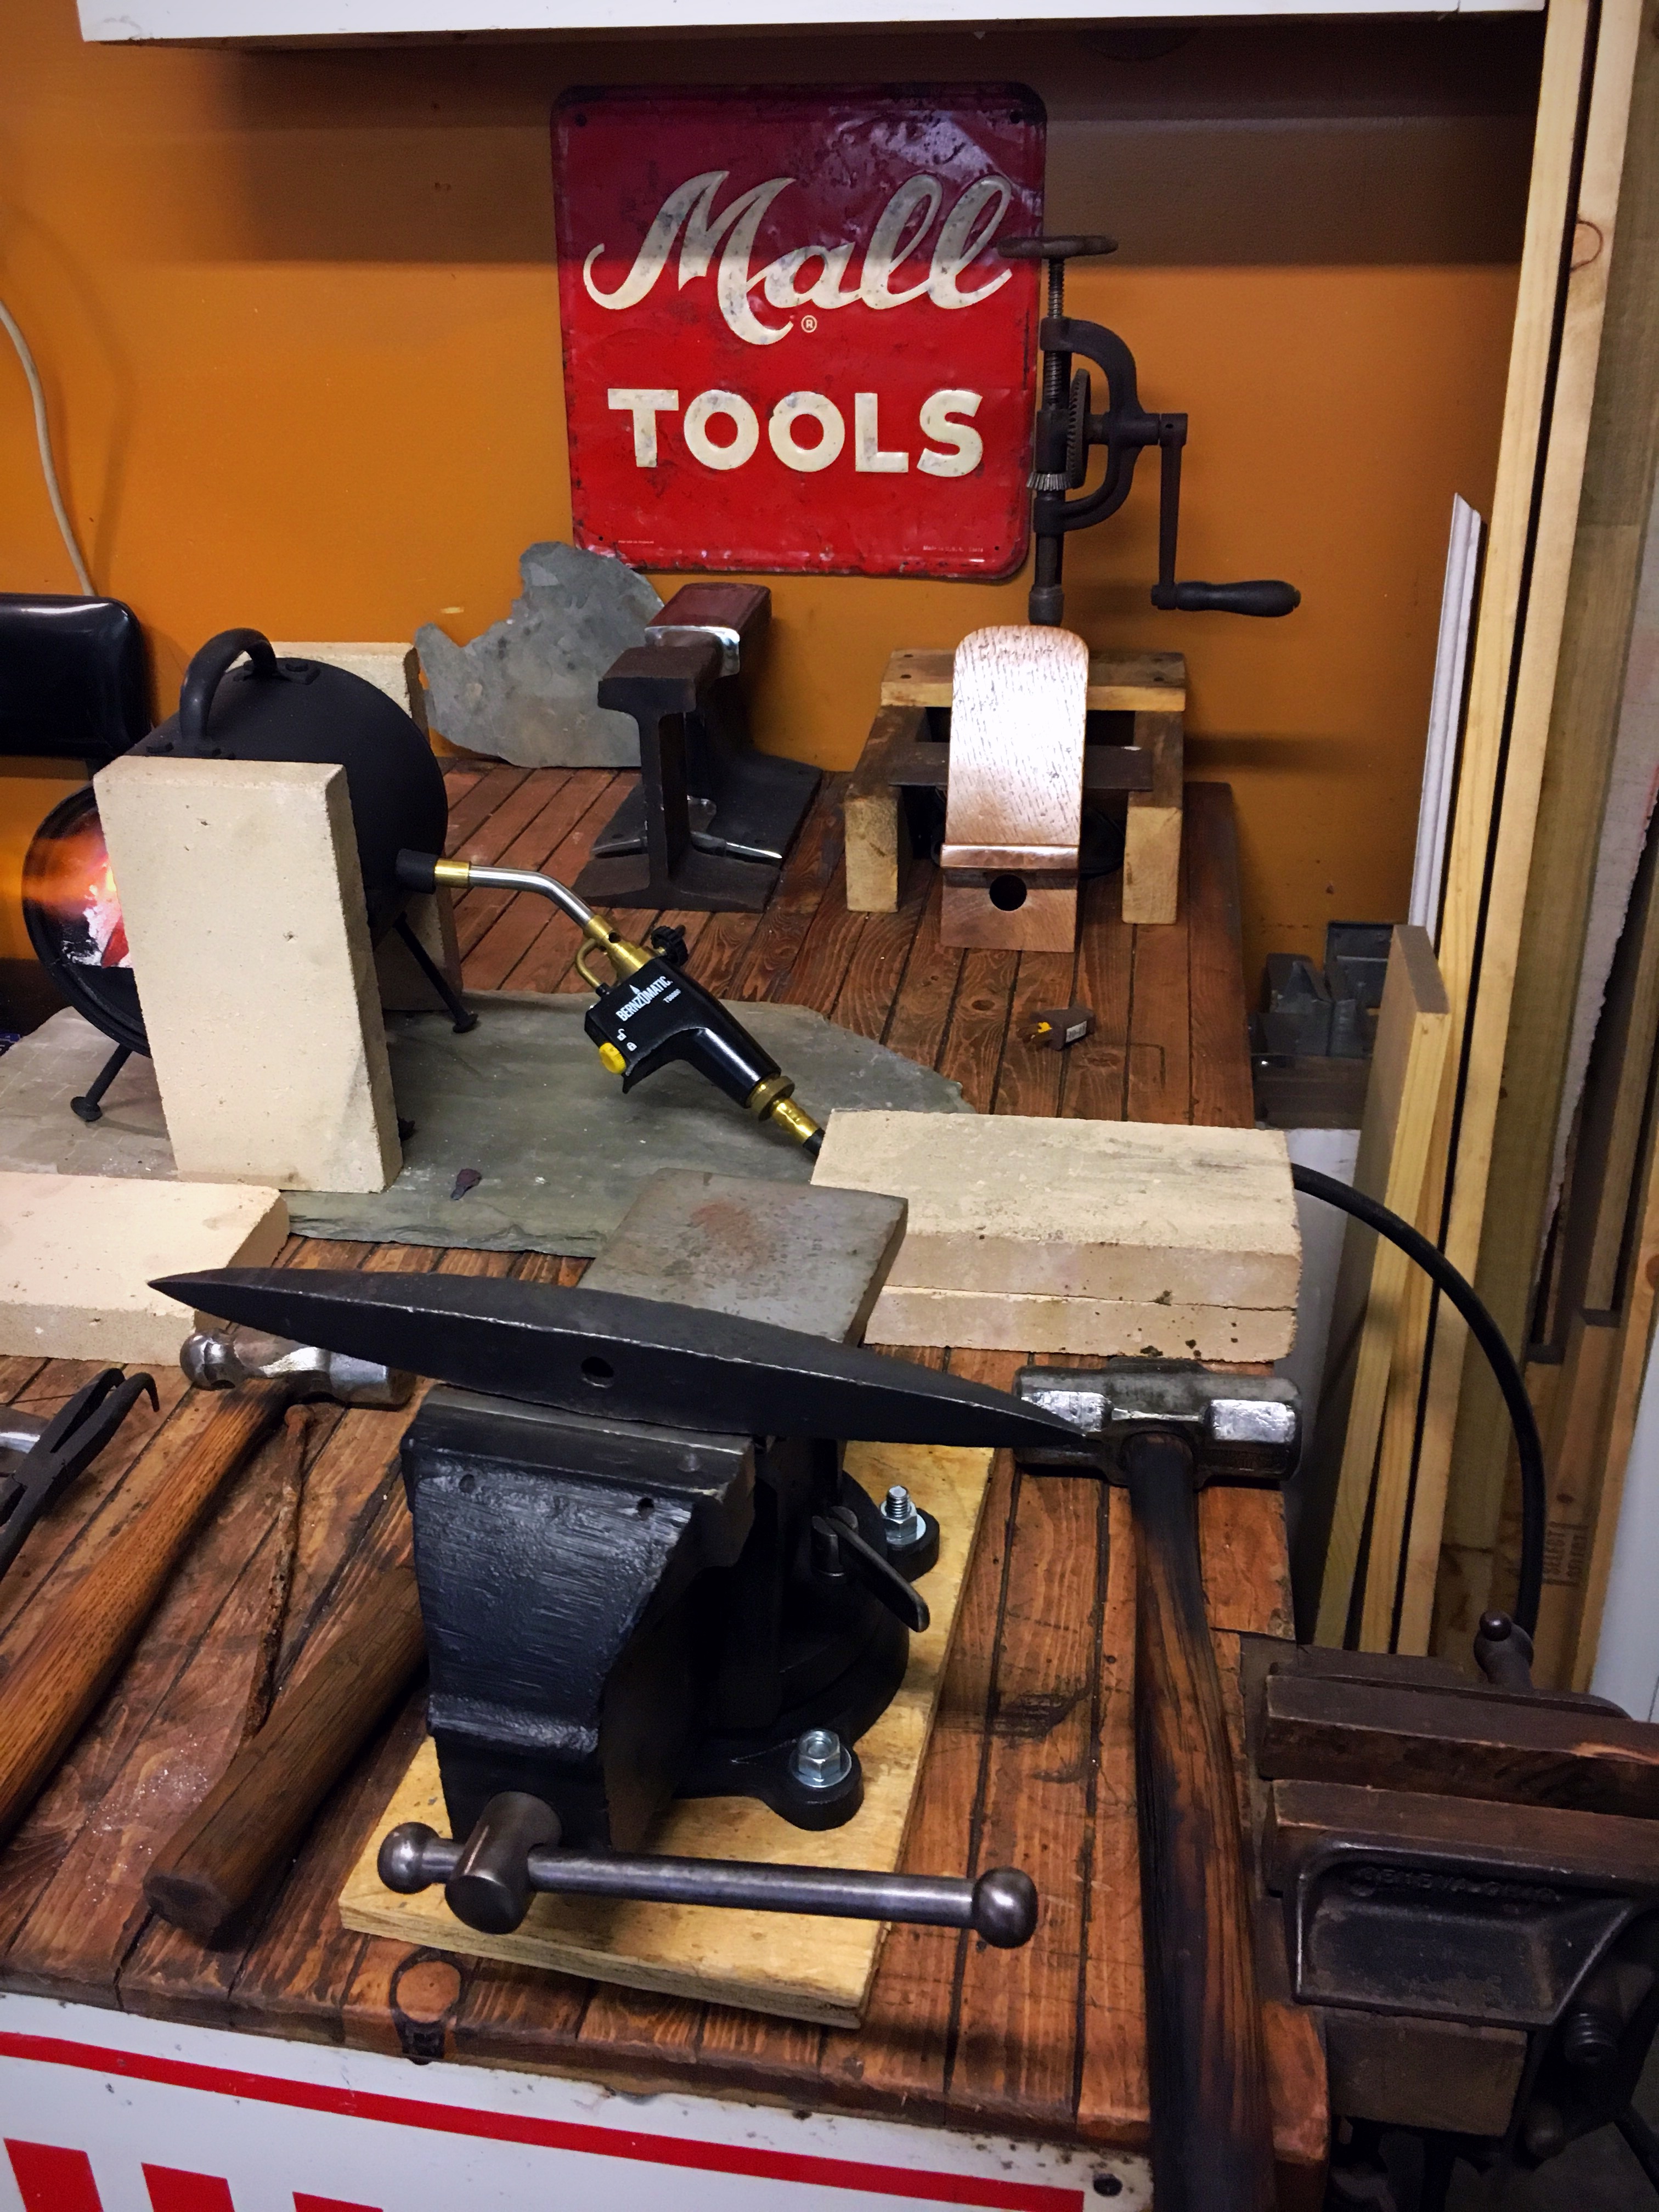
I added some refractory cement to the inside of my original canister forge.
As the interior was getting worn & cracking.
Its held together long enough for me to build another forge.
Dont know how long the Coating of the Furnace cement will last though.


-
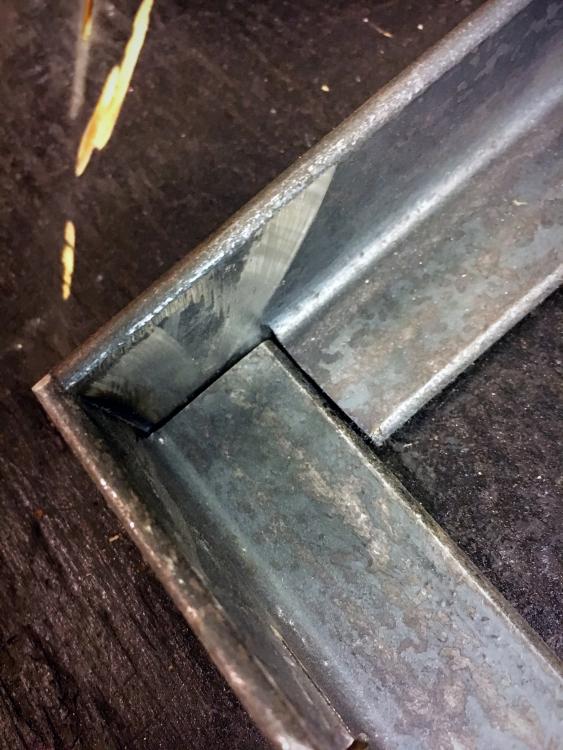
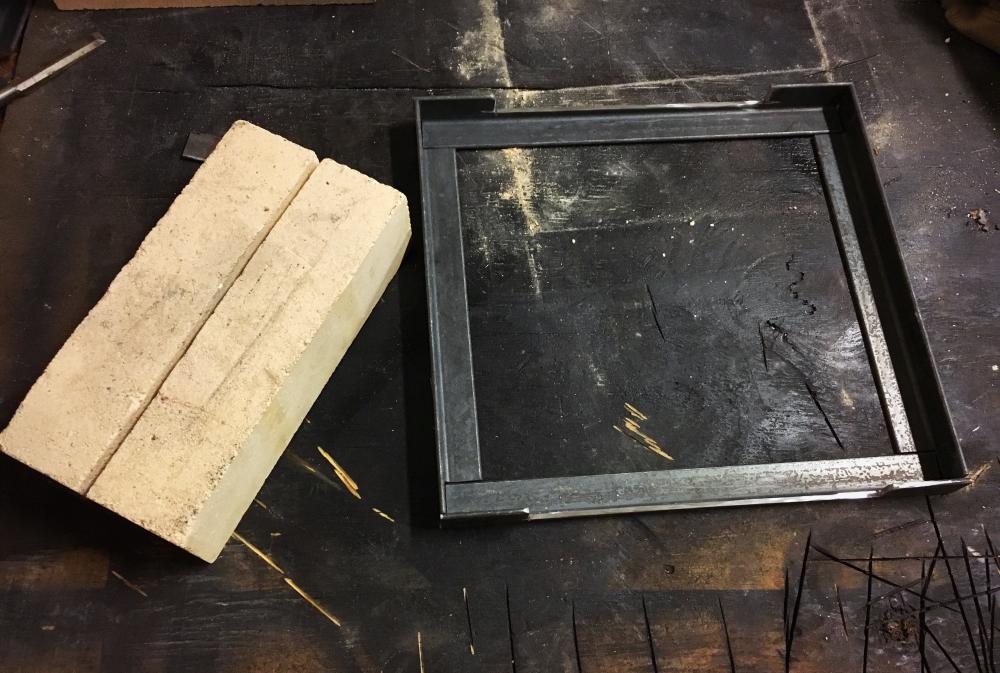
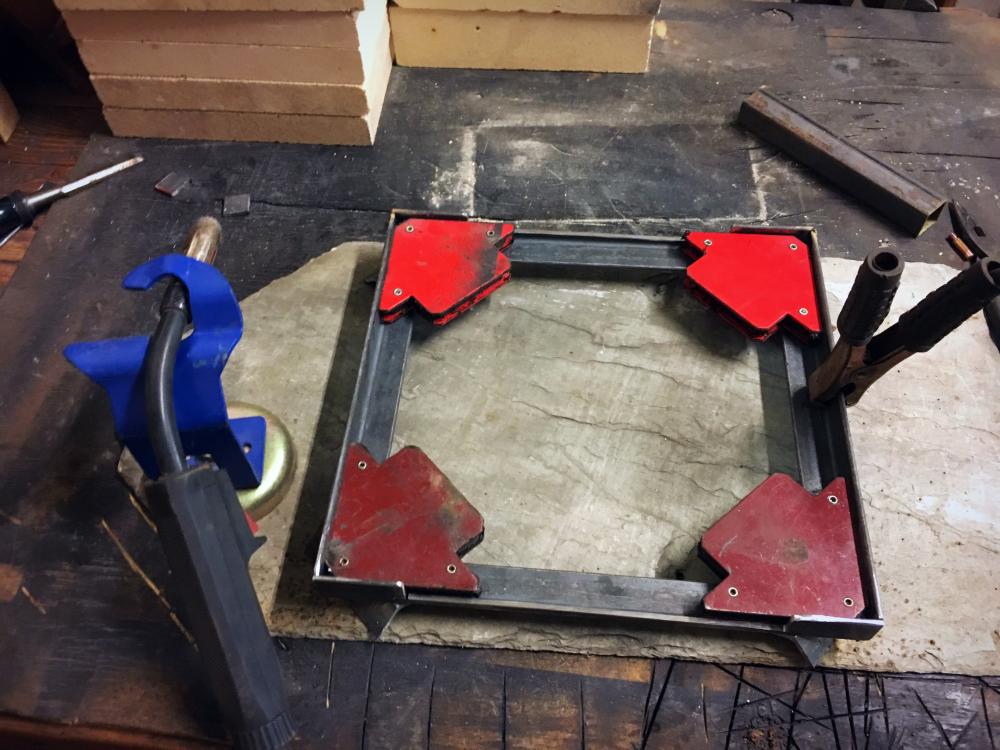
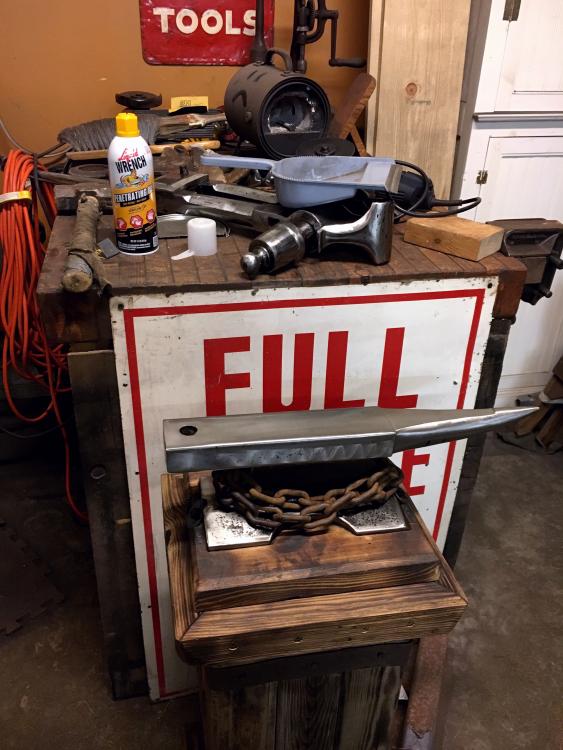
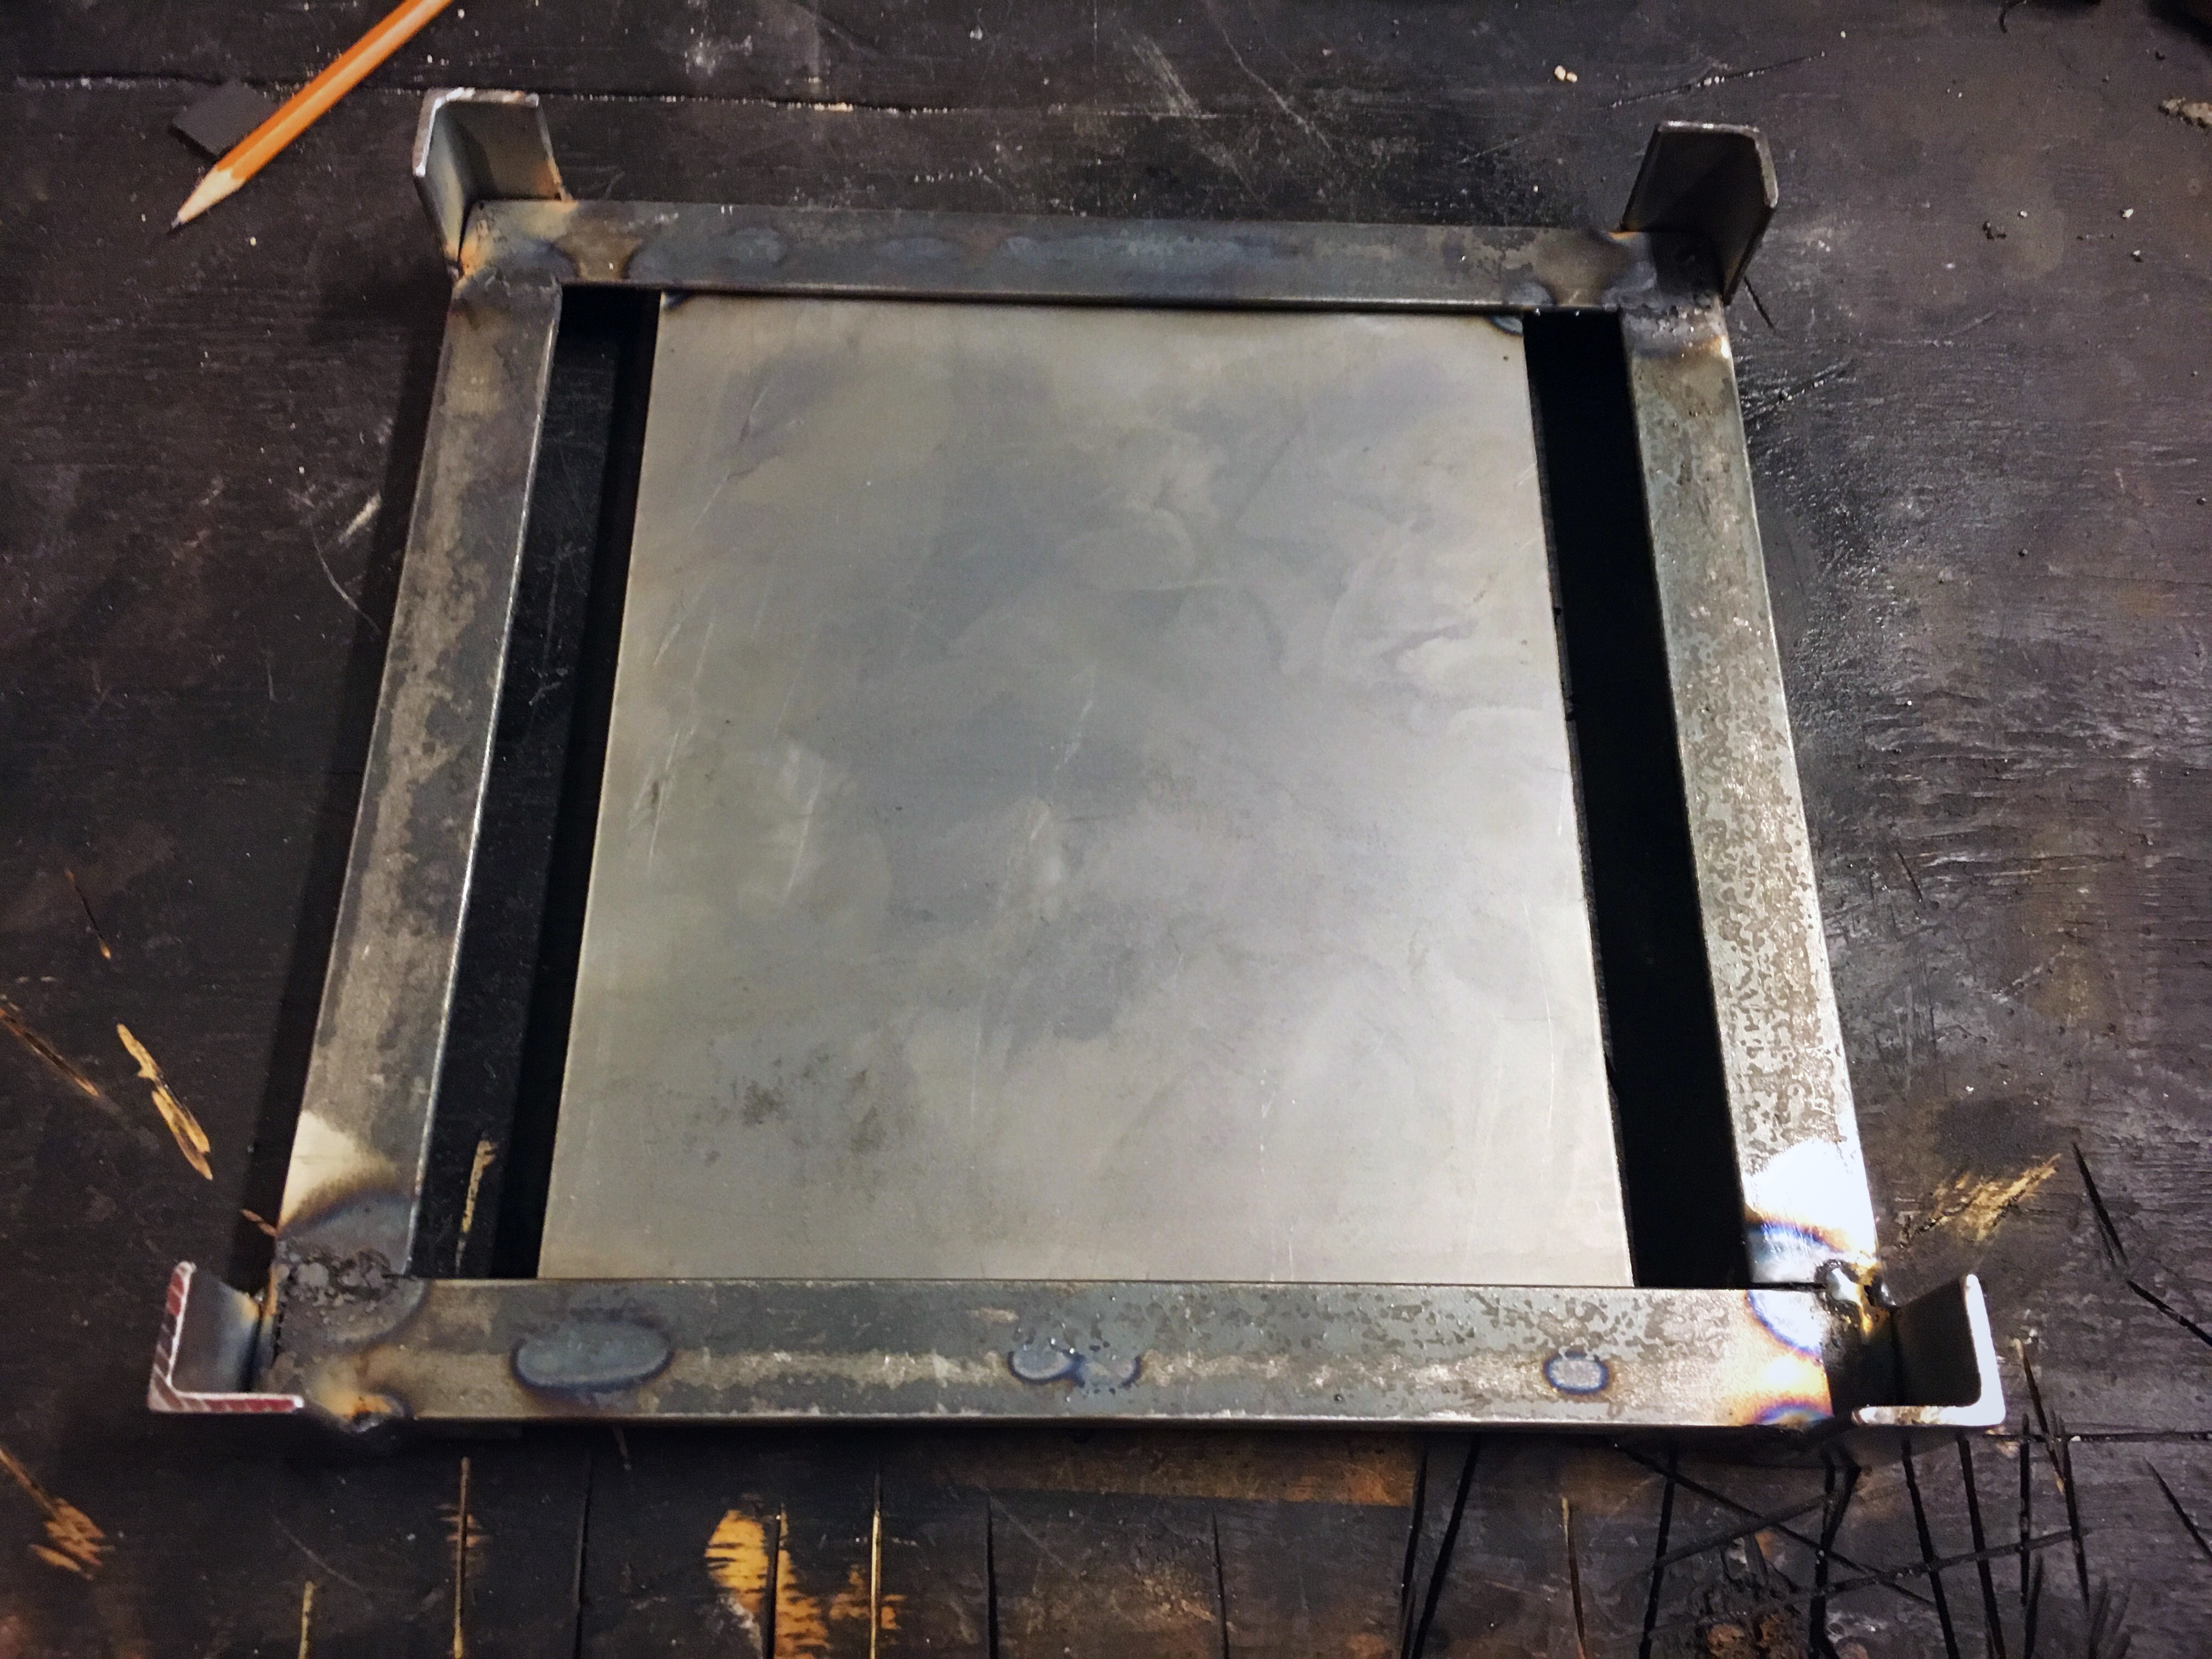
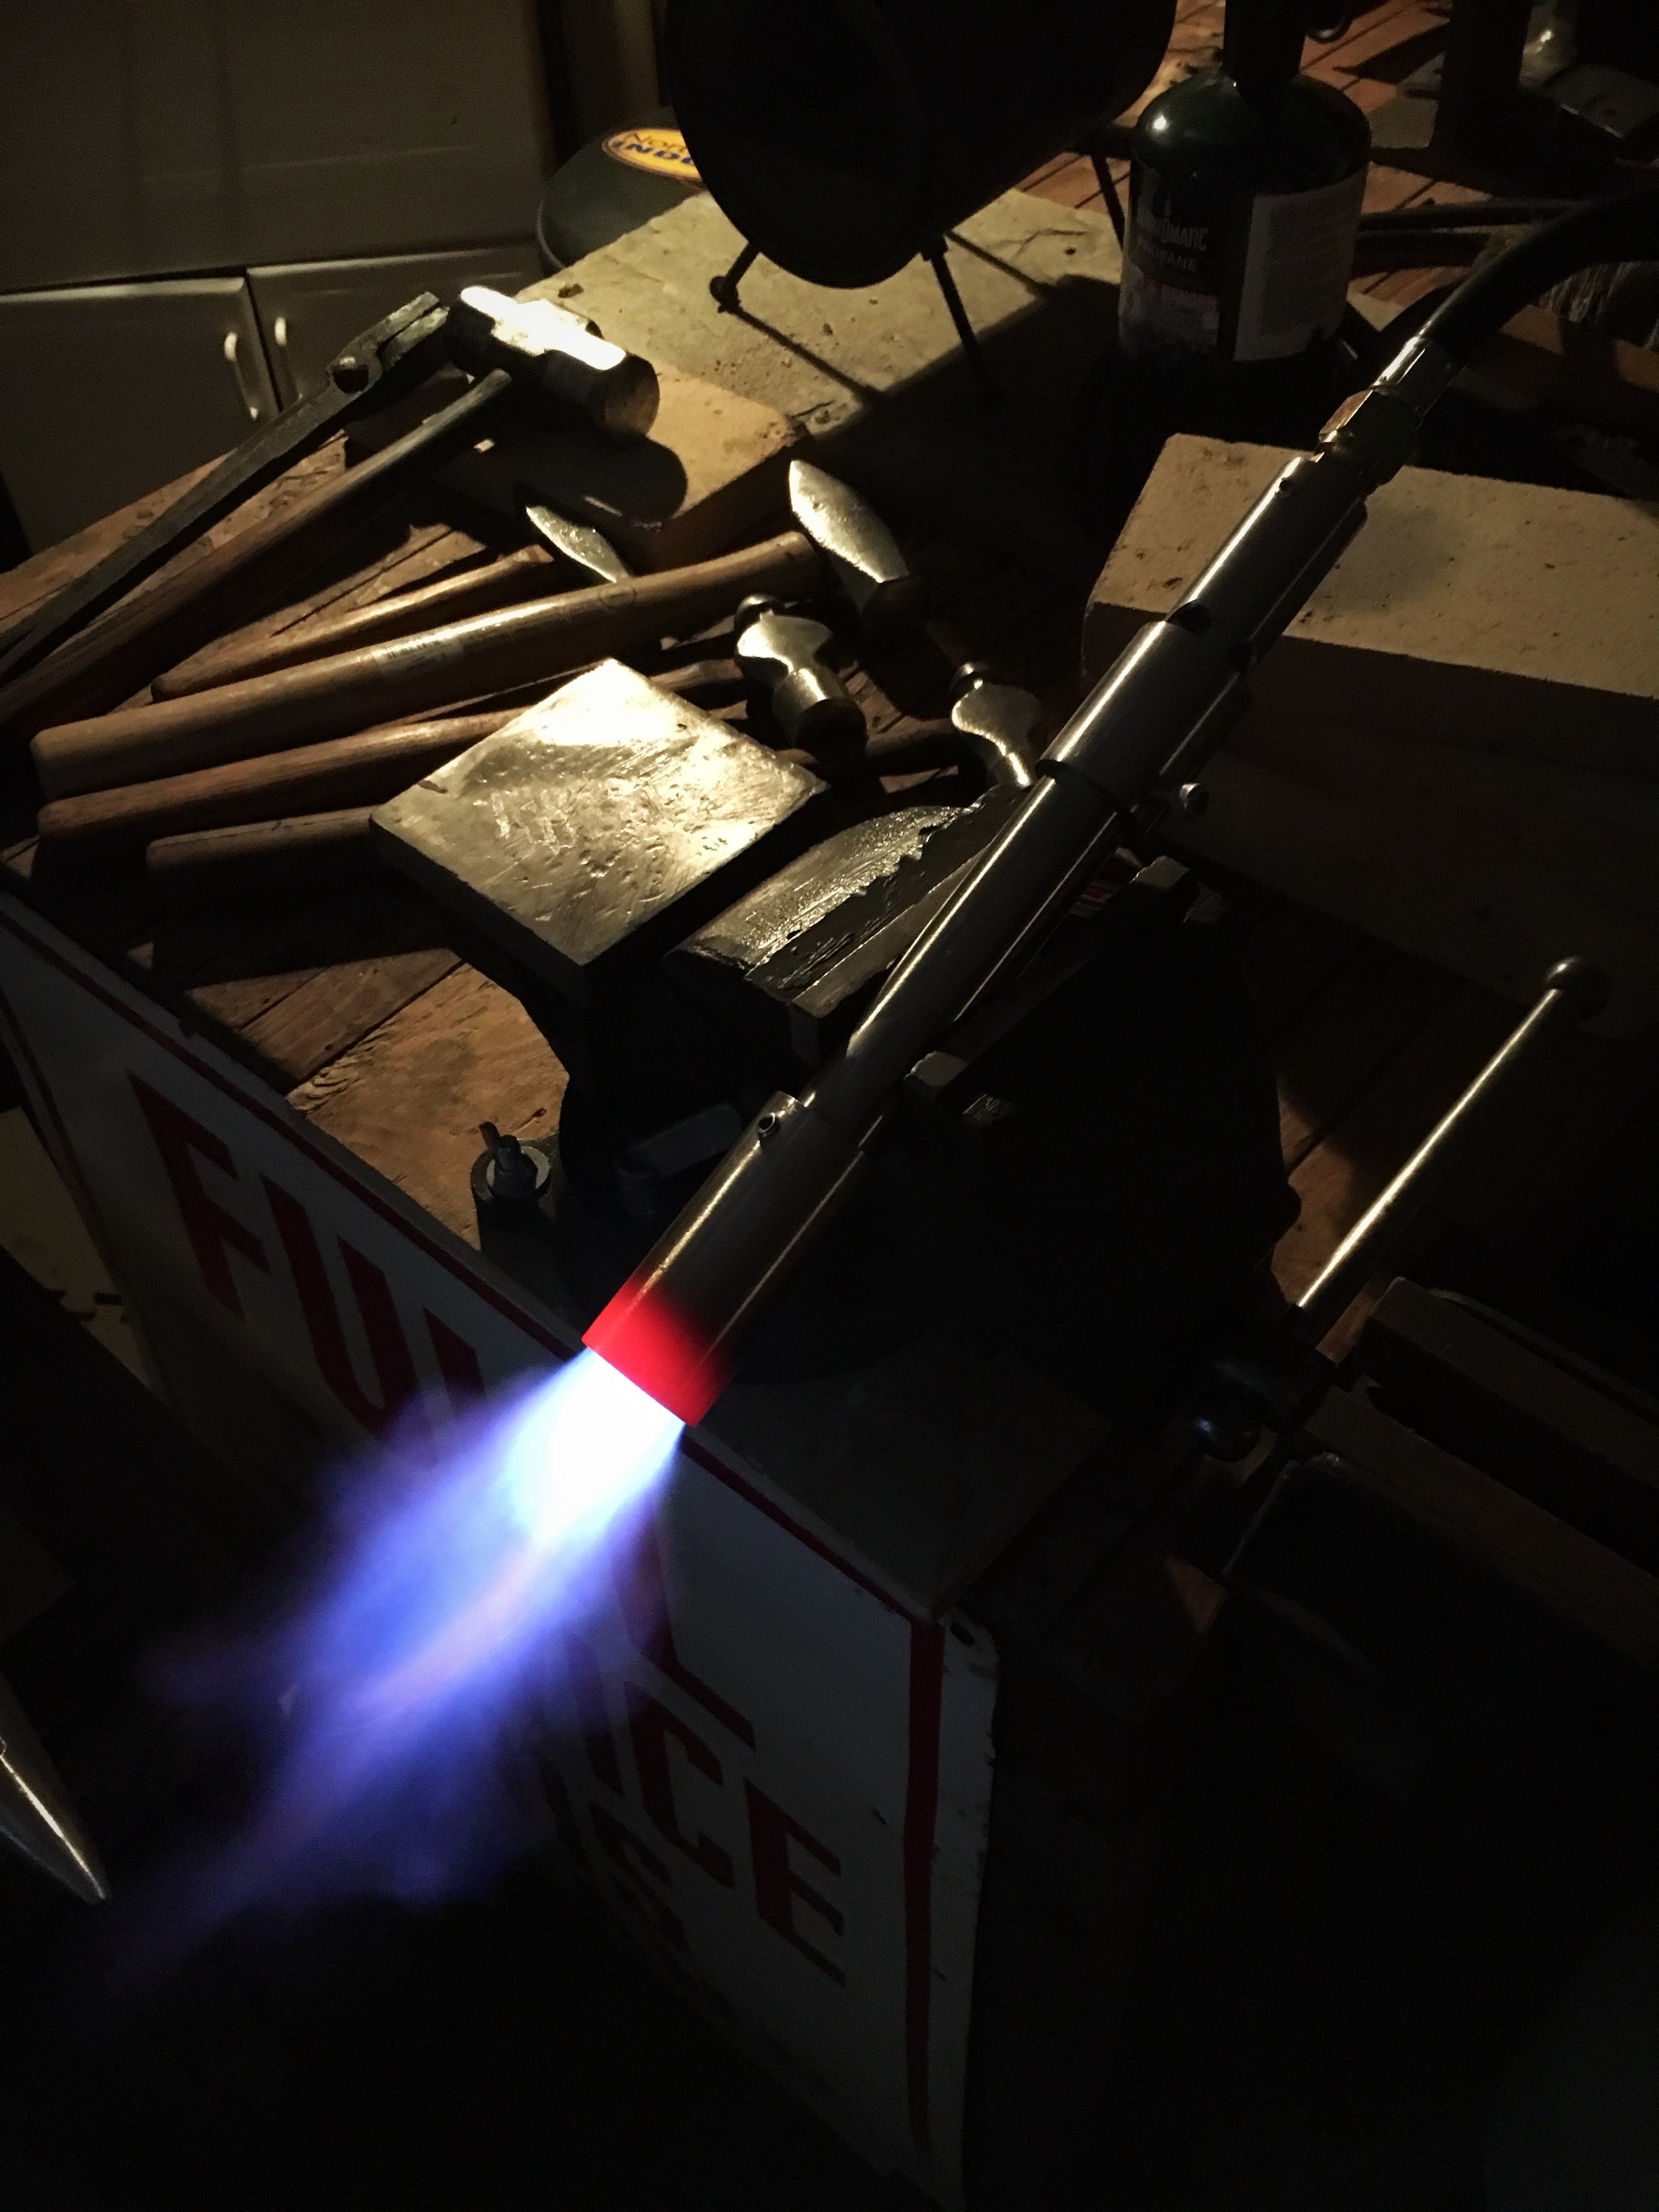
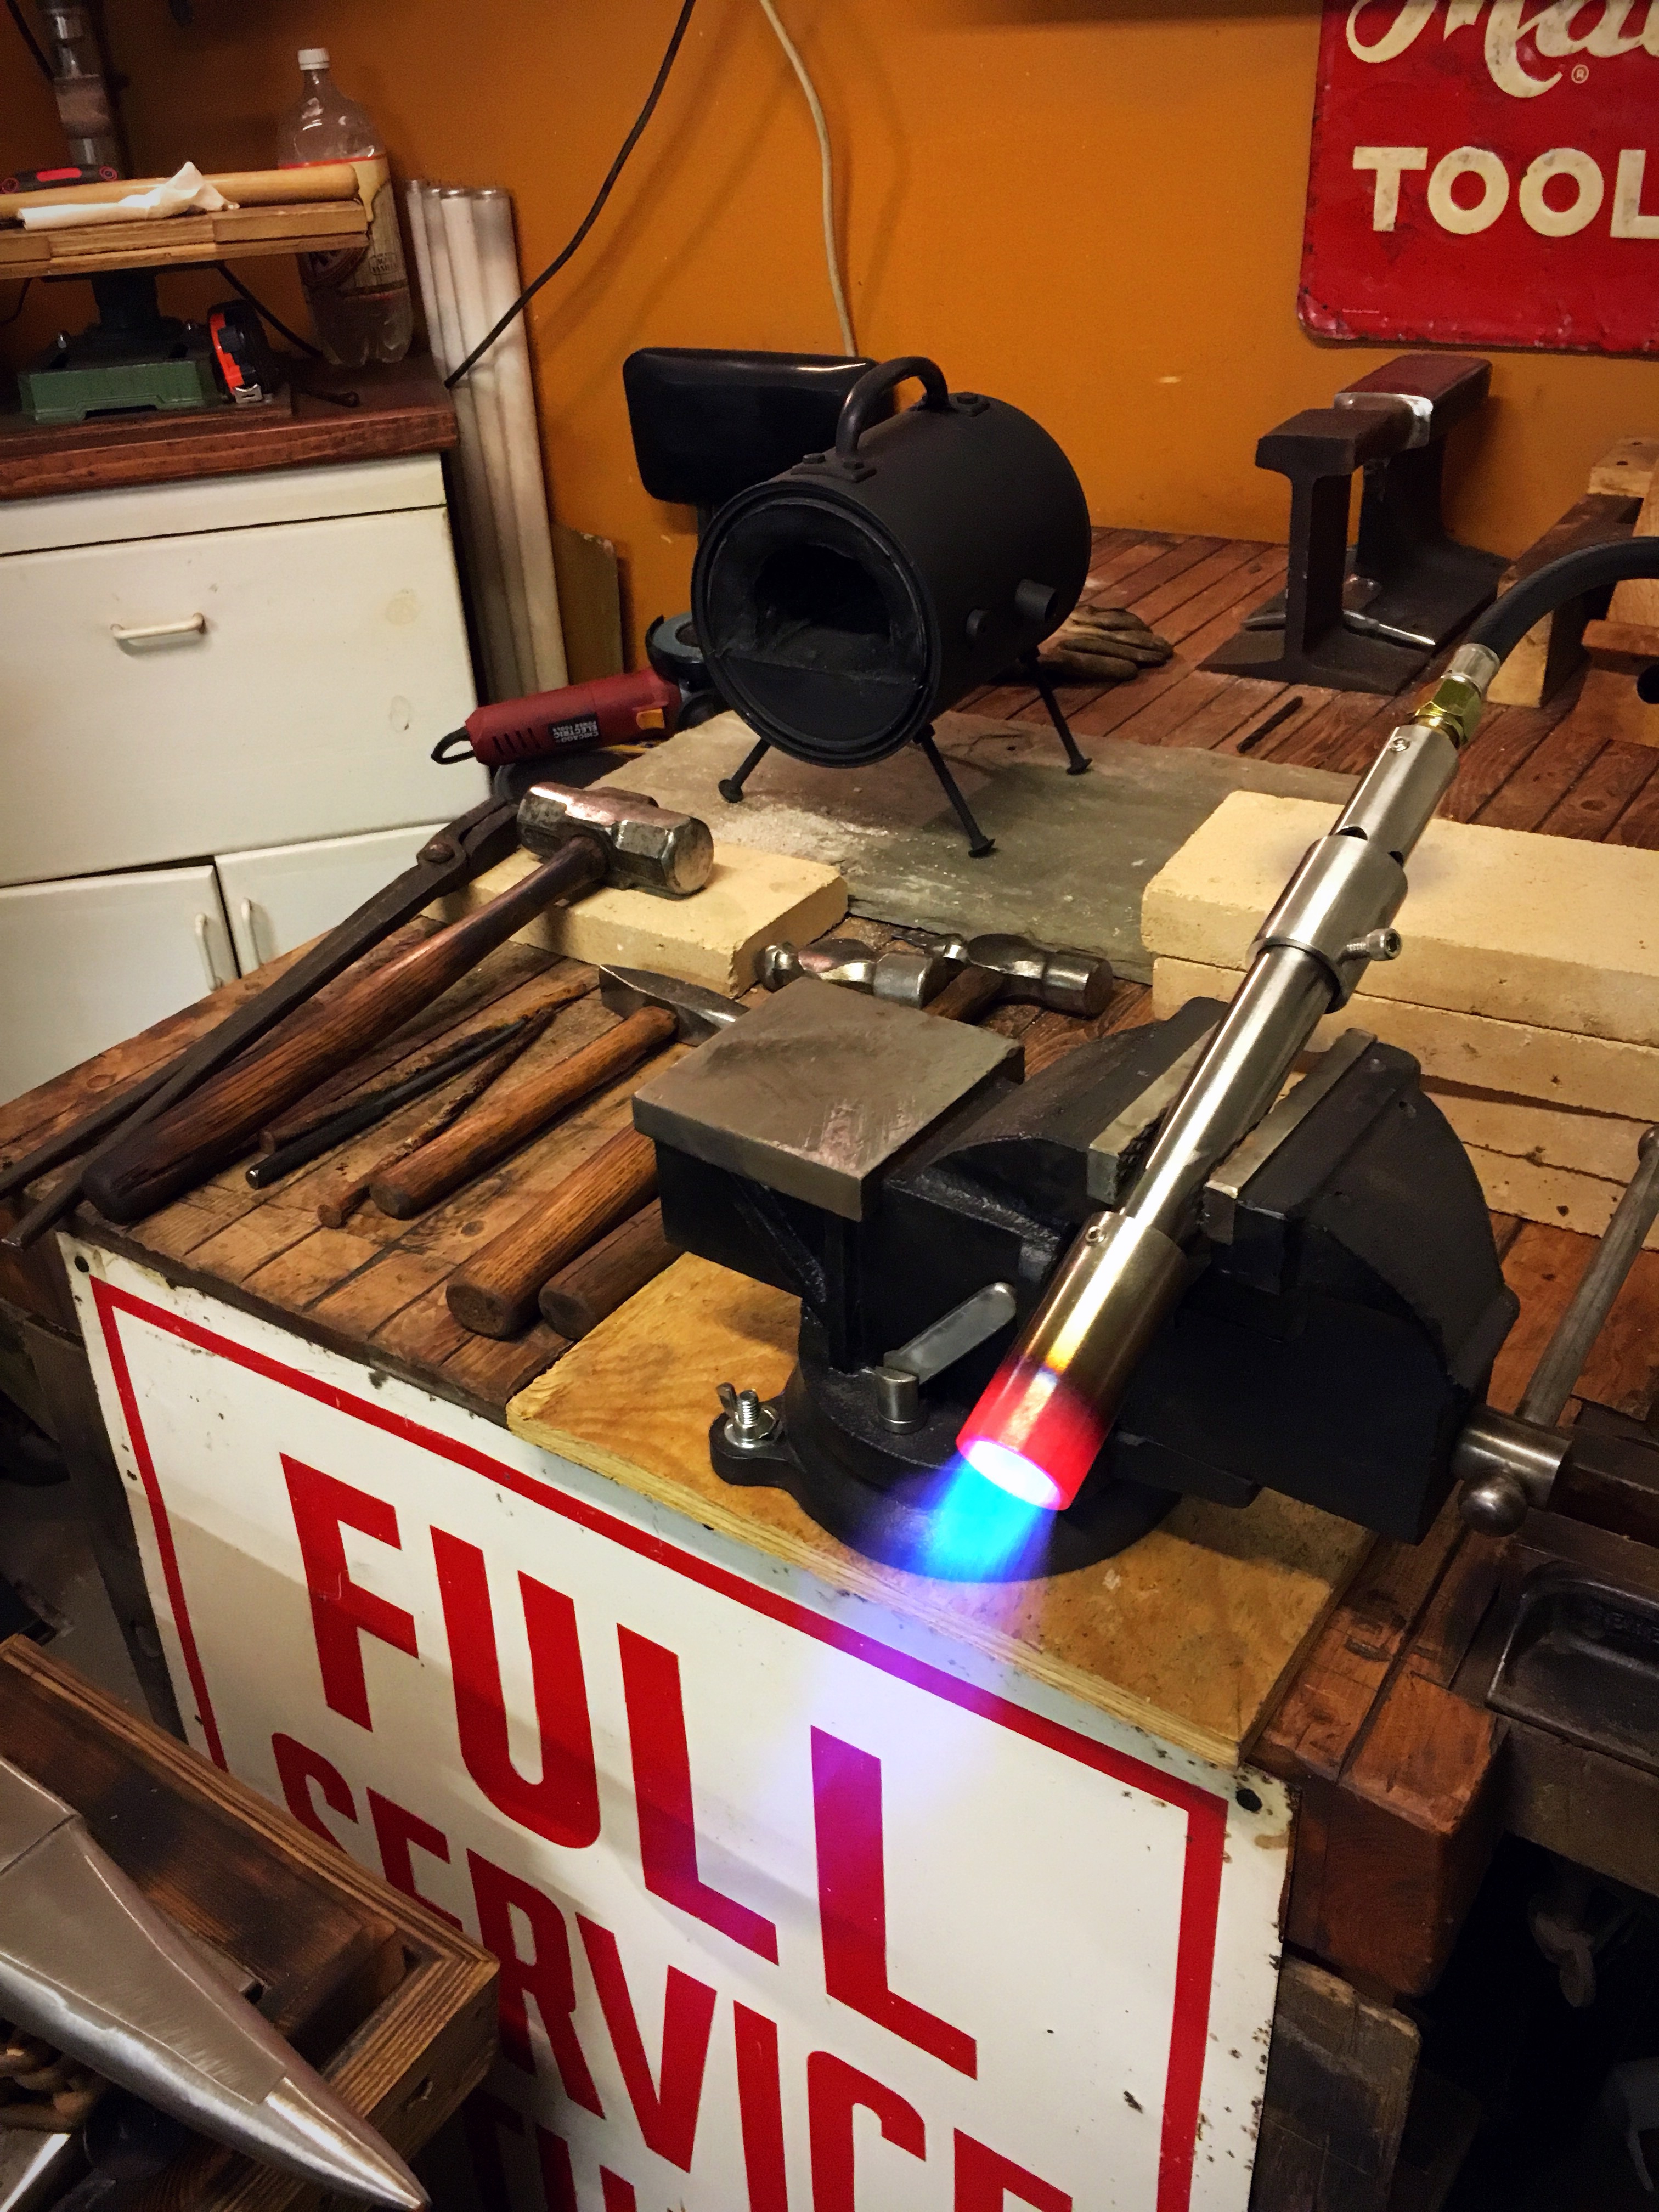
Welded up the frame for my "Heat Sink" Forge
")

-
Quote
Frosty: With a brick pile and a couple home made plumbing parts burners, yeah the Ts, powering it folk are a LOT more encouraged to give it a try. A couple hundred dollars isn't unreasonable for a forge while a custom fabricated 4 burner forge or even a Whisper Moma is obviously more than most folk want to invest of giving something a try.
That's where I am with this whole thing.
Not just starting but crawling into this hobby.
Wanting to add some custom forged accent pieces to the furniture I make.
I have no desire or ambition to become a full time / full fledged blacksmith.
I'll be happy being a tinkerer , if it progresses further well, that won't hurt my feelings.
Plus I love to learn new things.
Not just the How To's but the Why's !
Thank you for replying. All knowledge is appreciated!
FYI- here's my Heat Sink so far.
I'll put it into its own post.

-
That's just a super interesting piece of history right there.
-
One of my compressors that's on its last leg is the smallest portable one I use for driving finish & brad nails.
Its a 6 gallon tank.
Should be about right for my needs.
Once it's build & running my plan is to give the brick forge to a friend who's interested in getting into the hobby but has a couple kids that tend to command a lot of his spare cash.
figure it's always nice to "pay it forward" when you can.
Heres what I'm looking at doing temporarily. I've begun cutting the metal to frame it. It's around 268 cubic inches & with that little mini mongo burner I figured it should get me by & show me what I want & don't want in my final set up.


And the obligatory YouTube video of it.....
-
I've not been on here but for a minute yet I already know (have read) that Frosty has an opinion on these type of forges.
I know they're not considered efficient as they're often referred to as Heat Sinks and no professional would choose that route.
But for the weekend warrior, for the once or twice a month hobbyists, why not ?
And to that end is there a way to get the most from that set up?
**** Obviously I'm asking as I'm building a small one to tide me over till I replace my shops air compressor which I'm planning to use for a double burner set up.
So for the gurus on here, if you were restricted to using a propane fired brick forge how would you go about maxing out the potential of it?
-
Here's a short clip I uploaded to YouTube.
-
Which "Rex " are we referring to ?!?!
-
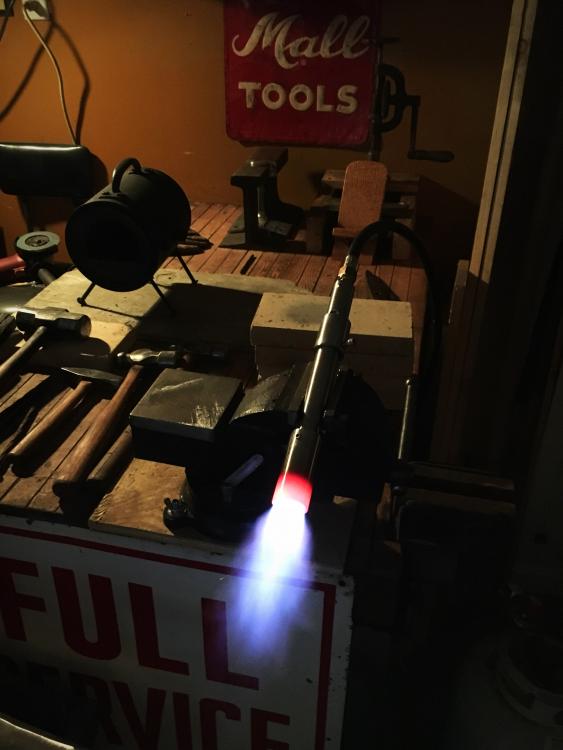
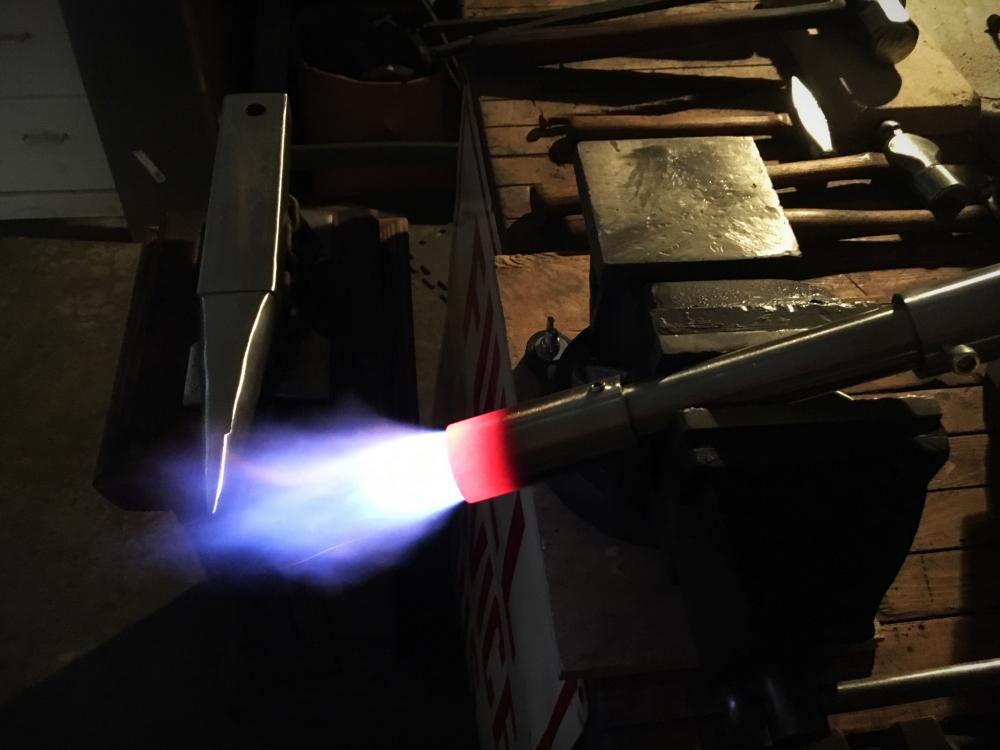
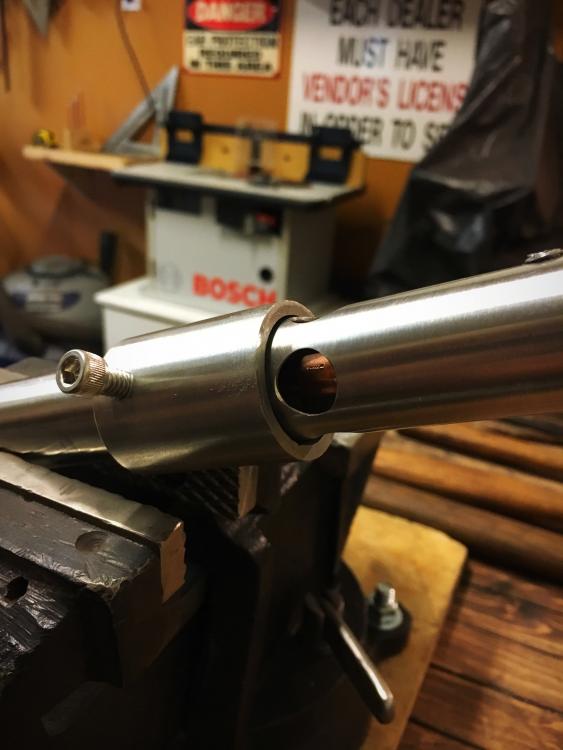
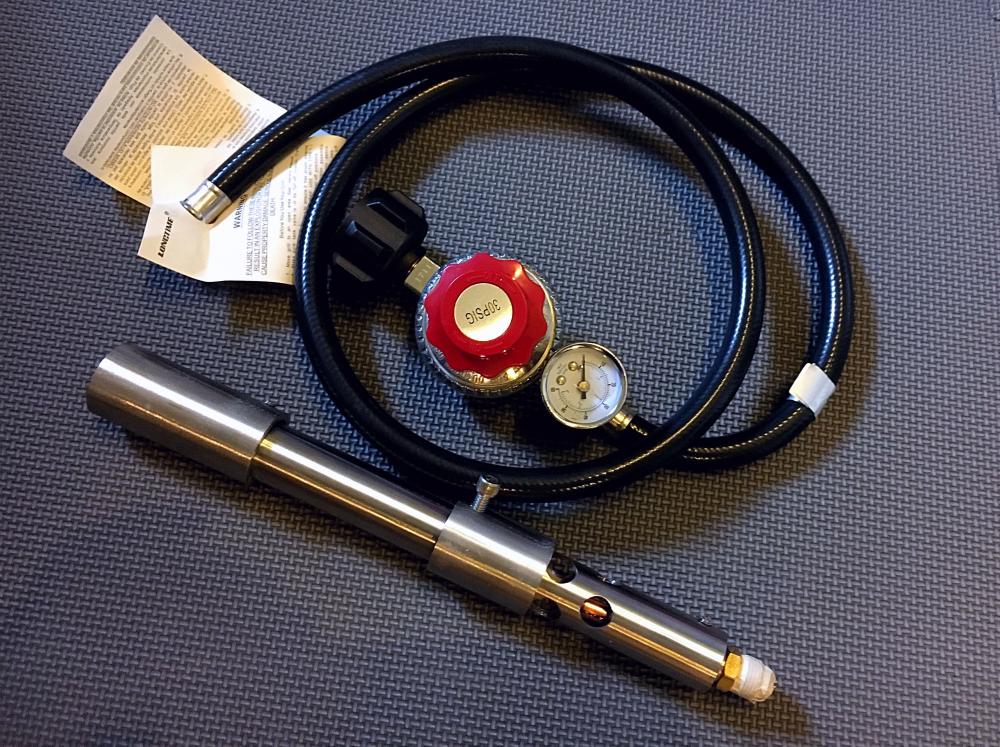
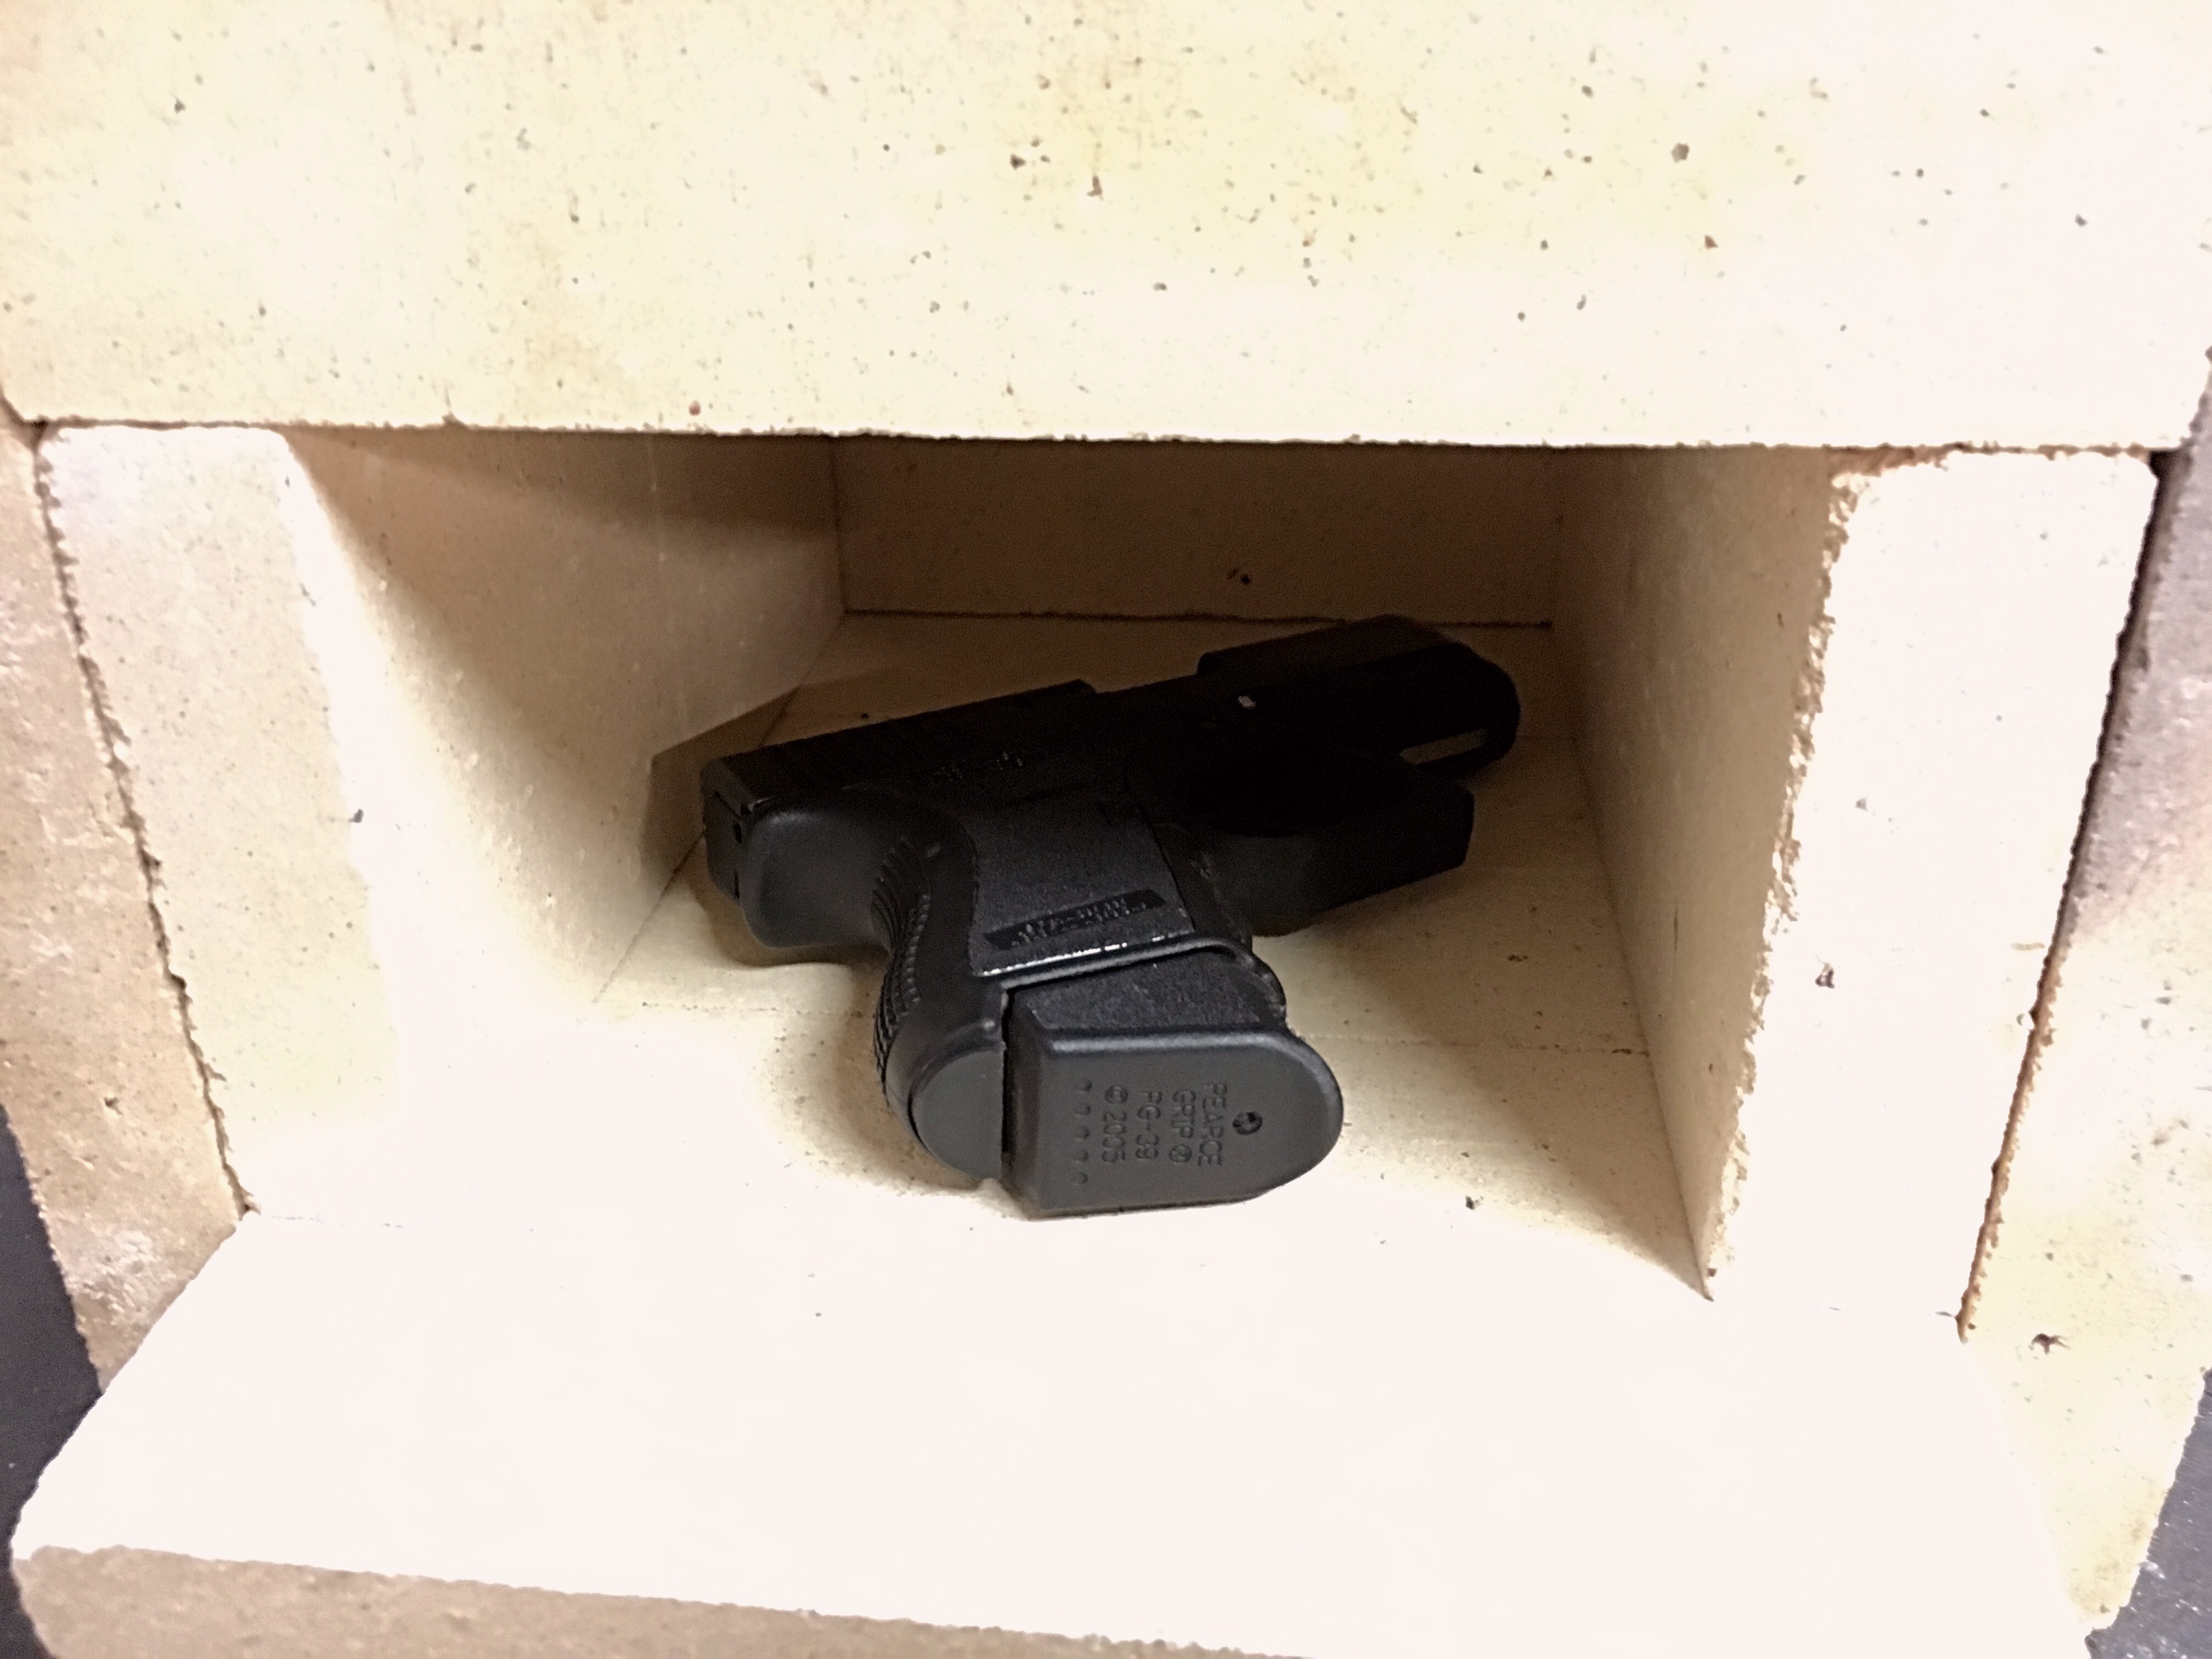
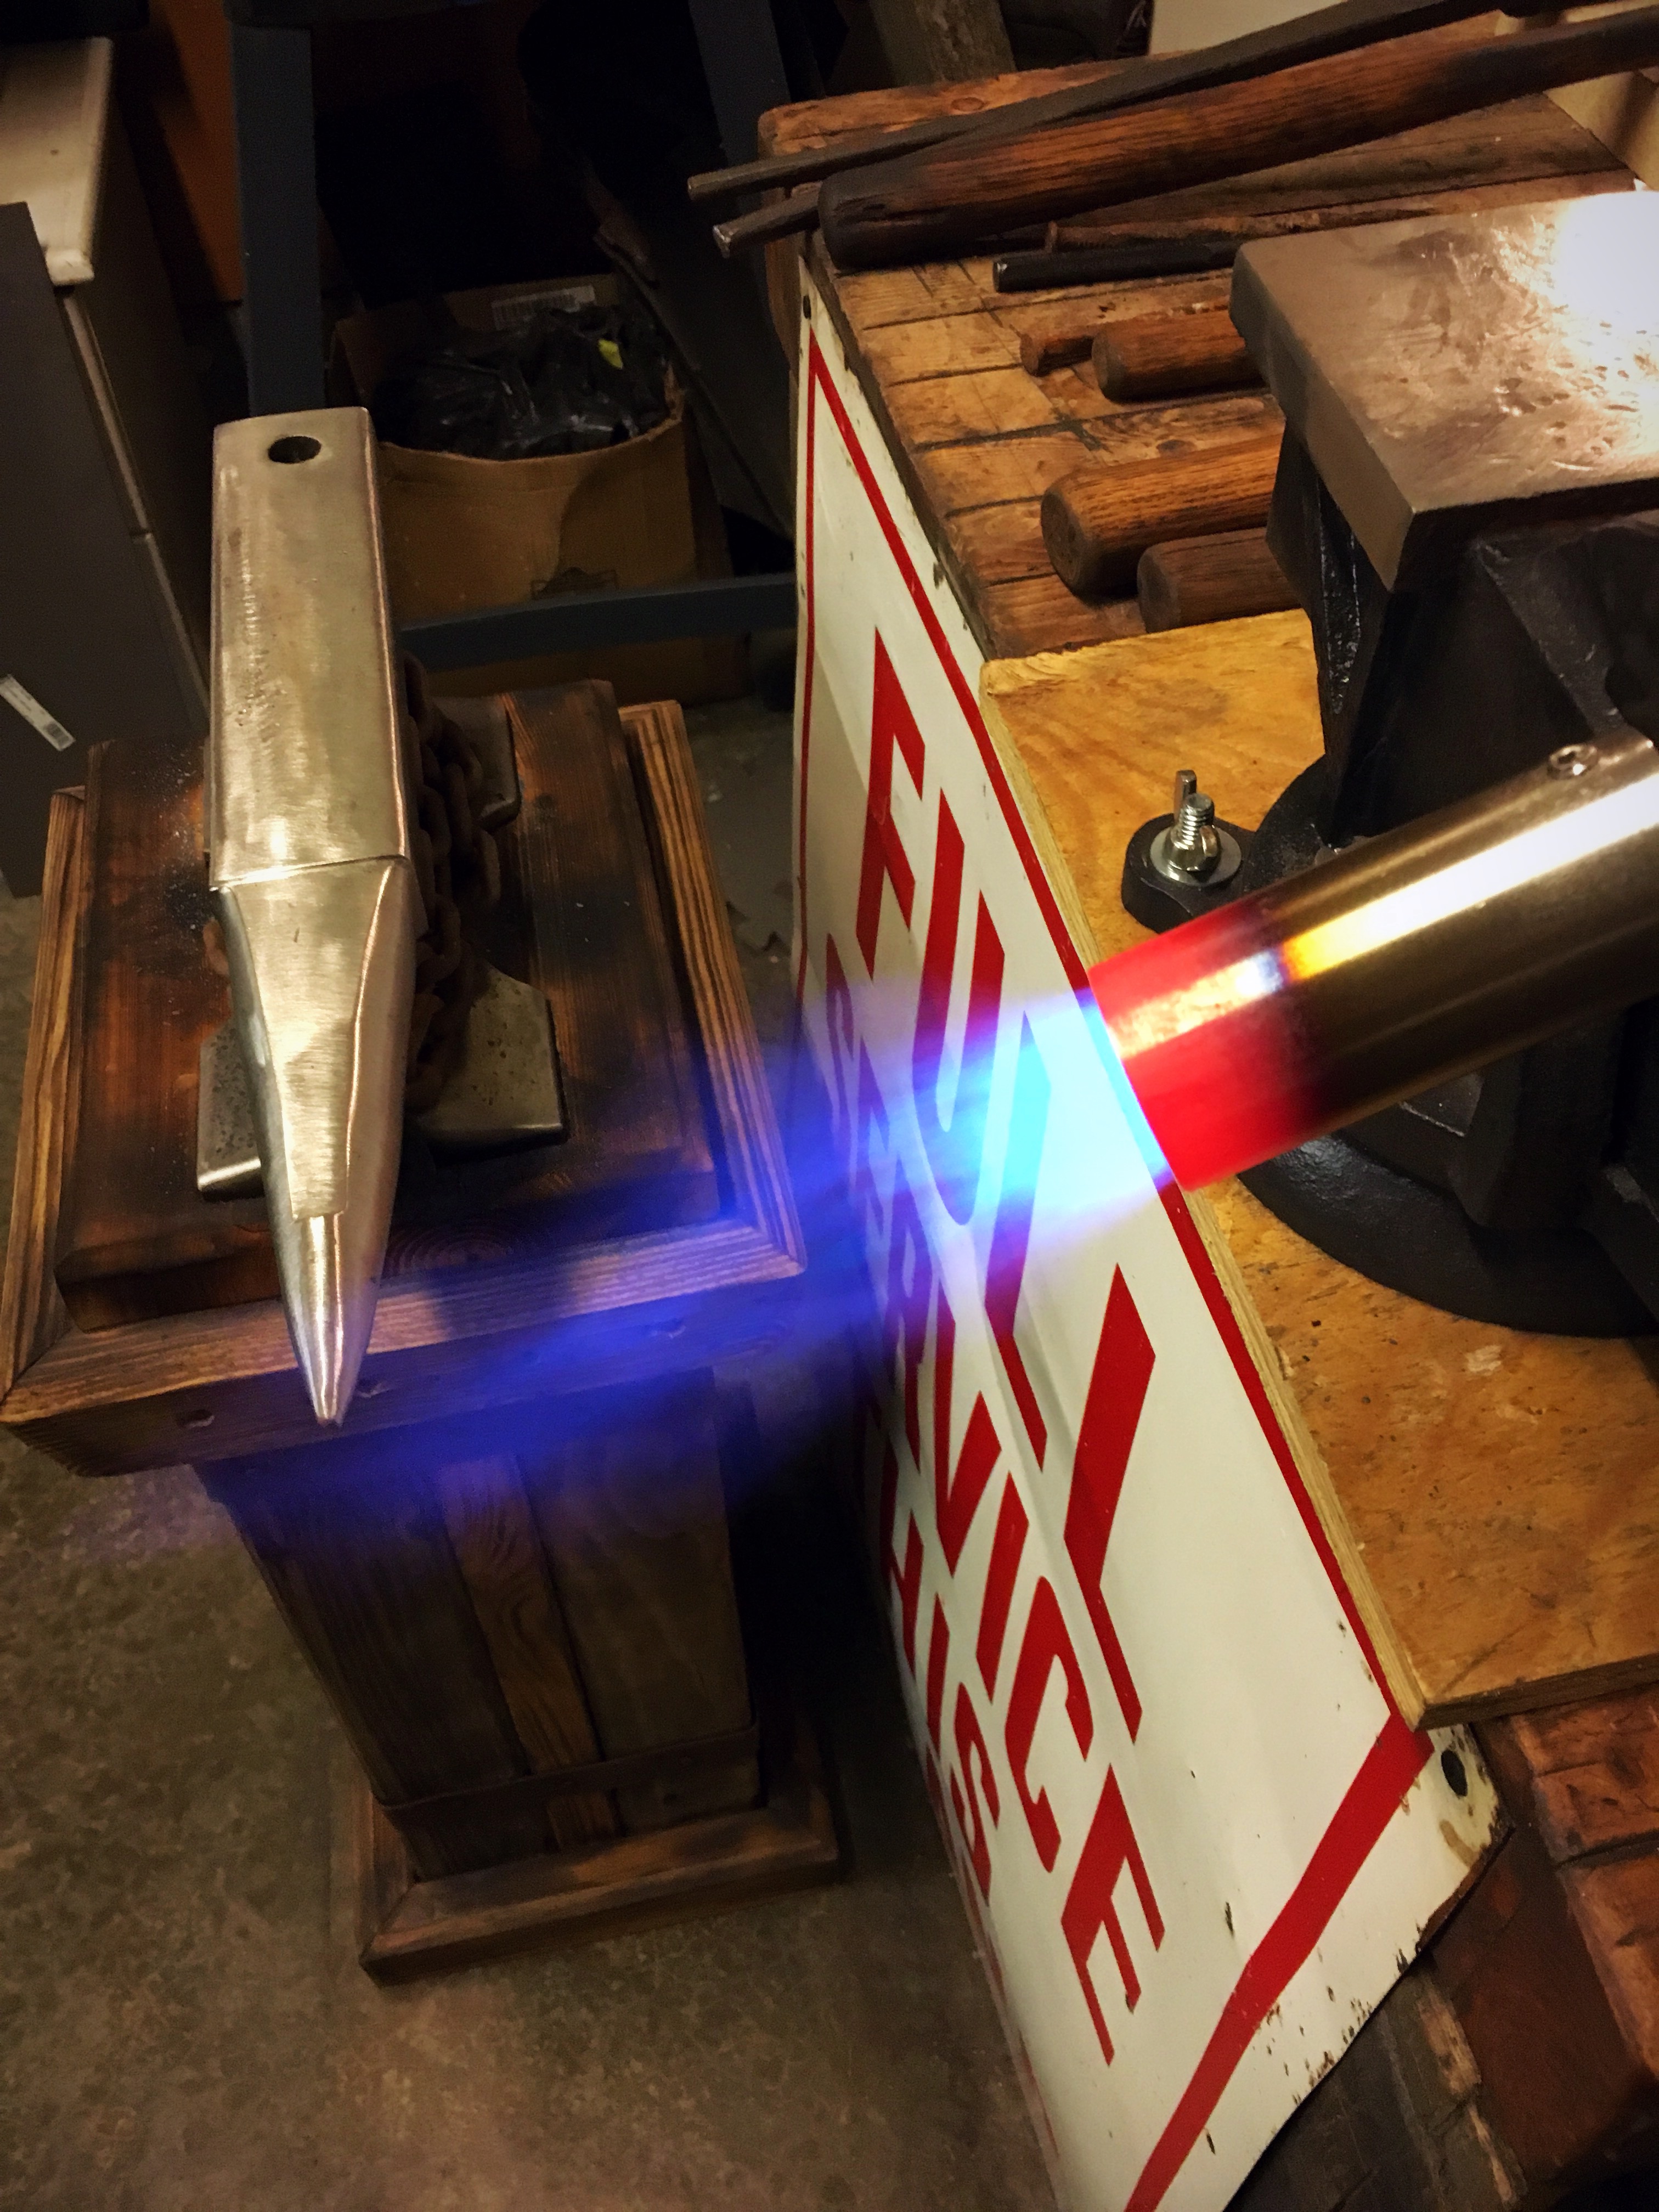
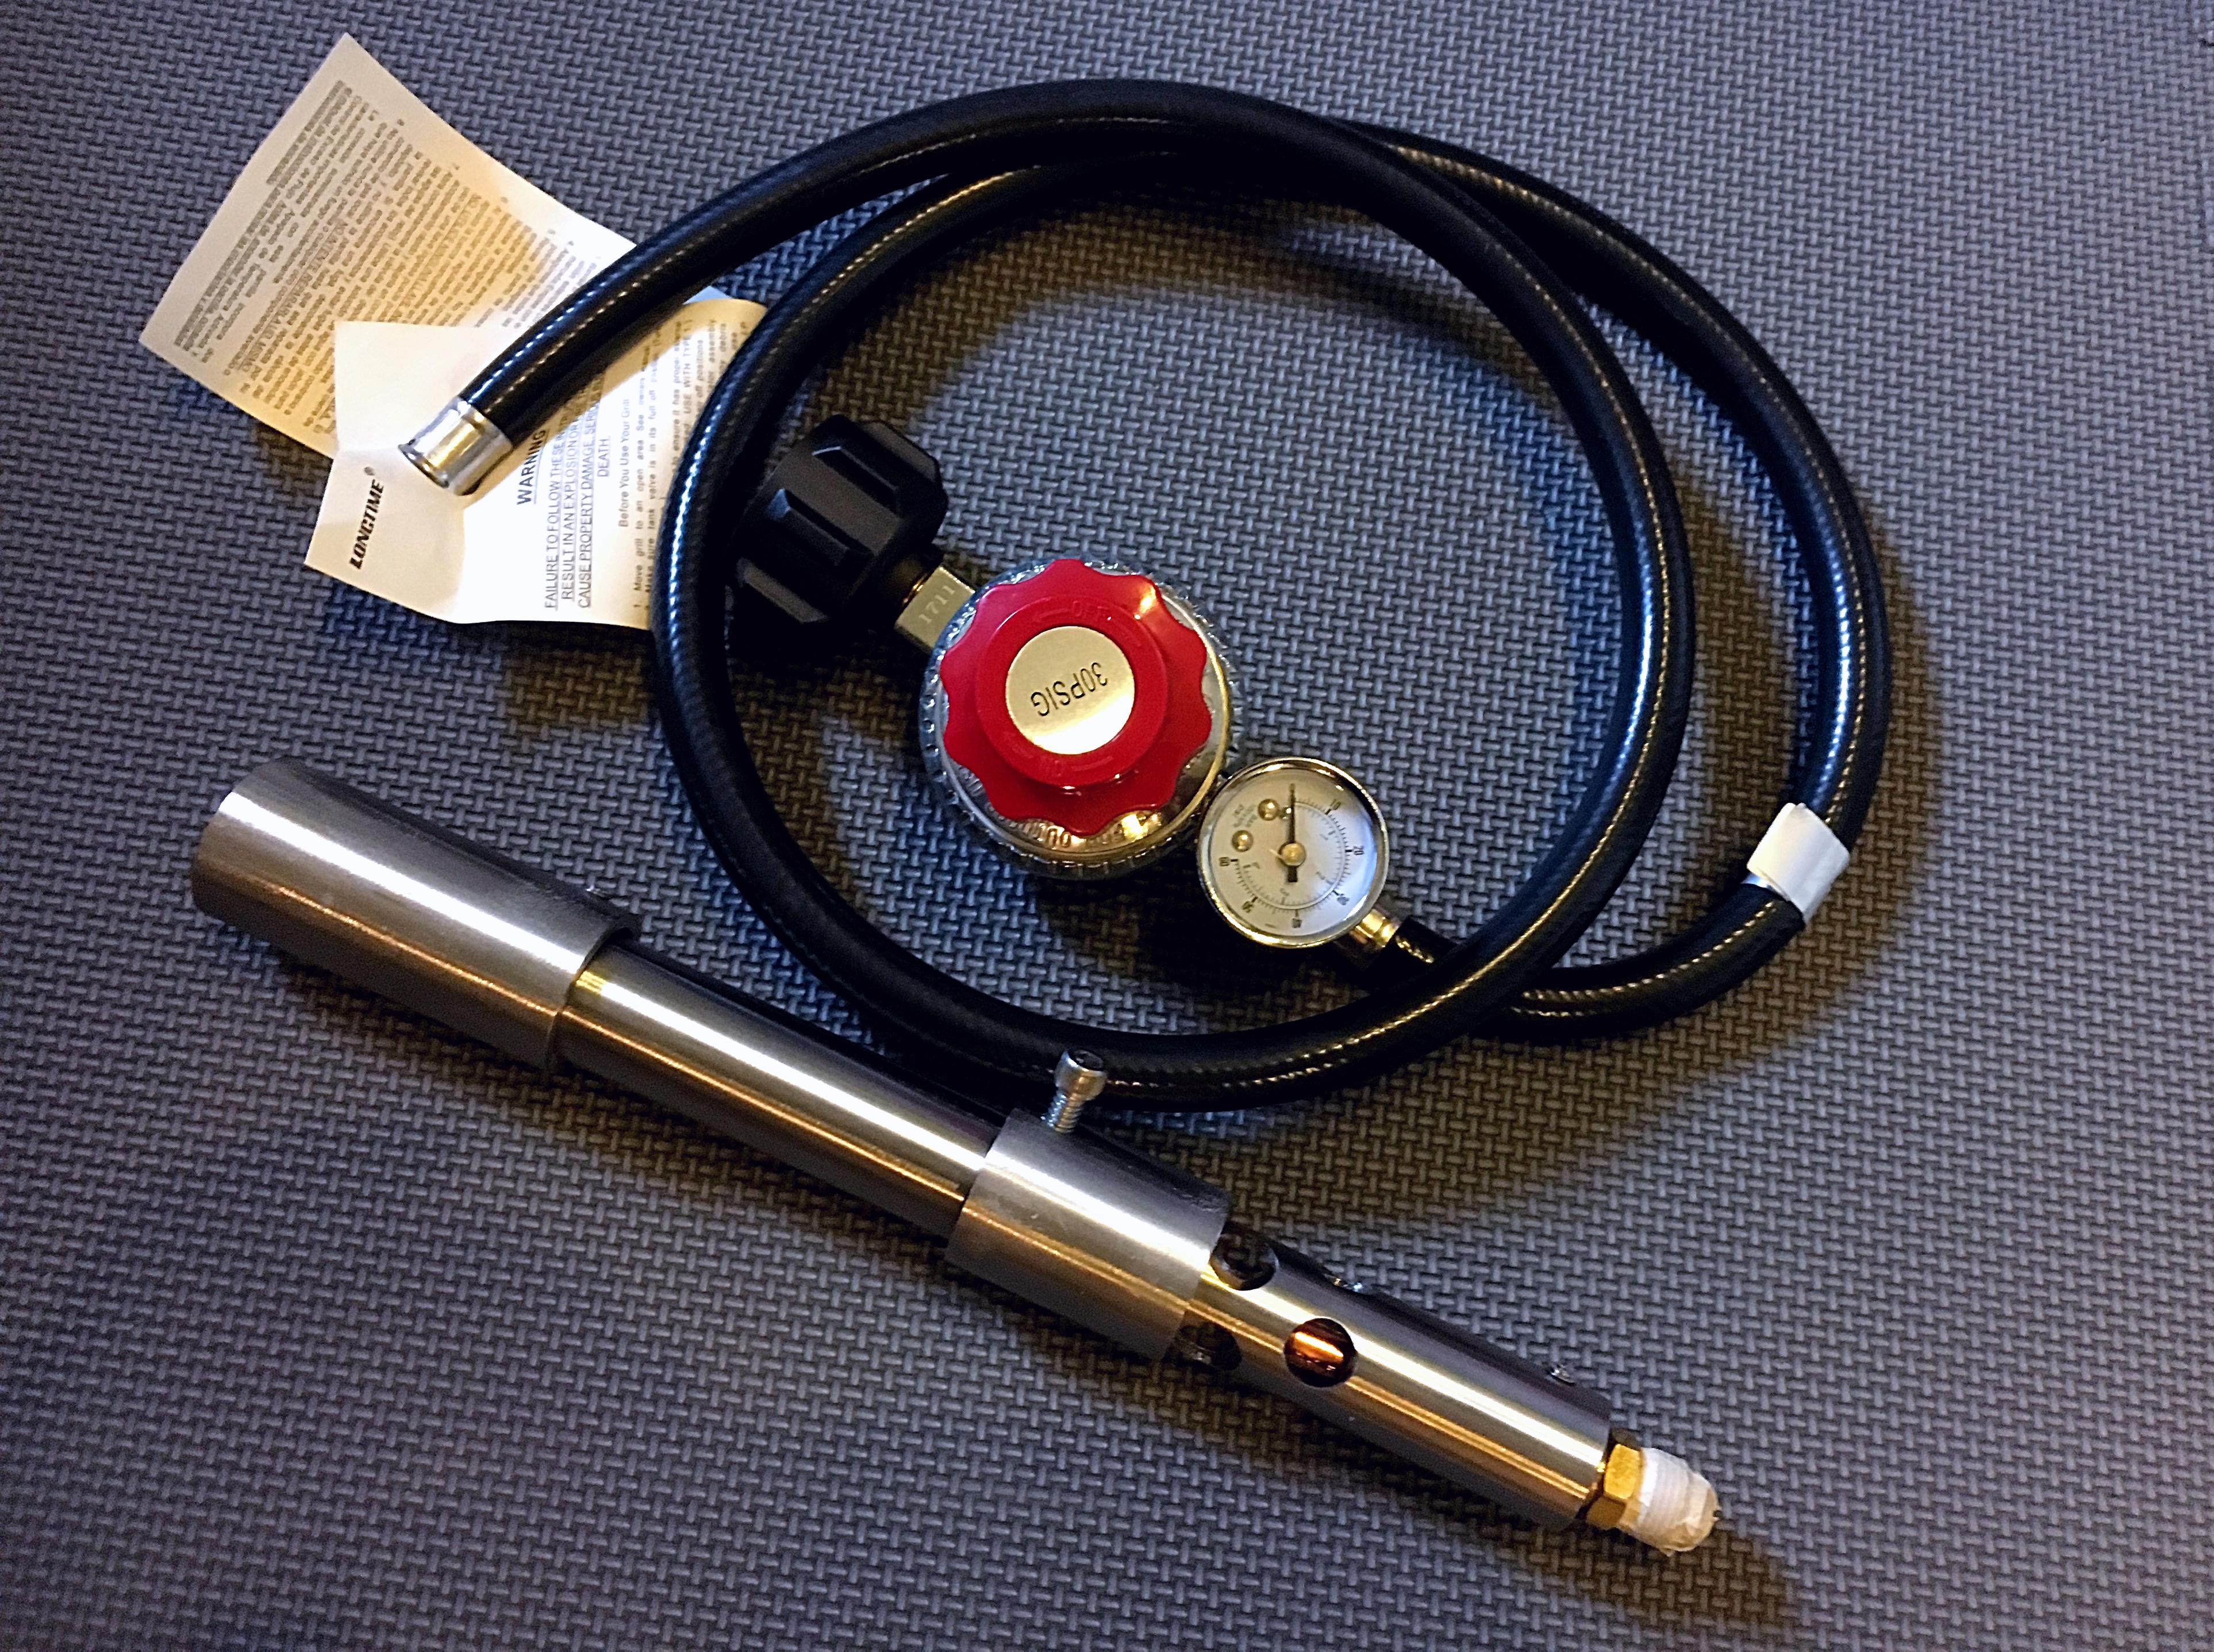
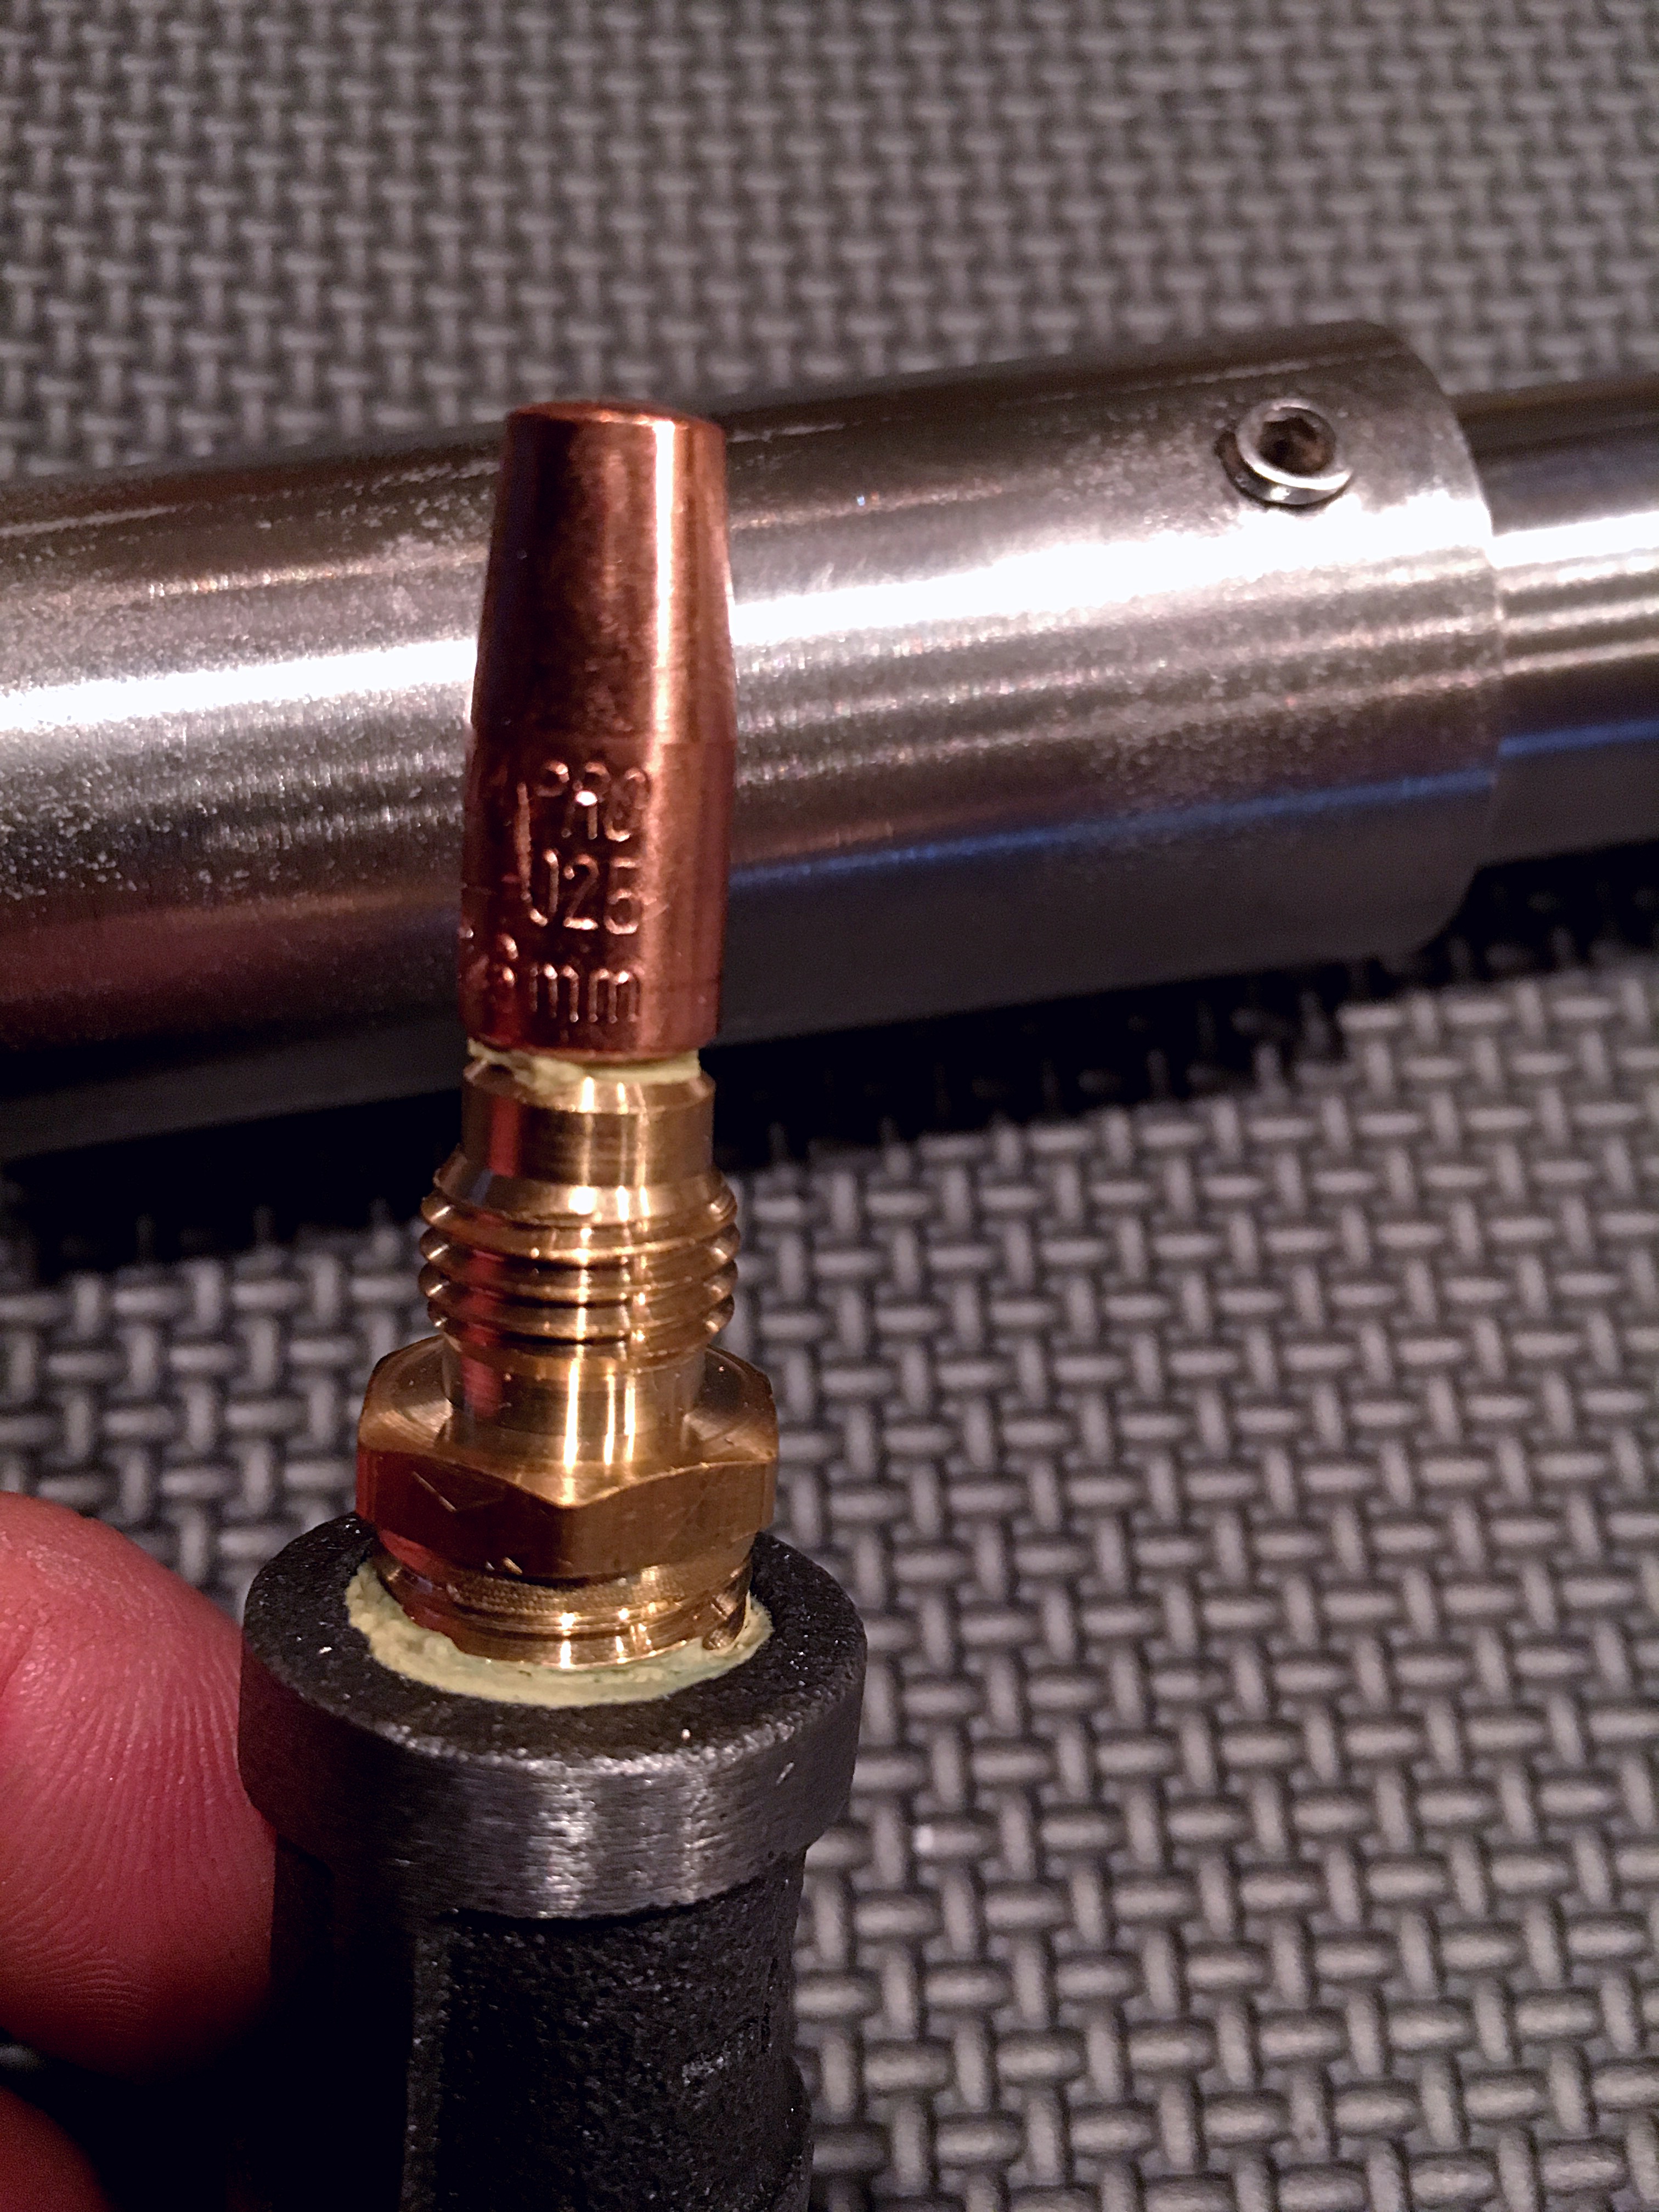
Test fired my stainless mini mongo Burner for the first time today.
At 8psi I got this....
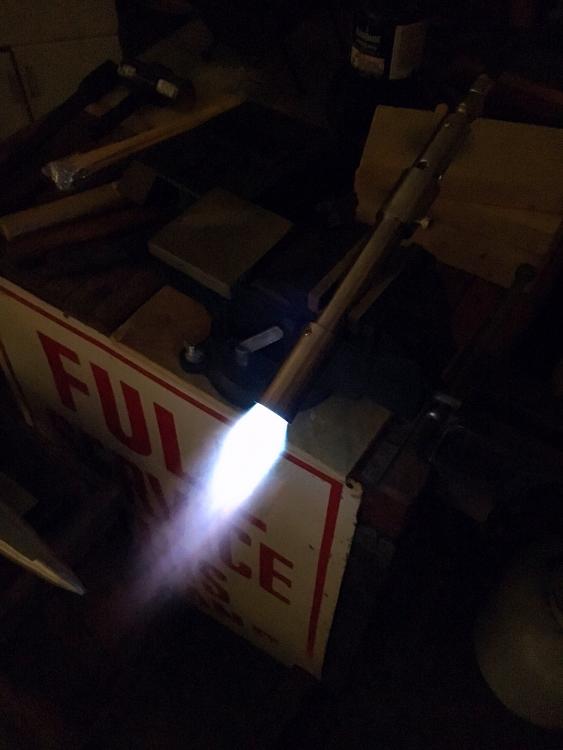
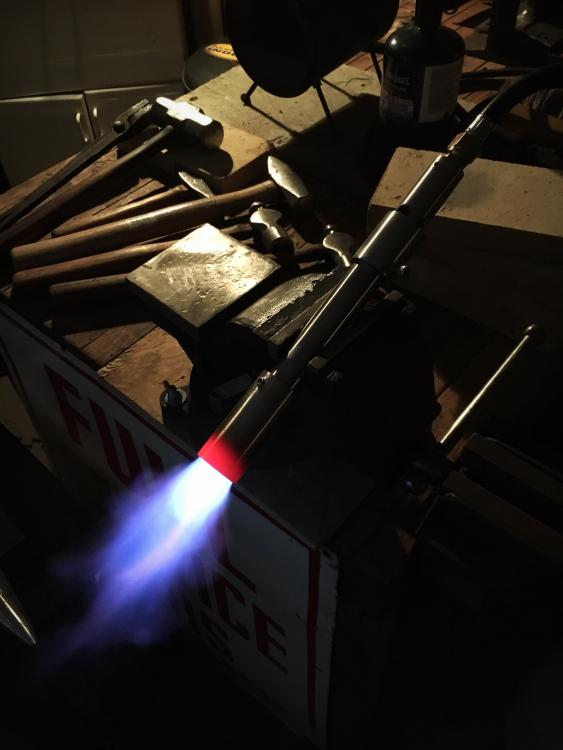
The first row of air inlets are completely blocked off.
When both were open it huffed constantly.
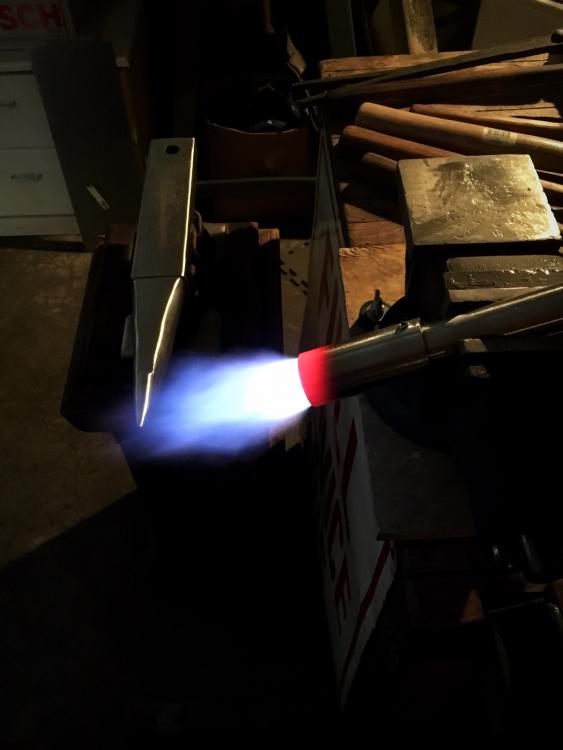
At 10psi I got this flame.
The stainless flair / tip got red hot real quick.


This is how far below the choke collar the tip is set.
The line is indicating the top of the collar position when I took the photos.
I've never used a burner before is this setup & positioning of the jet good to go?
anything thing look wrong or more importantly, dangerous?
-
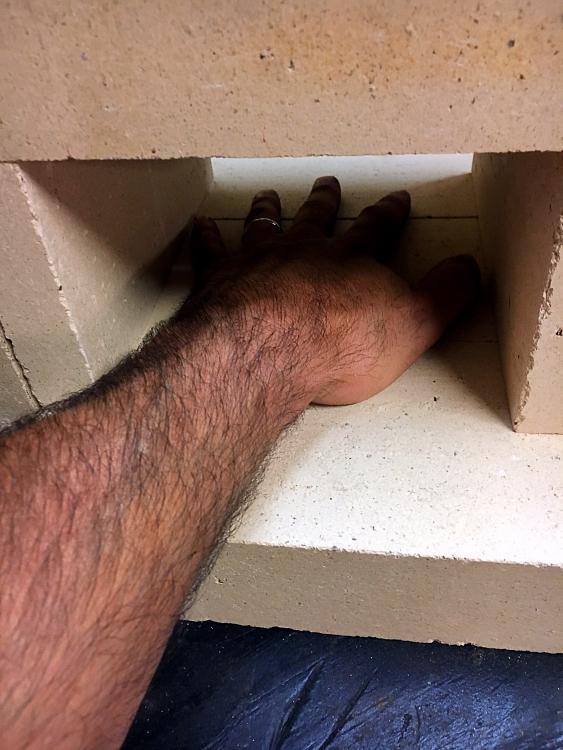
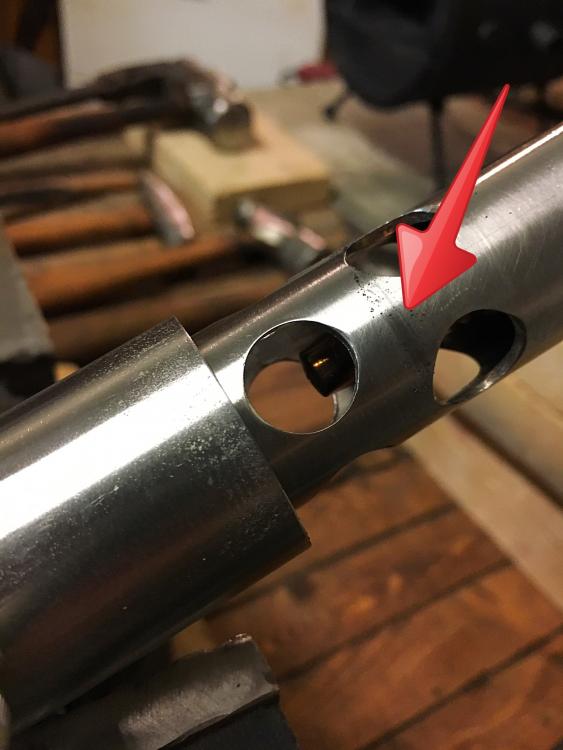
I've been De-Burring the one I bought and working to get the jet centered correctly before test firing it.
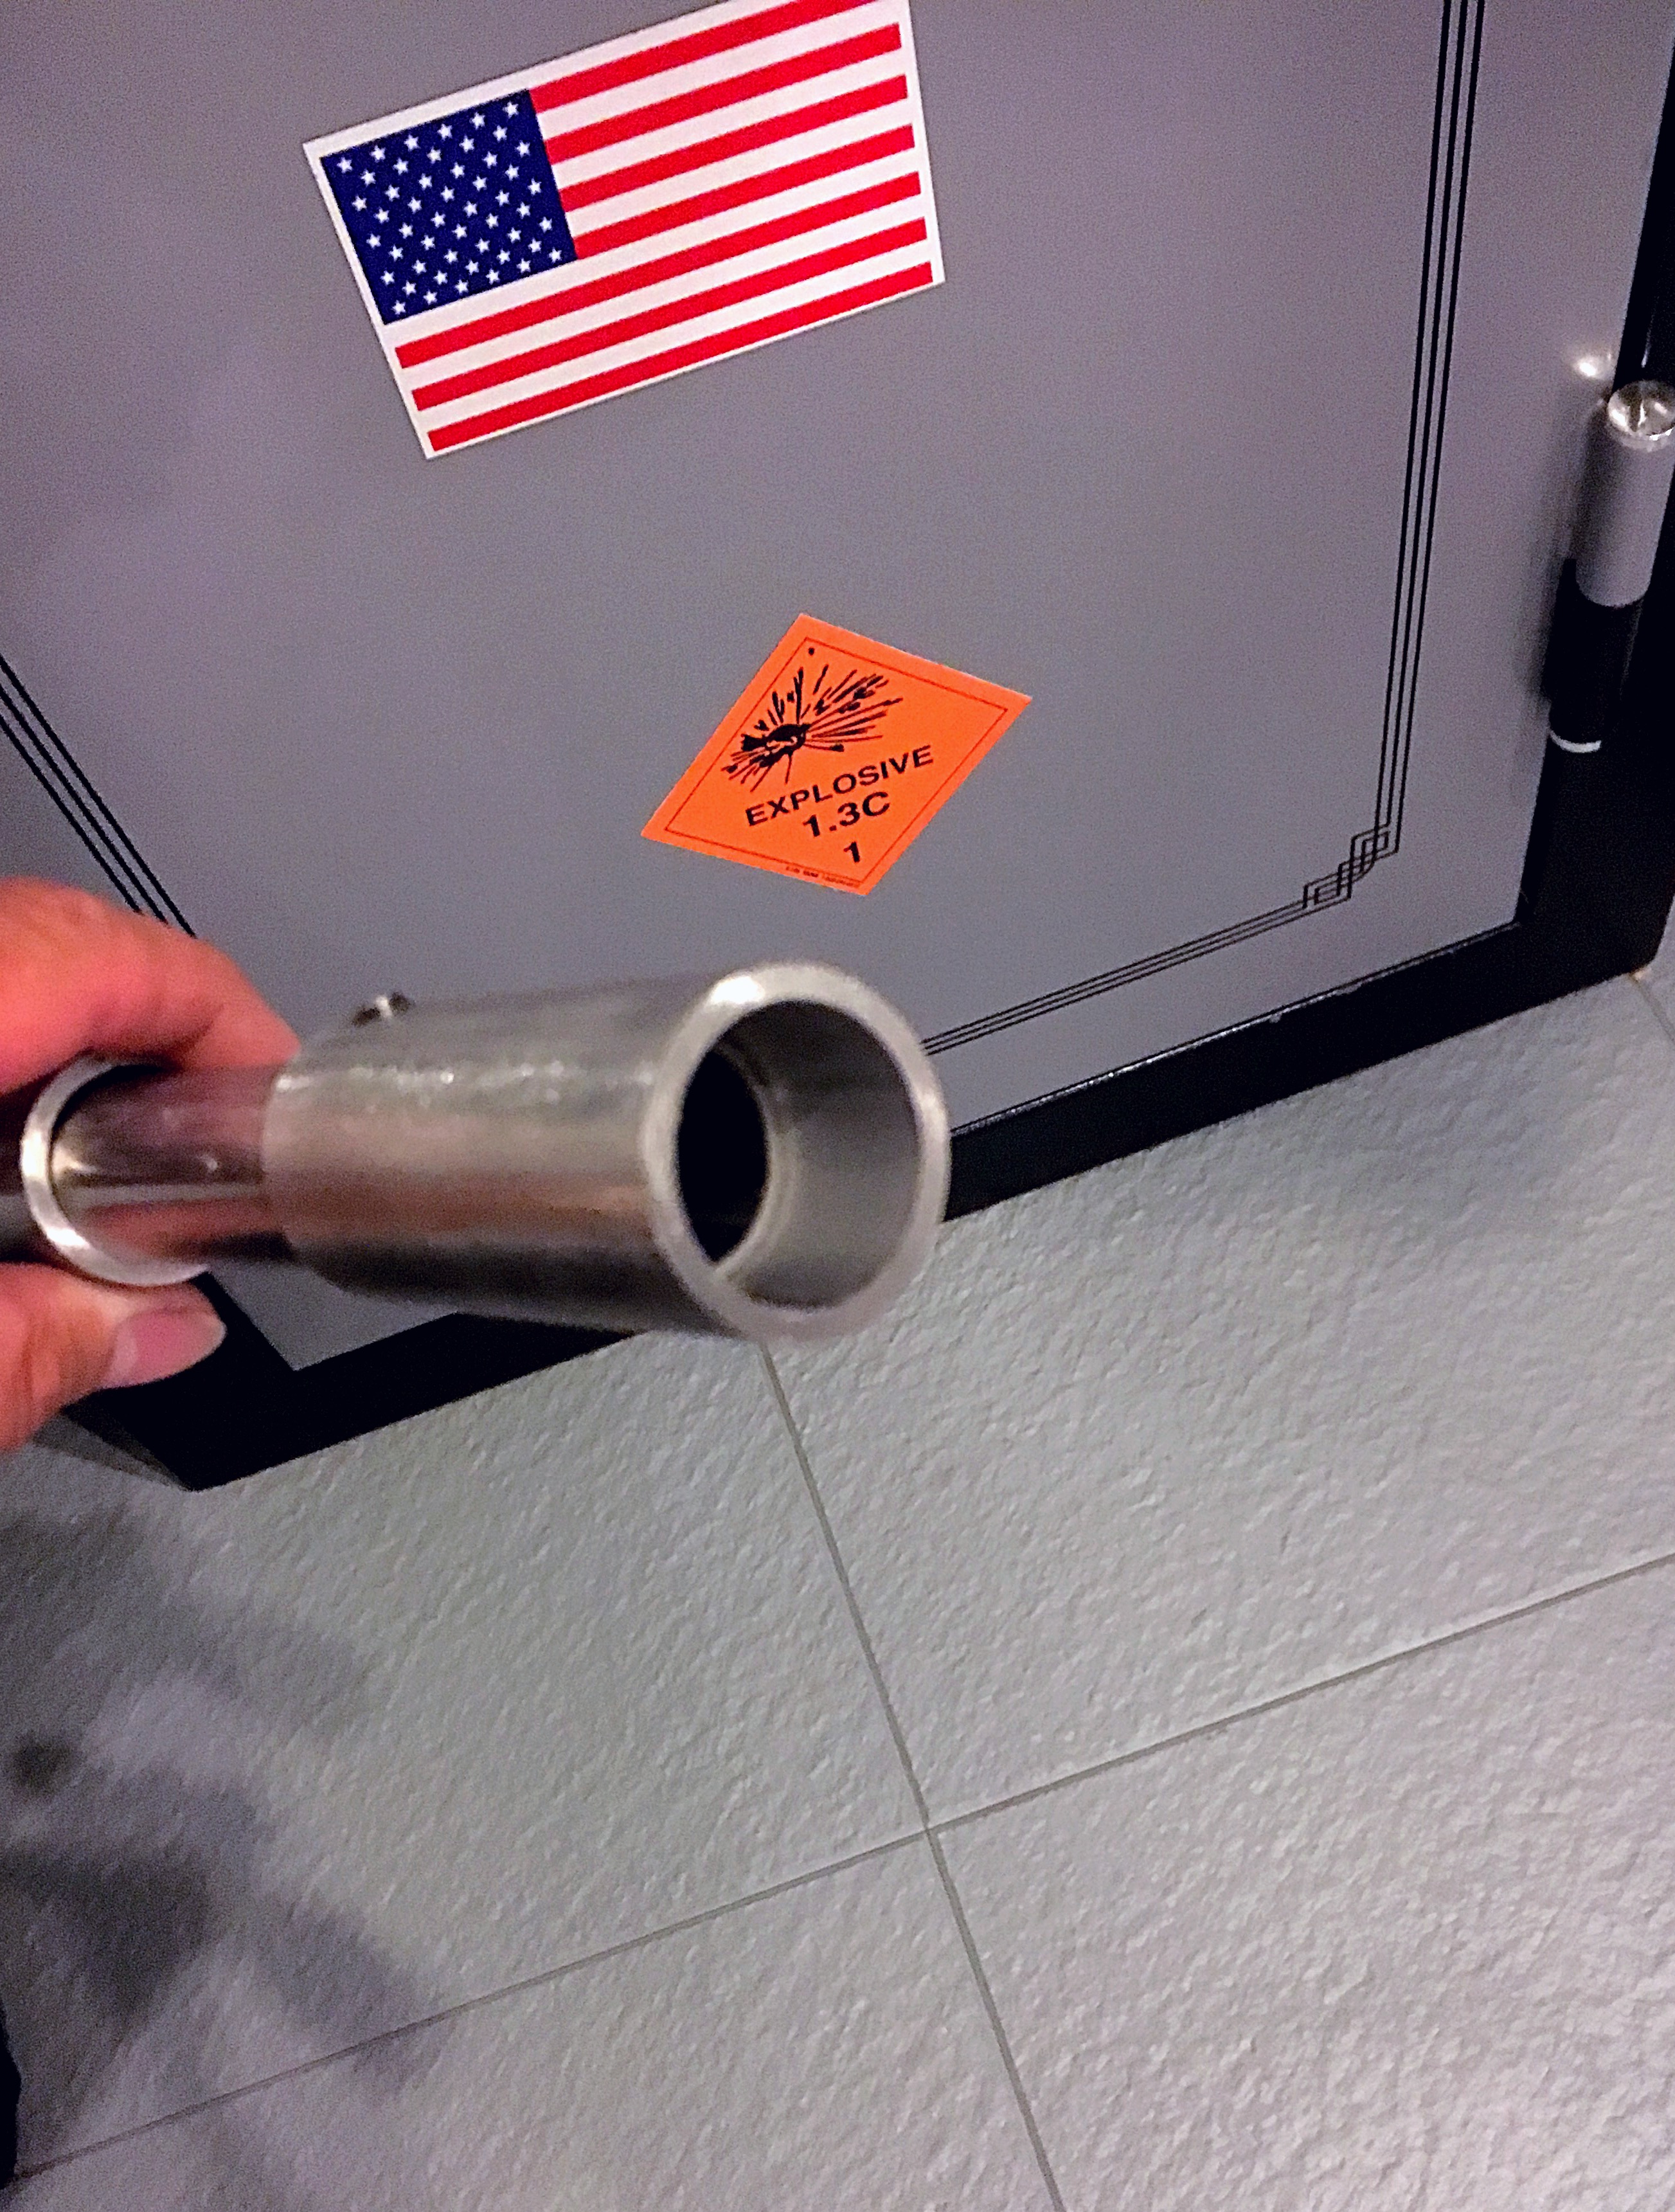
I may have to look into a 40mm ammo can. They're about the same size.
The ability to open the top to replace the Koawool is a nice feature.
-
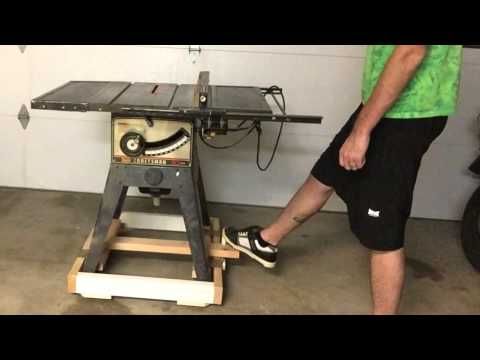
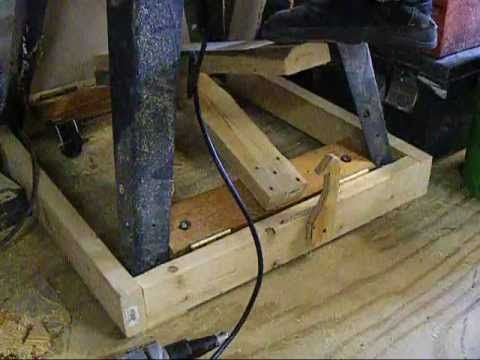
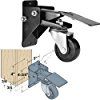
Eric, as a woodworker myself my mine goes to our solutions to moving 200lbs table saws while retaining their solid footing when in use.
Retractable casters are the way to go.
Over build a heavy table & add the retractable casters.
Or build your own version of them.
I have a 400lbs assembly table made of pressure treated 2x4s & 4x4s that rolls on them.
-
Huh, never thought about an ammo can.
The Jarhead in me loves that !
Mongo.... now I have Blazing Saddles running thru my head !

-
If I can bother you further, what are the inner dimensions of your forge & how does this burner work for you?
-
I know it's listed as a burner from Goede but there are a few exactly like this style listed for sale under different names.
I see T-Burners, Z-Burners, Side Burners, Ribbon Burners, Shorty Burners, T-Rex Burners & EZ Burners mentioned but no specific name for this style.
So I was wondering what this style/ design of a burner is actually called.
Also- this has a 3/4" tube with a .025 mig tip.
Are there any guidelines as to how many cubic inches of forge space this should be limited to in perfectly tuned condition.

-
Okay , strike my last post....
I have read & re-read this last page three times in an attempt to "get it".
I'm sure it's due to my total lack of experience but it seems that not only is each burner style it's own animal but how each style is tuned is dependent on a number of factors as well.
So much so that my above question would have to be answered with "well that depends ".
Am I wrong to assume that each burner also has to be tuned to each specific forge it's placed into?
That the shape & size & materials the forge is made of also greatly effects burner performance?
I ask because I think a lot of us newbies run towards the idea of a "plug & play" set up.
The foolish idea of placing an order for an entry level forge & burner and are disappointed when you can't just hook it up & go.
Everything is much more involved that it appears on the surface.
Glad there are folks who spell it out for people like me who at times feel "in over their heads".
So much to learn & consider before you can get to the point where a person is ready to move & shape metal properly.
-
I have a question that I'd like conformation on.
On a burner I've read that the flair isn't needed if it's to be inserted in a forge.
Is that correct?
Or if it's possible should a flair be left on ?
Also there seems to be a lot of opinion of how far back the burner should be set from the inside of the forge.
Is there a hard rule for that?
-
3 hours ago, ausfire said:
And you did well! You managed to centre the punch accurately to pop out a perfect plug like that without having it hinge on the back. Now, let's see if you can do ten in a row like that!!

Hey now, I'm still rollin with training wheels here.
But I have decided to build a burner & another forge .
Something more efficient .
Still reading & researching but loving all there is to learn. A little overwhelmed but lovin it.
-
As a newbie I was checking how long it takes to get my mini forge up to temp and how long it takes to get a bolt back to working temp between trips to the anvil.
Also punched my first hole in steel.
Attempted a scroll.
I know, nothing earth shattering and kindergarten stuff for you guys, but I'm having fun!


-
2 hours ago, Reeltree said:
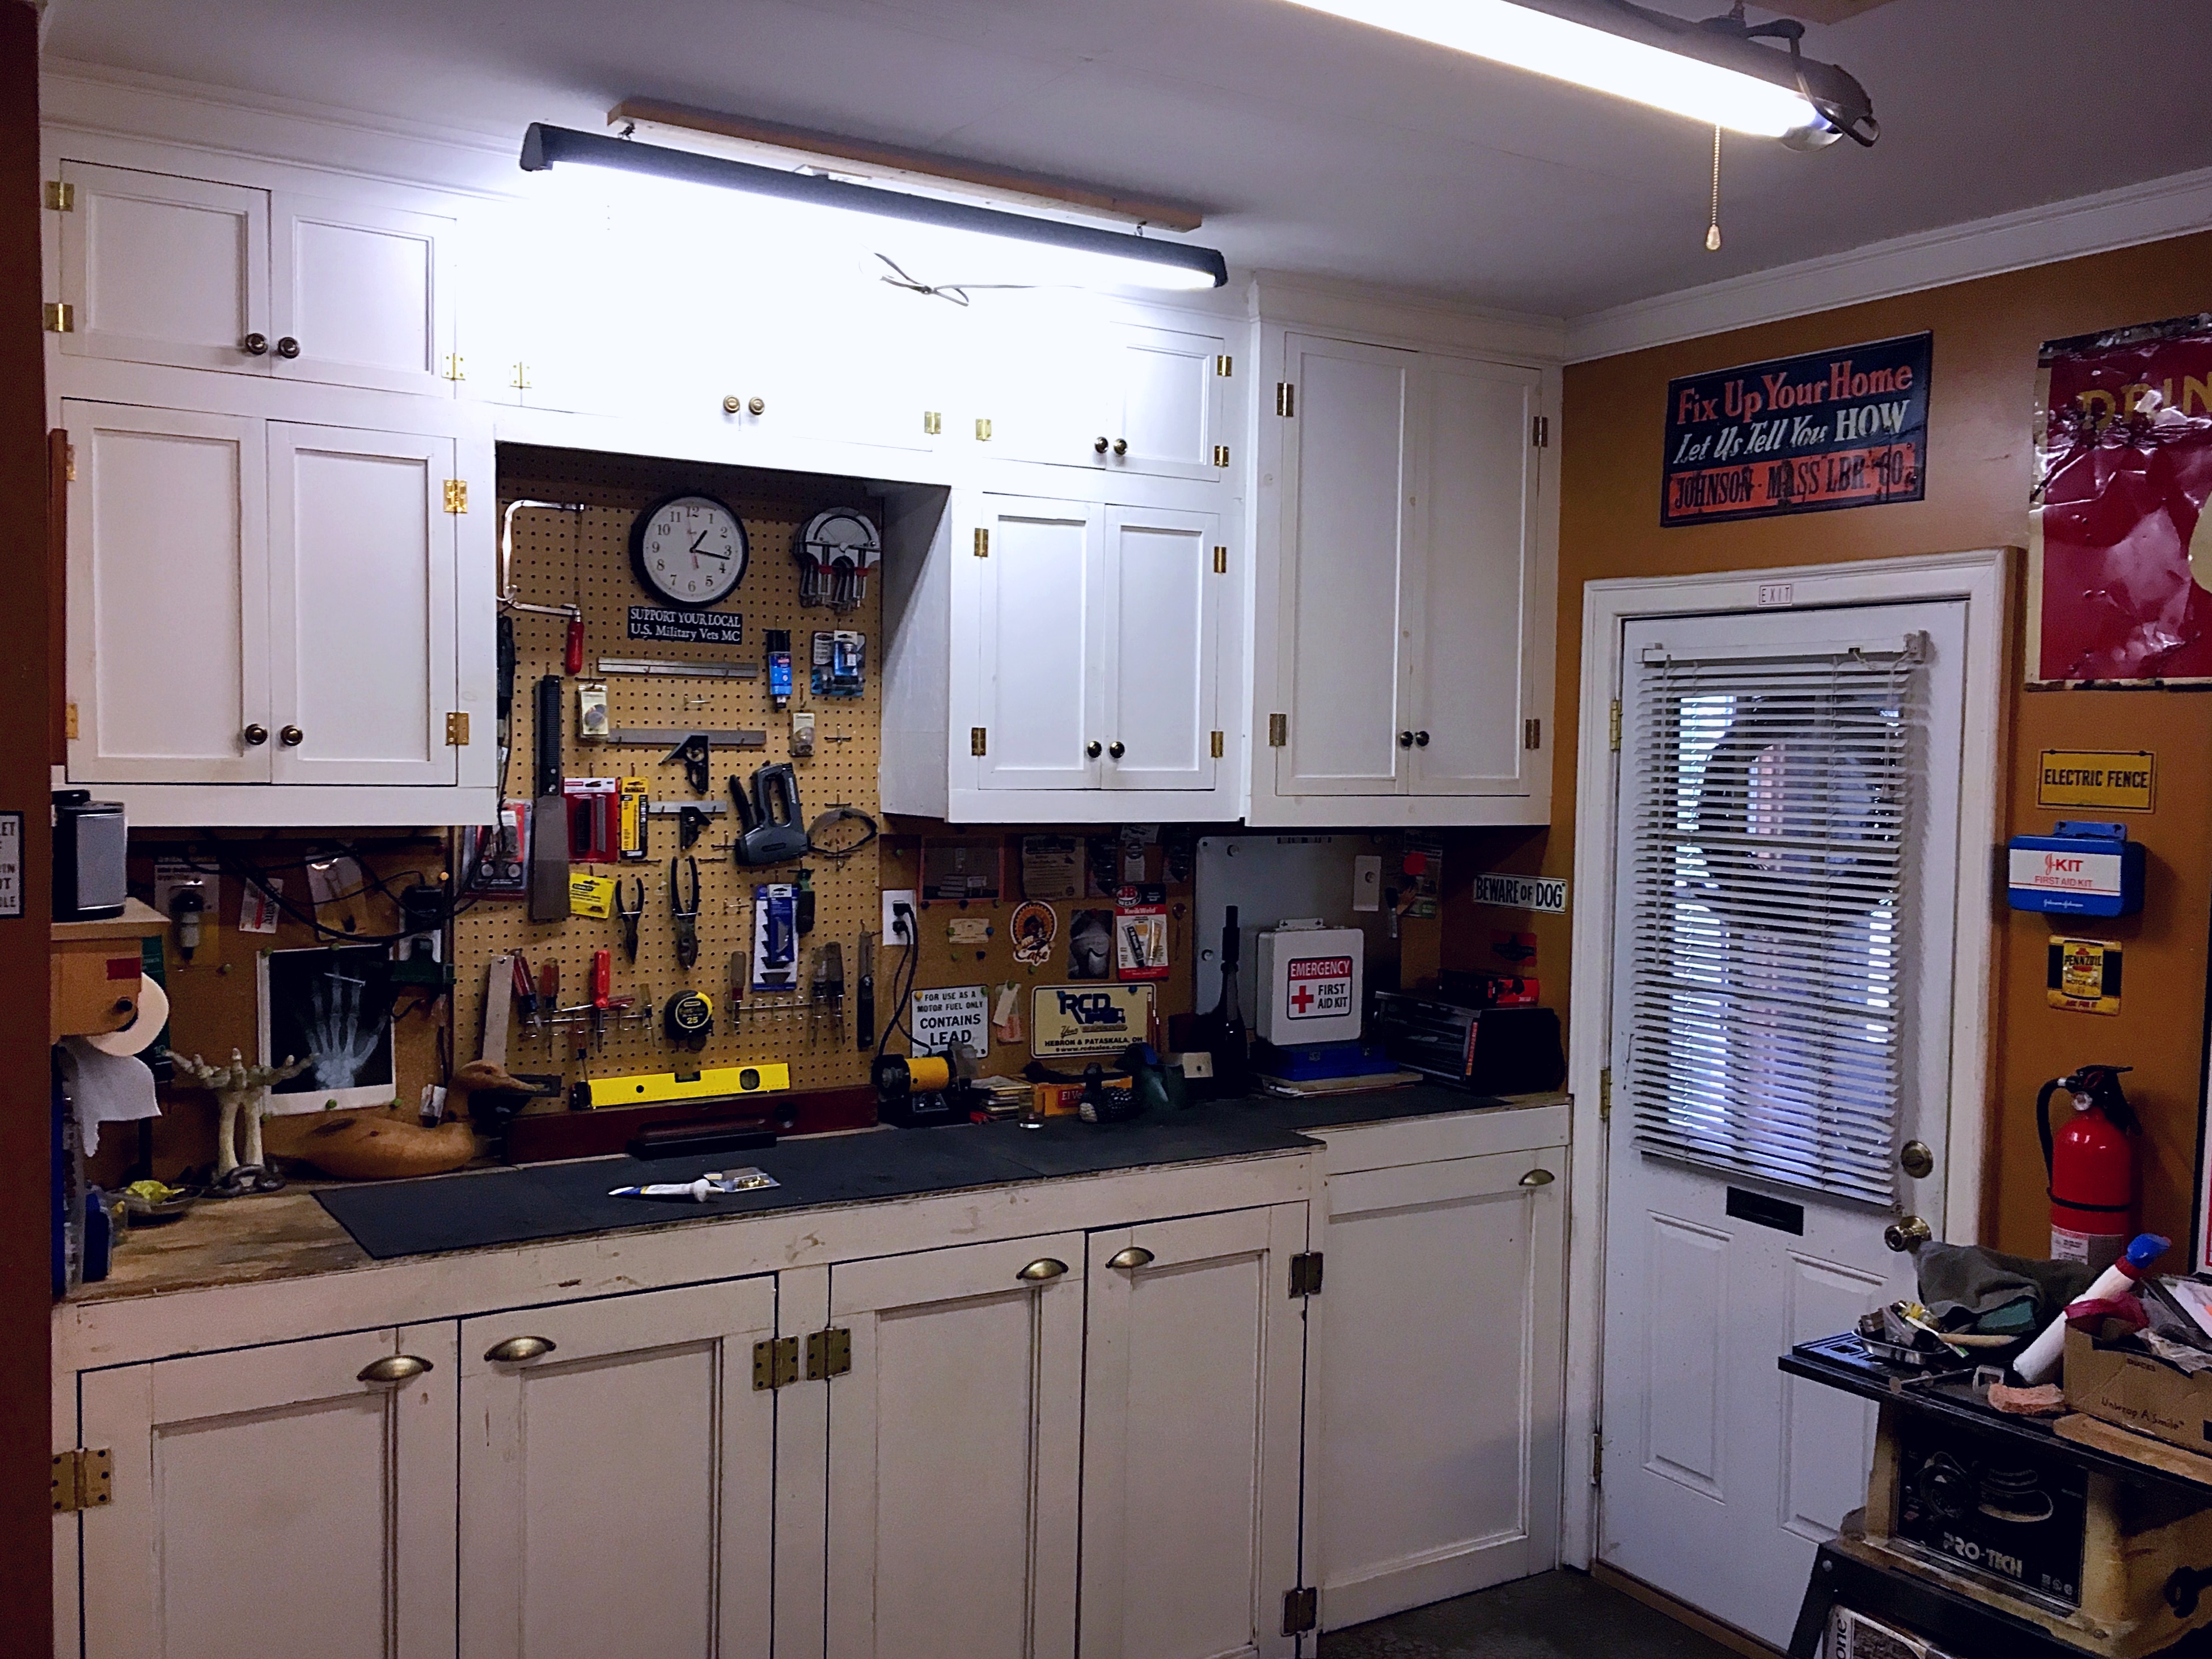
wow ,,purty shop,,I was measuring and figuring for a water trap and air lines to plumb in a compressor,, have most all the fittings but will still cost near 200.00 for the copper pipe, ball valves, air connectors and such,, hope to find a 3/4 hydro hose laying around to use for a flex hose from compressor to the water trap,, I know I got one somewhere, If the shop looked like grumpy's it would be in my hand already
I've found so many things under all the saw dust & grinding crud!!!
I should probably do this more often.
We bought the empty lot behind us.
It had three out buildings.
I took down one but may convert one of the others into a metal working shop and leave my current shop woodworking.
-
What did I do in my shop today....
4 hours of scrubbing , shop vac-ing & cleaning resulted in just shy of 1/2 my shop getting cleaned.
Looks like it's going to almost be 1 hour of cleaning for every hour of grinding .
Next time, xxxx being nice to the neighborhood. I'll grind outside where cleanup involves the garden hose!!!

-
Blacksmiths business card holder ?
either way it's a great conversation piece.
-
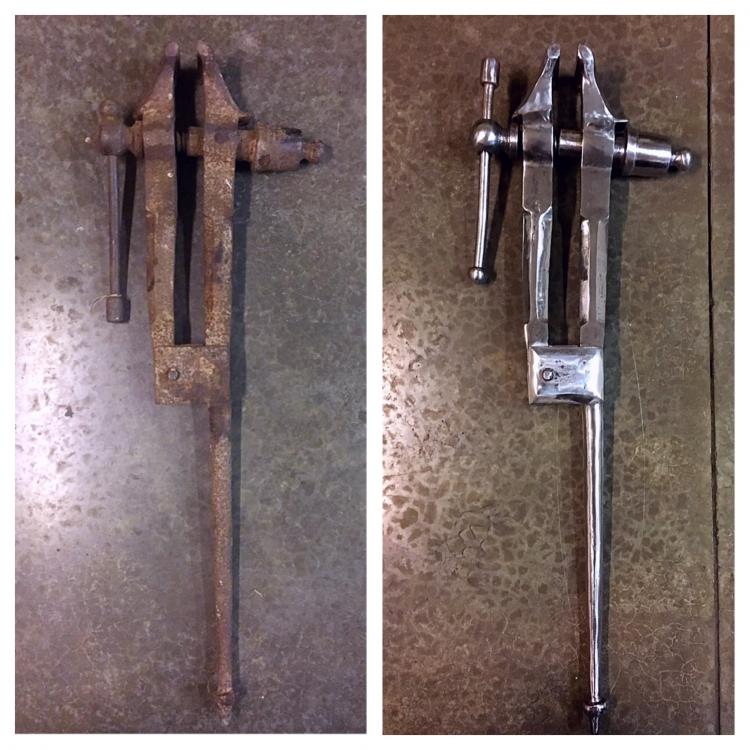
9 hours ago, Millhand said:
She's beautiful! Unfortunately in a smithy environment it wont look like that long. No matter what you put on it.
Id prolly use frostys bowling ally wax on it if it were mine.
I'm not looking for pretty or shiny.
I just want to start with something in good condition versus looking like it's been salvaged off the ocean floor as this one did.
It's been said , things rarely break or fail due to being clean, serviced & well maintained.
I'm just not wanting to paint it but I'd like it a dark color.
-
I'm wanting to do a oil finish on it.
boiled linseed oil or some sort of blackened finish.
I'd even considered a gun blowing but ruled that out,
-
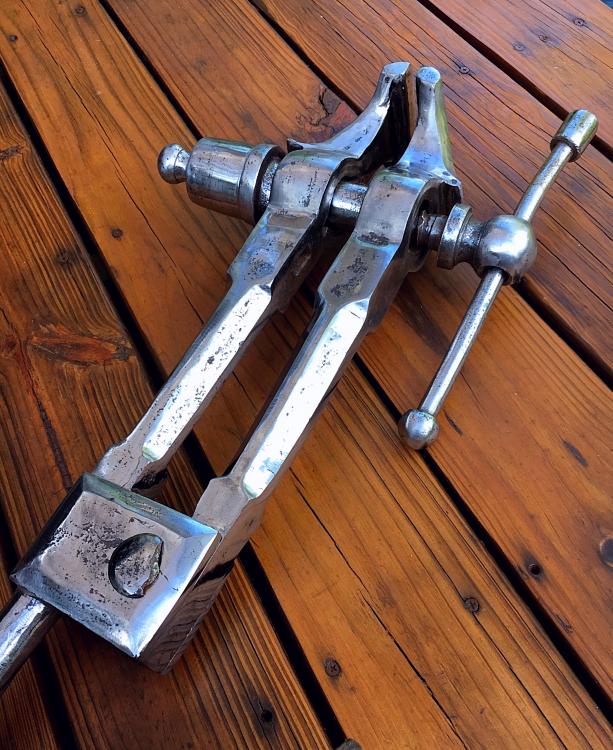
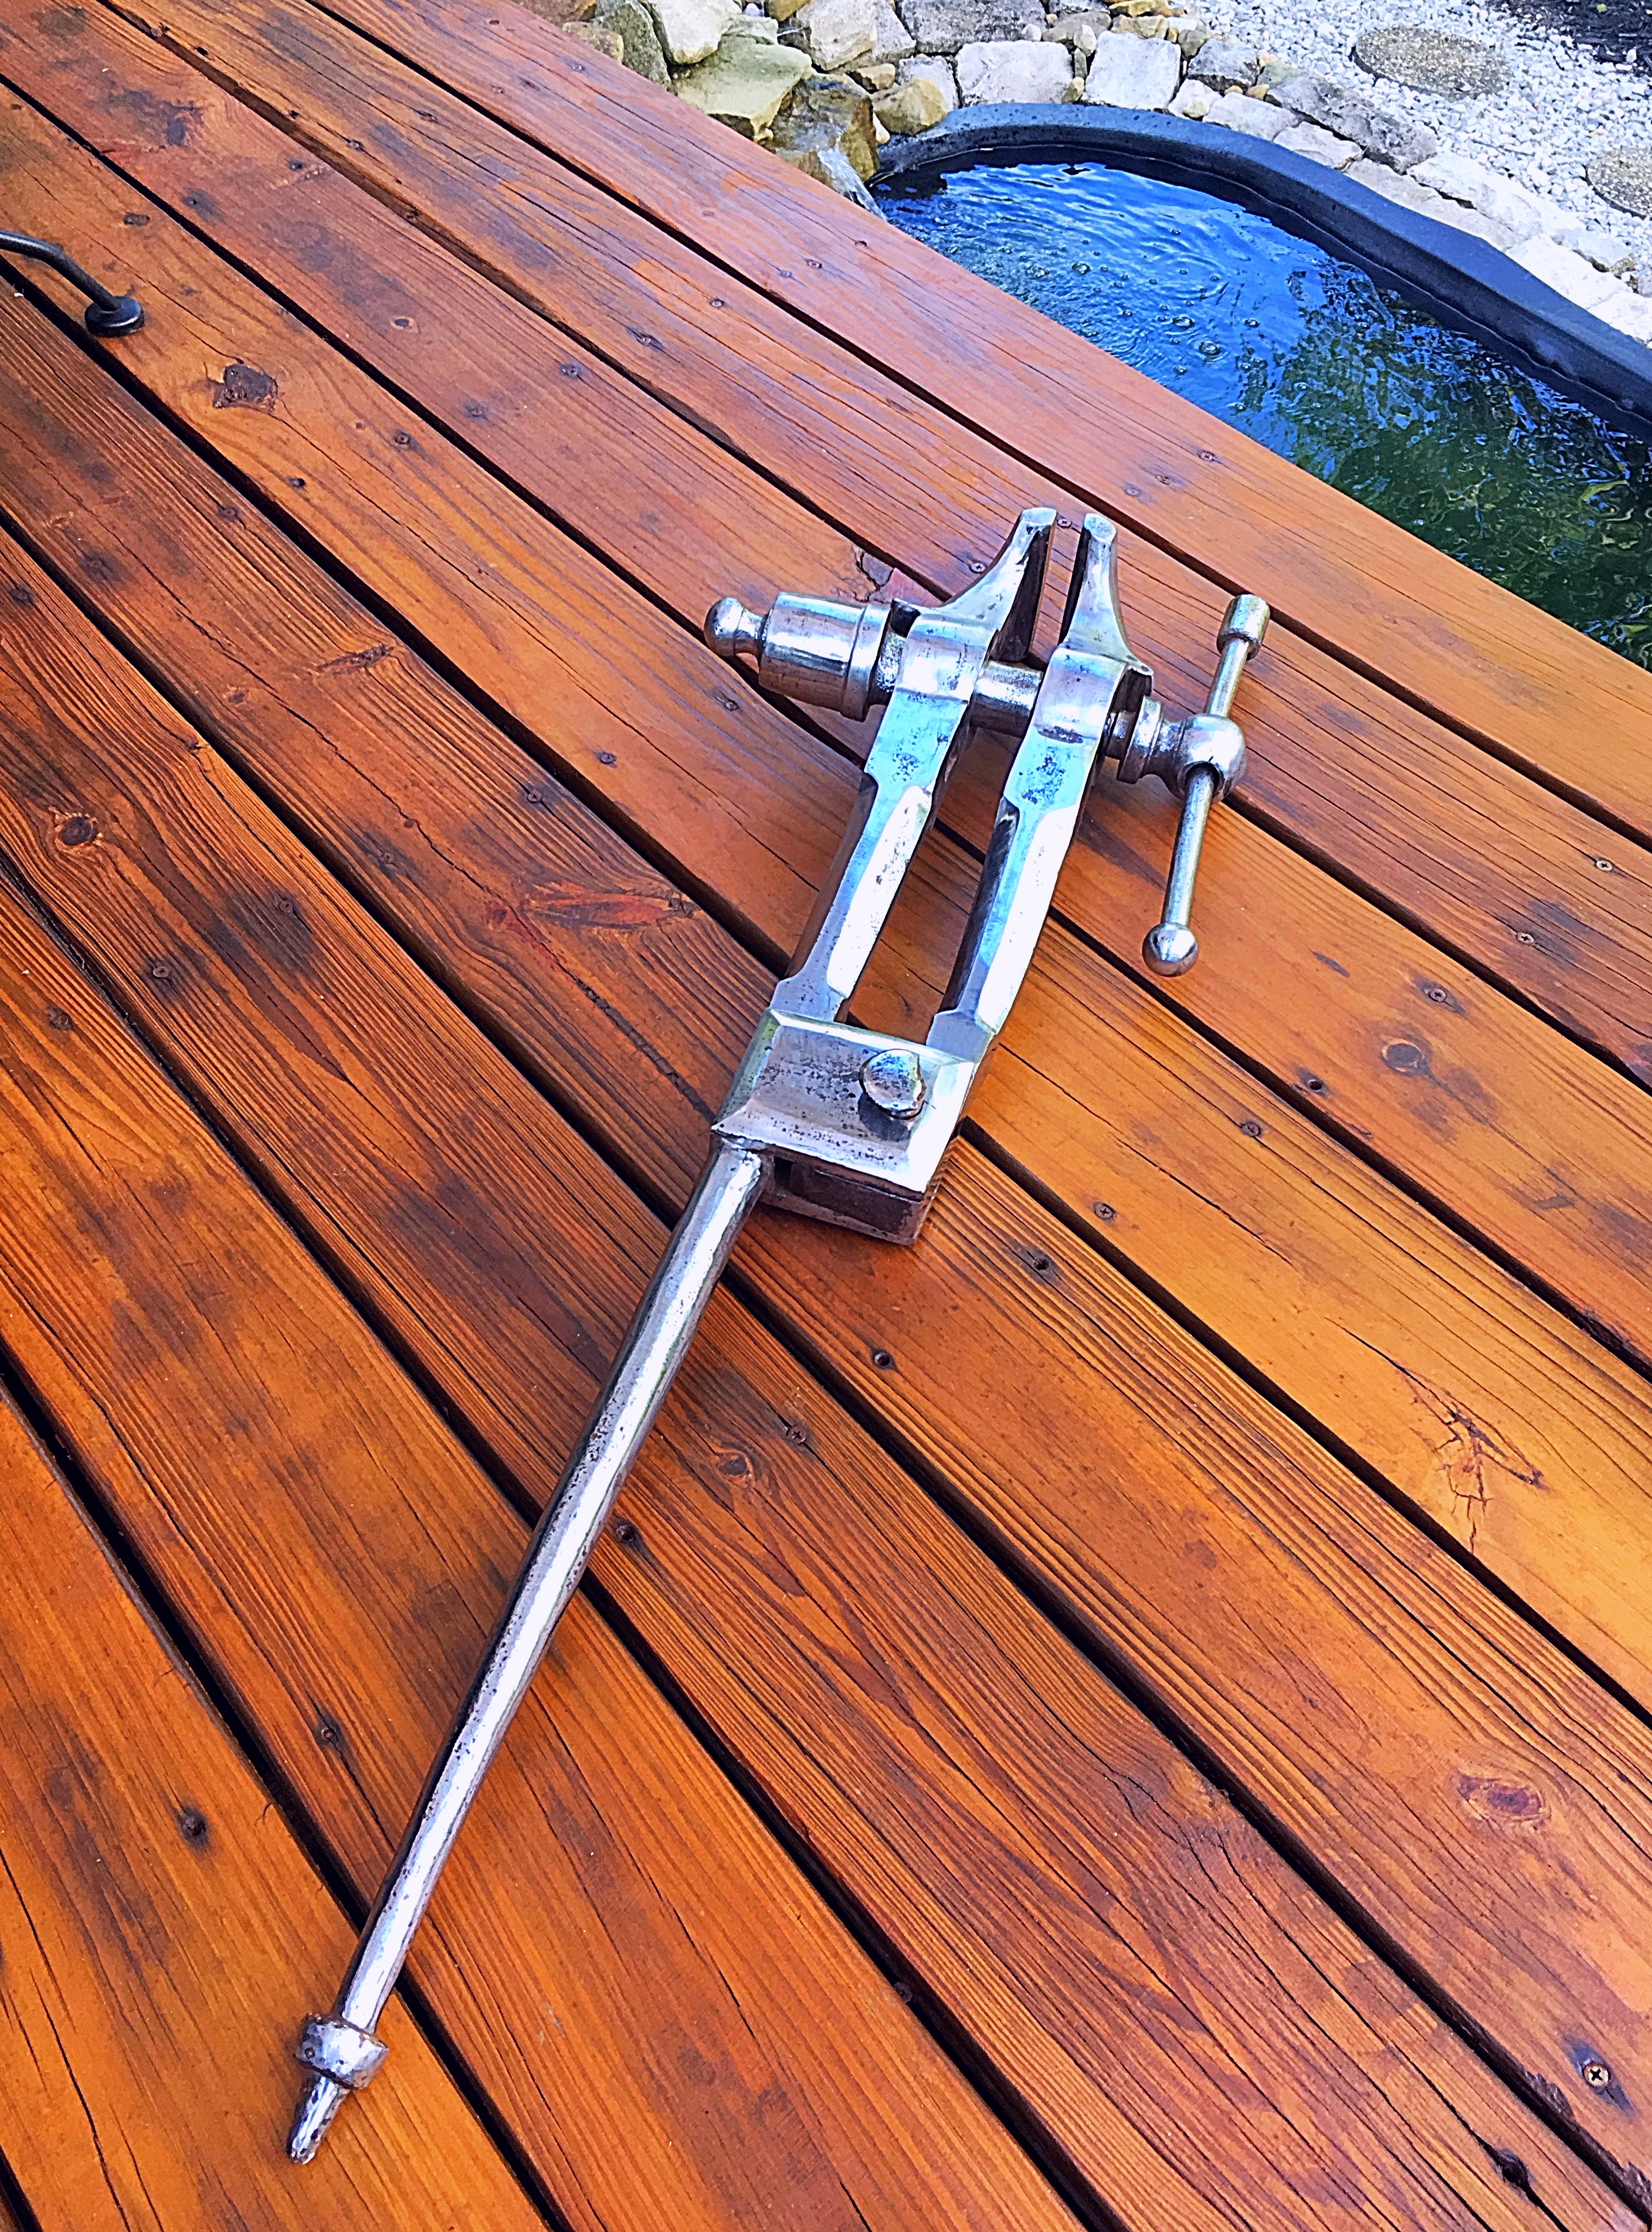
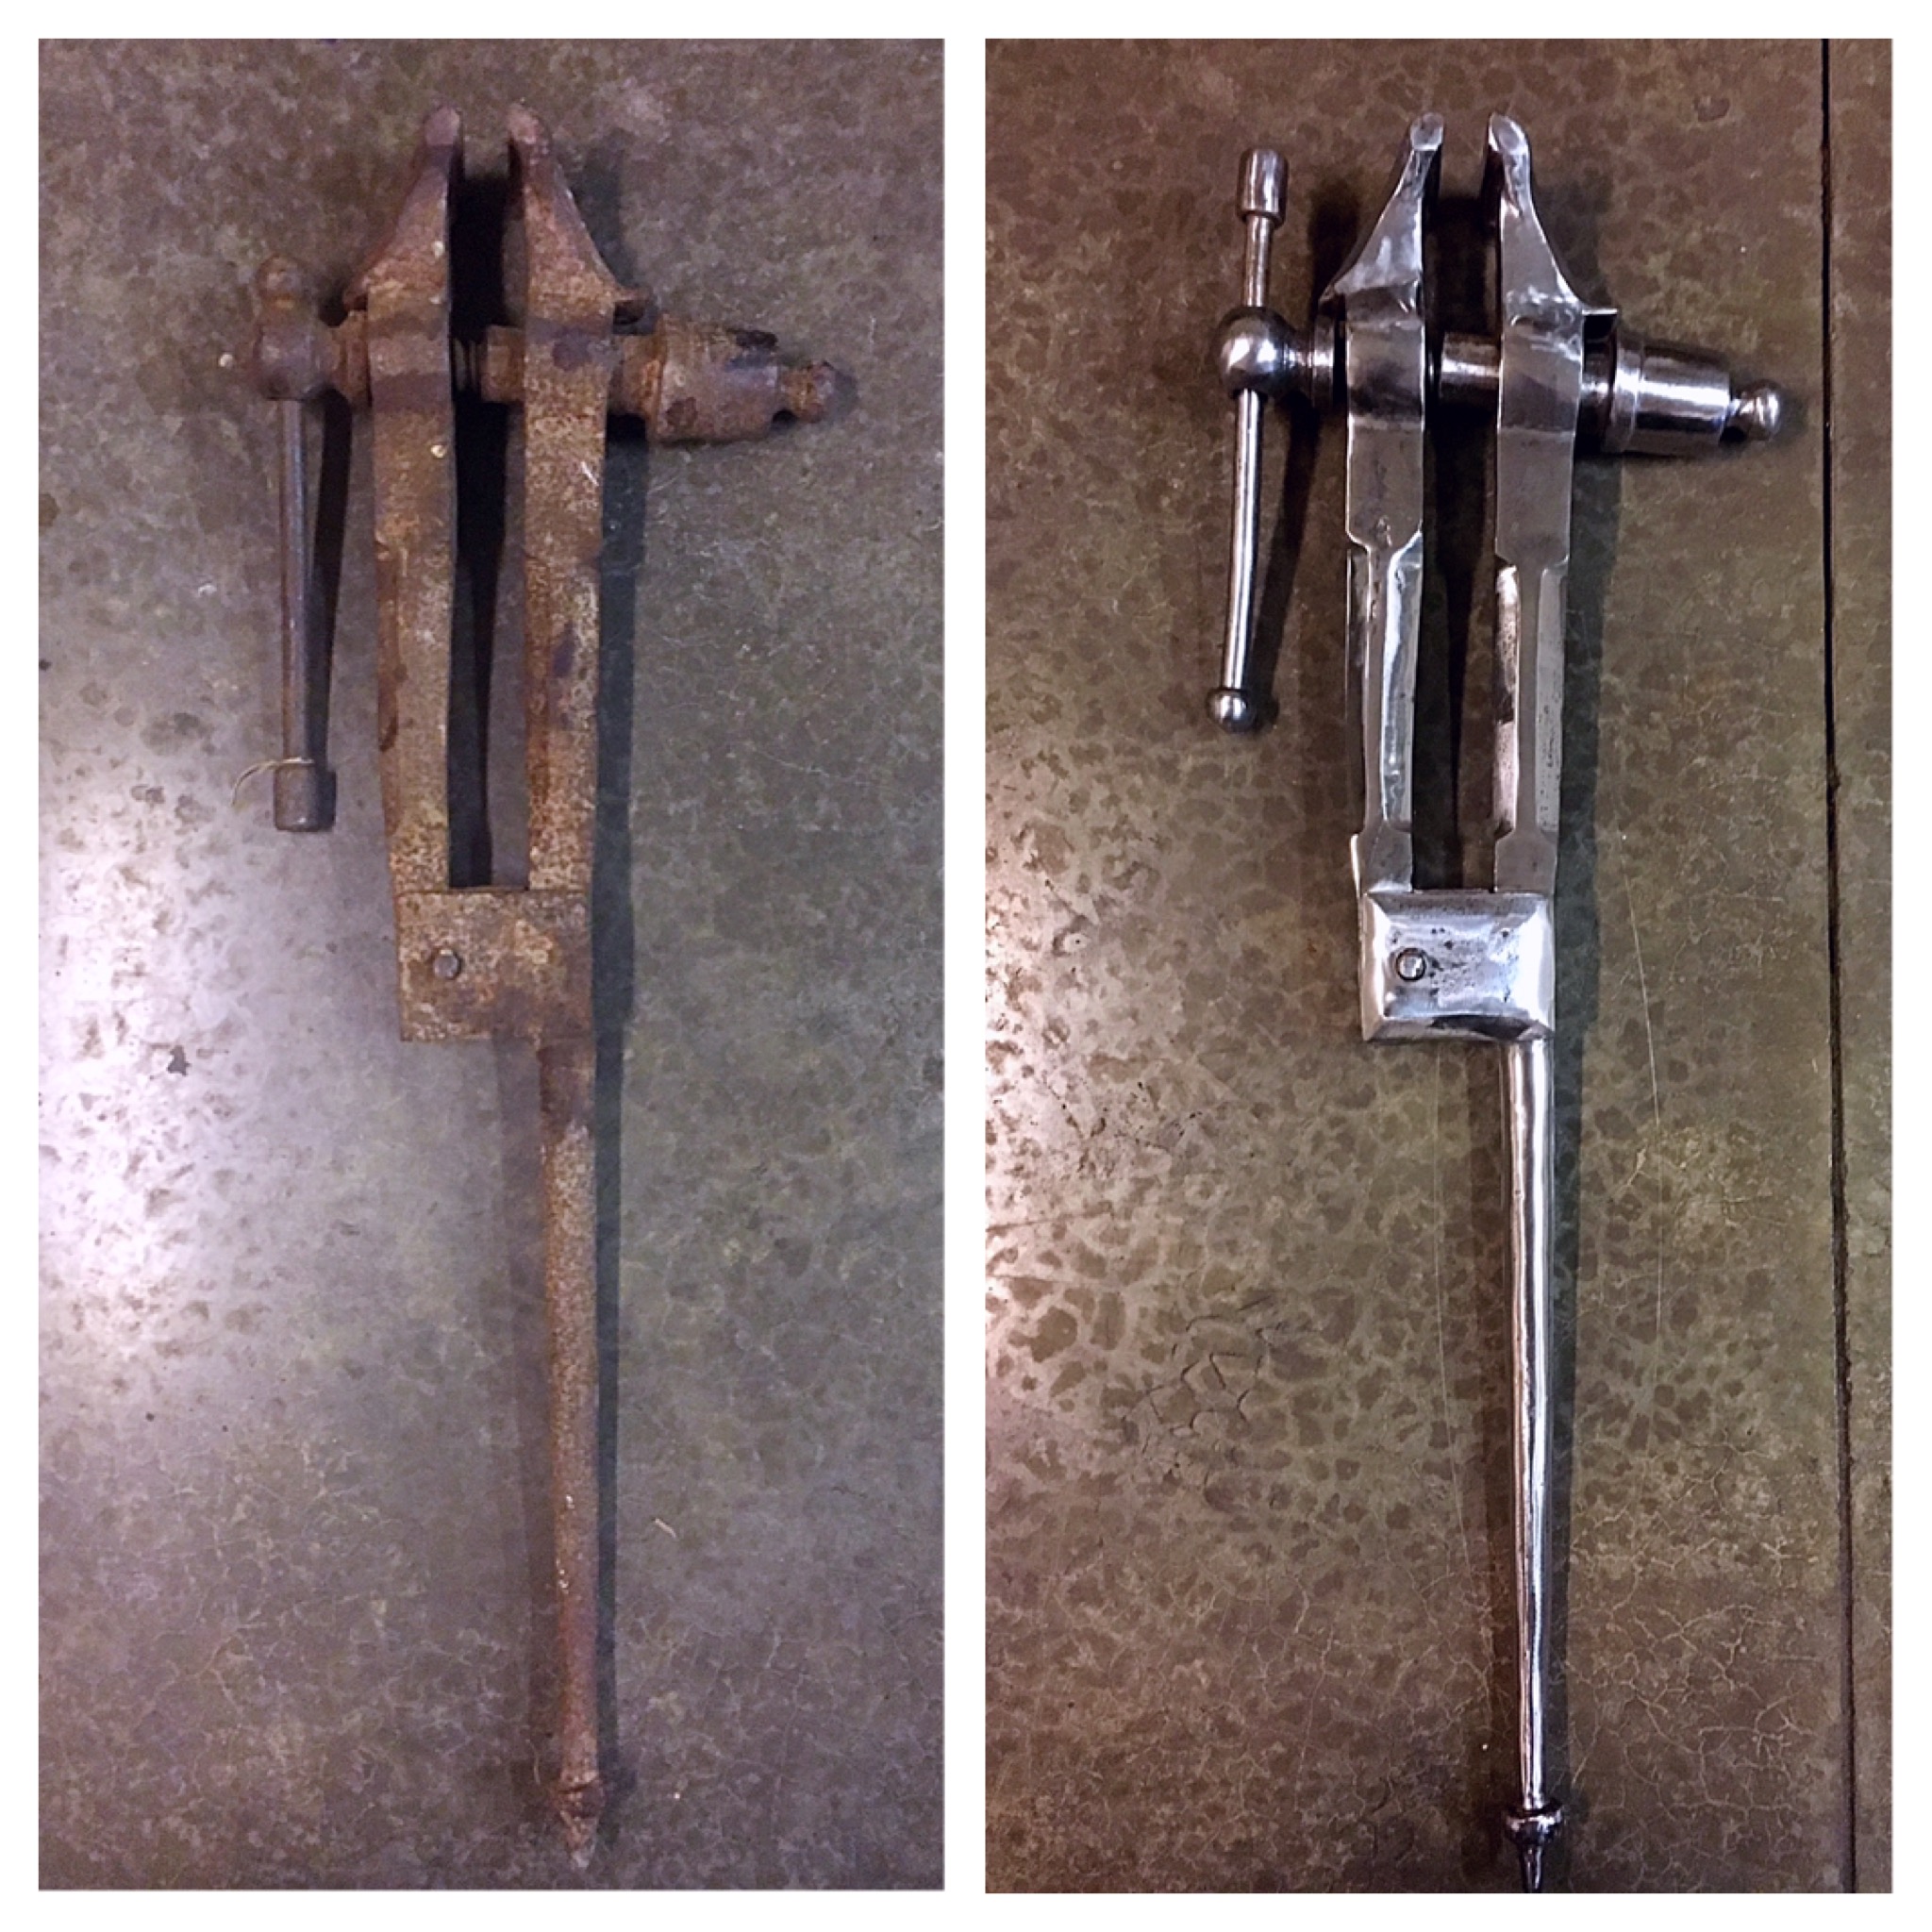
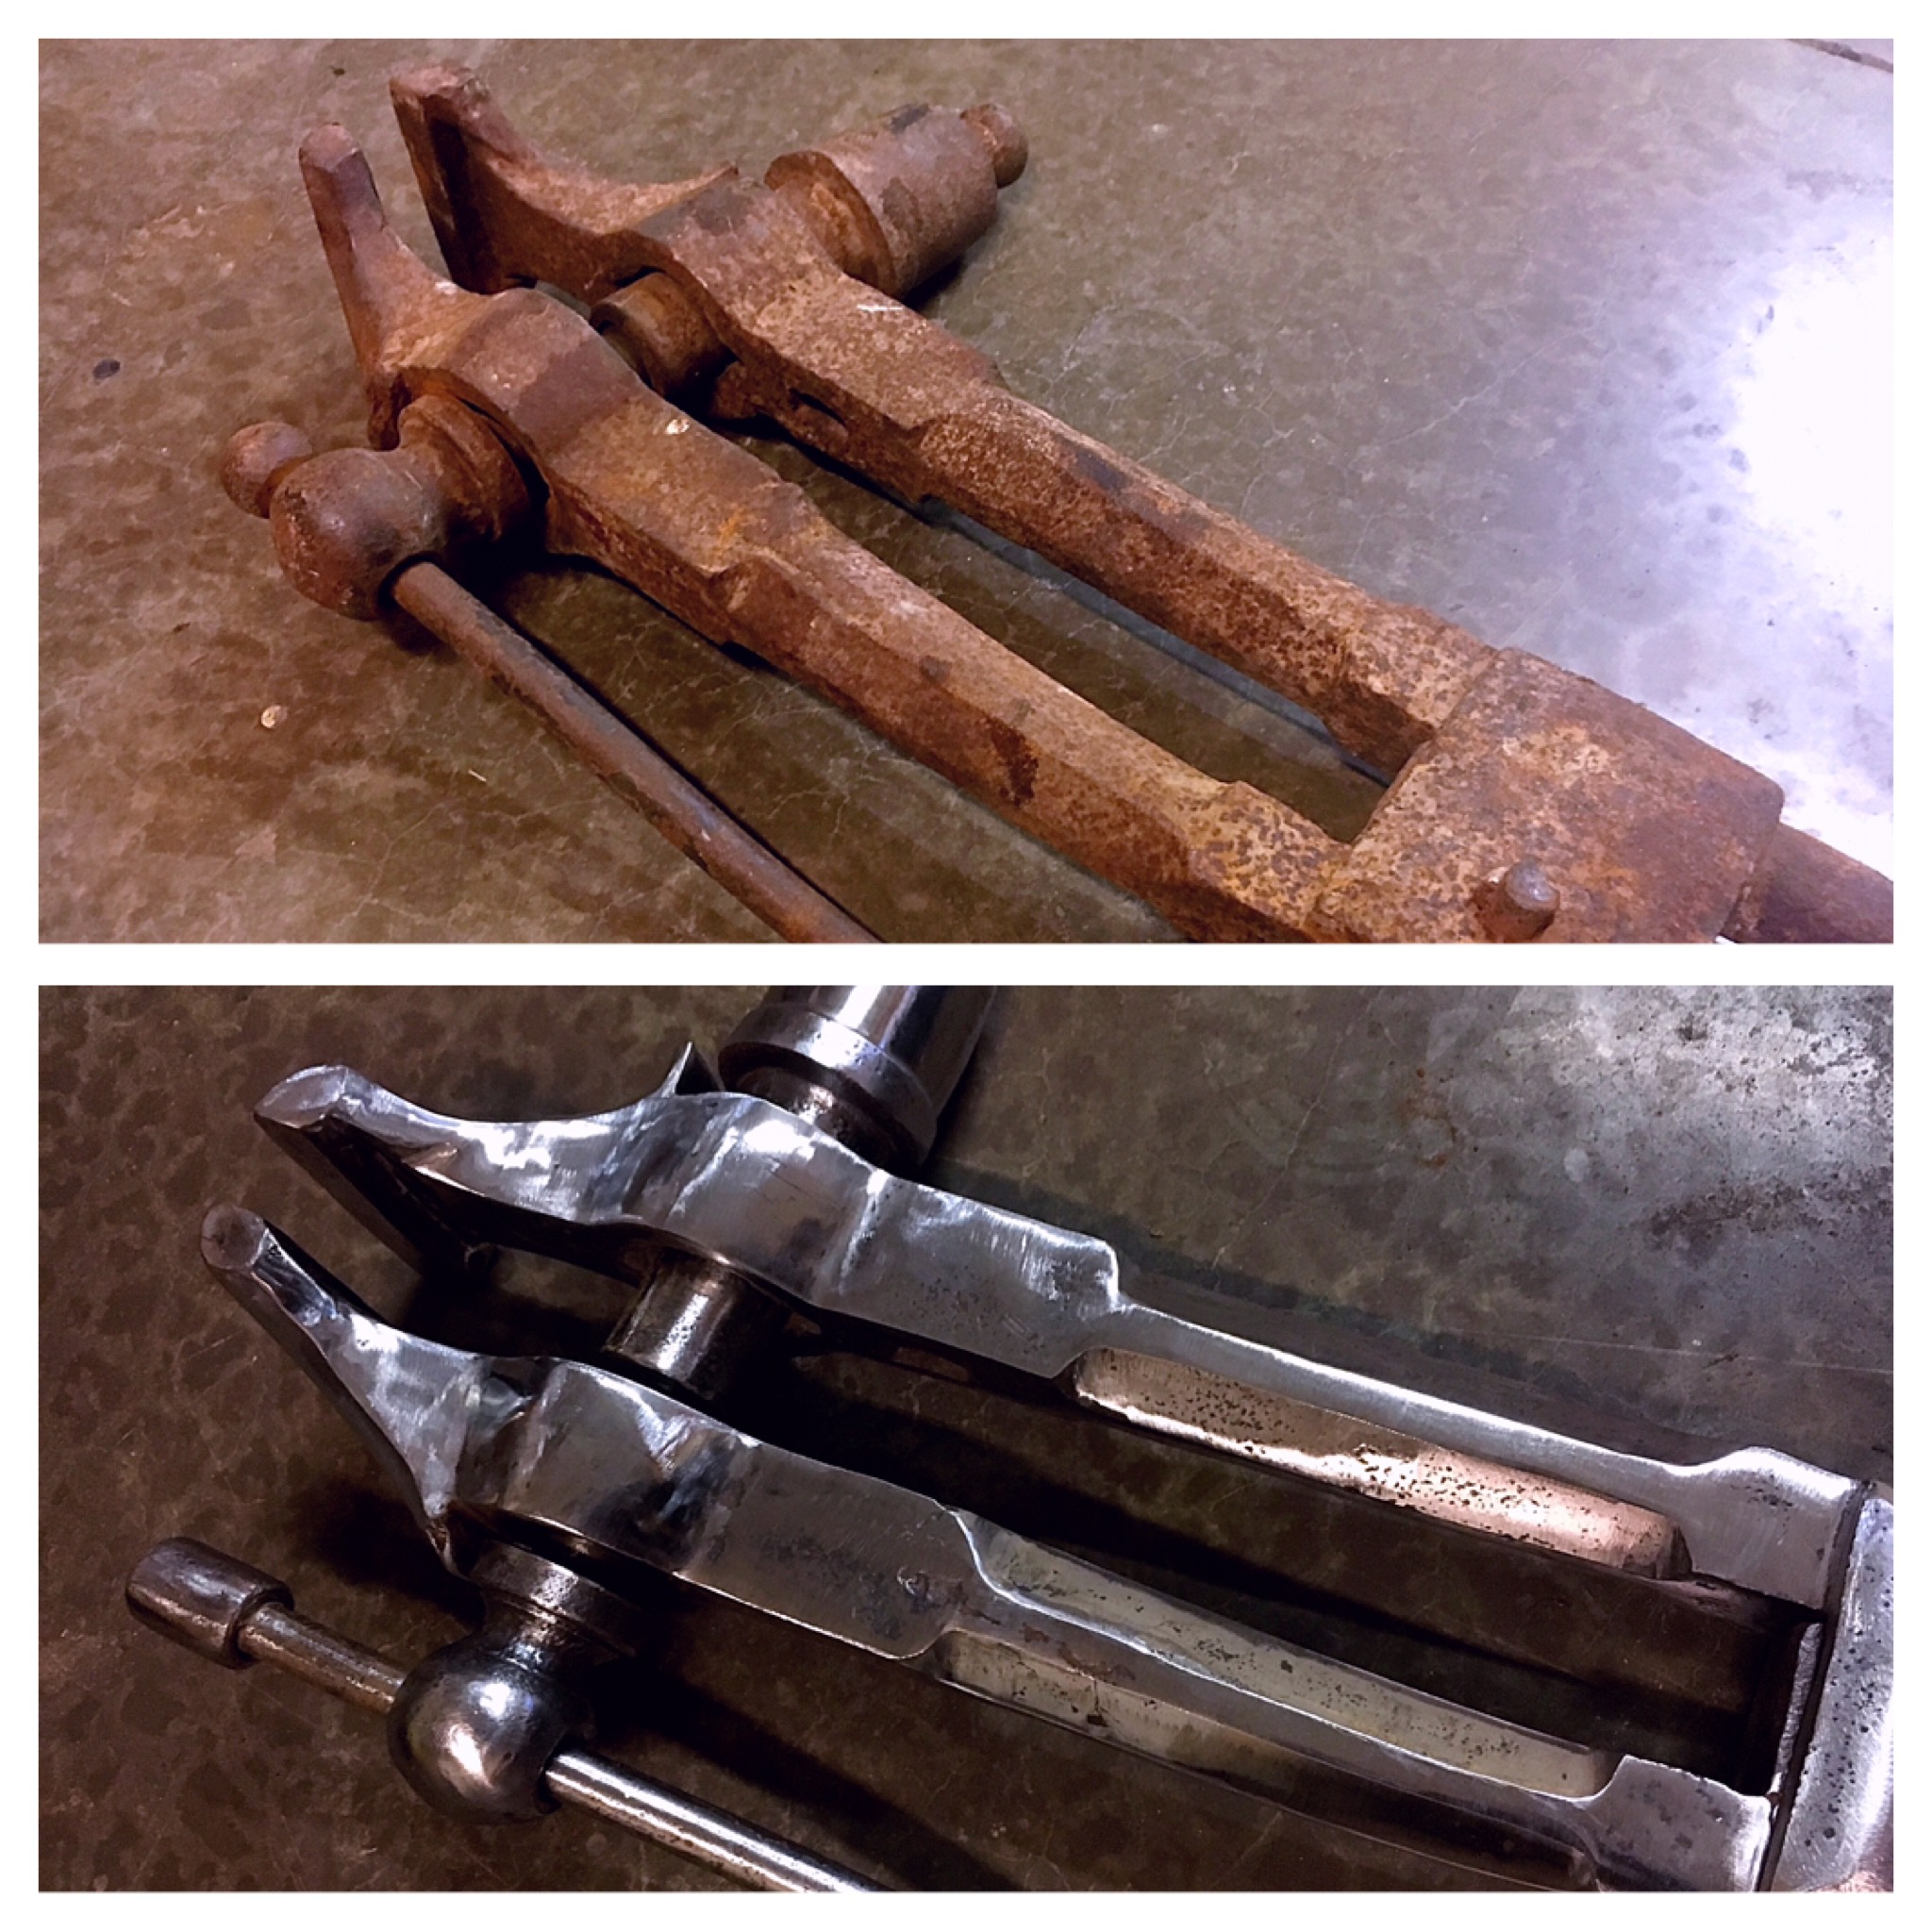
Finally !
I have all the rust off & the majority of the pitting removed.
I spent 10hrs over the past three days just to get to what is for me, an acceptable starting point.
I suppose I should just learn to love rust.
Now it's on to figuring out how to make or where to find some thrust washers... & making a mount.


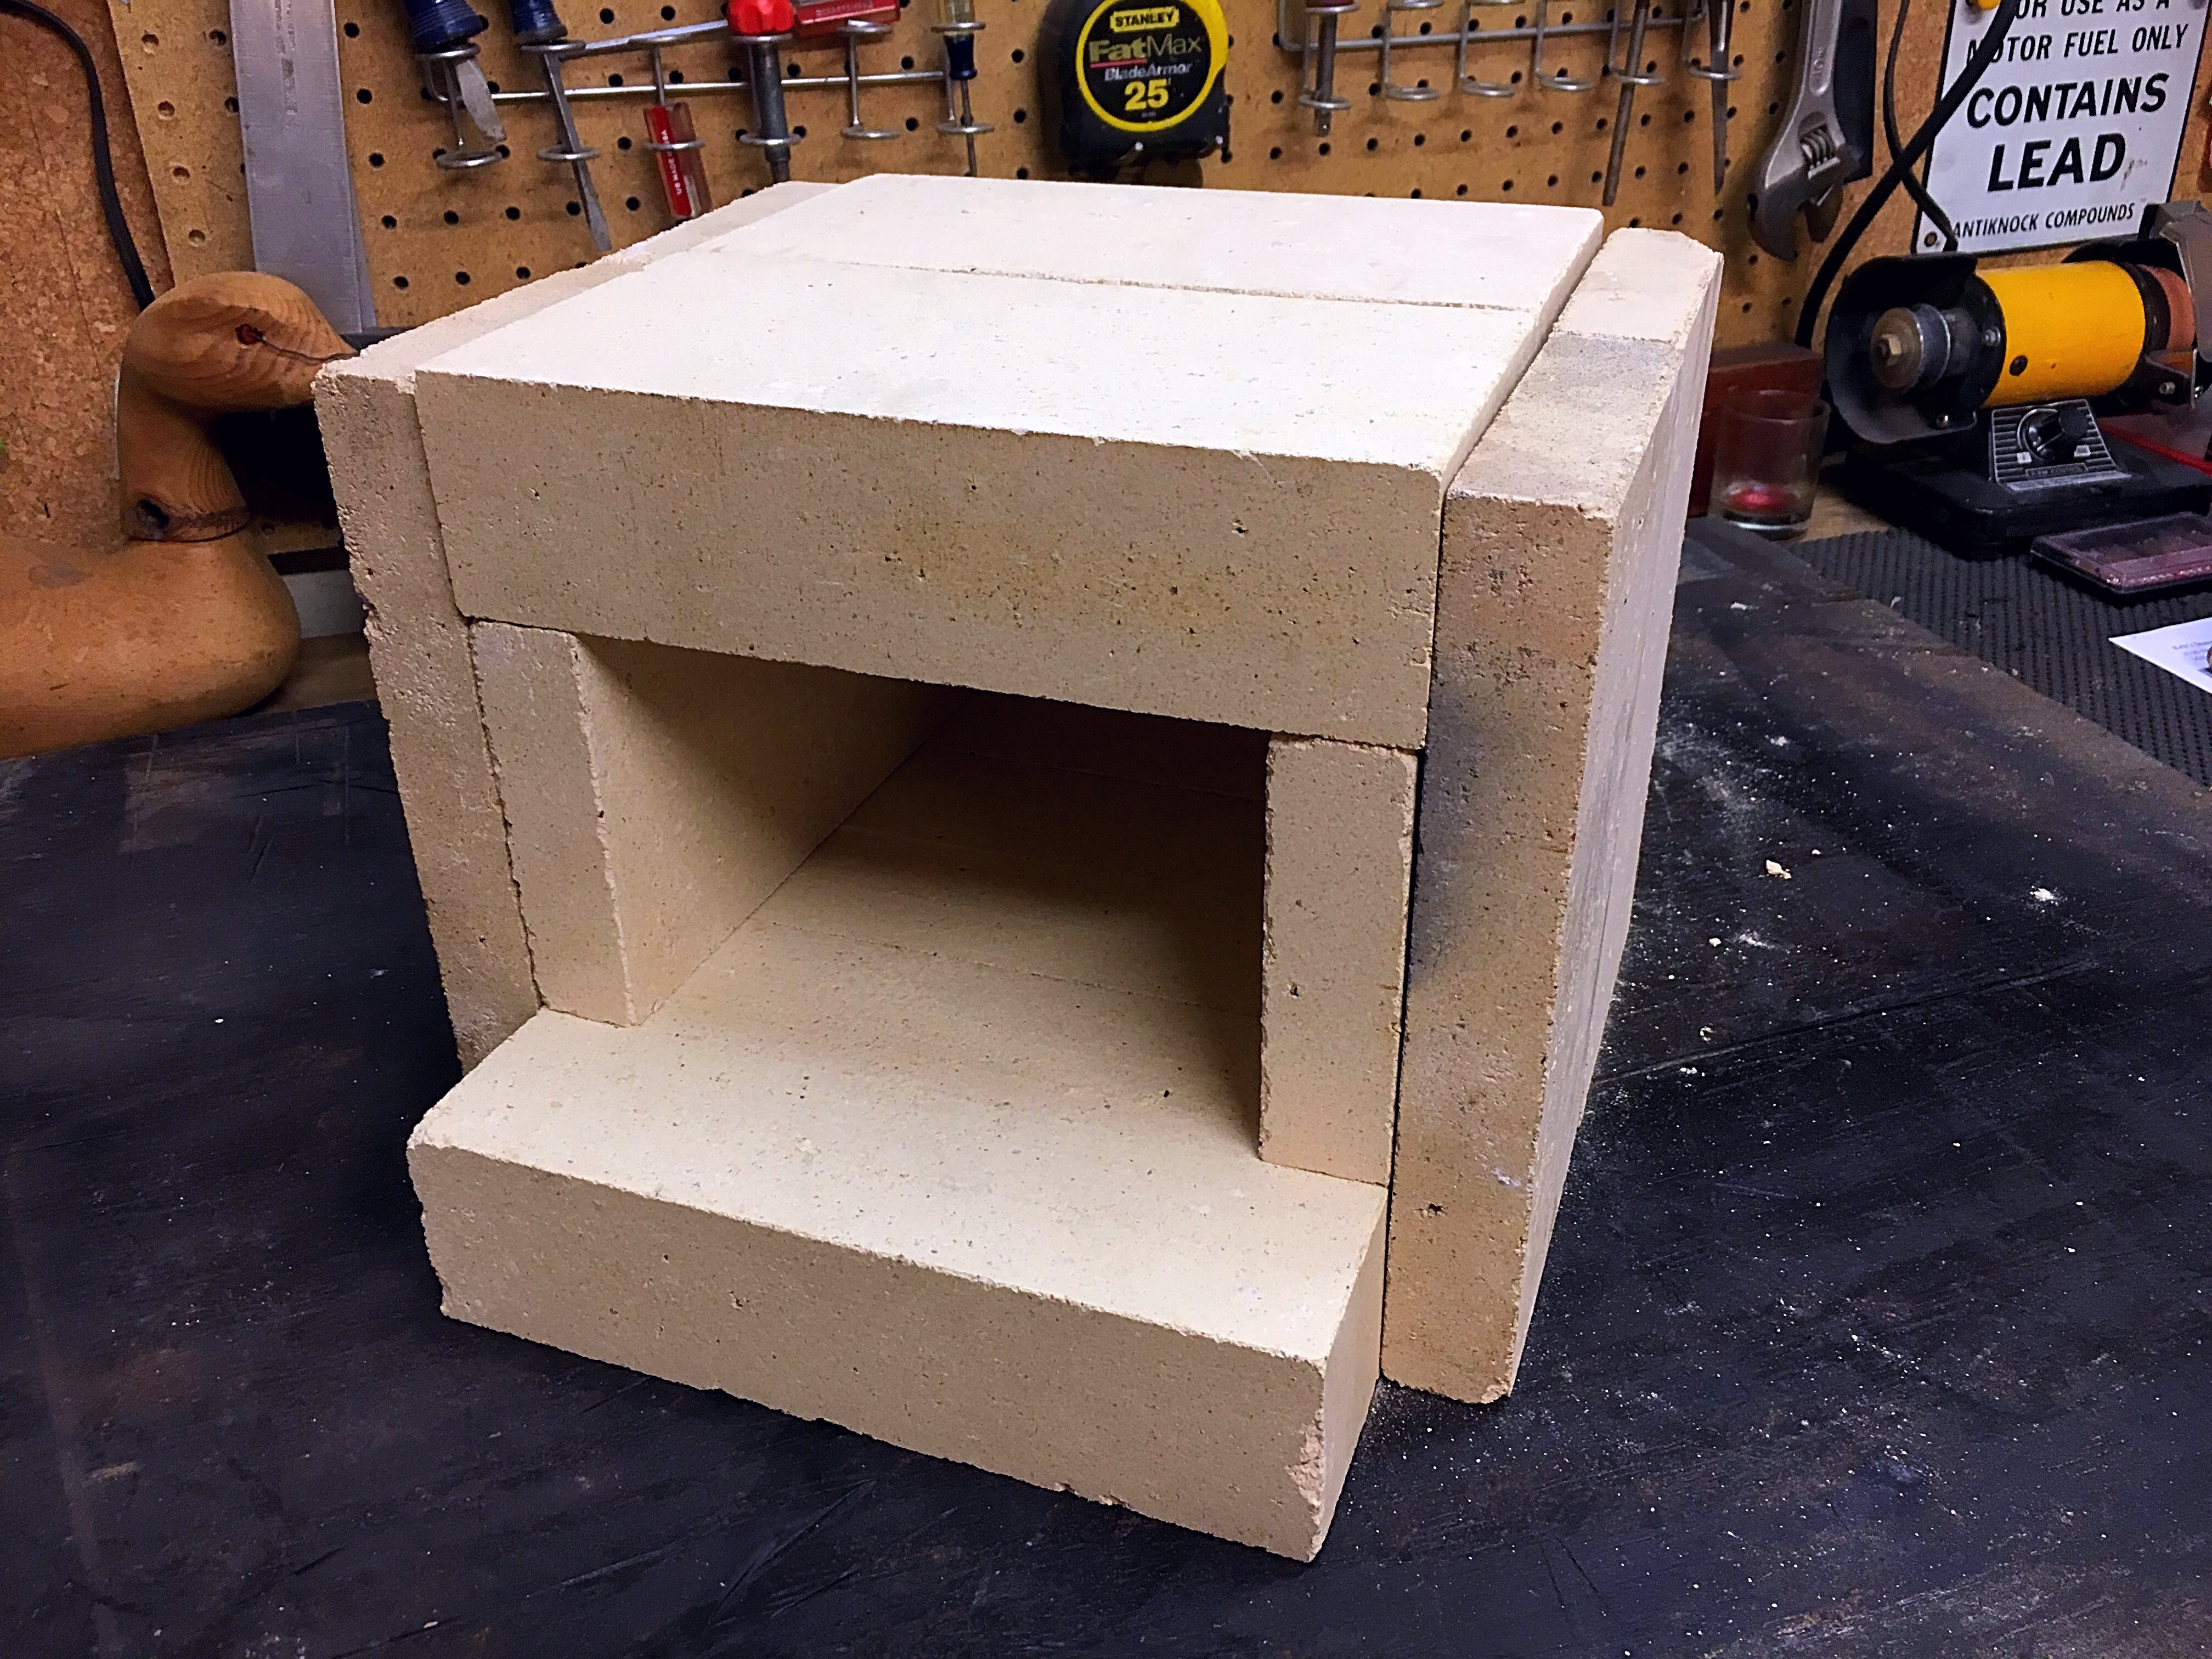
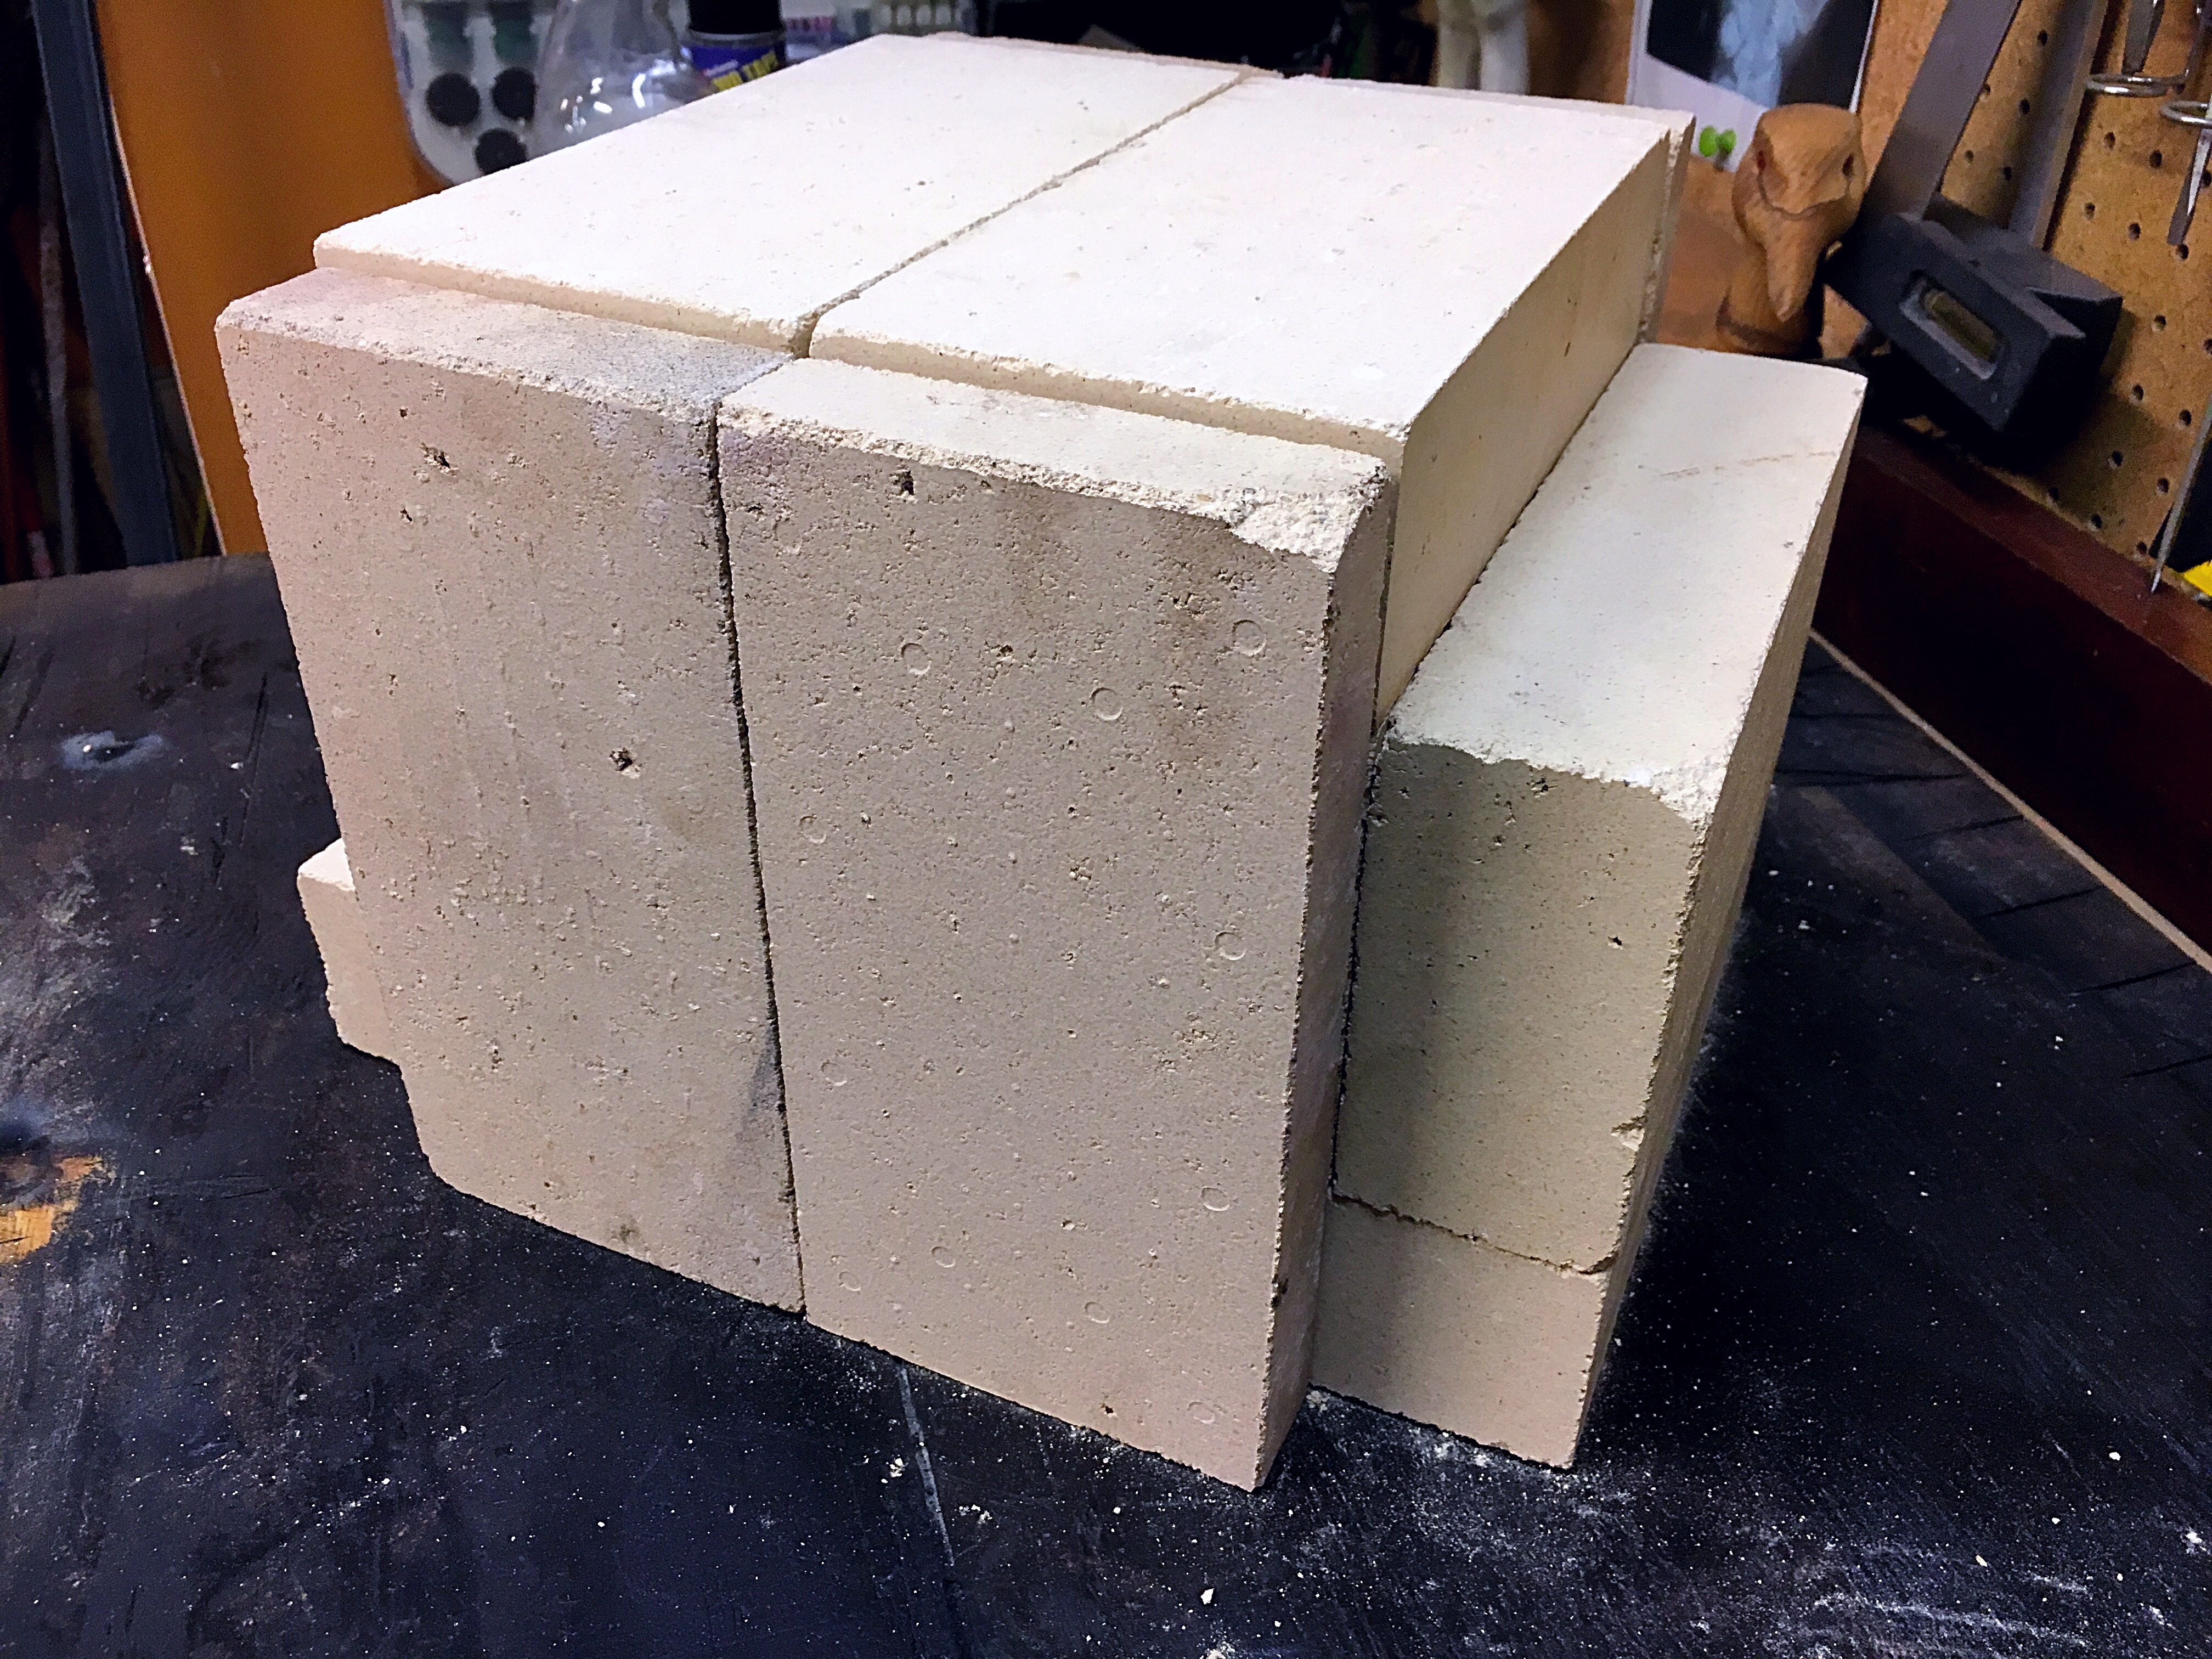


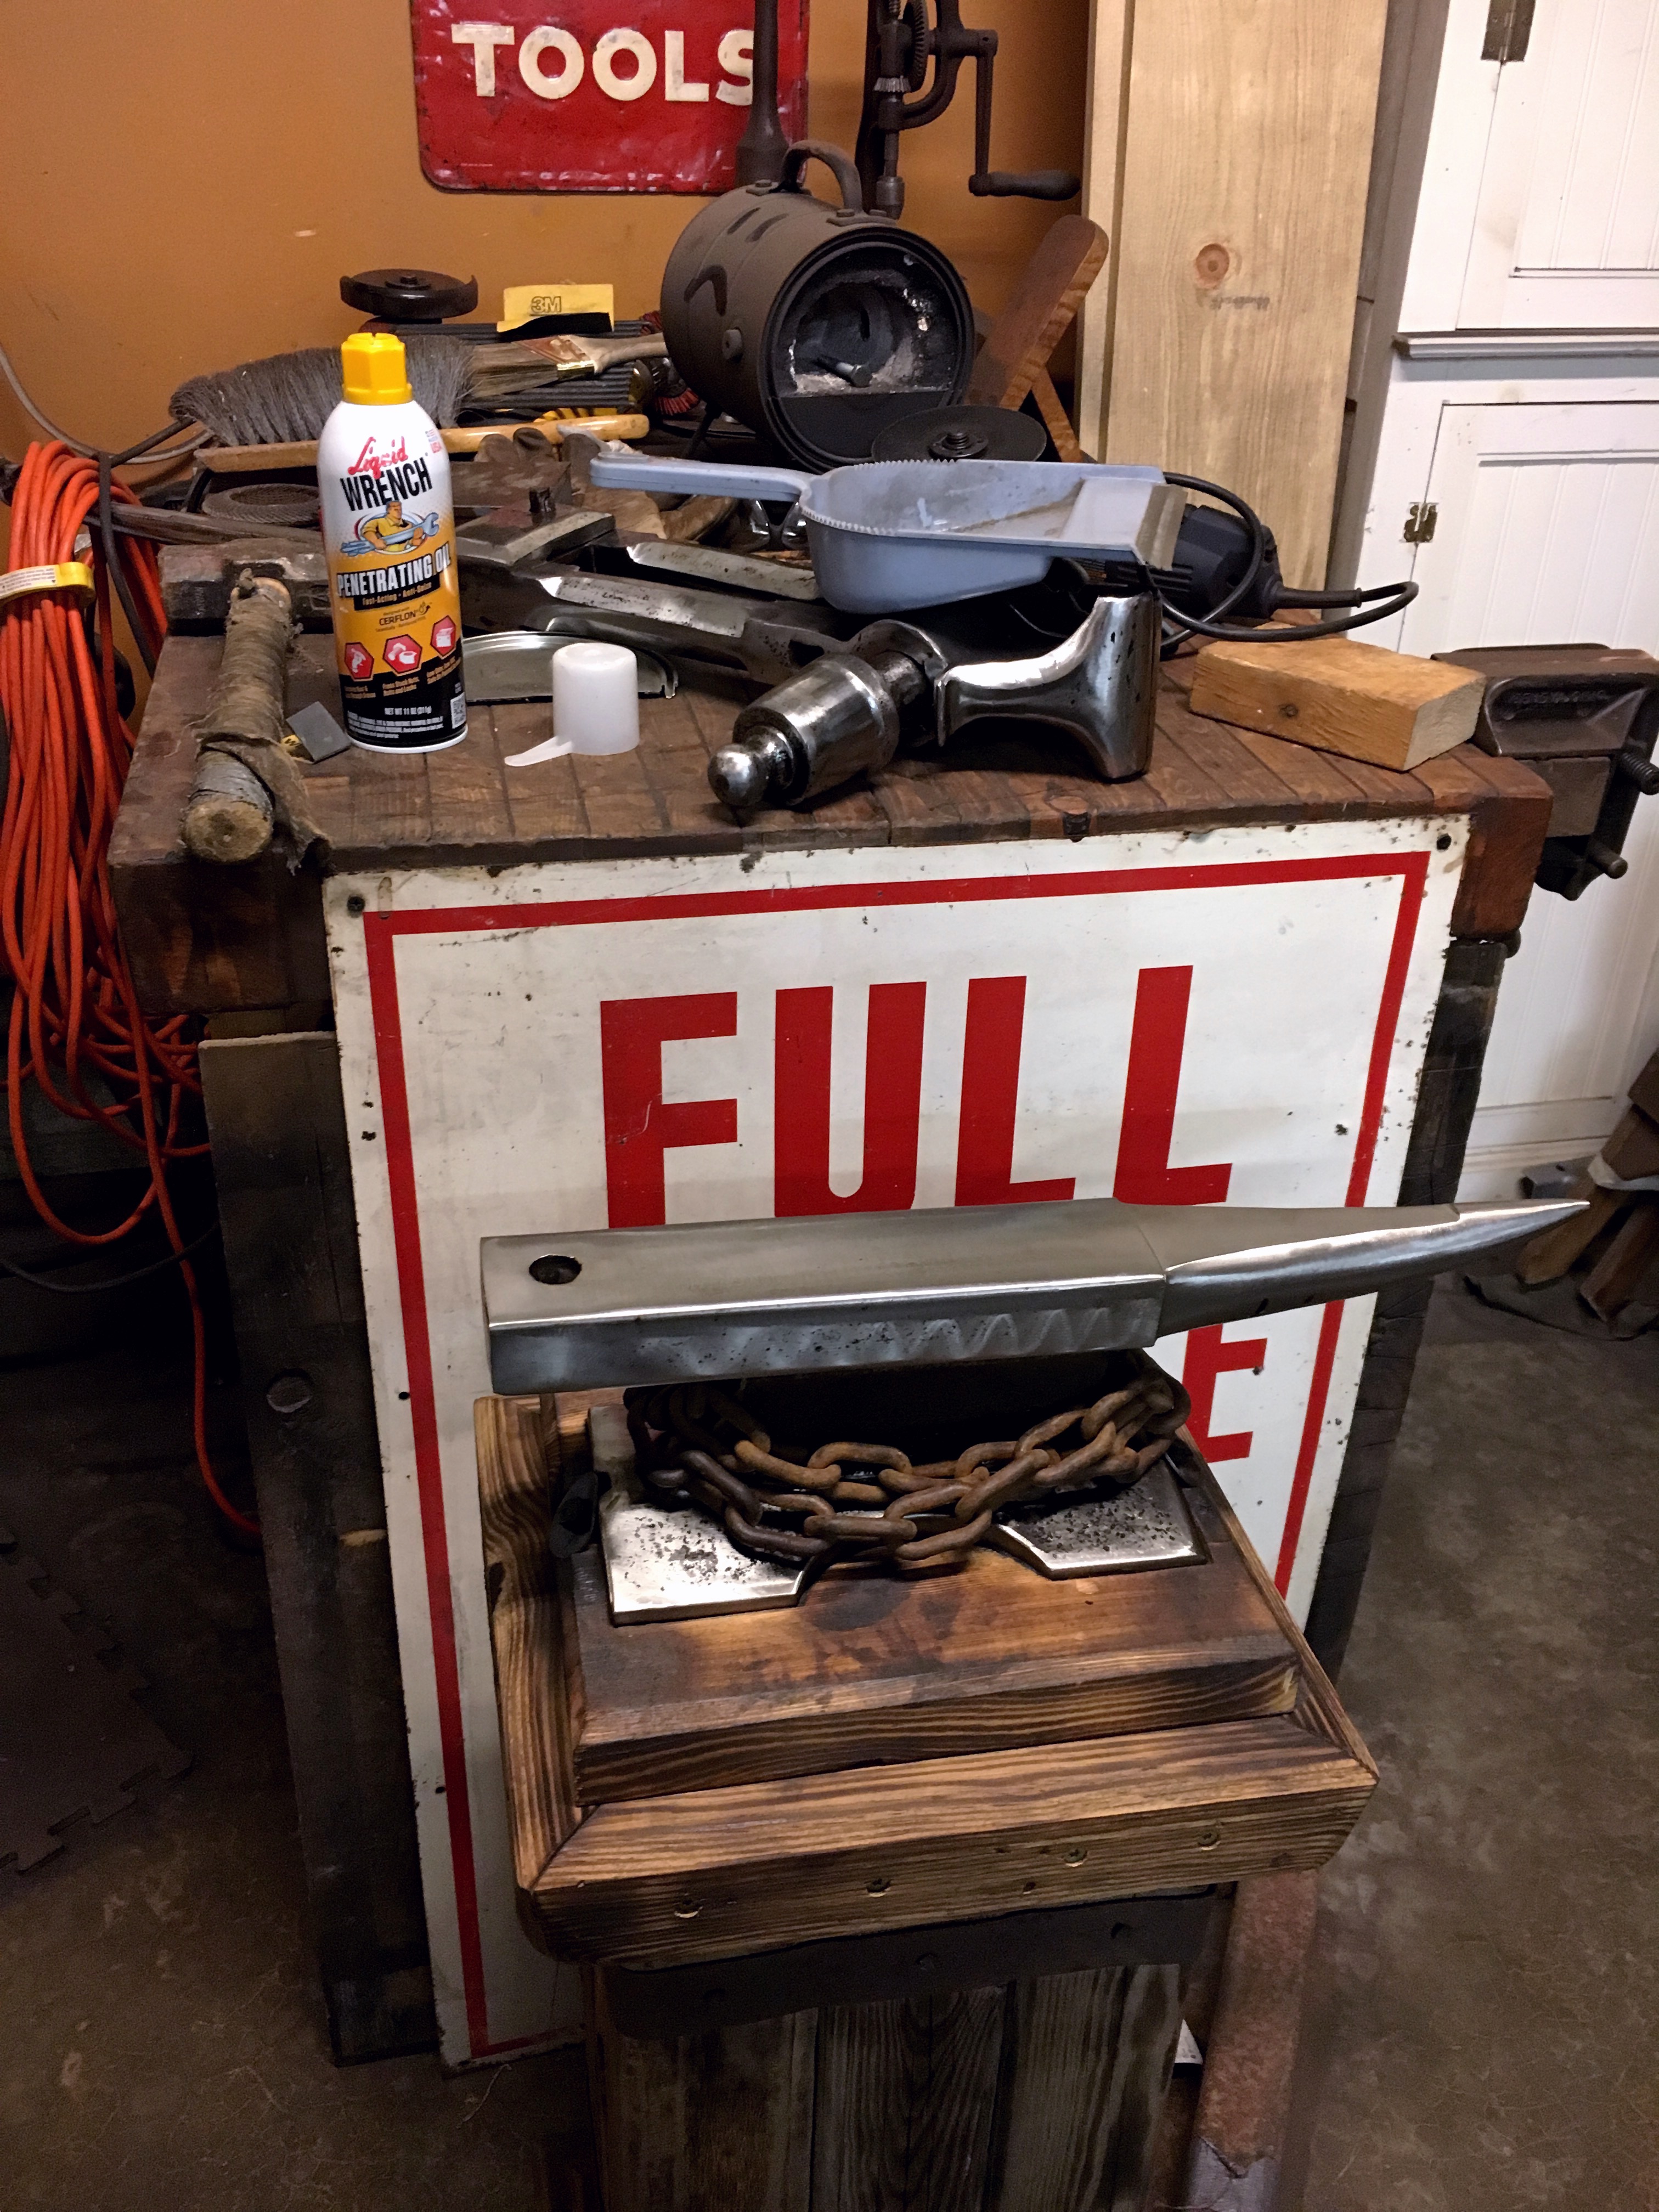


Hard Fire Brick Forges
in Gas Forges
Posted
Got everything welded & the burner holder drilled & threaded.
Its painted and almost ready.
I did a search for zirconium silicate and 5% bentonite clay but can't find a seller.
anyone have a source?