

D.IVO
-
Posts
80 -
Joined
-
Last visited
Content Type
Profiles
Forums
Articles
Gallery
Downloads
Events
Posts posted by D.IVO
-
-
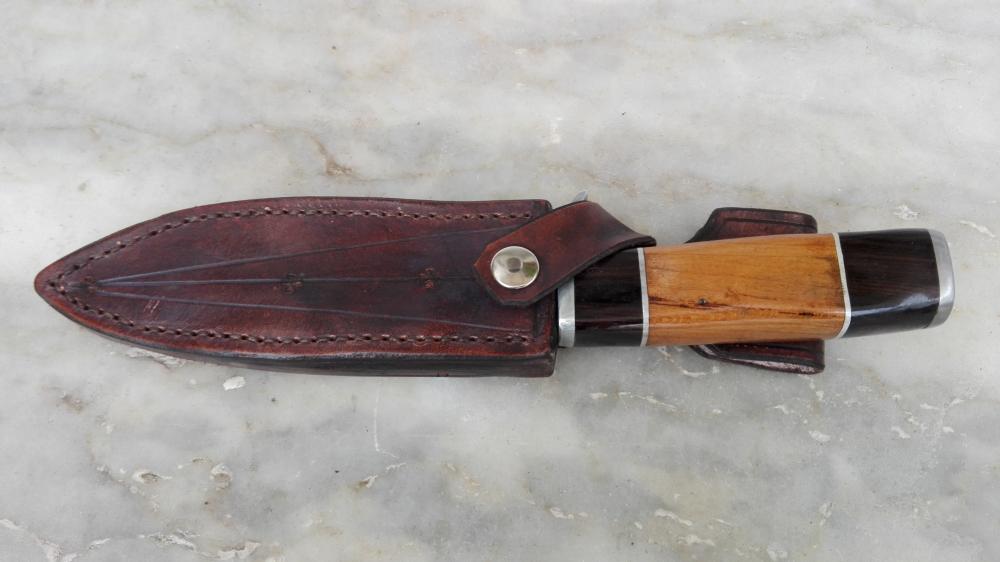
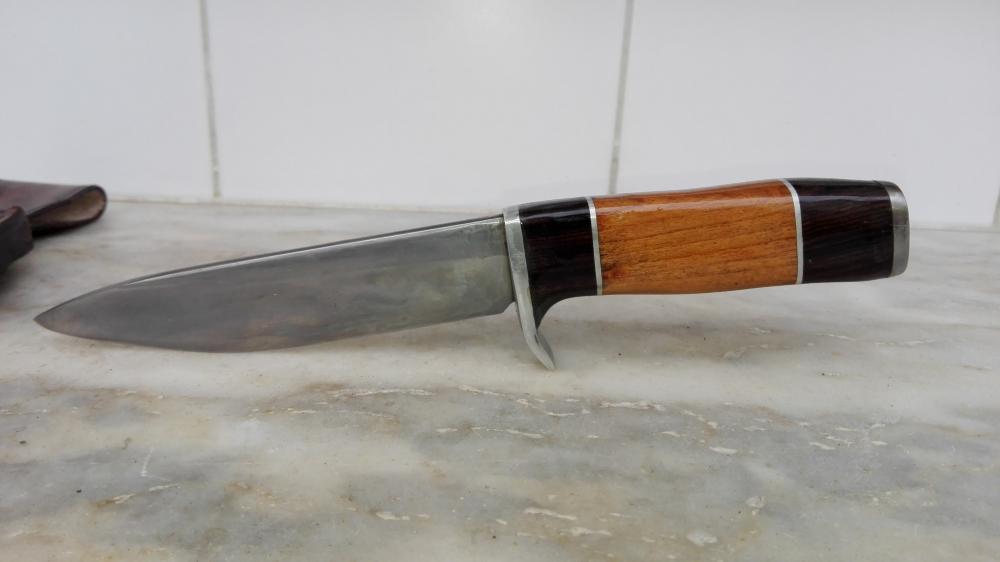
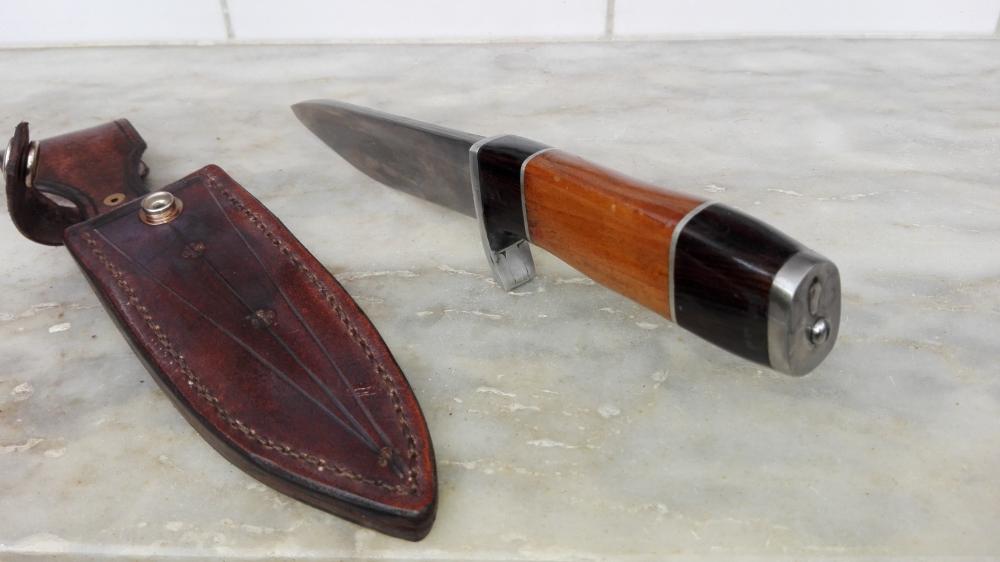
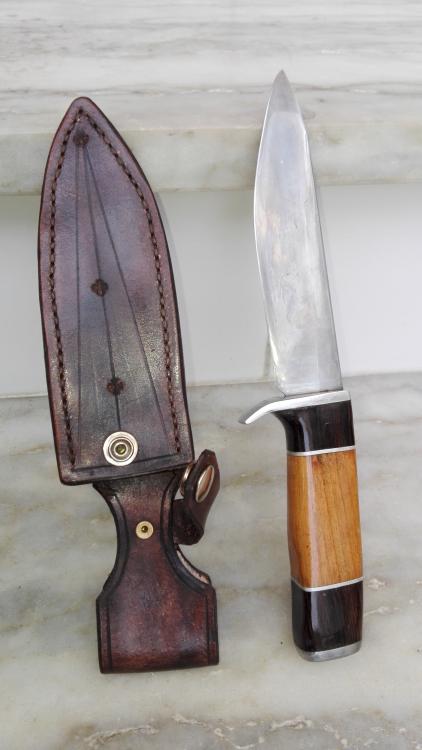
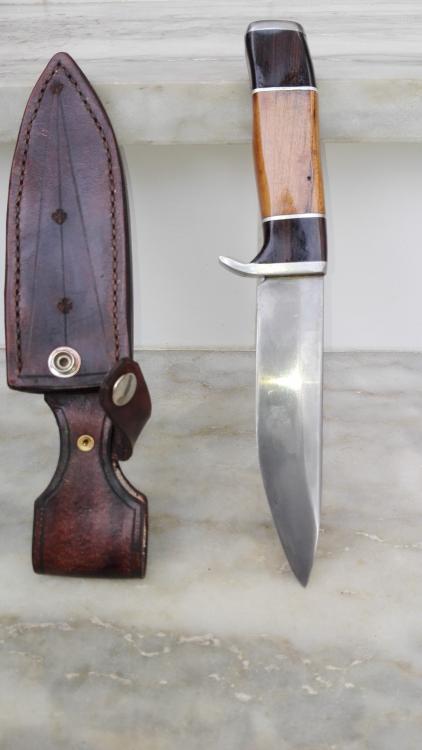
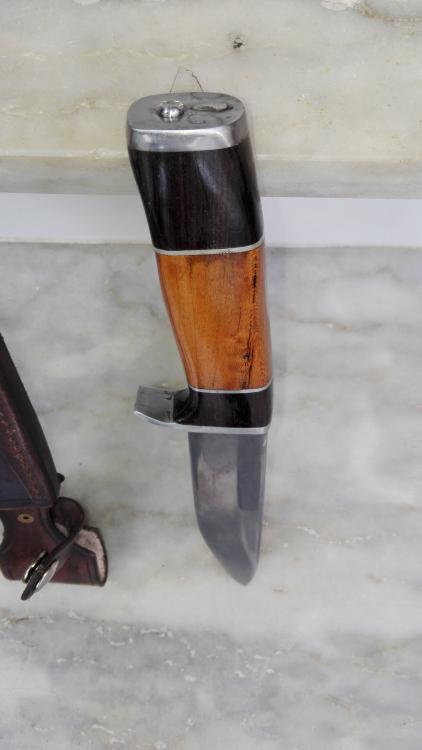
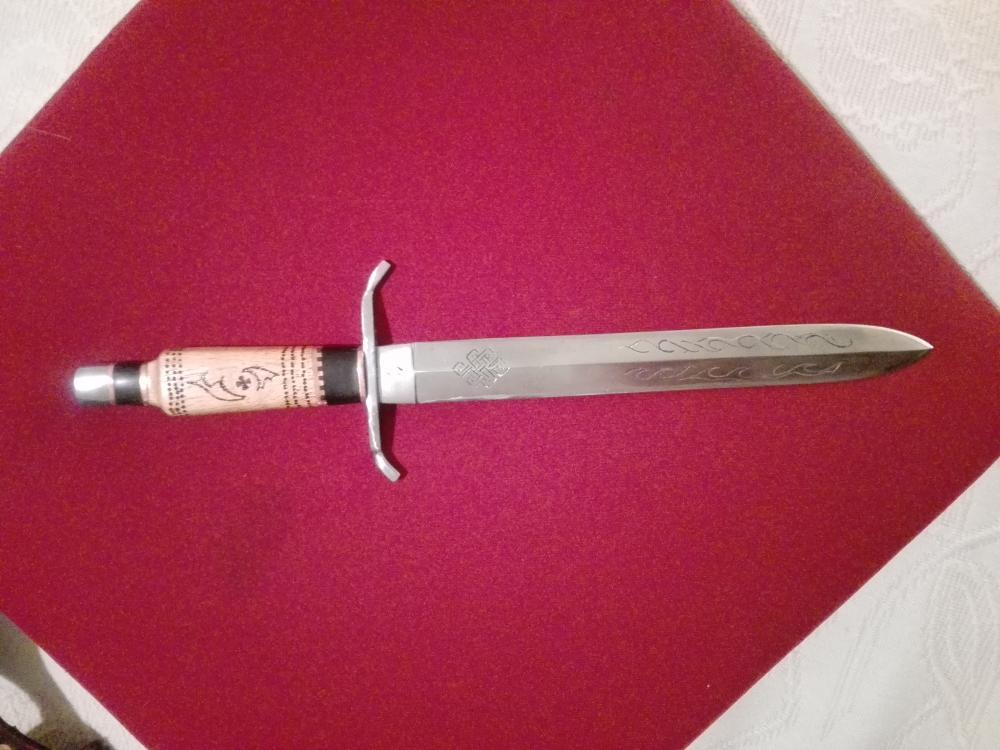
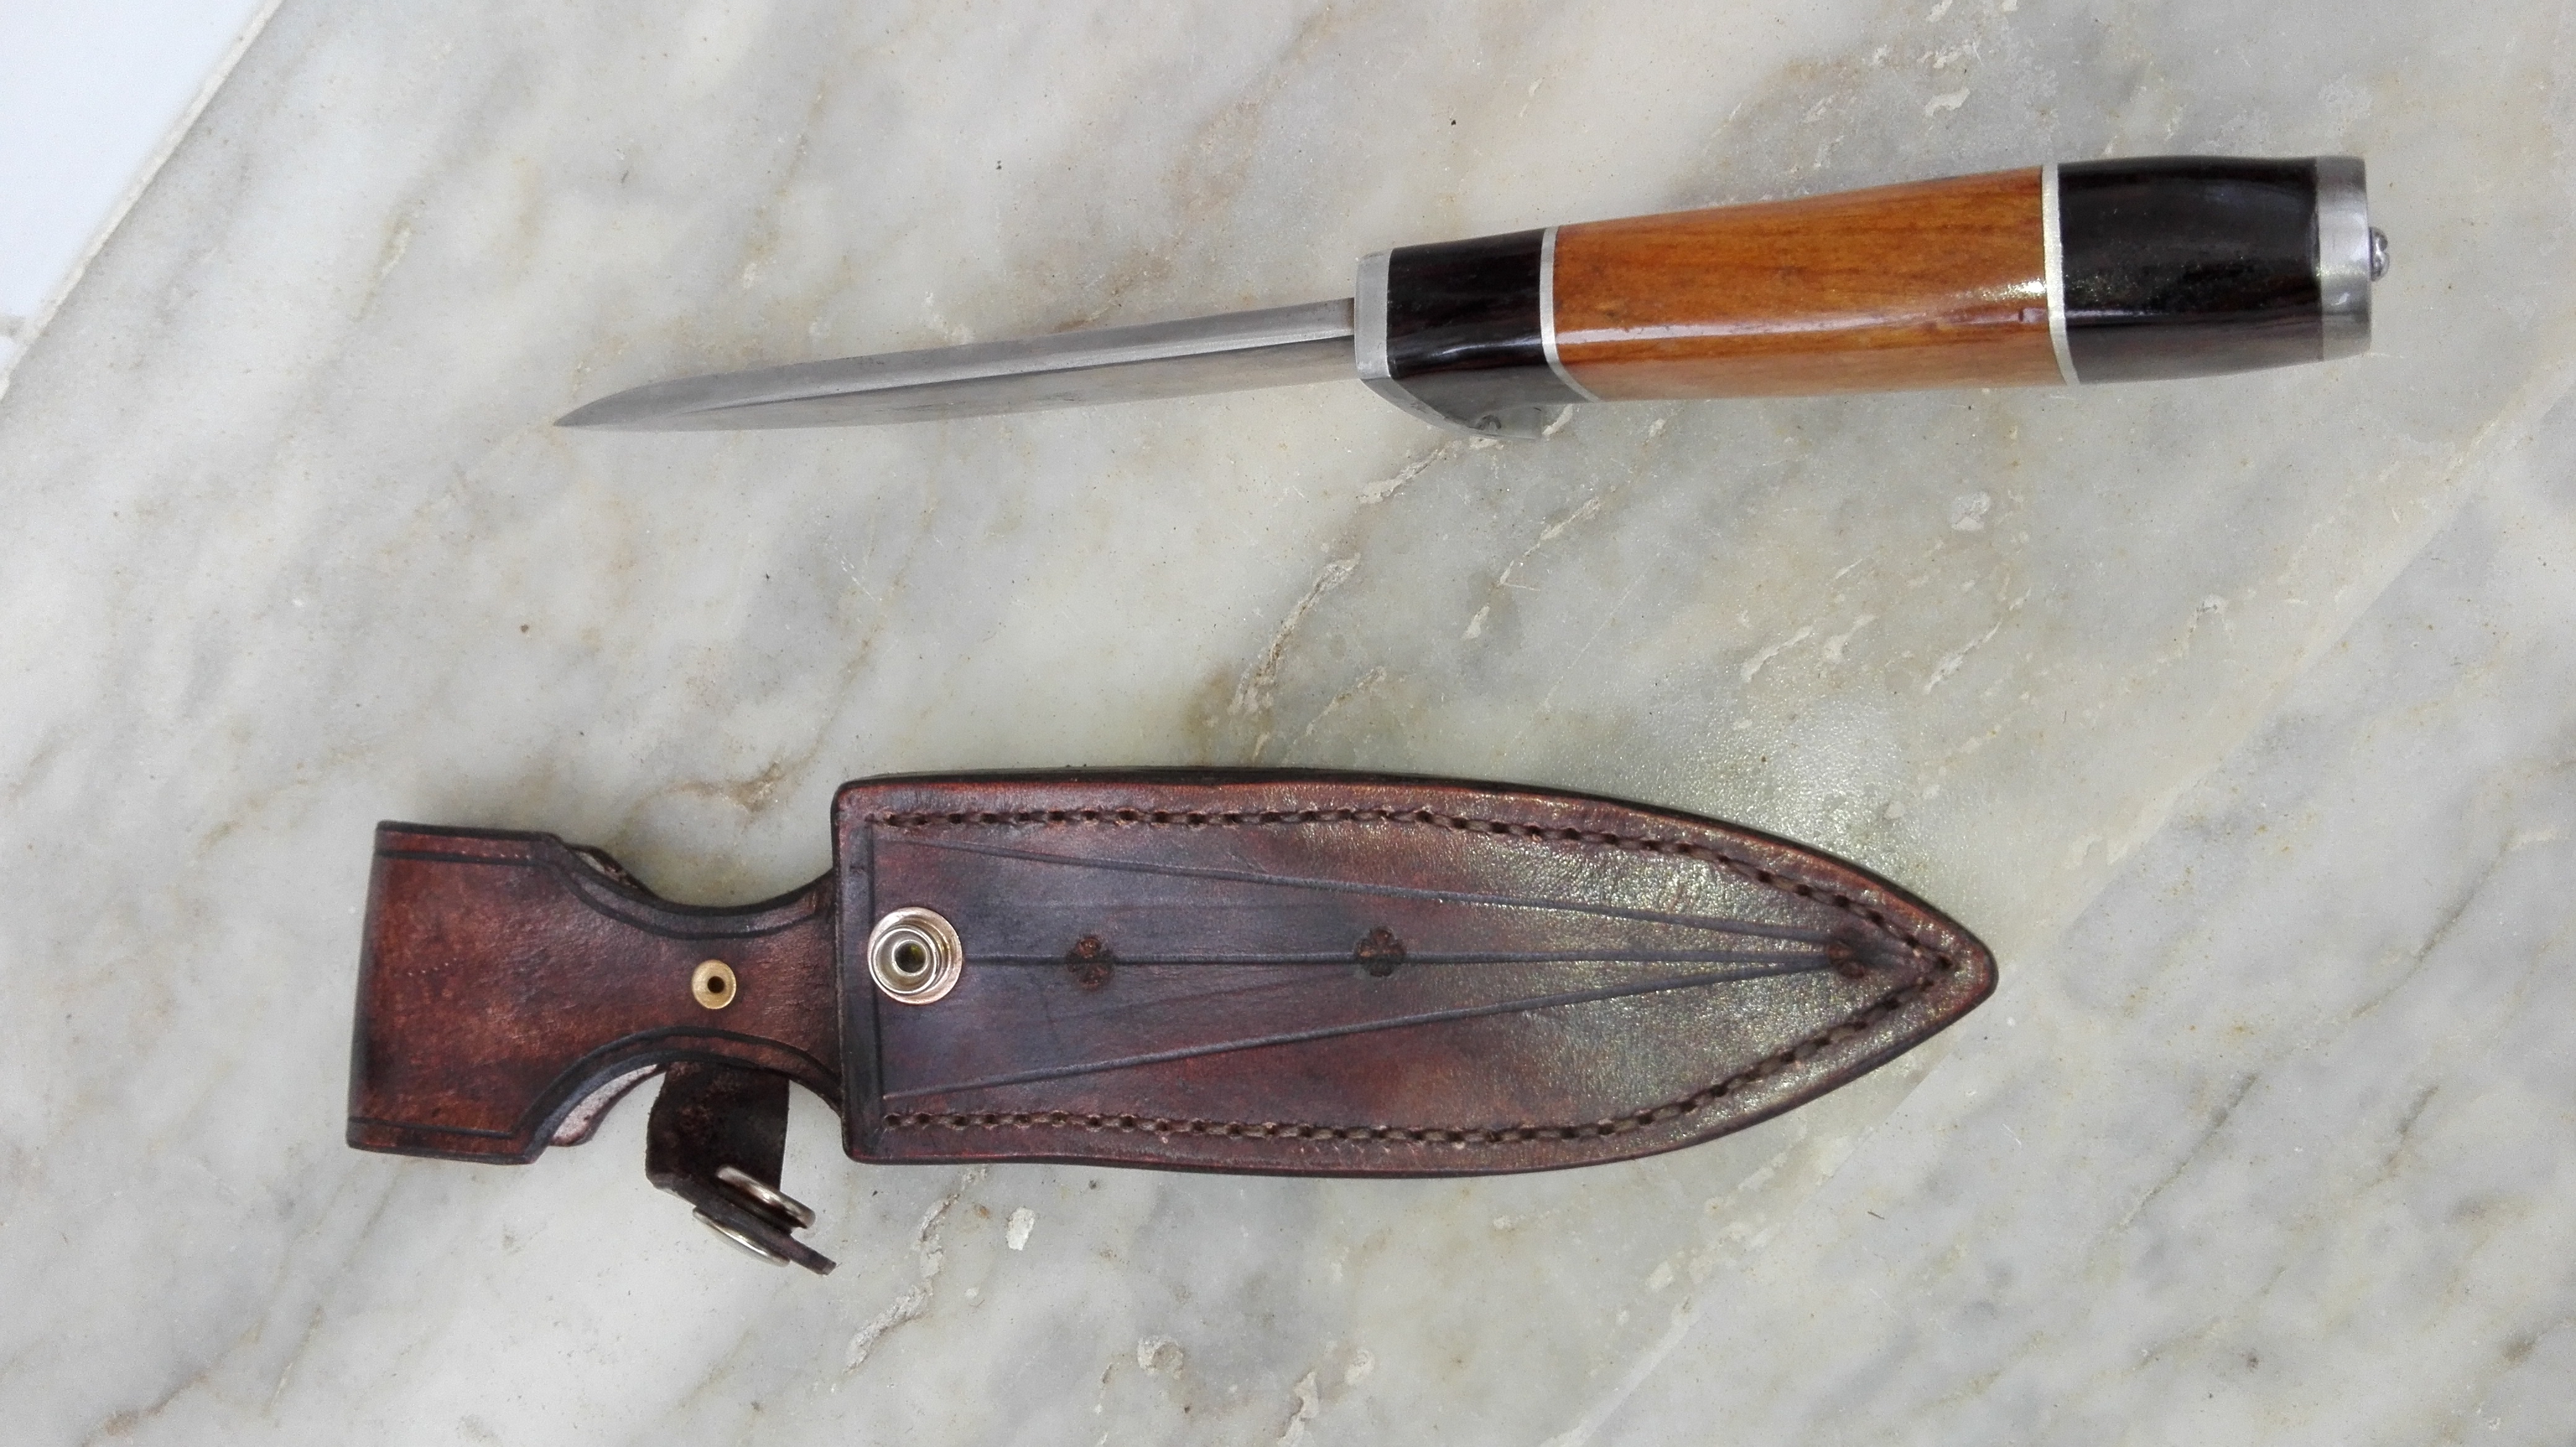
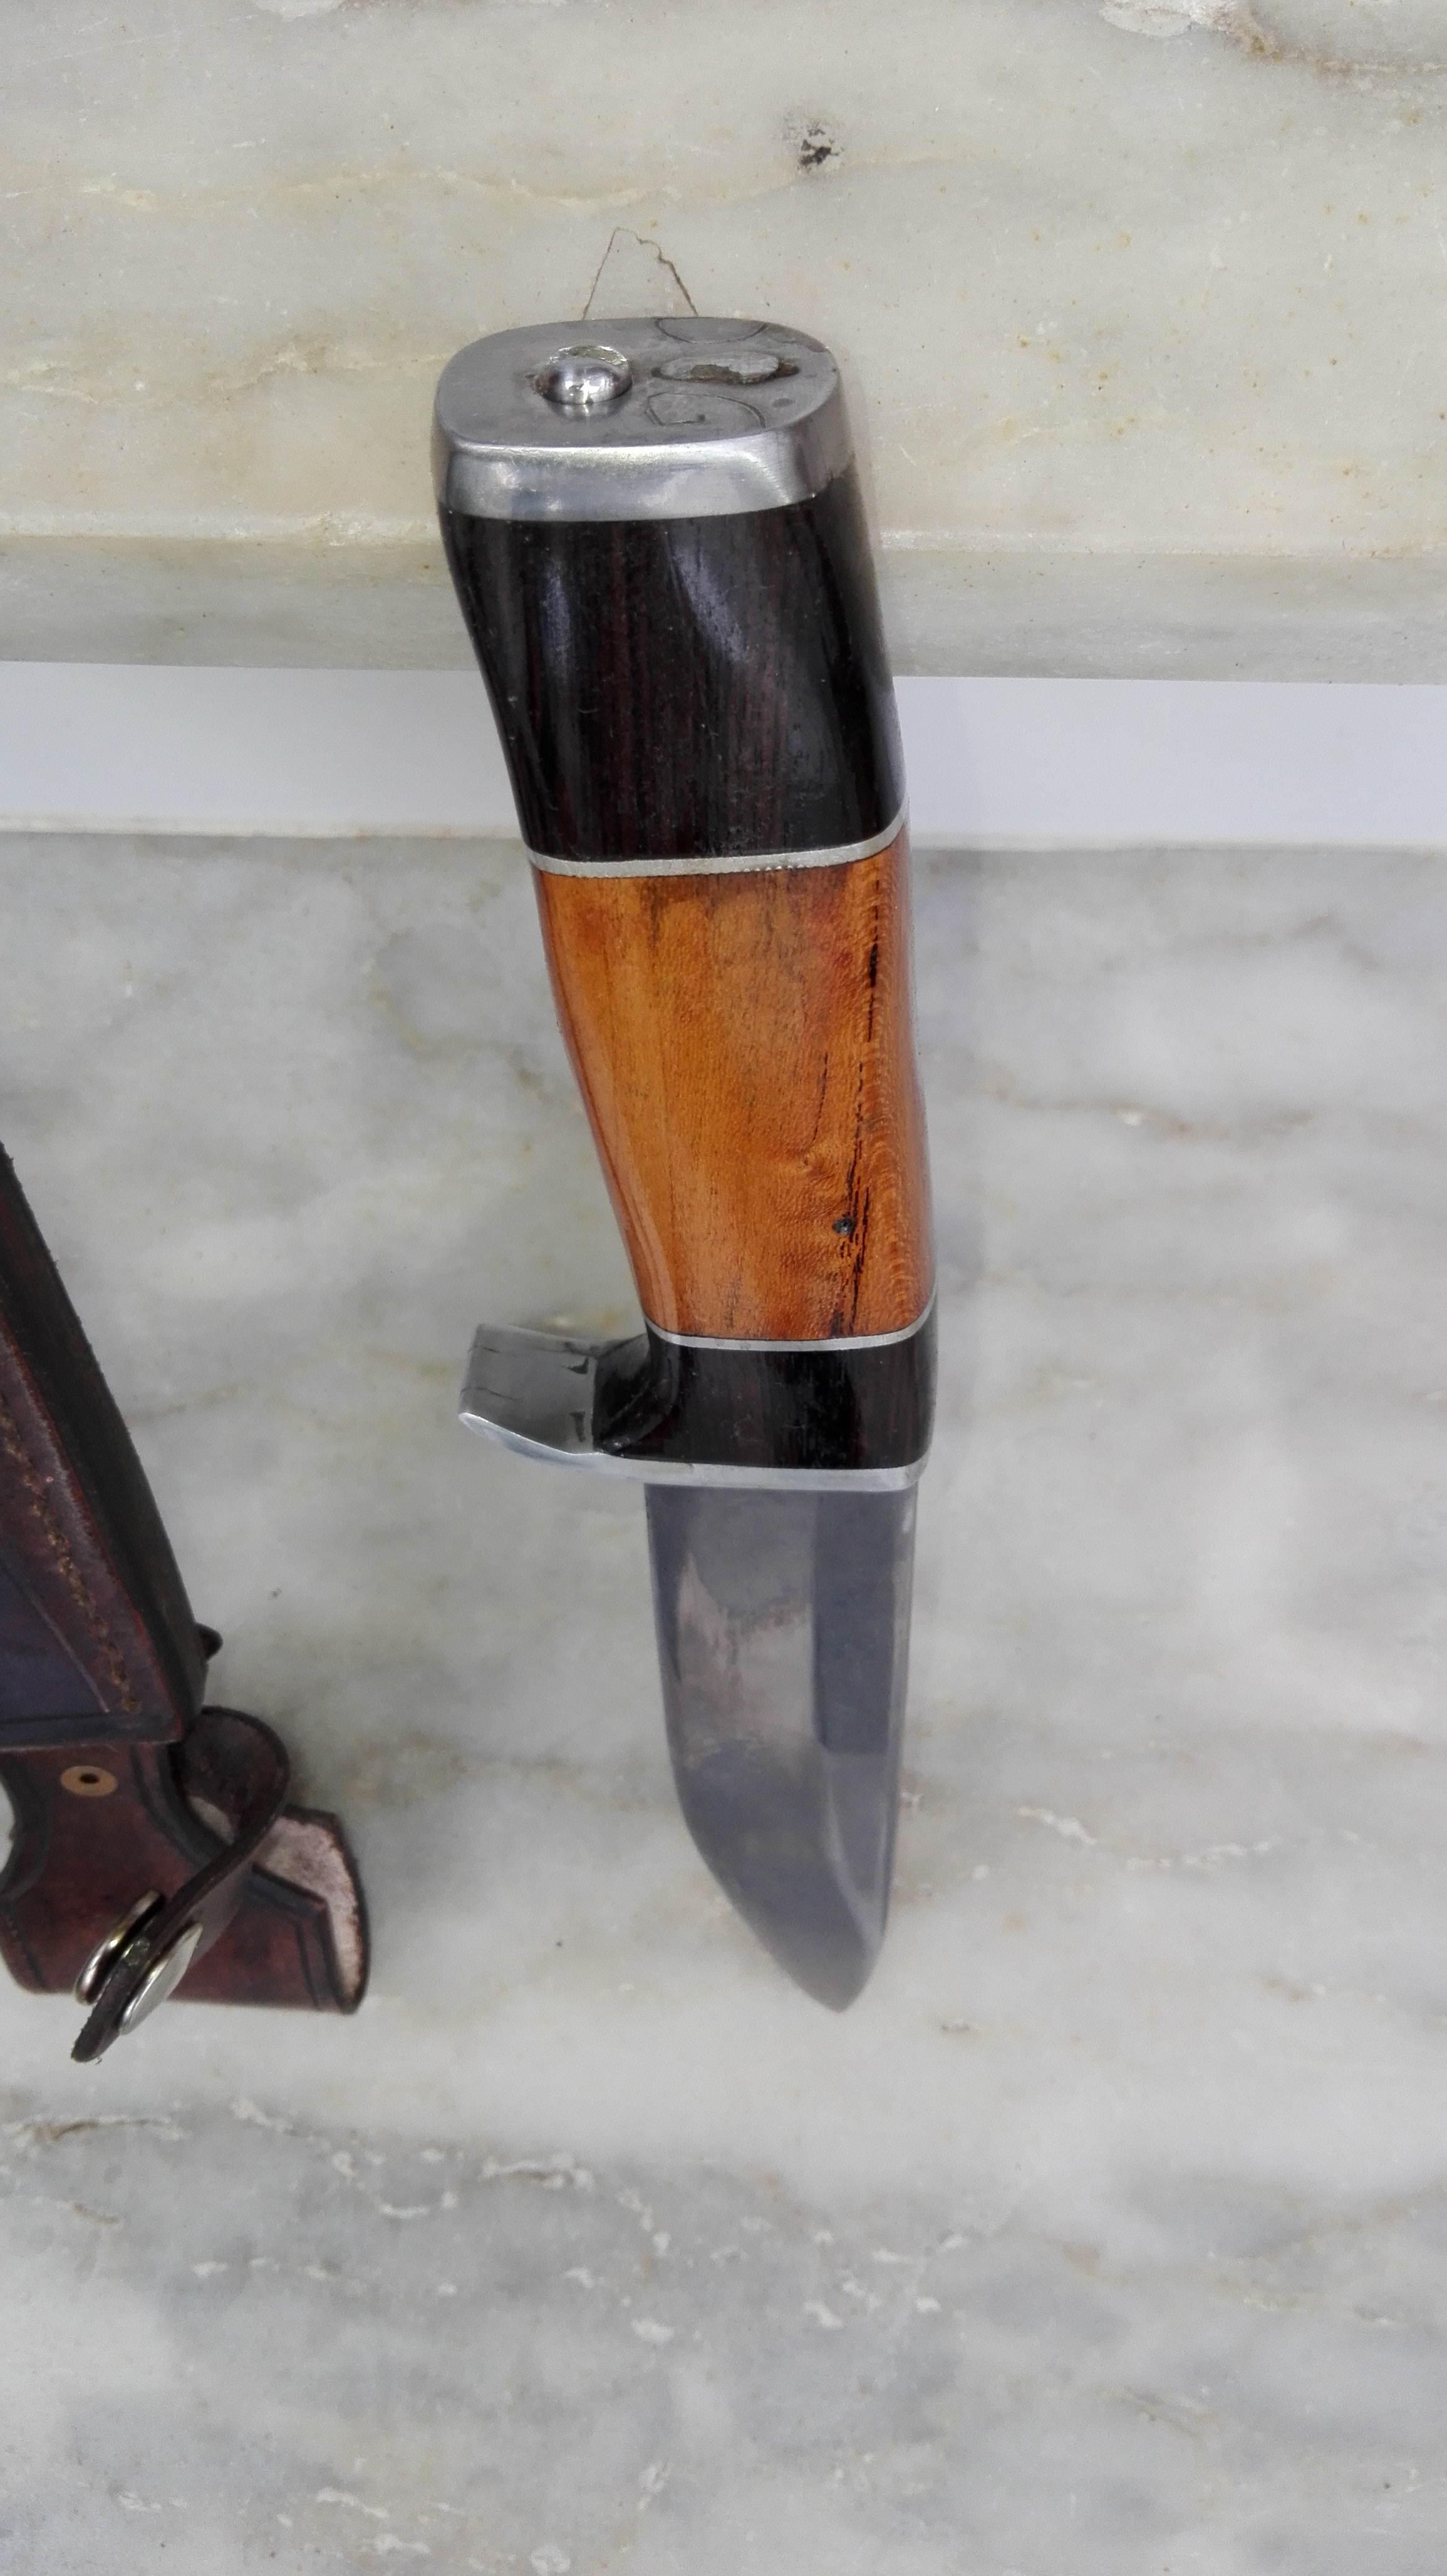
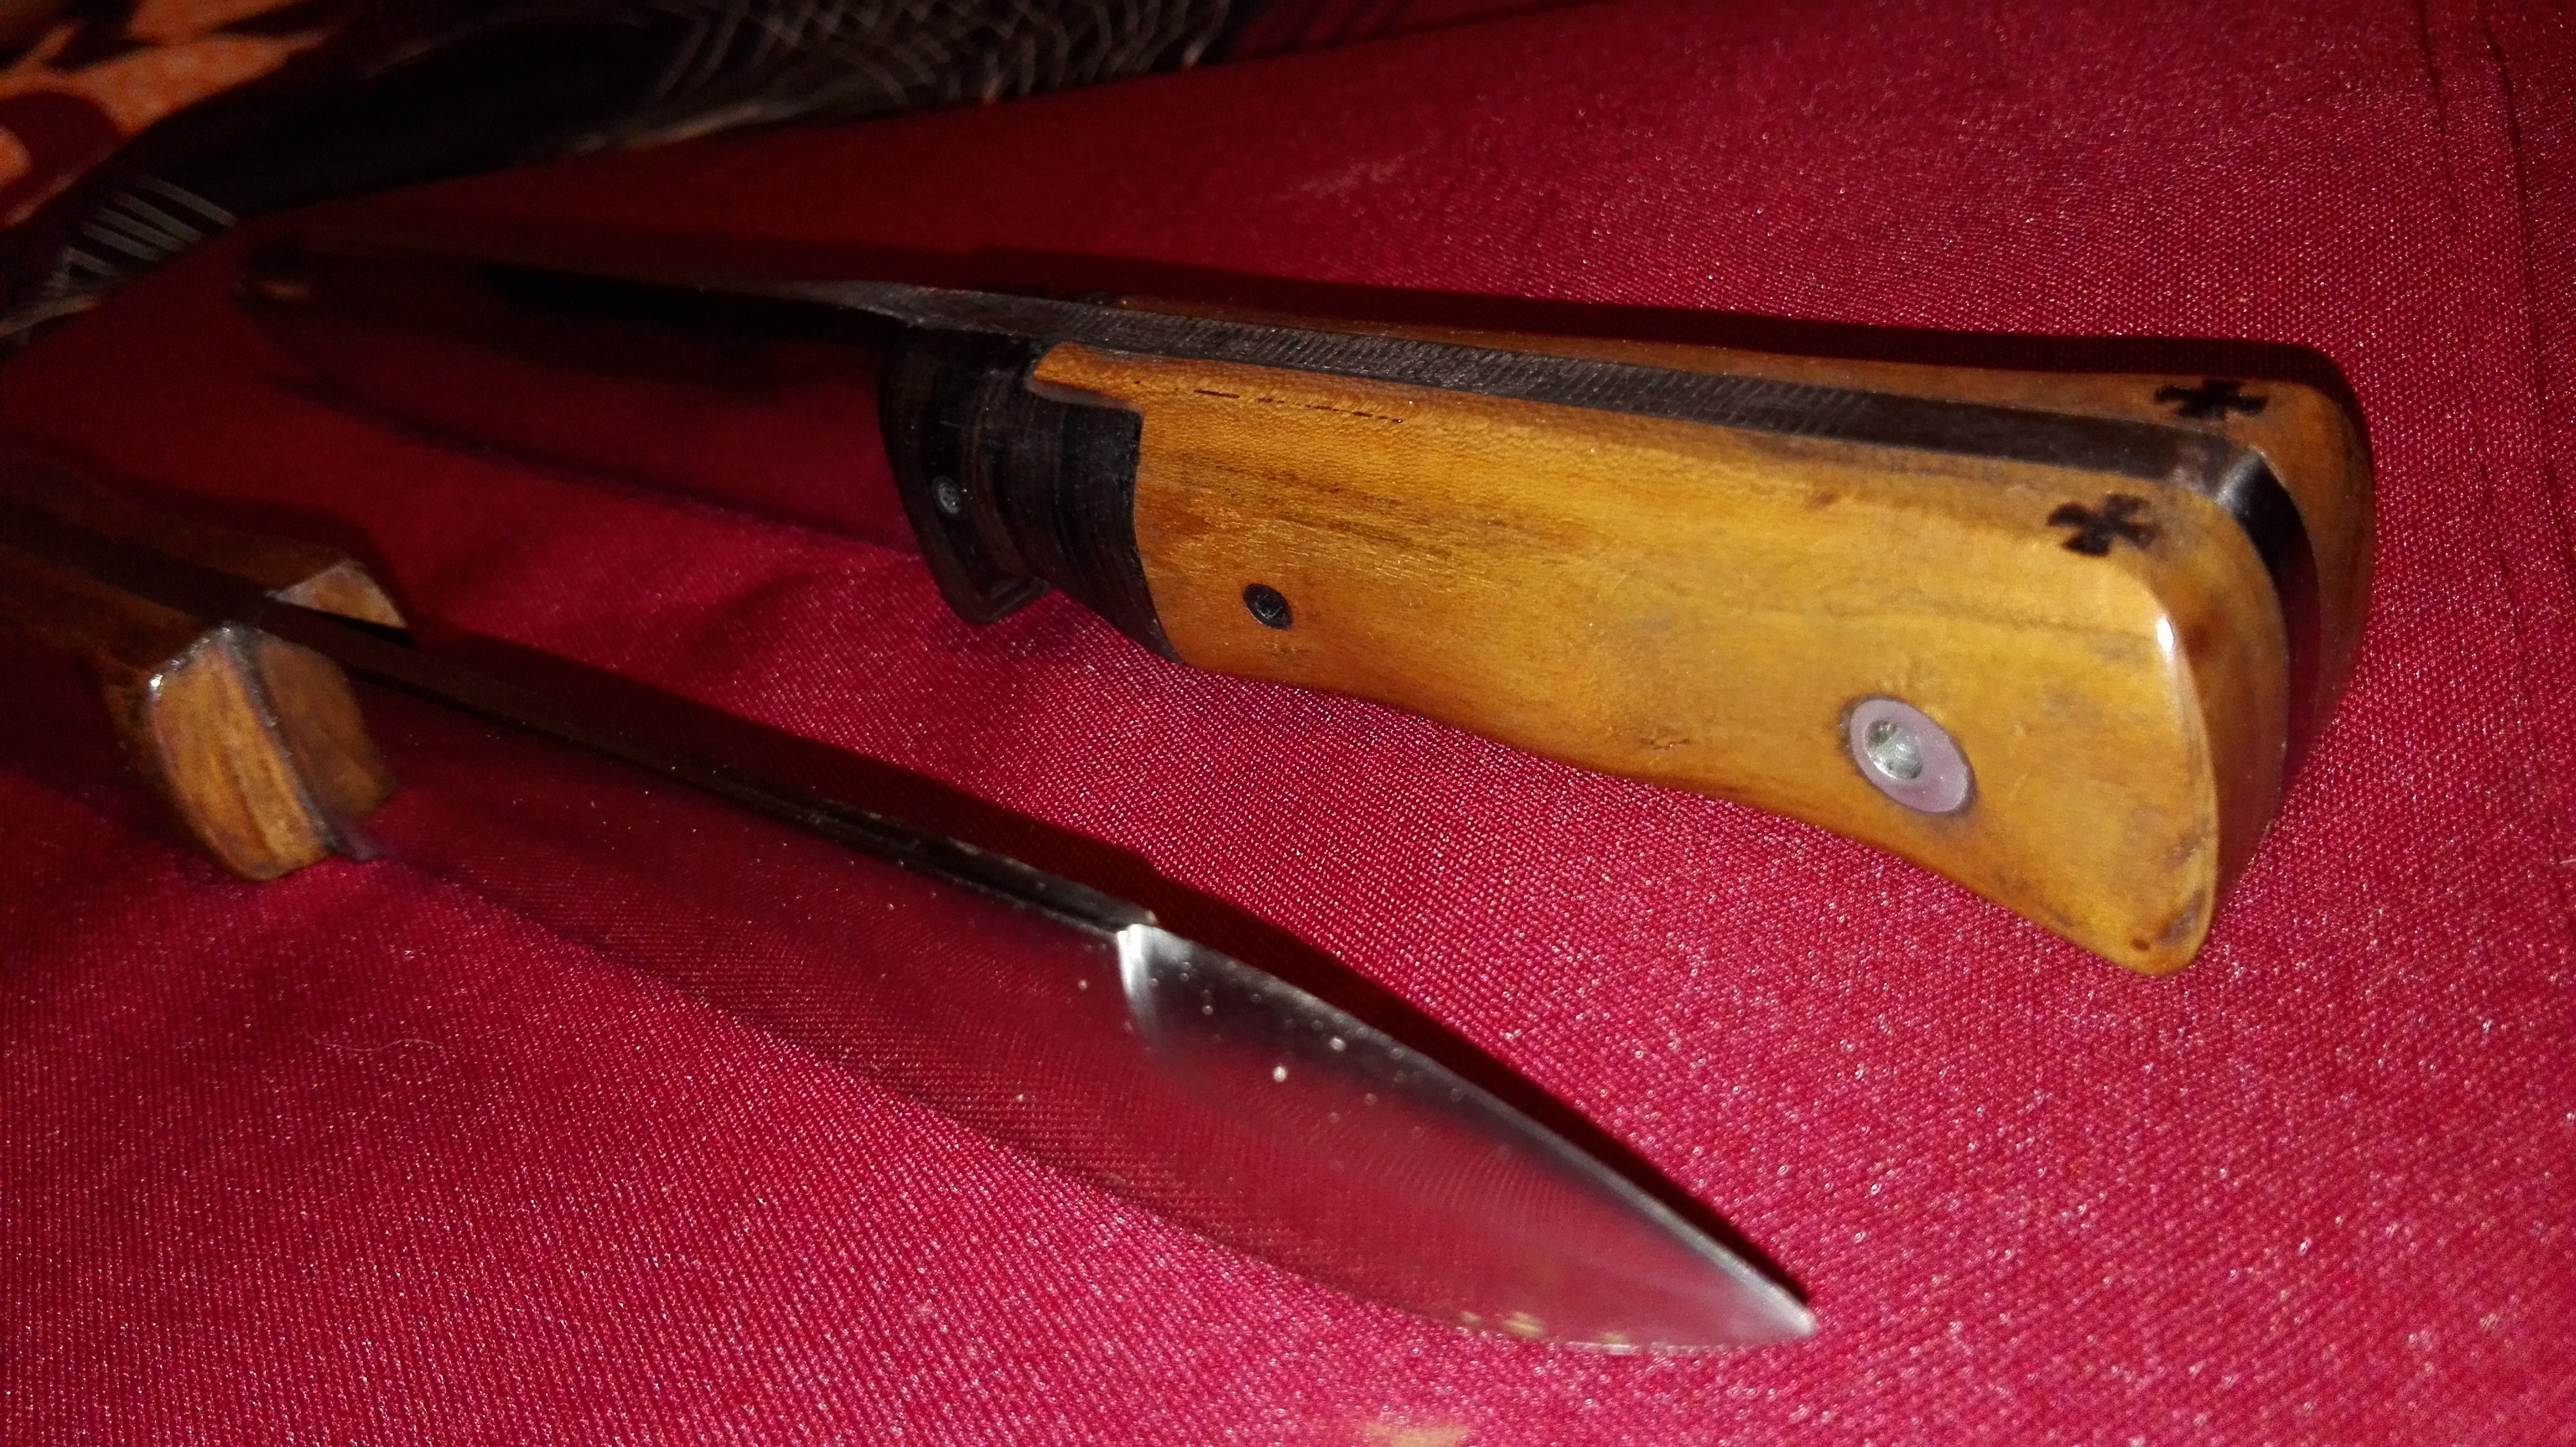
In celebration of my 30th anniversary , here's a small hunting knife of my signature style.
Blade of spring steel, diferential hardendend, lenght 14 cm, width at base 5.5 mm. Alluminium guard
Handle made of palo santo and cherry tree with alluminium spacers and steel butt cap screwed and pinned tang.
Sheath made from 5mm thick leather.
I've etched the blade with lemon vinagar to give a darker look, it's not a blade with great edge holding like my other ones from file steel but one of the sharpest and strongest knives I've made yet.
Still trying to figure out the right finish for the palo santo wood, the varnishes I use take days to completely dry.
Cheers


-
So that's how boomerang is made..
Strange shoes, I believe the japanese wear something similiar.
-
I hammer and grind on the backyard of my apartment, as long I respect the legal hours there´s nothing the neighbors can do. I do not use the forge nor the anvil more than twice every week, for a few hours, until I move to new home with decent privacy.
2 1/2 hours on the anvil is not much but imagine every day you got home from work and some artist is ringing the church bell for hours, a person can get psychotic.
-
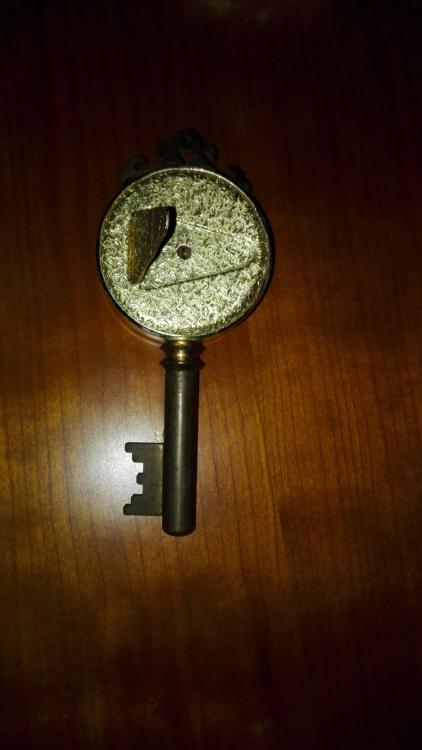
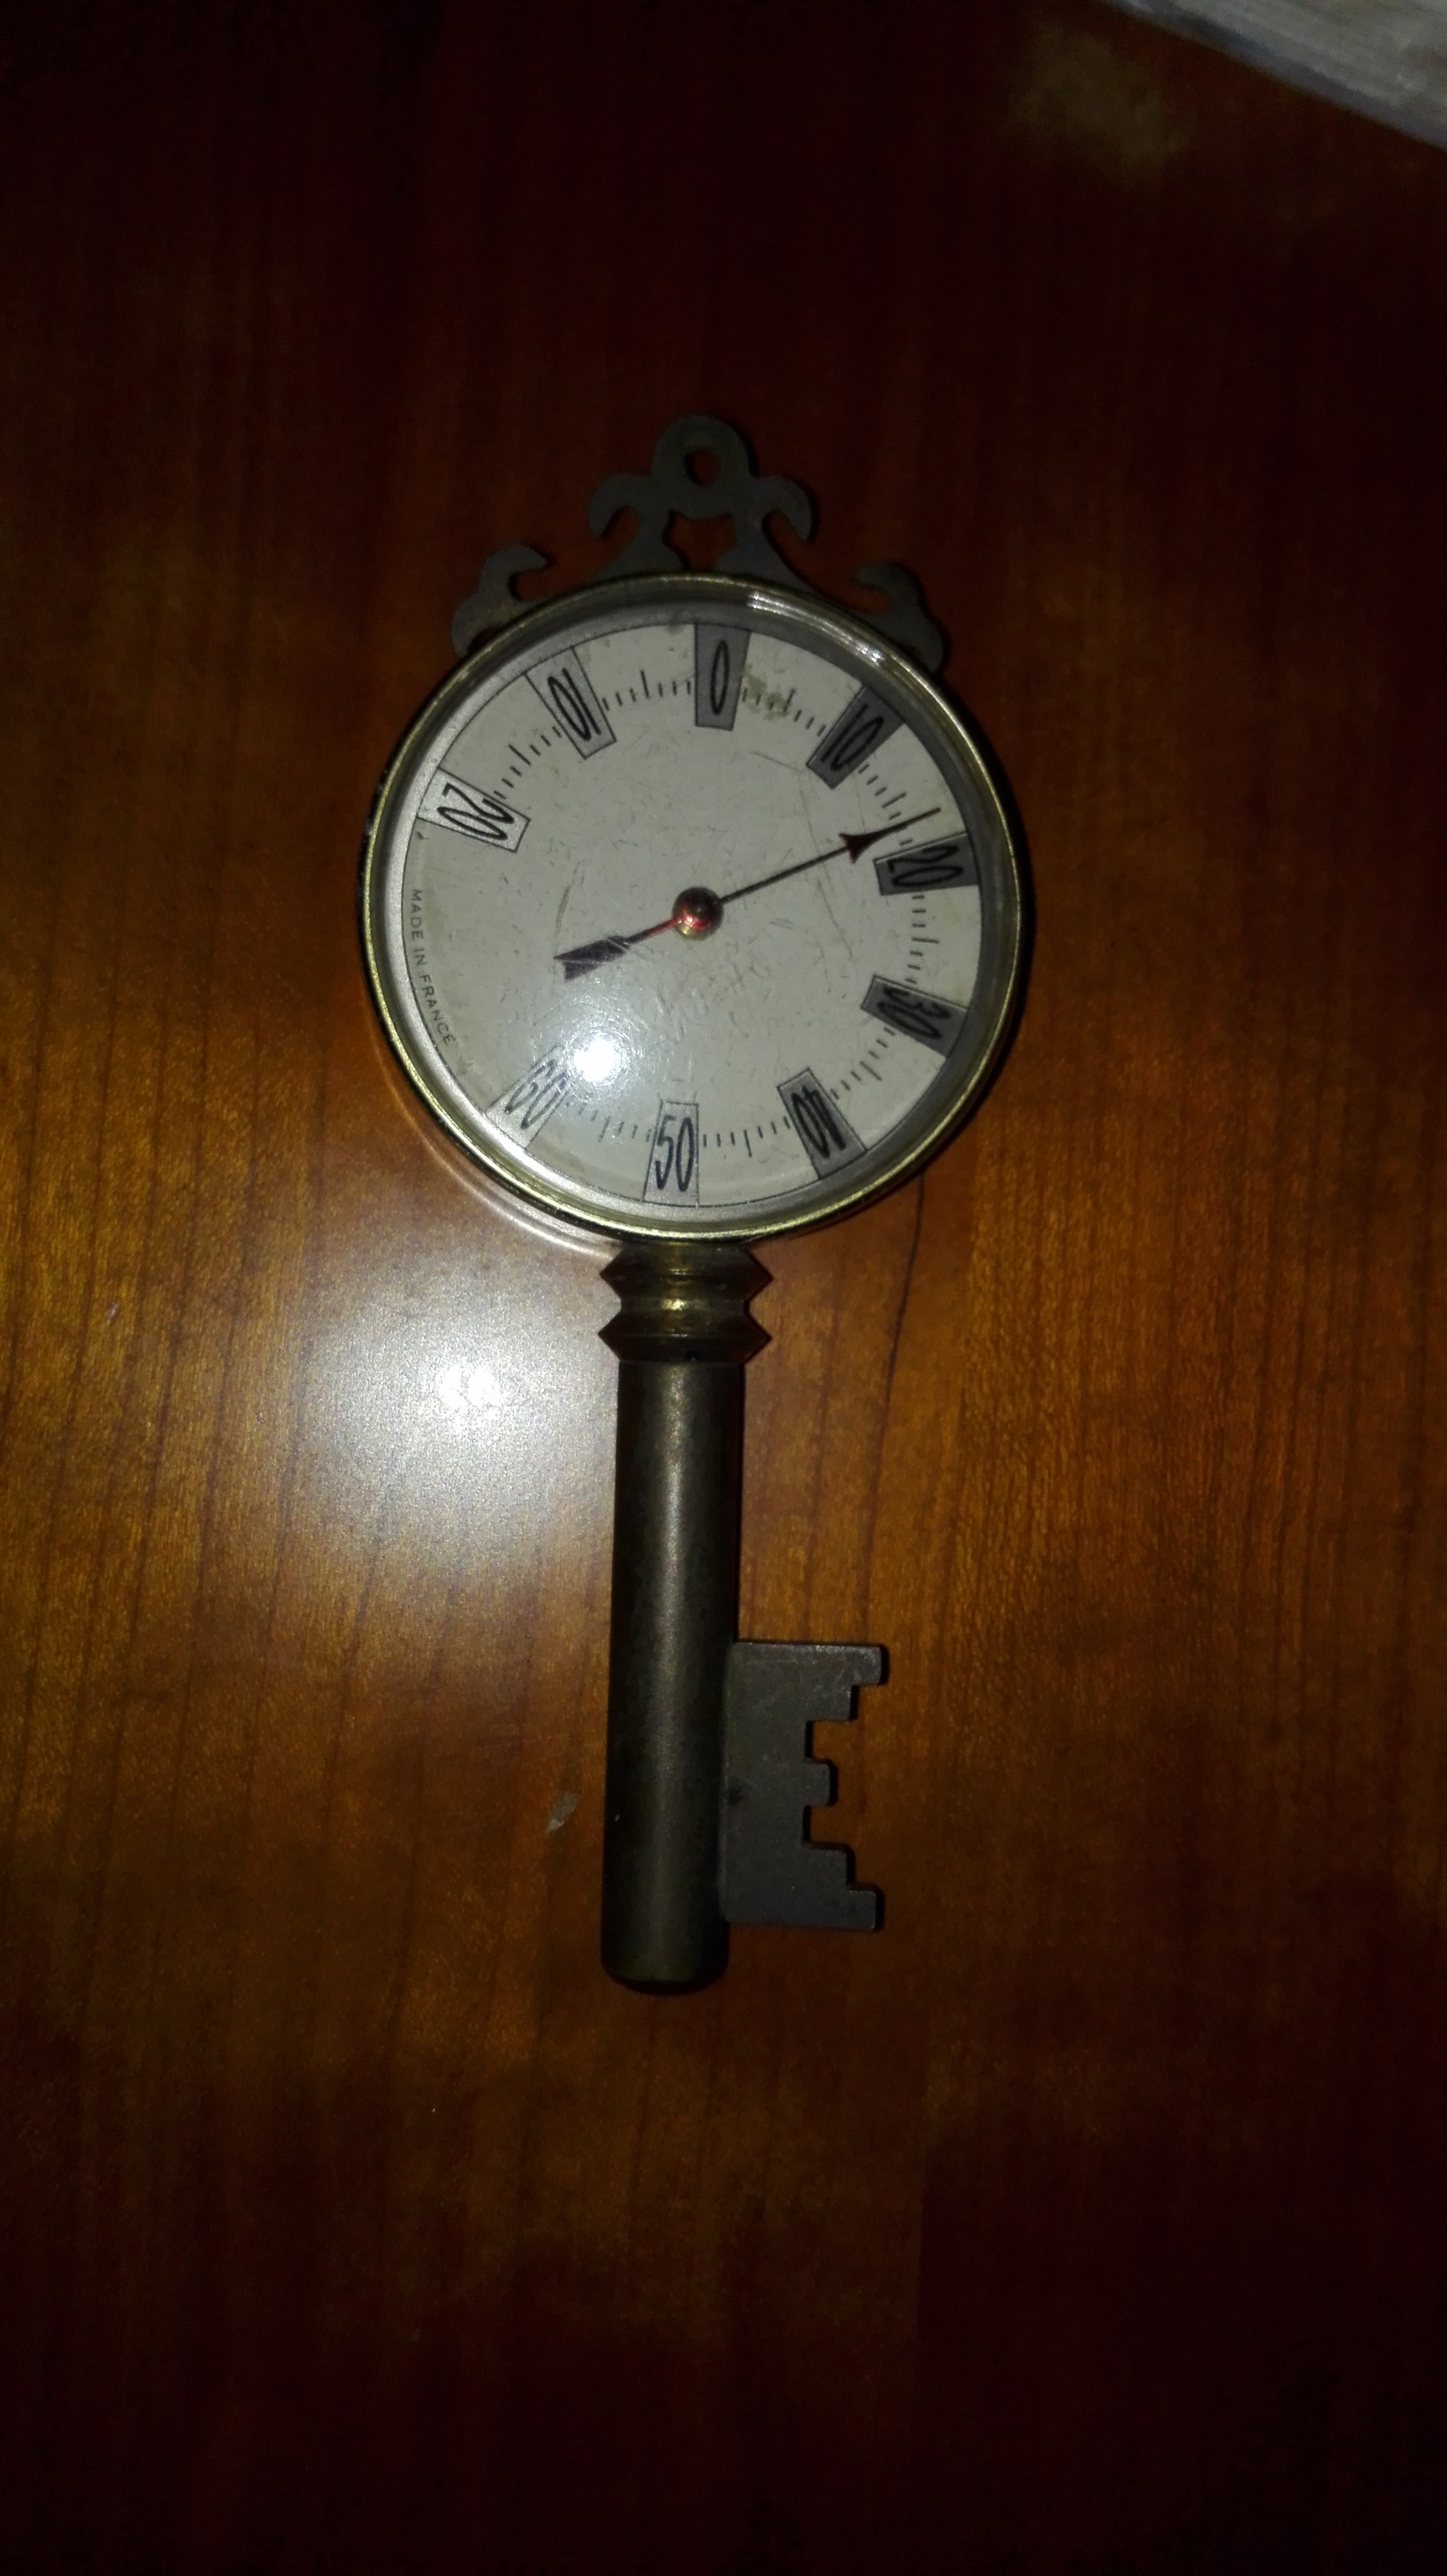
Just tested on a flame and the dial moved slowly, gonna soake it with Wd-40 and see if it loosens the mechanism.
Thanks.
-
Hello, my grandma gave me this item to restore, I think it's a thermometre . There's a nut in the back to turn the indicator .
Any thoughts?

-
Having a Facebook page with some friends where you show your work will get you started. However you cannot sell anything at local markets or online untill you're 18 of age.
-
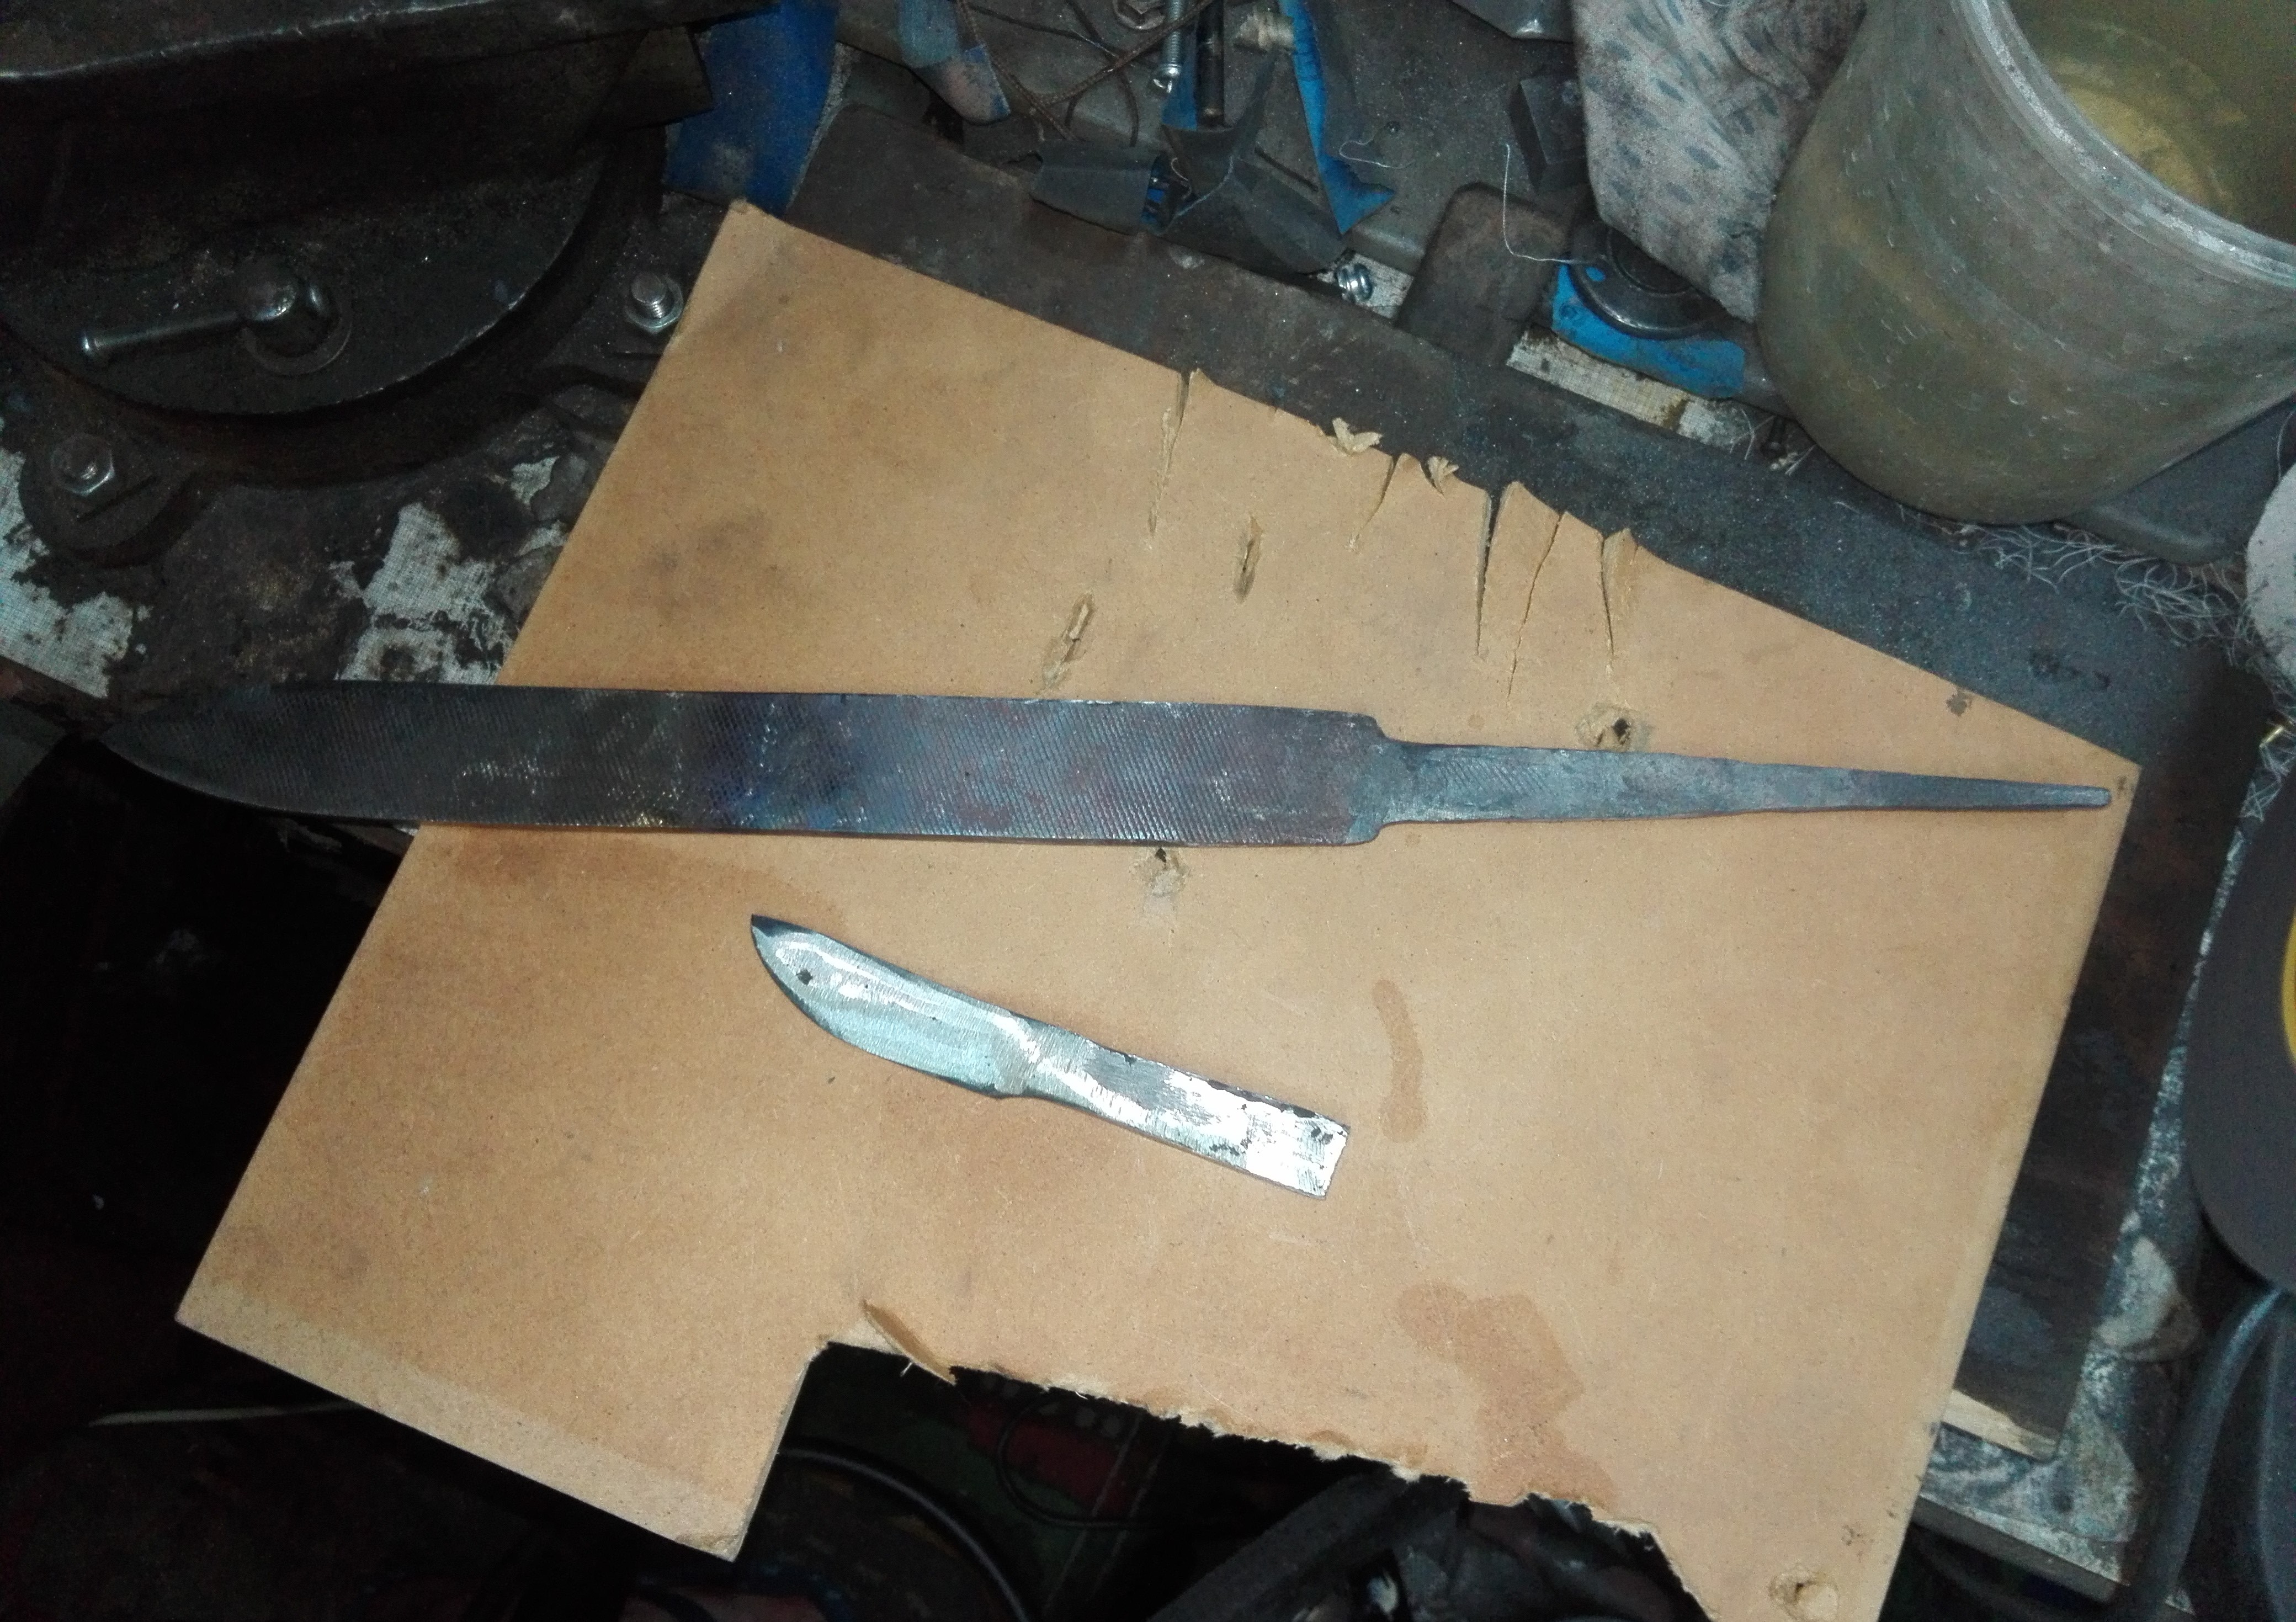
Go to a auto scrapyard and buy a leaf spring, they are high carbon steel and will give you lots of room to experiment.
-
On 2/20/2018 at 11:21 PM, Frozenforge said:
I wonder how many people are making hardened but untempered blades then breaking them cause they don’t show the tempering process on the show, correct me if I am mistaken but I have never seen it in any of the episodes. Not good tv just watching an oven!
The blades are tempered for two hours in a HT oven, although it's never shown the judges often talk about it specially when someone uses a torch to straighten the blade.
-
The window handles are quite original, might not be very confortable though. The kukri looks a lot like a falcata apart from the handle.
Well done!!
-
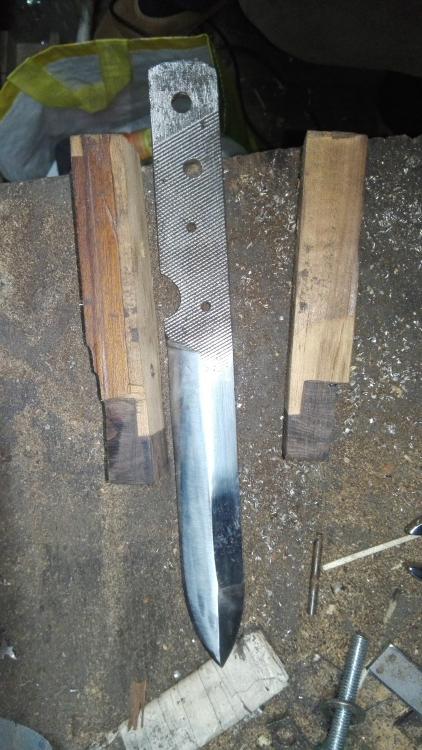
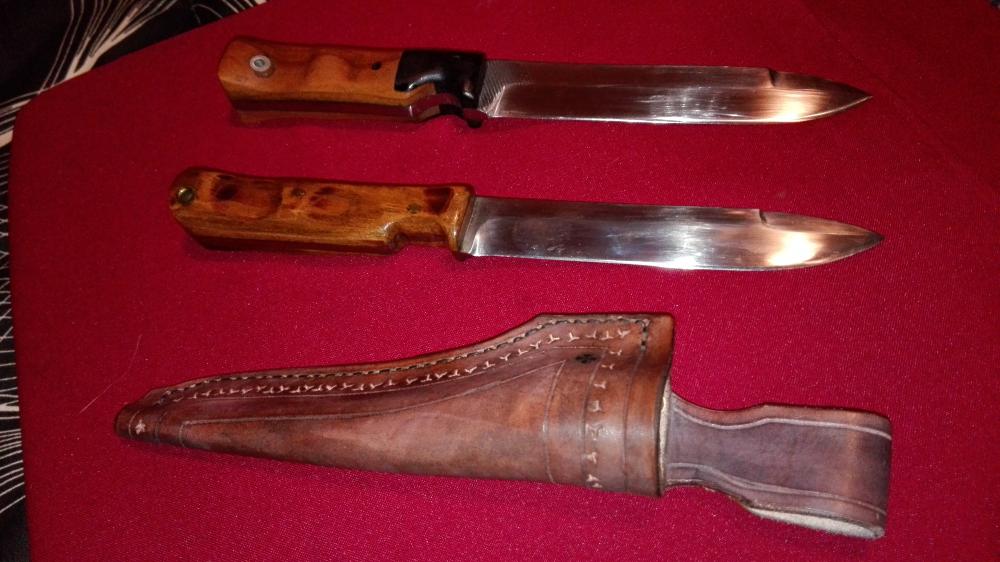
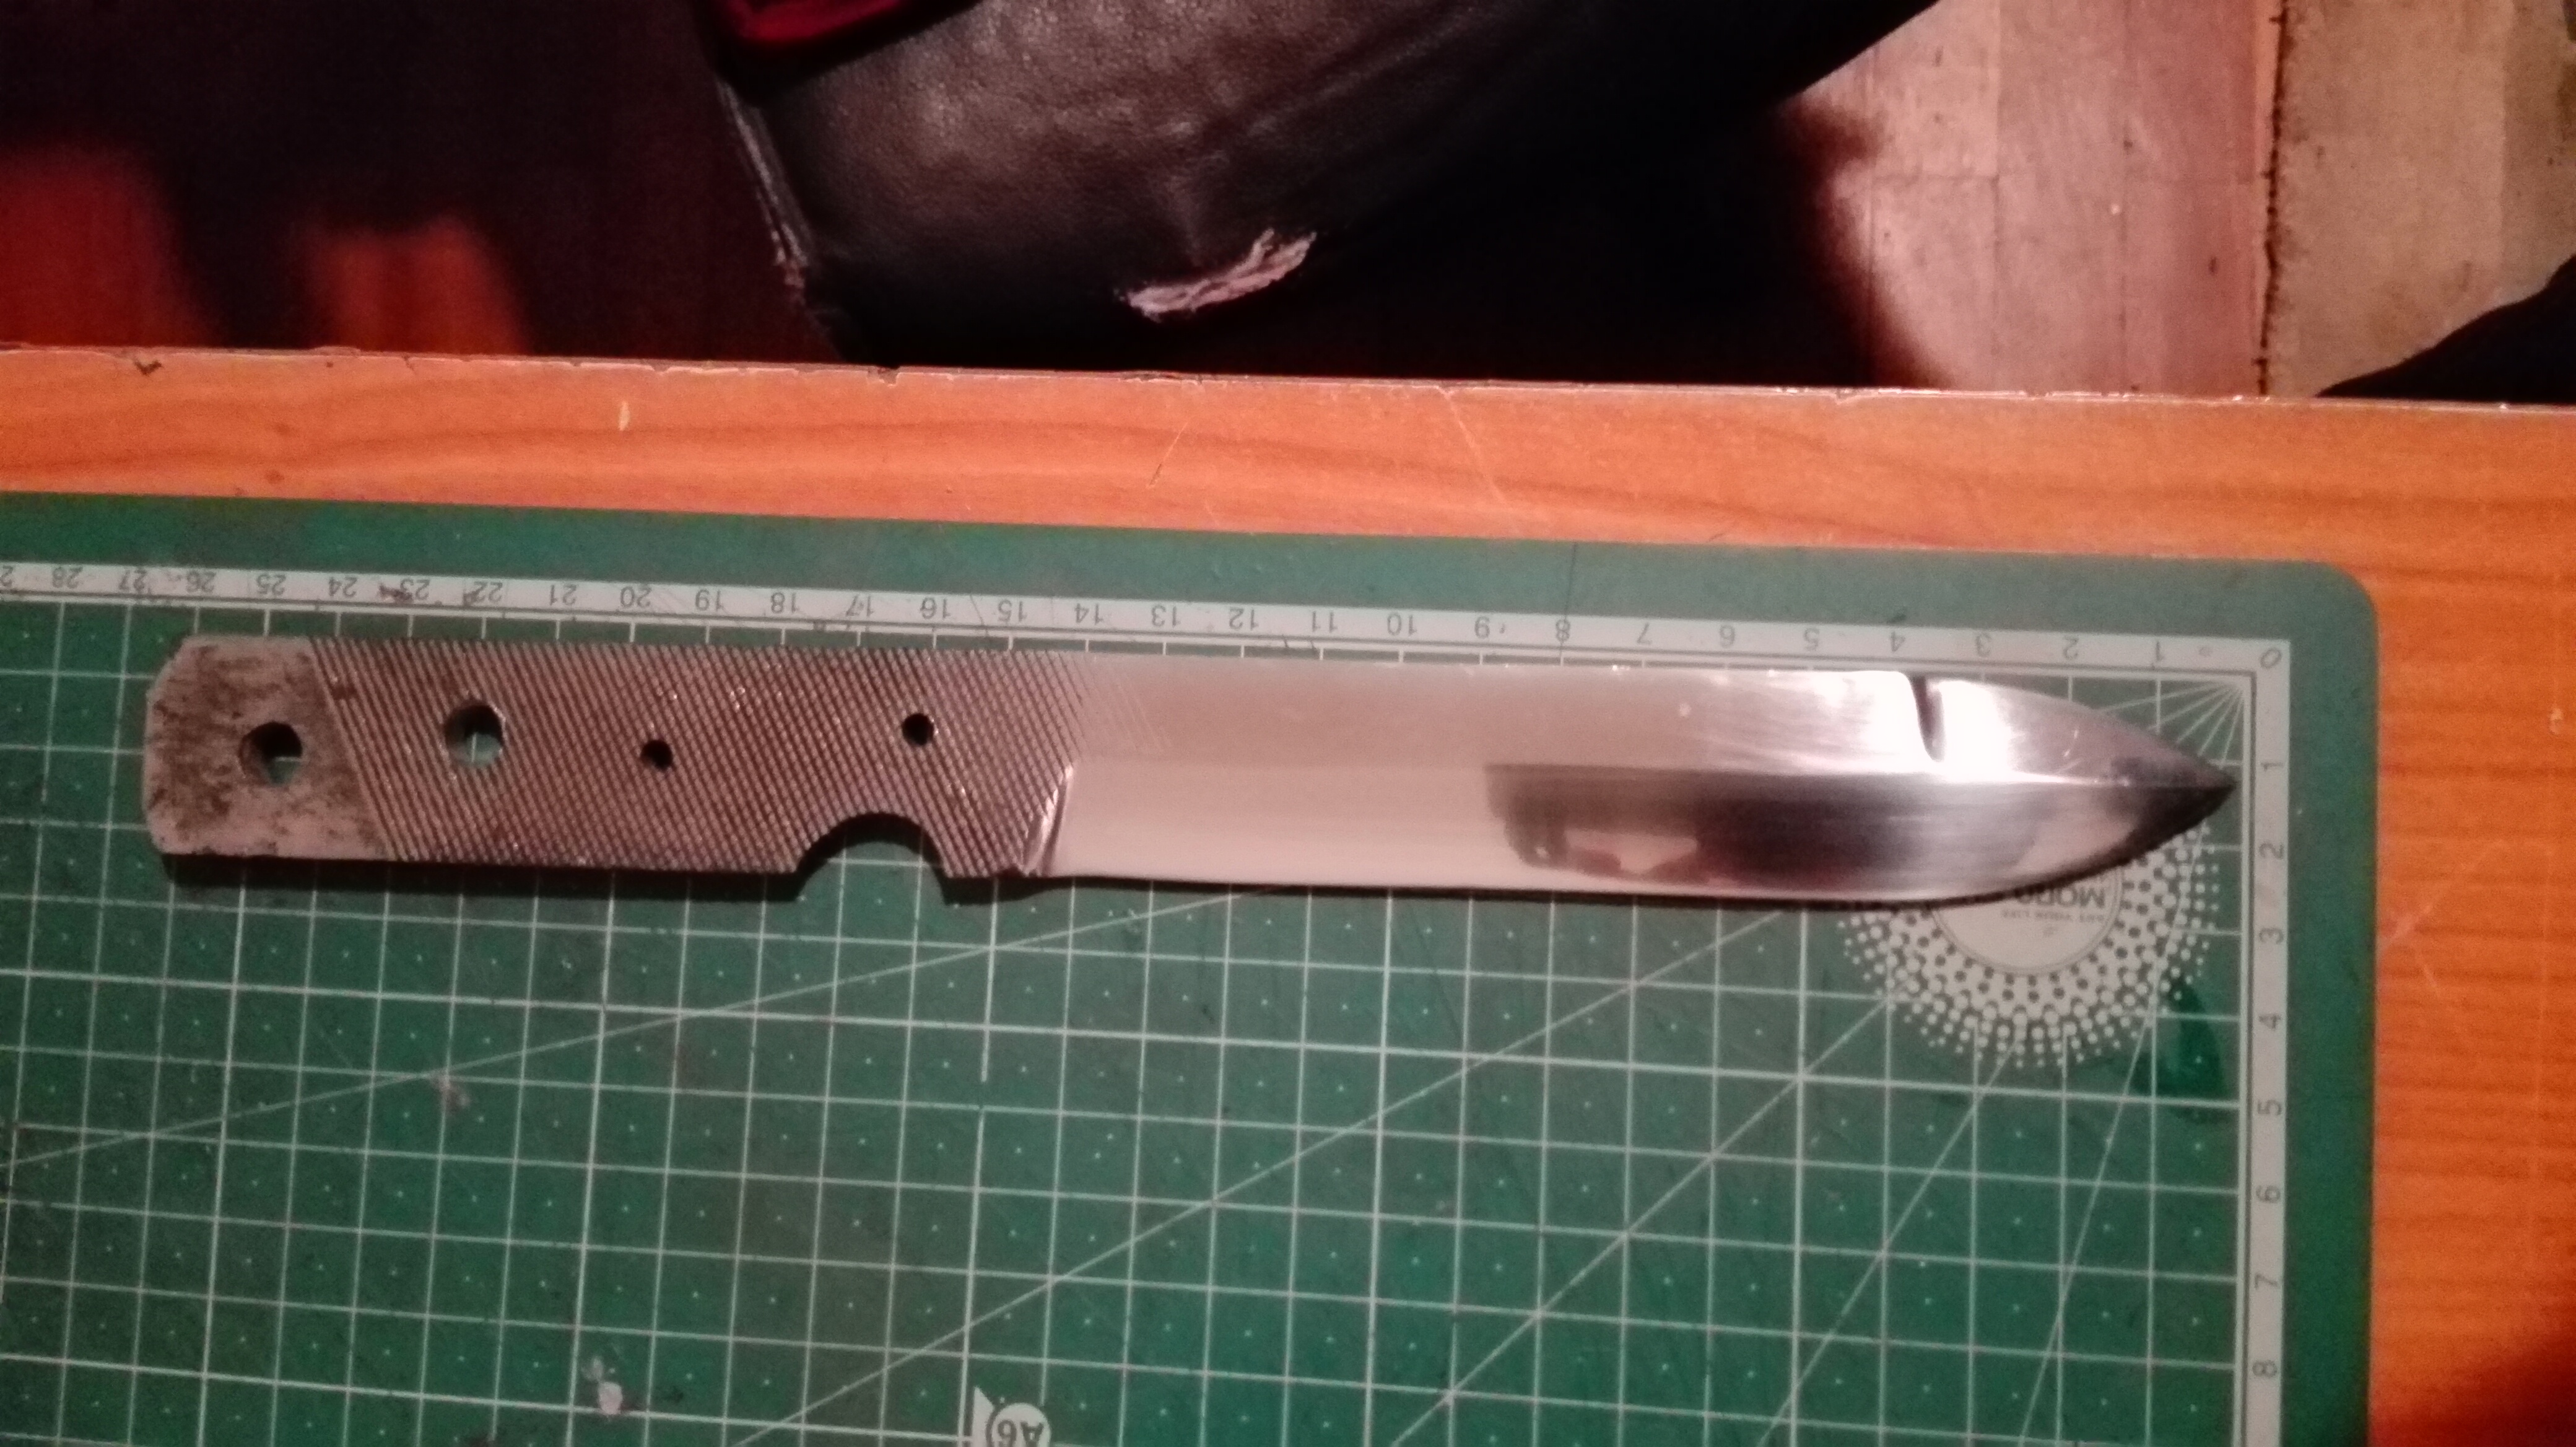
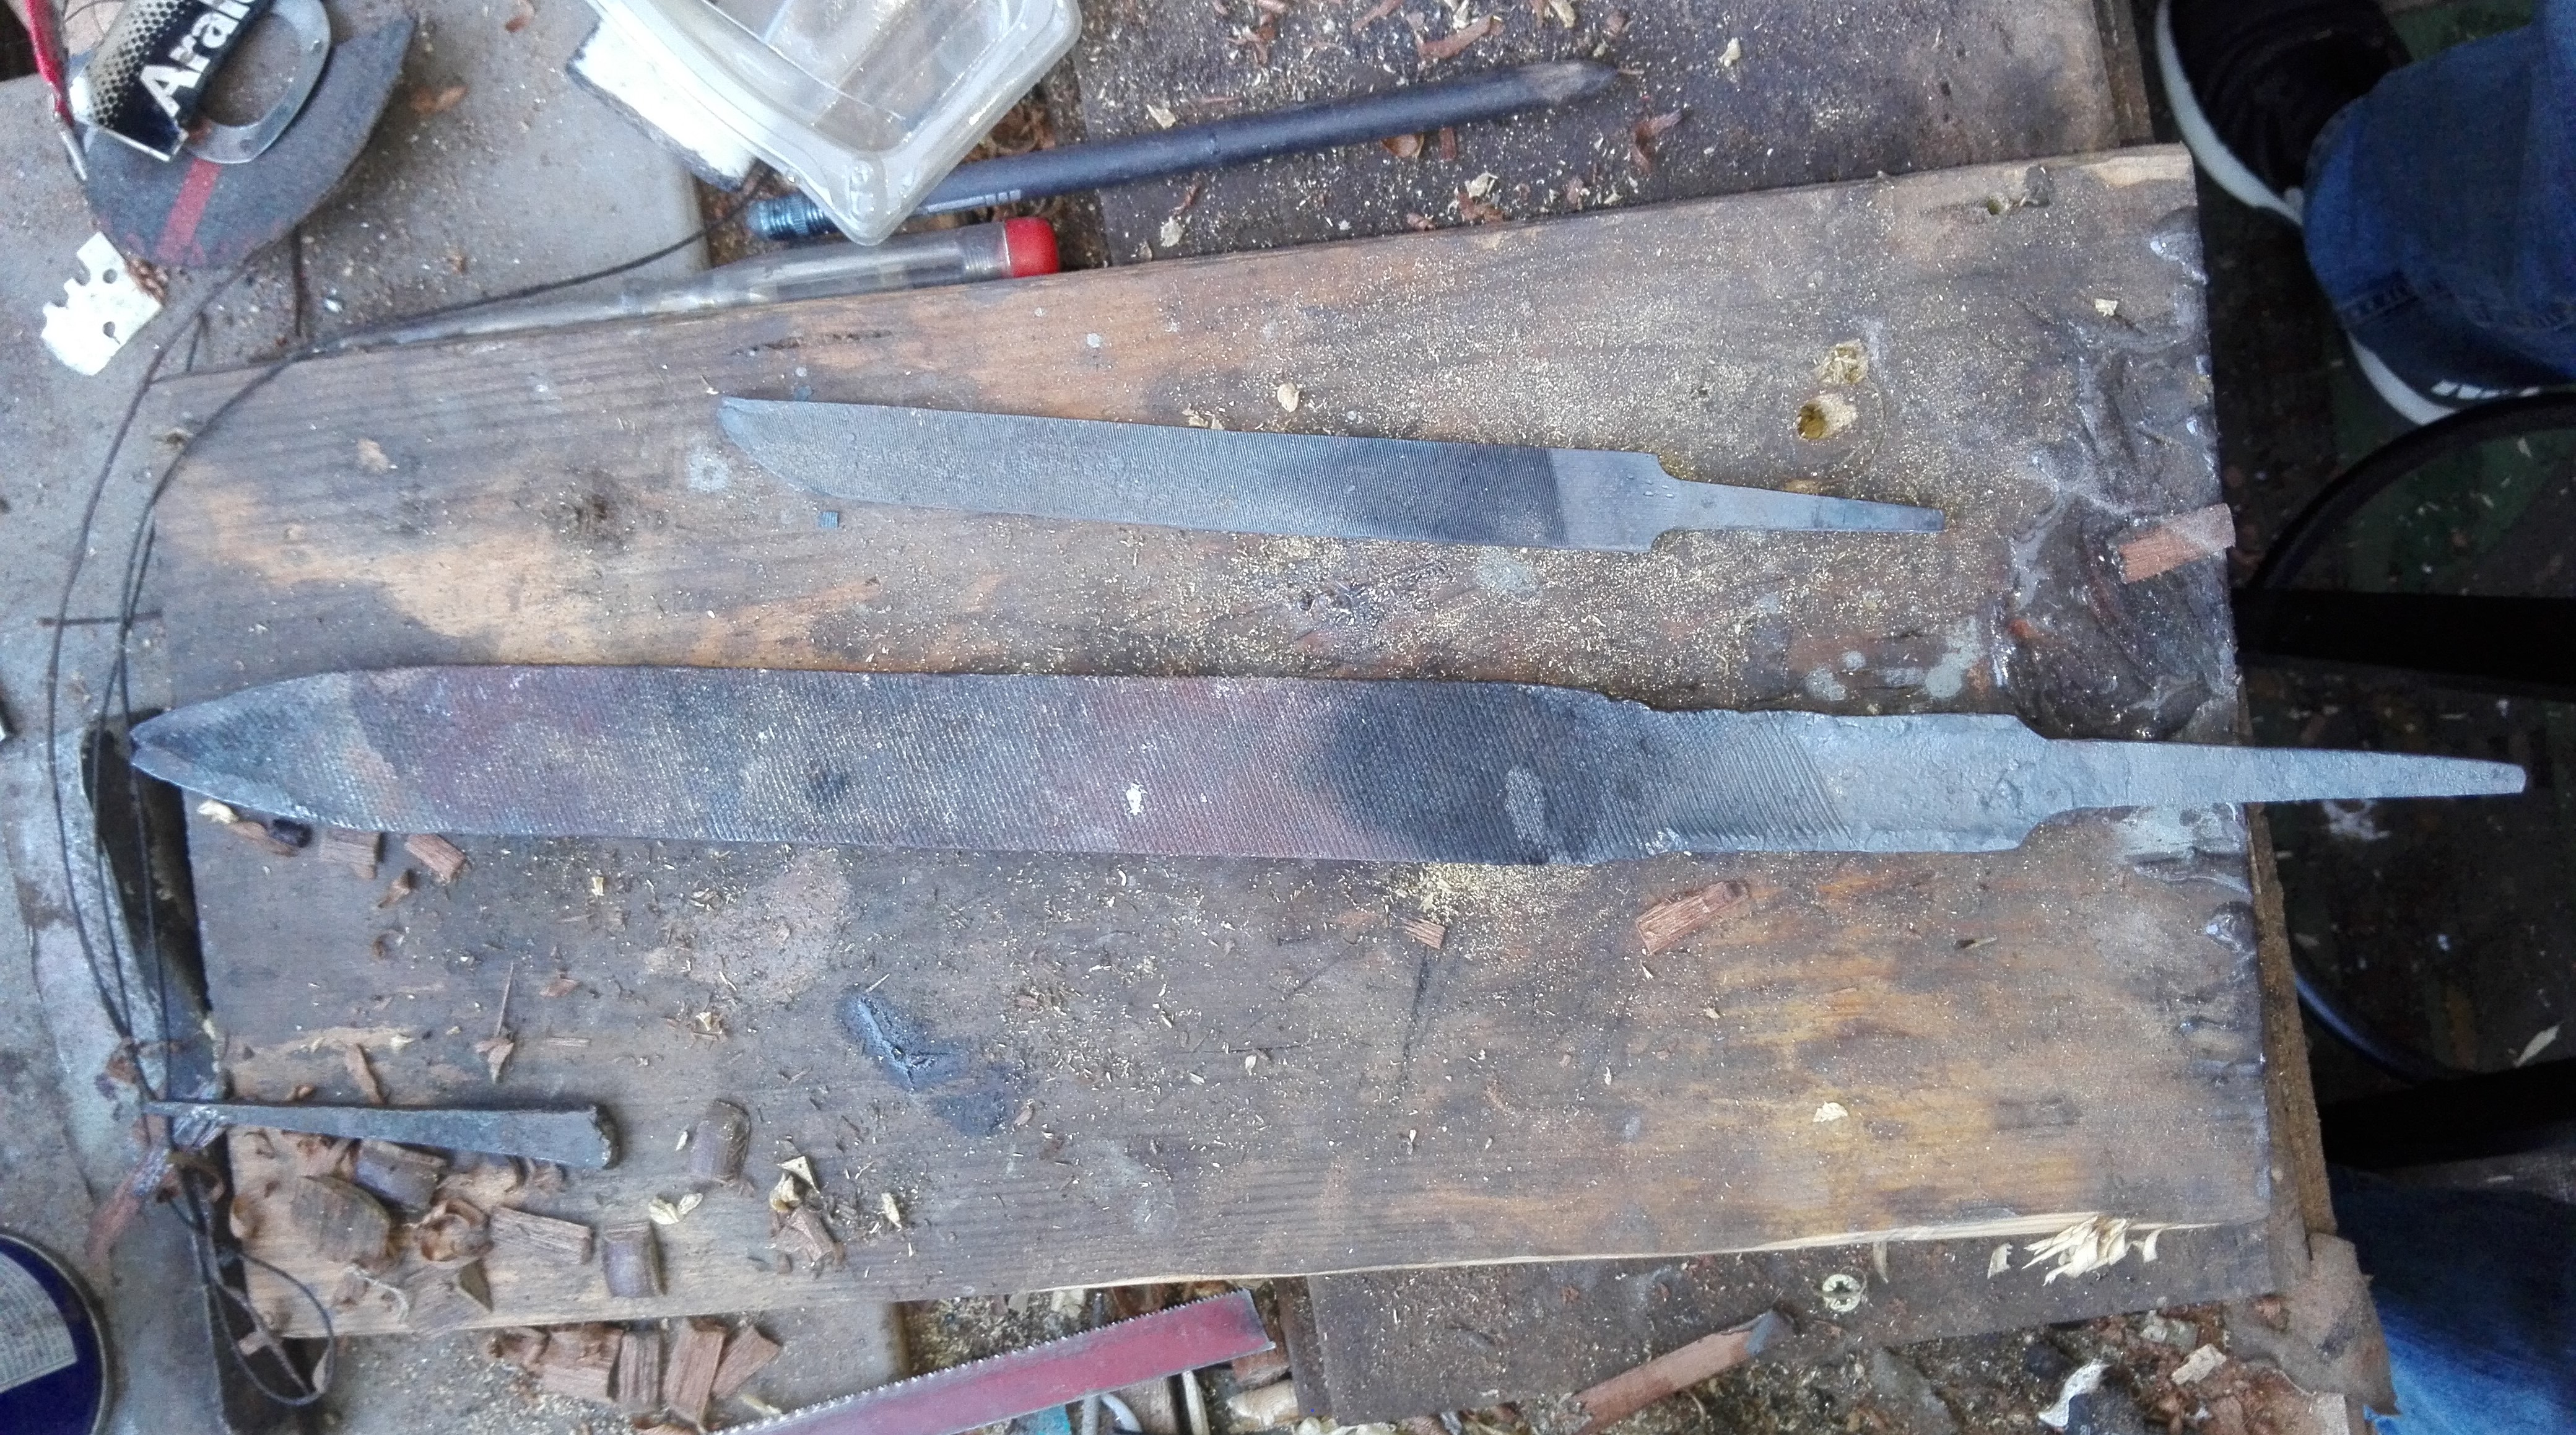
My latest experimental full tang knives.
File steel , Brazilian Blackheart and Cherry Tree, carbon fiber pins and aluminim tube.
This was the secound knife complete after three trials ( secound one was two hard and broke while tryng to straighten), did a edge quench and tempered 1 hour at 200Cº in the oven. The first knife has a Cherry Tree and brass pins, it's through harden and tempered twice with blow torch to dark straw on the spine.
I thoughtof using a harder and denser wood for the front of the handle so it does not need any varnish that can peel off from resheathing the knife and it´s also an wood more resistant to scratching. Looks cool too.
Enjoy and comment.


-
No one would dare say these are you first knives, cheers, you´re in the right art.
-
Not long ago, in one of the Forged in fire episodes, one contestant chose a plastic tube to quench a sword. It failed because the bottom melted .
-
20 hours ago, Will W. said:
Agreed. The idea that the ancient peoples of the world had a better understanding of any field of science than modern man is a fallacy through and through.
Example: imagine trying to explain chromium and stainless steel to the greatest smith in all of Bohemia. Good luck!
Not only did they had better understanding they also built stuff we cannot replicate today with modern tech. Ex: Giza Pyramides.
The technology was lost so no one can say wich is better.
-
The clearness of the pattern is mind blowing, usually all I see are bladesmiths incorporating chains on the blade and beat on it so much the pattern becomes very faded.
Great work!!
-
The knife has a curious design that combines ancient and modern appeal. Gives the impression it came out of a science fiction movie.
A work of a art.
-
If you need to temper some steel butt dont have an oven, fear not. Stick it into you car's exhaust pipe and rev the engine, although revving above 6000 rpm will induce too much flexibility.
Tested on 4 cylinder 1.400 cc Honda.
-
Hey, you got a welder so might as well build one. No need to spend hundreds on something you can make yourself.
In your situation I would go with a gas forge because of the distance to buy the coal and the ventilation in the garage which will never be enough . People with coal forges either have a chimney directly on top or forge outside like me.
Be aware that coal burns hot enough to melt stainless steel so always keep an eye specially when doing small and thin pieces of stock.
You could build a gas forge using an empty oxygen bottle, with both ends opened it's big enough to fit swords.
-
Leveling the height of your anvil with the waist will improve hammer control greatly also you should bolt the anvil to the stump because it's rocking making things harder to control.
Alec Steele has some good videos on hammer control but lately I cant bother watch his videos anymore, nothing really interesting and new to learn and his excessive enthusiasm is tiring.
Mr Walter Sorrels has a ton of videos about knife making and who helped me get started.
-
7 hours ago, Latticino said:
Definitely on the road to mastery. I well know how difficult it is to get a consistent grind on a double edged blade (still struggling with it myself), so I'm impressed with your symmetry. Is that hand engraving on the blade, or did you do that work with a rotary tool of some kind? Was the engraving done before or after the blade hardening?
Actually the thing I'm most impressed with is the copper spacer with the crenelated top (that appears to "toggle" into the dark wood of the handle). Is that just a dark epoxy filling those gaps, or are you doing something very tricky there?
Nice job for an early blade. I look forward to seeing your progress. One suggestion to consider: if you are going to remove all the traces of the original file anyway, you might consider annealing the billet first, rough grinding away the teeth, then forging in the bevels to save grinding time after rough forging.
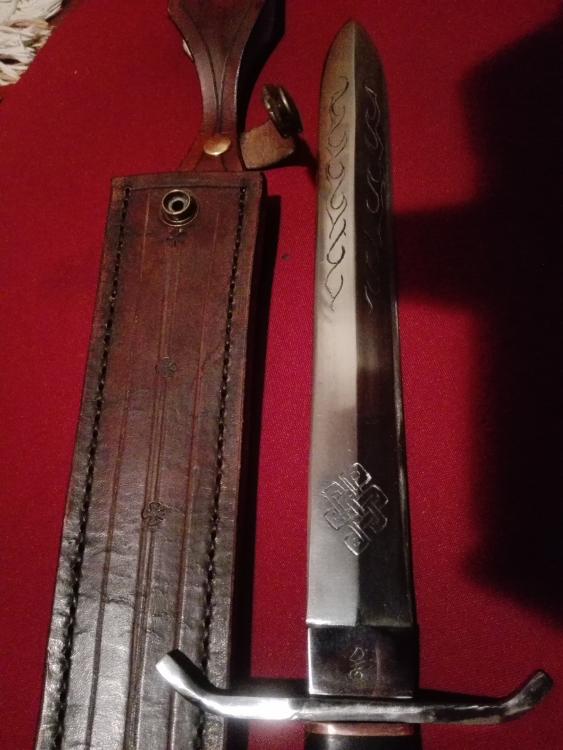
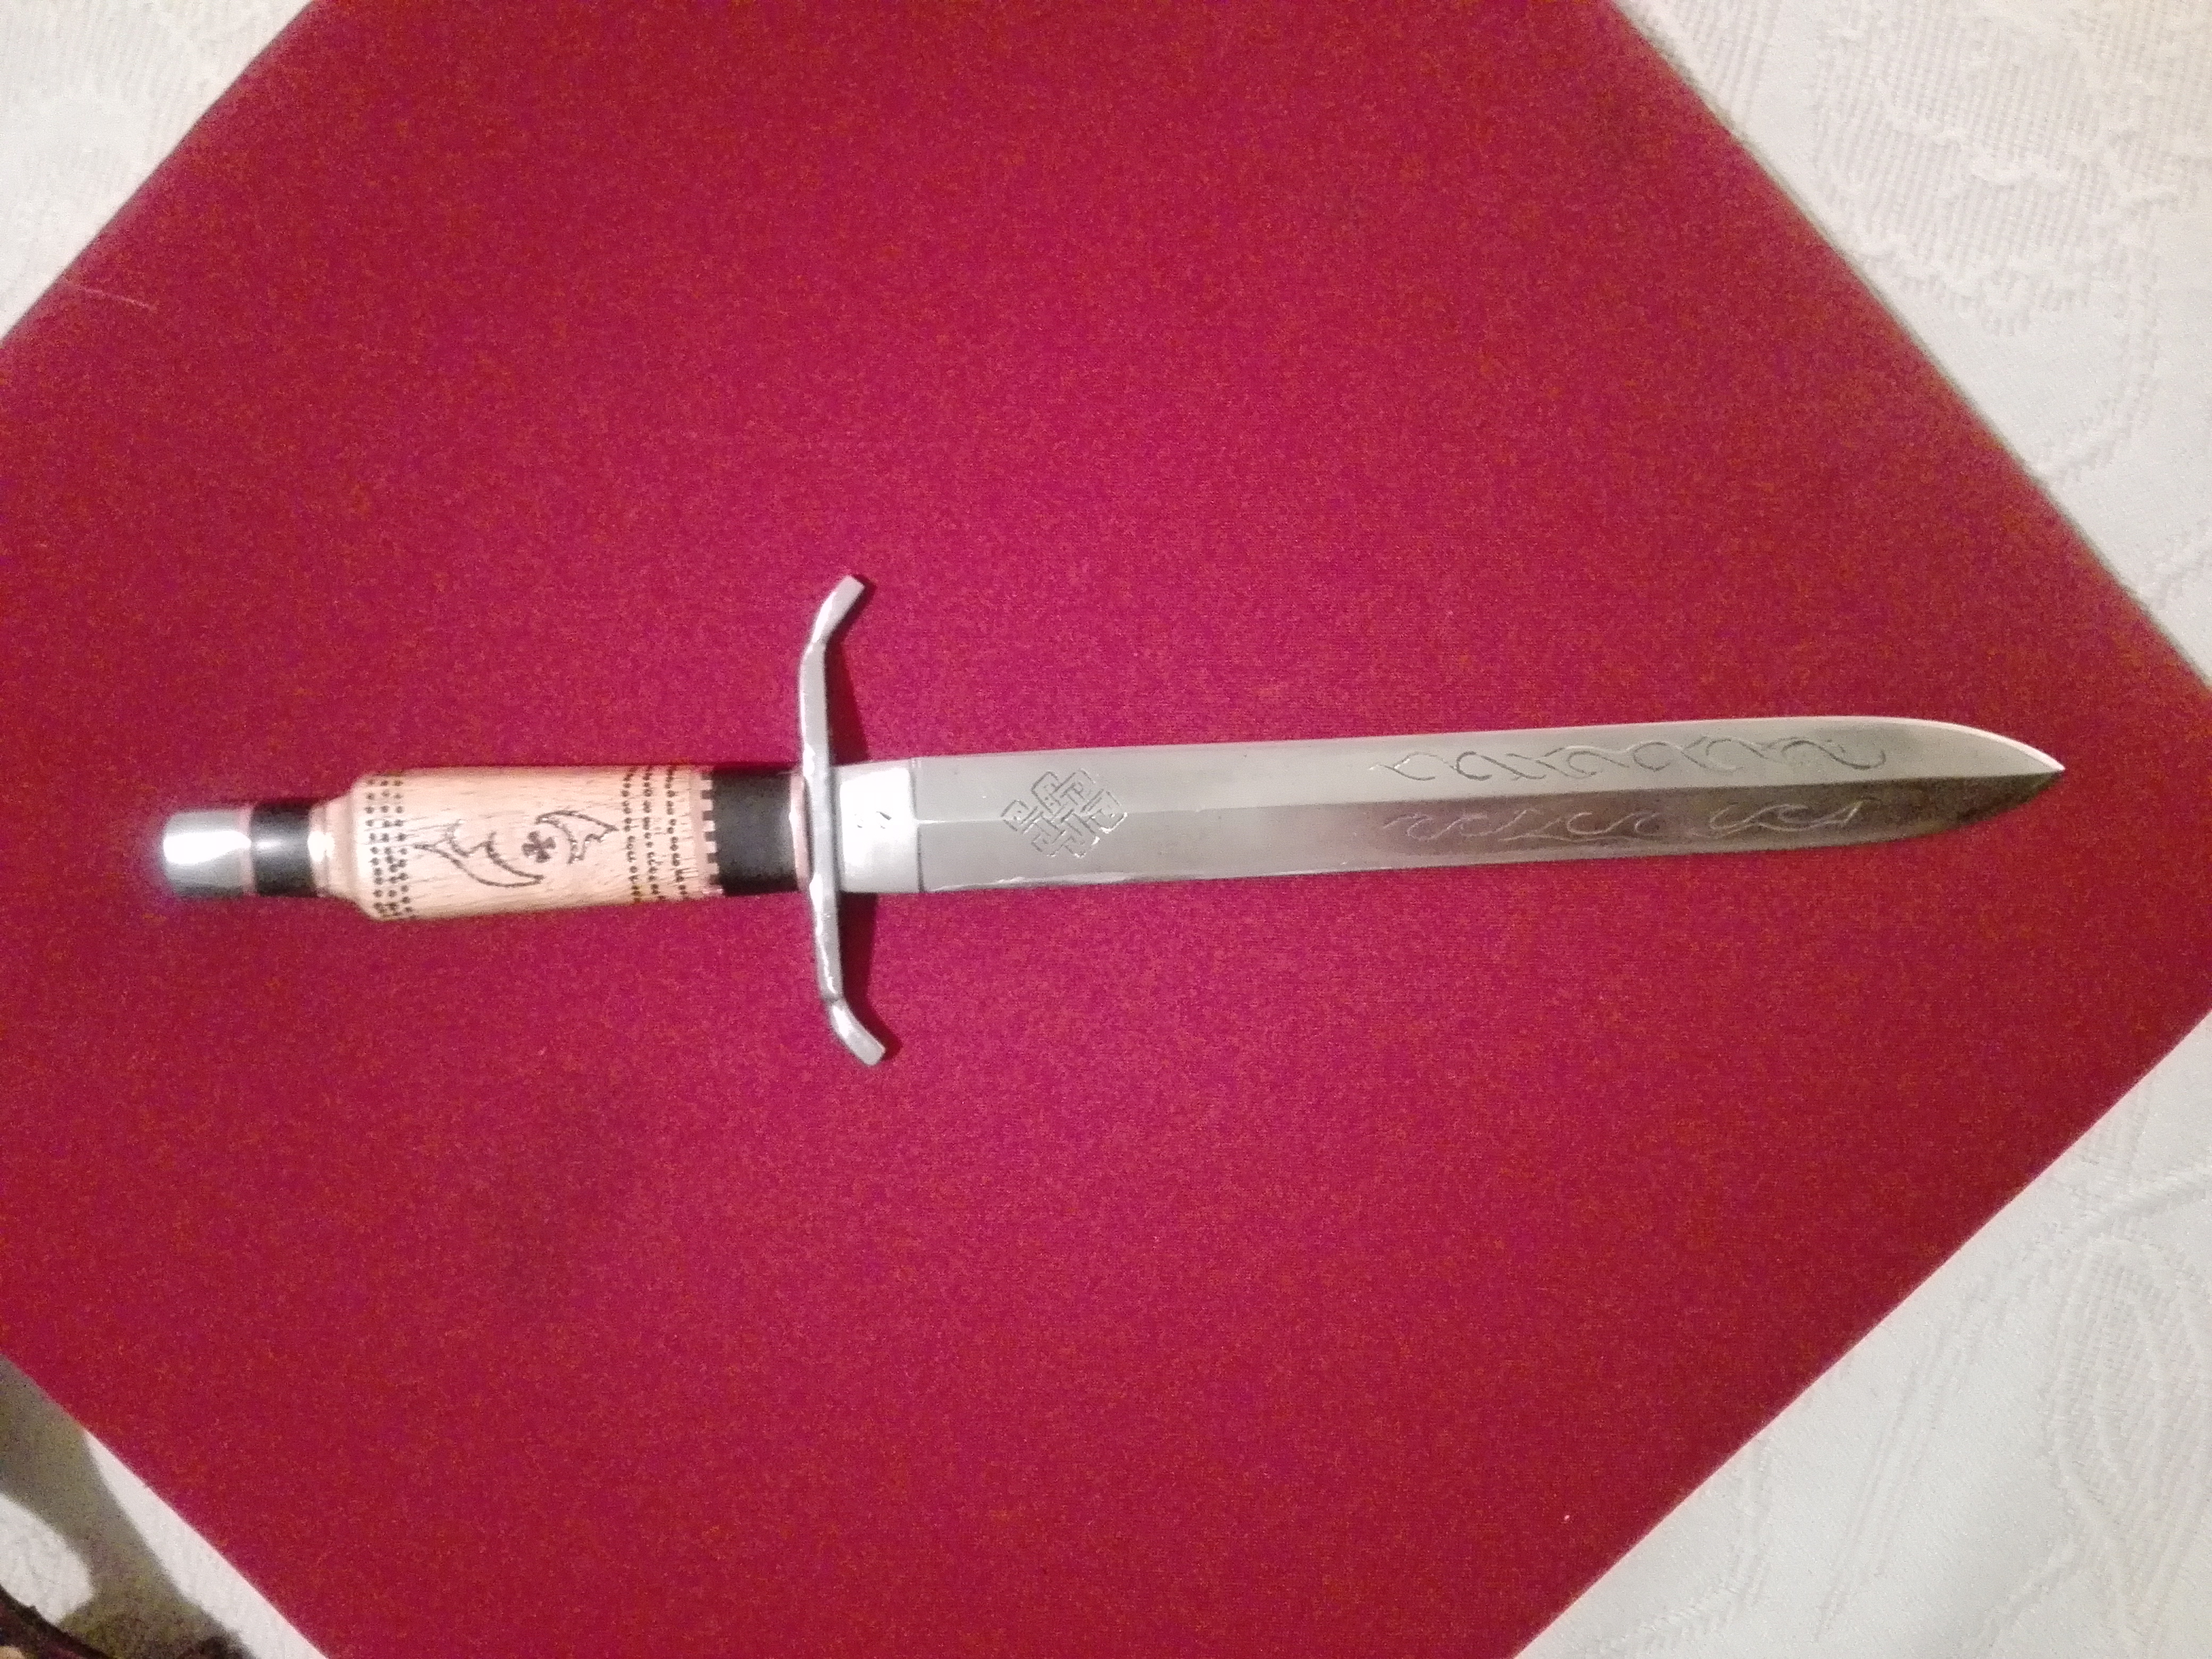
Engraving was done with the Dremel with round diamond bit, had to re engrave the tribal because after HT removed some of the design grinding the scales. The diamond bit cuts easily even on tempered blades.
The coppers spacer was the center of a water block from a previous graphics card, glued with clear epoxy .It resembles the walls of a castle.
Thank you all for the support and criticism.
Cheers
-
20 minutes ago, Pupmaster said:
I think it's very pretty, as far as daggers go! (Sorry, I'm a girl... I guess a somewhat girly-girl)
") The scrolling part toward the tip is my favorite part.
The scrolling part toward the tip is my favorite part.
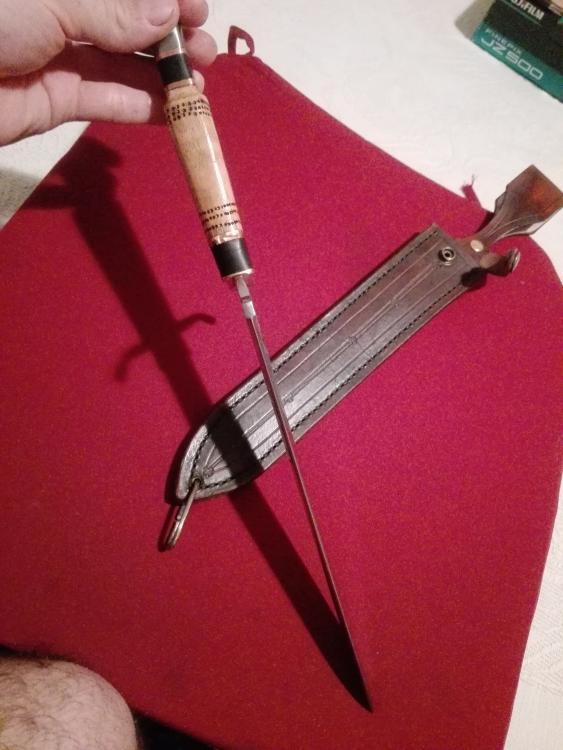
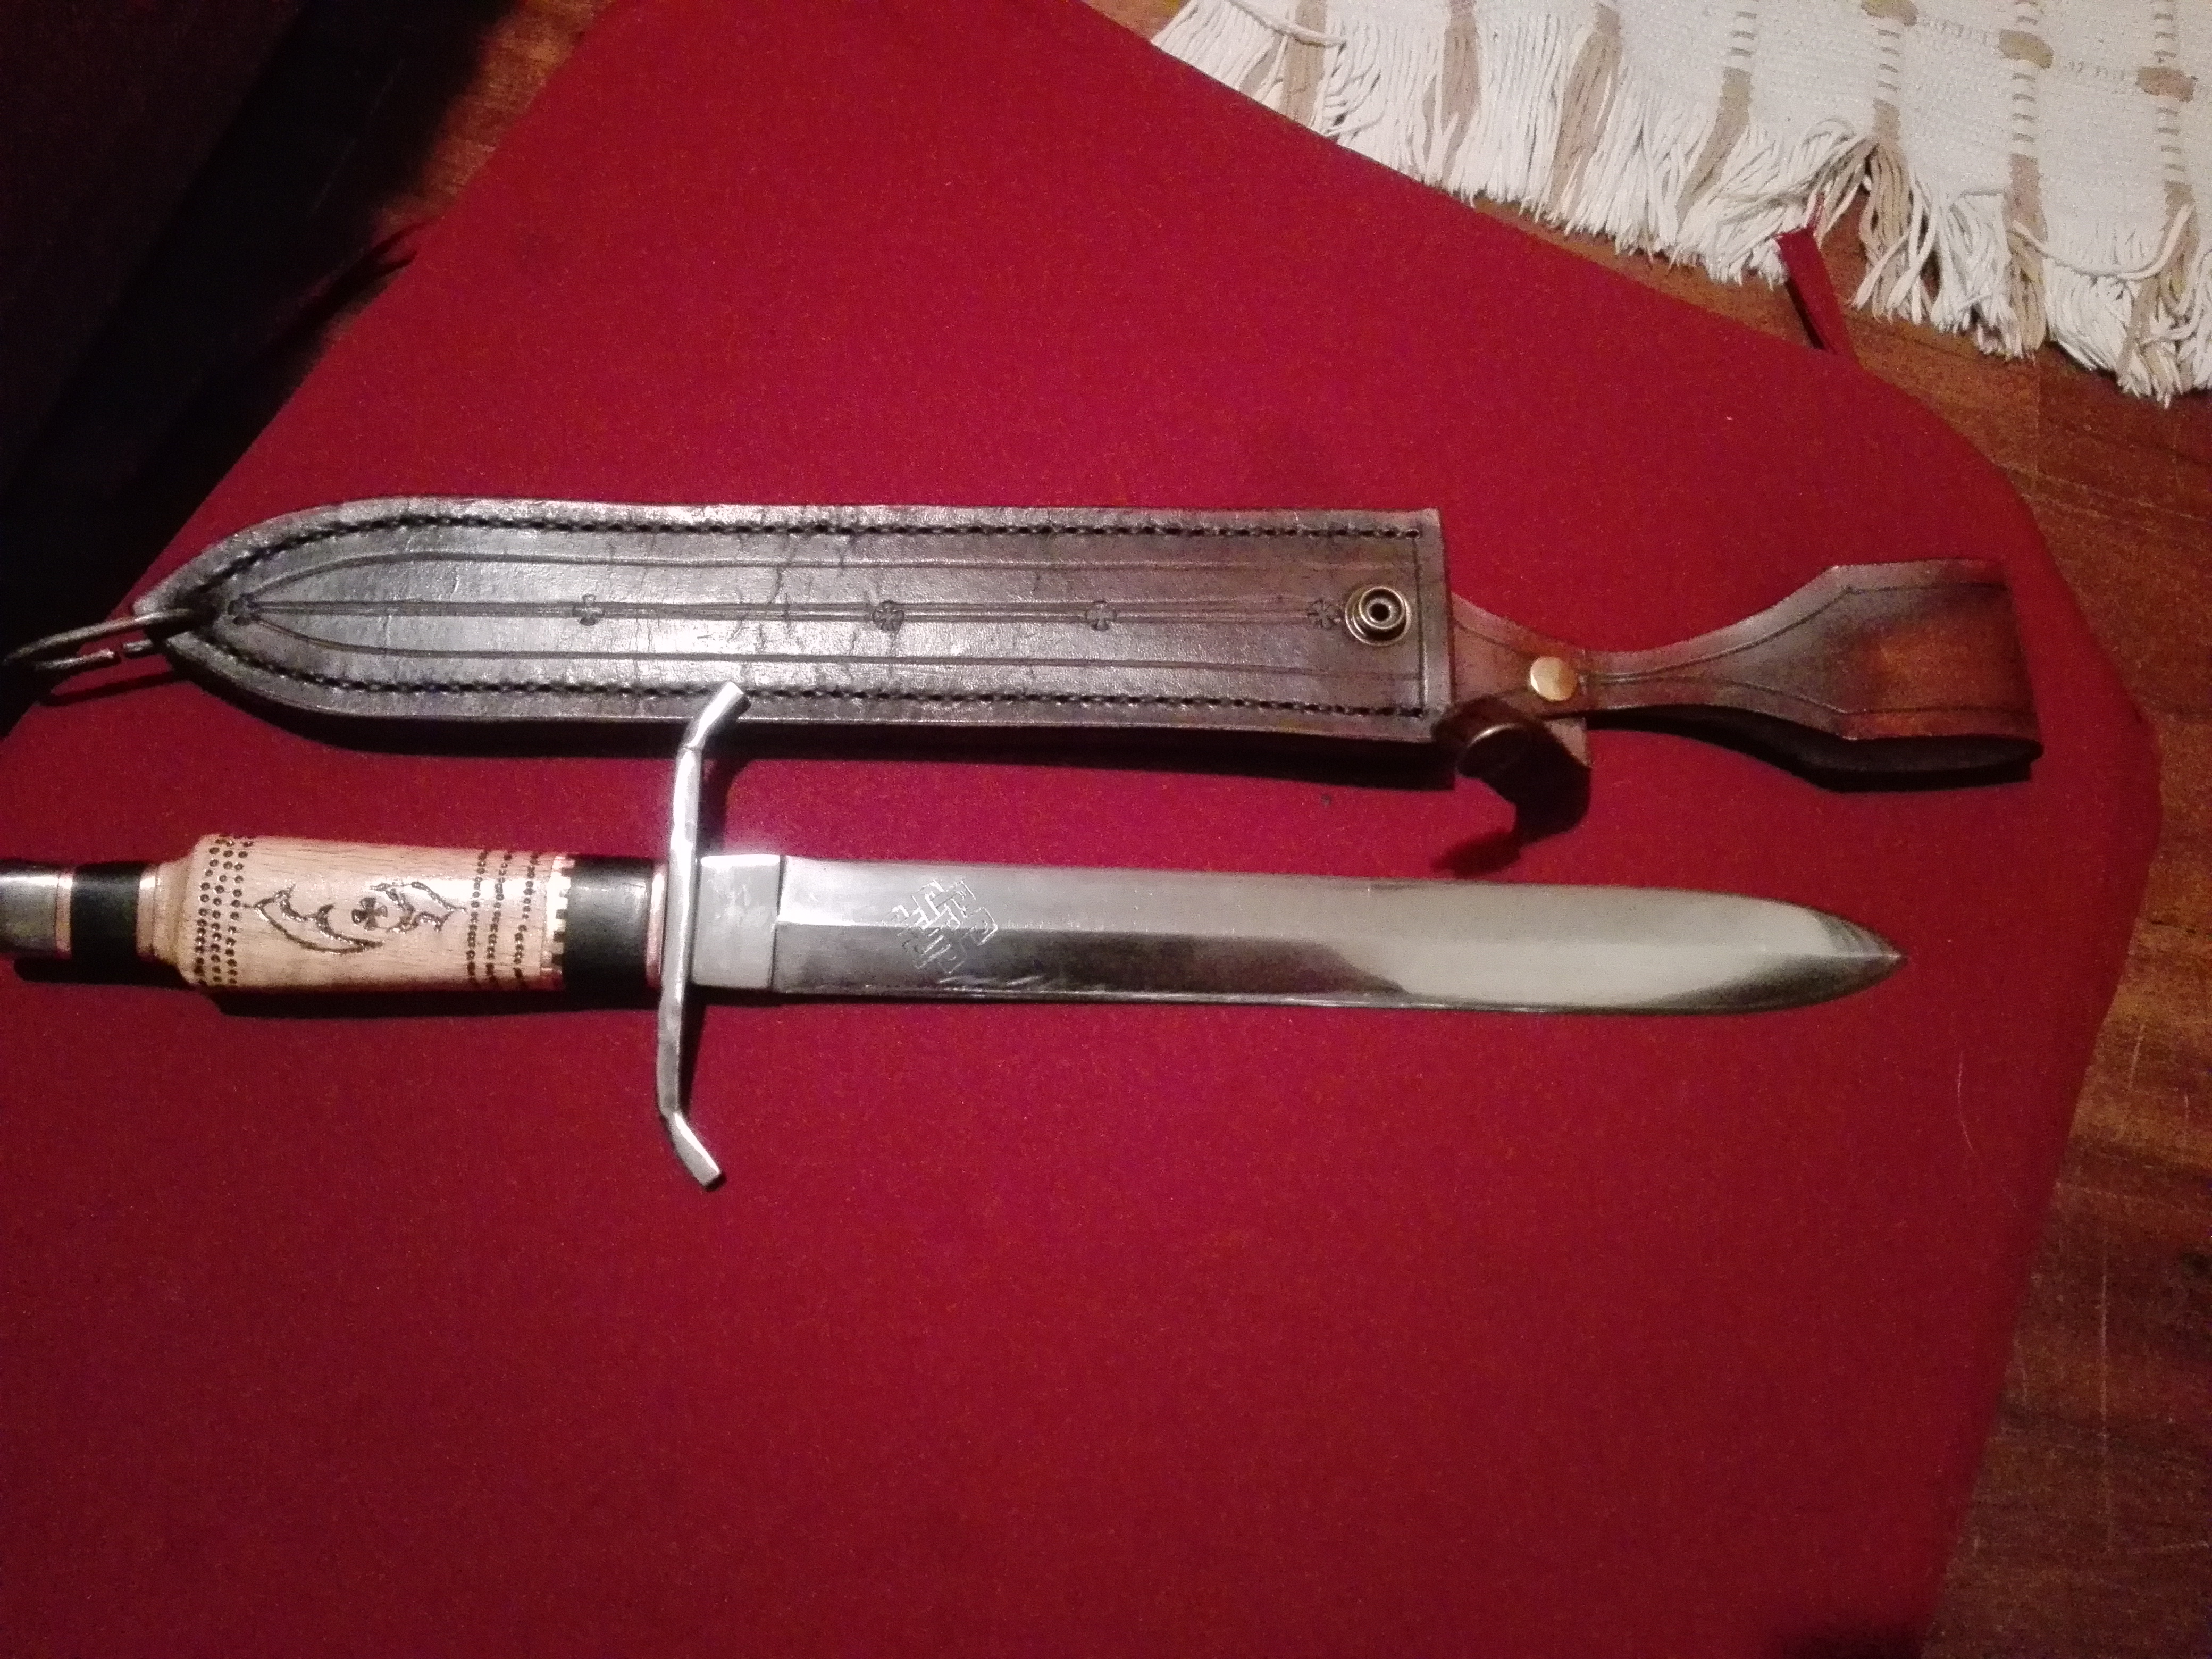
This might be a silly question, but what is the hook at the end of your sheath designed to do?
Come as you are, don't apologize because that's a good question.
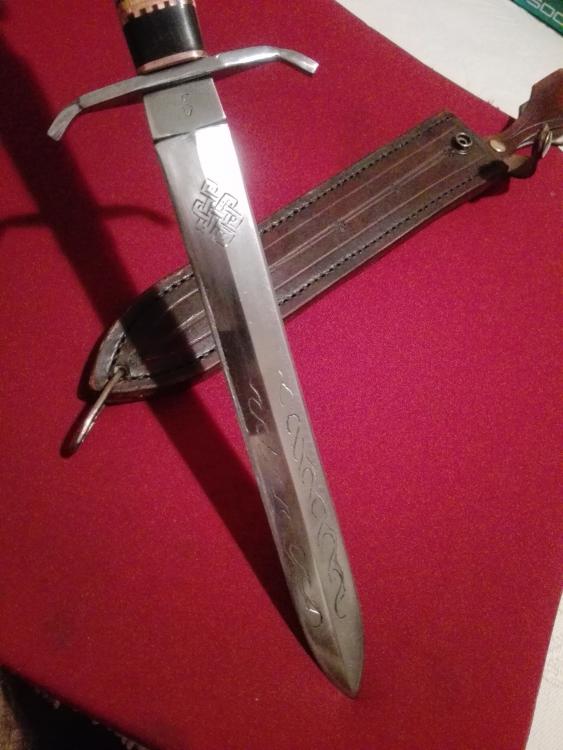
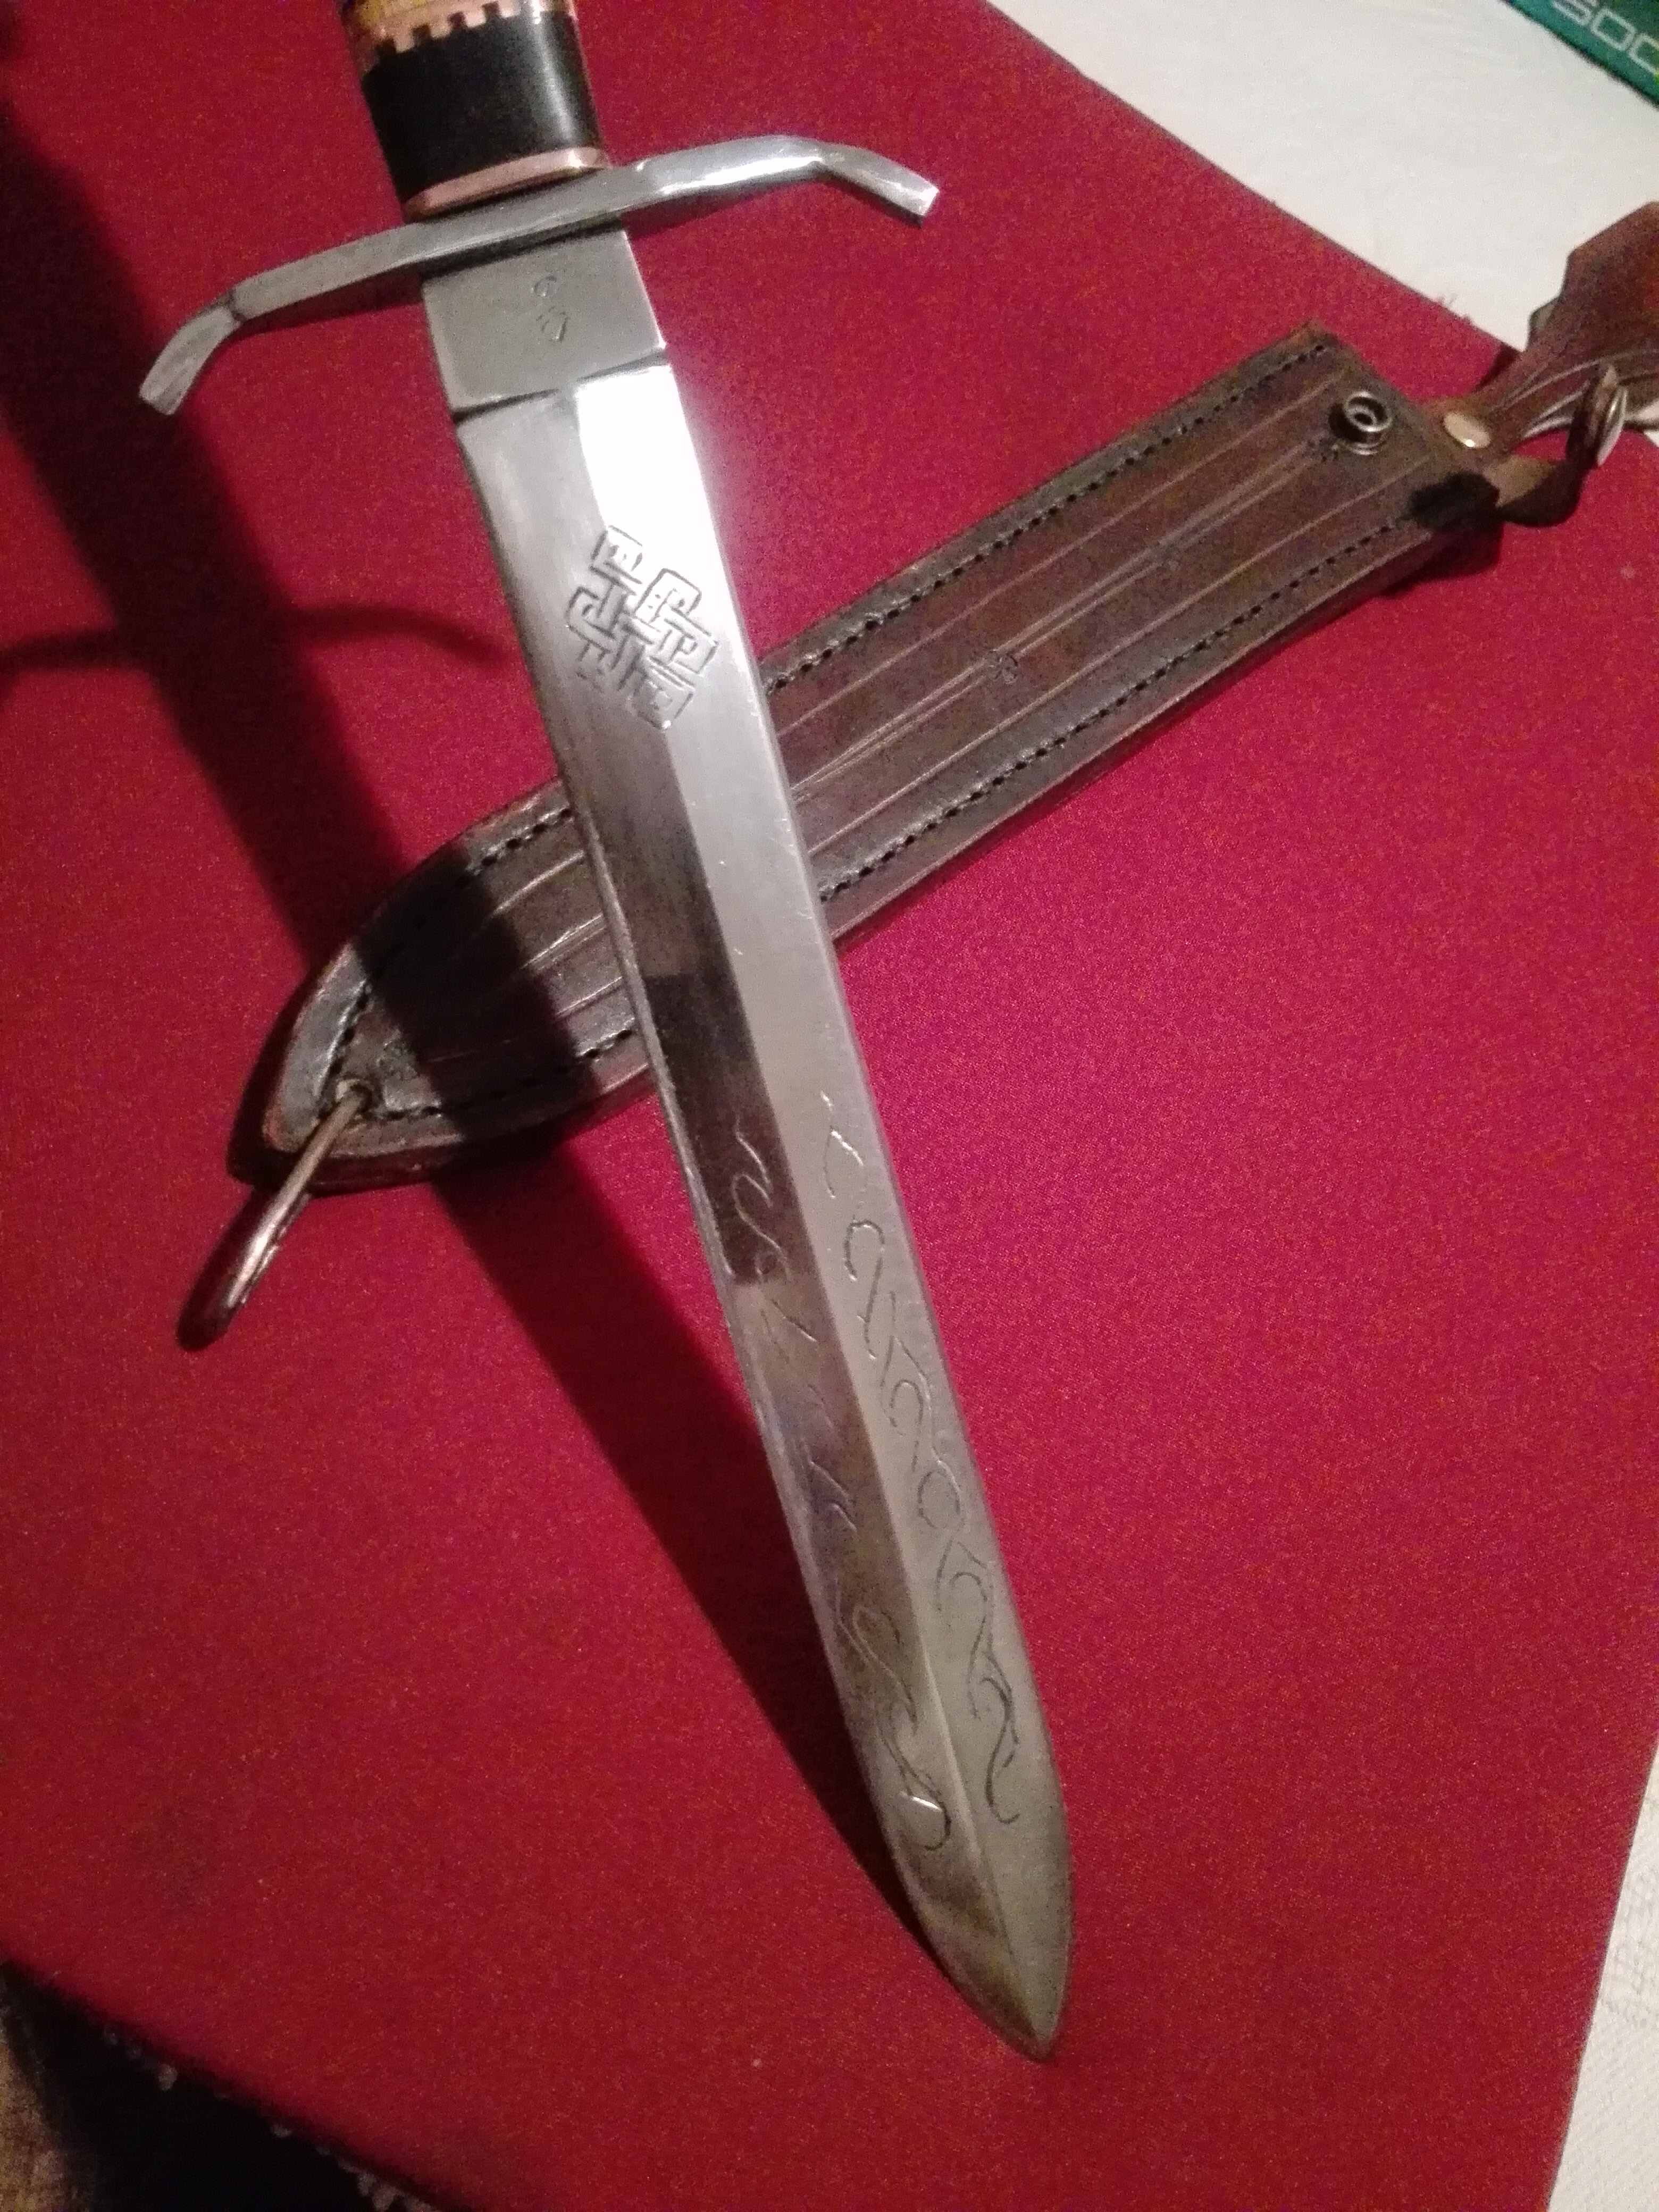
The wire loop is there so you can strap the sheath to the thigh so it's easy to carry and draw, not that I will be carrying it as it is illegal and I'm not in the bullfighting business. More of showpiece.
-
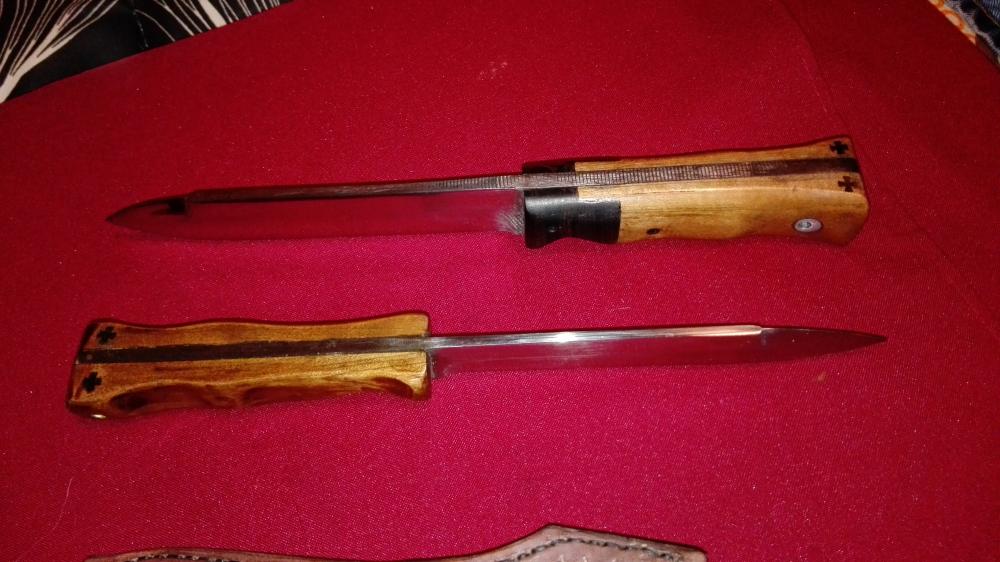
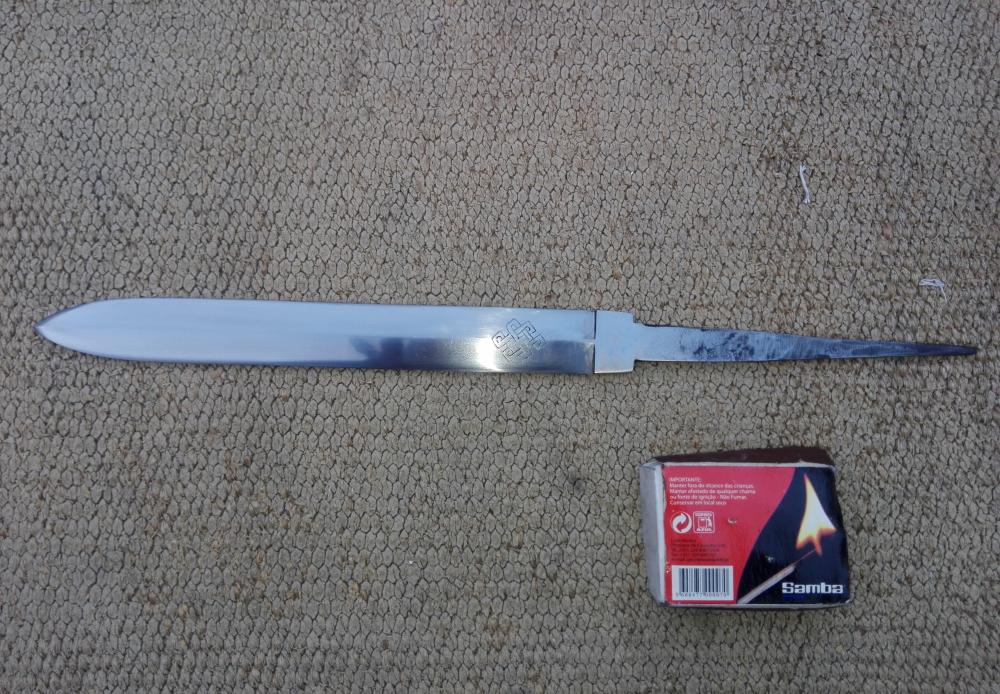
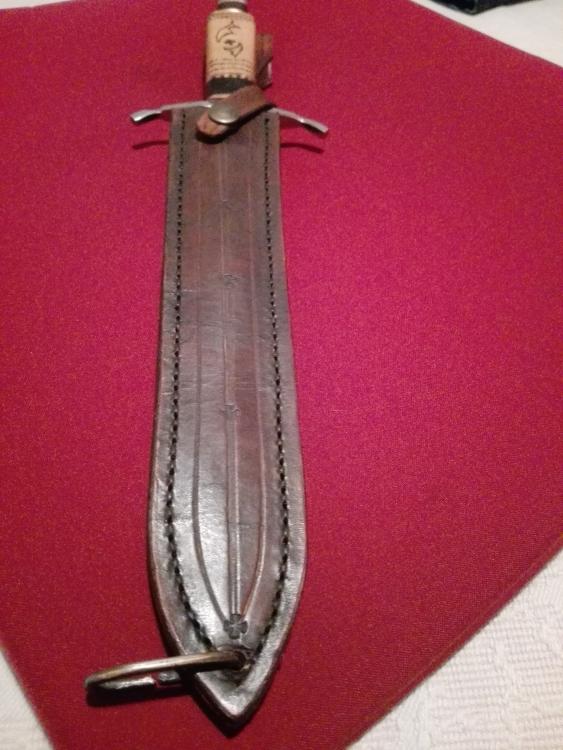
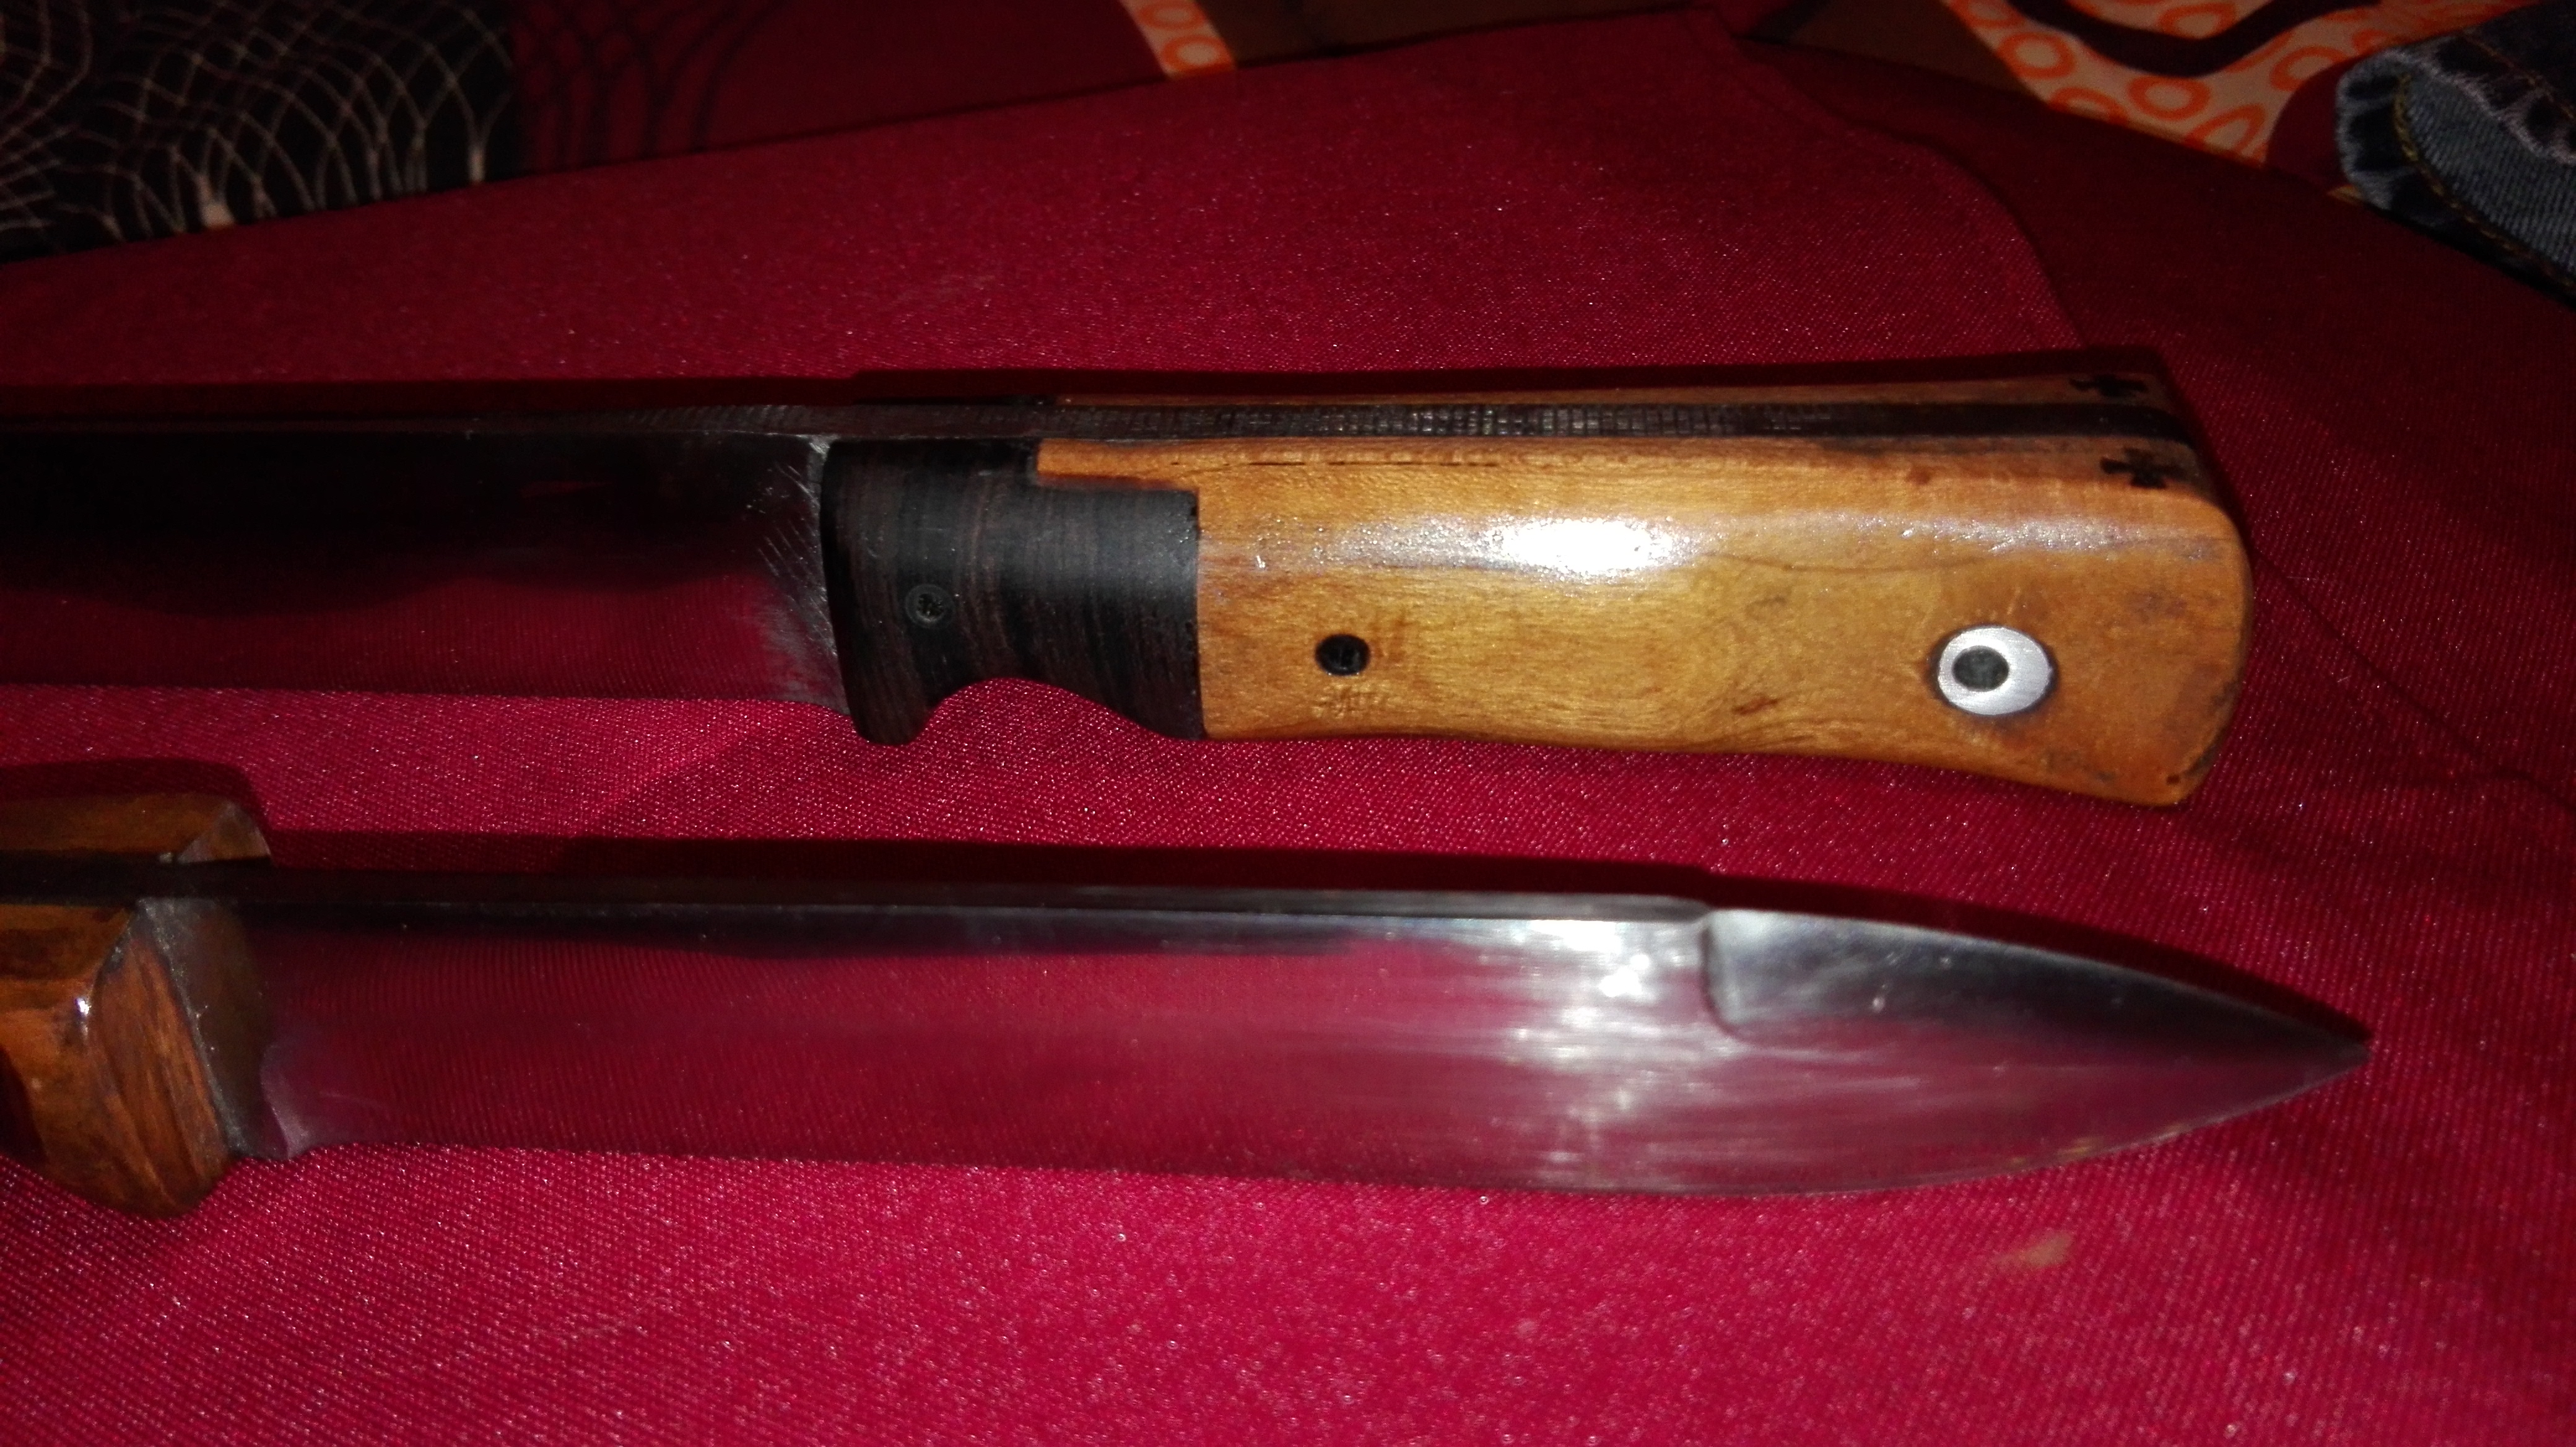
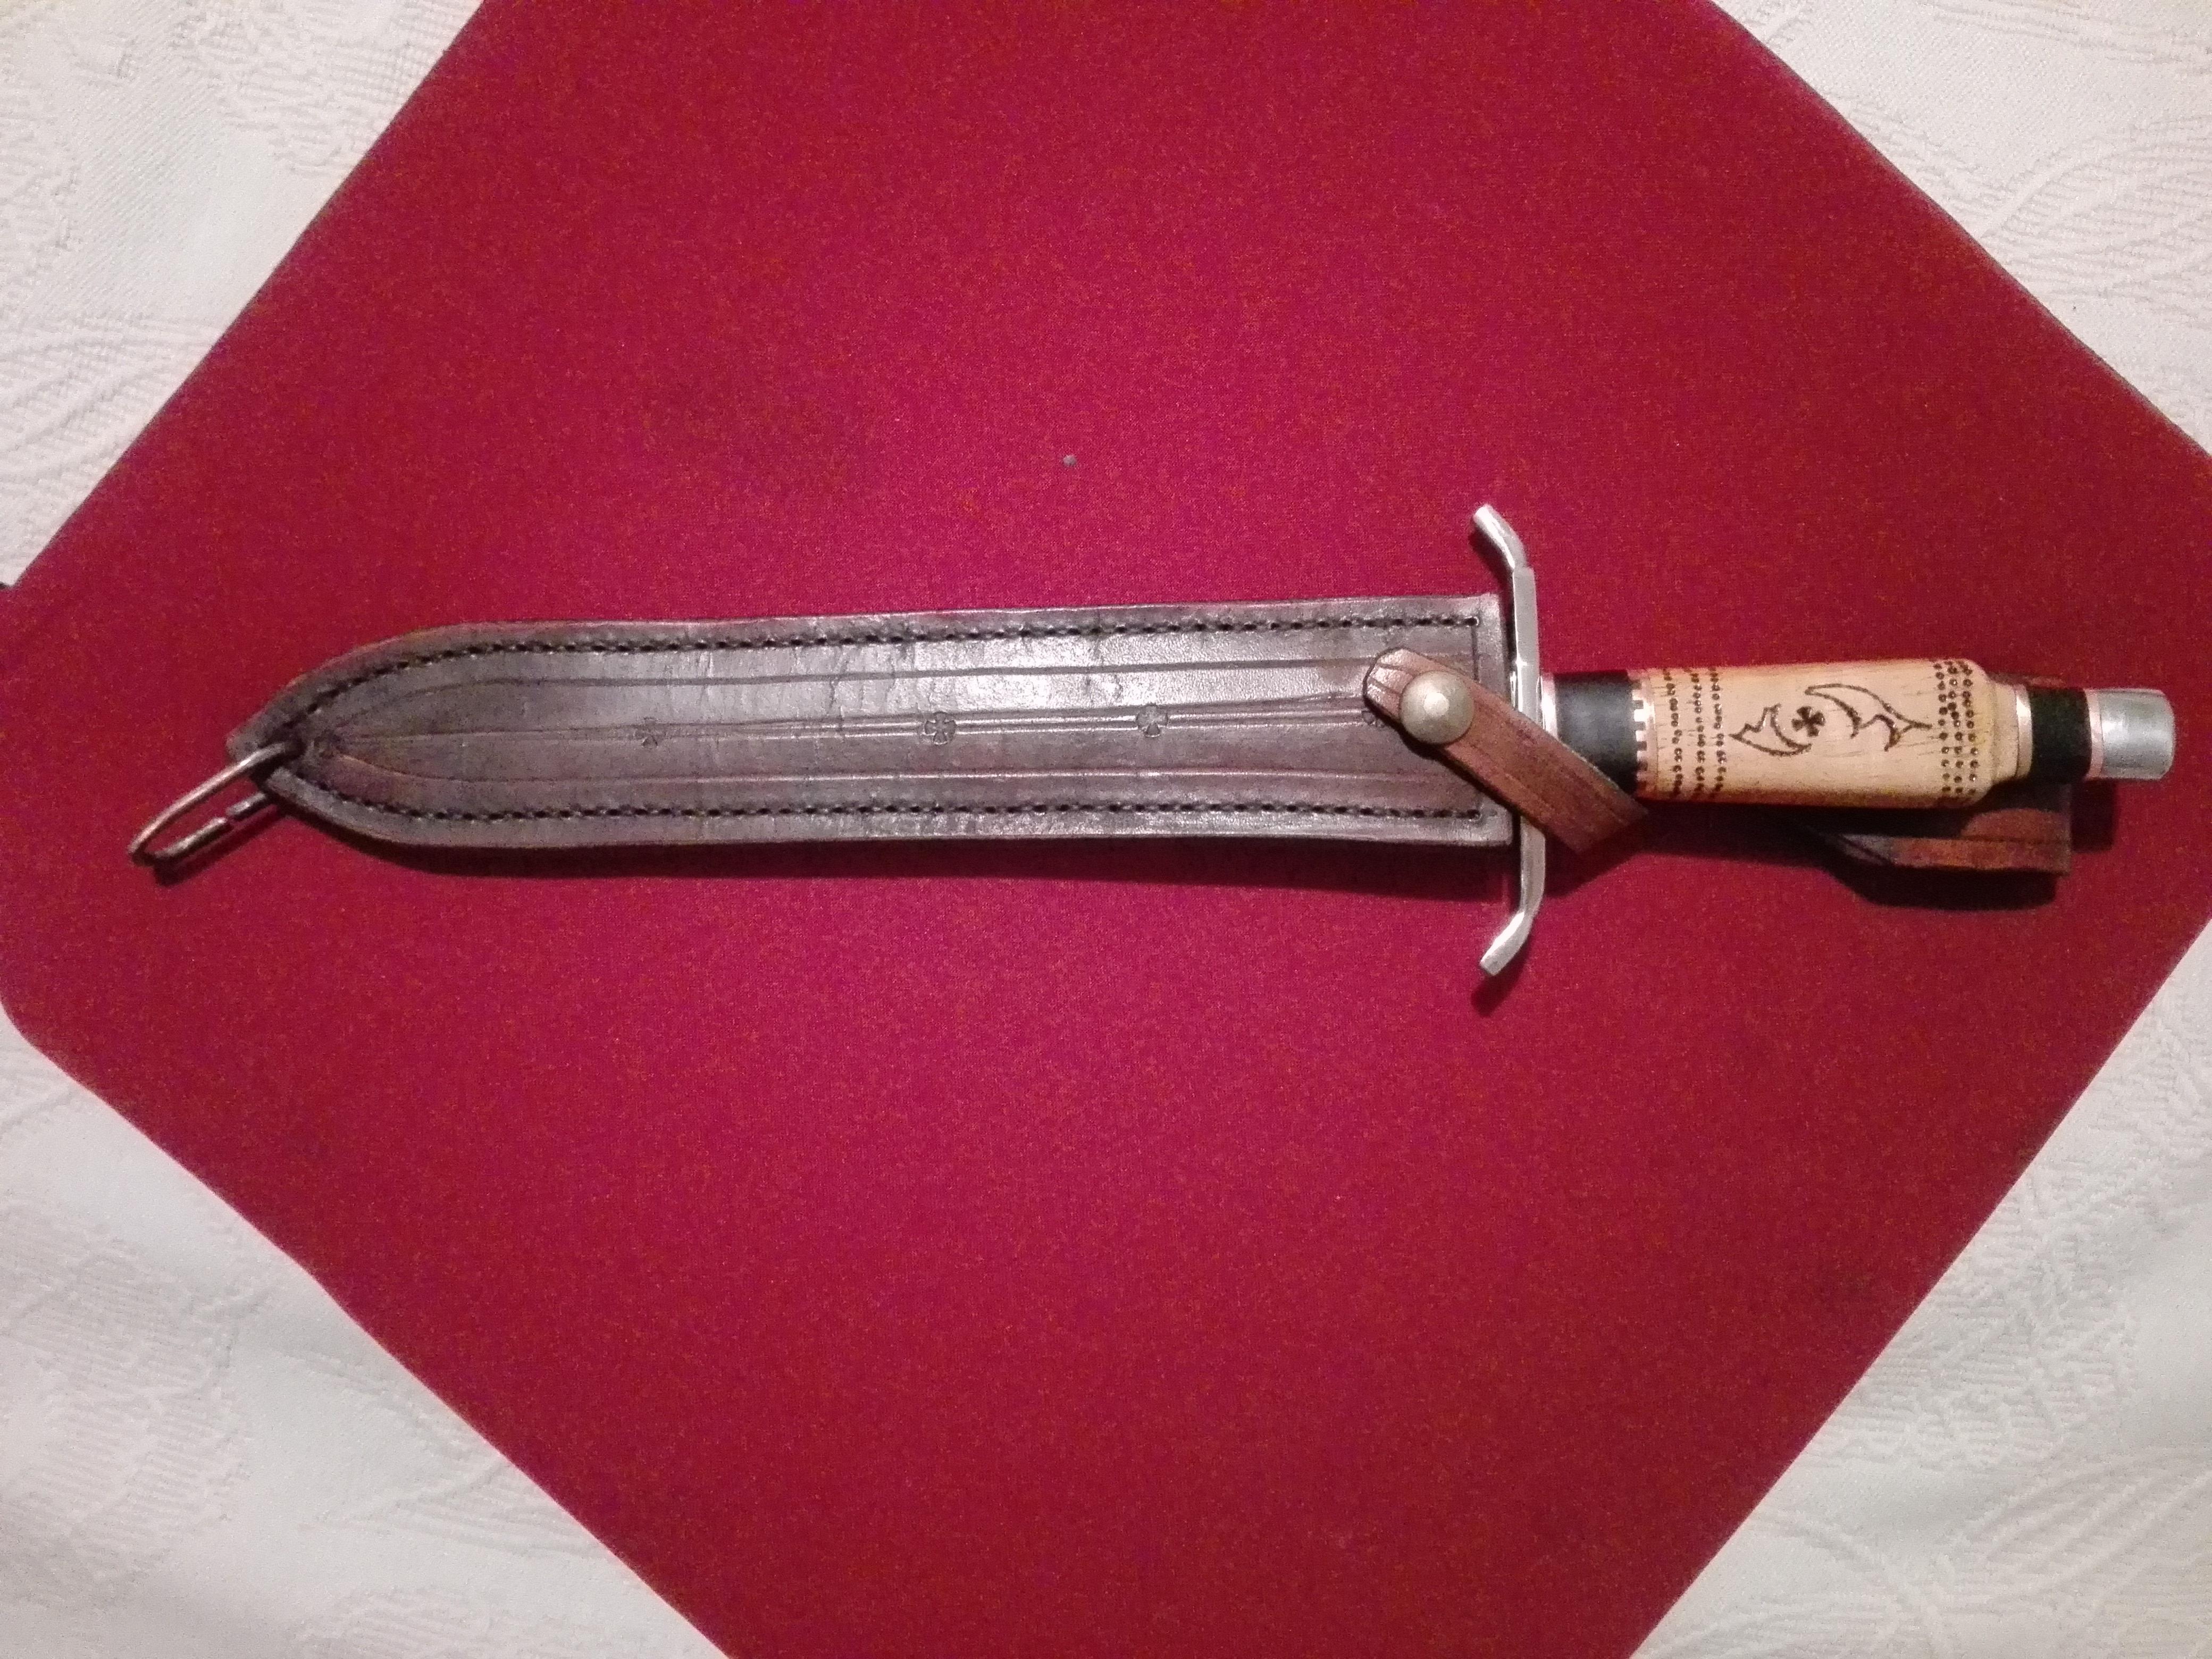
This months creation, forged from an old file with engraved tribal and karma sign on both sides. Total length 37 cm, blade 24,5 cm and 6 mm at the ricasso.
Steel cross-guard, copper spacers, pau santo ,oak wood and steel pommel secured with a threaded nut. Hand stitched leather sheath .
This was the most complicated and difficult knife I've ever made. From forging the tang, grinding the bevels, doing 4 ricasso and fitting the pommel on the threaded tang which broke twice, a huge undertaking with the small 5"x 26" belt grinder I have. Soon I'll upgrade to 5"x 48" and make some more daggers.
Enjoy
Cheers


-
Looks like the work of a pro, really appreciate the handle design.
Cheers
-
200 for a Swedish cast steel anvil is a steal. They usually go above 300 sometimes double that. You should inquire if he is familiar with anvils or blacksmithing in general, if not, he might sell you very low.
-
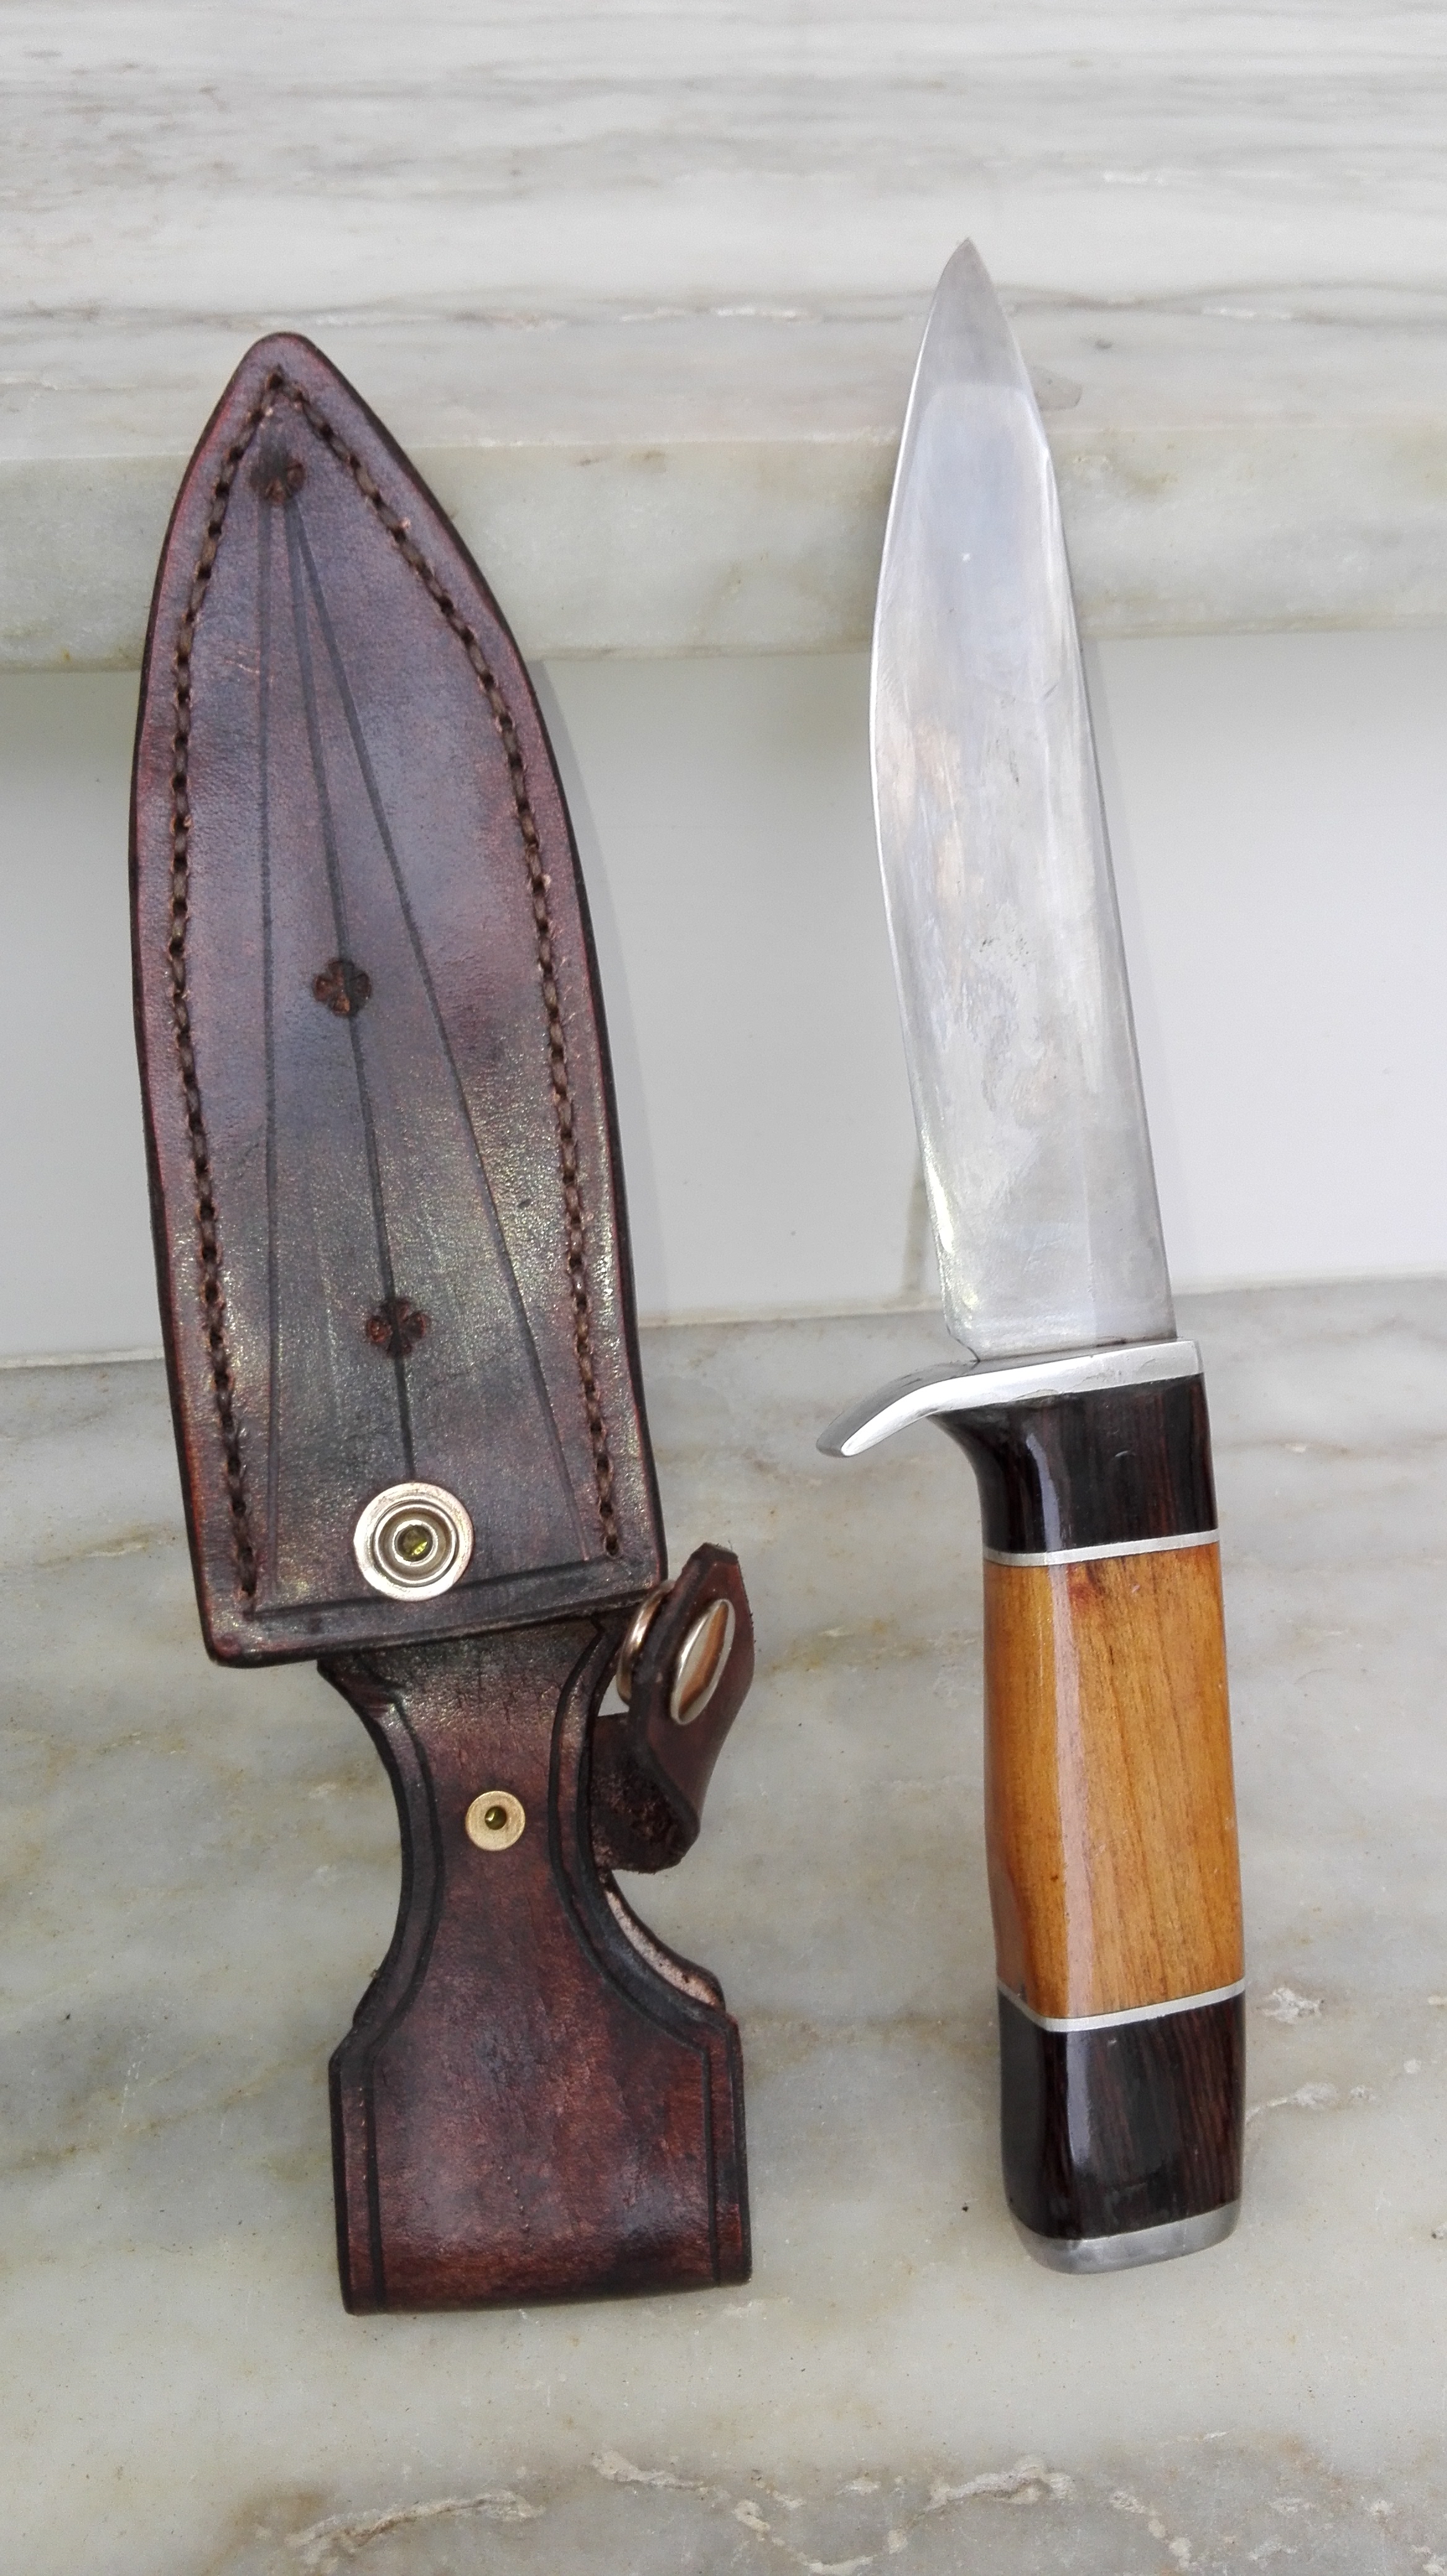
5 mm is a lot for such a small blade, nonetheless no one will break it.
Good fit and finish.


Knife making video questions
in Knife Making
Posted
It's high carbon steel judging by the number of springs on the sparks, it wasnt heat treated nor did he bothered sharpening.
A knife without HT is only a paper wheight.