Tzelik Hammar
-
Posts
153 -
Joined
-
Last visited
Content Type
Profiles
Forums
Articles
Gallery
Downloads
Events
Everything posted by Tzelik Hammar
-

What did you do in the shop today?
Tzelik Hammar replied to Mark Ling's topic in Blacksmithing, General Discussion
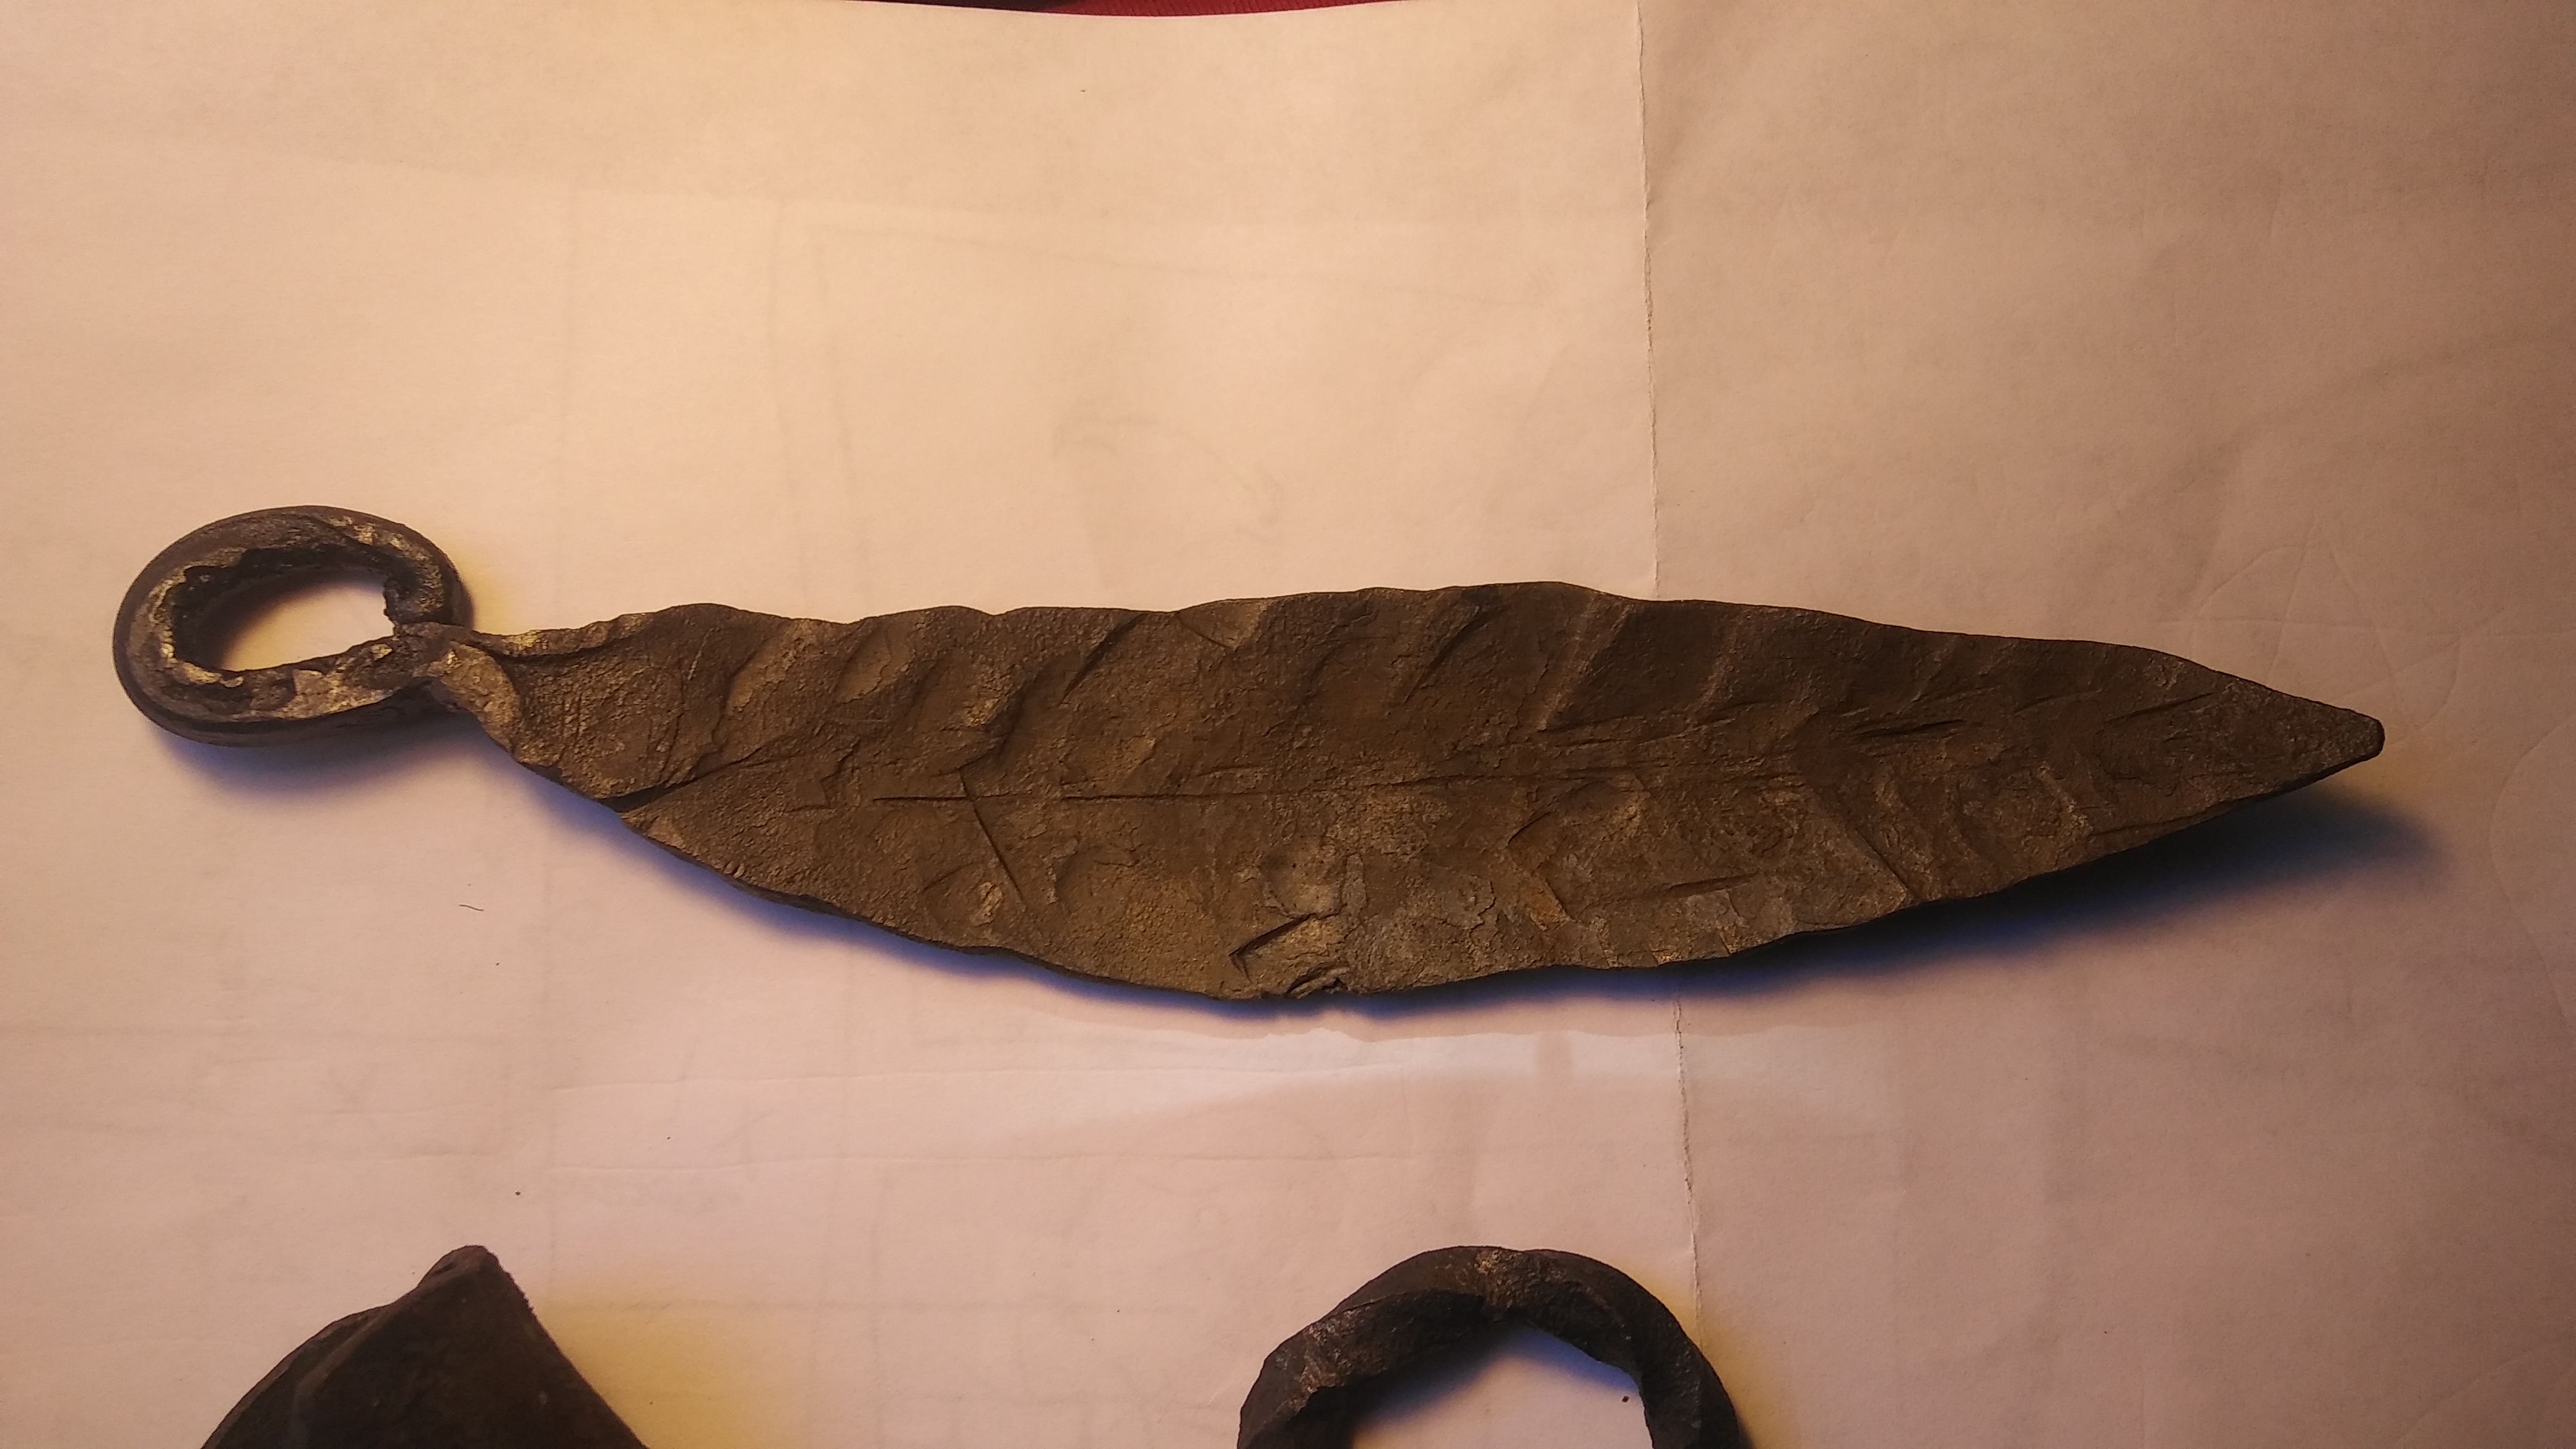
Those look awesome! Love the leaf of the plant holder -
What did you do in the shop today?
Tzelik Hammar replied to Mark Ling's topic in Blacksmithing, General Discussion
No, gonna split the handle and chisel it out, the put it back together. No external pins Yeah, working on acquiring one of the good brushes. Until then I'm doing my best with the old wire brush, water to pop scale, and a brass brush to finish. -
Thank you Frosty. Will do!
-
What did you do in the shop today?
Tzelik Hammar replied to Mark Ling's topic in Blacksmithing, General Discussion
Appreciate it. It's a mental thing I guess. It's weird learning a trade backwards. I can make knives and armor, but I'm still learning how to do things like tongs and these little hooks. Proficiency in the basics is something I require of myself, despite experiences with more advanced techniques. -
Safety glasses for forging...
Tzelik Hammar replied to elkdoc's topic in Personal Protection Equipment
But it's so pretty... -
What did you do in the shop today?
Tzelik Hammar replied to Mark Ling's topic in Blacksmithing, General Discussion
Trying to get the basics consistent so I can feel right calling myself a blacksmith. Working on my scrolls, curls and twists. Made a J hook with a twist and an S hook with a twist. Also put some more time into a knife I've been working on, and made a small axe pendant for the girlfriend.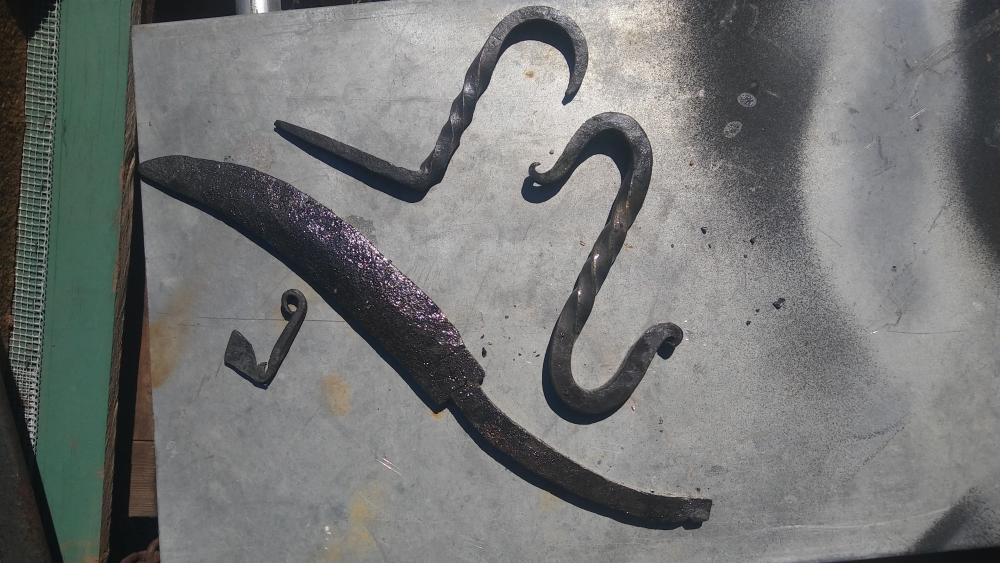
-
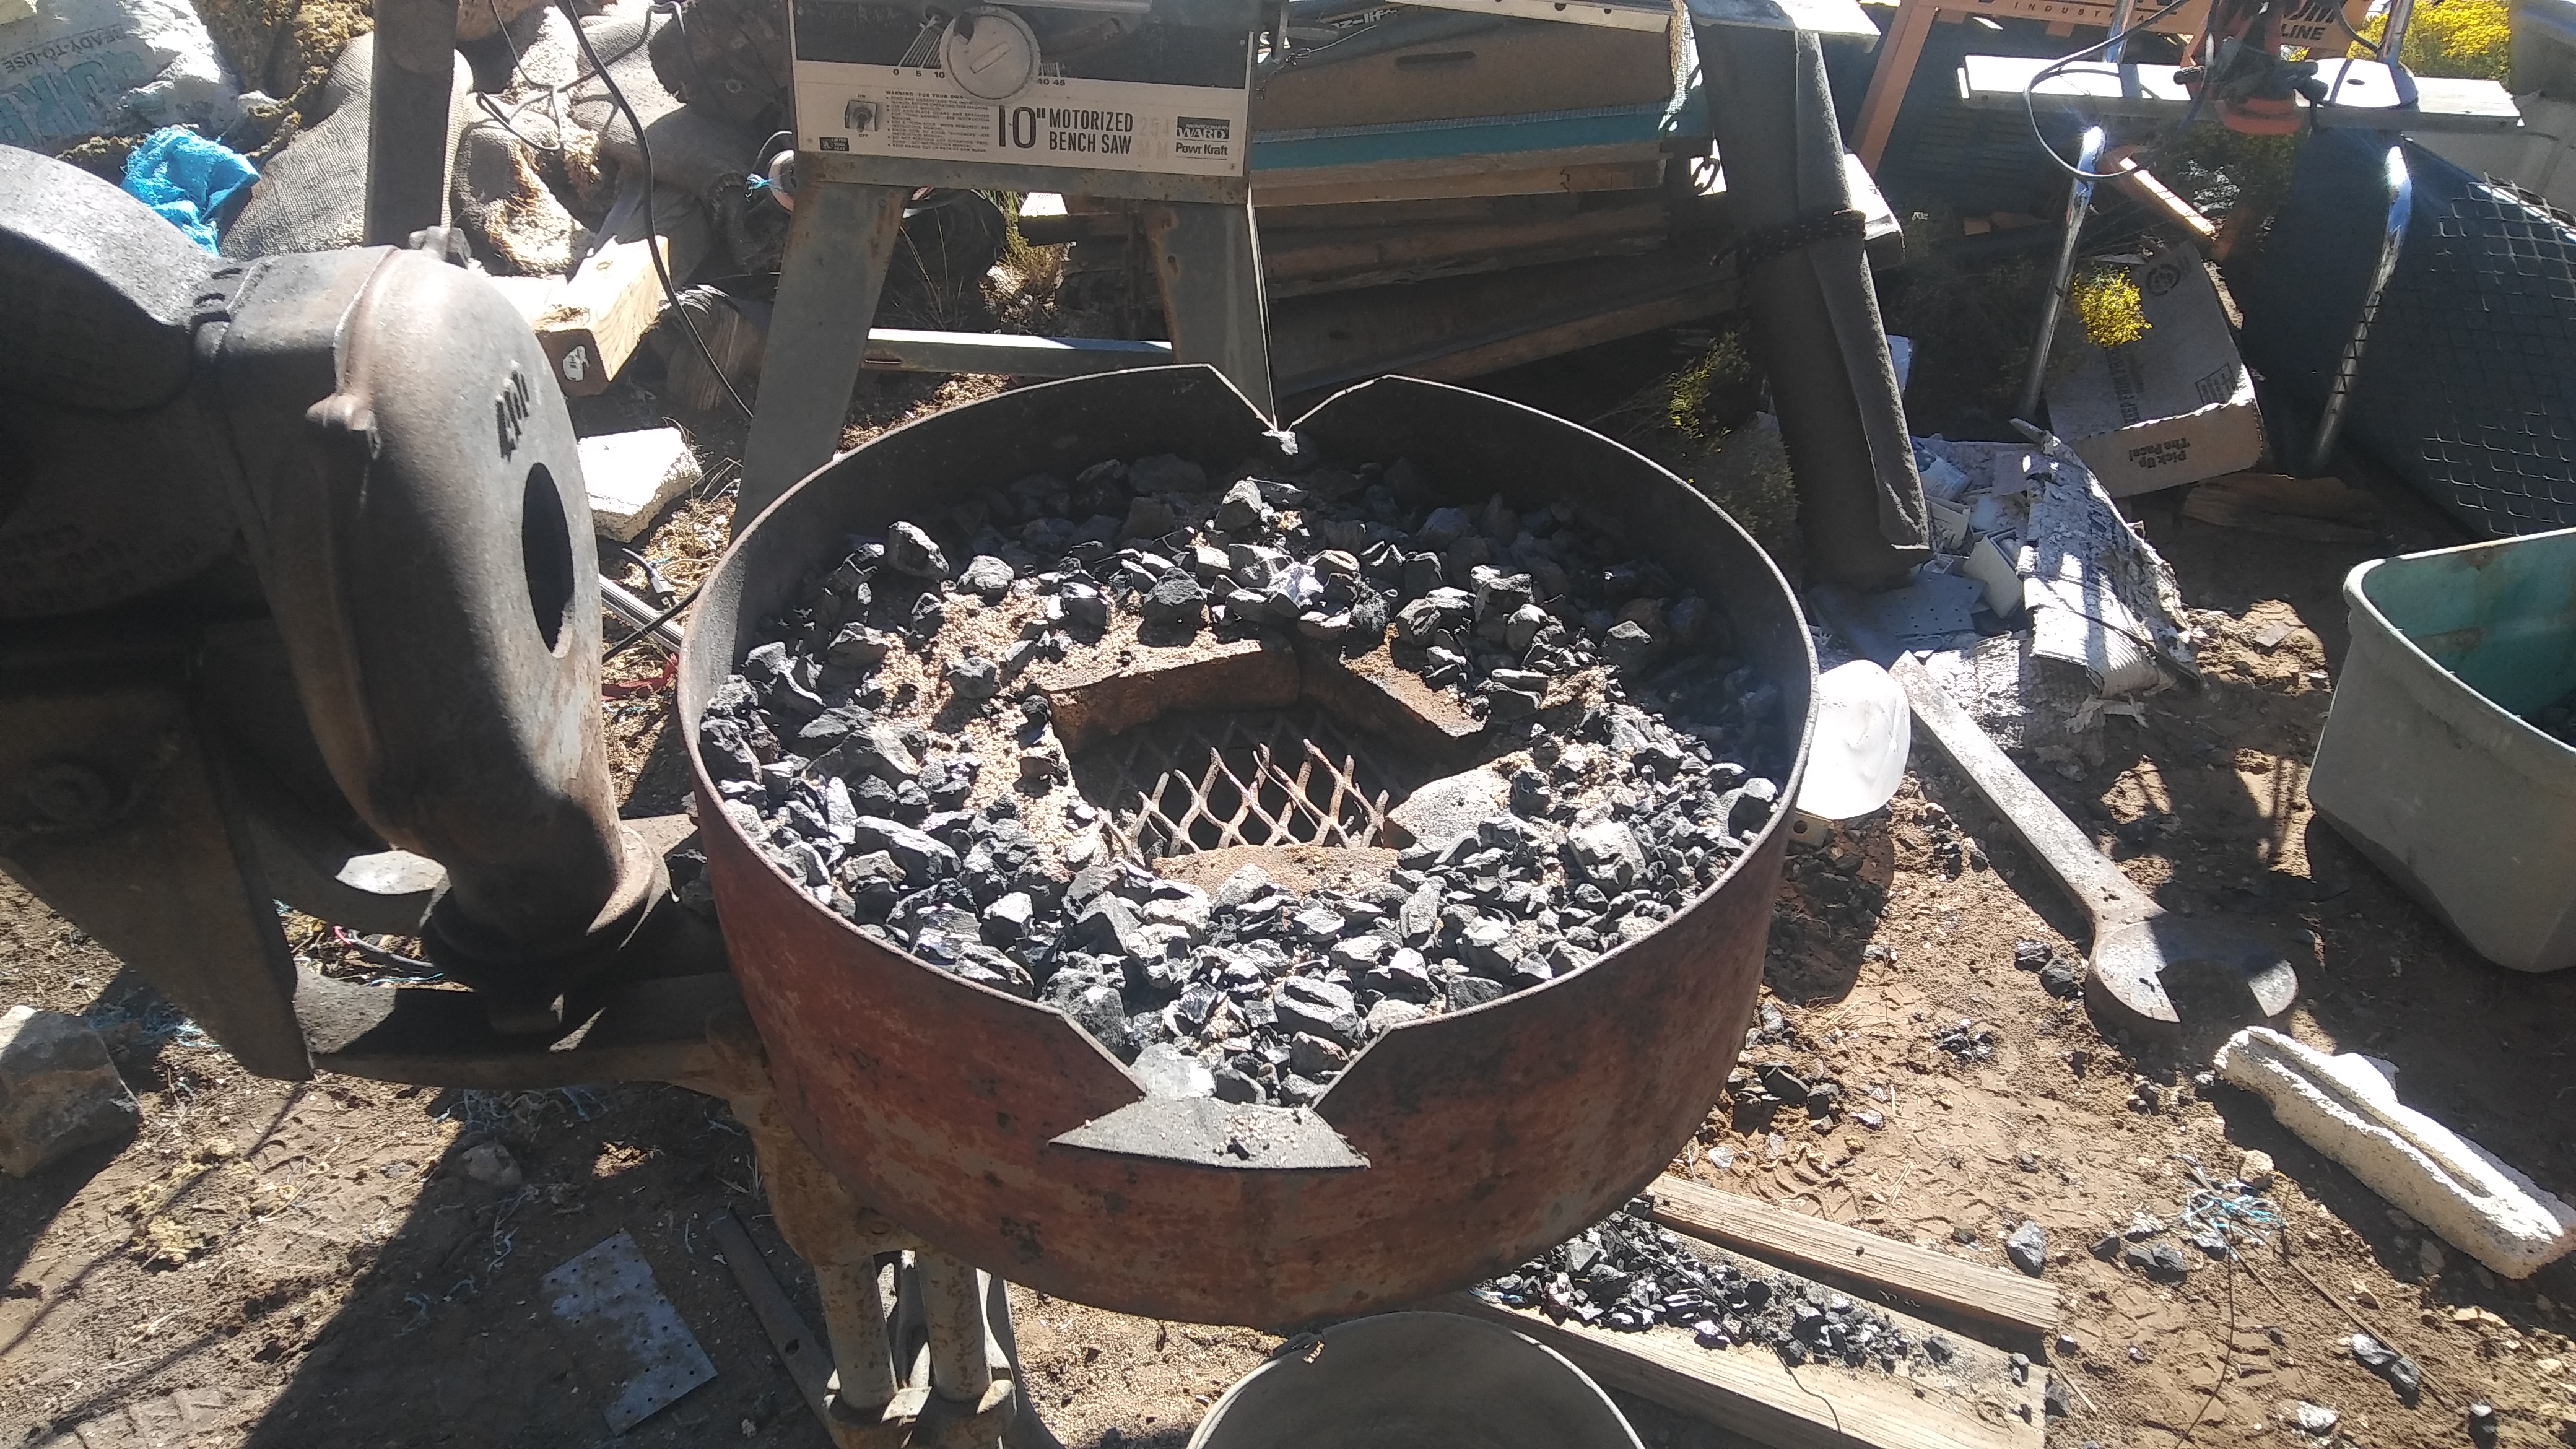
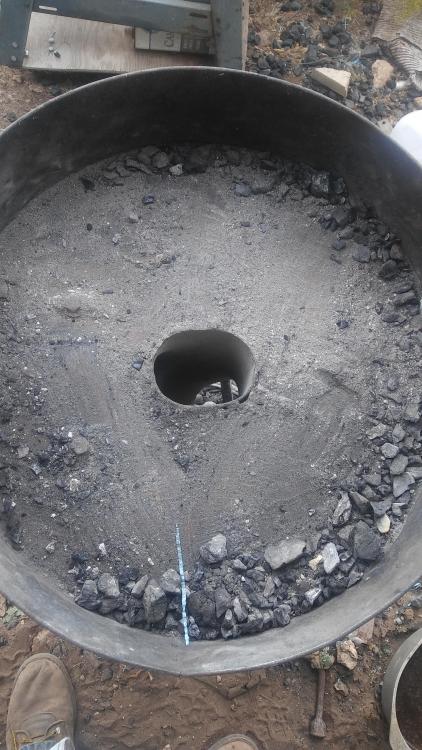
Found some thinner fire bricks and set the expanded grate back in. Fire works beautifully and the cuts in the pan run right through the heart of my fireball. Took some fiddling but I think I have it licked. I'll know more after I dissect today's fire.

-
New bladesmithing specific logo - looking for input
Tzelik Hammar replied to TheoRockNazz's topic in Knife Making
Maybe turn the "nazz" square on is corner and run a cross sword and hammer behind it? Kinda piratey and you can focus on the name being clear. Sadly the overall effect of the current one is too busy and feels like it was stretched beyond is limits, breaking clean lines into pixels. Love the idea. -
The inside of my pan. The tuyere sticks up about 1/4 inch above rest, and it is the high point. The rest slopes down to the outer rim. I've tried various grates with different levels of success, so far expanded metal is winning for a good burn. The issue now is that unless I dig a hole in the previous fire to start a new one the next day (using the old fire as both pot and insulator), the coal just rolls out to the edges. The problems with digging in to the old fire for the new one is that my pan is constantly full of mess and I get a lot of crud when I poke around to check for clinker, and my stock either sits at a wrong angle or pushes through the old fire to get to the heat, picking up crud along the way and introducing old ash right into the heart of my new fire. I've tried a couple things (sand, dirt, damp dirt) to level it up or even slope it inwards, but I don't know what I'm doing. I cut in a small ledge and mousehole in the opposing faces to try to bring the stock into the fire at a better angle, but it didn't help much other than I don't have to hold my iron constantly. Next level would be to put a brake rotor or fire bricks in to create an actual pot to hold everything in. This would cut my pan depth by about half, but would it result in a more reliable burn? I'm using anthracite and charcoal.
-
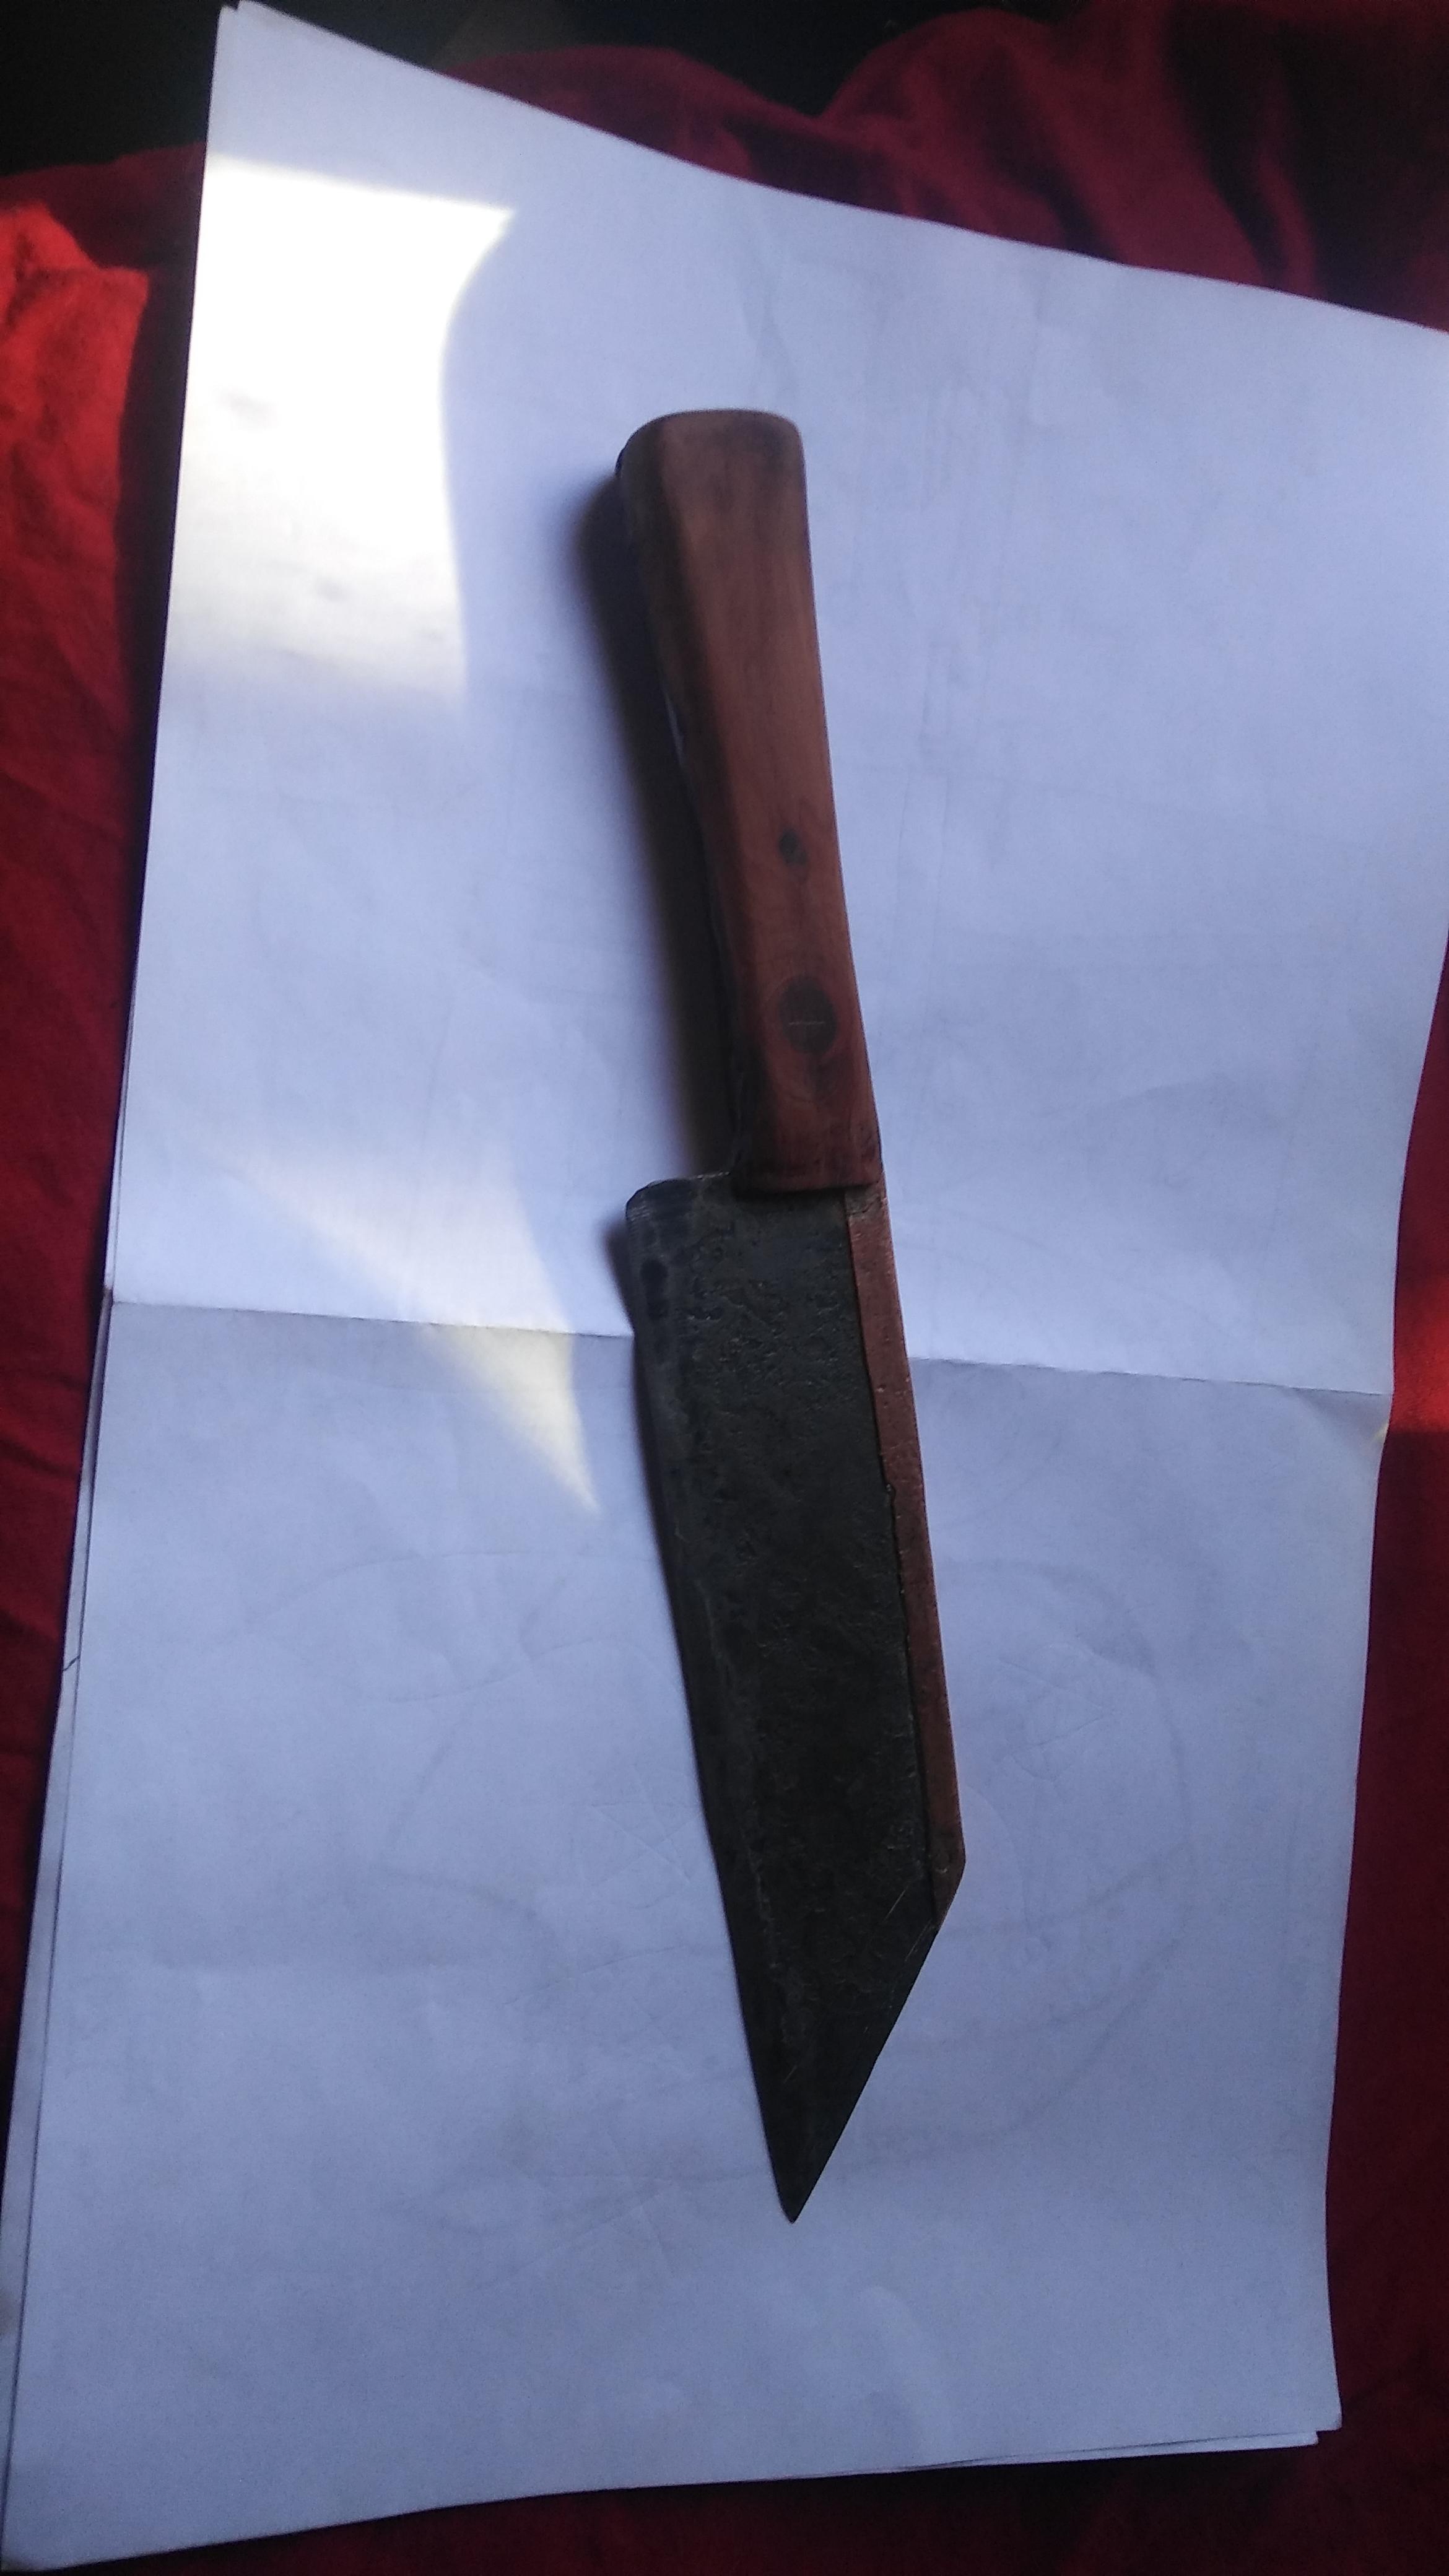
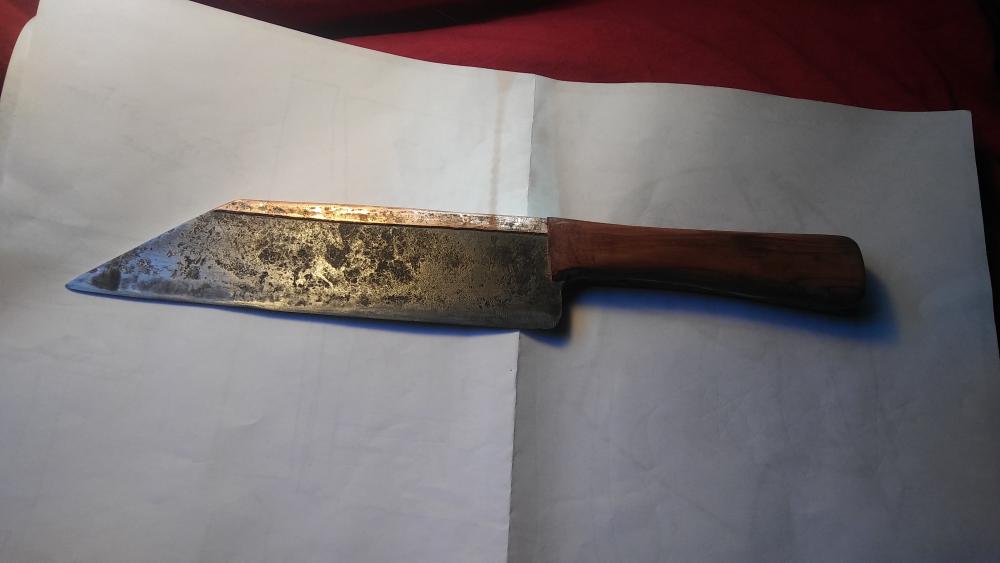
The scales taper forward to cover the end of the copper, I nipped it too short. Shame the cedar grain doesn't show up in the pictures, it's actually really pretty. As for hacking... It's great Balance is about two fingers in front of the handle and it moves nicely for chopping on things. I'm debating giving it away or testing it to failure, as it's my first forged blade and I kinda want to see if I've made something reliable.
-

-
What did you do in the shop today?
Tzelik Hammar replied to Mark Ling's topic in Blacksmithing, General Discussion
Not very good, but I said I'd post pictures.
-
You might check out technicus Joe on YouTube, he has done a lot of videos on restoring old blower's and he might have one for your model.
-
Like Mr. Stevens said, PTSD, tbi, needing a therapy hobby, all pretty common around here. Welcome aboard. Word of advice, start cheap, get to know if you like it before the Anvil-lust takes hold. Try the jabod thread! Read the stickies or some of the curmudgeons will make you think fond thoughts of boot. Great people here and an amazing amount of accumulated knowledge. Just read up beforehand and you should be safe.
-
First, this is not a historical blade, i just like the Seax shape. It's full Tang and the copper is wildly inaccurate. I like it though, turned out as intended (rough look included). The only change from the original was removing the large pin in the handle to keep the balance right. Still unable to upload pictures, hopefully I can do it tomorrow.
-
What did you do in the shop today?
Tzelik Hammar replied to Mark Ling's topic in Blacksmithing, General Discussion
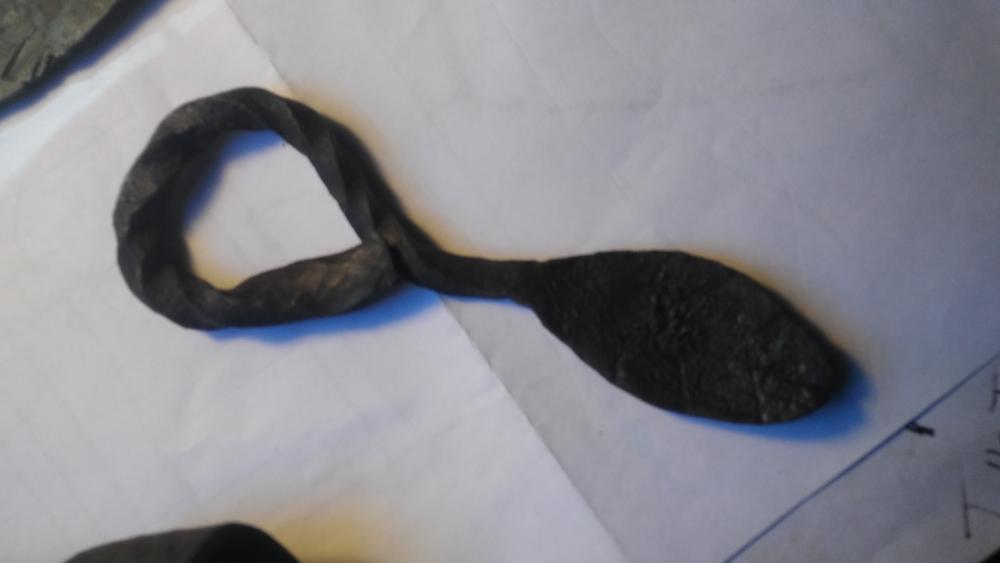
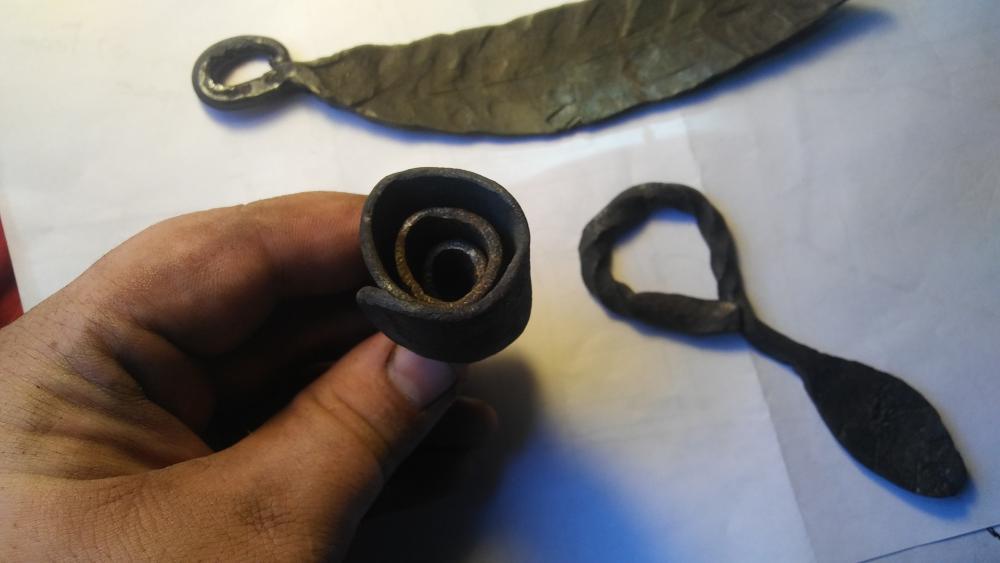
I made a big "elf" leaf, my first forge weld, a small leaf/twist/bottle opener failure, my first attempt at a rolled Rose, and finished my "Seax". It won't let me post pictures from my phone for some reason, so I'll update this later. -
I'll post a pic when I finish a pair! So far I have a bunch of weird shaped sides that don't fit together. Tomorrow is a forge day though, so fingers crossed!
-
Ah. Well, looks aren't the important thing for me right now. Nobody sees my tongs but me! I just want to successfully forge a decent pair. Murphy loves me, and thinks my tong attempts are especially hilarious.
-
I'm still struggling to get tongs right, so forgive a dumb question. What do the shoulders accomplish?
-
Thankfully mine is made up, continuing the tsa bit about visiting Frosty. The oddest things I've ever had to explain to the tsa is my cane (it's rather club like) and a full to-go box from hard eights BBQ.
-
What did you do in the shop today?
Tzelik Hammar replied to Mark Ling's topic in Blacksmithing, General Discussion
Wow, he got lucky! I'm pretty sure if it had been me I would have fallen on it and fired another 4-5 nails through my foot. Lol -
Sir. You can't take a hammer on the plane. "But I'm going to visit another smith, I need it!" No. I don't care you're a blacksmith. "But" Sir, please step to the side. "It's just a hammer, man" Stop! Put it down! -taser noises- ... And that's how you wind up in jail for having a hammer at the airport. Haha
-
But then I'd have to check luggage...
-
Careful Frosty, I might show up on your doorstep! If I do I'll bring pie though...
-
What did you do in the shop today?
Tzelik Hammar replied to Mark Ling's topic in Blacksmithing, General Discussion
I glued my boot to the floor... Dropped some epoxy while attaching scales to a knife. I felt verrrrry smart when I tried to walk away... Handle adhesion looks strong though >.>