Mitch W.
Members
-
Joined
-
Last visited
-
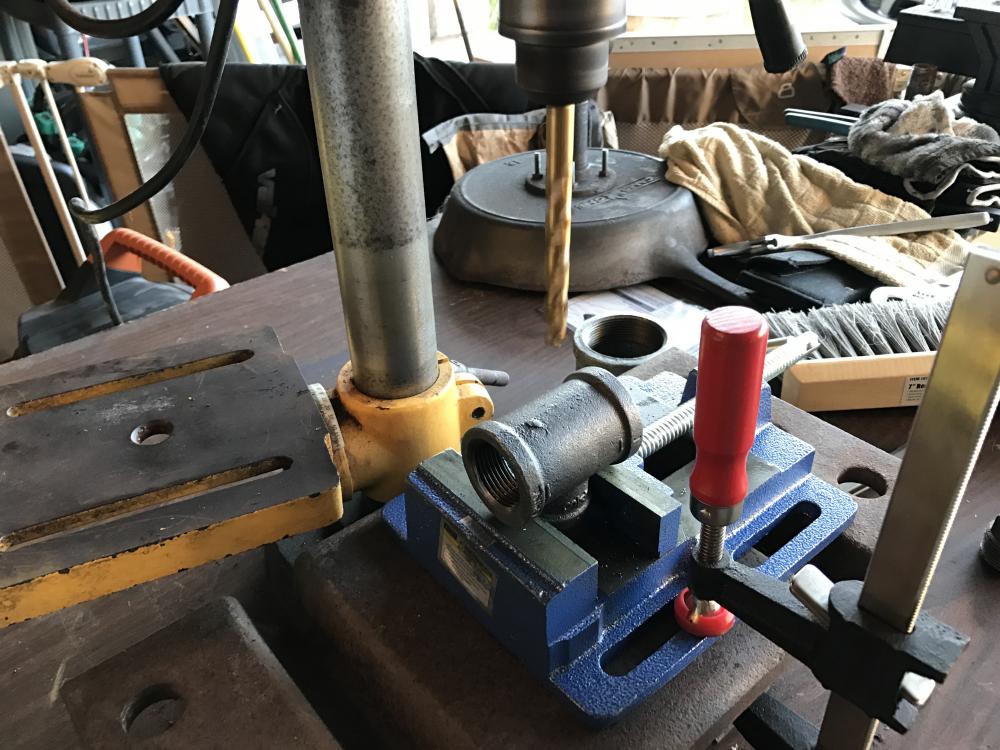
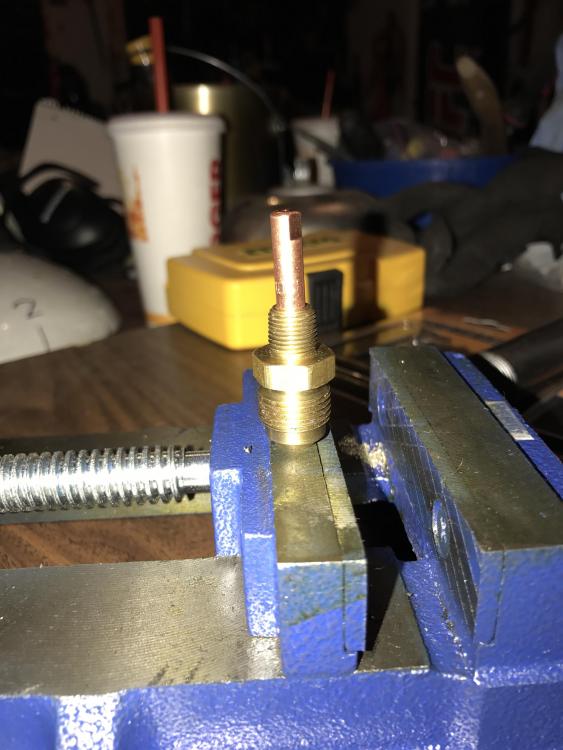
Thank you! I knew I should have left the T fitting in the vise. I pulled it out to inspect the hole I drilled and then realized I would have a problem lining the everything back up to thread it. I don't know why I even inspected the hole, BC I'm not even certain what I was looking for. And yes, I did unplug the drill press. When you stated that it goes against everything you know to do it that way, I took heed. I can only imagine all the carnage involved in learning that lesson the hard way. I need my hands to work and I've grown rather fond of them over the years. I'm going to get a floor flange tonight and practice it a few times tomorrow. I pretty excited to see how it goes tomorrow. I'll keep you posted. Thanks again for the help.
-
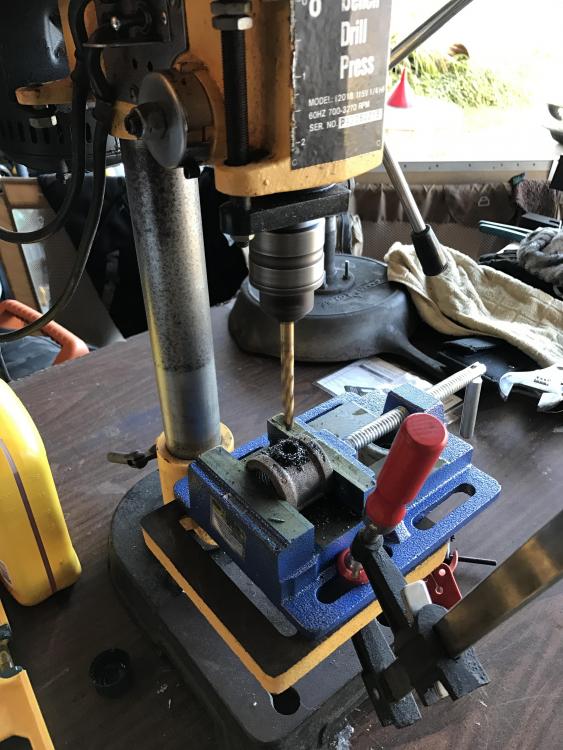
Frosty, Hoping to get a response from you regarding the burner I put together. I experienced a few problems to say the least. I attempted to use the "chuck" to start the the threading but I screwed it up. I tried to hand turn the press while the chuck was inserted, but I couldn't get the bit to turn. Not sure if it is a safety feature or what, but the drill press would not spin once I tried to hand turn. So I went to the hand and eyeball method which turned out like junk. I'll need to practice a few more times on some scrap pieces to get it down. I quickly realized the domino effect of having a bad tap. Everything else was completely off. Thoughts? Concerns?


-
Thank you for info on the taps! If you see the the pipe I threaded, you would have thought I tried to do it while standing on my head. It's terrible, but now I don't feel so bad. The pieces were labeled a certain size, but they were not accurate. I ended up buying both an SAE set and a Metric set BC I couldn't get the threds to line up correctly. And then the bit had a really hard time staying in handle BC is is really cheap. I think it's made from recycled coke cans. I'm going to reach out to Frosty again and see if I can work on the method where he uses the drill press to start the threading process. I'll keep this thread updated with the progress.
-
My "Tons of EGO'S" comments is not directed at the grey beards. I think they are an experts for a reason. They dedicated the time to the craft and it should be respected. Without using names, I would give an example of an ego on display for reference. A Sr guy on this forum gave directions on how to build something properly and even gave specific specs. It was very informative. The next post read something like this, "I went ahead and made some modifications to widget x, but I'm having problems with it, can you help?" Sr members tries to figure out why the modifications were needed but the other member could not explain why they did what did. Additionally, they wanted to argue a point with the guy who had spent well over a year creating the darn thing. It was mind blowing! Hence the ego's comment. Some people will not take advice well because it may bruise their ego. So as a new guy coming in with a fresh set of lenses, this caught my eye. I wanted to point out that as a new reader and smith you will see ego's on display that will blow your mind. It had never Occurred to me to challenge or modify a someone's work who is an expert in their field or craft. More importantly, take the comments as constructive criticism because the grey beards know what they are talking about. Had I learned that 2 months ago, I would probably have a forge that actually works, instead of a pile of metal and bricks.
-
Buzzkill, Thanks for encouragement. As for the HF tools, it funny you bring them up. I watched a YouTube video on tools harbor freight sales that you must buy. I didn't know what a tap and die set was, so I googled it and that's what came up. The video made it sound like they were super aweome. It's much like using Wikipedia as a source document, you never know what you will get. I probably drilled 10 holes in my practice pipe before I figured out how to use the darn thing. What set should I buy? I don't mind buying a quality set. It looks like it's a tool commonly used in the craft.
-
Frosty, just the opposite. I would encourage every beginner to read all of your posts since you have have answered TONS of questions regarding your burner and other burners. For example, I didn't read your directions carefully enough when I decided to make your burner, nor did I read the several posts before I asked a question regarding the use of a lathe. I was quickly pointed in the right direction, but could have avoided an embarrassing moment by taking a few minutes to read about the burner and reading the directions more clearly. Maybe I should have stated a little more clearly that I was trying to document my thought process as I was going along, at that moment in time. What I wrote yesterday was a quick snapshot of two months of bad decisions, which could have been easily been recognized if I had relied on more experienced Blacksmiths to coach me along. Half of that time I was mucking along because I had not found this website yet. What I was attempting to point out is how my thought process was wrong BC I had not made a plan, researched what I wanted to build, and to your point rely on some of the other blacksmiths to guide me along. In 2016, you and another forum member had commented on the frustration of helping someone, but not getting any follow-up if it had fixed their problem. That's when I thought to myself that it would cool to document all the bad and good. I know I'm not the only person going about business this way (the wrong way) and I can be a great example of what not to do. Moving forward, I would hope that what I have written clears up any confusion about what I posted earlier, as it was not a direct attack against senior blacksmiths, but more of learning moment on my part. I was the "bad" thought process of thinking I could easily do this with little to no help. Additionally, I was going to post my failed burner in the "T Burner Directions" thread for guidance and not here. It looks like the admins have gone to great lengths to keep all the topics as organized as possible for everyone. I didn't want to start a whole other conversation here when the appropriate place for that conversation is in the thread you started for the directions. Once I found out what I was doing wrong, I bring that back to this thread and summarize/document my steps. If that's the wrong way to do business, then again I have learned something new and anyone new doesn't haven't to follow that step. I'll wait for your response and hopefully I didn't piss you off enough that I won't receive further guidance. I would have done that yesterday but it was 2 in morning. Last, I really wanted to emphasize to new folks they shouldn't be afraid or intimidated to go out and learn something new. I'll be honest, I was bit intimidated after reading through some of these posts. The topics get heated and it can be a bit intimidating to someone new and with very little knowledge of the craft. I don't expect that to resonate with more Sr Smiths, but for someone like me who has very little knowledge, but eager to learn, it was a bit shocking. I guess in my dream world, I expected something different. Luckly, BC I updated my profile like you requested, I was contacted by a local smith and they gave me resources on where to get basic classes. So if I had ignored your advice, I would have missed out on that opportunity. As for the bad humor interlaced within my post, it's just that, humor. Not a direct attack on anyone person. If you felt I was attacking you or any member of the forum personally, I apologize. I'll go back a reread what I wrote and edit any comment you find offensive in nature. Please let me know if you want me to post the failed T Burner in the directions thread. I would love to hear your advice and how to better my basic tool skills and the burner itself.
-
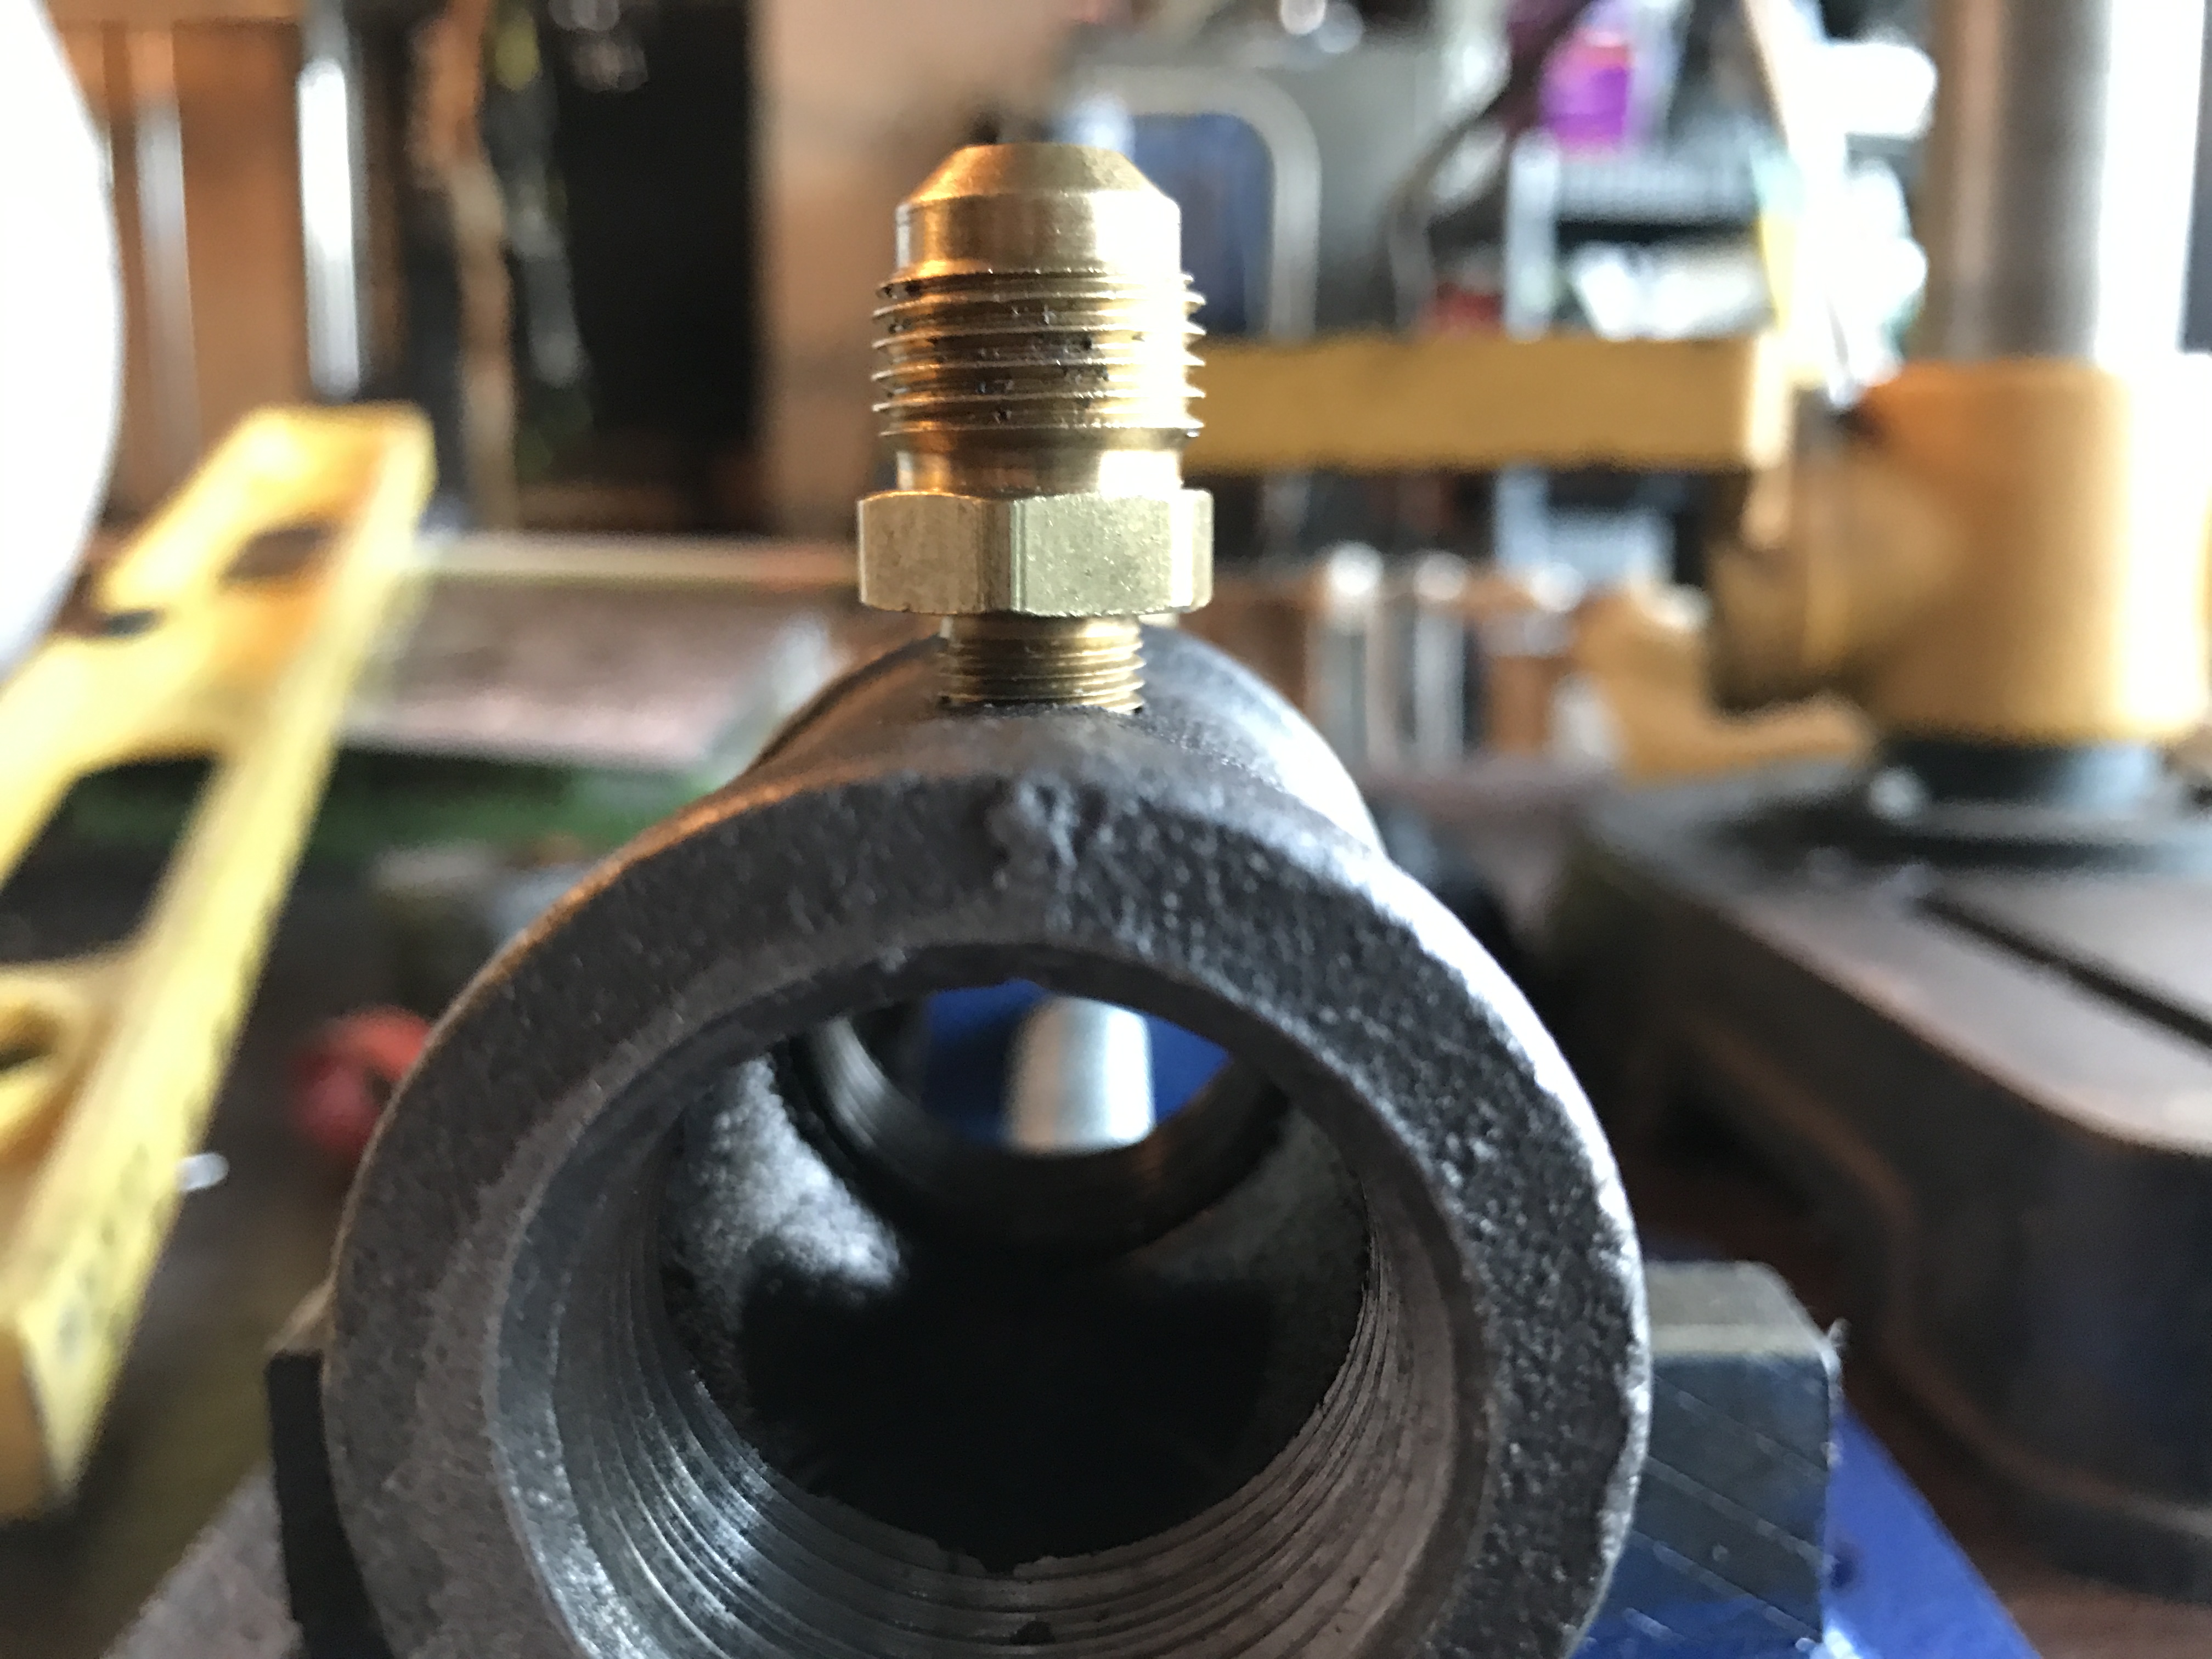
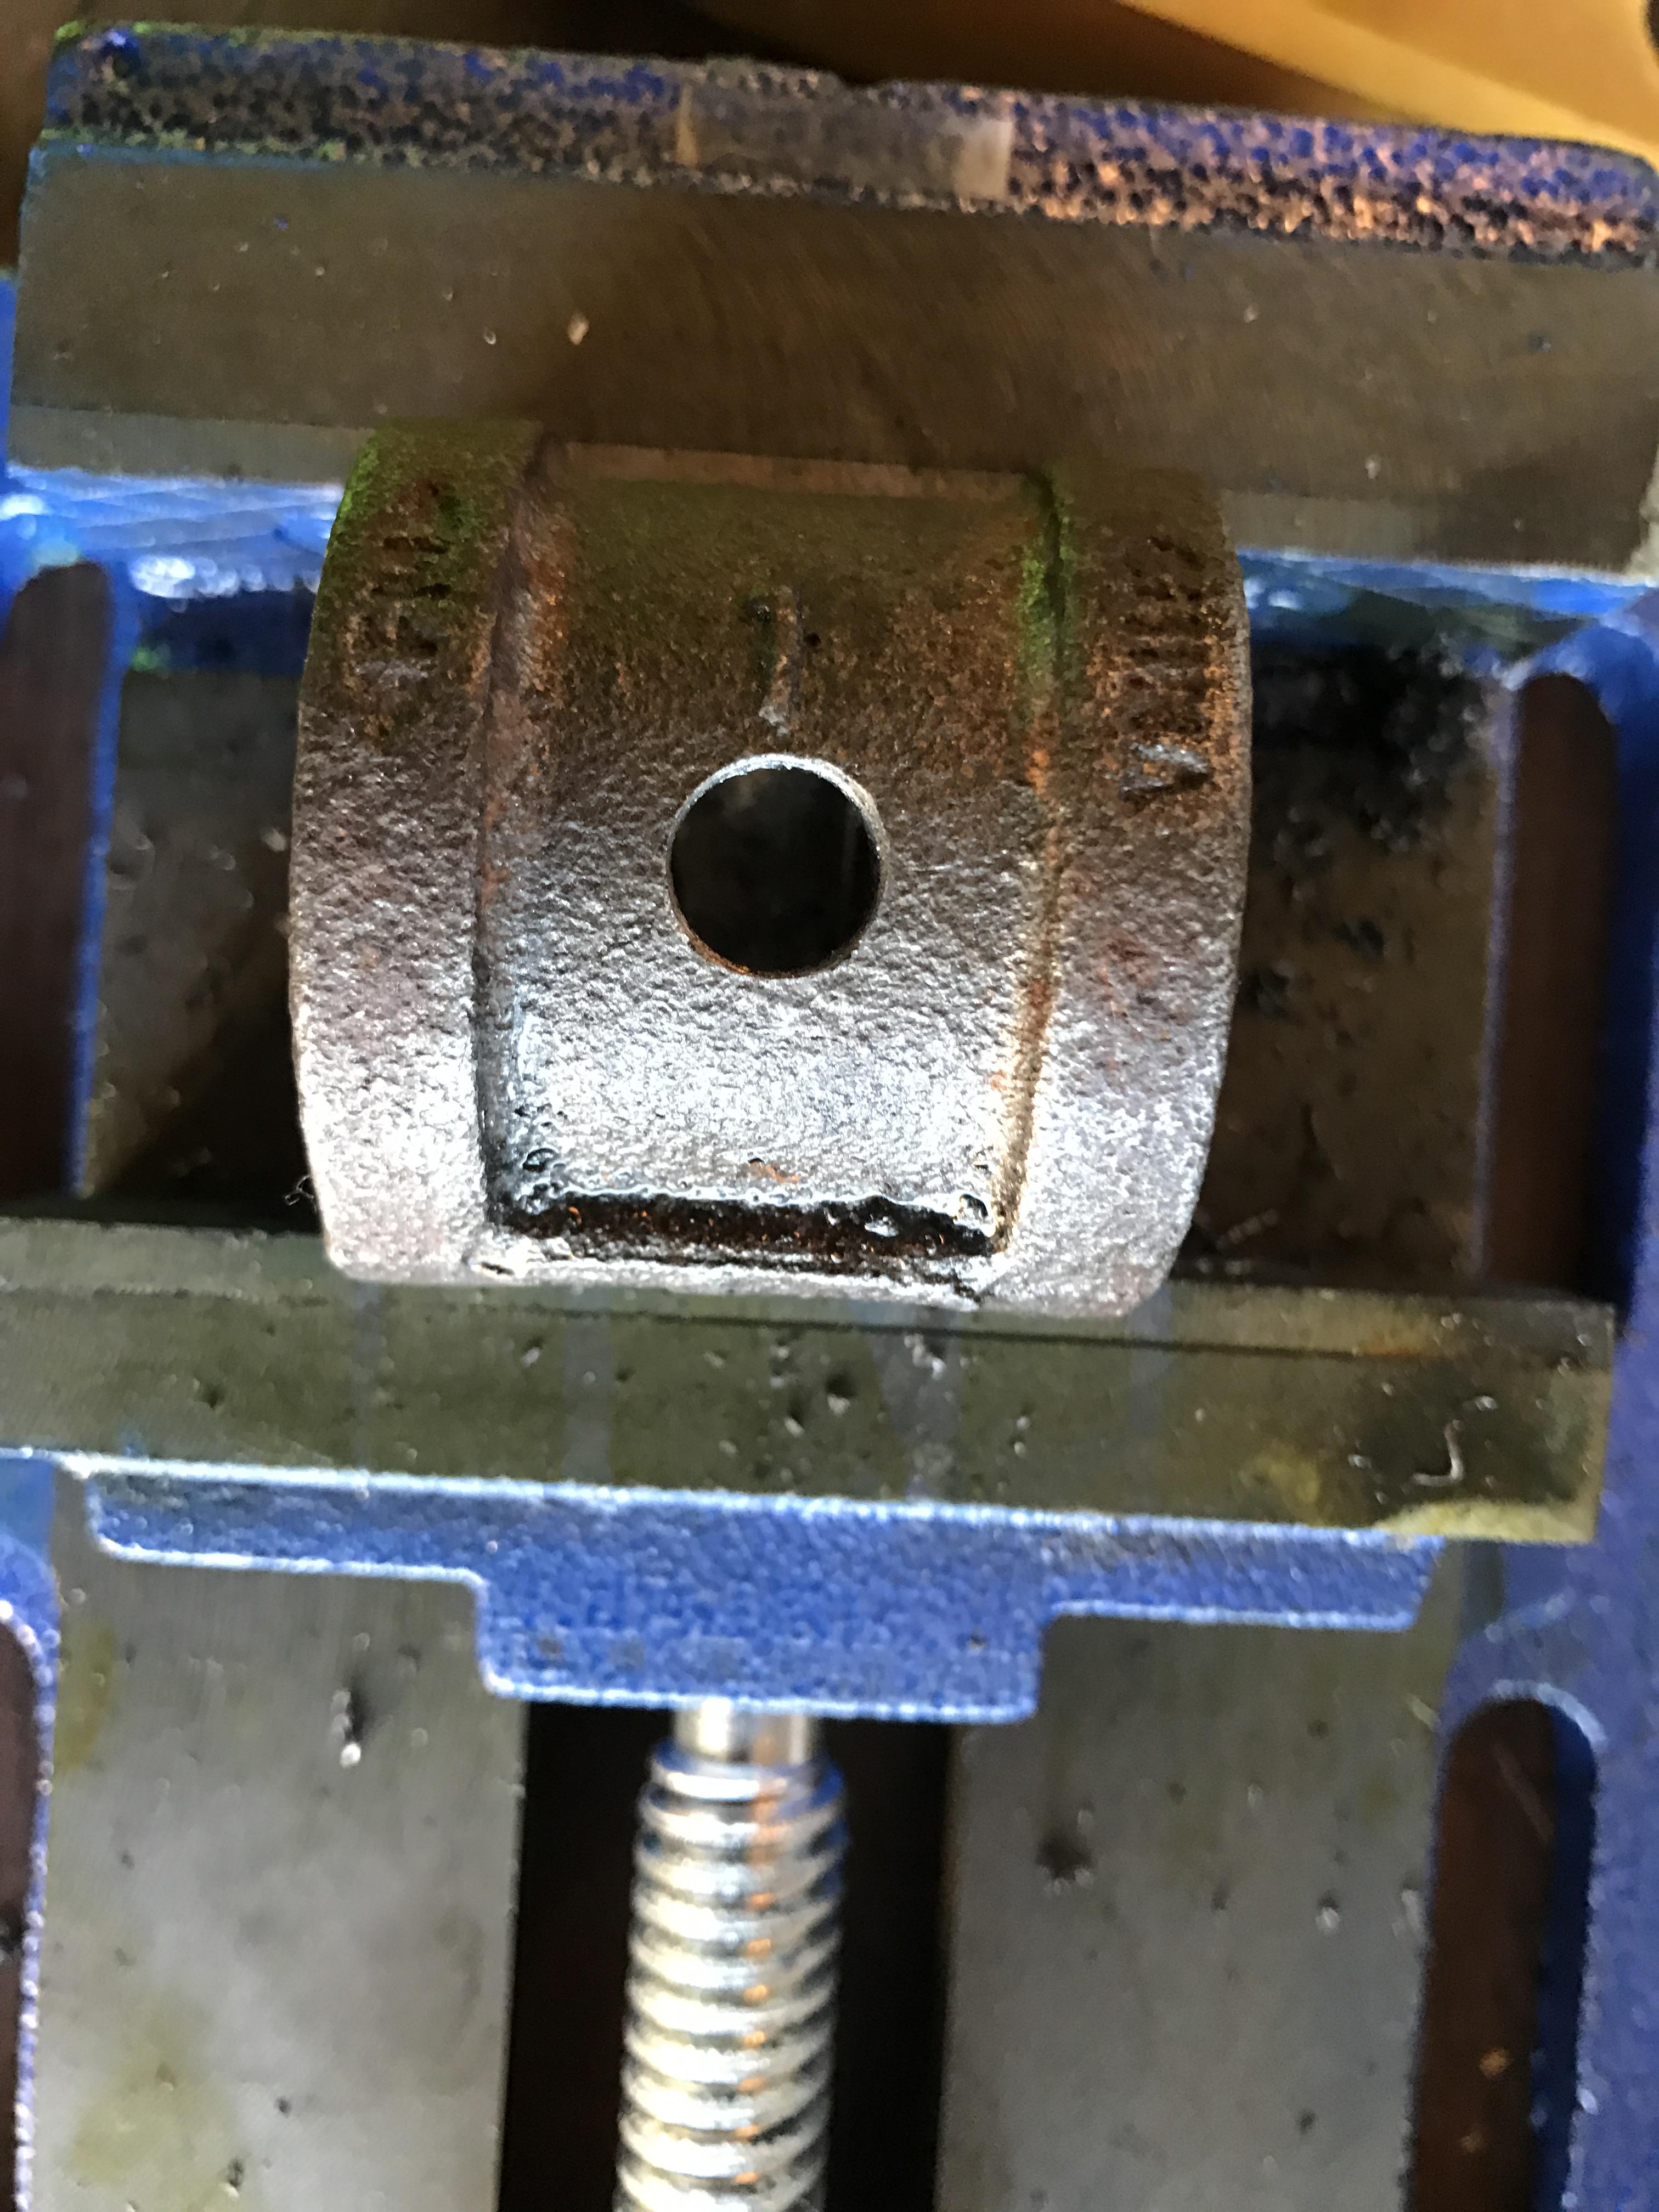
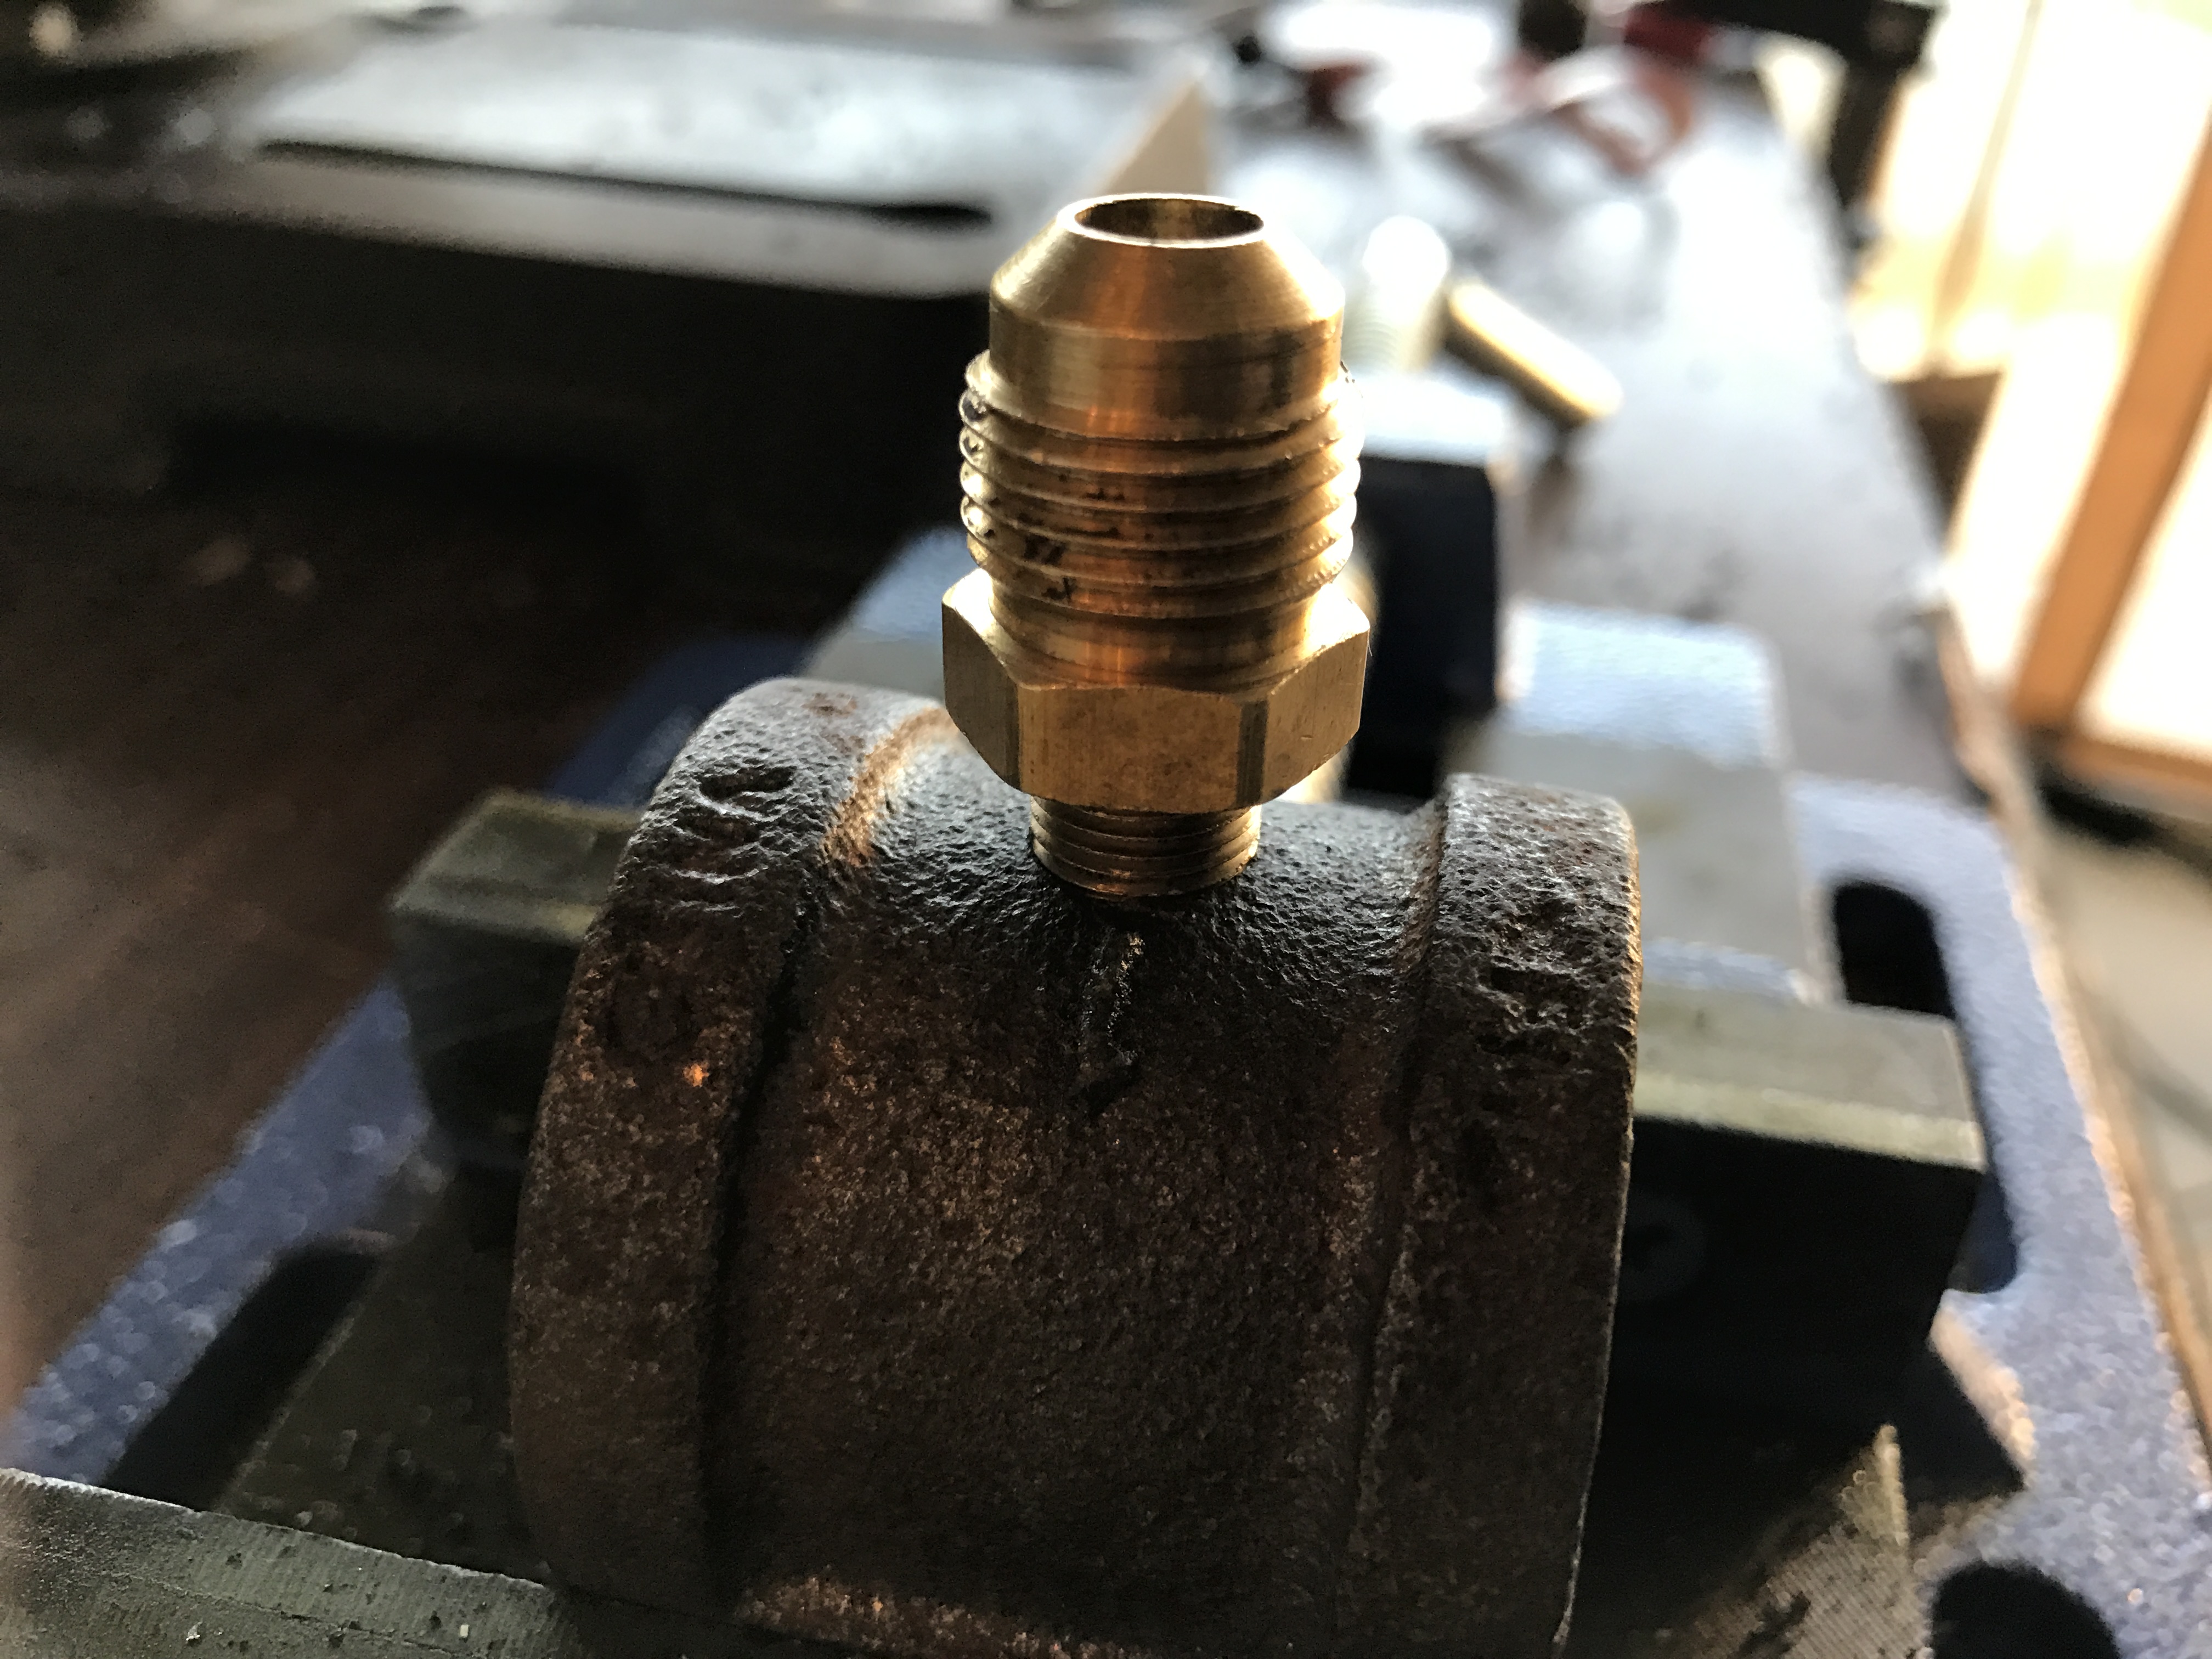
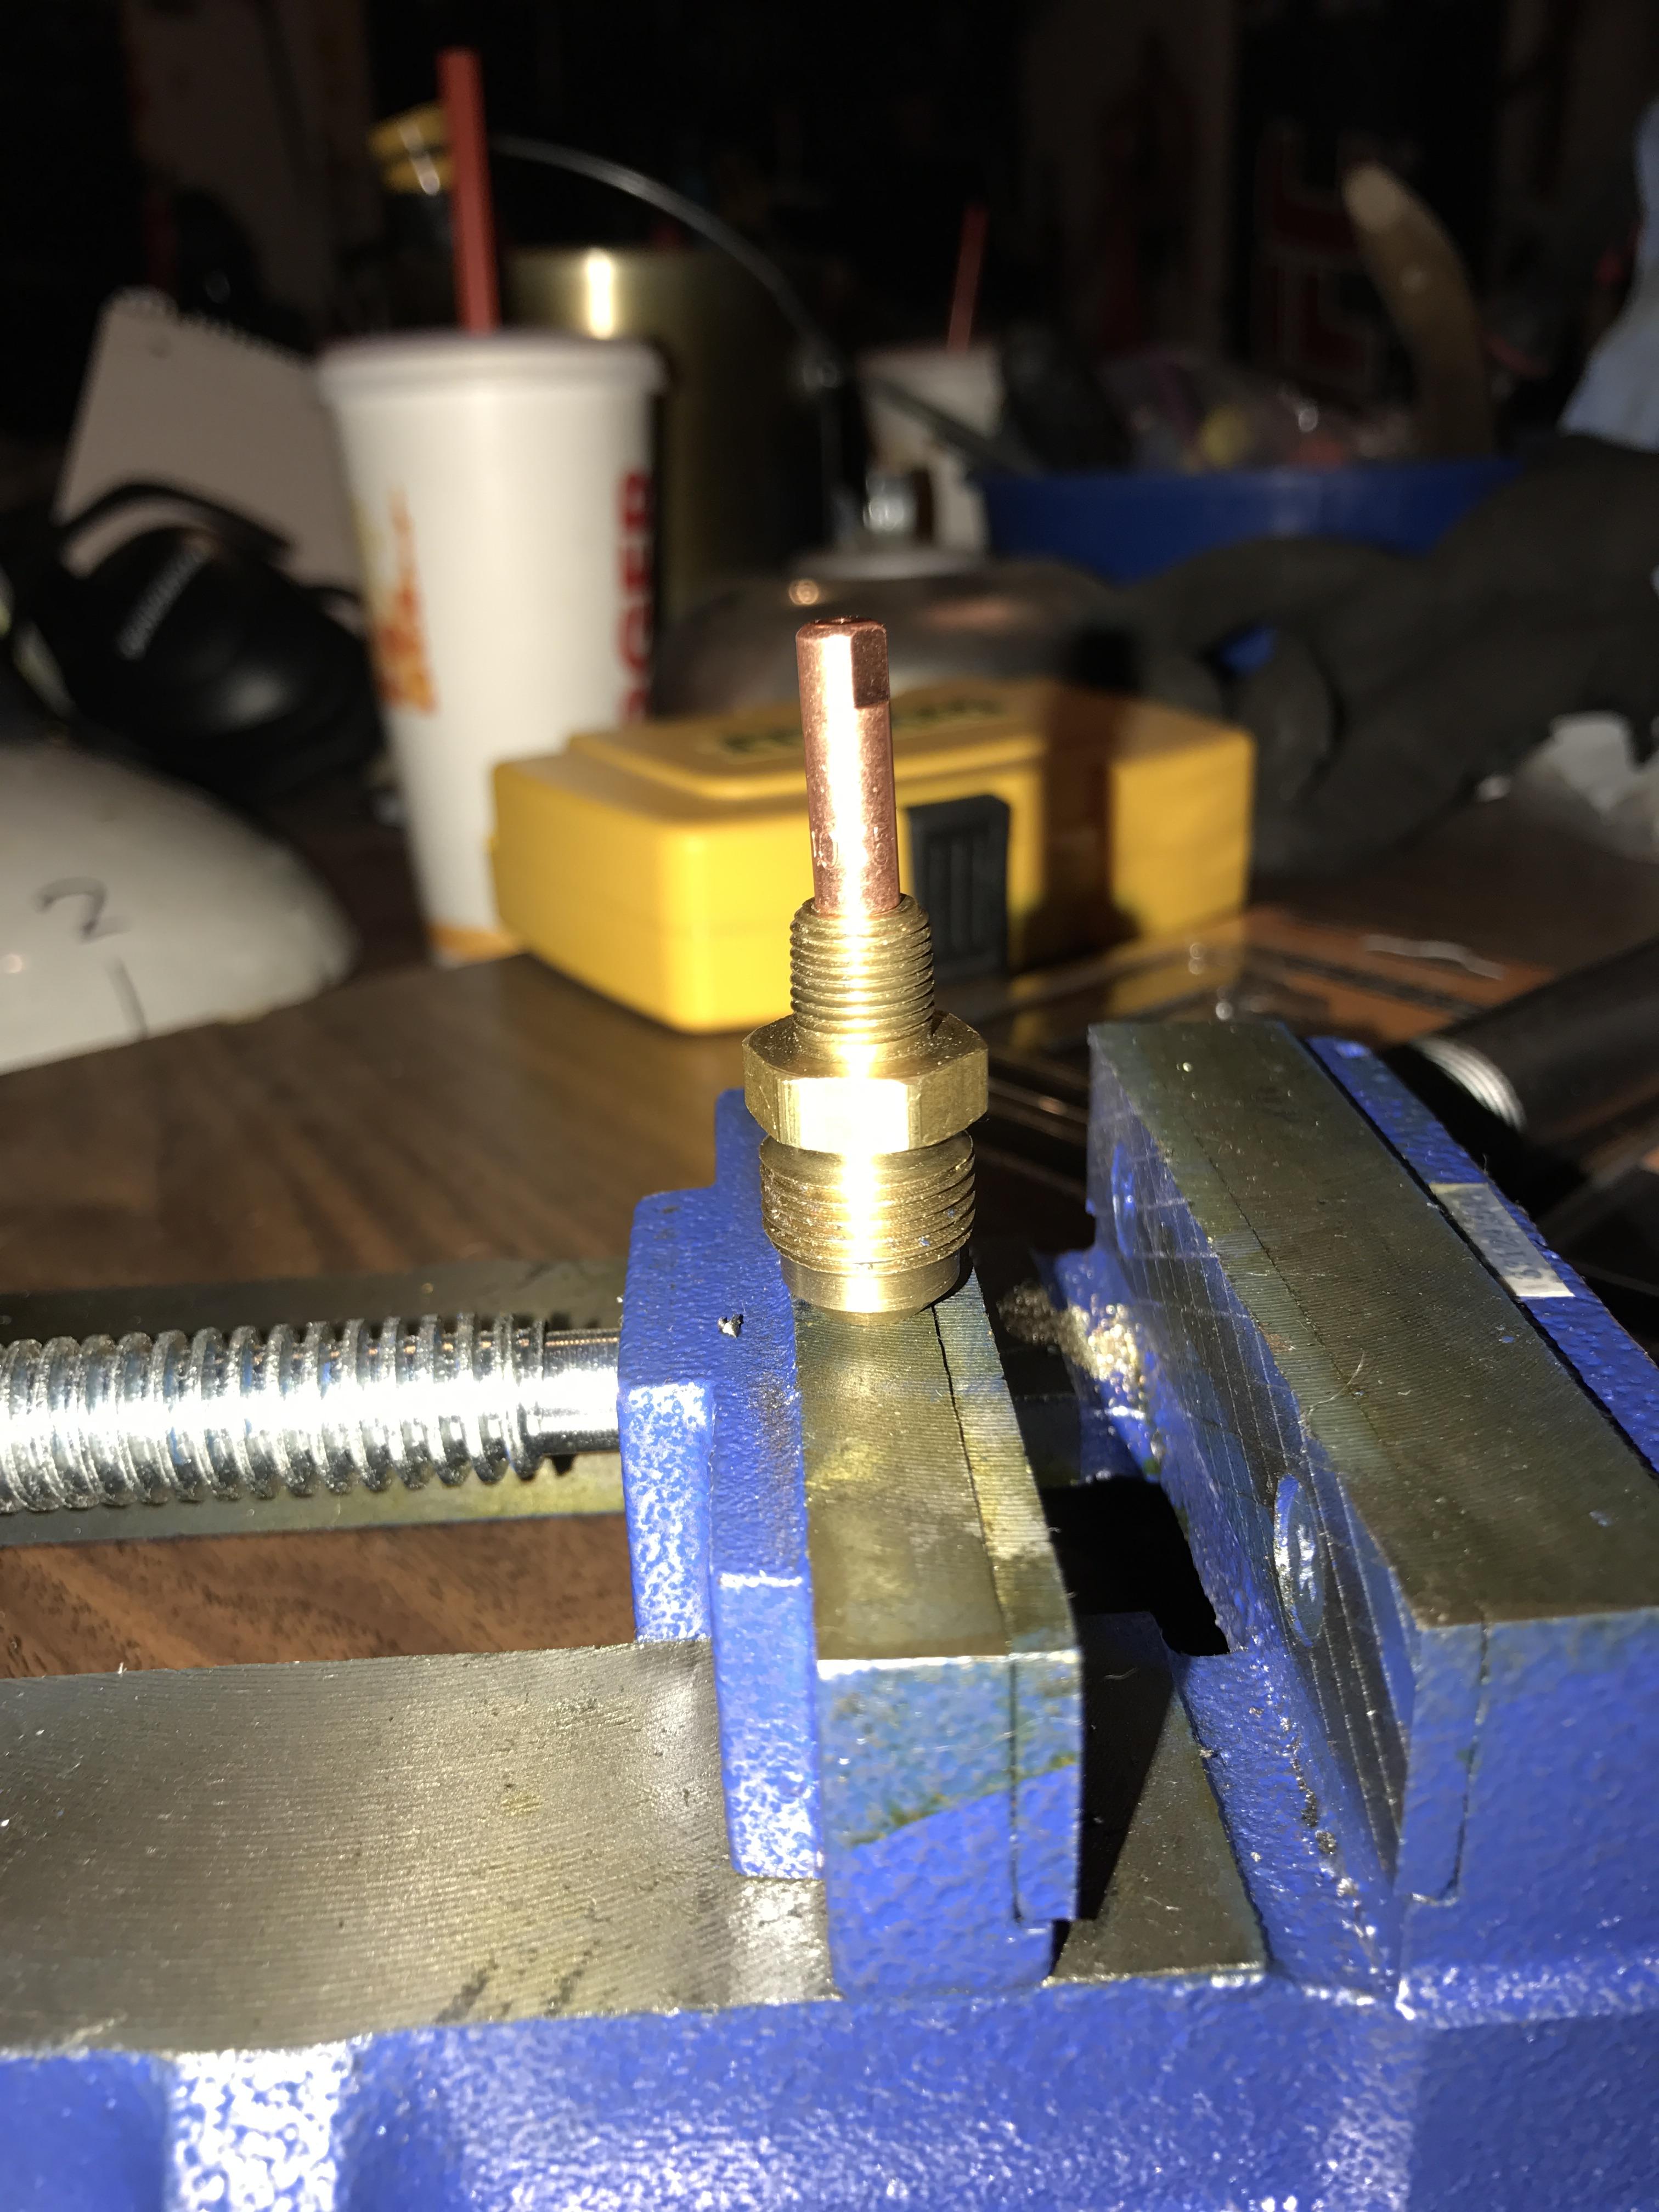
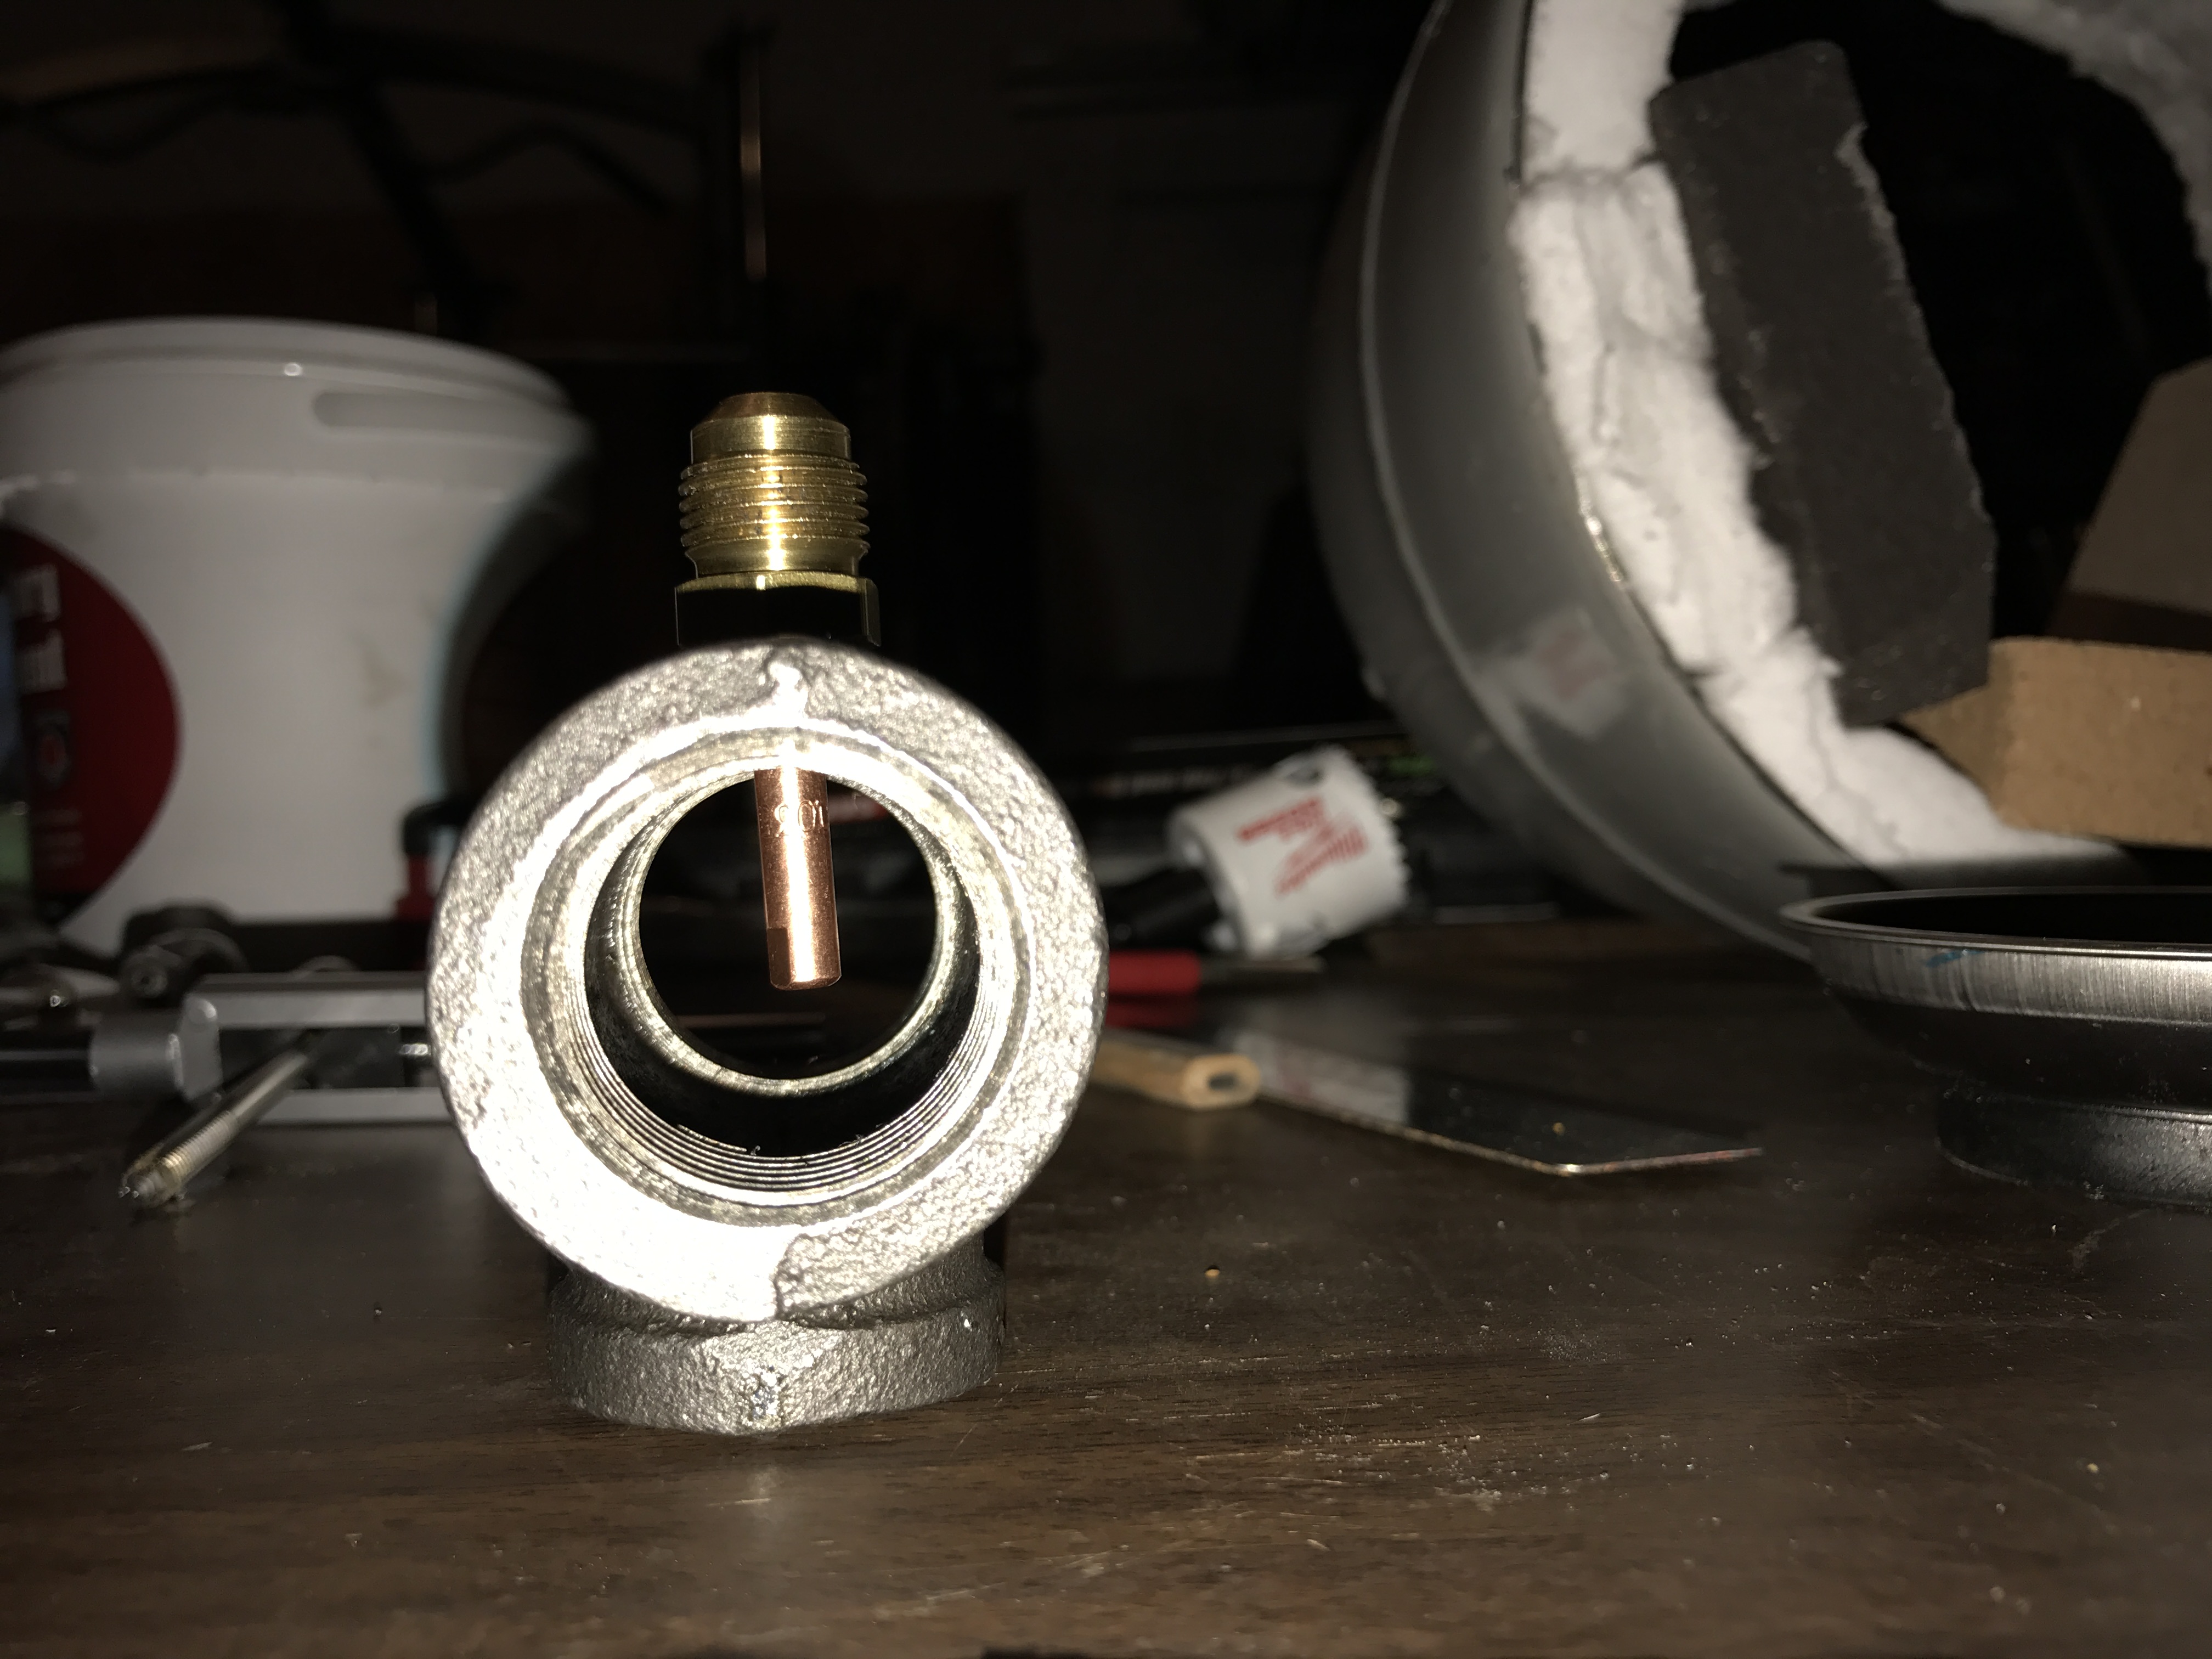
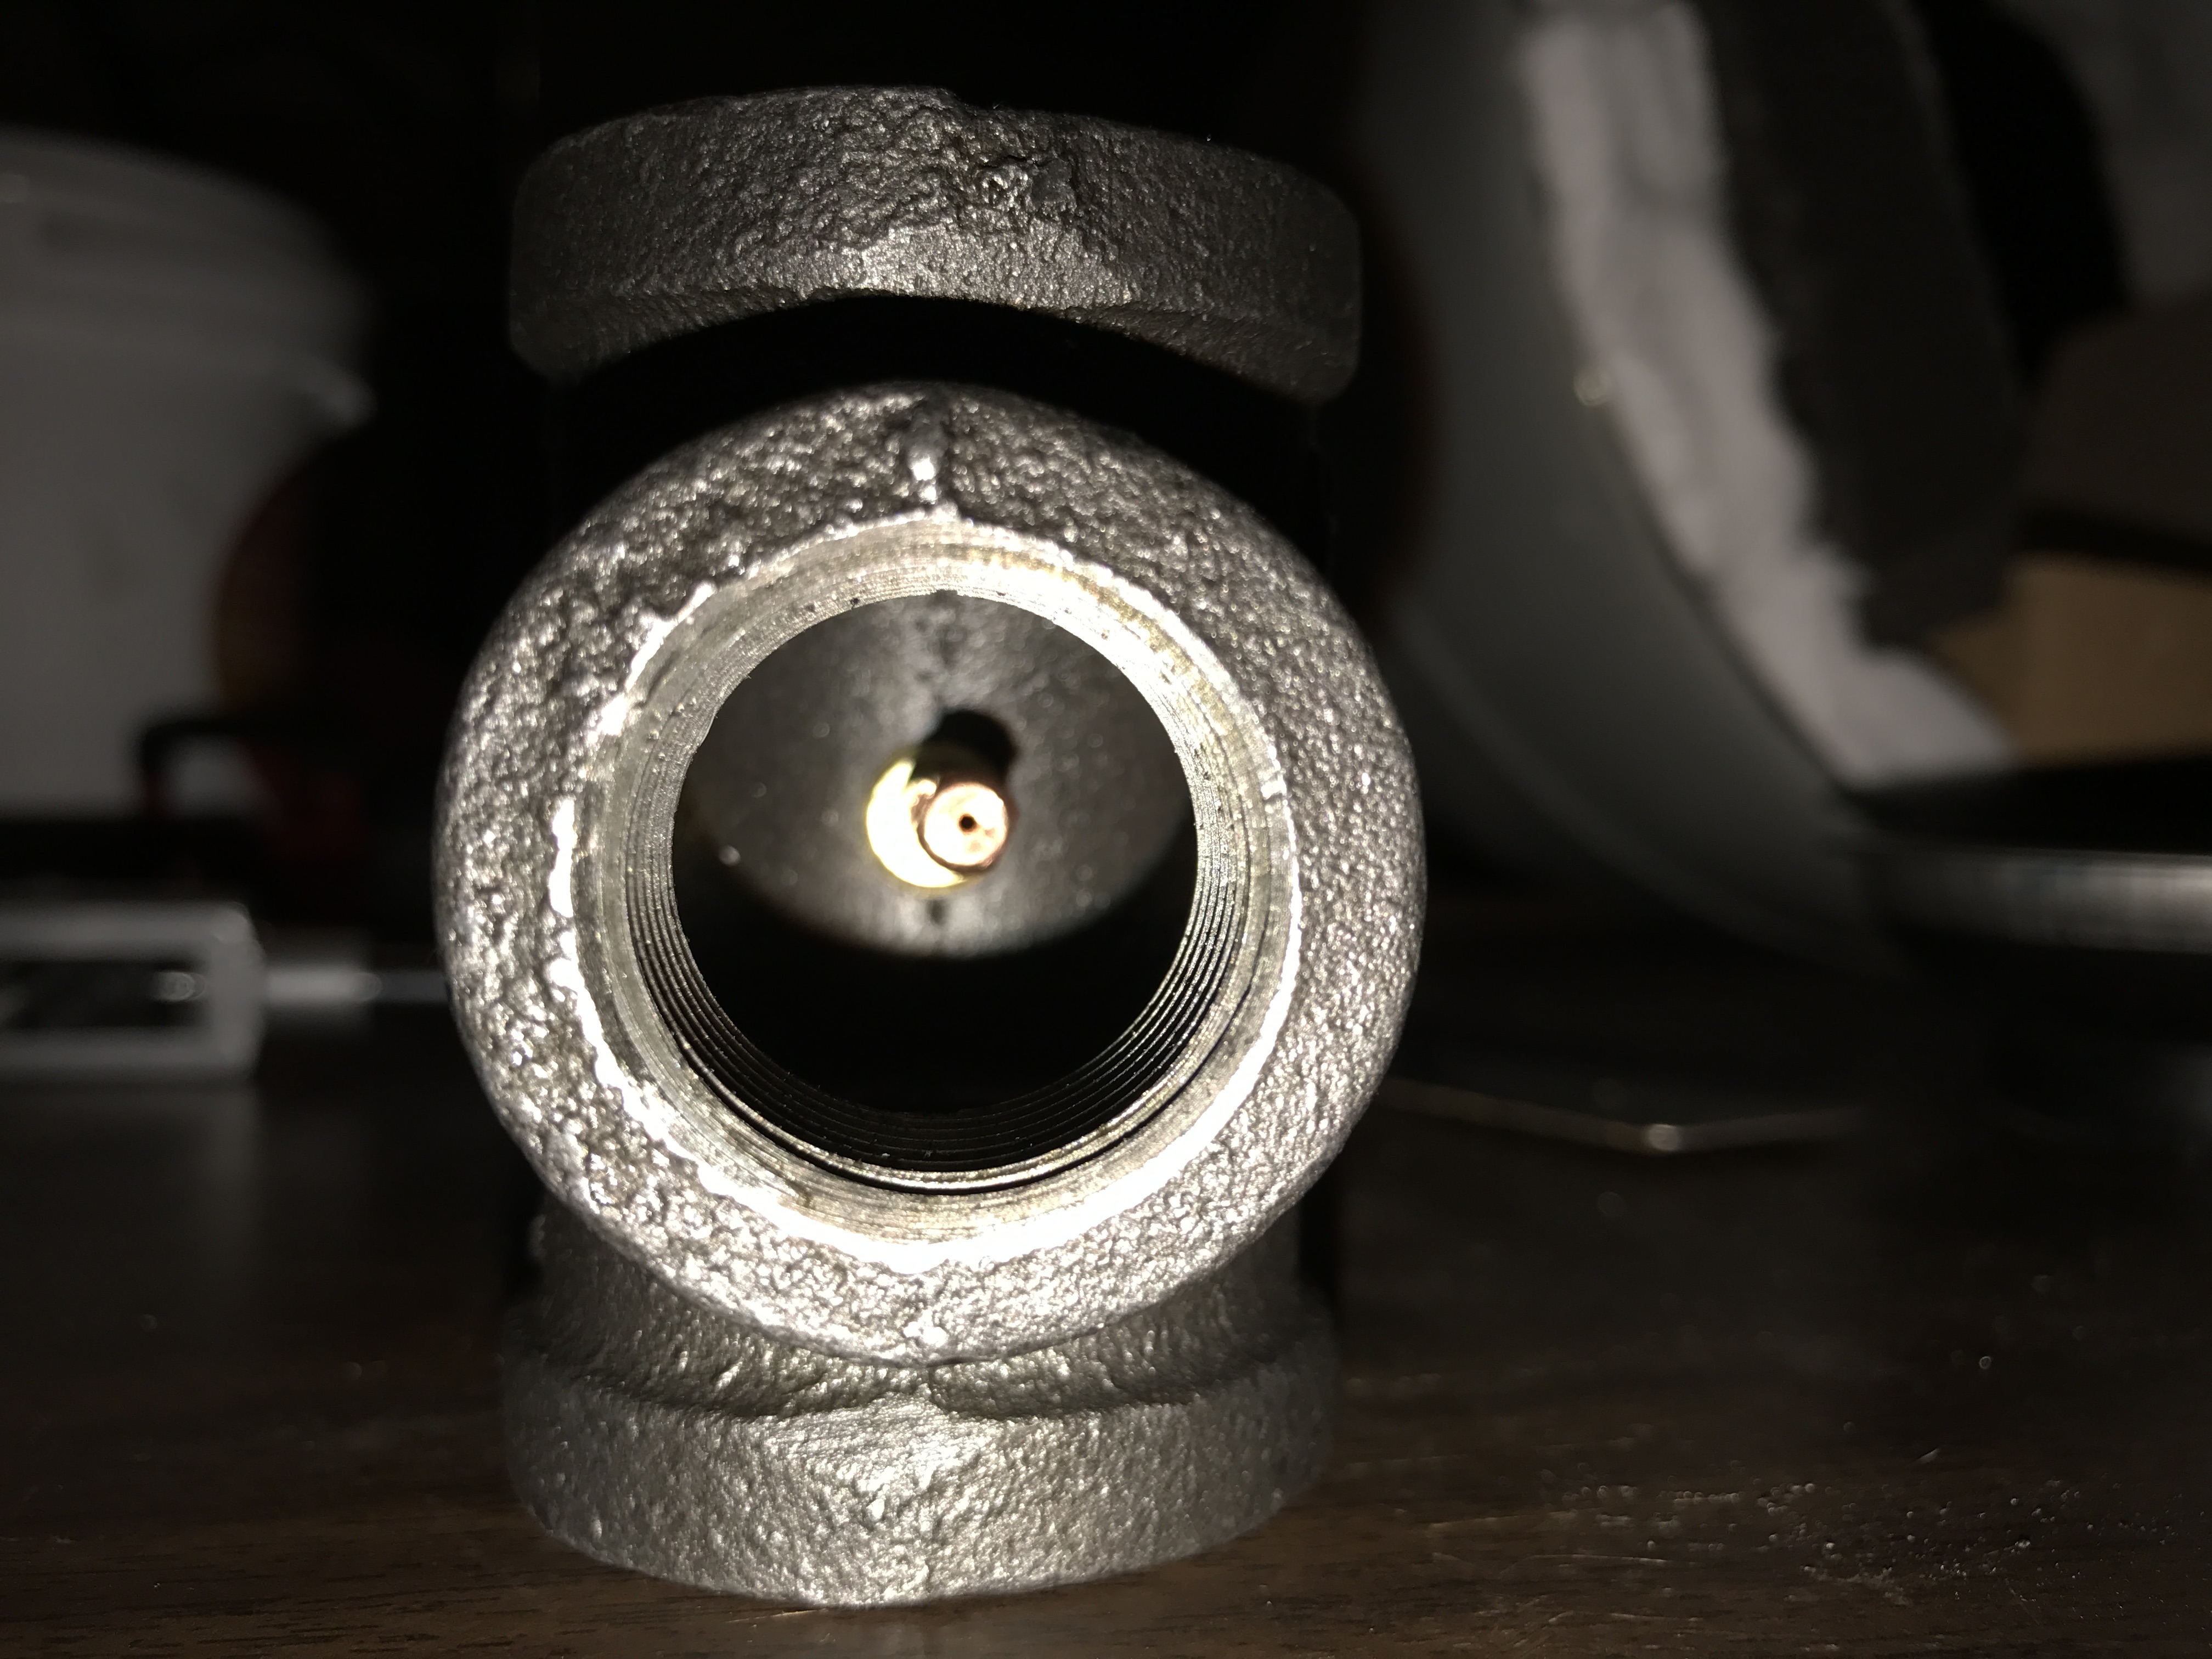
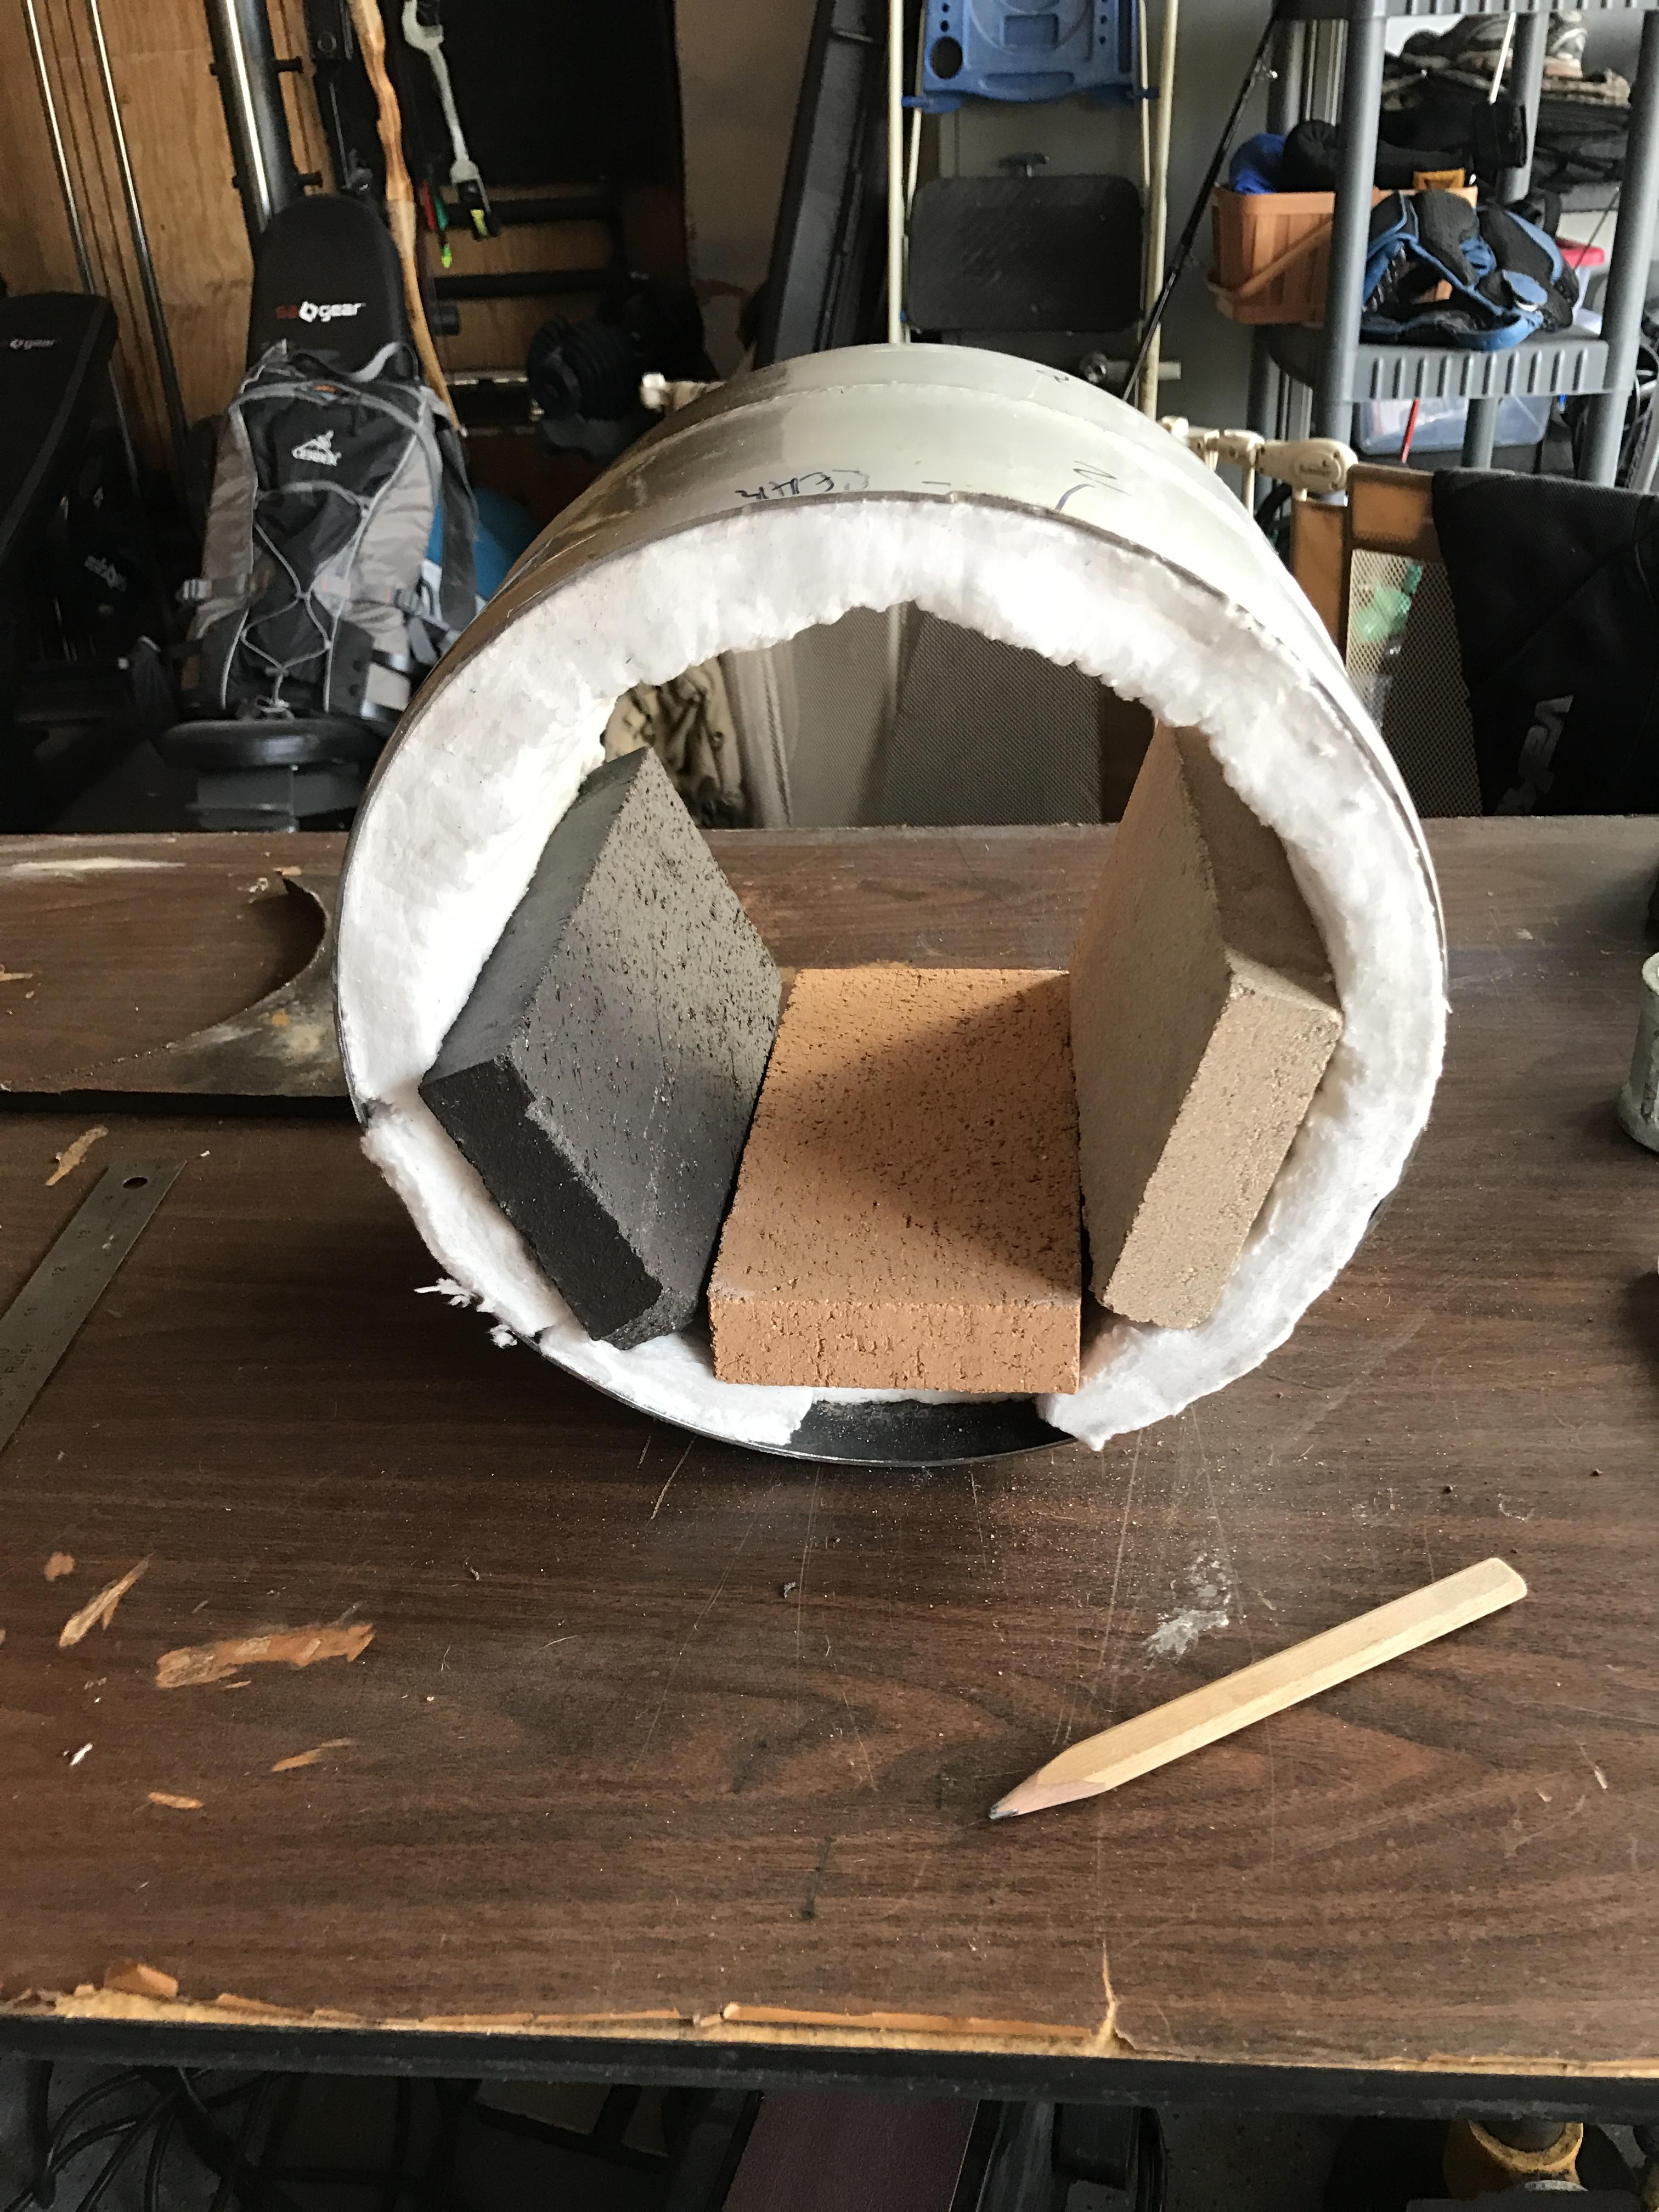
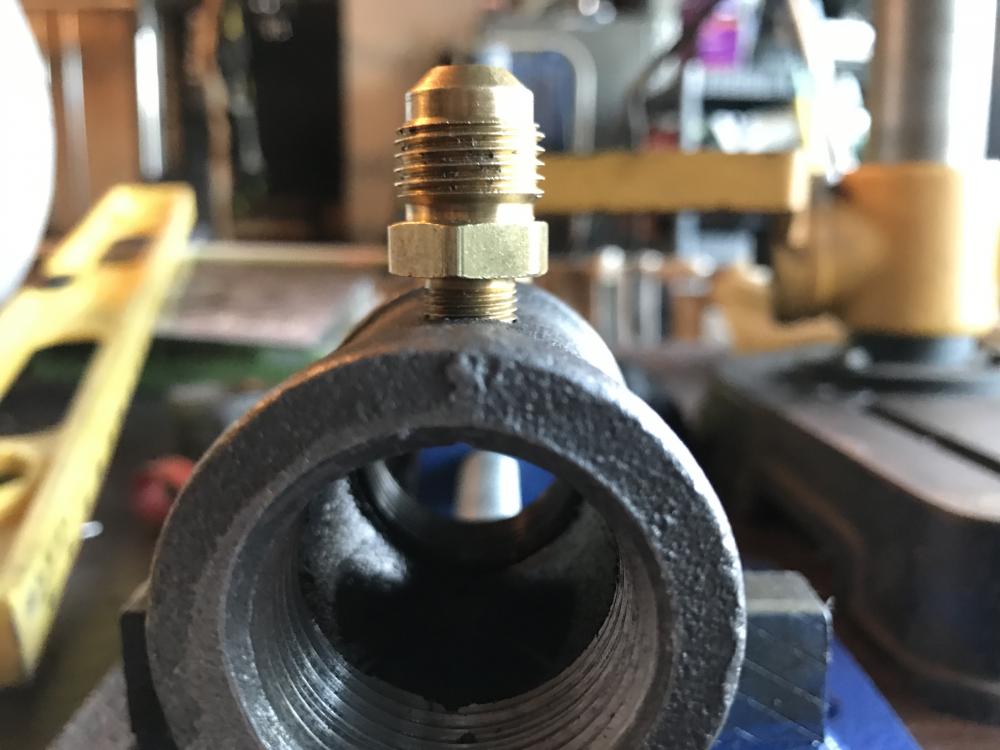
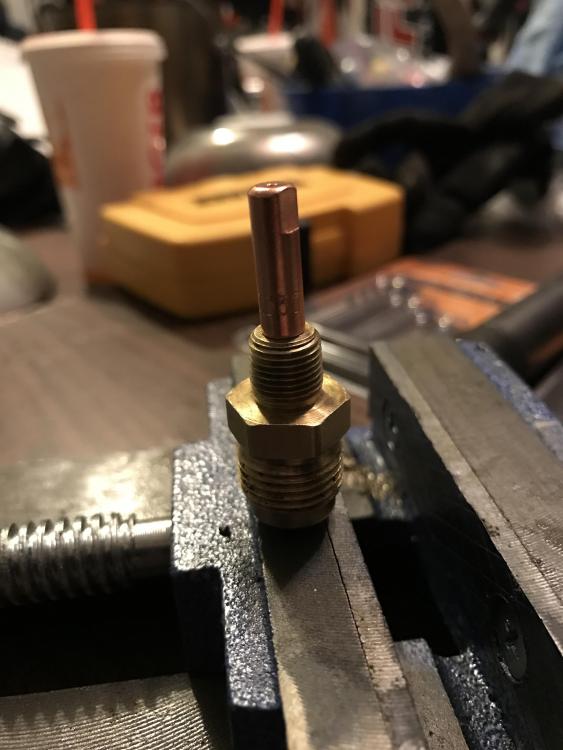
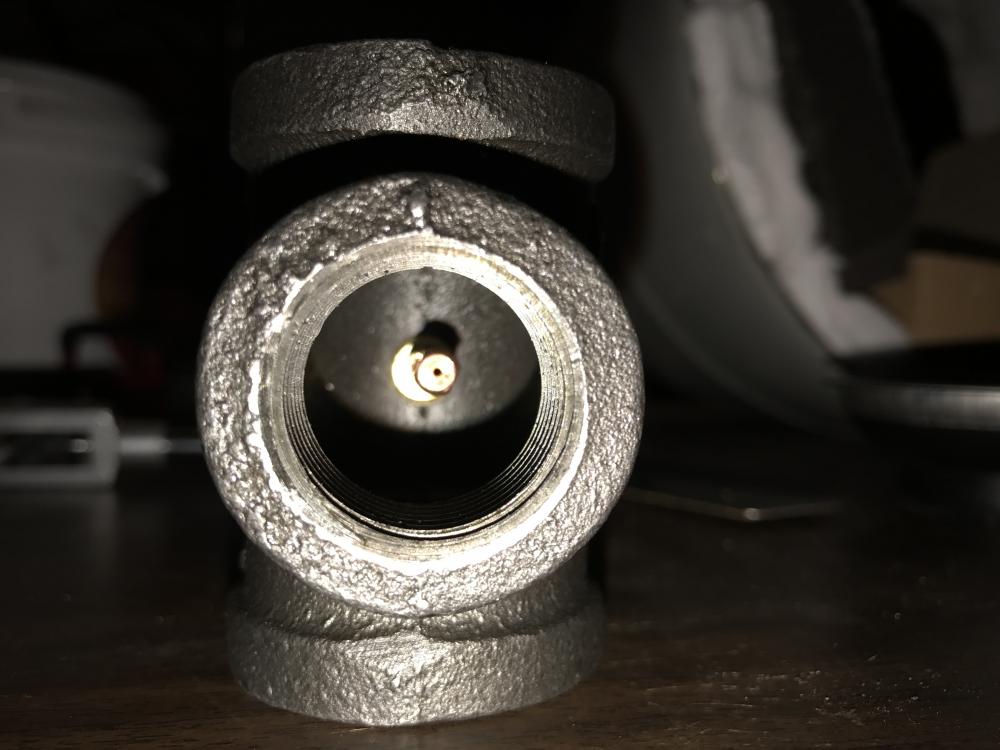
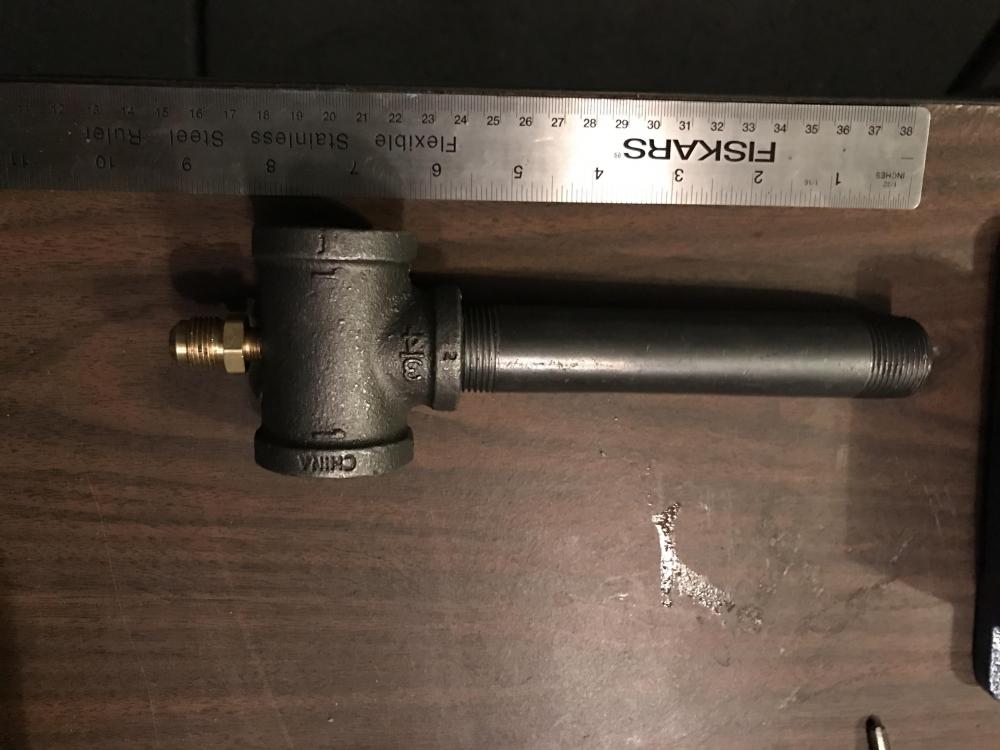
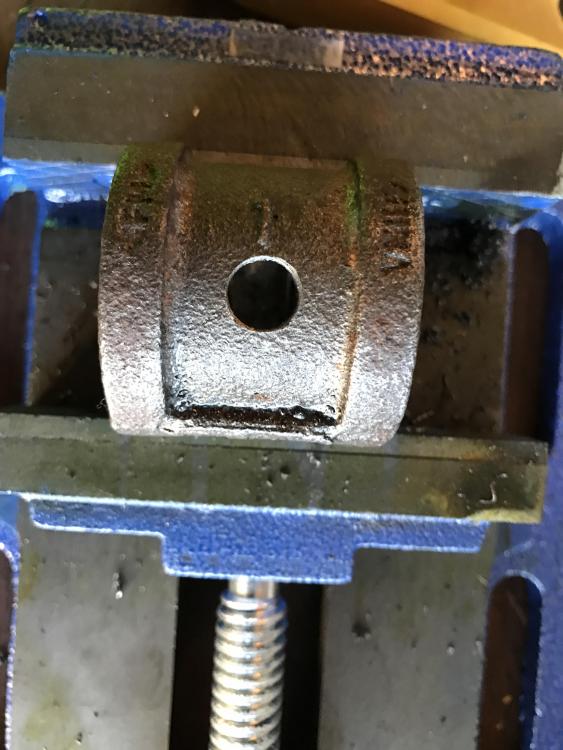
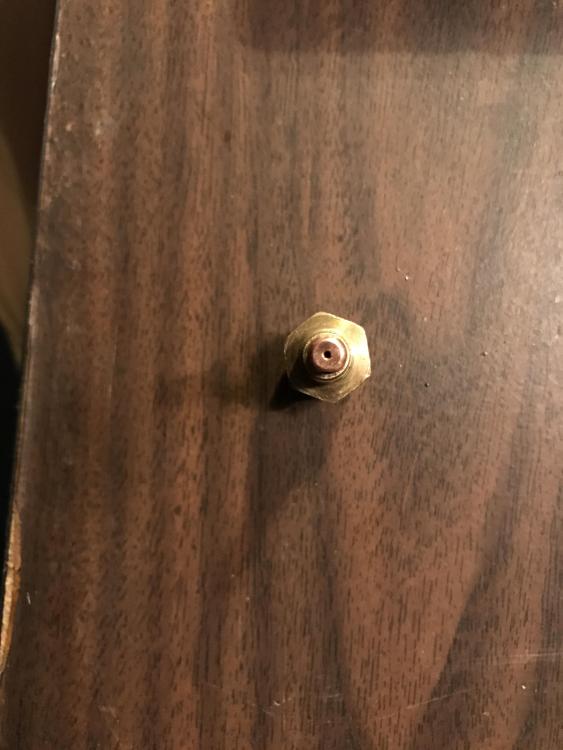
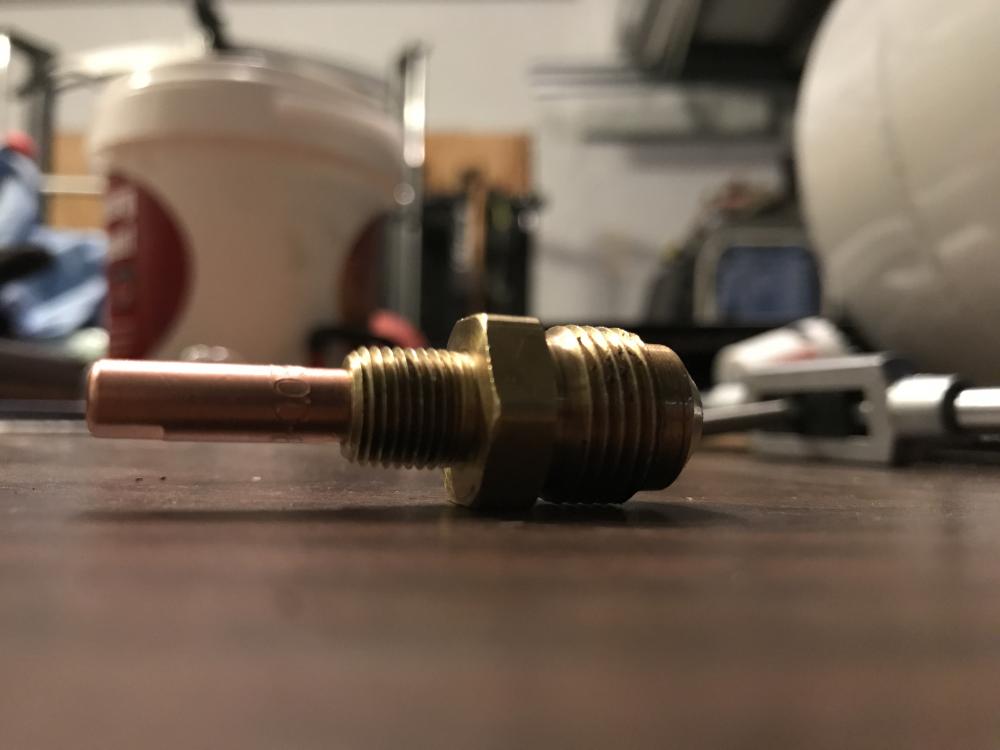
So don't go off and create the best forge in the world because it will turn out like a pile a garbage, which will look a lot like my forge (see pic). I've since redesigned a new forge that I will build and I had to do math and a ton of research. But that post is for another day. I need to finish this forge first, because I'll learn more from failing on this one than just giving up on it. You will also notice that I have fire brick ( I think) in the forge. Well that's there BC I thought I was smart, but it turns out that's a stupid idea. So don't do that either. I literally went to a store that sales brick for outdoor pizza ovens and asked for 4 test pieces. They gave it to me for free and I thought it was a super genious idea. Instead, I ended up with bricks that I don't even know what temp that are rated for. Yes, certain bricks have different ratings for heat. Some are soft and some are hard. You guessed it, I read about it in a post on the forum. Which is where I also learned about kiln. I'm forewarning you, do not open Pandora's box and tell a smith on this forum what is the best product to line your forge with. After reading through a ton of posts, there is a guy who sales this stuff and I'll be sending him my business. Just google Wayne Coe Blacksmith and you will see the link to his website. There are several posts that get into kiln and things to use to line your forge and his website has come up several times. If you want to get into the science behind the products, then go read it yourself. I read those posts several times and I'm still not sure I understand it. So, my thought is I will contact Wayne and line my forge with some of the products he sales. It's said to be similar to ITC-100, but better. I like better. BTW, I bought ITC-100 because I watched a YouTube video swearing by the stuff and I was going to lather the forge like a German Choclate cake. Again, I was wrong!! My thought was to line the entire forge with ITC-100, to include the bricks, but that would be a big waste of time. I haven't even set where I want my burner to be located and I'm thinking about giving my forge a bath in ITC-100. So again, draw out your plan first. Literally, draw out what you want it to look like and do the math. You even need to consider the path for the flame. You can't just throw stuff in the forge like I did and expect it to heat metal for your katana build. So at this point, I decided to go back to the T burner and make it work first. My mindset is to get a working burner that I can test inside of the forge and then start tuning it. I may be wrong, but I'm going to place my burner at a slight angle instead of pointing straight down into the forge. Several posts talk about hot spots that are created in the forge because the flame is focused in a certain area and not dispersed along the entire forge. Now I haven't found a formula, yet, for proper placement of the burner, but again this is a learning process. Not every forge is the same, so I wouldn't expect an exact placement formula. Another thing I learned is the purpose of the forge. You don't need a giant forge if you plan on doing jewelry or small parts. There are multiple burners and forges for different needs. So read around and find what forge size is best to start with. As for me, I want to learn to make Tomahawks. With the method I want to use (flux) I have to do research on the liner. I learned that Flux eats away at certain liners and bricks. But I'm betting Wayne Coes products will fit my needs, if followed properly. Again, I probably saved myself a lot of heartache by doing some research before lathering my forge in ITC-100. Now look at that, a TV inspired smith learning something. Maybe there is hope for us newbies after all! If you don't plan to introduce flux to your forge, then maybe your liner will be different. You won't know until you decide the purpose of the forge. If you read enough posts, all the grey beards will tell you there is no such thing as a forge that does it all. There is wisdom in those grey hairs, so absorb it before they realize they could get paid for that knowledge. Now my burner build didn't go so well. I've never tapped, welded, or worked with a drill press. But that all changed last week when I gathered a few tools and failed miserably in the process. So you can see that I created a very bad version of the Frosty T Burner. Even though Frosty goes into pain stacking detail on how to line up the holes to tap them straight and center, I still found a way to screw it up. The good news is I got my Tap and Die set on sale at Harbor Freight. I didnt even know what a tap and die set was, but now I do. I actually bought spare black pipe to practice my drilling and tapping. Once I was comfortable, I moved on to the real thing. So by looking at the pics, you can see how offset the holes are that I tapped. BUT, I bought spare parts and I get to try again this weekend. I also get to figure out what the difference is between a ball valve and a needle valve. And what type of regulator to use to control the PSI for my burner. I don't know squat about any off these items, which is going to be pretty important if I want to build a forge. I'll probably head over to a RV place because there is one close by. I've read several posts that warn newbies like me to be careful with propane. The point here is, don't let anyone scare you because you don't have the knowledge base they do about propane. Get motivated and go out there and educate yourself. Educate yourself on the safety issues and use common sense. I'll update my post this weekend on my progress and hopefully by the time you read this, I'll have already made all the mistakes you can avoid. I'm the meantime, enjoy looking at my terrible T burner build.


-
Purpose of New Thread: Documenting my failures and successess while attempting to build my first propane forge. Very detailed for anyone who is super new like me. There is no reason to read or follow this thread any further if you are an expert at building forges and blacksmithing. This thread should be beneficial for those who have very minimal skill and knowledge related to blacksmithing, like me, but are now falling in love with the craft. When I say minimal, I mean limited tools, limited knowledge of how to use certain tools, and your wife will not allow you to even unclog the toilet BC she fears what may follow! If that describes you, then you and I can relate with one another. After spending several days reading through multiple threads on this site, I learned a few things. First, there are a TON of EGOs in the blacksmithing community. Do not let the keyboard warriors scare you from the valubale resources this site has to offer. Two, do not expect someone to be nice to you because you just now learned about blacksmithing and want to build katana swords BC you binge watched 3 seasons of Forged in Fire. Three, don't ask questions unless you have researched the problem thoroughly and are still lost. You will get an answer, but it probably won't be what you were expecting. (If someone retorts what I write about that, then go read a few threads because you obviously haven't read any.) Four, spend time putting your bio together so people know where you are from. I've already had some local reach out to me and I'm looking forward to working together with him some day. Again, I'm still learning all the "unwritten rules" as I go along, but I learned most of them by reading through several threads. I would recommend you do the same. Soooooo, let me begin by saying I love watching Forged in Fire. I've read a few posts in here and we may be in the minority by admitting we like the show. Because of some of the comments I've read, I have embraced the idea of being called a "Forged in Fire" TV smith. If we survive not blowing everyone up, we may one day pound some metal into an object! However, my son and I love the show and are eager to learn more. So that's how I ended up here. Along with this site, I watch a ton of YouTube videos for building forges and blacksmithing. Some are better than others, but I learned more by reading the Forge 101 posts here. Which brings me to the forge build... Before I learned about this site I started building a forge out of a propane tank. (See pic) Be super careful cutting these bad boys up. Again, we are not expected to survive long, so don't give us TV Smith's a bad name. Just make sure to bleed the propane out of the bottle, clean it, and "air it out" for a few days before hacking away. I cut away both ends of the tank and was left with 12 inches in total length . I used a handsaw BC I didn't want to risk the sparks and propane having a party together in my garage. I then researched forge liners on google and found kawool was an option. I bought some on amazon and thought this was super easy. I then quickly found out you need to wear a good mask while working with this stuff. No, the little white mask that old people wear will not work. Drop the coin on a nice mask because you will use it A LOT! Do not go cheap on this. Sell a kidney if you must, but save your lungs with a proper mask. Your kids will need one at all times too. The liner was actually really easy to put on. As you can see in the picture, I thought I had it all figured out....... then I stumbled onto this website and quickly realized I'm really unprepared to make a forge, let alone an efficient forge for my needs. So hopefully you learn from my mistakes and read through all of this before you start a build. Now I'm going to finish the build I started because I want to see this through. After reading a few posts, I learned that you need to do some math and learn how to measure in cubic inches. If you are like me, I have no clue what that is, but I dare not ask here, so I went back and asked my friend Google. I like Google because it doesn't judge my stupidly. Long story short, it's how big the inside of my forge is. The reason this is important is because there is a guy who goes by the name Frosty, who posts all kinds of information on this site. He even has a burner that he created and gives very detailed plans of it under the forge tab. (Forge > Frosty "T" Burner) He basically tells you how big the forge needs to be, in order for his burner to efficiently heat the forge. In my case, I need to make the measurements and find out because I don't know. Being stupid, I just rushed into building the burner because I assume it's a one size fits all kinda deal. Now I know the forge needs to be somewhere in the ranges of 300 - 350 cubic inches. If I'm saying that wrong, don't worry, I will be corrected within hours. Point being, check out the post related to the Frosty T Burner

-
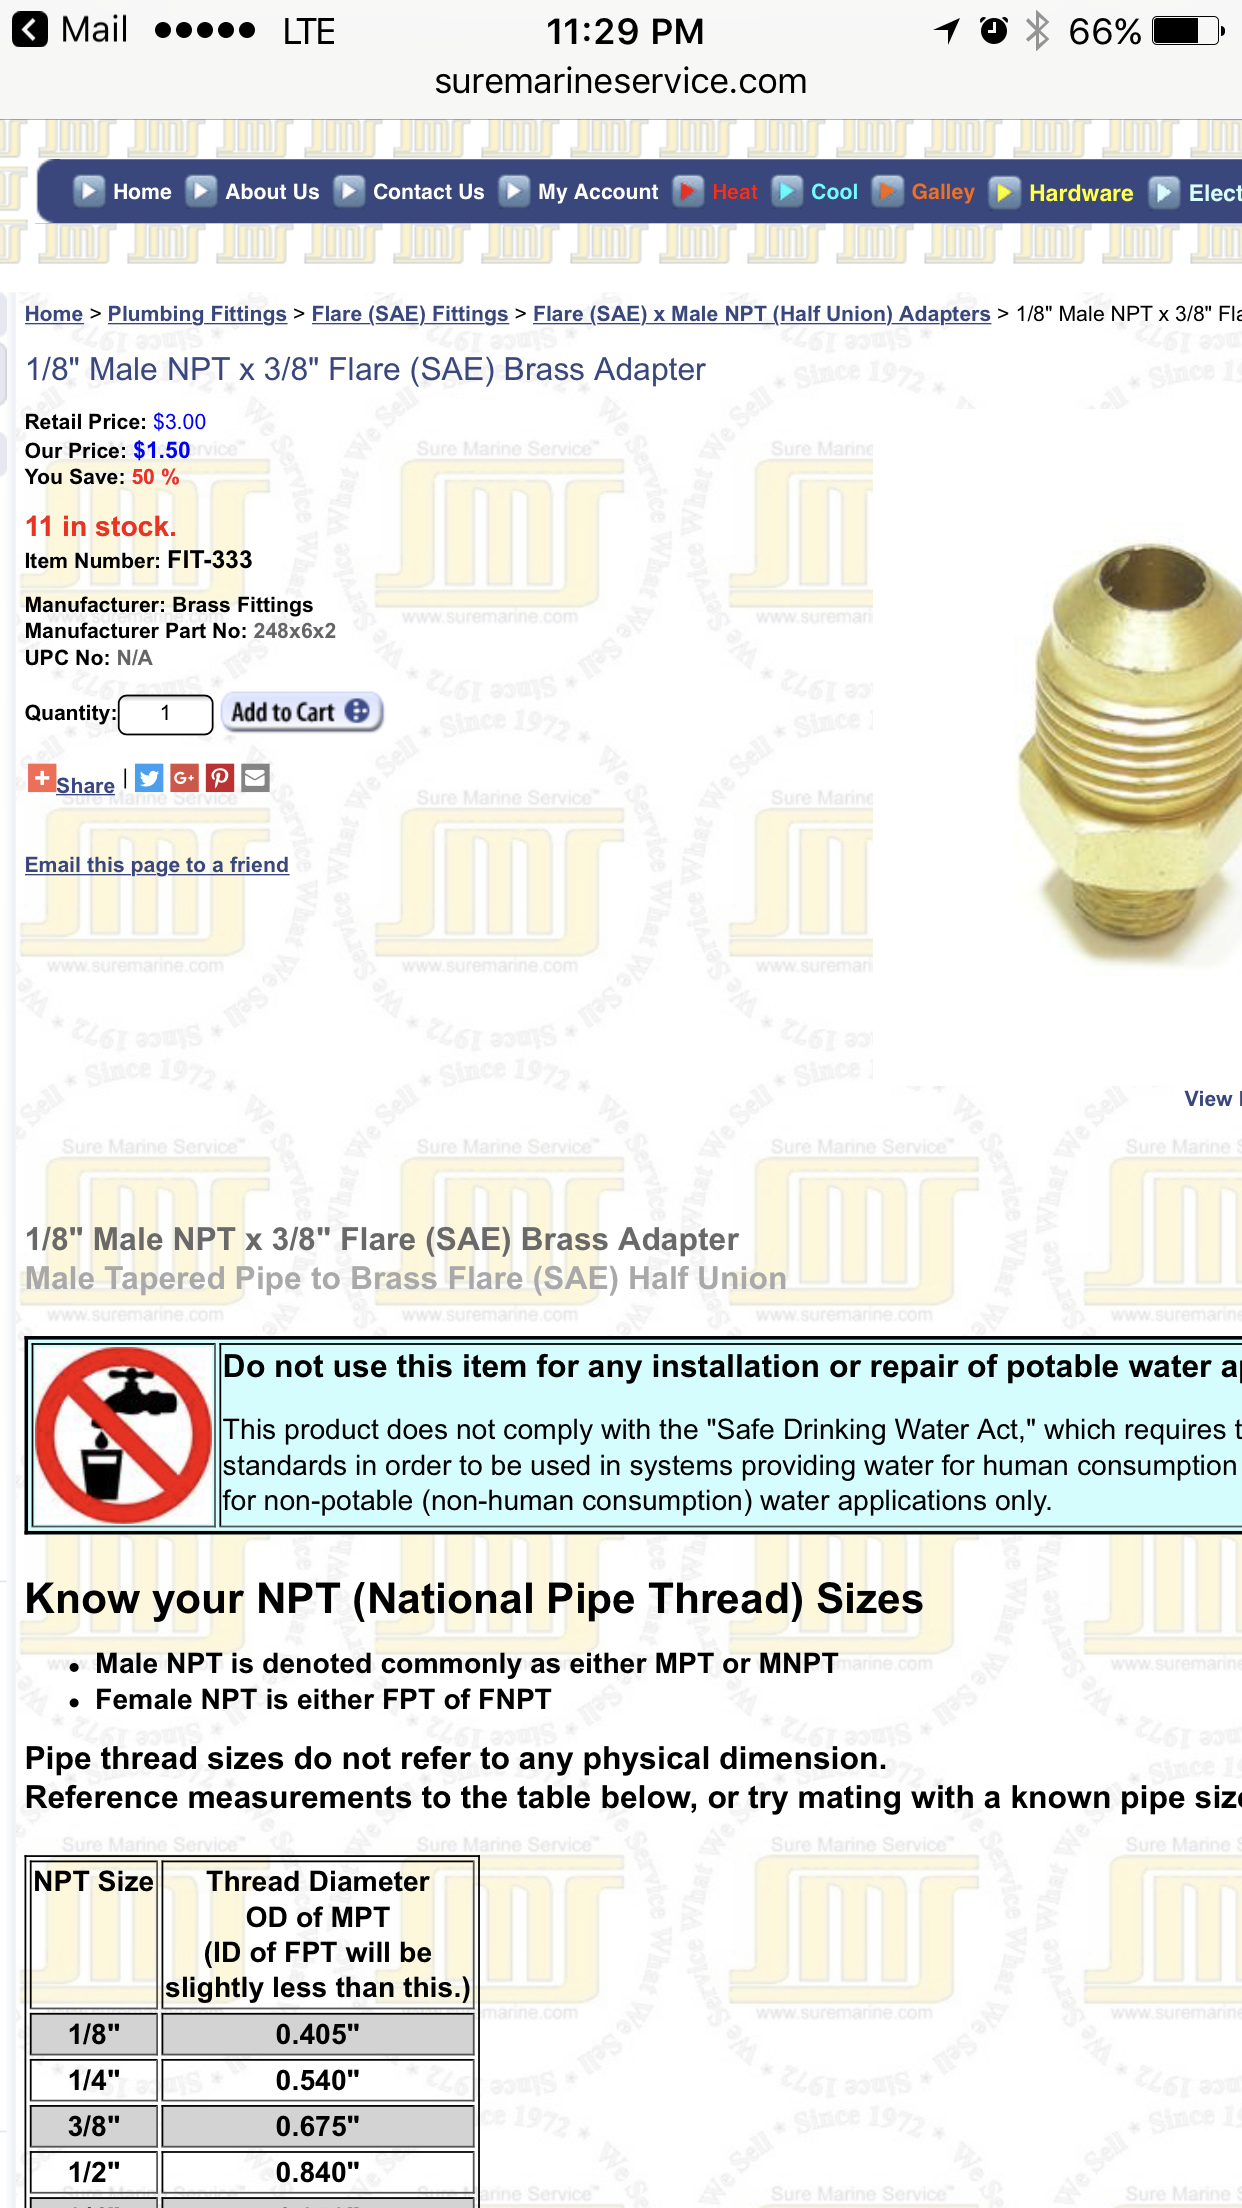
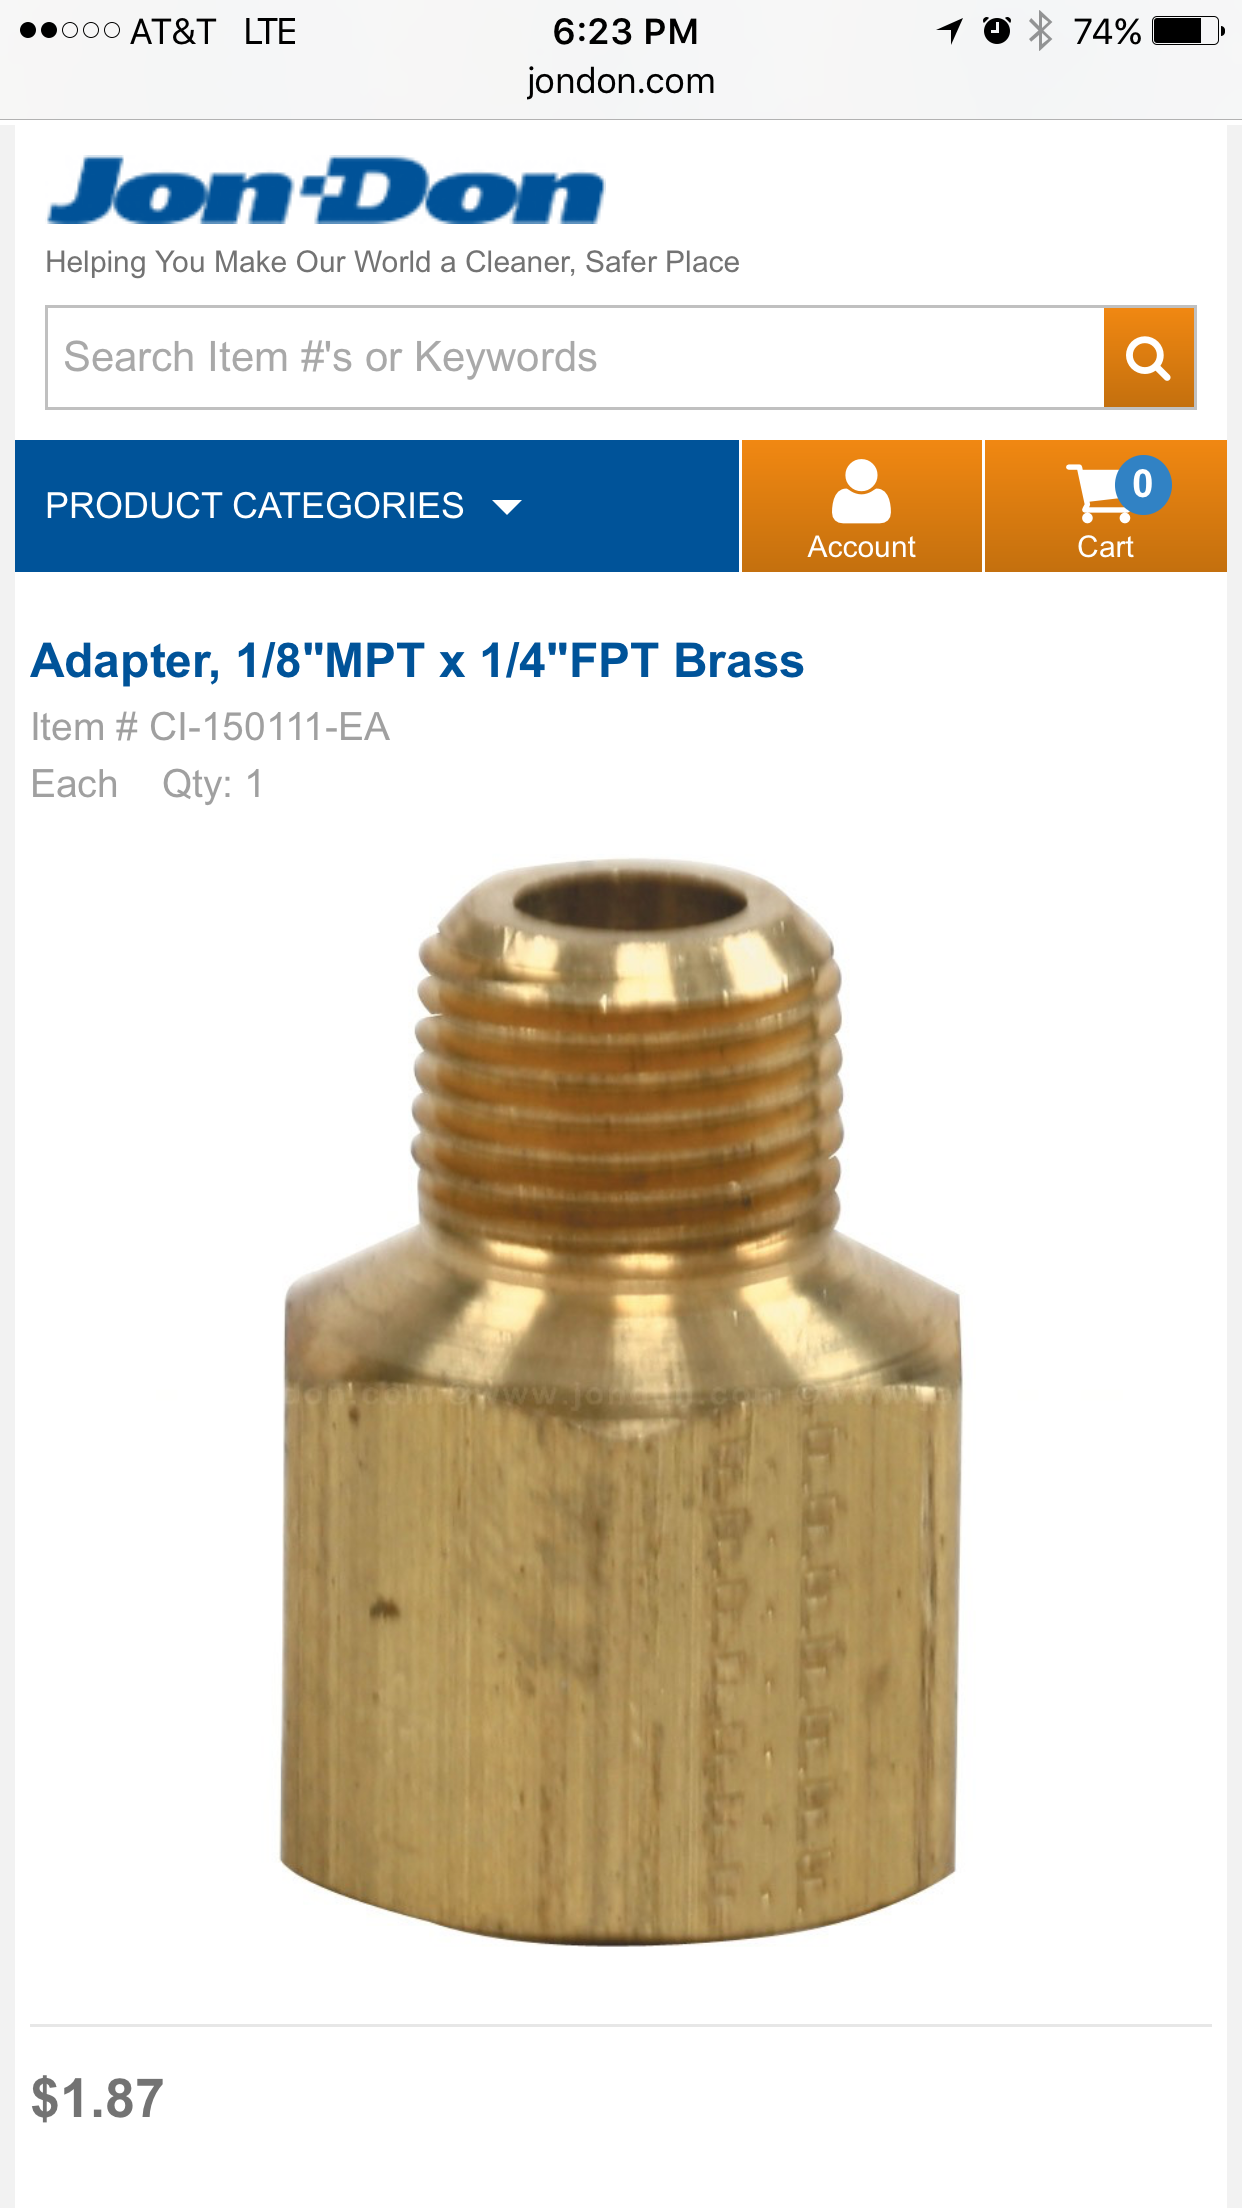
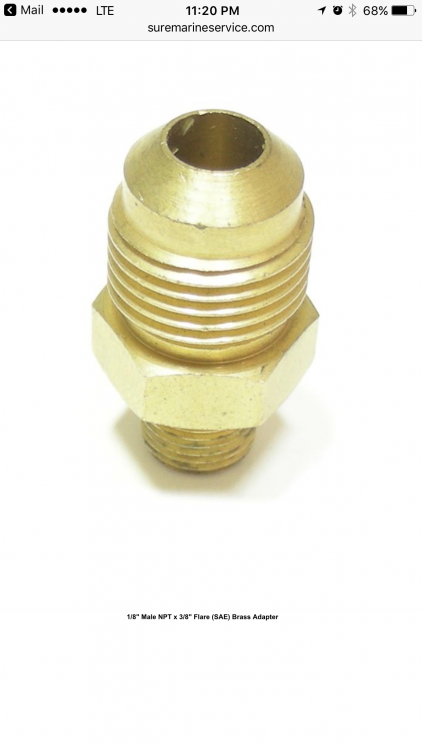
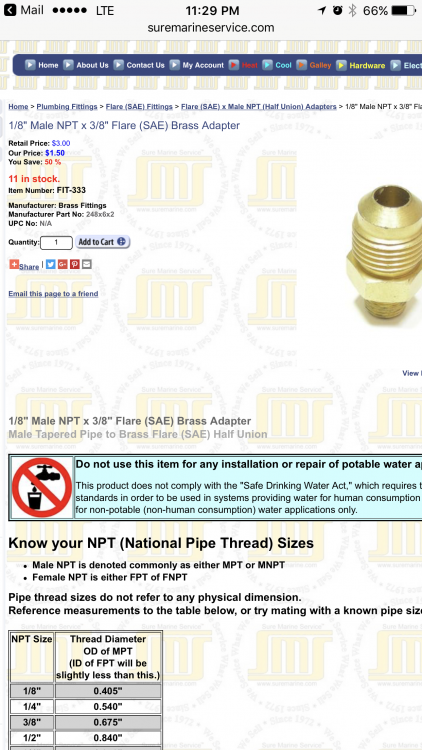
Stockmaker, Thank you very much for your quick response and willingness to help. I'm having a really hard time finding the correct part. I wanted to go with the hose for the propane burner so the 3/8 flare makes since. I'm stuck with relying on a google searches for the part because no one in the big box stores in San Diego know what I'm asking for. I found the following part by searching 1/8" MPT x 3/8" male flare. Is this correct? I want to order several of them because I know I will make mistakes along the way, but I really want to learn how to do this.
-
-
Frosty, You answered my question back in Nov. 2016. the drill press method you created and discussed at length in your directions is the alternative. On page 2 you stated a metal lathe was a primo item to have, which I incorrectly took as a "must have" tool for the build. The precison aspect was my main concern, since there was a emphasis on that word. It will serve me well to read each archived post before asking further questions. BTW, I wished you had a YouTube Channel so I could pick your brain virtually. You seemed to have forgotten more in one day than I have learned in a lifetime.
-