

G-ManBart
-
Posts
115 -
Joined
-
Last visited
Content Type
Profiles
Forums
Articles
Gallery
Downloads
Events
Posts posted by G-ManBart
-
-
Here's a pic of the area I'm talking about...from the original CL post. It wasn't taken to show the edge, but you'll get the idea.
-
3 hours ago, Irondragon Forge & Clay said:
Excellent just the way she is. I wouldn't do anything to her except hit hot metal to keep her happy. Good score by the way. Just to be nosy, how much did you get set back for her?
I don't plan to do anything other than the slightest touchup where the mushrooming left a jagged edge. I'll post a picture of the area when I get it home in good light.
I paid $900...pretty happy with that!
-
1 hour ago, ThomasPowers said:
I don't see anything on the edge that needs cleaning up. What do you intend to do to "clean it up"?
The pictures don't show it well, but there's some mushrooming on the edge that caused a couple of jagged, sharp edges. I was just thinking of getting rid of the sharp edges so I don't slice myself open.
-
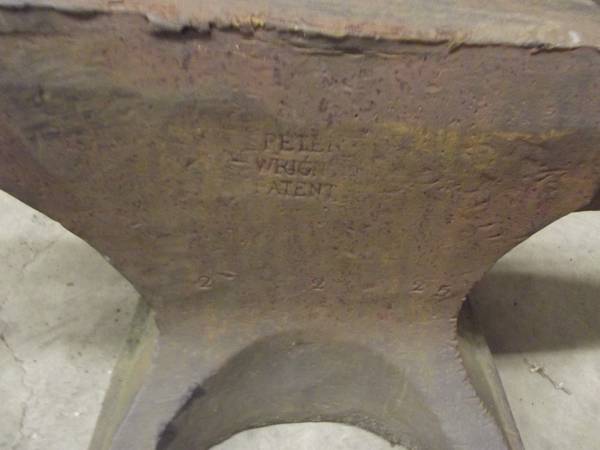
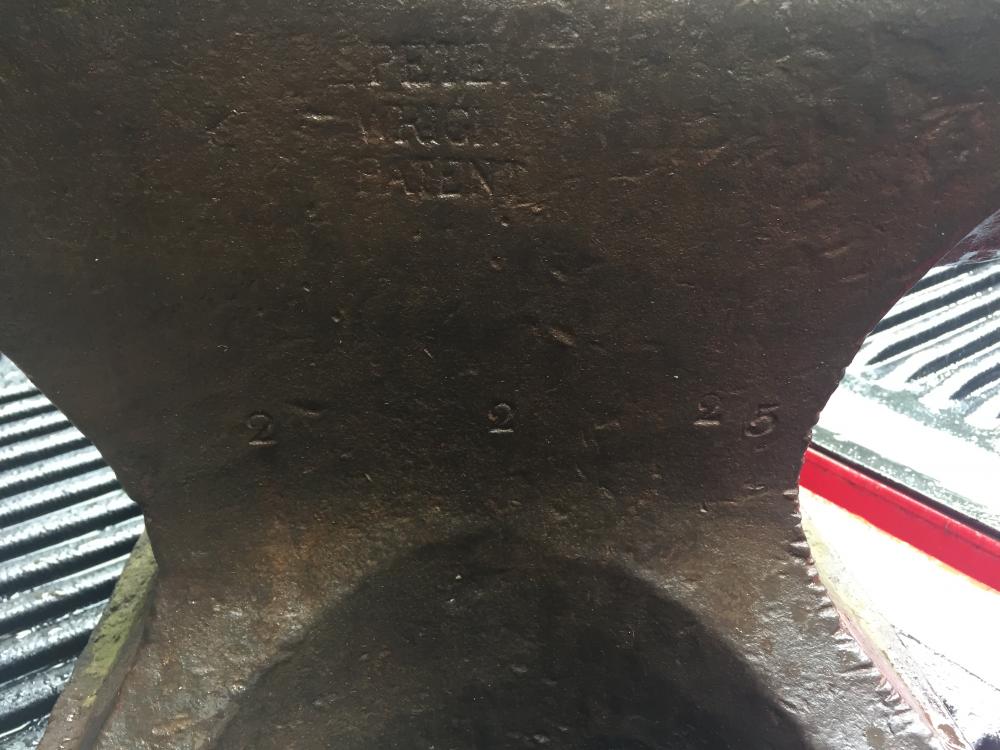
I'm in PA this weekend visiting family and decided to take a look on the local Craigslist...this PW was only 10 miles away, so I contacted the seller and picked it up. The pictures aren't great because it was raining, but I'll take some when I get it home. It's marked 2-2-25 and has a 9 on the left side of the front foot, but I can't see any other marks aside from Peter Wright Patent. It has great rebound and ring, essentially no sway, and really just a bit of edge deformation that should be easy to clean up.
The seller said he got it years ago when he bought the entire contents of an auto repair shop nearby that had been in business for decades....pretty cool.


-
3 hours ago, Kozzy said:
That casting is an excellent example of how not to design a casting--and why the good designers are worth their paychecks. Understanding what happens with material shrinkage and CONTROLLING that is a big deal both in metal casting and plastic injection molding.
No argument there, but I will say I've had several Parkers with the same style base (even the same model) and none have looked quite like that on the bottom. They've had holes that weren't fully open, but that was about the extent of it, so I'm just wondering if this one wasn't something of a dud.
-
On 5/29/2017 at 12:14 AM, Frosty said:
Yeah, that's a big part of what I like about it....pretty safe, and it even has a pleasant odor. I've gotten it all over my hands and arms and it's as if it were water.
Here's the base after a coat of self-etching primer:

-
Hey all,
I'm a super newbie to all things blacksmithing, so I can't offer much to the site on those topics, but I a fair amount of work with metal...welding, cutting, restoring, etc. One of my hobbies is restoring bench vises, and removing rust is a common task. I've used most of the common techniques, to include electrolysis, wire wheel, etc but one of the easiest is a product called Evaporust. I understand it's a chelation process, and the nice thing is it's not hazardous, non-toxic and generally pretty harmless.
I just started restoring an old Paker 975 vise (5" jaws, about 105lbs) and the swivel base was pretty rusty. I would normally just wire wheel something like this, but it's hard to get a wheel down on the inside, and it takes a long time. This time I just put the swivel base in Evaporust and let it sit for about 36 hours give or take. Yes, you will notice quite a few casting flaws and incomplete holes, etc...they really didn't worry about them as they didn't hurt anything and weren't normally visible.
Here's the "before":


After soaking and being wiped off:


After five minutes with a wire wheel. At this point it's good enough to prime, but if it was a museum piece I'd try to get that last little bit of the inside cleaner. This will be a fairly inexpensive user vise for someone, so this is good enough.


I primed it and will add pictures of that later. I should point out that Evaporust is reusable (I filter it through a rag after each use) but does seem to wear out after a while, so it doesn't last forever. It's also not cheap...about $20 a gallon at TSC, or $80/5gal off Amazon last I knew. Anyway, it's just another option and would be really hand for small hand tools that have gotten rusty, or other stuff you can toss in and check back after a day or so.
-
Wow, that is absolutely beautiful!
-
Again, I haven't decided if I"m keeping it, or selling it, but I'm absolutely interested in what other folks think, if only because it might help someone else.
With that said, let me add a constructive comment (honest) that I think helps everybody. I never said anything about sharp, crisp edges, much less welding anything. All I mentioned was dressing the edges where damaged, and thinking about just a little bit of work to the face to remove the dents.
You might wonder why I bring that back up. What happens on forums is that someone reads your comments about crisp edges, and welding on the anvil, and they pile on because they either missed my original comments, misread them, or thought they missed something. Next thing we know we've got an debate about two things that were never even mentioned by the OP, and all it does is confuse the issue.
Just look at the comments in this thread. It's as if I started out by saying "hey, I found this anvil and want to make it look like new again" or something along those lines. Nothing could be further from the truth, but it still went sideways quickly
")
I just thought is was a pretty darned cool anvil, and thought folks here would appreciate it...I think we all would agree that it's a nice find, and that it deserves to be taken care of properly, and put back to work for another 150 years or so!
-
4 hours ago, Kevin A King said:
It is said several times above - This is your anvil and you can do as you wish.
I REGRET the repair, I regret the work I did to this anvil and I wish I could take it back! The anvil would be worth more to someone (A collector perhaps) as an old, rounded edge hay budden than in its current state of "perfection".
I wish you all the best in your repair. If I had a DO OVER - I would NOT DO THE REPAIR my little hay budden below.
Thanks for sharing that.
As I've said, I'm not certain I'm even keeping this anvil...when my buddy said he found an anvil, and gave me a reasonable price, I just had to grab it. It really was just a thought that a very slight bit of work to the face might be useful, but that's all it was...a thought. I think that may have gotten lost in the discussion.I figured it was worth continuing the discussion, because it might be useful for someone else since it's something of a hot topic.
1 hour ago, BIGGUNDOCTOR said:I have yet to see a surface grinder that follows a contour. I have a surface grinder, and have run others in the machine shops I worked at. The wheel sits at a pre-determined height, and the part reciprocates back and forth under it. The table is then moved forwards or backwards to grind the entire face being done. Surface grinders are used to make items dead flat. You can radius the wheel for grinding a straight radius.
That anvils surface looks fine to use. I would only flap disc the edges to a smooth radius to help prevent more chipping.
I think they call it form grinding and contour OD grinding? I haven't seen the setup the recommended shop uses, but the blacksmith I talked to said they have been working on anvils for years (they don't advertise the service).
-
On May 1, 2017 at 10:17 PM, bryson489 said:
Has anyone had any luck finding info on these Studebaker? Trying a rebuild now.
There is an older thread on Welding Web about restoring one that might be worth a look:
http://weldingweb.com/showthread.php?432041-Found-a-grail-and-restoring-(Studebaker-hydraulic-vise)
-
On May 12, 2017 at 4:58 PM, ThomasPowers said:
Pack the screw box with a good grease and tighten the screw all the way. Grease inside the cheeks and around the pivot bolt.
Wipe down the vise with boiled linseed oil.
When you go to use it; remove the grease and lube it with a light machine oil.
Store it in the place with the lowest humidity and fewest temperature swings to prevent condensation---but well greased it shouldn't matter over a short run---say.
10 years.
In your neck of the woods BLO works well to prevent corrosion (I lived in both AZ and NM in the past), but around here, I've found it doesn't work nearly as well. I've used it to coat clean, bare metal and found rust developing within a few weeks. This was metal I polished to a mirror, cleaned with acetone, wiped dry, then coated with a good layer of BLO.
A great alternative is Fluid Film....it's based on lanolin, so it's not toxic, doesn't hurt paint, doesn't smell bad, and you don't have to worry about soaked rags catching on fire like you do with BLO. It's popular to use on tractor implements that sit out in the weather...and exposed hydraulic pistons on machinery as well. When I get a vise in that I'm not going to get around to for a while I give it a light coat of FF before putting it on the shelf, and have yet to find any rust starting on them.
It used to be harder to find, but now I think both Lowe's and Home Depot are carrying it.
-
9 hours ago, Glenn said:
The idea of "cleaning up an anvil" is a sensitive topic.
Let is start over.
Fair enough. I'm a fan of leaving vintage items intact as much as possible, and I certainly wouldn't want to see anything bad happen to a piece of history like this anvil.
Most of the restoration work I do is on vintage bench vises, but I find it applies to many other things as well. I'll start a thread on that soon....I have much of it already documented on my website so folks can do their own, and only need to add some pictures of the processes to go along with the before and after pics I've posted (the site is very much a work in progress).
Back to this anvil, I took a straight edge to it tonight and measured the sway since it seemed like a smart idea to get a baseline before really going any farther into discussing options. I used a welding magnet to hold the square in place right down the centerline of the face, and then measured using a 1/32nd scale from a thread pitch gauge (didn't have a machinist rule with me). The max appears to be more than 1/32nd, but less than a 1/16th, so I'd say 3/64ths give or take. I'm not sure how well the pictures will show, but it was less than I expected. Here's what I found:


-
1 hour ago, brickman said:
tell me more about this reffflinghaus.... Thats the anvil i want to buy some day. I'm rocking an old Peter wright and Sodorfors right now 86lb and 130lb respectively.
I just picked it up recently and still need a few pieces of steel for the stand I'm going to fabricate for it, so I haven't used it at all. I'm a newbie so my plan was to work on my technique with my 150lb Fisher (it's got some damage) before I start using the Refflinghaus.
I'm sure someone will chastise me for buying a big, new, expensive anvil since I don't know anything....but hey, it's got amazing rebound, and looks cool, so I'll survive.

-
11 hours ago, Frosty said:
Uh huh. You really think surface grinding 0.03125" will do any good? Want to bet? I can see in the pic that face is well more than that far out of plane and a surface grinder makes planes. It will grind to the lowest point before it CAN take your 0.03125" and clean the face.
More anvils have been ruined by experienced machinists than Gen. Sherman was supposed to have.
It's your anvil, do to it what you wish. I have nothing else to say, you know too much already.
I'm not sure why you'd say I "know too much" since I wasn't arguing, just pointing out I wasn't talking about an angle grinder like several people mentioned. It's possible to surface grind on a radius and/or follow a contour so I don't see why it wouldn't be possible to follow the contour of the face and take off just a small amount, but everybody can decide that for themselves.
As I've said, I'm not planning to keep this anvil...just grabbed it because a friend found it at a reasonable price. I thought folks here might find it interesting....I wish I hadn't posted anything at all now.
-
For some reason people see "grind" and think angle grinder, but I was talking about a surface grinder run by a machinist who regularly works on anvils.
I've actually had great success removing deep scratches using a flap disc followed by a unitized wheel and then a deburring wheel. Frequently the vises I restore have an "anvil" portion that winds up with light chisel and hammer marks....unless they're very deep I'll run 60, 80, 120 grit flap discs over it, then a unitized wheel and then the deburring wheel on a grinder and it's nearly a mirror finish.
As I said in my first post, I grabbed this because a friend picked it up, and I know a couple of people looking for decent anvils....figured one of them would really appreciate it. I think it's really cool, but my anvil budget is pretty much blown after buying a new 330lb Refflinghaus a few weeks ago.
-
1 hour ago, littleblacksmith said:
Ok, good to hear that, actually that's GREAT!!
Yes, lots of opinions. This is mine.
It doesn't matter who is holding the grinder, you are still doing the same thing; removing the face.
In the words of Mr. Powers;
"don't take off any more off the face than you would your own, and do your own first!"
Or something along those lines.
Now a 32nd is really not much, can be done with a wire weel removing a 32nd of the rust, or with hot steel, which ever you prefer. you could probably get by without much damage.
Littleblacksmith
I do a fair amount of restoration work on metal and it takes a bit of effort to remove a 32nd deep scratch/nick with a flap disc on metal much softer than an anvil face, so I have a hard time imagining taking that much off an anvil with a wire wheel. Still, I wasn't talking about an angle grinder at all, I was talking about a surface grinder, run by somebody who does repair work on anvils regularly. I don't know much, but I know enough not to use an angle grinder on an anvil :-)
-
27 minutes ago, Glenn said:
That anvil is close to 150 years old. A light professional grind should clean up the face and could destroy the anvil. If you remove the patina, you will never be able to get it replaced in your lifetime.
ONLY use hot iron to clean up the face. A few hours getting to know each other and the face will shine.
There are many opinions on the site about how to "clean up" an anvil. You can always modify the anvil later so wait a year before you do anything. You may want to do a little reading before you do something that can not be undone.
If you want to remove the rest, look up electrolysis on the forum. It removes the rest and not the metal.
As you said, there are lots of opinions on the topic. A local blacksmith (full-time with years of experience) told me taking a 32nd or two off the face to get rid of the dents wouldn't hurt it if done by someone who knows what they're doing....didn't seem unreasonable.
26 minutes ago, littleblacksmith said:Nothing professional about grinding an anvil. It takes life out of the tool, and you don't help it but actually do harm to it. A anvil with sharp 90degree edges and a perfectly flat face isn't necessary. Those edges are far from bad. I almost never use a sharp edge, and if I need one, I can use a hardy tool that has sharp edges on it, or my striking anvil, though that is lower.
Could you take a pic of the third hole closer to the step of the anvil? is it round or square, go all the way through? I'm just curiose.
good find.
Littleblacksmith
I wasn't thinking it needed a perfectly flat face, but the dents are pretty much everywhere, and would seem to be enough that they could be a problem for some uses. The edges I thought would dress up nicely, but never thought they needed to be 90*.
The hole near the step is just some kind of damage...not round, or square, and doesn't go through. I'll try to get a picture of it.
-
I have a friend who's a local picker and he called me up about an anvil yesterday, then sent me a couple of pictures. He normally finds vises for me, but I told him to keep an eye out for any anvils.
It's got some sway, some dents, some edge damage, but still has good rebound and ring. Still, I think the edges should dress up pretty well, and the chips look worse from the side than the top. I'm far from an expert, but thought that a light professional grind should clean up the face to make it a good user, and I know a couple of folks looking for their first anvil, so I'm going to give them a call.
As best I can tell, the markings are M&H, Armitage, Mousehole, Forge, 1.1.6, and 146lbs all on separate lines. I need to clean it up and try some powder to get a better look at the markings. A friend told me he believes the markings are likely 1870s give or take...pretty cool it was kicking around Detroit!


-
2 hours ago, JT said:
njanvilman said the jaws on these vises were originally welded on from Fisher .. I can see where mine are welded .. he said this is correct and the way they were made.. those on the one you were looking at are probably factory correct ... JT
I should have been more descriptive. I'm sure the jaw inserts were welded originally...almost have to be with that style. I was talking about the jaw towers that the jaw inserts are on. I'm pretty certain this isn't a factory job:


-
On 3/28/2017 at 11:00 PM, Riverdweller said:
JT thanks for the heads up. I will check that tomorrow. I appreciate your input.
Swedefiddle if it ain't broke don't fix it. If it's broke, you should man up and see what you can do.
There should be a set screw at the bottom of the dynamic jaw housing. That set screw fits into a recess on the inner part of the spindle to keep it inside the dynamic jaw. Have you looked at that yet?
Also check that the pins at the back of the body are in place. They hold the tail cap assembly and nut in place. Sometimes the pins shear if the vise is dropped and lands on the spindle, but usually it cracks the body of the vise itself.
That's a very cool vise but know that the jaw shape isn't the strongest style so it's not really meant for heavy duty work. The jaw towers and jaw supports aren't as massive as you'd find on the machinist models, probably to allow better access to the work piece. In short, you don't want to put something in it and hit it with a big hammer :-)I know a couple of collectors who would probably trade you a bigger/heavier Wilton for that one just because it's unusual.
-
19 hours ago, JT said:
Hello njanvilman !! I've wire wheeled and cleaned that area but see no signs of a date on this one.. JT
Post some pics after you get it cleaned up!
I passed on a #6 recently....guy wanted $1K but both jaws had been broken off and welded back many decades ago. It was really fixed nicely, and the jaws still lined up perfectly, but I couldn't bring myself to pay that much for it.
-
14 hours ago, SReynolds said:
Mine. In the shop. Looking at blowers today at the farrier supply i found one canedy otto. Just like mine/yours. Gunky. But smooth. However; the crank arm was literally arc welded to the shaft. Asking 250.00 for it.
I still hate you
LOL...I think the guy behind me who didn't get it hates me even more!
3 minutes ago, SReynolds said:There is to be end (axial) play in the fan shaft. But not radial.
That makes sense. It's not a significant amount of movement, and won't let it get anywhere near the housing so I wasn't too worried. Yesterday I was visiting with a friend who has a ton of blacksmithing equipment and played around with a couple of Champion 400s he's restored and the difference is night and day...makes me even more happy I managed to get this one. Now I need a forge to go with it...the two at the auction were small and pretty rough.
-
15 hours ago, jlpservicesinc said:
Congrats.. Post back how you like it. with a review.. I'd like to pick one up also but the 58 with side shelf..
Will doI I'm a super newbie, so I'll wait until I can make a reasonably informed review. I considered the 58 with the side shelf, but decided against it. A buddy of mine just started importing Refflinghaus locally and I figure I can always sell this one and get a 58 if I change my mind.
14 hours ago, Anachronist58 said:G-Man, perhaps you should get some counseling in regard to all those vises?
Robert Taylor
Haha....buying, restoring and selling vises is what paid for the anvil! I only have a handful I'm keeping for myself...maybe 5 or 6 total.
1 hour ago, Daswulf said:If you want to give it some scale you need to hammer some hot steel on it.
nice anvil.
I can't wait to try it, but I'm going to be smart about things for a change (I hope).
I'm not even good enough to call myself a novice, so I'm planning to use my beat up 150lb Fisher for a little while, work on hammering technique, and then make the switch. I probably put the cart ahead of the horse, but had an opportunity to get the Refflinghaus immediately and didn't want to pass on it and then have to wait down the road.
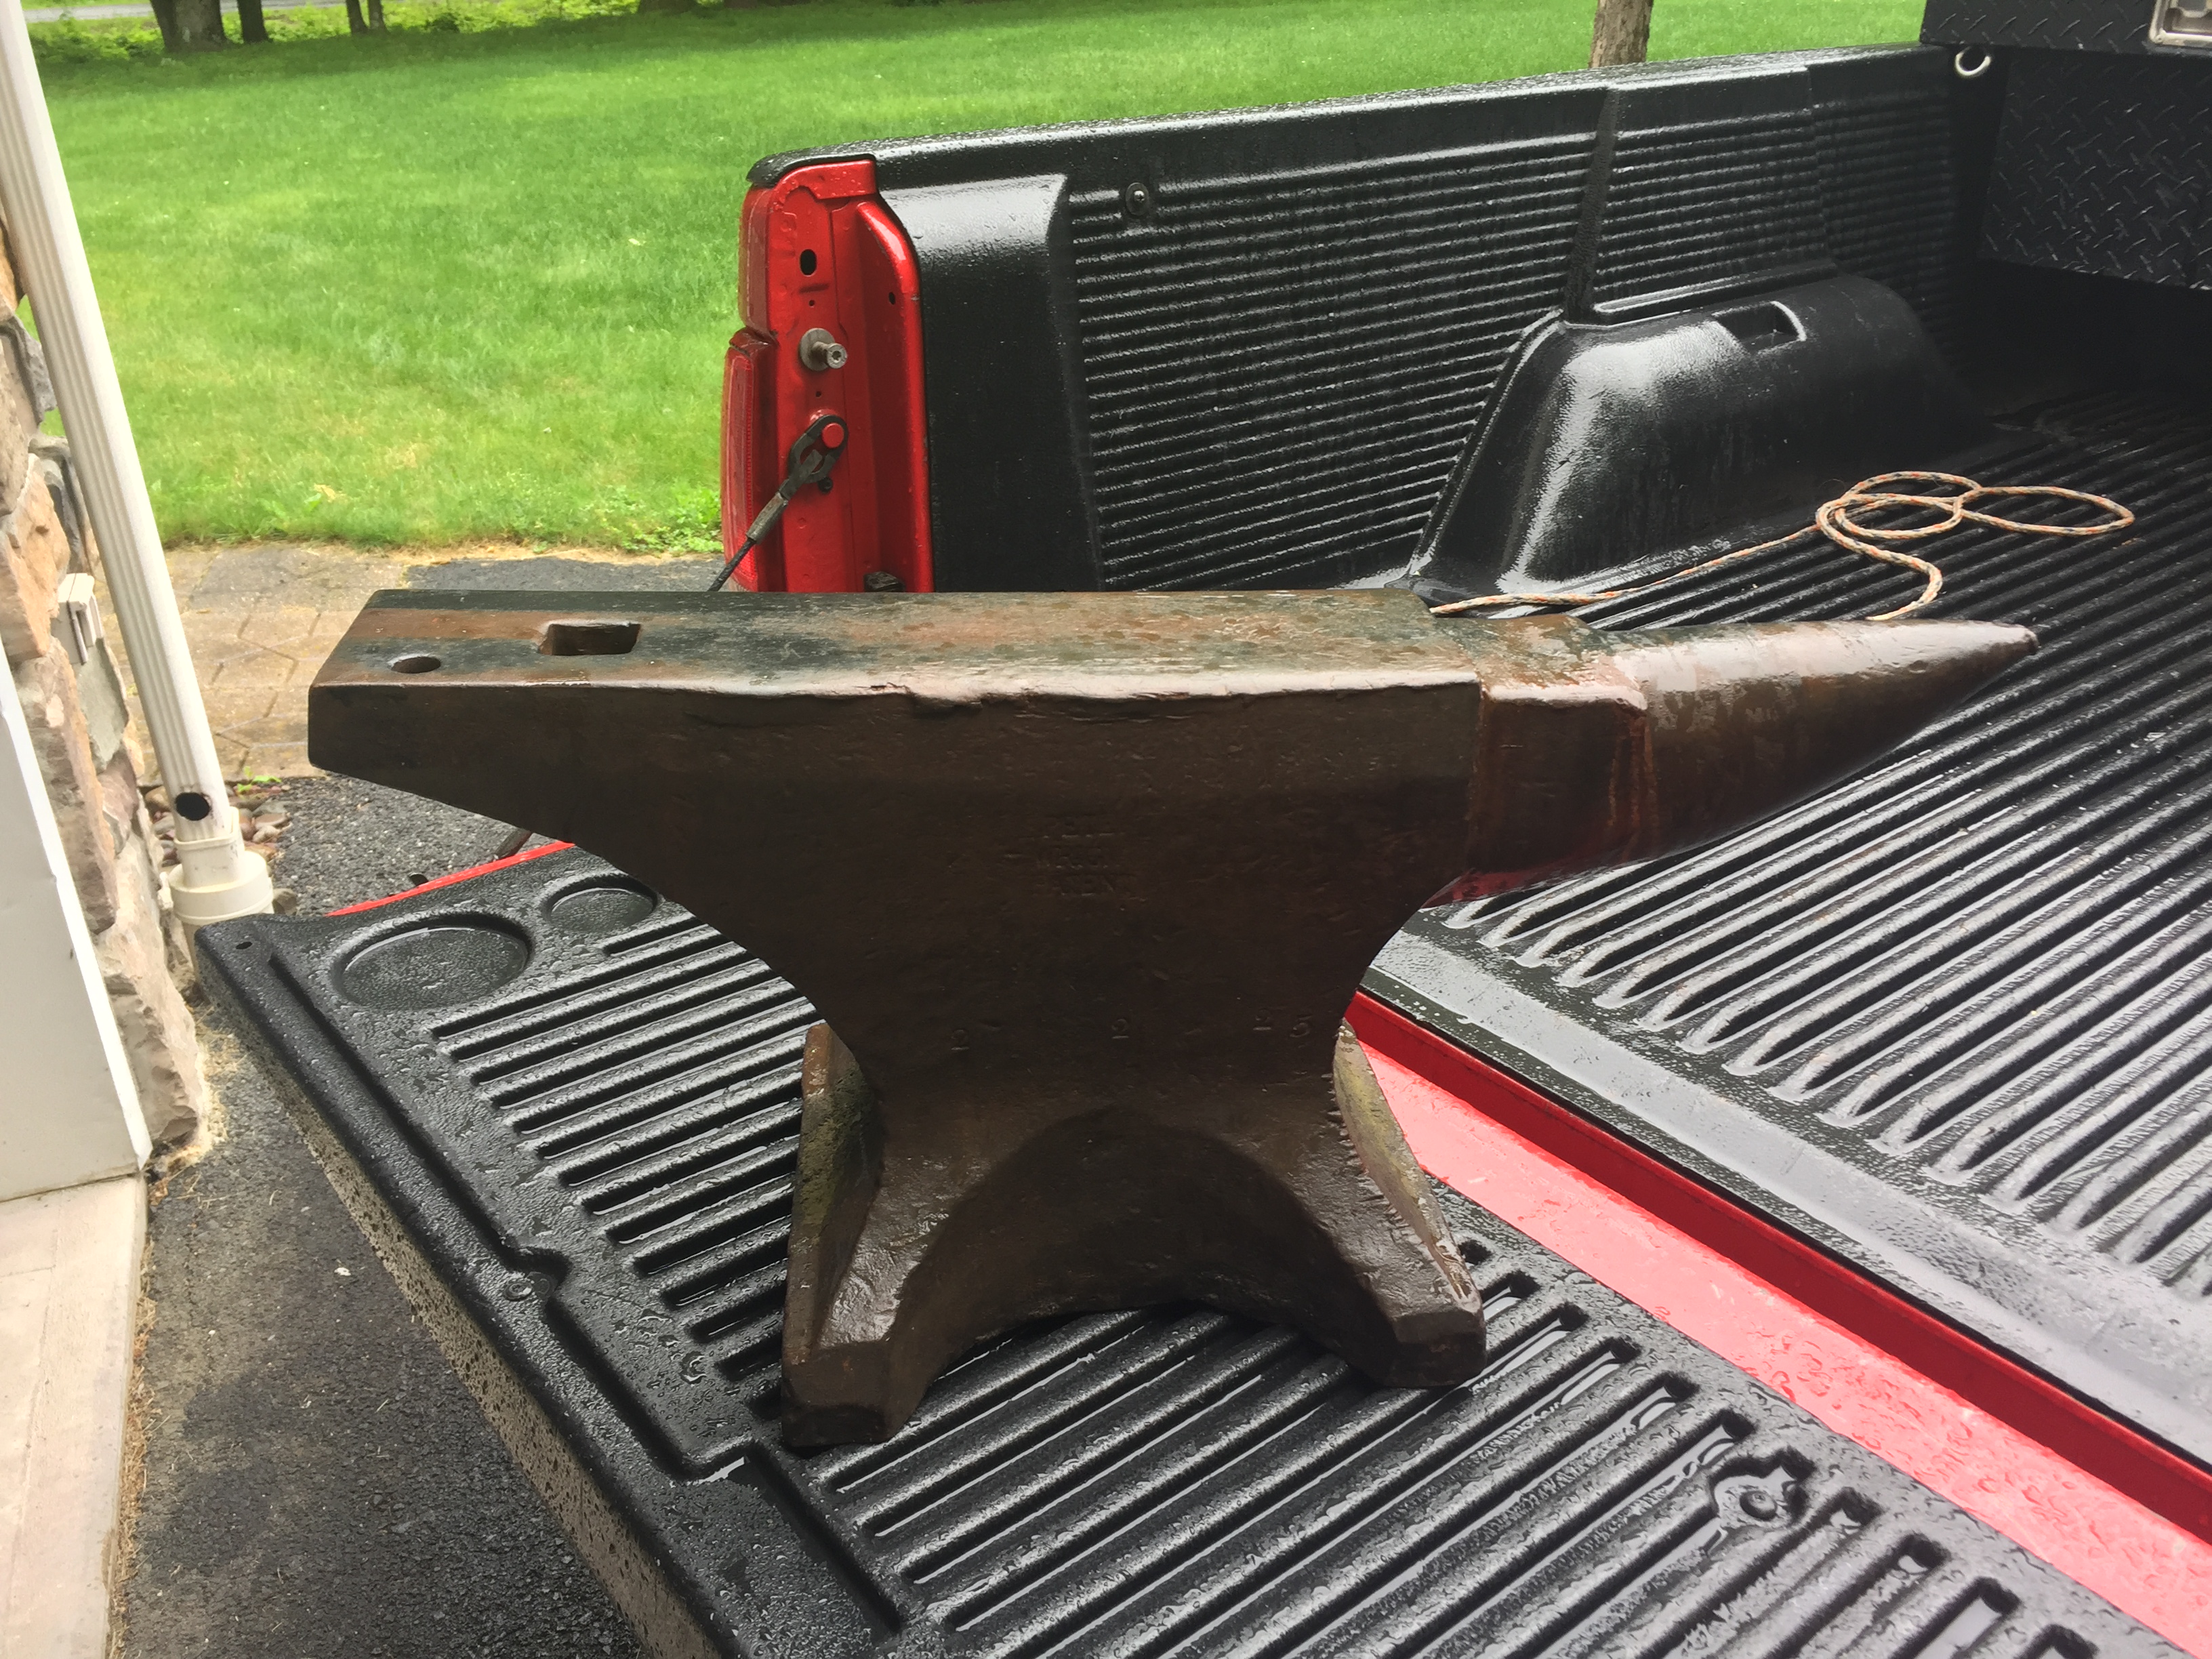

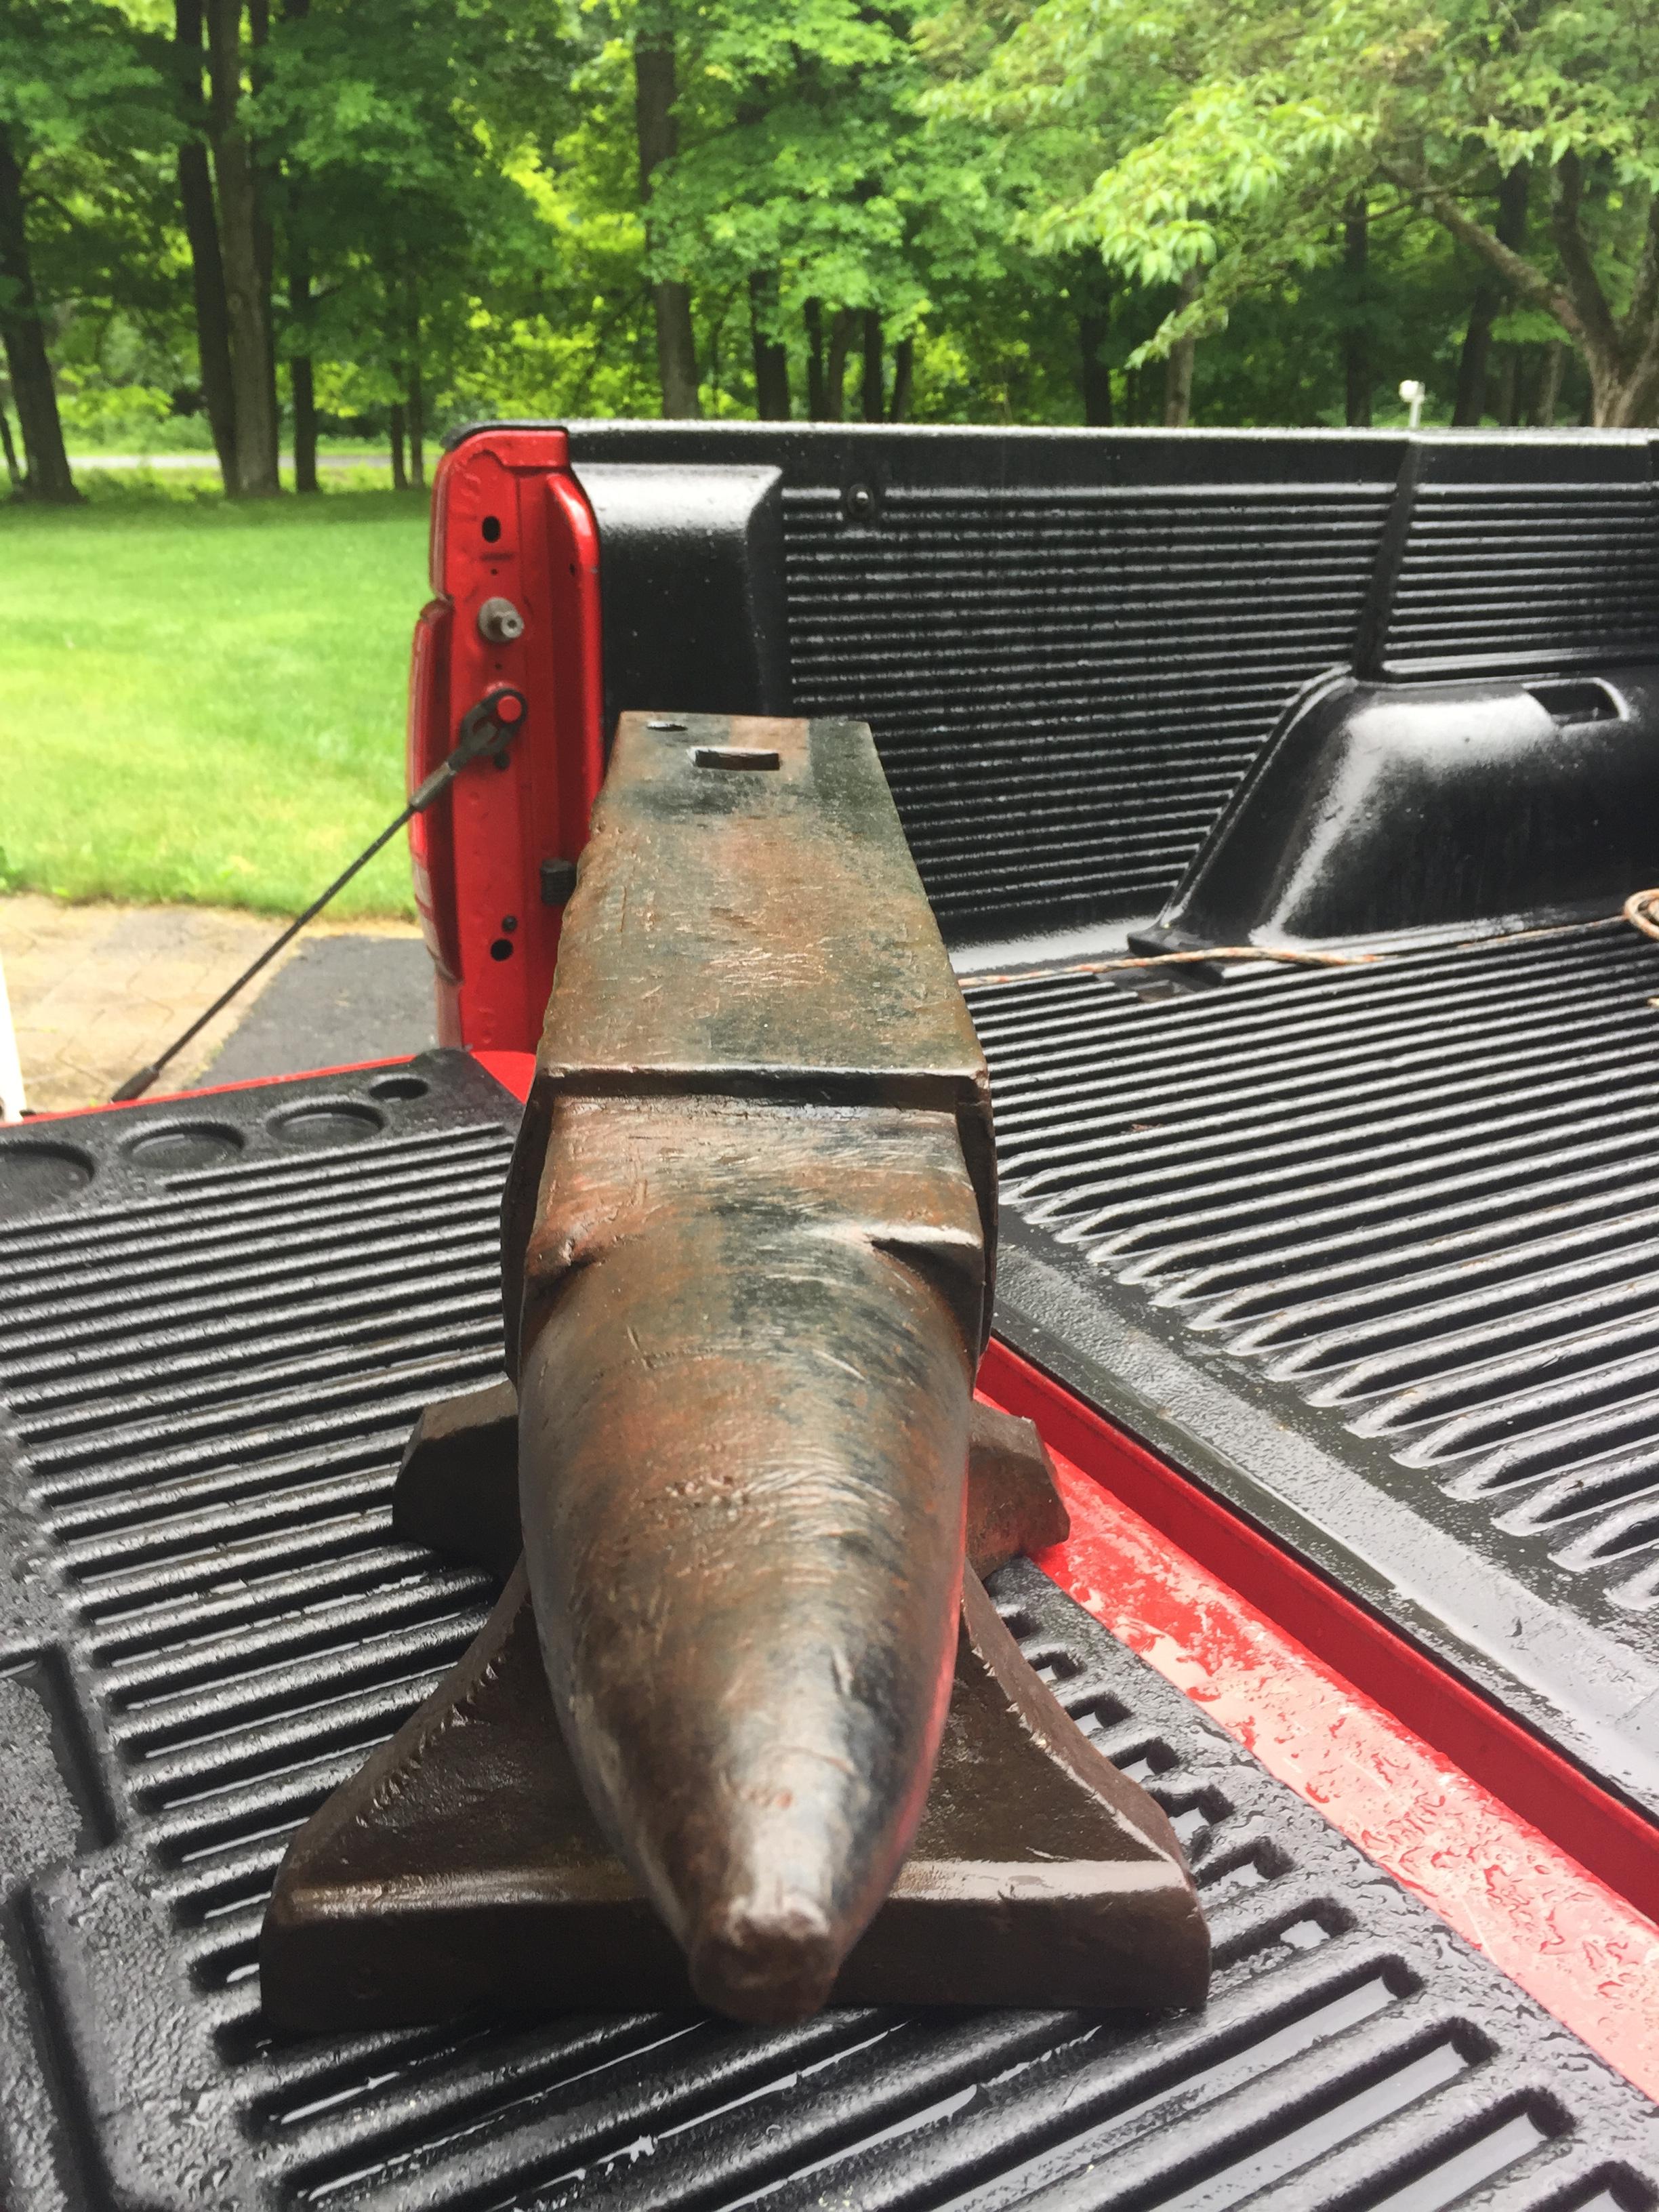


Found a 305 lb PW today
in Anvils, Swage Blocks, and Mandrels
Posted
Got home and took a couple of better pics. All I was considering doing was to remove the jagged parts to leave a rounded edge that wouldn't be likely to chip.
I tested the rebound again after unloading it and it's got to be at least 85%....barely have to move your hand to catch the ball bearing.