

bigb
-
Posts
320 -
Joined
-
Last visited
Content Type
Profiles
Forums
Articles
Gallery
Downloads
Events
Posts posted by bigb
-
-
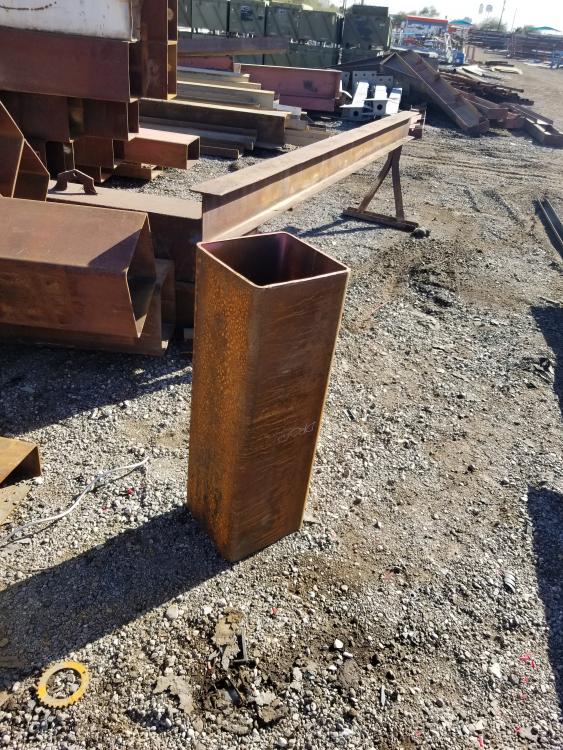
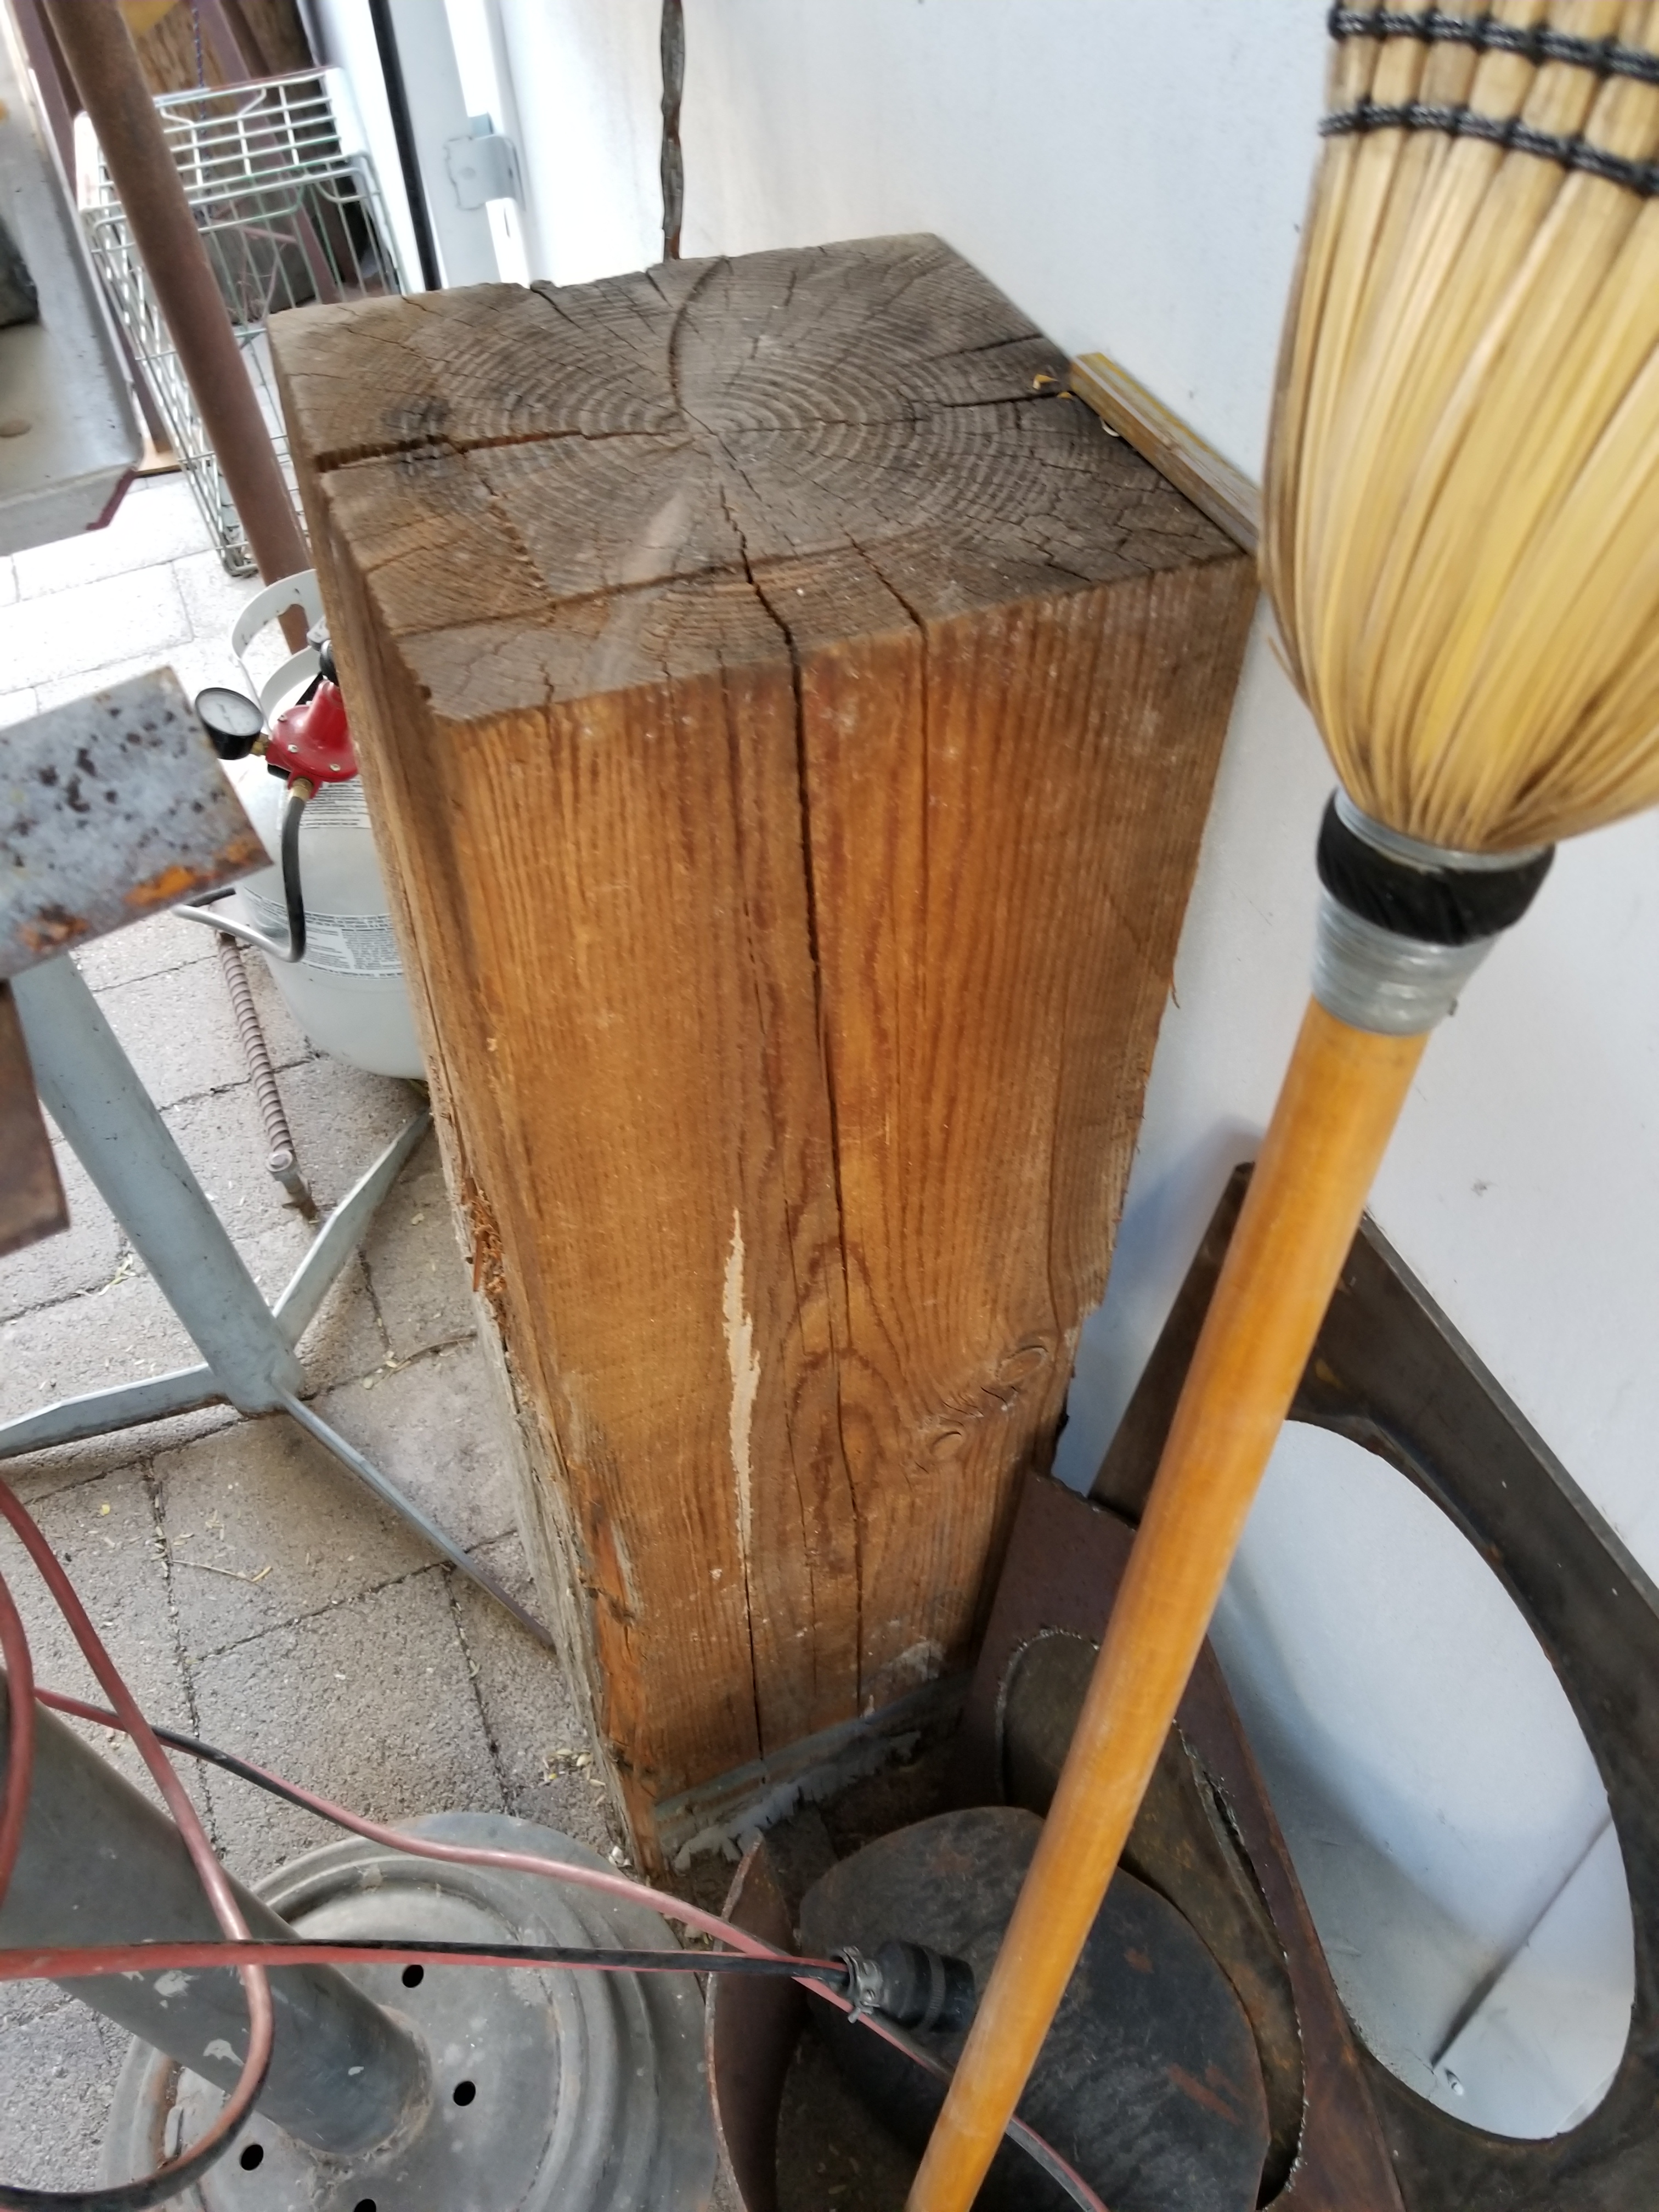
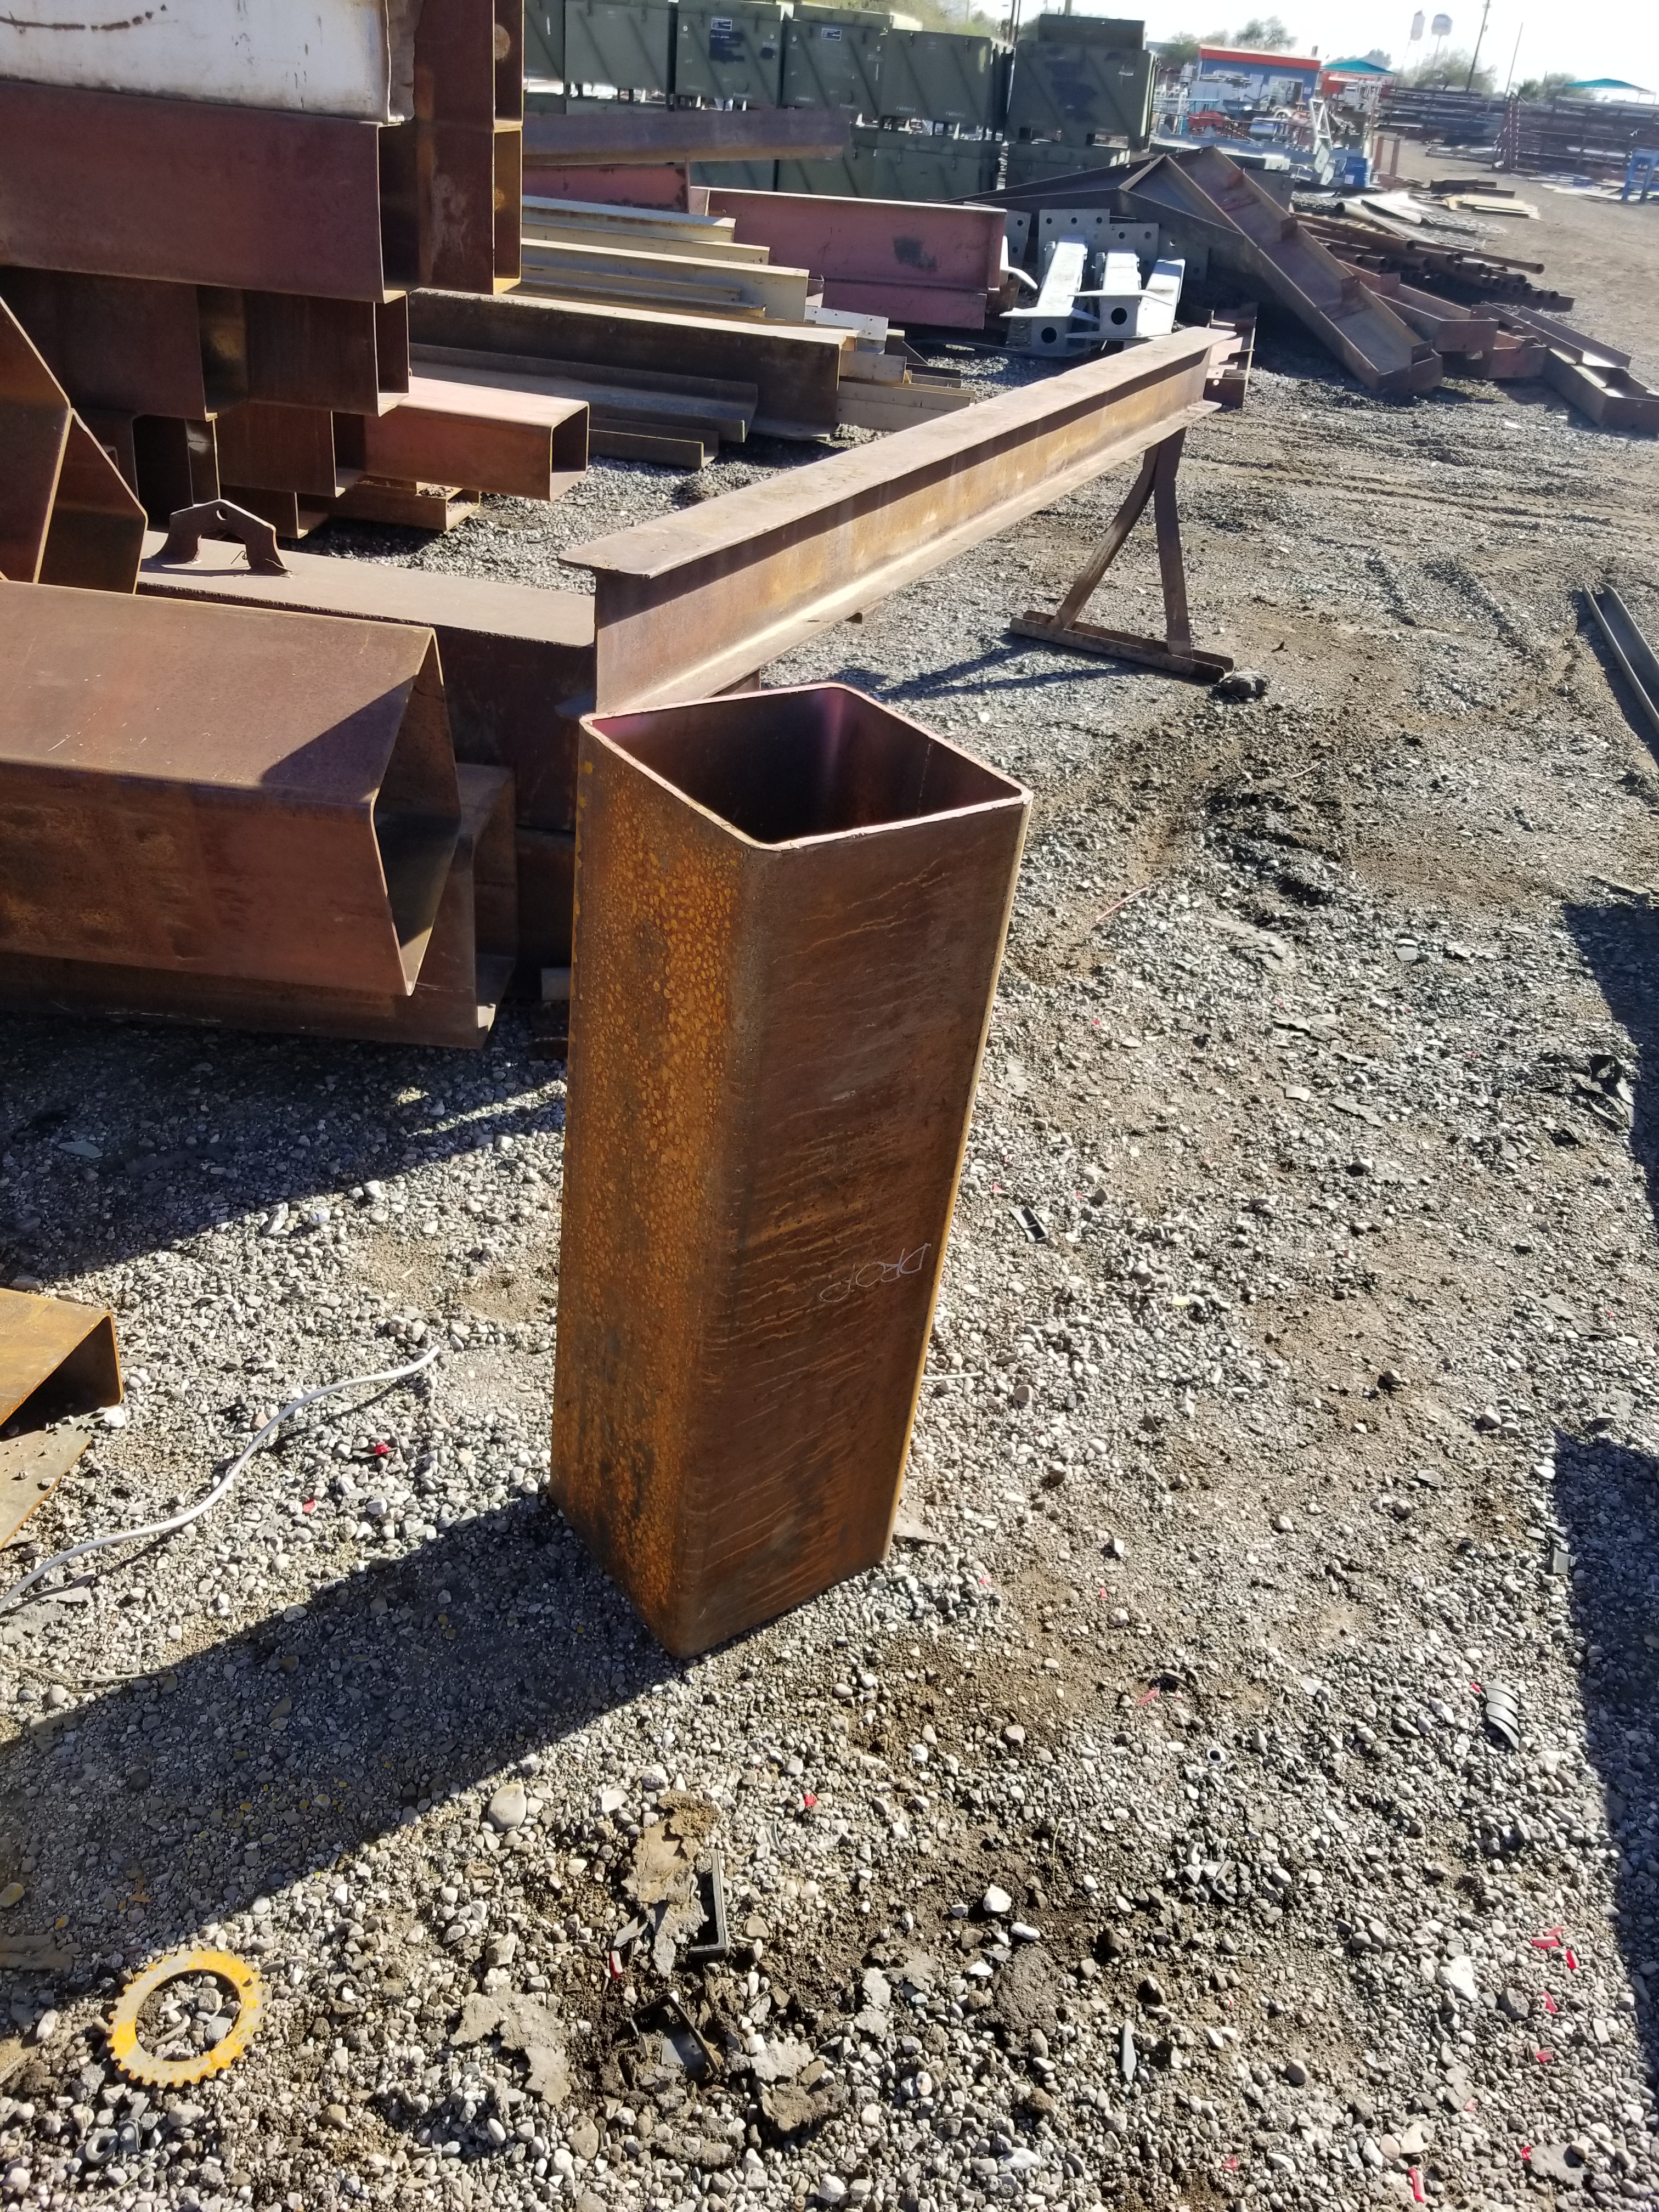
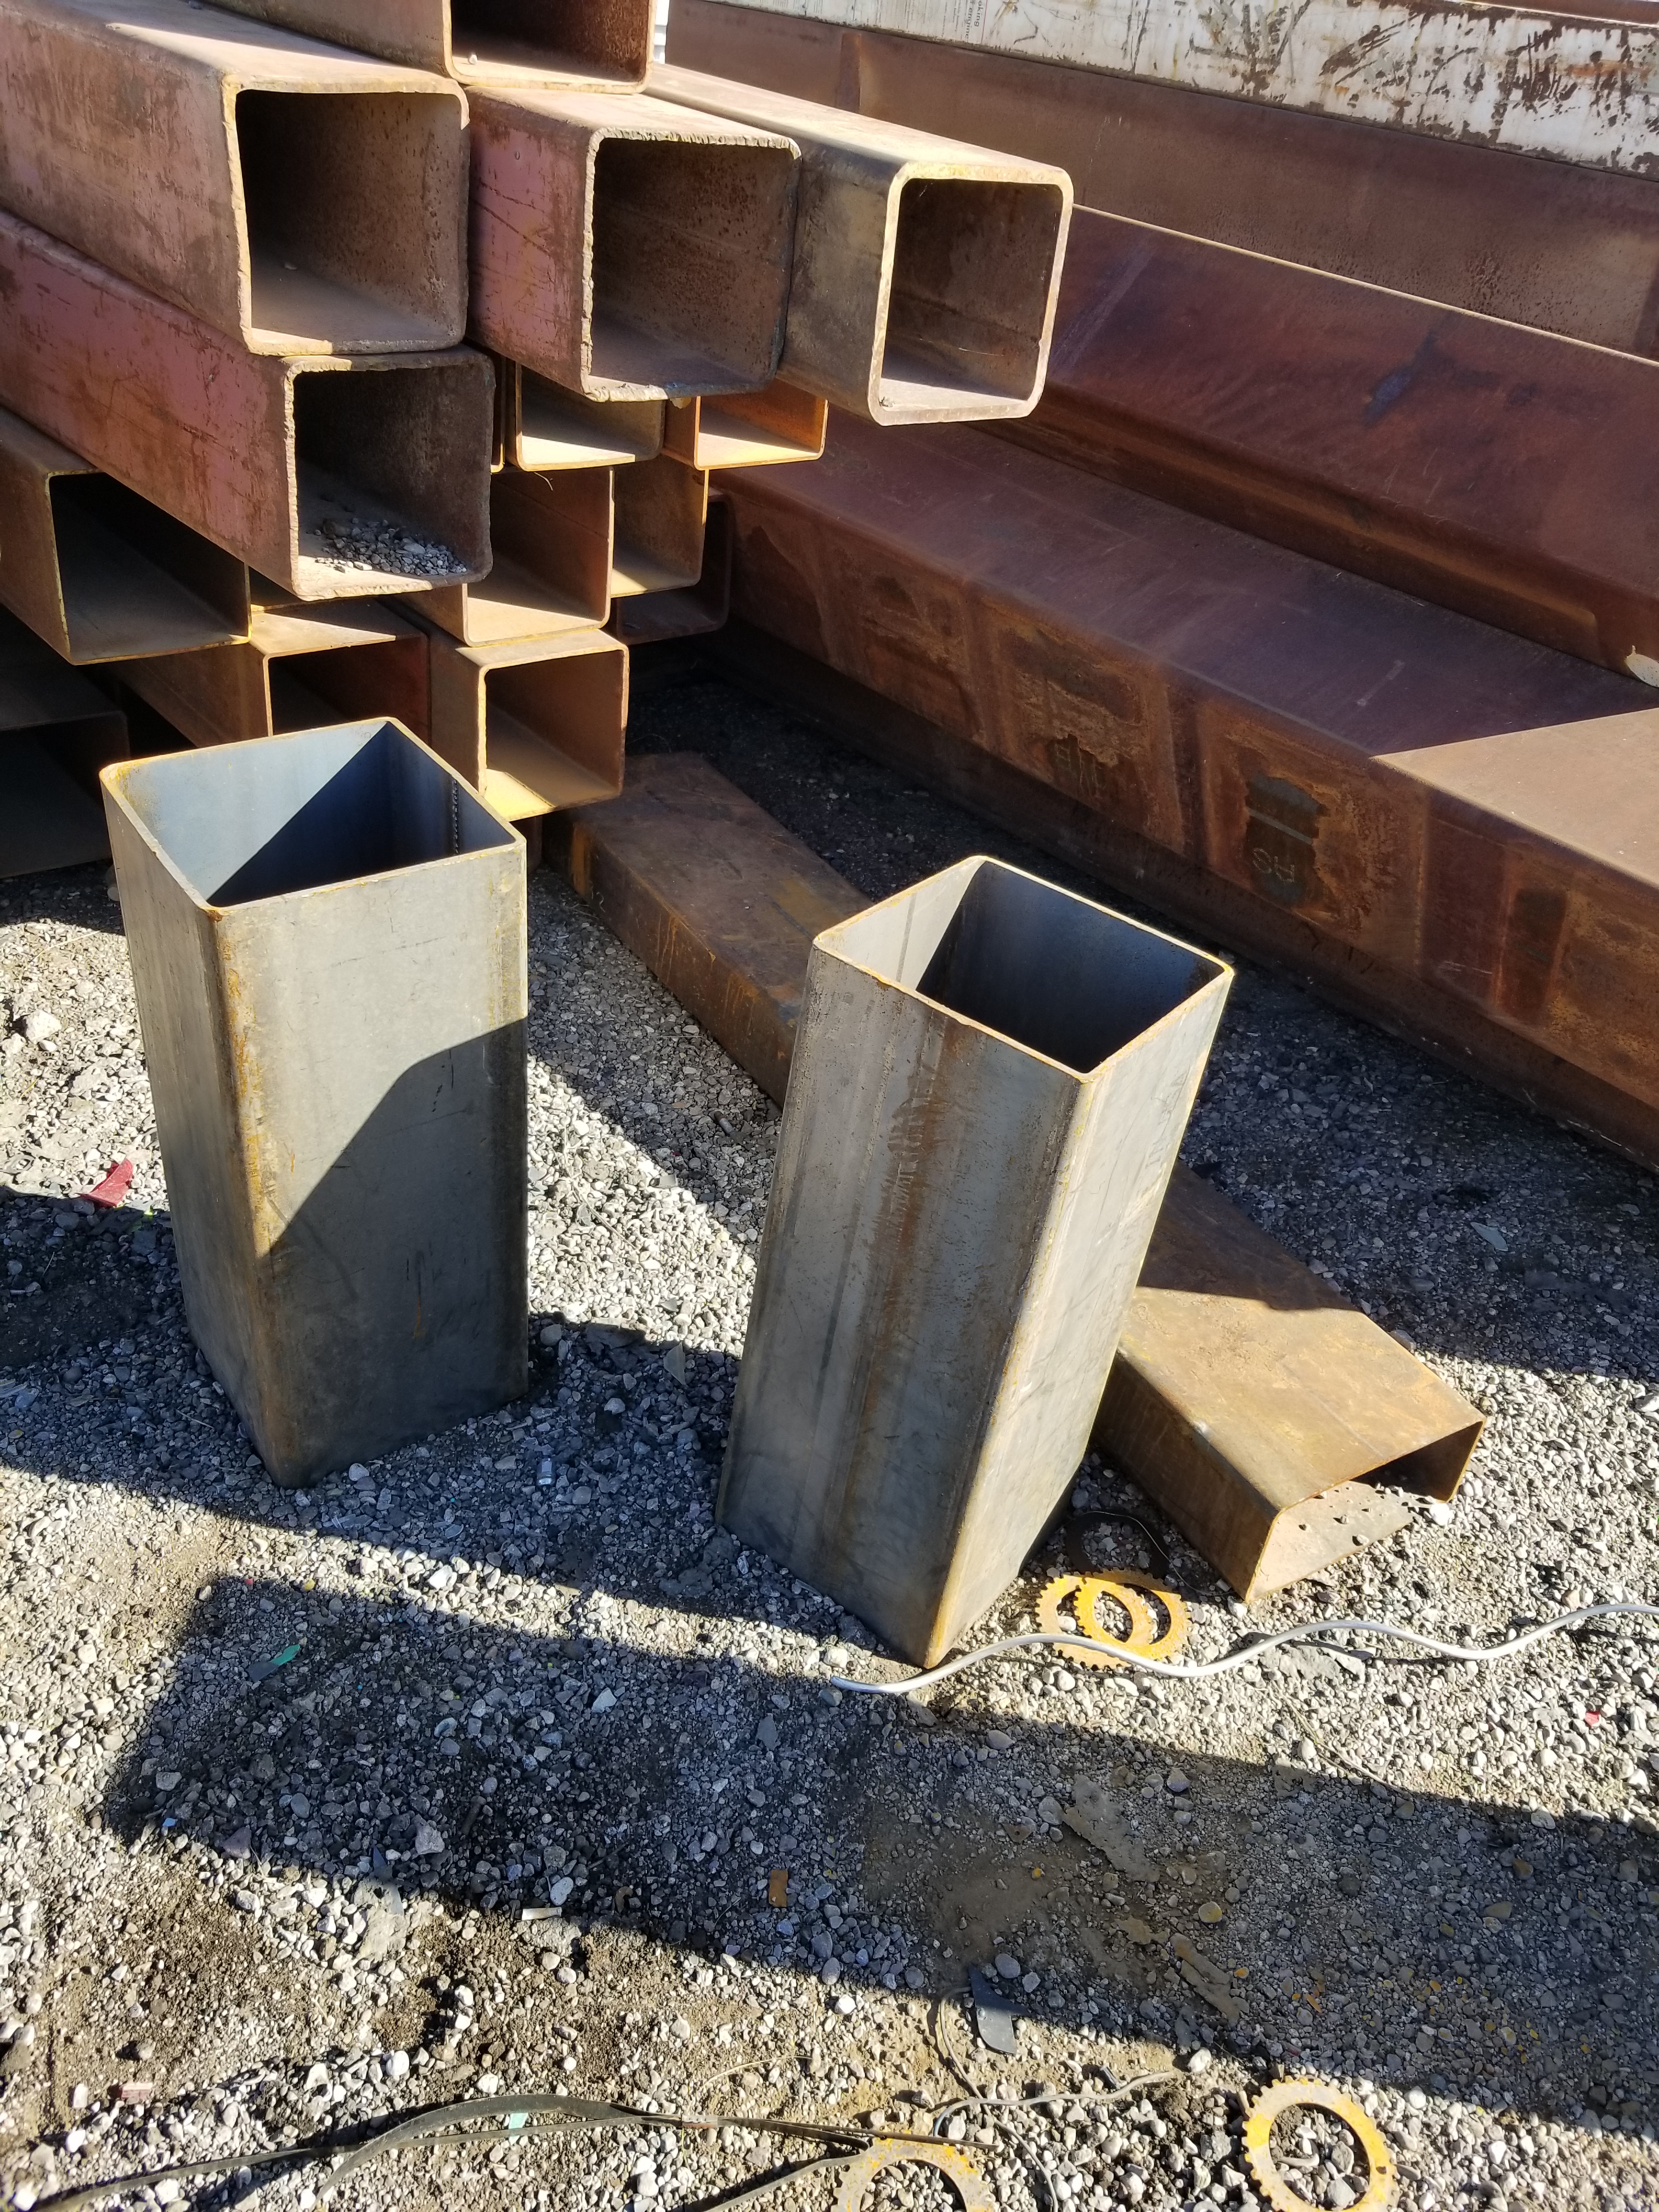
Getting ready to put something together for a post vise stand. I have a few of these 11"x11" pieces of timber and I also have access to plenty of 12x12x1/4" square tube, and 12x12x3/8". The timbers fit nicely into the 1/4". I also have some circles of plate from 18" up to about 36" to use as bases. I was going to weld a piece of the 12x12 square say maybe a foot tall to a 36" base plate then slide a chunk of the timber in and bolt it up. Then bolt the vise to the top of the timber and bore a hole in the base for the leg. But I got to thinking, maybe just go all the way up with the steel and make a plate top for bolting the vise to, and skip the wood. Is there any advantage to using heavy timber vs steel? When I think about it the force is mostly on the leg anyway which will be seated into steel. I've had this heavy timber for a while and been looking for some uses for it. The piece in the photo is split and weathered but I have much nicer ones coming off a job site soon, about 42" long and free.
I also have a nice 11 foot box beam, 4"X6"X1/4" that I got for free a couple years ago that I could cut a length from and weld to the base if that would be strong enough, maybe add some gussets.


-
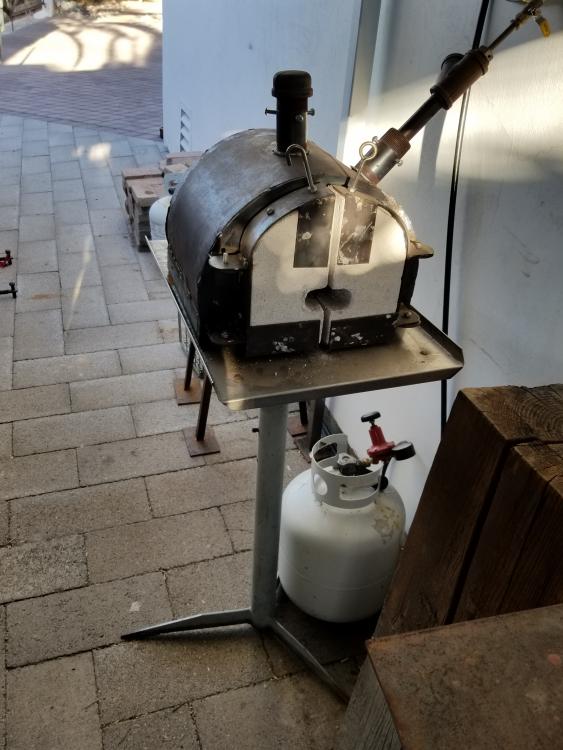
I too dislike leaning down to see into the forge which is why I like the adjustable stand I have. I only lowered it because I don't have a porch on it yet and I needed to lower it to table height when I was heating some long stock. I think you have convinced me to go with two wheels so I can just lift one end, BBQ style, and move it about. My wheels will be in contact with the floor, I don't want to have to tip it too far to roll.
-
12 hours ago, DavidF said:
BigB, you have a great set up. Why not use some angle iron or tube iron (plus a plate if you wanted to do that) to create a wider base and place some casters on the bottom? If I had your setup (especially your stand), I would fabricate a bottom to replace the three stand legs to create a platform wider than the forge’s shelf and put some decent sized casters on the bottom. You could have the mobility you want with very little work. I can’t tell if your forge is secured to the base, but it doesn’t appear like it, so I would pick up some metal strapping, run it over the top of the forge, and secure it to the cart (or they have strap you can cinch the ends). Awesome setup and easy to make mobile.
David, I thought about that. I am thinking about welding some round plates at the ends of the 3 legs and putting on 3 wheels. They would be out past where the legs end now. If it turns out to be too unstable I can just grind them off, or maybe take the wheels off and use the plates for skids. Or maybe just 2 wheels so I would pick one end up and roll it like a BBQ. Like I said I don't move it more than a few feet, basically just pull it out from the wall when using it.
-
I've seen reference to the wood and used 1/4" plywood as well, but the conduit is easier to see and feels more real, IMHO.
-
I am in the process of setting the height for my new to me A&H anvil and in doing research I came across some old threads where someone mentioned using EMT for trial anvil heights, as it will show the angle of every hammer blow. (I can't find the thread again but I think it may have been Thomas Powers' suggestion). Being an electrician by trade I promptly went outside and grabbed some 3/4" and some 1" EMT scraps out of the trash and took them over to the anvil. I want to say this is a valuable tip. Not only can you read the hammer blows very easily for adjusting anvil height, you can also easily see if you are canting to one side or the other. It is also very handy when trying out different hammers. It occurred to me that this is also a good way to practice hammering and holding work pieces without starting up the forge and only takes a few minutes up to as long as you want it to. The EMT is soft, and the smaller sizes are softest, getting harder to shape as the size increases. 3/4" seems to be perfect for practice. Now I can go out there whenever I have a few minutes and smash up some EMT.
Just wanted to bring this up for the benefit of beginners like me.
-
Those are some good ideas, here's what I have now. I like the stand but it's tough to move. I thought about putting wheel on it but it might tip to easily. I might stick with it for a bit longer as I never move it more than a few feet. I do need to add a porch though
-
My gas forge presently sits on a 3 legged height adjustable meat scale table. Moving it a few inches here and there is not too bad but I am considering a wheeled cart. Also, I am adding one of Larry Zoeller's idle circuits which will add too much weight to the fuel line to have it unsupported so I will need to add support for that. Thought about a flat top metal cart, also thought about a 2 wheeled hand cart with propane bottle underneath.
How about some pics/ideas of some of those portable setups?
-
4 hours ago, Daswulf said:
the paint is an issue since you won't want to burn off paint in the forge.
Is that because of the lead fumes or because it is bad for the forge?
-
I have that same Littlestown vise in my shed. In fact I have about a dozen bench vises out there and 3 post vises. I have only a few mounted for use, my favorite is an old Craftsman 6", a very smooth and tight unit, got it for $20. I also have a cheap import mounted up on my outside bench, basically don't care if I break it or not, so far it has only lasted 25 years or so. In the shop I have my Dad's old gunsmith's vise and an old Rock Island on an old Mobil Oil Gargoyle stand. I'd have to look through all the ones in the shed to tell you the makes but I know a few are good old American steel. No Wiltons though. Maybe someday.
I don't know why I have so many vises, they just seem to find me. I dream that someday I will be able to mount them all up.
-
This is a replica of the "Tucson Ring Meteorite" which was found by a blacksmith in the 1800's here in Tucson and used as an anvil. The actual one is now in the Smithsonian.

-
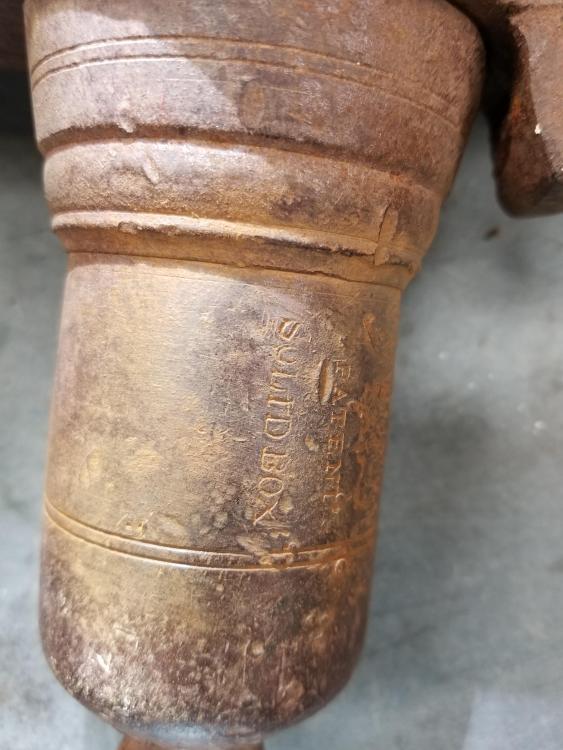
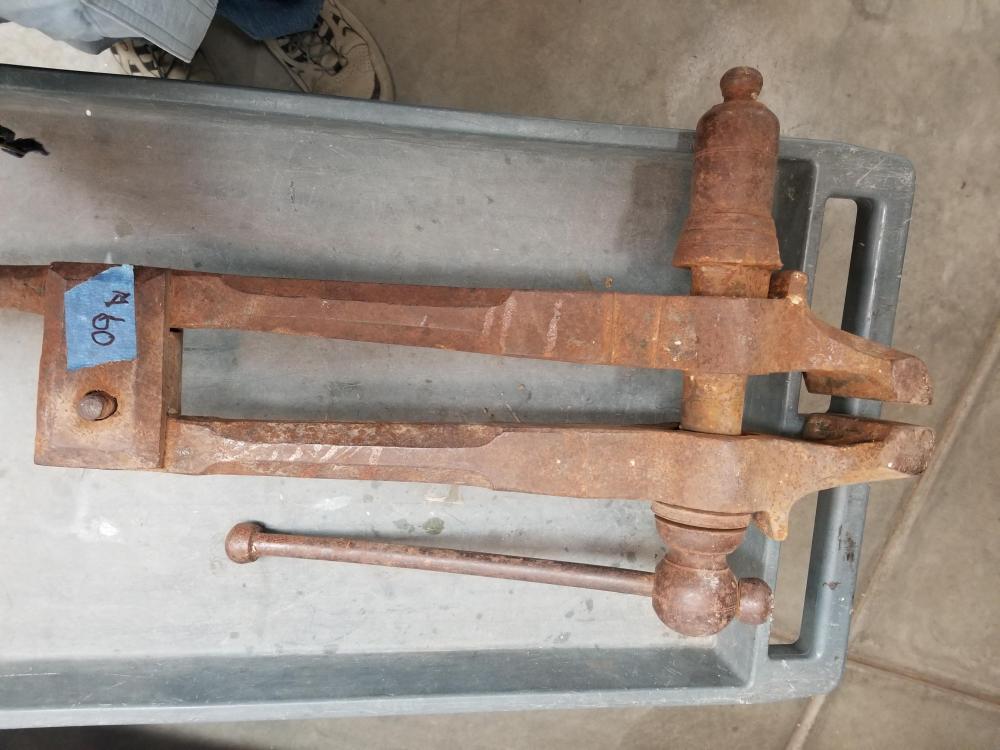
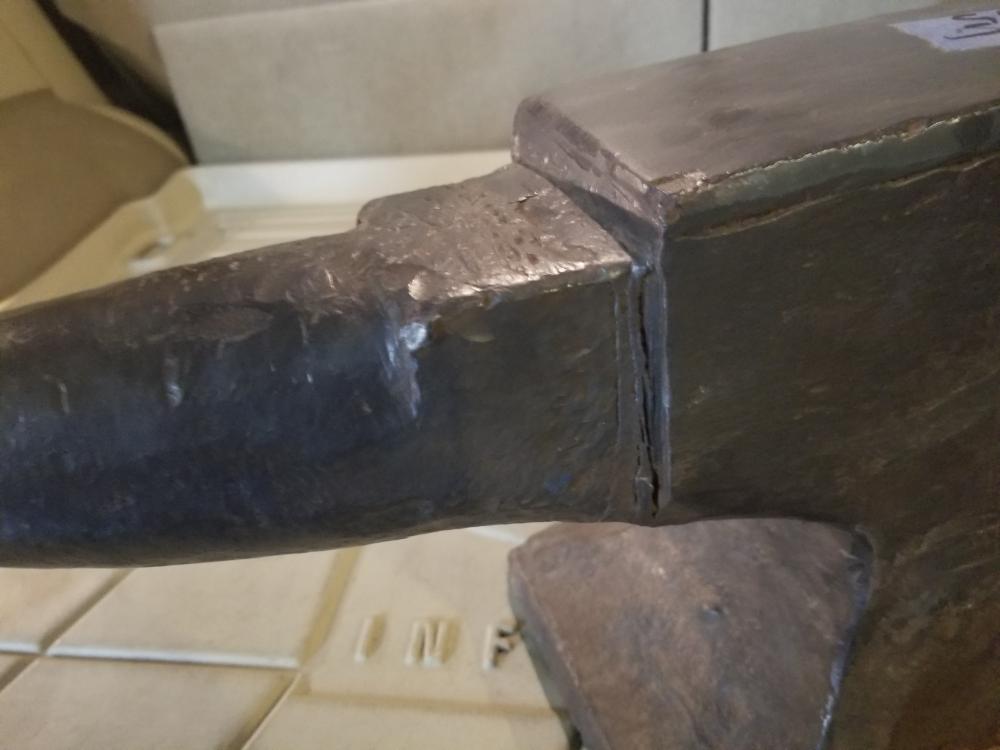
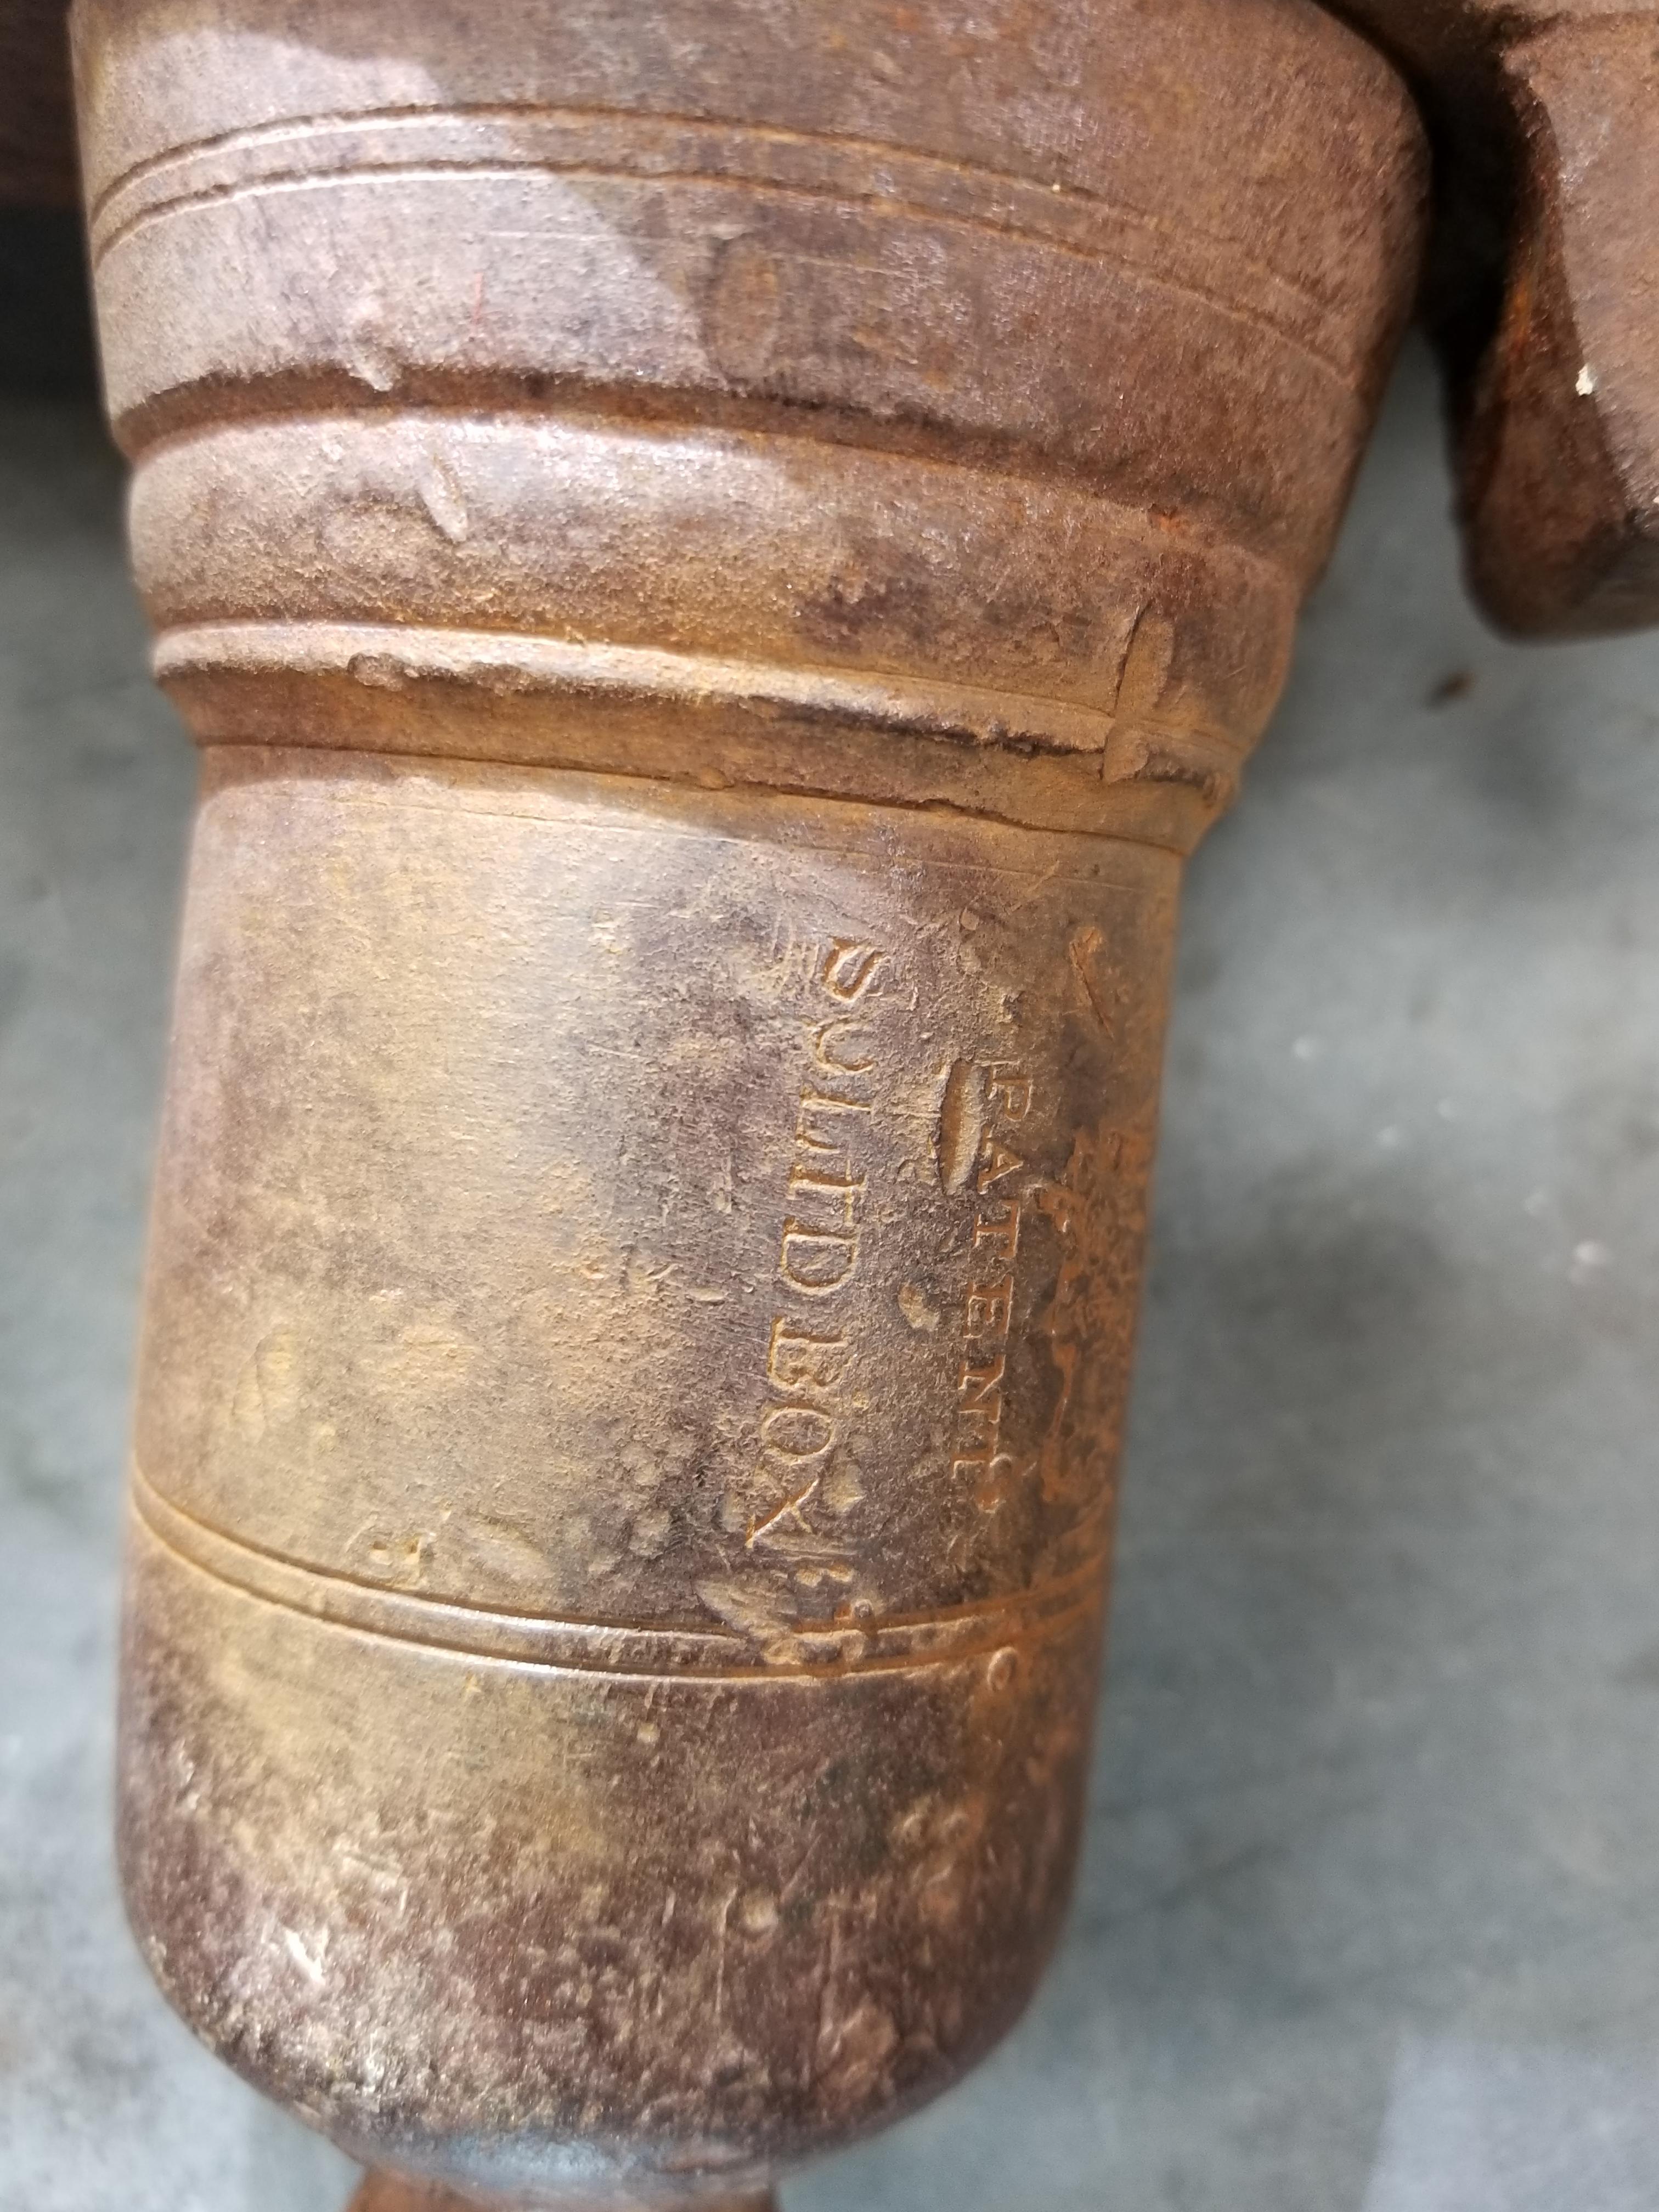
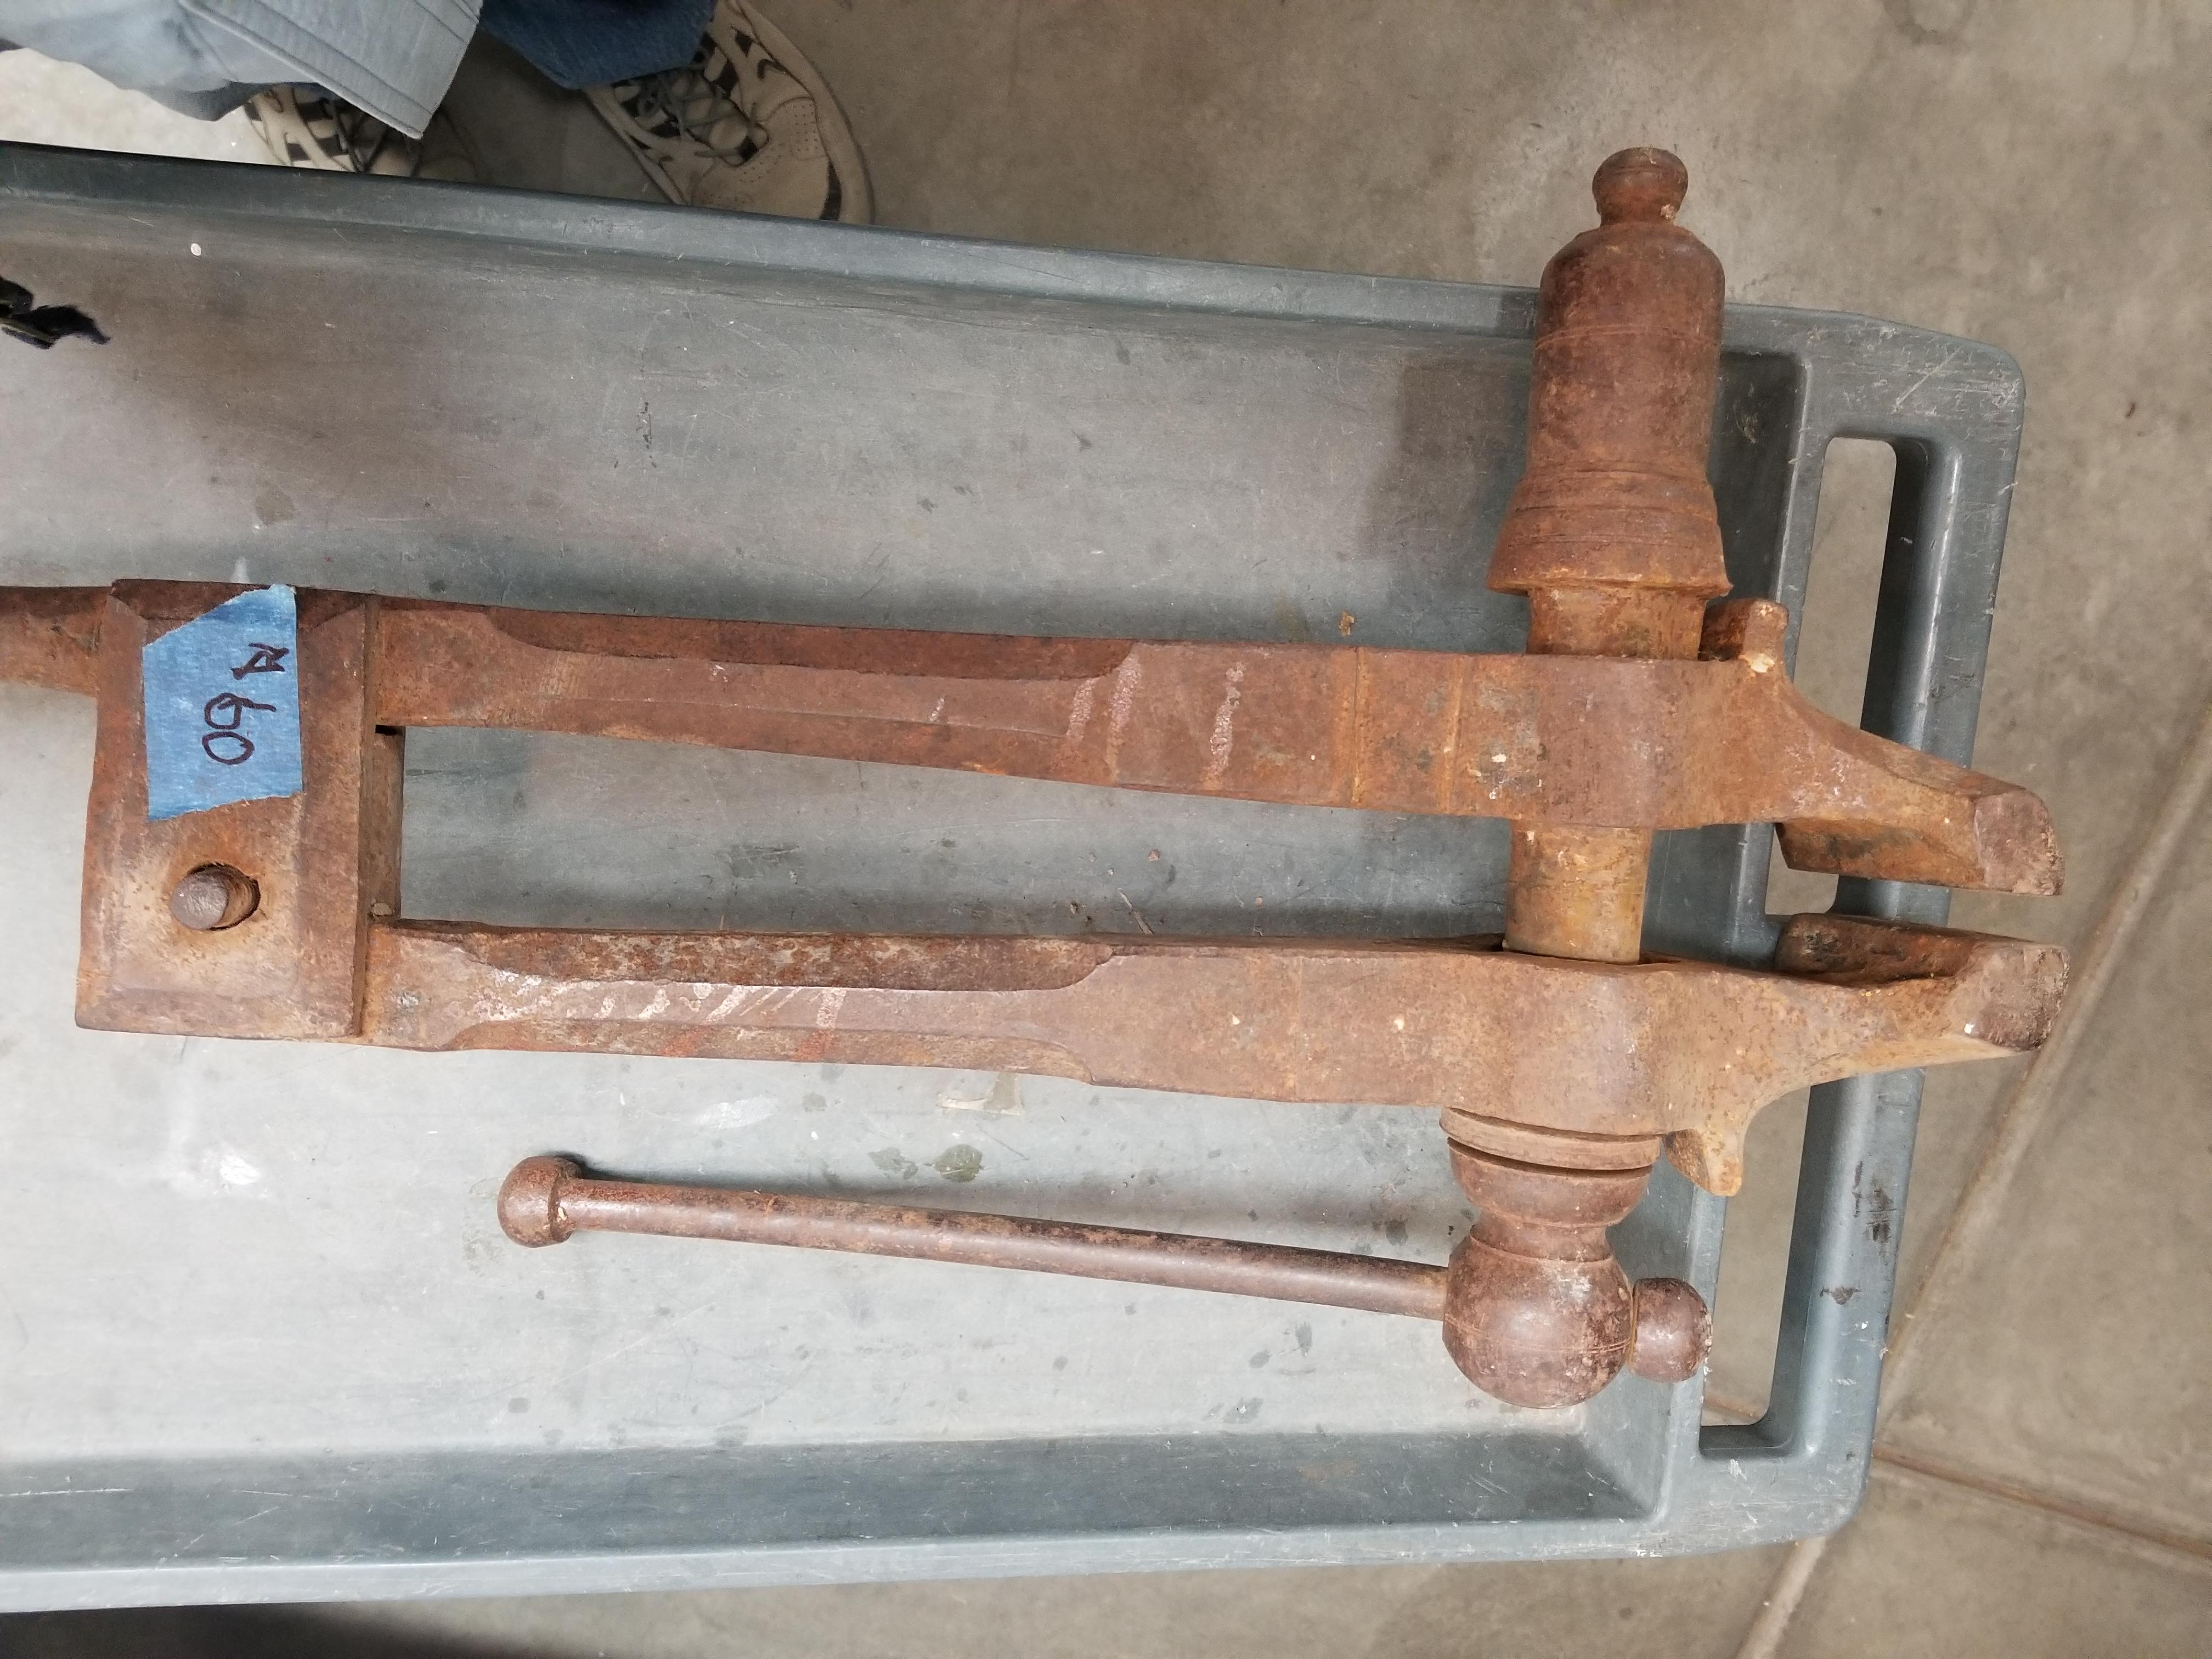
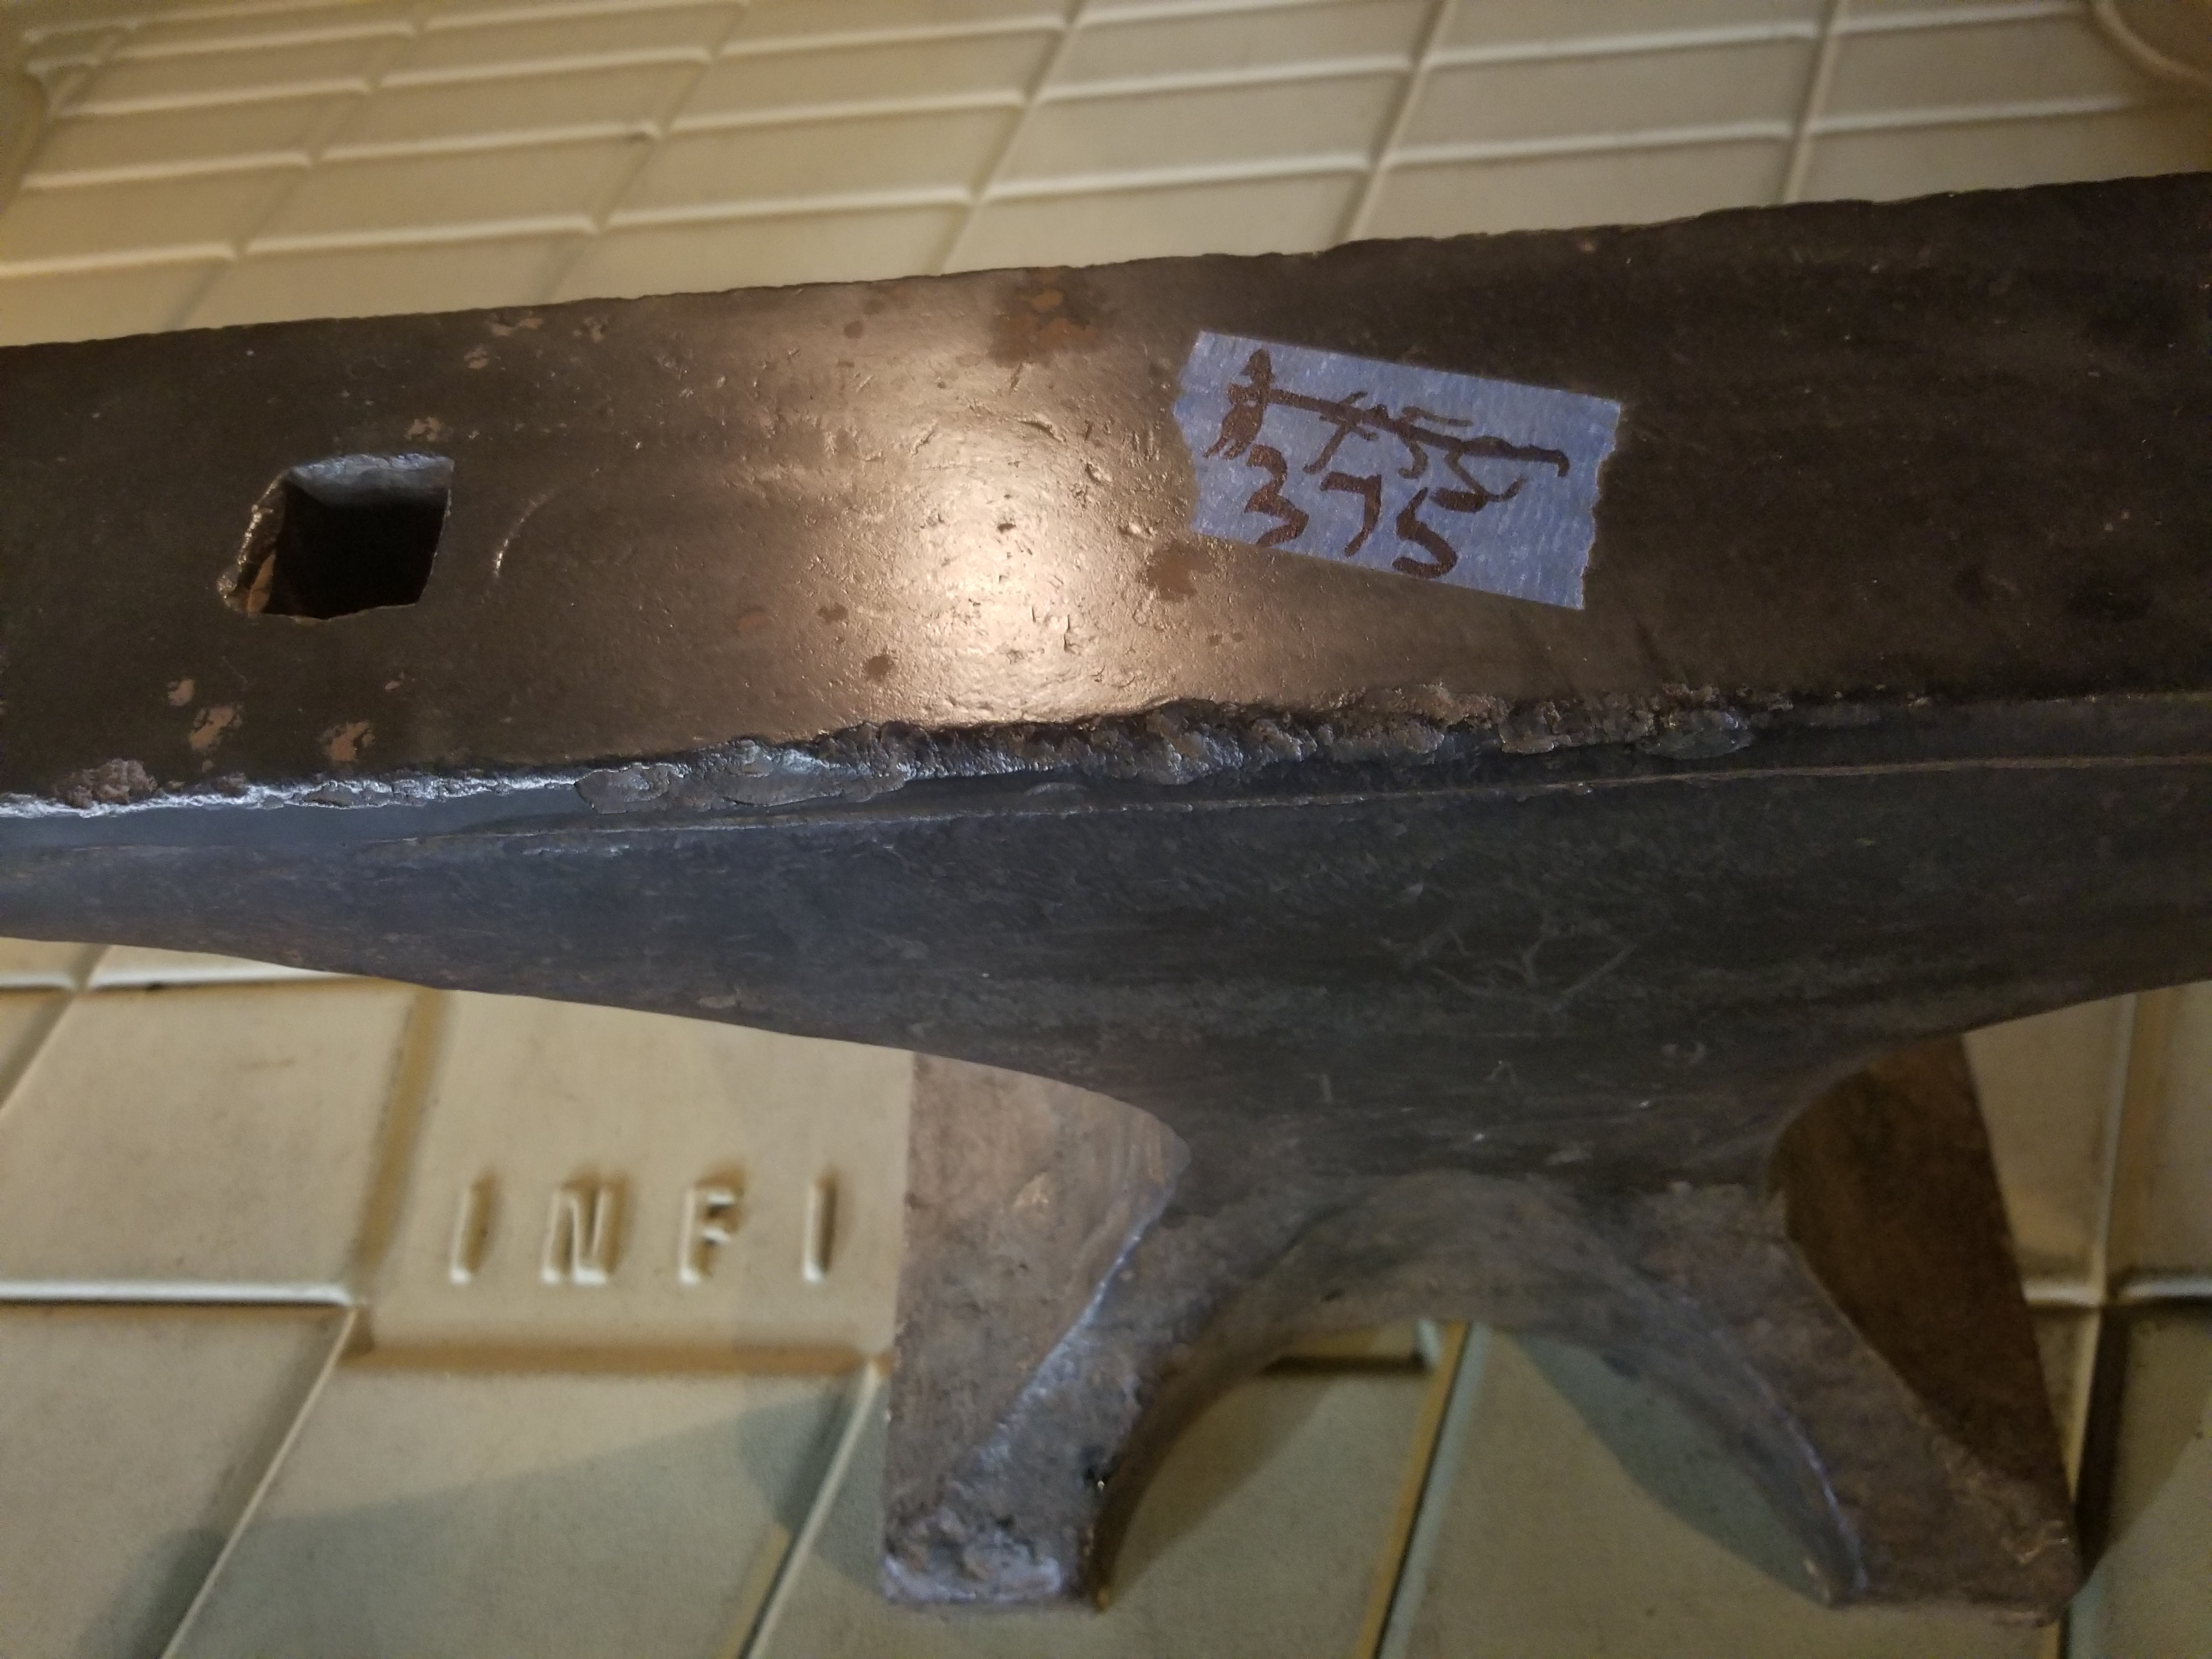
I haven't cleaned the post vise up yet but I did test it out and it works great. I found some printing on the screw box, I am wondering if it is a replacement screw box? No printing anywhere else on the vise.
-
7 hours ago, Hammerfall said:
Show us some pics of the other stuff"
I posted them here:
-
33 minutes ago, ThomasPowers said:
They are not supposed to spin fast enough to fly apart much. They are for touching up edges not for removing masses of metal.
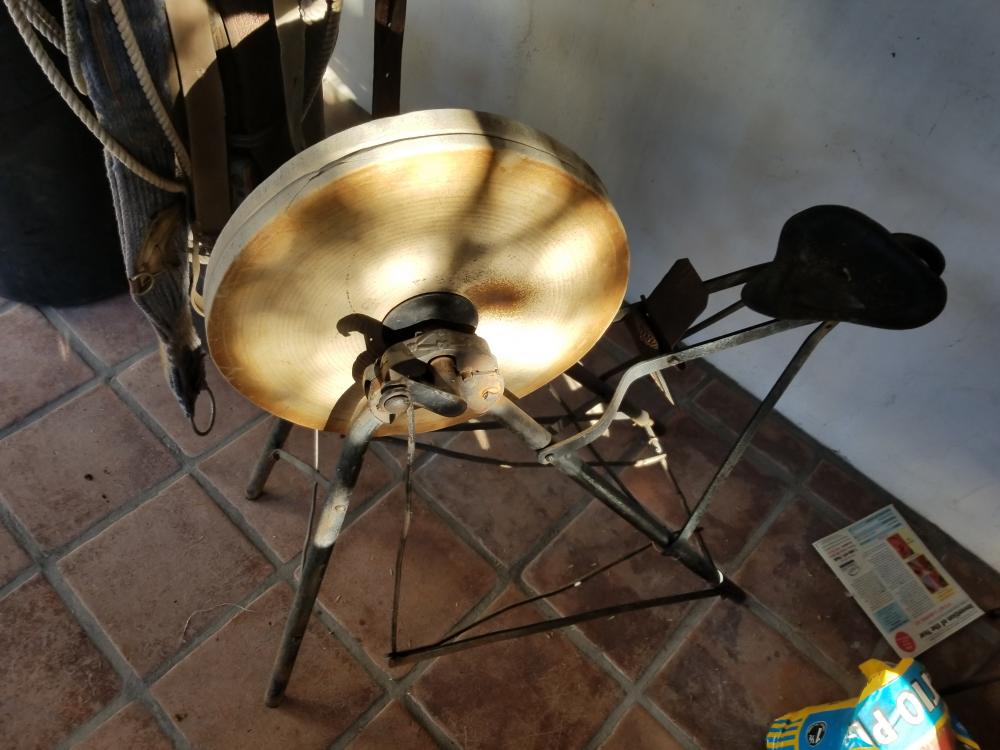
So I should stay away from the Binford Small Block Chevy Bicycle Grinder Adapter Kit?
-
yes I won't be using the wheel, it's just for display. I thought about what could happen if that wheel came apart..........noticed there is some kind of err, walnut guard down there in front of the seat.
-
Thanks Black Frog!
-
they are 4.5". I am looking forward to making the parts I need but first I am working on all the other stuff I got at that yard sale, really cheap.


-
29 minutes ago, Black Frog said:
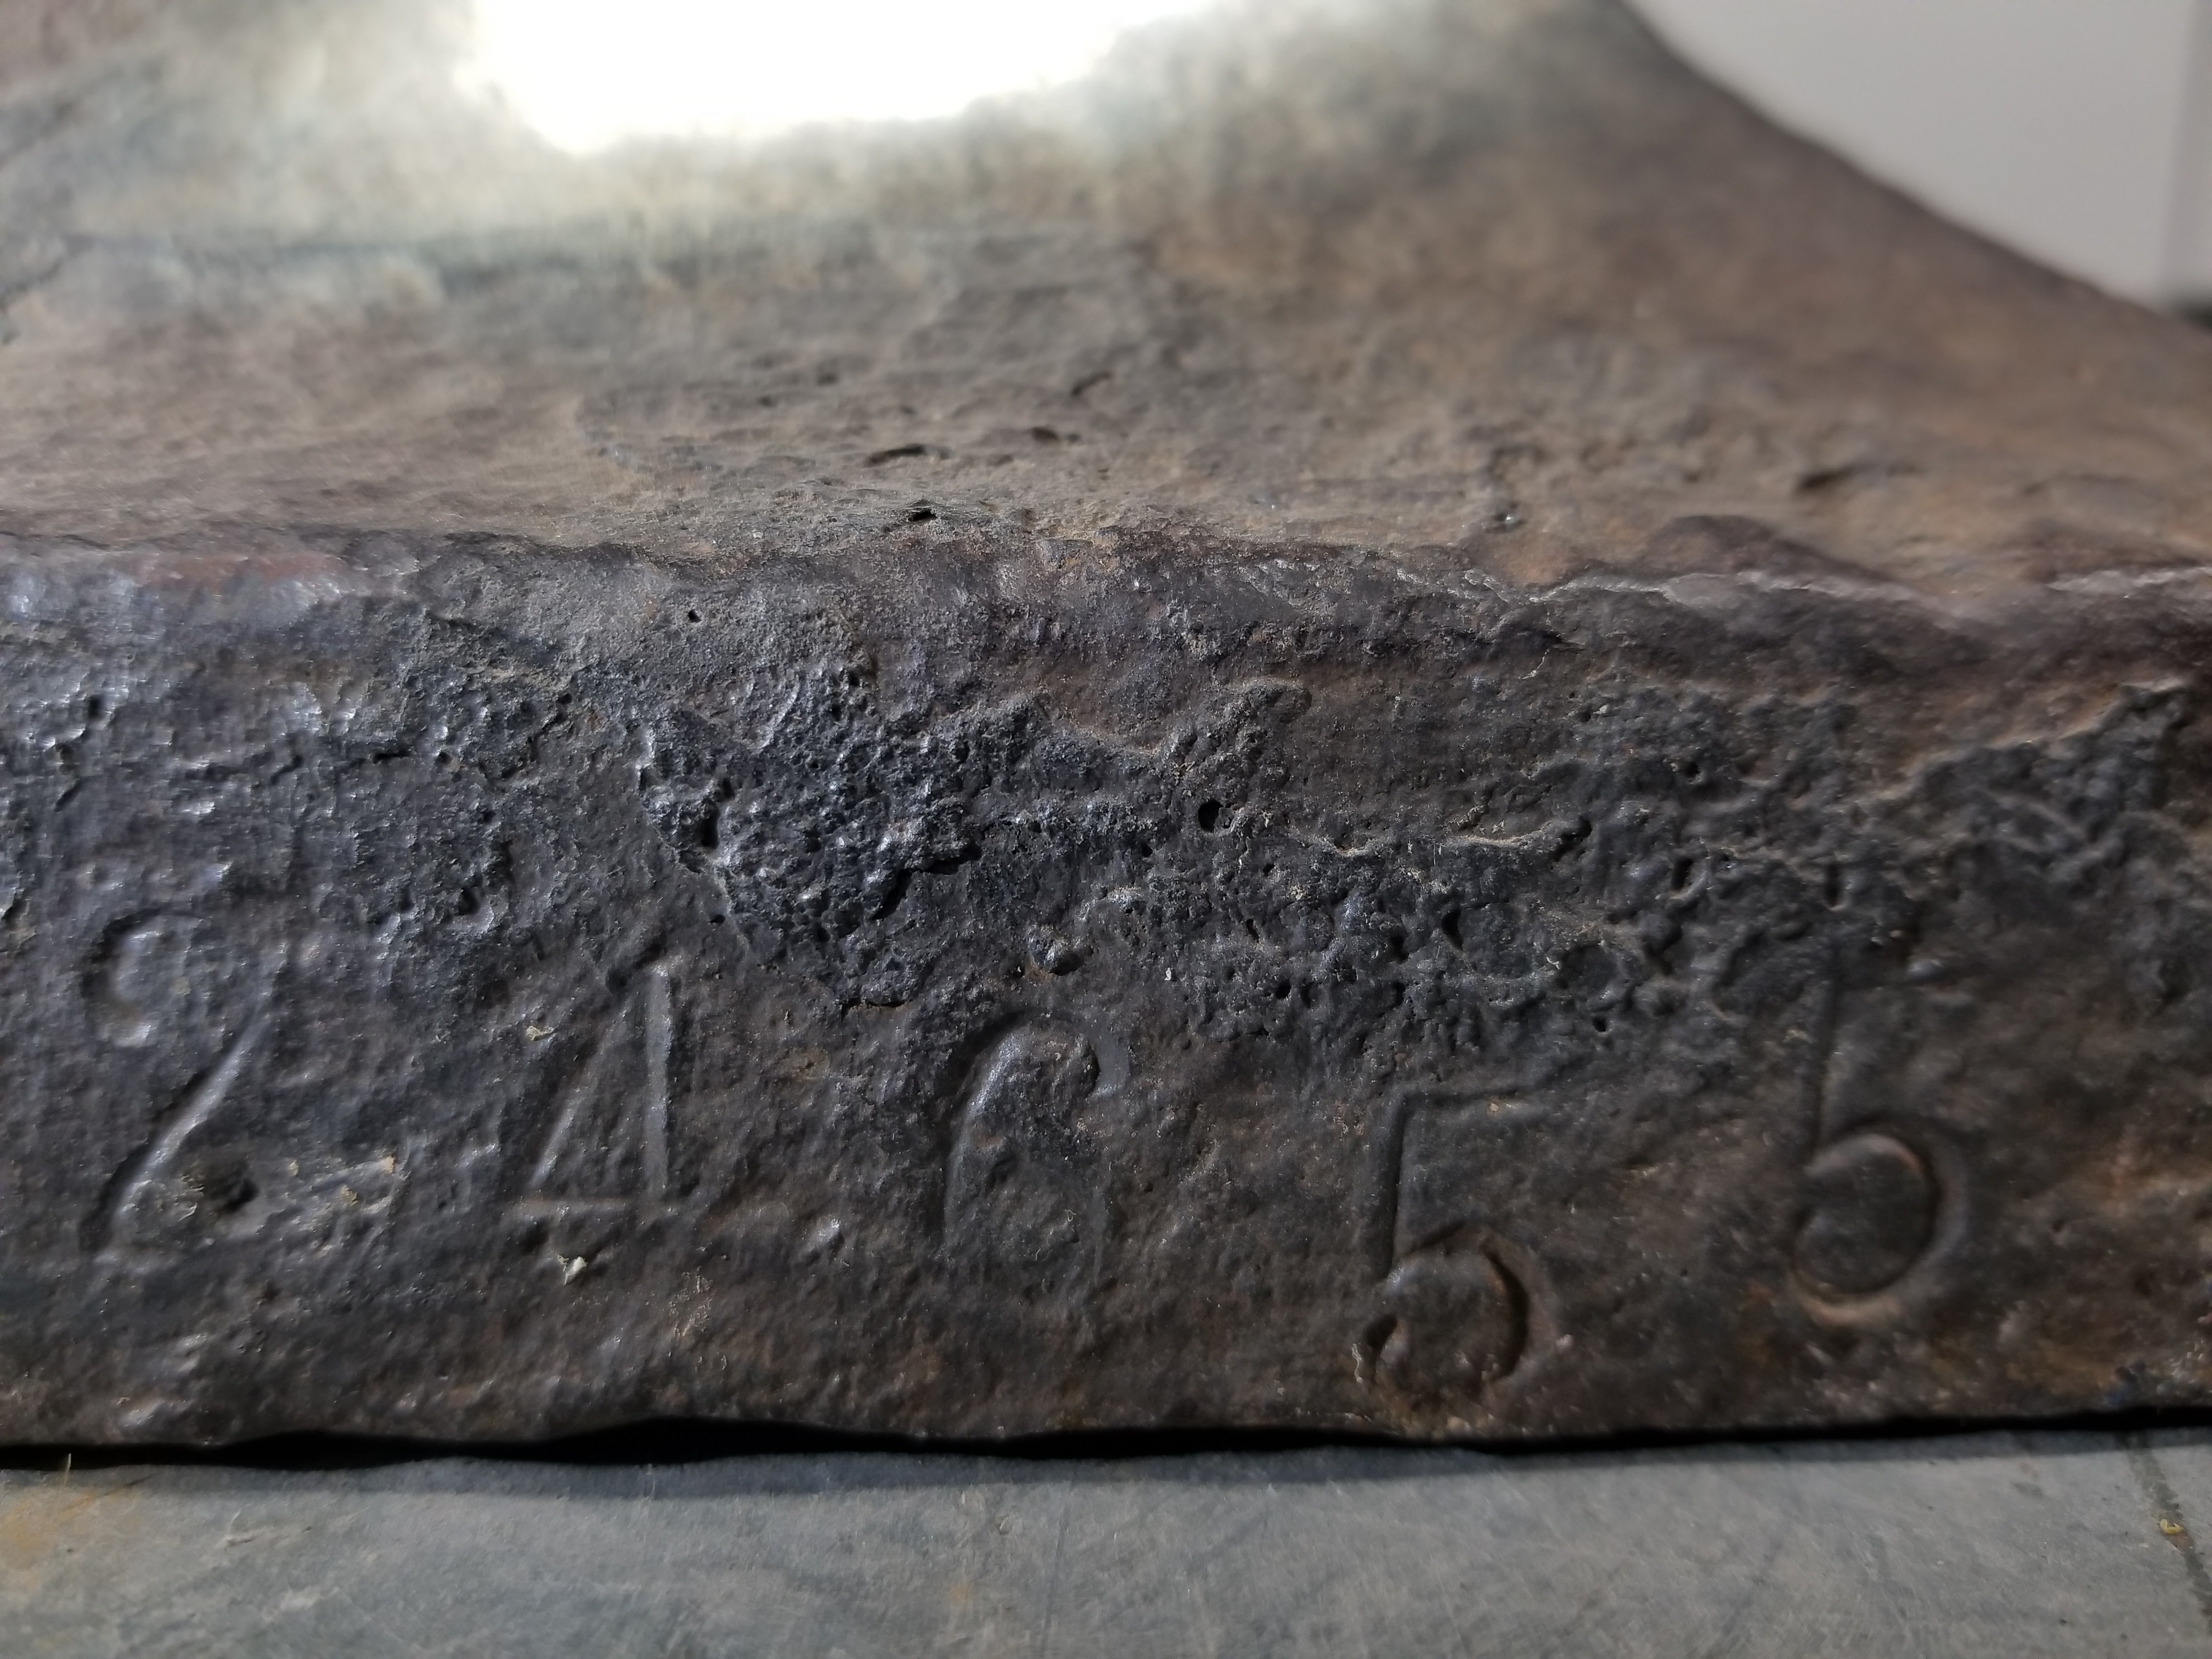
How about a close-up picture of the serial number on the front foot under the horn?
I didn't even know that number was there

And I just did a Google search and found an old thread on another forum about a 77 lb A&H only 34 numbers from mine!

-
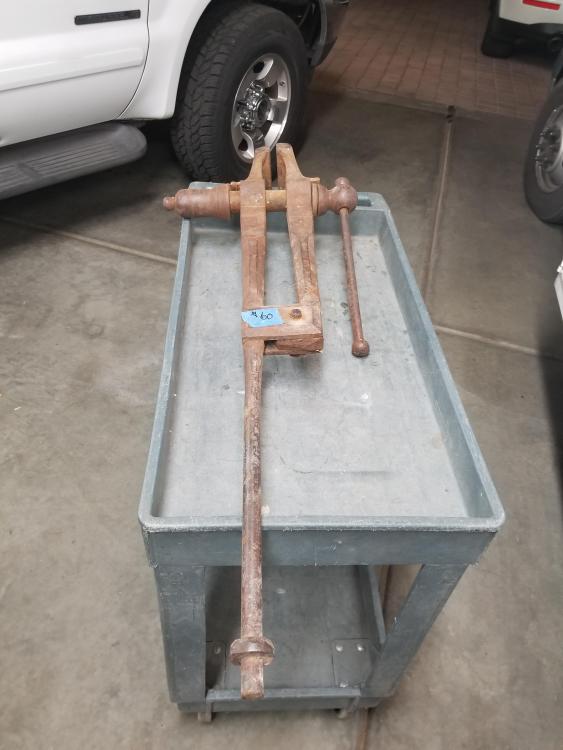
Just picked it up for $60, needs a spring and mount
-
I just bought an Arm & Hammer, see my new thread and tell me what you think of it.
-
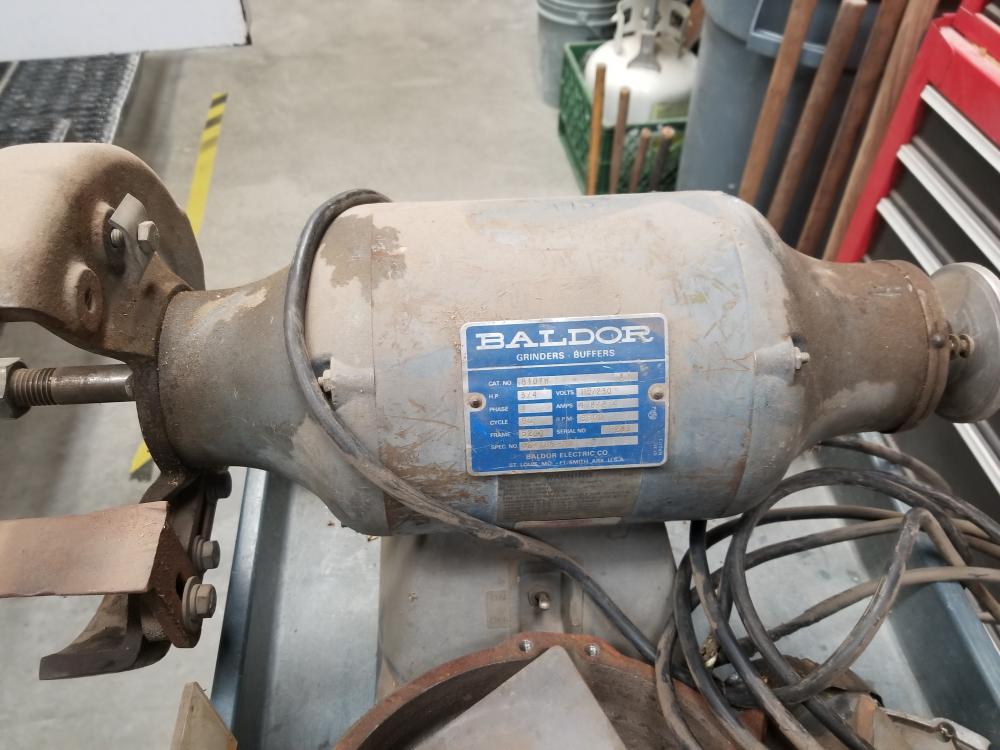
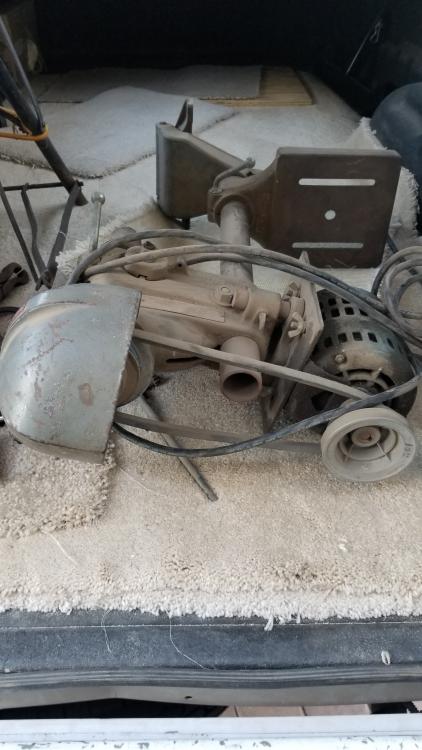
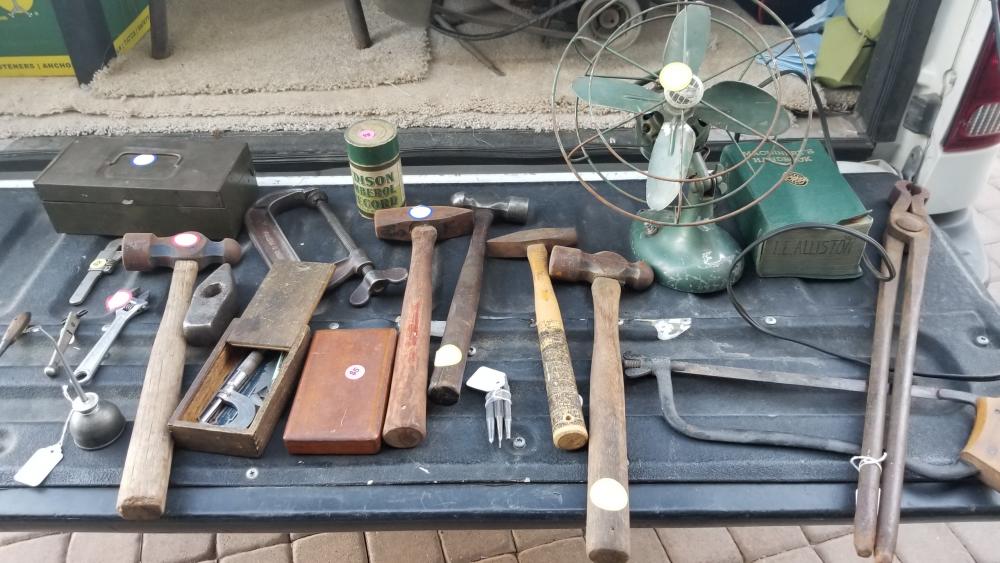
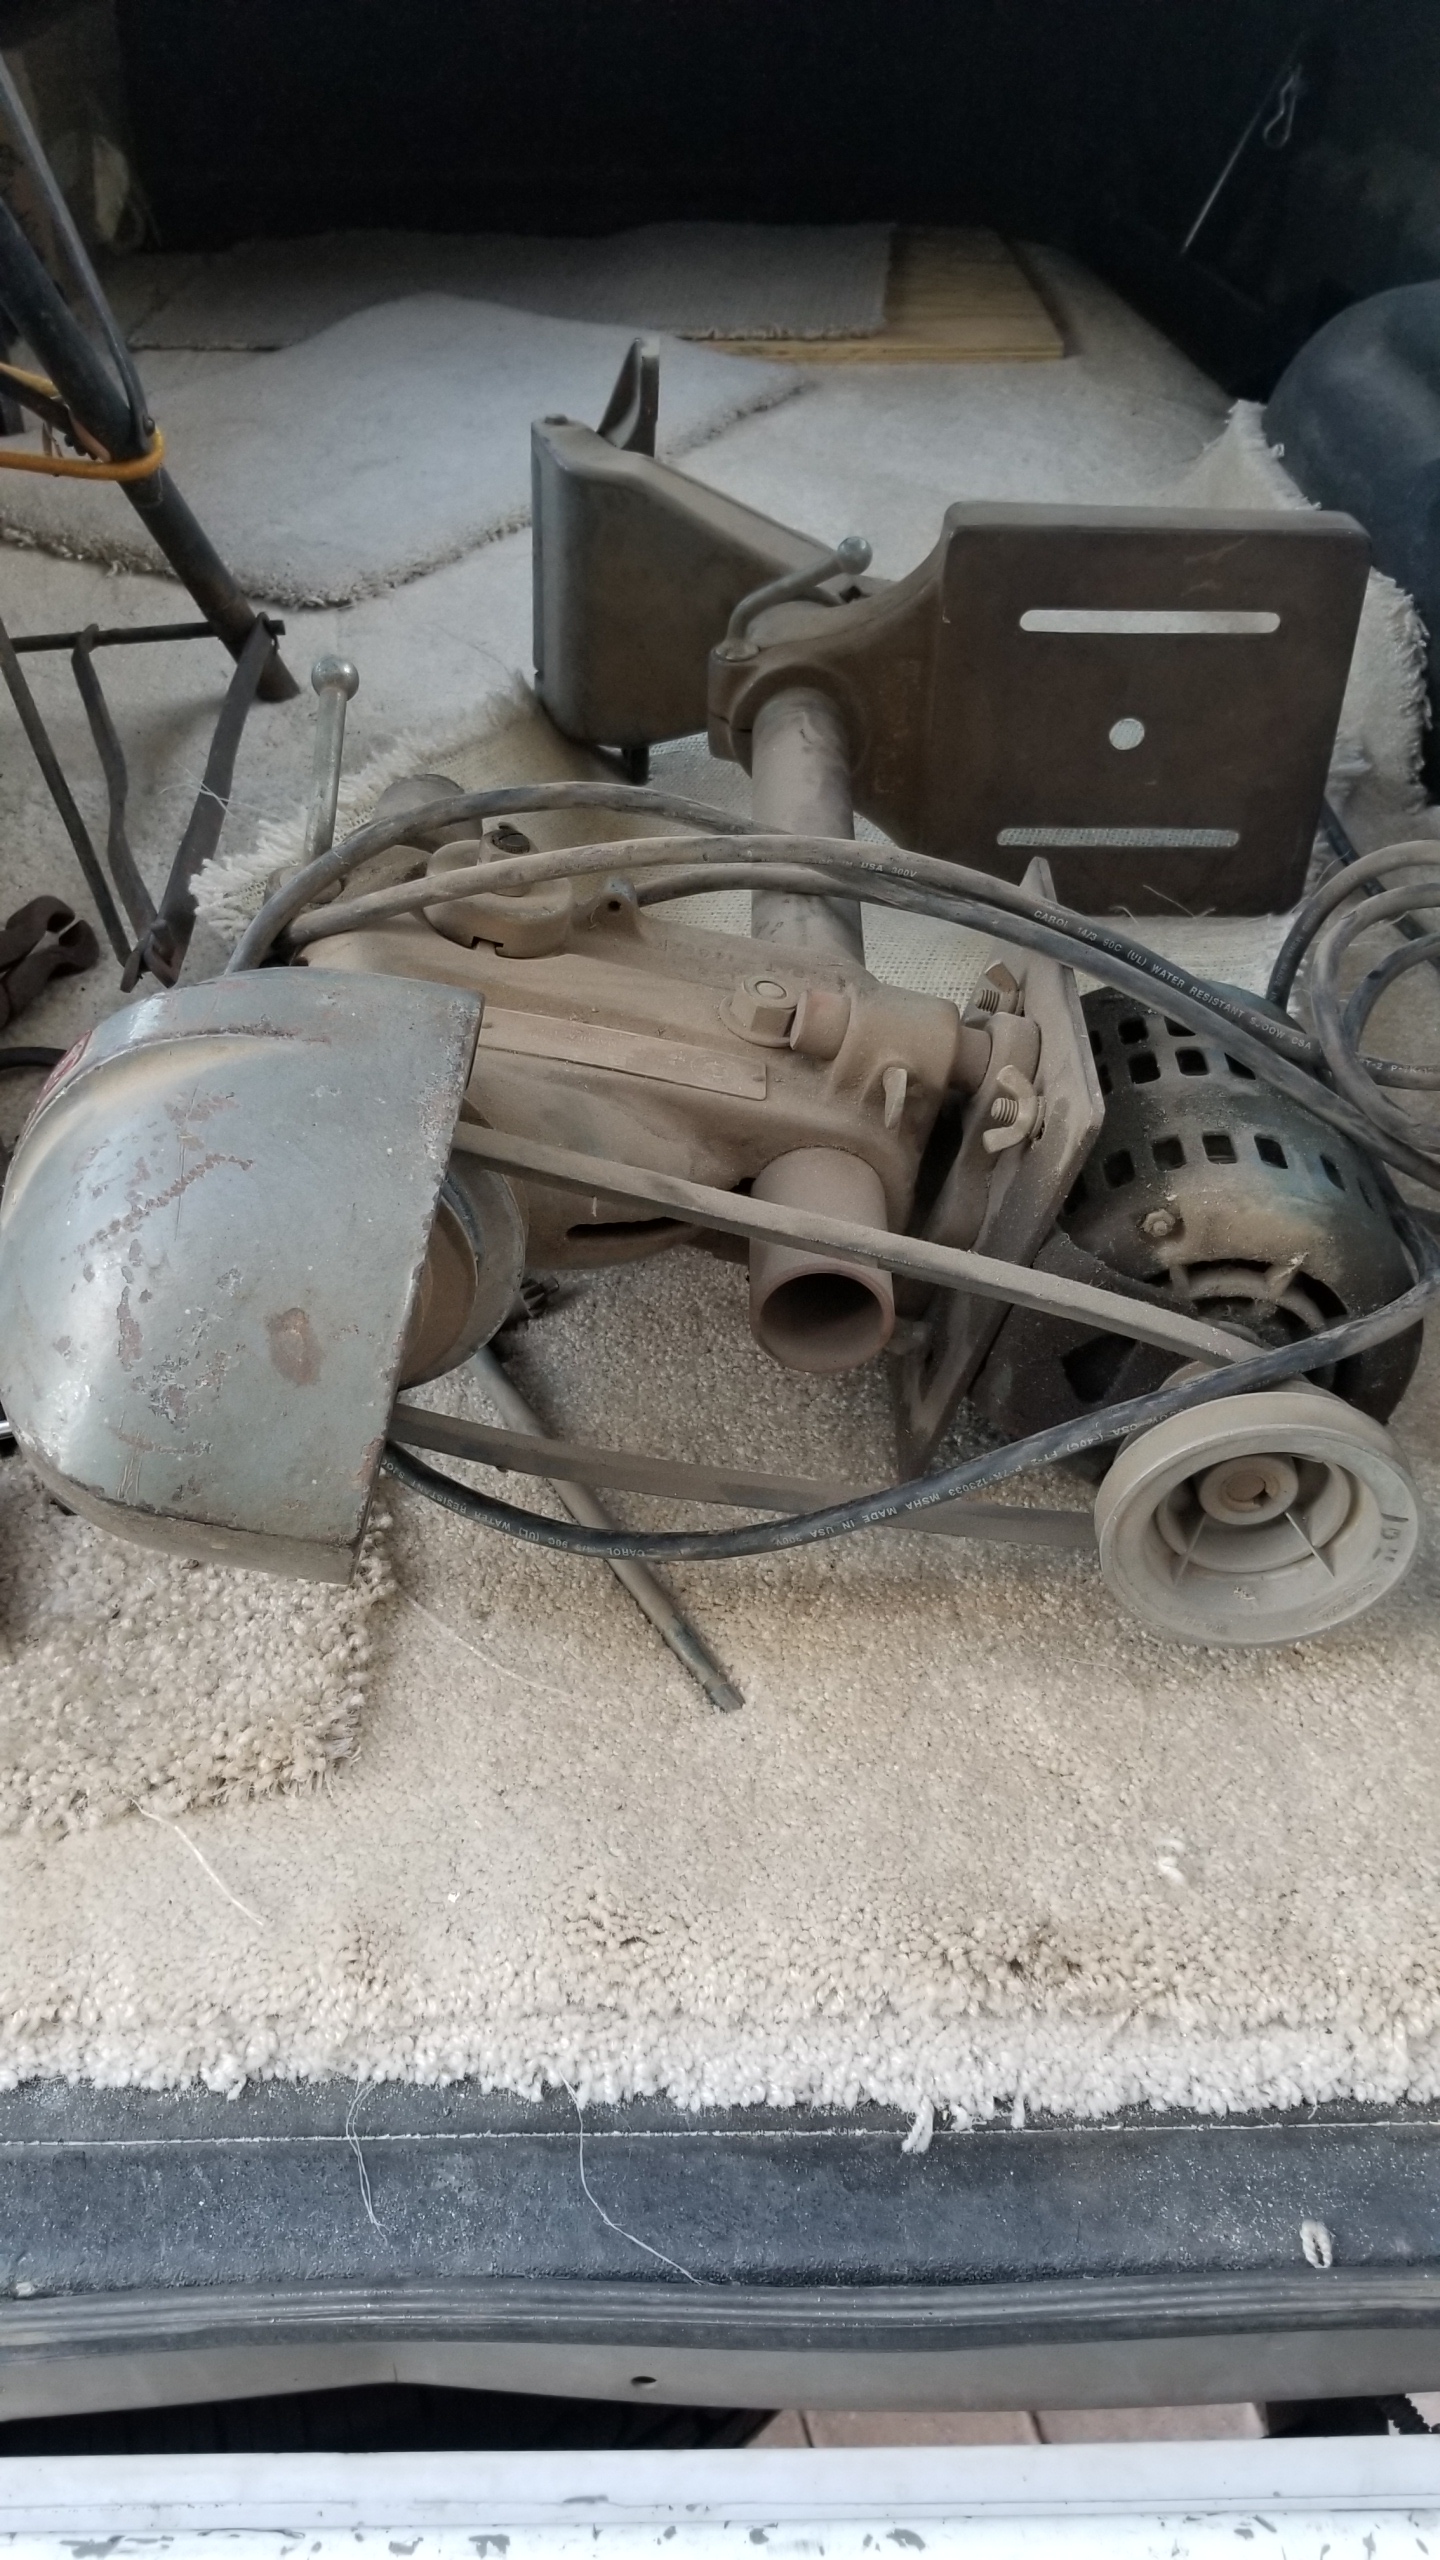
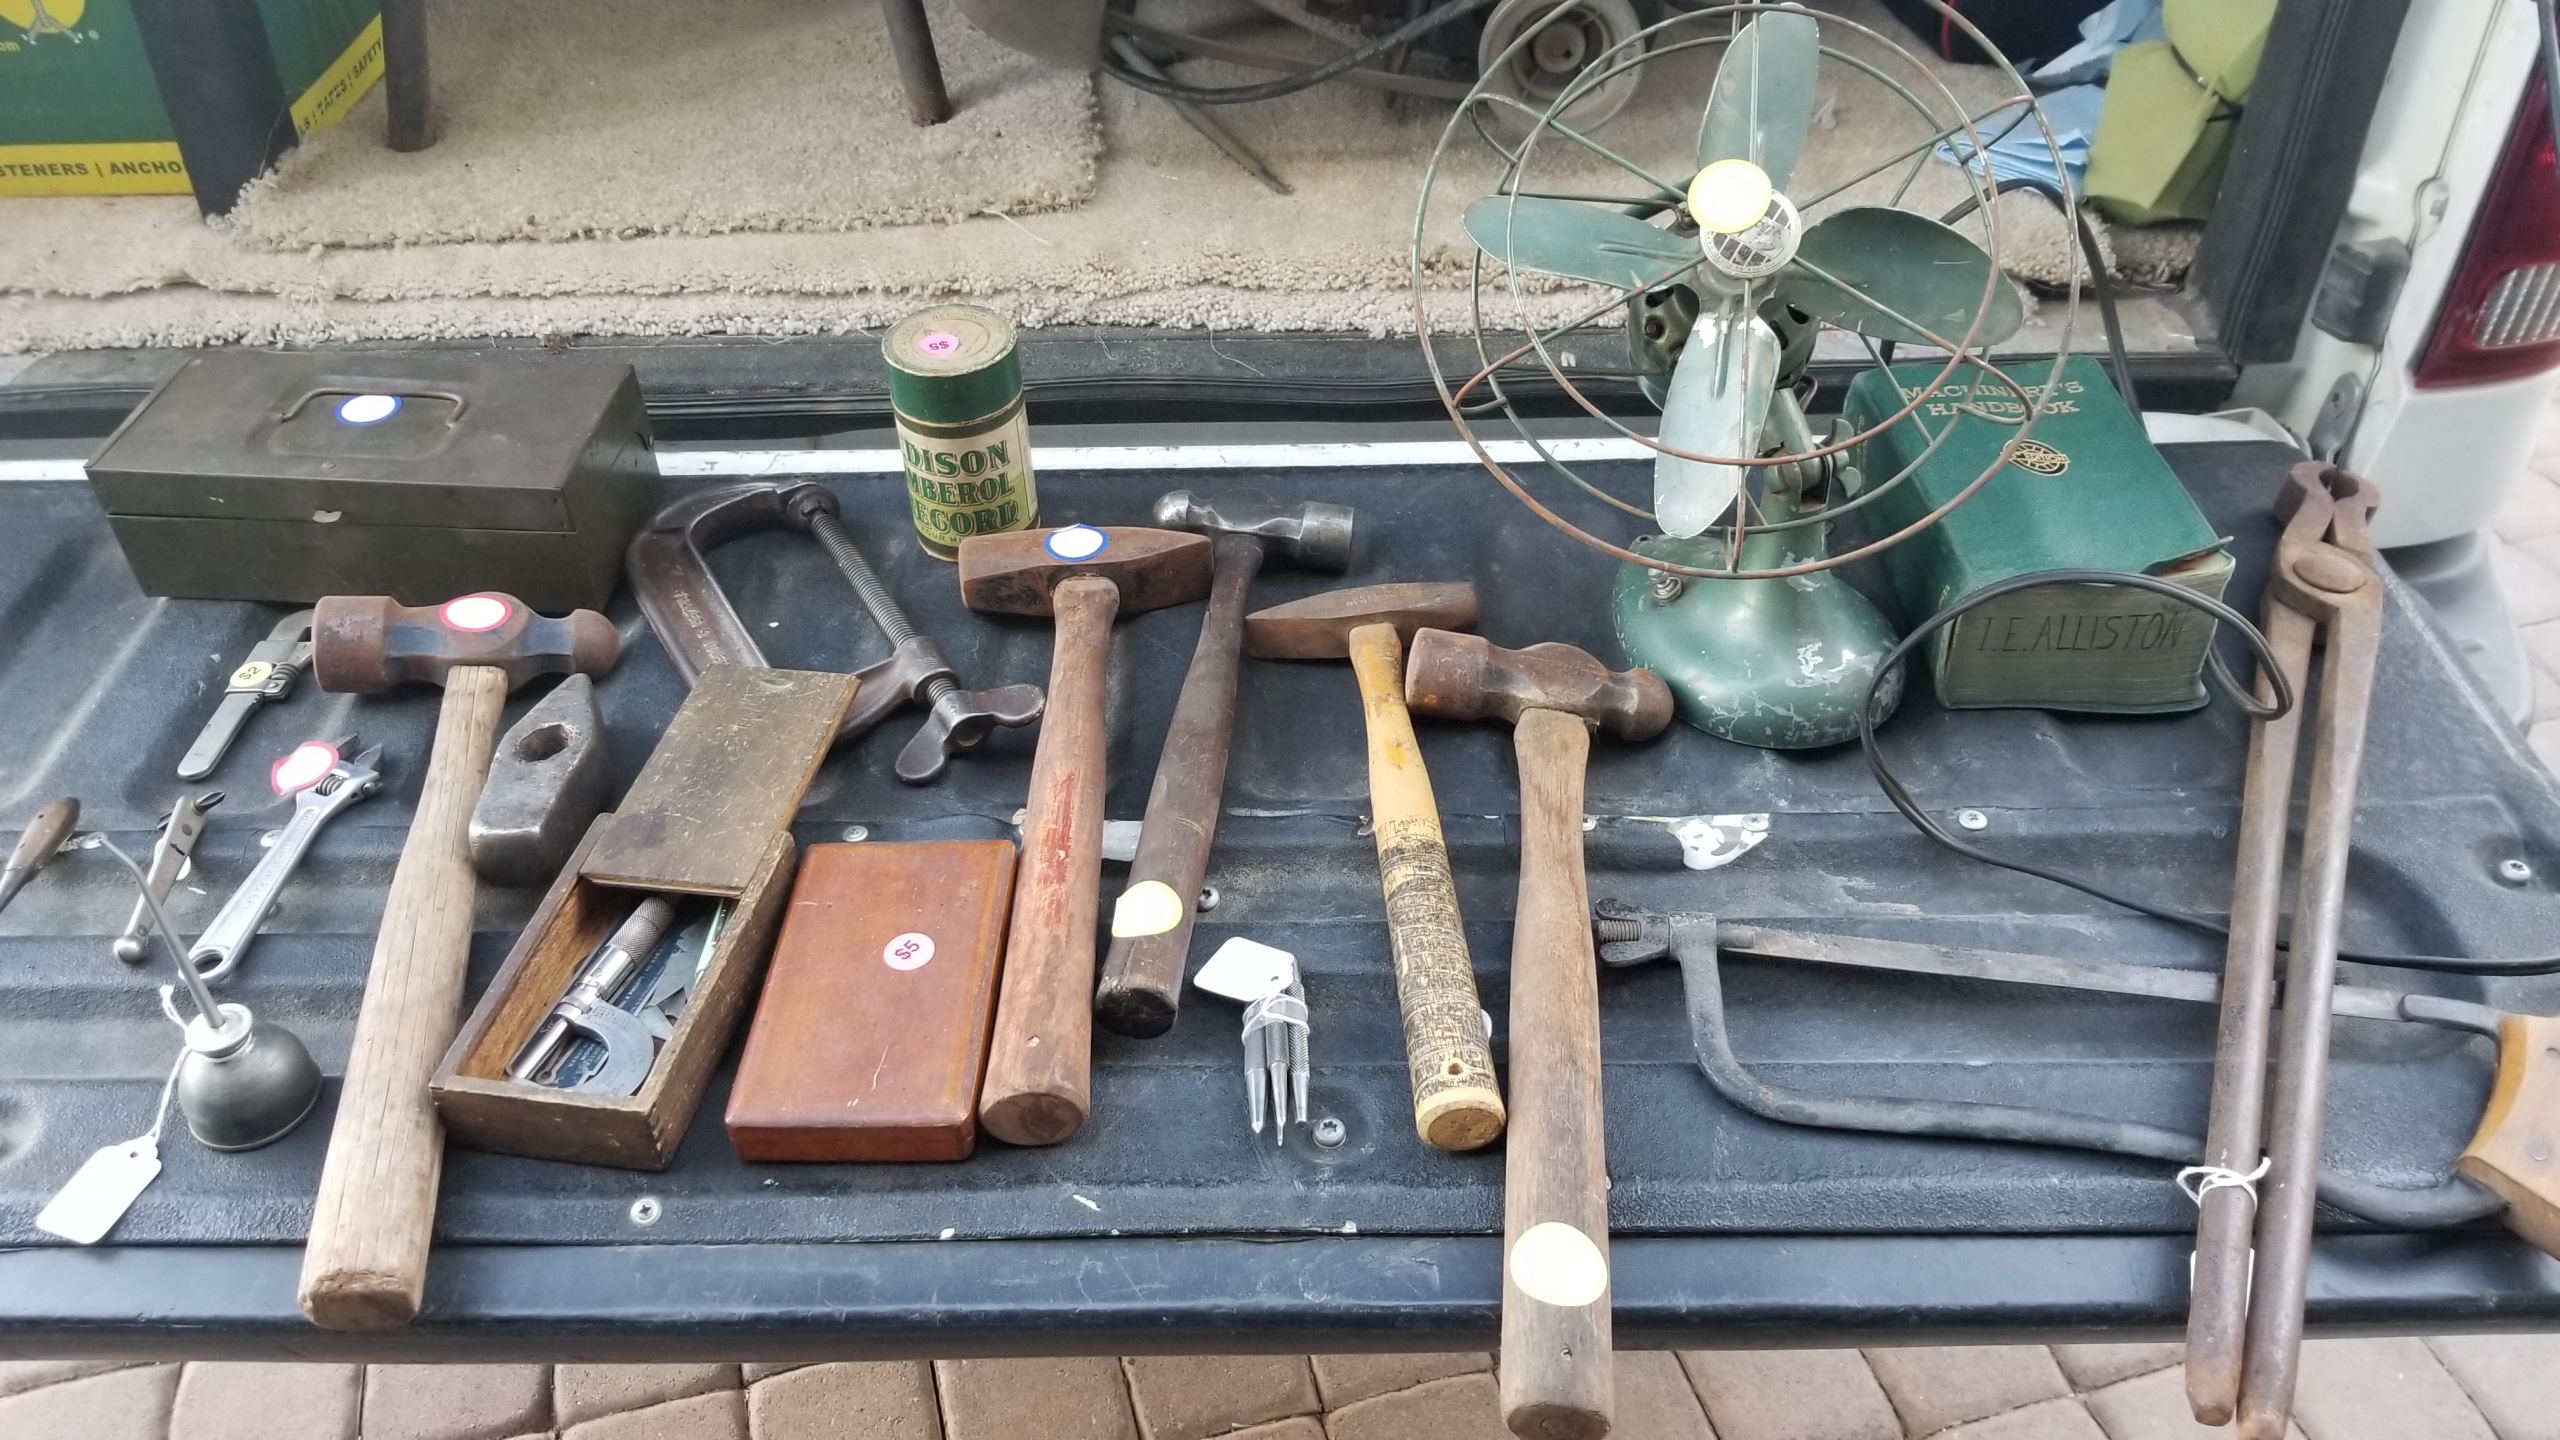
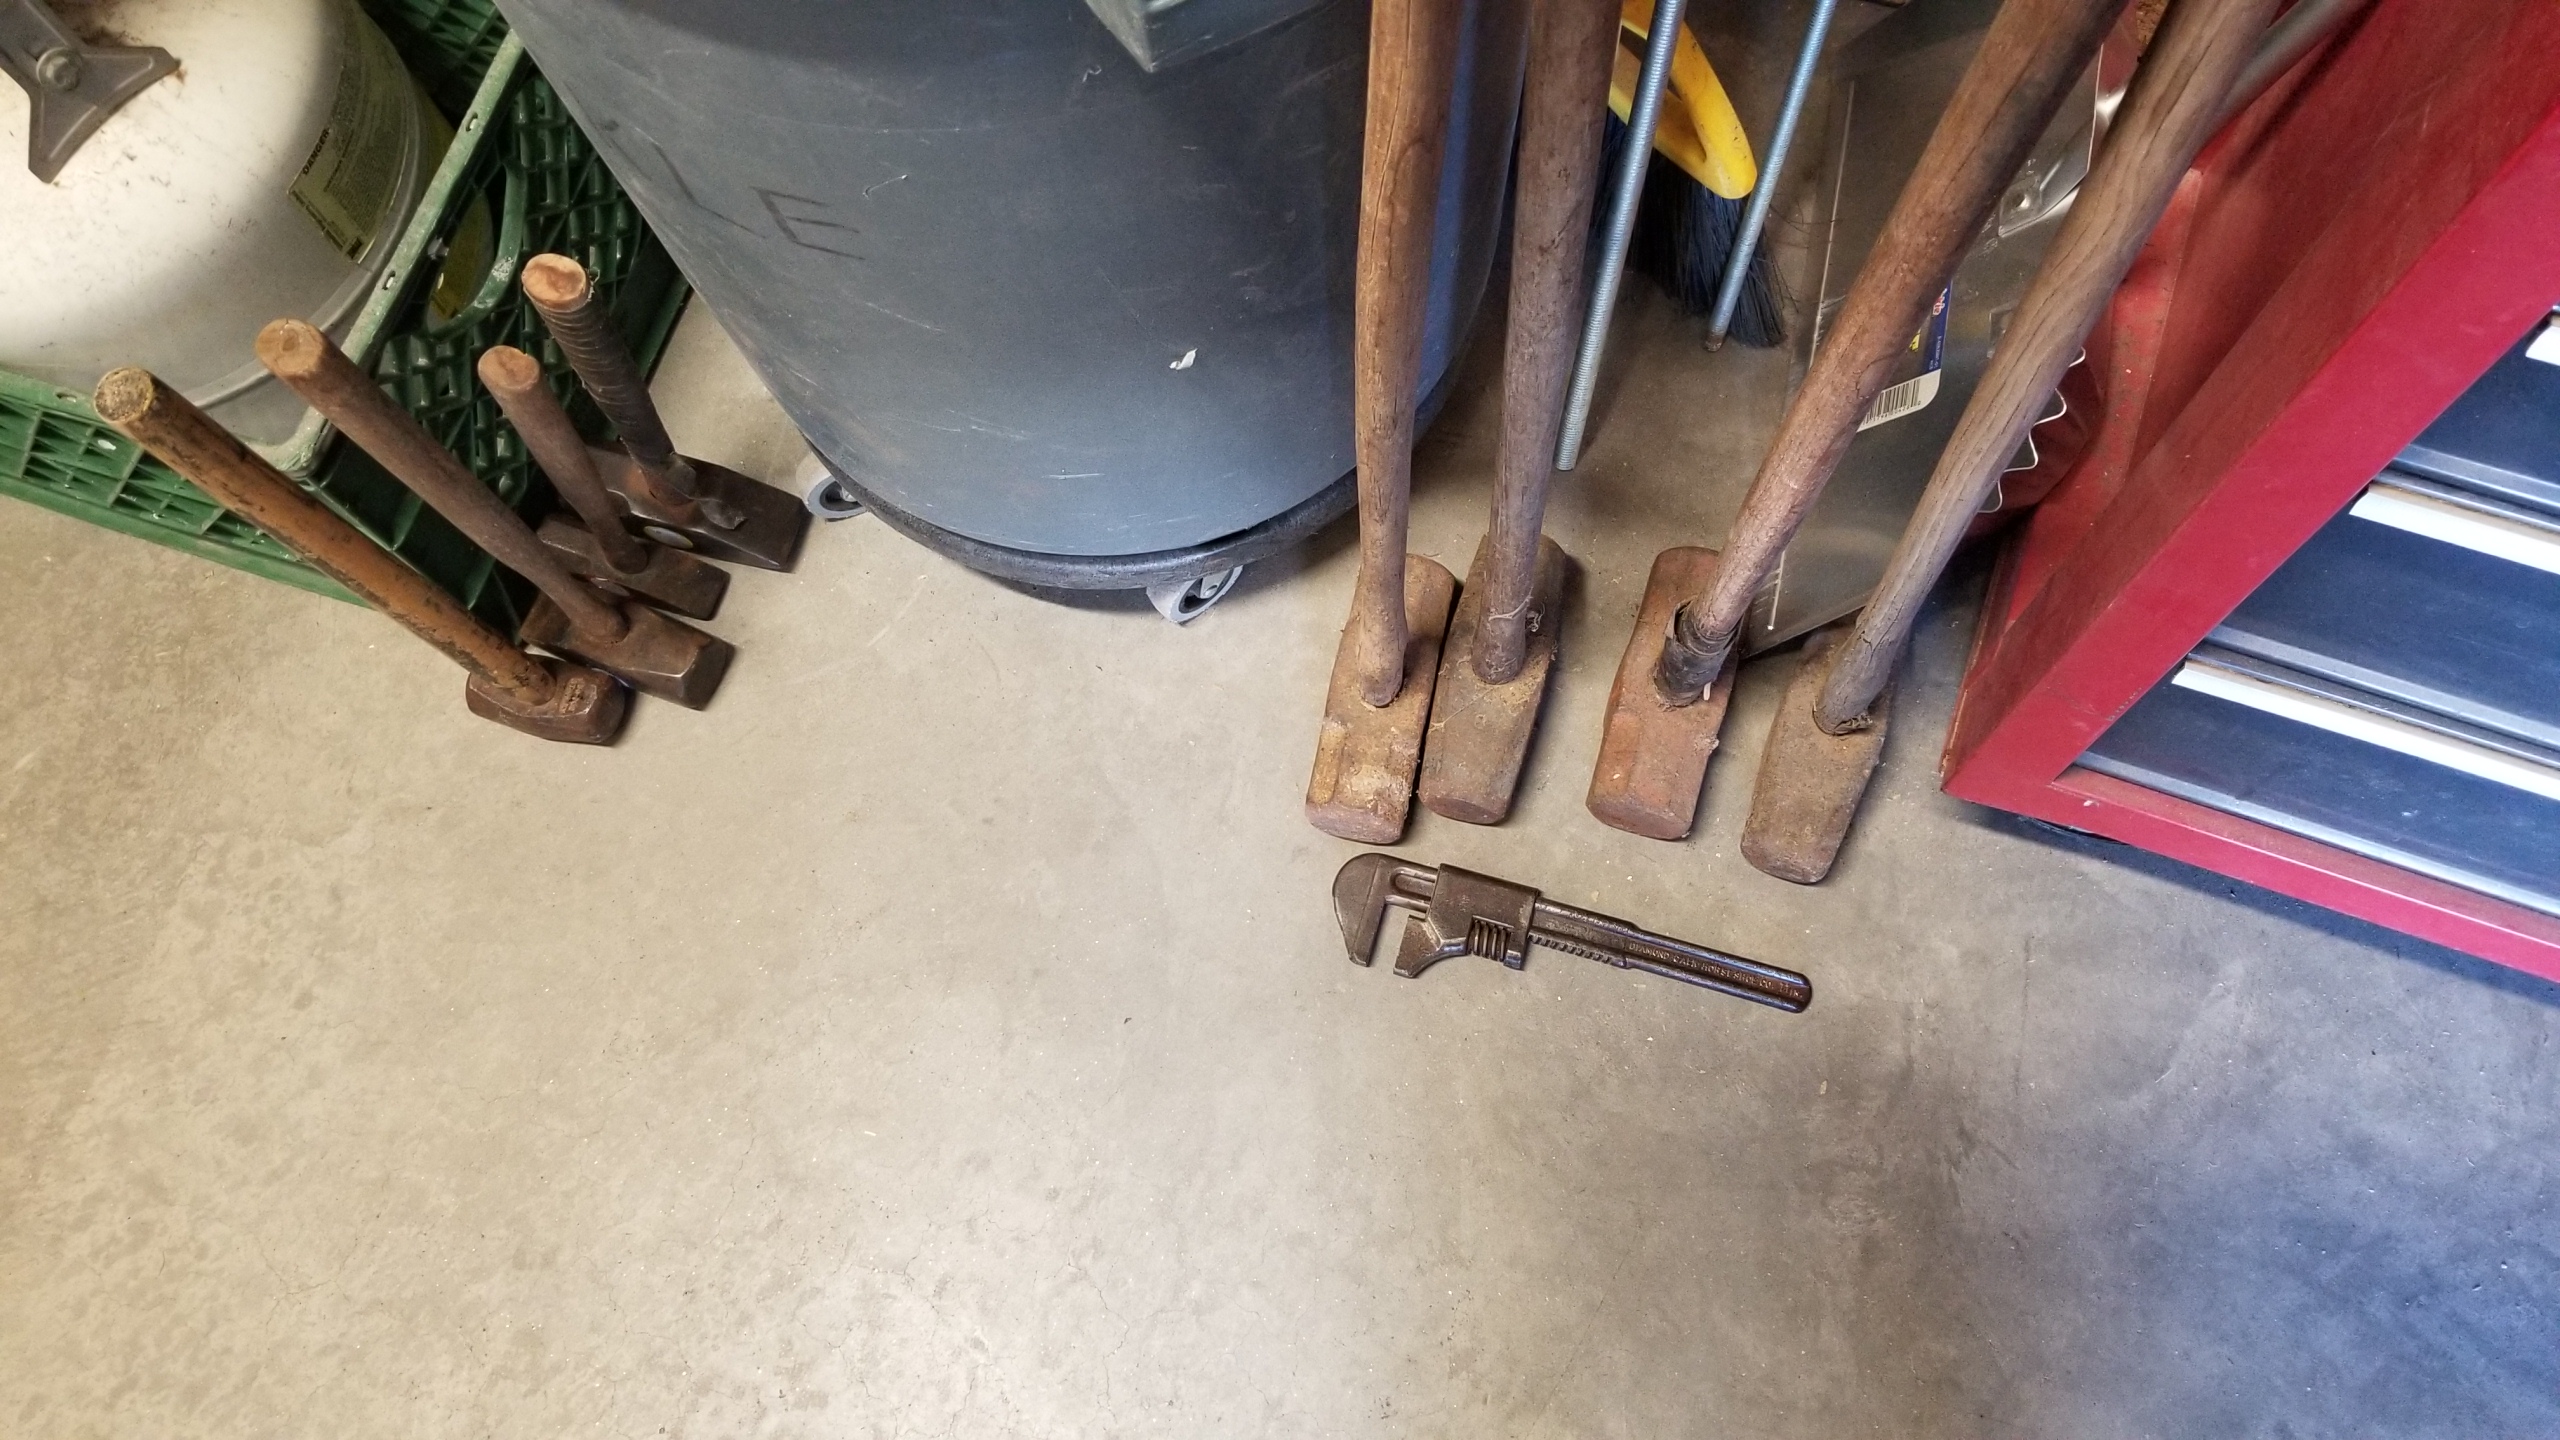
I finally got lucky. I think. A yard sale came up on Craigslist right near my house, blacksmith stuff. I emailed them and asked if I could come by tonight, before the opening tomorrow at 8. They said sure. Got there and met some very nice people. He is retired and selling some of his stuff. So I got this 149LB Arm & Hammer for $375. It was his first anvil. My 1" ball bearing rebounded 9 inches after being dropped from 10, tried in numerous times all over the face. I also got a pile of hammers, $5 ea for the sledges and $3 to $10 on the others. Post vise for $60, wrench for $8. Baldor 8" grinder, needs work, $15!!! (it actually runs but sounds like it needs bearings) US made Craftsman grinder $40, it coasted so long when I shut it down I thought the switch was broke.
The anvil looks rough but the surface is great, and from a little research that I did the A&H was a rough looking anvil with most attention spent on the working face. I understand the A&H was made in pieces, and wrought. The horn sure looks like a separate piece, and even looks like a repair was attempted on it?


-
As a side note, that fine metal dust that seems to find it's way everywhere is a good reminder to wear a respirator, even for brief grinding sessions. I find if I keep them hanging around the shop I am more likely to grab one. A Ziplock bag keeps them clean when not in use.
-
I'm no expert on anvils but I may be an expert on looking for one as I've been watching CL for a couple years now. I have a nice Swedish anvil that I got for $150 but only 65 lbs, my 112 lb Mousehole is very, very rough and I'd like to replace it with a nicer one someday but if nothing comes up I am thinking about the NC Tool Cavalry anvil. It sells for $440 and from what I have read seems like very good quality. Powerfist on the other hand has some sketchy reviews and QC seems poor with inconsistency from anvil to anvil . A Google search brings up a thread about them here on IFI, the consensus seems they are cast iron and they don't seem too knowledgeable on their website. I would rather buy something made here from a company that has been around and knows what they are doing, NC tool anvils are made in North Carolina.
-
I set up an area outside with work tables and a tin roof, I do all my heavy grinding out there. Of course it doesn't get very cold here so that helps.
-
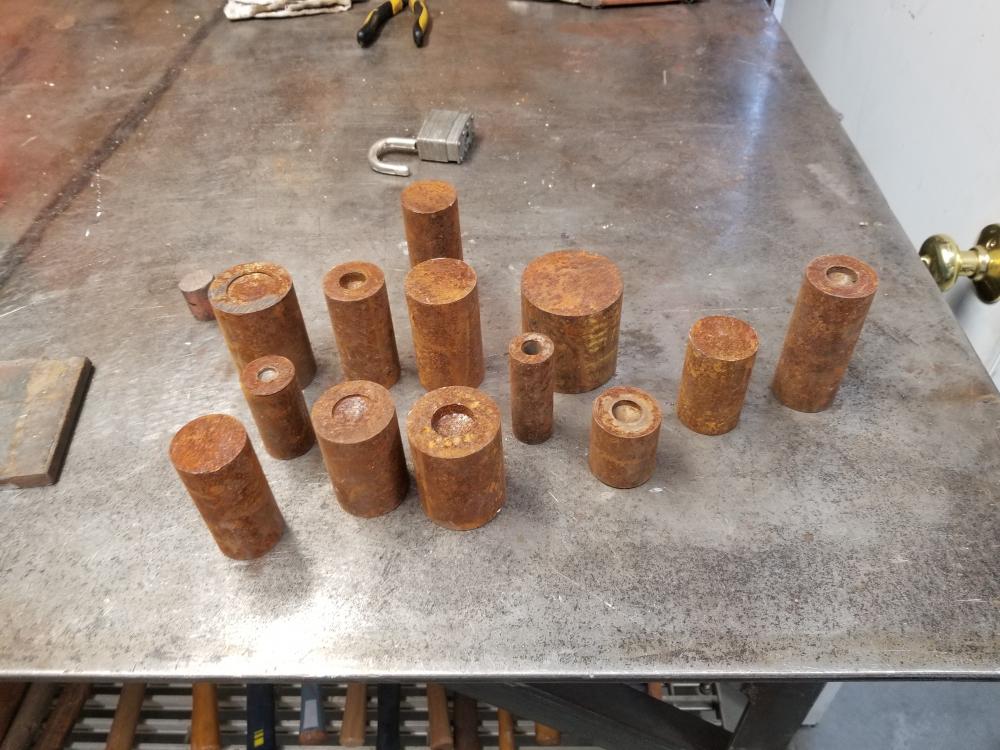
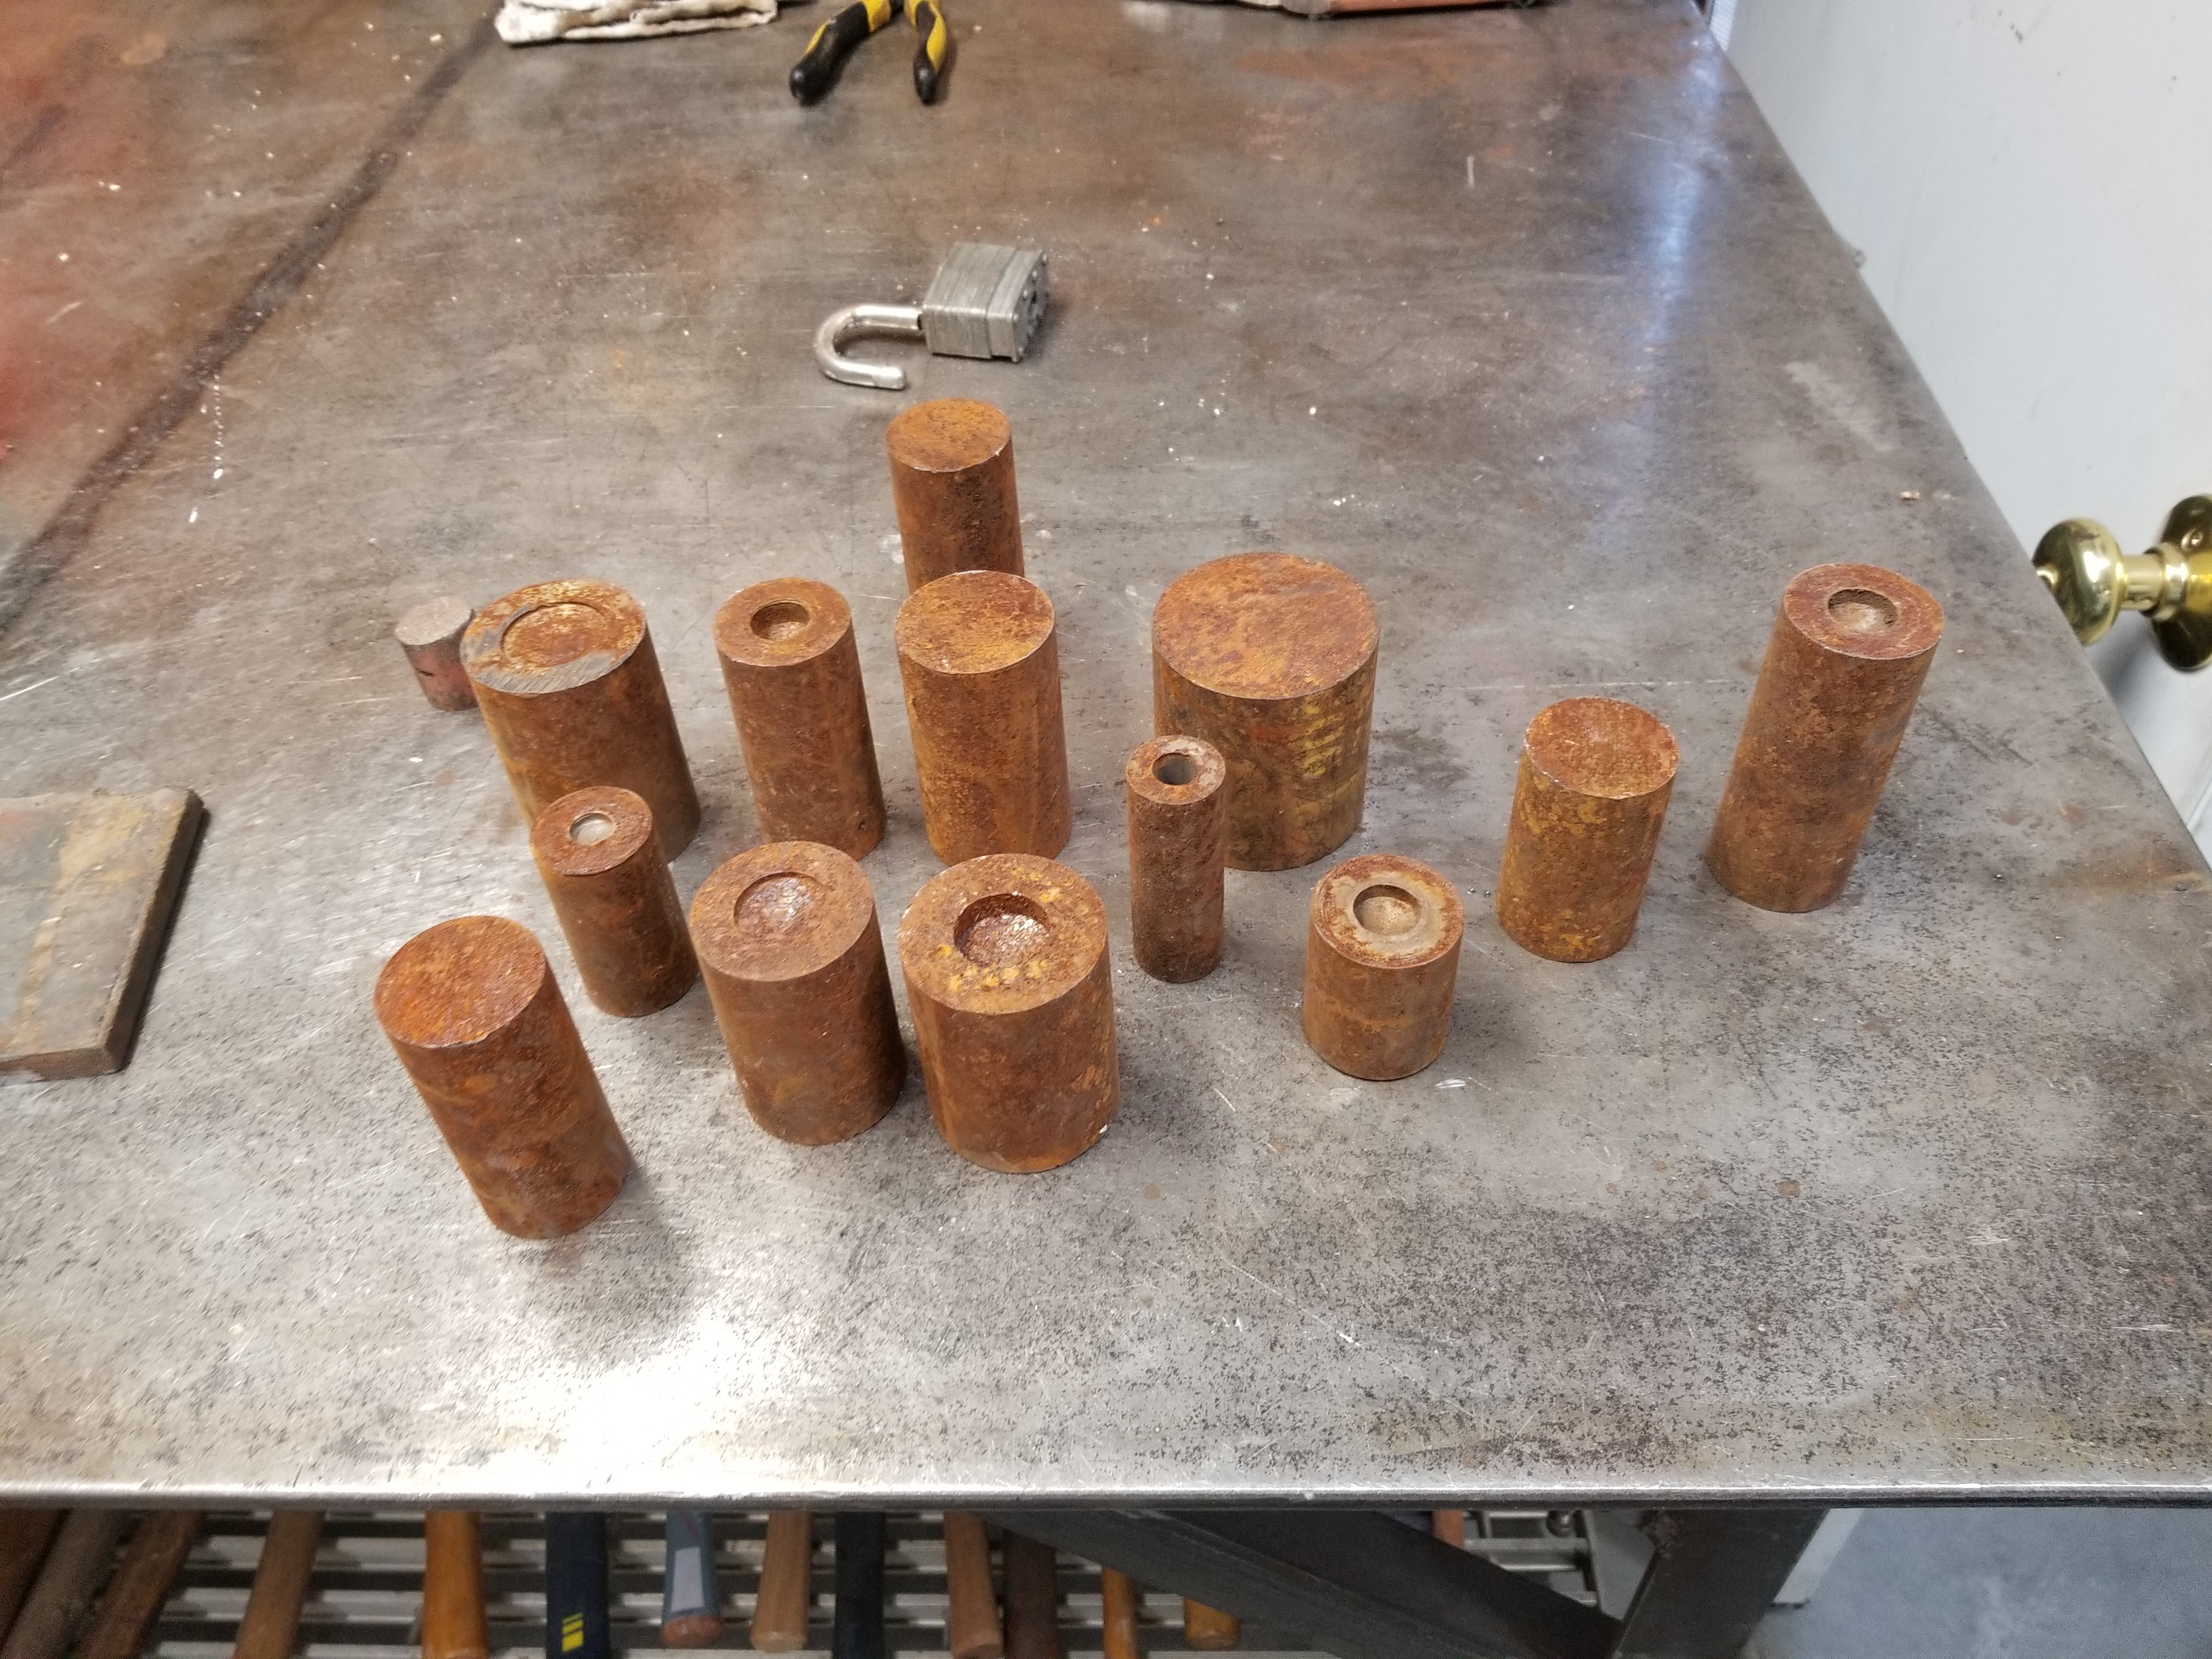
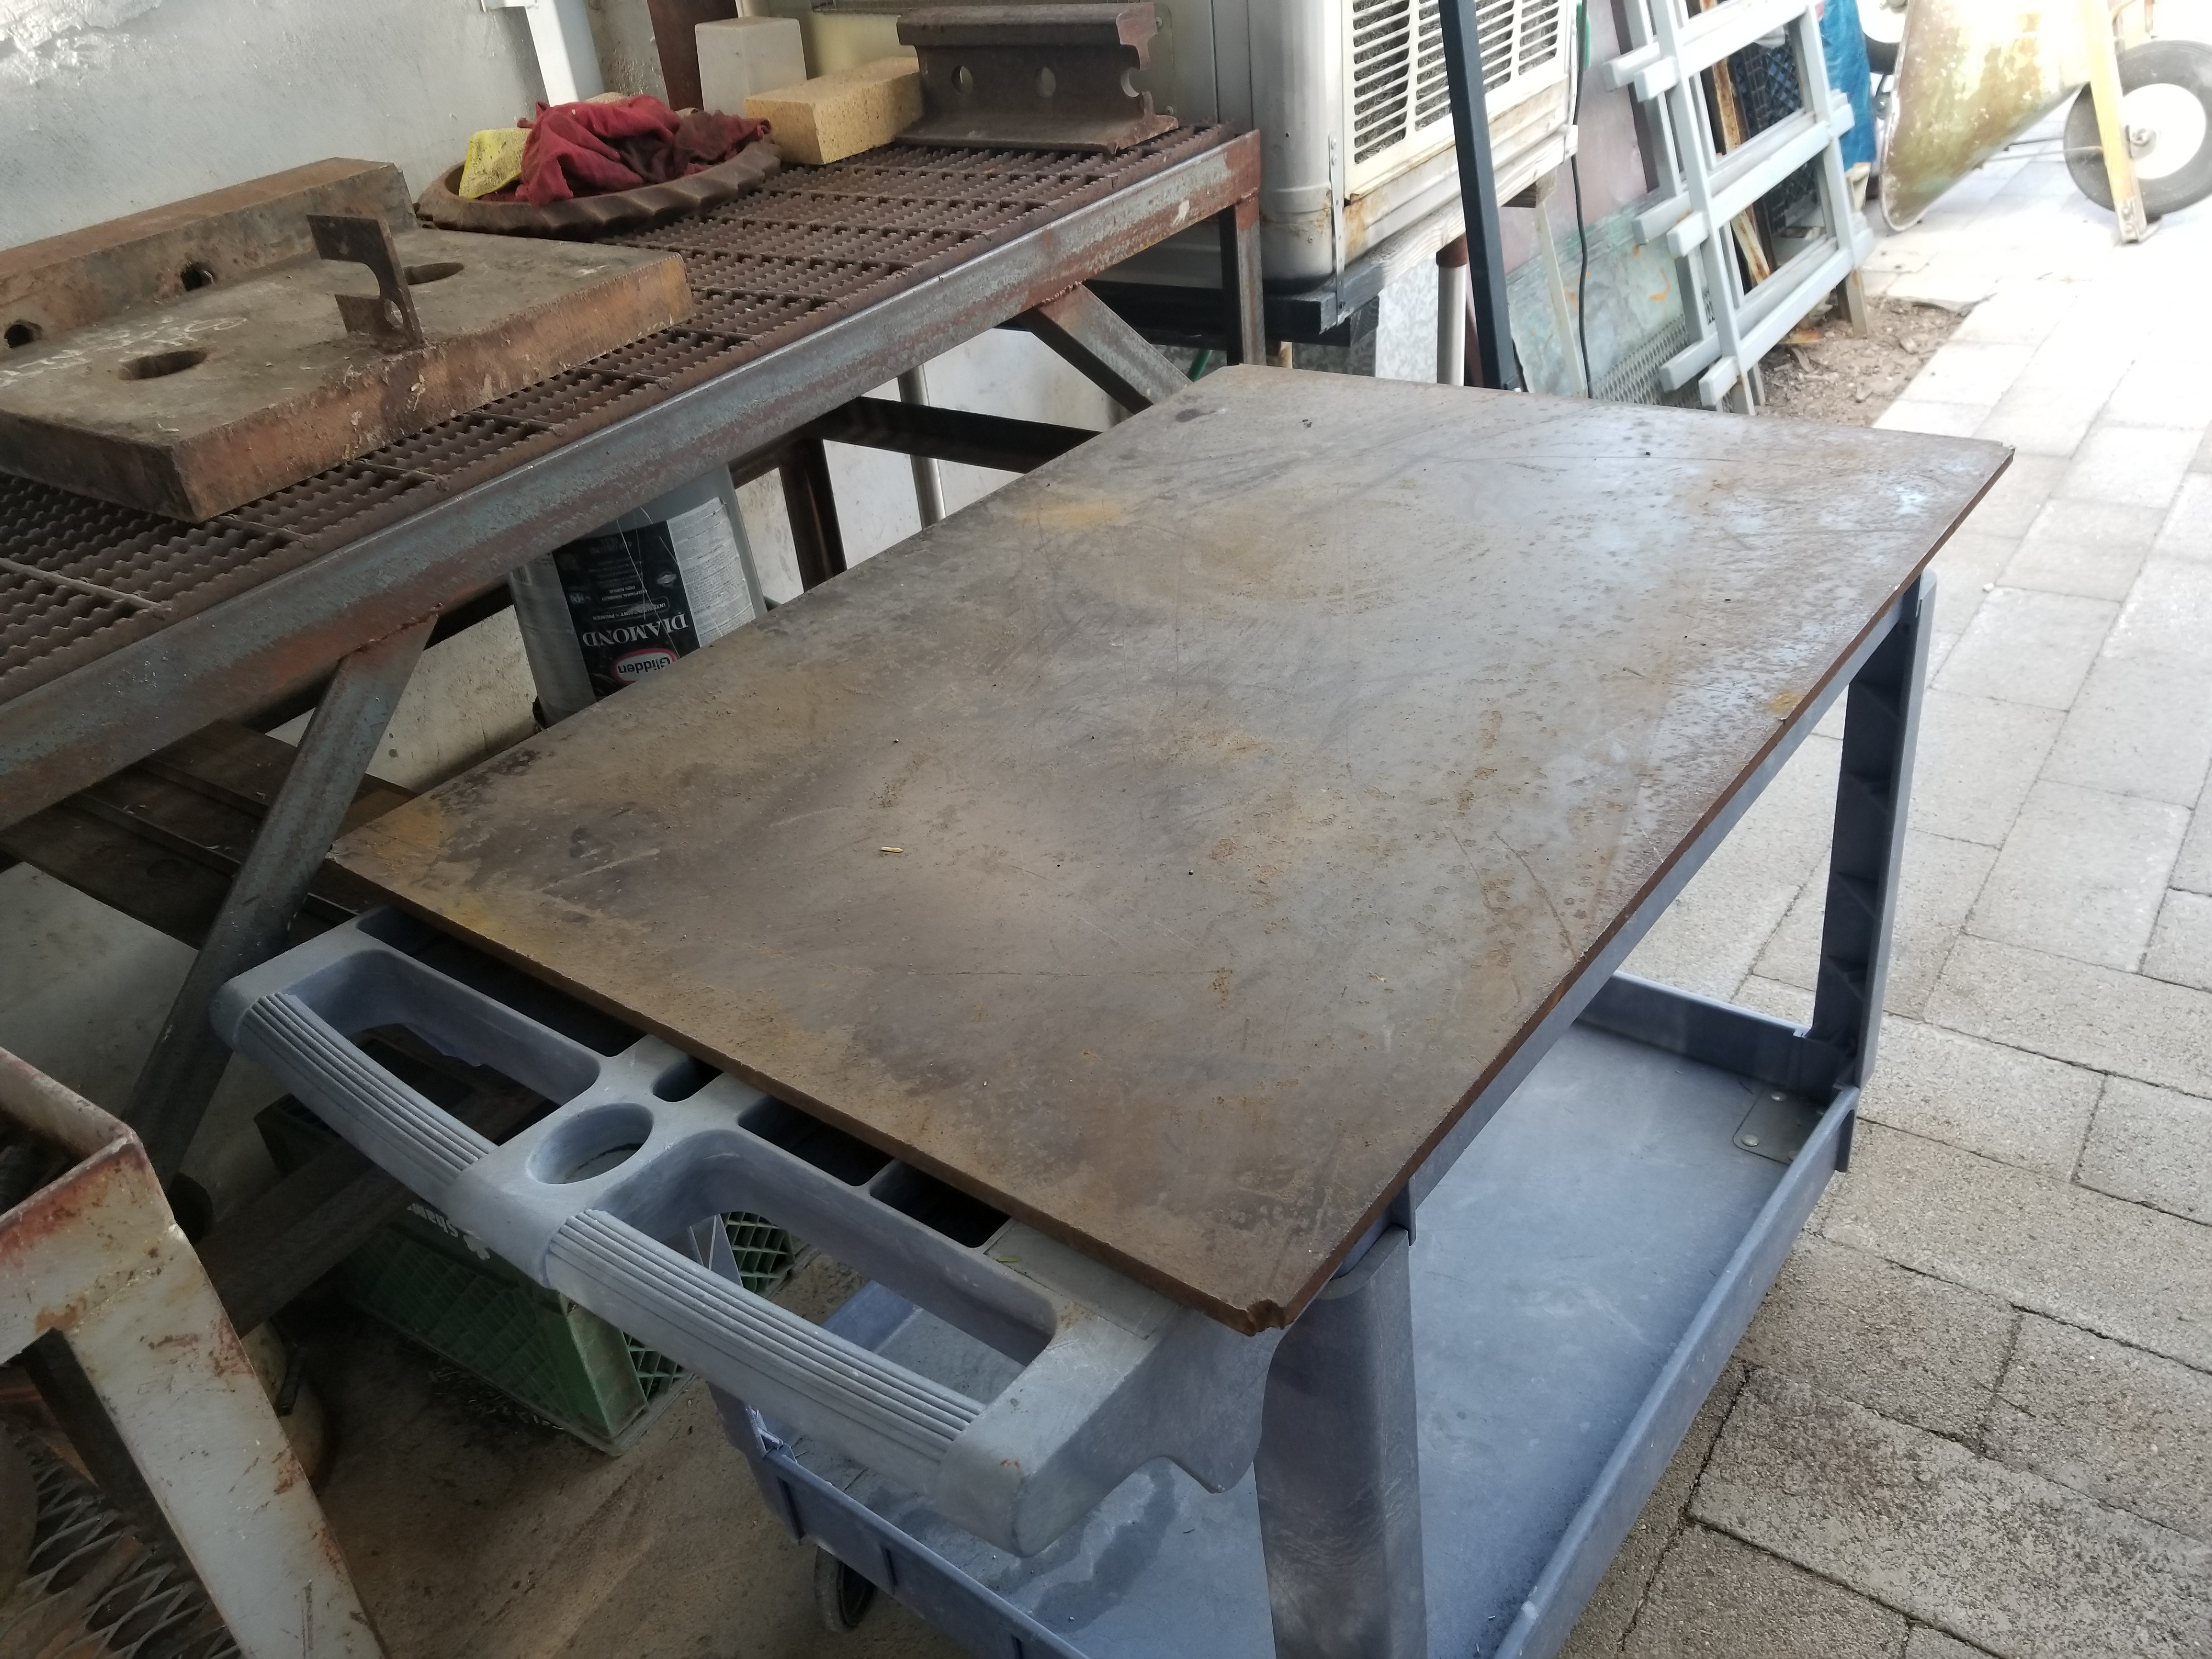
Picked these up at the scrap yard, the larger diameter ones just look like cut offs but the smaller ones with the divots were in with a pile of machinery parts and very large gears. Thinking of using for hardie tools.Found a nice, perfectly flat chunk of 1/2" plate as well to add to my work surface.


building a vise stand, wood or steel?
in Vises
Posted
Marc,
I just don't have a lot of room on my cramped city lot, and my smithy is built on the side of the garage with a paver floor. I considered mounting it on one of my very heavy steel tables. But even as heavy as the tables are I think my 235 lb body standing on the base plate while using the vise will help. I could also fill the steel tube with concrete.I totally understand what you are saying about portable vises moving and rattling but I can't really do permanent right now. Unless I get rid of one of the tables and affix it to the masonry wall somehow, but I do welding out there too and having 7 feet of work table is nice. They are made from 1/4" angle with storm drain tops which are covered with 1/2" plate. One is 32x36" and the other is 32x48". The 1/2" plates are removeable for torch cutting.