

bigb
-
Posts
320 -
Joined
-
Last visited
Content Type
Profiles
Forums
Articles
Gallery
Downloads
Events
Posts posted by bigb
-
-
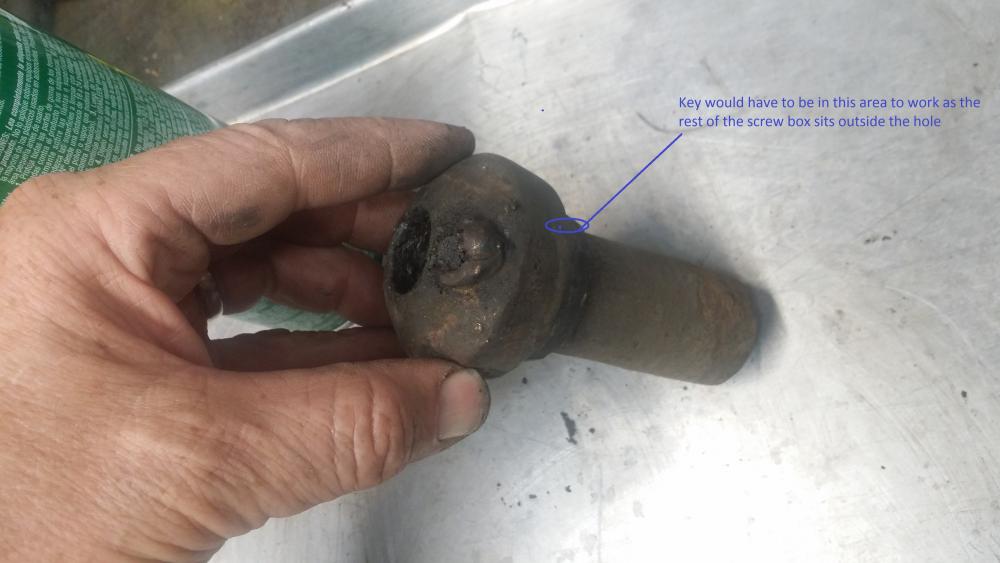
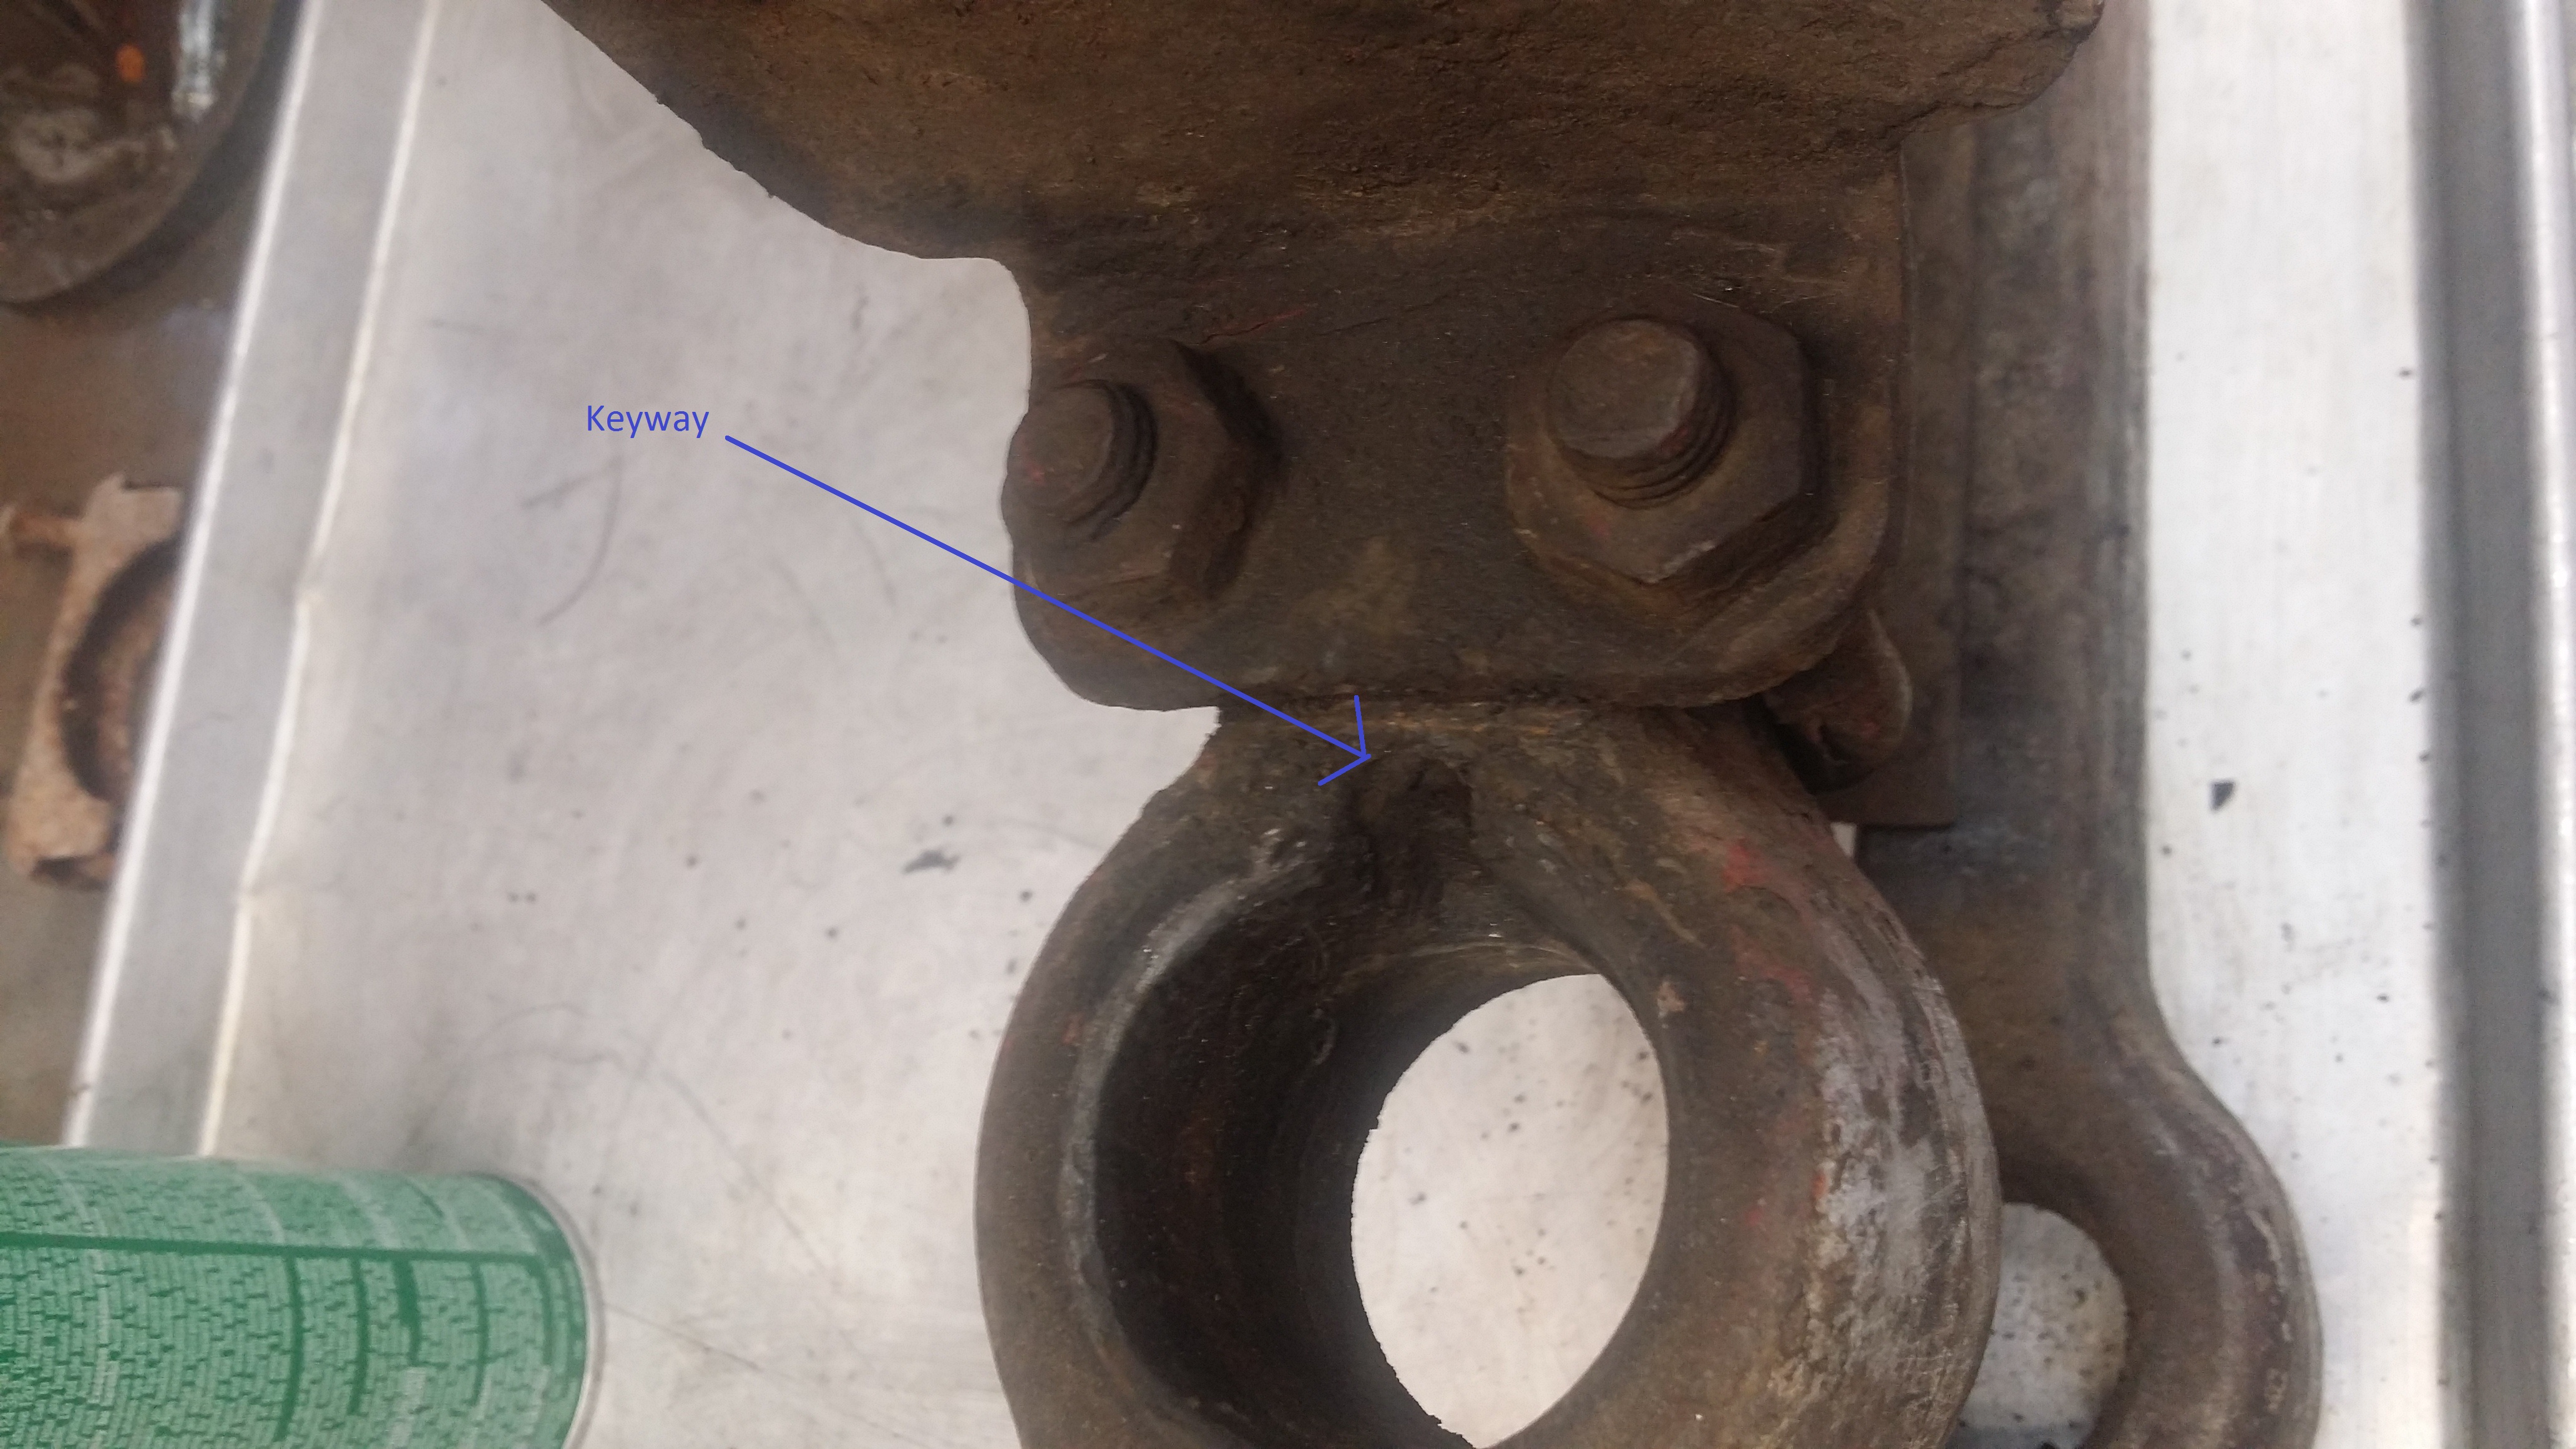
Got the key finished. I cut a groove into the screw box with a die grinder then fitted an edge piece from a shear drop that fit the rounded groove perfectly. Brazed it together then ground the key so that it fits the keyway but rounded so the screwbox has ample vertical movement. Works great. Arftist I gave strong consideration to drilling and tapping but one issue is the location on the sloped edge does not have much depth for very many threads.
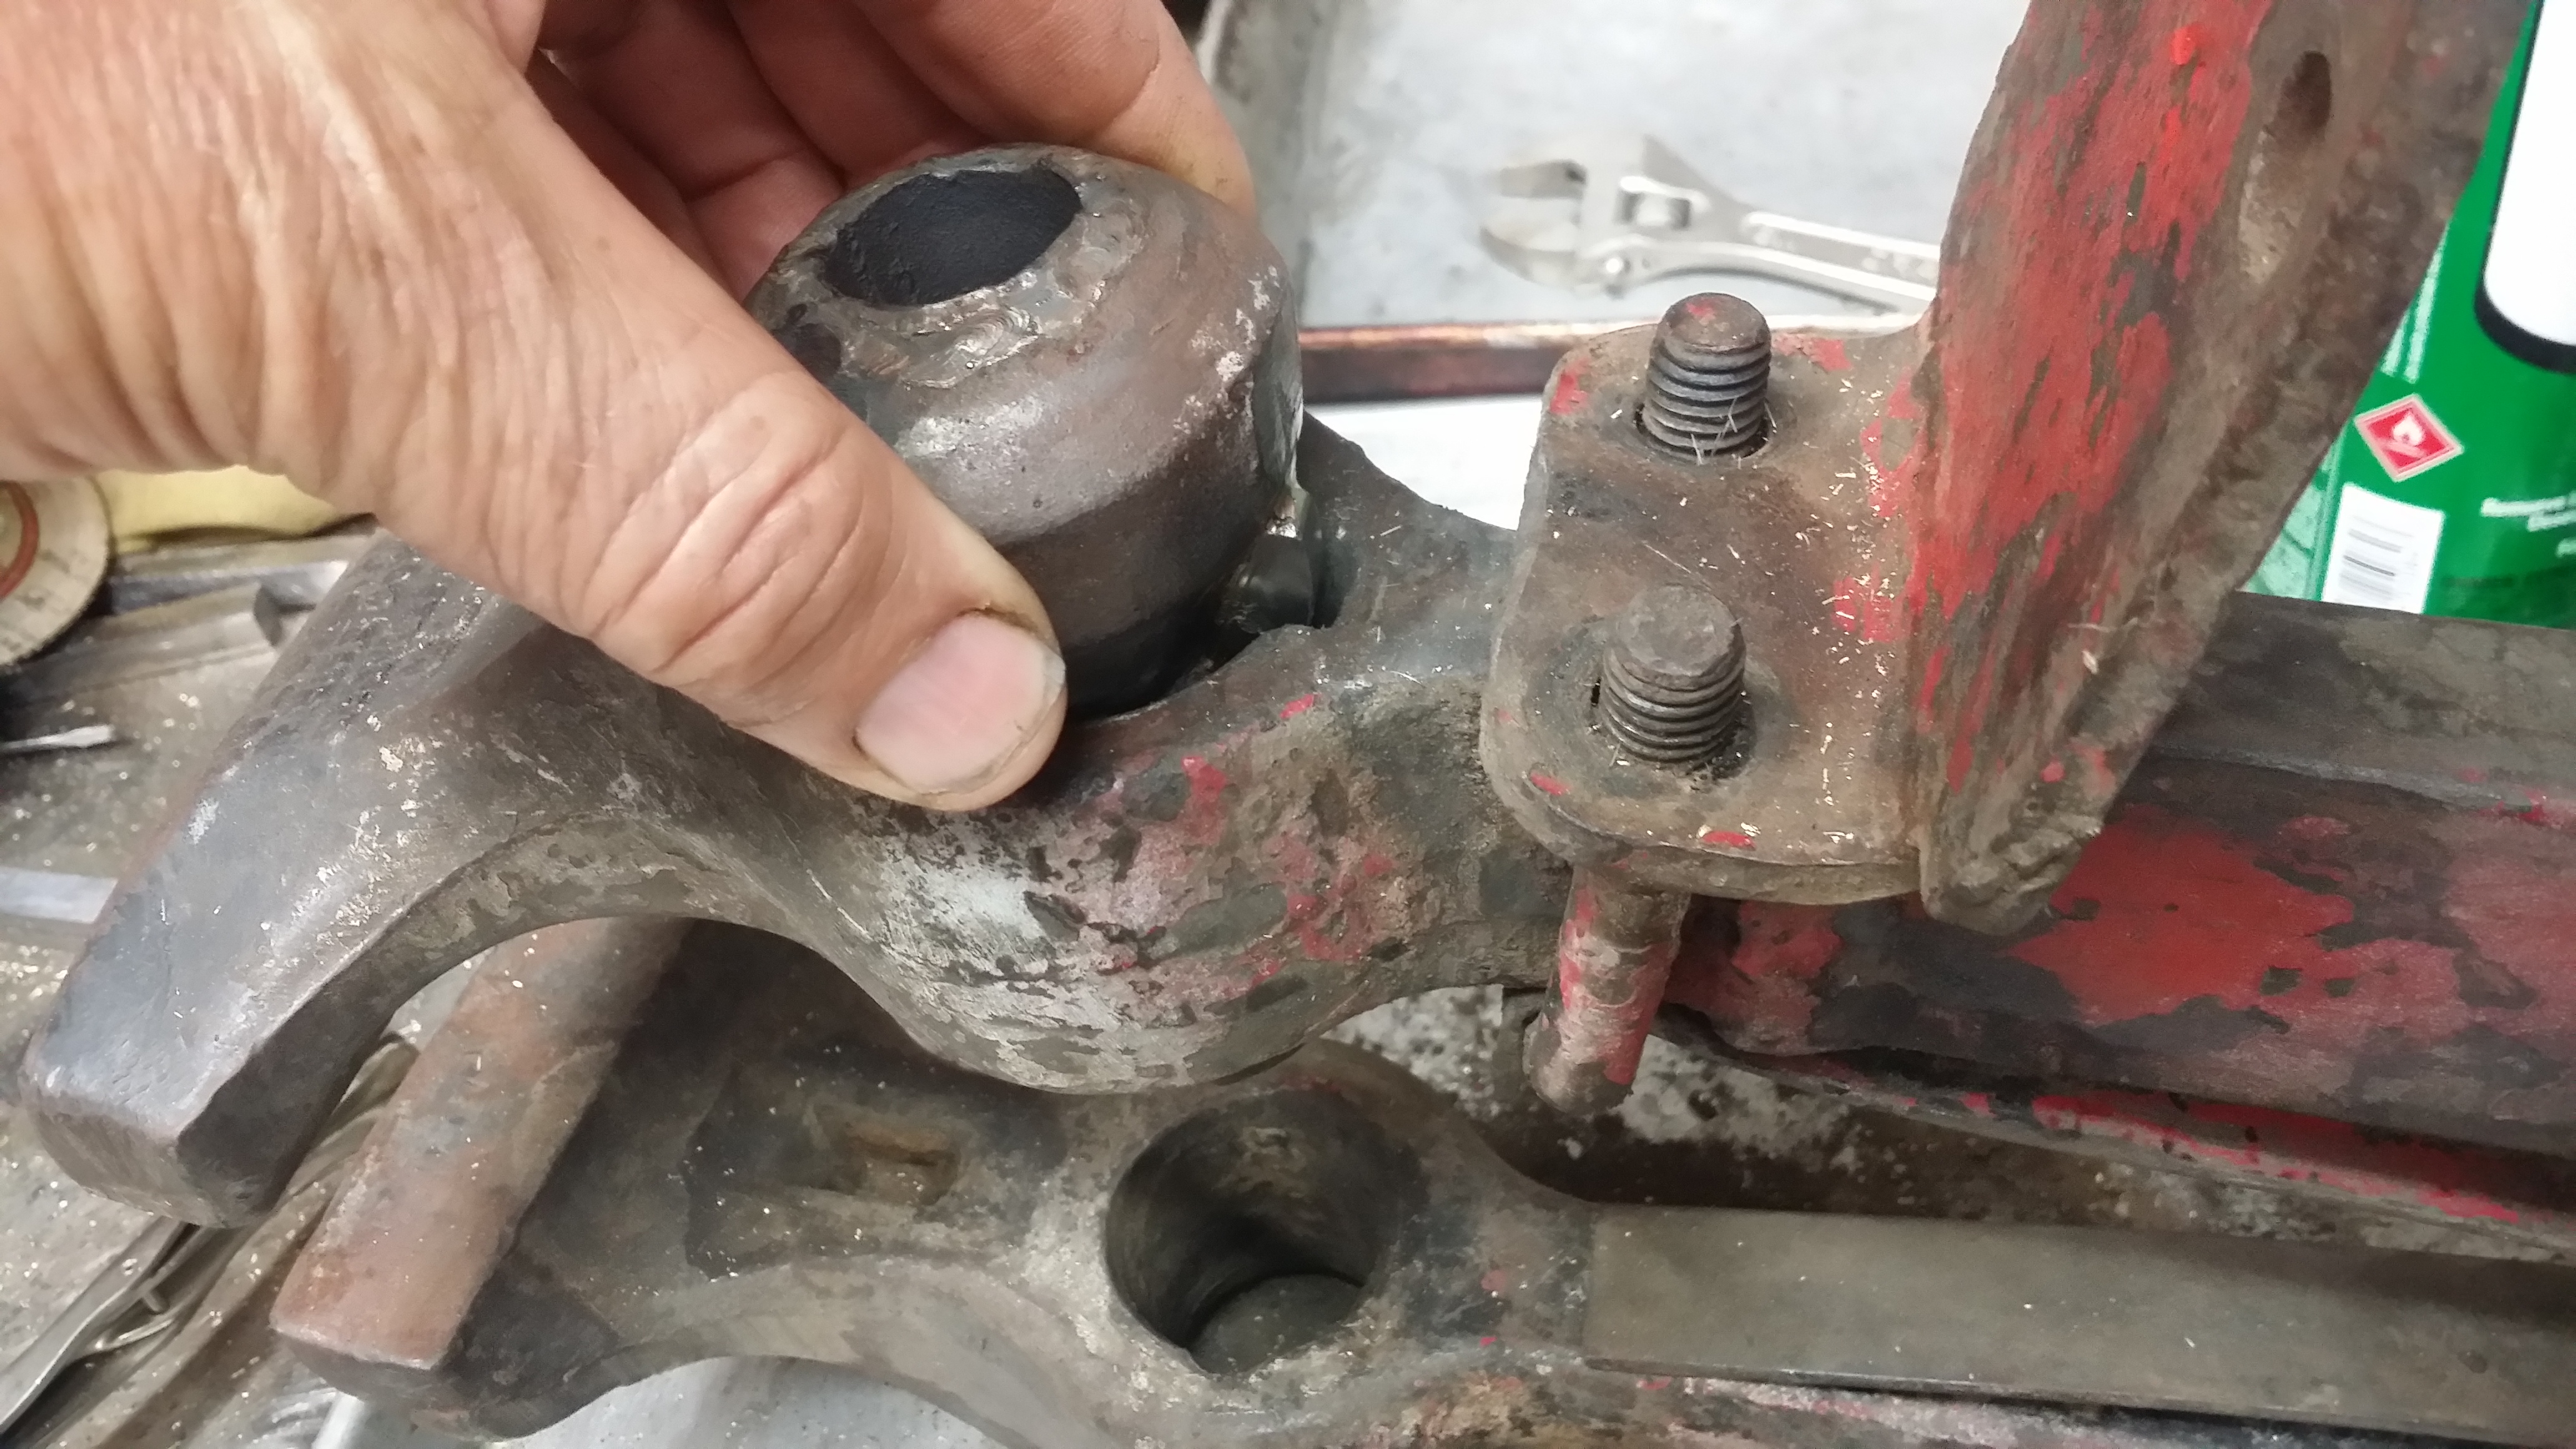
Will start the thrust washer for the handle this week after work. Not sure if I'll forge one from square stock or just cut one from some 2" circles of plate. I have a whole bucket of plasma drop plate circles from 2" to 6", 1/4, 3/8 and 1/2"

-
We had a 54 with a big airplane on the hood. Those are my two older brothers in the Great Smokey Mountains, 1961.

-
Wayne, I am leaning toward your forge design but I have a question about step #7, why only one layer of insulating blanket on the top?
-
I will be following this to see how it comes out. What filler and process will you choose? If it does not want to weld well how about brazing? Although I doubt you could get it hot enough for brazing with the top in water.
-
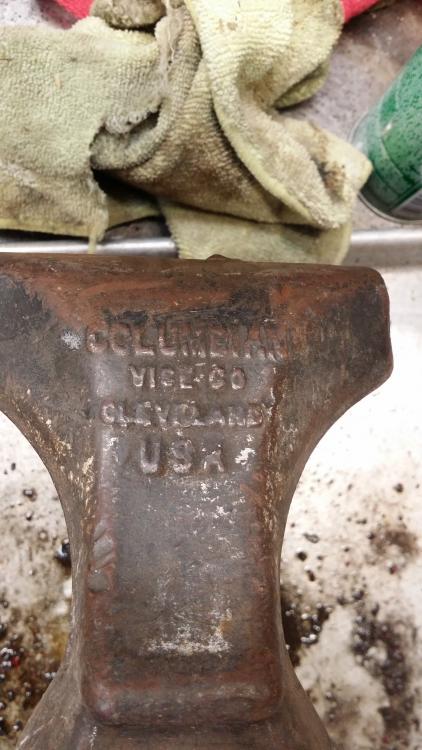
Thanks for all the suggestions. Progress will probably be slow as I have about a million irons in the fire. Started cleaning the jaws tonight and made a pleasant discovery.
-
12 hours ago, ThomasPowers said:
As you want the washer to be able to slide as the angle of the moving leg changes; making it to lock in is probably what you don't want to do.
Ok I see. I just thought with the conical shapes it would allow the screw to angle with the jaws. But you guys are saying leave it loose in the opening, it's okay if it drops into the bottom of the hole?
-
8 hours ago, ThomasPowers said:
What is the issue with making a 1/2" thick washer with a beveled inner edge?.
That's what I'll do although the way the end on the screw is shaped it looks like I should make the washer with a male cone on the vise side and a female cone on the handle side.
-
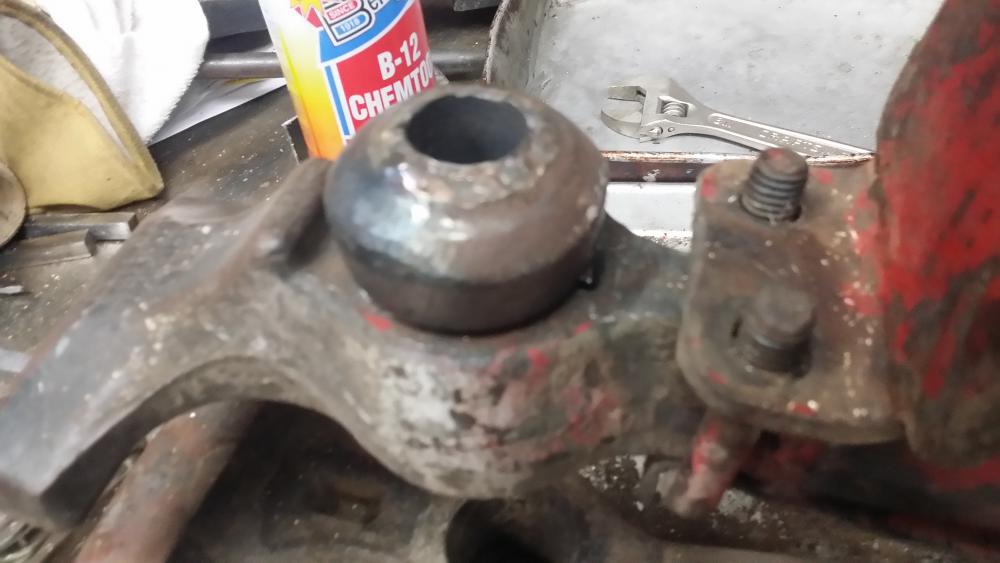
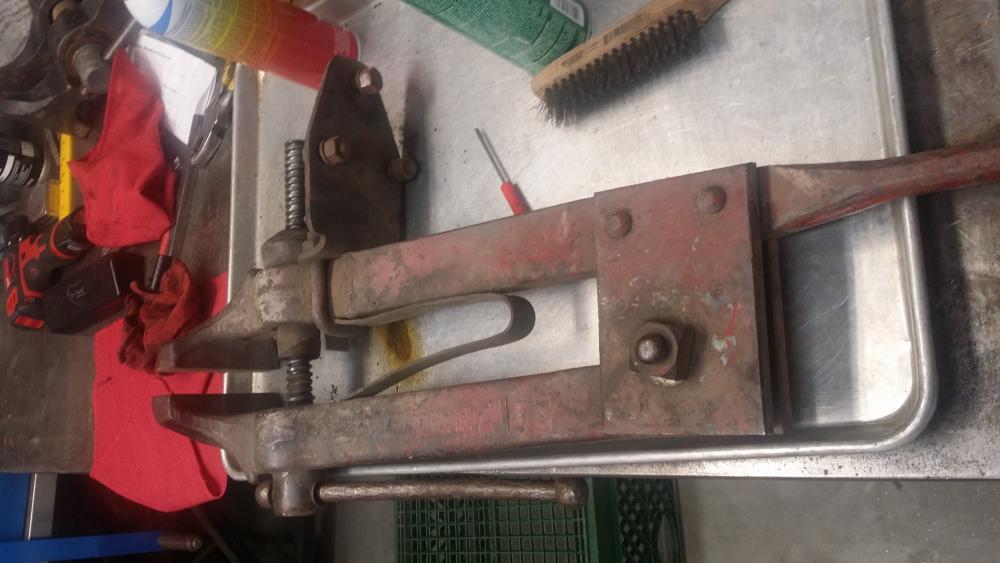
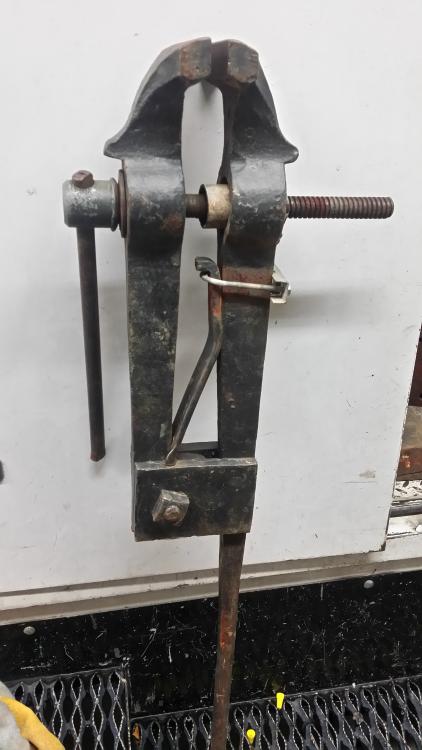
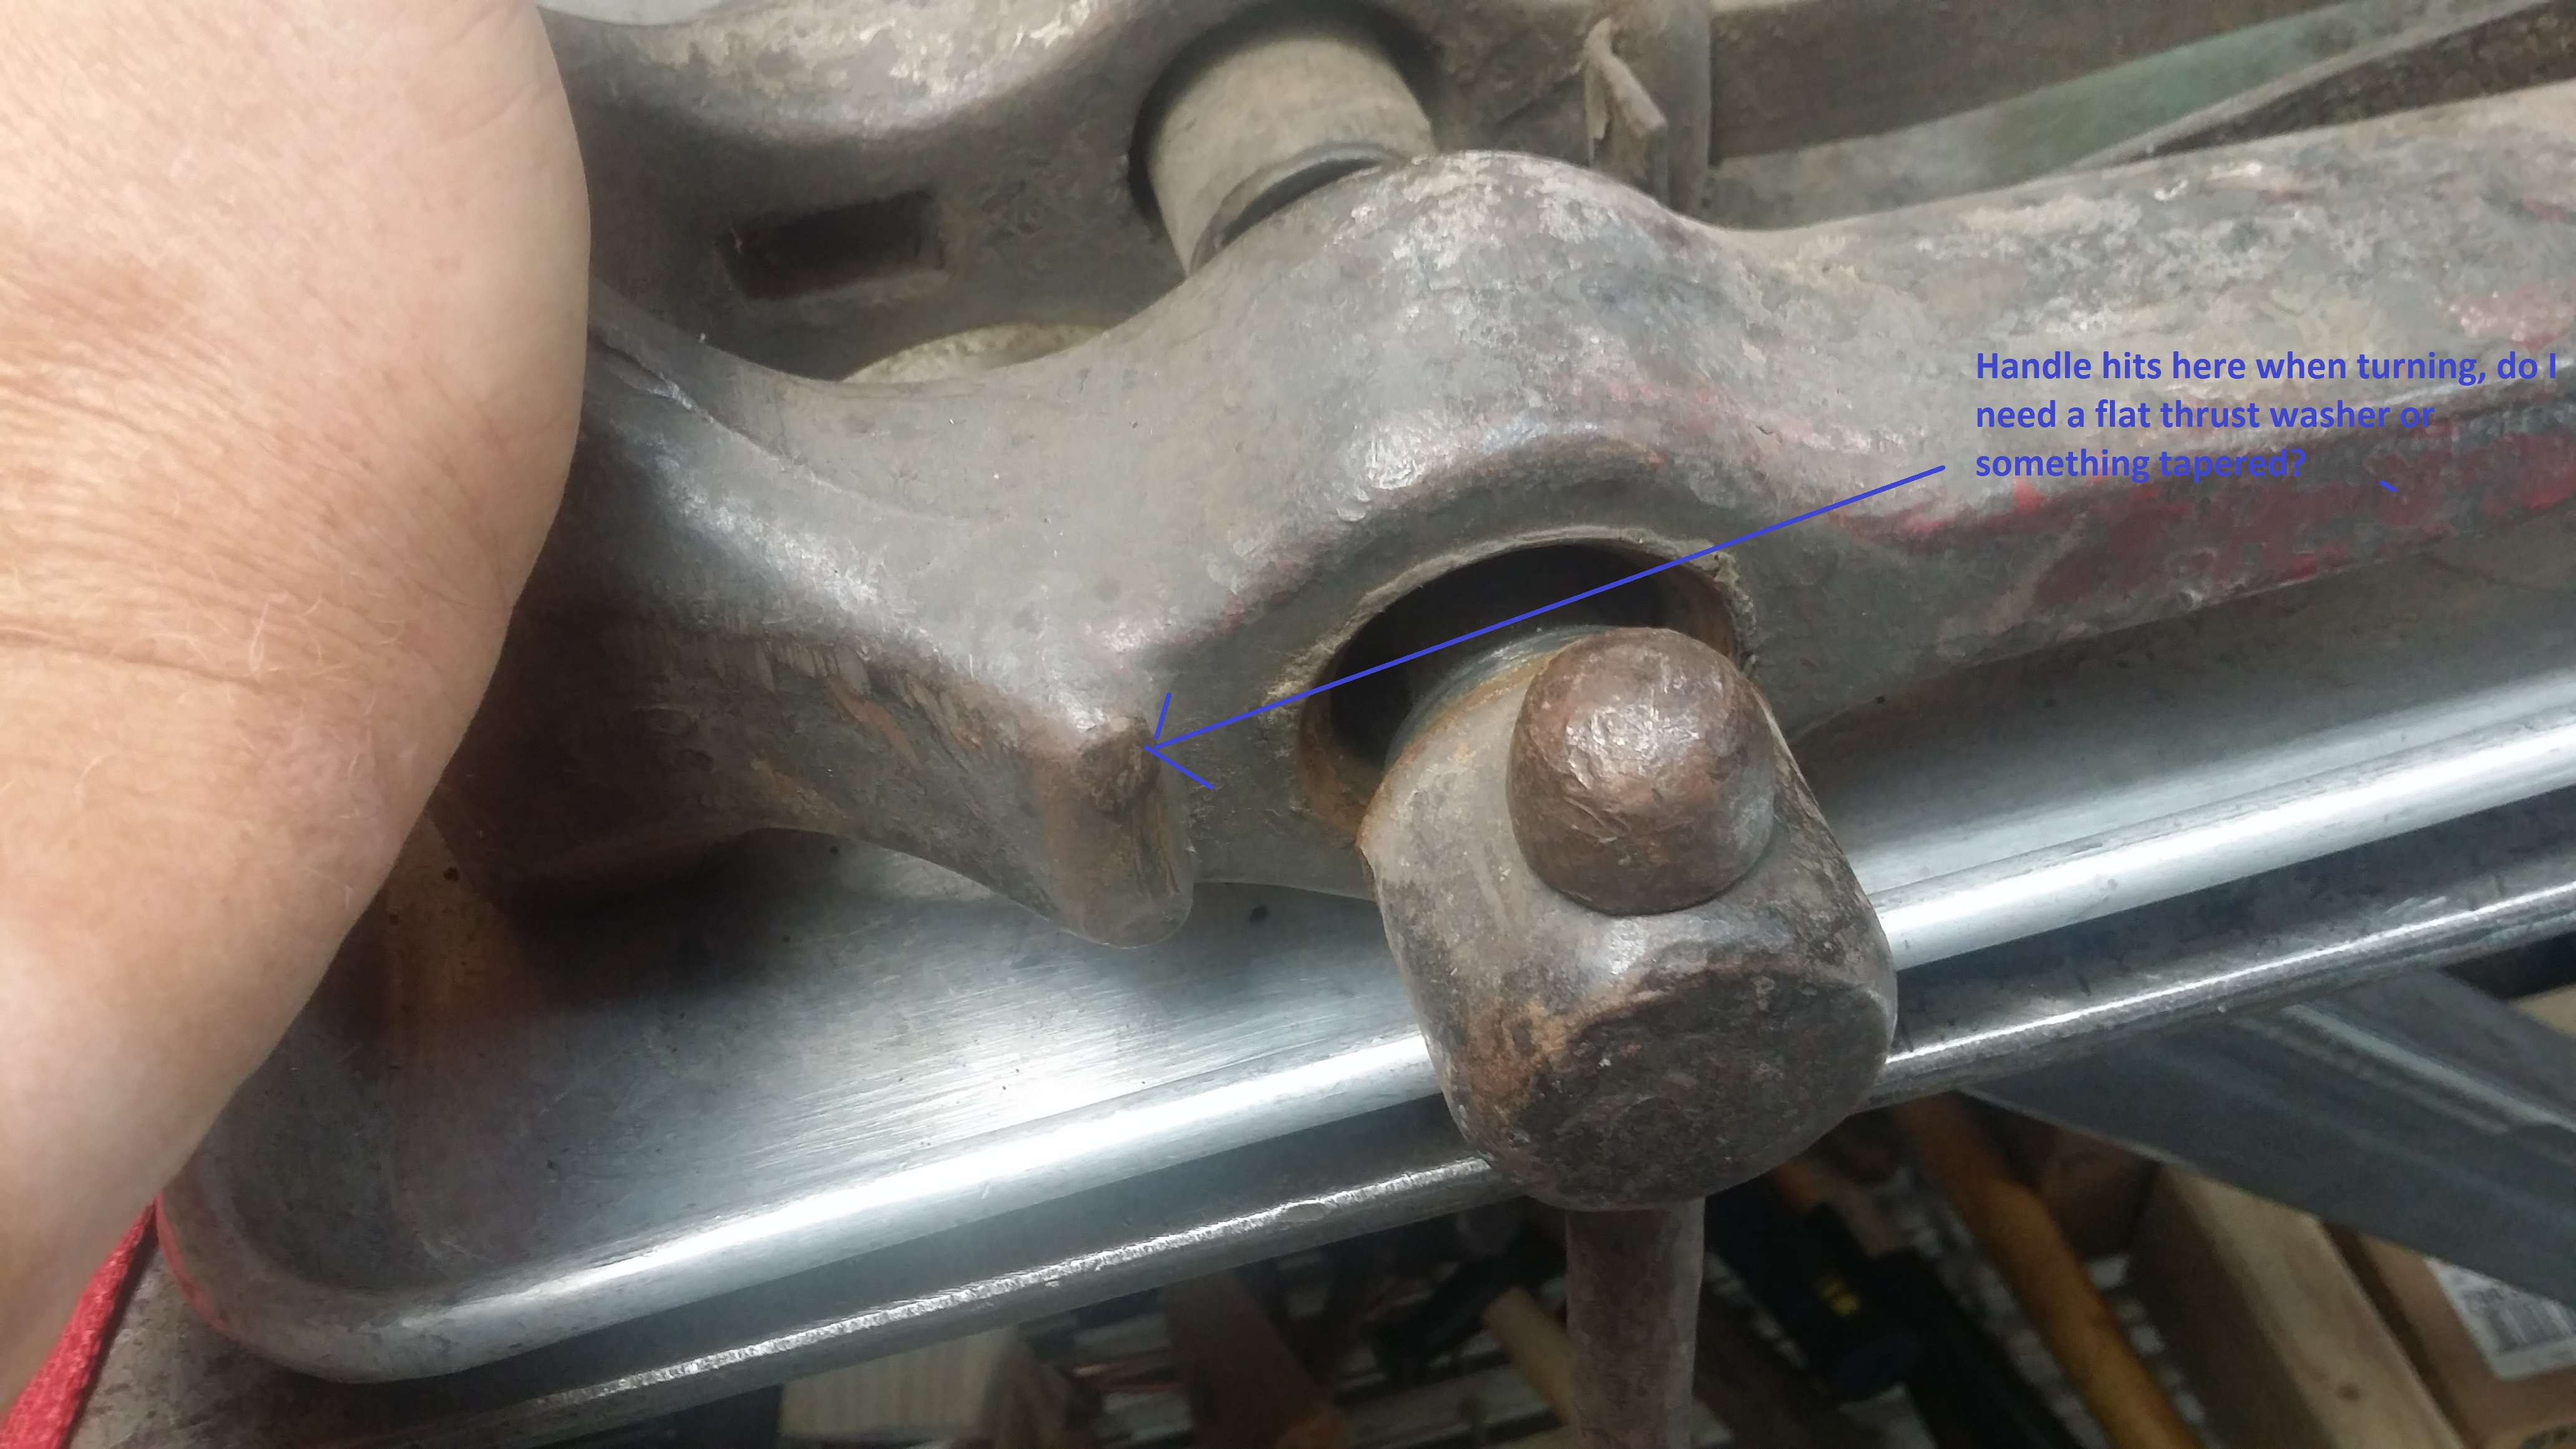
Brought this one home yesterday. First off I need to figure out a thrust washer arrangement to make clearance on the front where the handle bumps the protrusion on the jaw. A previous owner bent the handle for clearance. Also, there is no sign of a key on the screw box it is either worn away or not the original screw box. How should I go about this? I am thinking to cut a keyway into the box and press fit a key to match the one in the hole. Either that or try to braze something? I have access to tig, stick, mig and O/A. (Not sure what that ugly weld blob is all about, I am going to grind it off).
Lastly, should I try and butt weld a piece onto the leg to restore it's height? I would grind each half to a taper and clamp into a jig made from angle iron. Any tips welcome.


-
Gumbatron thank you very much, that is exactly what I was looking for. Now I see how the wedges work and yes I am going to make up a sleeve and key. Thanks again!

-
The glass will be in some sort of loose "crumbly" form from what I remembered she told me. She had a name for it but I forgot. She will pour in some of the glass and back it up on the bottom with some special paper. She has been doing kiln work for many years and makes beautiful things that actually sell, unlike my junk.
Frosty yes this is for split crosses.
-
OK thanks guys. Looking at a heat color chart it says that scale falls off iron freely at 1750F and mild steel burns at 2400F. So since sparklers are an indication that your work is starting to burn I deduce that to mean sparklers begin to fly around 2400F?
-
I am making something with mild steel that will have holes that I want filled with glass. A friend has a very nice, large electric kiln. She will run it up to 1500 degrees F to melt the glass. The kiln has the element wires on top, over the work pieces. I do not want the risk of sparklers damaging the element wires. At 1500 degrees F is there any chance of sparklers?
-
Bringing this thread back up to ask if you still have the photos from your original post.....Thanks
-
11 hours ago, littleblacksmith said:
are you referring to the wedges that keep the mounting bracket in place?
Littleblacksmith
yes
9 hours ago, ThomasPowers said:The screw box contains the female section of the screw. In my terminology the "eye" is the hole in the non-moving shaft the screwbox is mounted in/through.
The wedges make an easy to make/use/adjust method of assembling and tightening the vise and spring to the mounting system. Using two makes the angles slighter and helps to keep the vise from canting in the mount---I've often used one though; particularly in my travel vise where the helpers have managed to hide the wedges. (often dropped into the bottom of the scrap bucket...) not as elegant but works.
Thanks for all your patient answers. I am going to visit one of our local blacksmiths (Holy Hammer Ironworks) and ask Harold if I can examine one of his vises. One more question, if the nut is welded or brazed in won't it cause a problem with the jaws fully opening as the outer jaw tends to hinge slightly downwards as it opens? I was thinking the female threads must somehow be allowed to float for proper operation, or am I over thinking this?
Next time I come through Socorro I hope I can buy you a meal at el Camino.
-
22 hours ago, BIGGUNDOCTOR said:
There are some threads here that show how to modify a bell type house jack for a post vise screw and nut.
Looked them up, seems all the house jacks and scaffold levelers are about 1.25" screw size, is that size what leg vises of my size used? I may just try Thomas suggestion of brazing it and keeping the screw I have which looks to be about 7/8".
I am looking forward to fixing it up, I have two very heavy steel tables in my smithy that I made from 1/4" angle and storm drain for the tops. I will weld a mounting plate onto one of those tables to bolt up the vise once I make the new mounting plate to fit the vise. Anyone know of a good diagram or tutorial on making a replacement mounting plate/spring retainer? From what I have been able to find on the web it looks like there are two wedges but I haven't found a diagram good enough to figure out. This is the first leg vise I have really seen close up.
Edit: I just found a good diagram by searching with Google which brought me back to this site. I have a really hard time searching this site but I find a Google search works best to find stuff here. The diagram I found was from March 2015 by John Mcpherson. I still need to figure out those wedges and their purpose though.
Another question, is the screw eye the only part with the female threads, and the screw box just a cover for the screw?
-
6 hours ago, BIGGUNDOCTOR said:
What part of Arizona? I recently saw an 8" post vise sell for $80 in Bullhead City. If I knew then what I know now, I would have just taken the day off work and got it as a few months later I got laid off due to work shortage.
I am in Tucson. Big interest in blacksmithing all over the state especially up North keeps the prices high.
14 hours ago, notownkid said:You certainly got your $100 worth with everything in the Pic. In time you may come up with the original type parts for the vise or something to look better.
I would enjoy fixing it up to be more original but don't know where to look for parts
-
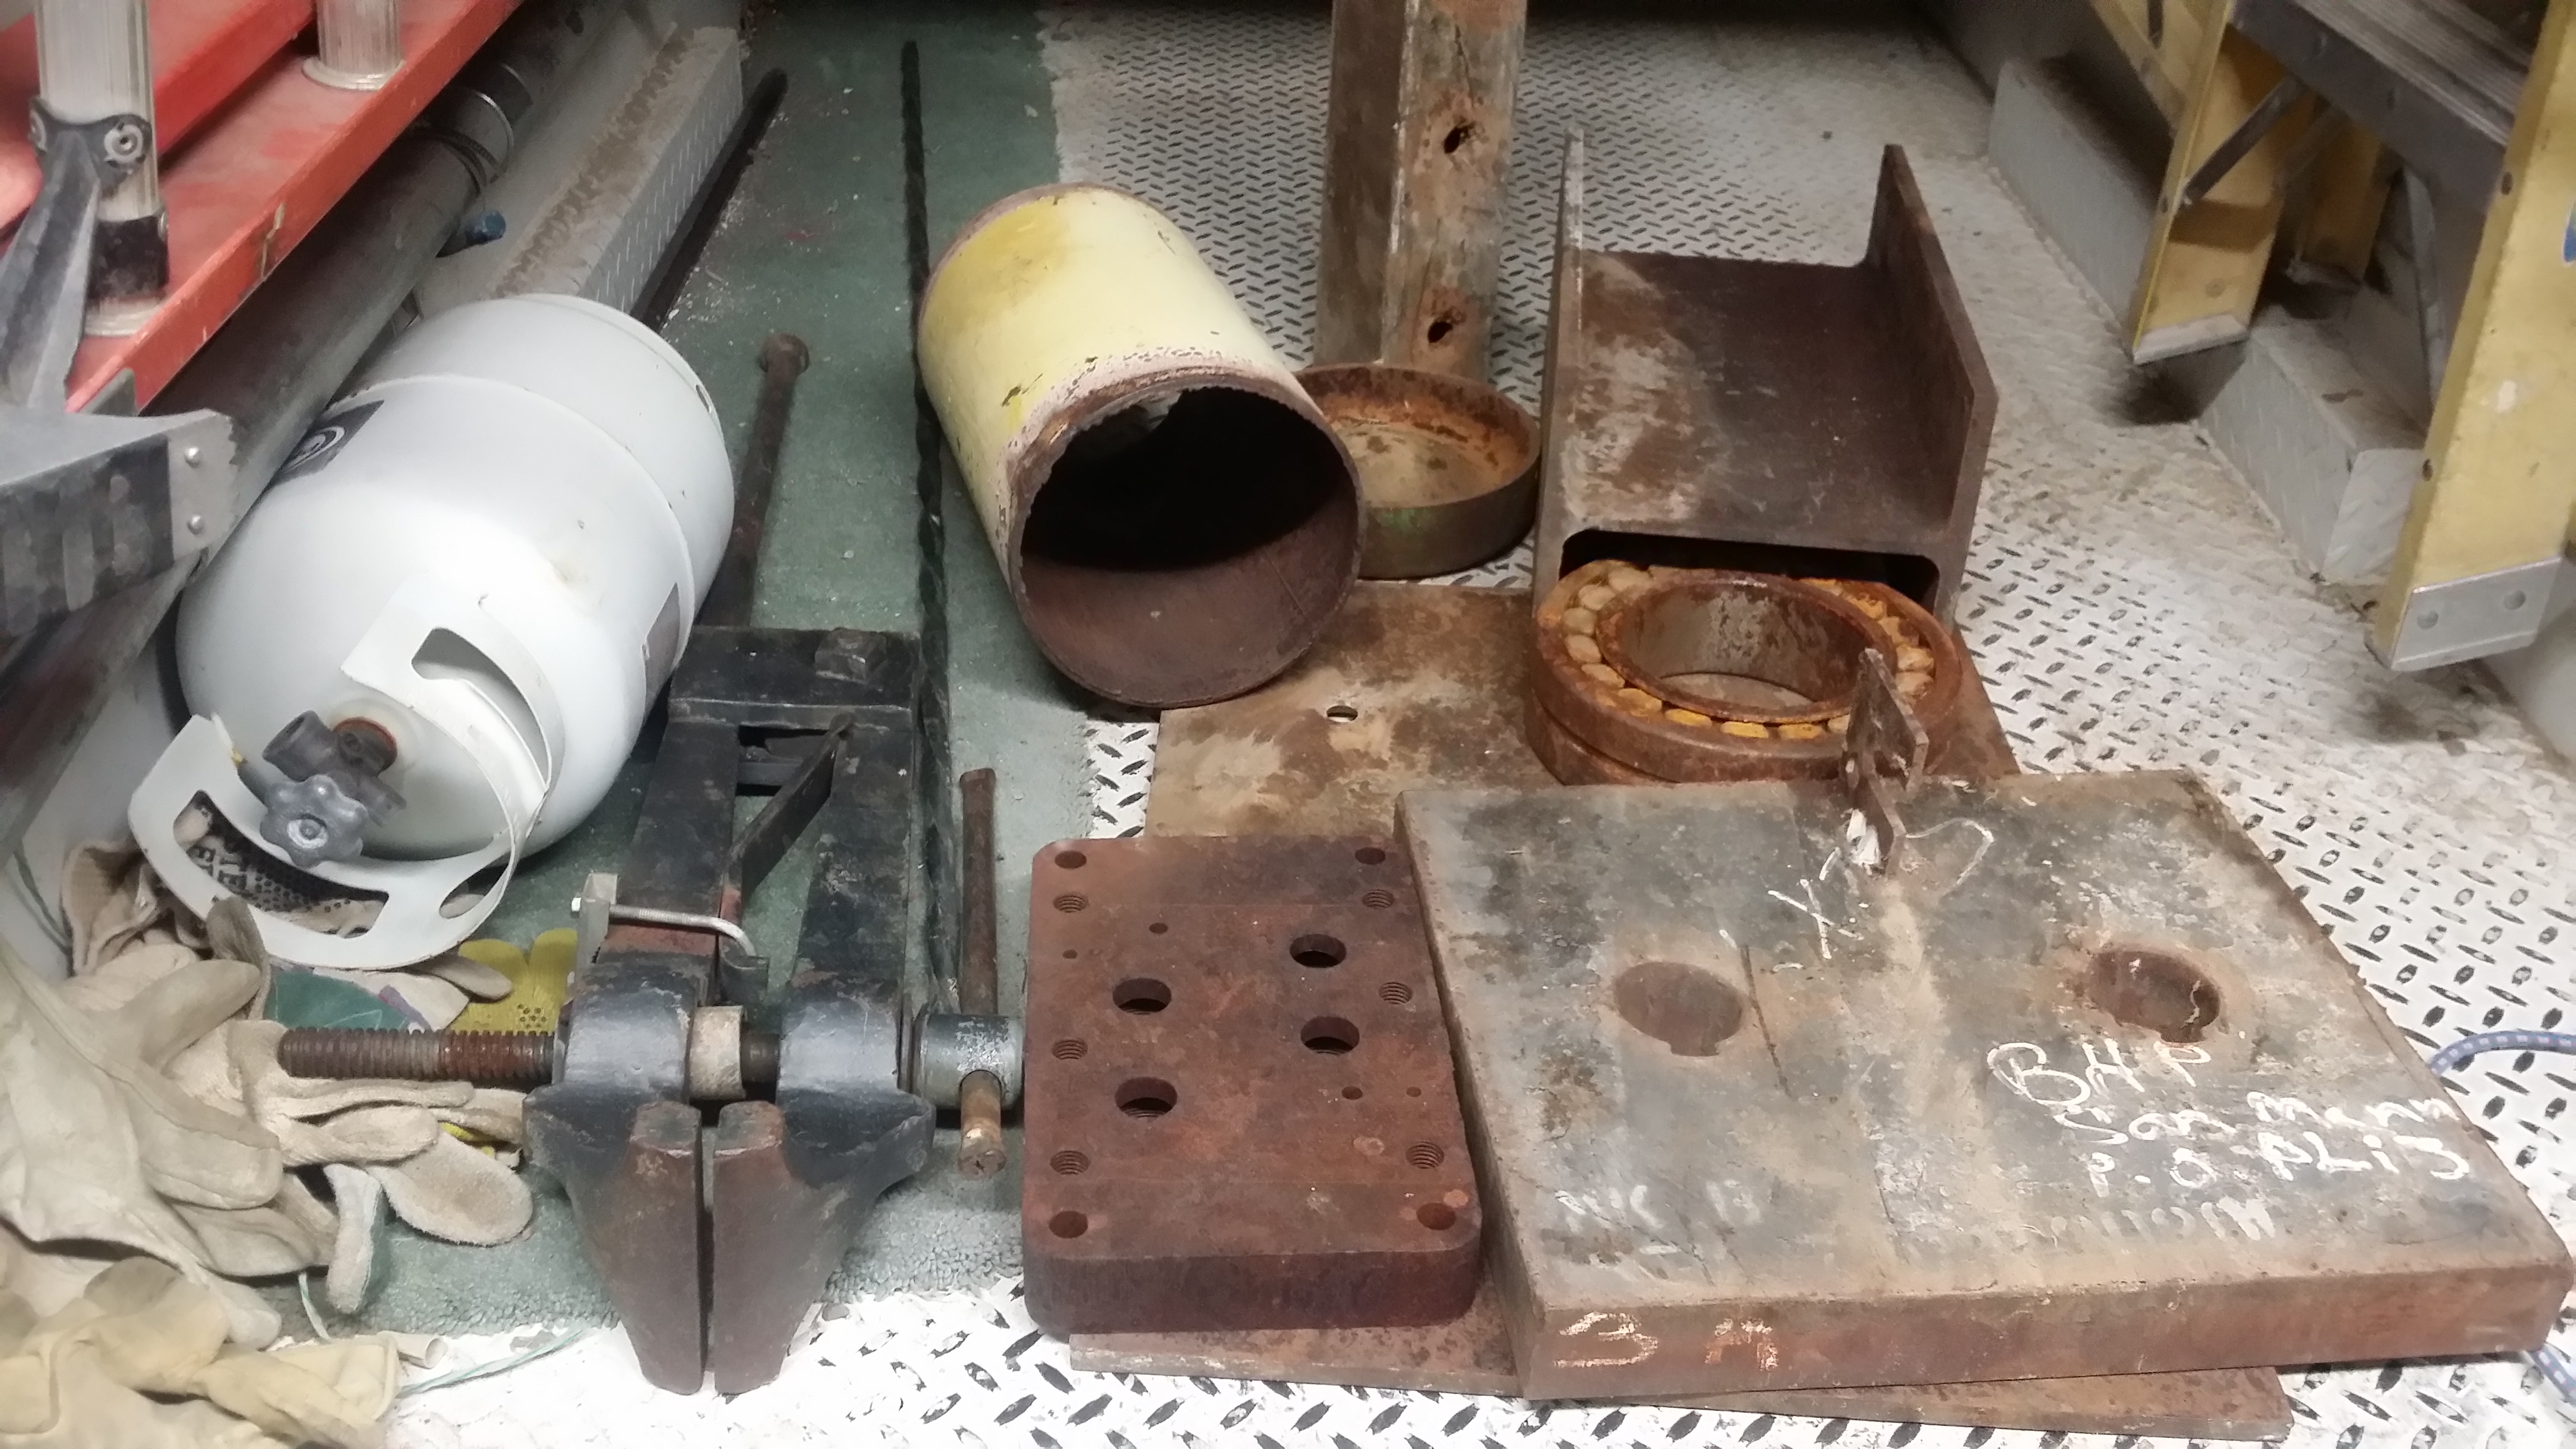
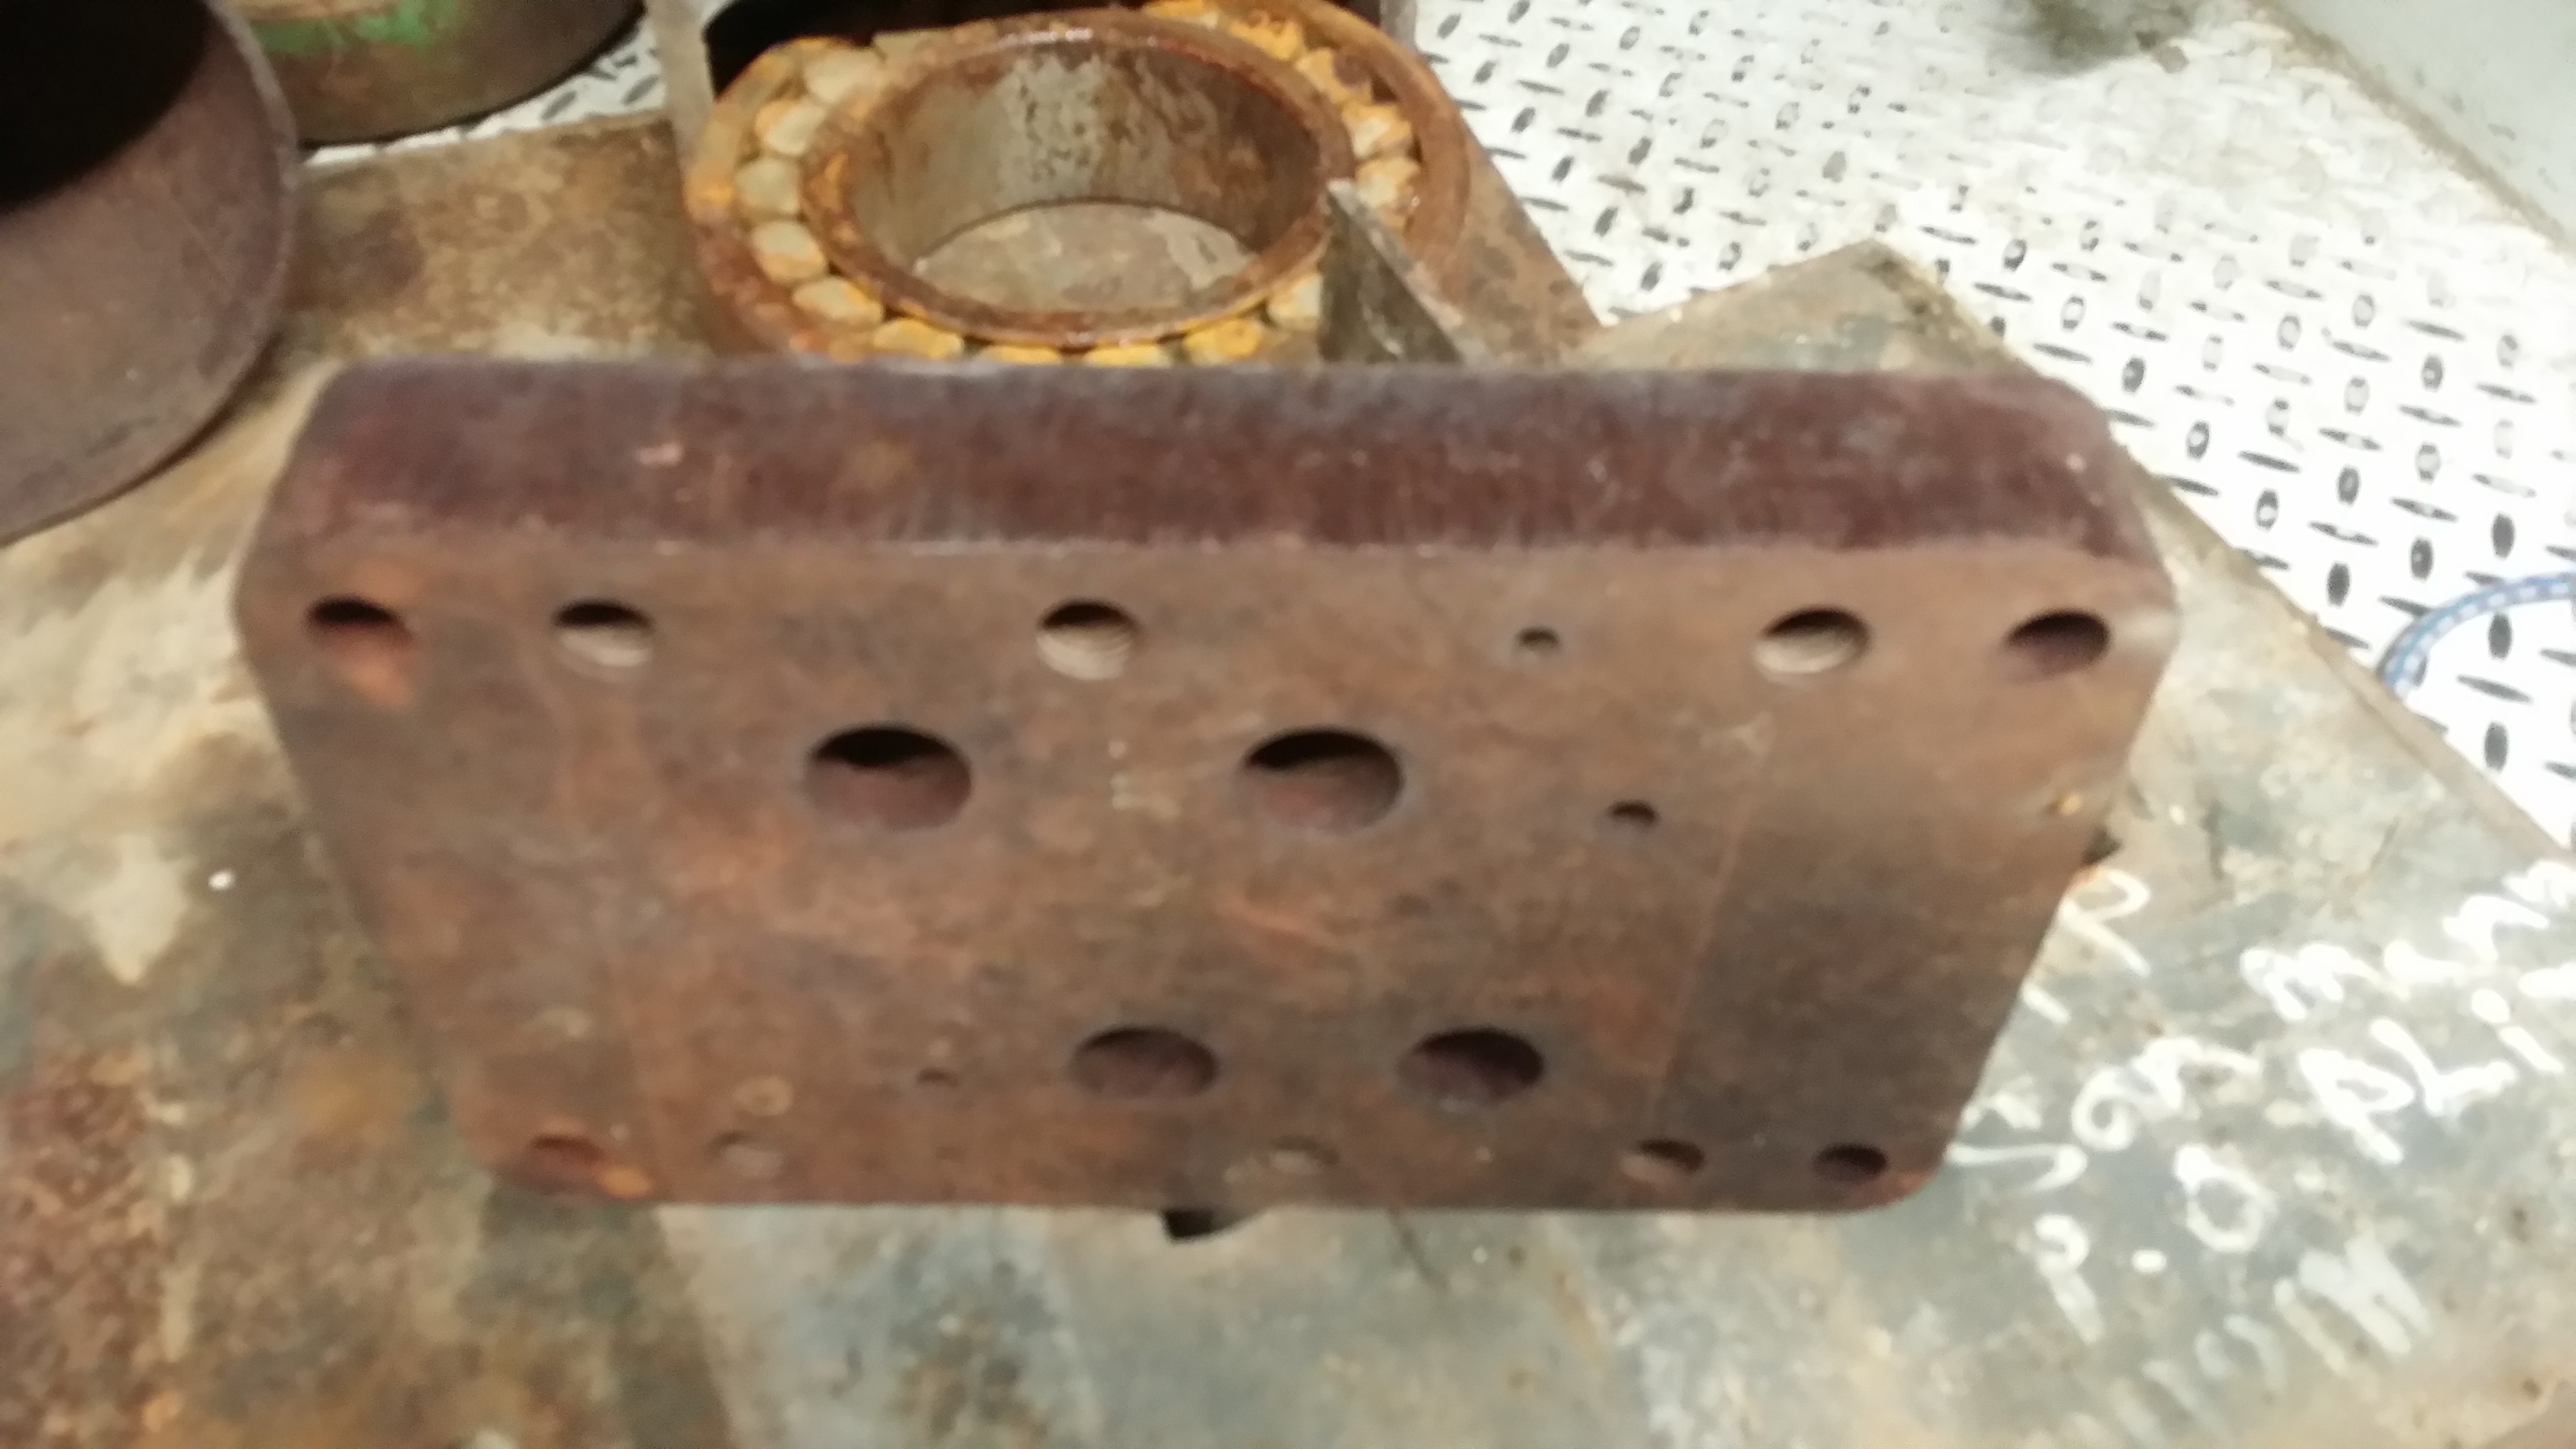
Picked it up yesterday, they are tough to find around here and a complete one usually goes for $3-$400. I paid $100 for the vise and he threw in some really heavy pieces of steel, a solid 4X4 with tapered holes, a 2" plate about 18"square, a 1/2" plate about 24x36, a thick plate with various holes for a swage block and some miscellaneous treasures. Pretty sure the heavy pieces came from the copper mine, the 2" piece of plate anyway has the name of a mine up North written on it.
Anyway the vise works but someone has done some hackish repairs on it. I plan to make the mounting bracket that is missing but not sure what to do about the big nut welded in with those awful looking welds. Not sure if that's from poor welding skills or the material is cast? Here's pics of the vise and the assorted "treasure". There are no markings on the vise.


-
39 minutes ago, ThomasPowers said:
One reason I like the TPAAAT; you are generally not competing with the entire world over an anvil.
Well I would be glad to drive up to Socorro and pick up some of your overflow.
-
I've had a Craigslist search alert for an anvil for pretty near a year now. Last week I was stuck on the phone with the phone company who I despise when a 112 lb England anvil in excellent cond. popped up for $200. After arguing with the phone company and getting stuck on hold the call finally ended after 30 min. I called on the anvil and someone was already on the way, and they did buy it.
Been bothering me all week, shoulda just hung up on the phone company. Rant over.
-
Bringing this post back to say I ball bearing tested the Mouse Hole anvil today with a 3/4" bearing. I got varied results depending on what area I tested with about 2/3 of it barely over 50% rebound but near the horn I got about 70%. Also tested my little 58 lb Swedish anvil and it was a good 85- 90% everywhere I tested it.
Funny my results were right in line with the same anvils tested by Anvilfire.
-
Hello Thomas. We went through Socorro on Memorial day and had breakfast at el Camino.
-
9 minutes ago, Daswulf said:
should safely be able to test rebound with a hammer as well other then a ball bearing. you'll be "hammering" on it so......
I wanted to use a ball bearing so I can compare with the chart over at Anvilfire
-
Going to follow this thread as the old mouse Hole I bought last month seems to have a soft face as well, shows hammer dents from just rebound testing like yours. I have a 1" ball bearing ordered to try and measure rebound.
-
I like it. Did you use any kind of grate in the bottom of the fire pit? Did you use flux core or solid wire? I am looking at coal forge builds as I am planning to rebuild my home made coal forge which I discovered has an old fire pot and tuyre under it up inside the barrel they used to house it. It has a gravity weighted ash dump as well and a clinker breaker shaft going thru it with no clinker breaker left on it. Pretty sure someone salvaged an old forge and put it all together in a 55 gal drum using clay as the bed. I am leaning toward your design which is a lot like member DSW's if I am not mistaken.


Does anyone here use one of these silly things?
in Vises
Posted
At first I was looking all over for the can of Pabst Blue Ribbon beer then I realized it probably means Pro Bull Riding?