CAE
Members
-
Joined
-
Last visited
Everything posted by CAE
-
No Root......last night was a supposed Beaver Dam, which in reality was in the middle of a flooded bottom and about 12' to 15' in diameter. Puniest beaver dam I ever seen. I have no faith that the Blacksmith in the program even lives where the program is produced nor living a simple life. Just my 2 cents. I would love to see a producer take part in this forum and get some real ideas for future episodes. Last one I will waste my time watching Frosty. By the way I too think "Ink Masters" is a decent program. At 61 only have one Tat but am considering a second commemorating my Irish Heritage.
-
I've been generally disappointed with the program "Iron and Fire" Last nights episode pretty much sealed the deal. I was originally hoping the programming would include in depth history and techniques of Blacksmithing I do find some parts interesting but the fluff, these producers add to this reality program is just plan ridiculous. How stupid do they really think we are. Anyone with even a minimal knowledge of outdoors and wildlife had to question the blowing up of the "massive Beaver Dam" in last night episode. No Beaver Dam at all. At best a pretty good size Beaver Hut in the middle of a swamp. Backwater that could have very well been created by a dam. What they blew up with some concocted home brew explosive was certainly not a Dam. Not even going to comment on shooting propane tanks with high powered rifles. Just plan ignorant.
-
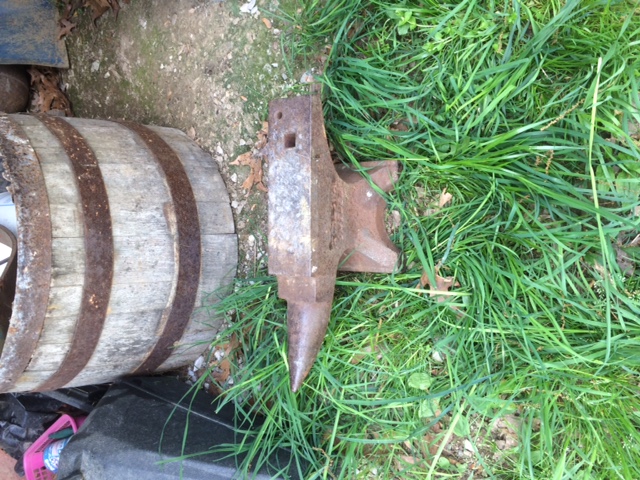
While visiting a good friend in Southern IN. while Turkey hunting he showed me this very clean anvil that was his fathers. My friend is in his early 70's. I'm guessing the stamps on the feet ("C" and "26" or "86" are date it was made 19"26" and maybe the weight 86# and the pattern "C" . Anyone have any ideas. Weight is in the 70# to 80# range, but that's just a guess.
.jpg.09bb2ed9df4db76136a5a455ea1d5b22.jpg)
.jpg.2b3e629e5a9b6076f4839152f653d700.jpg)
.jpg.08950996beca432044d948068d54c1ea.jpg)
-
All good stuff. Loving old tools and such I couldn't bring myself to modifying them. Being that I'm nothing more than a weekend blacksmith I'm guessing it will never get in the shape it was or worse. Anyway.
-
Thanks for the advice Arkie. Probably going to break it down again any way to clean the box one more time with ATF n Acetone. Still a bit of rust n grim I couldn't get to. I've heard linseed oil is a common cover coat for raw metal as long as you wipe the excess off. Good? Bad? any advice here?
-
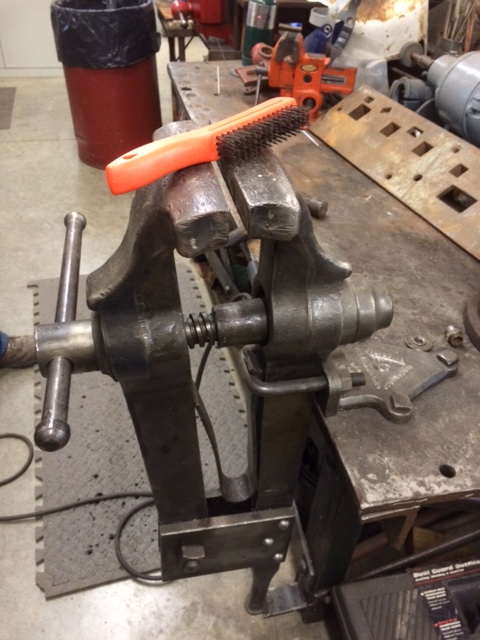
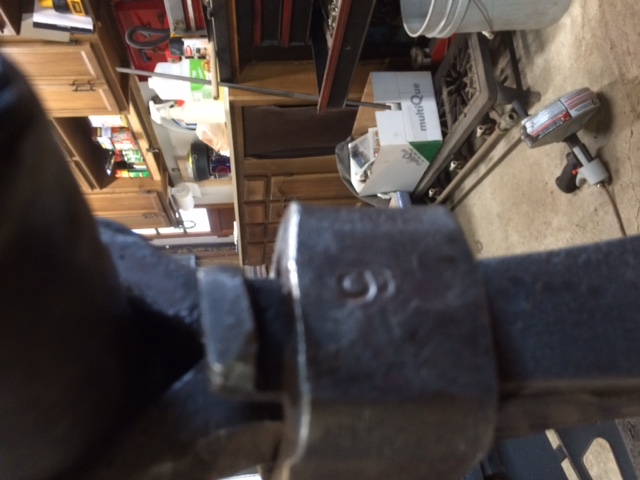
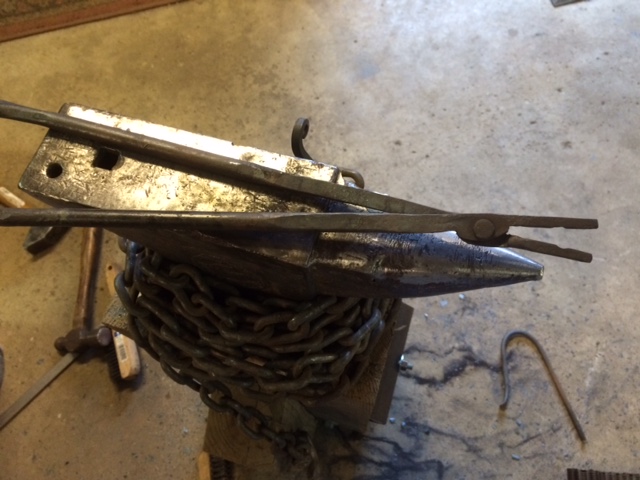
I'm new to the Blacksmith scene but I've been looking at post vises for some time and have seen plenty of three and four inchers. This was in a shop I visited last weekend. That wire brush on top is a standard size. The jaws were as long as from my wrist to finger tips.... every bit of eight inches . The pic doesn't do it justice. It was cleaned and polished like the silverware in your wife's kitchen.
-
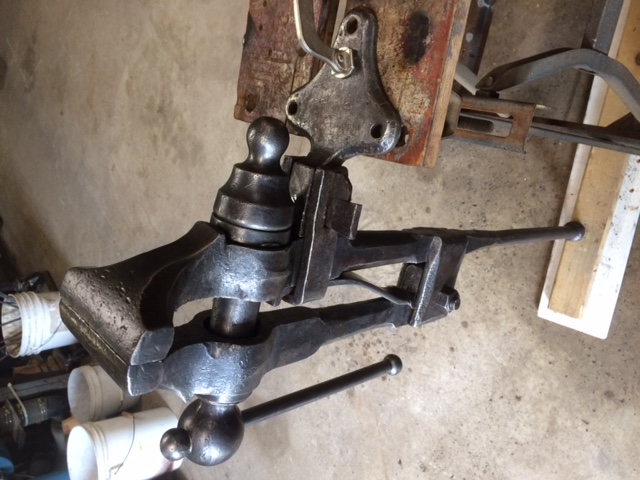
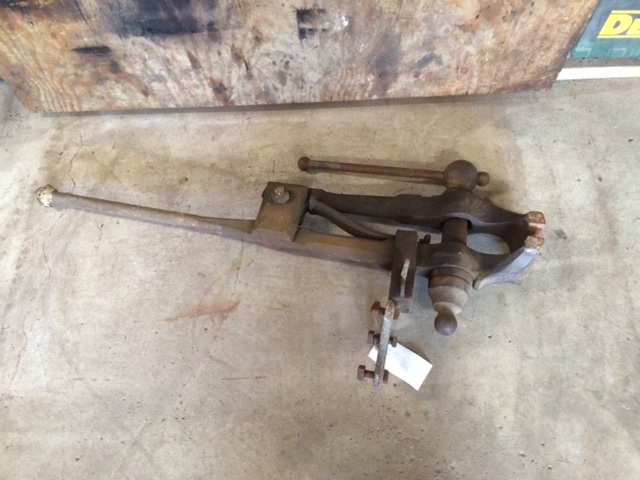
Never did get the box out. I cleaned it and female threads the best I could while still in the jaw. I can't bring myself to use any kind of hammer on the box. After getting it to the condition in the pics I greased the screw and it went back together like butter. I will continue to work on the rusted wedges day after day.with ATF and Acetone. It works flawlessly so going to leave well enough alone. Making plans for a portable stand as my shop is my garage and this sweetheart will never be seen in the condition I found it in ever again.
-
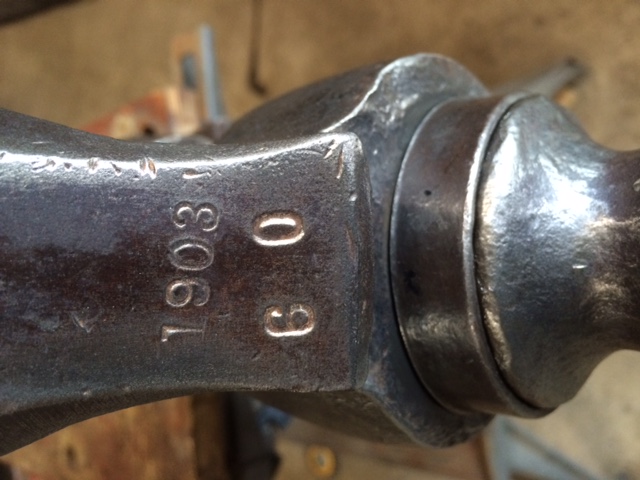
I would have bet it weighed more than sixty while handling it but your right it comes in at 60.5# on the wifes bathroom scale.
-
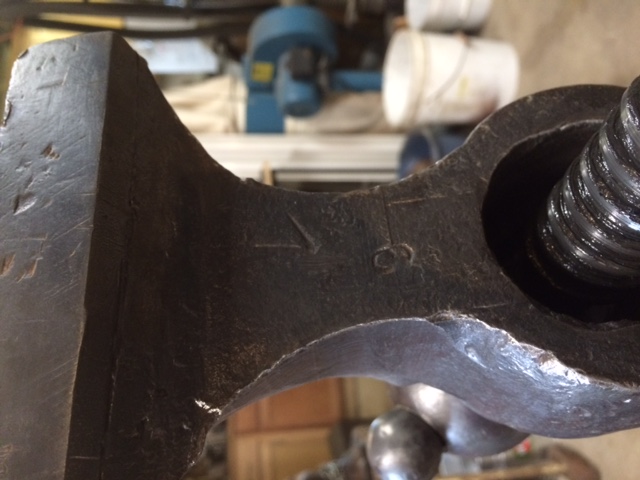
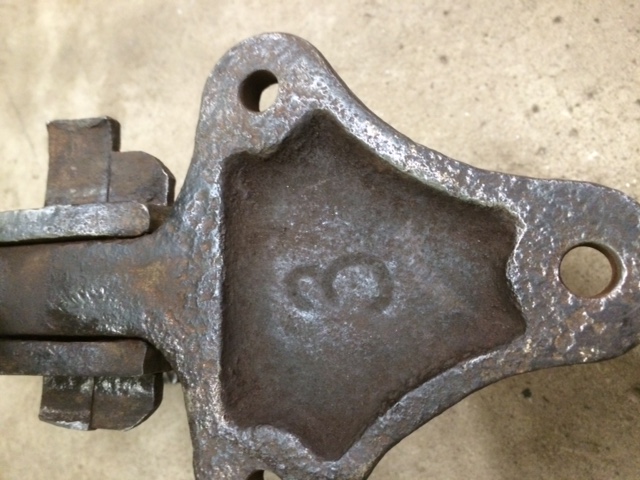
Went ahead and worked on what I could as far as cleaning it up. Wire wheeled for over three hours. I've done a bit of research on the maker. I understand vices are even harder to ID than Anvils. I haven't come up with much at this point. If anyone has any idea I'd be interested. It's my thought that the 1903 was the year it was made. I have no idea what the rest of the marks might mean. Caintuckrifle I have the stuff to mix this up and will give it a try. Thanks.
-
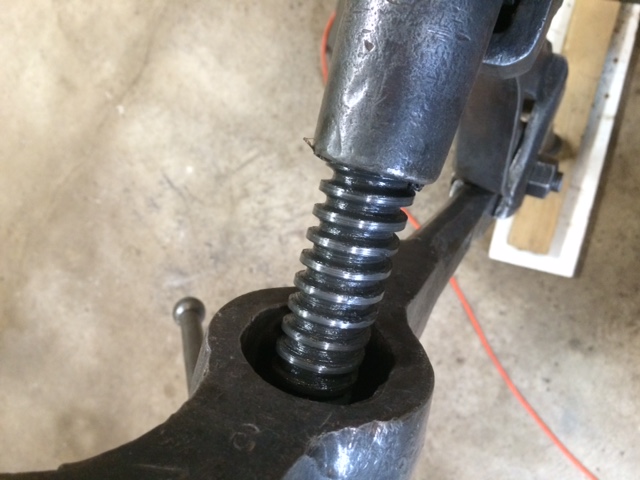
The screw box alignment/key is OK and in the slot. There's very little room (1/8") space between the thrust washer, Cap and Jaw before key stops box as you try to pull it out of the jaw.The alignment ridge/key seems to wedge tight from the inside out. Does this mean this vise has a two piece screw box? Should the cap unscrew from the female threads? This appears to be the only way this box is coming out of the jaw.
-
Picked up a non marked 5" leg vise complete and in great shape. The Screw box must be two piece as it will not just pull out the back when the screw is turned out. Keyway from inside out and I can't break the cap loose. Soaked in WD and Liquid Wrench for a day..... Still no luck. Any suggestions.. I hate to put heat to it but is that a last resort? Same deal on the Keeper and key for the mount. It's covered with years of oil,grease and all the grime that can stick to that.. but that has kept the surface rust to a min.
-
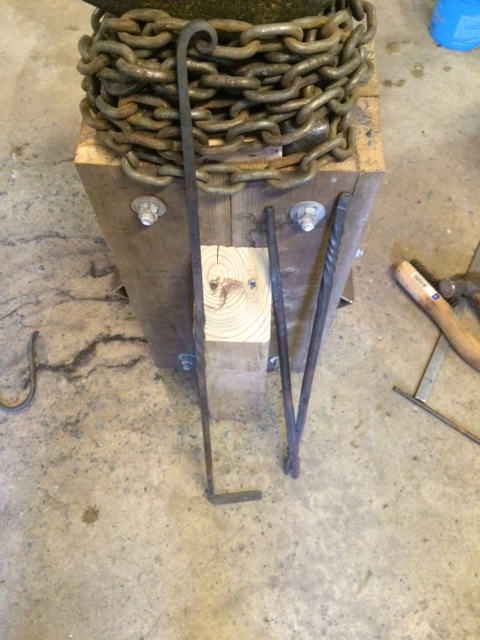
Like you I'm new to the BlackSmith thing. Built a coal and gas forge then realized you can't do much the right way without the right tongs. Went to tractor Supply and bought some steel. Beat it all up and still didn't have a working pair of tongs. My fault not the steel's. Bought a pair of Wolf jaw and Box from Centaur Forge. Over $80 shipped. can't do that every time I need a different pair of tongs. Resorted to old rebar until I got the general mechanics of how to actually forge tongs. There not pretty but functional and less expensive to learn on. Rebar can suck, some hard some soft some very brittle. Work everything hot. I started with 1/2" but to make anything worth your sweat 5/8 or 3/4" works best for most style of tongs.
-
Like any new venture I guess I'm just overwhelmed with everything to do with Black Smithing. So many vid's and so much good advice/ideas on IFI I want to do everything and I want to do it now. Need to come back to the reality that I'm nothing more than an apprentice at this stage and keep with the smaller projects (like Tongs) and get proficient at it before I go on to anything else. By the way Brian Brazeal is like a Black Smith God. I think he could move metal in his sleep. Couple of gents across the pond like Daniel Lea and Alec Steele also amaze me with the experience they show at such a young age. Off to light the forge. Thanks for everyone's advice.
-
This may not be the best place for this question but it's about Smithing and Tools and Power Hammers so I will try here. For those of us who've just started blacksmithing and don't have a big fancy Power hammer whats' the next best thing for drawing out material such as tong reins besides a hammer. I've learned thru trial and a lot of error that making tongs from too thin of stock is just not worth it. Seems to me you should start with at least 5/8 or 3/4" That means you got a bunch of drawing out when it comes to the reins. Any suggestions? Spring Fullers?
-
Mr. McPherson, My apologies. During several google search's on how to date an anvil by serial number, they returned many post from the "I forge Iron" website with answers to the same question from various people for different anvils. Not trying to cause problems or get anyone in trouble. Not asking for anyone to publish Mr. Postman's work. I don't think it would be a crime for someone to forward an answer to a question they found in a publication they happen to own or have read. If that were the case there's a lot of possible copyright infringement going on across the net. Thank you for bringing this matter to my attention and I'll ask anyone who's read my question to please refrain from any answer which has been referenced from Richard Postman's book for reasons explained above. I guess it doesn't really matter the age. I was just curious because..... that's my nature. I believe it to be a good find and will serve me well. Respectfully
-
While searching for date info, several results came up by the person you call Postman. Where do you find Postman's list? When I search all I find is the book he published for sale. I believe you could be right about what I thought were A's. Arkie do you have Postman's list? If so can you find serial number 480754?
-
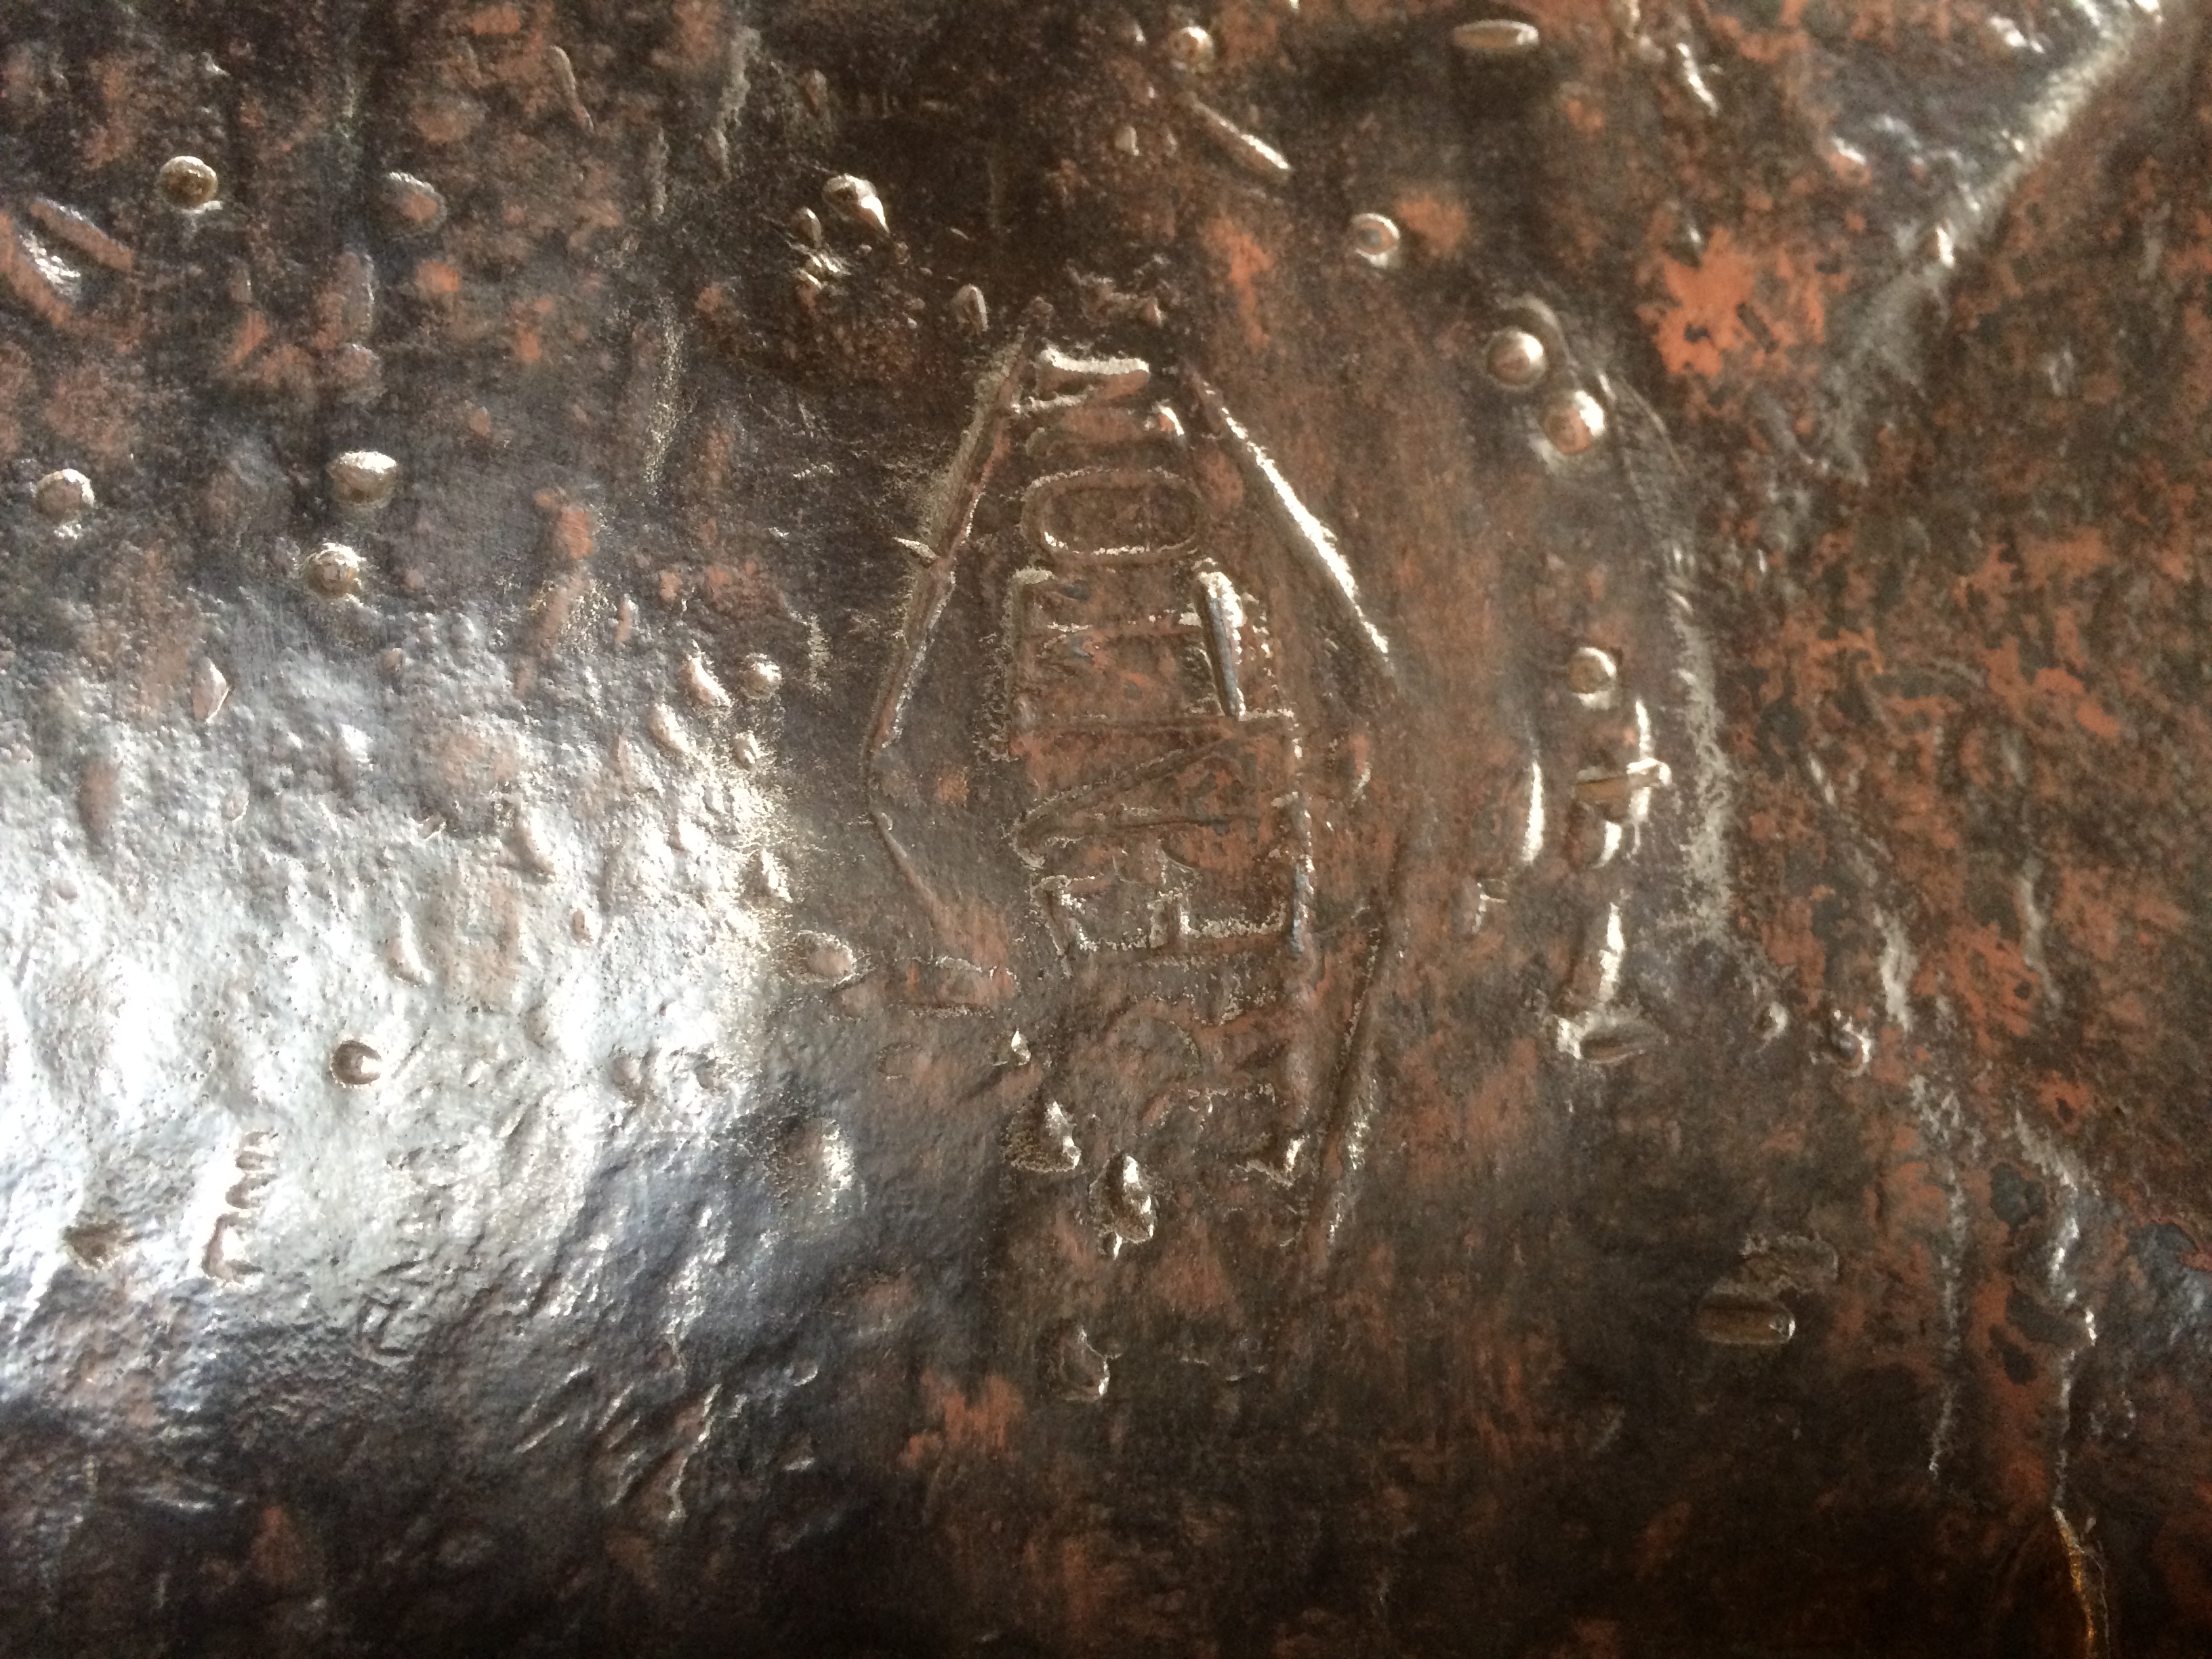
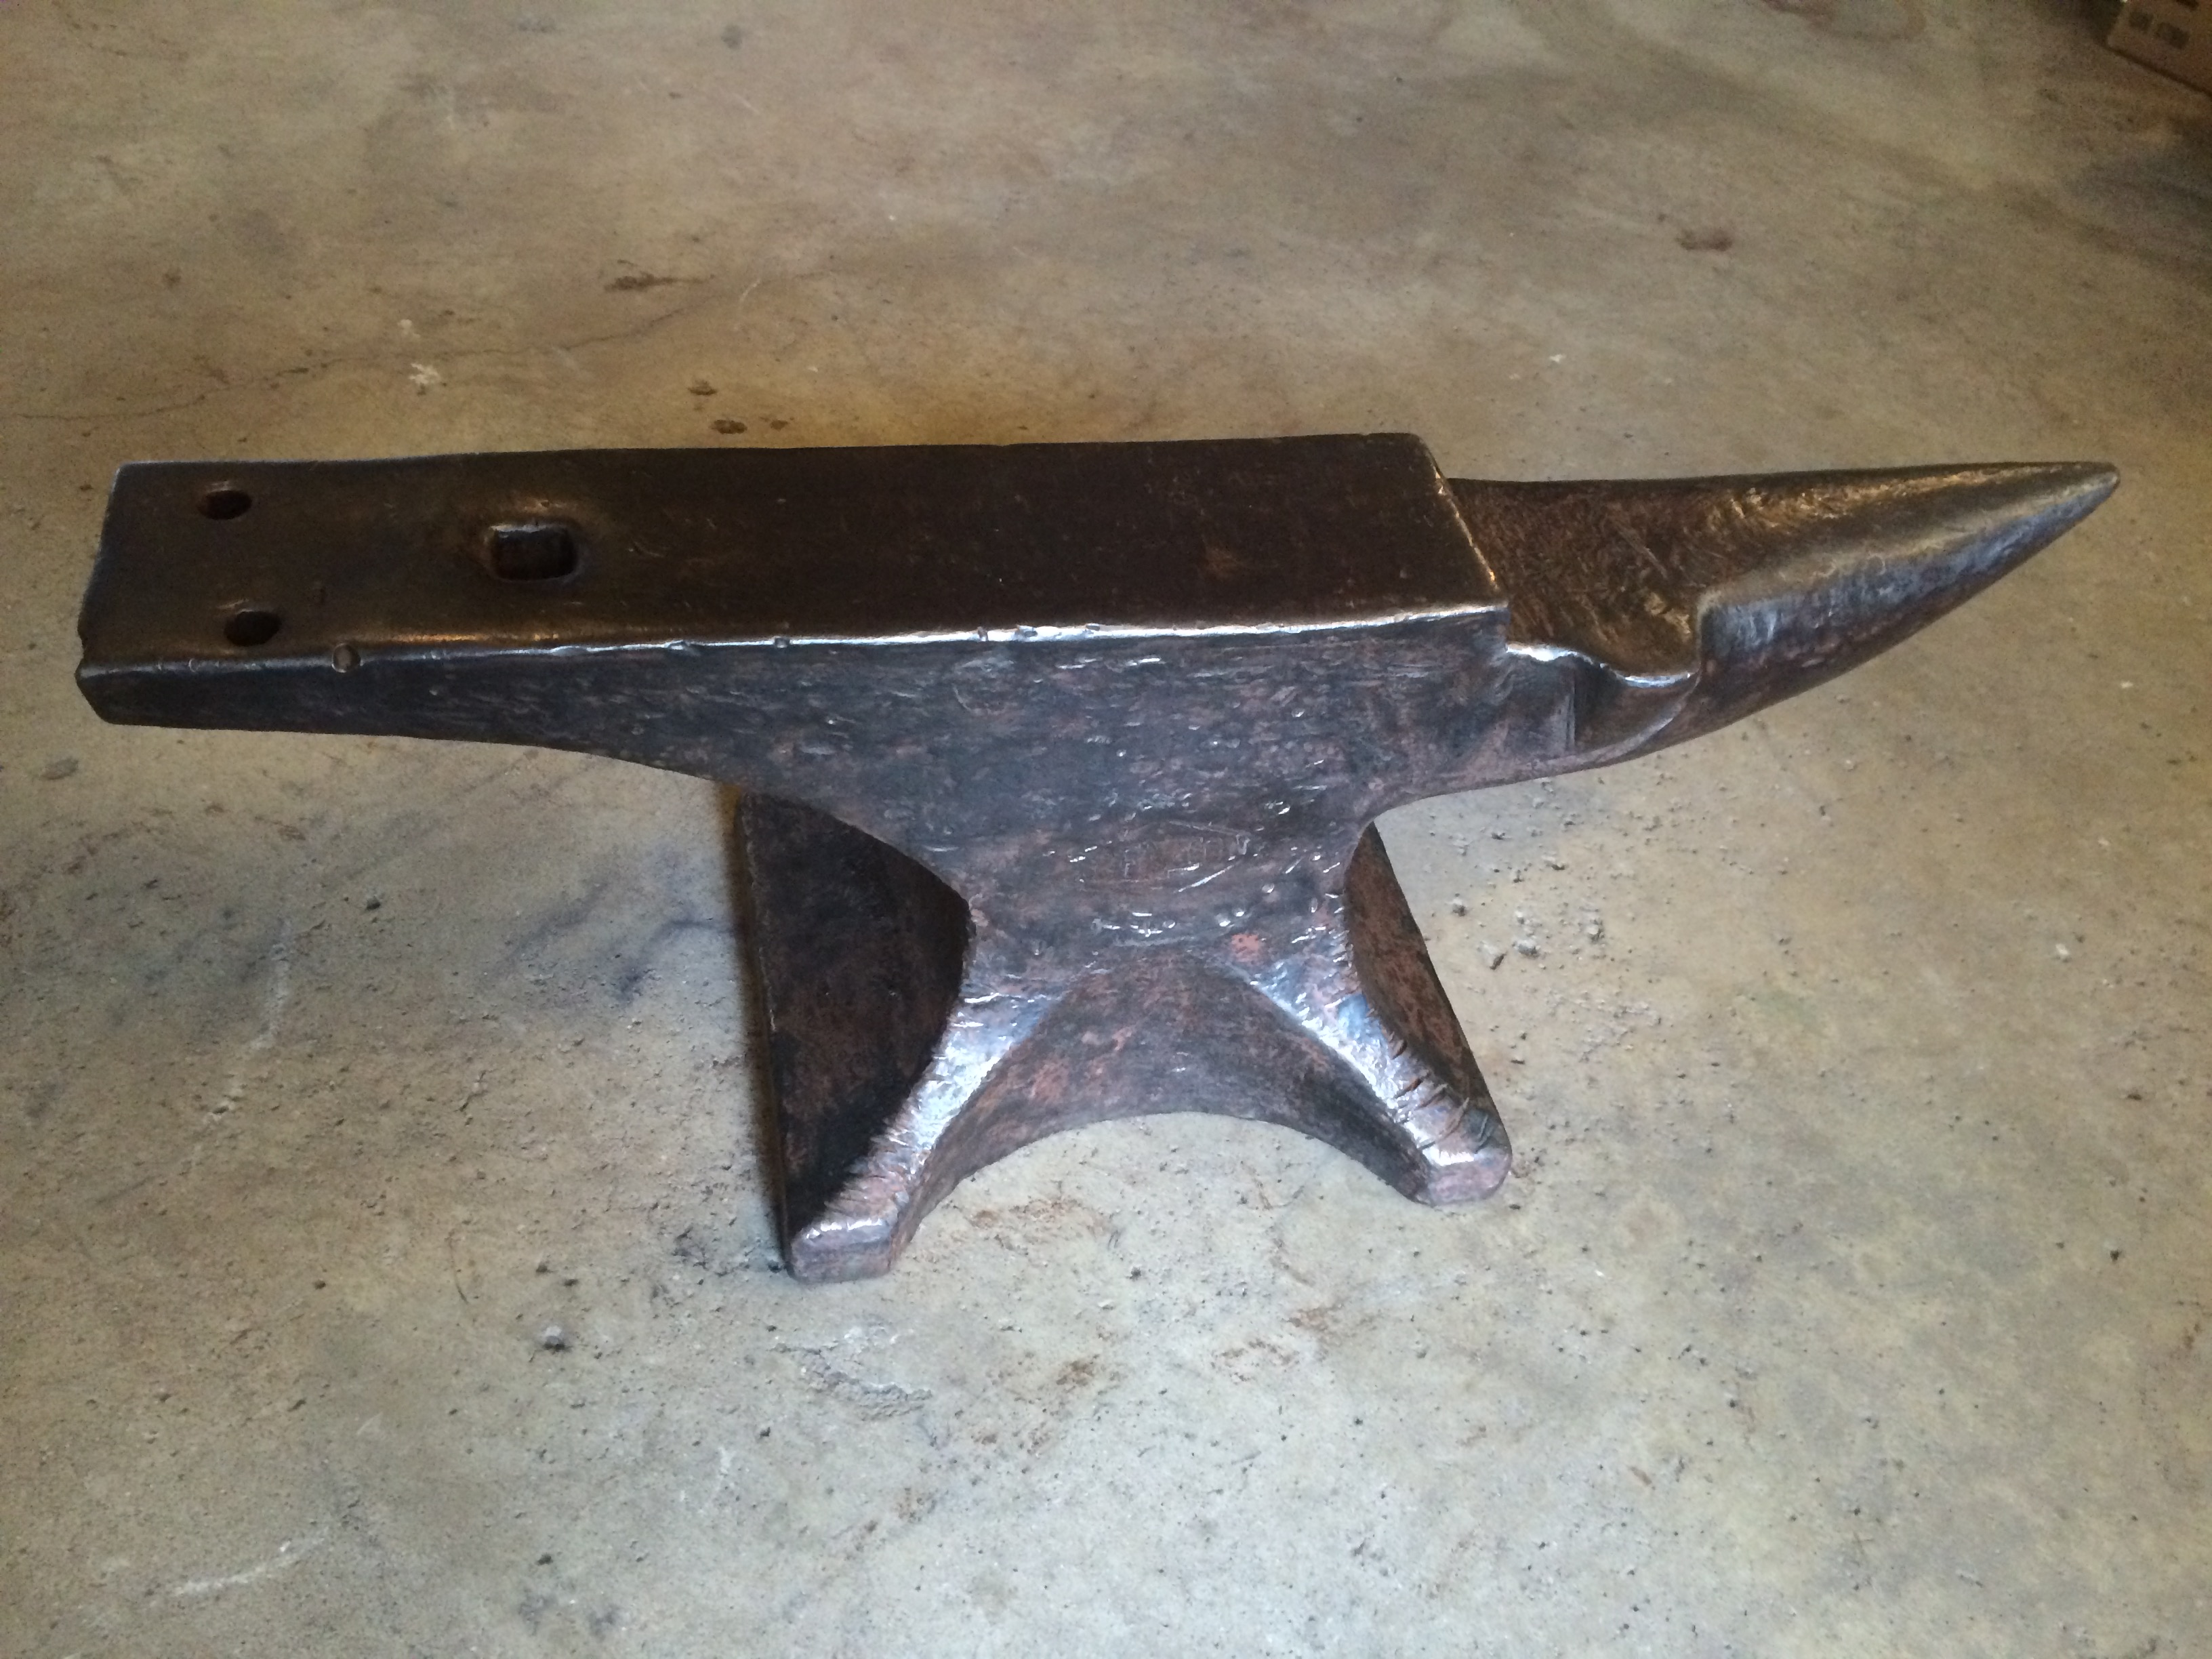
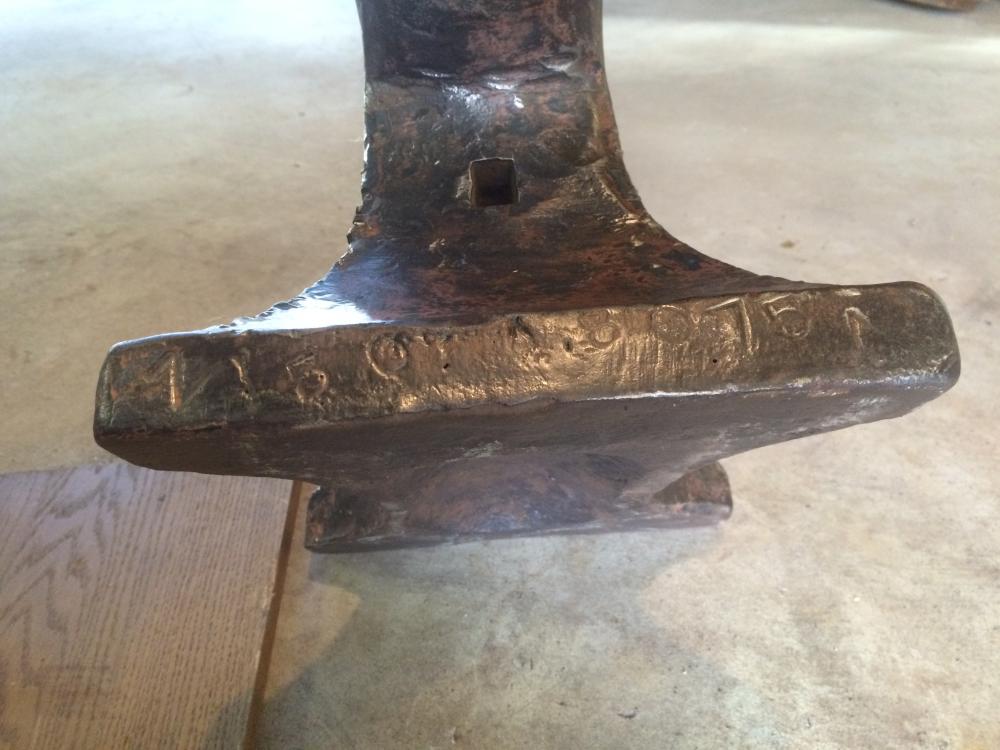
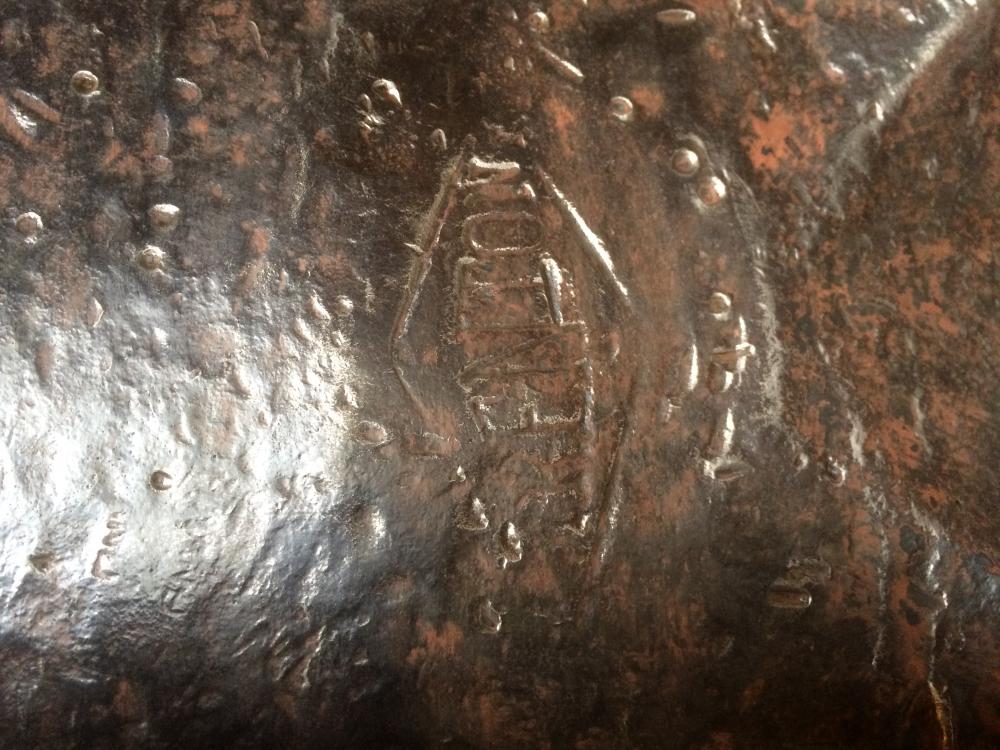
Got lucky today and picked up a #150 Trenton in pretty darn good shape. Have searched most of the afternoon for date age from serial numbers with no luck. Can anyone help? First set I know is the weight . Second set I think is A8075A

-
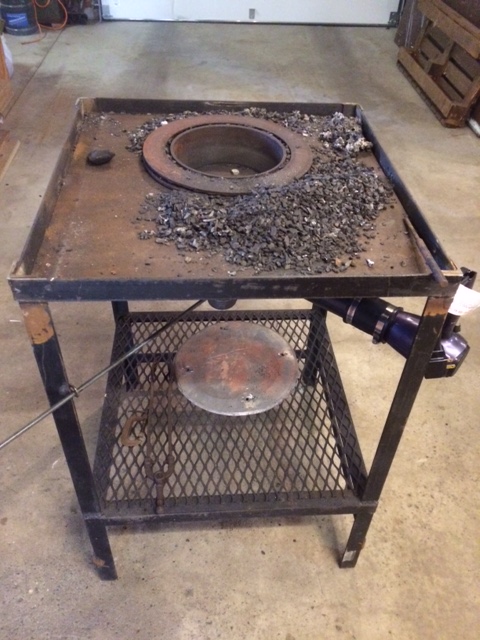
Solved some problems today just by buying Nut Coal instead of Rice from Tractor Supply. Couldn't get it started with charcoal like the Rice coal so I used a hand full of Rice to get the Nut going. Managed a horrible pair of Tongs and a poker. A Poker to manage the coal forge and Tongs because I don't have one pair. Both tools I really needed to even get started. A couple Fire Brick at the back helped pile the coal to a height where I was able to pass material through to heat the center park for forging. Ran the forge for almost 4 hours on less than two gallons of fuel. Considerably less than when using the smaller stuff and much more manageable.

-
Yup that's whats on the tomorrow list. What would you think if I drop in a 1" or so ring of 2-1/2" in pipe and fill the rest of the void with sand or perlite or dirt. or whateve won't burn just to save the time I'll spend cutting and fitting fire brick?. Just in case that's not the problem?
-
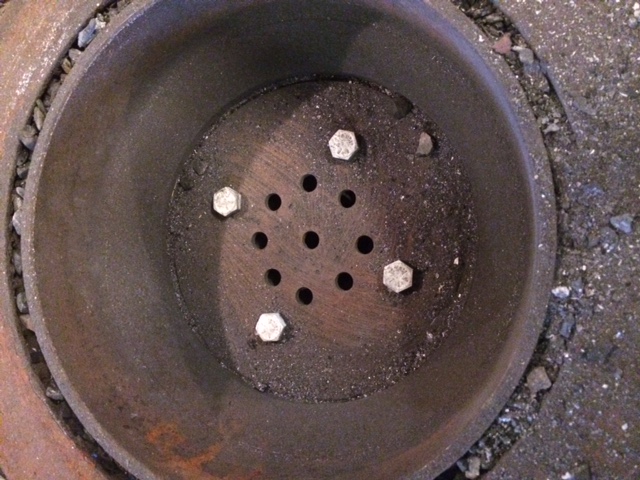
Arkie Took your idea and made a similar mod to help control air supply. Just cut a slot in the cross pipe and made a sliding gate. Saved me another trip to the hardware store for a coupling and nipples to replace the existing pipe. Push rod with notches at full open, half and full closed. Will probably add 1/4 notches as I found today it seemed between closed and a quarter open it ran pretty good. Still seemed to create a much larger diameter hot spot than I needed and the sweet spot was still too deep to heat the middle of a 1/2" round without adding a bunch more coal to raise it. Tried this once and it just seemed to burn as wide as the drum itself. Seems a waste of fuel. Going to try to raise the bottom an inch or so with some fire brick to see if this helps. This rice coal is on the smallish size. 1/2" at best. Packs in pretty tight and when burning, grows all the way to edge of the drum. Don't need that big of hot spot. Don't have a clue why the pics are spun 90 deg.
.JPG.8380f973949252108900ef2df1edb5d8.JPG)
.JPG.2c472ddca03c50cd5c3f42ea769b5d80.JPG)
-
I'll give that a try before I go cutting. Thanks.
-
I've seen so many vids on brake drum forges I knew it wasn't properly stoked. I guess I was just trying to see if everything worked and when it did get a pretty good heat going I made a very poor attempt at half of a pair of tongs that I started in a coffee can forge that lasted all of about 6 firings. So much for homebrew refractory. Got tomorrow to cut a material slot in the drum edge....play with air management. make a hood of sorts and maybe even try to finish that pair of tongs. I'll put up some pics of a better firing and the whole forge when I get a chance. Thanks to everyone for all the advice.
-
LOL..... been to HD, Menards, Tractor Supply and Wally world twice this week already. Next time I head that way I'll have to pick me up a xxxx Fan for when this Blow Dryer takes fails.
-
Found Glenn's post on coal fire management, Very good info for a newbie. That one should be a sticky in the Solid Fuel Forge forum . Your diy blast gate is an awesome piece of Mc Givery. Will see if I can manage that one tomorrow along with some sort of a hood. The $14 blow dryer I got is surprisingly quiet even on high. The blast gate will certainly help managing vol. I'll save the water for an "if all else fails" kind of thing. Last thing I want right now is to replace the cast rotor..
-
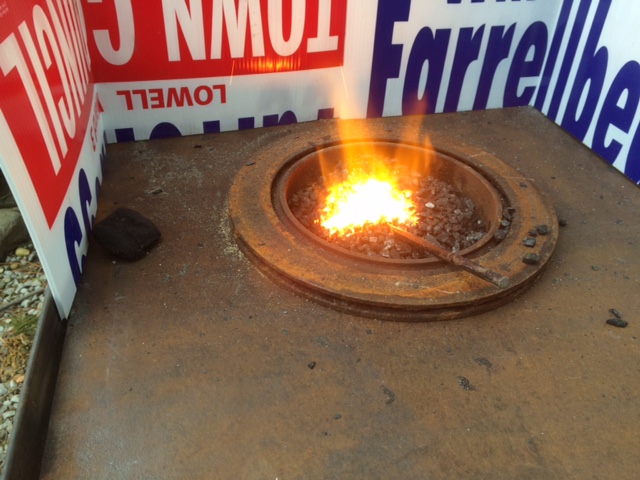
This was much simpler to put together than as gas forge. But I'm still working on a gasser too. Nothing special to most I'm sure. Typical Brake Drum, hair dryer set up. But for a retired carpenter who never did anything in steel n metal I was pretty proud of how she turned out. Locol Tractor Supply had Nut Coal last week only thing left was Rice coal so that's what i used today to light her up. I've read that Anthracite coal is hard lighting. I tried the news paper ball in the bottom but being pretty windy today that didn't work even with the make shift wind block. Put a couple pieces of grill charcoal and lighter fluid in the bottom and once that took off topped it with the Rice Coal. didn't take but a couple minutes with the air on low and she took right off. Just a couple things I need to change. Need to get the Drum lower and or cut out a slot for material. I think I need another way to regulate the air pressure. I think the low setting is OK but when on high she's like a blast furnace. Thinking about drilling holes in the cross pipe going to the T and making a sliding sleeve to fine tune air pressure. The drum seems to be too deep and with air on high the hot spot is too big and to deep to. Burning a lot of fuel and can't heat the material in a specific area without a huge fire ball. Can I pack the drum with some kind of clay or refractory to make a smaller funnel to conserve on fuel? The Rice coal seems to create a lot of clinkers too. More than I think there should be. Ran it for about an hour and the bowl had at least a full handfull of them and rather large. 1" to 1-1/2" in size. Is that typical or due to the rice coal? Never even looked into a forge till today. Think I need some shaded glasses of goggles (since I wear glasses). Going from the forge to the anvil.....I'm looking thru an orange glowing spot in my vision.