

Patrick Kerns
-
Posts
44 -
Joined
-
Last visited
Content Type
Profiles
Forums
Articles
Gallery
Downloads
Events
Posts posted by Patrick Kerns
-
-
So I have the option of picking this guy up for about 50 bucks and two hours of driving. It clearly doesn't have a spring or a mounting bracket, but am I correct in thinking that those are two parts that are relatively easy to re-manufacture? I quite like the design and the screw is reportedly in good condition.


-
Bo, where on that brass compression nut is it measuring 9/16 inch? Because as far as I can tell that is not a standard available size for those fittings. When I measure the nut from the back of the fan shaft is is 3/4 inch OD, about 7/16 ID, and around 24 TPI. Still no luck here finding a workable jam nut.
-
Frosty, thanks for the tip on where to find flap caps - also I think I'll take the wood slats off and use some steel to hold up the forge
")
Arkie, I was eyeing some of my square stock with something like this in mind last night, it's nice to see it so well executed!
-
After about four hours of extremely ill-planned mucking about in my workshop/basement/home gym/storage area I present what is undoubtedly the ugliest thing I've ever made.
THE COMEDY FORGE mark I
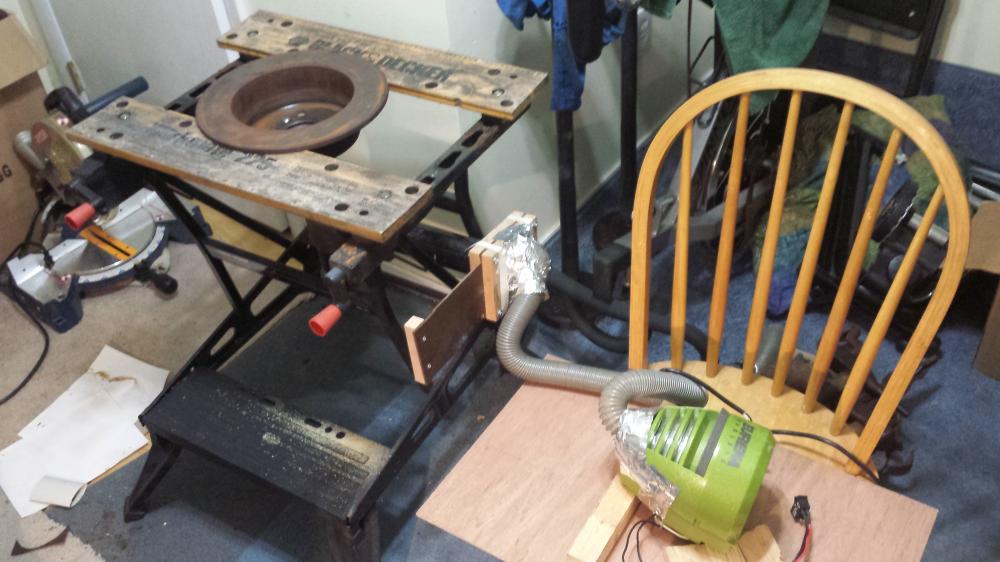
The funniest part is that it actually works! It's probably not going to be getting anything to forge welding temp but it will suffice to get me to the goal of "light a fire" by this weekend at which point I will be using a rock as an anvil so I can actually hammer on something.
This "apparatus" probably isn't going to last more than a few forging sessions but it is temporary until I finish overhauling my champion 400 and weld together my forge table.
Also, I'll but putting some bricks under the brake drum so I don't burn up the workbench and will be burning some charcoal in the first few loads until I get to the guild meeting to buy some coal at the end of the month.
Just need to kludge something together out of scrap for the grating inside the drum and it will be ready to fire up.
-
Took a crack at the axel with both a hacksaw and a metal cutting bladed sawzall - no love. Will probably take it with me to the guild meet and see if anyone is willing to help me hot cut off the flanges at one of the guild forges in exchange for me doing some striking for them, or for a chunk of axel!
-
Arkie, thanks for the tip. Now that I have some access to a welder I should be able to put something together for a proper ash dump, I've seen a lot of good designs for both sliding and lever ash dumps.
-
Charles, of course you're correct thanks for your comments. I thought about a number of options for my first forge including welded steel plate firepot, commercial cast iron firepot, and some sort of duck's nest. Brake drum won out for me based on the KISS principle - minimal expense, ease of fabrication, proven history of effectiveness. After it's been up and running for a while I'm sure I'll want to change some things about the forge and will hopefully have cash to upgrade to a commercial cast firepot eventually or the welding skills to fabricate a nice plate firepot.
-
Thank you for all the advice!
Frosty, when you say it's heat treated to be tough do you mean it was hardened and then had a lot of tempering done on it? Will let you guys know how the muscle building goes
Also I have a sawzall for backup!Also, what do you guys do with the flanges - seems like they would have some usefulness as a base for something. Oh snap, I think I just figured out what I'm using for a tuyere grate.
-
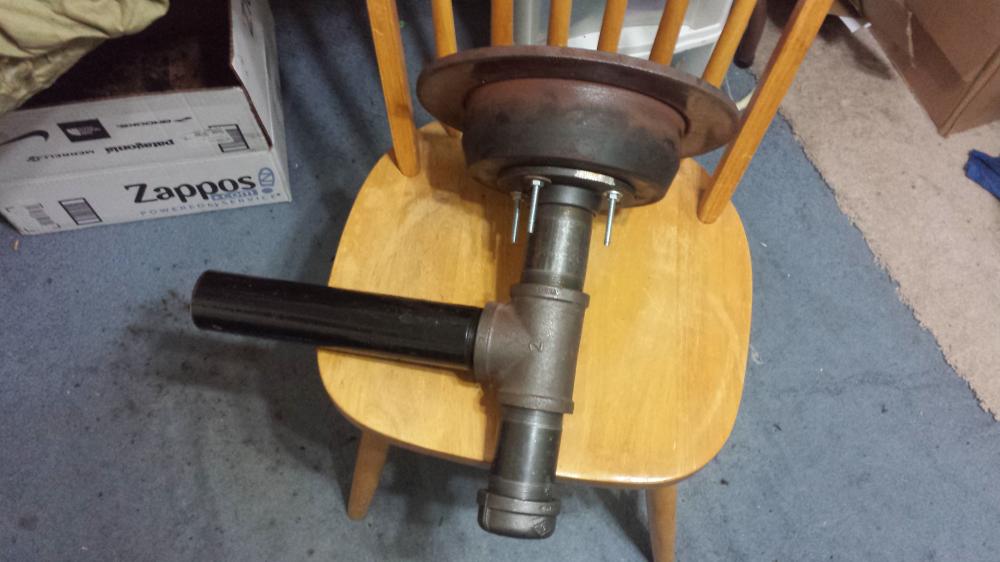
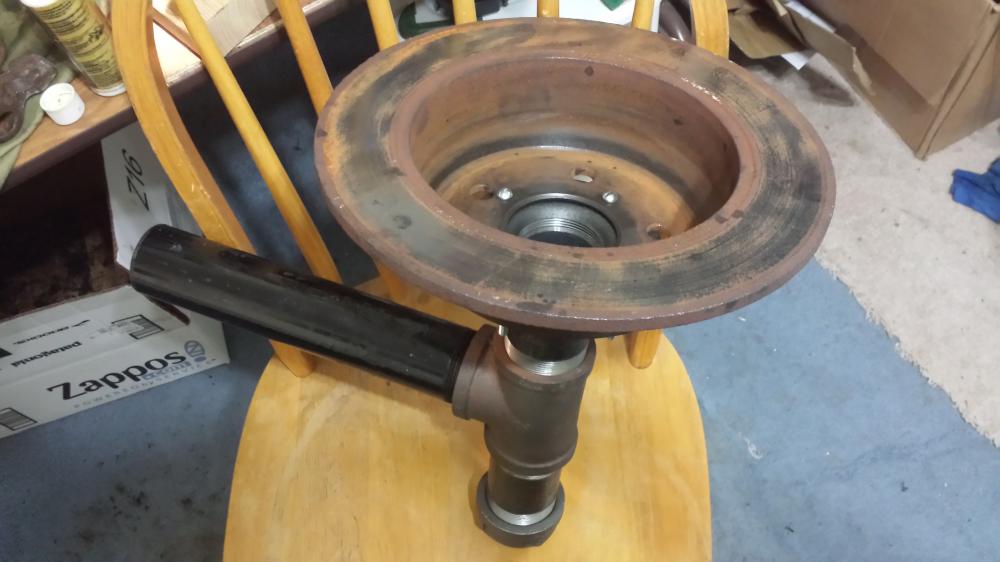
Progress!
-
Hello! Just picked up two F150 axel shafts today at my local pick and pull. My question is how to best go about breaking them down into usable lengths. My current plan is to anneal the shaft near the plate at the end and then hacksaw it off, then anneal the rest of the shaft and cut lengths on an as-needed basis. Any advice would be helpful. I have minimal tools at this point but hope to be making a fair number of hardie tools/chisels/hammers out of the axel shaft. I've calculated it out and the price I paid works out to about 1$ per pound for the round stock of what is probably 4340
.

-
Have you though about paying a machinist to make a replacement?
-
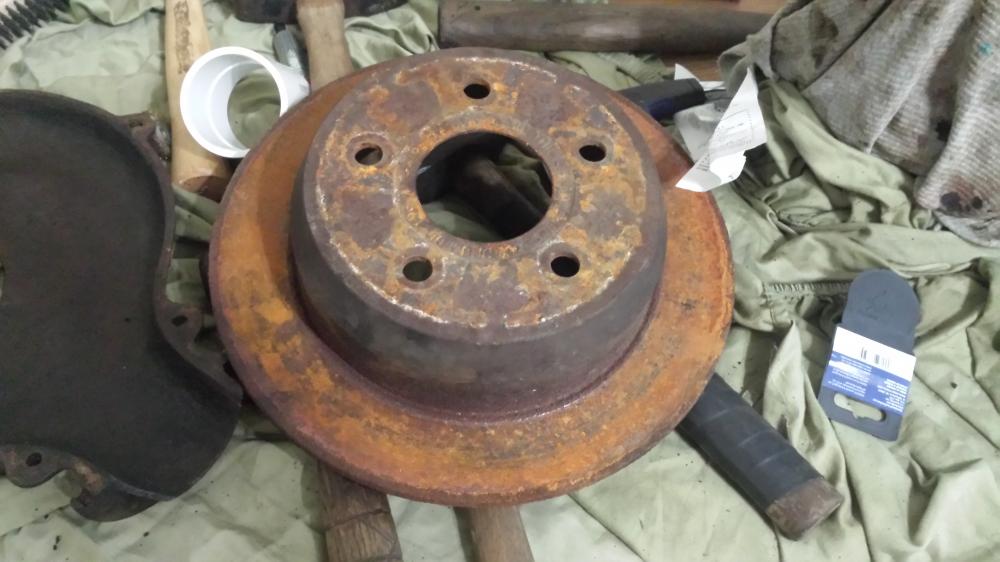
Went out to my local Pick and Pull type junkyard and found a nice brake drum for the forge, it's about 3" deep with a nice "brim" to it, which is what I was looking for. Also pulled apart a F150 pickup rear differential, popped the c-clips, and got myself two 4340 steel rear axel shafts which are basically 1.5 inch diameter by 32 inch pieces of round stock. Should be enough to make a lot of the tools I'll need for the first year of blacksmithing. All in all was about 50 bucks. They threw in the rear diff pin which I think will make a nice punch for free because they didn't have it on the price list. Not bad for a Saturday morning.
From what I understand the 4340 will be a little red hard compared to 4140 because of the slightly higher molybdenum content but I suppose I'll have to make sure to work it really hot, and that same problem should make it pretty good for hot work tools like a hot hardie.

-
Bo T, thanks that's very helpful. I'm going to go buy a 9/16" brass compression nut and some propane for my torch. I figure between the jam nut and endless heat, hit, oil cycles this nut will come loose eventually. Man this project is taking way longer than I anticipated.
One thing I was wondering was has anyone ever added an oil drain oil to the bottom of the case? It seems like the oil dripping out through the fan bearings washes out all the grease and contributes to bearing breakdown - if the oil could drain straight out of the case the grease might stay in the bearings and prolong their life. Maybe you could hook up a tube to a drain hole in the case and collect the used oil in a jar or something?
-
Man, where is that piece from? Is it the door from a fallout shelter or something?
-
Bo, did you just screw the nut and jam nut down all the way so they held the shaft in place or where you holding one with a wrench while you went at the fan nut? Not sure how to apply the jam nut principle on this application. Need to pick up a propane take for my torch so I can really heat up that nut, continuing to put liquid wrench on it every day.
-
Good show Bo! Maybe I'll need to bribe my local mechanics with food/beer to hit mine with an airgun - that's not a piece of kit I'm likely to get anytime soon.
-
Bo T, I had luck using a small adjustable wrench on the flats of the cone to remove it in back if that helps at all. I'll search through my collection and see if I have anything to try as a jam nut.
I've been trying the heat, penetrating oil, tap, repeat process this morning but no luck so far. I think I need more heat, have been using wooden matches
Will pickup a long butane lighter and try that. Either that or I will try my soldering iron.I'm beginning to grasp why the guy at practical machinist recommended applying anti-seize compound to to the fan shaft before putting this darn nut back on.
-
Liquid wrench, mild heating of the nut, tap gently but firmly with hammer on center shaft, repeat. Standard auto mechanic technique for removing stubborn nuts. Liquid Wrench is one of a number of similar compounds. Go to auto parts store if you don't find it at Local big box store.
Thanks! Liquid wrench is indeed what I've been using. Will try the heat, tap, repeat. Much appreciated. What's the best way to heat the nut?
-
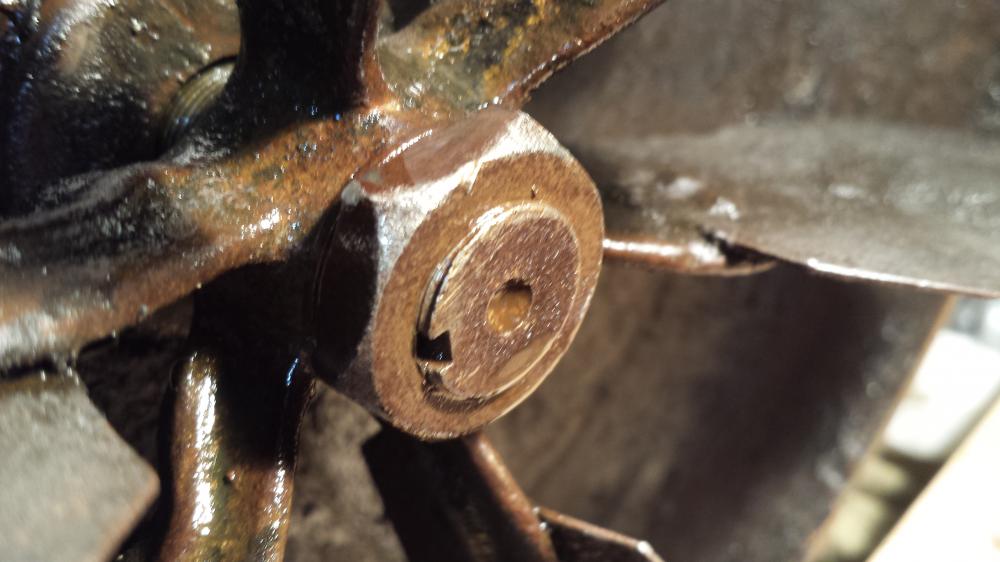
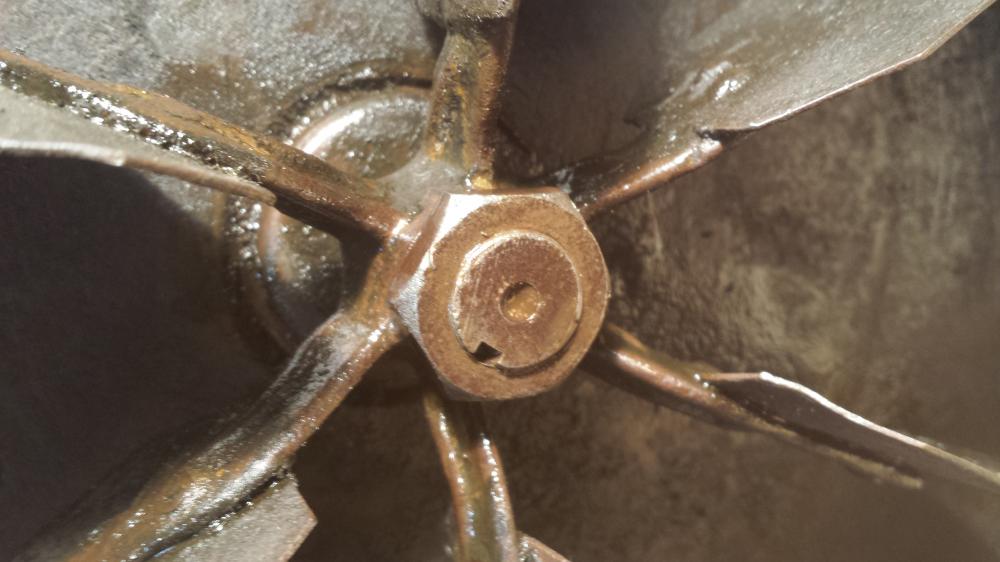
This front fan nut is really giving me trouble. I've got the right sized socket for it now but it won't budge. It's a little hard to get good leverage on since I need to hold the fan spider to prevent spin. Also, I'm not 100% sure which way to twist the nut. The rear fan locknut in the back bearing assemble came off to the left and in the patent diagram the threads on the front of the fan shaft are running in the same direction - so that means I should be twisting it left, correct? I've hit it aggressively with penetrating oil and some wire brushing to try and break up any rust that's holding it on. If someone knows for sure which way this nut is supposed to turn off I'd be in your debt. When I examine the protruding threads it looks like it turns off left, but it's not budging.
-
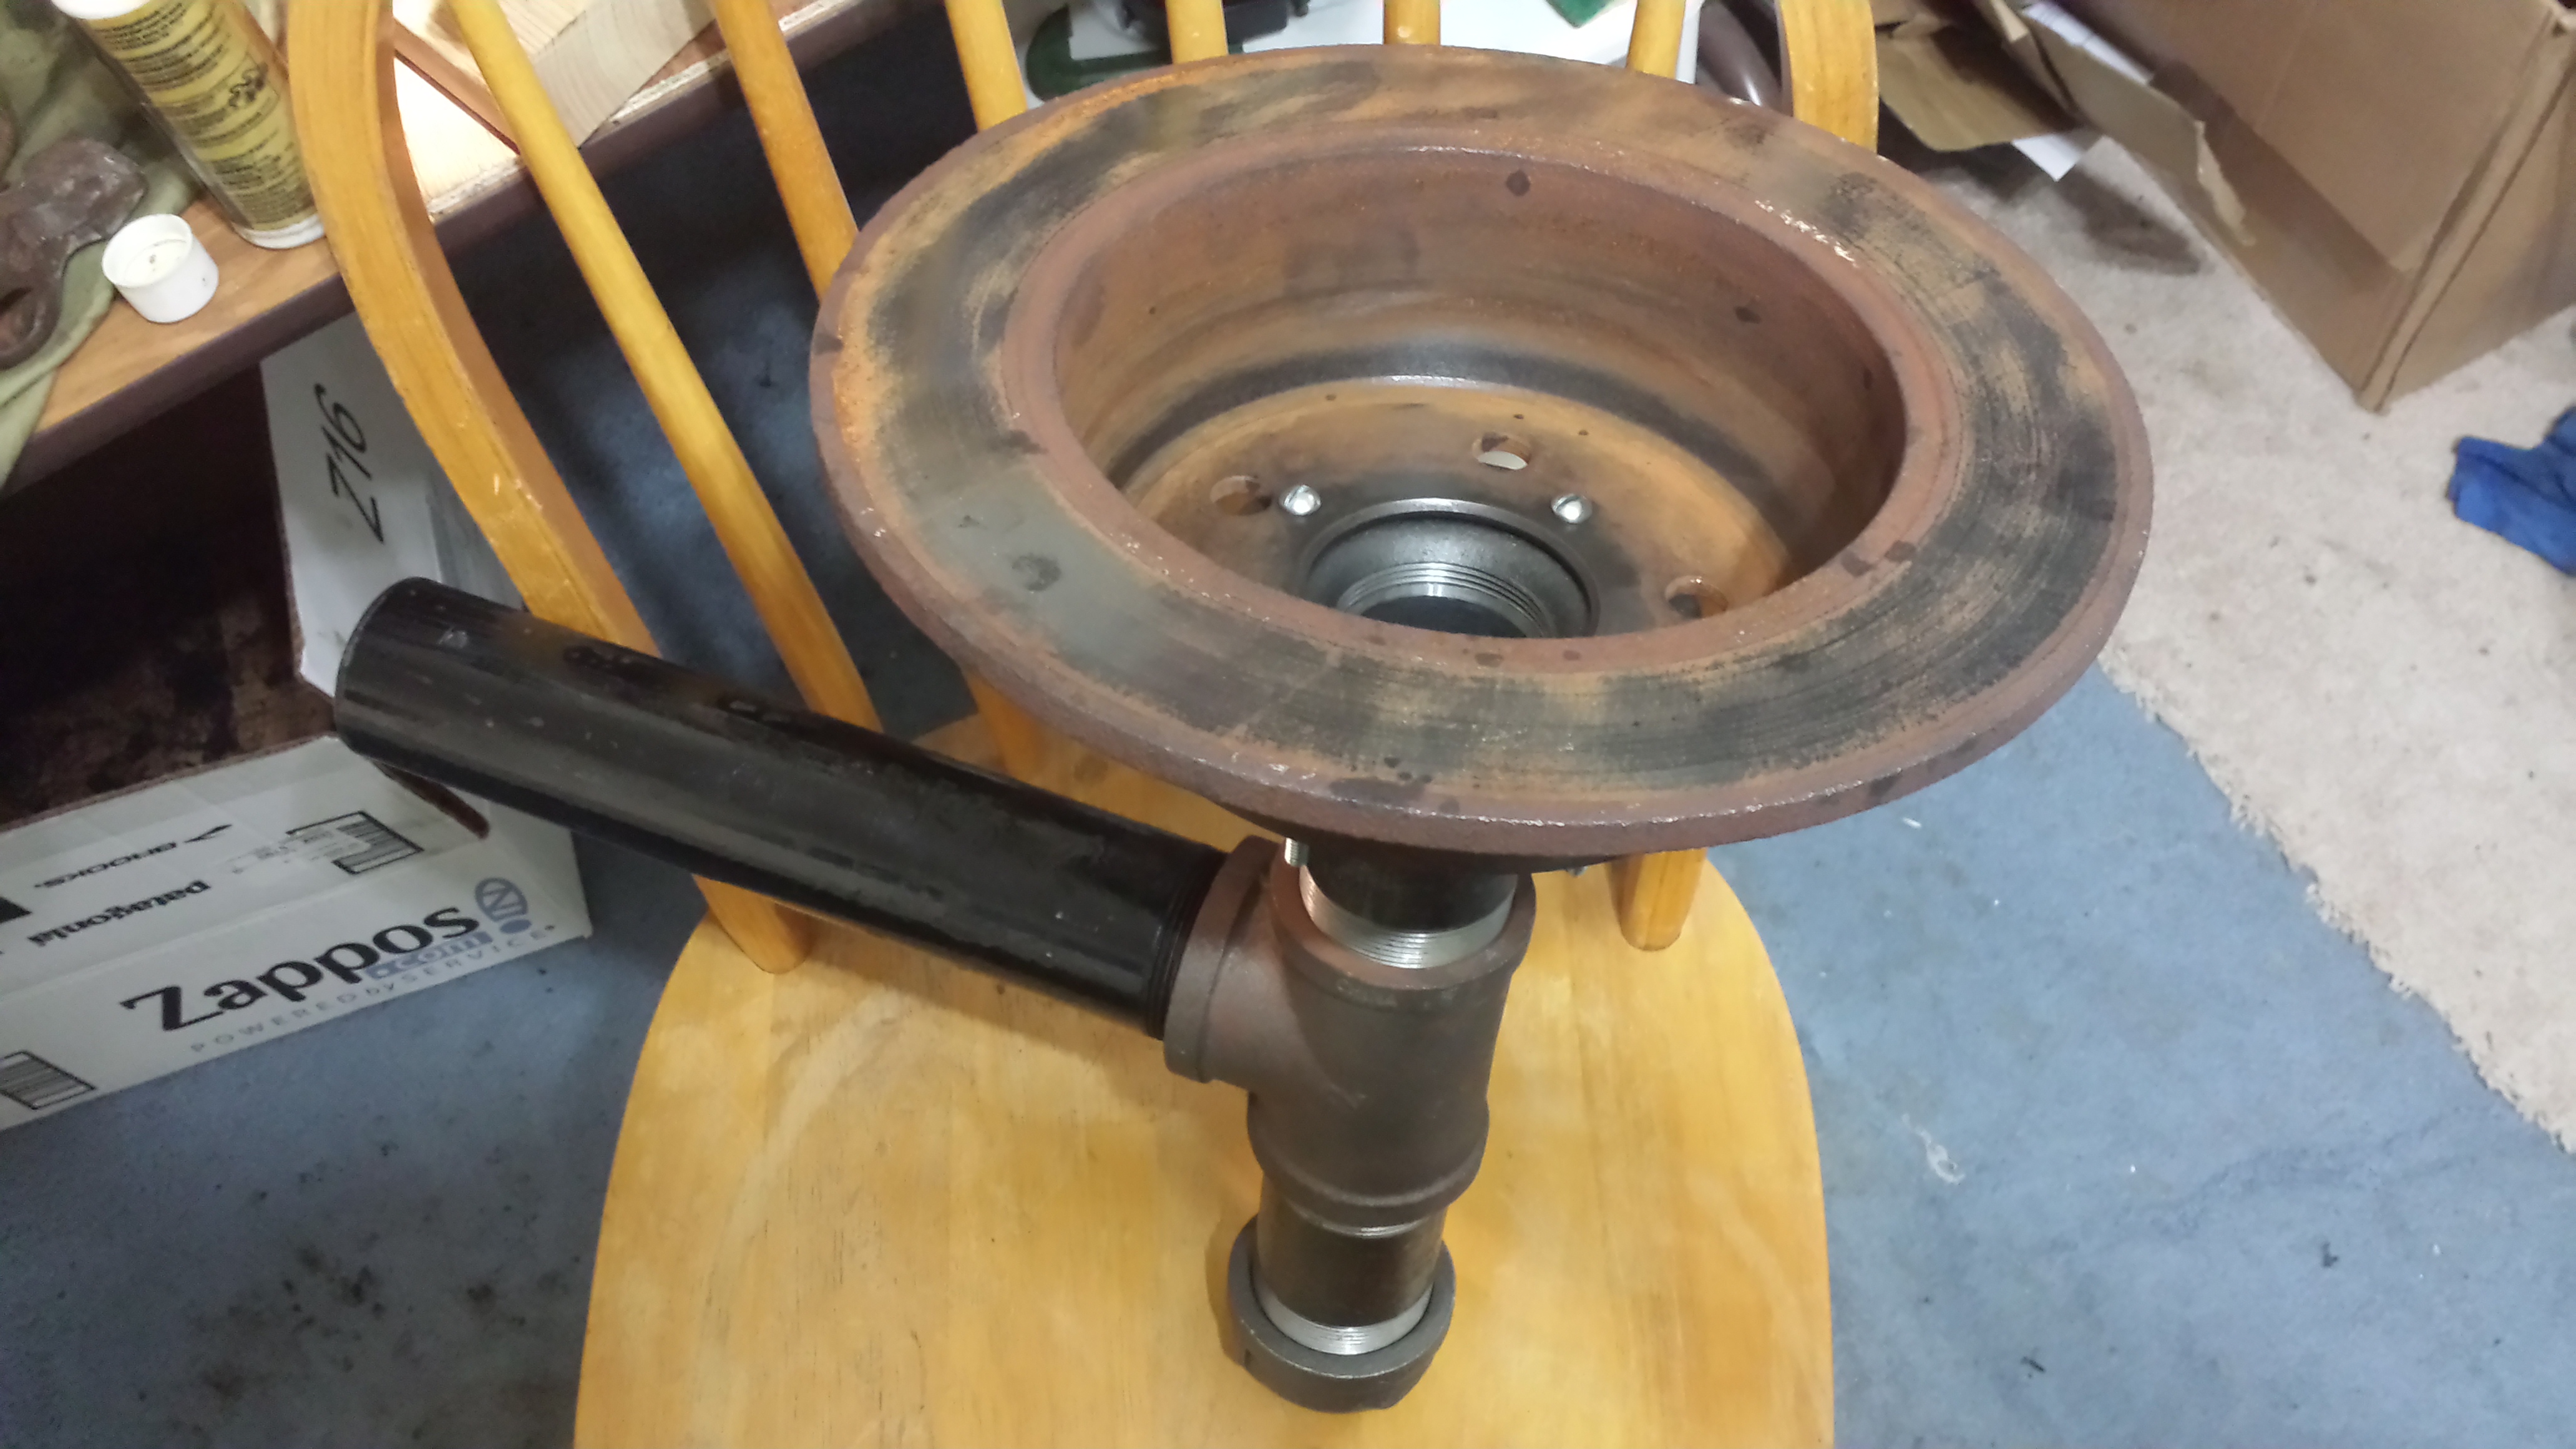
I am now well supplied with new sockets, kerosene, gloves, new 1/4 inch ball bearings, grease and a grease gun, etc. Looking forward to the next stage - hope to get the fan shaft out tonight and start flushing the crank case with kero.
-
I turned down the 325 counteroffer and I'm not going to lose any sleep about that. Will now return to my regularly scheduled TPAAAT.
-
I managed to get the rear fan lock nut, washer, cone, and bearings out but am unsure of how to lock the fan shaft in order to remove the front fan shaft lock nut on the fan side. Going to pick up the 1" socket for it today with a few other odds and ends.
Never mind, read the advice a few posts back, will try that today.
-
I managed to get the rear fan lock nut, washer, cone, and bearings out but am unsure of how to lock the fan shaft in order to remove the front fan shaft lock nut on the fan side. Going to pick up the 1" socket for it today with a few other odds and ends.
-
Hello,
I might be able to get this 70 pound for around 300. Do you guys think it's worth it?
Ebay link removed


Opinion on this Post Vise?
in Vises
Posted
Found a very similar vise at a guys house when I was doing a swap with him his morning - except this one has a spring and mount. Got it for 80 and was happy about it. Will post before/after cleanup pictures here shortly.