

beaudry
-
Posts
188 -
Joined
-
Last visited
Content Type
Profiles
Forums
Articles
Gallery
Downloads
Events
Posts posted by beaudry
-
-
Clamps made to fit in the square holes , round and square pegs of various sizes and heights, a heavy leg vise mounted near one corner on it's own foundation with the top of the jaws just below the the top of the table.
One end of the heavy frame that supports the 5' x 10' platten sits on a 20'' tall wide flange beam that sticks out a couple feet on each side. This makes a handy step to jump up on top of the table with a long hot bar to upset the end against the 6,000# mass of the table top .
Great tool, I have mine set up in front of the shop so that there are no obstructions to working anywhere around the table.
-
Keep the edges and corners clear of obstructions. Mount vises to a solid post along side, attached to the underside of the table for rigidity.
Set the legs back from the edges the depth of your deepest clamps.
Use heavy flat plate with true square corners for the top and set it up level so you can use it as a work surface that you can set up projects with an accurate reference to plumb, flat and square.
Put a heavy shelf below to keep set up fixtures ,clamps etc.
Put good lights above out of harms way and a hoist.
Run a solid ground back to the welder.
https://www.iforgeiron.com/topic/53401-layout-work-tables/
-
https://www.instagram.com/p/BeA25dCAsV4/?taken-by=harrismetalsmith
Hopefully these guys won't mind sharing this photo from instagram of a brick floor in a blacksmith shop.
-
8 hours ago, rockstar.esq said:On January 13, 2018 at 7:04 PM, beaudry said:
Plumbers and electricians are somehow in another league altogether, so if that's how you want to spend your work day , go for it.
What I meant is that electricians and plumbers are in early and all throughout a building project .
Running hot and cold water, lights and power are essential components while ironwork , particularly forged ironwork is more of a luxury item that usually comes at the end of a project when the budget has been pretty much blown out of the water.
There is still a place for it , but it takes some time and effort to educate the client how it can really add aesthetic value and why it costs what it does.
-
Shop rate is pretty area dependent, so an actual number may be less than useful to the discussion.
A better benchmark is the going rate for a skilled tradesman with a shop in your area, auto repair , cabinet makers, welders etc.
They have similar overhead and equipment investment and provide a product and service at an hourly rate or by the job . A perusal of their premises or local reputation will indicate pretty well how close that rate is to a livable return for their efforts. Your rate should be comparable at the very least . For that you should be fully tooled up and ready to go , able to deliver a superior product on time and at the agreed price.
Plumbers and electricians are somehow in another league altogether, so if that's how you want to spend your work day , go for it.
I haven't made a dollar for 22 years that didn't come from metalwork of some kind, by far most of it custom architectural forged work.
This has enabled me to raise a family , buy any tool or equipment I needed , build a house and shop ,live completely debt free , send my kids to college and fund a decent retirement and take off at least a couple times a year.
I don't bother to make hooks or bottle openers or anything someone can shop for on the internet. That's a race to the bottom with third world craftsmen or part time hobbyists .
If I charge by the hour I include every minute I'm making the clients project a reality. site visits, design time , phone calls ,emails as well as actual work in the shop , travel time, delivery and and putting everything back afterwards, ready for the next job.
Material is at cost plus a percentage. This always includes shipping and consumables related to the job.
If it's a fixed quote I include all the above, figuring it all out on the high side, because it almost always takes every thing you think it will take and then some. Every once in a while you get pleasantly surprised and really make some money.
The best clients are those that made their money by their own efforts and can appreciate the investment of time and equipment and skill you can bring to making their dreams a reality.
The worst clients are the ones with trust funds who like to pretend they are poor.
-
The brick floors I've seen were common hard fired red brick. They were laid tight to each other with no mortar
The sand slurry was pit run glacial sand mixed with enough water to make it flow and level out like wet concrete.
The sand slurry was screed flat and level with a long straight board and then allowed to firm up as it dried.
The slurry method was a fairly quick one way to get a firm level compacted substrate for the brick floor, but this could have also been done with a compactor and shovel , rake and level.
After the bricks were laid on top of the sand , more sand was sprinkled on top and then swept clean, filling in any cracks.
It's a nice floor for a blacksmith shop with just enough give to be easy on your body, good traction ,fireproof, drains any spills and can be easily repaired or taken up to run wires or piping under the floor.
If I was going to build a new blacksmith shop from scratch , this is or compacted dirt is the kind of floor I would put down.
I personally don't like spending my day working on a concrete slab and think using the floor as a layout surface is inconvenient and in the way.
My preference instead is to have a couple of steel tables dedicated for the purpose. Large or heavy pieces get moved around or in and out of the shop with an overhead jib crane
I mostly do large pieces like gates, stair railings and staircases and like having the work up at a comfortable height where I can get all around it.
-
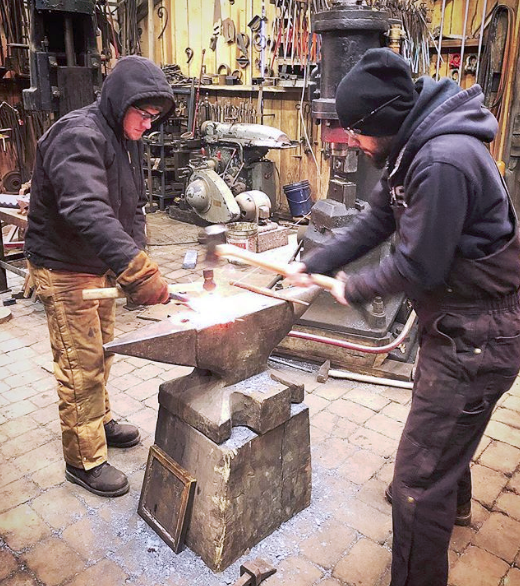
My younger son at the 200# Beaudry forging 250 railing pickets .
Raising the hammer put the bottom die at a comfortable working height, allowing good posture as well as a clear view of the work.
Dropped treadle keeps allows a relaxed stance with both feet solidly on the ground.
-
This just proves the old adage that if you ask 10 blacksmiths a question you will get at least 11 answers, mostly opinions based on varying amounts of real world experience.
Another good option is a brick floor
I have a friend that has built two blacksmith shops with this kind of floor and really likes them for a number of reasons.
He poured concrete stem walls and then brought in a mixer truck with a load of pit run sand and water slurry.
The sand slurry was poured on the floor sub grade and leveled with screeds. When the slurry set up hard, he dry laid hard bricks on the entire floor.
When it came time to install the power hammer, he pulled up the bricks in that area and poured a deep concrete foundation block .
The floor is fireproof , easy on the feet and yet hard and solid enough to roll machinery on.
-
My forge shop was something that quickly evolved in the flat area in front of my enclosed wood shop [ wood floor ] and machine shop [ concrete slab ] .
Within a few months the business took off into a full time paying occupation and it grew to it's present form.
At first I just had a tarp for an awning to cover the area until I built a heavy timber roof structure and some sidewalls.
Even now , knowing some of the disadvantages and advantages of different types of floors, I'd still do it basically the same way.
-
I'm sure that there is ''recipe'' for a dirt floor, but eliminating any organic matter and rocks that keep the floor from compacting is a good start. Some clay in the mix helps.
Keeping it damp helps to pack it down and keeps it from being too dusty in dry weather.
In addition to the inherent softness of the floor , the natural gentle contours that develop over time feels good as you move around the shop.
I sweep mine with a stiff broom between times that I go over it all with a fine toothed spring rake to gather up the leaves that blow in and the small rocks that work their way to the surface.
There is some maintenance involved and a lot of people would prefer to just pour a concrete lab and be done with it.
I wouldn't put a wood floor in a blacksmith shop, although it was fairly common at one time.
Recently ,I had an inspection at short notice from my industrial insurance company in regards to fire and ways to minimize the risk . Among other things, they seemed to like the fact that I had a dirt floor in all the areas of the shop where hot work was done.
-
A packed dirt floor is traditional in a forge shop and easy on the body. You can dig it up to run water , air , or power lines.
Anvils , post vises , fixed benches and power hammers and other stationary machinery can have proper sized concrete footings buried below grade.
Sparks don't fly far when they hit a dirt floor and hot pieces don't roll and are easy to pick up.
Rake it smooth and flat every few days as a way to gather your thoughts and to warm your body up for the days work ahead.
Dirt floors aren't perfect, but they have a lot of advantages. I've never lost so much as a rivet in the dirt.
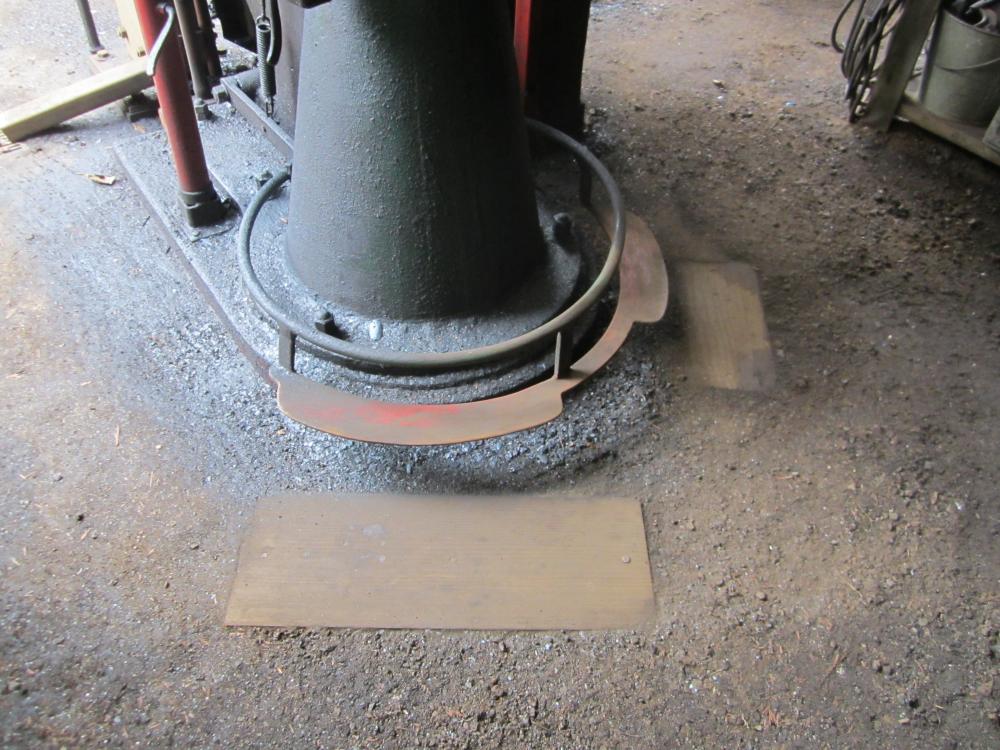
Here's mine, 20+ years of dirt, sand , clay, scale , swarf ,crushed clinker and ash, wetted down and tamped periodicaly.

-
Interesting press with such a tall frame. This opens up some interesting options not usually possible with other presses .
It seems like the best thing is to fabricate a heavy table to bring the work up higher,but still be readily removable for tall jobs.
I make all my tooling where the combined height of the bottom and top tools has the ram fully supported by the guides throughout the entire stroke at the heaviest load.
-
What swedefiddle said above, these mechanical hammers were originally designed and built to fairly loose tolerances.
People [ particularly machinists ] get all excited and think they will ''improve '' on the design by rebuilding them to overly close tolerances with grease fittings and tight bushings everywhere.
This era of machines were designed to run with frequent hand lubrication at open oil points at all the moving parts that allowed the oil to flow through, flushing out the dirt and scale inherent in a working blacksmith shop.
Basically these upright hammers translate the circular motion of the crank to the up and down motion of the ram through a spring actuated knee action of the linkage.
This action needs a certain amount of slack and lots of oil to work smoothly
The force and speed of the blow is either controlled through a mechanical clutch integral to the machine or with a driven slack belt and idler pulley arrangement.
Keeping things well oiled and adjusted enough to take out any excess slop without binding will make for a well running machine.
Keep us posted and we'll all learn something as well.
-
The books referenced have pictures of the complete hammer so if nothing else you should be able to tell if your hammer has all its original parts and is set up as designed.
Sometimes these old machine were kept running with parts from other machines or shop built to fit.
A lot of these smaller hammers were used in remote rural settings where they were on their own to keep things running with what they had at hand.
-
I think there's some information about that particular brand of hammer in the book ''Pounding Out the Profits''. Definitely not enough to rebuild it but just a general note in how it fits into the overall history of the evolution of the mechanical forging hammer. Other than that , you are basically on your own, unless you can find someone that has a similar hammer.
It seems that Weygers book ''The Complete Modern Blacksmith'' has some information on that specific model of hammer.
From your picture it looks like part of the adjustable gib that's made to up wear on the ram guides broke at some time in the past and it was braze welded back in place to allow it to be kept running.
The best bet is to free everything up and oil the heck out of it and see if it will turn over and go through the basic motions of it's stroke to see if it's worth your time and energy to fix it.
Be honest with yourself about whether you have the skills, $$ and motivation to take on a project like this and do a proper job of it.
Good luck and keep us posted and share some more pictures of it
-
On 12/31/2017 at 9:44 PM, Judson Yaggy said:
I sold my treadle hammer the month after buying my fly press. 7 years ago now, haven't regretted getting rid of it for a moment!
A flypress is a whole other beast than a treadle hammer. Ones a push and a bump , the others a single or multiple hit . Each has it's purpose and best use.
I use them both a lot and like all the various options available. I've made about a hundred tools specifically to fit the flypress and about an equal number to use under the treadle hammer.
The nice thing about a treadle hammer is you can set a hand held tool on the work in just the right spot and drive it in with whatever power is appropriate and then follow it up with another tool for a second or third operation all in one heat.
Even though it only hits straight down , a treadle hammer can give angled blows to the work by the manipulation of various fullering or block tools.
The flypress excels at being set up to do a single operation to multiple similar pieces at a time, less so for one offs where the stock is changing section rapidly.
Big section and volume changes in the material is where a power hammer is the tool of choice.
-
Here's a couple of shots of my hammer ;

The whole arm assembly can be moved up and down the rear post using a rack and pinion gear to accommodate different heights of material or tooling, but I tend to leave it in one position and make all my tooling as short as possible.
The only departure I made from the ABANA plans was the large removable table. I made this so I can use my swage block as a lower die .
The table has a 1'' square hardy hole [ same as the anvils and flypress ] so all my bottom tools fit as well .
There is some slight sideways slop in the hammer from the linkage, but in practice this is not noticeable and the hammer is very accurate.
This is a great tool and really opens up a lot of possibilities.
-
The advantage of a hammer with parallel swing arms is that it strikes an exactly flat blow , regardless of height setting of the hammer.
This flat blow is also a limitation compared to a hand hammer or a striker with a sledge in that it can't strike an angled or sideways blow .
It looks like there was an attempt to remedy this limitation in some of the designs above.
-
I built a treadle hammer 20 + years ago from a set of plans that ABANA published .
This is a parallel swing arm design with the bottom arm a straight section of spring steel. The head is a chunk of 4'' square solid that weighs 85#
The pivots are 1'' round bored out for 1/2'' pins . All moving parts are open oil points or grease fittings.
I bought all the steel new , cut to size and welded it with a basic 220v Miller DC stick welder. The only machine tools I had at the time was a portaband, an angle grinder and a decent drill press.
This hammer hits soft and easy as well as really hard and everywhere in between. Mine get used a lot for punching holes and top tool , stamping and chisel work.
It doesn't replace a power hammer , but is really useful, especially if you work alone.
I've broken the ends of the coil springs that lift the hammer back up three times after thousands of hours of use.
My suggestion is to get hold of a set of plans for a proven design and follow them exactly.
They can be dangerous tools.
Mine is bolted down to it's own concrete foundation block
-
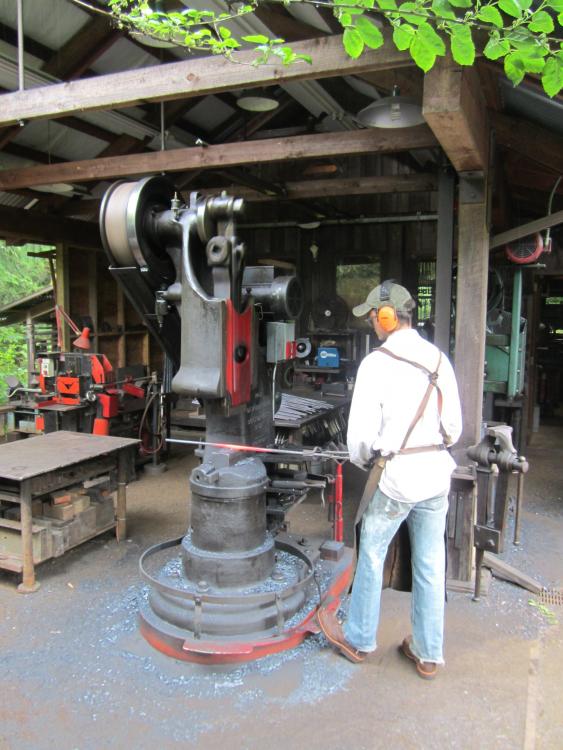
I raised my hammers up on timber risers , both to act as a cushion between the frame and anvil and the concrete foundation block as well as getting them up to a more comfortable working height.
I used pressure treated douglas fir glulam beams glued and through bolted for the risers. These were cut to closely follow the profile of the hammer base and were banded with a piece of 1/8'' flat bar to protect the edge of the wood.
Raising the hammer made it necessary to lower the treadle which I did with an extension with 3/16'' flat foot plates located both in front of the dies as well as for approaching the dies lengthwise from the side.
This extension allows me to keep both feet solidly on the ground at all times , allowing much better control and more stability in my stance while running the hammer.
Because I have a dirt floor in the forge shop , I buried a wood block at grade so my heel doesn't dig a hole in the floor and there is a consistent level spot to work from.
These machines are dangerous , but having a balanced and easy to use foot treadle at the right height makes makes a huge difference , both in control and safety.
Getting it set up correctly takes some time both in fabrication as well as getting the return spring tension adjusted properly.
A return spring on both sides of my 100# Little Giant made all the difference in the treadle acton as well as the operation of the over the top band brake which is also activated through the treadle.

-
There's a stick lubricant available for use on bandsaw blades that helps with both speed and ease of cutting.
The brand I use is Castrol ,but there are others.
I find that good quality Lennox or Starrett 10-14 variable tooth blades seem to last the longest on general cutting in steel
-
I built something similar at least 20 years ago and it's been a very useful addition to the shop. I held the trigger closed with a hose clamp and put a switch up front to turn the saw on and off.
Some time ago I built an accessory stock support that makes it much safer to cut irregular pieces that won't sit flat on the table . This is also much easier on the blades .
The narrow stock support is made with two pieces of angle iron bolted together with a spacer for the blade. It gets clamped to the table and would work with any kind of vertical bandsaw. I made one out of wood for my wood cutting bandsaw.

-
do a quick google search on kick press and you will get a lot of information.
They sound useful for a lot of applications within their range which is mostly sheet metal and light gage work.
A fly press or a treadle hammer are going to be more useful in a blacksmith shop
-
Frosty ,
I bet you would get a noticeable increase in performance if your 50# hammer was bolted down on a proper foundation like it was designed for .


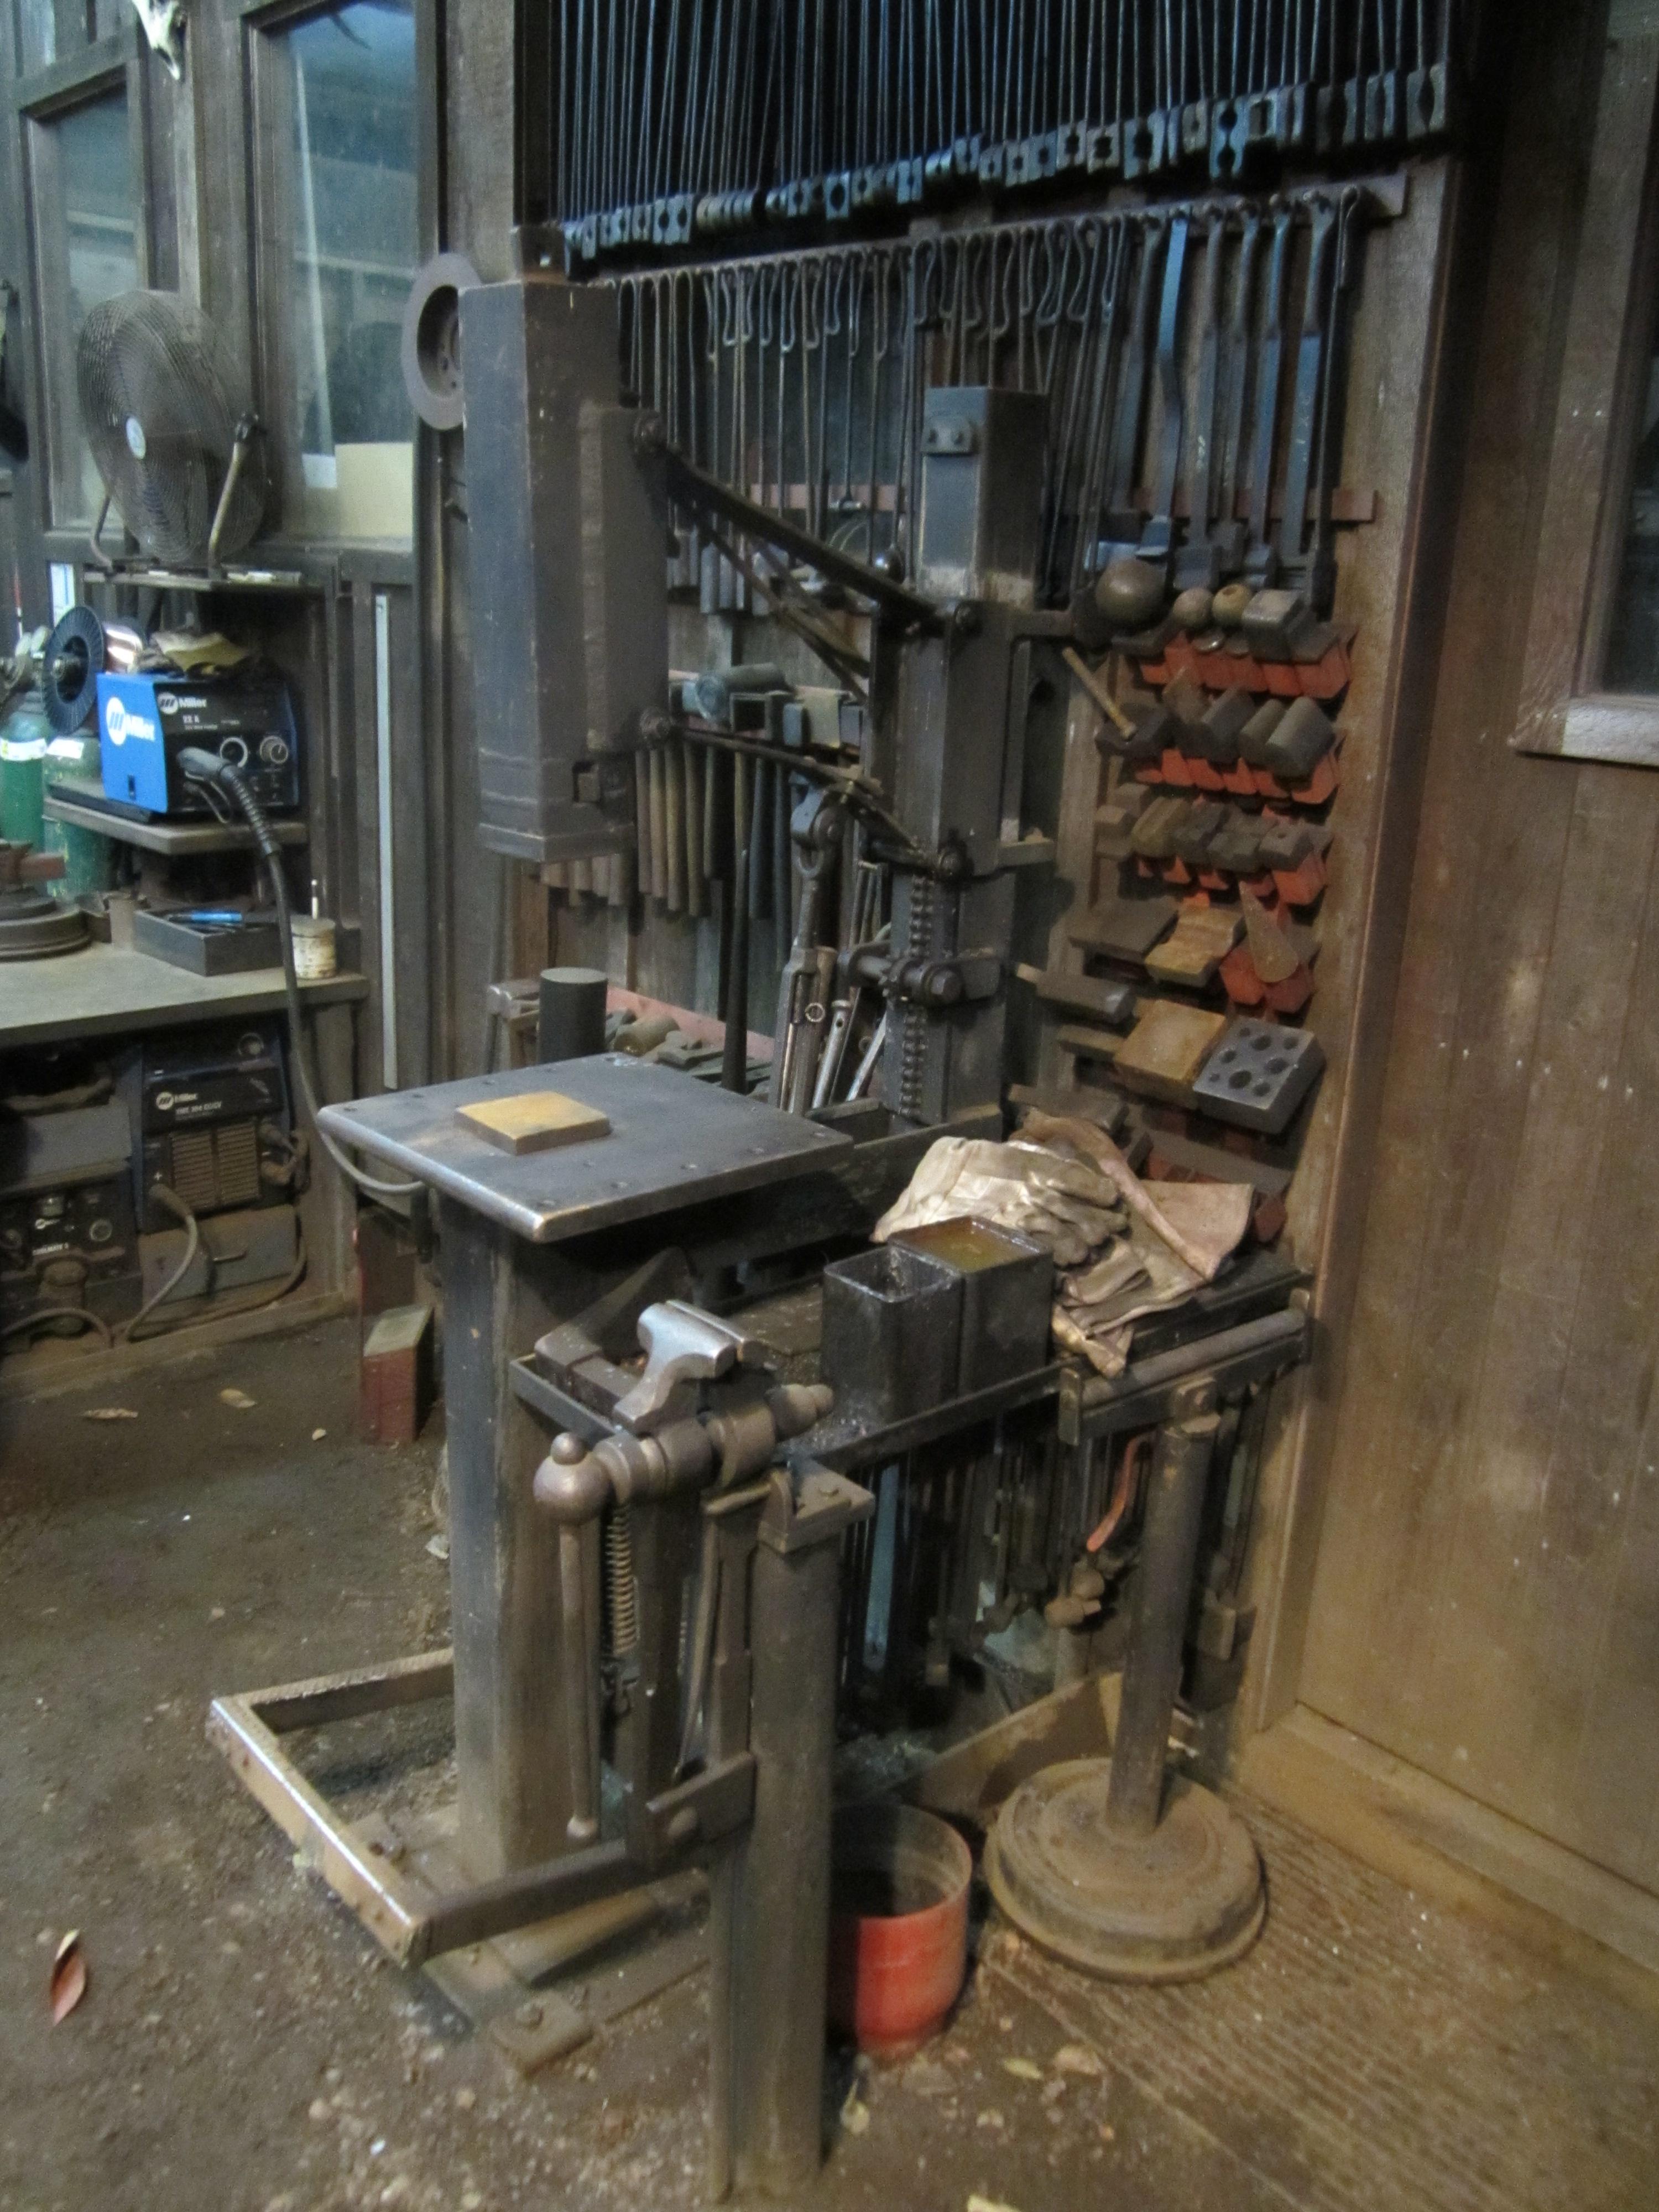


Show me your work table
in Blacksmithing, General Discussion
Posted
I've never quite understood the idea that to be productive a work space has to be a cluttered mess, although I admit, everyone has their own method to their madness.
For myself, I try to keep my main work table clear except for the job at hand. There are three other smaller work tables close by where tools and parts that are in use are easily within arms reach.
There's steel topped cabinet right next to my layout table that houses the welder, tig cooler and plasma cutter that is about 3'' lower.
This enables me to pile tools on that surface below the level of long bars that overhang the main table surface.
The difference in height also allows me to clamp all along that edge.