
templehound
-
Posts
448 -
Joined
-
Last visited
Content Type
Profiles
Forums
Articles
Gallery
Downloads
Events
Posts posted by templehound
-
-
Well,.....beautiful stuff!
-
On 4/19/2023 at 6:03 AM, Irondragon ForgeClay Works said:
I'll see if I can find mine and post a picture. A commercial version not made by me. When I find it, I'll post a thread about it in Historical Blades. It's a WWII Aviators survival machete.
Dragon, I will keep an eye open and have a look.
On 4/20/2023 at 4:51 AM, Hefty said:Templehound, for such a BIG knife, it still has such good fit up and finish! Those fullers are a thing of beauty!
Cheers,
Jono.
That is a nice comment, Jono! Thanks a lot!
-
JHCC, Frosty....thanks for the lovely comments, Gentlemen!
-
The billet from the 2nd video looks very good, nice and very natural!
....but I am struggling with the short terms in English....what is TBD?...
-
Thanks a lot, 1forgeur !
")
... Sorry fellas, of course the overall length is a mistake, it measures 325 mm.
-
Over two decades ago I restored an enormous flick knife from Russia stamp dated 1876 on the ricasso. Very impressive piece it was.
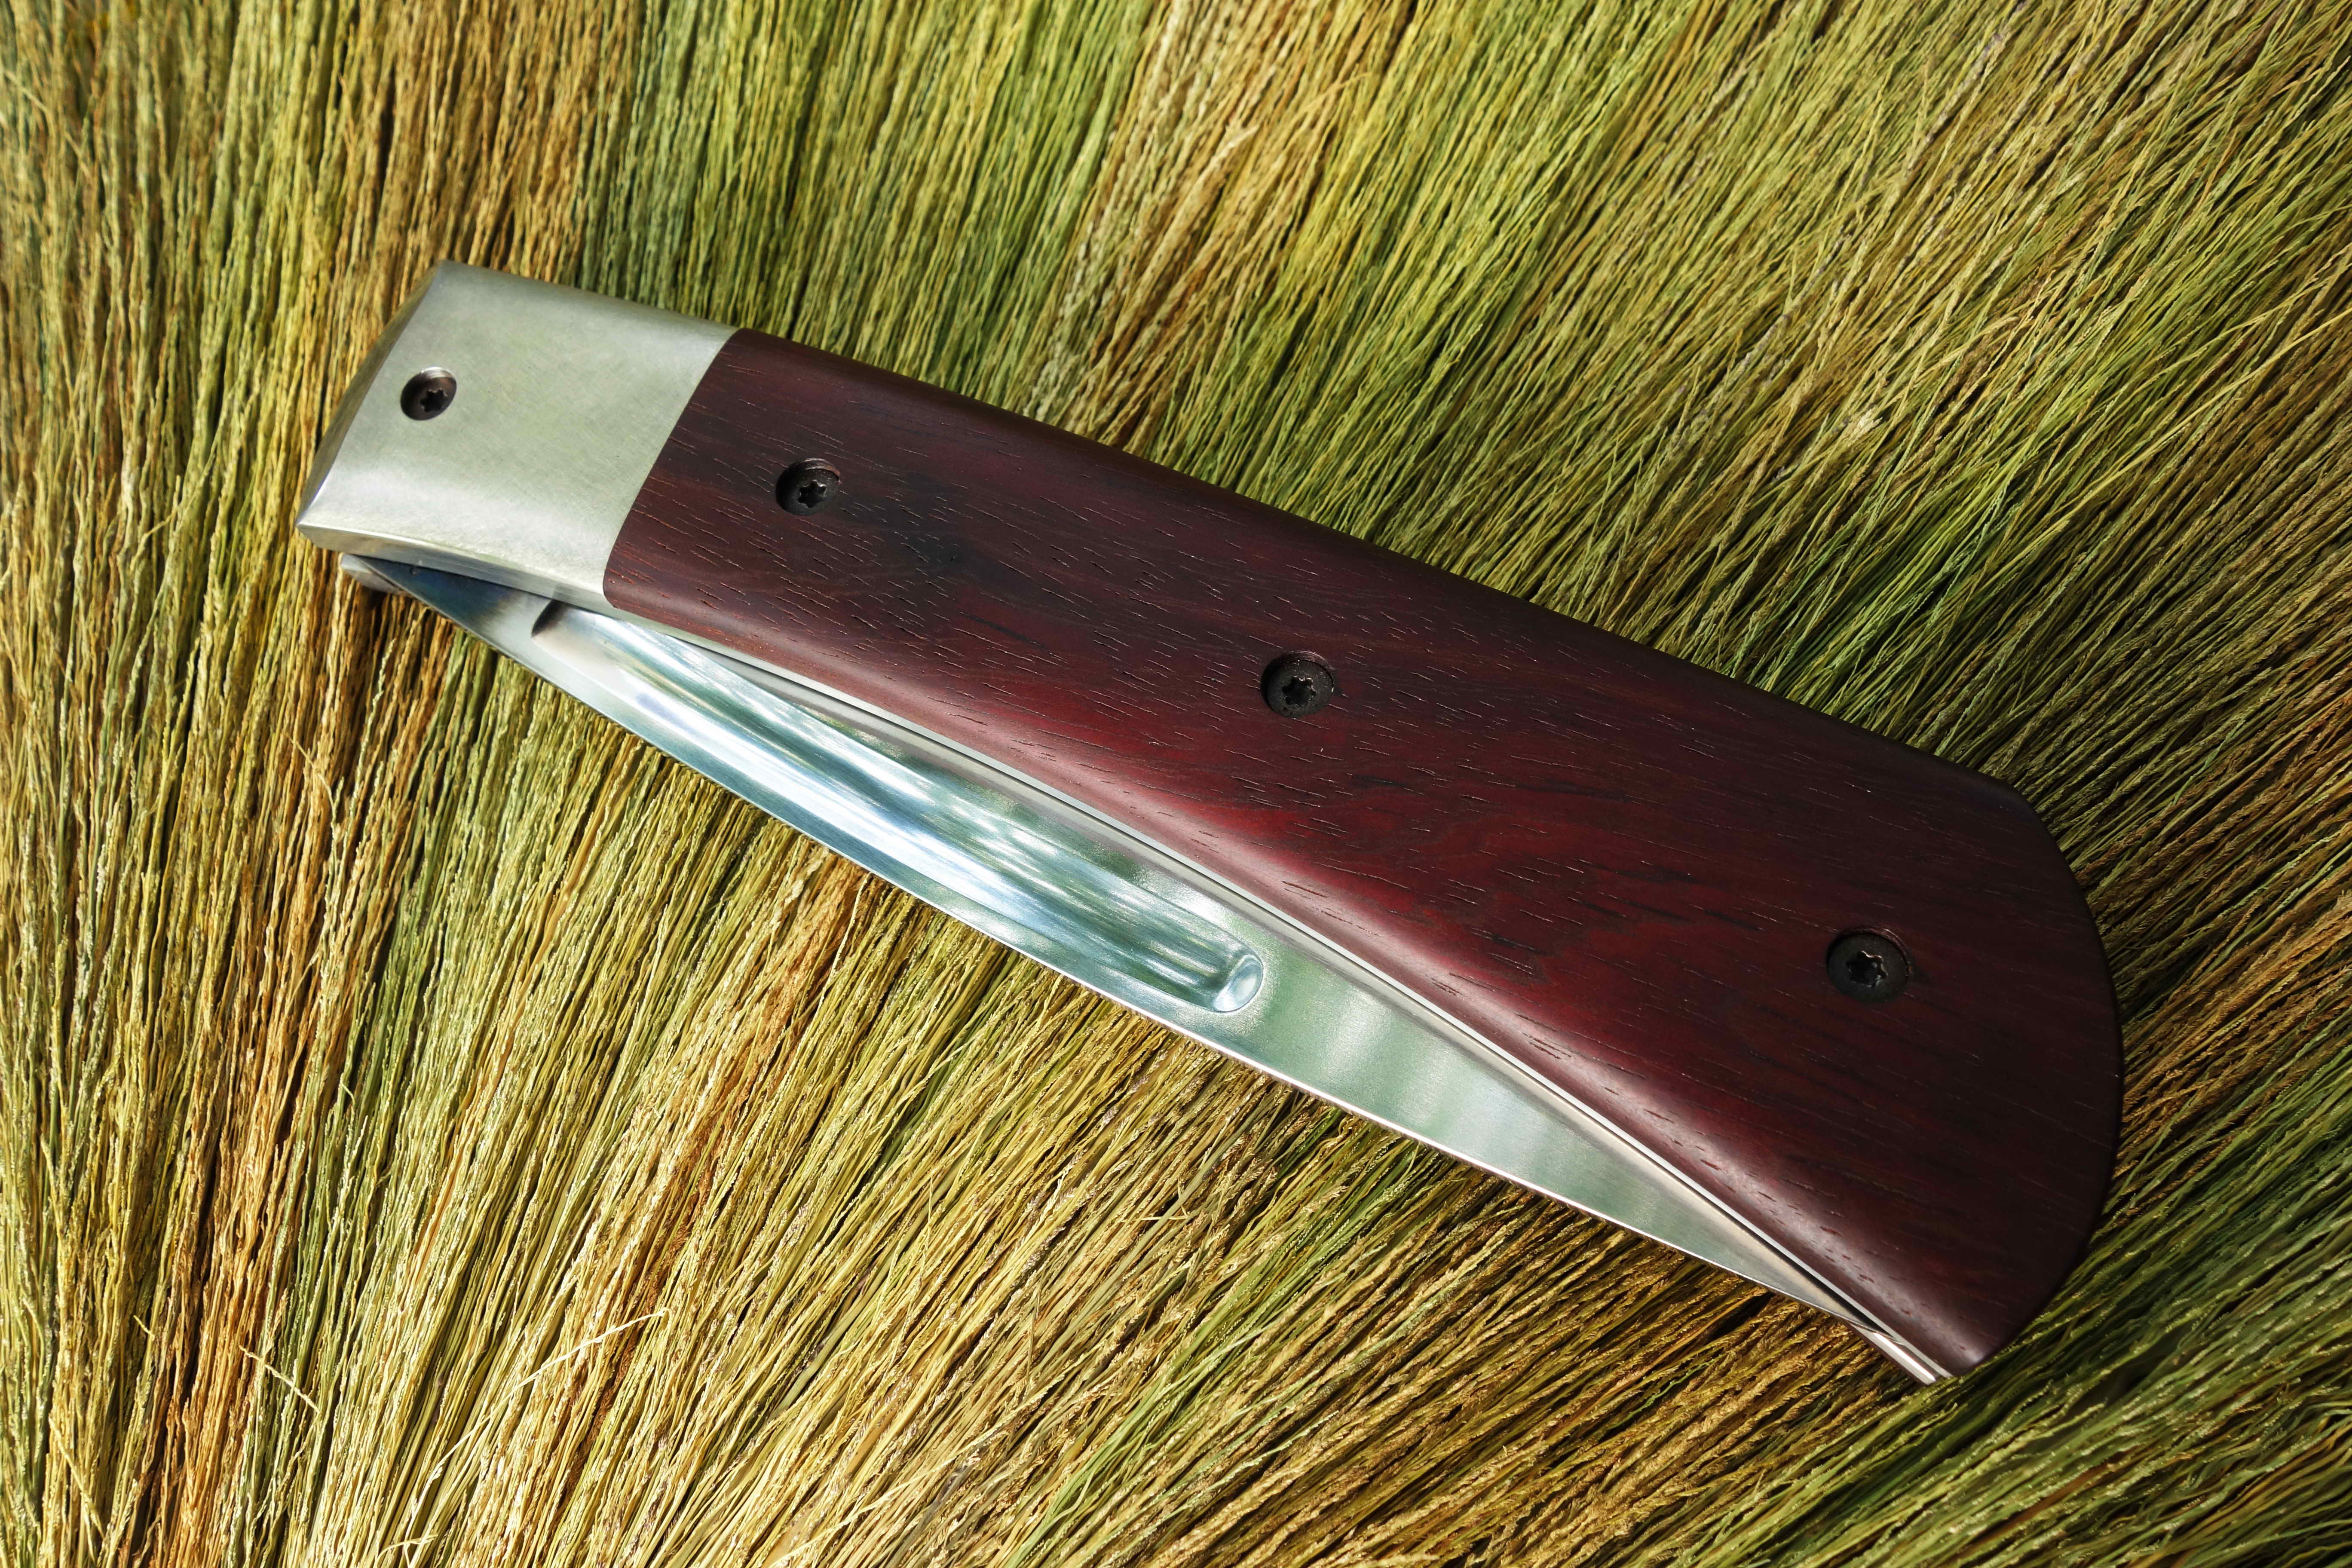
I became fascinated with huge navajas, big folders from Afghanistan and somehow I was inspired to do a big folder myself....at least for a while.
But after I started working on the knife I absolutely lost confidence....it didn't make sense anymore, the motivation was like a bushfire, burned hot but burned out too fast.
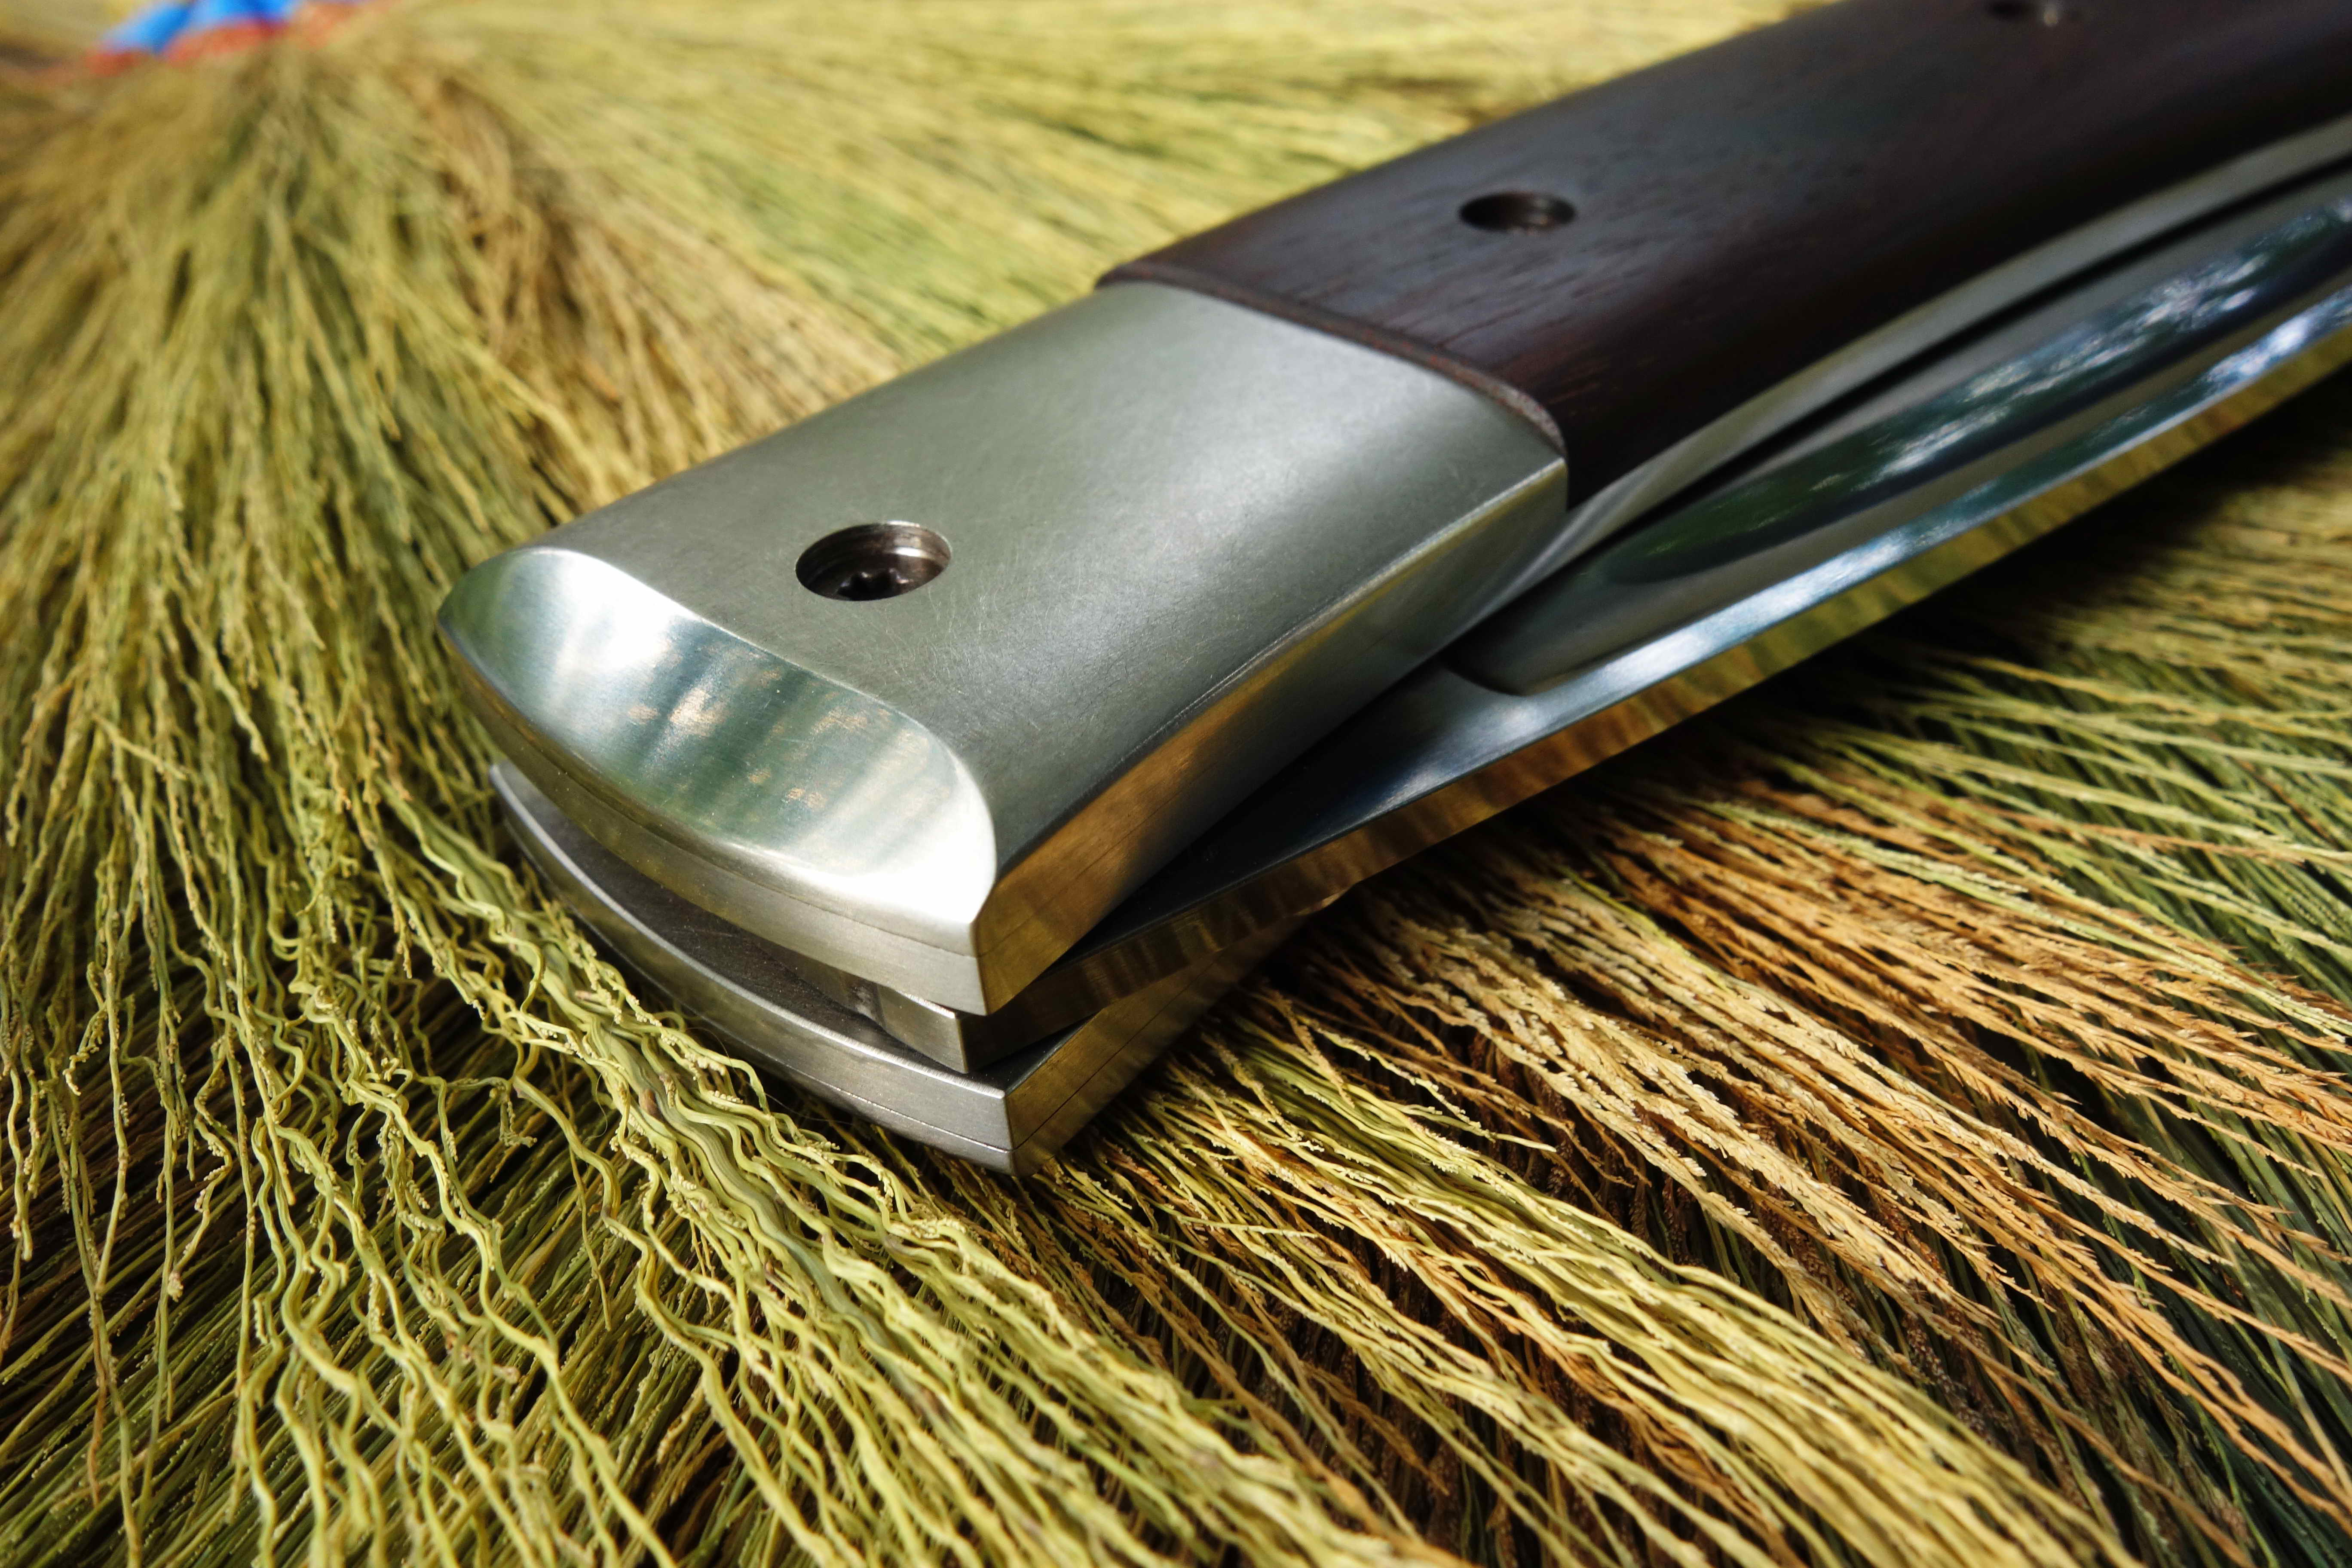
You guys maybe can comprehend why...and besides it would nearly be impossible to sell the knife....however I put the already milled and worked Titanium liners away and forgot about it.
Until recently I stumbled over it again and I kept working on it mainly because it was a pity for the Titanium and the work already put into it.
And with every day the piece developed more and I really could catch up with my igniting motivation from two decades ago.
And after it was finished I loved it!.....
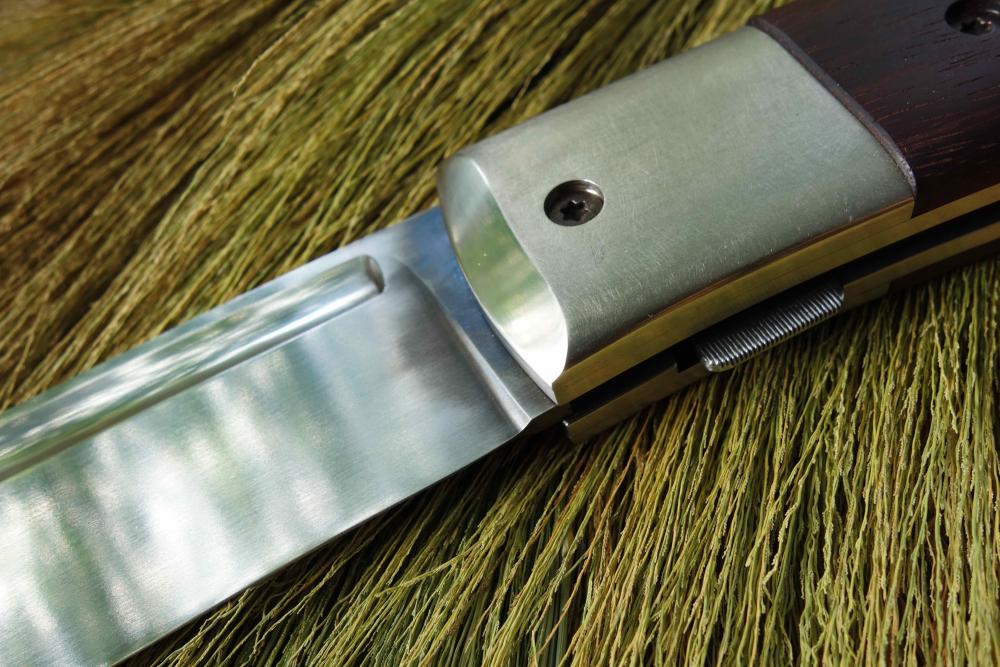
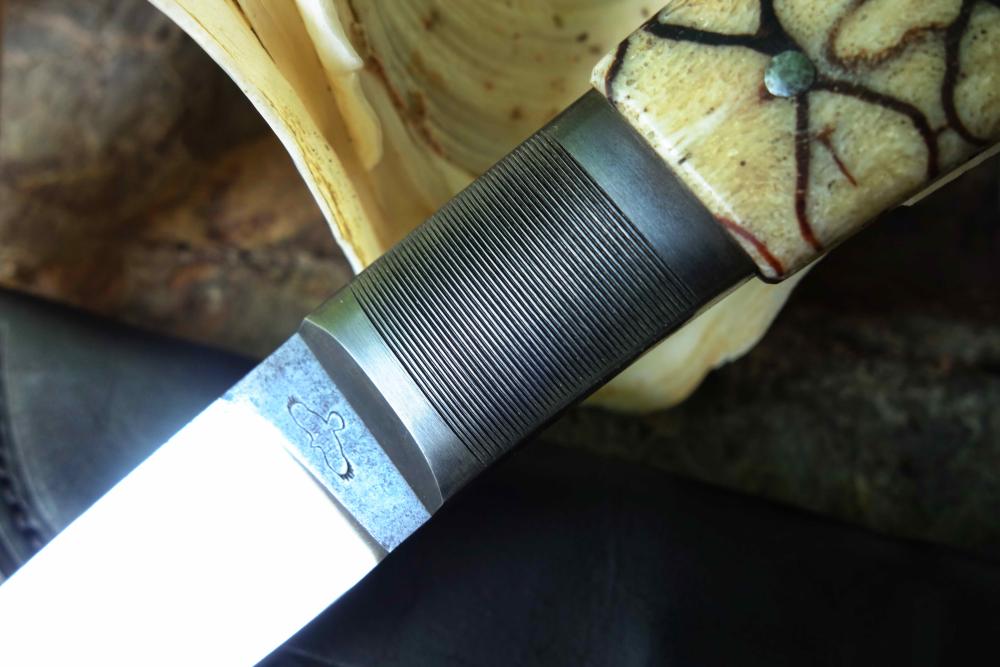
but it took me three times as long as I needed for a normal sized folder with steel bolsters and without the fullers.
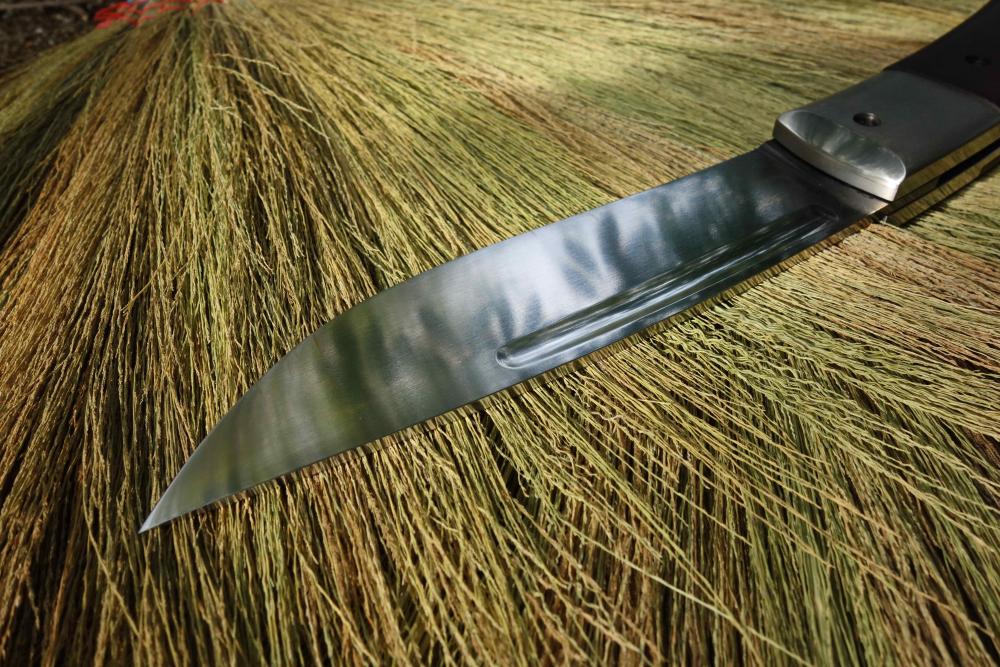
....the blade with the fullers took itself nearly a week until I was satisfied with the result.....and the Titanium ate up belts and tools but using Titanium and cutting the fullers was mandatory considering the final weight.
....but I was sure never to do such a knife again....never ever.
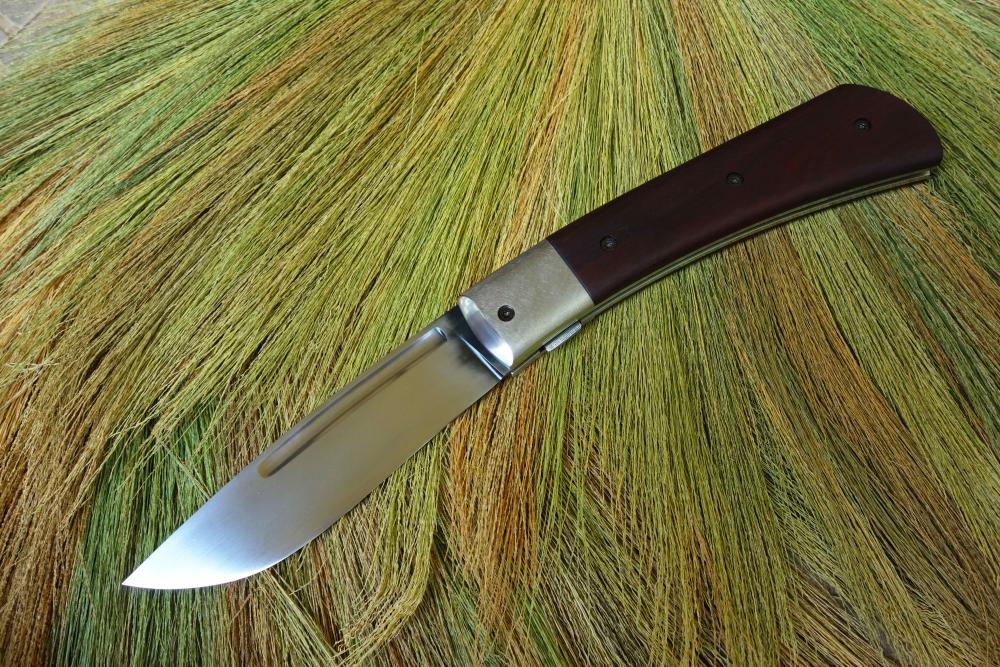
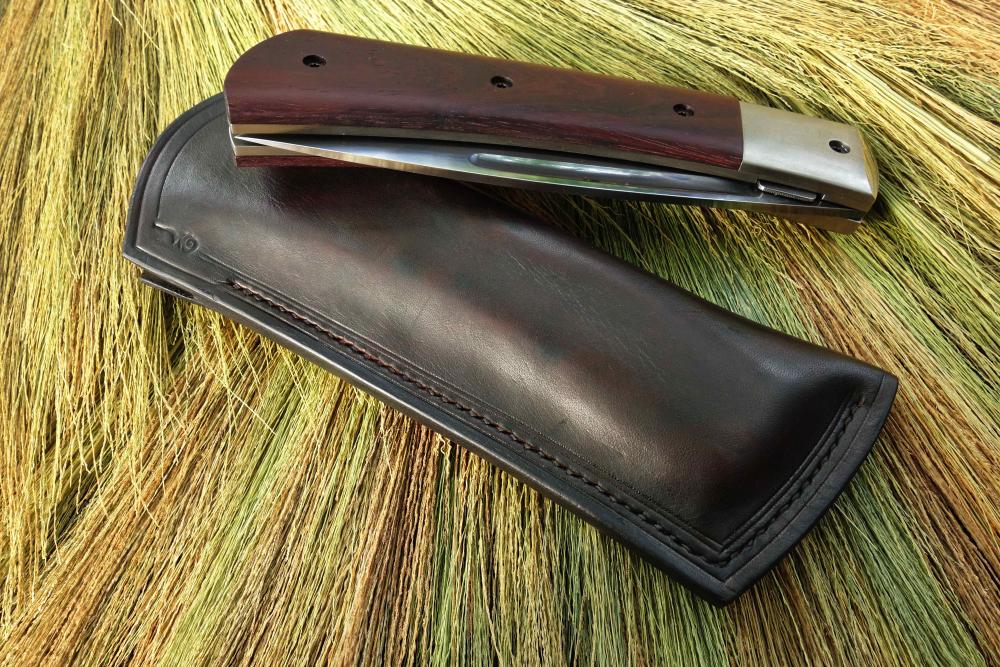
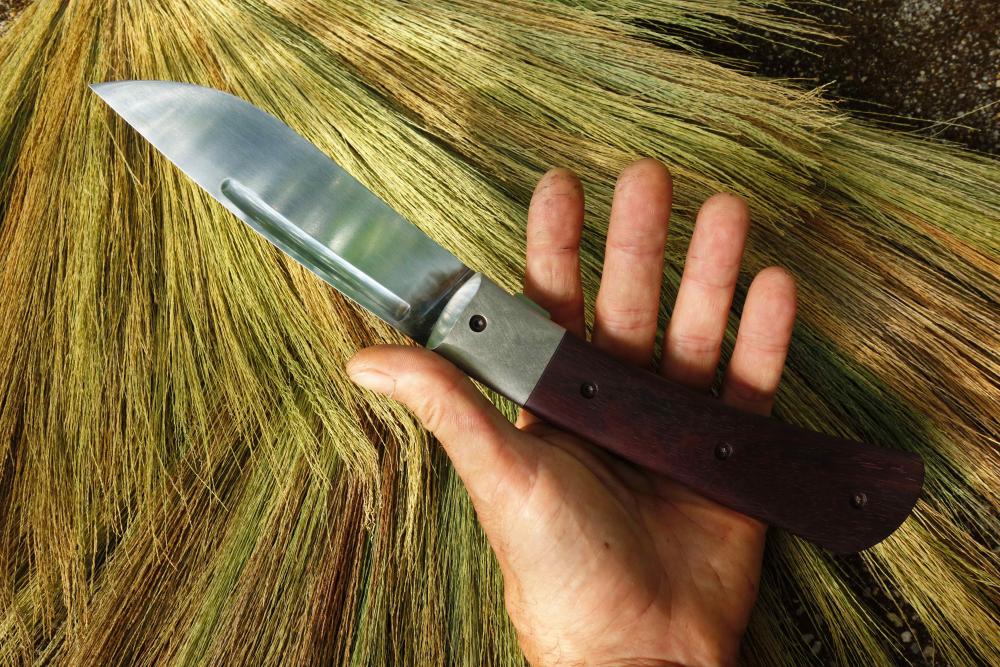
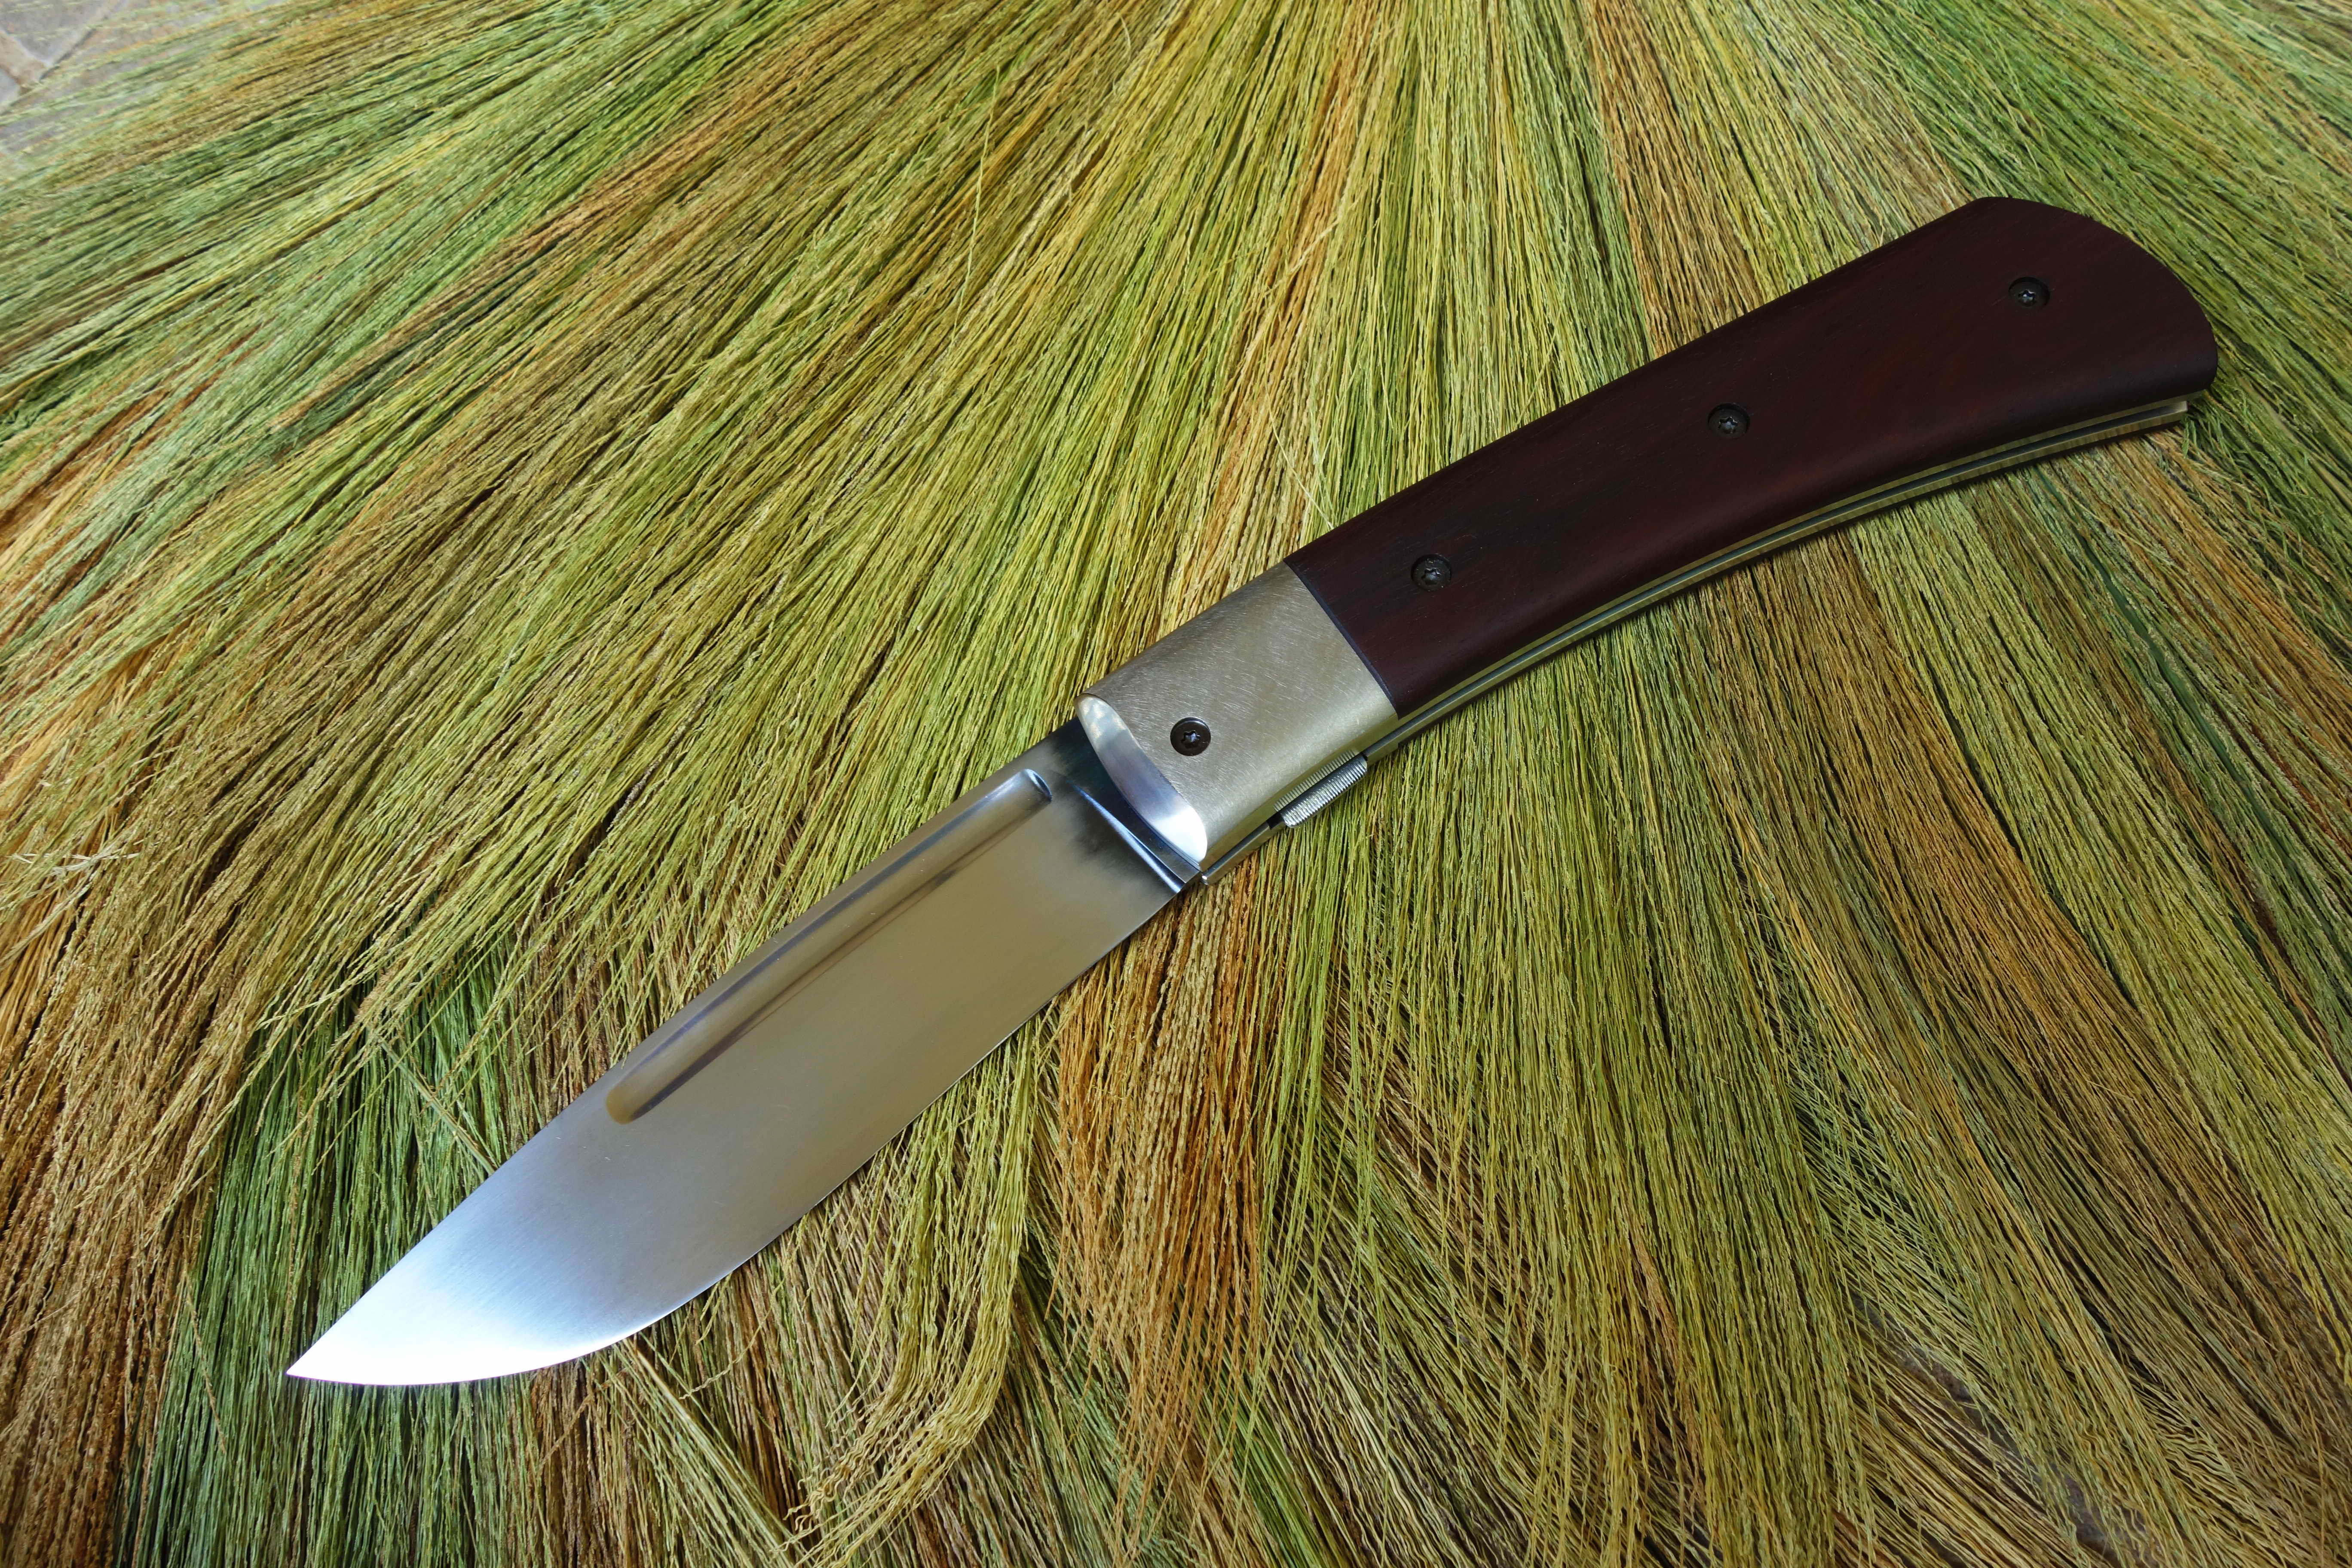
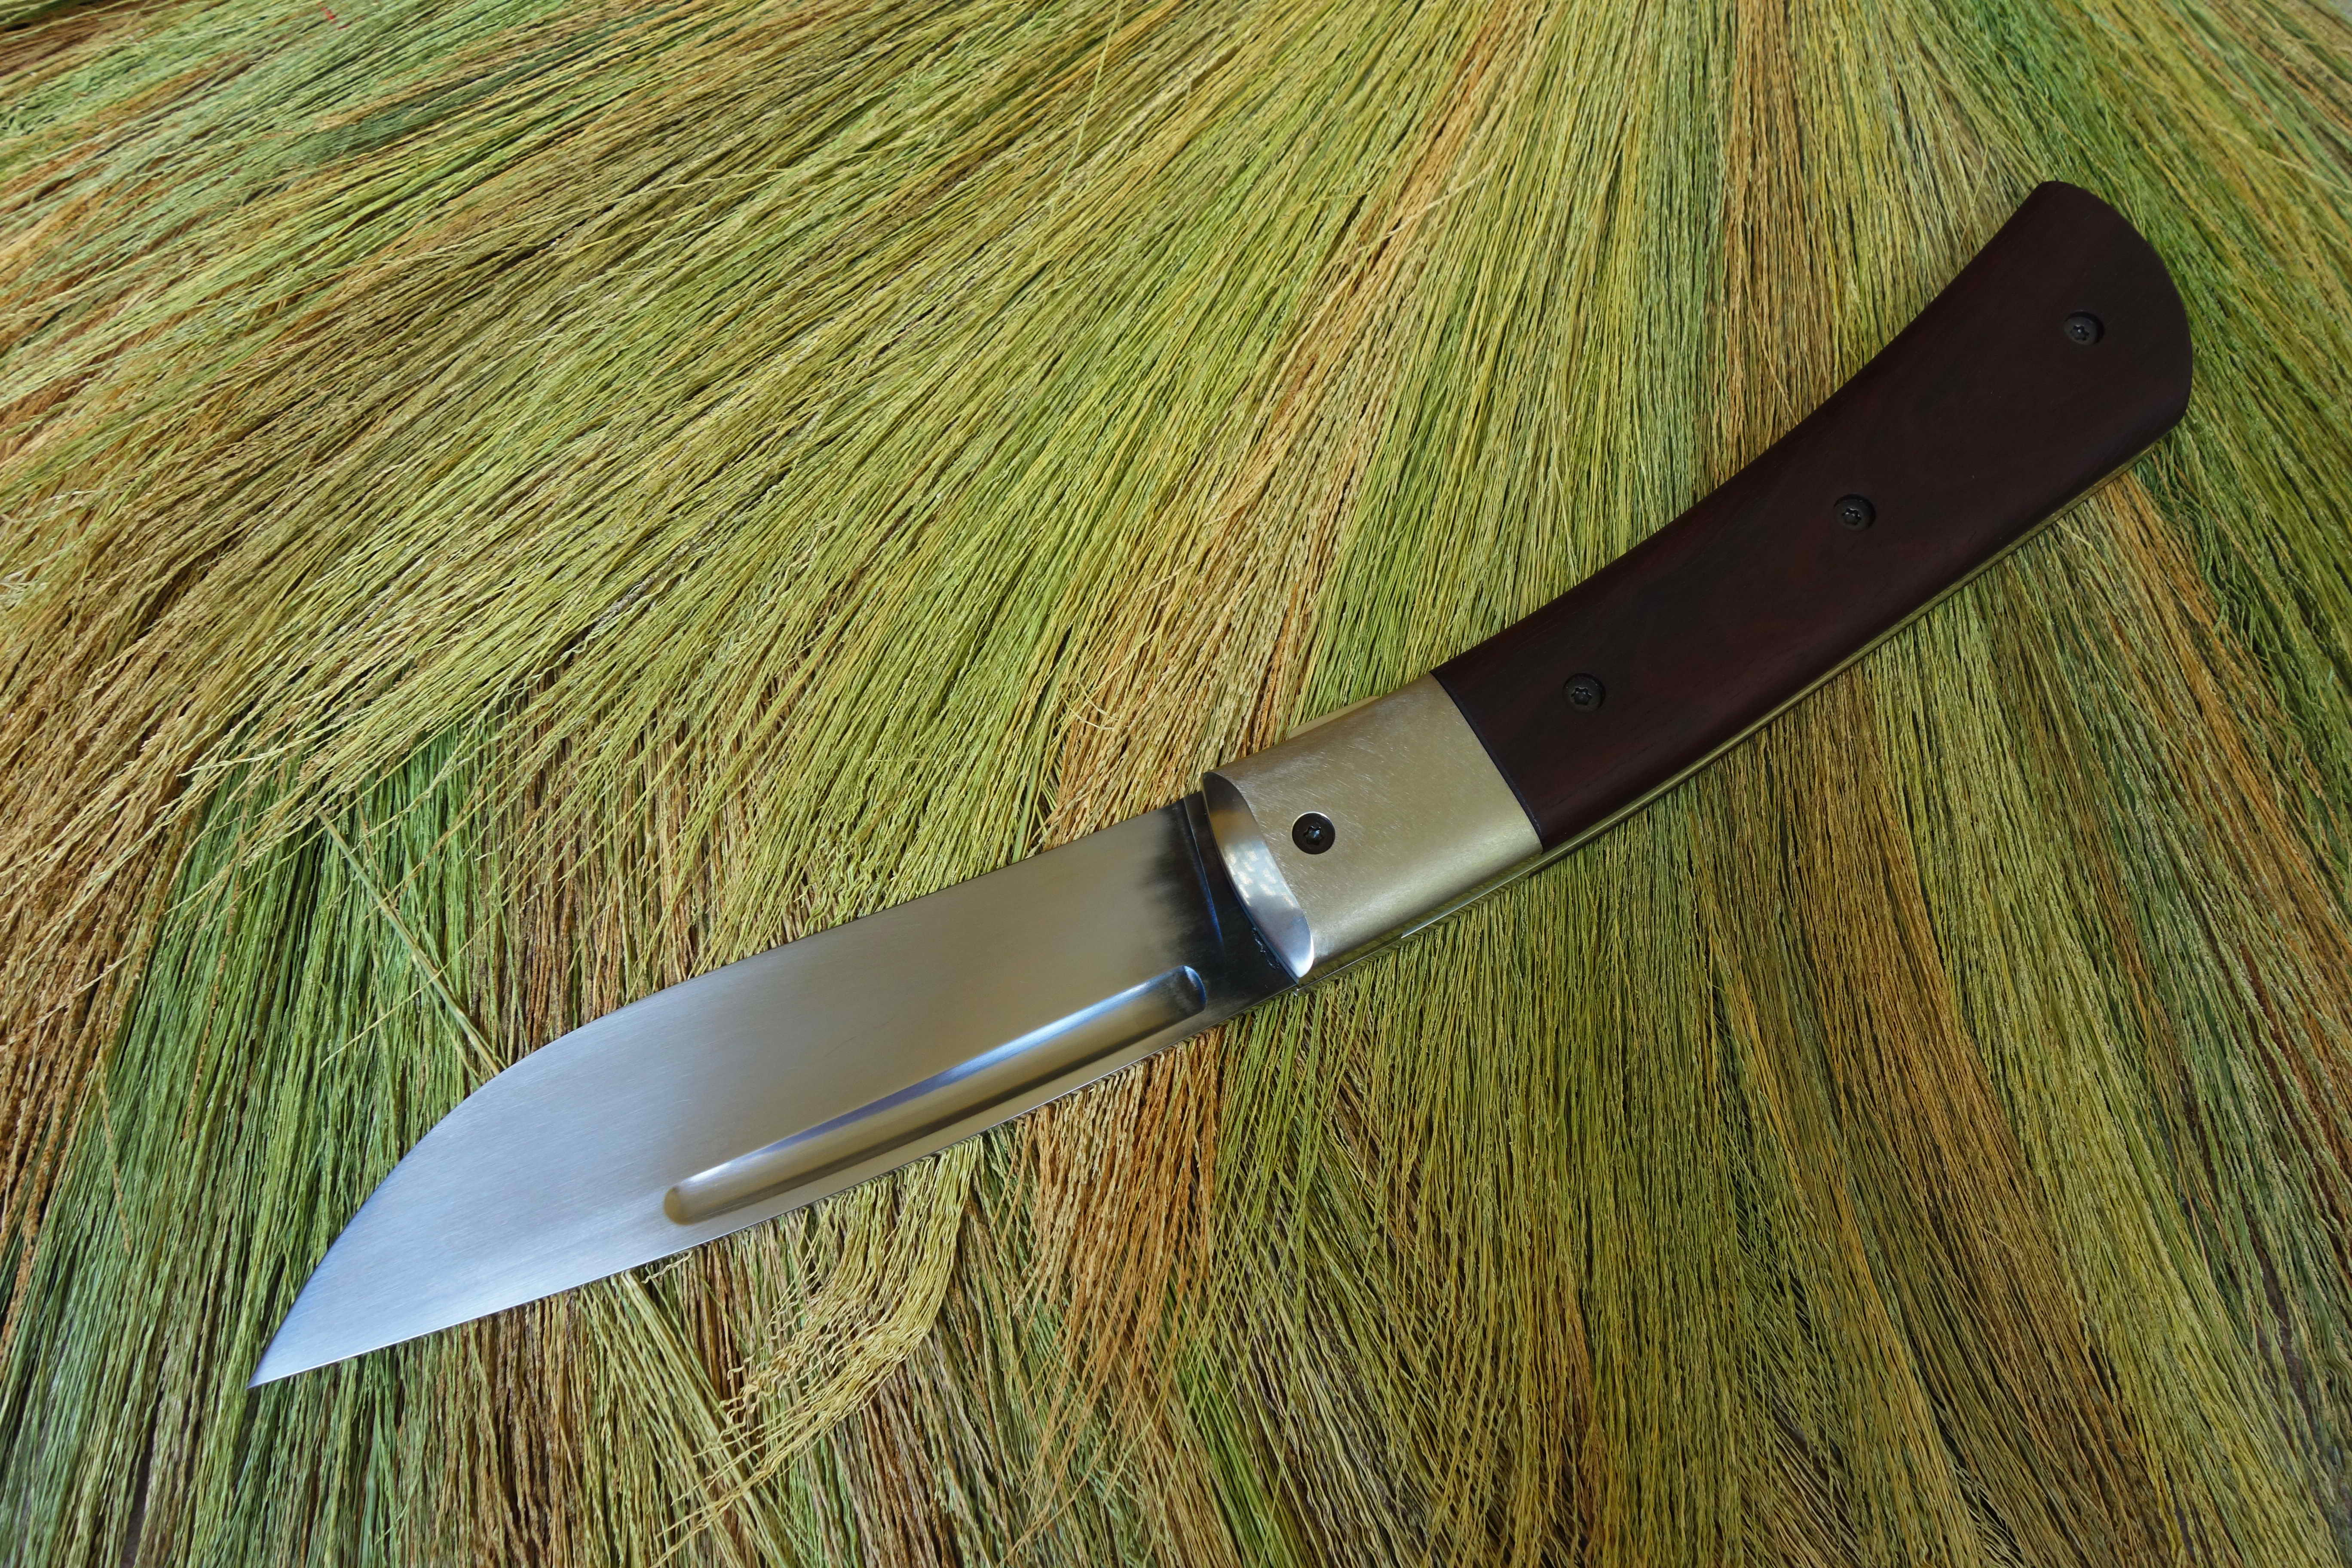
Blade is O1 with 3mm in width and 150 mm in length, detachable bolsters and liners are titanium 6Al4V and Ceylon ironwood for the handle slabs.
In overall length it measures
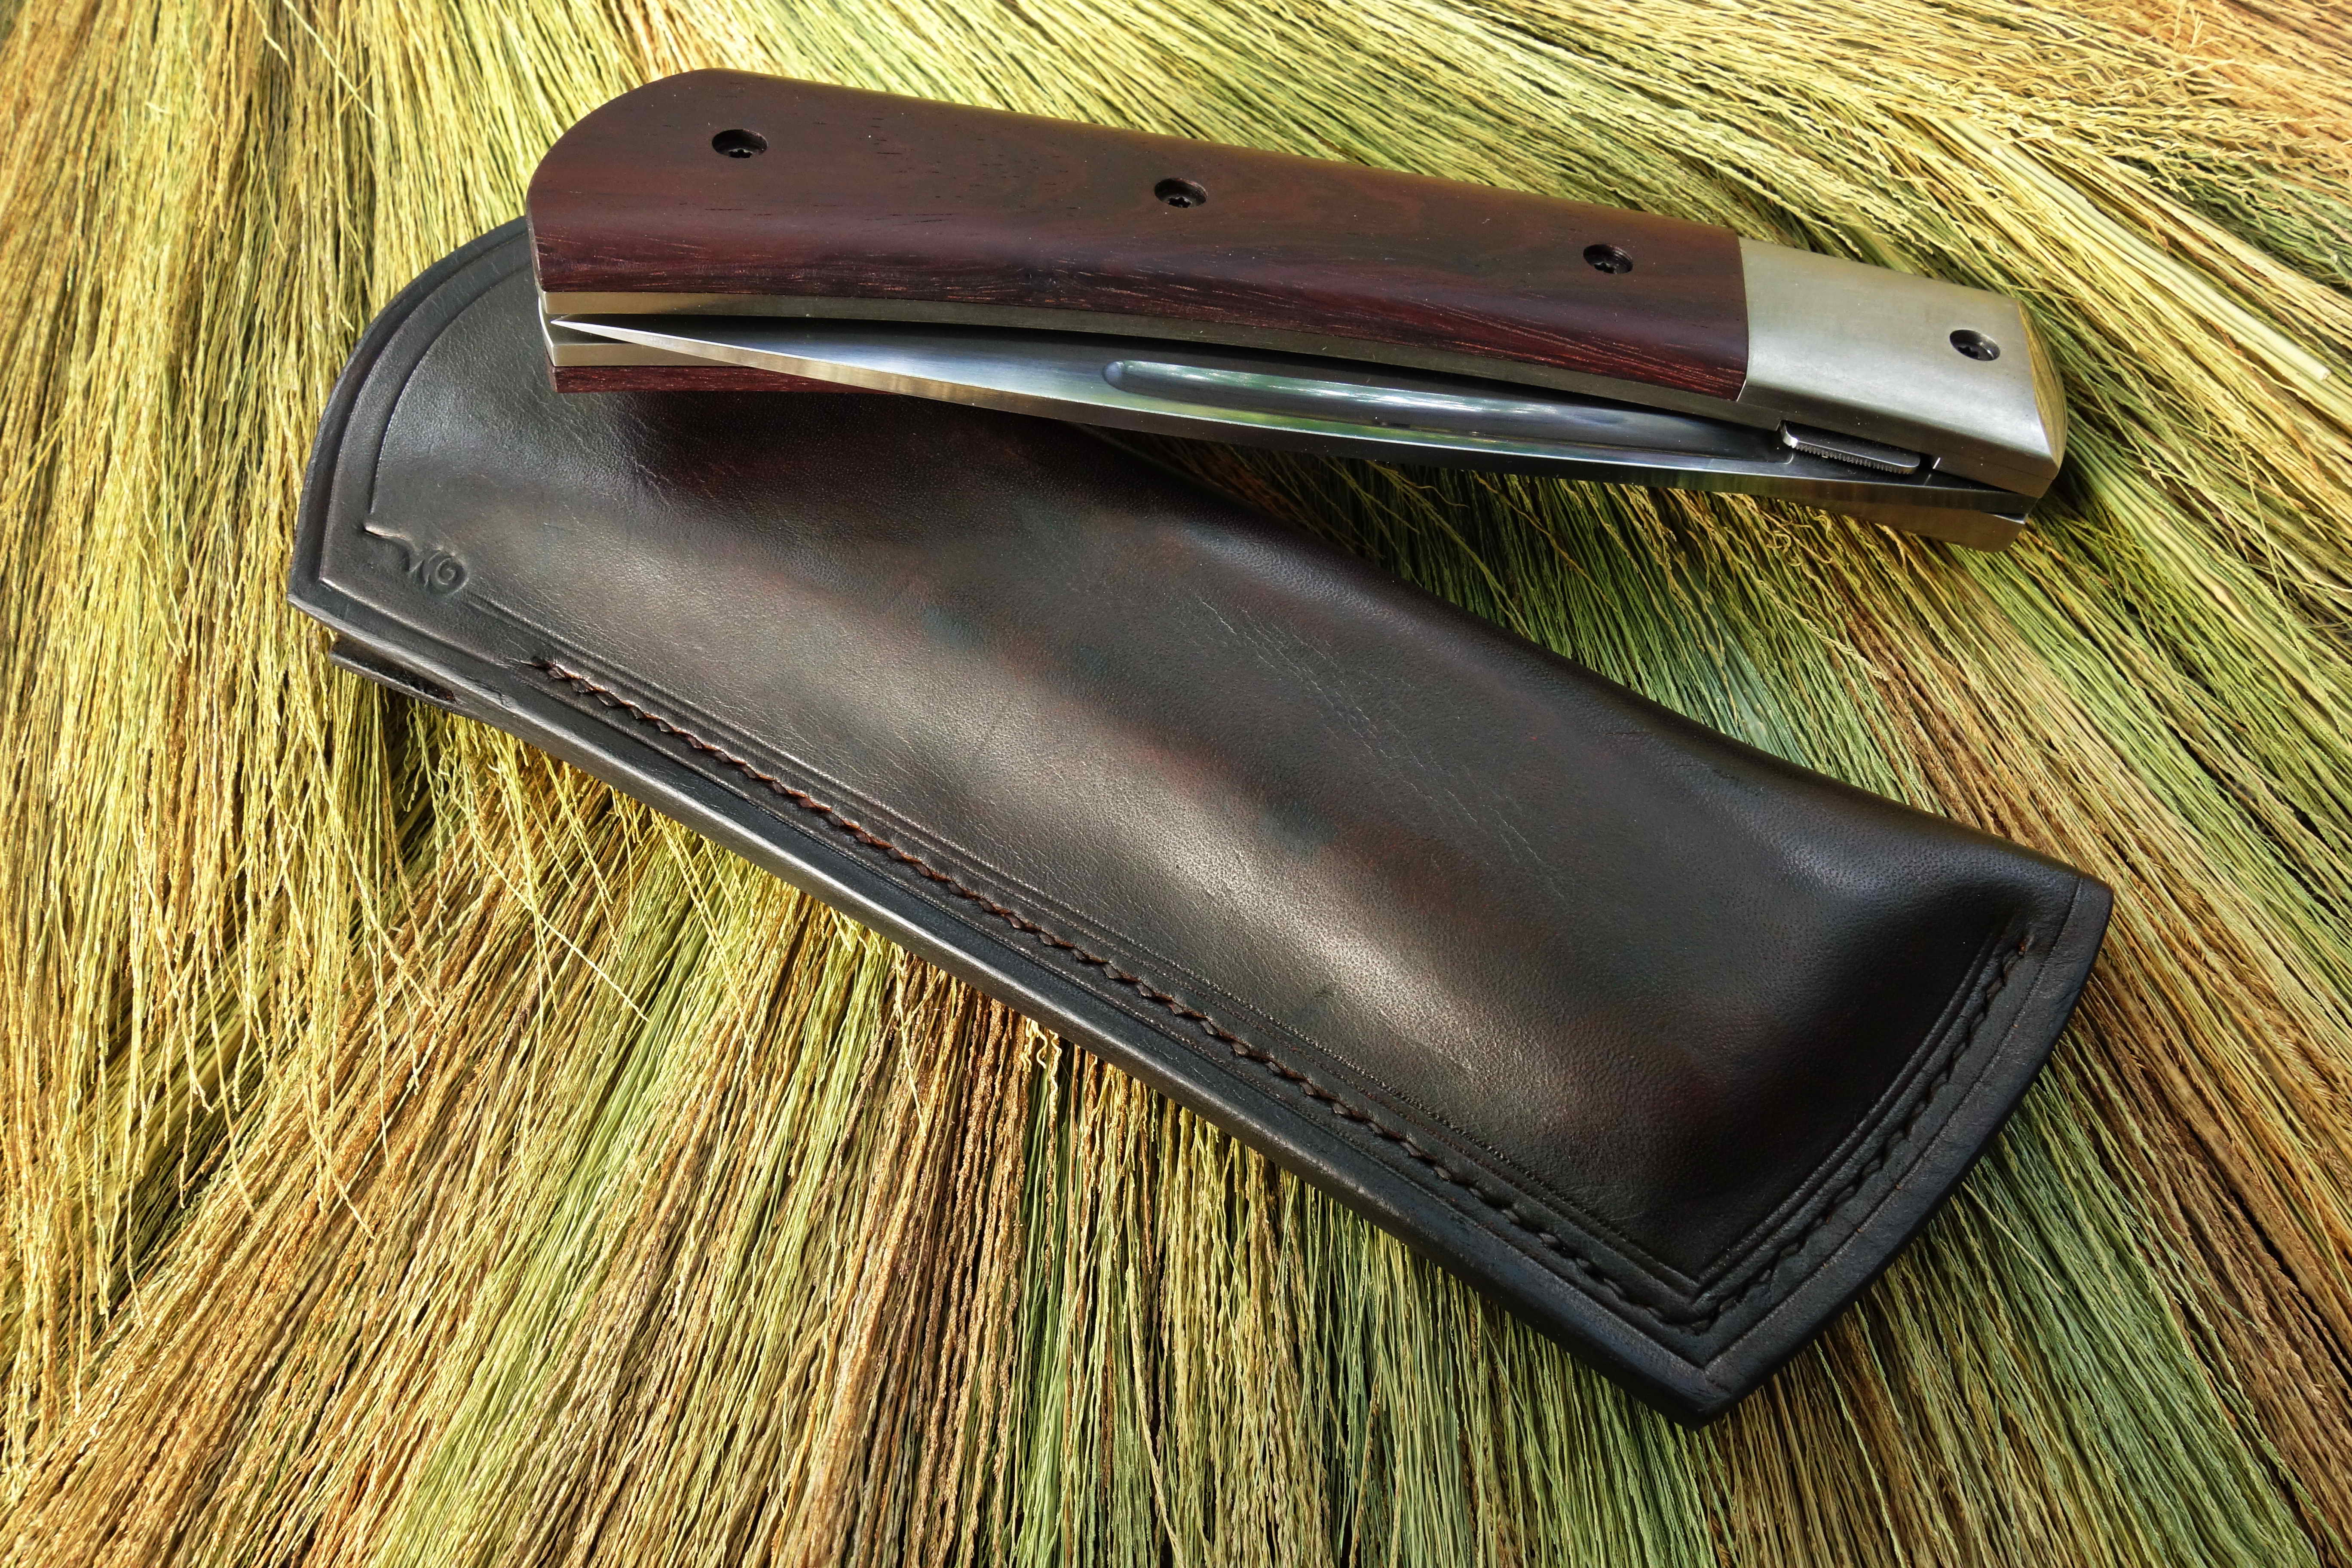
175 mm325 mm and weighs 350 grams (I was surprised because I expected it heavier...).You do not want to carry this in your pockets it would pull the pants down, even carried in a holster on a belt it would be not really comfortable...it has to go in the rucksack
or backpack....but anyways you open it and feel it, that knife is serious business.It opens up a coconut with ease and chops bamboo like nothing.
The protecting pouch is made from water buffalo leather.
....so here it is :.... the cudgel in the sack.
you guys have a nice weekend
Cheers


-
George, thanks for the kind words on the knife!....yes, I am a German expat living in Thailand and the knife was ordered by an English expat (living in my neighbourhood)
he is an retired marine who served in Afghanistan....so in his taste he is emotionally bound to some tactical military look on knives like micarta, G10, carbon, blade grinds that pry well but won't cut and he became a good friend.
I am not into that kind of tactical knives at all, which is obvious when you look at my style of knife making, but for a friend of course I will do as " tactically as I could represent for my taste".....using "tact" nicely to a low level decision....

Cheers
-
PaperPatched and M3F, thanks a lot, Guys!
-
SLAG, Chad J and Les L, thank you very much, Gentlemen!
On 2/16/2023 at 12:18 AM, Chad J. said:Love the shape and handle. How tough is that coal to work and can it take a beating?
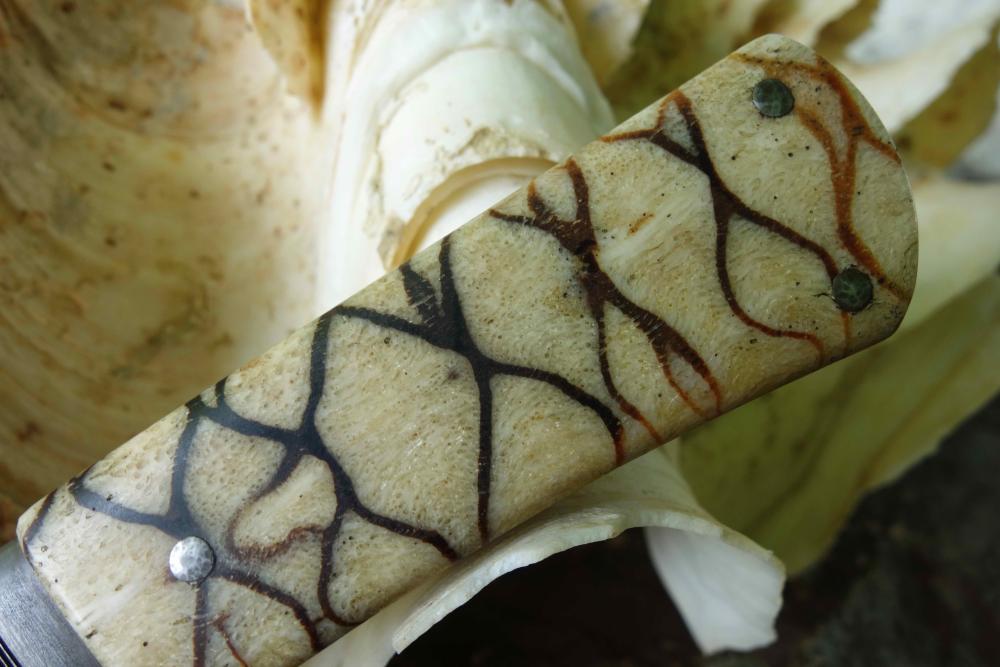
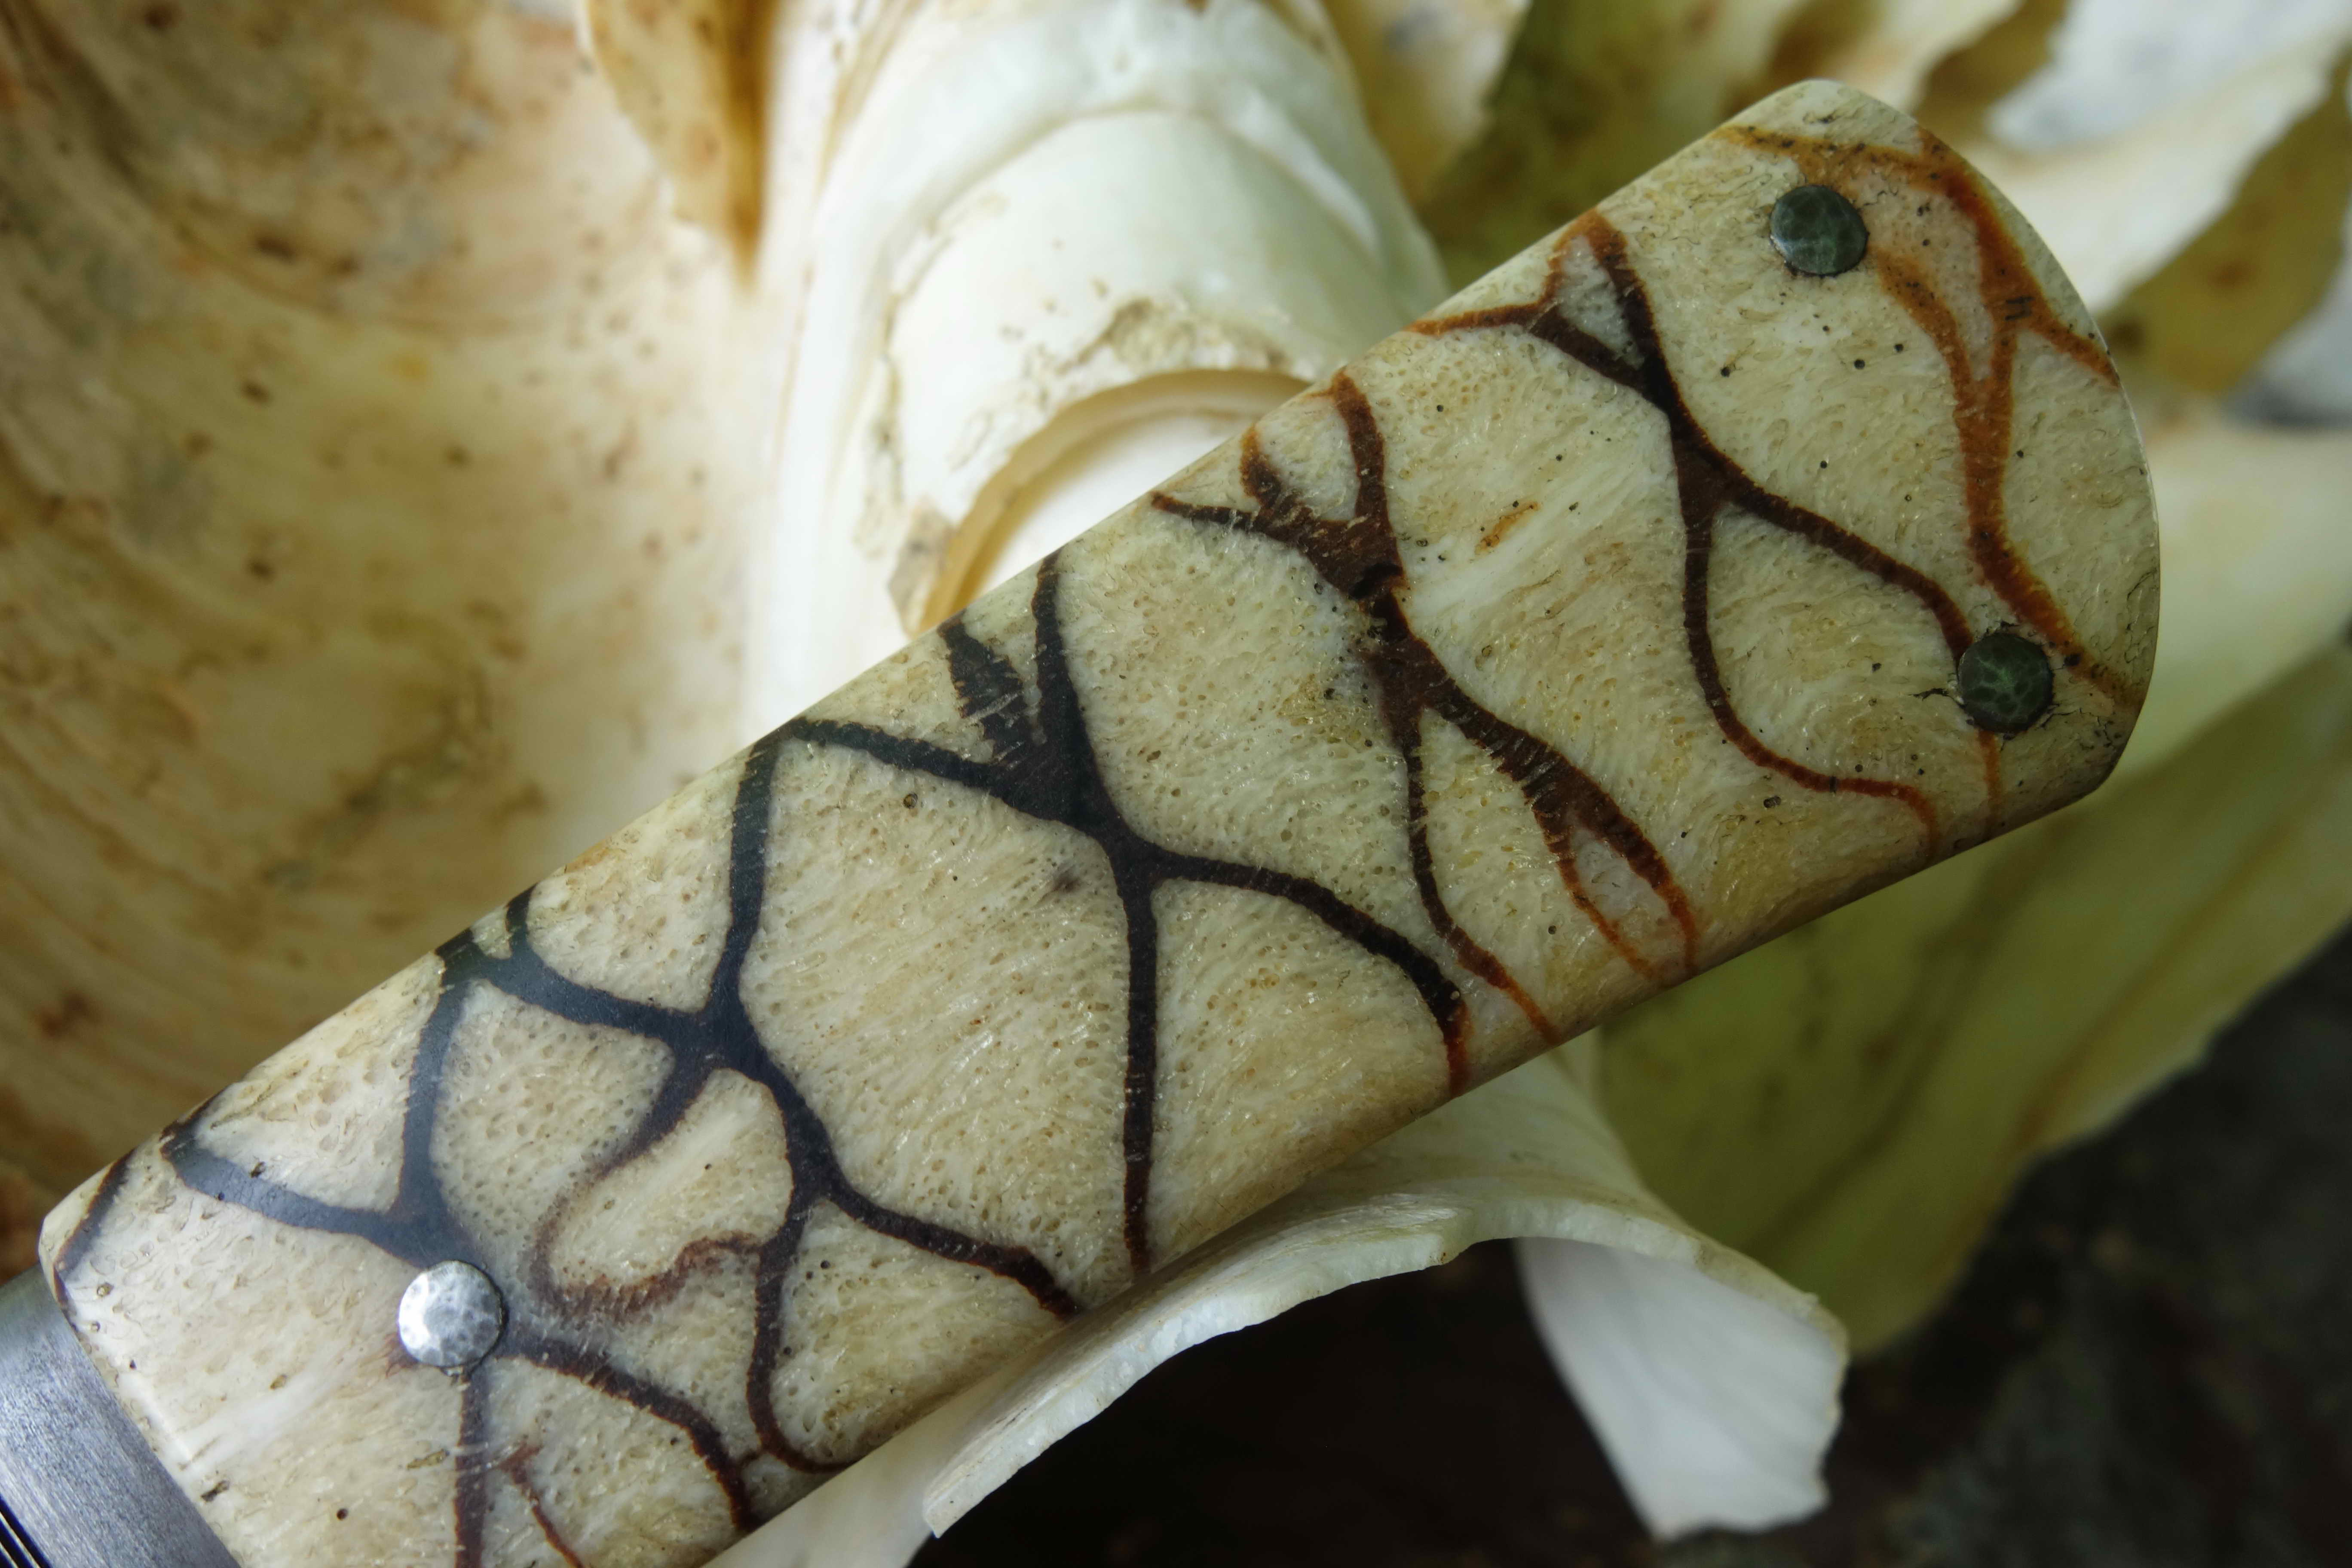
this pair of slabs has been stabilized, typical stench while grinding.
But that was only short at the beginning. The stabilisation didn't went through.
It is comparable to camel or cattle bone.....although I think camel bone is a bit more brittle.
Some pieces can still be a bit salty and with neglected care I observed corrosion at the border of the tang where the coral meets the steel.
But that is not an issue for me, just oil it up every 3-4 days than it is fine.
.thumb.jpg.36ef7c388178445242ee6ea9e0f73ec4.jpg)
-
Thanks Simian and Thomas !
-
Thanks a lot, fellas!
11 hours ago, Me and Knives said:I like it. What kind of epoxy did you use?
I only use slow bonding epoxy, never the fast stuff.
On flat tangs I only need a very small amount, just to keep the scales stay in place that I can rivet the pins....or is it peening the pins?
Anyway...I construct with no light gap and a real tight tolerance on the holes and pins.So when pressed together there is nearly no glue left because of the
tight tolerances.
Many years ago I read an article about the work of Tim Hancock. He mentioned that he uses no glue at all.If every thing is tight and the pins are really riveted with a head
glue is superfluous. That was an real eye opening inspiration to me.
-
14 hours ago, Goods said:
Templehound, sorry, I read that the first time around, but didn’t remember. Knowing the other work you’ve posted, when I scanned back through I was looking for a material specification and wasn’t expecting it to be in the text.
Any reason you wouldn’t use the W2 just for the edge material? Either way, I understand about making another. It’s hard to make just one of something.
Keep posting your work. It’s very inspiring!
David
....nothing to be sorry, David.
I thought about forge welding a sandwich with W2 core, but due to the lack of having no power hammer I am not really trained and skilled to forge weld layered steel.
Even a simple piece of Damascus is a big challenge to me. The most difficult weld is the first where you welding a few pieces of steel together at the same time.
After you fold it the first time there is only one weld for the two pieces, it becomes easier at least for me.
So welding a core is like a san mai and the possibility to get welding flaws for me is quite possible.
Like I said this is my first spear head and I tried to keep it as simple as possible.
Thanks for your good words about inspiration. Response and exchanging conversation motivates a lot.
-
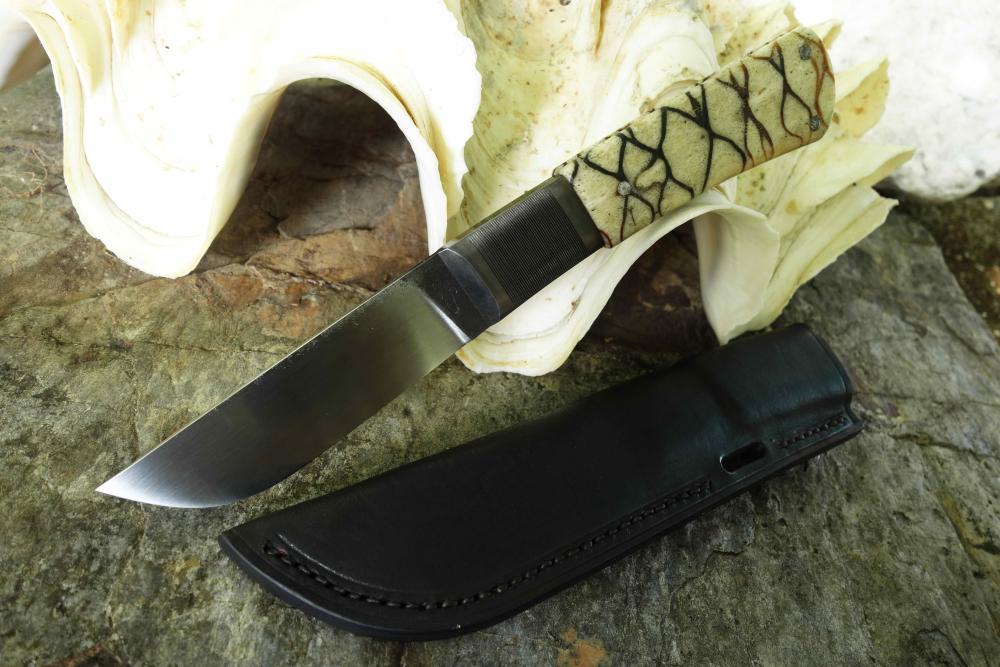
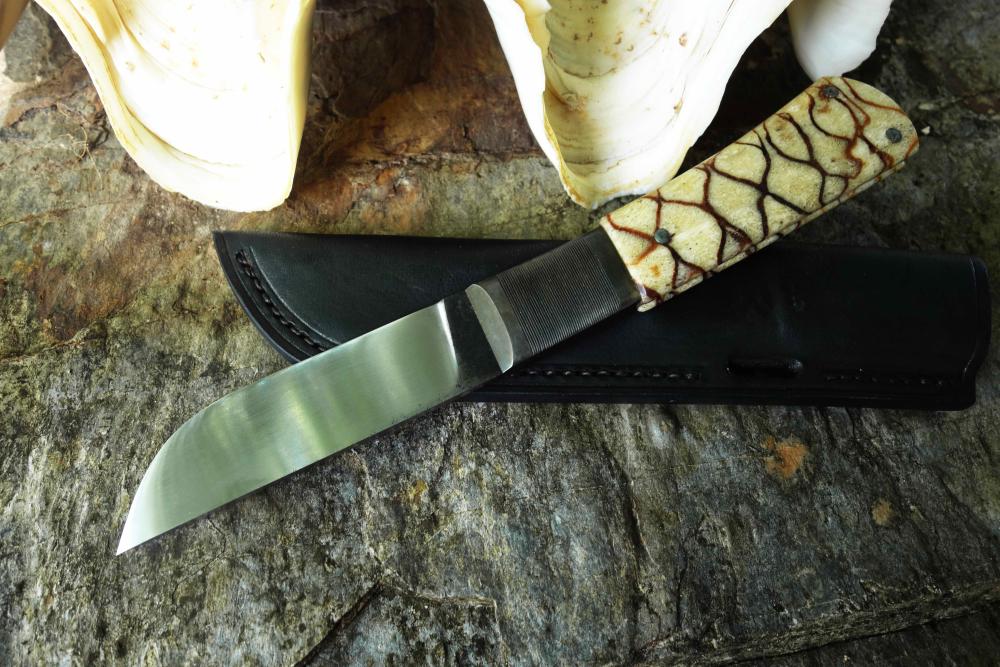
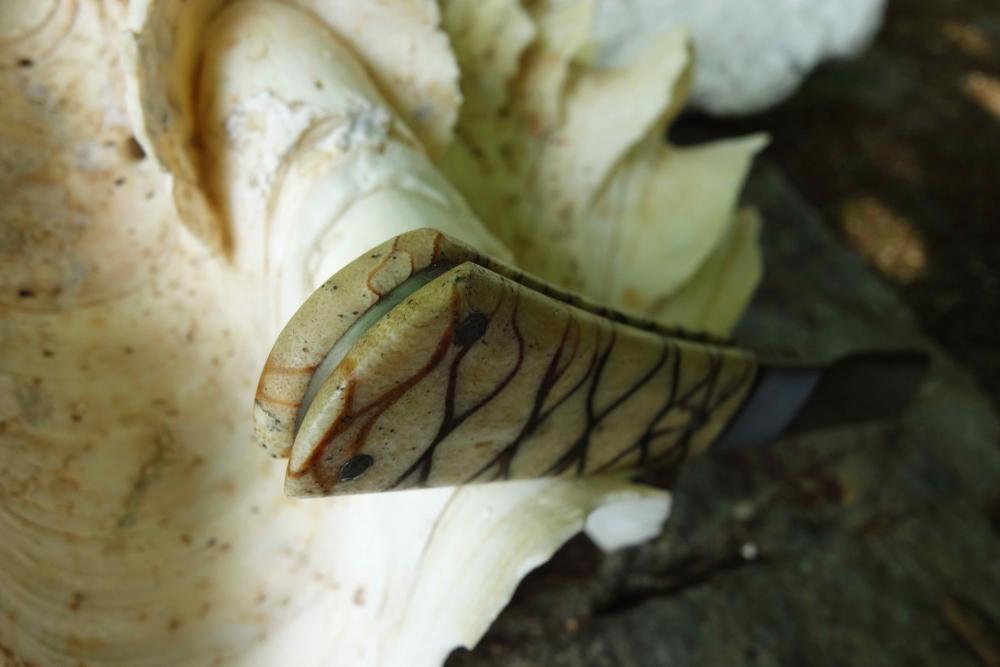
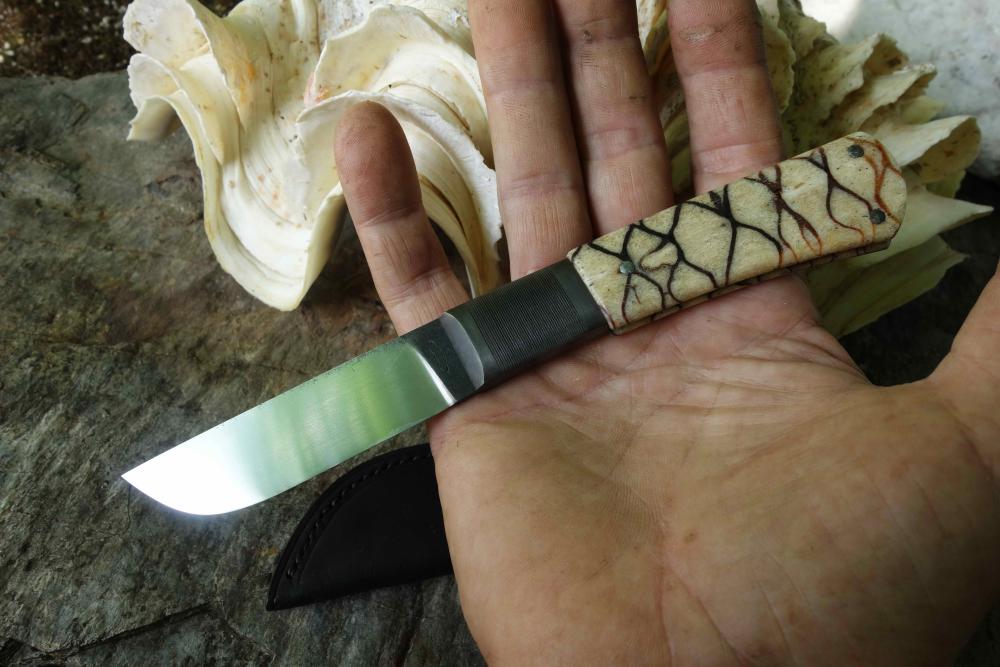
On some pieces of tiger coral the stripes often look like dancing people,.....it reminds me of cave paintings.
to me it is one of the most beautiful handle materials especially combined with black patinated steel.
Blade is ground from 1.2419 (105WCr6), steel bolsters and steel pins and tiger coral.
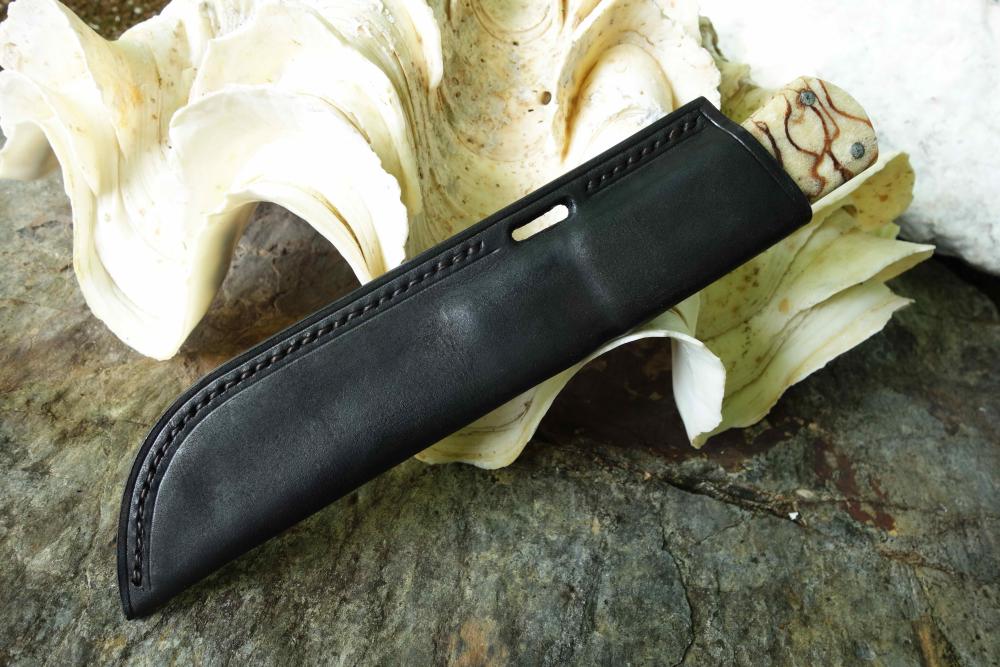
Sheath is half tanned cow leather with raw hide core.
Cheers
-
Thanks Guys!
On 2/11/2023 at 1:42 AM, Goods said:What material did you use?
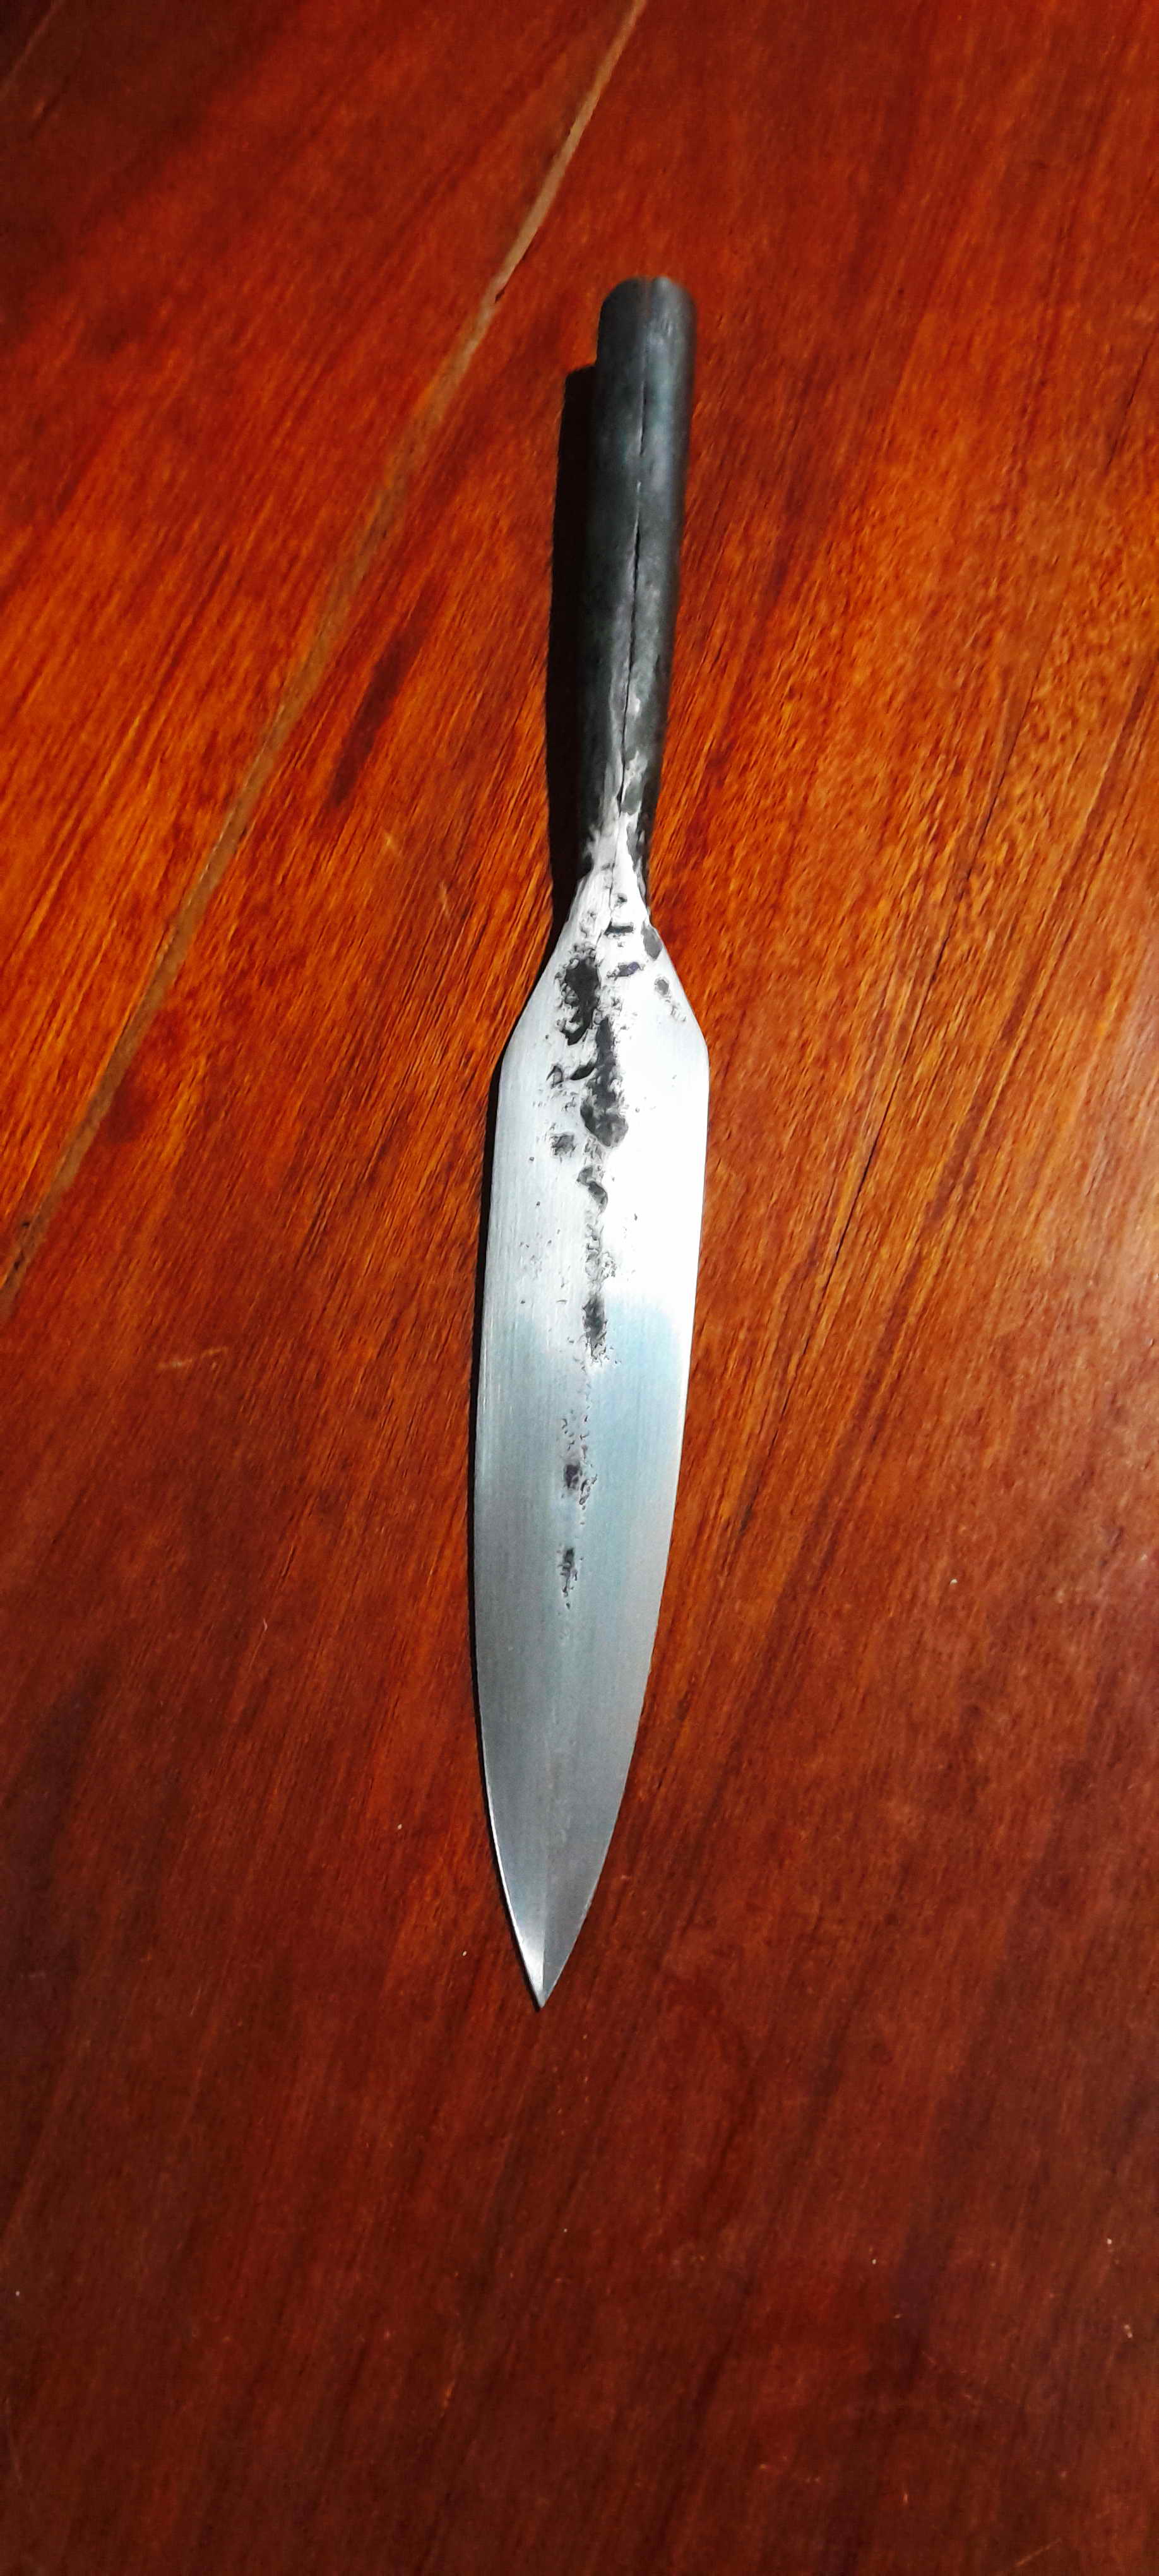
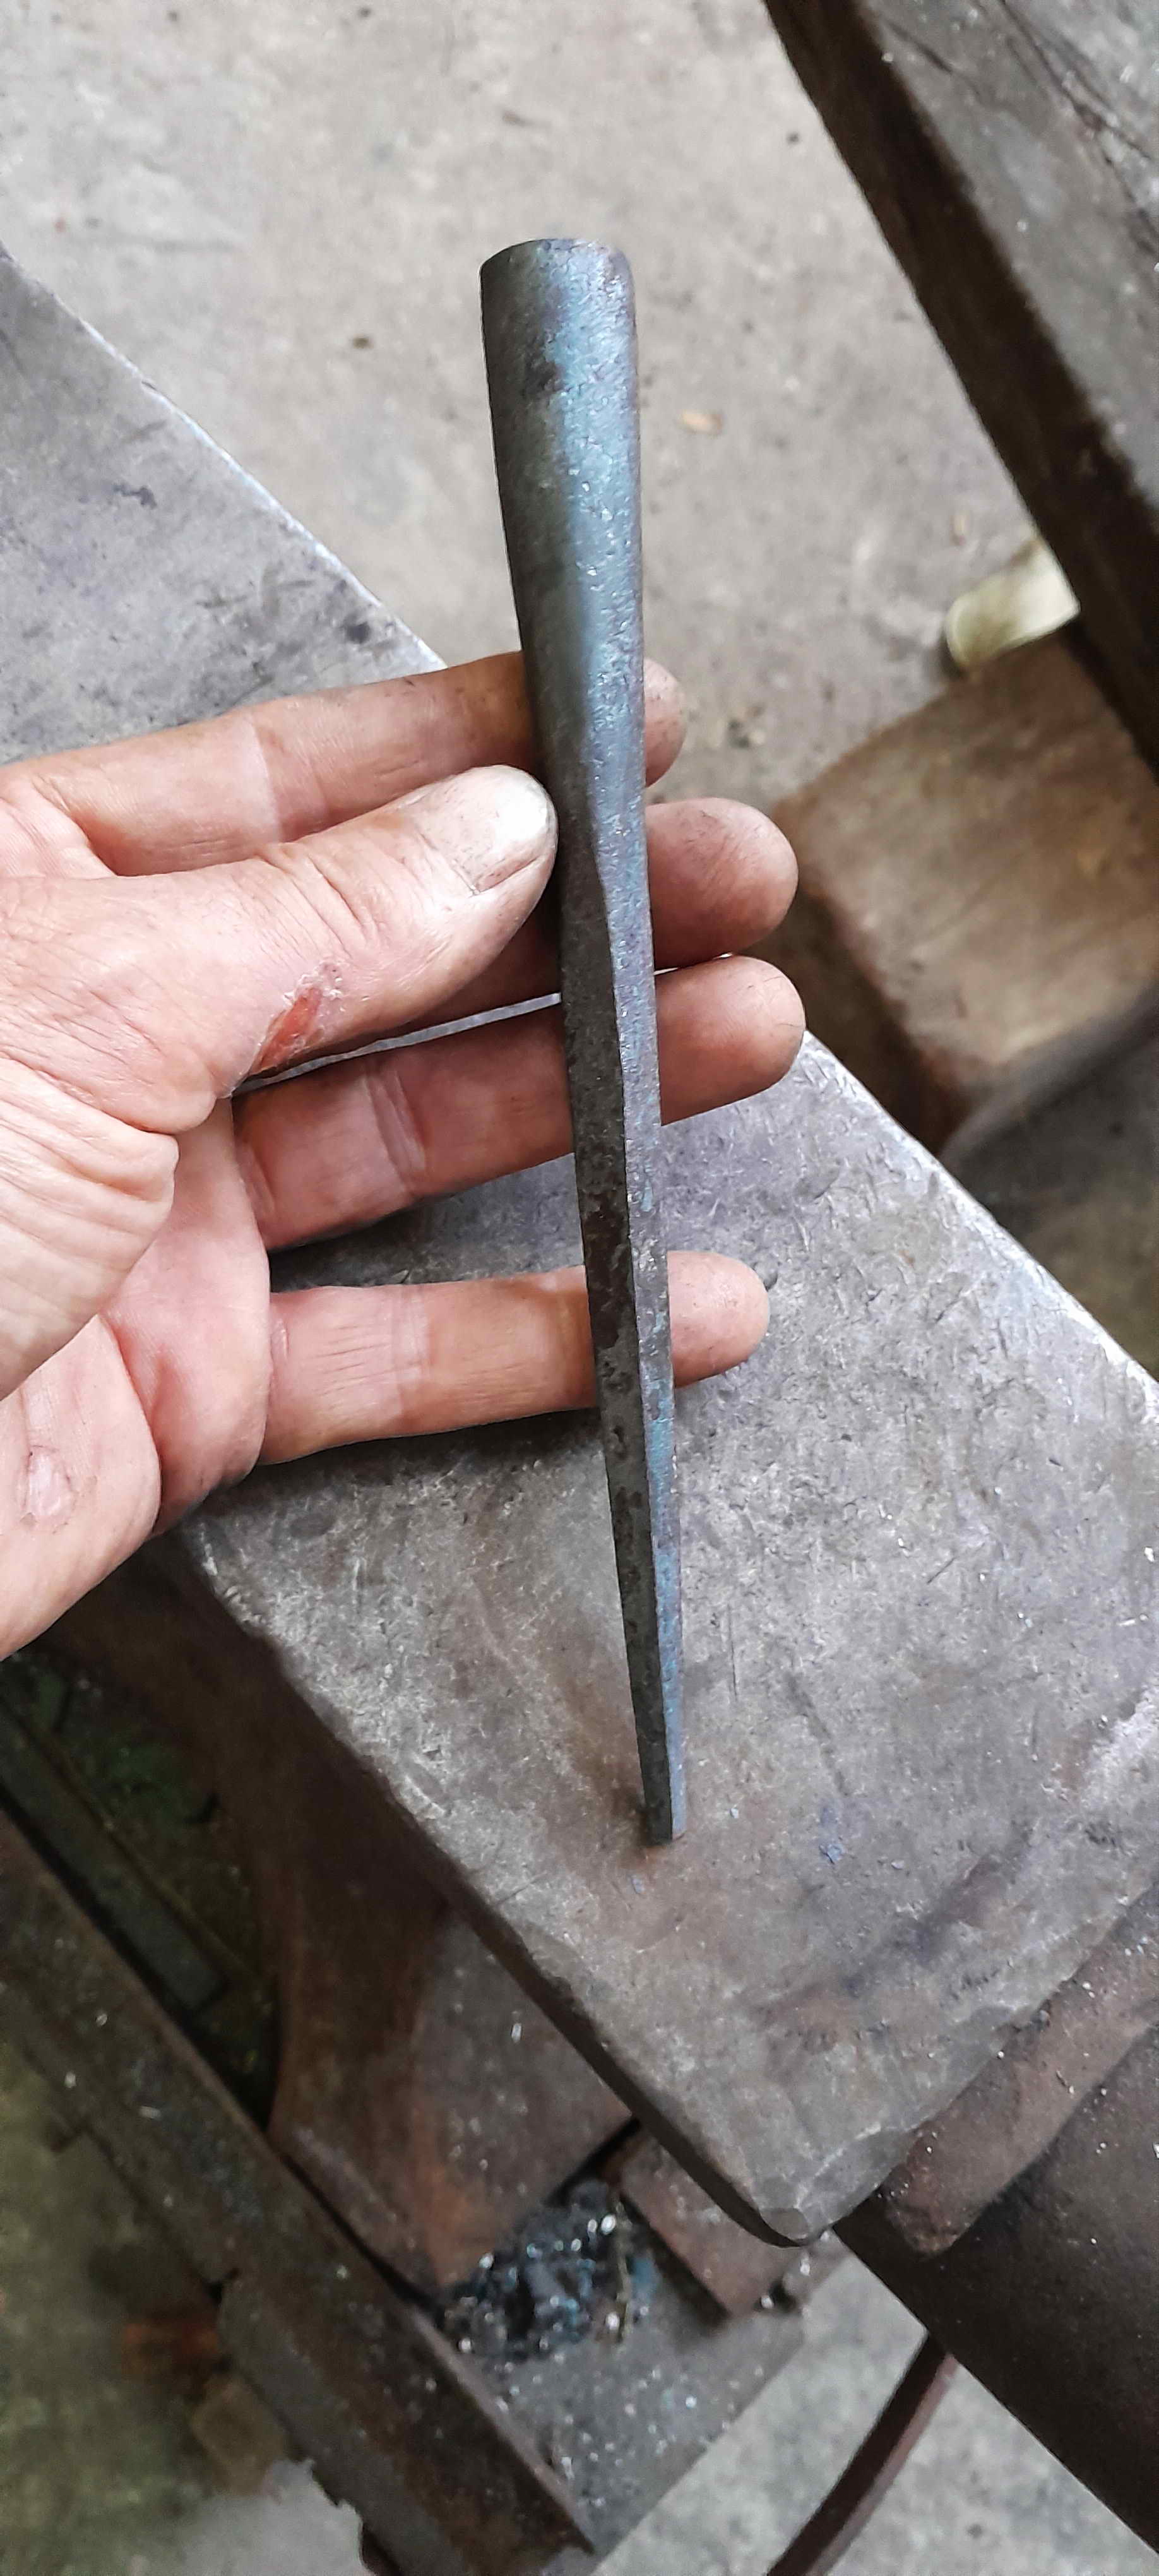
David, I used a medium carbon crow bar. Looking at the spark picture it has allegedly 0,5% carbon. After I finished forging there was maybe 0,3-0,4 % left ?
I used too many heats for sure, until the result was satifactory to me. It wont take a proper hardness quenched in oil I had to quench in water,
I think medium carbon is a good choice for a javelin head but You must have routine and use only a few heats to get the thing forged.
The next one I will use W2 with 1% carbon just to be sure that there is enough carbon left after the struggle....well, it's all about practice again
-
Irondragon, George, JHCC thanks a lot for the nice comments!
On 2/9/2023 at 11:17 AM, George N. M. said:Not unsurprisingly, very nice. Did you weld the seam on the socket, either in the forge or with electric or gas welding?
You might also try experimenting with an atalatl which will increase you range and power surprisingly. It takes some practice to use it but not a lot..
I made a similar set of 3 matched ones some years ago for a friend to use on horseback.
"By hammer and hand all arts do stand."
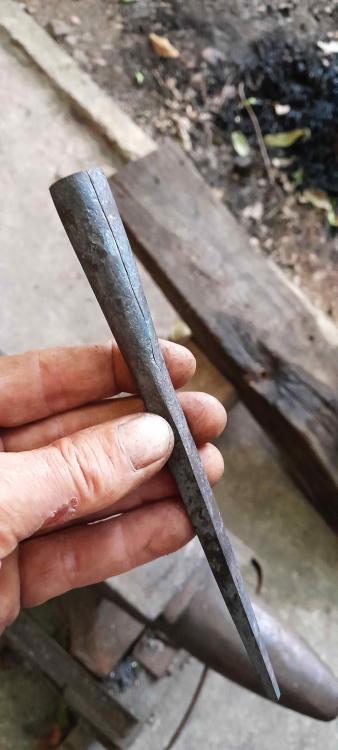
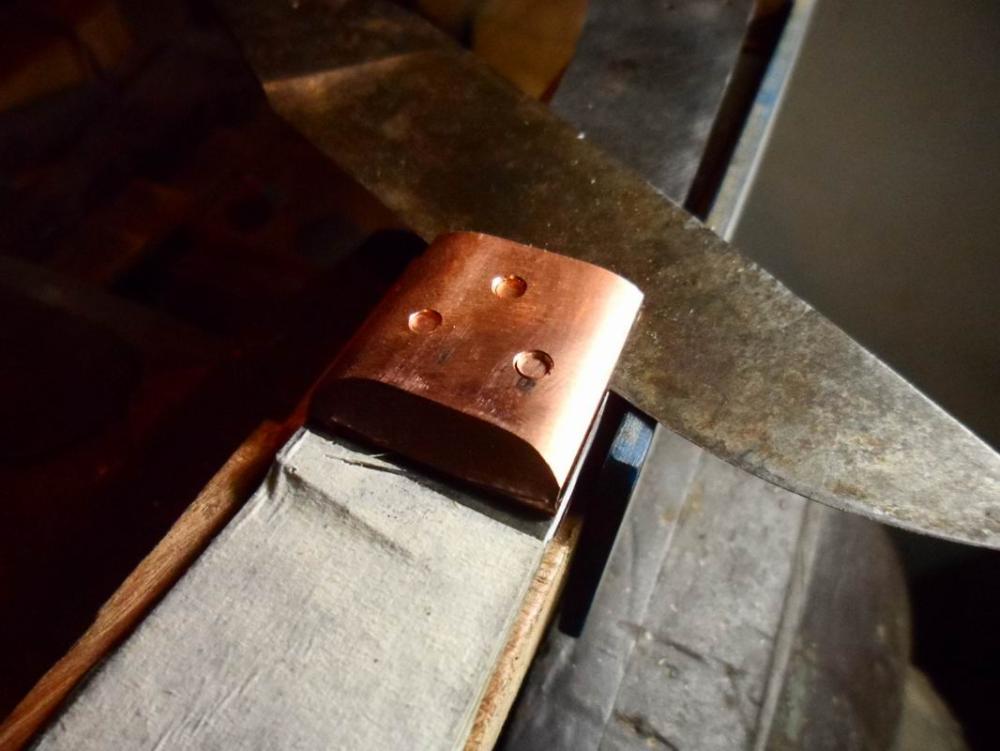
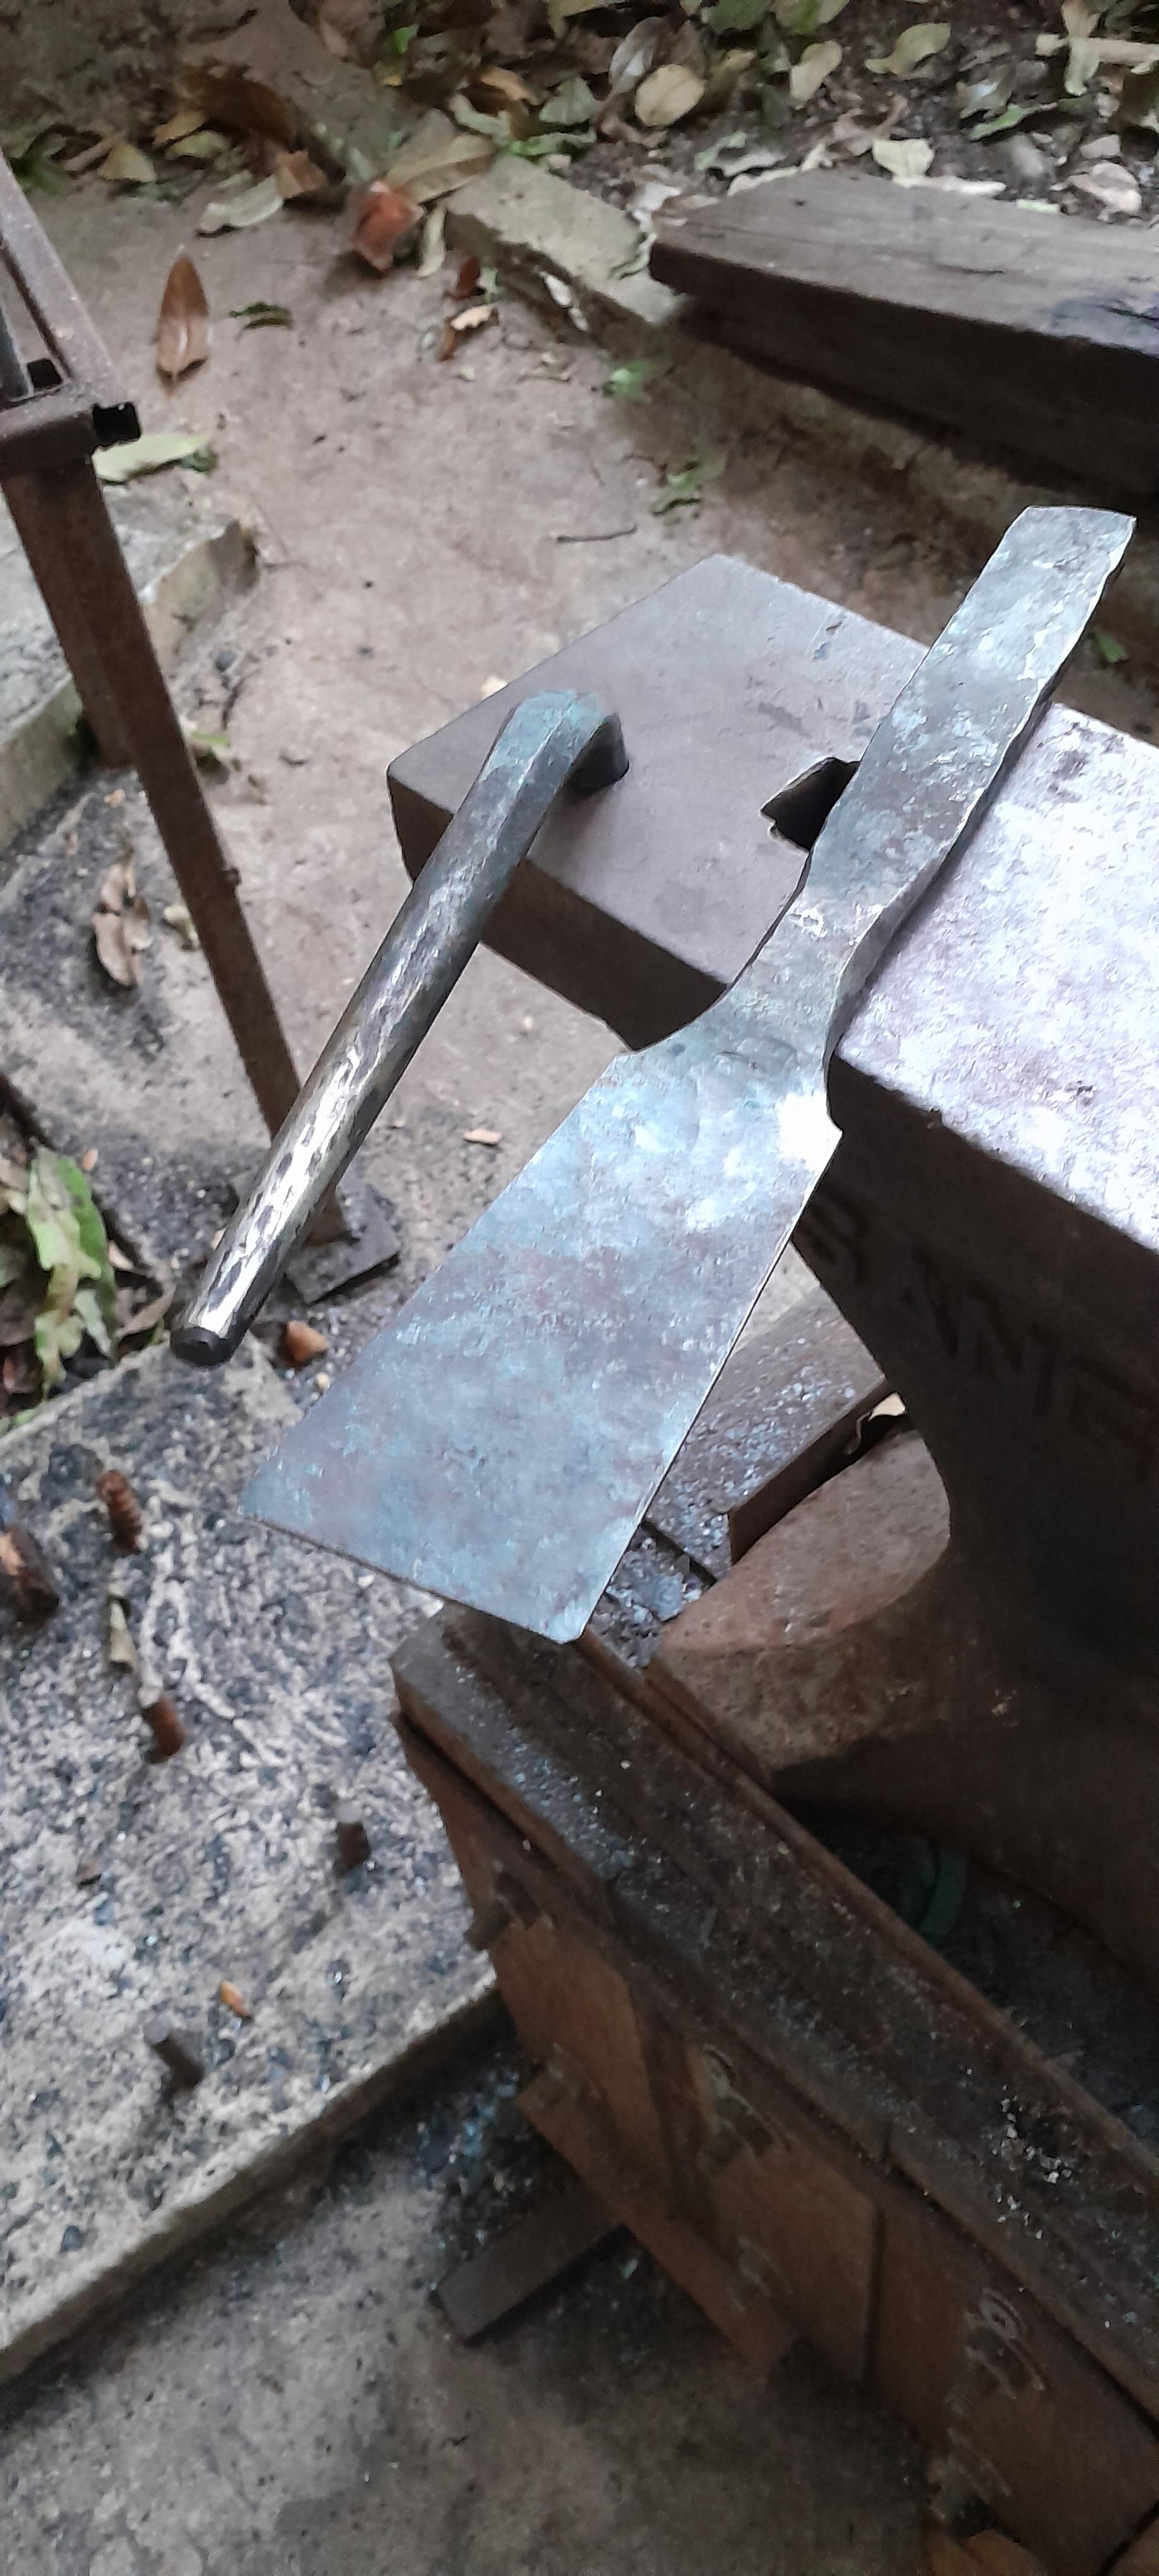
George, the socket is not welded, it is just a "normal joint"
in fact I never have forge welded a seam on a socket, I would have that for sure screwed up.
But I didn't mind because I wanted an ethnical Javelin, kind of African, and they all have an open seam....all in favour for the master plan
For forge welding a socket the thickness should have at least 2,5 mm - 3 mm, I guess...that would have increased the weight of my spear considerably
which I definitely wanted to avoid.
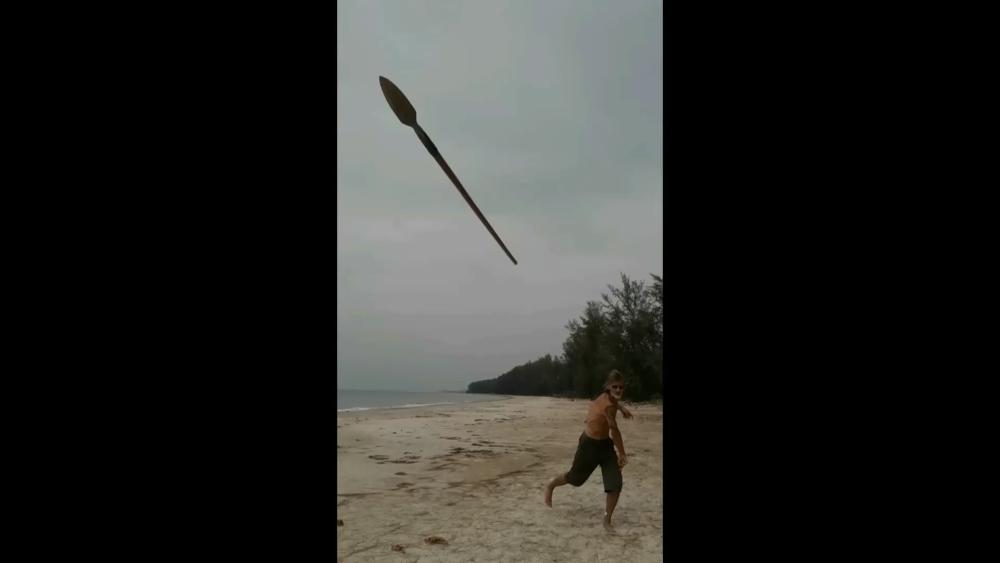
In its current balance and weight and my untrained "skills" it throws comfortable from 15- 20 m.Above that it is more power and precision needed
which I unfortunately cannot perform....honestly throwing a javelin is much more difficult and physically demanding than I expected.
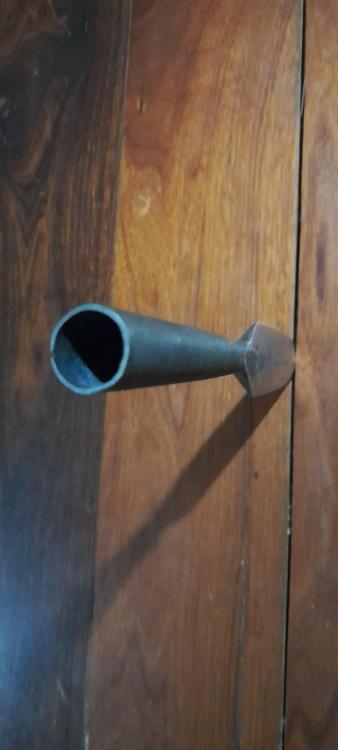
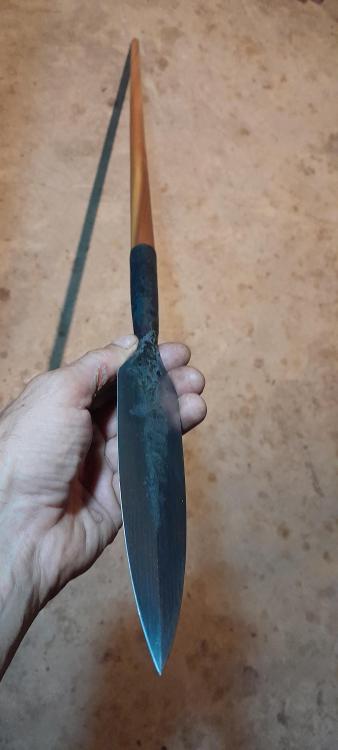
The thickness of the shown socket is 1,3 - 1,6 mm,thinner towards the edges.
I also made a tail spike but the javelin is so nice and easy to throw and well balanced that I left it out for the time beeing
....it would have get heavier and change the balance point.
I'm not sure what I would need that spike for except sticking the spear upright in the ground( which I would consider dangerous)....
ah yes.... the ethnic or African spears all have a tail spike and they like to stick it upright in the ground
 but what else could it be used for...
poking in dead animals or elephant dung or some dirt stuff
....just so as not to soil the tip.
...but tail spikes look cool. The javelin would look more ethnical and in that sense more complete.

-
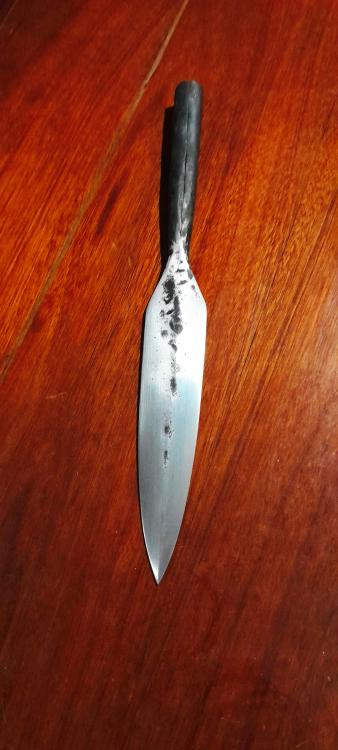
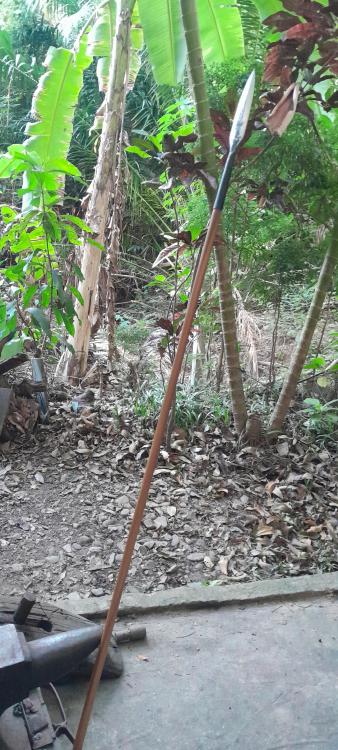
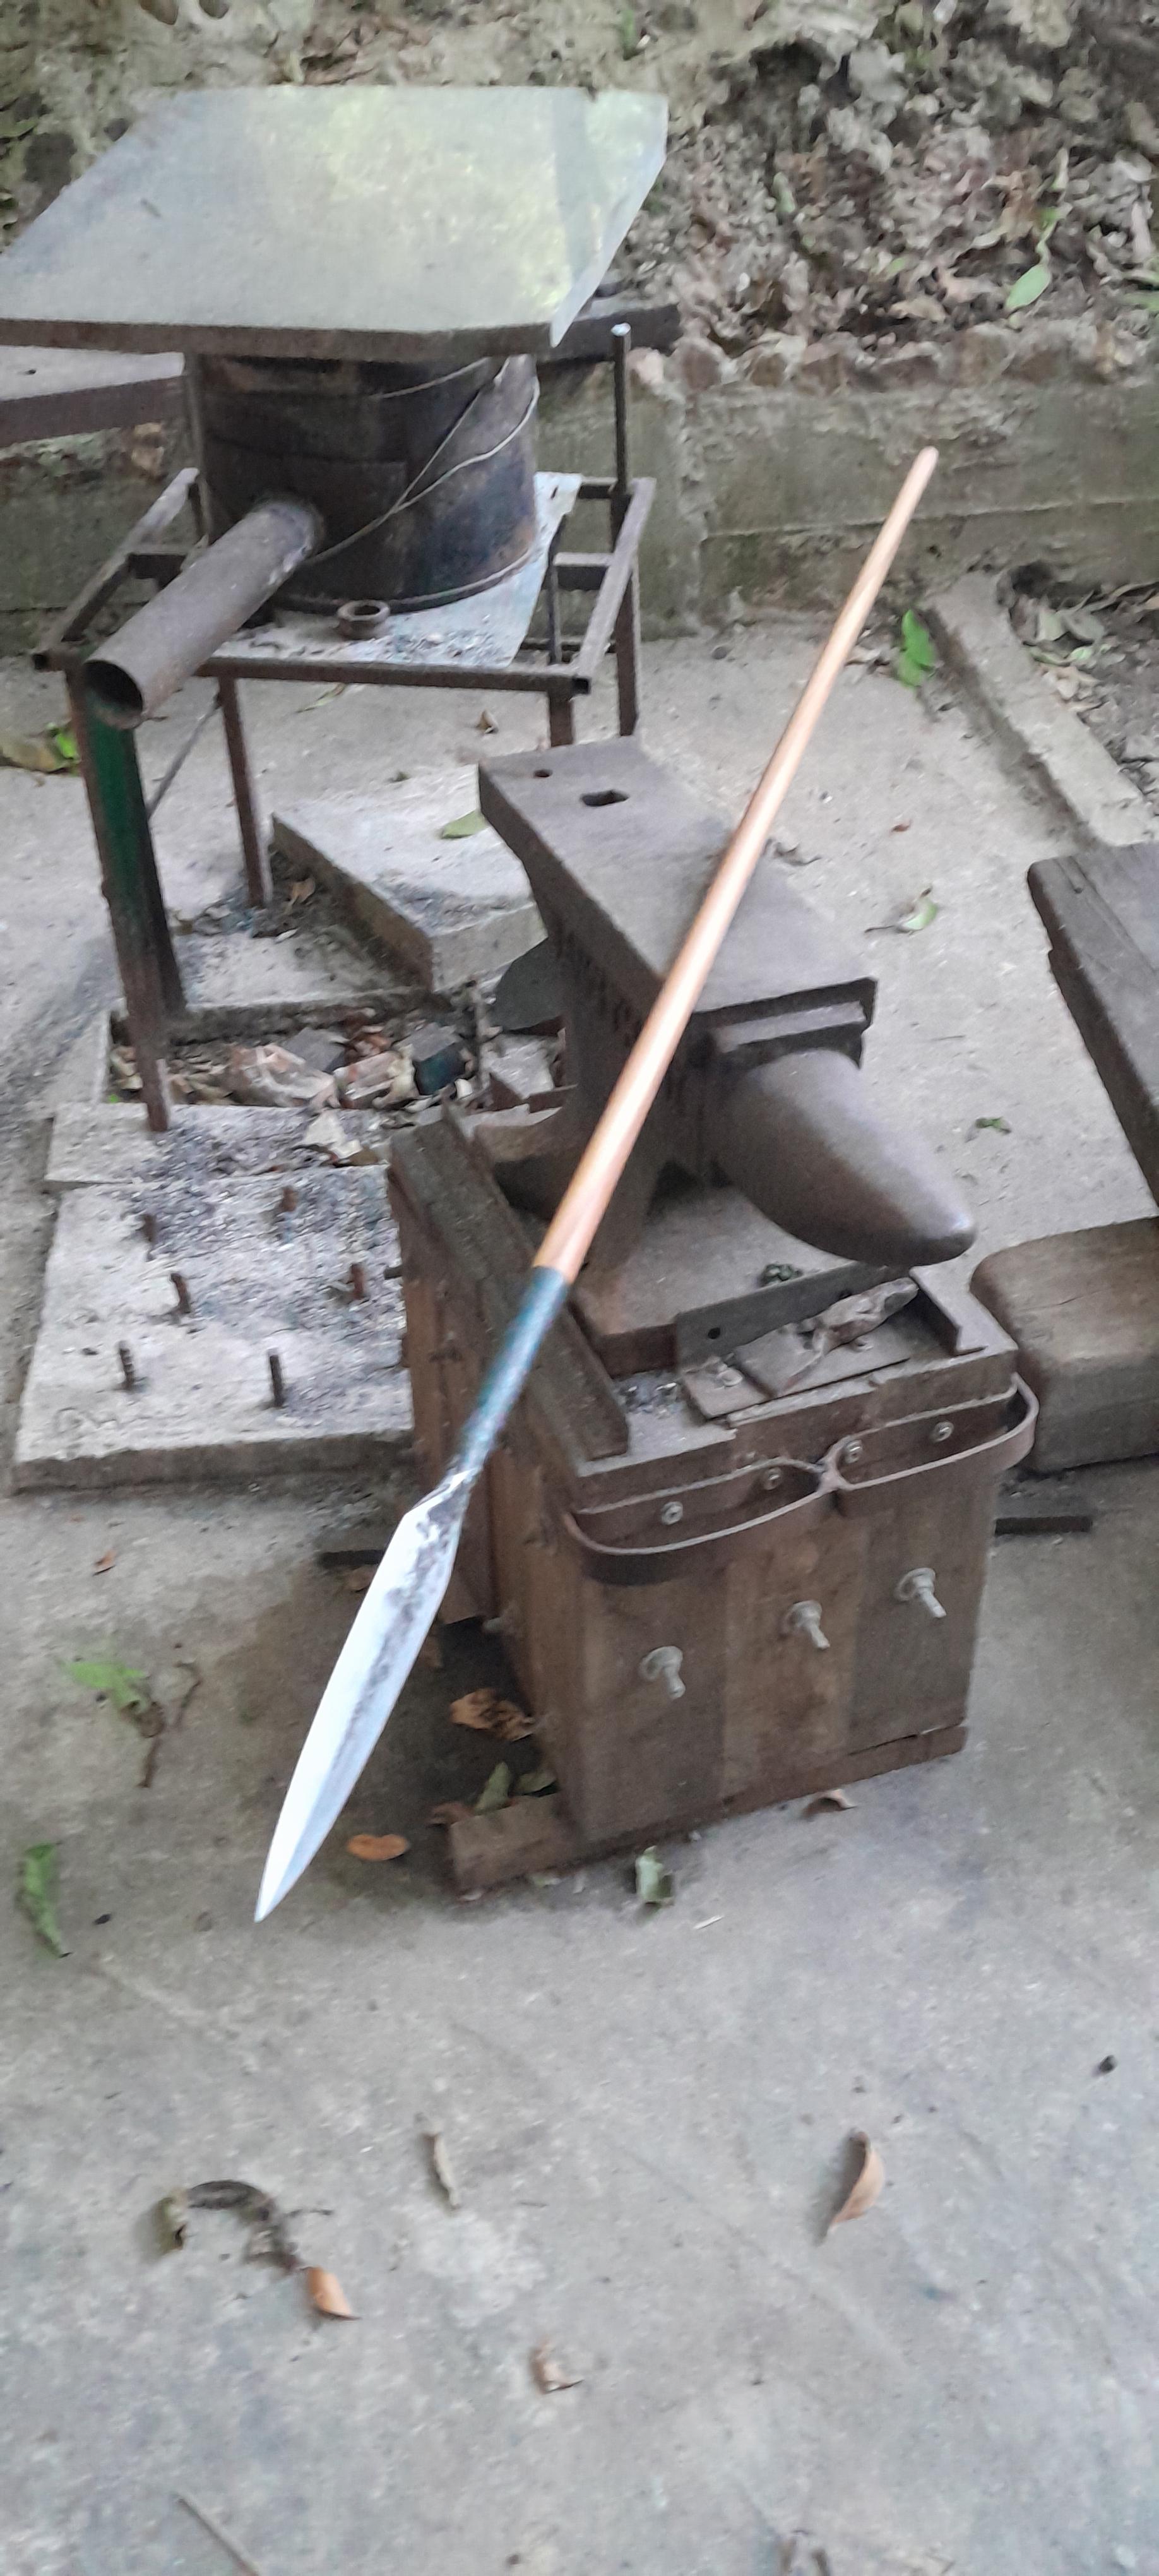
....since a decade I wanted to make a javelin for myself,.....
I do not fight, I do not hunt, but I absolutely had to have a javelin....
not like a heavy viking spear but more like a light weight African ethnic throwing spear....I have loved african spears since I was a kid.
On the last christmas eve I made one for the first time, and it was just as difficult to forge as I imagined.
I forged it from a medium carbon pry bar and the shaft I made of a handle of a straight garden hoe which I found at
the local hardware store. This wood is hard, elastic, springy and with its mottled tobacco color quite beautiful.
with a diameter of 19 mm it is light weight and fast and throws beautiyful.
Cheers


.thumb.jpg.0e57397602e12d9c6a868c867a906981.jpg)
.thumb.jpg.81bd3d3e7db4857da7c7a23964c71a72.jpg)
-
4 hours ago, Simian said:
Super happy with this, .
That is understandable!....it is a long way from welding a canister to finishing a complete great looking knife!
Very well done!
-
On 2/1/2023 at 3:14 AM, Simian said:
Awesome - Simple answers are the best!
Now, being serious, you posted this in November... what have you made recently?

Time is running fast..... well, I have made a few and I will post something in the next few days.
Thanks!
-
On 1/29/2023 at 6:04 PM, Simian said:
Final question from me - As an aspiring bladesmith, how do you get the tang so flat? Surface grinder, hand sanding on a flat block or something else?
You can ask as much as you want Simian, I am happy to share techniques and experience.
Most of the time I use flat bar stock in the right measurements or thickness and surface quality.
Sometimes I have to clean up forged blades in the ricasso aerea I do that on the flat platen of my surface grinder in lower speed and important : sharp belts and low or less pressure !
The only occasion I use hand sanding on a flat platen is when I clean up the pivot aerea of folder blades.
That's the part of knife making I dislike the most because it eats up belts, finger tips and time.
So getting nice flat stock that's already useable is the best .
-
On 1/26/2023 at 8:46 AM, George N. M. said:
TH, cool. I have not heard of or seen that method before and will sure consider it in the future even though I do not do that many knives (too much bench work, not enough forging, and I don't particularly like or am good at leather work). I have always heard that solder served the purpose of preventing water from entering and getting under the handle slabs or along the tang. It looks like your bolstering method would be so tight that any water infusion, even if used as a dive knife, would be nonexistant to minimal.
GNM
George :
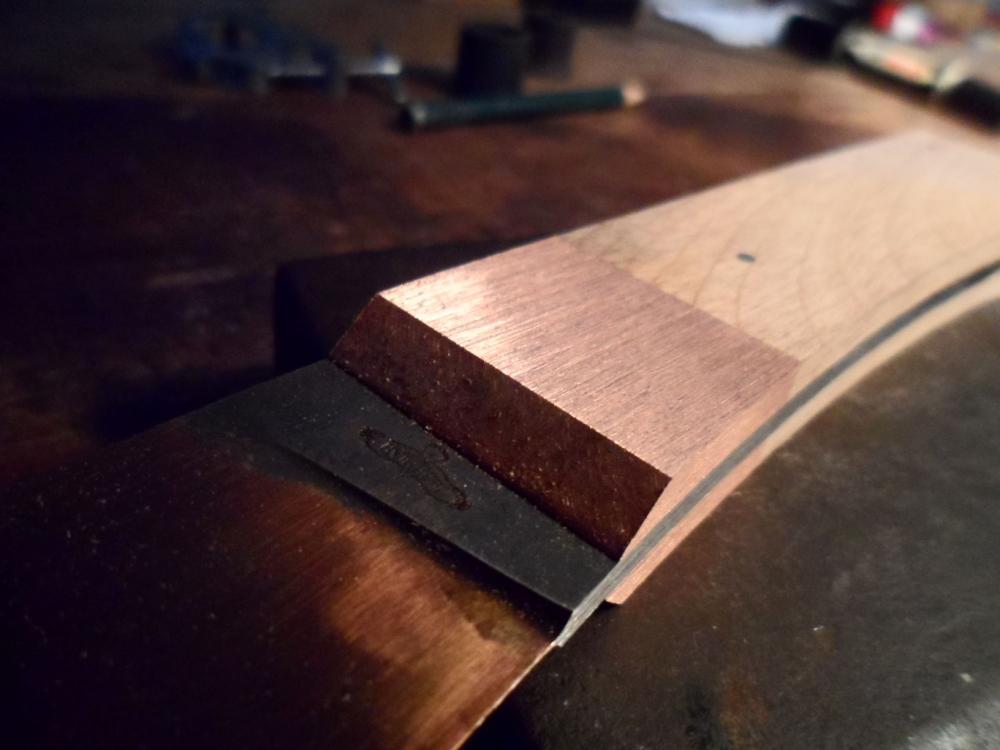
the surfaces of the tang and the bolsters should be light gap tight, if so, its not likely that there will be any problems of moisture sneaking under....
at least not in a life time.
to prevent this in any case the knife should be maintained with highly viscose oil as is used for musical instruments.....just to ease the conscience
But if done well I doubt that there will be any air and moisture getting under causing corrosion. So oil will not be able to get under it as well.....I think
I do not recommend WD 40 in this aerea because it damages the structure of natural handle materials which joining the bolsters.
WD 40 is recommended for the daily maintanance of machines...or just for the blades.
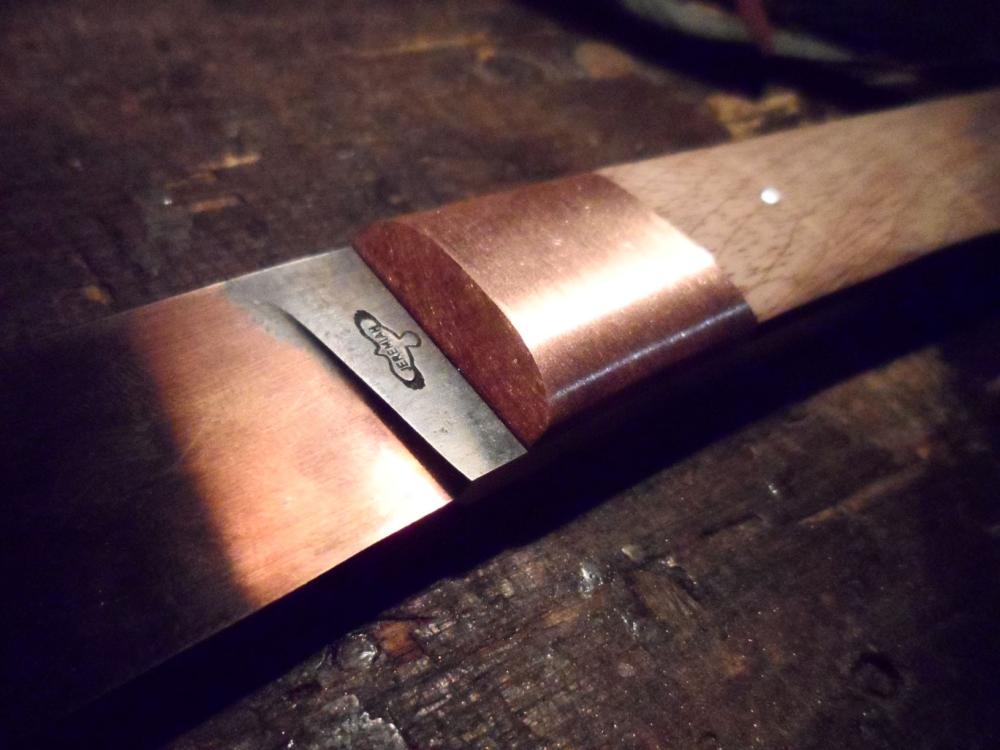
On 1/27/2023 at 1:53 AM, Simian said:Fantastic - I've just noticed how it was done on the Natural.
Truly superb work.
I figured you would see that
")
George and Simian, thanks a lot for the response!
-
I once had such an event that the bolsters were no longer exactly opposite after pressing.
The super strong bond amazed me and prompted me to take some pictures, .....all the more amazing that I could remember where I had kept them
-
On 1/21/2023 at 9:13 PM, Simian said:
Forgive me for asking, but how are your bolsters attached? it looks as though there are no fasteners? (I'm sure there are, but I can't see them!)
Such a tidy, functional and Beautiful blade, It's inspirational for me.
Thanks Simian!
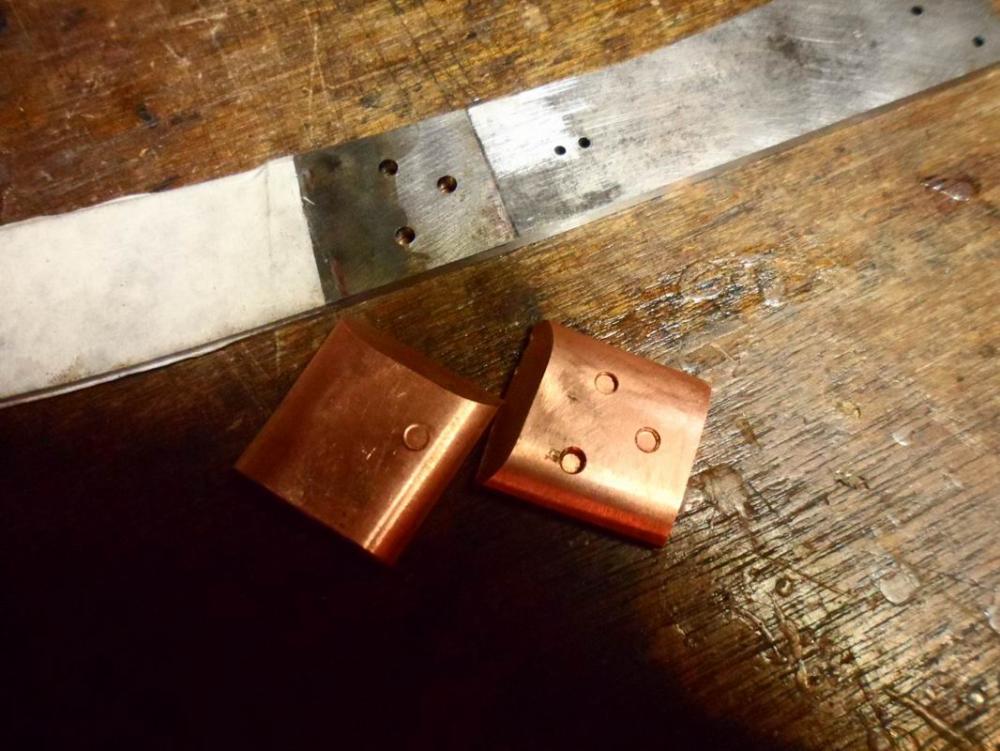
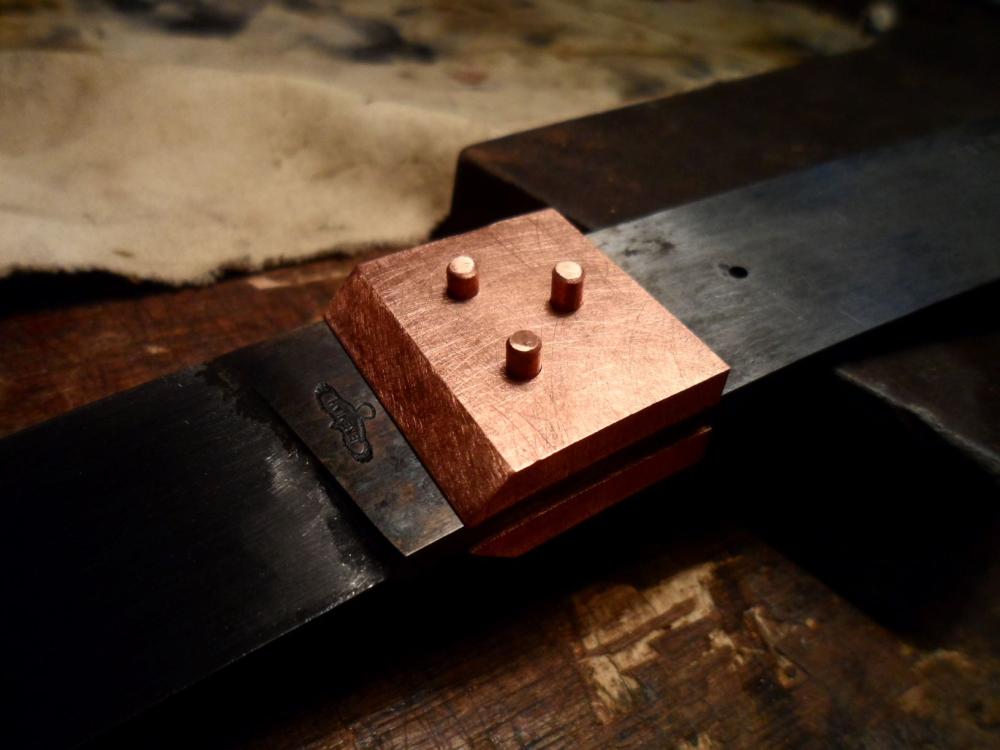
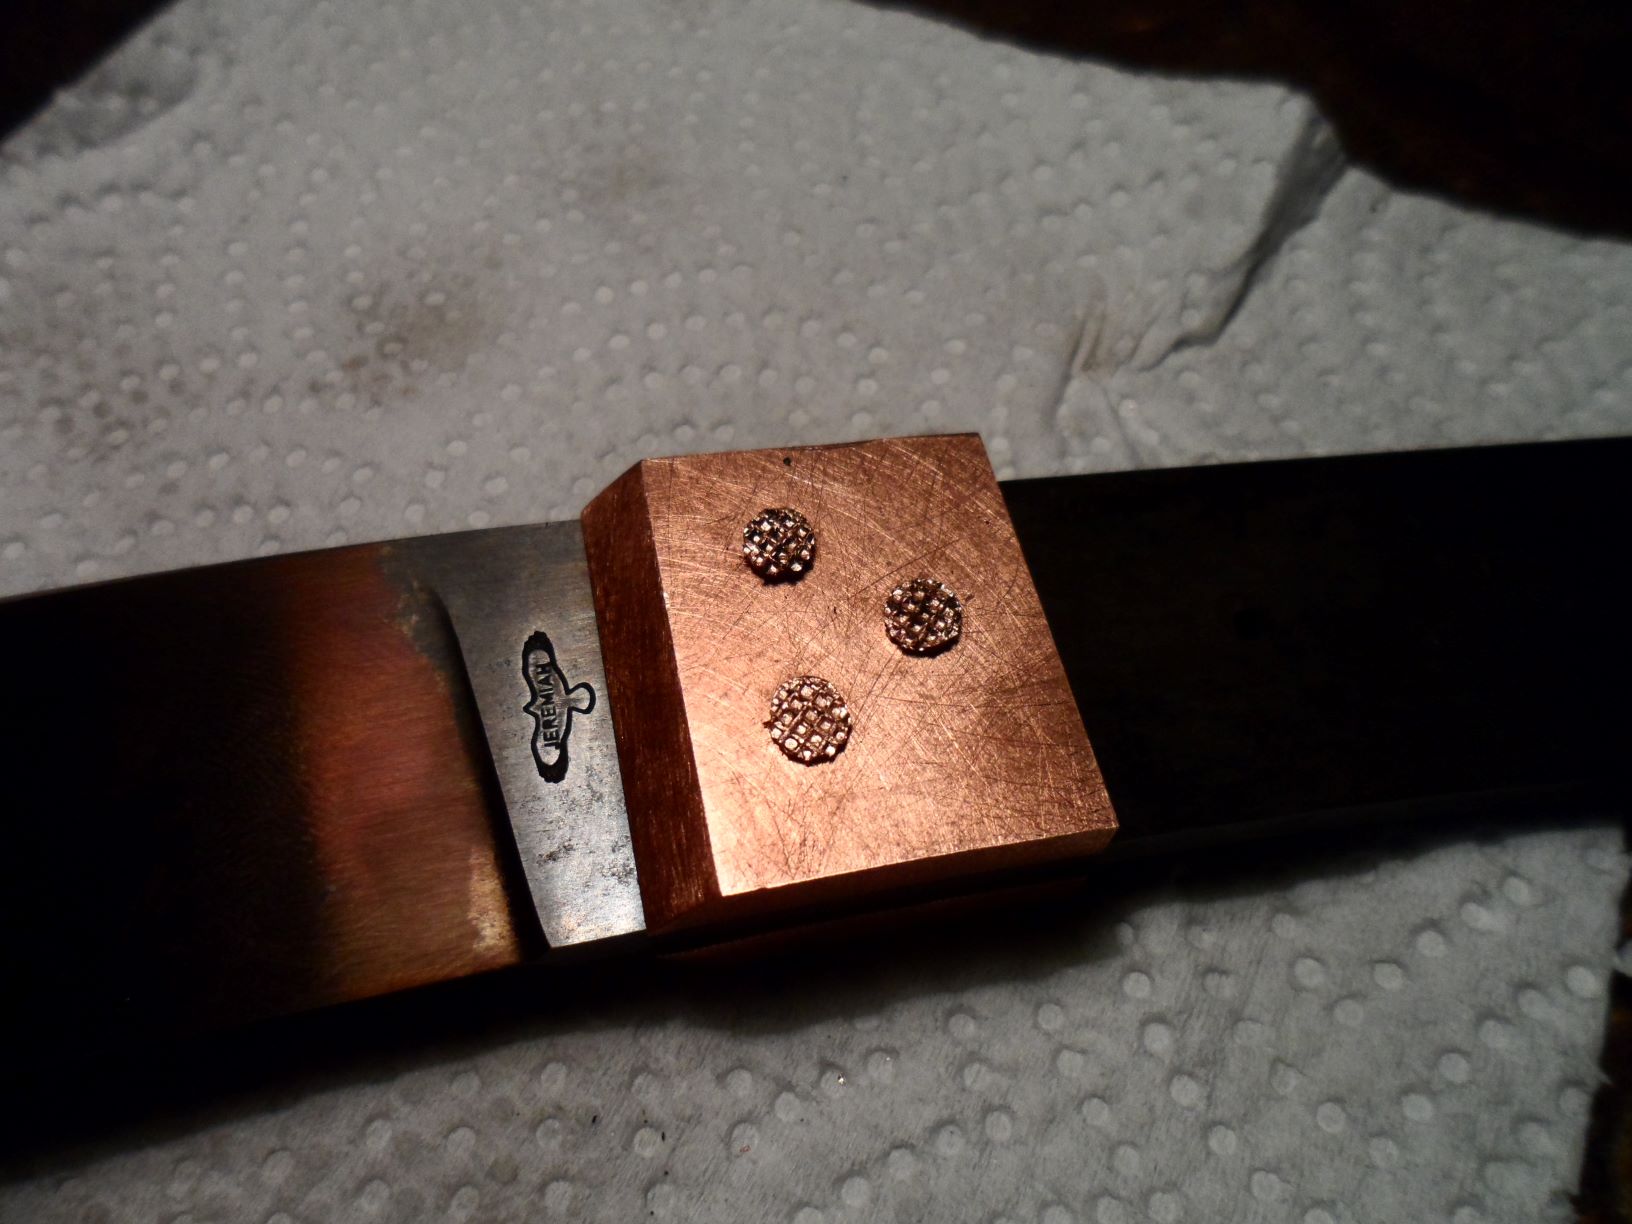
There are essentially 3 ways to attach bolster.One of them is soldering them on.In my opinion this is a bad way to do it.Flux acid, heat stress to the blade and
besides this bad mechanical detriments, even if its cleanly executed it dosen't look good.
Glueing them on seems kind of desperate because if the knife is experiencing some bending they simply can popp off.And glueing metal with metal can be temporary
Imho the only proper and absolute solid way is riveting them.I press them in my vice.
The holes are only a bit countersunk which is ground away in the forming process.But the form fit is so strong you have to chisel them off in case you need to do it twice
because of an unpleasing result.
Cheers

-
Ich danke Dir boisdarc!
thank you boisdarc
-
I saw this a little bit late, or just missed it somehow....
Thanks for the link JHCC!


.jpg.ad5c54ae6223f2aae866e9de89a8b080.jpg)


.jpg.511cf1f9a195060c8530cf1a84291015.jpg)
.jpg.9eea4b4c28d1e712a2029fab563358f9.jpg)


The Cudgel in the Sack
in Folding Knives
Posted
Les L, thank you so much for your nice comment!")