

templehound
-
Posts
448 -
Joined
-
Last visited
Content Type
Profiles
Forums
Articles
Gallery
Downloads
Events
Posts posted by templehound
-
-
13 hours ago, Latticino said:
Another lovely blade. Haven't seen a single one of your pieces that I wouldn't be proud to own, or even more proud to have made.
Thanks for sharing your process for making the buttons. While I'm unlikely to use a similar method, being lucky enough to have inherited a small vintage Unimat, I am still curious why you tapped the disk if you were going to rivet it. Was that just to allow you to hold it more easily in your drill press?
Thank You Latticino!
Some steels do not flow easy while riveting.They form a mushroom difficult and do not press on the disc satisfactory and sometimes it
results in little, clattering noises when knocking with the finger knuckle on the blade or handle.....or even clatter loud enough when they are dropped on a desk.
If that happens the riveting of the knife still can be well executed quality, only some tiny tensions causing this sounds....but it sounds like less quality and I really dont like this...
Sometimes it can be put right with stronger pening blows but steels does not drift that long, easy and good like copper and the mushroomed tang starts to get hard...and the knife still makes the clattering sounds.
Tapping the discs helps to prevent this.
The butt of the handle must be well prepared, that helps of course the tight connection.
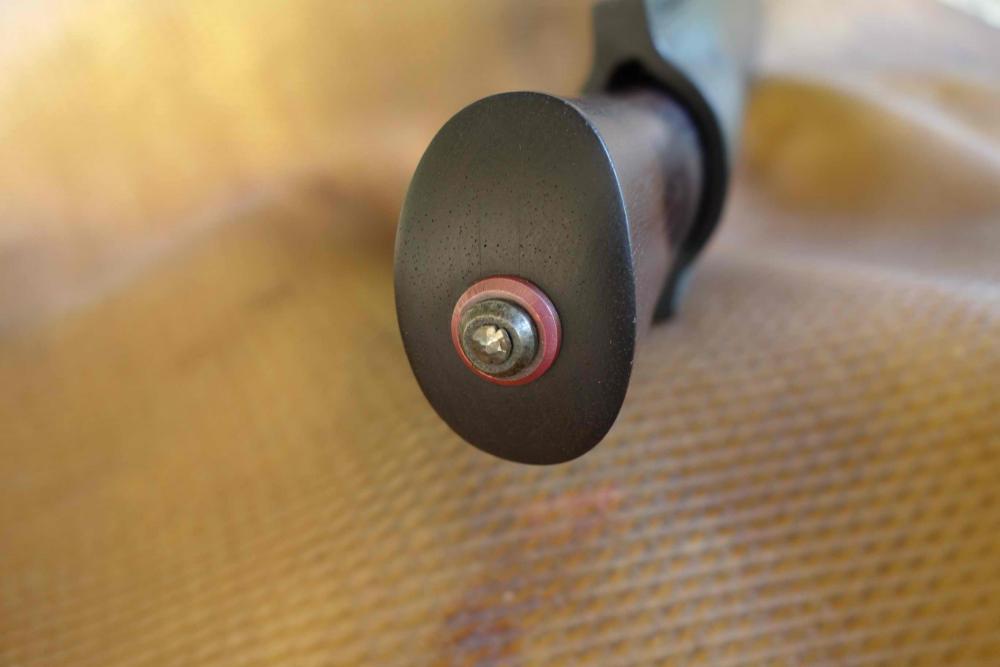
I start to rivet the first 10 blows or so clockwise giving the tendency to tighten up the thread and push on the disc.
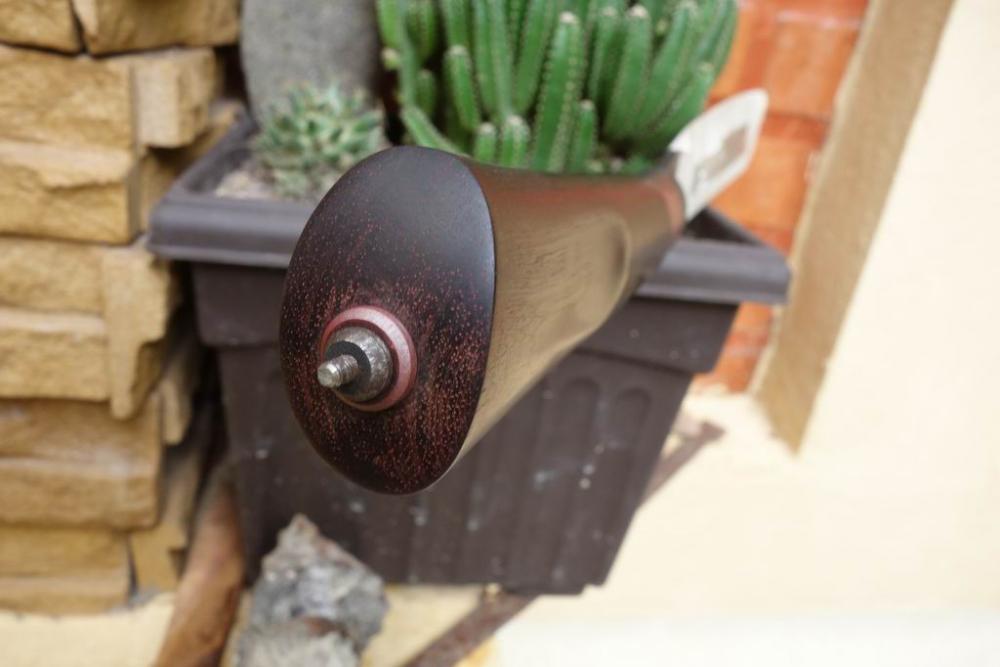
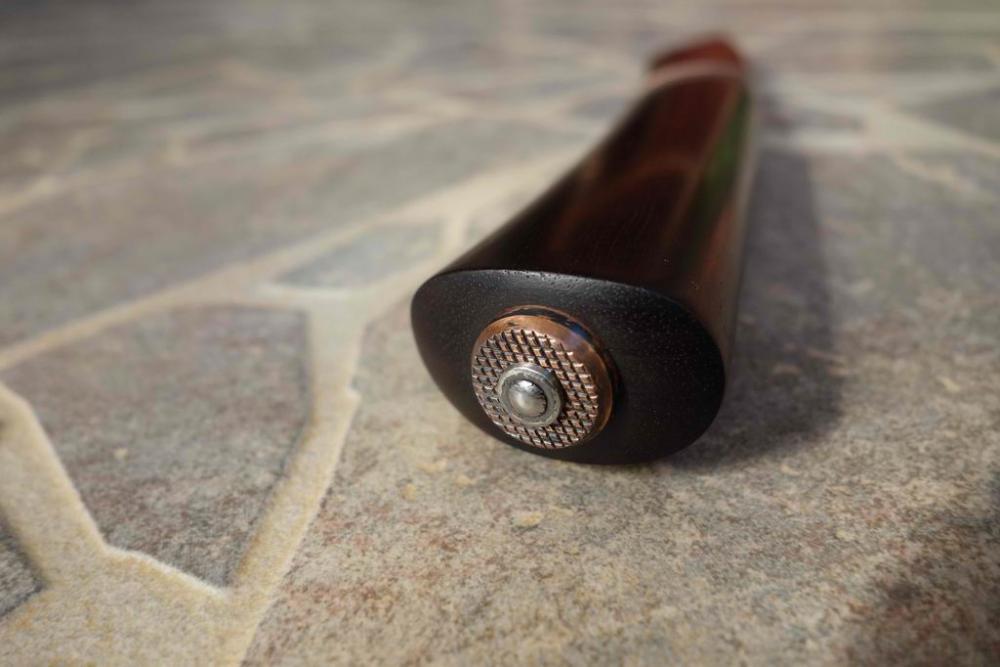
Riveting the tang to a nice even mushroom with good friendly edges it is hard not to hit the disc, which gives nasty dents, especially in copper.
I avoid this due a final, smaller steel disc without a bevel.While riveting the blows pushing down the edges of the mushroom, forming the same time the bevel of the steel disc.
I have some images of impressions with different knives but it is the same process.
-
-
On 7/3/2017 at 10:30 AM, Lou L said:
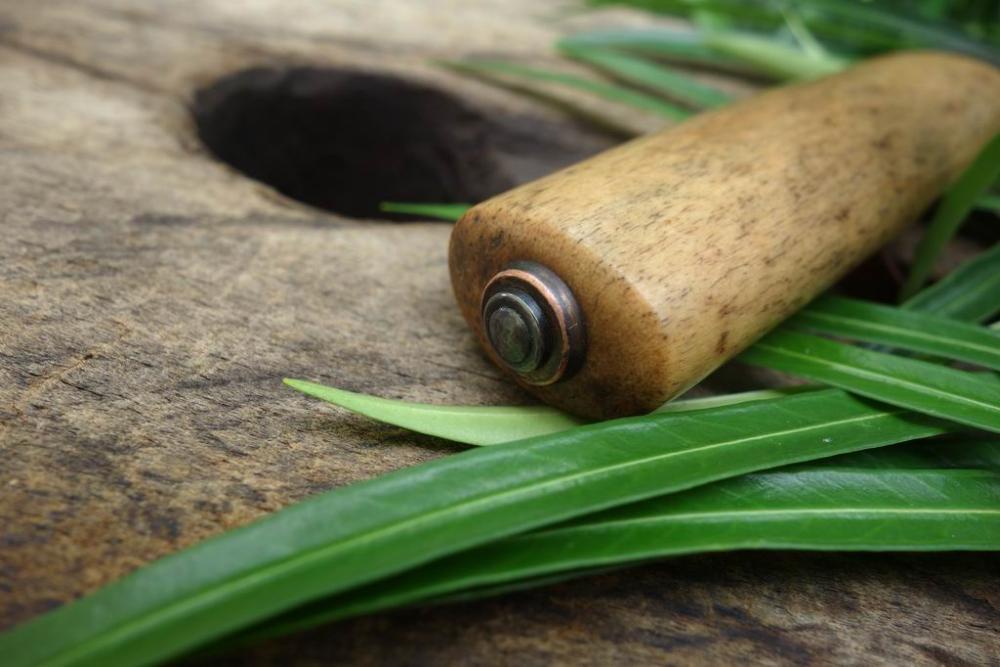
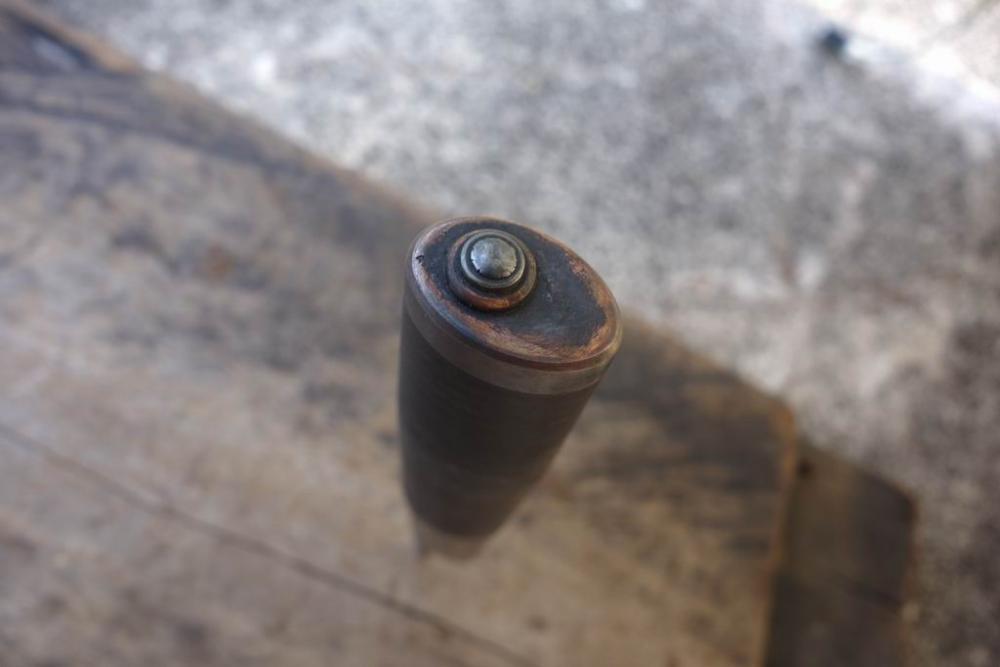
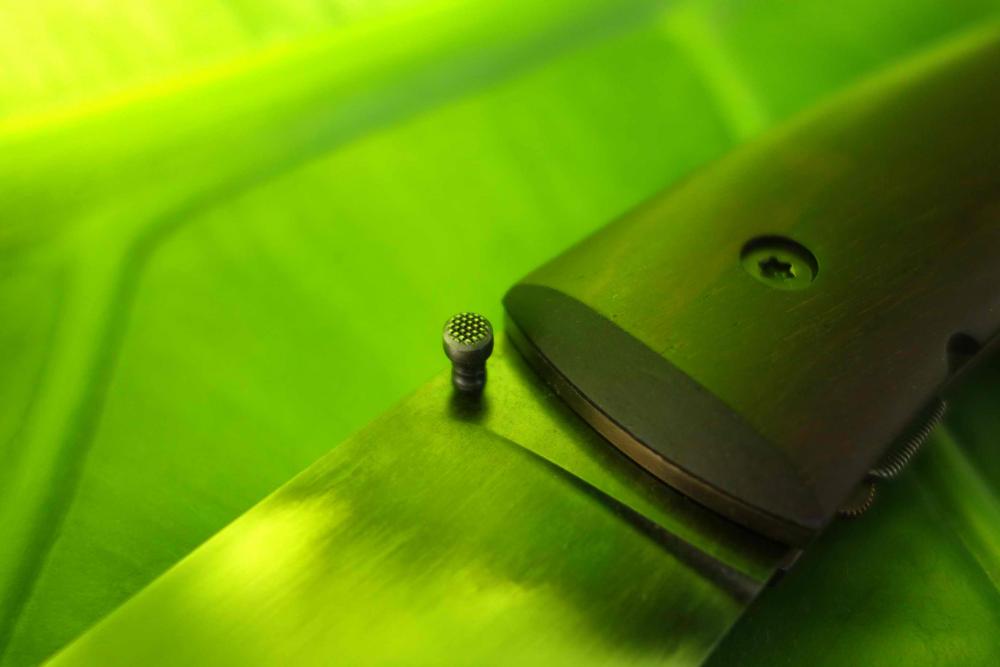
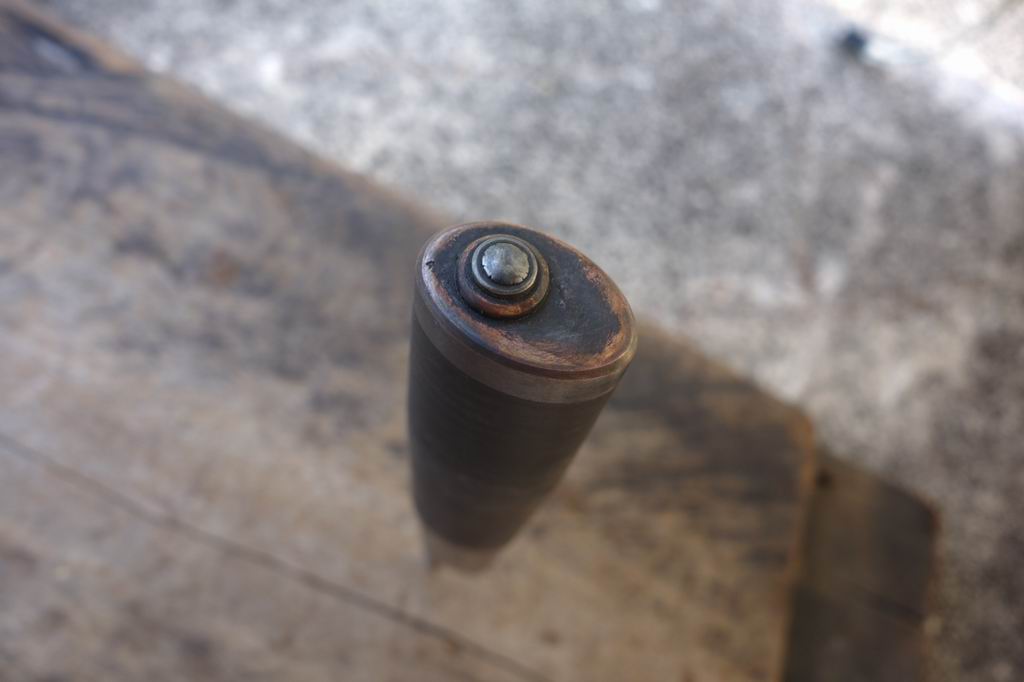
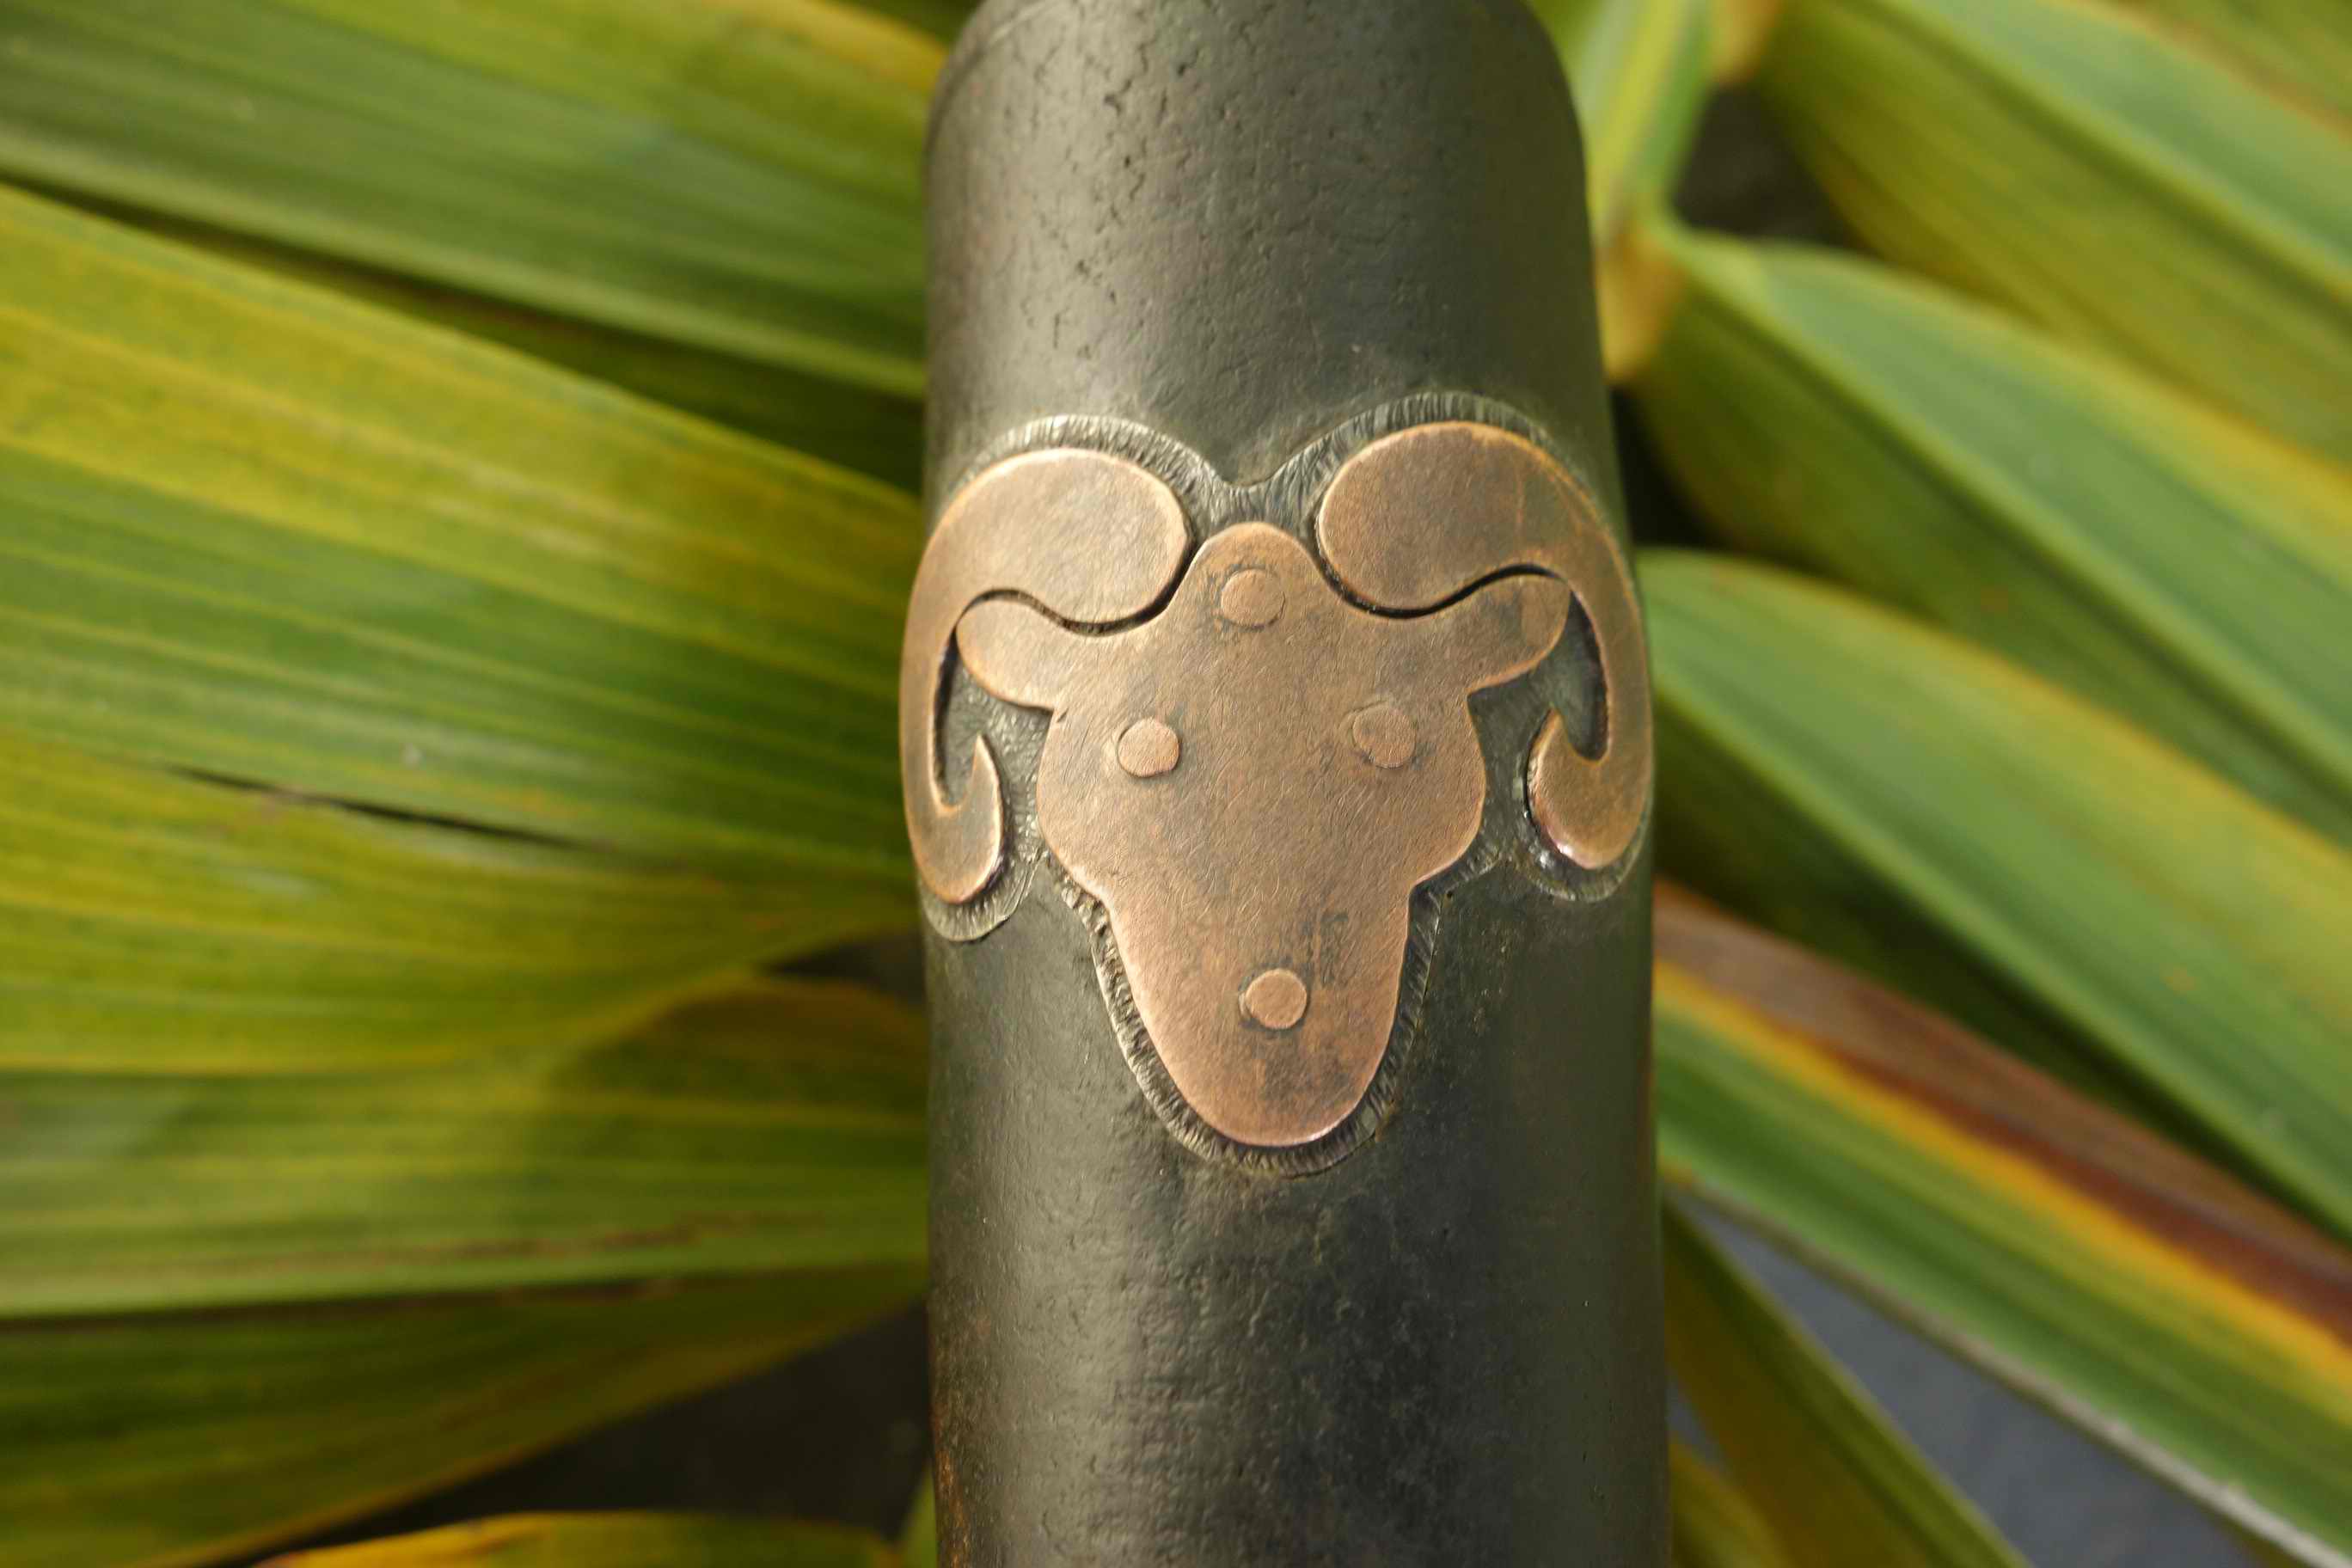
That's another work of art! How did you make the "button" that embellishes the riveted tang?
Thanks a Lot for Your reply, Lou L!
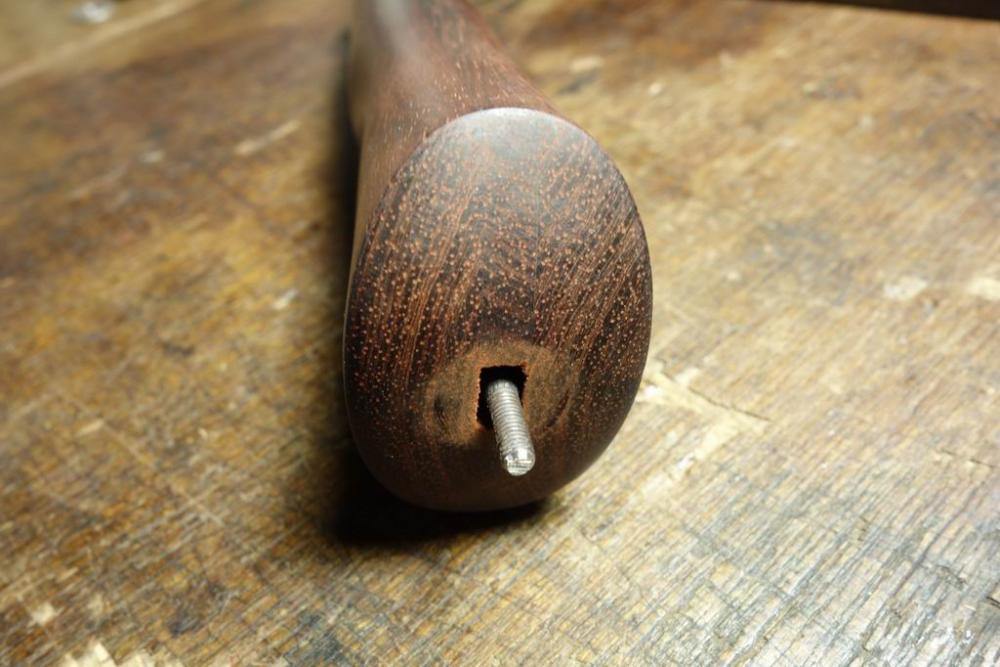
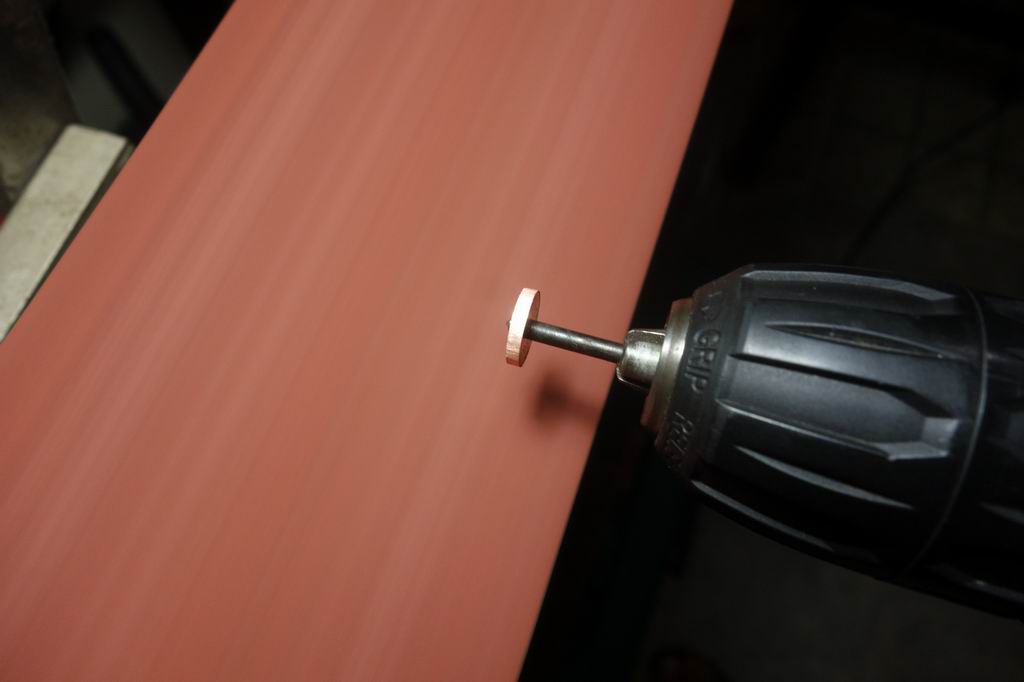
They are made easy without a lathe.
In this case I took copper 2 mm thickness, M3 thread on the tang and a cordless screwdriver.
There are only e few fhings to be aware of......
keep the scribed compass line single and thin
dont roll it while grinding, push down in facetes
coming near the scribed line change from coarse grit to grit 100-150
keeping pushing down facetes until You reach the scribed line as even and near as possible.
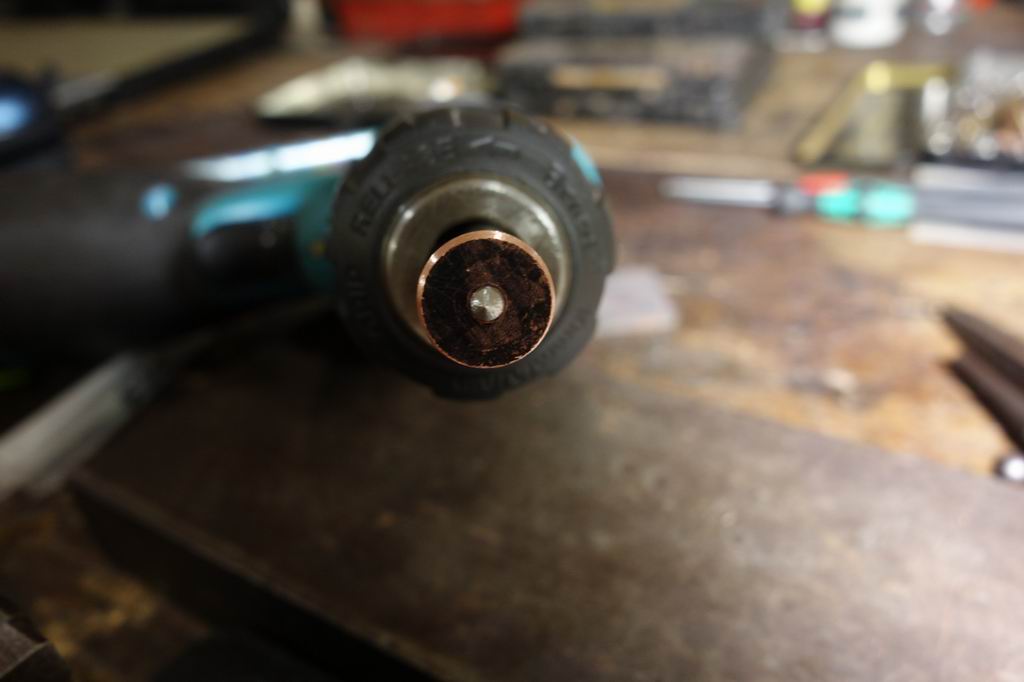
attach it to the screwdriver and go to slack belt grinding
start it running before You hit the belt.
after rounding go to an angle and give it a bevel
The more precise You prepare, the more round it gets.
Cheers
The software keeps confusing the sequences of the images....with everytime editing it gets worser.....well,
You have to pick Your sequence, bro
-
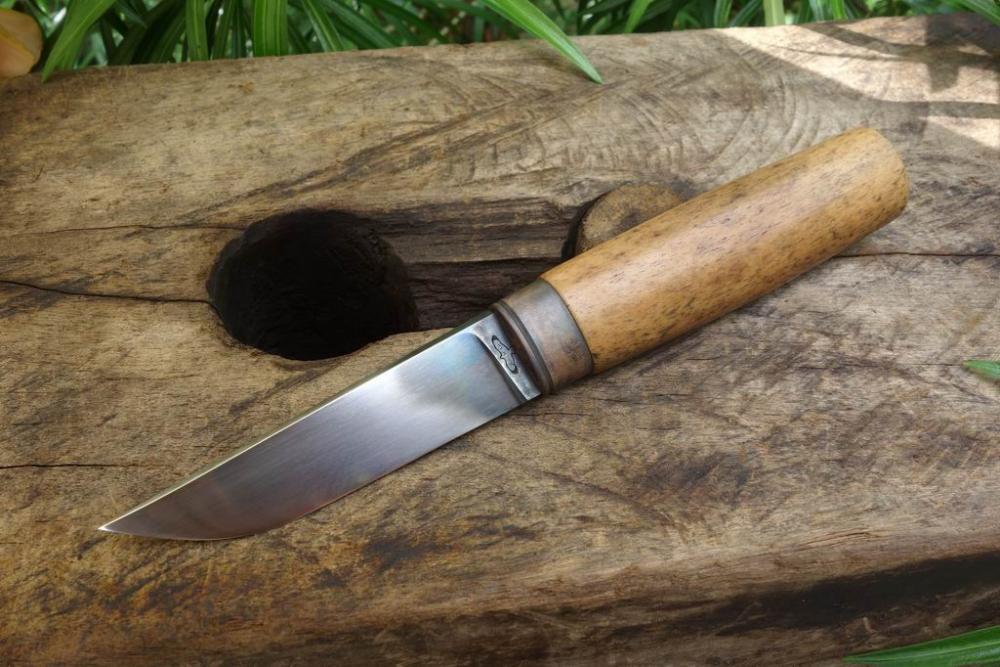
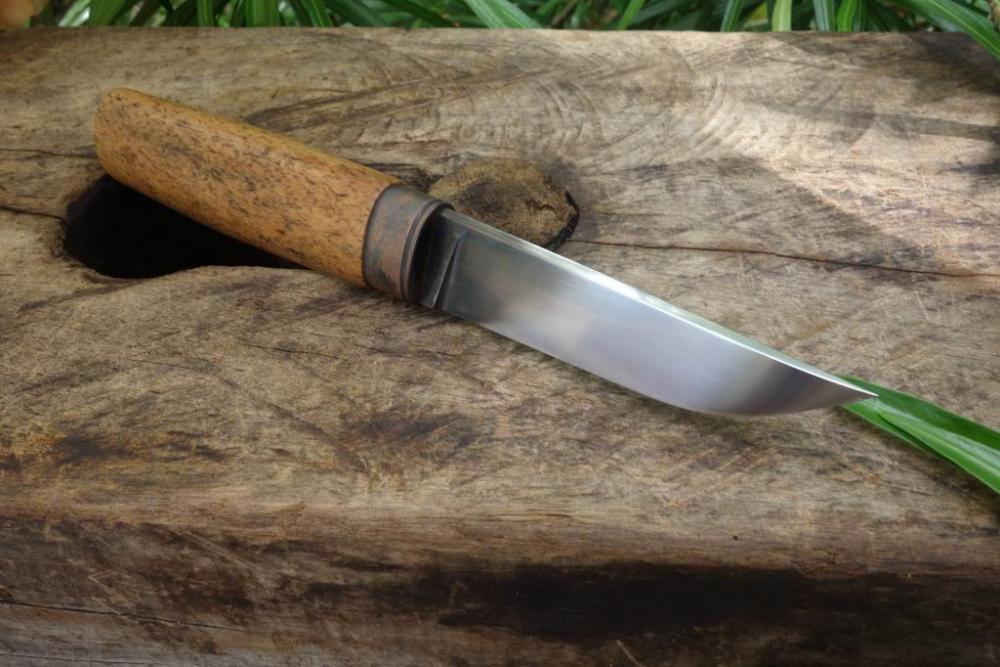
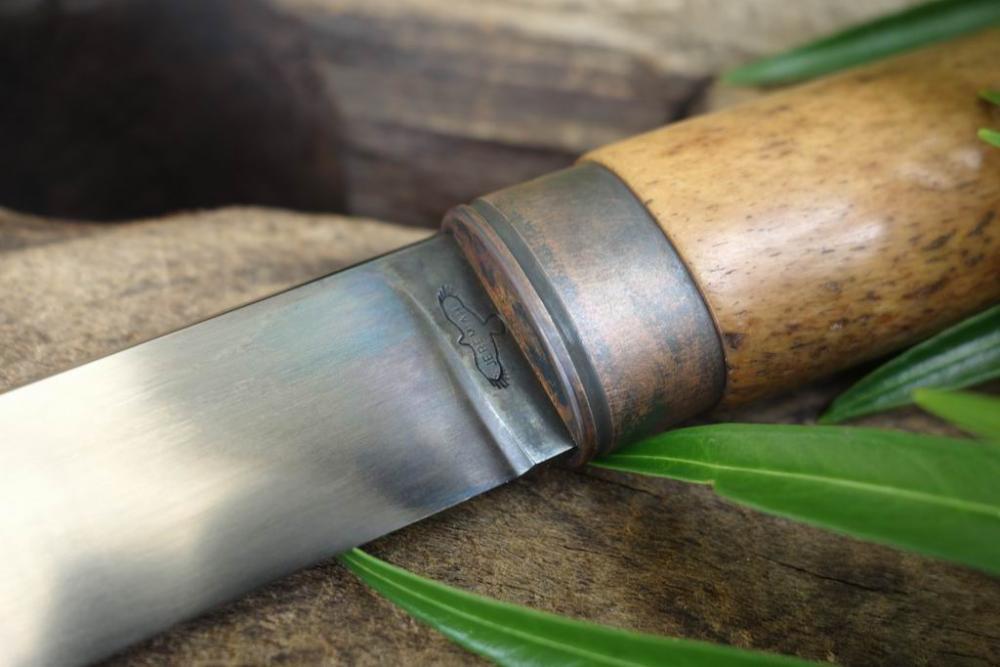
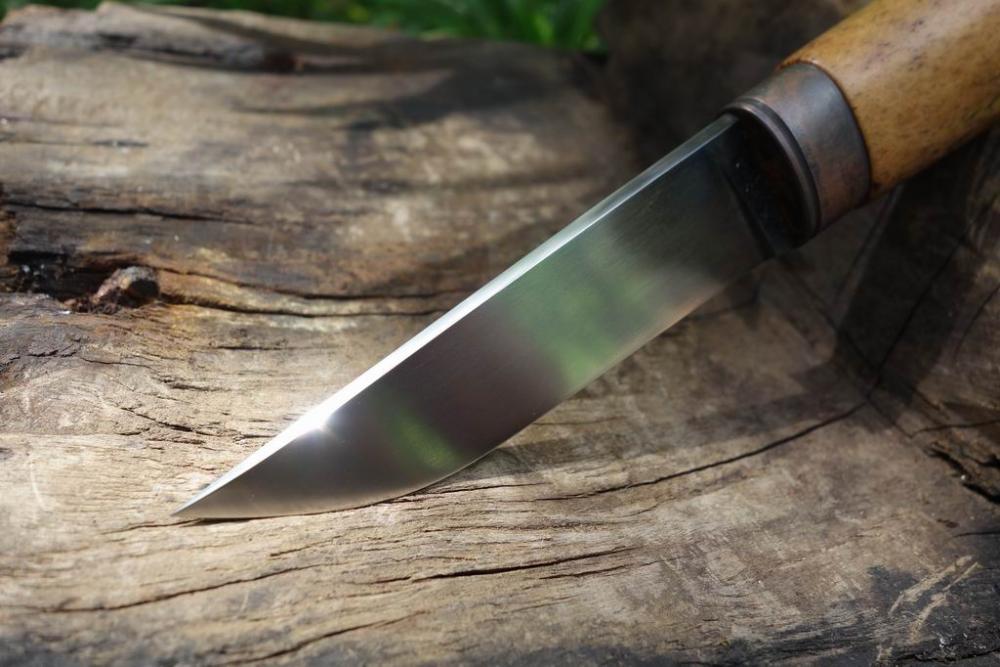
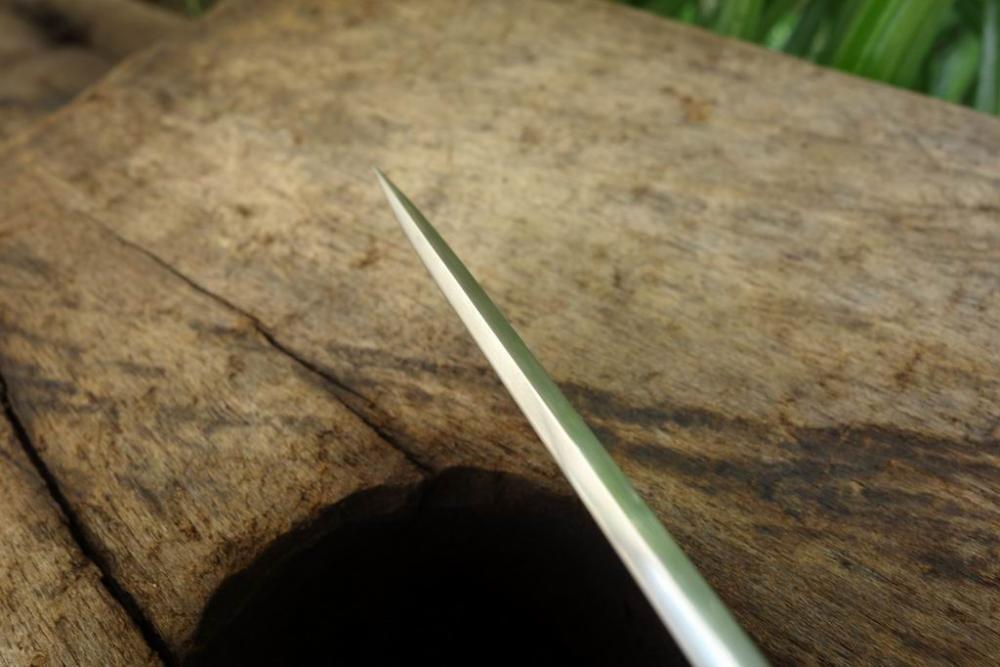
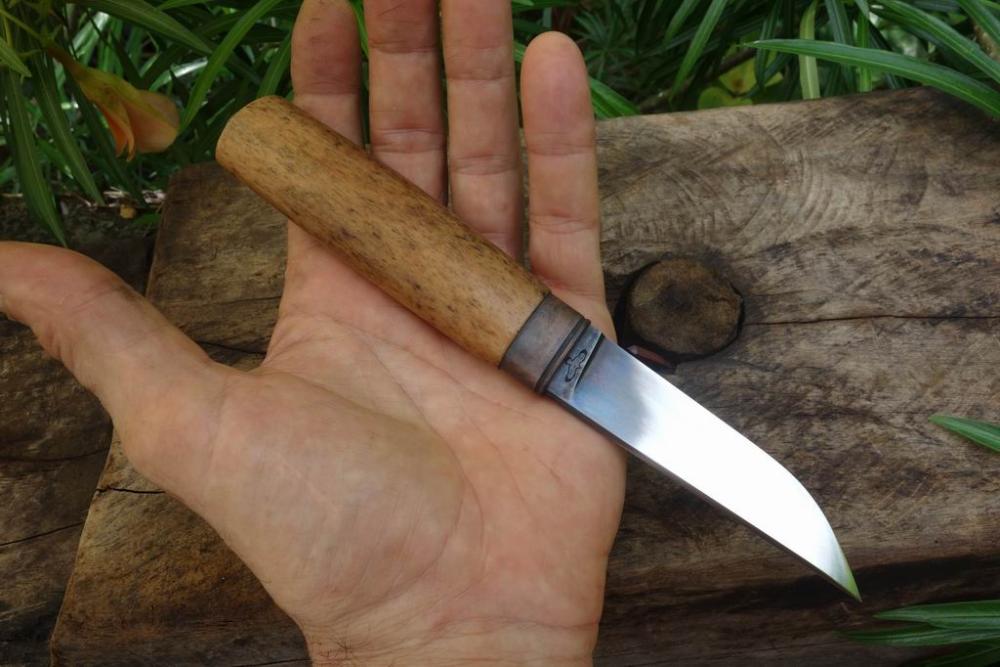
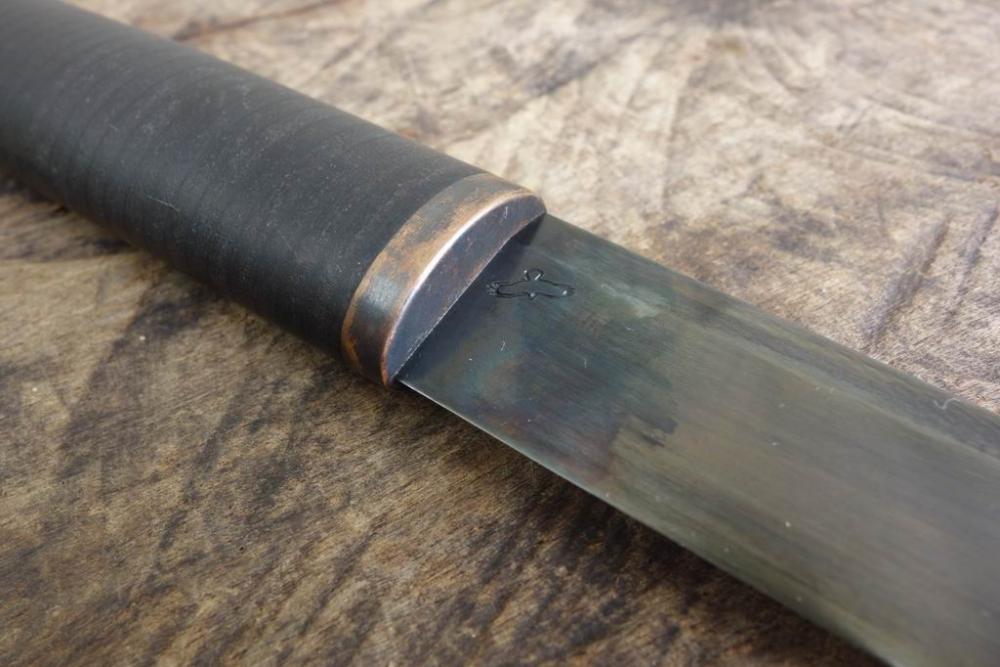
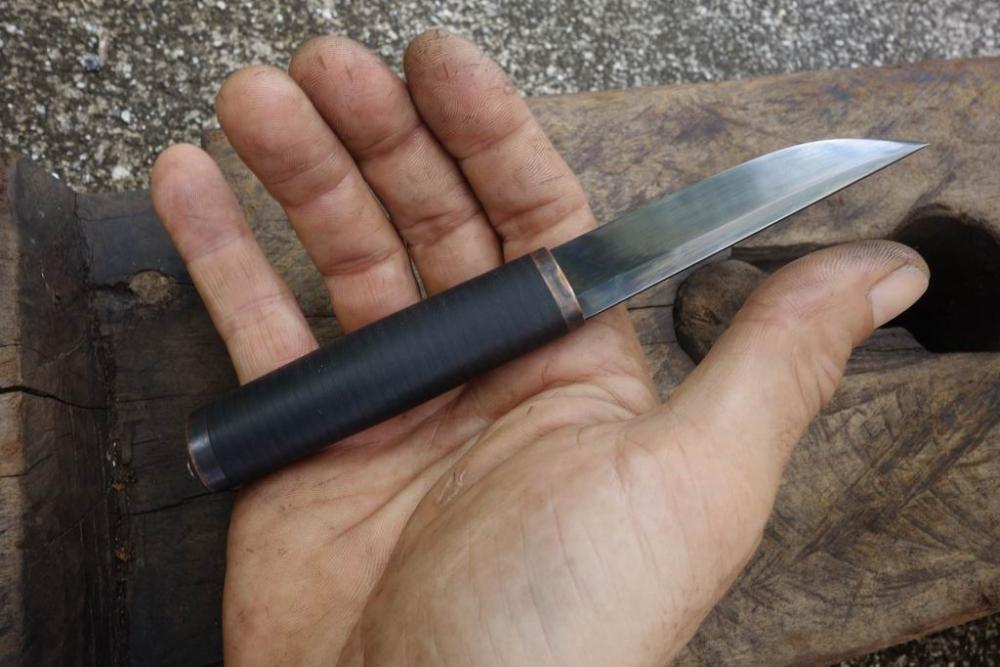
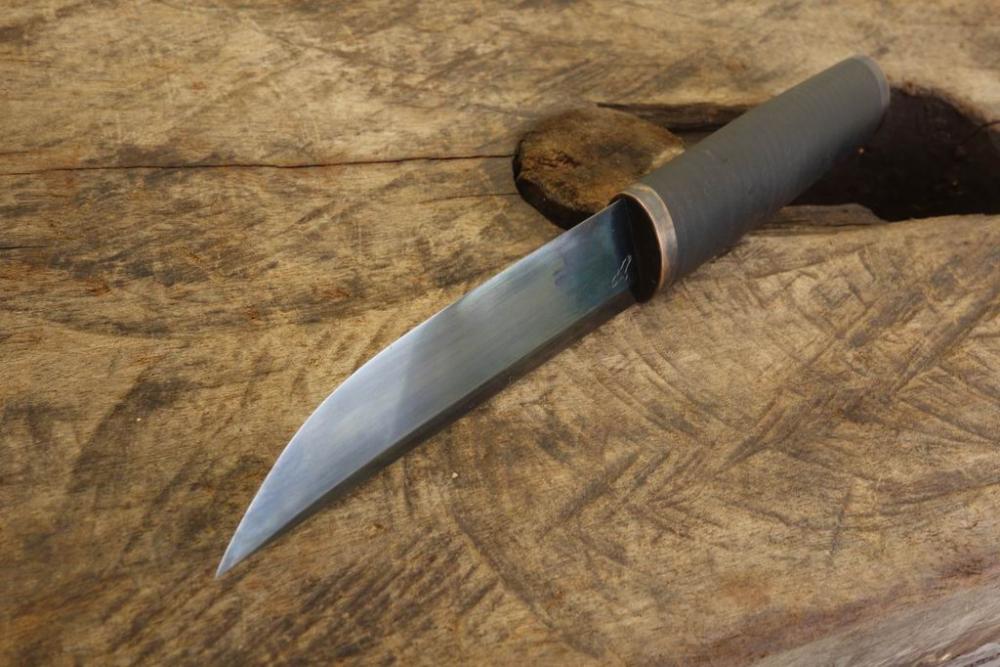
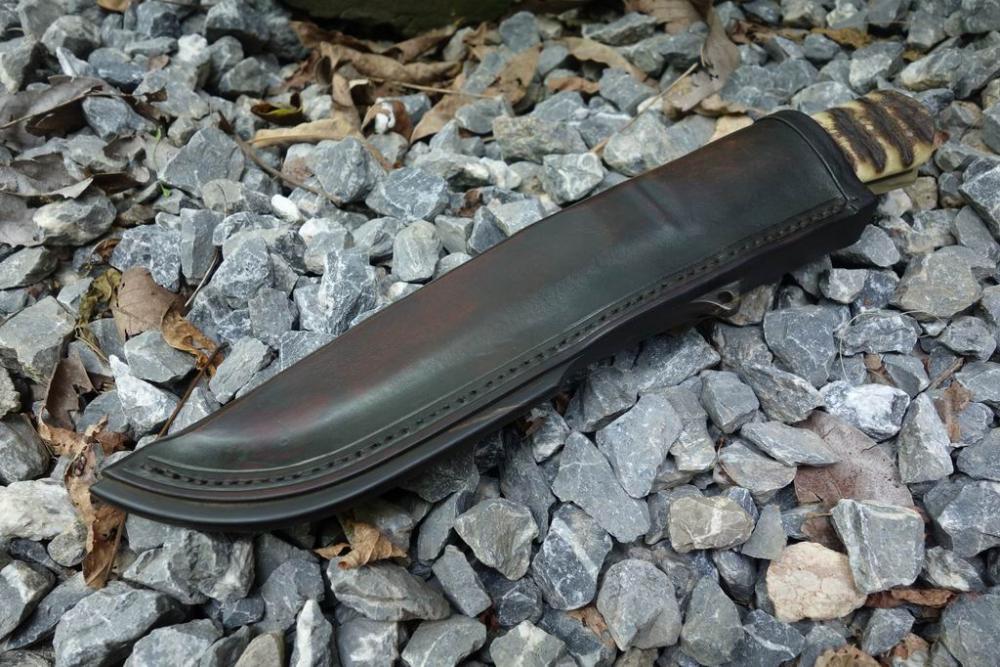
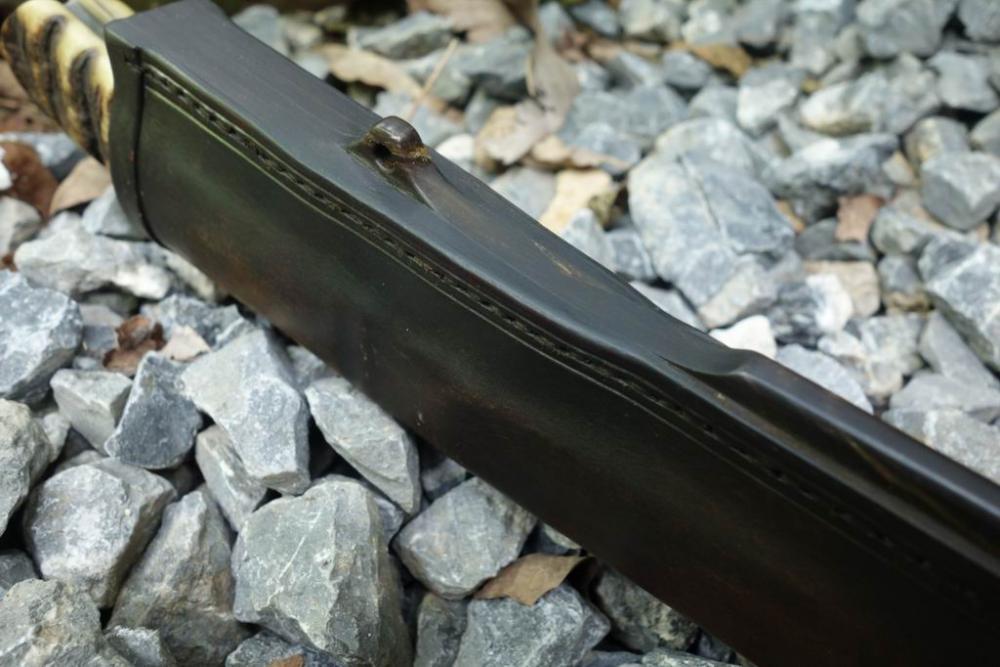
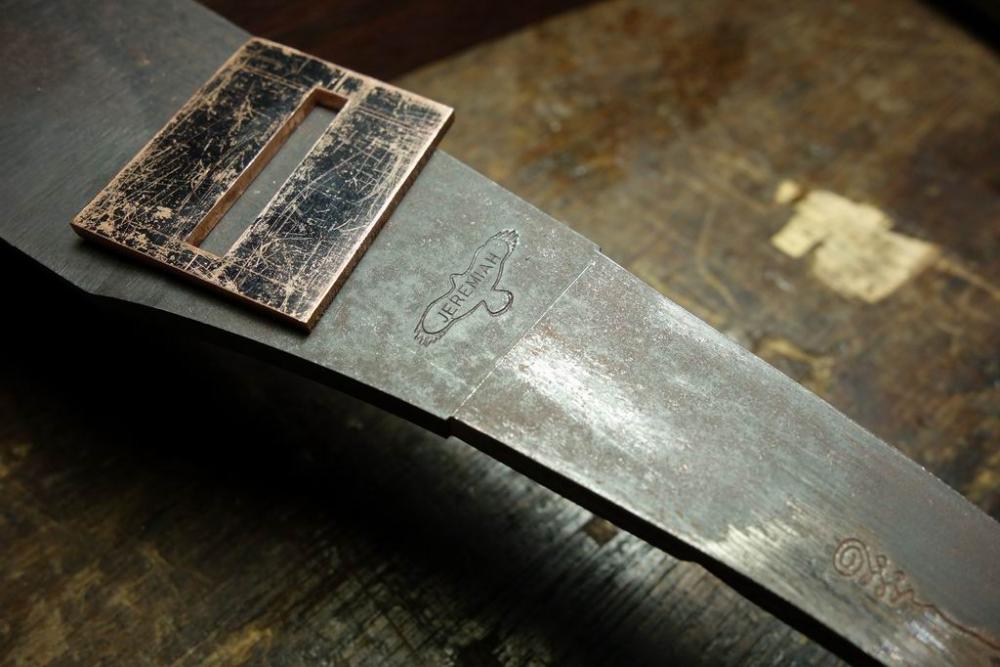
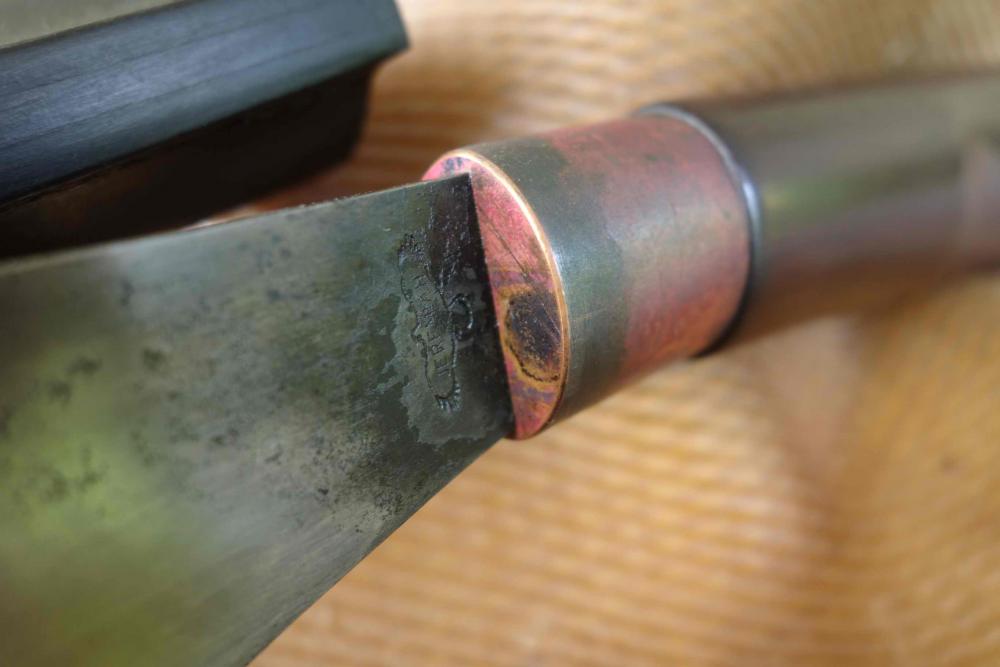
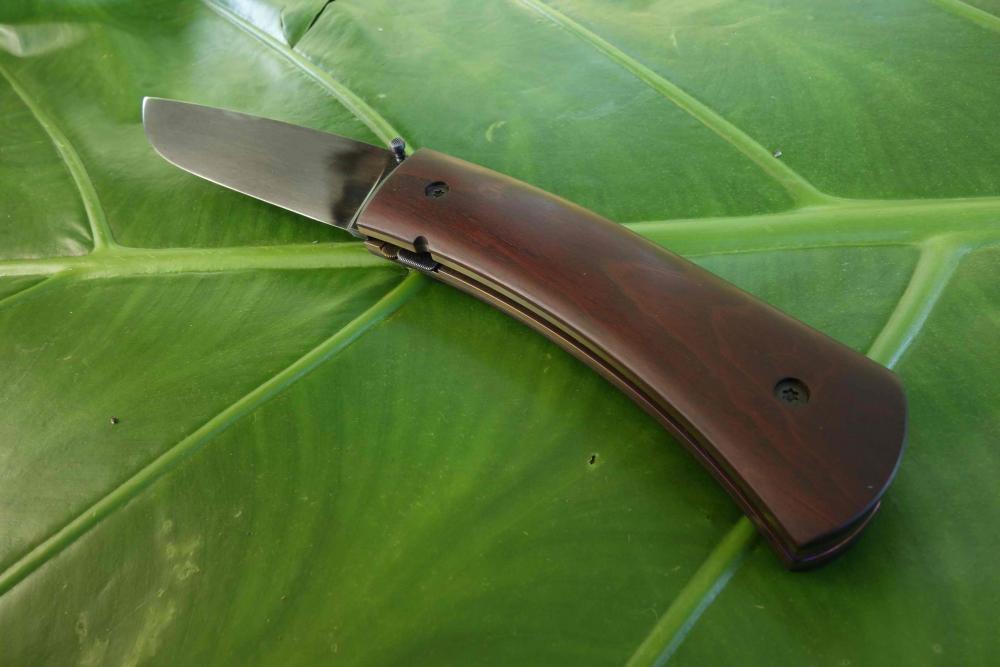
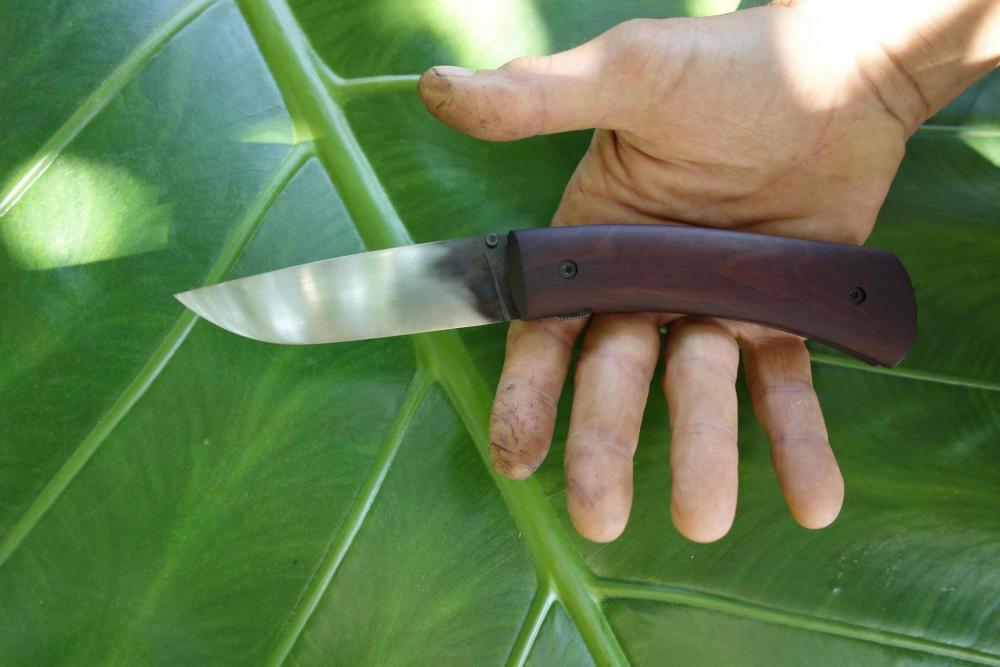
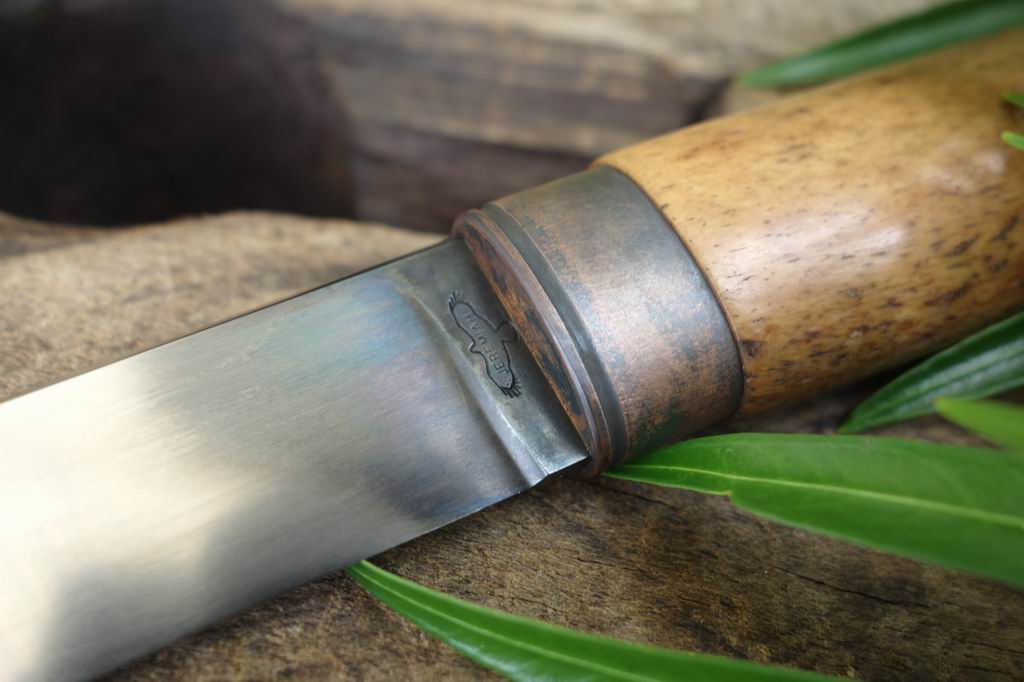
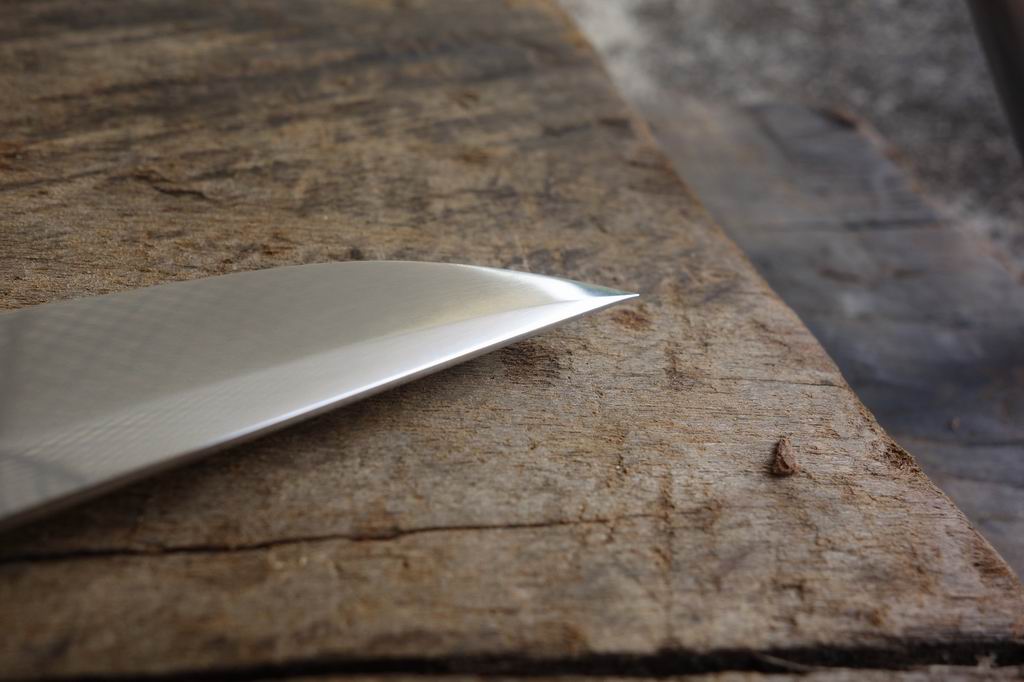
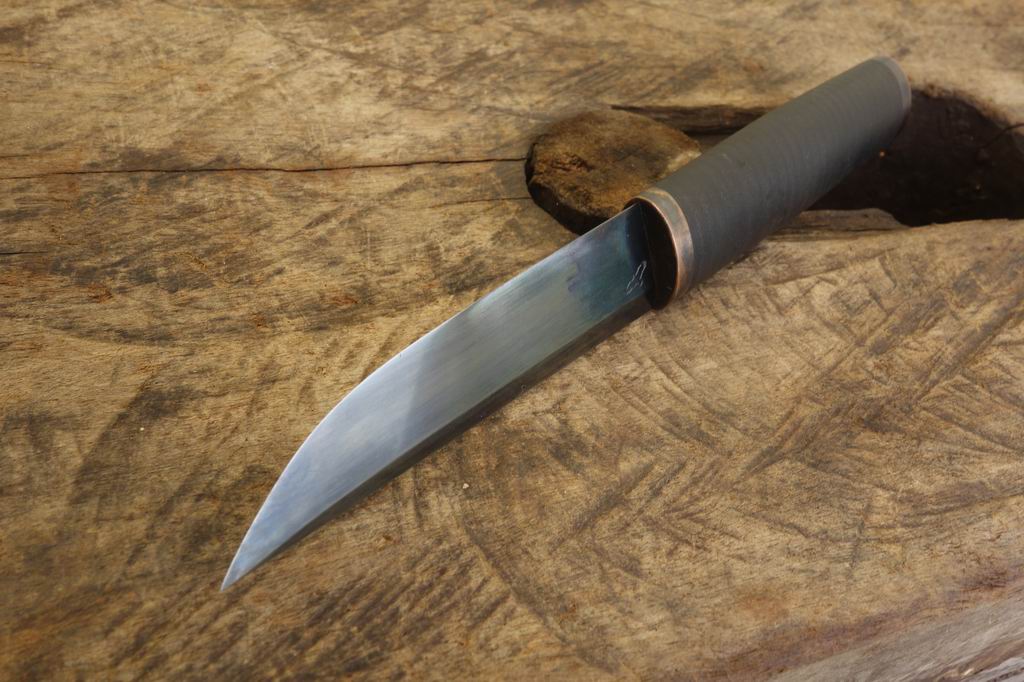
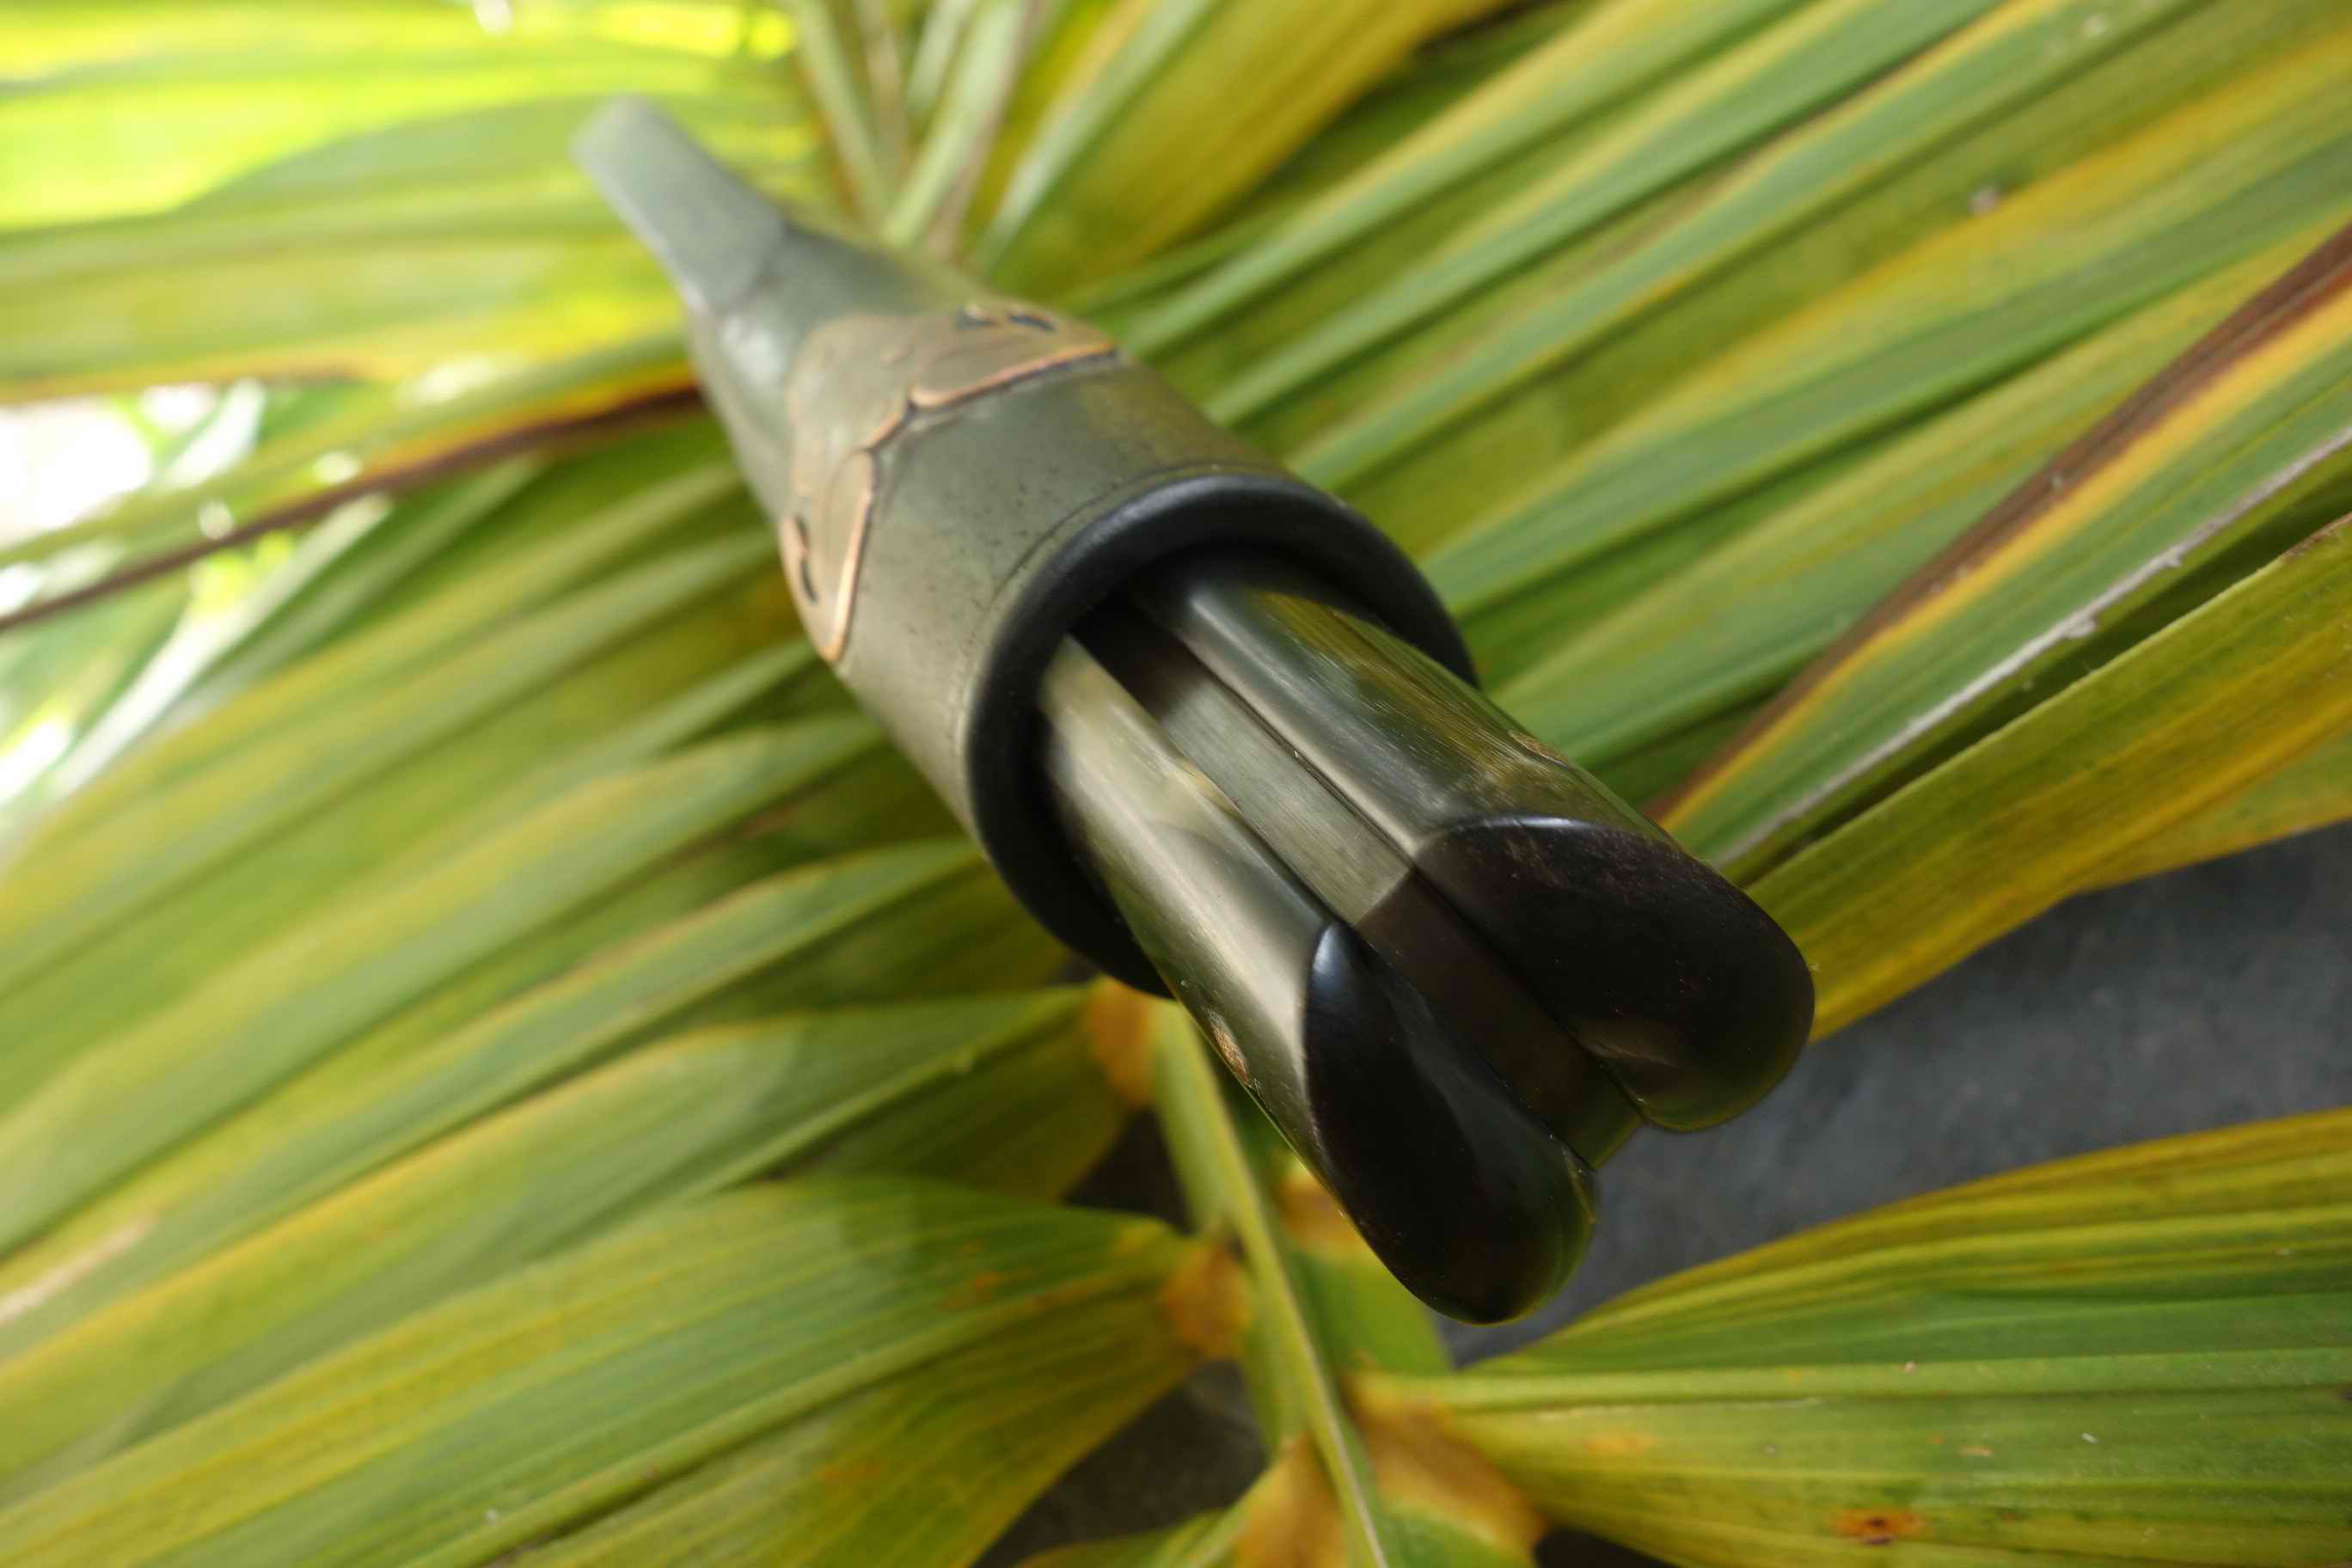
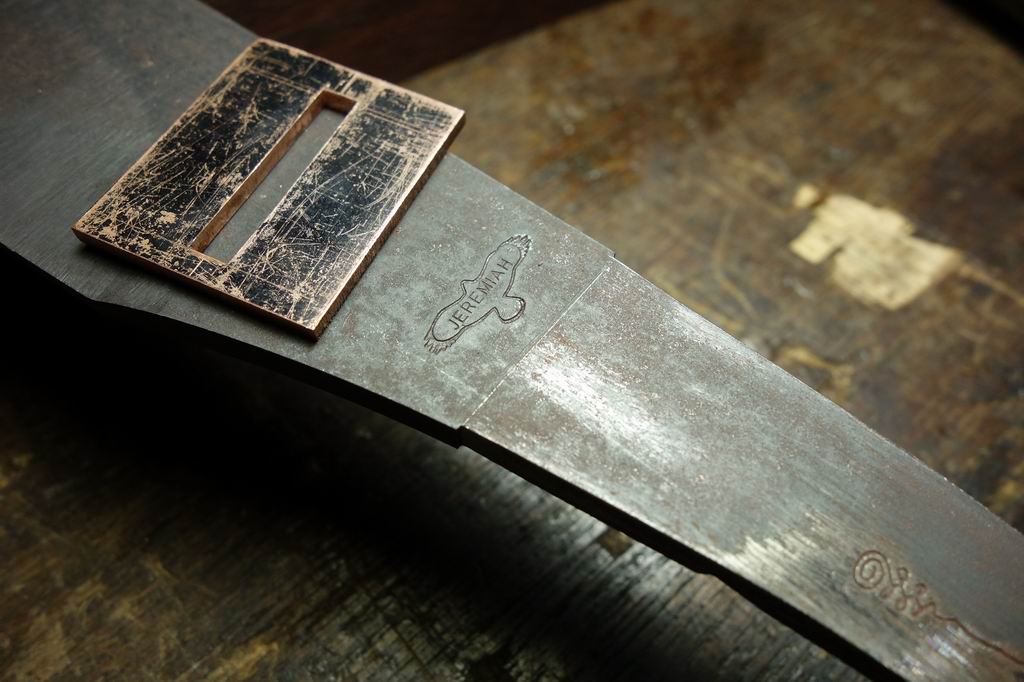
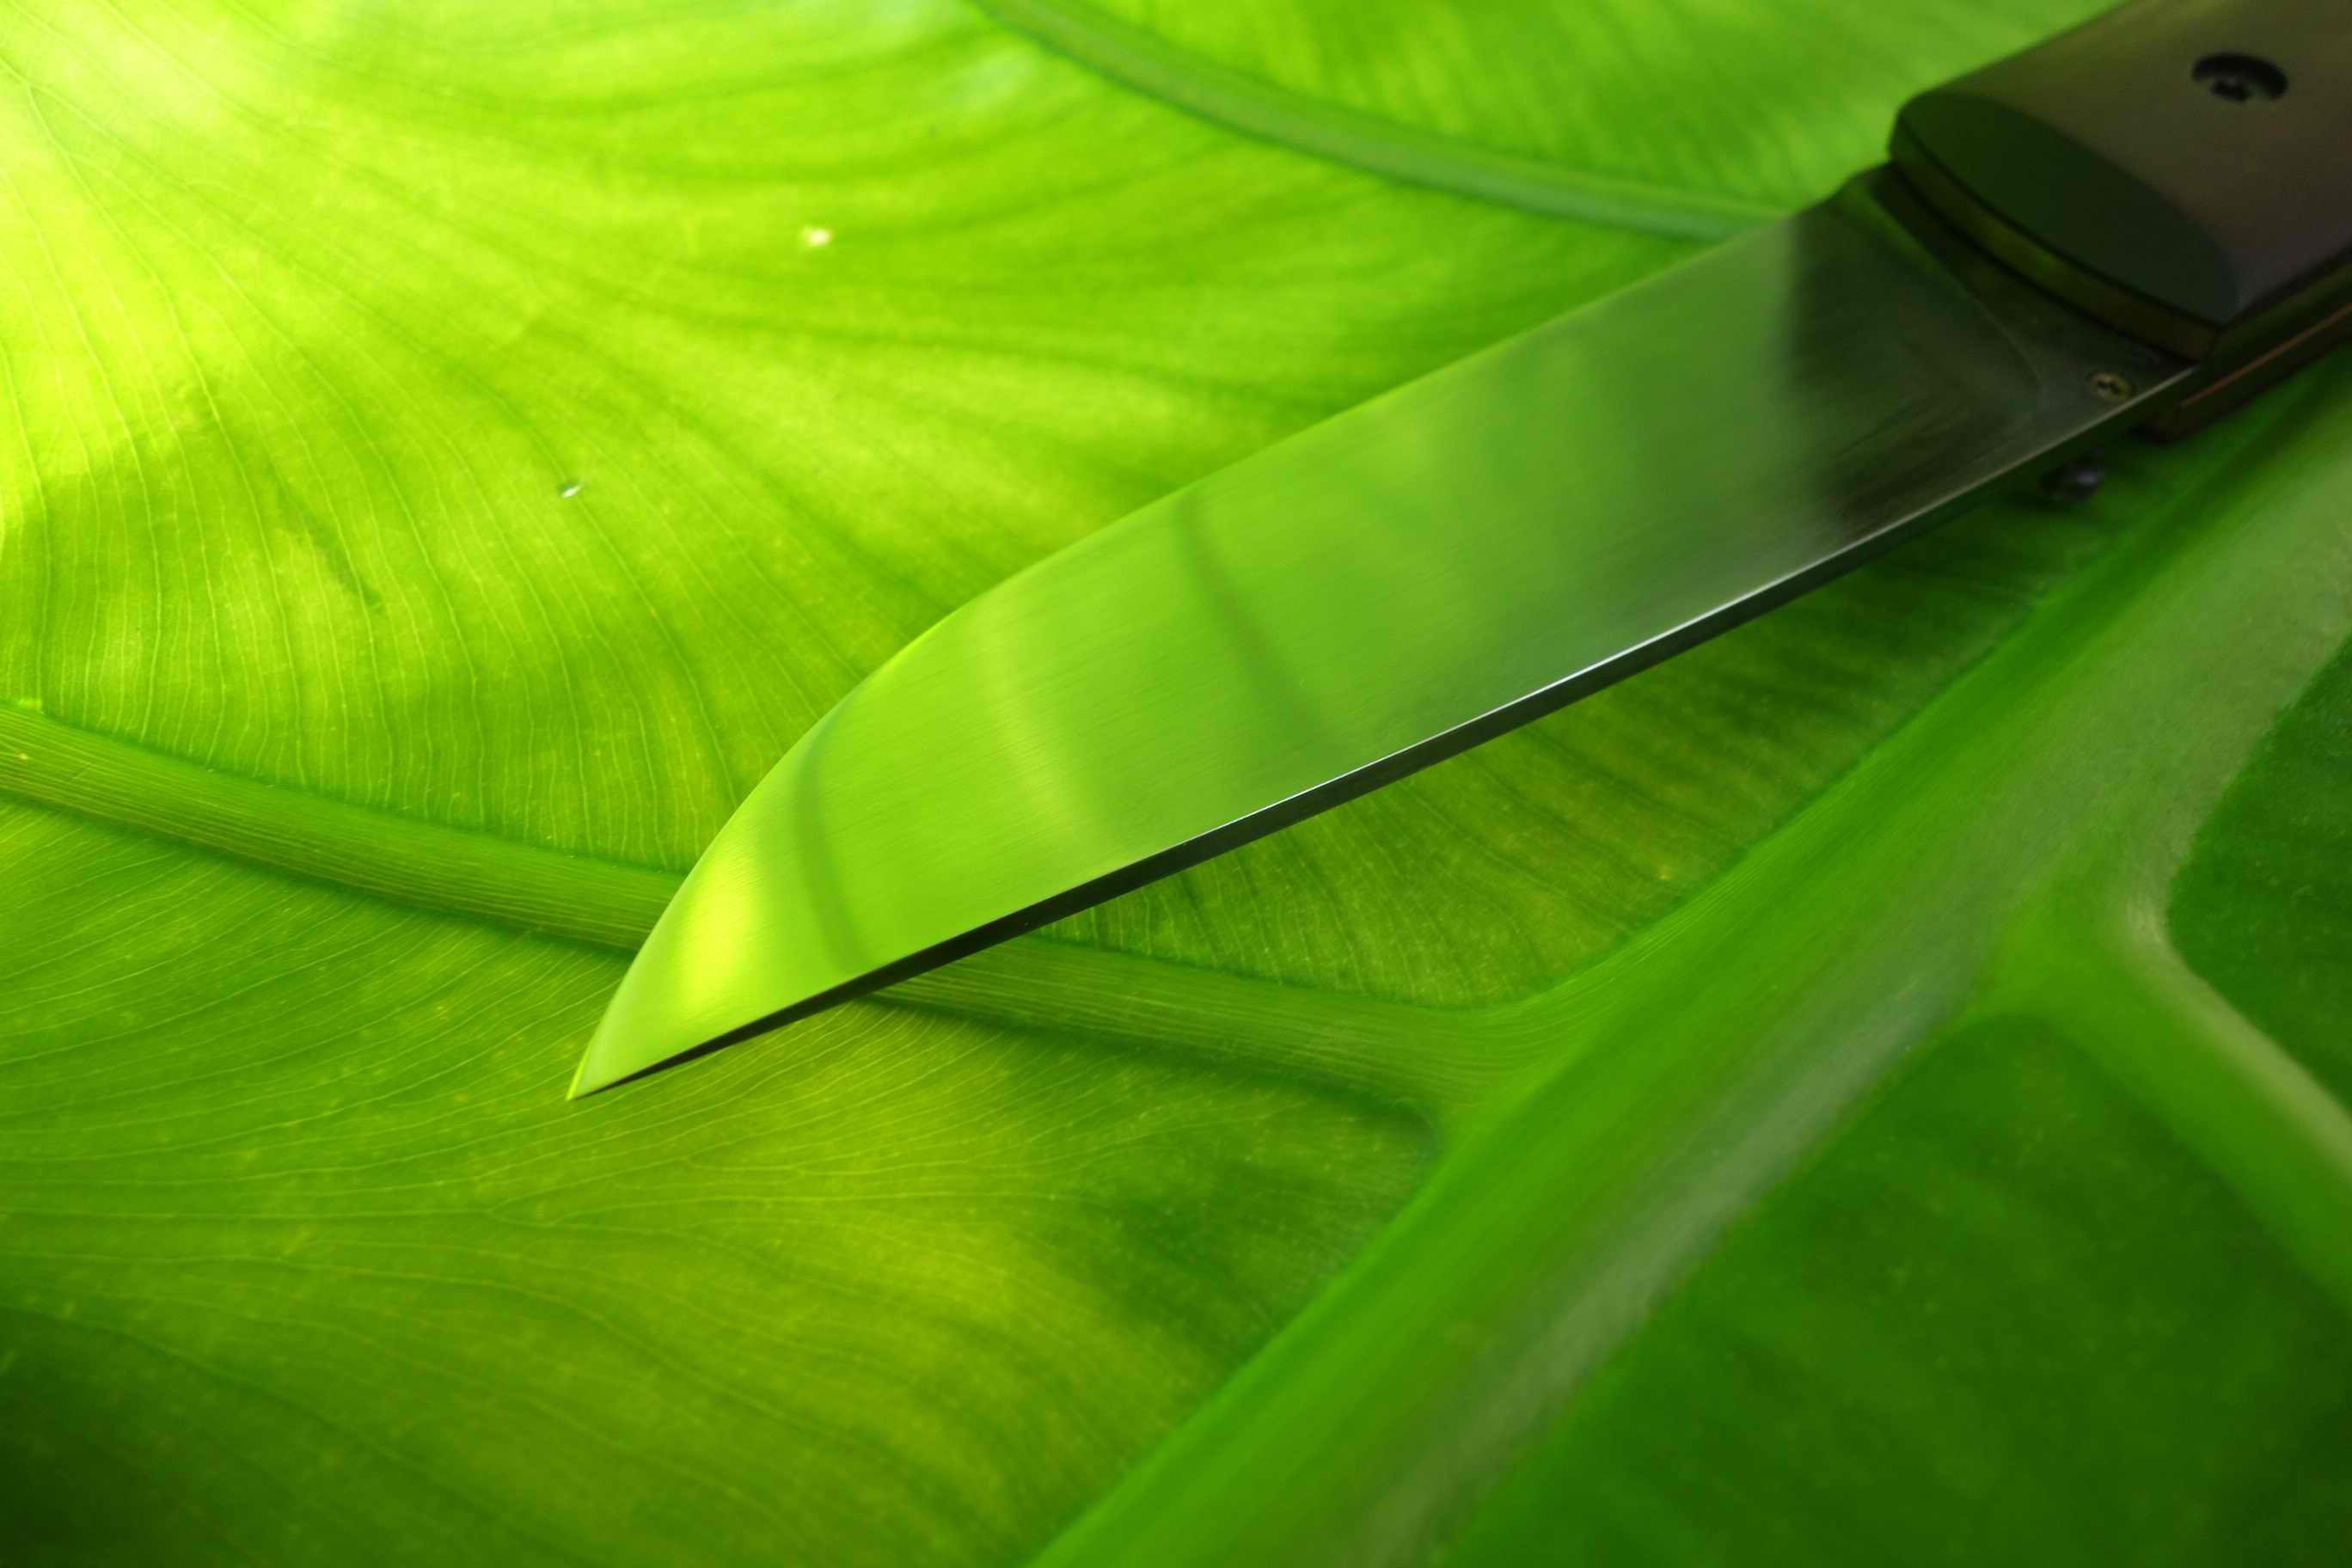
The blade of this Puukoo is made of 1.2419.05 (130WCrV5) tool steel and has 90 mm blade length and a riged back.
The handle is copper and bone with the tang riveted on the butt.
Overall length measures 210 mm.
cheers
-
19 hours ago, Daswulf said:
Excellent work Templehound. If you don't mind my asking, what finish do you use on the leather?
Thanks DASwulf!
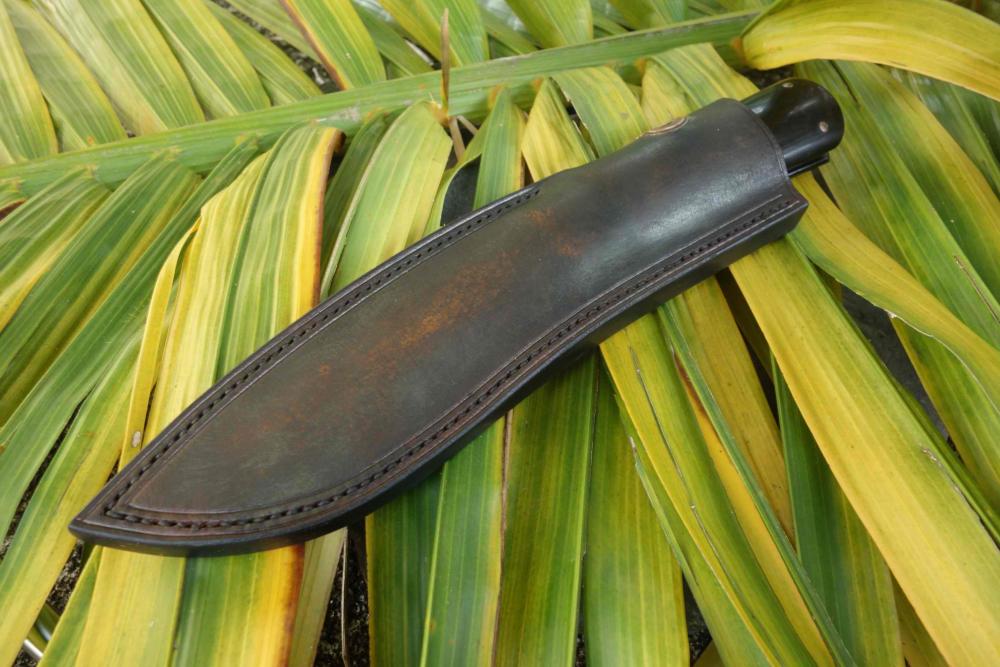
Actually there is no finish on the handle in the common sense.
I ground to grit 240 with no handsanding on the leather, just on the fittings I handsanded with grit 320 a little bit, getting the tiny facettes out.
I had the result that, the finer I handsanded the leather, the less homogeneous it looked.
then impregnated it with several coatings of hot bees wax.
I squeezed and massaged the handle until the knife cooled down, wiped off the wax from the fittings, and it looked good.
Ground color of the leather was dark gray.
17 hours ago, gmbobnick said:The Puukko is legendary and it appears you have honored it well. What a superb tool. It will teach a person to make small, sure cuts and no rash moves, as it sounds like you learned...and as it shows in your work as well. Great job!
Thank You very much gmbobnick!
-
When I was a little boy puukkos were my favourite, most important knives.
My first self cut deep flesh wounds came from Puukko blades.
They were always sharp. I loved them.
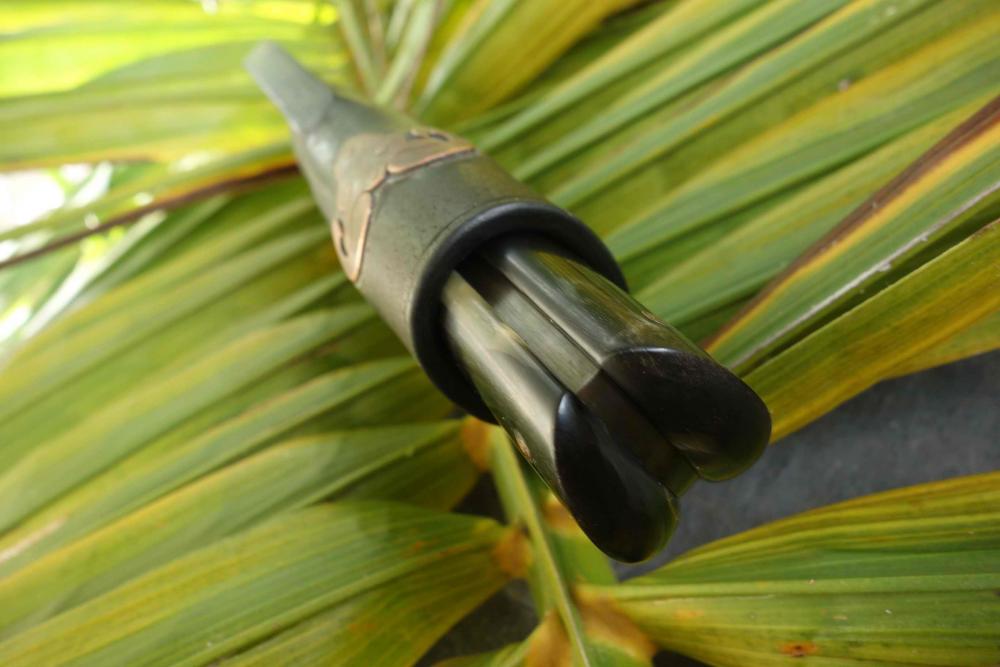
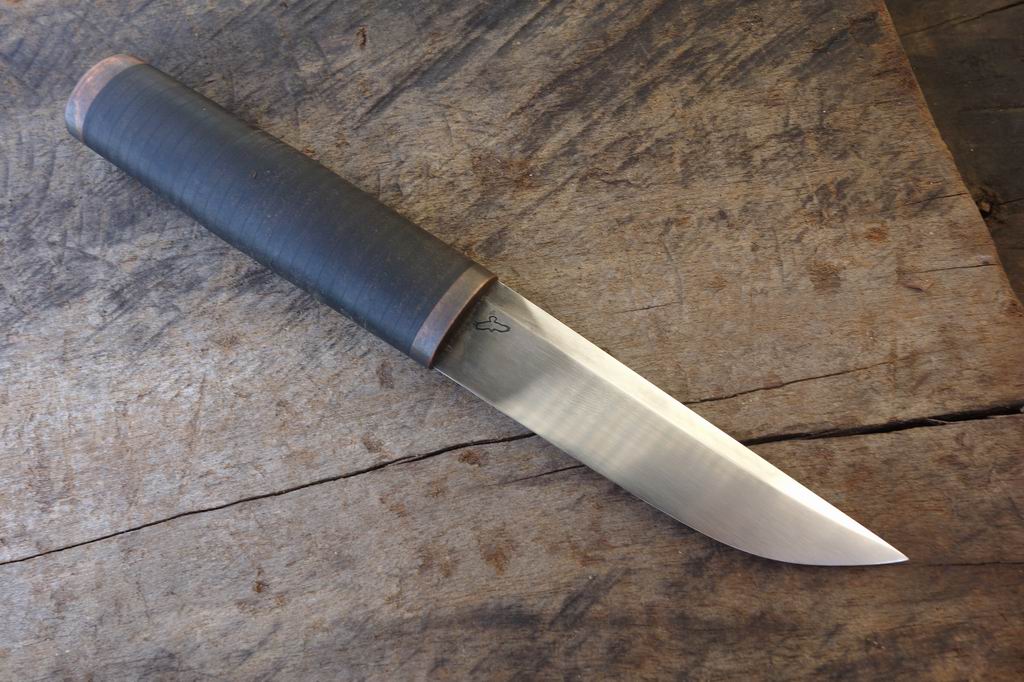
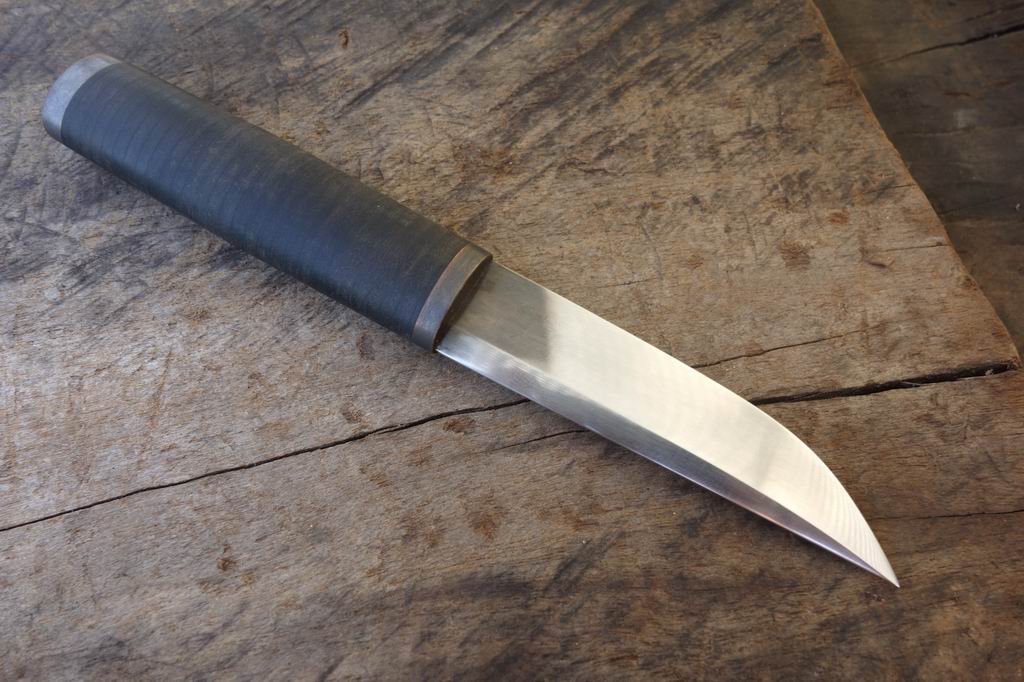
.....This small puukko has a blade with rhombic cross section and is made of 1.2552(80WCrV8) tool steel.
There is copper for the fittings and a stacked leather handle.with the tang riveted on the butt.
overall length measures180 mm.
Cheers


-
Very impressive, epic work ....beautiful !
-
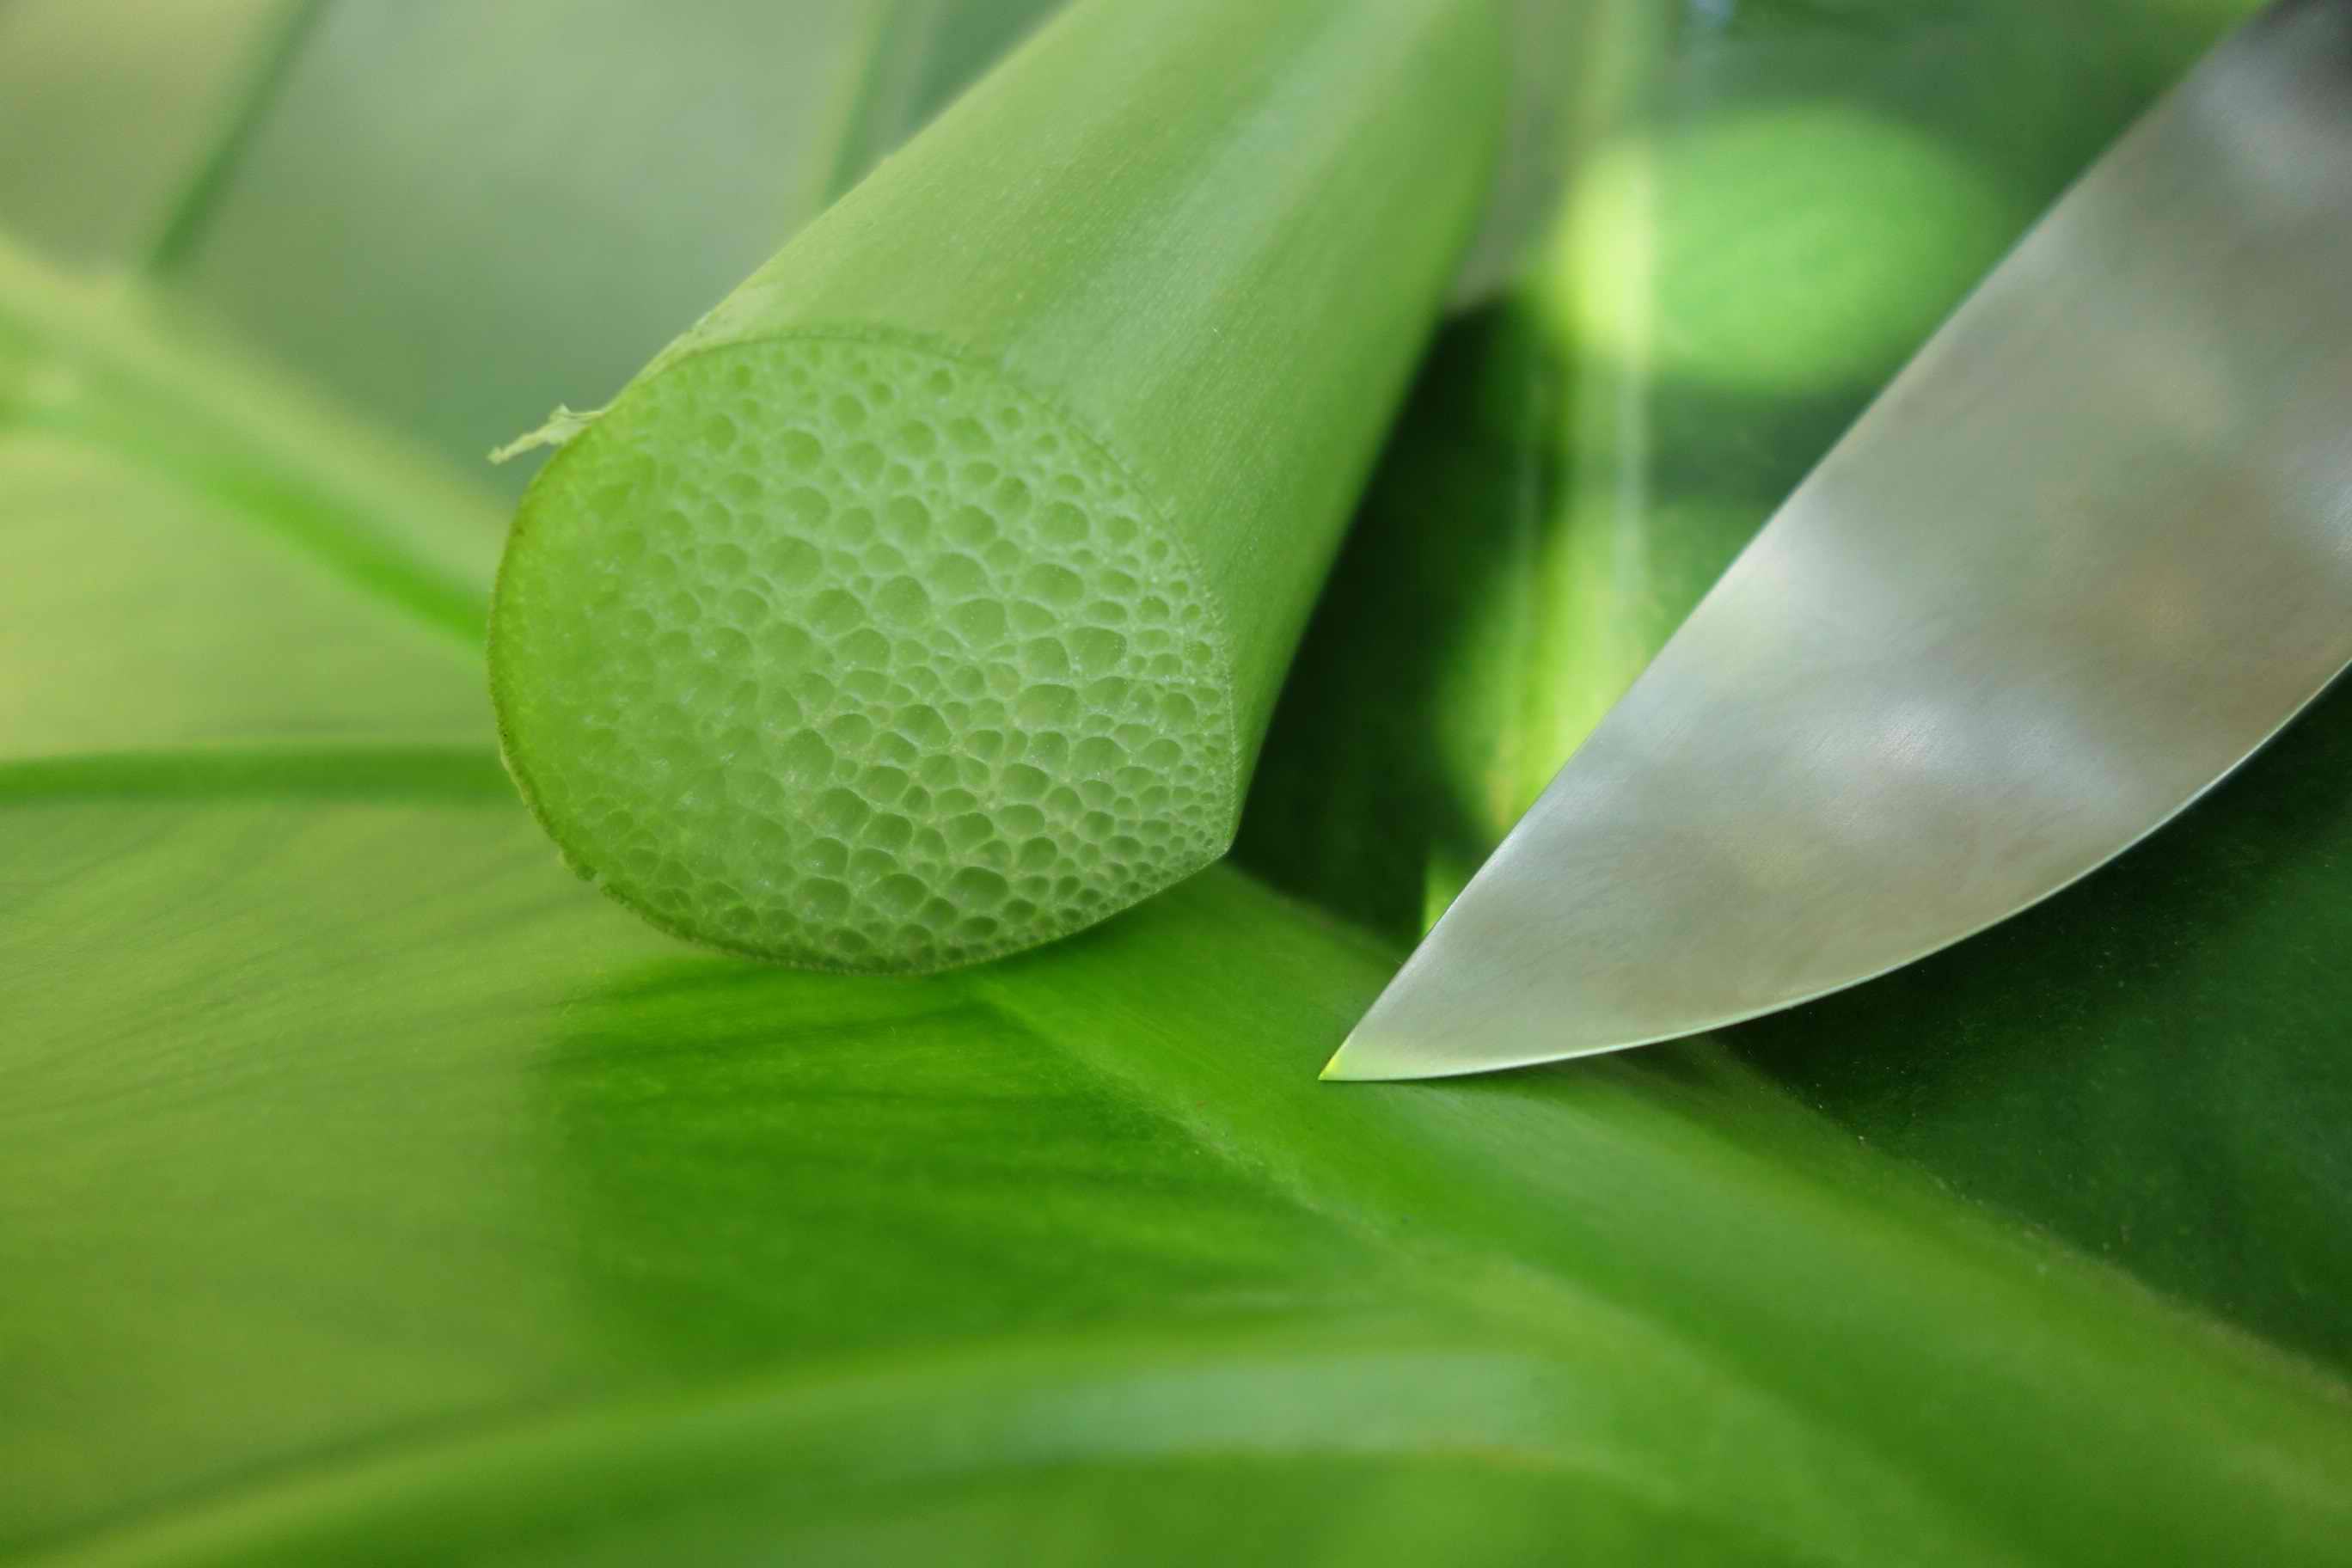
The edge tells mostly a lot.
The blade is a real convex beauty.....mostly Chefs know what cuts real good.
(....telling the color by eye needs years of experience.....maybe a few bucks invested in a thermometer?....those non alloyed cold work tool steels do not have a big tolerance in heat treating....not a critique, just a recommendation to be on the safe side according to heat treatment)
For the first complete knife You did an awesome job!
Looking forward to Your further creations.
Cheers
-
1 minute ago, gote said:
I think you should abstain from making public statements about other persons qualifications. It is not only common courtesy. It is also so humiliating to find that one has misunderstood the language.
Yes, You are right.
It was not my intension to do this.
Please accept my apologies Mr. gote.
-
4 minutes ago, Judson Yaggy said:
The longitudinal striations, clearly visible in the photo, are often but not always indicative of wrought iron. But it could just be abrasion or funny corrosion from the concrete. Those striations are what most of the other posters are referring to when they say "grain". When talking about the antique material of wrought iron this is correct terminology, and it is visible to the naked eye. "Grain" in modern steels is generally not.
I have taken (and passed!) college level material science classes AND forged a lot of wrought iron over the last 25 years, and that looks like it could be wrought to me.
.... I respect everyone passed anything.

It seems it is a linguistic difference between talking the "saying" and correct metallurgical terminology........the clearly longitudinal stirations are not the grain.....If I rely on German specific, correct terminology it is incorrect....and what is more worth remembering the "saying" or the science?
Right, in "modern" steels You cant see the grain with bare eyes, as You confirmed......and how old has material or steel to be to be called antique?
take the tool steel 1.2442 (115W8) this alloy is at least 120 years old , it is still in use today... if we have a piece of it from that time, lets say it is antique....if we have a recent made piece of it lets say it is modern? same alloy, same steel, different times....grain is grain....dosent matter what age and time.
steel is steel as wrought iron is wrought iron.
Only aspect is, wrought iron is today not made anymore(as far as I know) but it is not about how steel is made, it ius about grain.
But it is of course possible to make wrought iron today, this should look like the antique one. so the recent(modern)made wrought iron will show no grain structure to the bare eye but longitudinal stirations which are than refering to the saying, are visible grain structure.
this makes no sense to me, Sir.
5 minutes ago, SmoothBore said:Spoken like a true "textbook warrior", ... making the assumption that EVERY reference, ... spoken in every language, ... can only be interpreted in THEIR OWN vernacular.
While I on the other hand, had no problem differentiating the use of the word "grain" in reference to a texture that resembles weathered wood, ... from one about molecular strings and cross linking, ... or one about corn and wheat.
I think we are best served, when we view these forums as a general exchange of knowledge, ... rather than as a competition.
For, in truth, ... none of us has ALL the answers.
Thanks for Your opinion, I appreciate honesty.
I thought we are talking about steel or iron, a conversation that needs some accuracy.....as You wish, lets talk about corn, wood and wheat and maybe we learn something about steel today.
sincerly Yours
Textbook warrior
-
4 hours ago, gote said:
When wrought iron rusts, the different layers rust differently fast so the layered structure may show up on the surface. It can be quite visible even without x-ray sight. They are also far from microscopic. I have the same impression as Wroughton.
Well,.... but what has this to do with the grain?
That is a chemical reaction and interpreted view on the matrix what You point out.
If You have steel/iron and it has a good surface,maybe with bare eyes You are able to see the matrix and groups and bunches(!) of carbides , but You cant see the grain.
Size and form of the grain is something about micro(!) structure of steel/iron which needs metallographic amount of depiction and view.
With all due respect, but I "guess" You must have absolutely no basic knowledge about steel/iron if You say looking at the grain on wrought iron is far from microscopic...... X-rays?(LOL)
There are countless sources in the internet where You can educate yourself.Having an impression of something is not the same a having knowledge of something,
If you like, you can take a look here and go to the chapter "Measuring grain size" it is explained there pretty good
http://www.metallography.com/dist.htm
.....No offence, Sir, just my honest thoughts and opinion.....
-
1 hour ago, Wroughton said:
It's wrought. I believe I can see the grain.
Really?...You must have some X-Men like microscopic sight.
-
If we make a knife it should have the goal to cut, feeling comfortable to the hand, made stable and solid and have some beauty in the eye of the beholder.
Your knife has no real scandi grind because it is hollow ground.Hollow ground knives are for short cuts, like for surgery or shaving.
In Scandinavia wood whittling is a part of the culture and so are knives with a low bevel flat grind.Those grinds are not meant to cut deep into the object, which is not possible with woods.
If You see hollow grinds on such knives, then they are auto-ground mass ware, or the result of misunderstood cutting geometry.
Second critique I have on the size/wideness of the bevel...it is too narrow, You should dare grinding higher, giving it more ability to cut.
but If You think: " it cuts pretty good!".... than its fine

Third is the unequal positions of the tube pins holding the scales, getting an uniform distance is no big deal.
Well, the "prototype thing"....definitely nothing that fits a "first try" especially on design.
Finishing a knife(thats what You did) is always something You can be proud of and that deserves all respect.
getting better is something that keeps Your pride alive and growing.
You asked for thoughts and I gave them.
stay keen and all the best
Cheers
-
On 1.5.2017 at 7:39 AM, -Quint- said:
I don't know if it was intentional to keep the theme going or not, but I love that the butt end of the knife would leave a rams hoof print in anything you slammed it into, like a piece of clay, or a forehead

Amazing, incredible, inspiring work as always. Thanks for sharing.
Thanks a lot, Quint
-
Nice work!
-
On 4/29/2017 at 8:01 PM, lanternnate said:
Love the ram's head, very cool.
Thanks You very much, lanternnate!
-
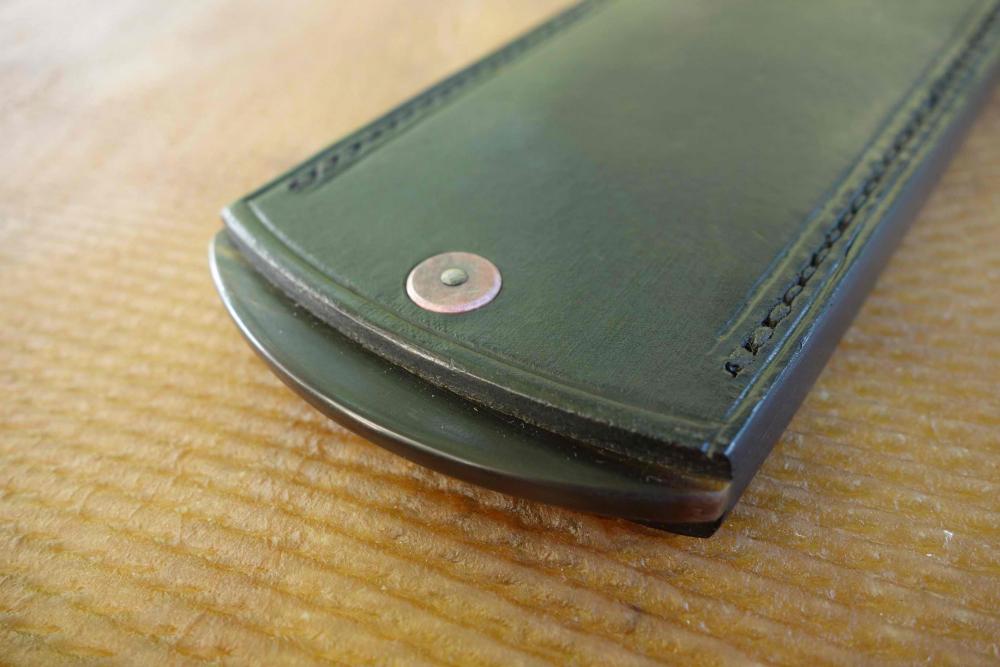
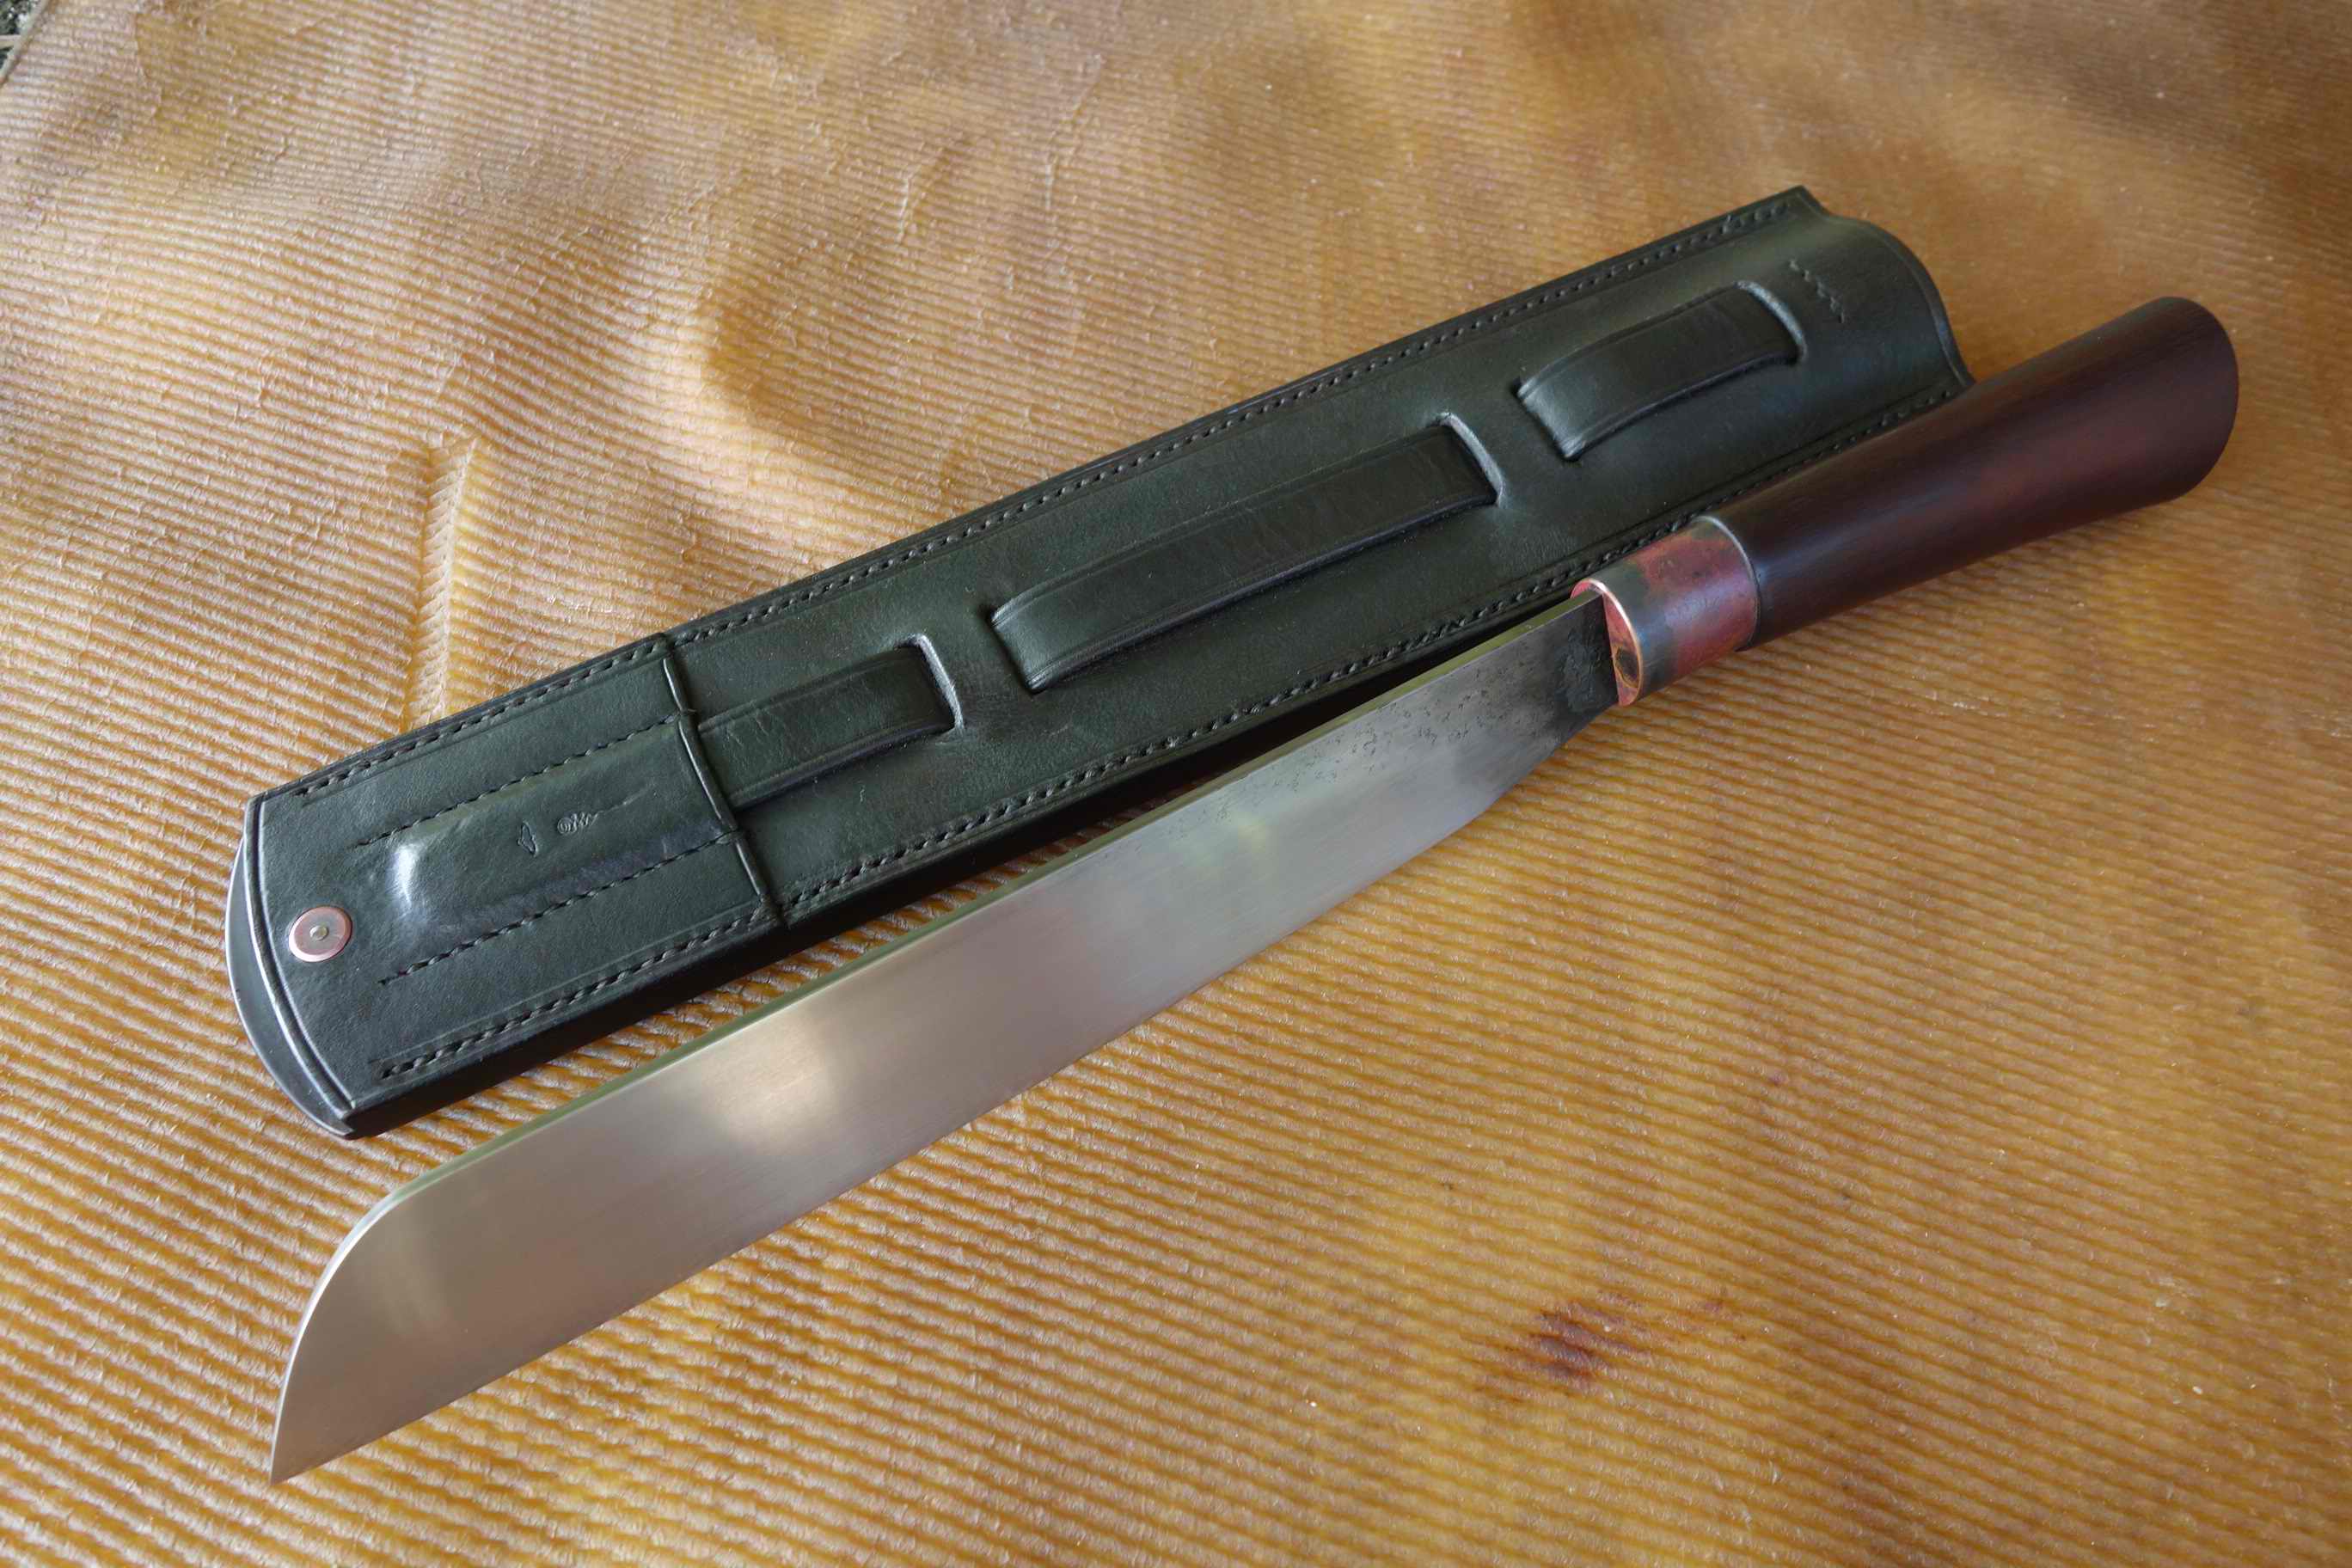
Once in a while there are sheaths with more effort than usual.Two of them I think they are worth posting.
The first one for the knife I posted already here
https://www.iforgeiron.com/topic/48962-ramco-07/
It is made from water buffalo hide with some embellishment, Something we Germans call a "Stocknagel"https://www.google.co.th/search?q=Stocknagel+images&tbm=isch&tbo=u&source=univ&sa=X&ved=0ahUKEwi_0vK60MnTAhVLLY8KHZhqBm8QsAQIIw&biw=1093&bih=510
 ......
It is made from copper and a small silver nugget that I once found.
It is riveted from the inside with small bronce washers and then lined with caddle leather.
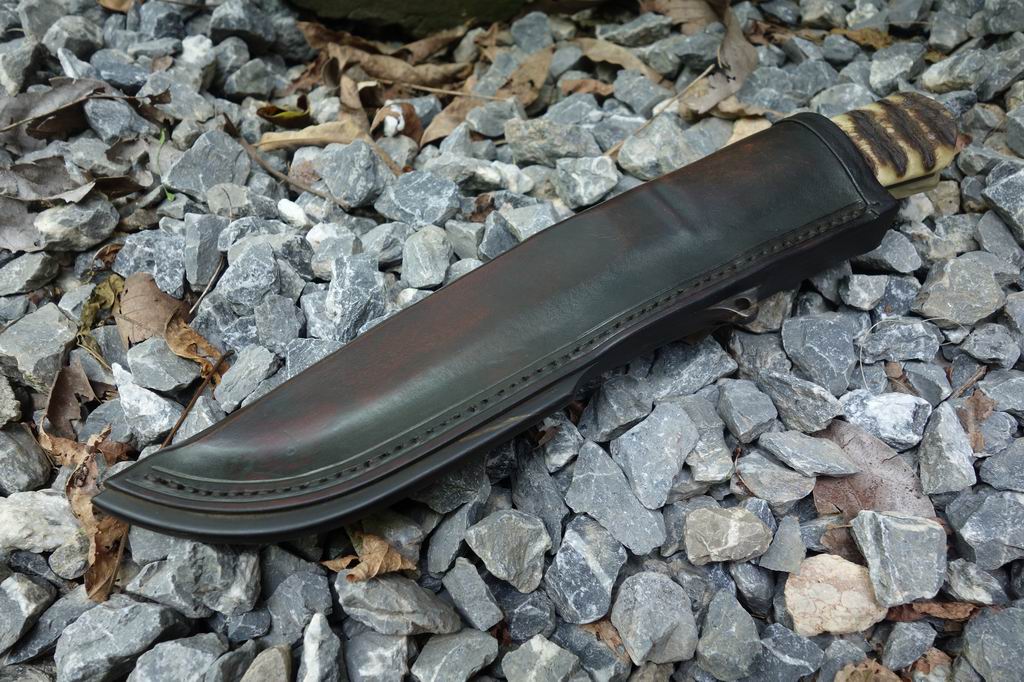
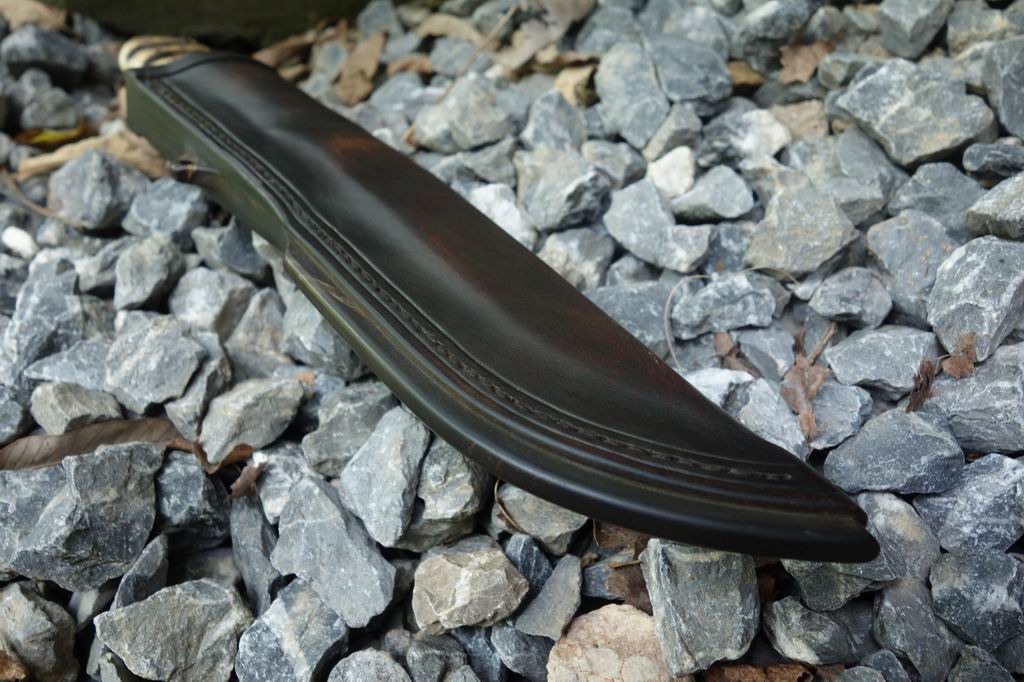
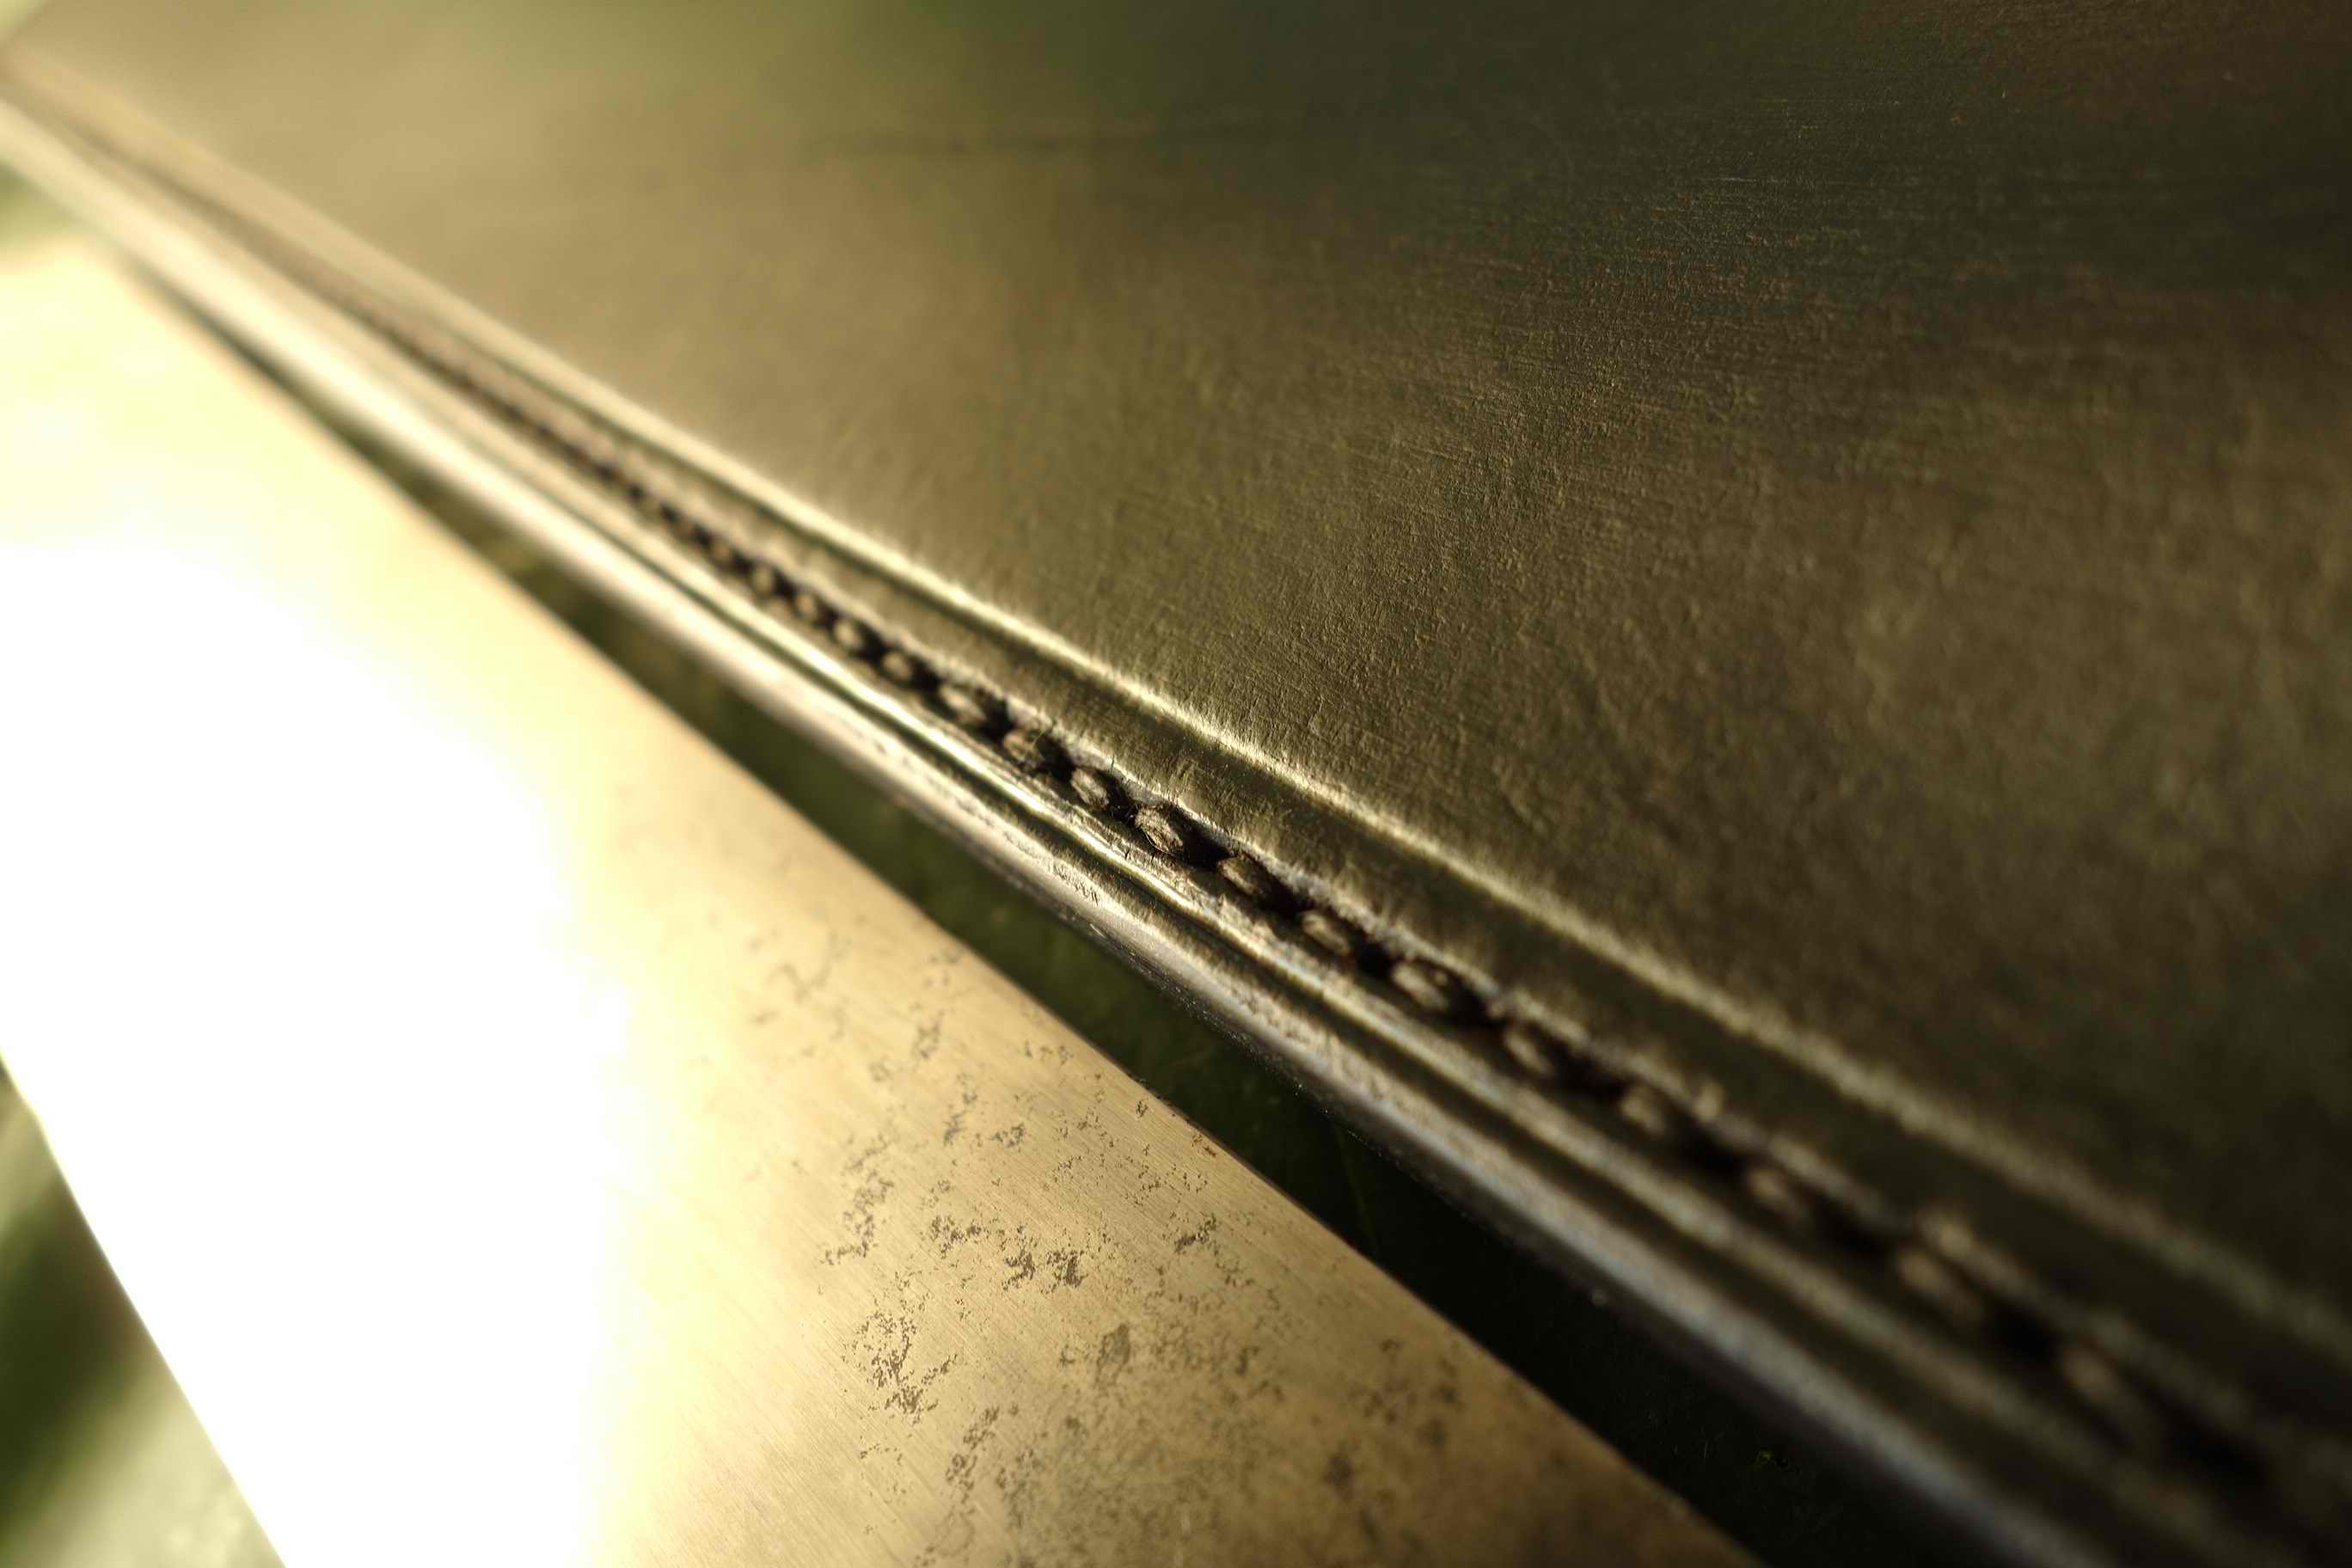
And here is the second knife, which I posted herehttps://www.iforgeiron.com/topic/47254-the-beauty-of-filth/#comment-492231
Made from semi-tanned caddle leather with a raw hide core and another "Horn Mohawk" to enhance stiffness and to protect the edge of the sheath.
Cheers


-
20 hours ago, Gergely said:
Beautiful work, Templehound! Your blades always represent a very high level of aesthetics and somehow "push my buttons".
") This time I can feel the physical ache for making a parang of my own. (Not sure that's gonna happen
This time I can feel the physical ache for making a parang of my own. (Not sure that's gonna happen ") )
)
And that sheath is awesome, too!
Bests:
Gergely
Köszönöm, Gergely!
-
Thanks a lot, fellows!


-
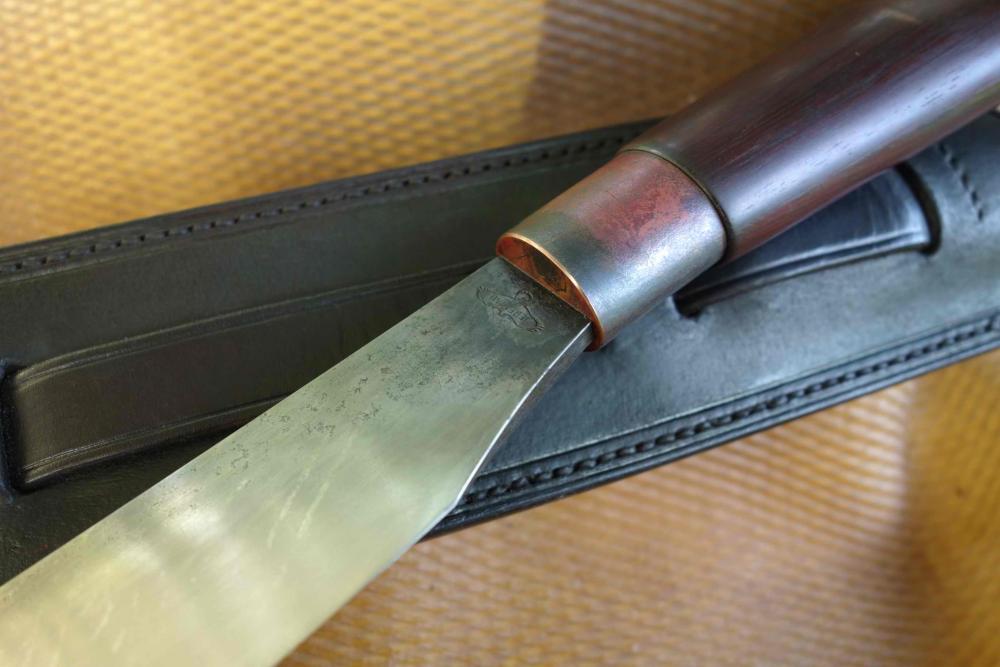
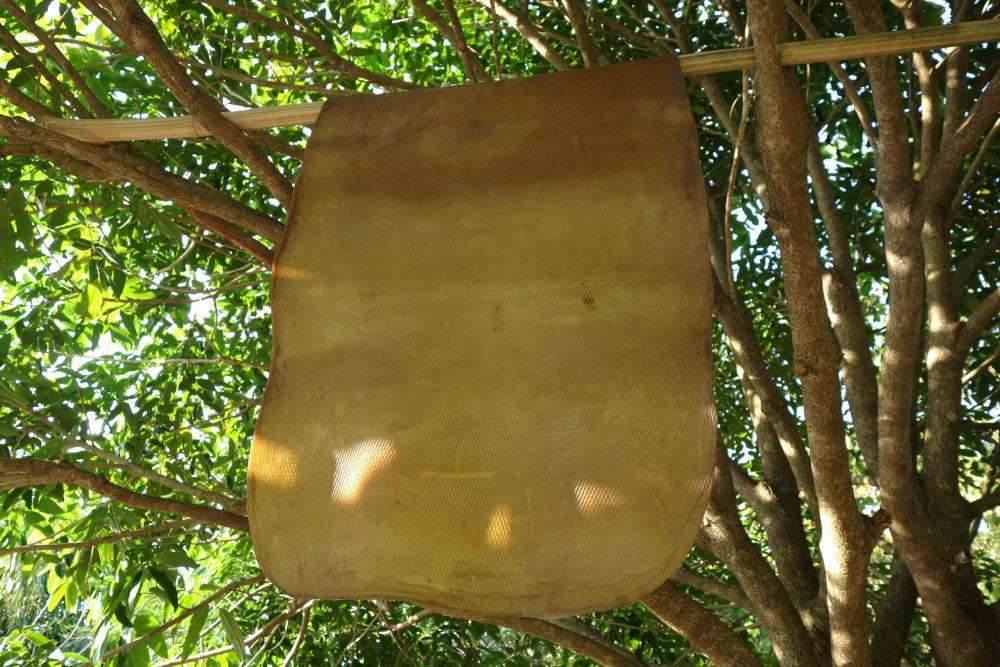
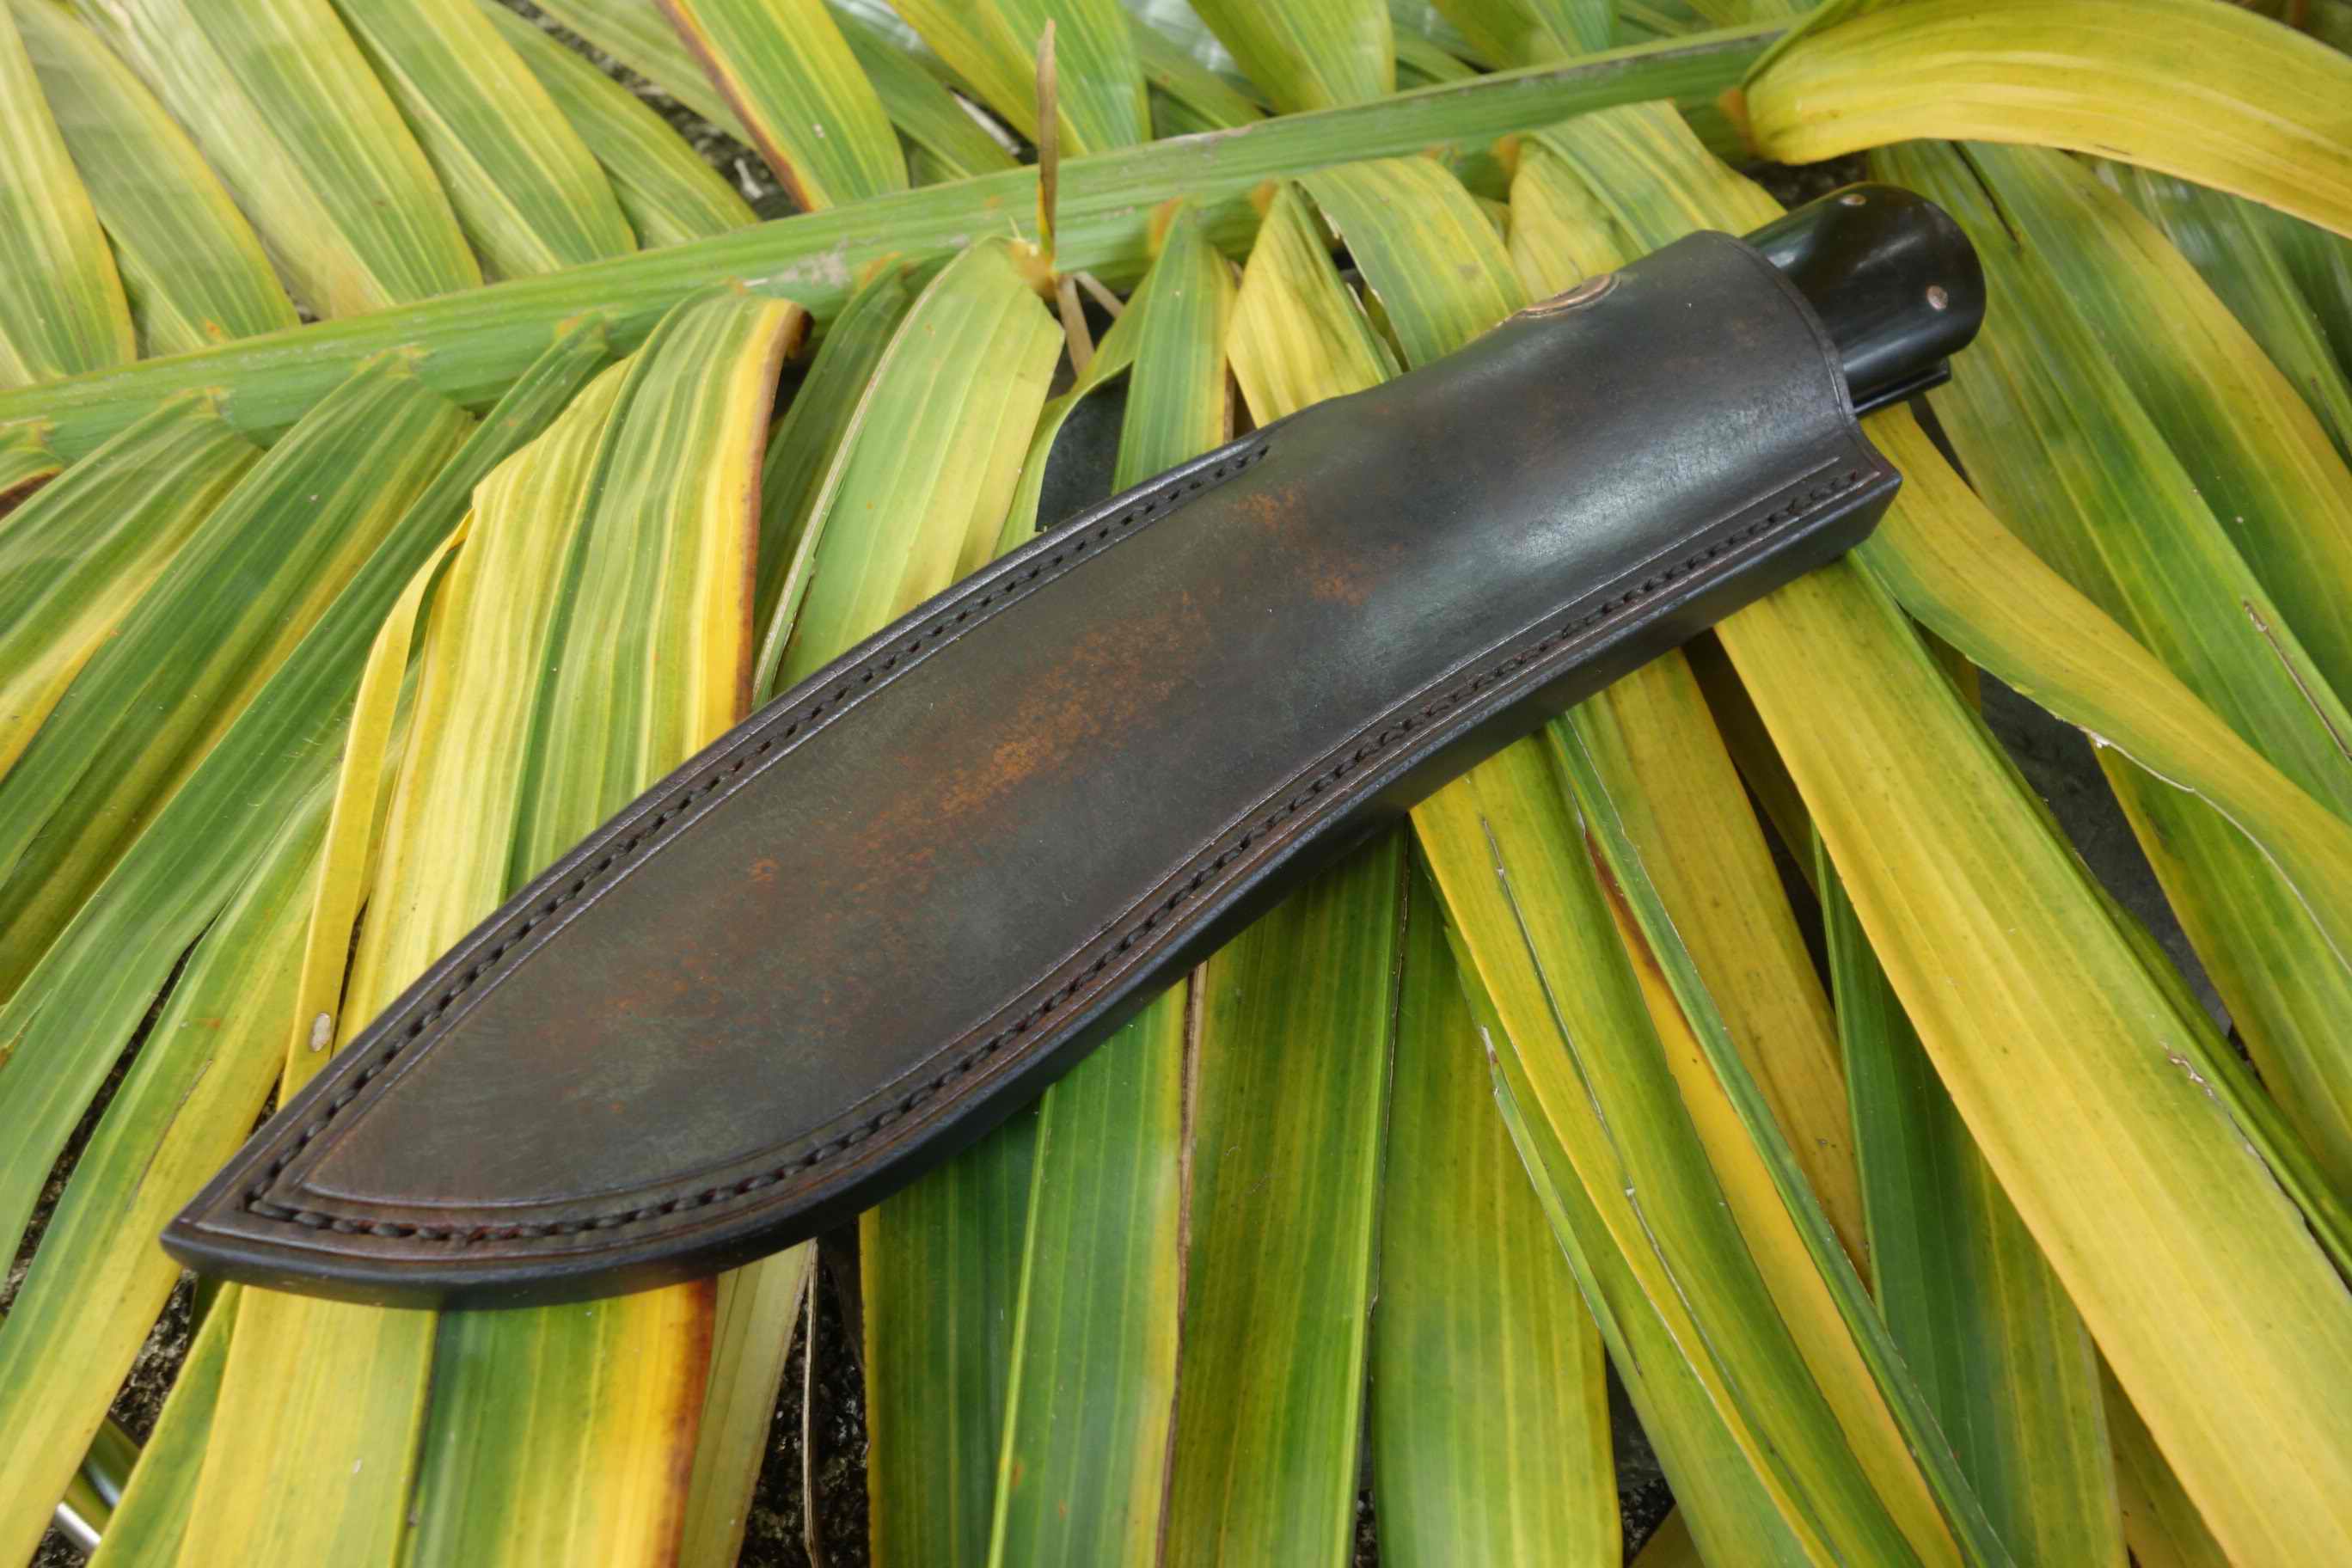
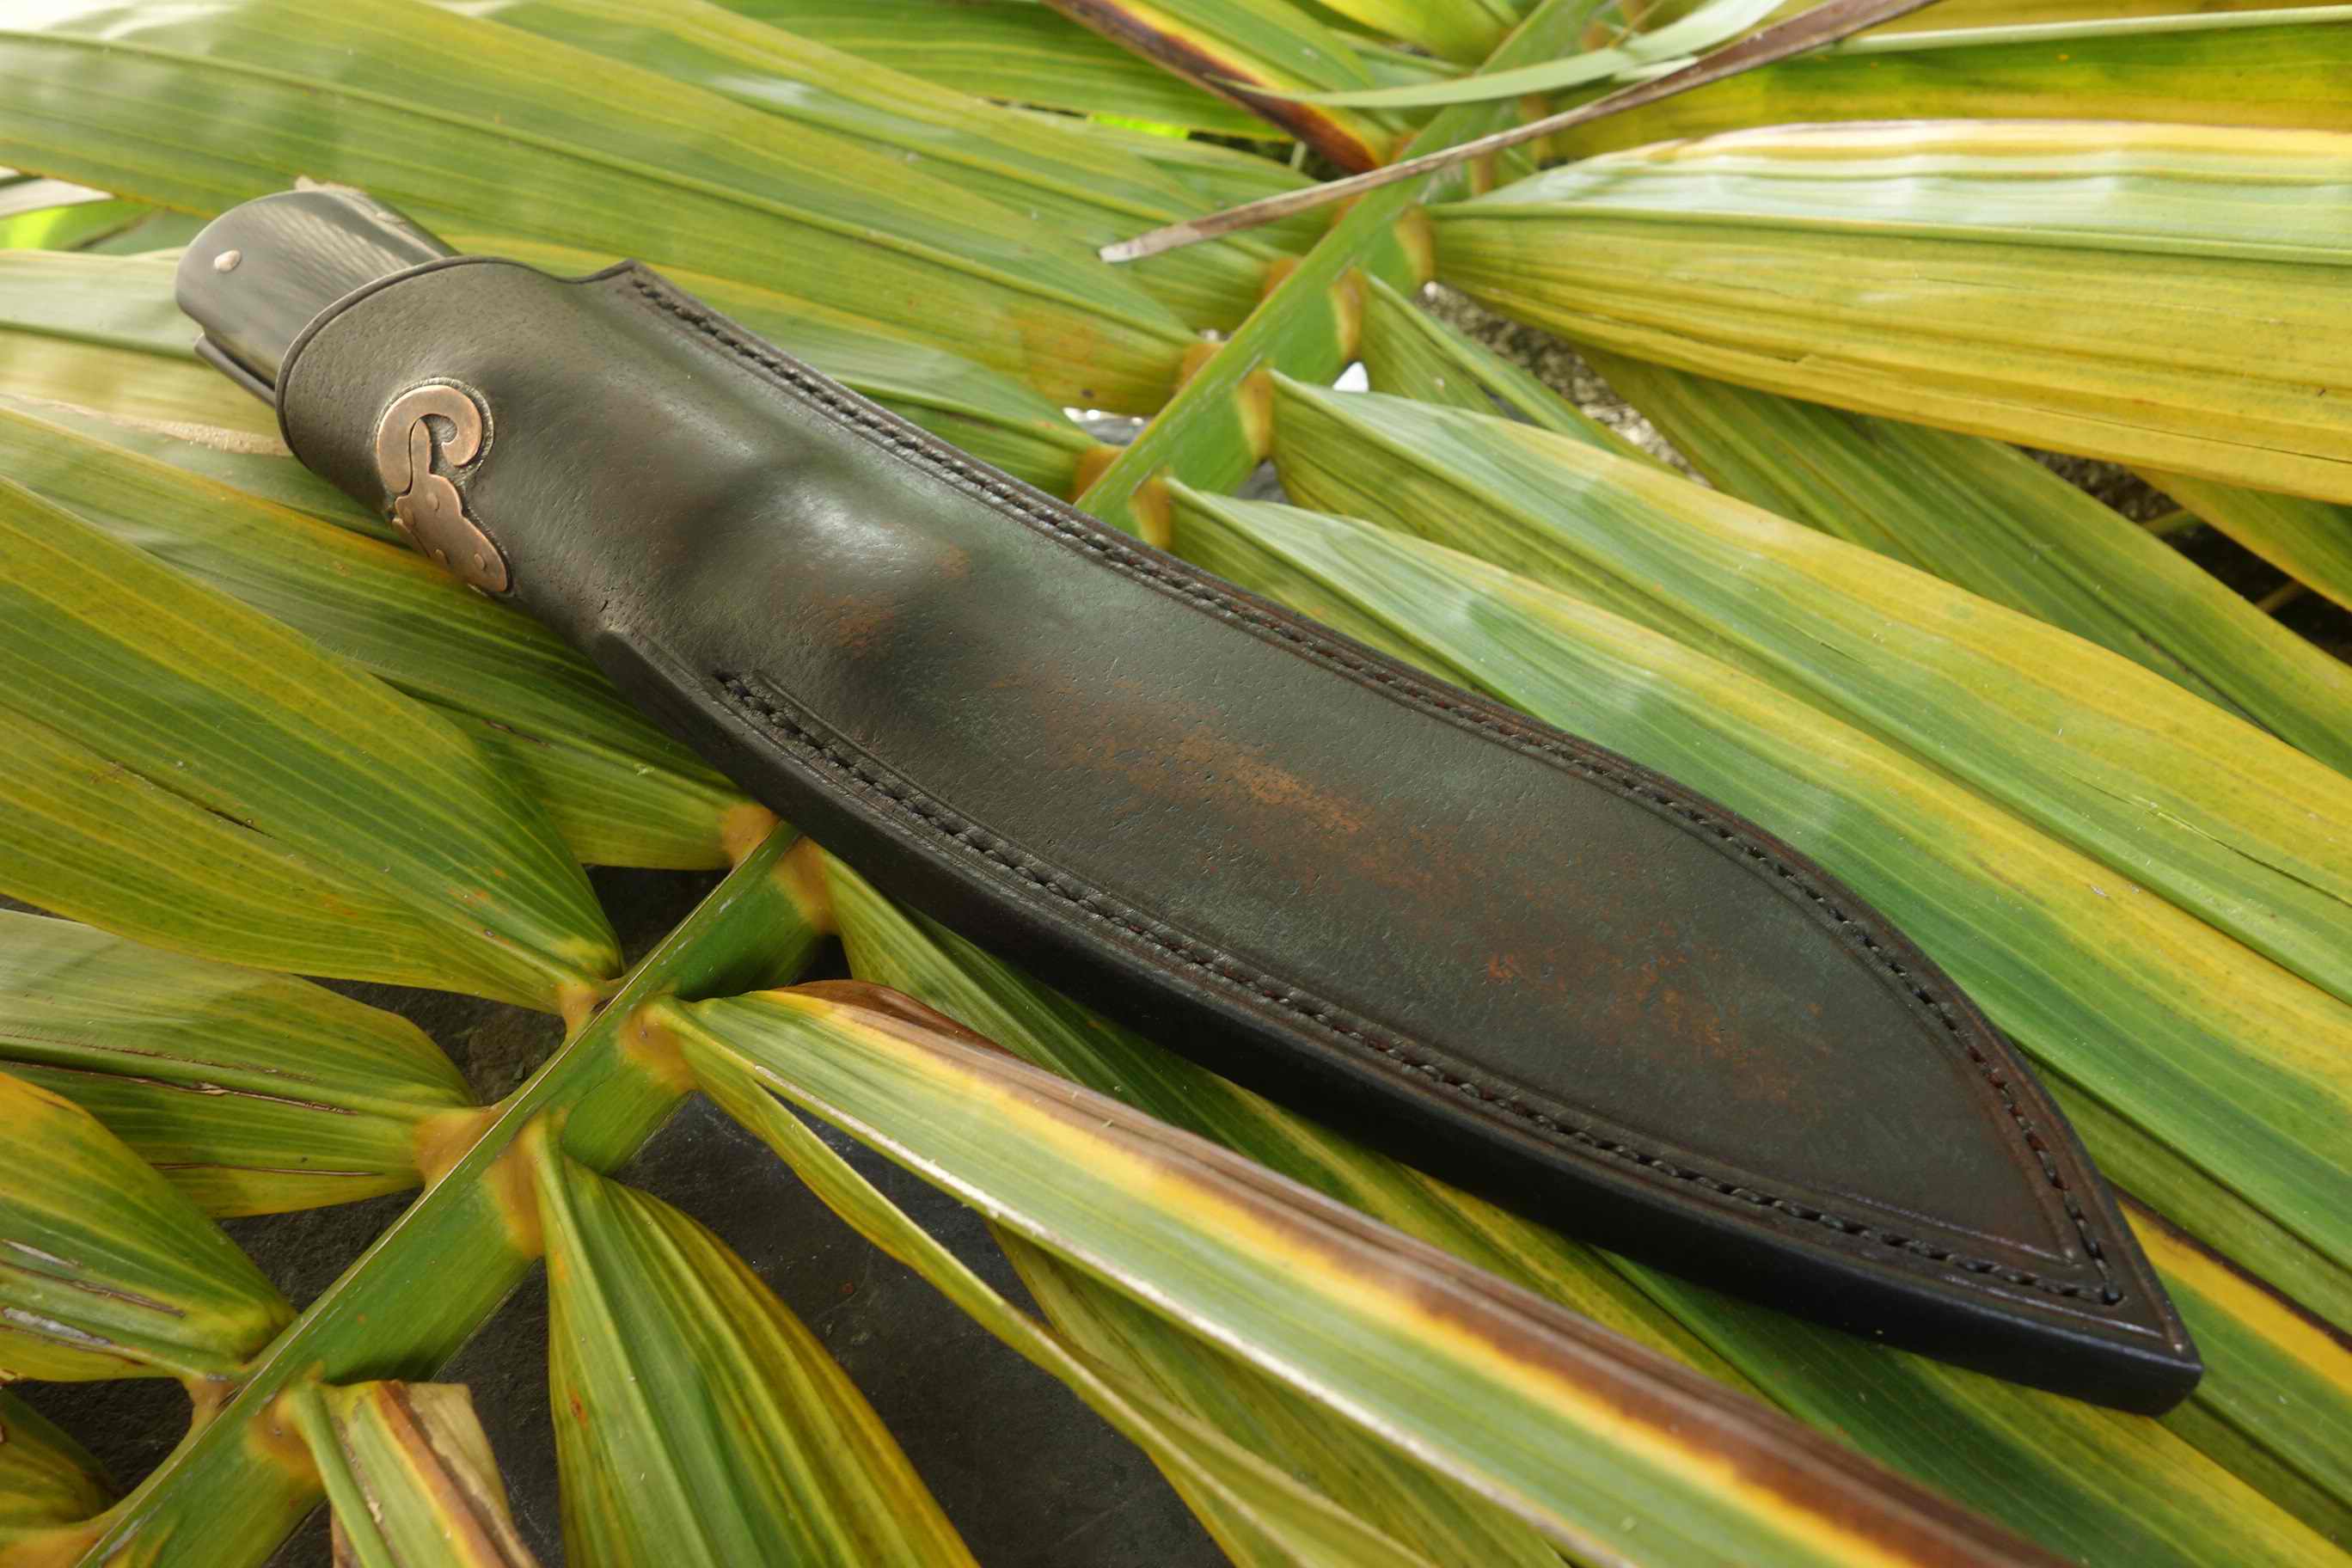
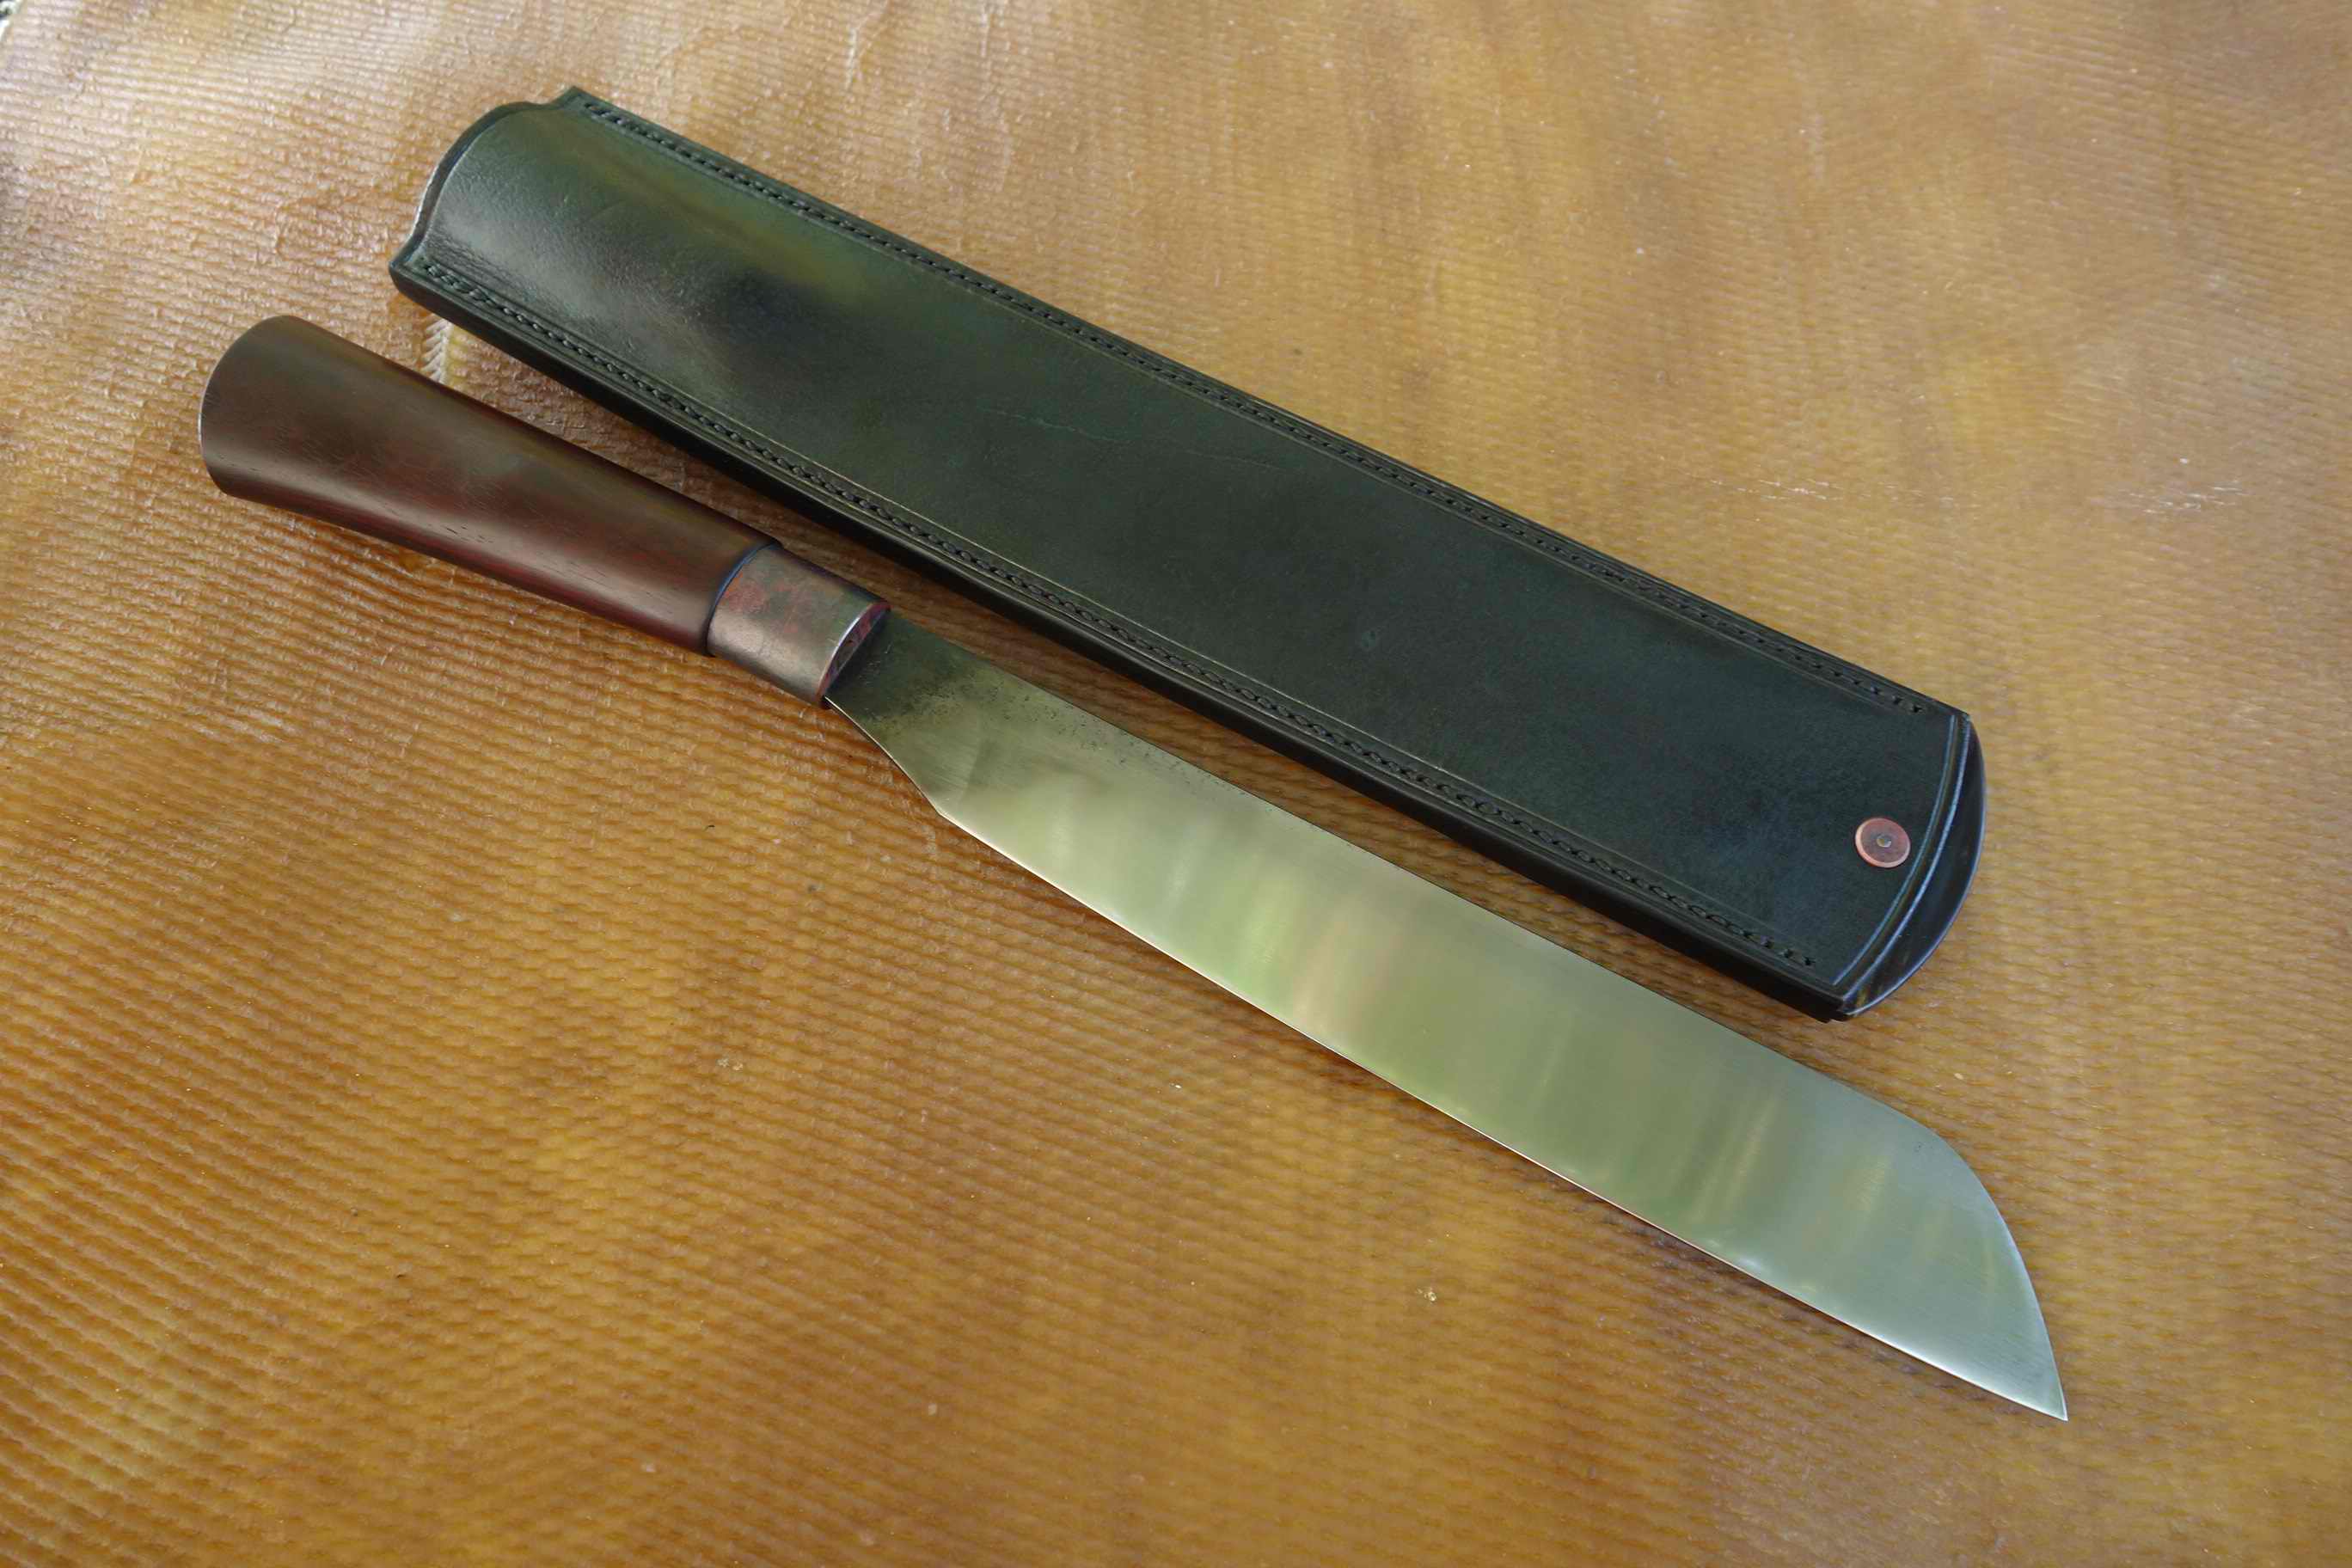
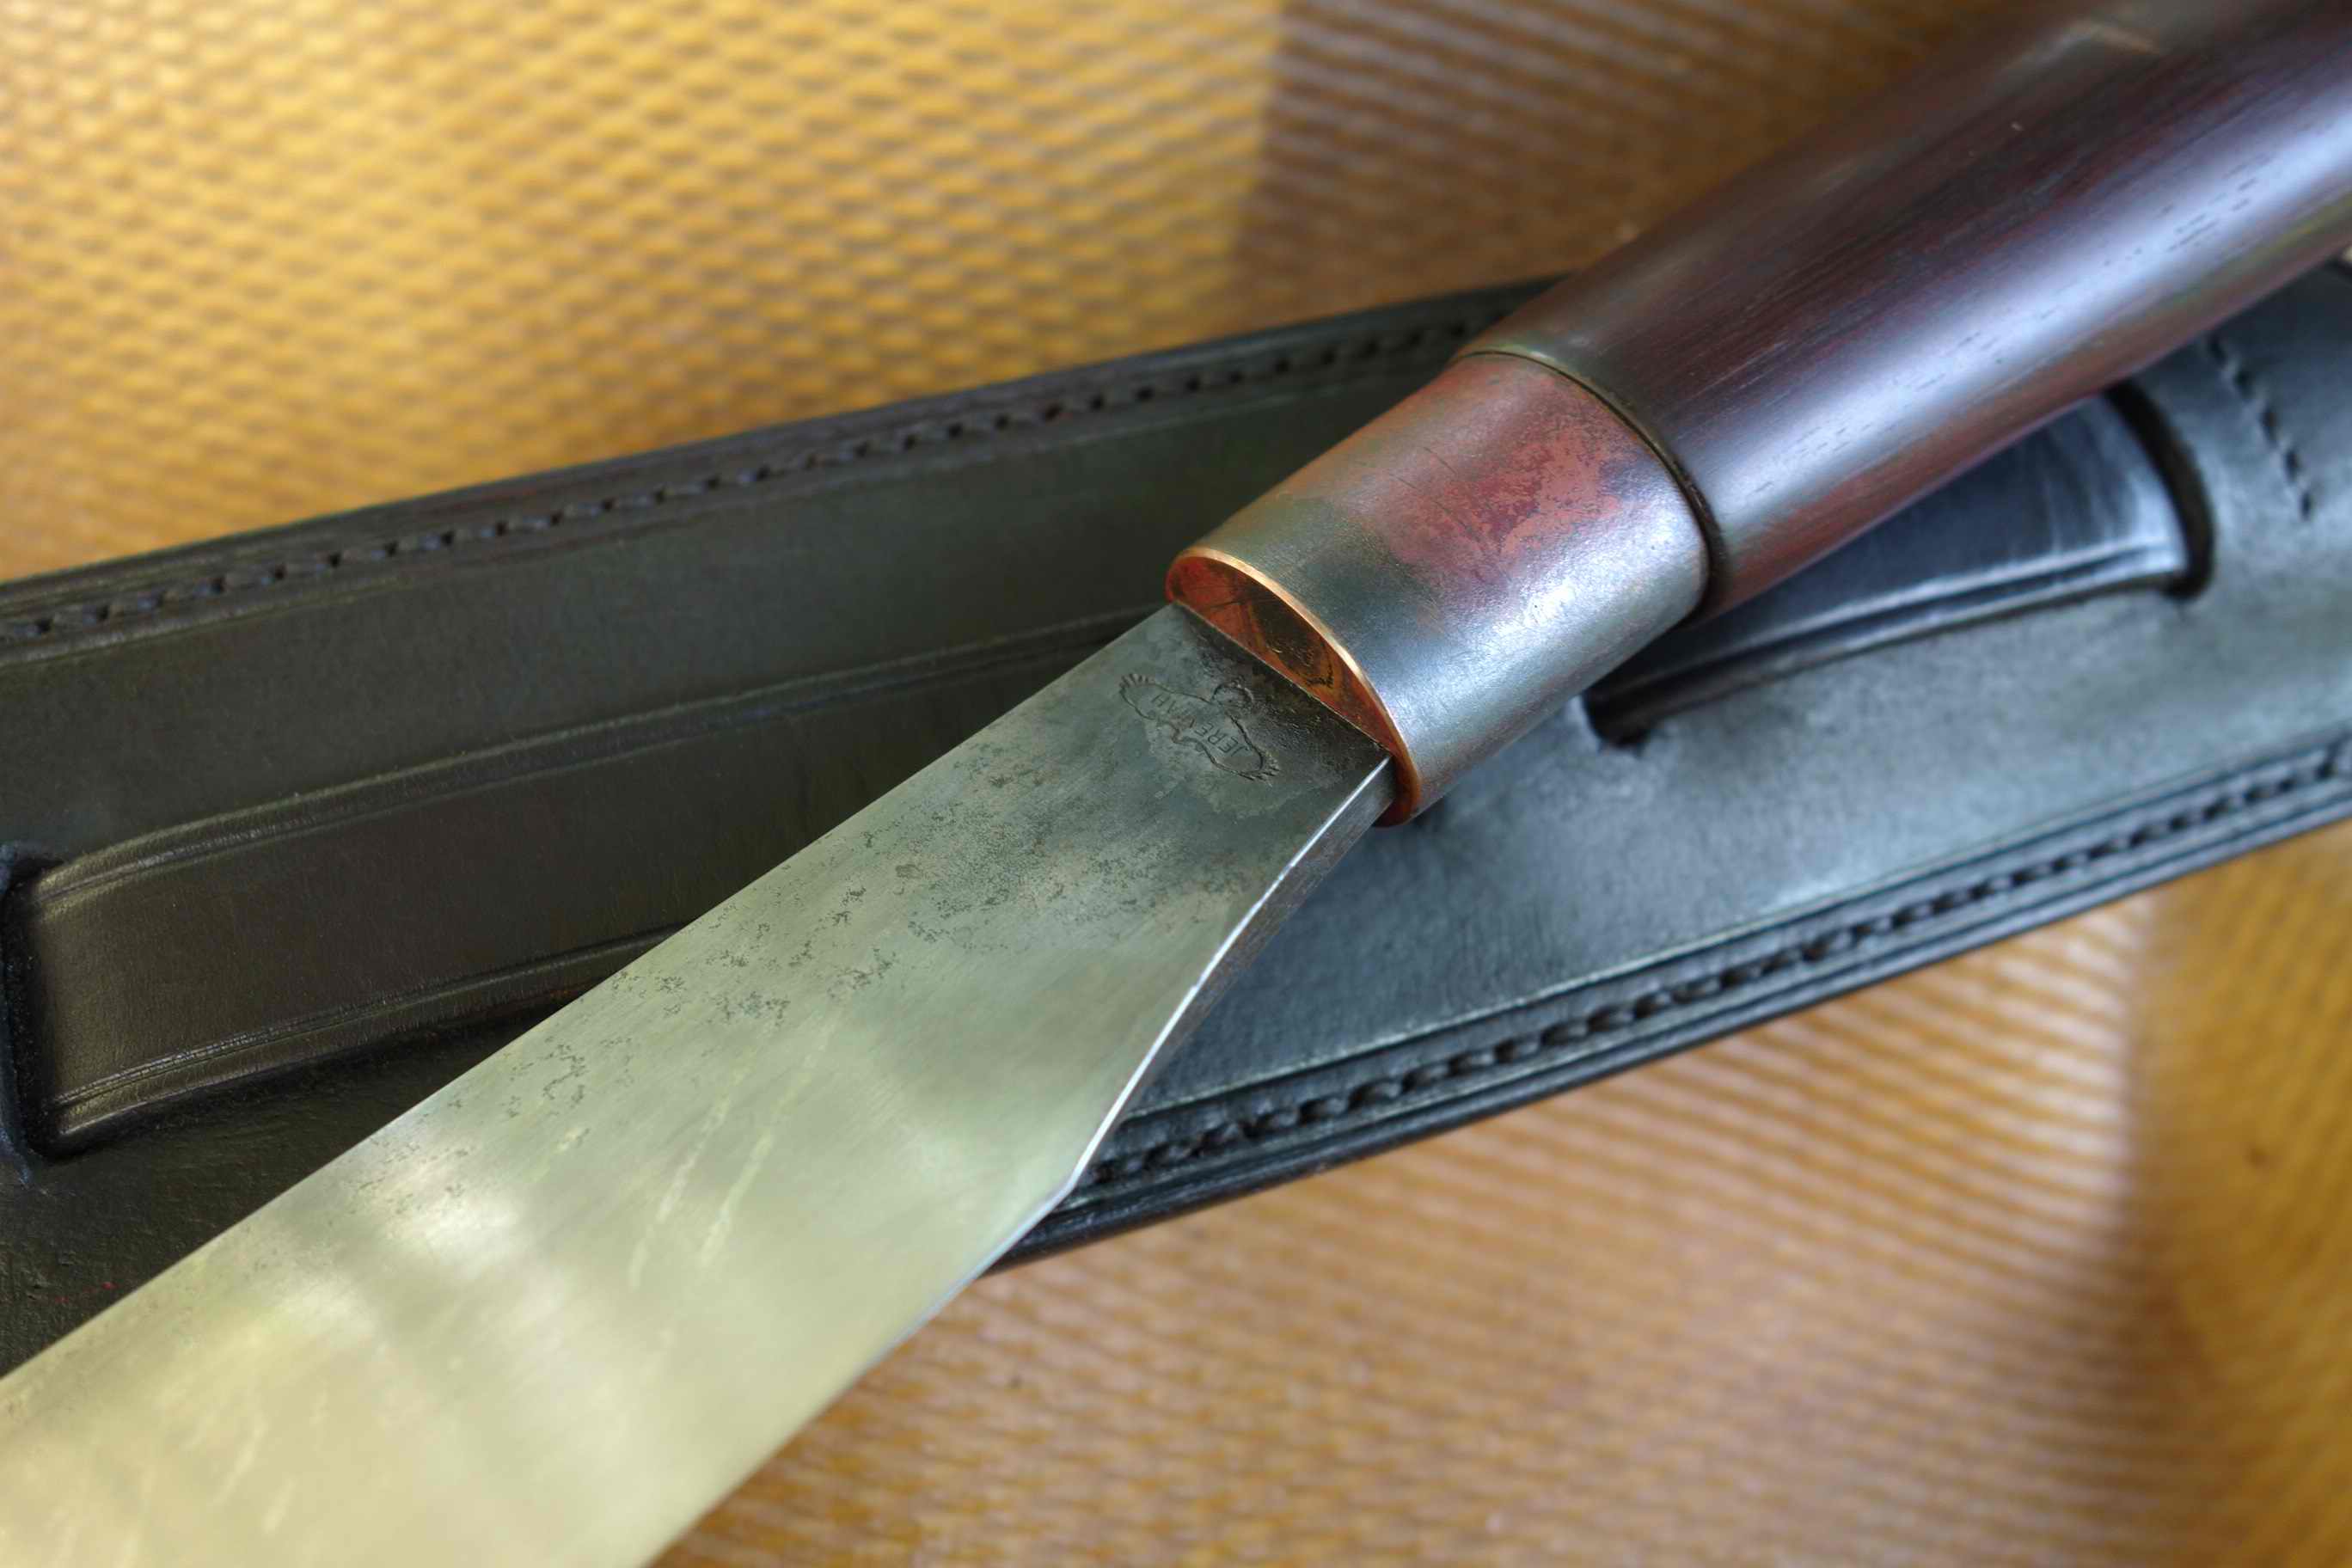
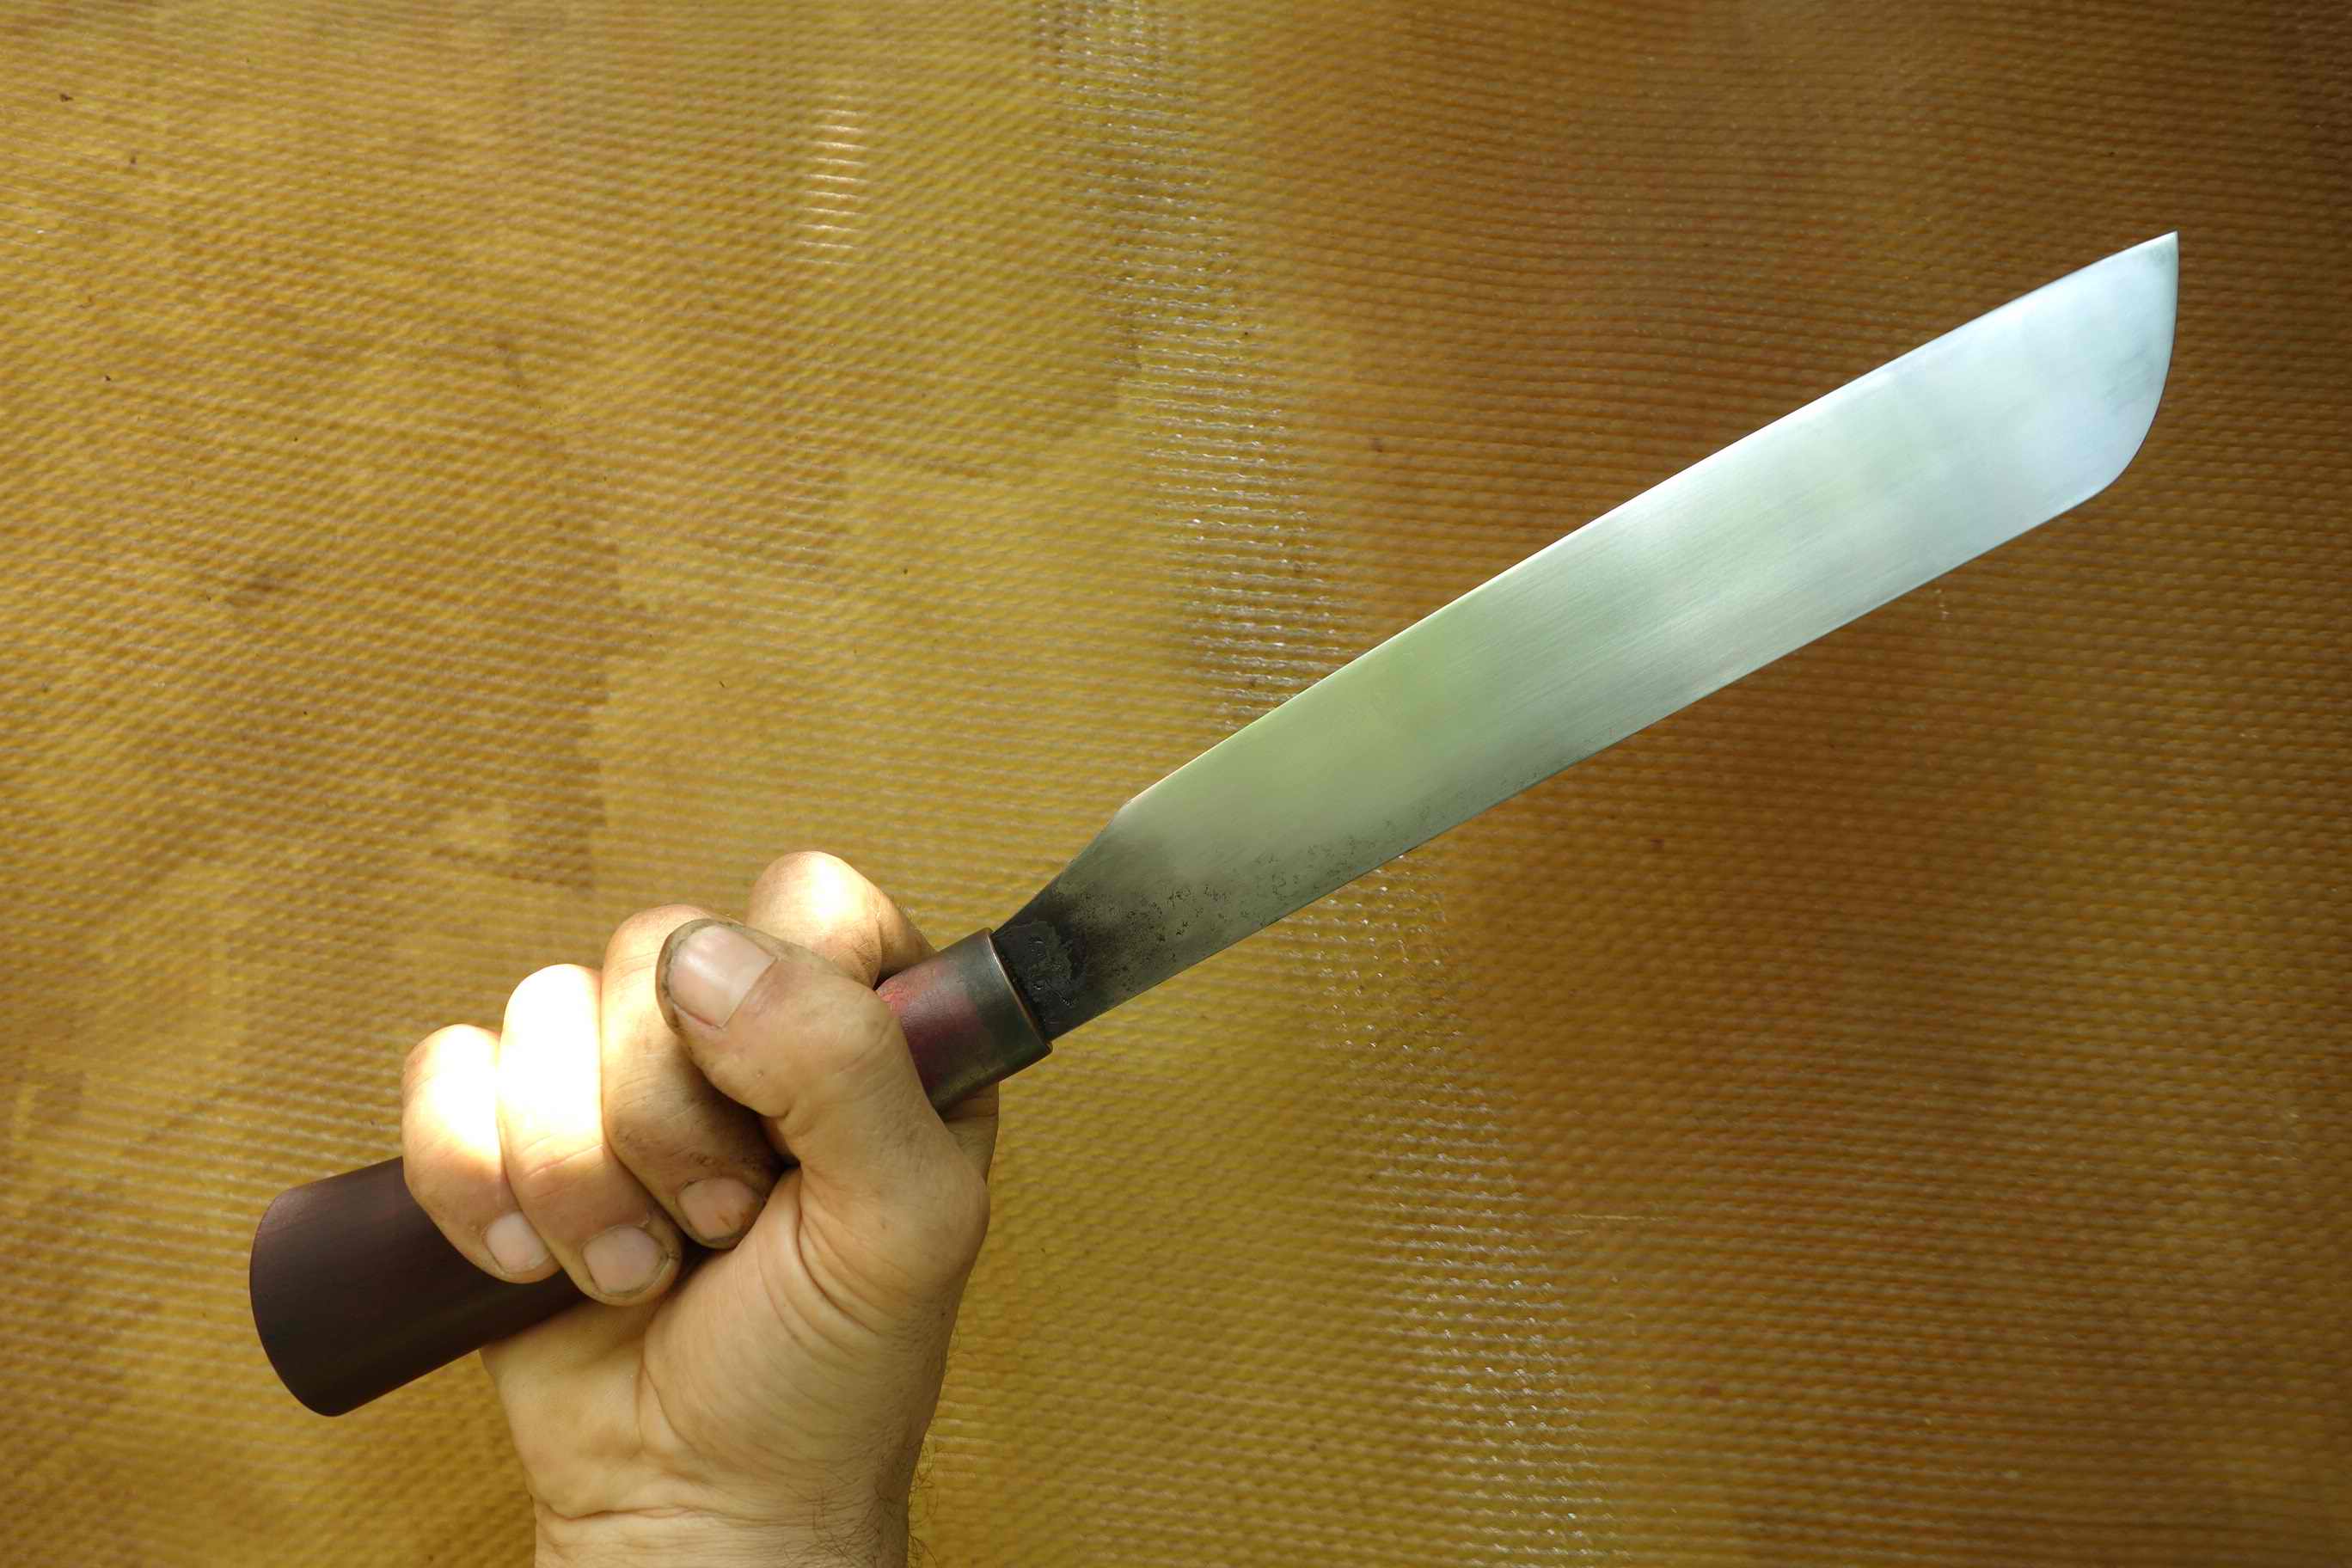
Lighter than a common parang but heavier than a machete this jungle knife, with a 250 mm long roller bearing blade (1.3505), has a copper ferrule and a 3-layer laminated Iron wood handle.
The tang is riveted on the butt and overall length is 400 mm.
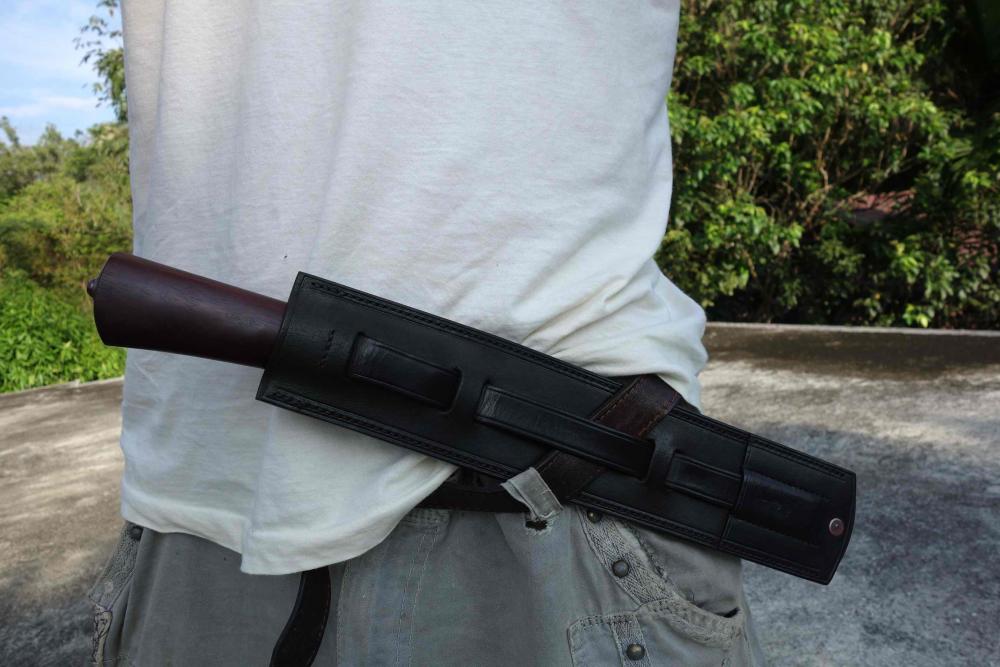
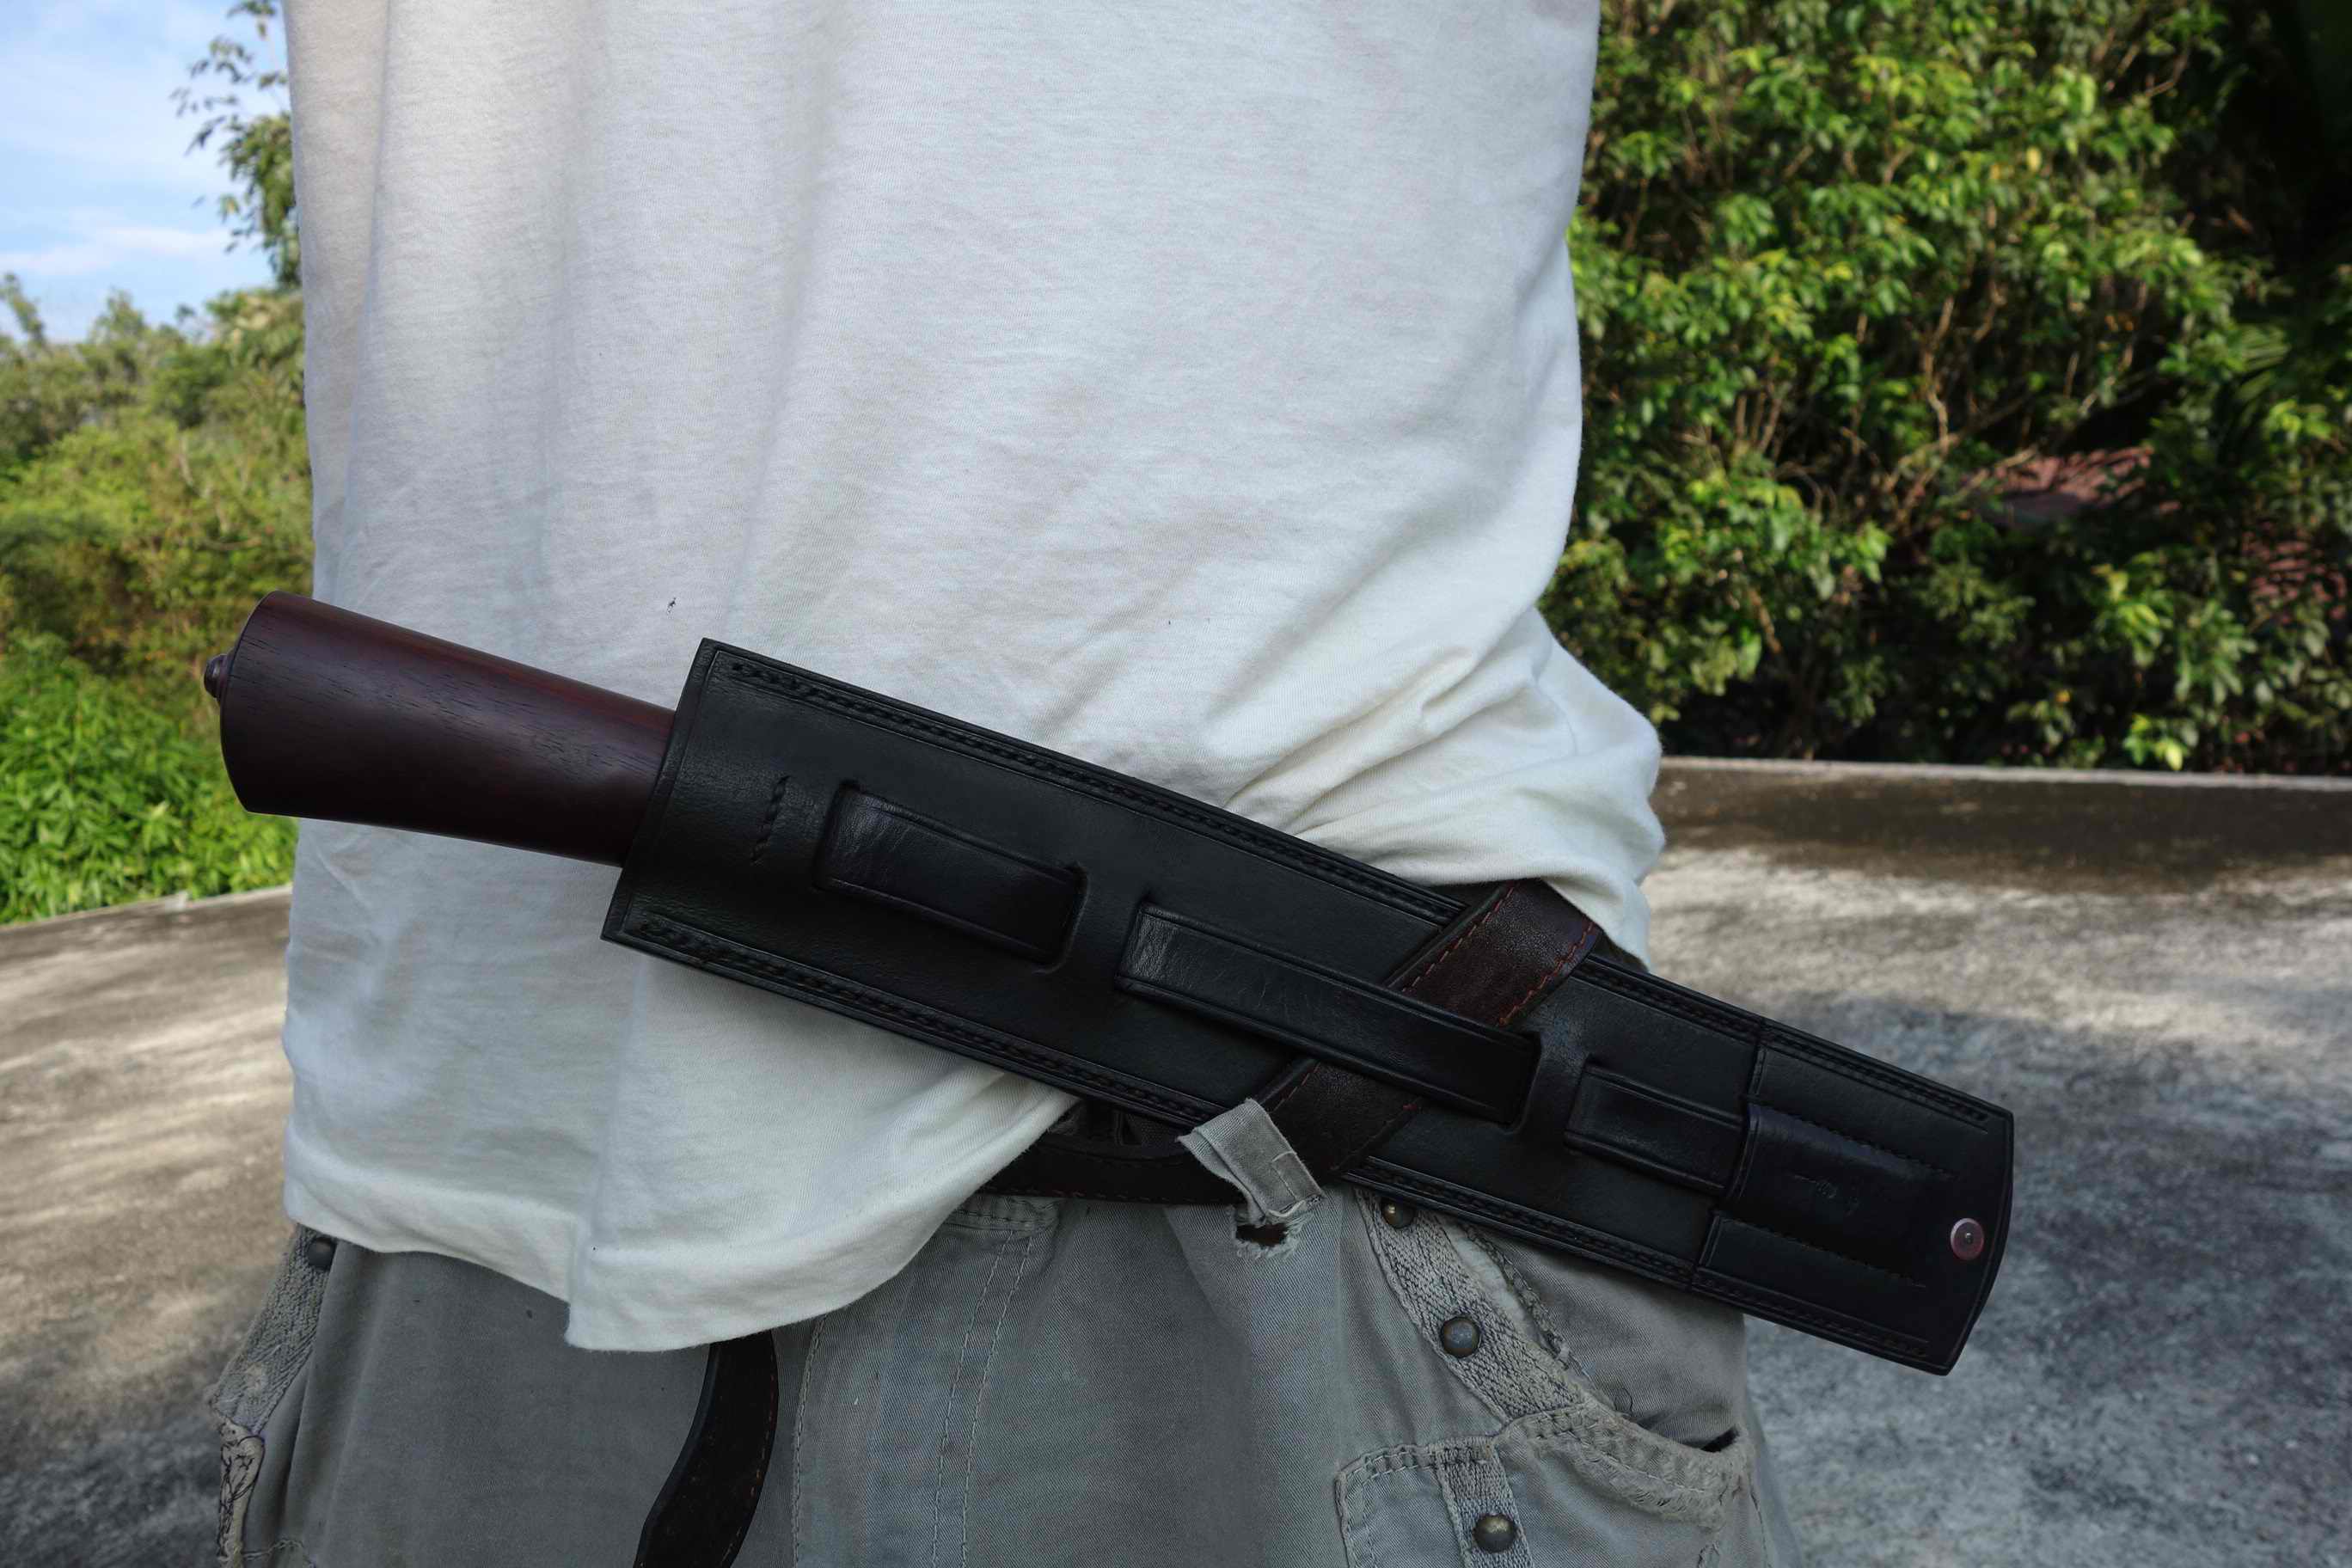
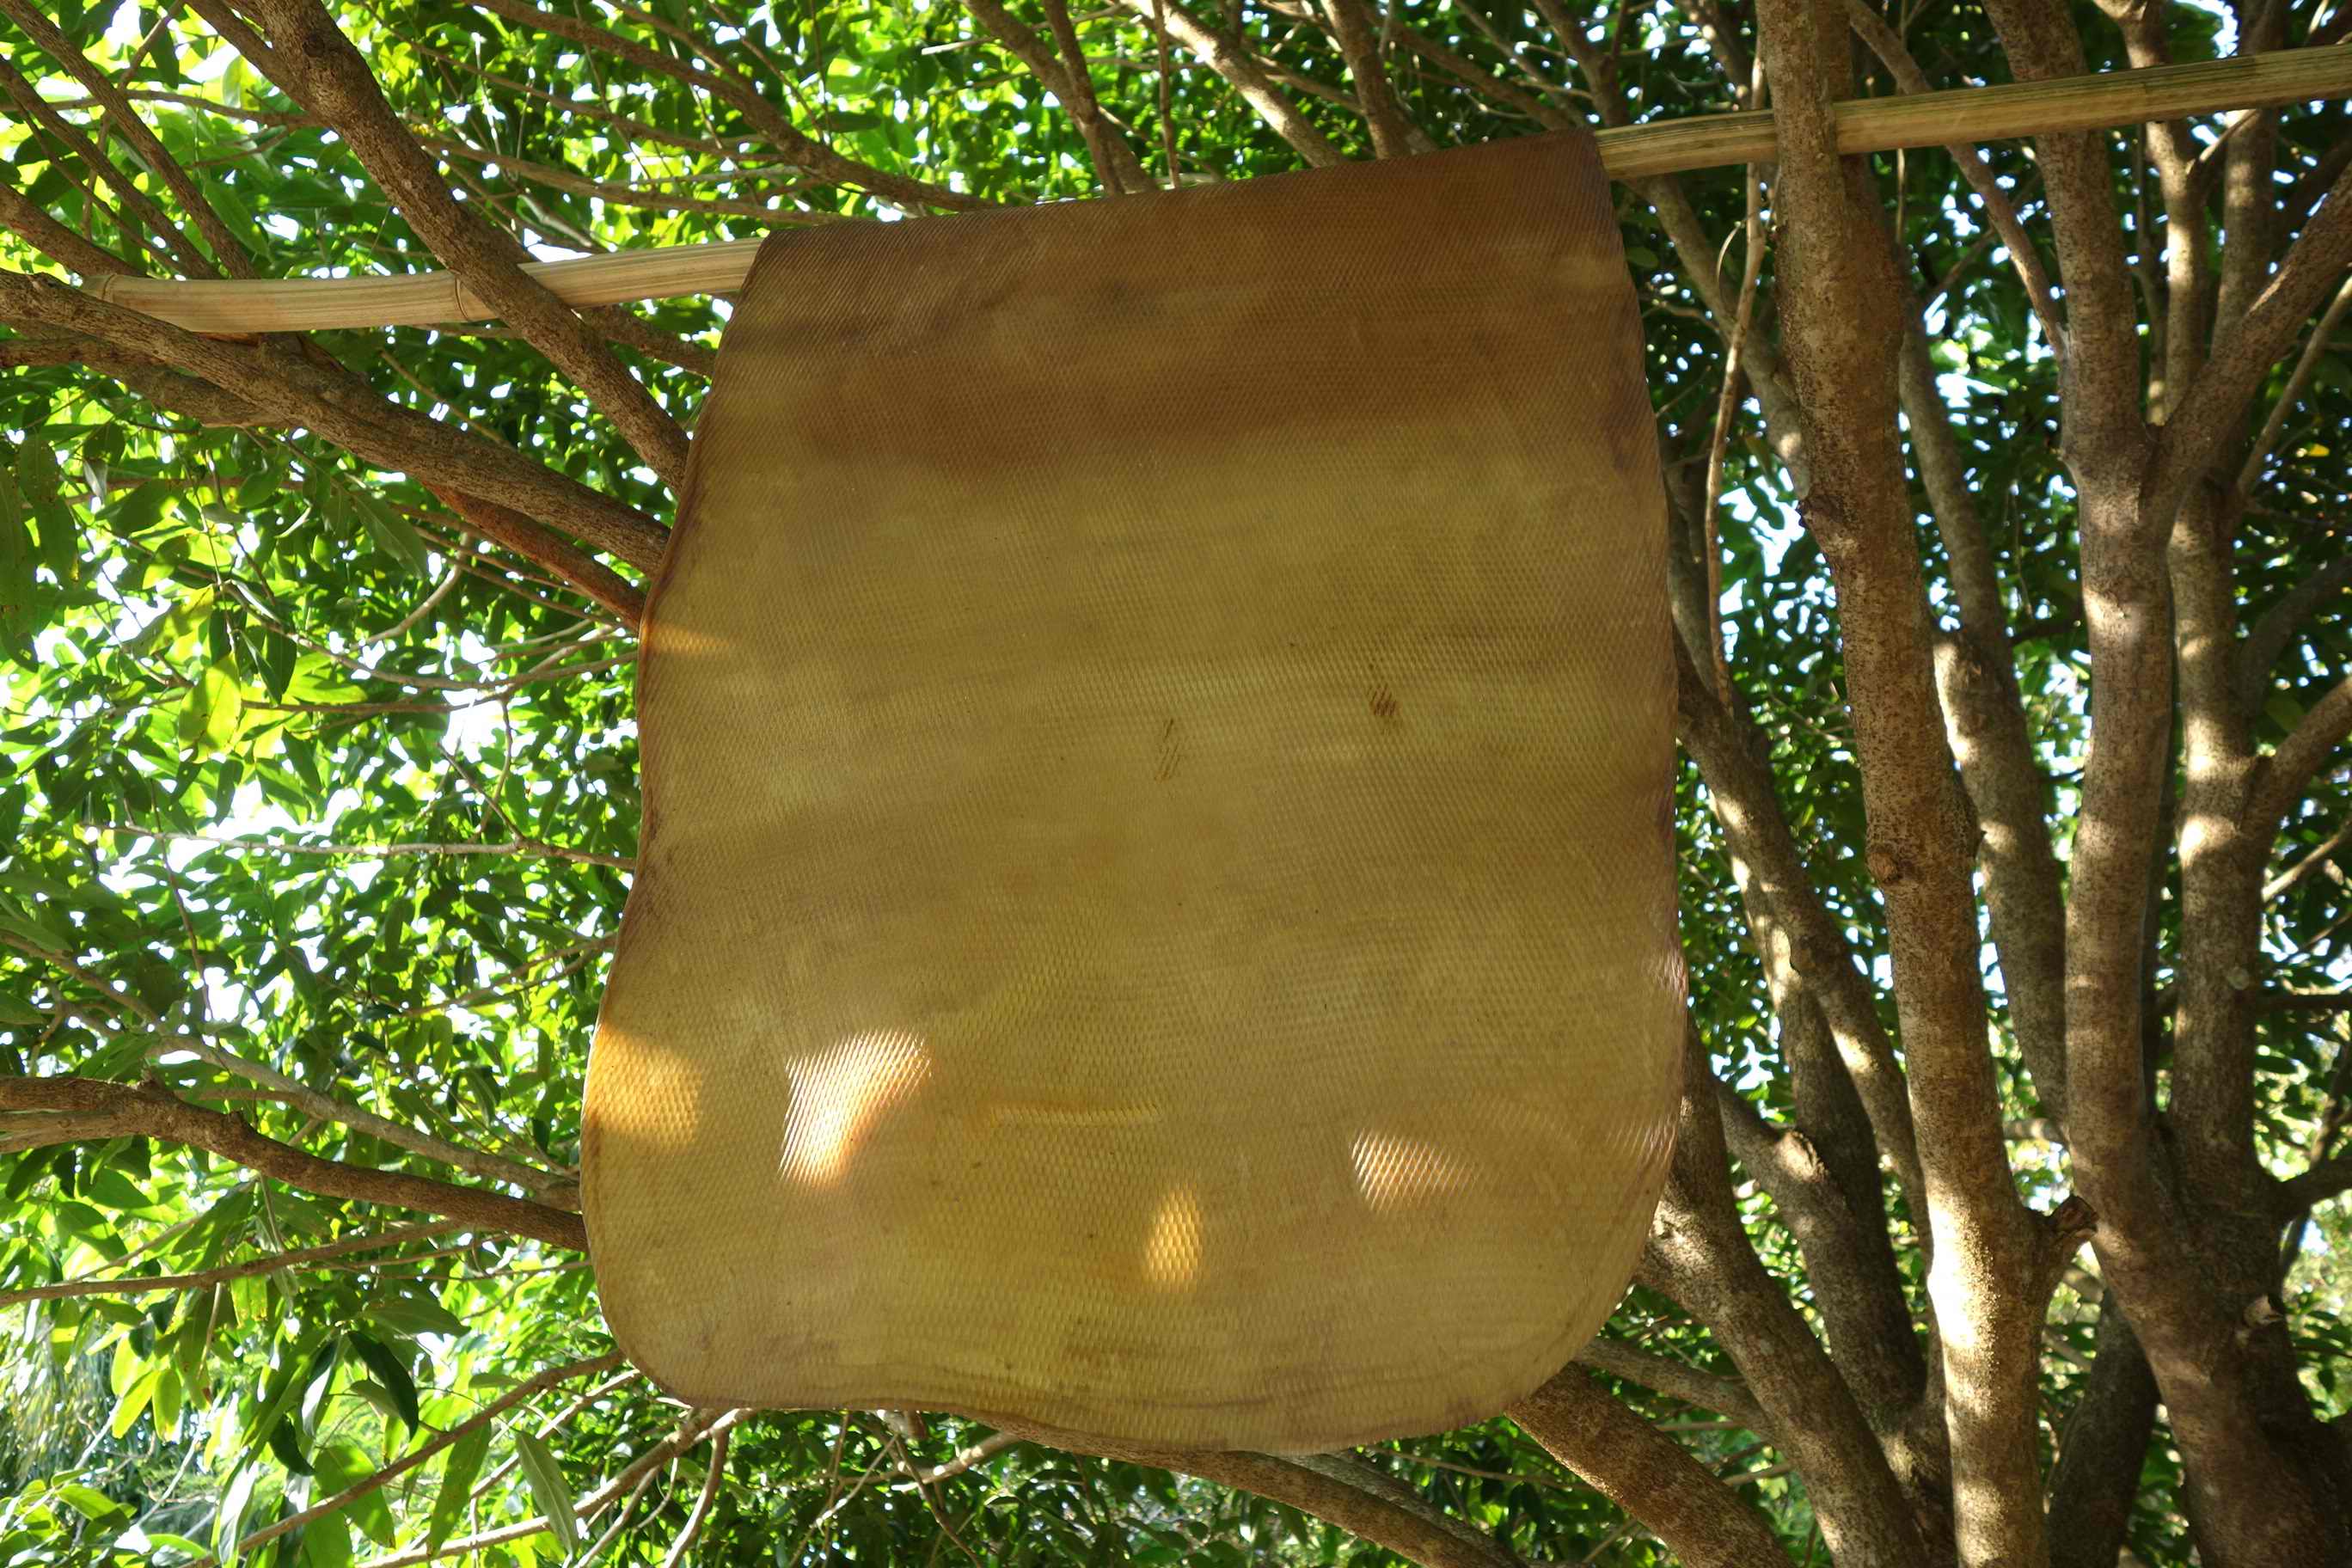
The sheath is made from water buffalo leather and has a "horn mohawk" which protects the tip againts bumps and wear.
The end of the belt strap is just pushed into that sewn, small compartment, it allows to remove the knife without opening the belt.
Back drop is an India rubber mat, local product from our area, which has plenty of rubber plantations.
Cheers


-
I am very pleased about those fine compliments, Thank You very much, Guys!
I appreciate this a lot!
-
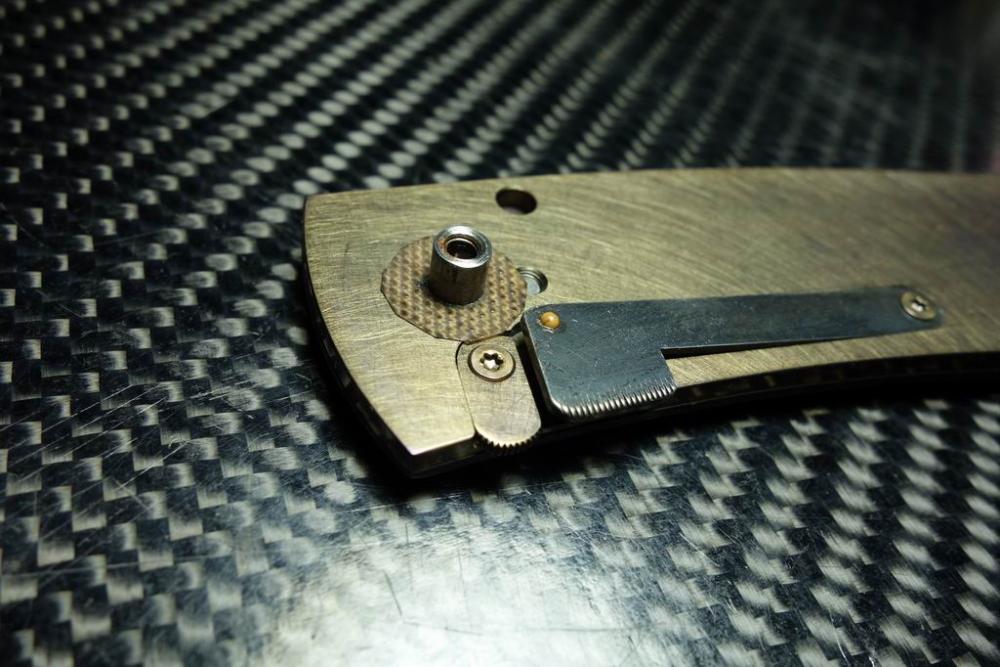
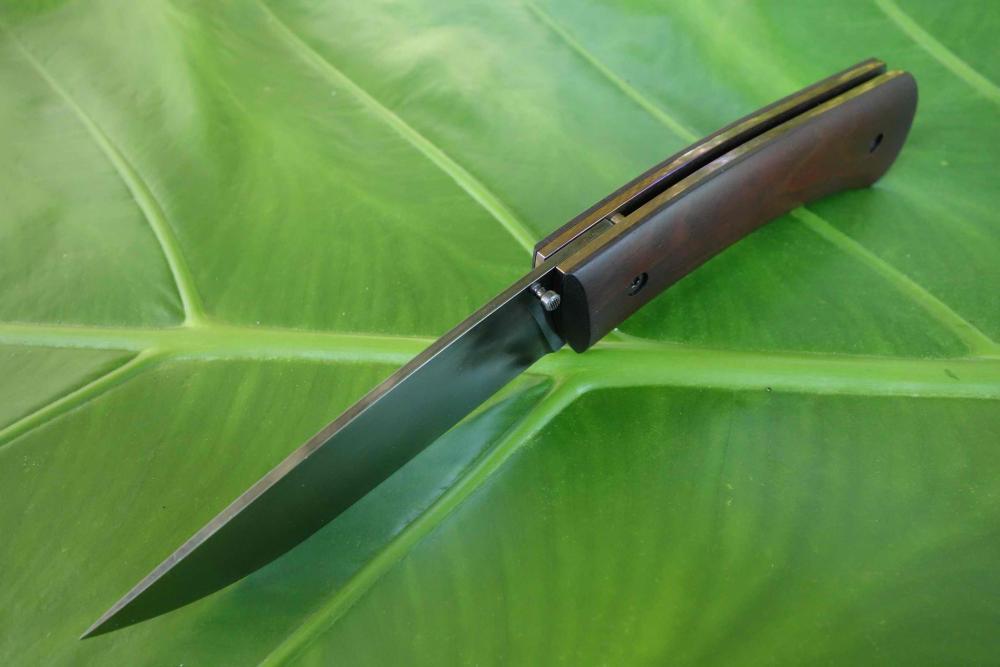
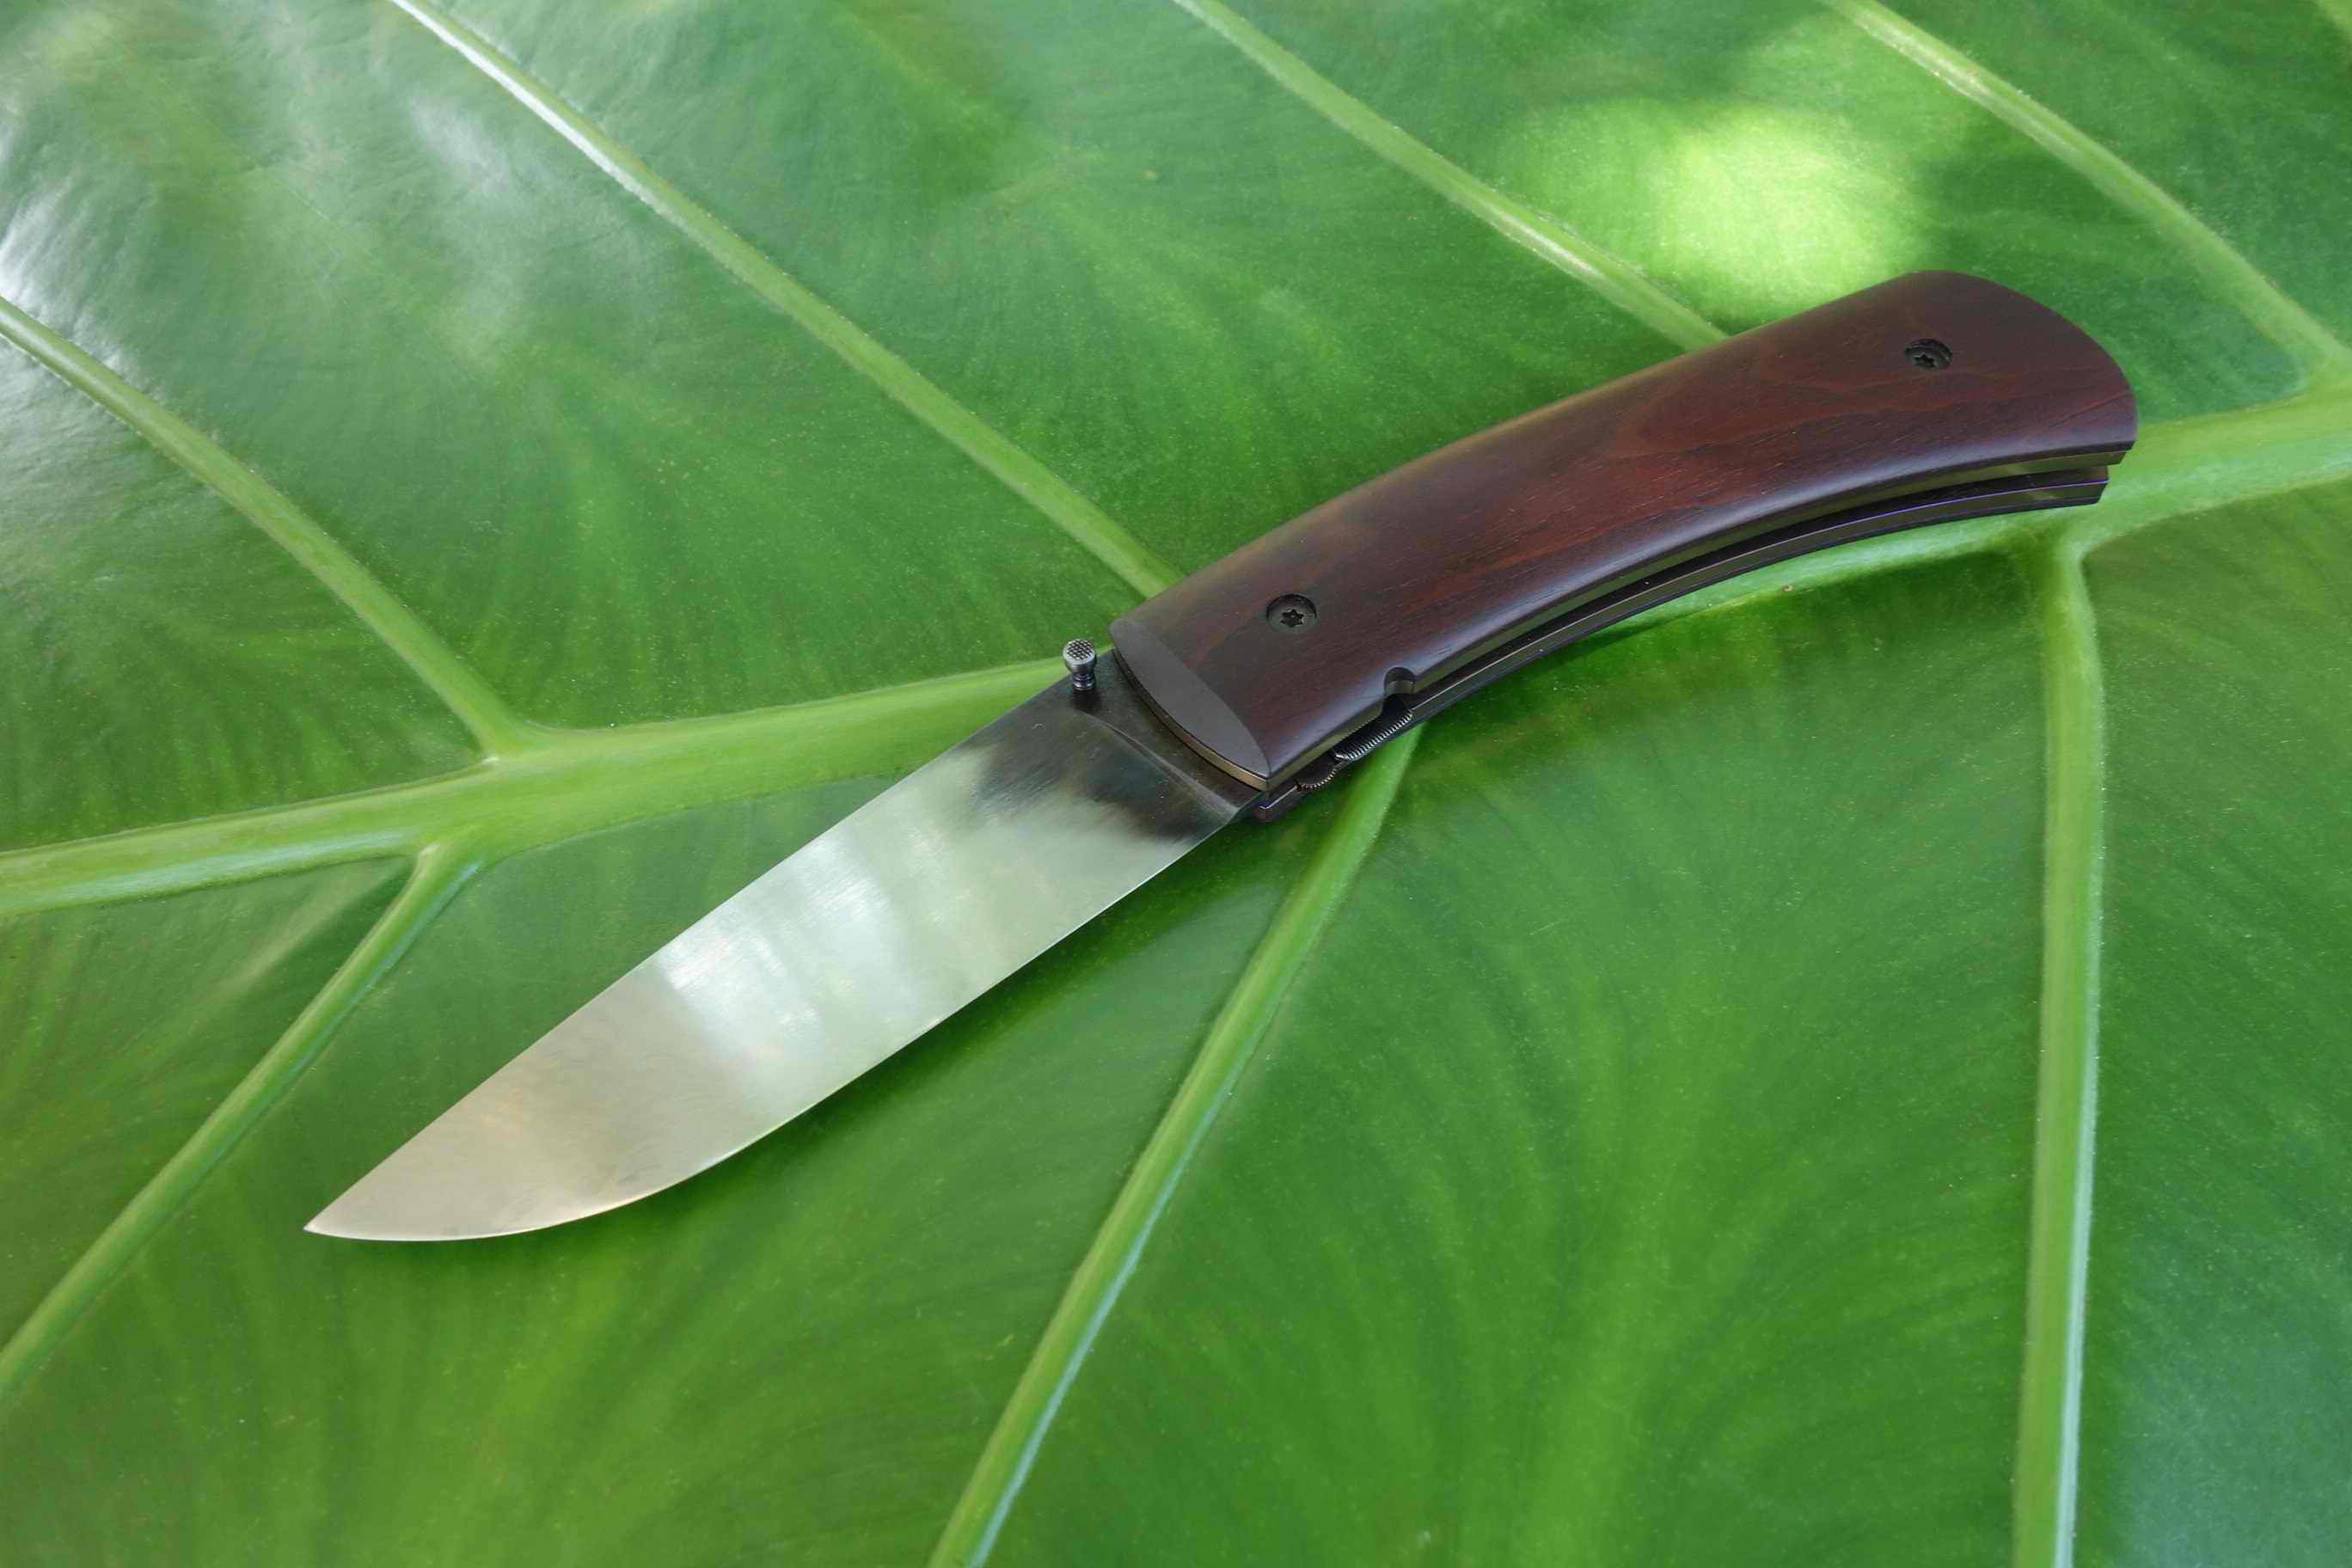
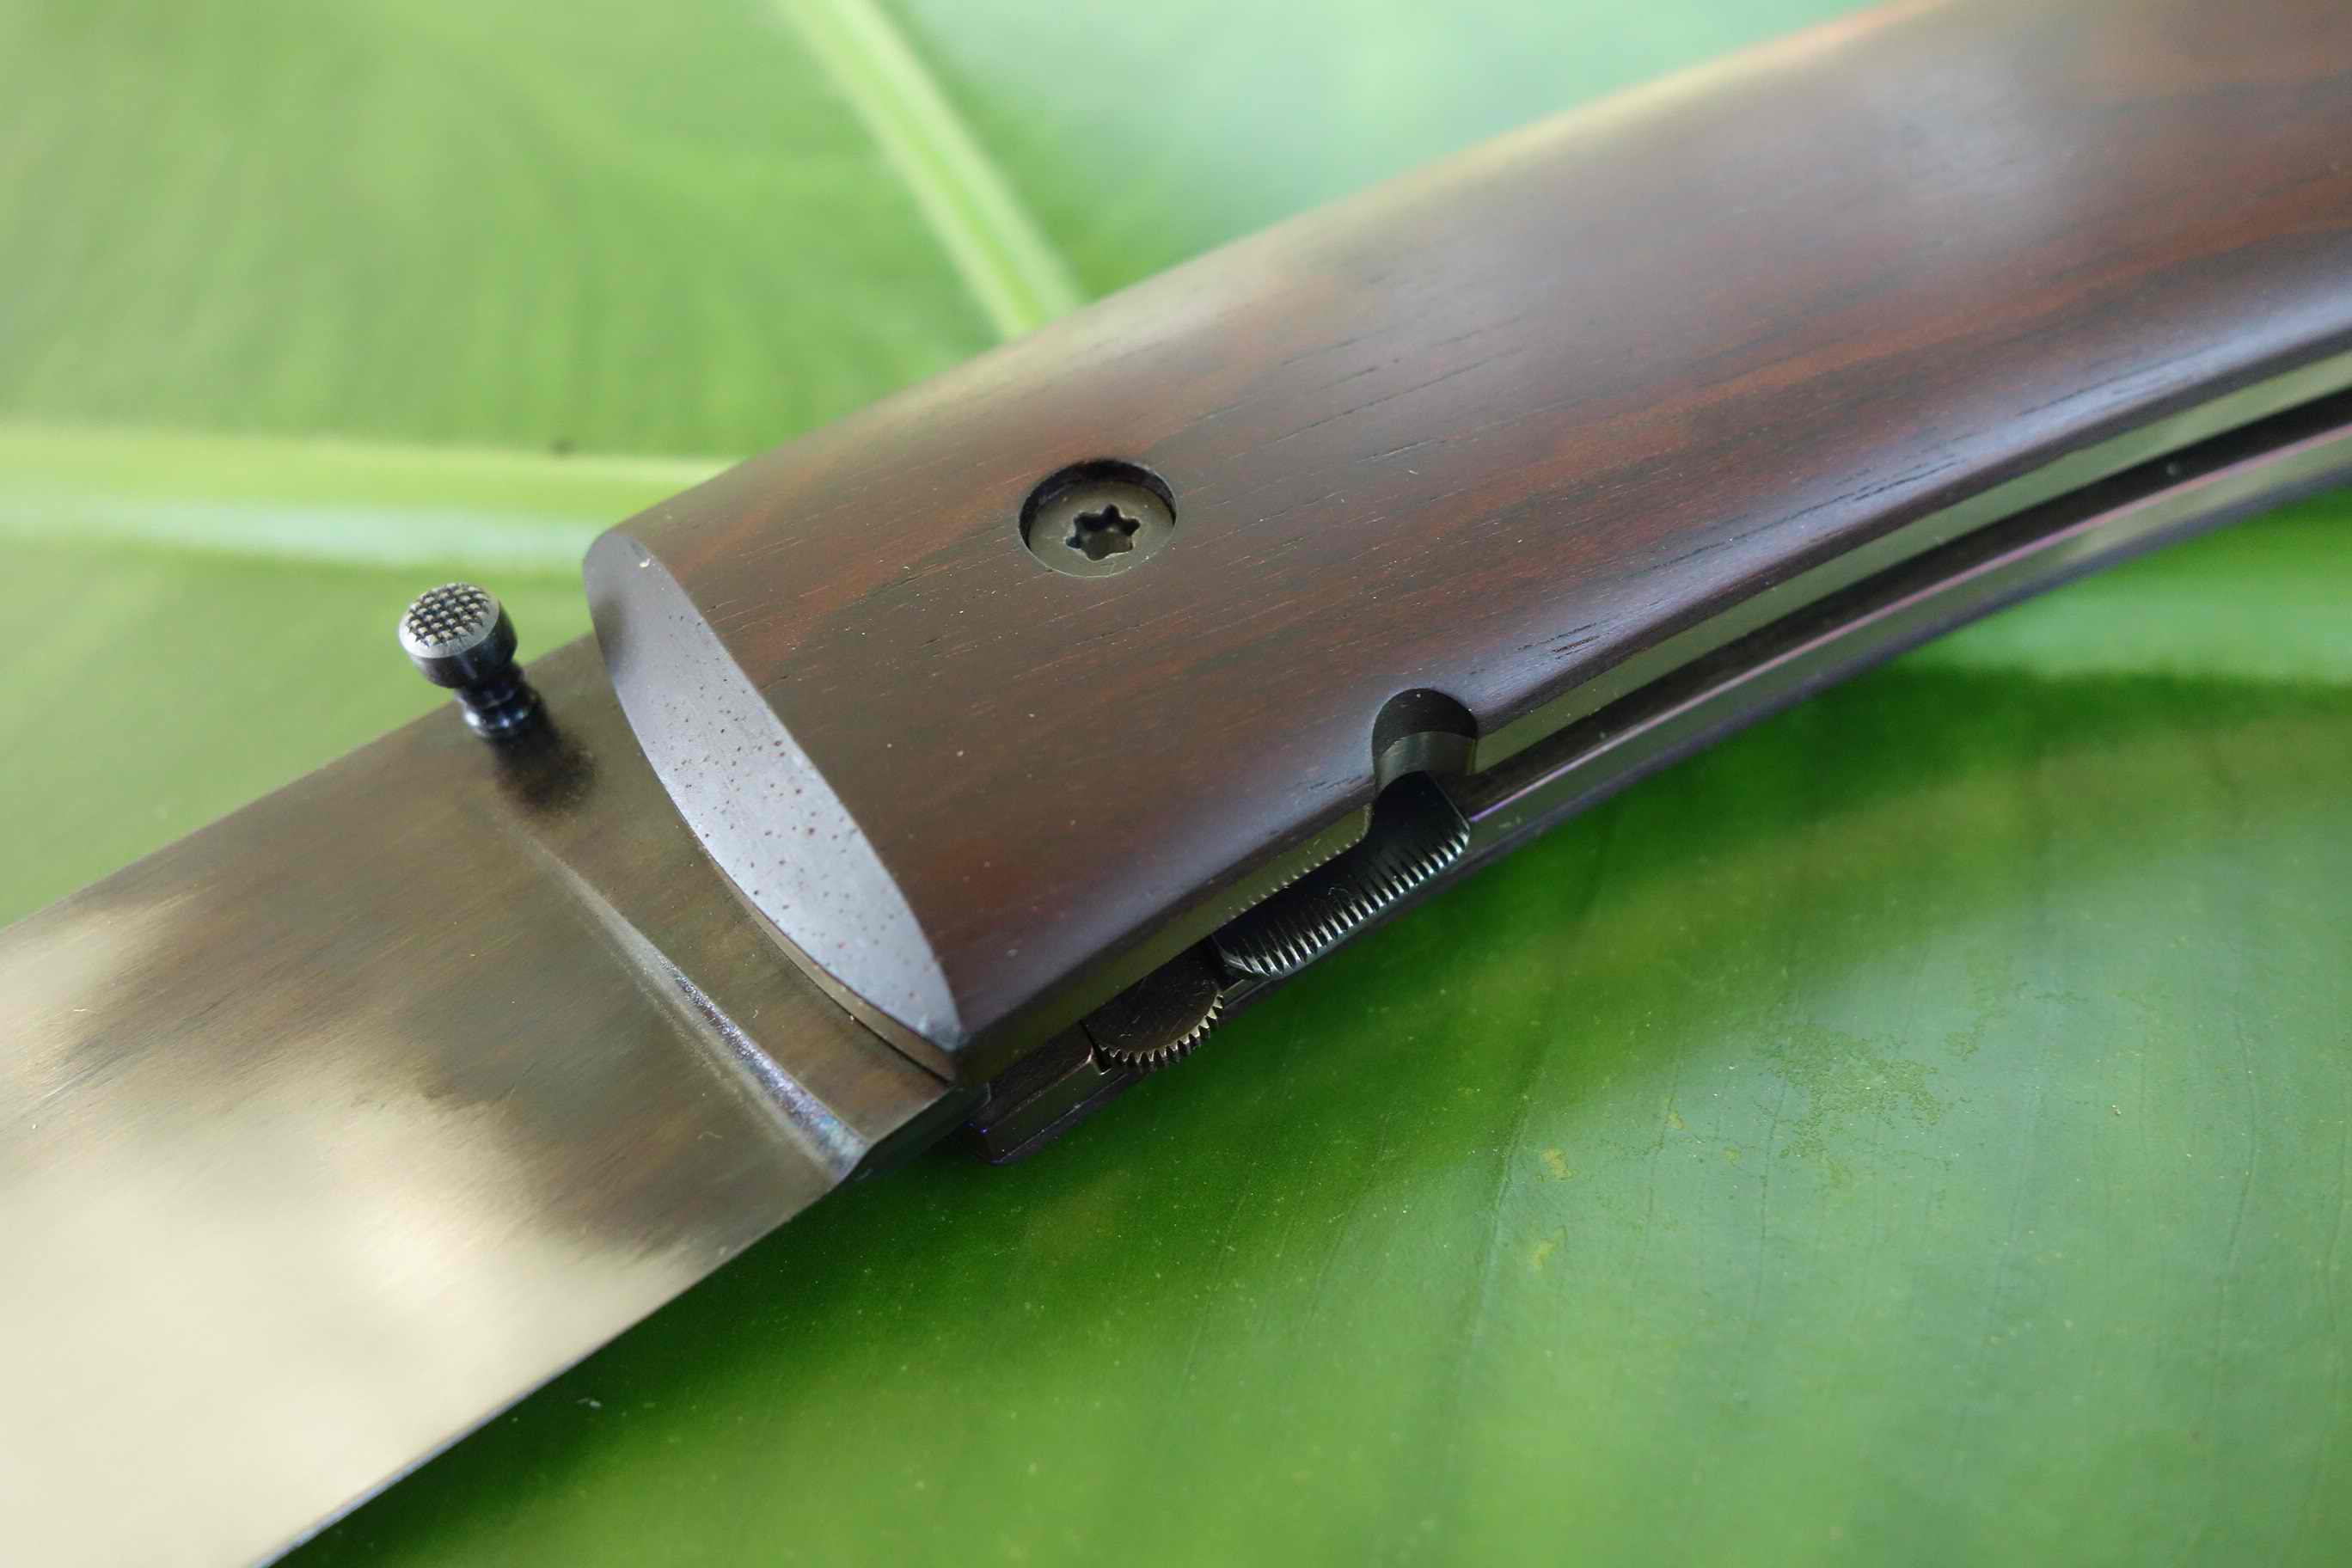
On 3/21/2017 at 5:51 AM, rockstar.esq said:
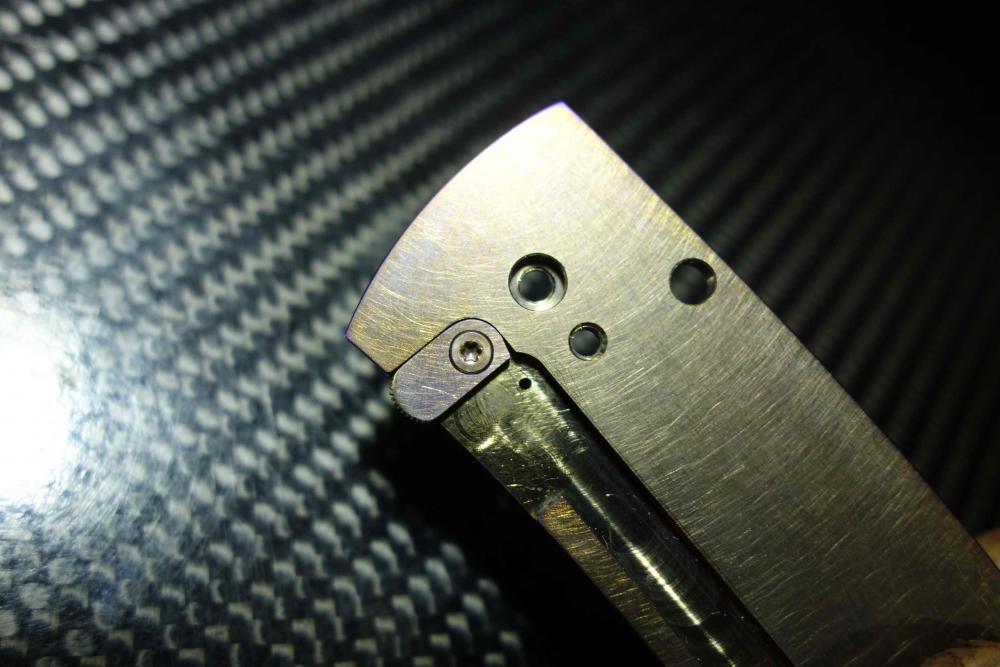
Could you explain the locking mechanism? It looks like a liner lock but I'm not sure how the second lever works.
Beautiful work.
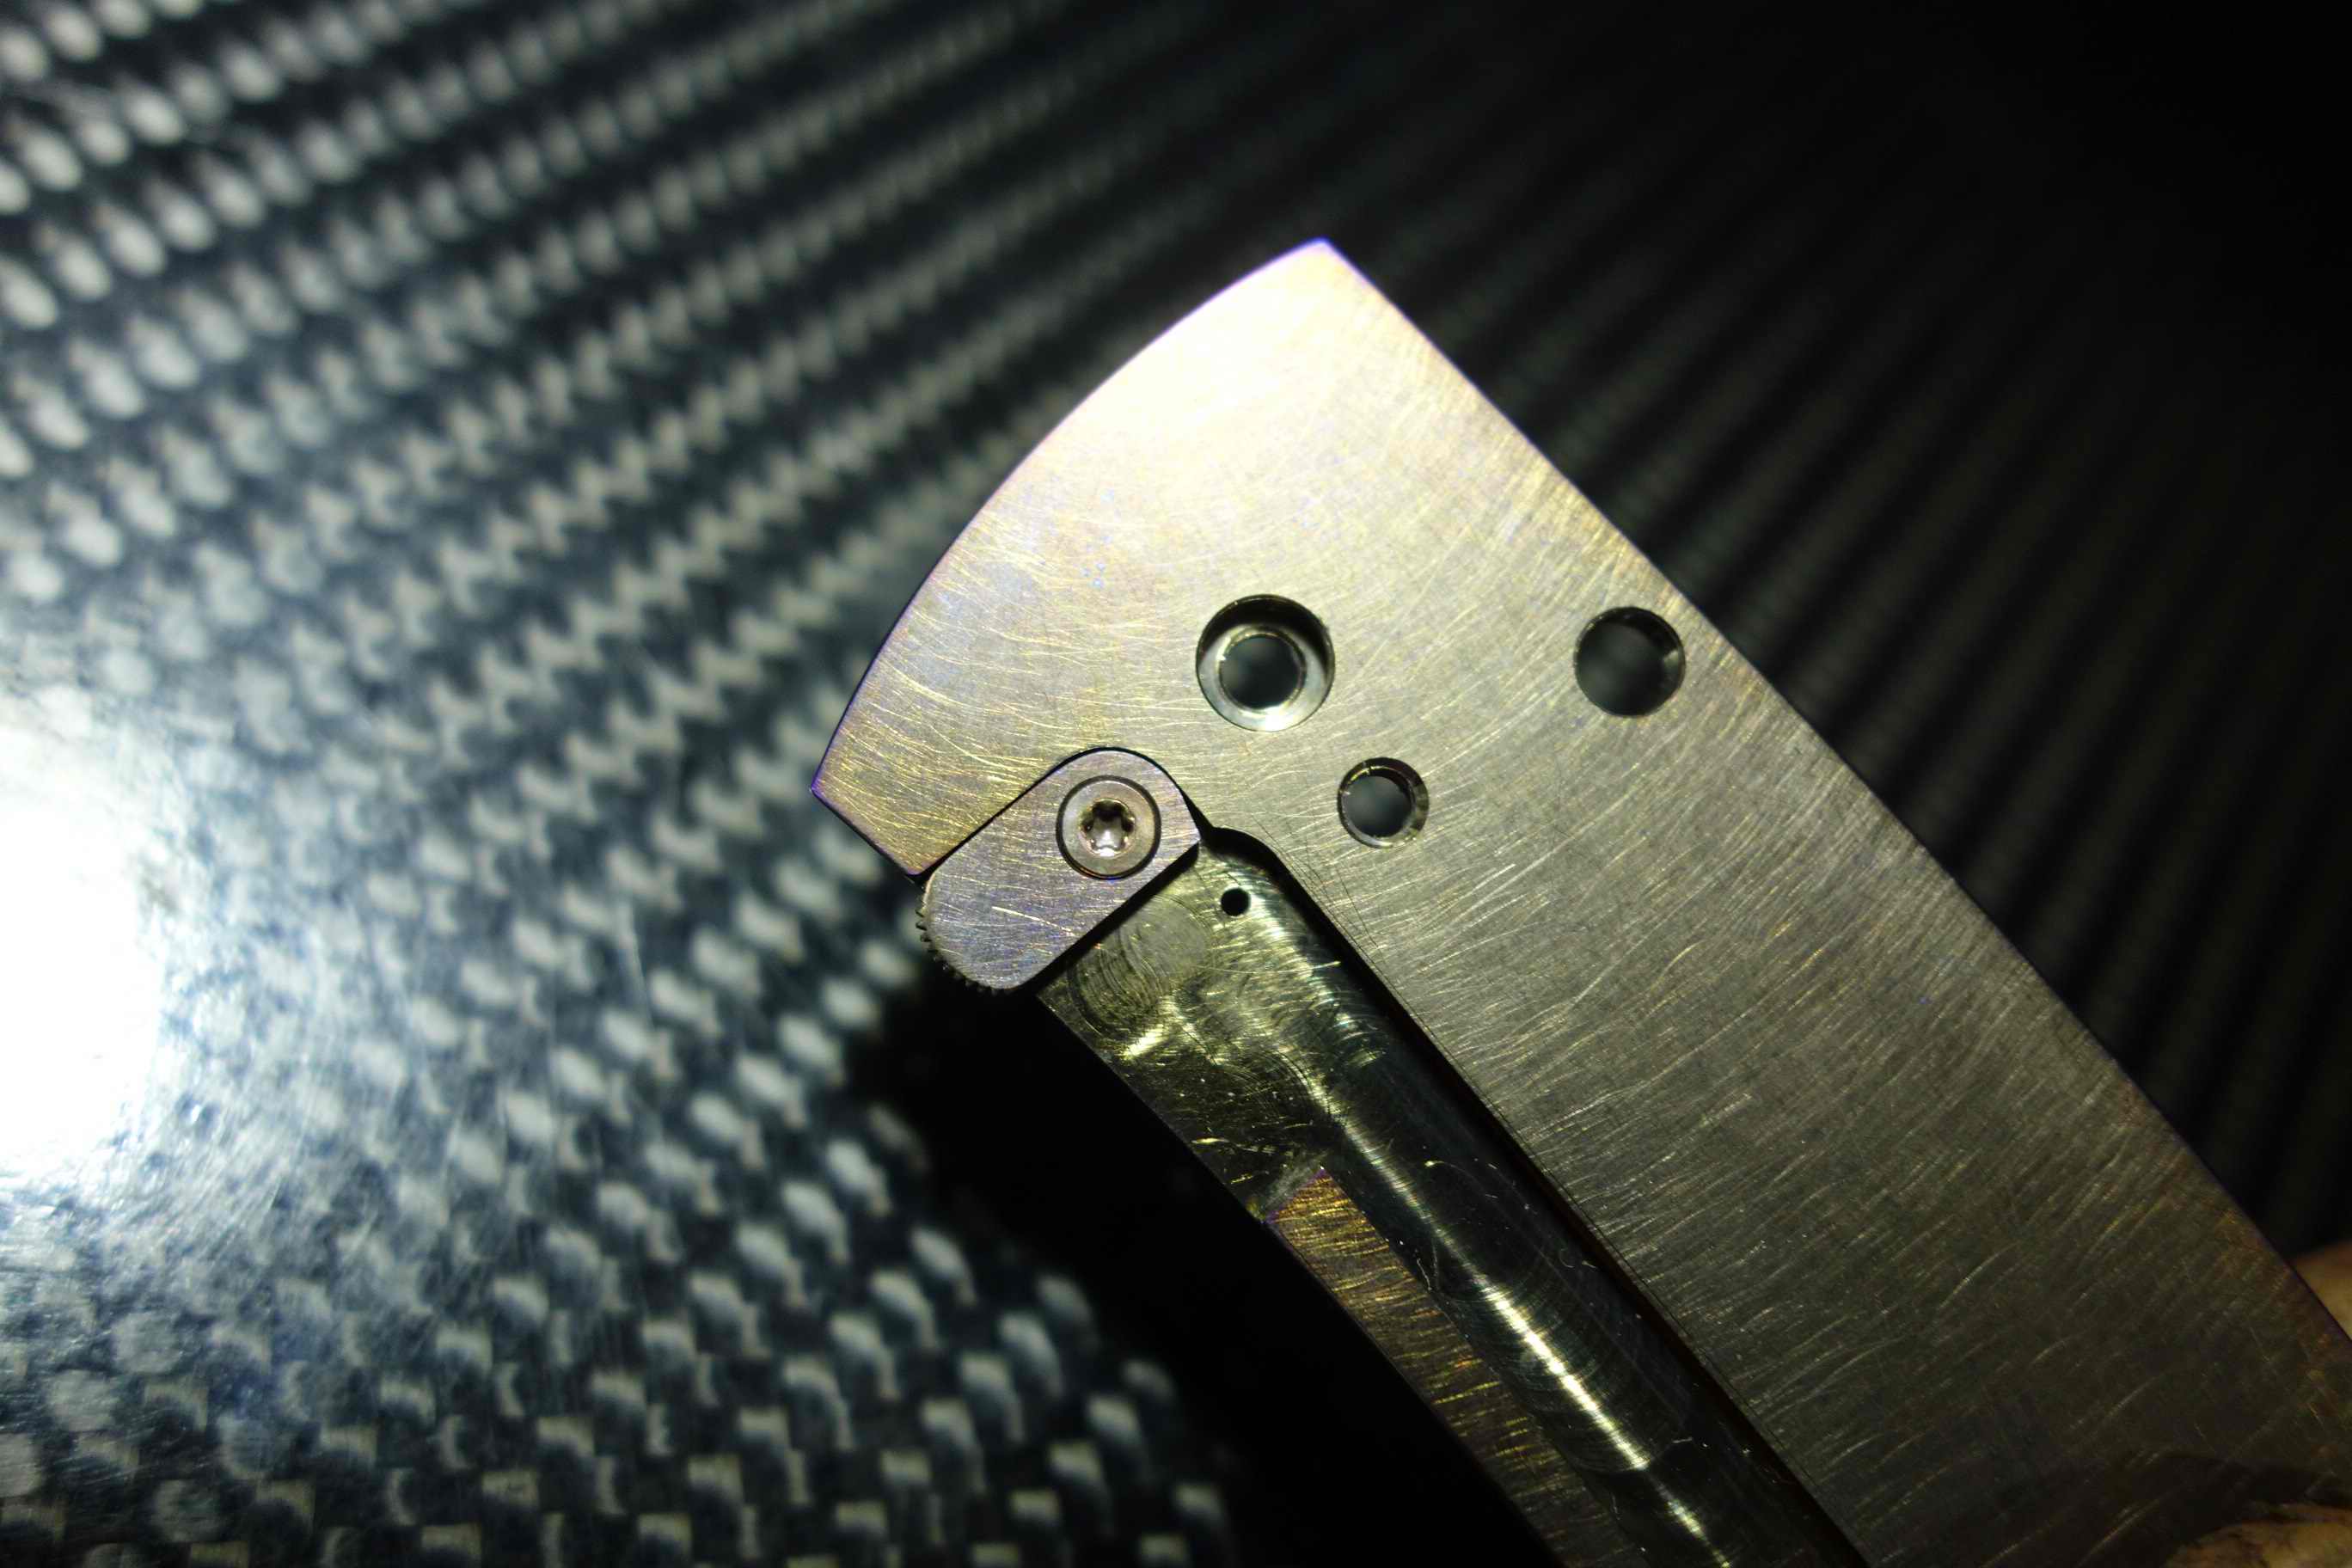
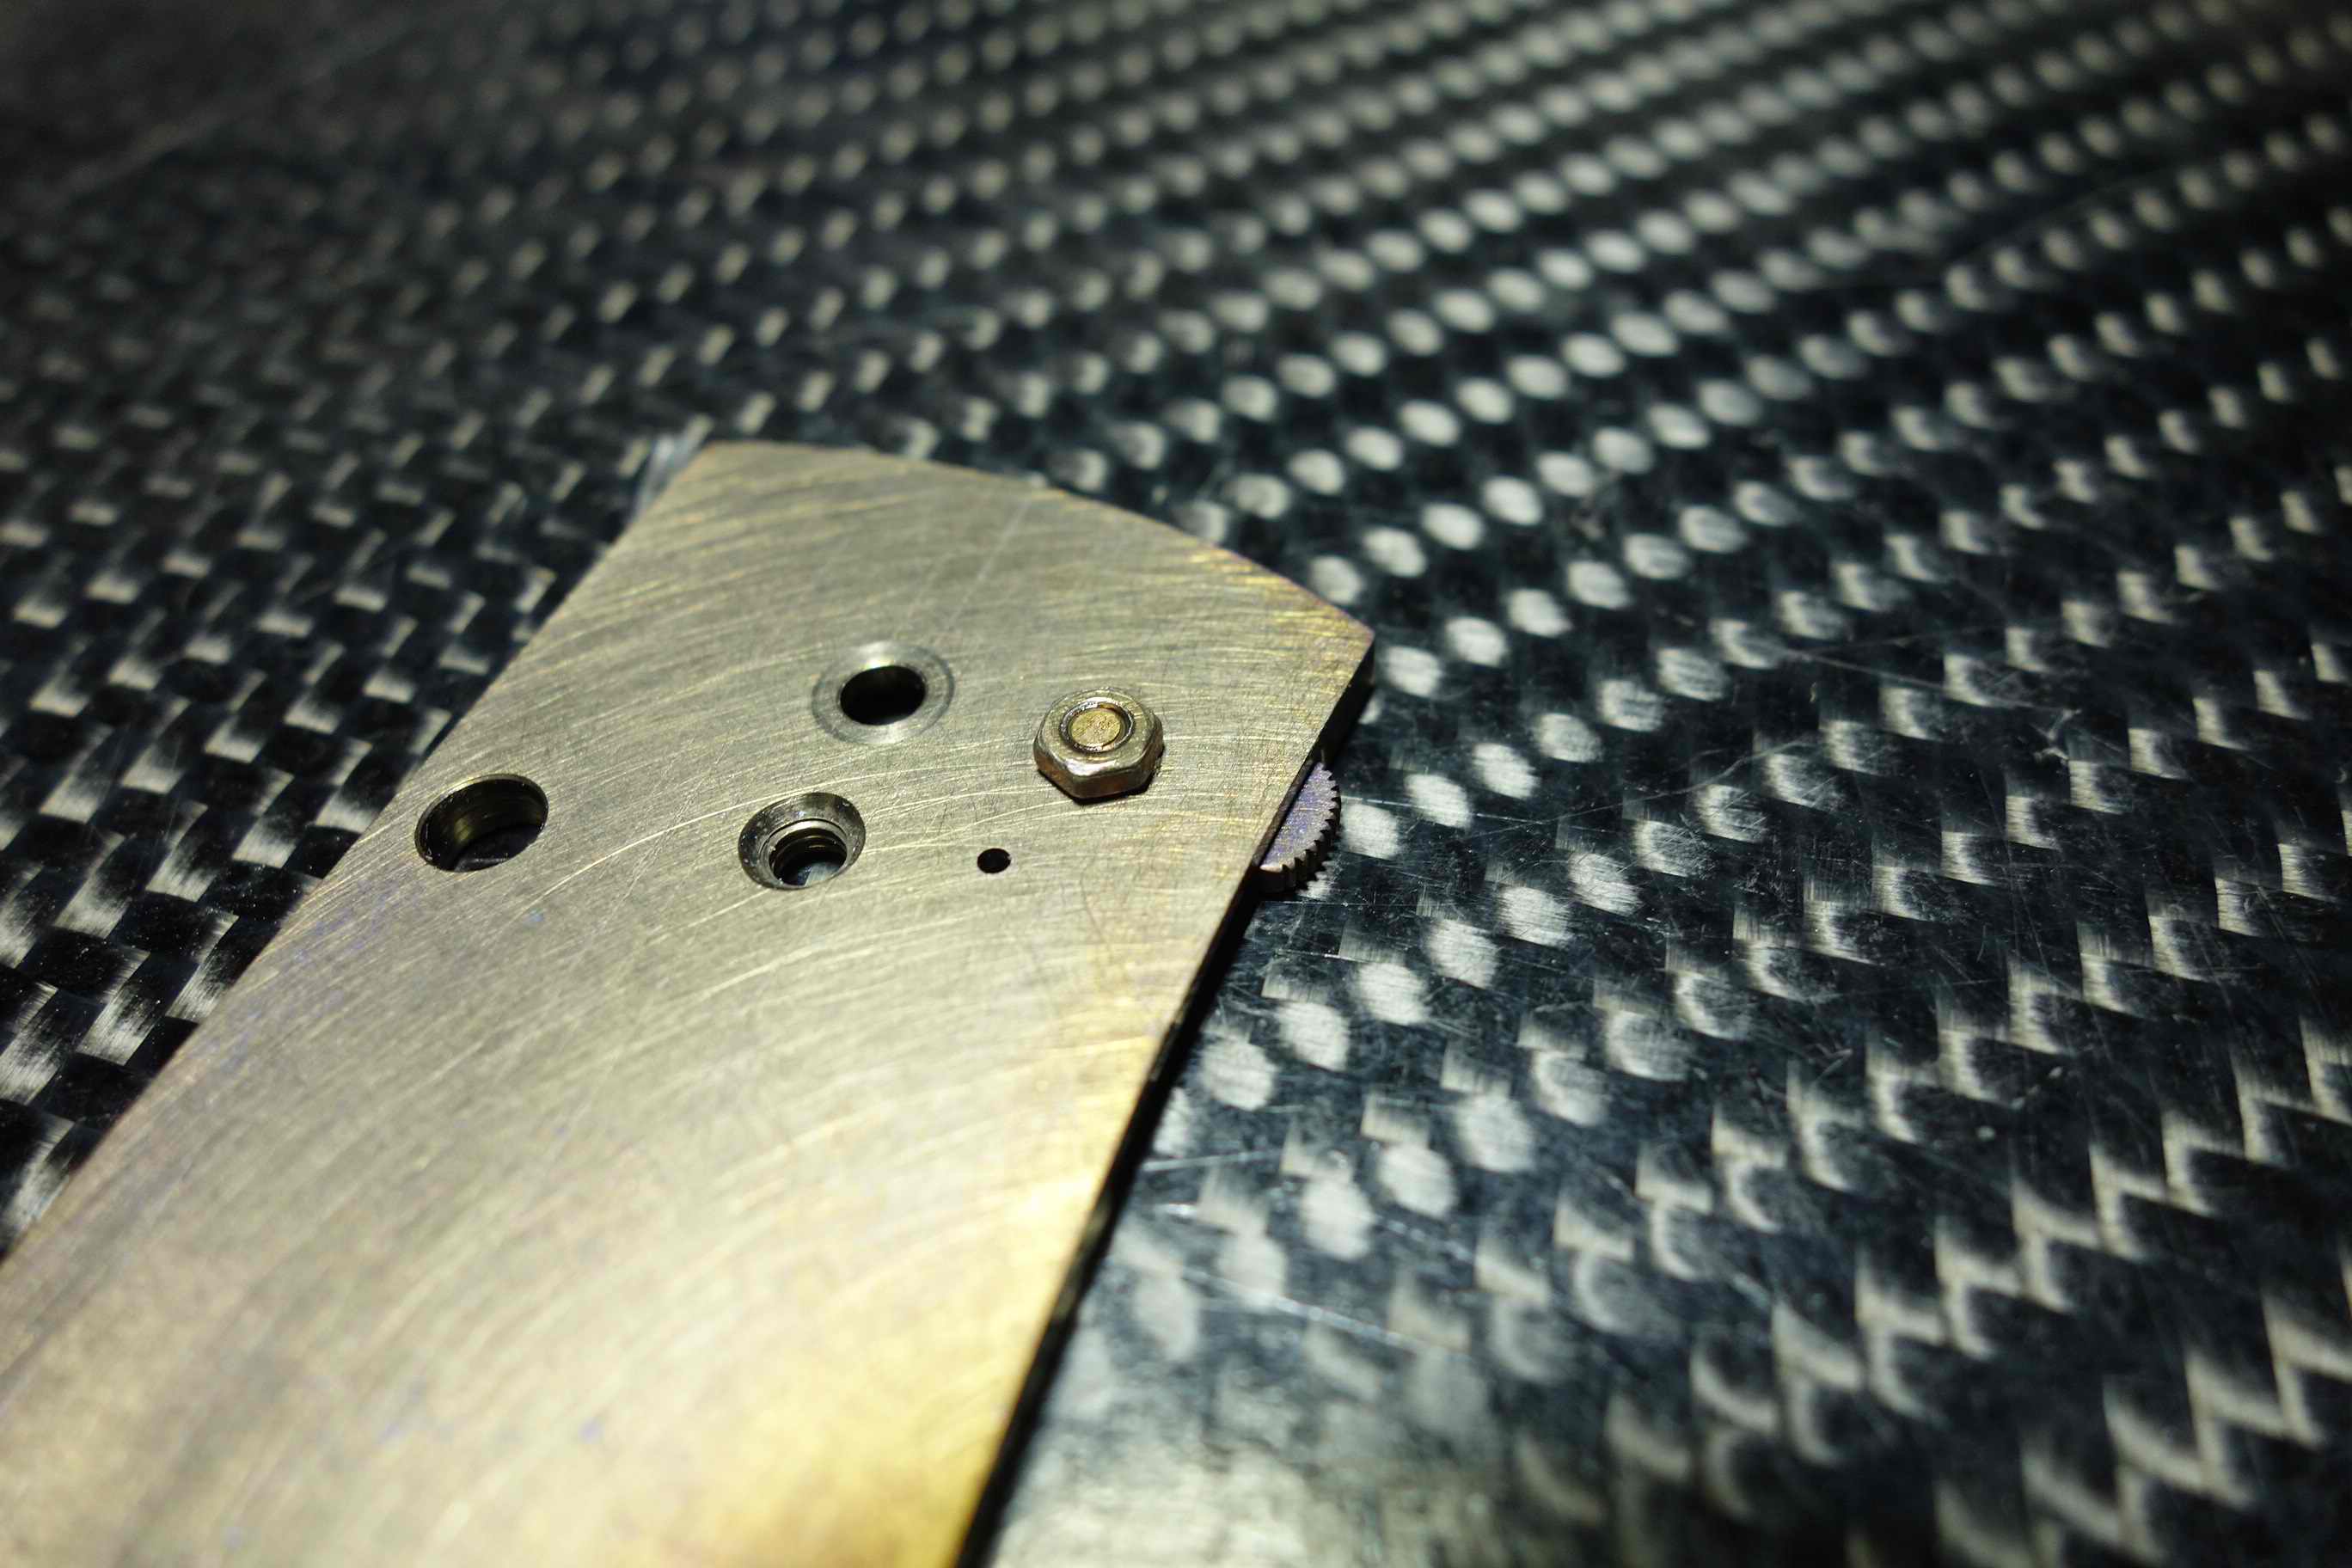
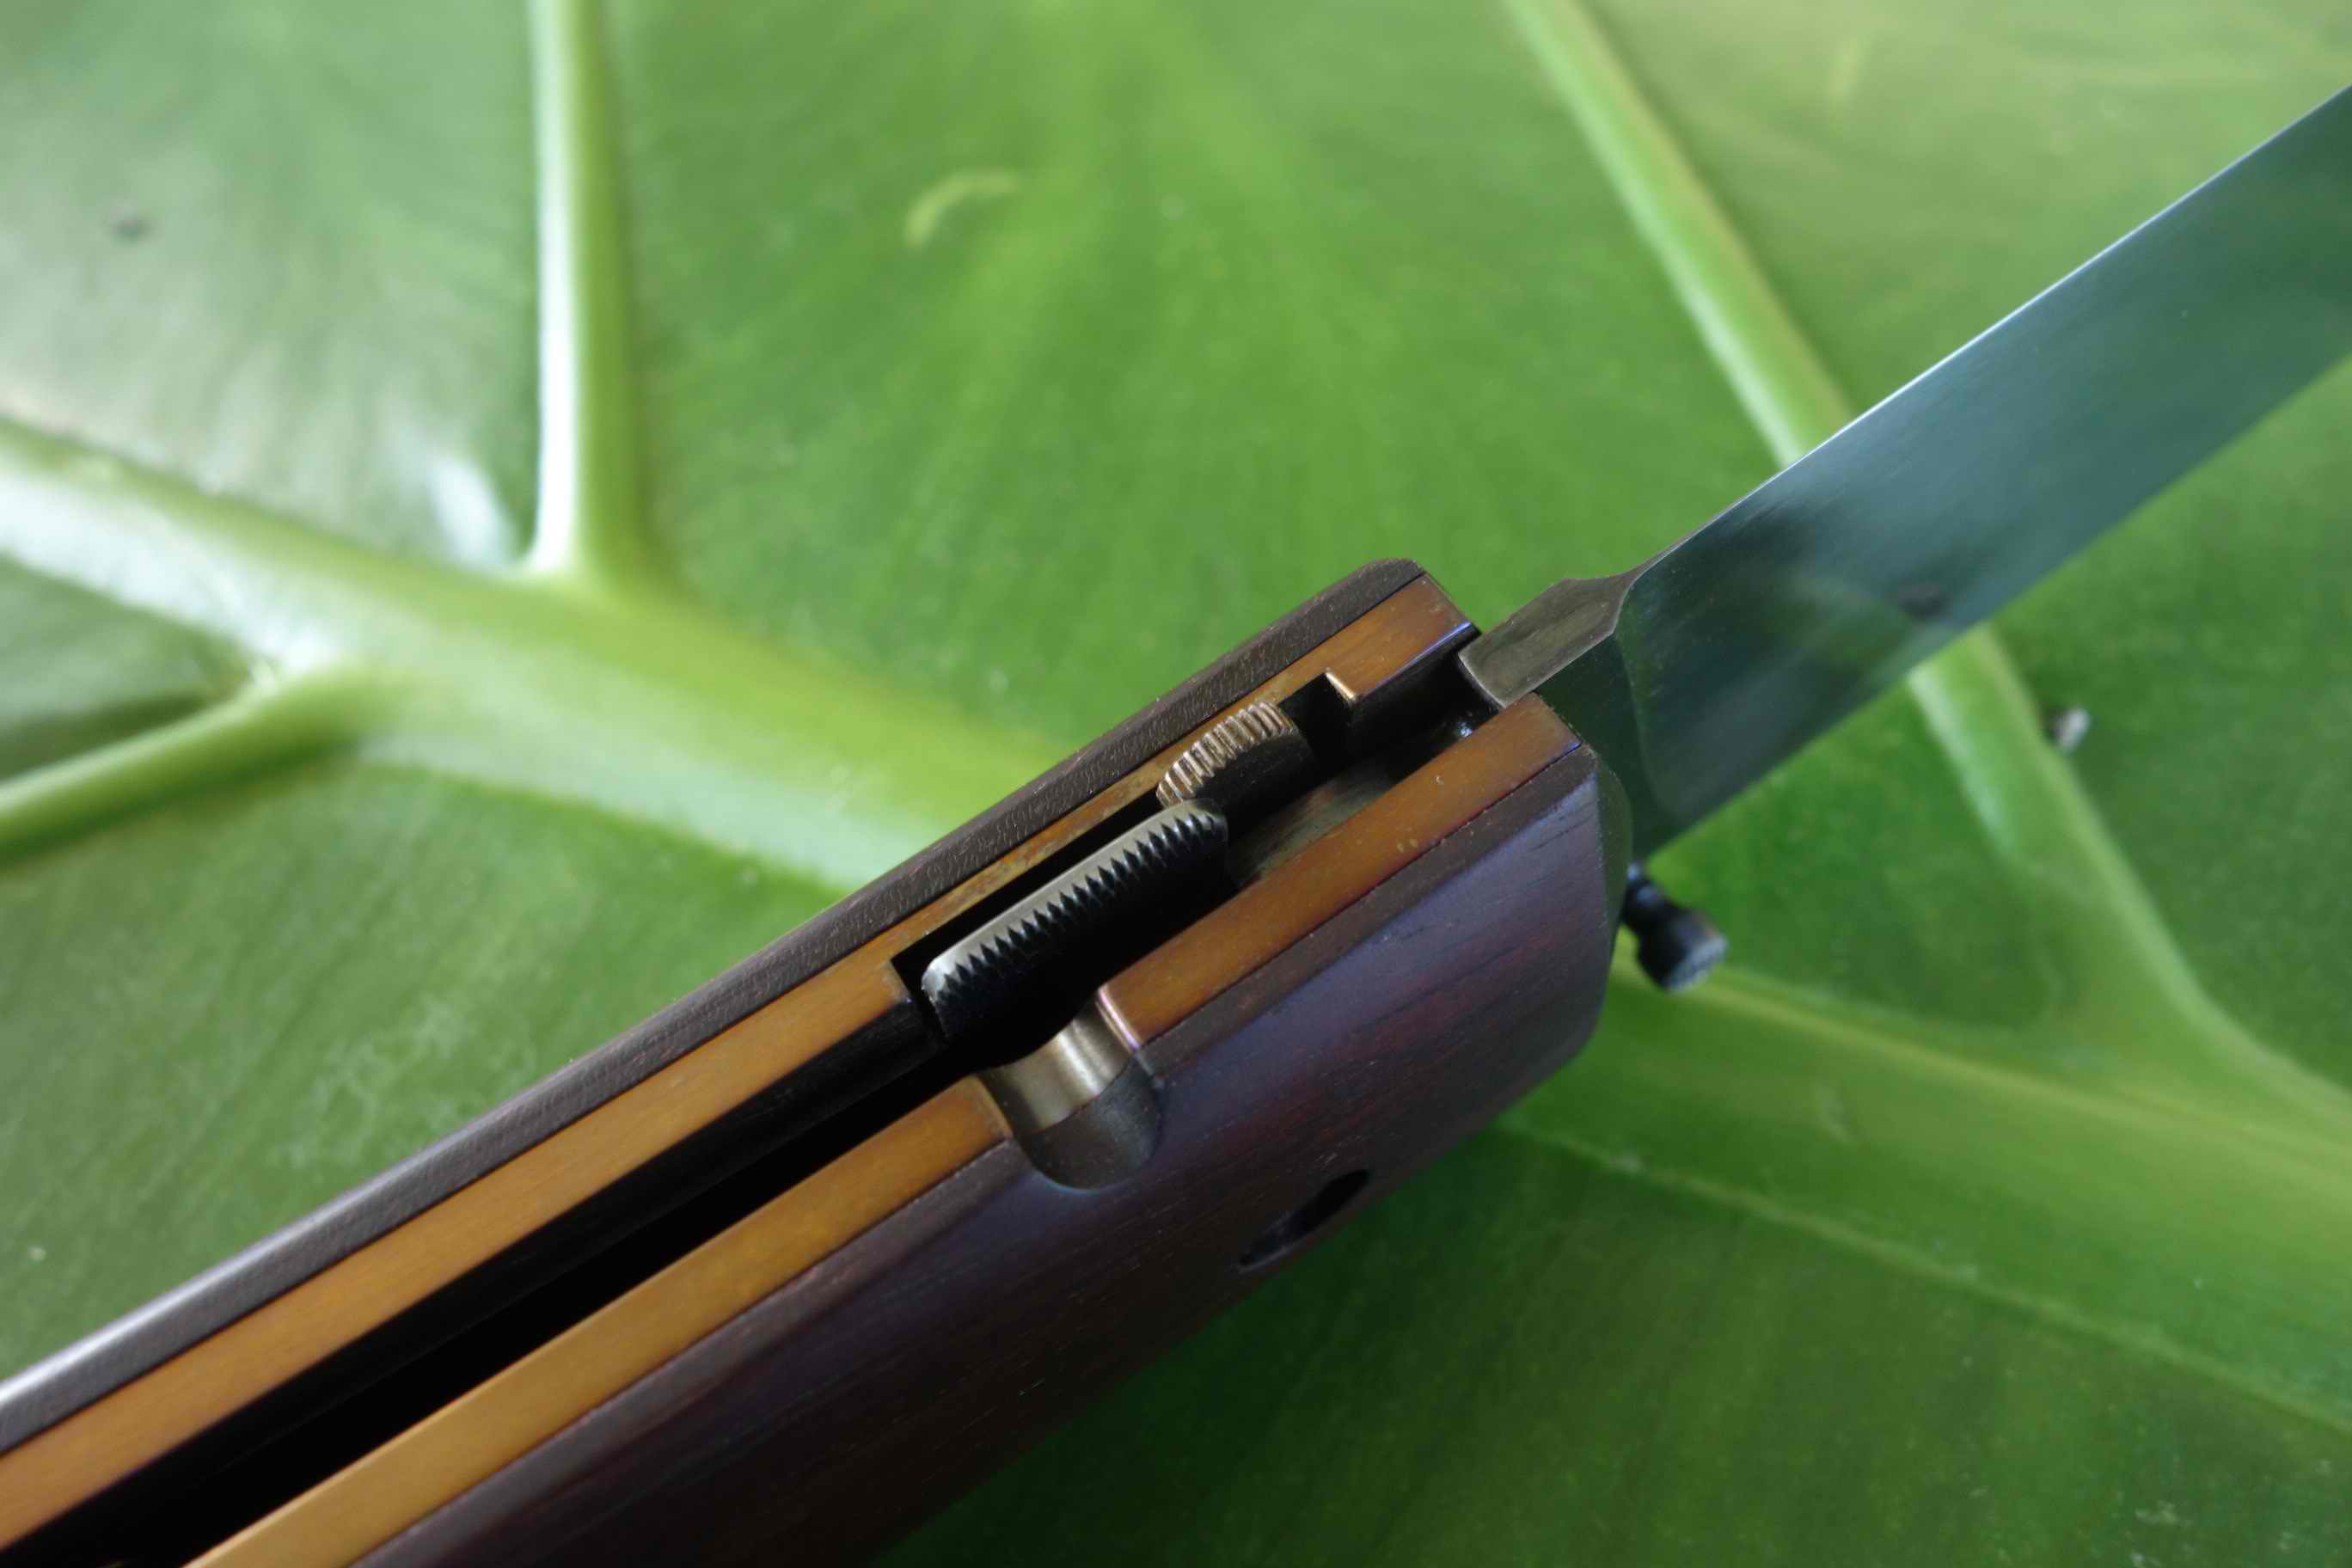
It works like a foot in the door, ...the second lever is just pulled under the spring.
The second lever is hold by a M2 screw with screw head and there is an additional M2 thread in the liner, so this two threads help the fine adjusting of the lever. To give the right amount of friction and resistance while moving, the lever is also underlaid with a small Teflon washer( like the blade).
The screw head is secured with a drop of Locktite so it wont get loose after a while.
I have a personal folder with that lock and after two years in daily use the lever has still its tight walk like on the first day.
Thanks rockstar.esq!
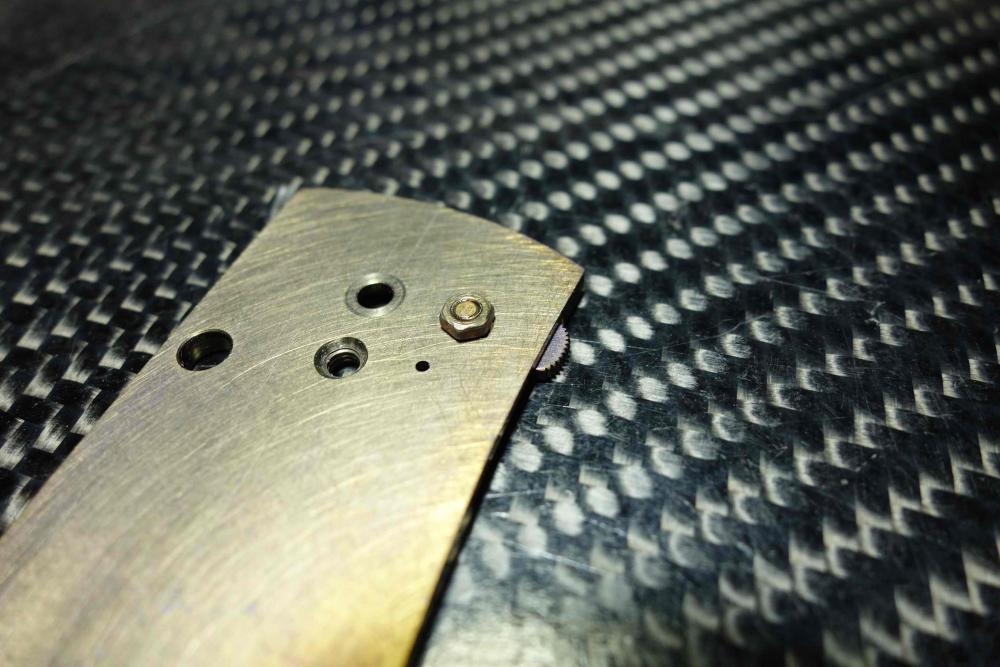
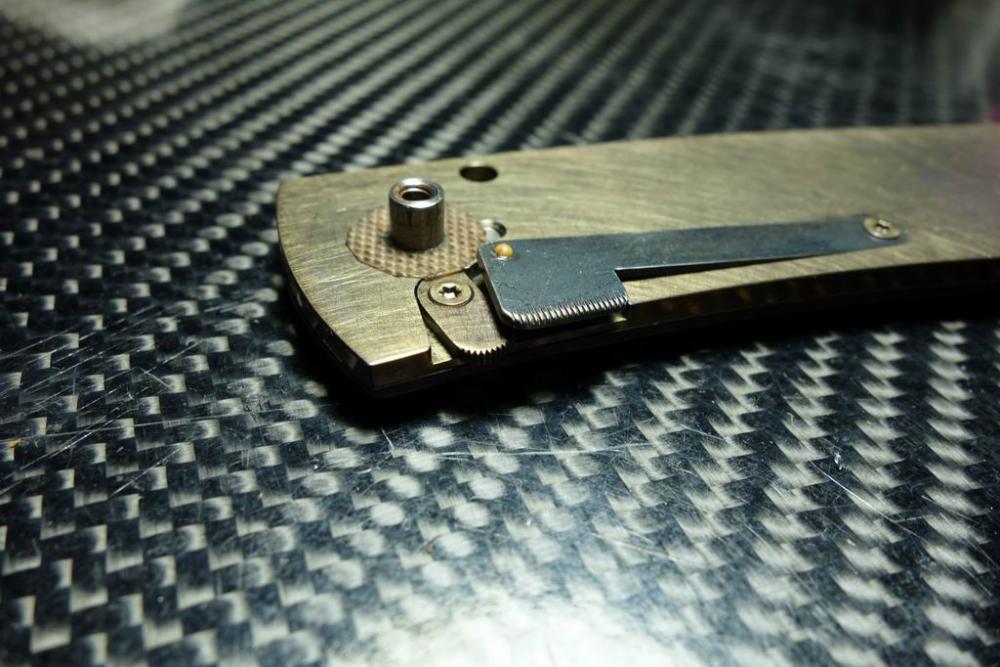 On 3/21/2017 at 6:02 AM, Michael Cochran said:
Looks like the one slides up allowing the liner lock to be pushed over as usual.
There is the lacking in my English that I have doubts that I got You what You mean....
...if You mean the one slides under the other, that it cannot pushed down anymore, than You got it
...
-
Thanks a lot, Gentlemen!
-
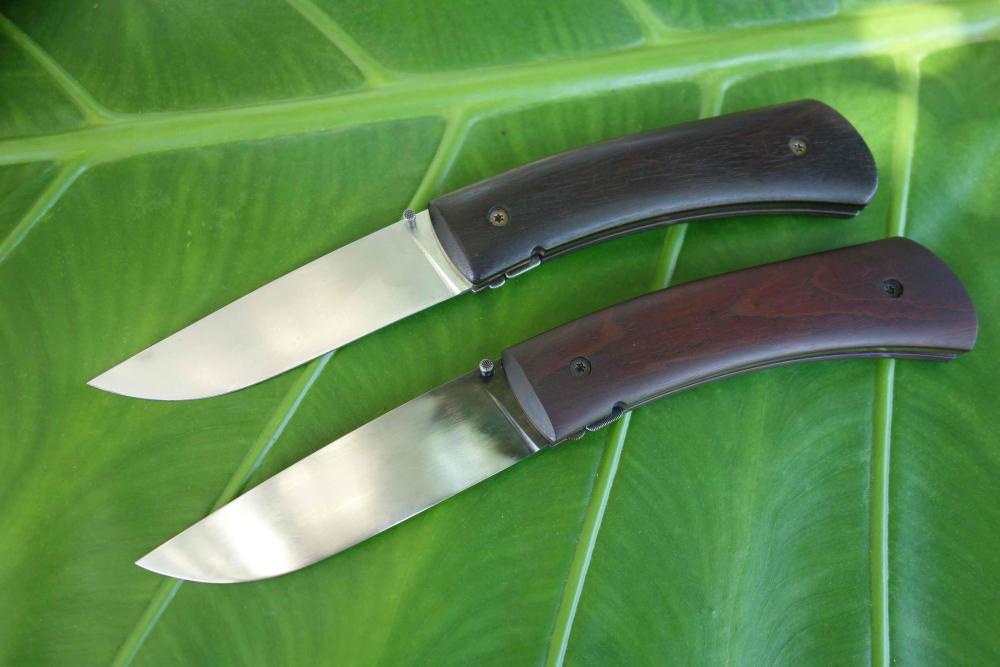
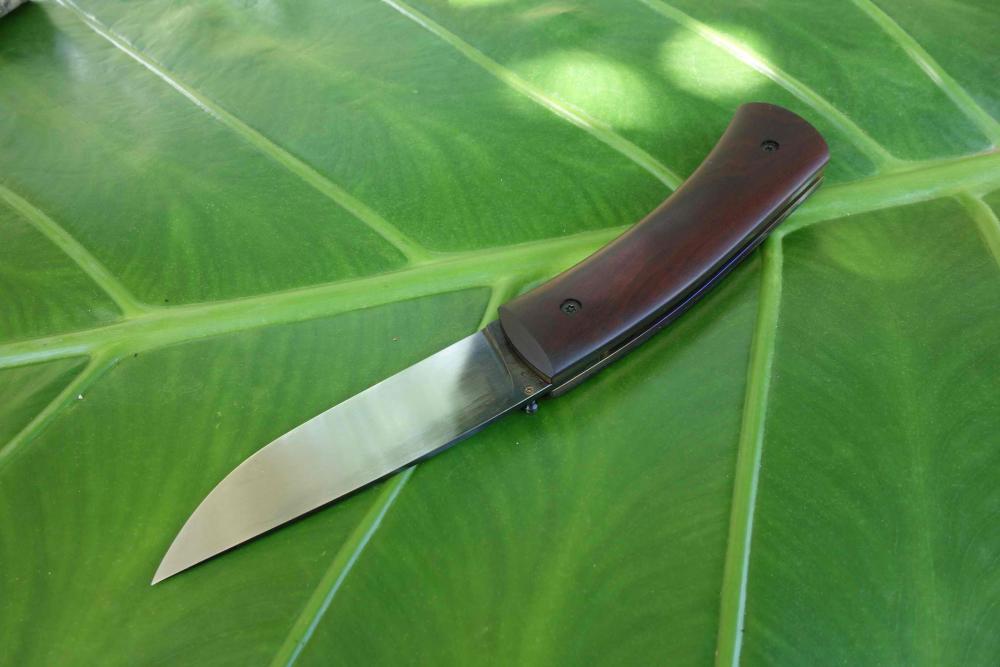
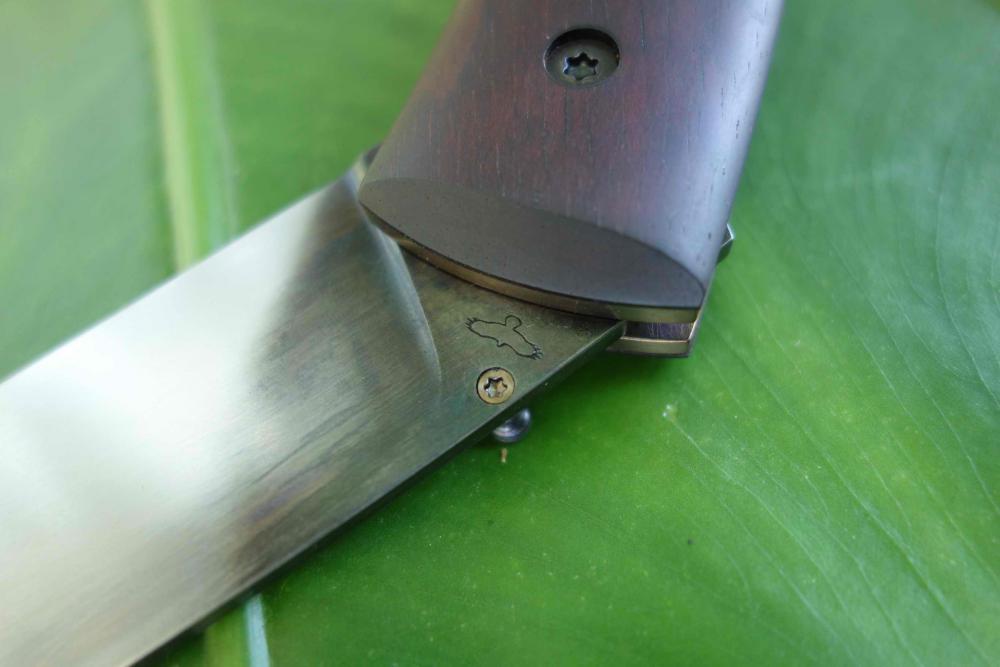
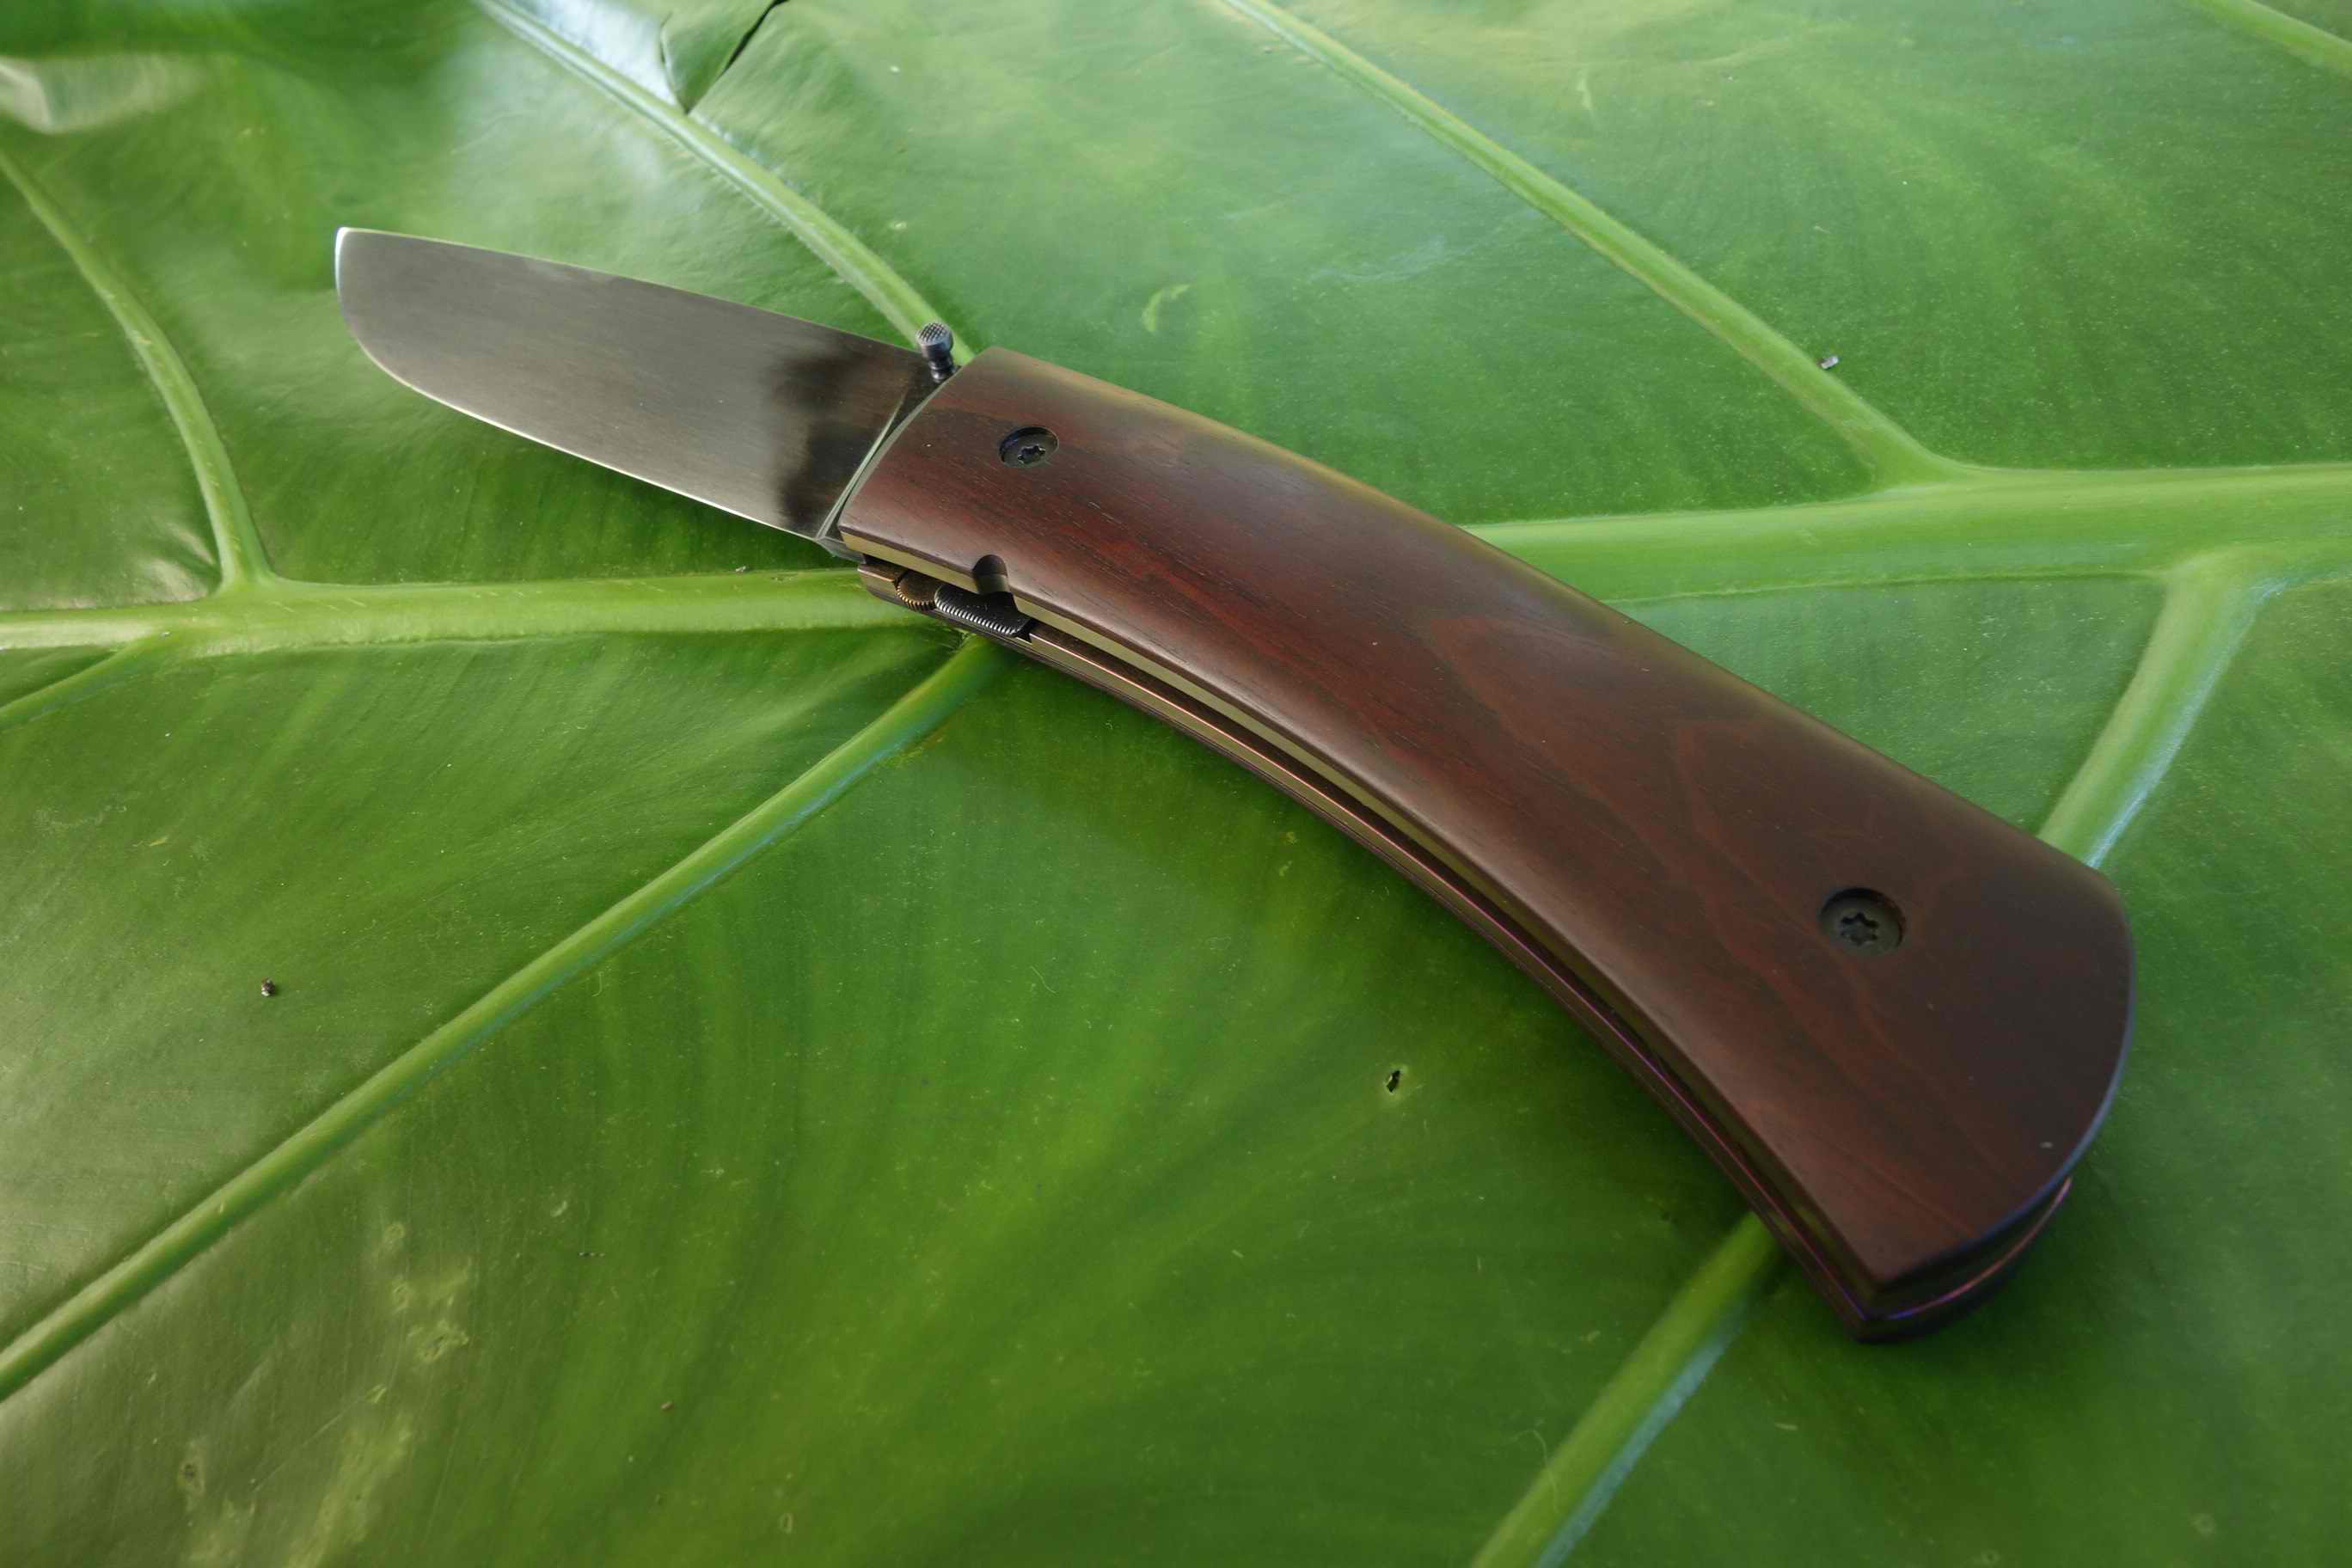
Large hunting folder that has 110 mm in blade length, 2,8 mm in width and measures 240 mm overall.
It has a additional lock for "the sake of the reliance" ...
Steel is 1.2442 (115W8), Indian rose chestnut for the scales, liners and second lock are 6AL4V
and the mechanical parts are made from 1.1274 high carbon spring steel.
cheers


Riged back and bone
in Knife Making
Posted
Absolutely.....in consideration that they are made free hand they appear in a good round shape.....actually of course they are not, but they look so.
Grinding to the scribed circle line is the most important step where You have to practice a little bit, try out material, grit size, tool options and the like, the rest makes the screwdriver.
I bet You are already able to do that.......")