

MotoMike
-
Posts
554 -
Joined
-
Last visited
Content Type
Profiles
Forums
Articles
Gallery
Downloads
Events
Posts posted by MotoMike
-
-
I like that logo.
-
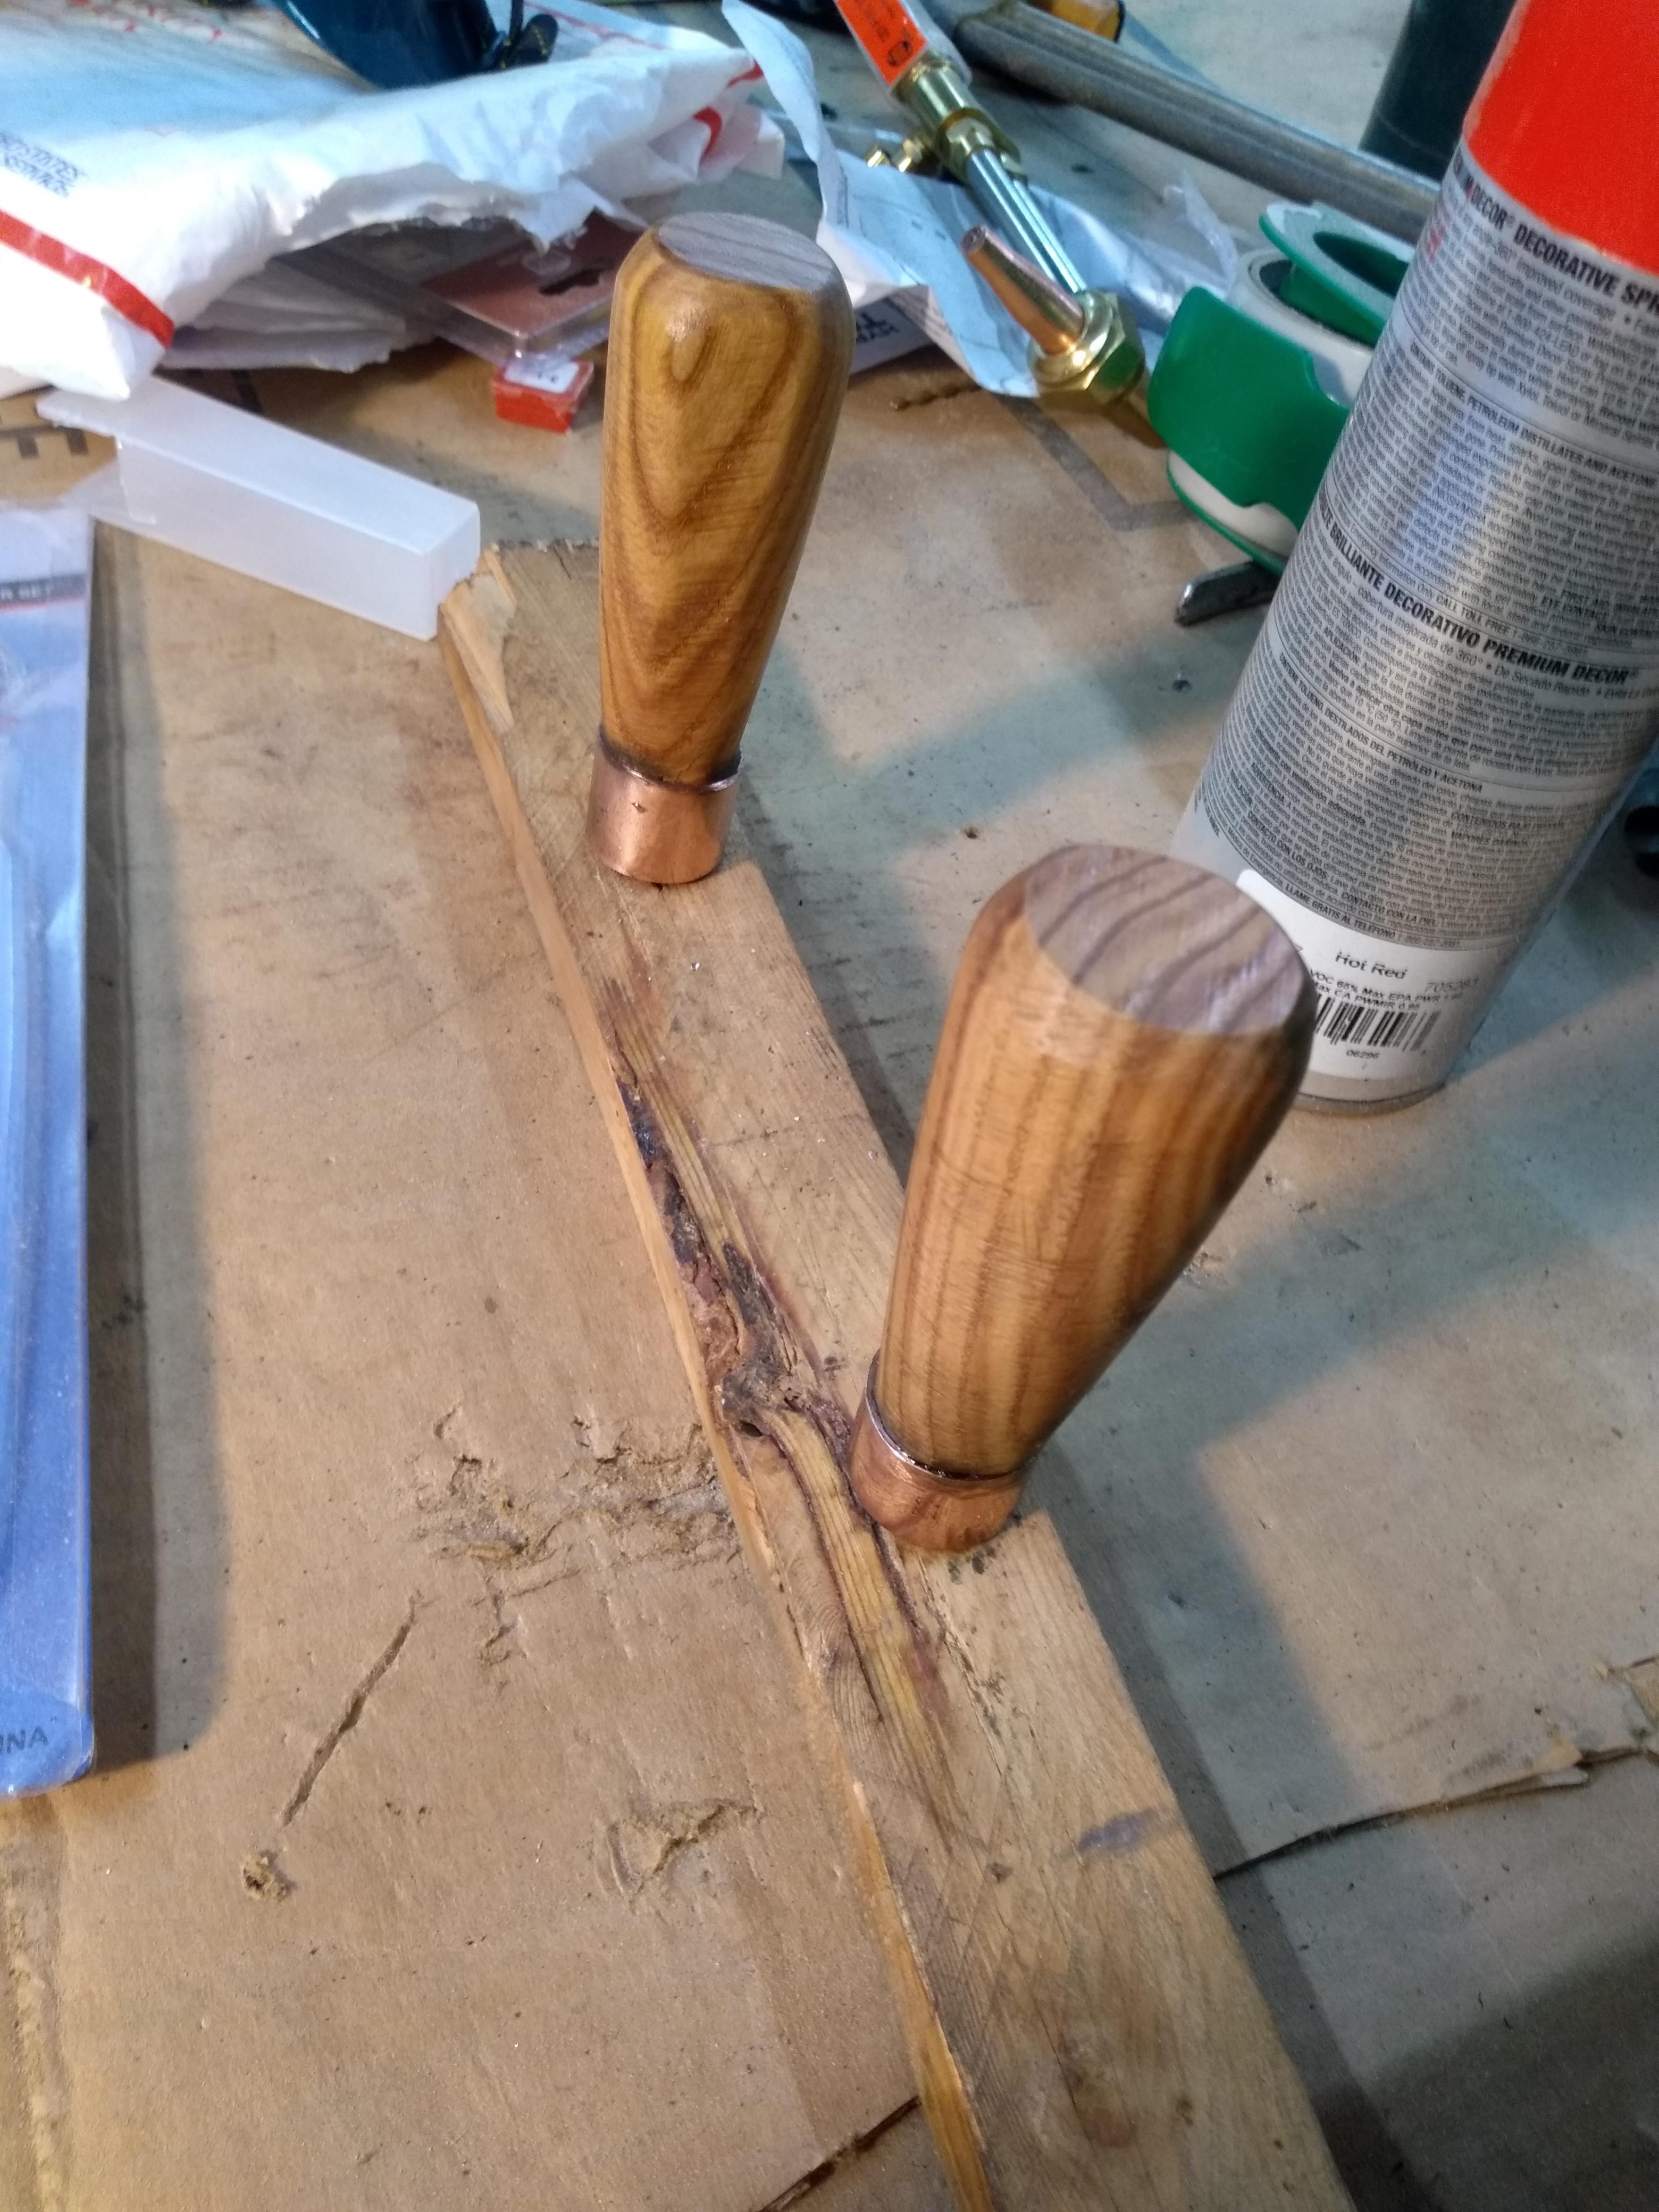
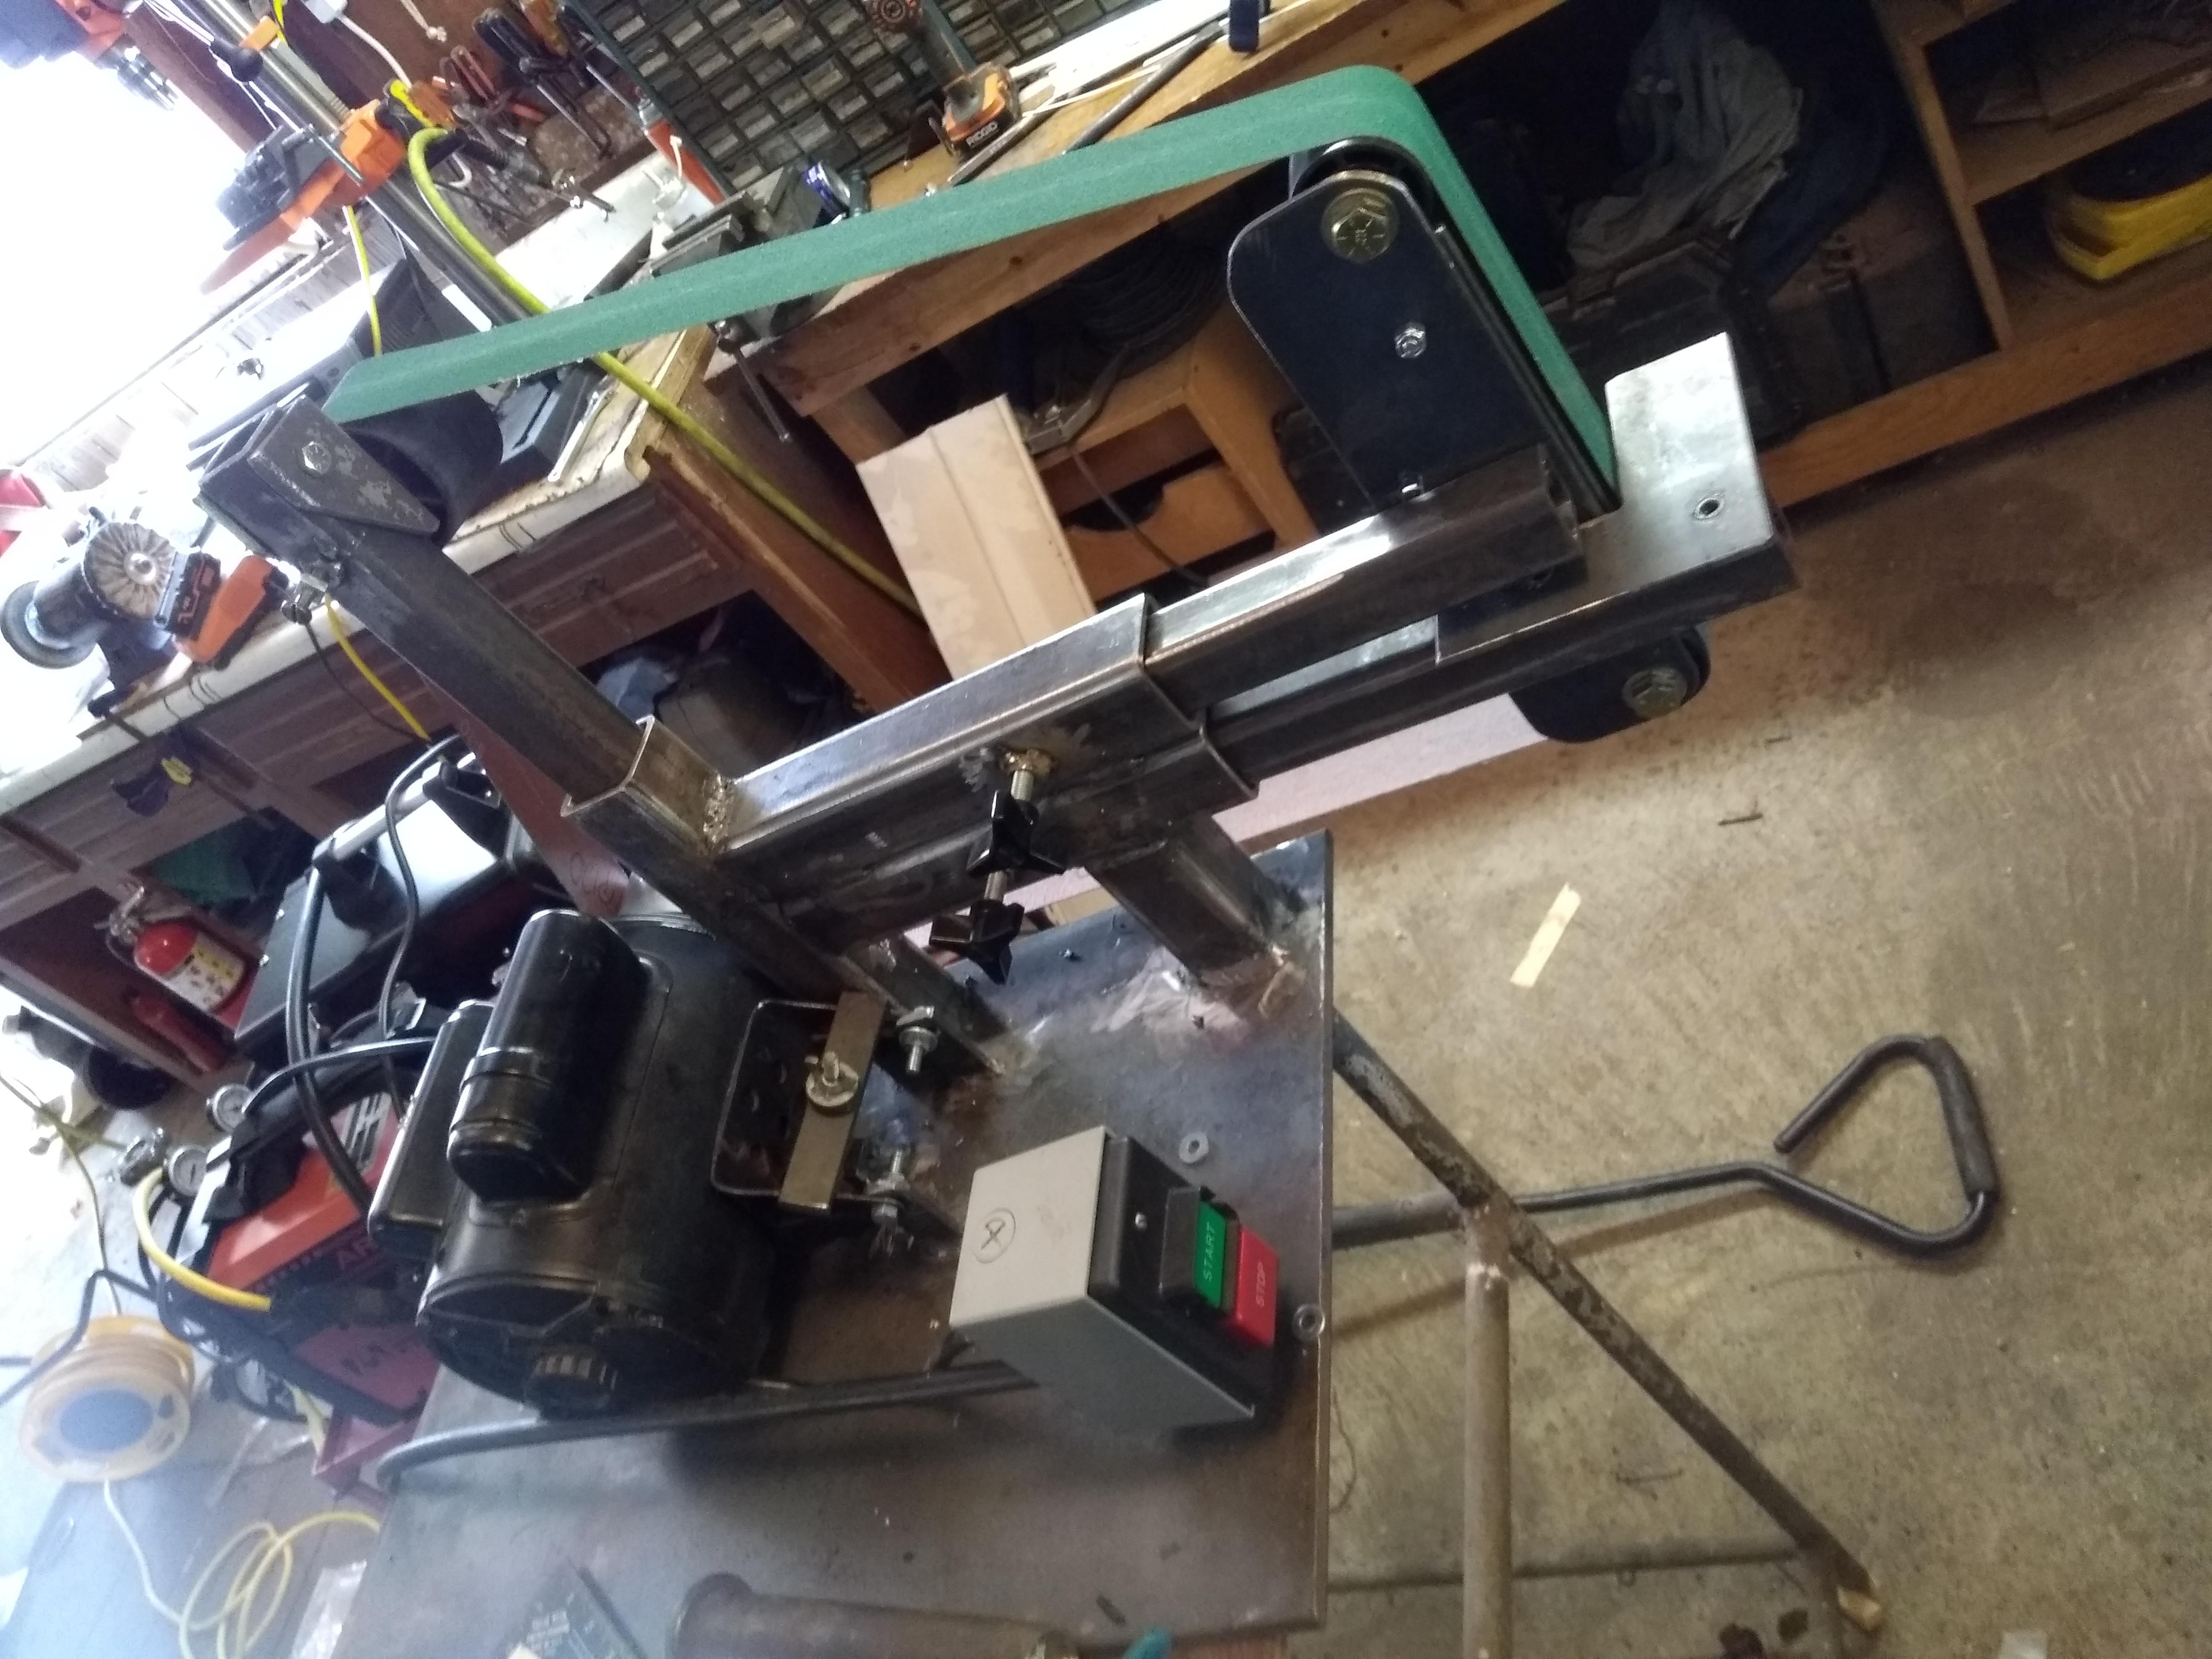
made some handles for a draw knife I'm making. and I learned that 36 grit belts will take off a knuckle like it's not even there!

-
thought I was finished but I guess I'm not. Glenn, took your advice on the foot strainer.

-
Looks handy. My hardy is about 1.2. would I sleeve it or would it be tight enough?
-
I don't see a plate on the face. Is it cast steel?
-
-
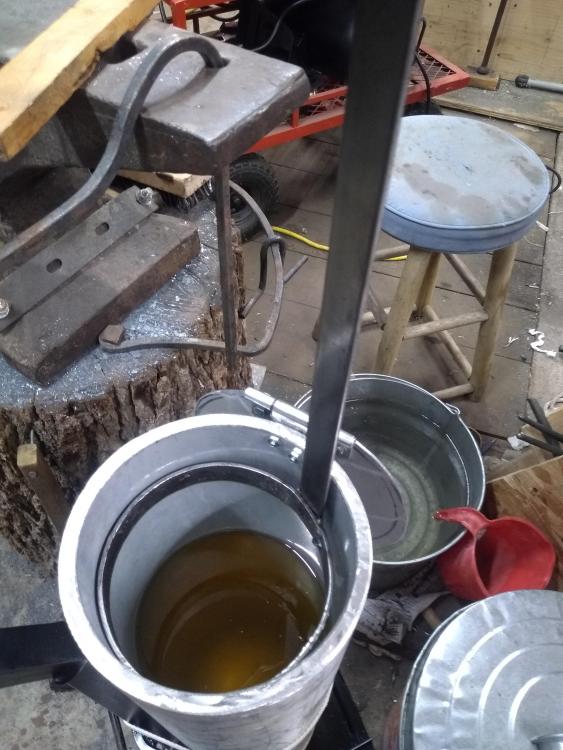
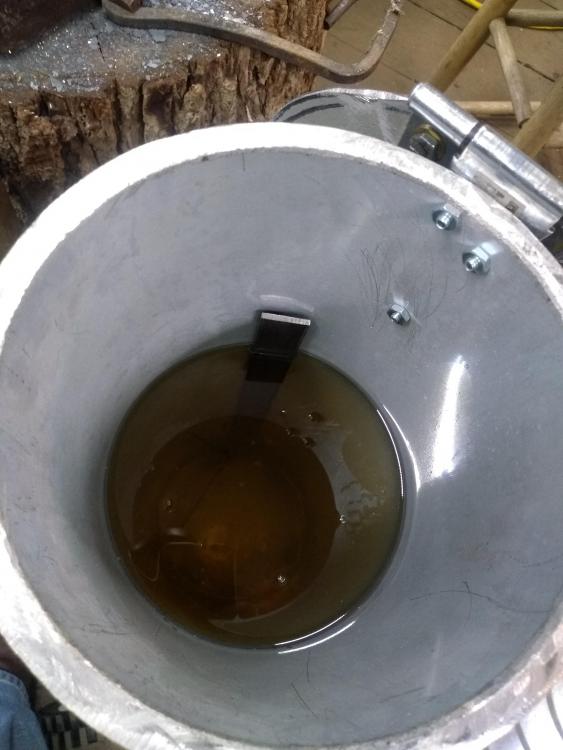
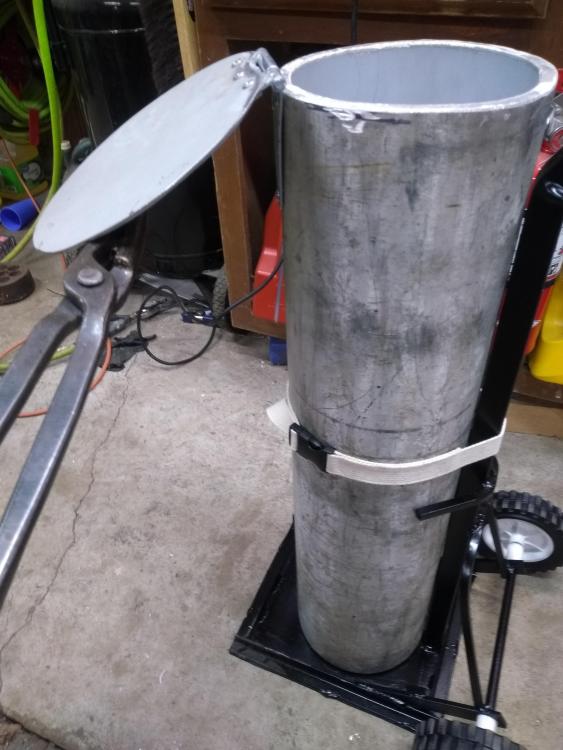
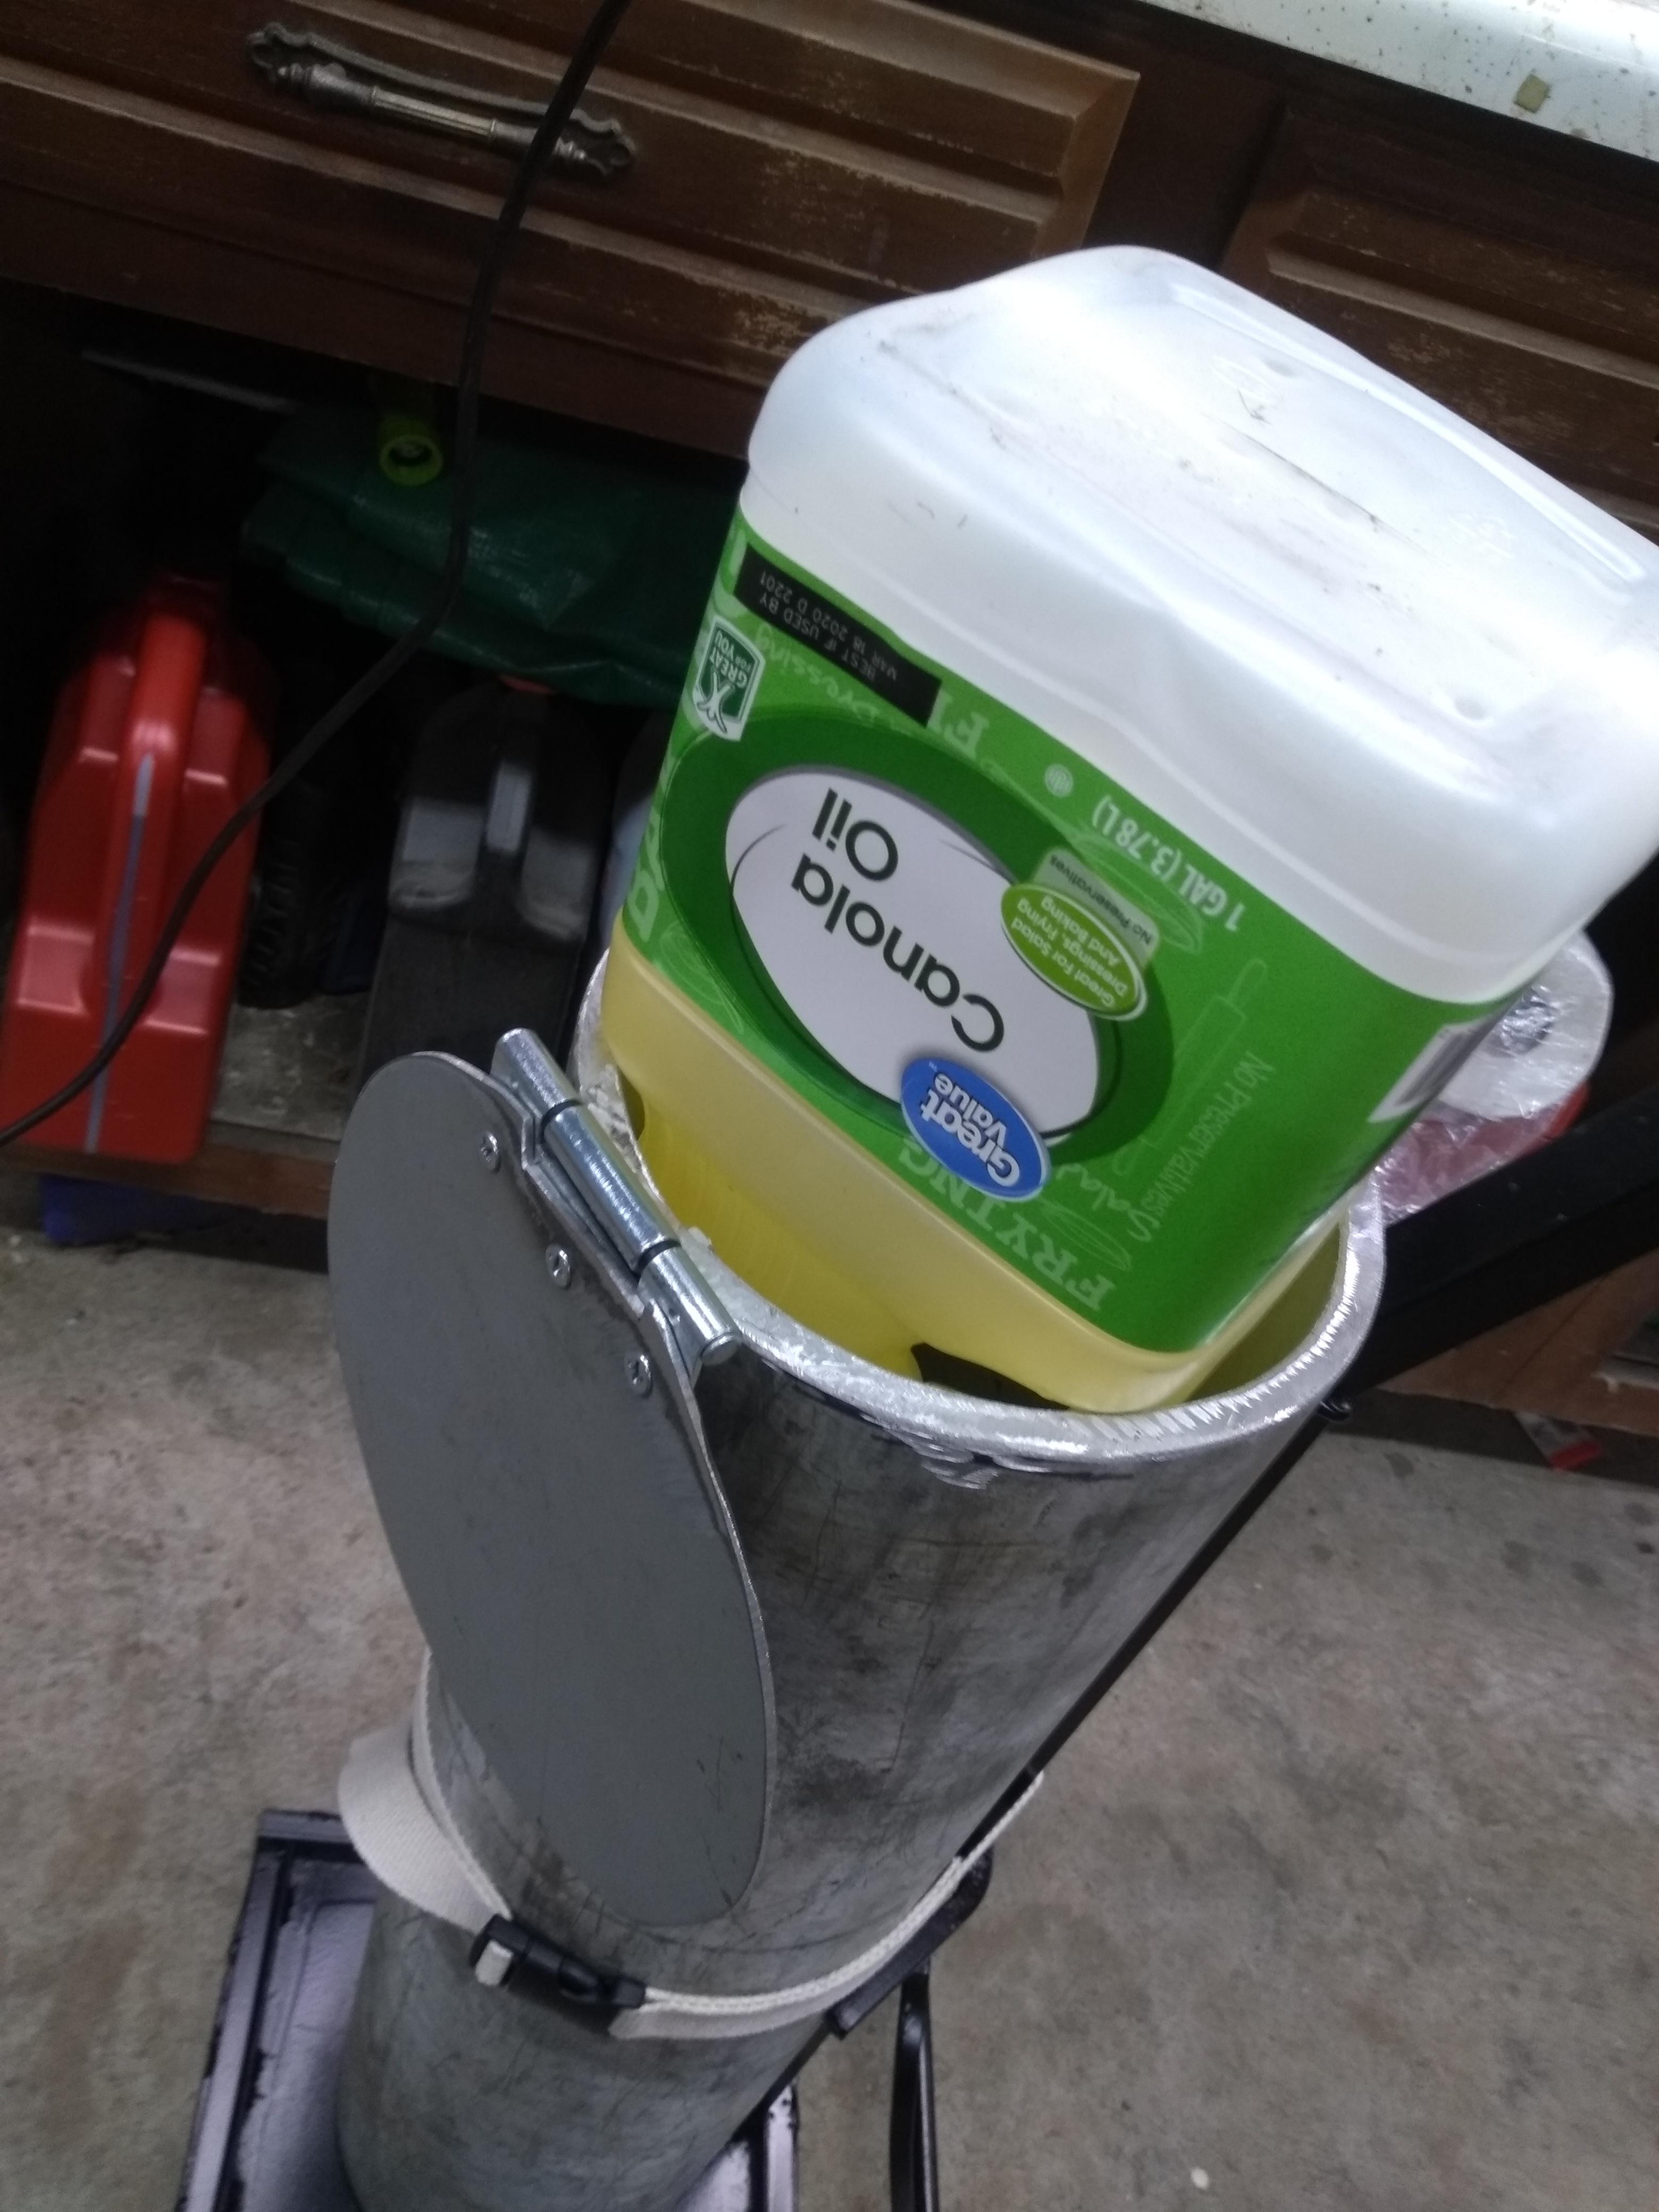
Glenn. Appreciate the advice. I've just come in from the shop. I tilted the tank over until I could feel it was about to go on it's own. It took abut 35 degrees to get it to start to go. It seems pretty stable to me. believe me, I don't want 3 gallons of oil on the floor. I've had half a quart and that looked like a gallon while cleaning it up. I like the idea of a foot strainer or basket in the bottom of the tank with a handle. I have decided to put another strap on it and some two stops on the base up tight against the tank to lock it into one spot.
Thomas. I hadn't worked out the details for heating the oil, but something along those lines was what I was thinking. For my tank, I had initially planned on using a 3 inch pipe with a rail plate for a foot. but when I did the math and the urging of a few smiths, I realized It really was only going to hold a little over a half gallon and I knew that would not be enough.
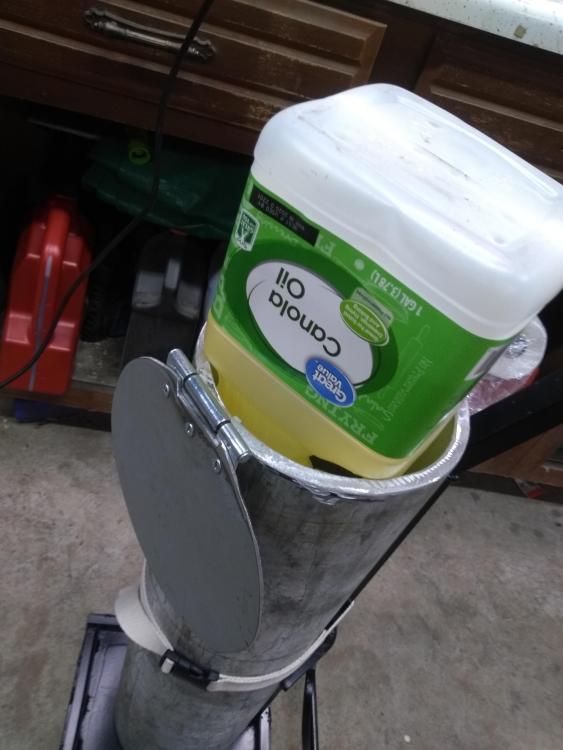
I realize that by keeping the level 7 inches below the top, I will have to be close to directly above the flame area if not right above it, so a big glove will be critical for the quench.
Thanks gents for your input. It is much appreciated.
Mike
-
Thanks Al. good point , I have a pretty strong magnet on a telescopic handle that hangs off the forge to check for non mag heat. I had thought of making a screen foot with a handle on it for retrieval but now you got me thinking.
-
Thanks Das
-
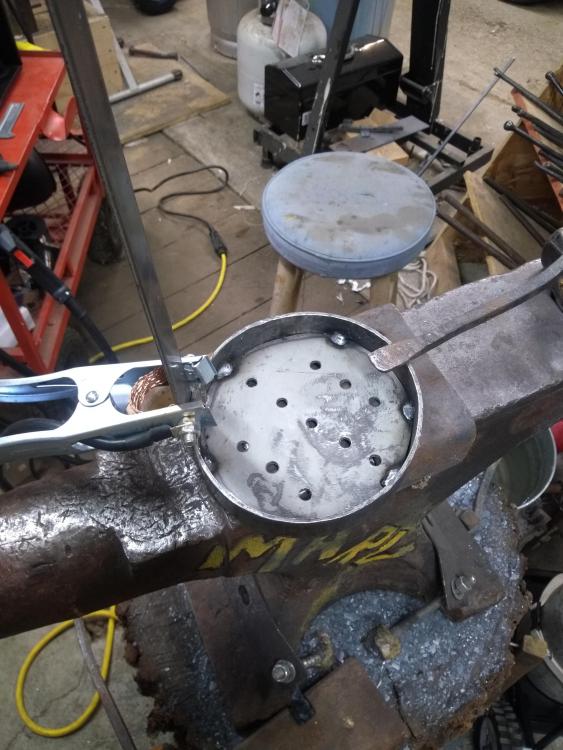
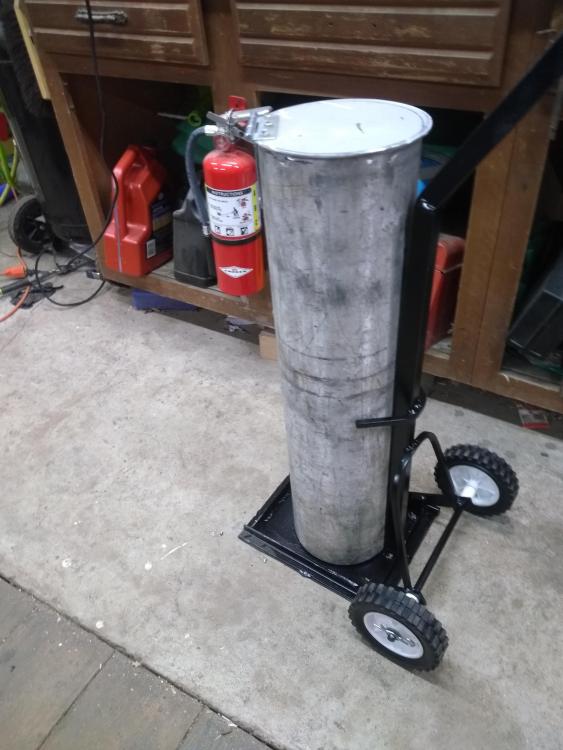
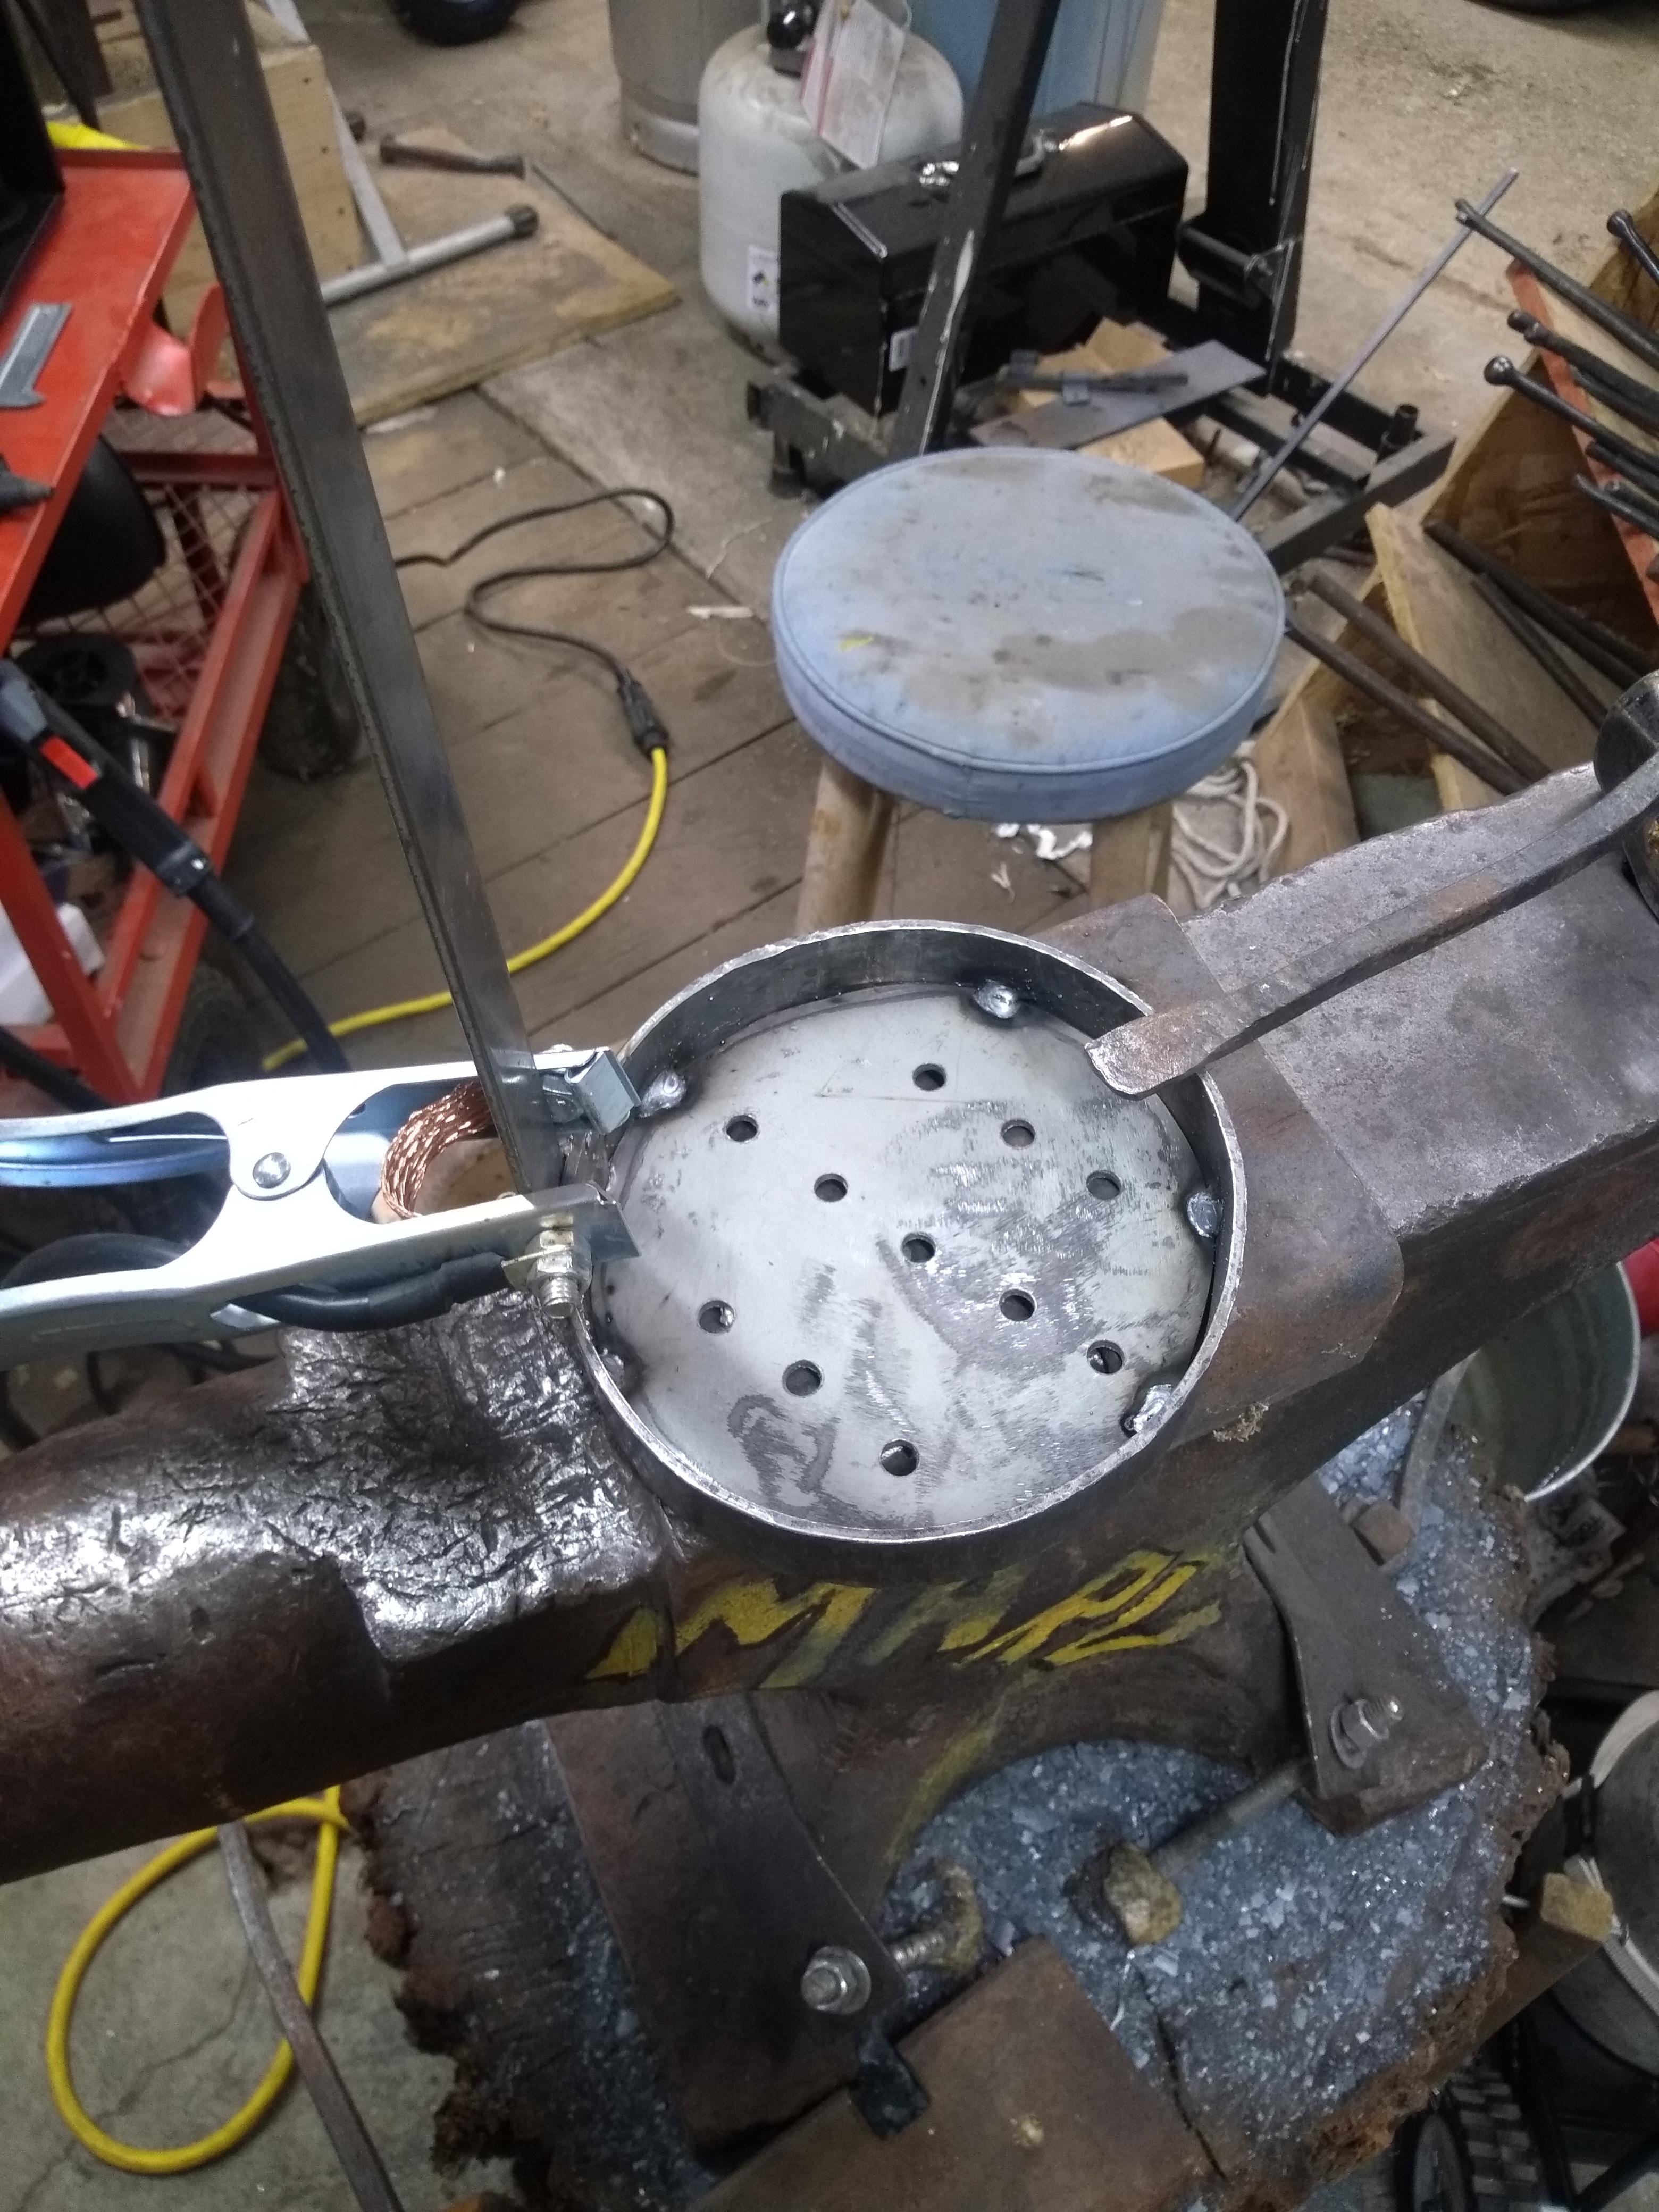
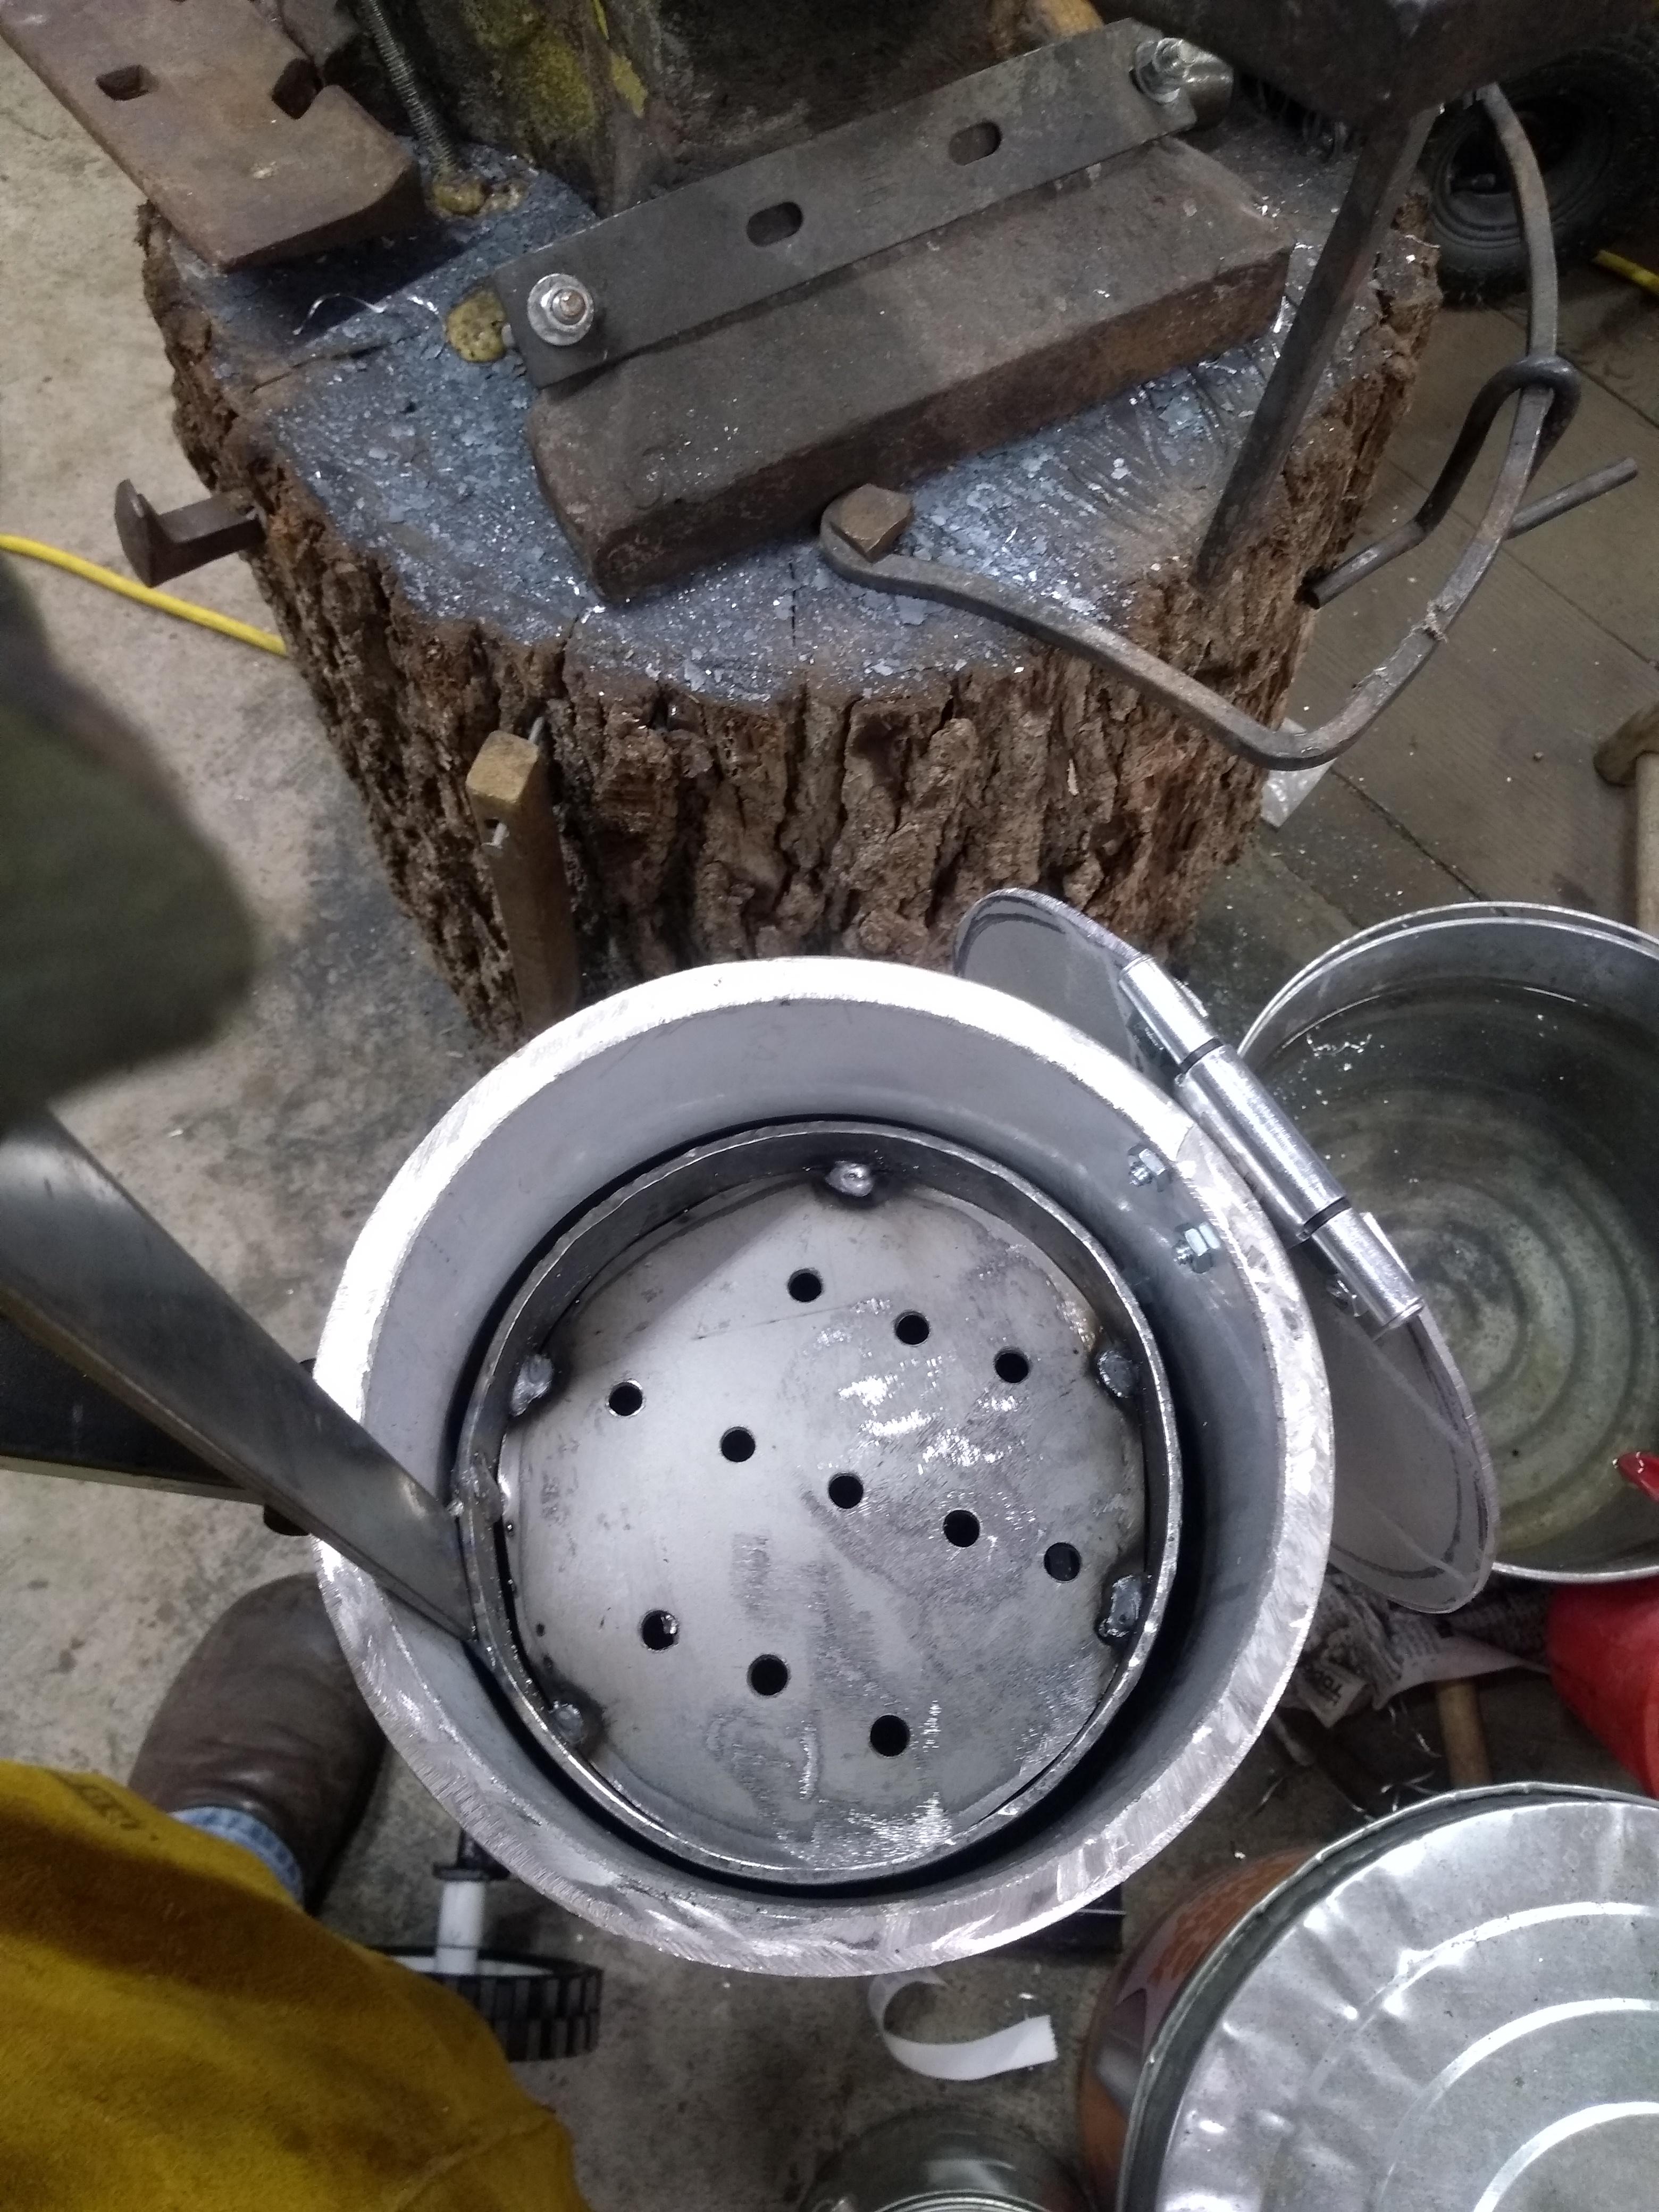
It is a retired oxy tank. 29 inches tall. I needed a base for it to make it stable. Job done. Also decided to make it somewhat mobile. the flame lid is easily flipped closed with tongs. with 3 gallons of oil in it. I hope there is enough room to contain any splashage that might occur. All scrap or items in my collection waiting for a use.

-
3 hours ago, Frosty said:
... it was super sensitive to dust and shorted out...
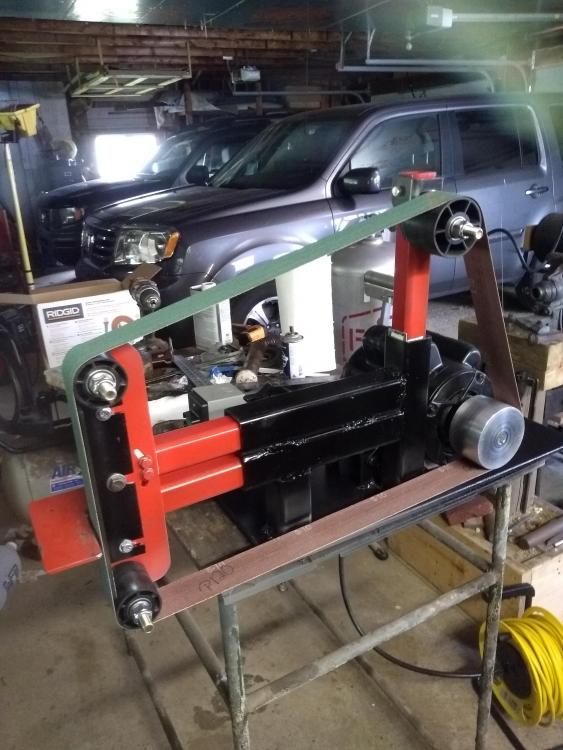
I used an on hand surplus air compressor motor. I don't know how sensitive it is, but I do know that these big belt grinders generate a lot of dust. It seems to get everywhere. I did not count the cost of that motor but In fact I did buy it with the compressor about 18 years ago.
-
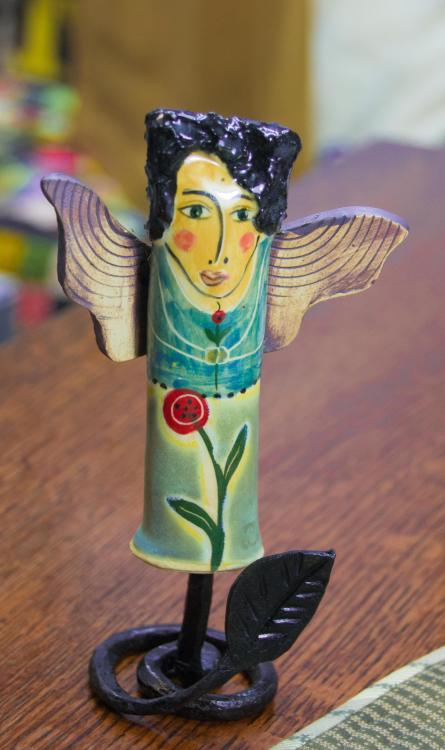
Rhonda's garden angel is not rated for freezing temps, so she needed to come in but did not have a stand to sit on. Now she does.
-
I built mine. had a motor already and bought the steel and wheels. I think I'm in it around $200.
-
Very solid first effort. I like the kukuri shaped one quite a bit. I got 3 gallons of Canola from Walmart for $4.20 a gallon a few days ago. I may try a knife of two this winter, after a year making mostly tools and decorative items, I've learned a lot about moving metal that I had no clue about before. Working on a draw knife at the moment. Good job.
-
Very nice setup. I've not seen a vice quite like that. Looks good.
-
Nice job. I don't feel bad now for staying away from knife making, I'm only into this for a year or so.
-
Test anvil in a chisel factory?
-
I'm struck with how flat the face is. It seems to have had some rough use with a couple chips out of the edge of the face, but really not much use. no cuts in the table. I will love to see what that lady looks like after you give it a wire brushing a bit of oil and hot steel polish. complain about the rust and negotiate it down.
-
Sure Gav, but It's cave man compared to yours

-
You probably mentioned, but what is your regulator? I It just seems like you have too much pressure suddenly there to me. Good luck, there are experts around.
M
Excessive wasted blank spaces removed
-
Nice looking build. Is it powder coated?
Air compressors are a good source I think.
Good luck.
-
Not there's an idea. consider it stolen!
")
-
I am sure those guys, Reil, Zoeller, Mike Porter, Frosty,Vullo, Cook Et AL, didn't make a great burner on the first go. I read enough to know they put a lot of time and experimentation into developing the hand full of burners that are sort of the standards. I know that lots of hardware stores will be a fitting or two lite. but in looking at just the parts you have there you are just a 1/4 inch nipple, and cap and a piece of 1 inch black pipe from building a Reil burner per the above plans. I don't know what is in the homage to Frosty T design, but you can't be far from building that "exactly" to the plans. I would pick one of the known proven burner plans and build it just as written. I know you'll get there. Where are you in humid Iowa, I'm in Humid Illinois, Savanna
-
Sorry Ouch
the big reducer used as a flare, then being mounted on the exterior is not a design I've seen. I was thinking that a proven design would be a good place to start. many use a flare at the end. but one that fits close as a 1 inch pipe does over a 3/4. then flared out to about 1.25. attached are the plans for a Reil burner that shows the flare. Then once it is small enough it might into your welded nipple. I suggested the coupler because I did not think the existing nipple protrudes enough to get two rows of bolts positioned about an inch apart to give you an adjustable burner mount that is very secure. I'm not a burner guru which is why I aways suggest using a proven burner design. Your first one looks similar to some I've seen but not exactly and your last one looks similar to a Frosty T but not exactly. I think it is worth noting Reil's comments about stability and the flare and it's dimensions. Good luck. sorry for not being clear


What did you do in the shop today?
in Blacksmithing, General Discussion
Posted
thanks Jen. that is useful info. I was planning on epoxying them in, but I might drill them through and do the traditional install. I have enough tang to draw it out enough to do that.