Shamus Blargostadt
-
Posts
195 -
Joined
-
Last visited
Content Type
Profiles
Forums
Articles
Gallery
Downloads
Events
Everything posted by Shamus Blargostadt
-
"fully functional" brings a list of requirements to the table. When you're spending hours slicing and chopping, a handle needs to be comfortable, needs to be shaped for control (contours for grip so you don't have to grip it so tight), and needs to be shaped (not round) so the person using it knows where the edge of the blade is by the feel of the handle. stone might make a nice embellishment but as a cook, I'd never buy a knife with an all stone handle. Professional cooks and chefs are going to be thinking about things like carpel tunnel and cramps... and awesome looking knives. I do much more cooking than blacksmithing and I concur with the previous posters on handle material.
-
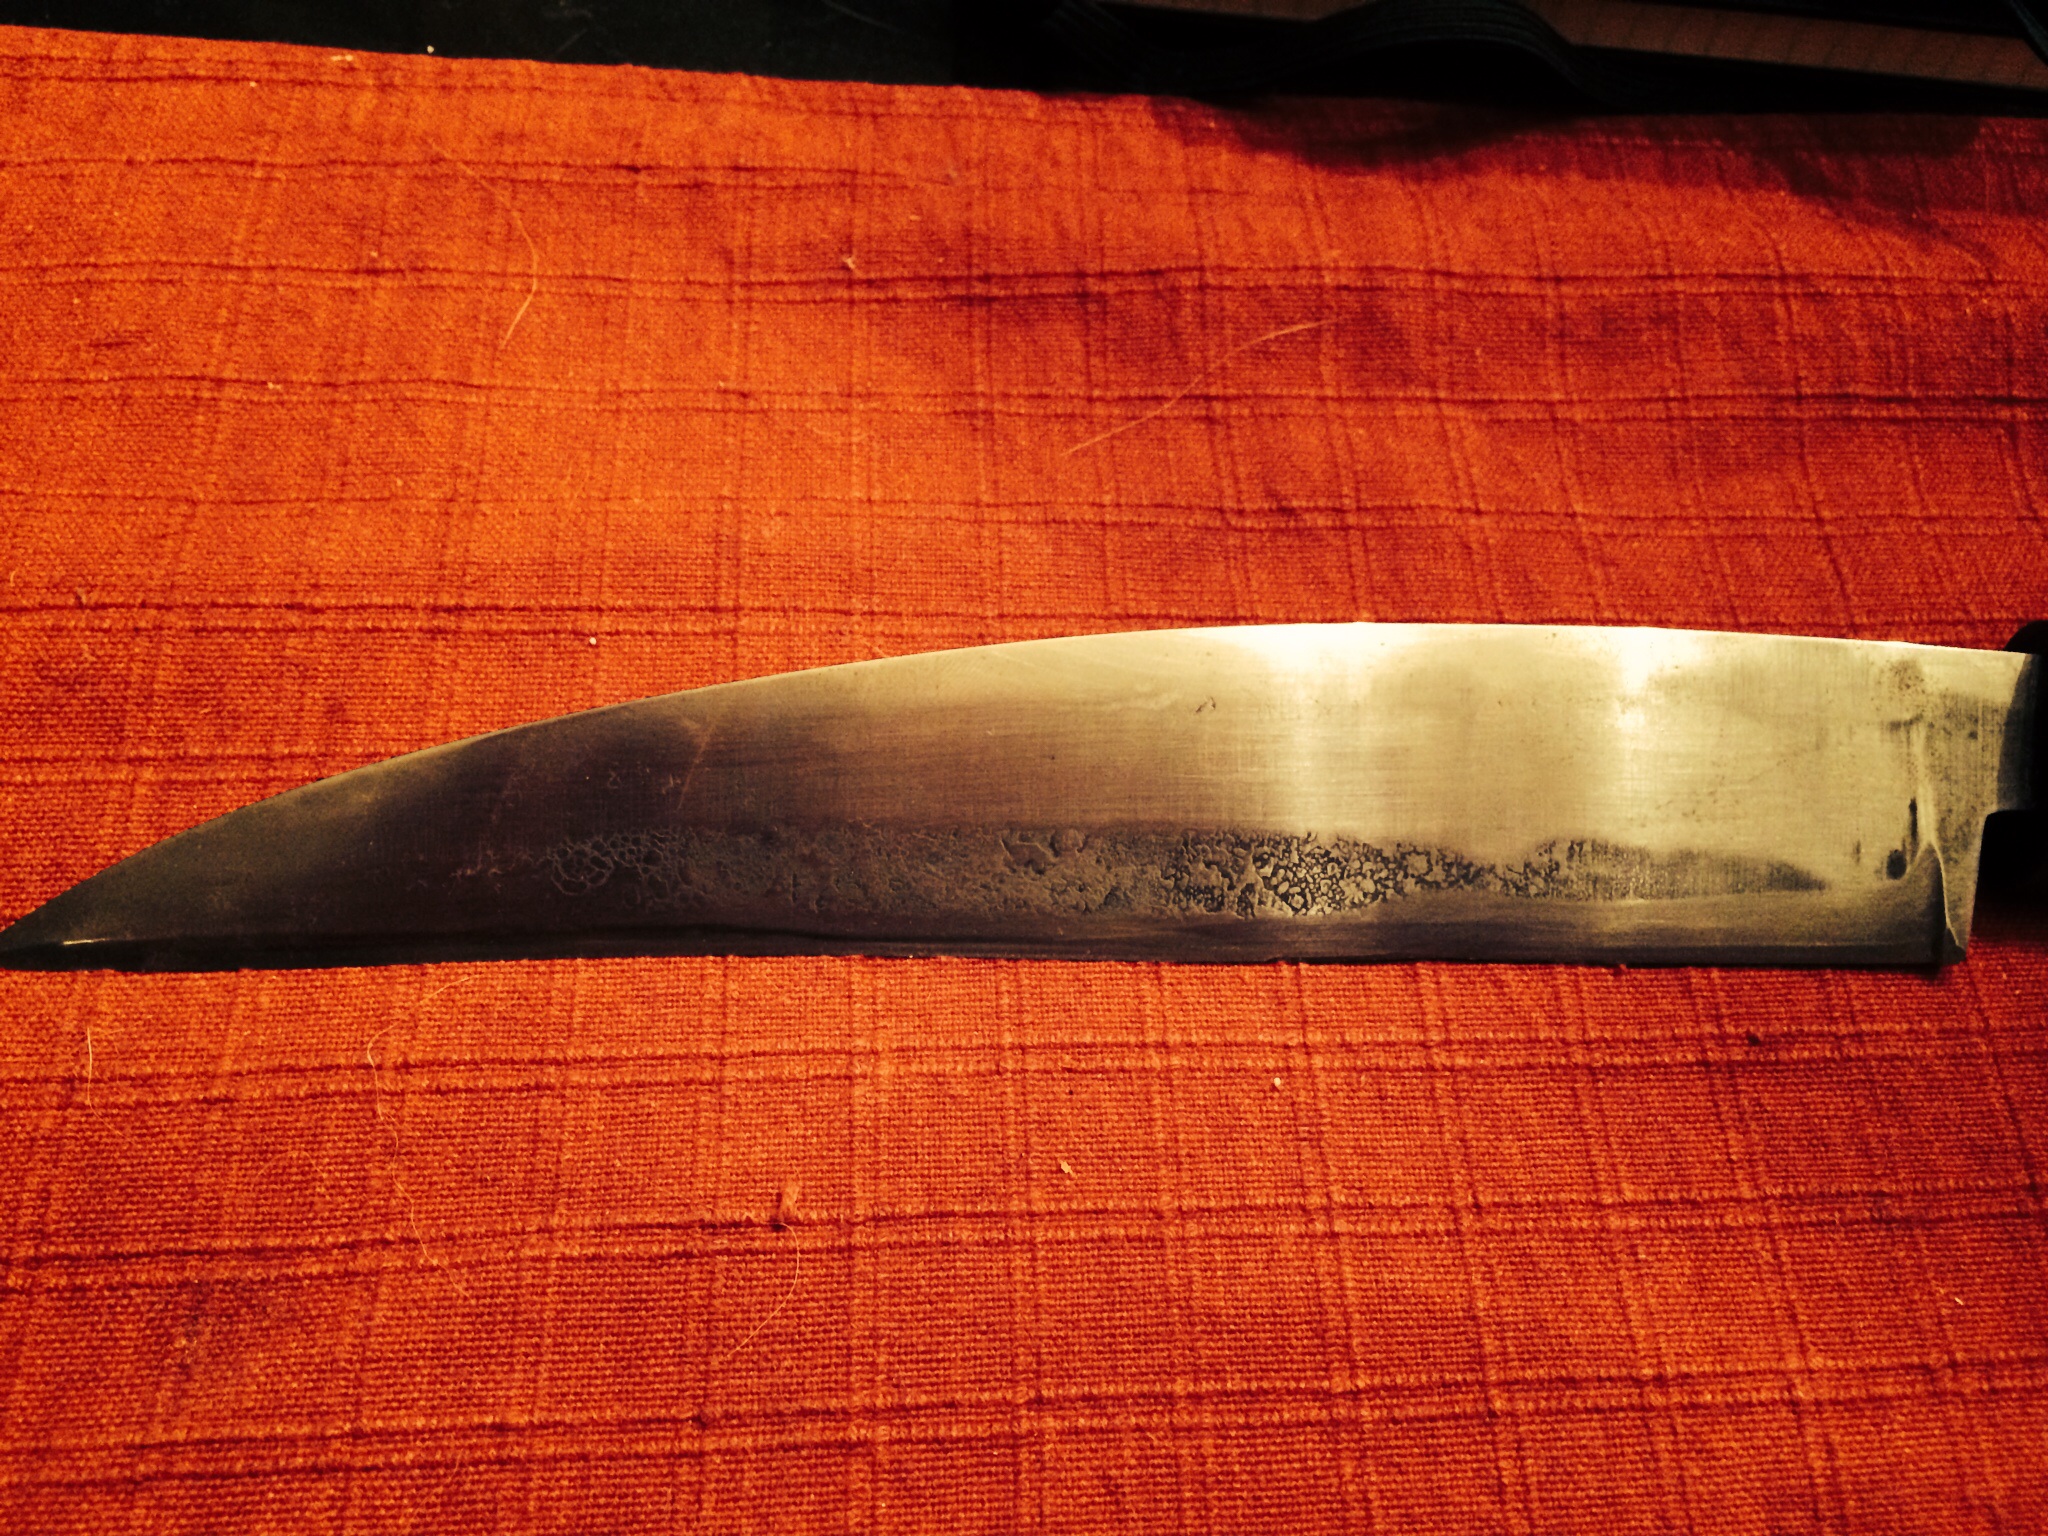
Thank you Charlotte! I was trying to do a Japanese edge, bevel on one side and hollow grind on the "release" side but my grinding skills were not up to the task. I'm going to need a lot more practice on the grinder.
-
very nice, thank you for posting the progression pics!
-
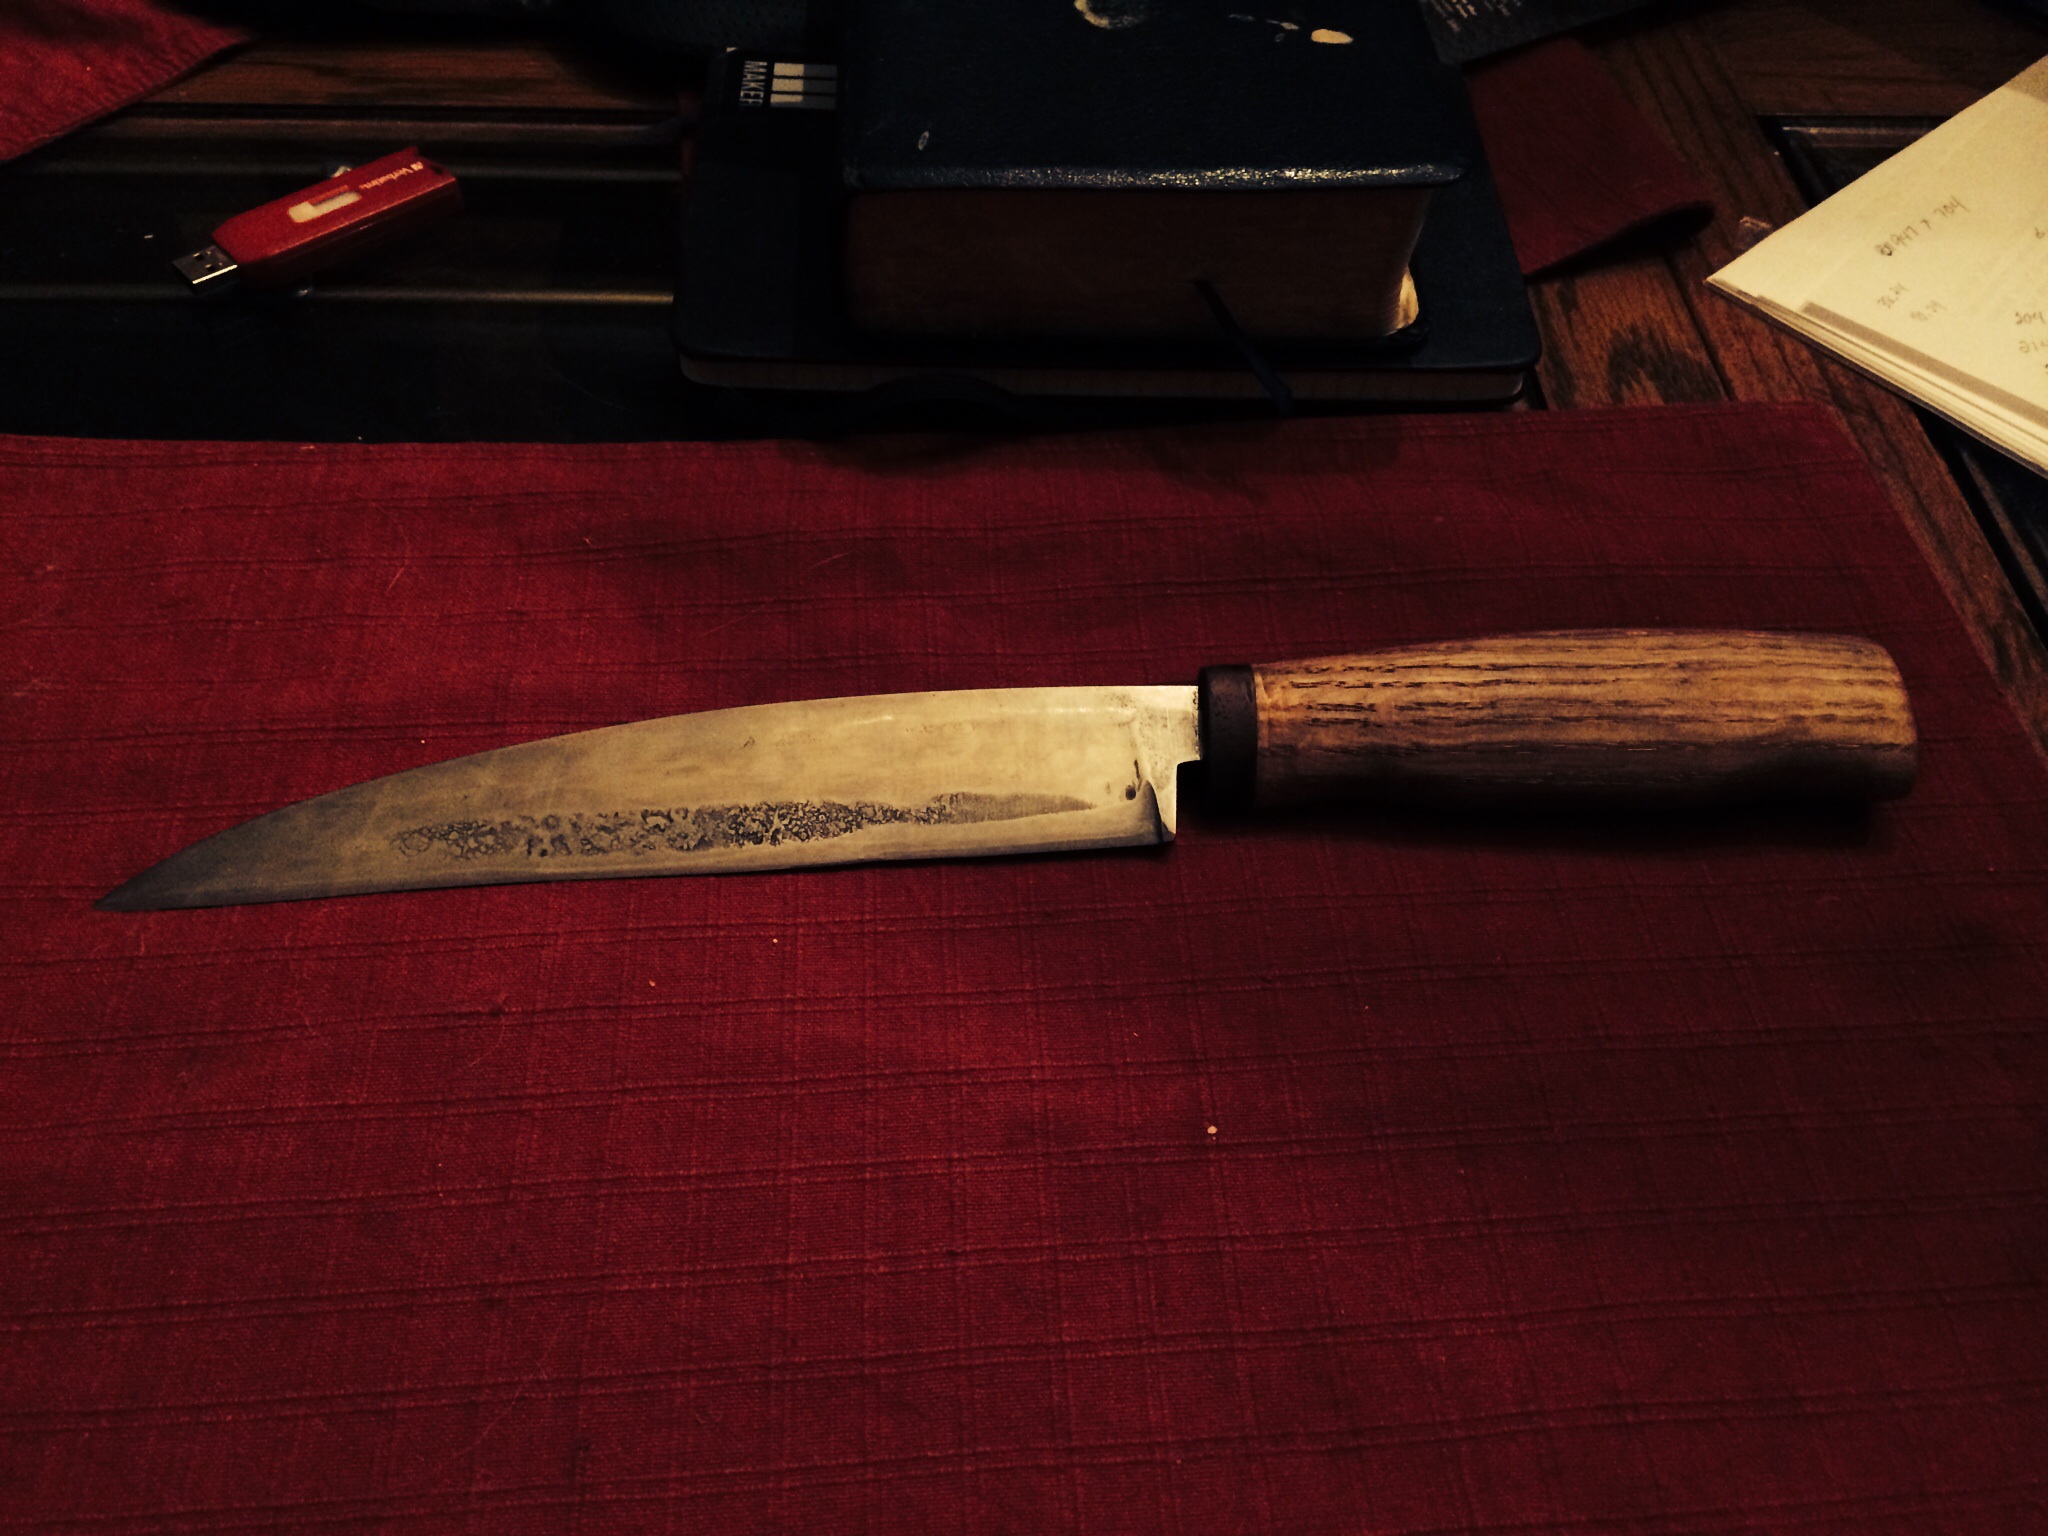
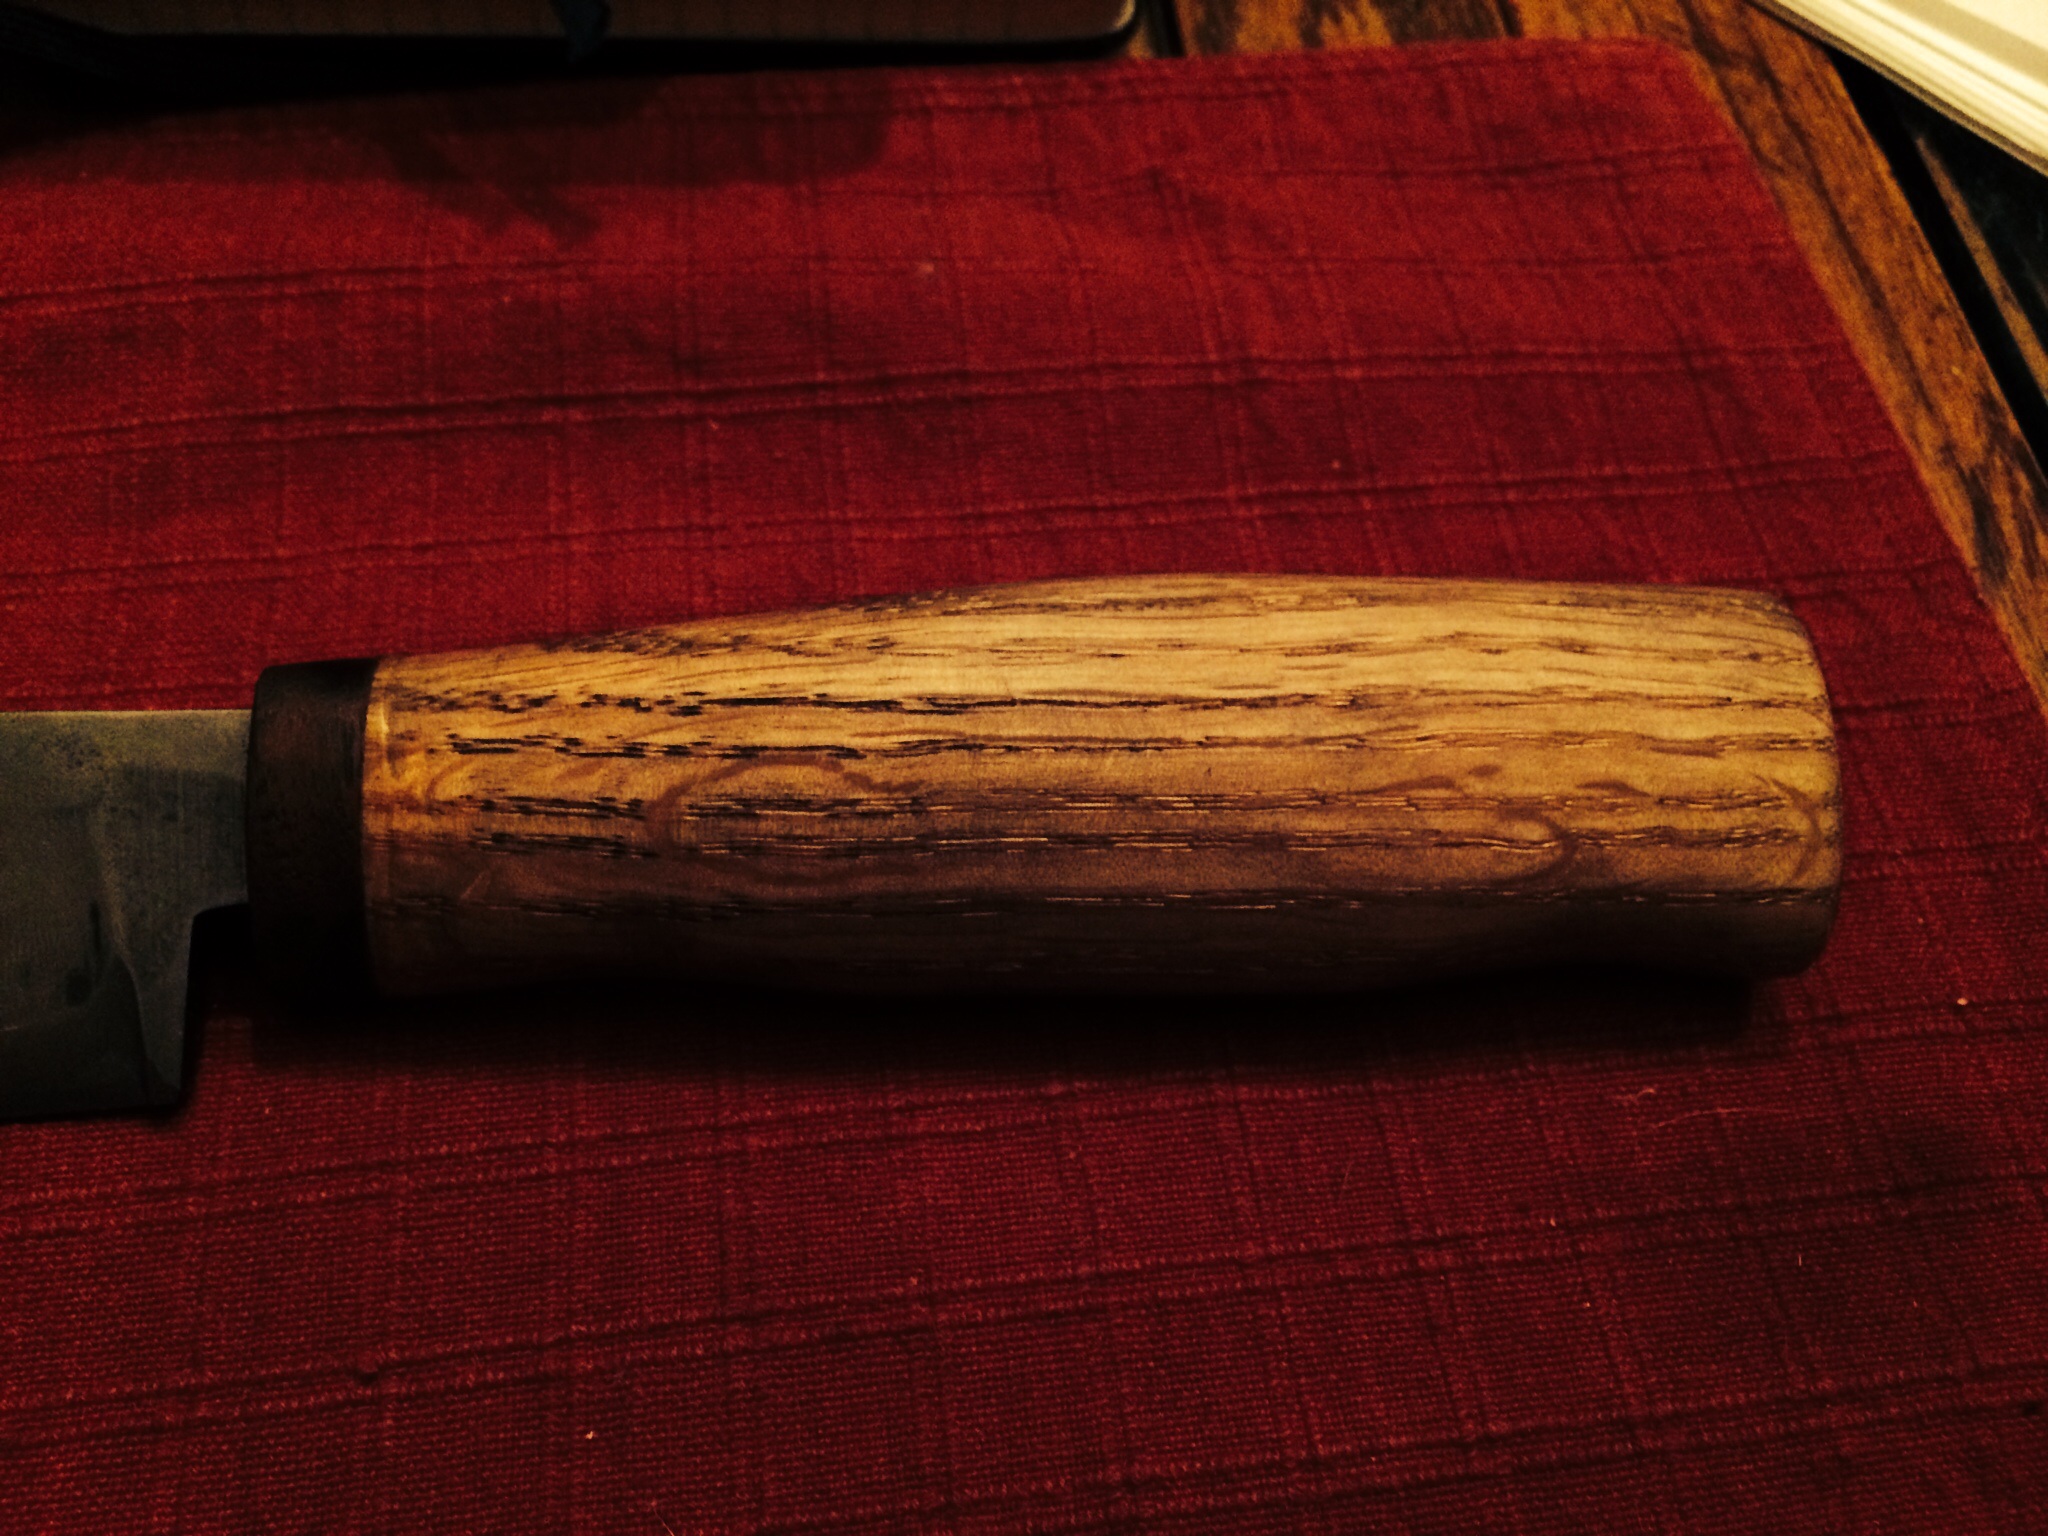
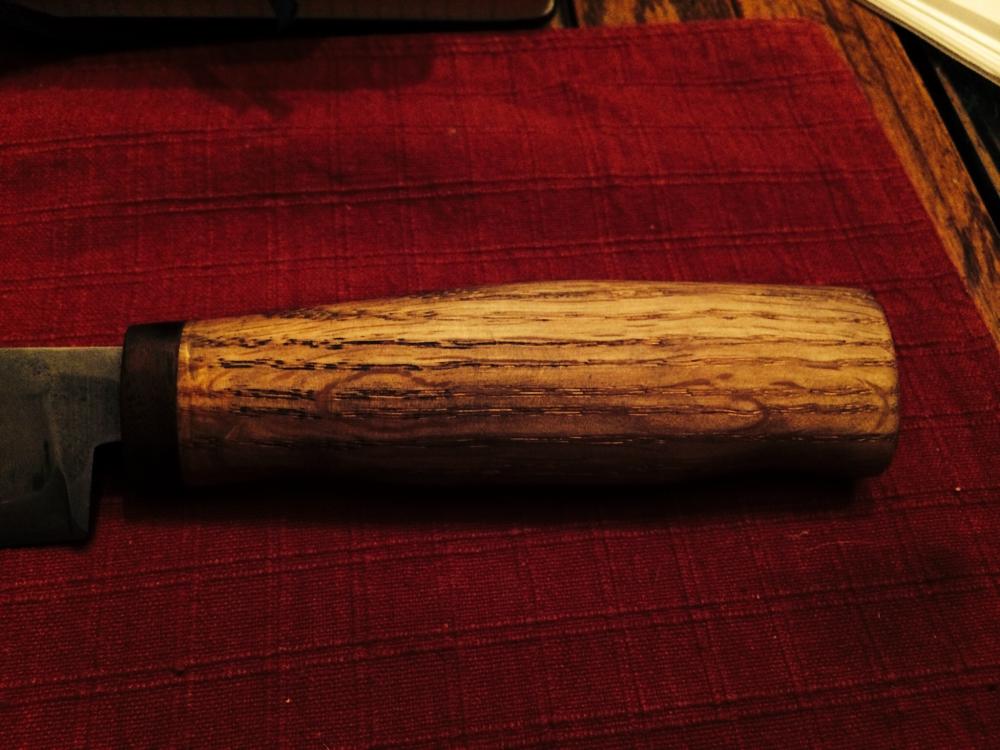
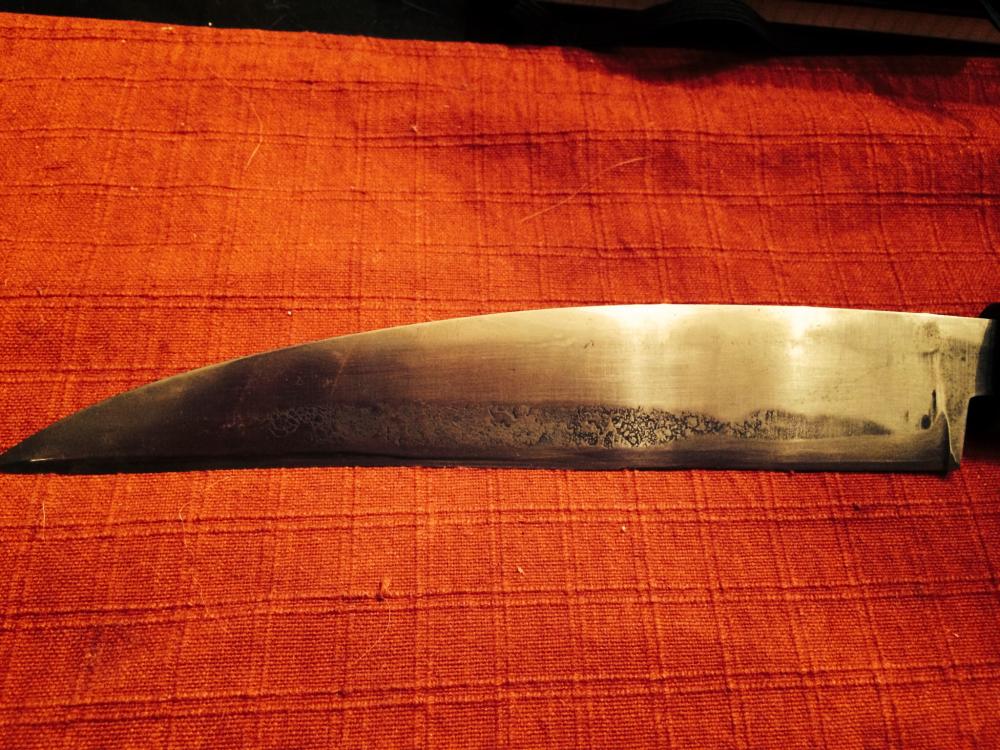
The edge is crooked, I have grind flaws, marks on the handle but it is wicked sharp and it will cut sushi rolls without crushing them. truck leaf spring, handle is oak and the brown part is walnut.

-
Ah sorry for the double post. Posted this first one from work and it said it was blocked for being a hacker site when I hit "submit". Just posted again with pics. Thank you you for the comments all
-
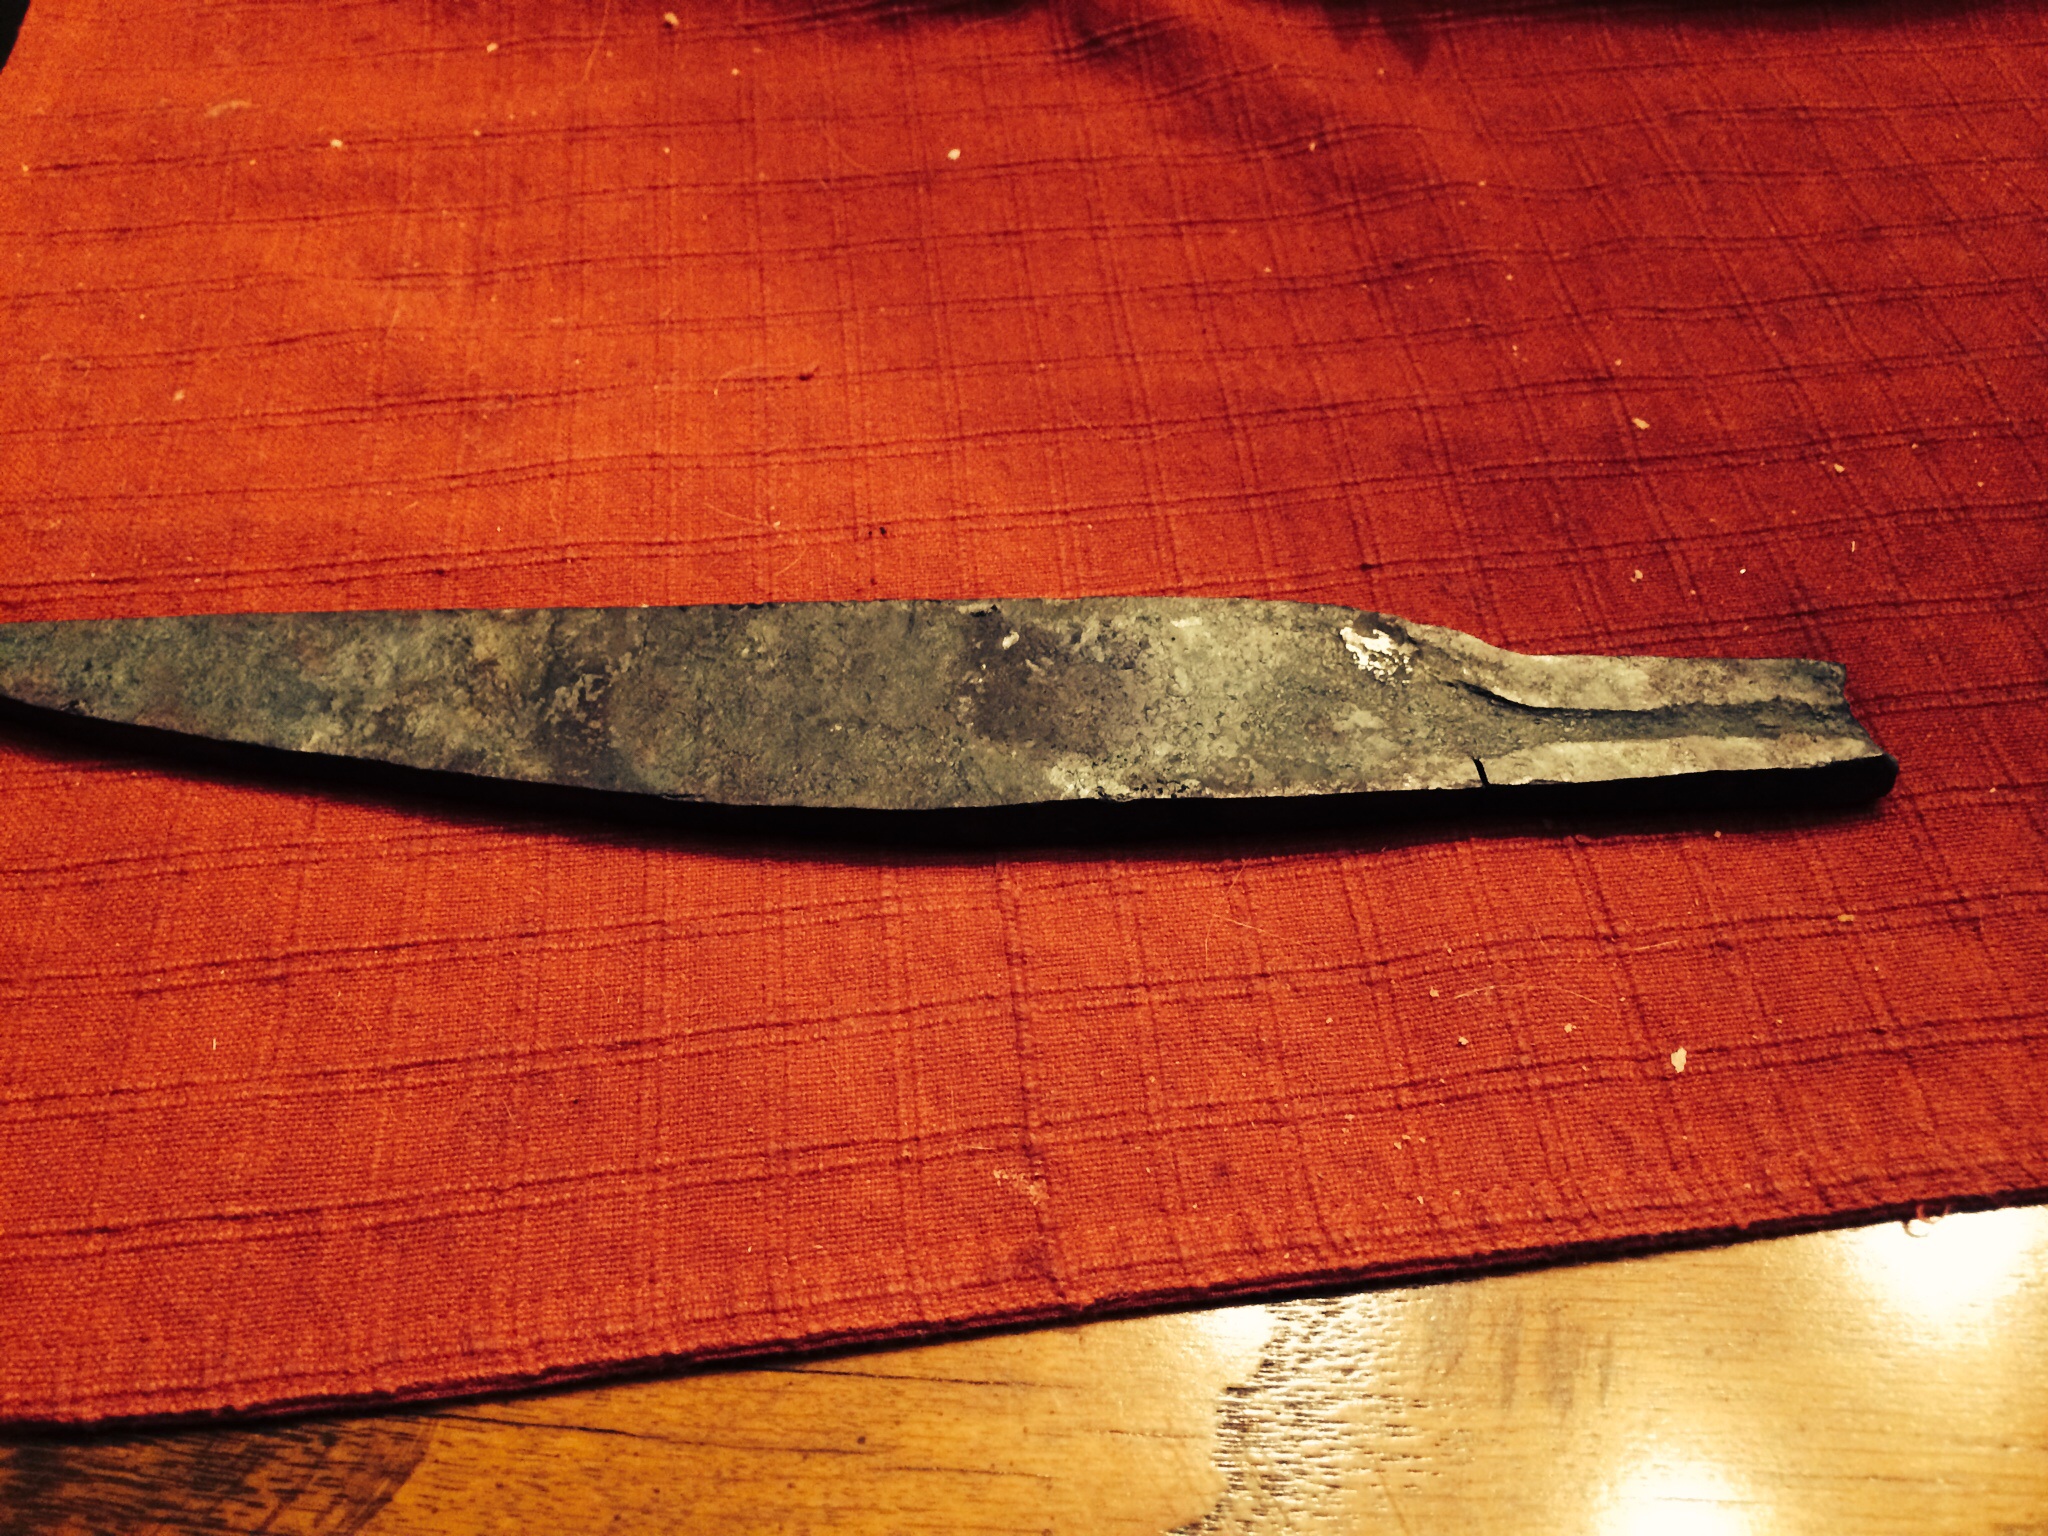
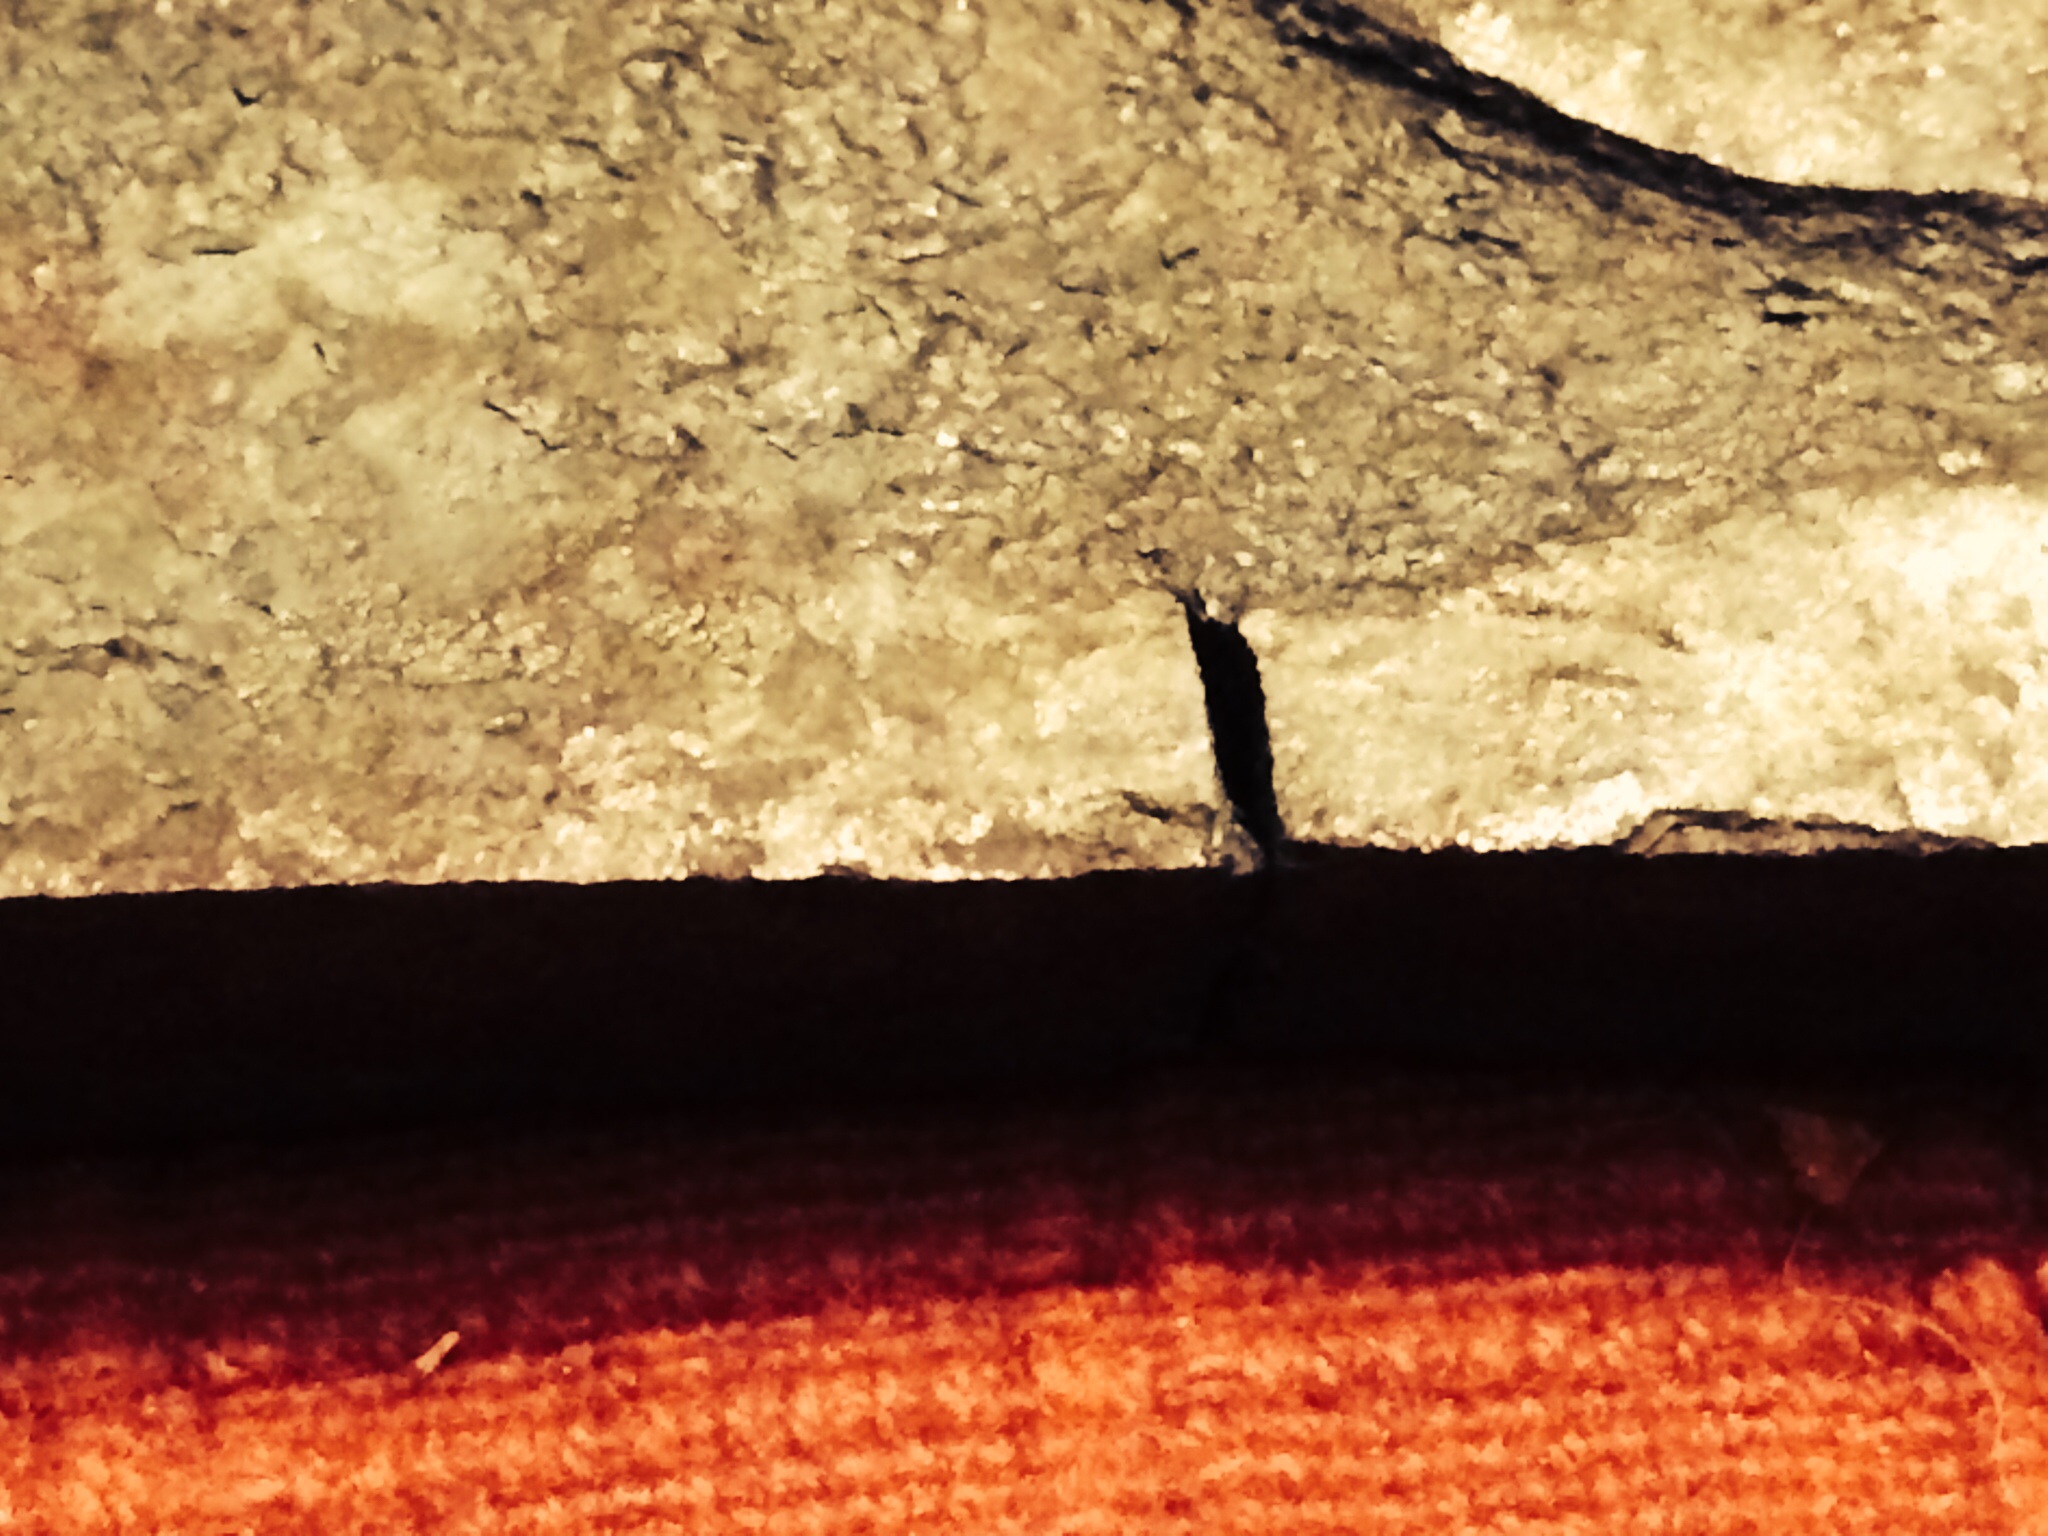
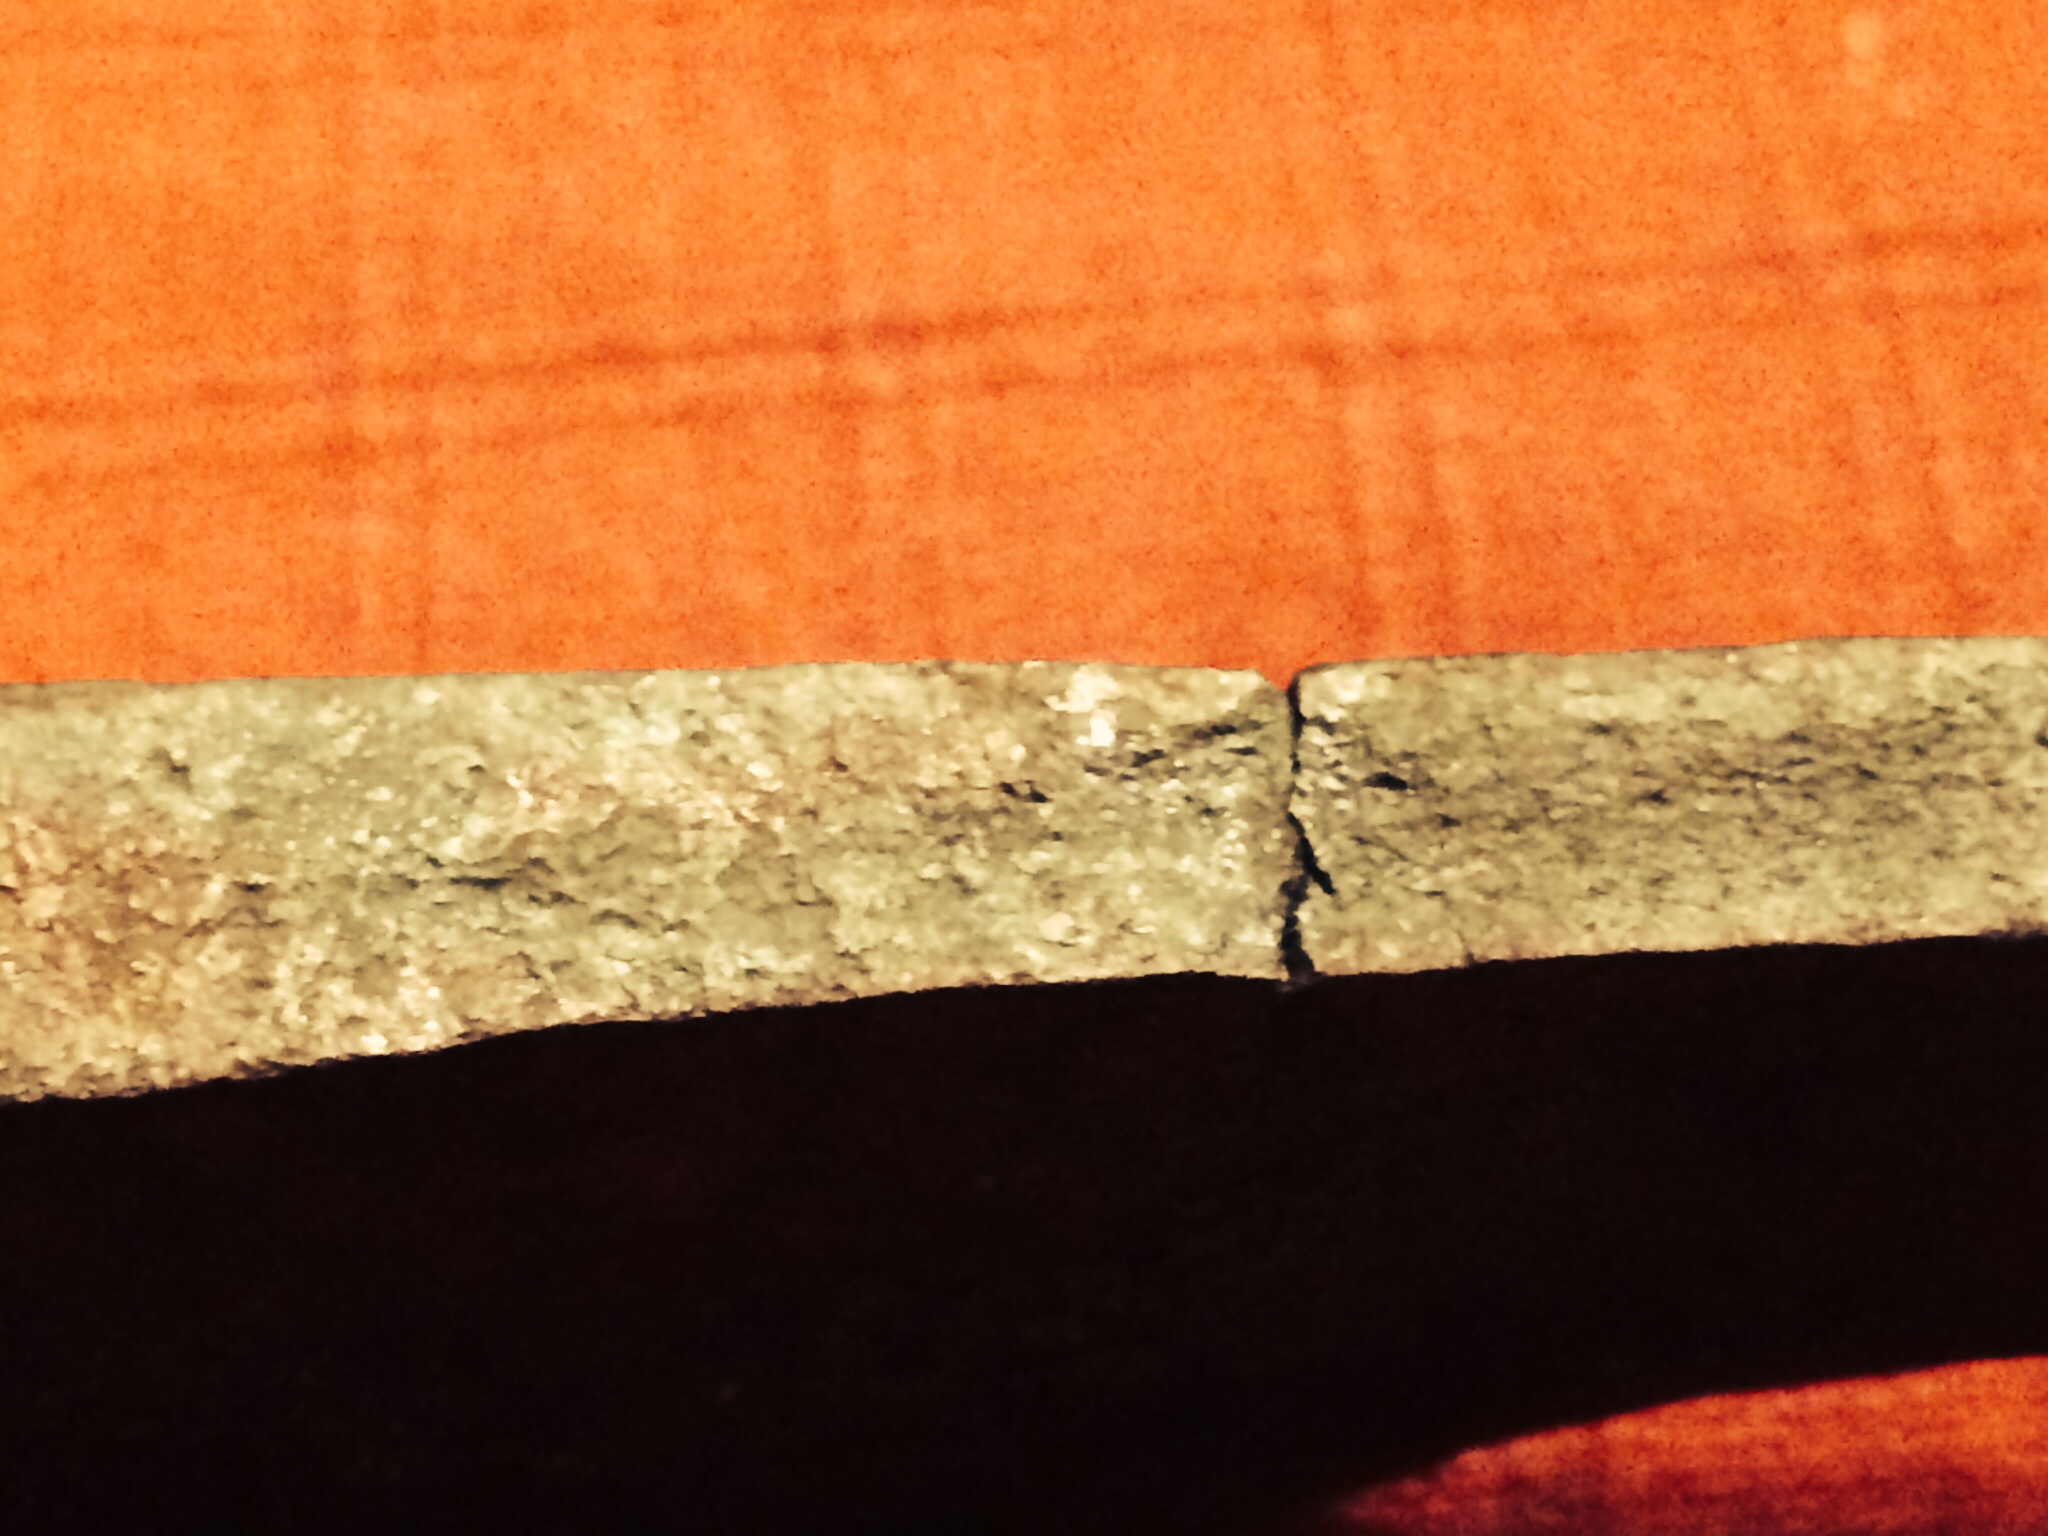
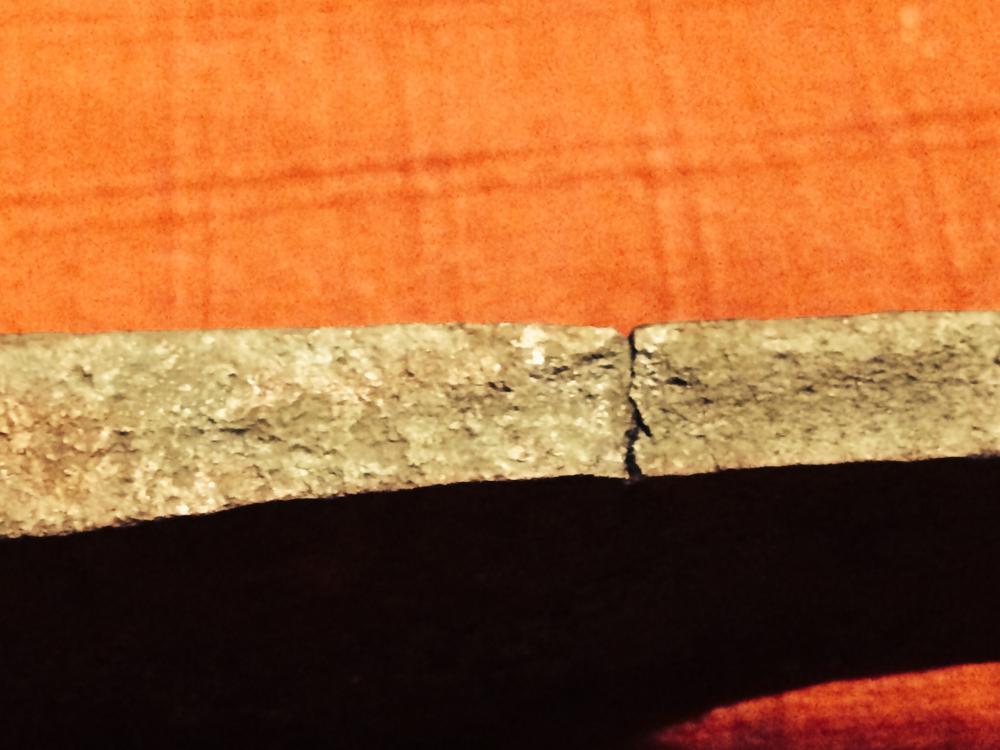
Forging a knife (sushi knife) and when forming the tang I got a crack. Can something like this be hammered out or do I have to abandon that whole end and do something else with it? Still learning and not afraid to learn the hard way, I just don't want to waste time and coal if it is futile. This is leaf spring material from a truck. thank you! Sorry for the double post. Unintended


-
I think I know the answer to this but just to be sure... I'm making a knife (sushi) with a hidden tang and the top part where the tang begins to form developed a crack (visible on one side, not the other) I'm still in the forging/shaping stage. Is this something I can continue to heat and hammer the crack out or do I need to cut it off and just switch to a smaller blade?
-
even my low setting (cheapest blow dryer I could find) sends way too much air. I need some kind of flu to cut it down. Too much air burns up the fuel too fast and burns up my steel. My son is constantly melting his pieces by turning on the air and getting distracted. I use coal.
-
What was the forge like that you guys used?
-
whew, tried to reply several times over the past couple weeks but kept getting "permission denied". I have a craftsman 2x42" belt grinder, single speed. It feels a little high, chest level. I've been holding the blade with leather work gloves while grinding (pain is an excellent instructor!) then cooling in a water quench bucket. I've been struggling with position on the belt.. not sure if I should use the small "slack" area or against the metal backing, or the arm flips down to allow grinding against the larger bottom wheel. My first attempts at hollow grinding against the wheel were awful. I'm able to muddle through producing a blade but I'm introducing a lot of flaws accidentally that seem to be near impossible to erase.
-
despite your indicated flaws, this looks great! Very impressive!
-
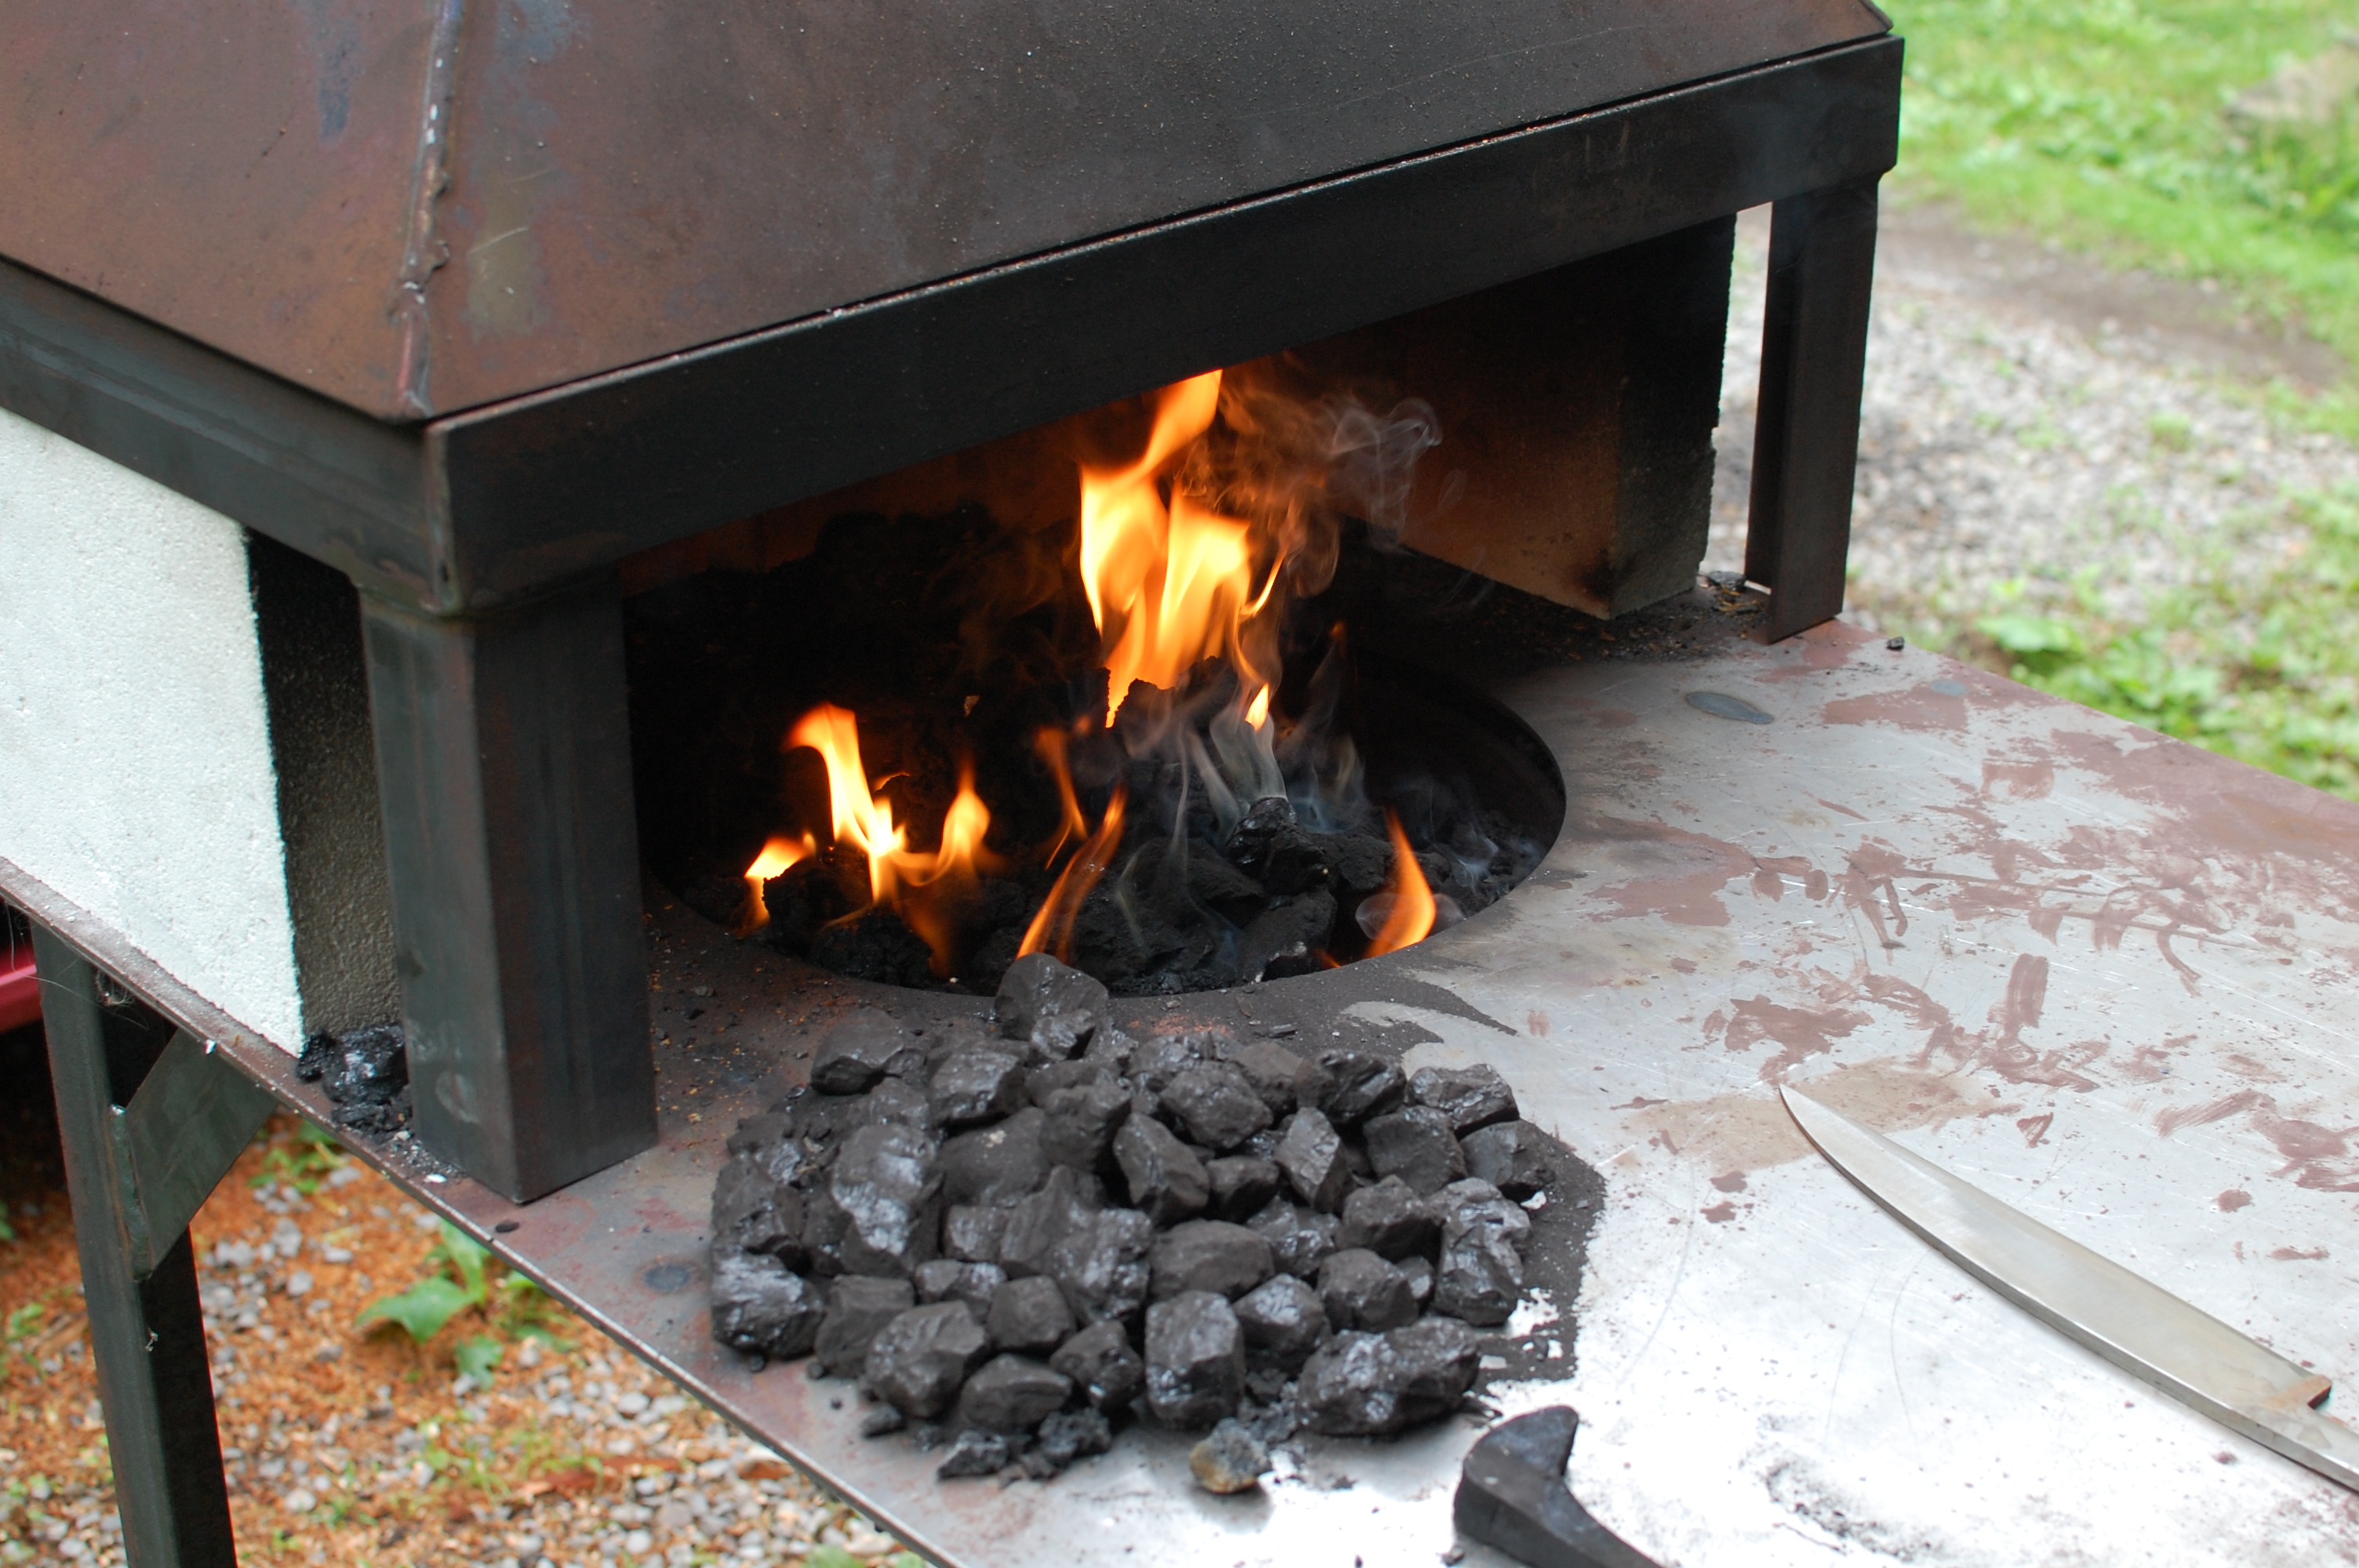
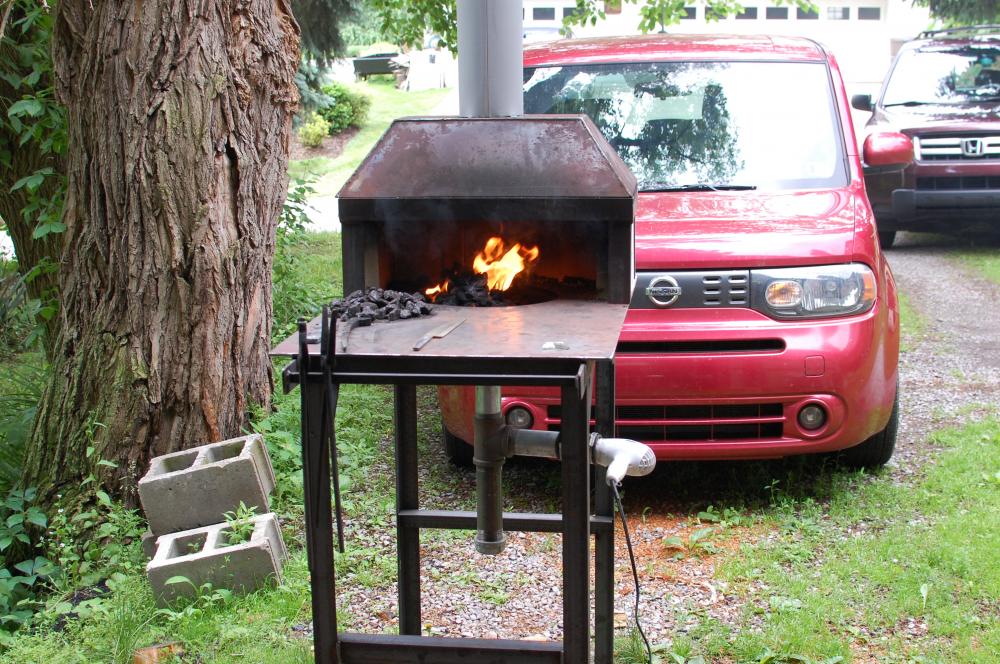
actually the bricks, hood, and hood supports are not fixed. They're all removable. It's all heavy enough to stay in place without welding it. I do run into length issues though. I had a hard time getting that entire knife length hot enough to heat treat.
-
Yes, actually in the mechanical drawing I made the angle steel the table rests on are supposed to be facing up, instead of down, to create a rail. He had it welded together though before I even knew he was thinking of welding it. No complaints from me though I was thinking I could probably use that inside my garage, with those bricks in place, and just find a way to pipe the smoke out of the garage. The fire can be light-yellow hot and the outside of the bricks are barely warm to the touch.
-
That's the sushi knife project I'm working on there on the table. Just heat treated it and did the first temper today.
-
welp, thanks to the inspiration of another thread in here, I had this made. Working pretty good but I need to build up the drum with some clay. Including design print too. If anyone wants the .dwg to modify, just let me know. There are 1.5" angle brackets welded to the bottom, 3 sides, so the drum just slips into it. Easy to replace if ever needed. The hood sections aren't welded on so they can be removed and the circle cutout replace if I ever want to use it for a table. Maybe to hold a propane forge down the road. My buddy works at a fabrication shop and supplied most of the material from scrap, and just charged me $50 for the stock he pulled off the shelf, then welded it for me (and gave me a welding lesson to boot!) Can't beat that! It does a great job keeping the smoke out of my face. I used firebrick just like the original guy I plagiarized did but I don't think they're necessary (an elder from church gave me a case of them!) I can just take them out and use them for a propane forge some day. forge2bric.pdf forge2bric.dwg

-
 for the sake of noobs like me - I've grown much more comfortable using this cheap ($19) 4" angle grinder. I'm tearing through this truck spring pretty nicely now. It takes about 20-30min to cut a bar out, using light back-and-fourth motions (rather than just digging in and cutting it like a piece of wood)
 -
I'm still chopping up this scrap truck leaf spring.. so practicing swinging the hammer and grinding I noticed there seem to be a lot of different jig designs out there. Can anyone recommend a tried and true one that isn't too hard to make that would work on my craftsman 2x42" belt grinder?
-
yeah I think I might need to make a jig. My first attempt at a hollow grind looks like a funhouse mirror.
-
man I feel like I have two left hands, both full of thumbs, trying to grind blades. I can't believe how much I suck at it.
-
just as a follow up, I cut halfway through with the grinder then hot-cut the rest of the way (with the help of my son) Now said piece is well on its way to becoming a sushi knife!
-
ah, that explains all of the cold hammering I saw on various videos on forging sushi knives.
-
I was going for one steel (spring steel) I'm still a beginner. Always wanted one of these but could never afford one.
-
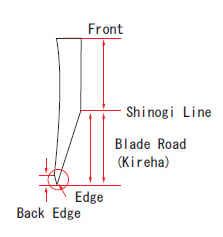
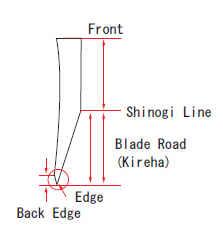
found this pic of a "traditional Japanese knife edge". Interesting grind there! This explains why there is a right handed and left handed blade. The "back" looks like a slight hollow ground.
-
Hoping someone may know about sashimi/sushi style knives. I notice that the handmade ones usually indicate if they're right handed or left handed. Every picture I've seen shows one side of the blade and a typically round symmetric handle. Does this mean the blade is sharpened on one side or do they get ground a special way, or perhaps both? Hoping to make a couple from some leaf spring steel as my next knife projects. Any tips appreciated.
-
Beginner steel stock
Shamus Blargostadt replied to Shamus Blargostadt's topic in Blacksmithing, General Discussion
"lunch buckets" are popular around here.. usually a small cooler or large tin lunch box. Definitely big enough to warrant a forged hook as a beginner project!