

FieryFurnace
-
Posts
2,106 -
Joined
-
Last visited
Content Type
Profiles
Forums
Articles
Gallery
Downloads
Events
Posts posted by FieryFurnace
-
-
Leg part for a ball and chain set? Frizby? What's the hoop game they play at CW reenactments where they roll the hoop around? INCOMING!!!

Sereously, I hope you have a power hammer. If not, my suggestion is to give it to somebody who does!
Toilet seat? I hope it has a built in heating element for the winter months!!!:D
 -
I have a broken fencing epee that I want to repair. The tip broke about 9 inches from the very end and it broke off flat. My guess is an over hard spot in the blade. (don't know what took it so long to brake as me and some friends have done some REALY hard and fast coriographed (SP?
 ) fights with it)
I want to weld the tip back on so that it can be used for light coriographed/practice fights ONLY. NO, go at your buddy and try to run him through, fights!!!!!!!
I figured if I welded it, the part right at the weld would be something like annealed if I let it cool in the air after welding. (Or on top of a dying forge fire.) Then what. I can't re-harden/re-temper the whole blade. Is there anything I can do for just the tip where I weld it? Can I leave it "annealed and would it work ok for light planned sparring?
Once again I am not going to use this for thrusting into the body after/if I fix it. ANY thrusting will be either parried or will be thrust inbetween the arm and body as a "planned" fight. However I don't want the tip to be constantly bending.
Thoughts??? Thanks!!!
Dave -
A friend of mine wants some small throwers. I would like to know if leaf spring would be ok and a sugested tempering method.
Thought??? Thanks!!!
Dave -
No extra tarps!
 One for the pigs, two for wood pile #1, one for wood pile #2 and zero for Dave's trailer!!!
Managed to get some more welding wire. I went to a Napa auto parts because Ace didn't have any! Well, Napa had the 10 lb roll, so I took it to the counter and handed it to the lady, who took it, rung it up, looked inquiringly at me, (no doubt noticing my youth) and said, "Are you sure this is what you want?" To which I replied, "How much is it?" (There were no prices)
Behind the counter lady: "$74.00!":o
Me: "Give me the 2 lb. roll?":D
The two pound roll was cheeper than Ace! If I'd known that Napa had the ten lb. roll it would have been cheeper for me to just buy the one than all the 2 lb. rolls I'm going through on the trailer! Oh well!
Updates Monday! -
If it's killing you imagine what it's doing to ME!
Bad weather here so I probably won't be able to work on it again 'till Monday! I hope to get all the welding done then and start the prep work for painting. I had all nice, for the most part clean, steel so I was hoping I wouldn't have to do much wire wheeling. Well, it rained all last night, and we are supposed to get more, so ALL the steel is turning nice redish brown. So much for not having to do too much prep work!:( -
I cut the hole for the blower today! I have a piece of 1/4 plate for the forge that is about 5' x 2'. Obveously that is too big for the forge so the actual forge is going to be about 3' x 2'. May be a bit more than 4'. The blower is going to take up the rest and it will also give me a flat place to put hot steel tools or whatever. Well, I have to cut a hole so the air pipe can go through the plate to the bottom of the fire pot. That's what I did this morning. I can't recall if I mentioned this, but we are once again out of welding wire. I also need some 1/4x2 inch flat bar for the edges around the forge. So work on the trailer is suspended until we get those. Meanwhile I forged my first hinges for the tool/coal boxes. They turned out well, and on the pieces that will be upright I made it into a sort of J-hook. Pictures later!
-
Check out my web site "poduct list." It has some of the stuff I do pictured. Give ya some ideas on simple projects that exercise and improve the basic skills. Rebar is ok; Ieven have some, but is there a place near you where you can get rods/bars of steel? (junk yard, welding shop, etc.) You wouldn't have to do near as much shaping to get the final product.
Wrought-iron works
Dave -
I'd do it! I'd probably make something real ugly, but I'm in!
-
good job! My "first trys" didn't look that good.
Suggestion: Could just be the picture but it looks like you're using some hefty stock. If so back off a little on the size of your steel. 3/8ths" and 1/4" is my recomendation! I've been forging for 2+ years and I rarely use anything over 3/8ths. It's a lot easier to work with in my opinion! Of course if any size steel is not readly avaliable than keep using what you're using now! You obveously now how to work with those sizes well! Keep it up! -
And here are the rest...

Fire pot! 1/4" plate. I prefer 1/2 but couldn't get any smaller pieces!
Air slits in the fore pot!
This is the pipe that will make up most of the air duc! I'm hoping to do a weighted ash dump!
I doubt I'll be able to work on it tomorrow but I'll have updates soon! -
underslung? That mean putting the axle where the wheels are under the trailer? If so, it's for CW reenacting so I need the wheels as out of site as possible. They will also be covered with burlap or canvas. It also elevated the forge to the perfect working height!
Here are some more pix!
There is the complete coal box! 1 1/2' x 1 1/2' x 2 1/2'
overveiw "fore to aft!"
Cutting the fire pot hole in the forge plate!
ME! Fondly caressing my Champion #40!
More coming! Winting for them to upload! -
Here are the rest!


That's all for now! I think the pictures are pretty self explanatory.
More tomorrow! -
-
I finally got some pictures of the trailer! We got the axel mounted today. I had to go back to the steel warehouse and get some extra frame work in order to mount the axle. I also had to get some more flux core wire (My trailer ate the other roll!
) and I went ahead and got the primer/paint. I bought the good stuff; the kind you put hardner in and put in the air compressor spray gun. Total bill for thinner, paint, primer, hardner and more thinner was $126! However, I bought a gallon of each paint/primer so I should have quite a bit left over!
I'll post those pixs as soon as they upload! -
AHHHH! Thank you! I feel SOOOO much better!:D
-
This figures!
Ya know we bought the "no tank" wire (flux core) for our welder; well we got the plug hooked up and now we don't have any tips that will fit the flux core wire! It's .35 diam. and out of all the tips we have (5-6) they are ALL .30 or smaller! So, dad has gone to the store to get a bigger tip, another wire wheel, and I am going to work on cleaning the steel where it needs to be welded. (I'm on one of those unplanned, self made, water breaks right now!) Anyway, time to get back to work I suppose!
Somebody feel sorry for me in my bad luck ok!!!!! Say something like, "happens to me all the time," "don't worry bout it," you'll think it was all worth it when you get it done" etc!!!:D -
Could you get a close up picture of how you attached the air pipe to the blower? Thanks!
-
I havent had a chance to work on the knife anymore. I'me trying to take advantage of the nicer weather here to do some outside stuff. I'll post updates when I get em!
-
Those sleeves aren't anything!
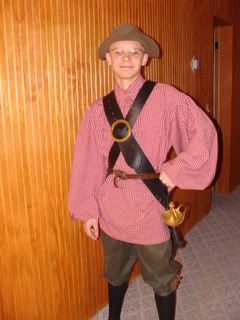
Or my more formal outfit! Got ruffles on that one!
Couldn't move my setup at that event, or I woulda been facing the trees!
"Murphy's law says wherever you set up, the wind will blow smoke/fire to you!"
Evil master mine
Mr. Murphy
Anyway, supposed to start welding tomorrow still, if the weather is fine! -
I'm didn't take it that way at all! Just clearing up why I was using unauthentic specs, and why I didn't want to use other unauthentic specs.
I don't want put to much "drapery" around the edge! Ya know, an extra spark lands in the wrong place.....
....something like that on a larger scale!!!!
The tire will be set back from the center, and the forge is to be moved forward to the very front of the trailer so that the tire cover will be well away from the firepot! -
Picked up the axle yesterday! I went ahead and got a regular leaf spring axle as a guy in town here sells them real cheap! Also I don't need the trailer to sit lower because I would rather have the forge mounted directly on the frame. You see, if I was to lower the trailer I would have to raise the forge/blower to the right working height. I'm hoping that the axle I have is going to raise it up high enough so that I won't have to do that!
Now I have to cut a bunch of 1" angle for the coal/forge box. Brilliant me got the lids cut the same size as the box...i.e. the lids fit inside the boxes! anyway I am going to add angle to the edges of the lid so that the lid won't fall into the box and it will also waterproof the boxes. (I was fortunate enough to trip across some "scrap" [they are actually ten feet long] that was free from rust, straight, and $.25 a pound.)
I have a very little bit of some 1"+ by 1/8" that I'm going to try to make hinges out of. I've never done hinges before! Before I try, I'm going to make a little form to bend them around so they will fit the hinge pins!
If weather permits we are going to start welding Monday....and there will be PLENTY of pix!!!
Thoughts?
Dave Custer -
FieryFurnace say's - "I'm trying to live in the 1800's here so we have to drop the jack idea".
If you are doing that - you'll have to drop the whole trailer deal, tires and all. In all reallity you keep going and do it!!! Regardless of the time frame your triing to mimick just getting people to watch forge work is well worth the effort - and if anything "you" get to do the forging and have all the fun even if noone is around. - JK
I do know that the whole channel steel frame, axel, rubber tires, diamond plate for the forge, etc. is unauthentic!
However, a wooden frame with wooden wagon wheels would not take to the interstate very well. The channel steel frame will be covered with rough cut lumber painted olive green, the tires will be covered with burlap or canvas material, (and be under the trailer) eventually I want some steel/wooden wagon wheels to put on at the event. The diamond side of the forge plate will be on the bottom of the forge and therefore out of site. Basically the unauthentic specs will be covered! Otherwise I would have to build the wagon forge and then build a trailer to tow it on.
That's why I didn't want jacks in the four (or two nearest the anvil) corners! It would be difficult to cover up and it would be extra stuff to carry around. -
The anvil will be on a stump, (Not permanantly) not the trailer. I figure I won't have to worry about trailer bounce and I'll be able to work all around the anvil.
-
UPDATE:
We have the plug for the welder...we just have to hook the plug up.
I pulled the bandsaw out yesterday and cut all the channel steel for the frame. Here are some pictures!

That is of course unwelded; just a rough layout.
The frame will weigh somewhere around 200#. I increased the frame width to 4 1/2 ft. (My cross sections were all 4 ft 7 inches so I figured "Why Not?")
I am going to get the five foot axel (3500# rating) and get it cut and rewleded to the exact size needed. I'm going to let the welding shop do the welding to make sure I get max penatration and strength!
I'm going to go out now and cut the fire pot hole in the forge pan sheet. (1/4 diamond plate.)
Thoughts?


Broken epee
in Swordsmithing
Posted
OK! Advice headed!
How do I "retip" it? Is that upsetting the end or welding a ball on the end?...or none of the above? The broken blade is about the length of a standard cutlass now, so if I could retip this one I might downsize my other one and retip it too. Then forge some more traditional looking handguards for reenacting purposes. What size tip do I need?
Thoughts??? Thanks!!!
Dave