
loneronin
-
Posts
92 -
Joined
-
Last visited
Content Type
Profiles
Forums
Articles
Gallery
Downloads
Events
Posts posted by loneronin
-
-
6 hours ago, JHCC said:
Electrolysis isn't as effective for getting inside things like screw boxes; it's more a line-of-sight between the piece being treated and the electrode.
When I was taking apart my big machinist's vise, the thing that eventually got the slide loose was PB Blaster. Horrible stink, though.
Yes, you must be right. I'm afraid there is no PB Blaster here in Italy but I will try some penetrant oil or, as suggested by pnut, 50/50 mix of acetone and automatic transmission fluid if I can find it
-
On 1/19/2021 at 5:56 AM, pnut said:
Soak the screw box in a 50/50 mix of acetone and automatic transmission fluid for a couple days and then try to loosen it.
I am thinking of electrolysis method for the screw as I don't have nor acetone nor transmission fluid available.
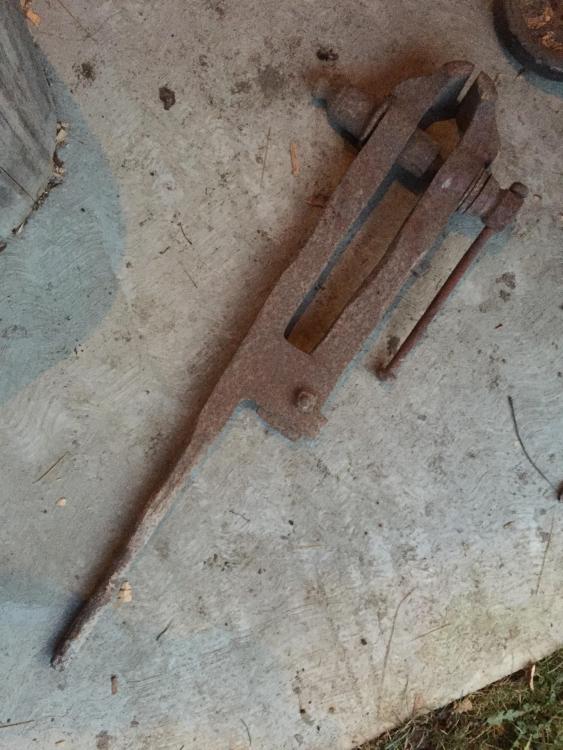
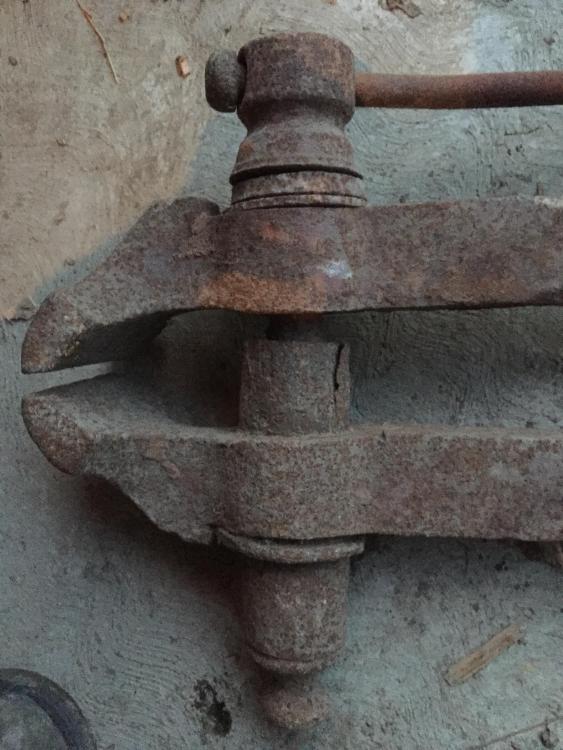
That crack is my biggest concern. anyway I have a spare screw if needed but I would prefer to restore its own one.
the spring, bracket and lever don't worry me. I can make them somehow.
-
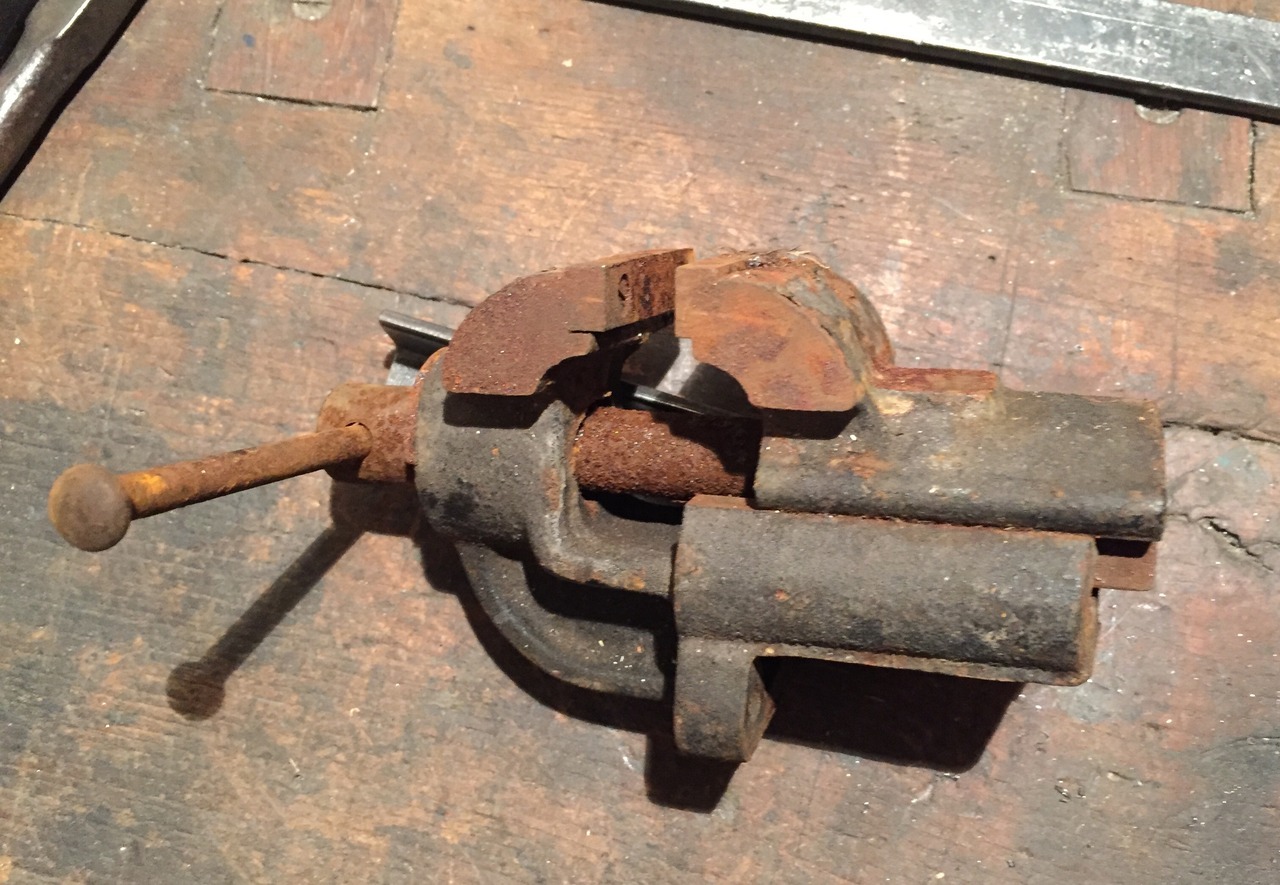
It has some issues: the spring is missing, the bench bracket is missing, the screw is locked and the screw lever is bent and broken but I couldn't pass on the perfect jaws and the very good price (10€)!
-
some time ago I made this support and I must say that I find it very convenient and useful.
it is assembled and disassembled in few seconds and allows you to fix the grinder to the vice and work by holding the piece with two hands. so it is possible to be much more precise especially if you work on small pieces.
you can mount all the discs and use the tool to grind, cut, wire-brush, smooth, sharpen, polish, sandpaper, remove rust, strip paint, etc. etc.
in addition it allows to hold the grinder in the vice in many positions
here you can find the video and inside there are all the details and mesurements if someone wants to build it:
https://www.youtube.com/watch?v=uAuiQPC4EwY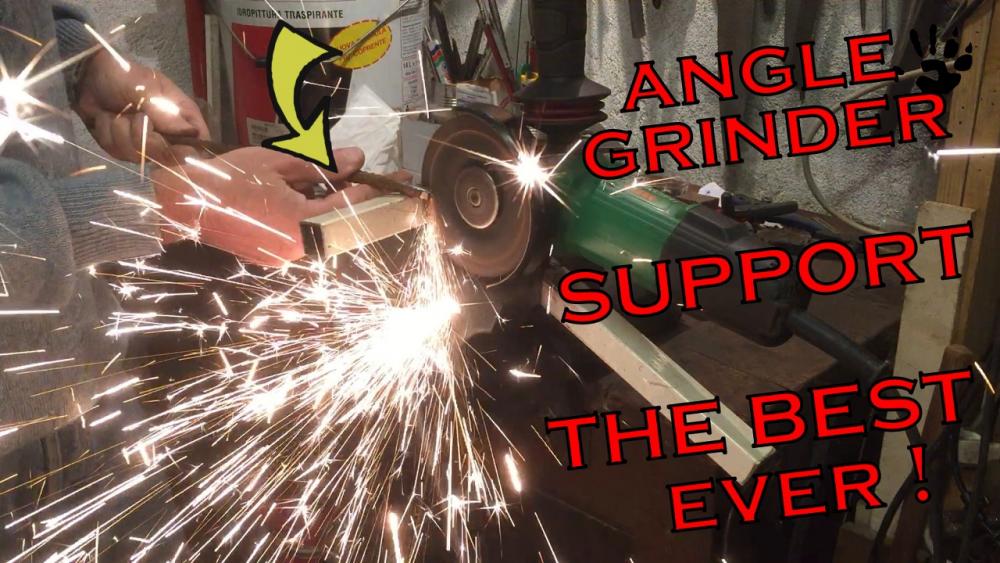
-
I was not satisfied by my chinese drill press so some time ago I start looking for a better one... it takes some time to find it out a at an accettable price but in the end I found it: It's a totally different animal. incredibly better. if you are interested here is the link to the video:
-
Hi Thomas, first I thought to take the tool holders that I have on the bigger stump and nail them on the new one but I usually move the stump by rolling it on the dirt so the handles would prevent the rolling and the rolling would bend the handles... it seems quite confortable to me to use the stop blocks as handles when I need to pull the stump up or tilt it down.
about the anvil to be removed before moving the stump, no problem! I have to store the two pieces in different places and I use a little cart for the anvil.
-
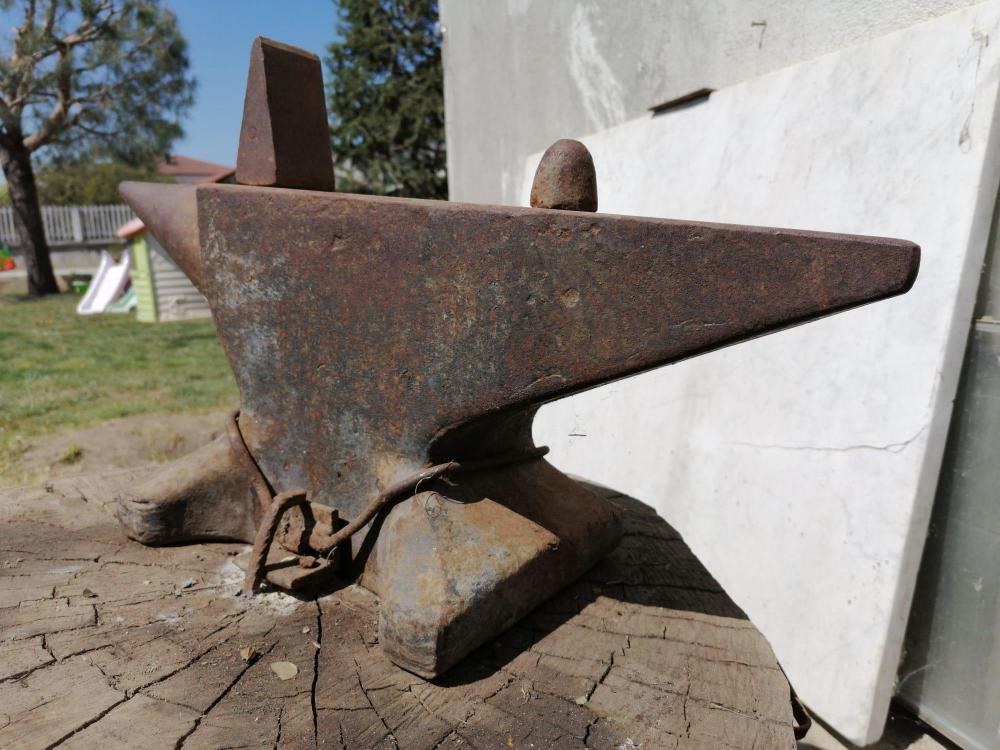
the original stump of my anvil was too big in diameter. uncomfortable to move and above all it did not allow me to be as near to the anvil as I like except by placing the anvil itself on the edge of it rather than in the center. so I decided to put it aside for now and use the old stump of my "ASO". I took two pieces of pallet frame and cut them copying the shape of the base of the anvil obtaining two stop blocks which I nailed to the center of the new stump. now I can move it more easily and can get closer to the anvil when I forge. it is perfectly stable and the anvil cannot move at all.
if you are interested here is the link to the video:
https://youtu.be/NHkdosG3-ZQ
-
with the steel bar obtained forging a rail road clip I made a single-edge push knife. handle scales asymmetrical also in thickness of chestnut briar. brass pins and black-forge finish. -
thanks for the correction Thomas. my english is not so good actually!
I changed the word but you are right. it should be "welded".
-
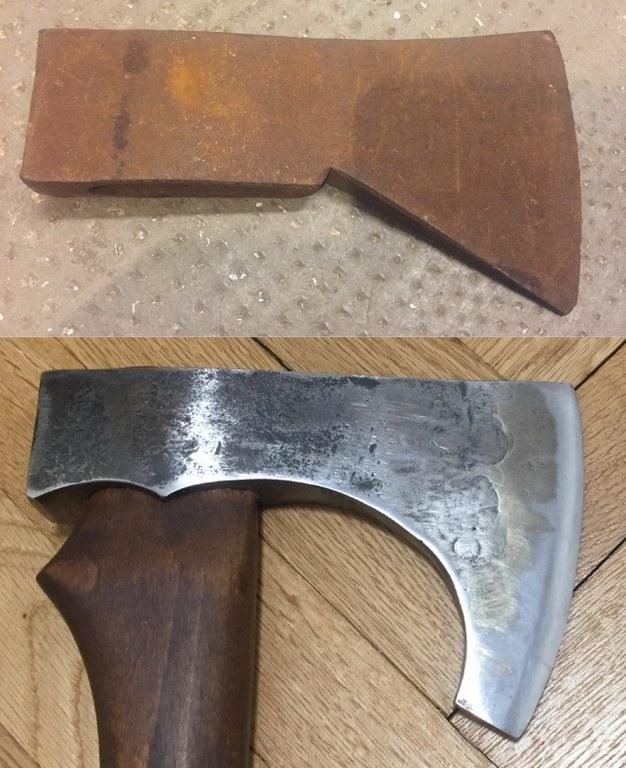
I found a 700gr hatchet in a market that had an elongated and teardrop "eye" for the handle with a beatiful shape. I took it with the idea of modifying it and obtaining a bearded one with the addition of a steel beard obtained from the leafspring of a truck thick enough to be forged. then I cut away a piece of the bevel of the purchased axe and soldered the leafspring. then I forged the new bevel, reshape the profile, heat treated and sharpening it. with a nice piece of walnut I made the curved handle and with a piece of lthick eather a sheath to protect the edge (and myself).
for those who want more details I also made a video of the various steps: https://youtu.be/nLGkLhjUa_k

-
Chris, Dick, Frosty, thanks for your comments, congratulations and advice. I have some shirts with small and big burned holes and I also have a leather apron but it was too hot when I cleaned it up so I decided to go "light" and get some sparks and few wire punctures... I know I'm not wise. I've never been.
-
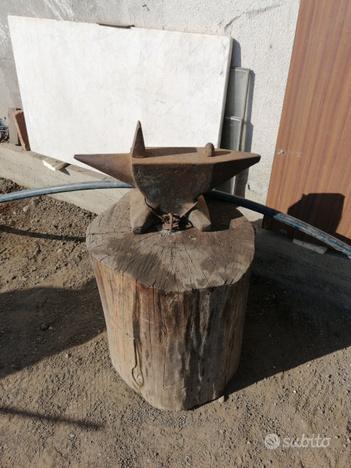
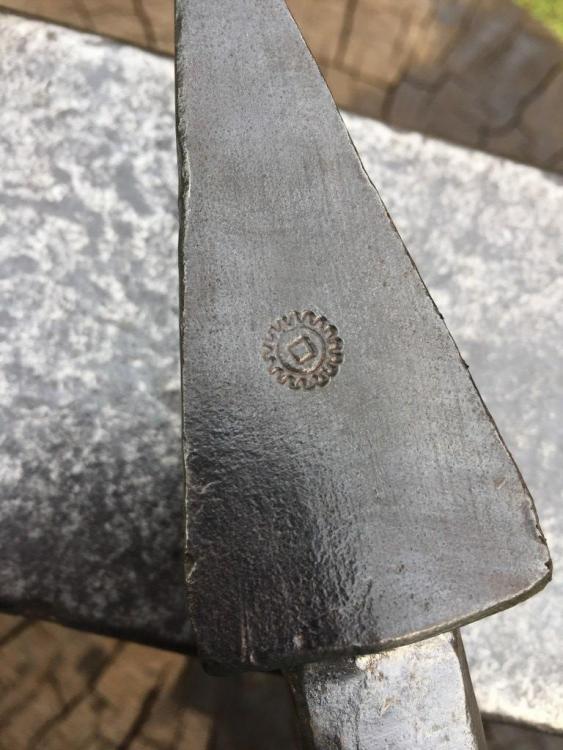
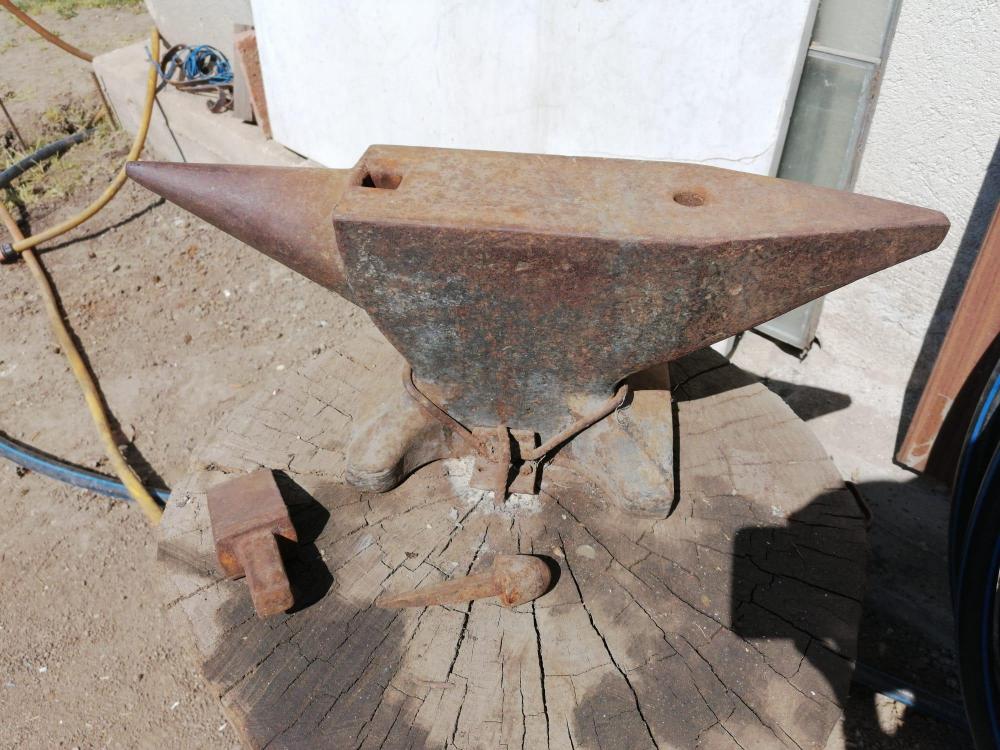
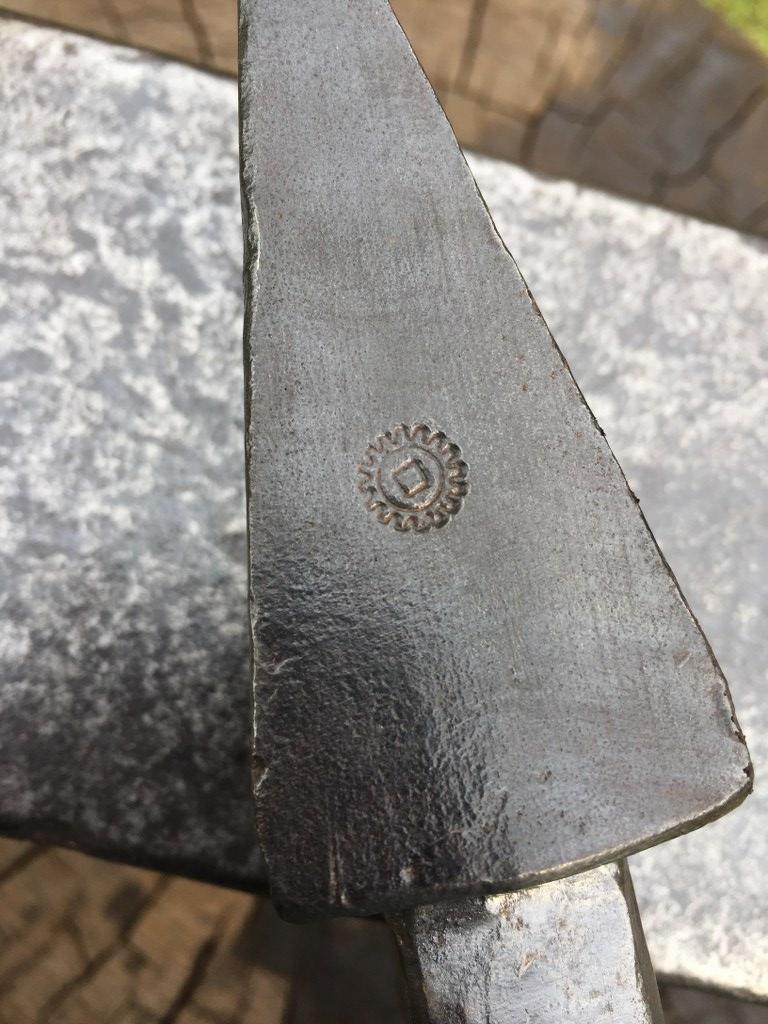
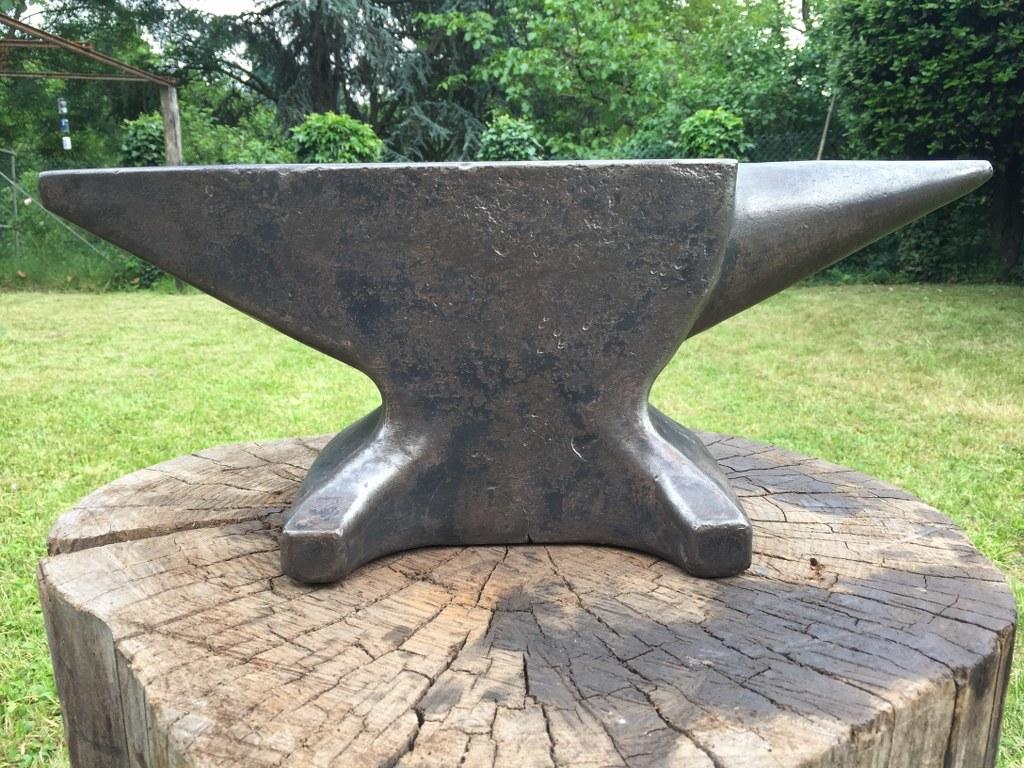
after a very long search a few days ago, precisely on April 16, 2020, I found this anvil on an online ad and purchased it without seeing it in person. I think the photos are very clear. it is a North German anvil of one-piece forged steel weighing 52kg (115lbs). this style includes a round horn and a square thong, a round hole and a square hole both above the base. this guarantees superior stability compared to holes placed on the tail and therefore outside the base of the anvil like in the London pattern. its measures are: total length from horn to thong 56cm (22inchs), width 11cm (4inchs), height 22cm (9inchs). it has no punchs but I believe it is a Peddinghaus fact the square hole is beveled which is a characteristic of the anvils of that foundry and on the hardie cutter there is a clear "gear logo". nowadays Peddinghaus no longer makes anvils of that weight but only 35kg (77lbs), 75kg (165lbs) and 125kg (276lbs). the one I purchased was certainly dirty and slightly rusty probably due to very limited use. the upper face is in fact in excellent condition, the edges do not show fractures or evident signs of hammering or other damages. in addition to the anvil there is a practically new cutting hardie tool, a round tool that I do not know how to use, a big hammer and a 60cm (24inchs) diameter by 65cm (26inchs) height wooden log with a couple of brachets to hang the tools. I think the previous owner does not know the value of this object in fact he put it on sale at a price of 200€ and with a minimum of bargaining I was able to go down to 125€ or 2.50€/kg when currently the official prices without any accessories or strain for the 35kg model is 765$ (22$/kg), for the 75kg one it is 1,425$ (19$/kg) and for the 125kg model it is 2,130$ (17$/kg). The previous owner told me that it belonged to his grandfather who use it for hobby, like I will. I cleaned it up well trying to preserve its oxide surface patina and I will have to secure it to the stump safely. I also tested it with a steel ball which I dropped by 1 meter. on average I get rebounds at 91-92cm. I am very satisfied with my new toy and I am sure it will be a great pleasure to forge on an anvil of this level with horns and holes for accessories for someone like me used to forge on a simple block of iron!

.thumb.jpeg.e7e4b502d3788265f03334a544077c15.jpeg)
.thumb.jpeg.8111feb23c6240dfa854fd73c694b06a.jpeg)


-
On 5/21/2020 at 11:04 PM, Chris C said:
Sounds like a plan to me!
")
as promised I tested my anvil and I get more than 90% rebound with an inch diameter steel ball. I also found a punch on the hardie cut that is the Peddinghaus gear logo. overall I'm very pleased of my new toy!!!
-
only with the hammer and seems very good to me but I'm used to an ASO so I have no real comparison. I will do a test with a ball bering and try to mesure the rebound hight. I'll let you know the result.
-
my new anvil (my first real anvil)!
115 lbs, no punchings, german style, fantastic bell sound, perfect edges, some cleaning needed.
... can anyone help me to identify/date it?
.thumb.jpeg.a5bc6292b402a24807a45b99c5e41a7f.jpeg)
-
18 hours ago, ThomasPowers said:
I remember back around 1980 being hassled over carrying my chainmail kit on a plane; basically a couple of sets of pliers and a set of hand snips and a bunch of steel wire. Finally I was told I could take it if I showed them a Business card. No problem but what my card as a geologist had to do with my maille making kit they couldn't explain.
I still miss the days where I got on a plane with two swords and my pocket knife and all they did was ask me if I wanted to put the swords in the hanging clothes closet on the plane...For an international trip too!
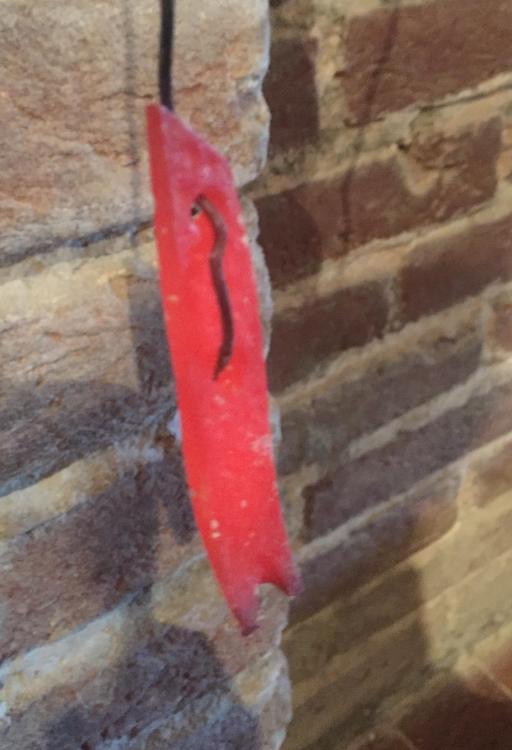
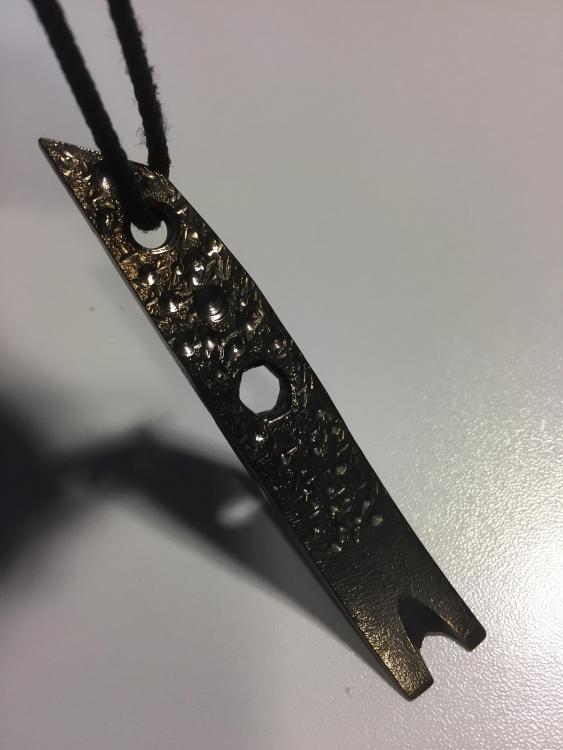
the mother of imbeciles is always pregnant... it can be considered also a weapon due to the square edges and the pointy end...
-
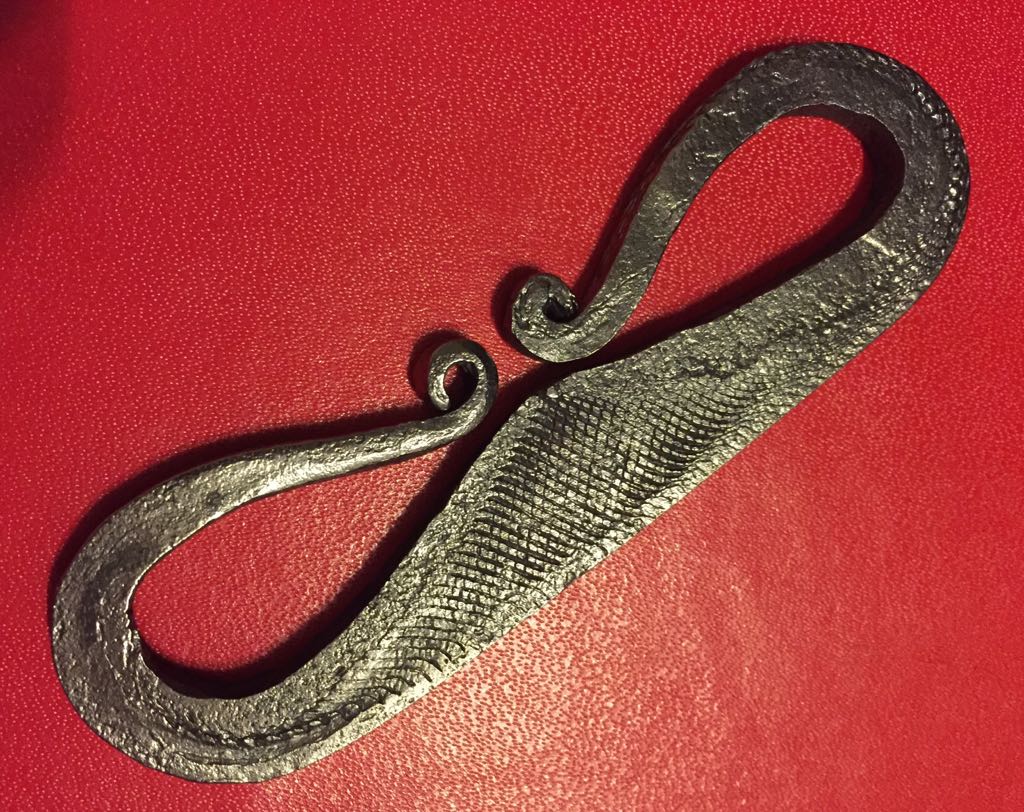
I didn't thought about this possible issue. I just wanted a keychain prybar to open paint cans or emergency wrench/screwdriver bits handle. I had no "bad ideas" for it but the police can see it like you said as a burglary tool. as you suggested it can be used as bottle opener with a little modification on the handle side but now that it's hardened I should soften it and heat treat it again after the modification... I will keep it as is by now.
-
I wanted a poket prybar and some days ago i found a little piece of steel cutted off from an other project. the material is a leaf spring from a truck. I don't like to put steel in the garbage so i gave it some blows and drifted an old and abused screwdriver bit in the centre hole. I used the drill and the dremel disc to get more grip to the handle. three normalizing circles, quench in warm oil, tow one-hour tempering circles at 200-210 °C and that's it.


-
I found this rusty little vice:
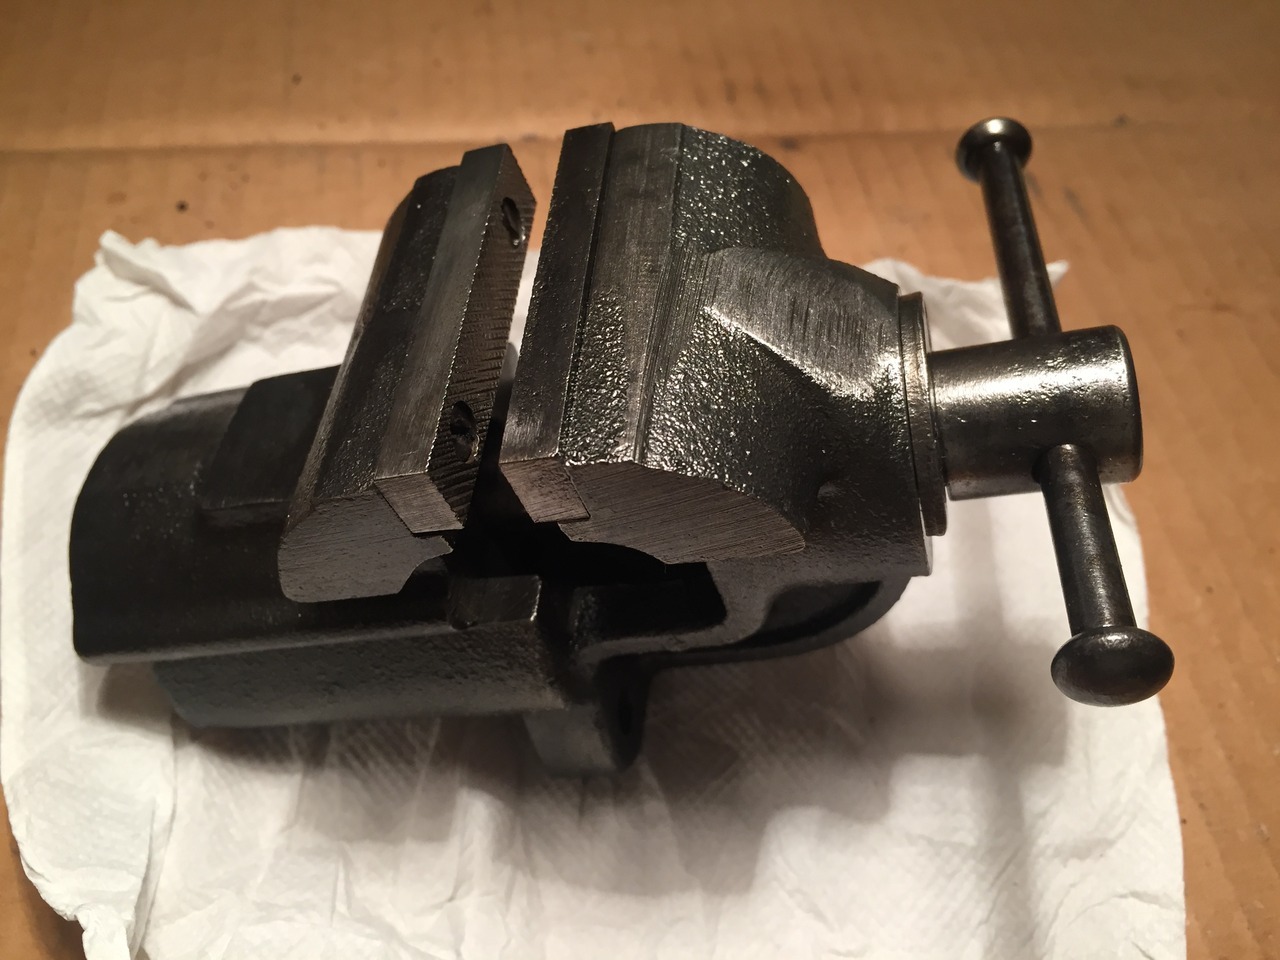
and after 48h of electrolisis and some oil I got this:
-
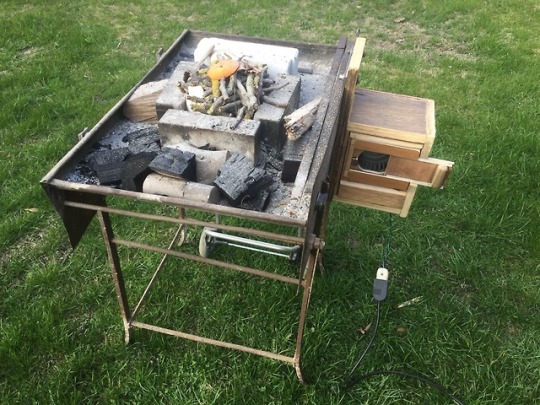
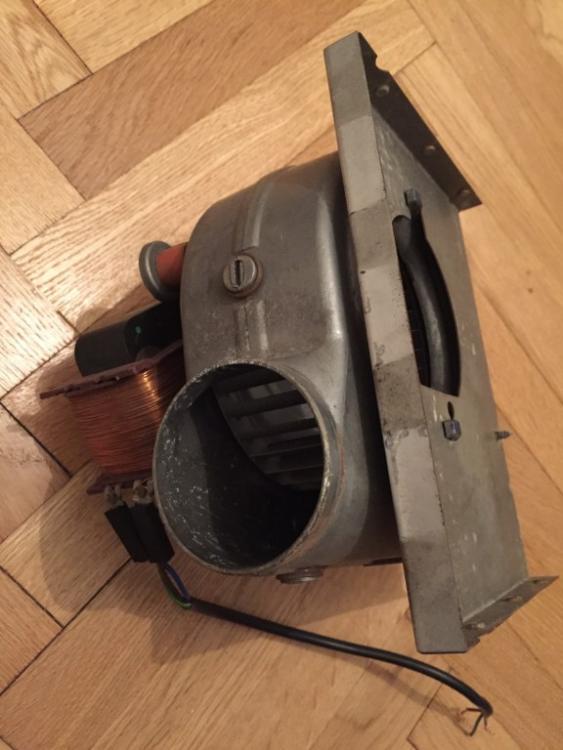
frame for my forge done! it can be attached and detached from the forge in one second. I put a switch on it and the blow power can be easily tuned with the sliding door.
-
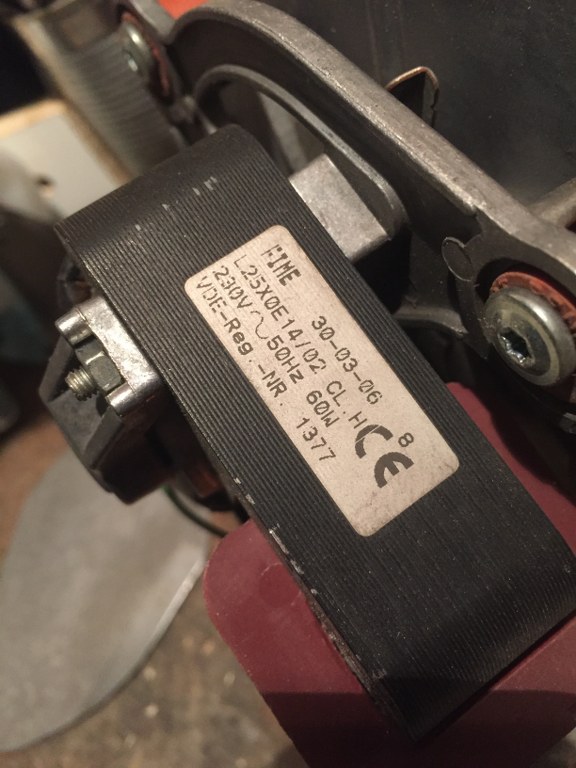
Thanks Steve! the regulator I posted is the right one? it's very cheap but seems to be 220V AC, 2000W while my blower is only 60W. I presume the regulator works fine till 2000W
-
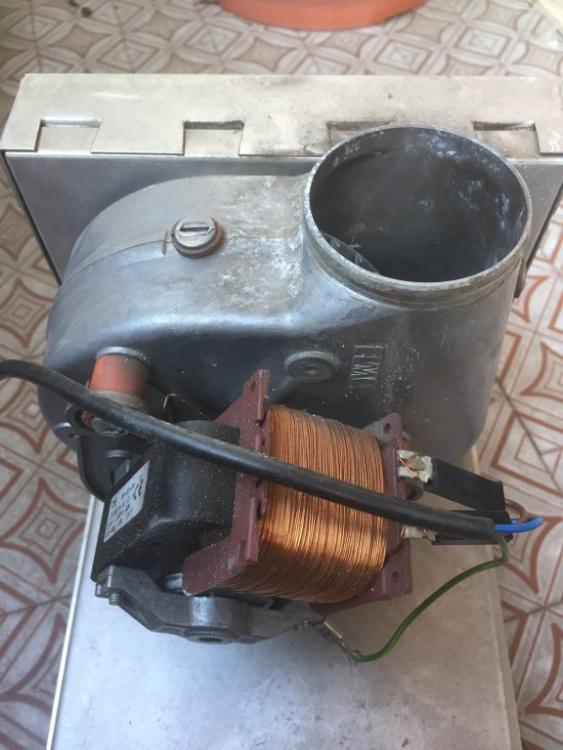
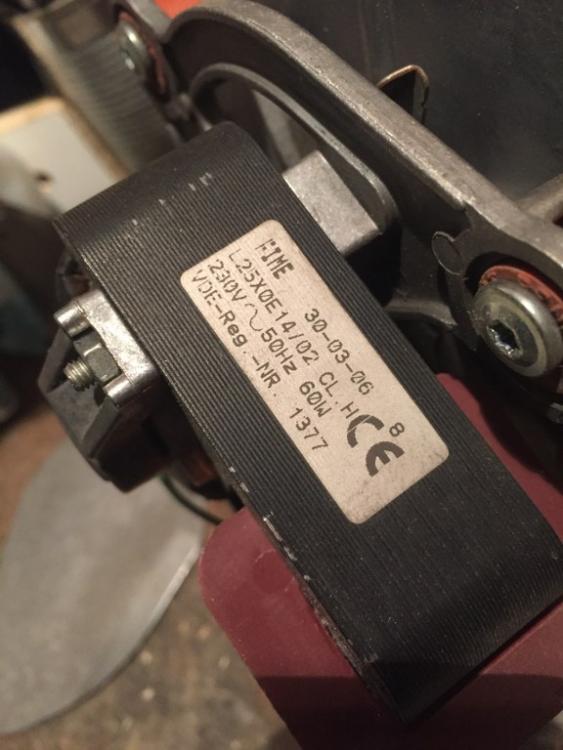
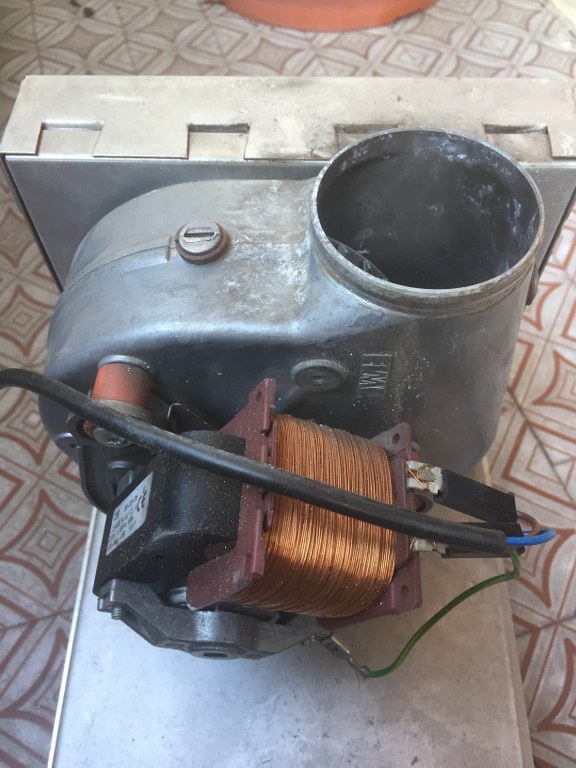
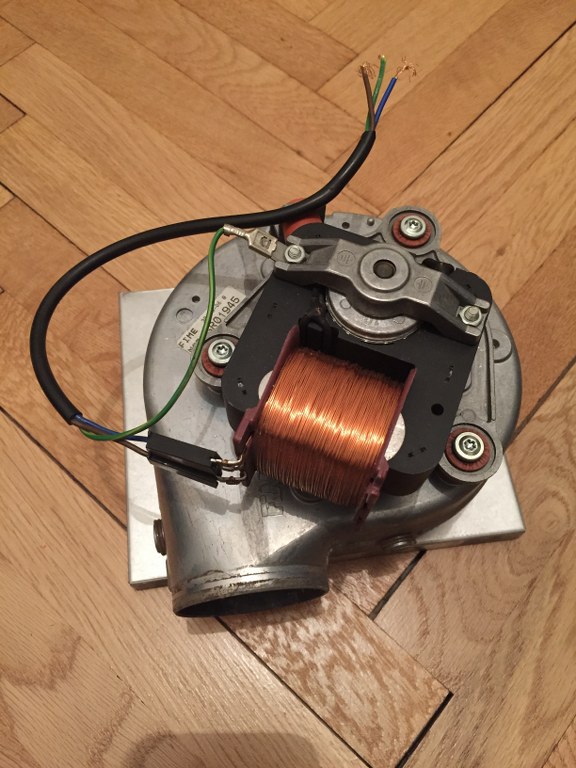
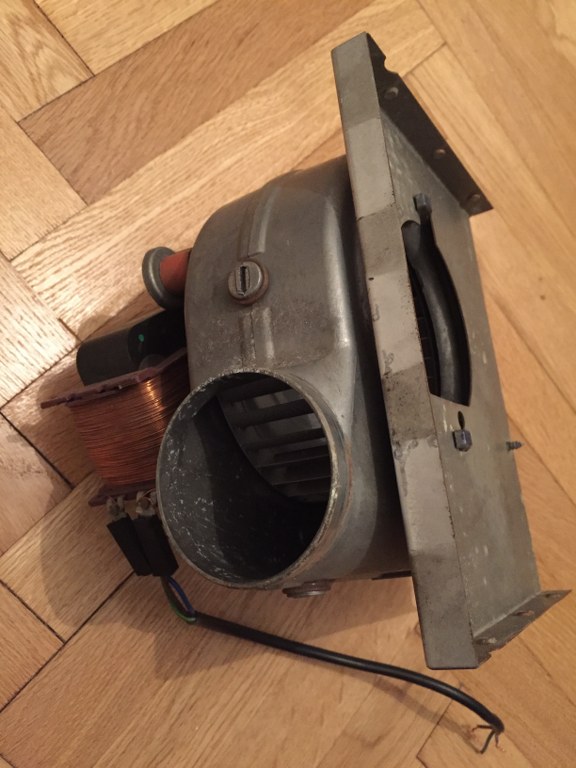
Saturday at a market I bought this electric fan that was part of a boiler. it works at 220V, I tried it works well. I would use it for my forge. I would have the advantage of not having to turn the crank any more.
I will have to make a small frame to hook it to the forge table and I thought to add a gate in front of the suction hole to regulate the air flow.
I also wondered if it would be possible to add a motor rotation speed regulator. I think of the classic light dimmer for example. risk of burning the motor according to you? does it take a particular regulator?
[2000W 220V AC SCR Electric Voltage Regulator Motor Speed Control Controller] regulator would be better than the dimmer?
First thing I want to avoid burning the motor!

-
yesterday I made this steel striker out of an old, useless file. It has been quenched in water when it was yellow. I read a big grain is better for the strikers. Actually it works well and I have been able to start a fire using it with a piece of flint and some char cloth in few minutes even if I never used a flint & steel before yesterday.

-
I have a stick welder with inverter. 190A max... and I can weld like an hobbyst...
to avoid heat treatment problems I can put the face of the flatter in a plate with some water and weld the buttom. I already used this method and it works great.


.jpeg.4849470f5a73e5ebd8b6381f0392c1f4.jpeg)
.jpeg.9f18204bd7a39f9f7a001baf622c21de.jpeg)


.jpeg.1e89d20cda9df3e2e411aac49a459a60.jpeg)


It followed me home
in Blacksmithing, General Discussion
Posted
maybe some vinegar made with Moscato... but I prefer expensive Barolo!!!