

Buzzkill
-
Posts
2,065 -
Joined
-
Last visited
Content Type
Profiles
Forums
Articles
Gallery
Downloads
Events
Posts posted by Buzzkill
-
-
You need to go up in mig tip size. The diameter of the orifice of the jet should be approximately 0.06 times the diameter of the burner tube. Keep in mind that mig tips are rated for the diameter of wire that passes through them, not the actual diameter of the orifice. A mig tip for 0.045 wire will get you pretty close. You may end up not trimming the tip much or at all to tune it though.
Also your tube length should be 8 to 9 times the diameter, so simply around 8 to 9 inches length for a 1 inch diameter tube.
-
You may not have seen it yet, but there's a whole thread on coal at Tractor Supply. In my neck of the woods it's about 6 dollars for a 40 pound bag in either rice or nut size. It's anthracite, so not ideal for smithing, but easy to get and reasonably priced - assuming you have a TSC nearby.
-
I'm not sure how happy you'll be using the Red Devil for a floor. I think you're referring to the refractory cement they make. I used a different brand of cement, but also rated at 3000 F, to line a propane forge a while back and was a little disappointed with the results. In my case it glazed, then turned "gooey" in the forge to the point where if I bumped into it with hot steel it would stick a bit like peanut butter. Again, this was a different brand, so your results may be better, but if you can get your hands on some kiln shelf I can recommend that far more than my attempt at using high temp refractory cement in a propane forge. Unless it specifically states it is a castable refractory I probably would go a different route based on my previous experience.
-
If the steel is still hot when your chisel/punch/drift gets stuck you can normally free it fairly easily by setting the object on its side on the anvil and striking perpendicular to the chisel/punch/drift.
-
Thanks for posting that link. I found the article and the comments from people who had interacted with the man very interesting.
-
Just a thought here. If you have access to a lot of 1 inch thick plate and a welder you could stack them next to each other on edge and weld them together. That would be a very easy way to make yourself a 1 inch hardy hole as well by just leaving a one inch space when sandwiching some shorter plates between longer plates.
-
On 5/13/2016 at 6:39 PM, dps9999 said:
so it got me thinking i am just curios (it would probily be more of a project than its worth) but has any one ever used oil instead of propane and use the burners that are in side these things...one of the guys actully showed me one of the newer burners he had in the truck and it seemed like it would be easy to mount and all that its got the main little pipe with a nozzel on the end and 2 smaller pipes one on each side and angled towards the nozel where the almost meet and that supplies the air....like i said easy to mount but how easy to make it work?
Can it work? You bet. Is it worth the hassle to you? I don't know. I started with used oil since I have access to a constant supply. I made a siphon nozzle which atomized the used oil in a stream of compressed air. I still needed a blower to provide enough air for proper combustion. The bottom line is I switched over to propane and only have mild regrets when I go to get more. The simplest way I can put it is that there is a lot more that can go wrong and a lot more that has to be handle correctly compared to propane. Just for starters think about the different flow rates of an oil at 0 degrees compared to 100 degrees. One gallon of used oil may be slightly different from another gallon, unlike oil directly from a manufacturer.
For me there was a lot more "tinker time" with the fuel and air adjustments, more mess, and more hassle than it was worth.
On 5/14/2016 at 3:04 AM, Frosty said:Thank you Buzzkill I sincerely appreciate it when folk point out my mistakes. I'd rather Be right than THINK I'm right.
And that is one thing I really appreciate about you and this site in general. A lot of effort goes into trying to provide accurate information, and good information can be priceless.
-
IMHO you are using way more fuel than needed. The pressure of propane tells us nothing without knowing what is restricting the flow. I used an unrestricted line from the regulator to the inlet on the burner and would never show any pressure no matter how far I opened up the regulator. If flames are shooting out the openings to the point where it's hard to approach the forge from that direction, to me that would indicate that there is a whole lot of wasted heat just going out into the open air rather than heating your steel. Since you said you can heat the steel to the desired temperature in the dragon's breath outside the forge my guess is you can cut back significantly on your propane and air to the point where you have only a few inches of flame exiting the forge and still easily get the temperatures you want. Closing off portions of the front and back should also keep a lot more heat in the forge. Obviously what you're doing works, but you're probably using something around twice as much gas as you need and that costs you money. It may also wear out your forge lining faster.
For tuning a blown forge, setting the propane and adjusting the air till it's loudest should give you somewhere near a neutral flame. However, that neutral flame can still be way more output than is needed. Personally I set for the loudest flame then cut the air back until the noise decreases and the flame gets lighter in color. Then I increase the air a little until I hear the volume of the flame increase again. I like to stay on the reducing side of the mix just a little to keep scaling in the forge to a minimum. If after a couple minutes I think it's too hot, I reduce the propane flow and adjust the air again. If not hot enough I increase the propane and adjust again. I haven't forge welded with mine, but I've never had the need for a dragon's breath like you show in the top 2 pictures to get the temperature I wanted.
-
Not sure. From my own experience it is good to have a restriction on the propane so that there is a measurable pressure build-up that the regulator gauge can indicate. If it's a wide open line then you don't see any pressure no matter how far you open the regulator. A mig tip or needle valve would produce that effect and maybe help with recording specific known settings for a particular burner/forge setup. It would also allow 2 or more burners better tuning control from the same regulator. It may be overkill to some extent, but there's not much of a downside for the feature.
-
Frosty,
There are needle valves on those burners. They are before the ball valves with a 90 degree elbow between the needle valve and the ball (or 1/4 turn) valve.
-
Sounds like you have a pretty good handle on the operation aspects. The ball valve does allow you to quickly shut off the propane if needed and/or choose which burner will be in operation. Some people open up their regulators to maximum and use the needle valve for tuning the propane flow. The main difference in tuning is that every change in either air or propane affects the flame, whereas once a naturally aspirated burner is properly tuned it pulls in the right amount of air as the propane pressure increases.
As for tuning I use a combination of sight and sound. It isn't difficult once you get used to what you are trying to accomplish. Once the fire has been going for a couple minutes I either cut back the air or increase the propane a bit until the burner flame gets lighter in color and the roar from the flames drops off just a bit. This is a rich flame that will burn cooler and produce more CO than is desired (for me anyway). Then I bring the air back up just a bit so the volume of the roar from the flame increases. At this point I have a slightly reducing flame and I leave it alone. If after a few more minutes I determine that it is hotter than I want I reduce the propane and go through the same process. If it's not hot enough I increase the propane and adjust the air in the same manner. Once you get used to the sight and sound you are looking for it is a quick and easy adjustment.
To get a handle on it play with both the air and propane flow. You will hear the roar get louder when you are generally near the right mix. It will get quieter with either too much air or too much propane. Too much propane will also give you more flame at your openings, so make sure you're not standing in front of those when you are experimenting with the mix.
-
Thanks for the compliments. I appreciate it.
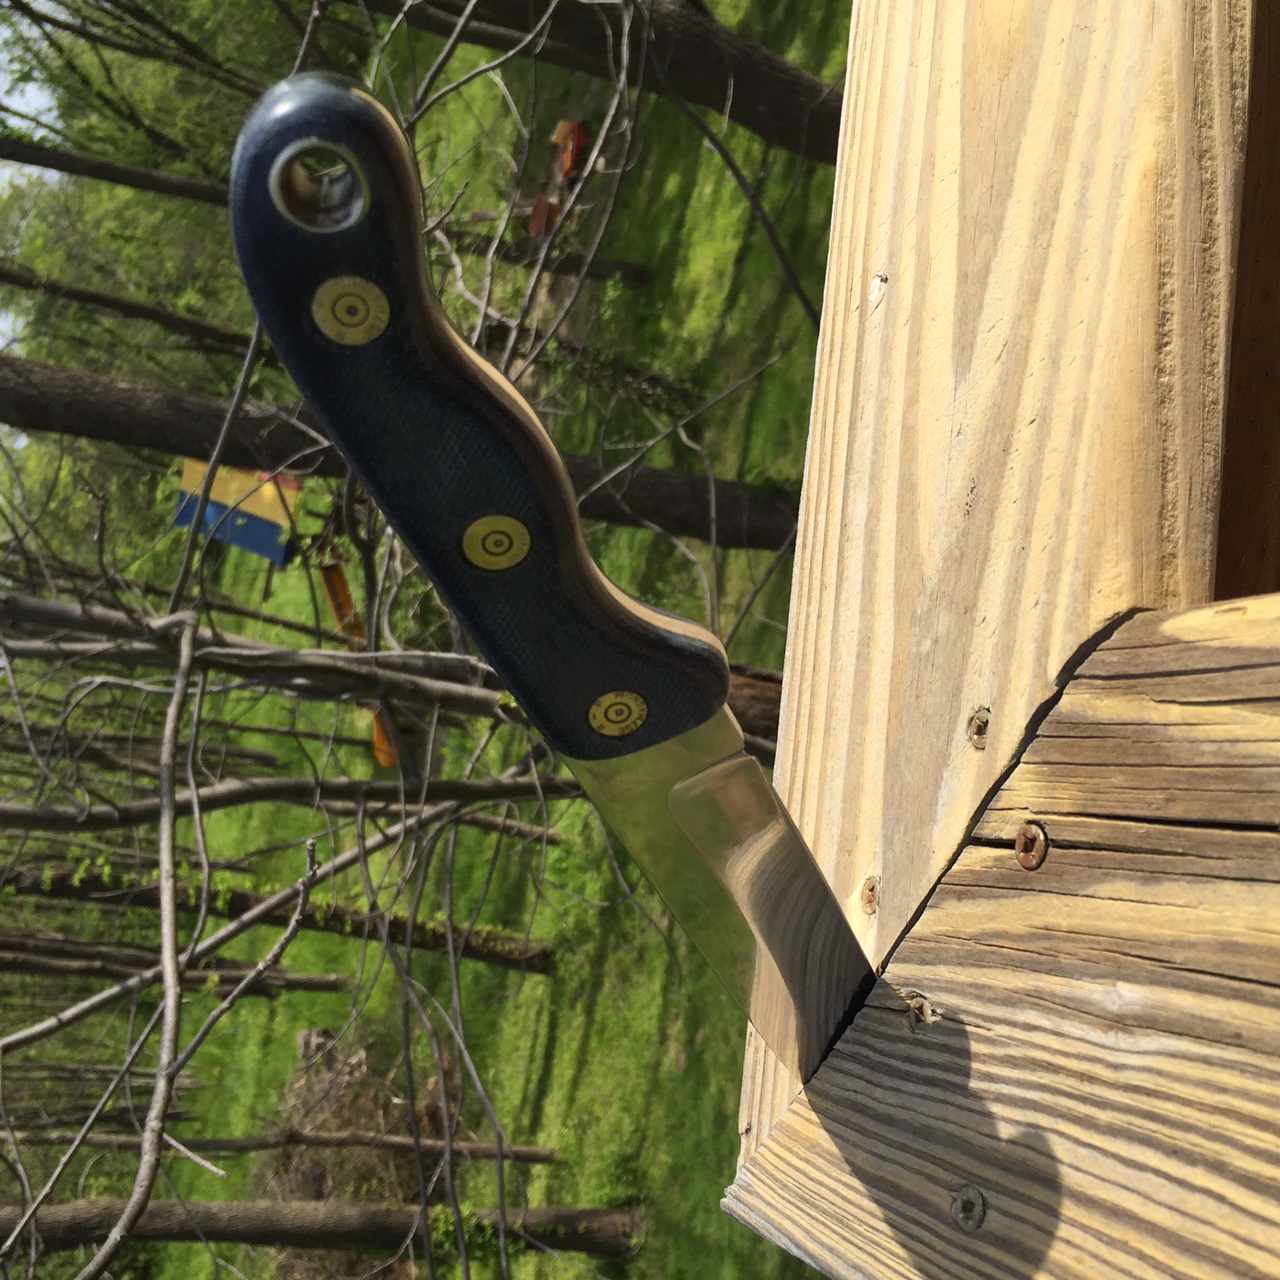
24 minutes ago, Darious said:What did you use for the interior pins under the casings?
Normally I cut brass or stainless rods to use for pins. However, in this instance I did not have rod in the diameter I wanted to work with, so I found some nails that had the right diameter and used them. Since I knew they were going to be hidden anyway and coated in epoxy when I installed the covers it seemed like a good choice for this project. Nails also peen fairly well even though it's a little more difficult in a recessed area.
-
Fortunately my older sister and I have almost always gotten along well. She got me out of trouble more than once when we were kids. I do have some scars from my other siblings though.
I hear you on the lack of preference for the american tanto, but he said he prefers that style. It kind of surprised me since he has been a martial arts instructor for 30 years with an 8th degree black belt in karate and 6th degree black belt in kenpo. I figured he'd prefer the traditional Japanese style tanto. No accounting for taste I guess.
-
Nope. I did that before YouTube, or even the internet for that matter. I didn't have any way to record it then either.
-
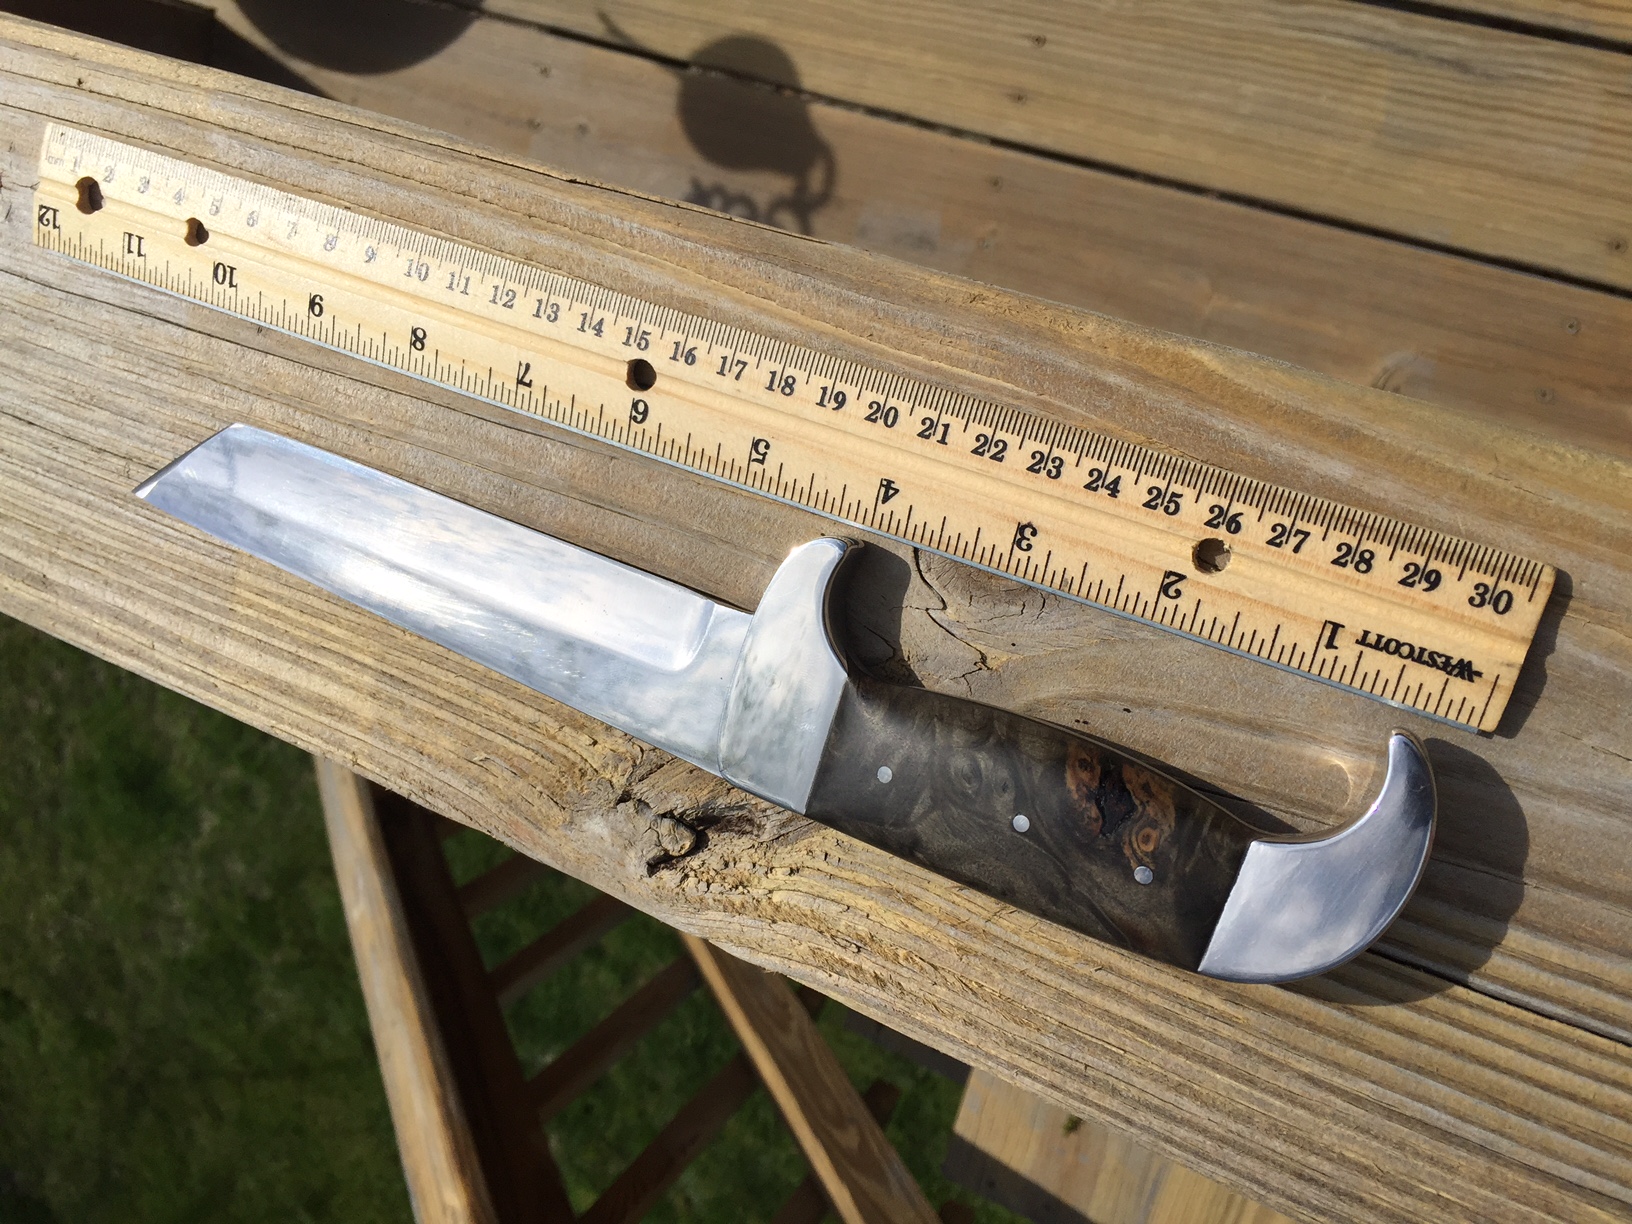
Here's the knives I gave to my older brother and sister over the weekend. Both are O1 tempered twice at 450F for two hours after hardening, and both are 11 inches overall length
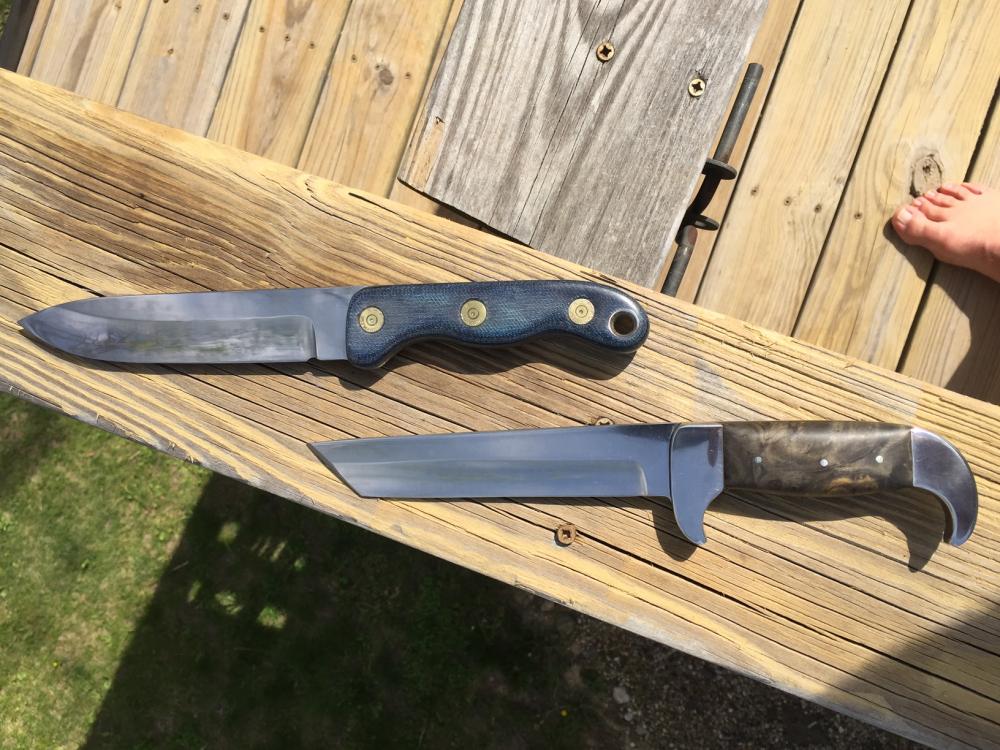 . If my hardness files are to be believed they are between 60 and 65 Rockwell. A few firsts for me here. My first hollow ground blades. My first (American style) tanto. My first dovetail furniture and scales.
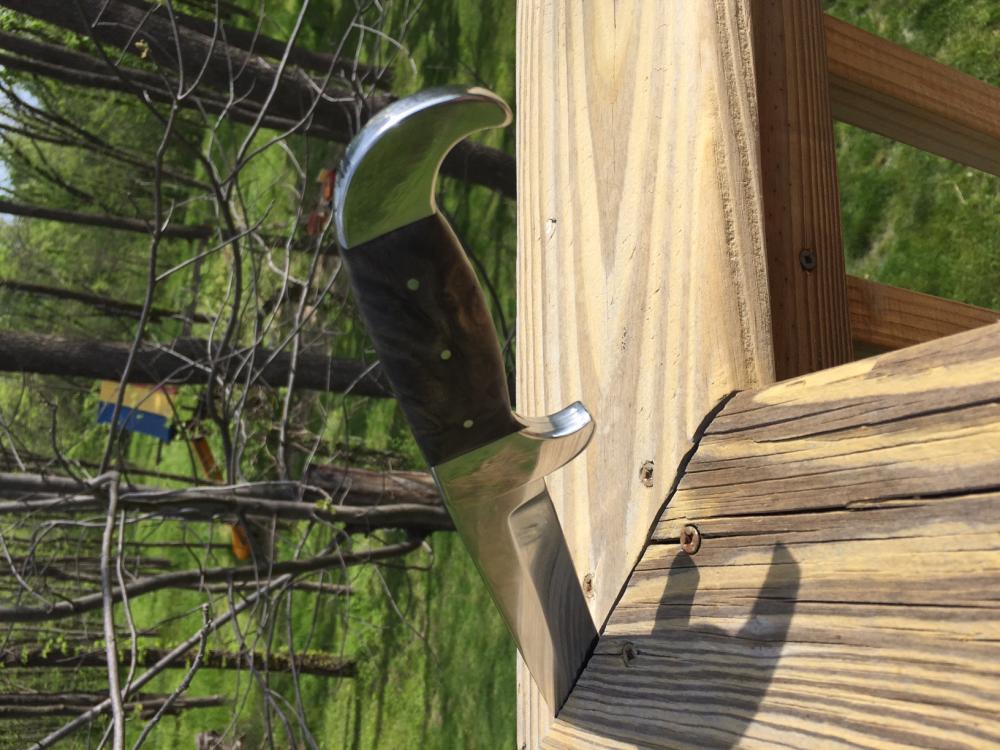
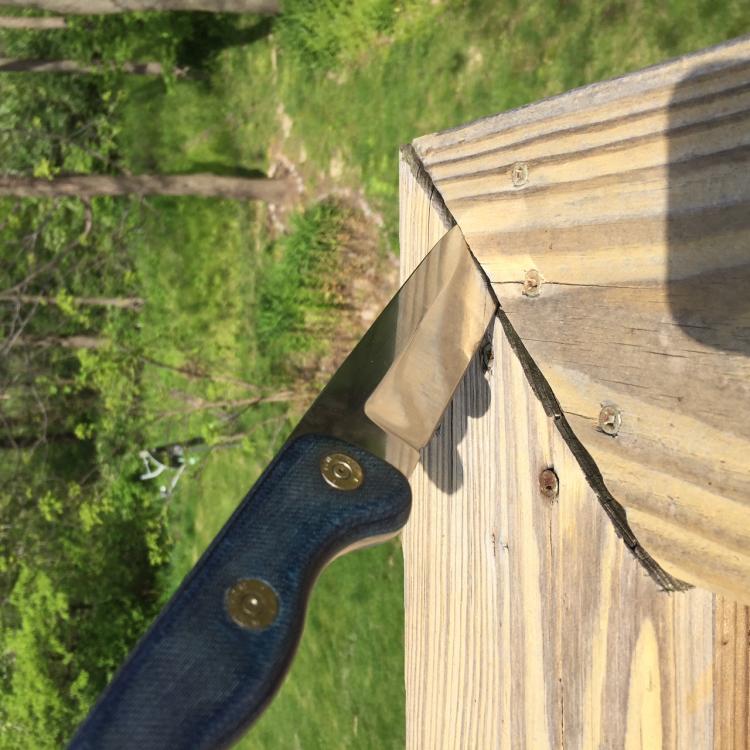
The tanto has stainless furniture and pins with dyed and stabilized maple burl on the handle. The drop point has home made blue jean micarta scales with spent .357 magnum casing "piin covers" which were fired from my sister's gun - to add that personal touch. I flared some stainless tubing I have for the lanyard hole.


-
9 hours ago, Frosty said:
Think we could've had a good time as teens had we been neighbors?
Frosty The Lucky.
Definitely. I'm not sure how it worked on the rifle round, but for the shotgun shell it just blew out the side at first. That meant finding a piece of pipe the right diameter to contain and focus the force. Basically it was a small barrel. But between the weight of the shell, the pipe, and the other pieces involved it was way too heavy to do anything but shoot in an arc, and even then the travel distance was pretty short. At the time I thought it was a novel idea, but it was practically useless on just about every level except entertainment.
-
This topic reminds me of the time I decided to put a 12 gauge shell on the end of an arrow when I was a teenager. Ultimately I got it to work, but it's kinda like a bowling ball - no point to it. Just FYI though, I still chuckle when I remember the arrow flying back further when the 12 gauge shell fired than it traveled forward from the bow.
-
A moose once bit my sister......
 No realli!  She was Karving her initials on the møøse
  with the sharpened end of an interspace tøøthbrush given
  her by Svenge - her brother-in-law - an Oslo dentist and
  star of many Norwegian møvies:  "The Høt Hands of an Oslo
  Dentist", "Fillings of Passion", "The Huge Mølars of Horst
  Nordfink".
Mynd you moose bites kan be pretti nasty......
-
If you got the tip hot enough to "lose the temper" then you should have seen colors appear on the steel. If that happened then you were working too fast with the machine as latticino suggested. If you did not see any temper colors appear on the affected area then it's likely you didn't have the proper steel for hardening, a proper quench, or you tempered too hot to begin with. Will a file skate off the other portions of the blade without digging in? If a file cuts into the steel easily elsewhere on the blade then it was probably never hardened. If your starting steel can't be hardened in the first place then it doesn't matter what you do; you still won't end up with a good knife at the end of it all.
The bottom line is you didn't give us enough information to accurately diagnose the problem.
-
A couple things: One could argue that it is a variation of an ulu. Secondly, I can't speak for navasky, but I know I wouldn't care if someone was just using my design for their own personal use. I might get testy if they were selling it as their own though.
-
My curiosity is getting the best of me. Why didn't you put all the holes to the inside of the legs? It would seem that stability would be better that way. Is it a preference, a practical matter of getting the heat where you wanted it, anticipating odd shaped pieces that wouldn't work in the middle, or something else?
-
And spaghetti noodles keep a straw temper in less than 10 minutes at 212 F. Not sure about the carbon content in those though.....
-
I'm much closer to you. If there's enough I'll just come pick it up and dispose of it for you. I'll even load it myself for free.
")
-
You aren't the only one Frosty. I still make my own exploding targets and aluminum powder is a component. I had never heard that the fumes from burning aluminum are poisonous and didn't know if I was misinformed and lucky or if information regarding the toxicity of burning aluminum had been incorrect/overstated on here.


My forge build
in Gas Forges
Posted
I welded some square hooks to the sides of my front opening so I can slip a single IFB snugly in and block about half the opening from the top. I have a tendency to "rub" against things when putting steel into or taking it out of the forge, so I prefer not to have things stacked up that I can easily knock over in the process.