monomoit
Members
-
Joined
-
Last visited
Everything posted by monomoit
-
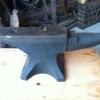
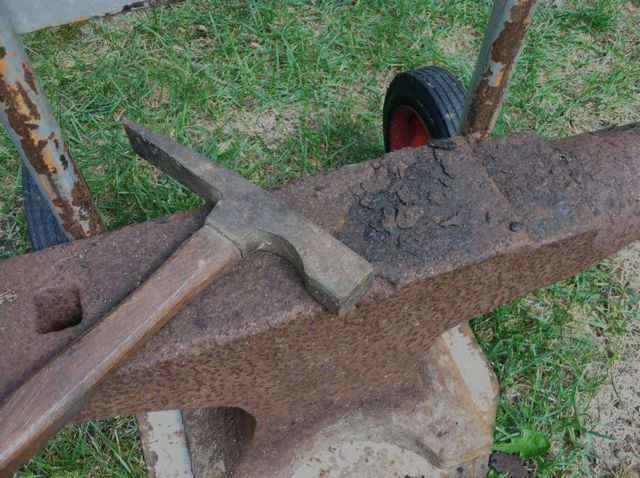
Quite fortunate this past week to pick up yet ANOTHER anvil, this one a bit different, however, than my past two Hay Buddens: This great old miniature anvil came out of a local estate that I was liquidating. It measures 4-3/4" long, stands 2-1/2" high, and weighs in at a whopping 1lb, 9-1/2oz. It has good age to it - I would guess that it dates to the late 19th century. What I like best is how it's a faithful representation of its larger brethren, right down to the wonderful "patination". Still not my smallest anvil, but a happy and welcome addition to the collection!
-
-
Woody, the soap is kinda force of habit, I guess. I clean a lot of small parts that end up being rinsed in the kitchen sink (when the Missus isn't home!), so soap and a scrub brush are standard fare. I used my smaller electric power washer to rinse the anvil, which still left a thin film of oxide on the surface. I have no doubt that my larger 3000 psi gasoline powered unit would have blasted it perfectly clean...
-
Newbie, great job! The stand is a thing of beauty...
-
Phil!! Oh my goodness! Have a lured you over to the "Dark Side"?!? :D In all seriousness, you owe it to yourself to try this out. There ARE certain things that simply can't be cleaned as well any other way - like the crescent wrench I illustrated on one of the previous pages. Recesses, moving parts, hard-to-reach areas, they all get cleaned - effortlessly. I truly prefer electrolysis from a cosmetic standpoint as well. We've all had experiences with a wire wheel leaving a "blotchy", non-uniform finish that doesn't look "right". As can be seen in the photos above, the electrolytic process produces a nice, consistent, "patinated" surface that looks... well... original. Finally, there's the labor component - electrolysis couldn't be easier. After the initial effort to put together a setup, parts simply clean themselves. All that's necessary after the fact is a quick wash-down with soap and water and then a final coating of oil. Voila! You're done.
-
-
-
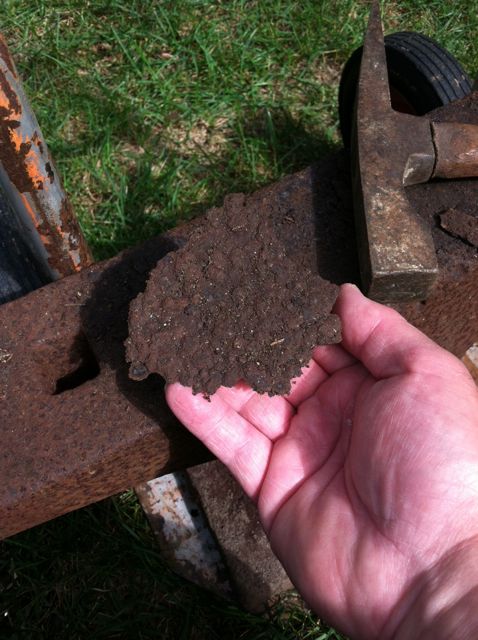
OK guys, I'm back!! My apologies, but work had me tied up for the past four weeks, seven days a week, dawn-til-dusk... Well, in any event, here are the results! In our last episode, the anvil was sitting in the electrolysis tank as shown below: (the rust visible on the anvil's top surface is that which has precipitated out of solution, and is simply resting there) Here is the anvil, pulled from the tank: It's now ready to be rinsed (and given some light scrubbing with a brush and dish soap), to remove the sooty black oxide present on its surface. I used my pressure washer and a scrub brush - it took all of five minutes. Here are the "before" and "after" shots: And finally, dried off but not yet oiled: This view of the underside shows the original state prior to electrolysis (because of the bubble of air trapped underneath): I then applied a coat of boiled linseed oil to prevent any further rusting: The serial number, 117229 (dating to 1906), can now be made out fairly clearly: As can the "4" present near the heel: The only bad news is the heavy pitting to the top surface: Recommendations on how to properly address (re-dress?!?) this pitting would be GREATLY appreciated. As can be seen above, is fairly substantial. And finally, the before-n-after photos of the anvil in the back of my truck, showing where it began, and how it ended!
-
Quick update: been so busy with work that I haven't had a chance to pull the Hay Budden from the tank yet to do the final cleanup and rinsing. Here's a photo, though, showing the condition of the anvil after about 2-1/2 days: It's done. The rust once present on the surface is completely gone, and a fine film of black oxide remains in its place. This is easily removed with soap, water and a scrub brush (or a pressure washer). Oiling the surface immediately after rinsing is imperative, so that rust doesn't once again begin to form. If I get a break at lunch today, I'll try to pull it and show everyone the results.
-
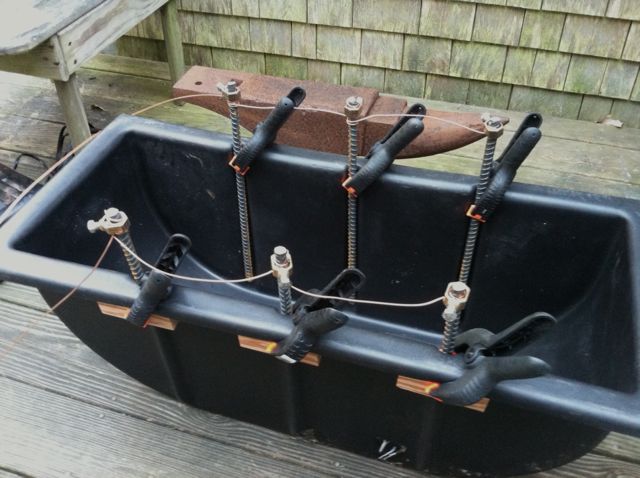
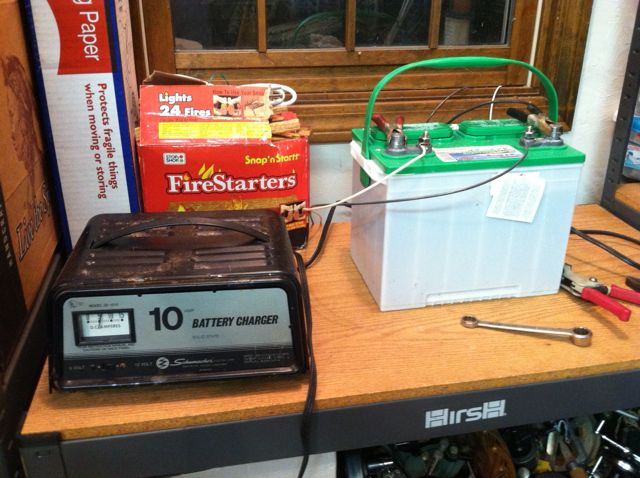
Vaughn, the way I have things wired up, the battery supplies whatever current it required to run the "engine". The charger, which is an automatic type, outputs current sufficient to maintain the battery's voltage. RIght now, after 24+ hours, the charger is putting out a constant three amps. This is a fairly heavy draw, but it's hooked up to a BIG item! As far as the tub goes, be aware that the dimensional limitations for an anvil would be about 11" in height, 29"-30" in length, and a base that is no more than 10" in width (perpendicular to the longitudinal axis). Probably a max of 200 lbs...
-
Came home for lunch and took a couple of quick photos of the cleaning in process: The light wan't the best, but you can get a fairly good idea of what's going on. After about 16 hours cooking in the tank, the heavy rust scale present on the surface just sloughs off, exposing the clean metal beneath. The rusty sediment is also clearly visible, resting at the bottom. Because of the size of the piece, I will probably leave it in for another day or two before removing to check it's progress (it will likely be done by then). The good news is that you can't "over-clean" an item; when the rust is completely removed, it's done - sitting in the tank for a longer period has no effect.
-
Thomas, in reply to your (rhetorical) questions: a) I like all of my tools crisp, clean and in good working order (anvils included), and this one obviously NEEDED cleaning! 2) Electrolysis loosens and removes rust scale, leaving the "healthy", un-rusted metal beneath unaffected. In addition to saving labor, and doing a better job of cleaning, it yields (in my opinion) superior cosmetic results as well. thirdly) I don't have enough other hobbies
-
-
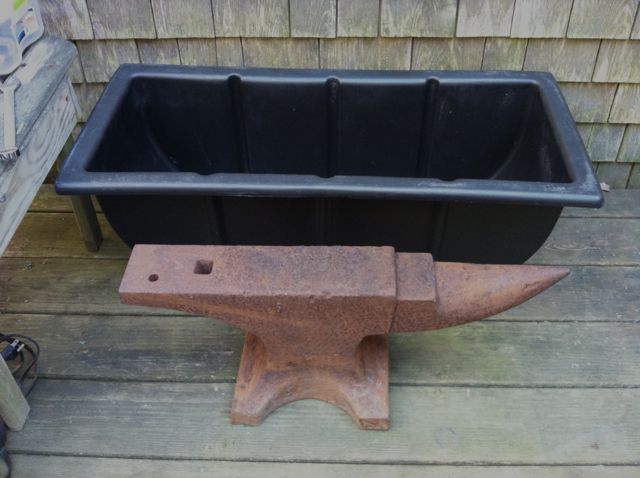
Despite my best intentions (and great desire) to play with my new anvil today, I didn't get much done. I did manage, however, to wrestle it out of the truck and into the back yard, and to take a few "before" photos of the markings: I also found the designation "2 - 2", by the hole underneath the horn: I never thought to look here on my other anvil, so I don't know if it's similarly marked. Can anyone tell me what this means? Also grabbed a quick shot (in the dark) of the serial number: All that I can definitively make out so far is "7229". It appears that there may be other leading numbers, but until the anvil's cleaned, it's hard to say. One of the great advantages of electrolysis is it's ability to "uncover" impressed markings, so it should be a lot of fun to compare before-and-after results.Vaughn, I think you'd be astounded at what electrolysis could do for the blower on your forge. Last summer, I found a pocket knife on the beach, that was absolutely encrusted with rust - barely recognizable as a knife. You could have soaked it 'til the end-of-time, or brushed it 'til the cows came home, and it wouldn't have made a bit of difference. After 24 hours in the tank (and a rinsing in the kitchen sink afterwards), that knife opened and closed with a snap! Was it as good as new? Heck no. The process can't repair damage (pitting) - but the corrosion was completely removed, and the parts "welded" together by rust were once again free to move independently. Each and every time I clean something like this, it feels like magic!! I never cease to be amazed...Phil, the only thing I'll need to do to accommodate the anvil is to increase the tank size; that's as easy as grabbing a plastic tote or tub big enough to accept it. And the job that electrolysis does on rusted metal is truly extraordinary... I'll post a series of before and after photos, and you be the judge!I'm REALLY looking forward to cleaning up this anvil. My plan is to do so using electrolysis - the results achieved with it are simply quite amazing, and the labor component very low. The process is equal parts Witchcraft/Alchemy/Black Magic/Weird Science. I built a setup that I use regularly to clean hand tools and other smaller, rusty items, but I will definitely need to modify (enlarge!) my tank in order to accommodate the anvil. For those who may be unfamiliar with what electrolysis can do, here are before and after photos of a common adjustable wrench I cleaned using the process: One of the ways electrolysis truly excels is in cleaning areas that brushes and abrasives can't reach - nooks, crannies, corners, and inside of moving parts. The above wrench is a great example. The adjuster could be rusted up solid, and afterwards, it would move freely... I'll be sure to document the restoration with plenty of photos, and give members step-by-step details on how it goes!Vaughn, thank you for the prudent advice. As it turns out, I will likely not have to use this anvil, because today, believe it or not, I found a second one - ANOTHER Hay Budden!!! I just started another thread about it here: http://www.iforgeiro...-rains-it-pours And I swear, I couldn't make up this story if I wanted to!! I'm almost too stunned to believe it myself...Just how lucky can one man be??? I mean, seriously?!? Less than one week after scoring the WONDERFUL Hay Budden Anvil (plus extras) that I shared in another thread here: http://www.iforgeiro...ay-budden-anvil I uncovered THIS one today!! And "uncovered" is the operative term: It's another Hay Budden - a 155 pounder - and even through the heavy scale, I can read the markings. This is the story of how I found it... I buy and sell antiques for a living. Today, I had occasion to be on a house call to look at some items that turned out to be of little consequence. While leaving the home with the owner, however, and walking down a pathway heavily bordered by English Ivy, I spied, peaking out from underneath the vegetation... the heel (and pritchel hole) of an anvil. After asking for permission to perform an inspection (and expending no small amount of effort to clear the ivy!), I pulled out what is shown above. The owner's response: "Hmmmmph! I had no idea THAT was there. I have no use for it, it's in the way. If you want it, take it - it's yours." Free. Nada. Zilch. Mine for the taking... As can be seen above, some of the ivy is still attached. It had been sitting there for goodness knows how long. Ants were crawling all around the back of my truck, and I didn't care. My prediction: it will clean up beautifully. I'm leaving shortly to go buy some lottery tickets. I'm feeling lucky :DMO, I have another swage block I've been trying to buy for a while now, measuring 18" x 18" x 4-1/2". The current owner, who has thus far been reluctant to sell, is using it as... a garden ornament!!Stewart, here's a question: what do you do with a great early anvil like this that's virtually "new in the box"?? Do you use it, or "preserve" it? It would seem that there will always be another good "used" anvil out there, but rarely one in this condition... An interesting conundrum!Fair enough, Fatfudd... but I'll need your address :lol: