Thorsrevenge
Members
-
Joined
-
Last visited
Everything posted by Thorsrevenge
-
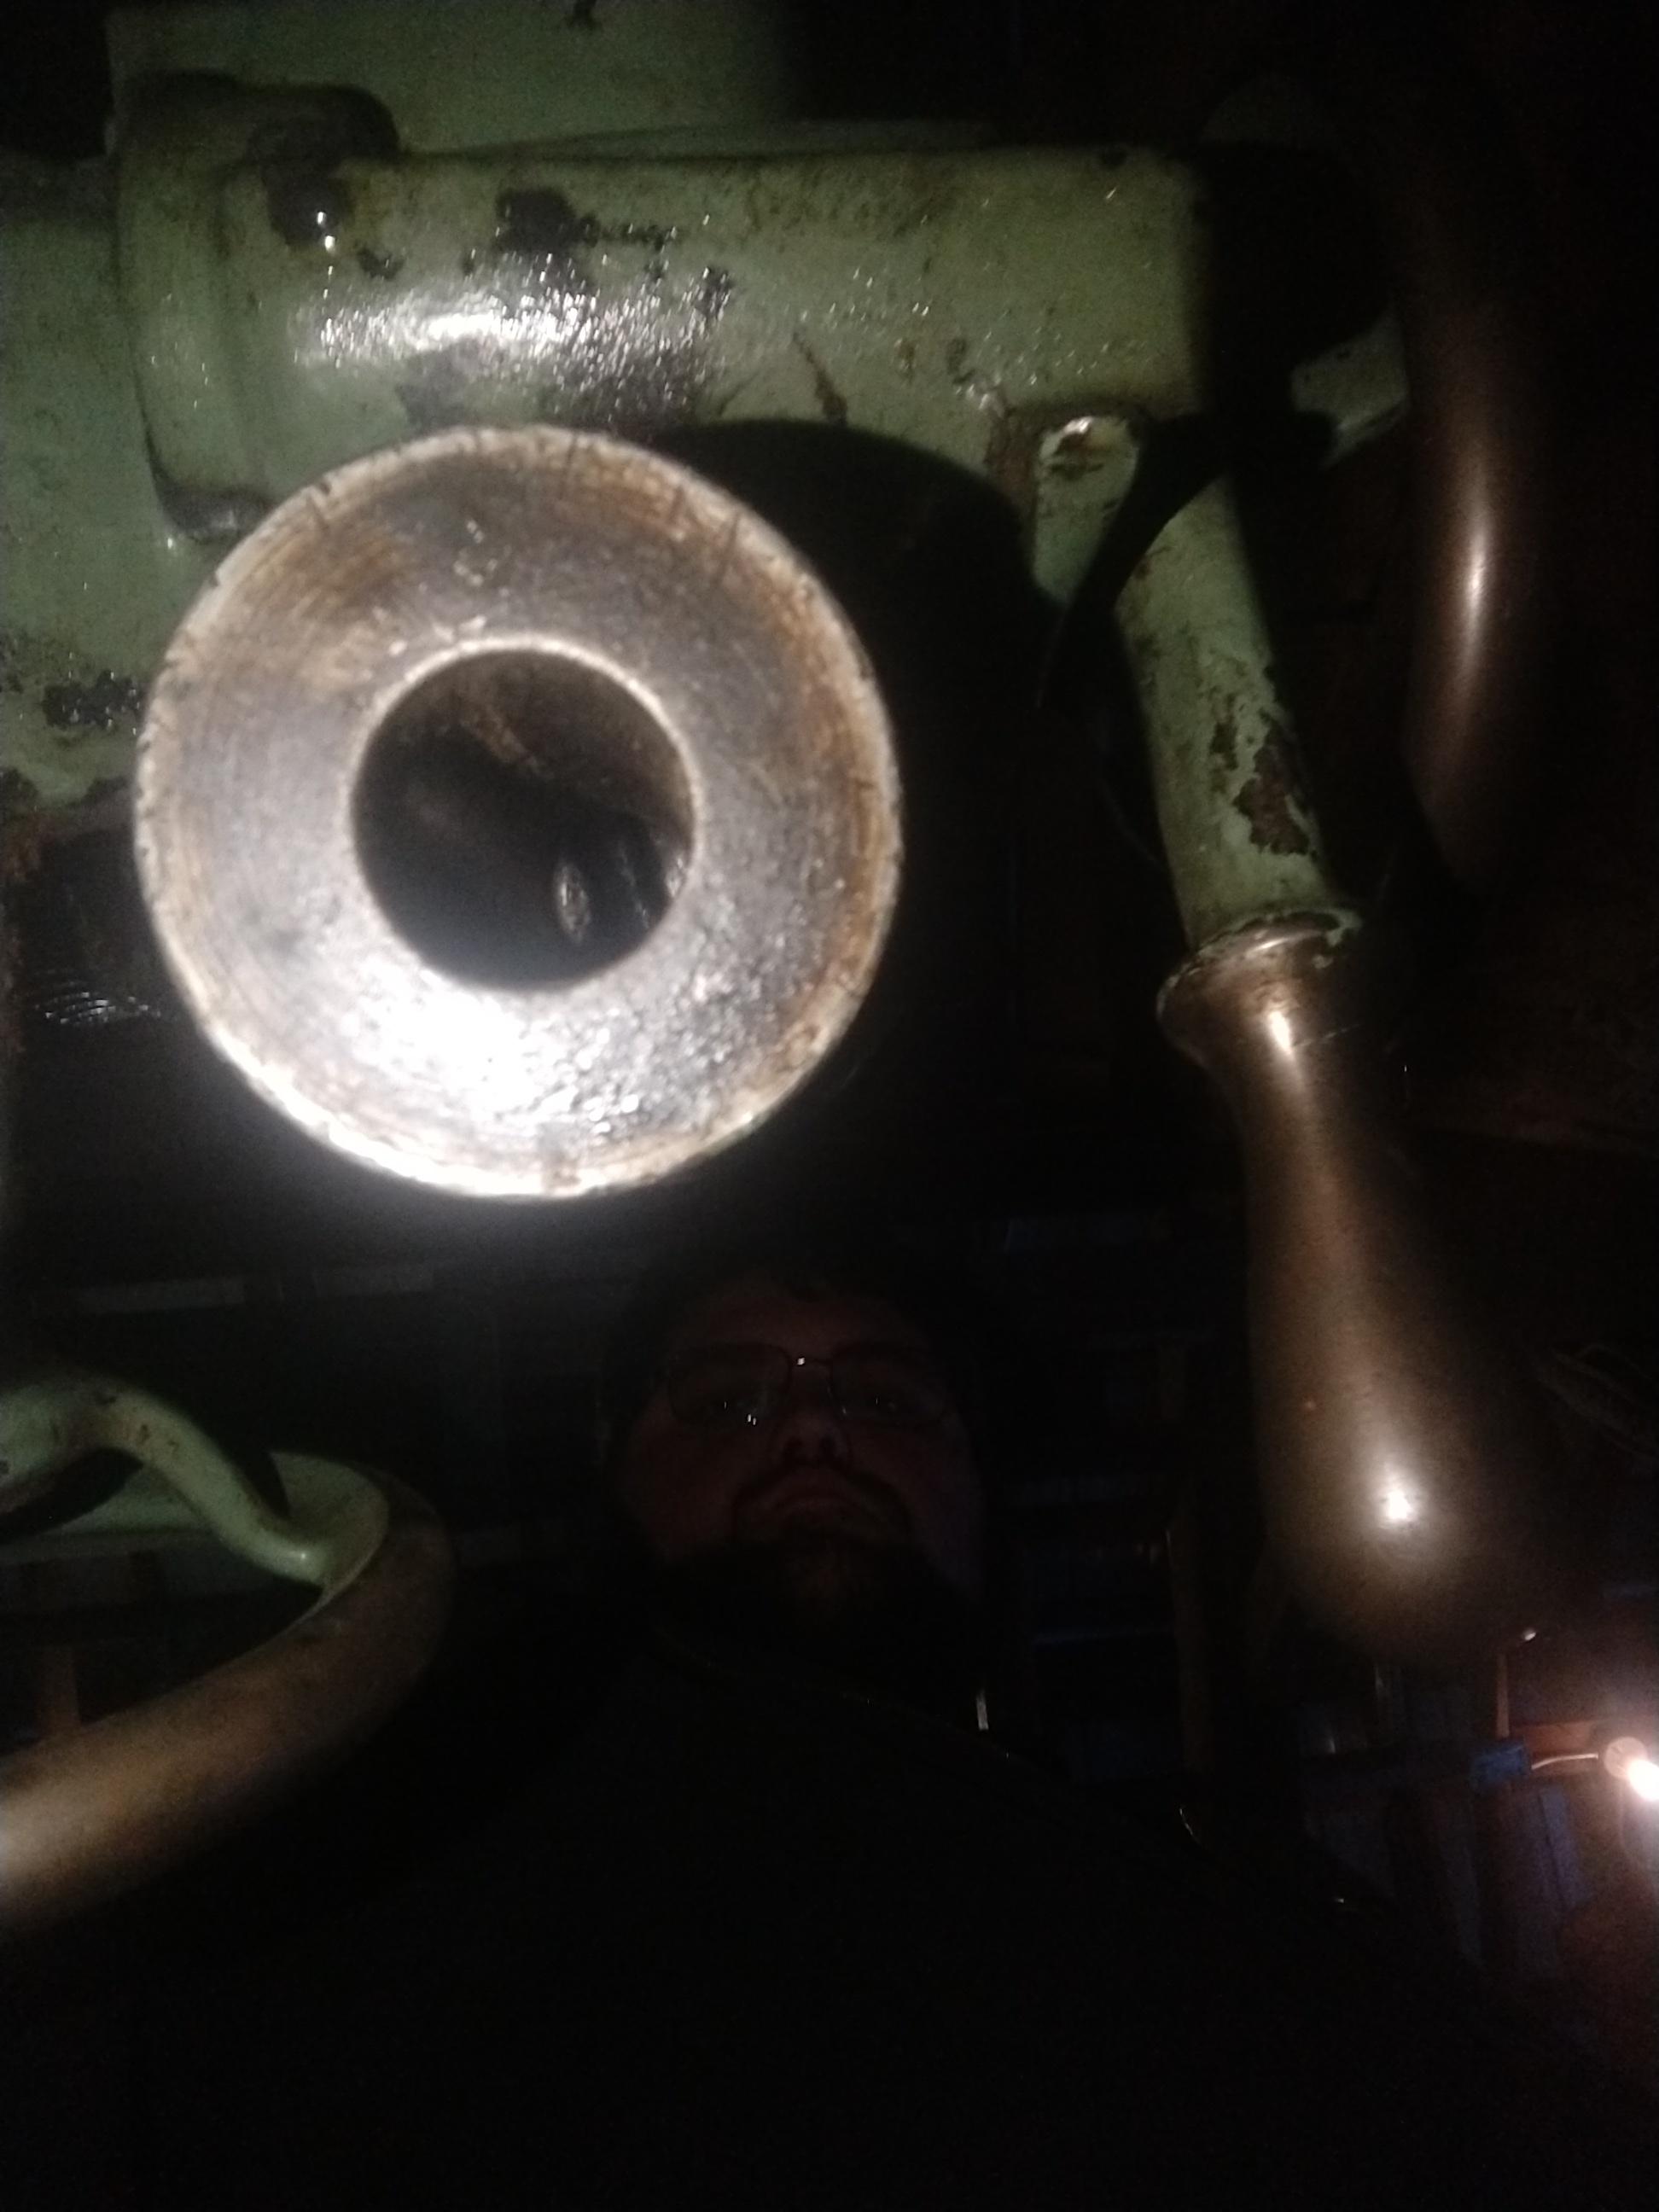
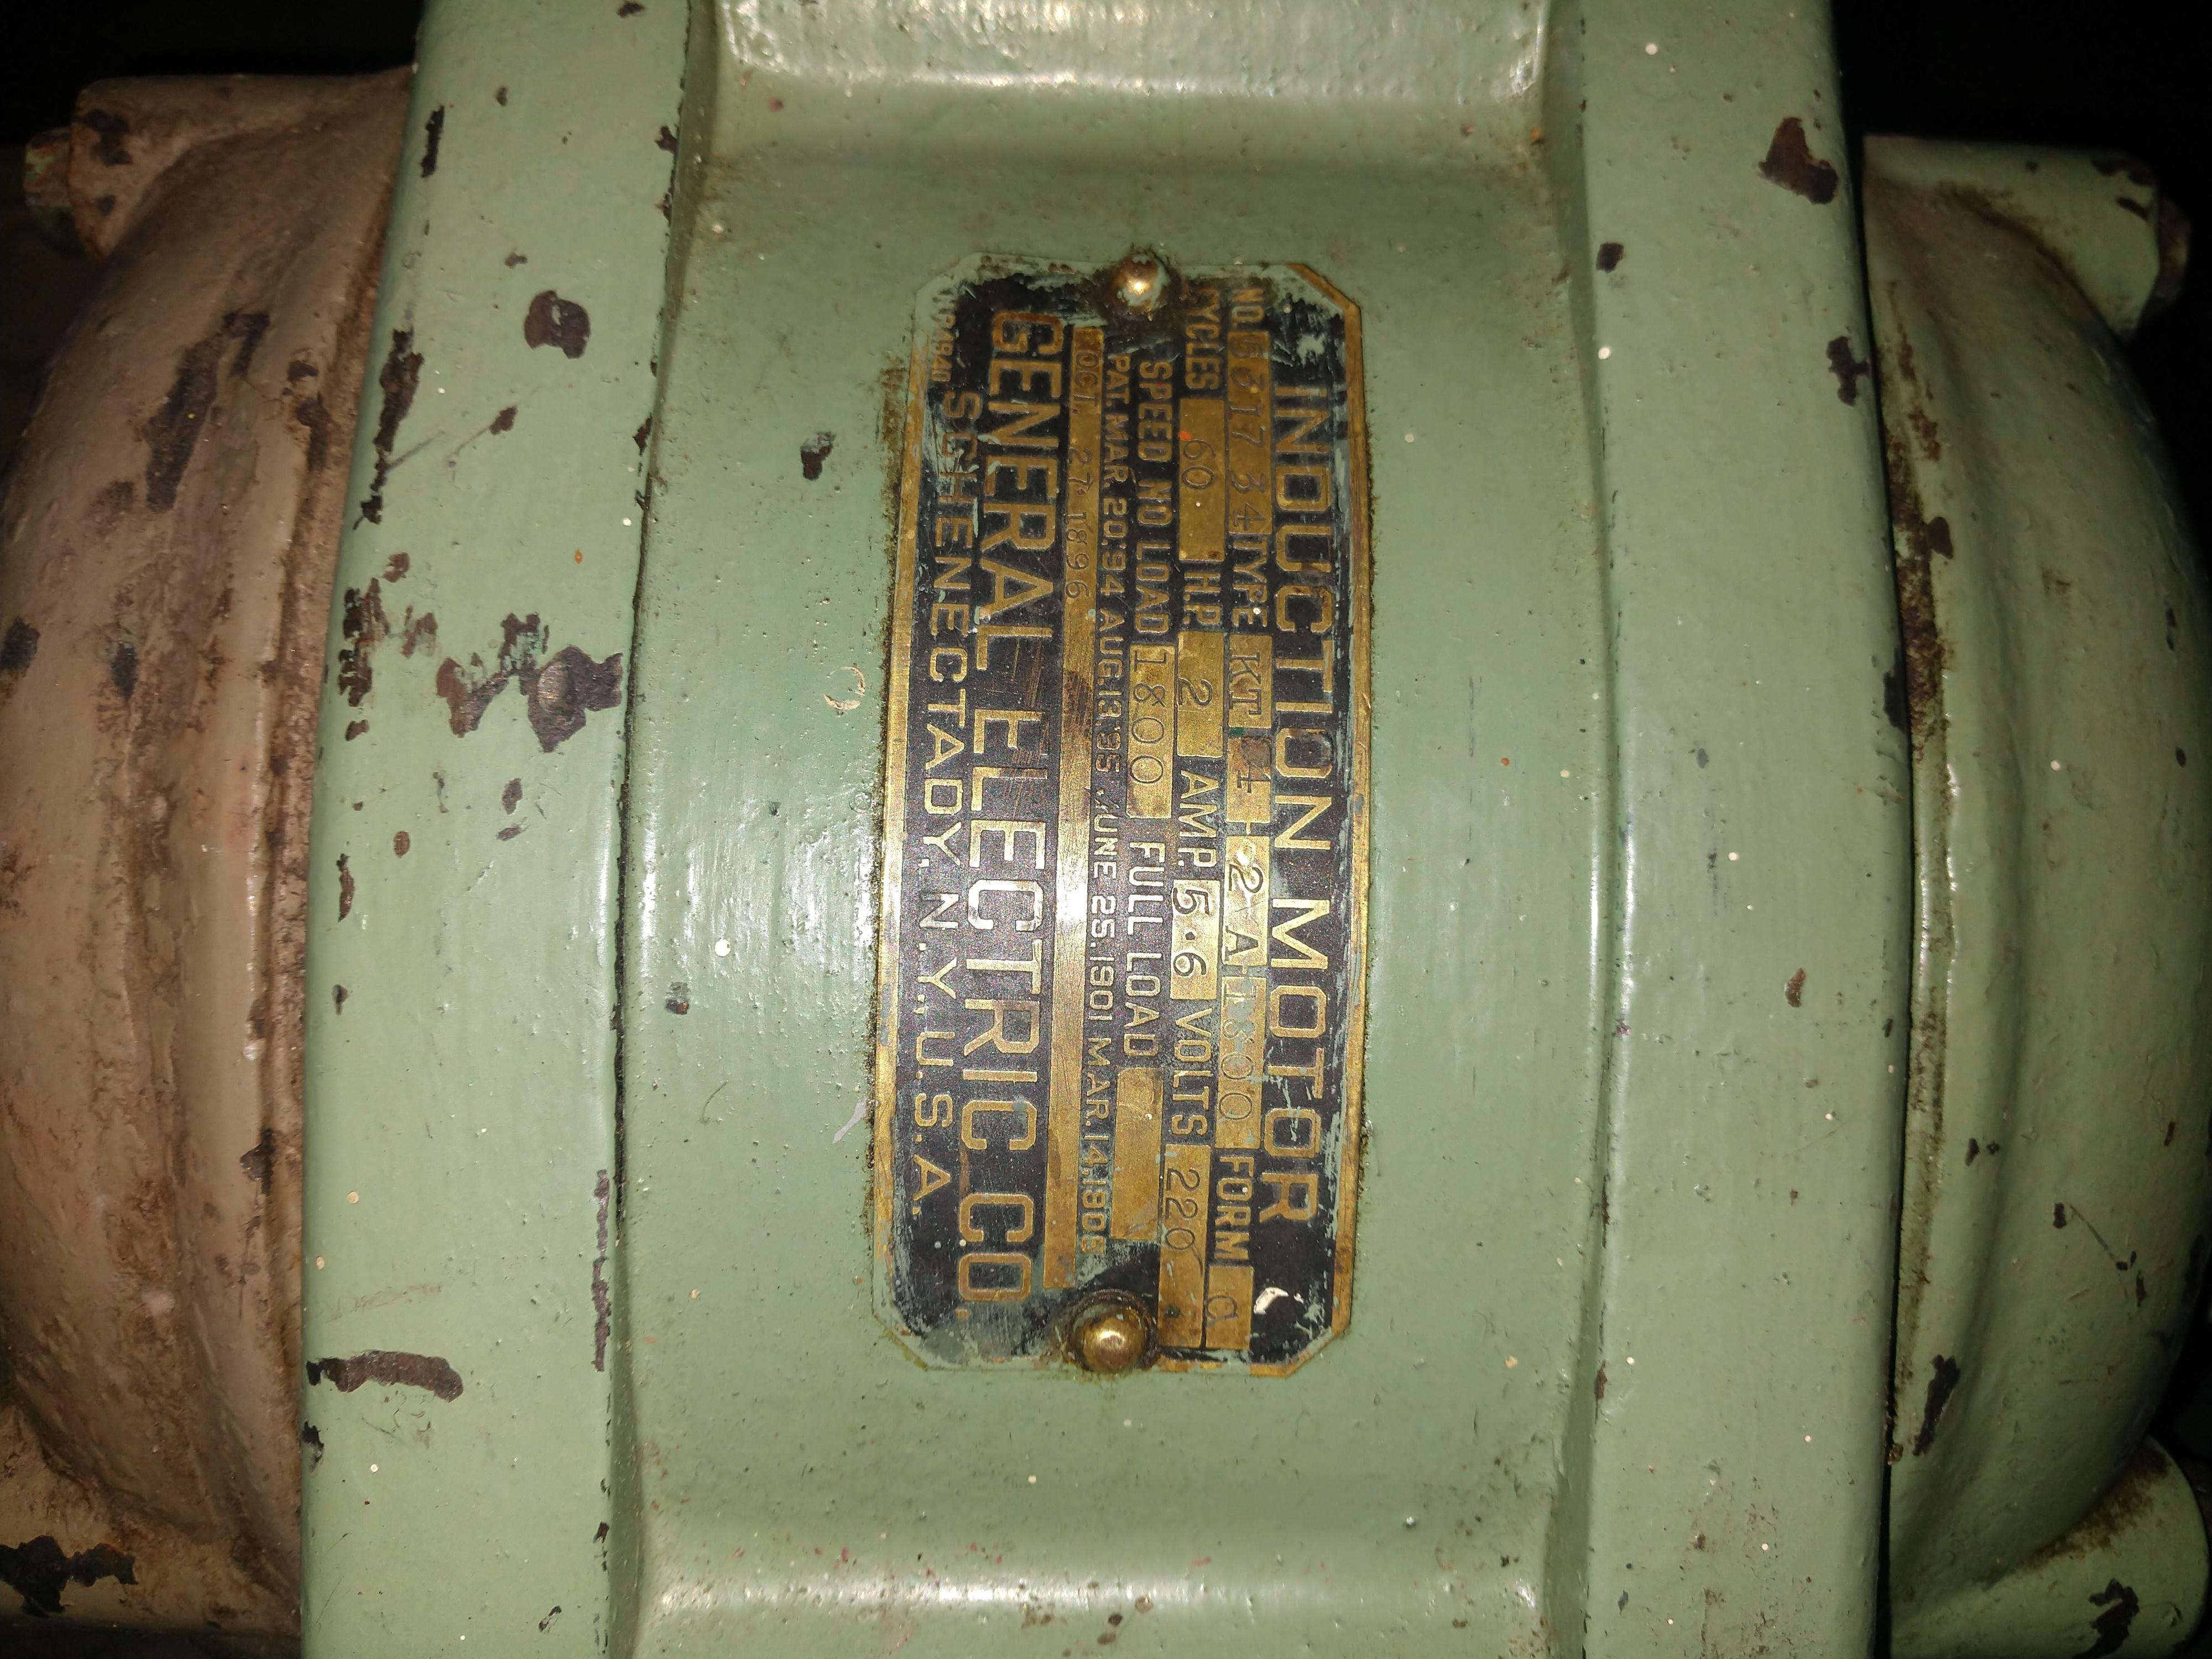
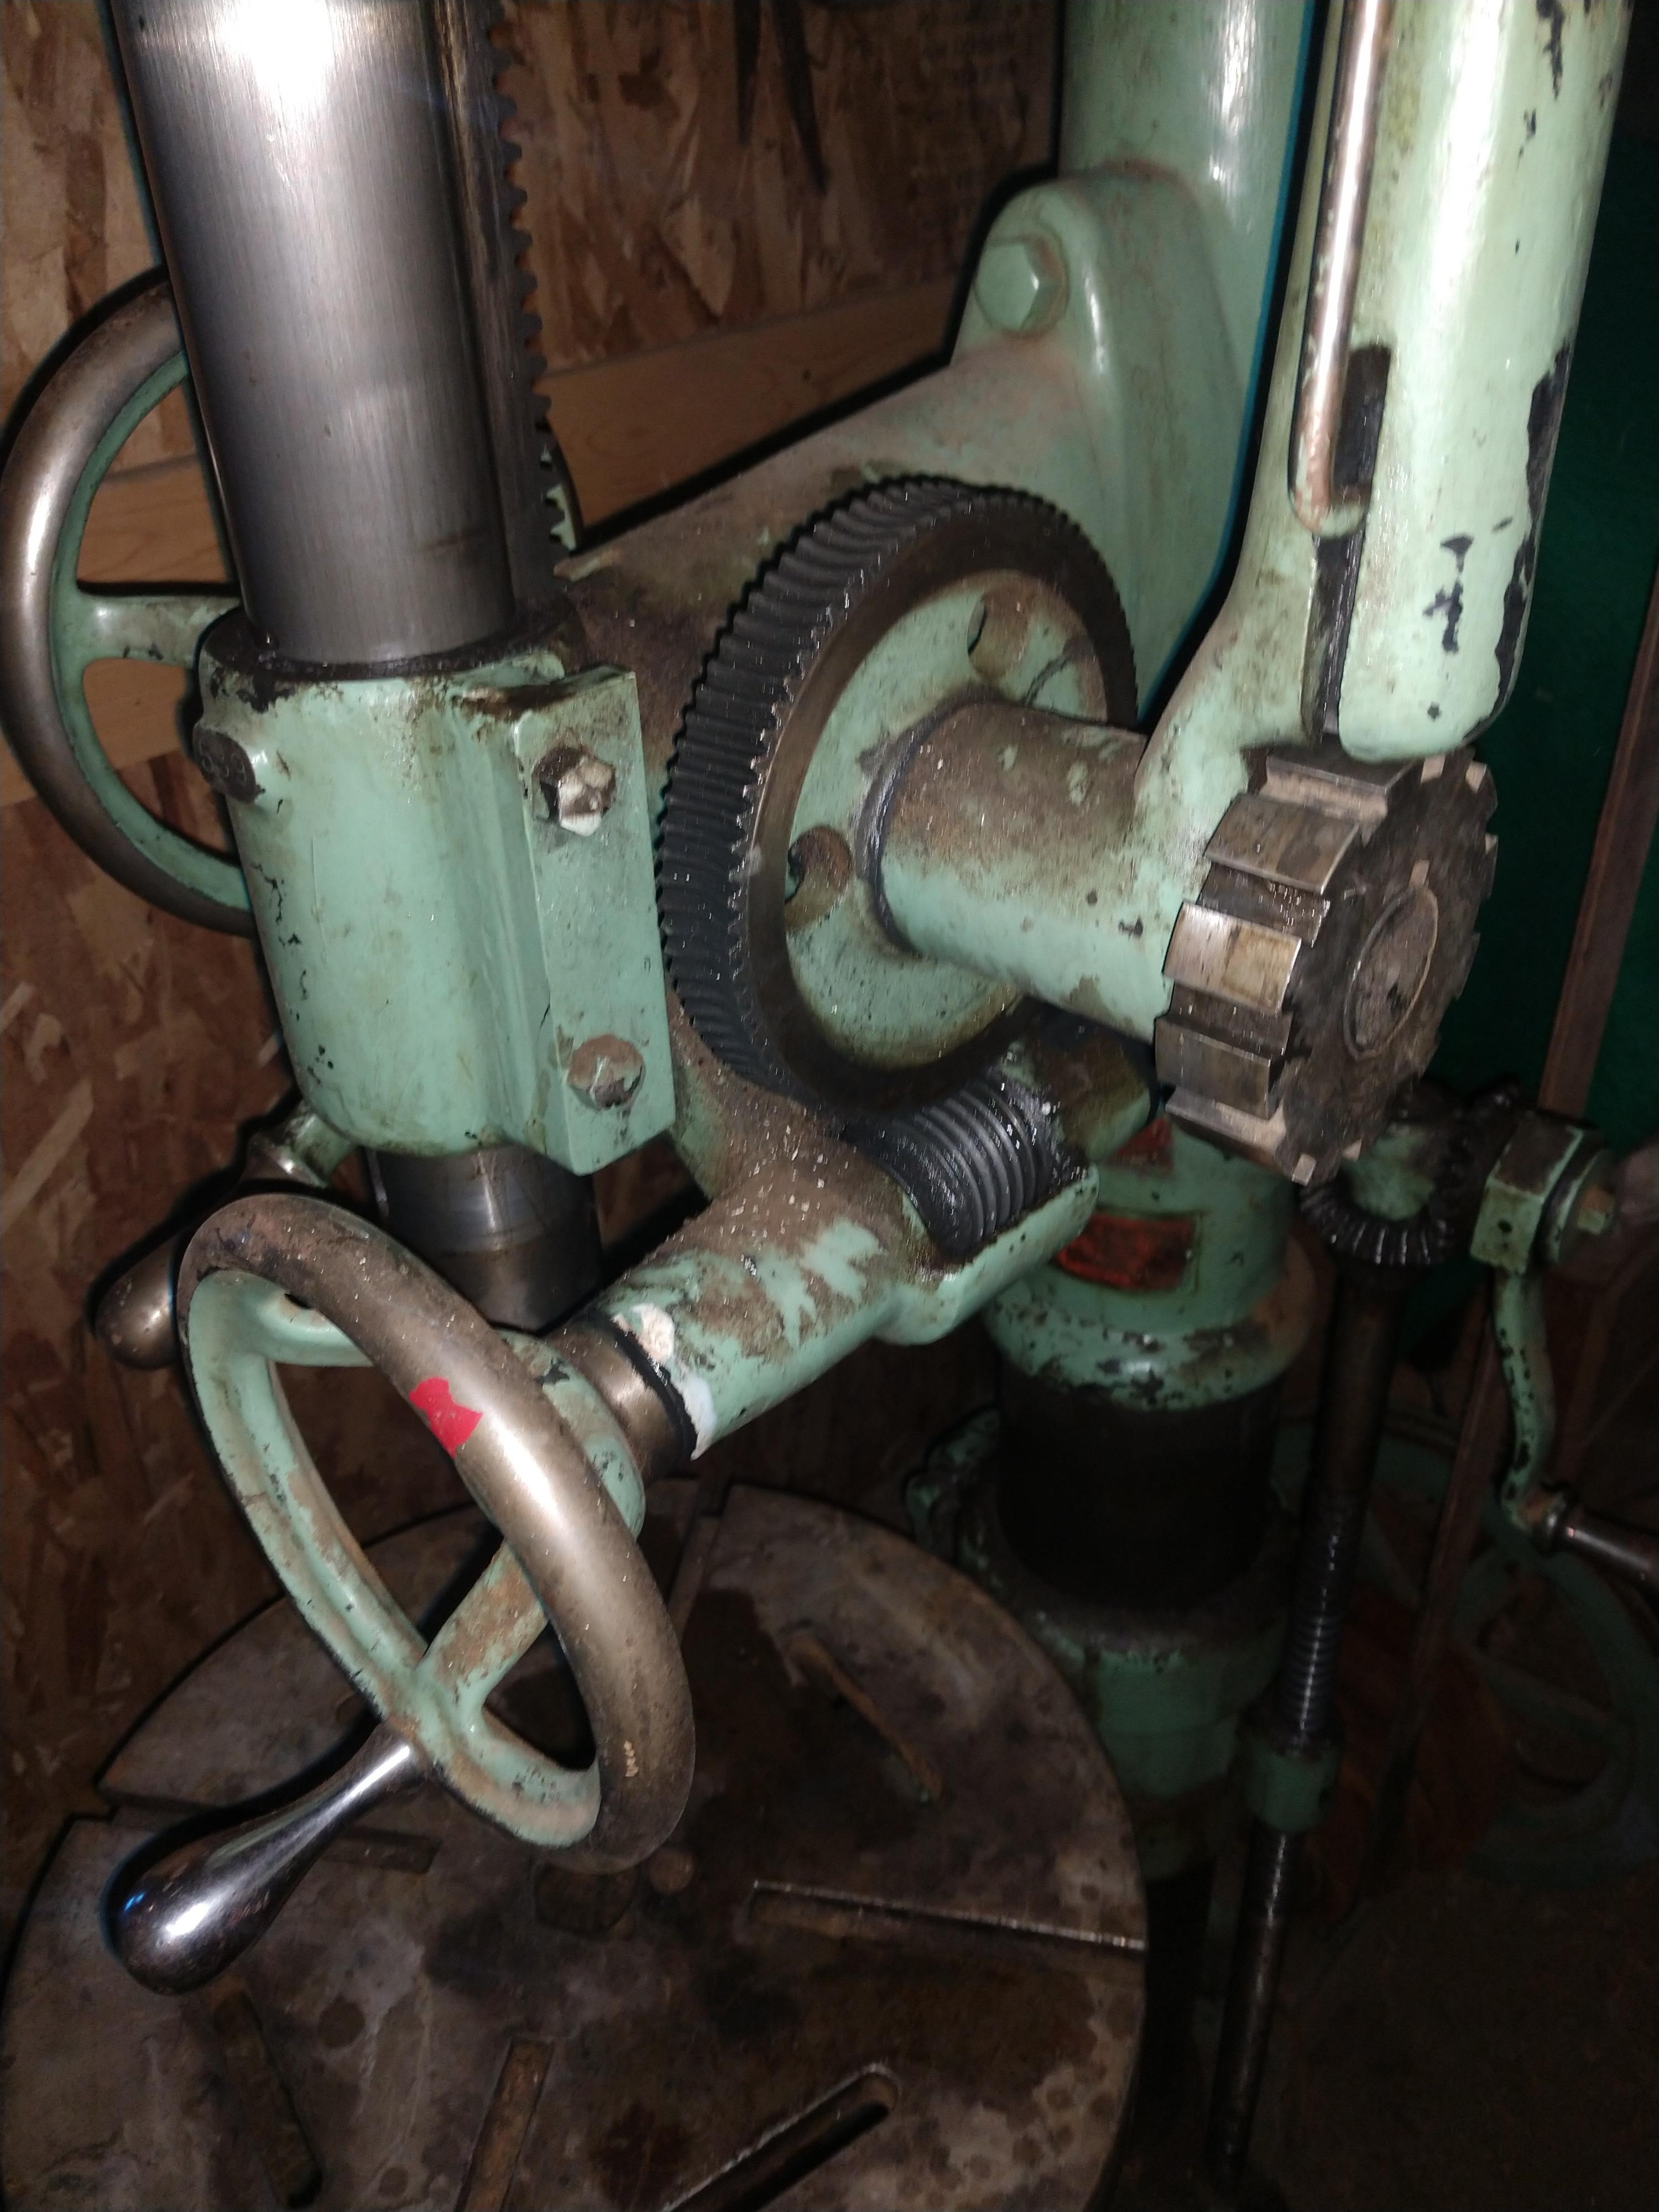
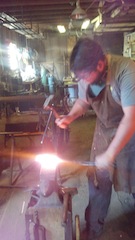
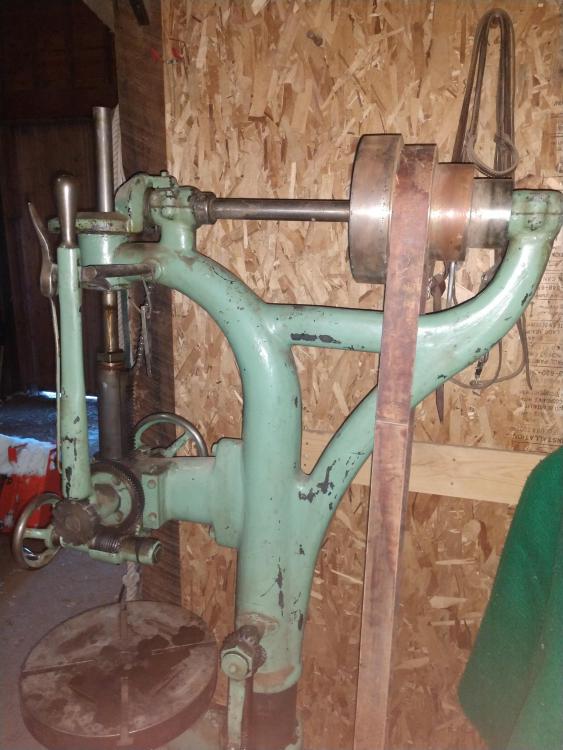
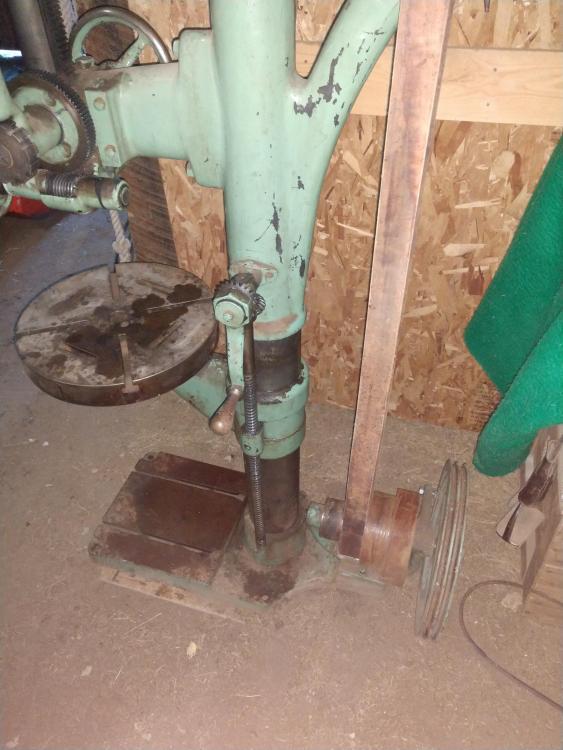
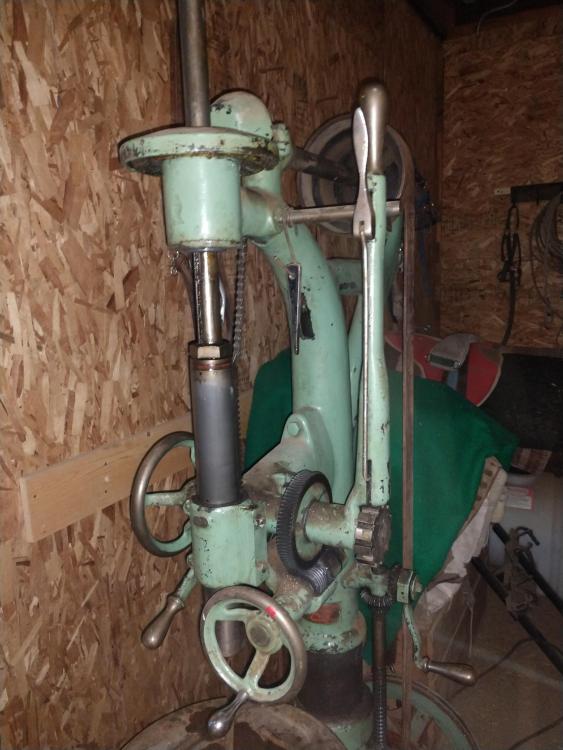
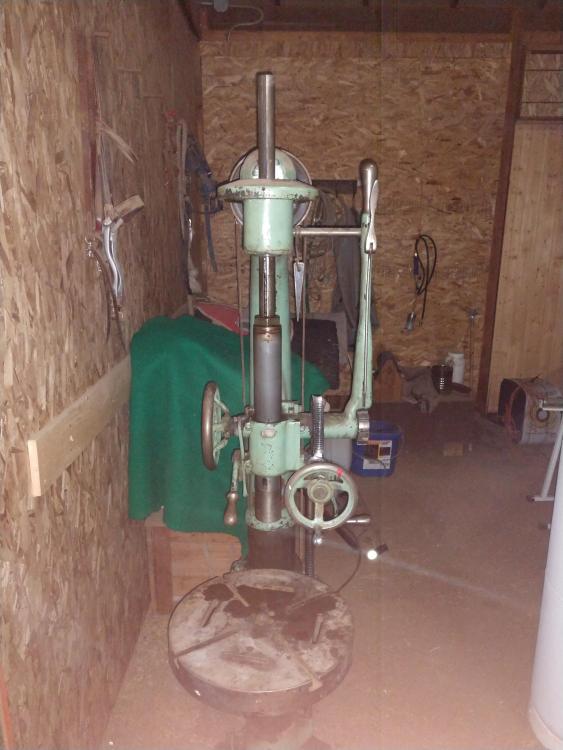
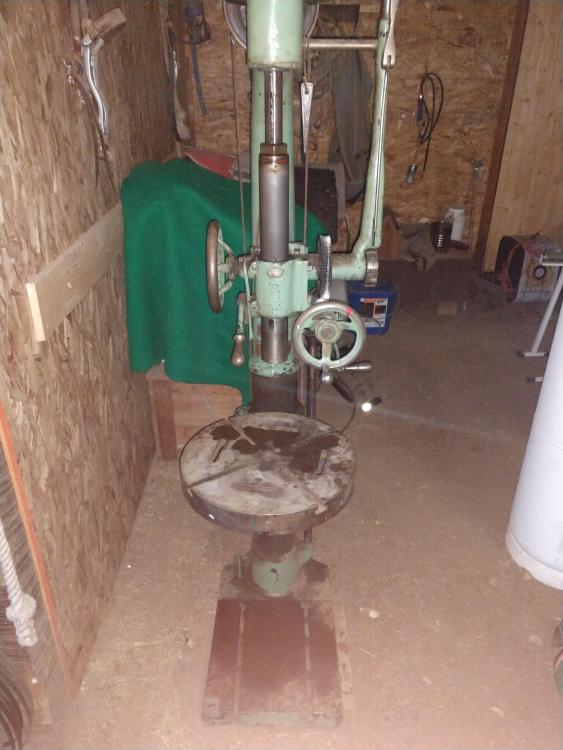
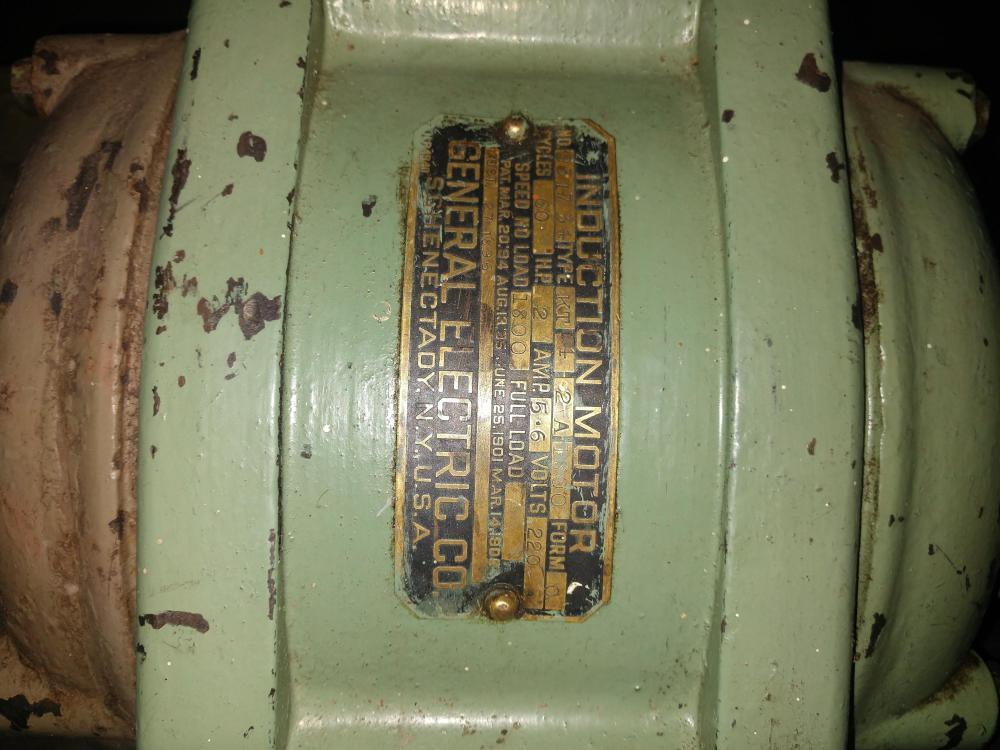
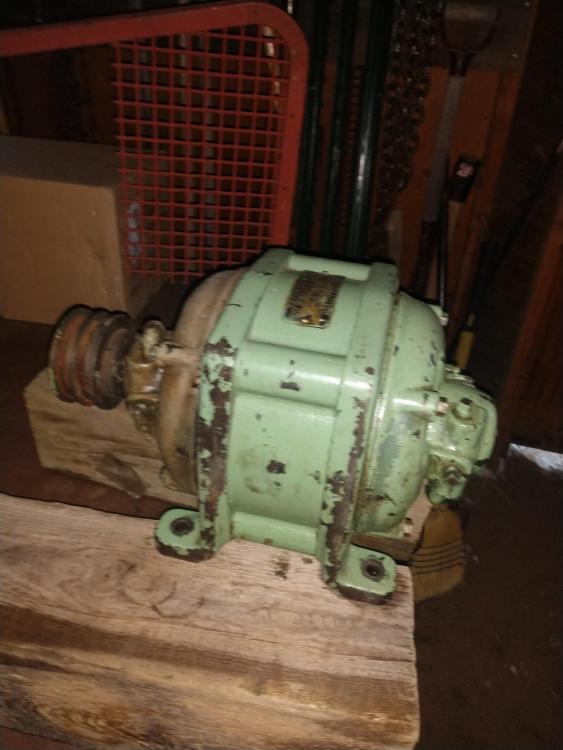
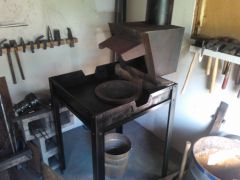
Hey everyone, I just recently picked up a Kern Machine Tool CO. Camelback Drill Press. It was originally purchased and used by the Maysville hydroelectric plant blacksmith shop servicing Salida Colorado. When that shop modernized it was shipped to the Glenwood Springs shop. Finally when that shop modernized as well an employee bought the drill, I then bought it from him. So this drill has seen a lot of use and history. I want to lightly restore the drill and make use of it in my shop. It has been well taken care of and the Babbitt was only poured 5 or so years ago and seems tight with remaining shims to go. To which end I am turning to my fellow smiths for knowledge and advise. So here is what I need to know. 1. What arbor taper does it use? I think it is an mt3 but I am not positive. 2. It came with the original working motor from 1896 which is 220 volts 1800 rpm and here's the kicker 2 phase. How can I convert my single phase 220 to 2 phase 220. 3. If I have to get a new motor what motors do those of you with your own Camelback use? Can I gets picks of the data plate. 4. should I just spruce it up since everything moves well and works, or should I do a complete tear down. Thanks in advance for the help I will add progress pics as needed


-
No just a normal Craftsman air compressor, that is not large enough I believe. My compressor is a small 20 gallon rated at a Max of 125 psi and 13 cfm at 90 psi. Would an accumulator help in this situation. Even with the compressor full and the flows both set at 125 on both the regulator and the filter it just doesn't seem to hit very hard at all.
-
I own one. I really like the hammer. I'm not terribly sure about the power pack. I think it may be useful with a big enough compressor to back it up. I just can't get it to hit very hard with the power pack at the moment. Otherwise the hammer is great. The only other thing I might add is the anvil is tubing and hollow I'm thinking of filling it with concrete and led. If anyone has any suggestions on how to get it to hit harder with the power pack I would like to hear them.
-
what kind of edge did you put on it? I have seen several that have little to no bevel on the back and a rounded bevel on the front. Then I have seen some that are edged like most small knives. Whats your opinion on which would work best?
-
 where did you find the fire pot?
 -
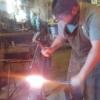
 This is just my little personal shop for when I am not working at my teachers shop in Mancos it isn't much but for someone just starting out I think it is pretty good
 -
 just showing some viking runes a chiseled on the cane for fun
 -
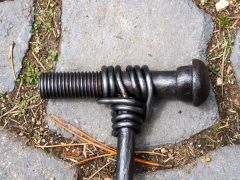 Showing the detail of the hand with the rail road bolt and the two forge welded bars wrapping around it
 -
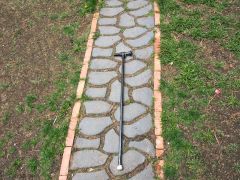 I got bored one day and decided to make a cane out of some scrap I think it came out pretty cool looking but it is pretty heavy the main shaft was 3/4 inch round bar the hand was an old rail road bold and they are connected by two 1/4 inch round bars forge welded to the main shaft and wrapped around the handle hot
 -
-
 I was commissioned to build this coffee table for a wood worker in New Mexico he runs an etsy store called wood Geeks by boss/teacher though that since I brought in the business I should do the work by myself and make this my first highish dollar job. I did however insist on paying my boss/teacher for use of his tools and shop but I think it came out really well I am currently waiting on pics from the wood worker with the top installed
© Two Raven Forge 2013
-
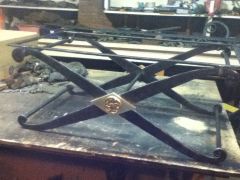
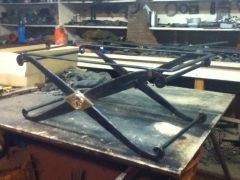
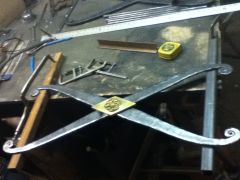 This is one set of legs for a coffee table I was commissioned to build they were drawn out from 2 1/2 inch by 1/2 inch flat bar using a 50 lb little giant the brass plate is also 1.2 inch thick
© Two Raven Forge 2013
-
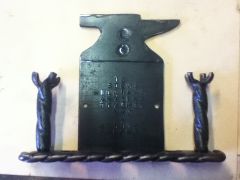 I made him his own small pipe rack that hold a long pipe I got him the columns are tenoned on and the anvil was chiseled out of plate then I added both his and my touch marks to it it hold a total of four pipes
 -
-
 The top bar is held on by the split columns wrapping around it and the columns them selves as well as the two upright parts for the long pipe are all tenoned on the to small bit in the middle swivel and hold odd shaped pipes and are riveted on
 -
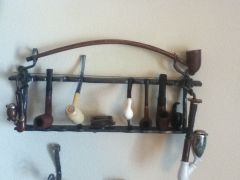 I wanted a pipe rack to display my pipes so I made one
 -
 this guy was fun to make just because of the size they wanted the bolt is 1 1/2 inches wide by half and inch thick
© The Cowboy Forge 2012
-
© The Cowboy Forge 2012
-
© The Cowboy Forge 2012
-
-
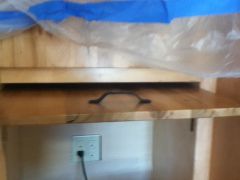
 This is just one of about a hundred and fifty simple drawer pulls I made for a job
© The Cowboy Forge 2012
-
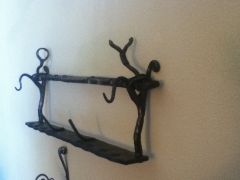
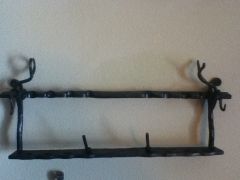
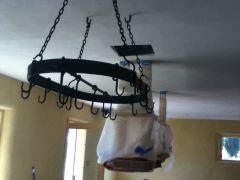
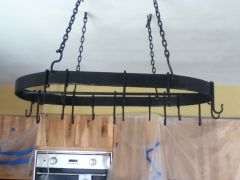 This was my first really solo job that my teacher gave me to do the hooks slide along the rack but can not be removed as they are bent all the way around
© The Cowboy Forge 2012
-
© The Cowboy Forge 2012
-
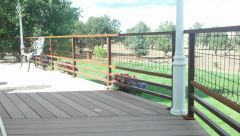
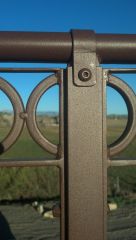
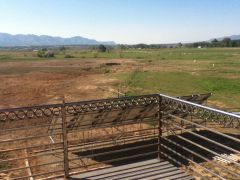
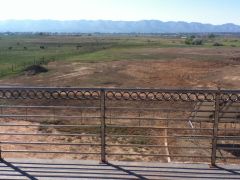 This deck was twenty or so feet off the ground with an external elevator pretty view though. We made this rail is sections as they needed to be able to remove a section at a time for a fork list to move in their furniture. The top cap has pipe welded to it every so often that slides into the posts and then they were secured with decorative collars and bolts
© The Cowboy Forge 2012
-