

David Kailey
-
Posts
276 -
Joined
-
Last visited
Content Type
Profiles
Forums
Articles
Gallery
Downloads
Events
Posts posted by David Kailey
-
-
that looks great
-
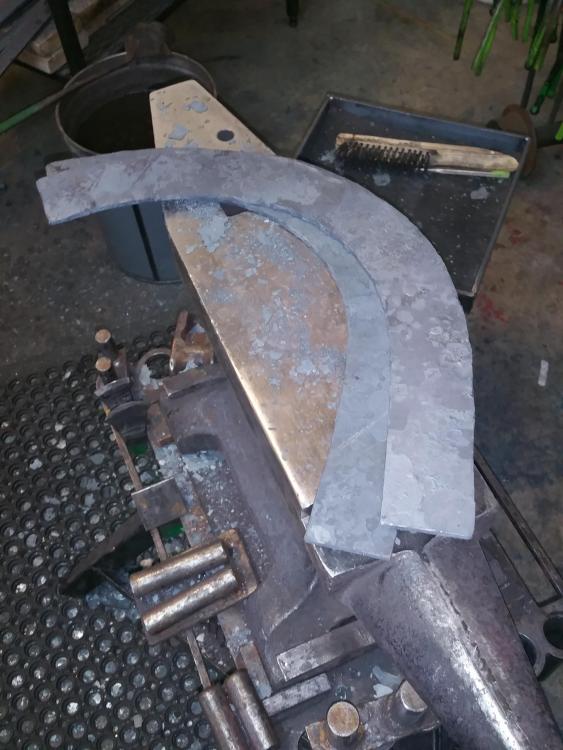
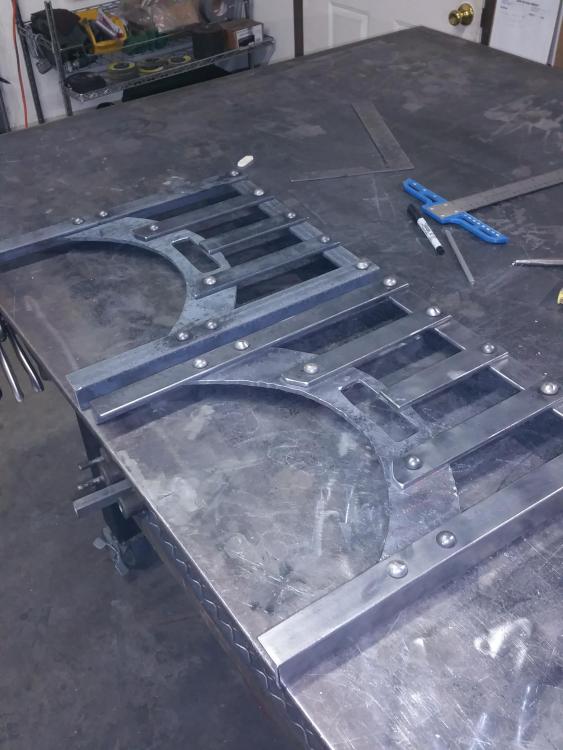
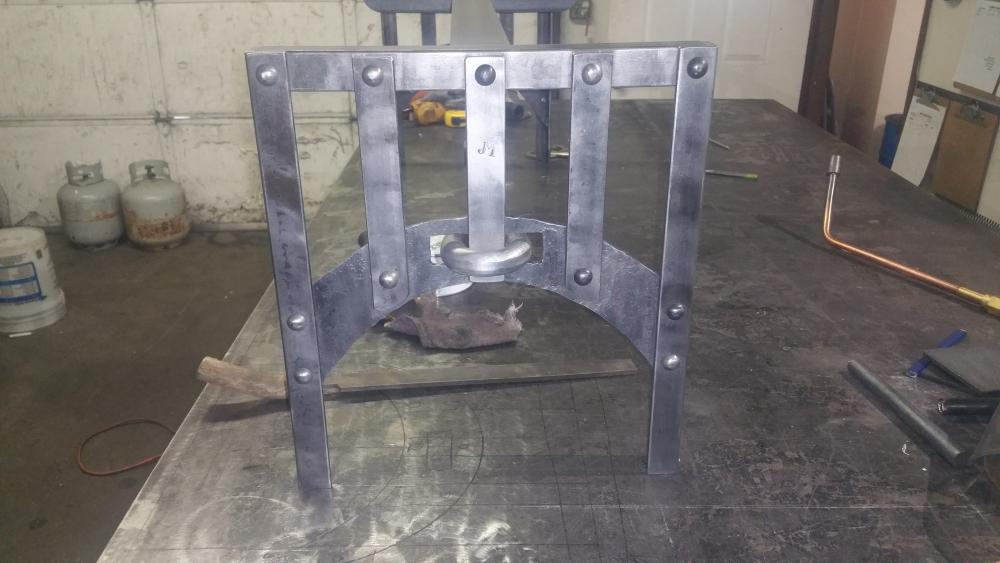
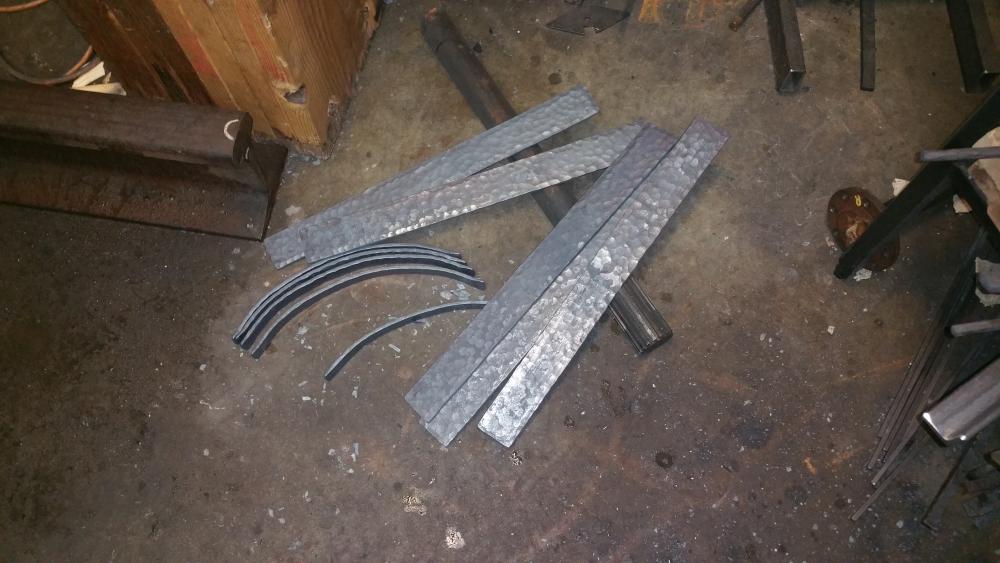
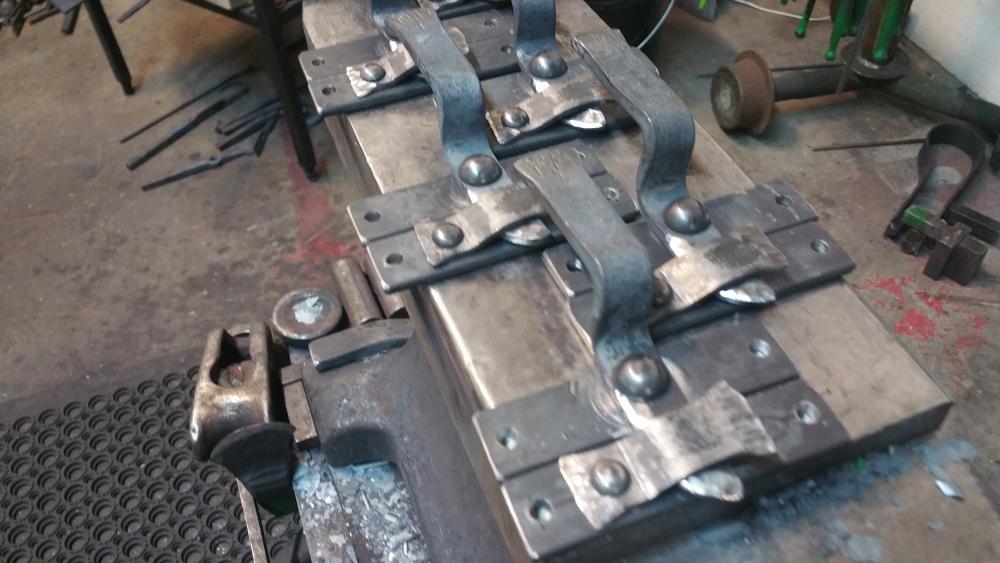
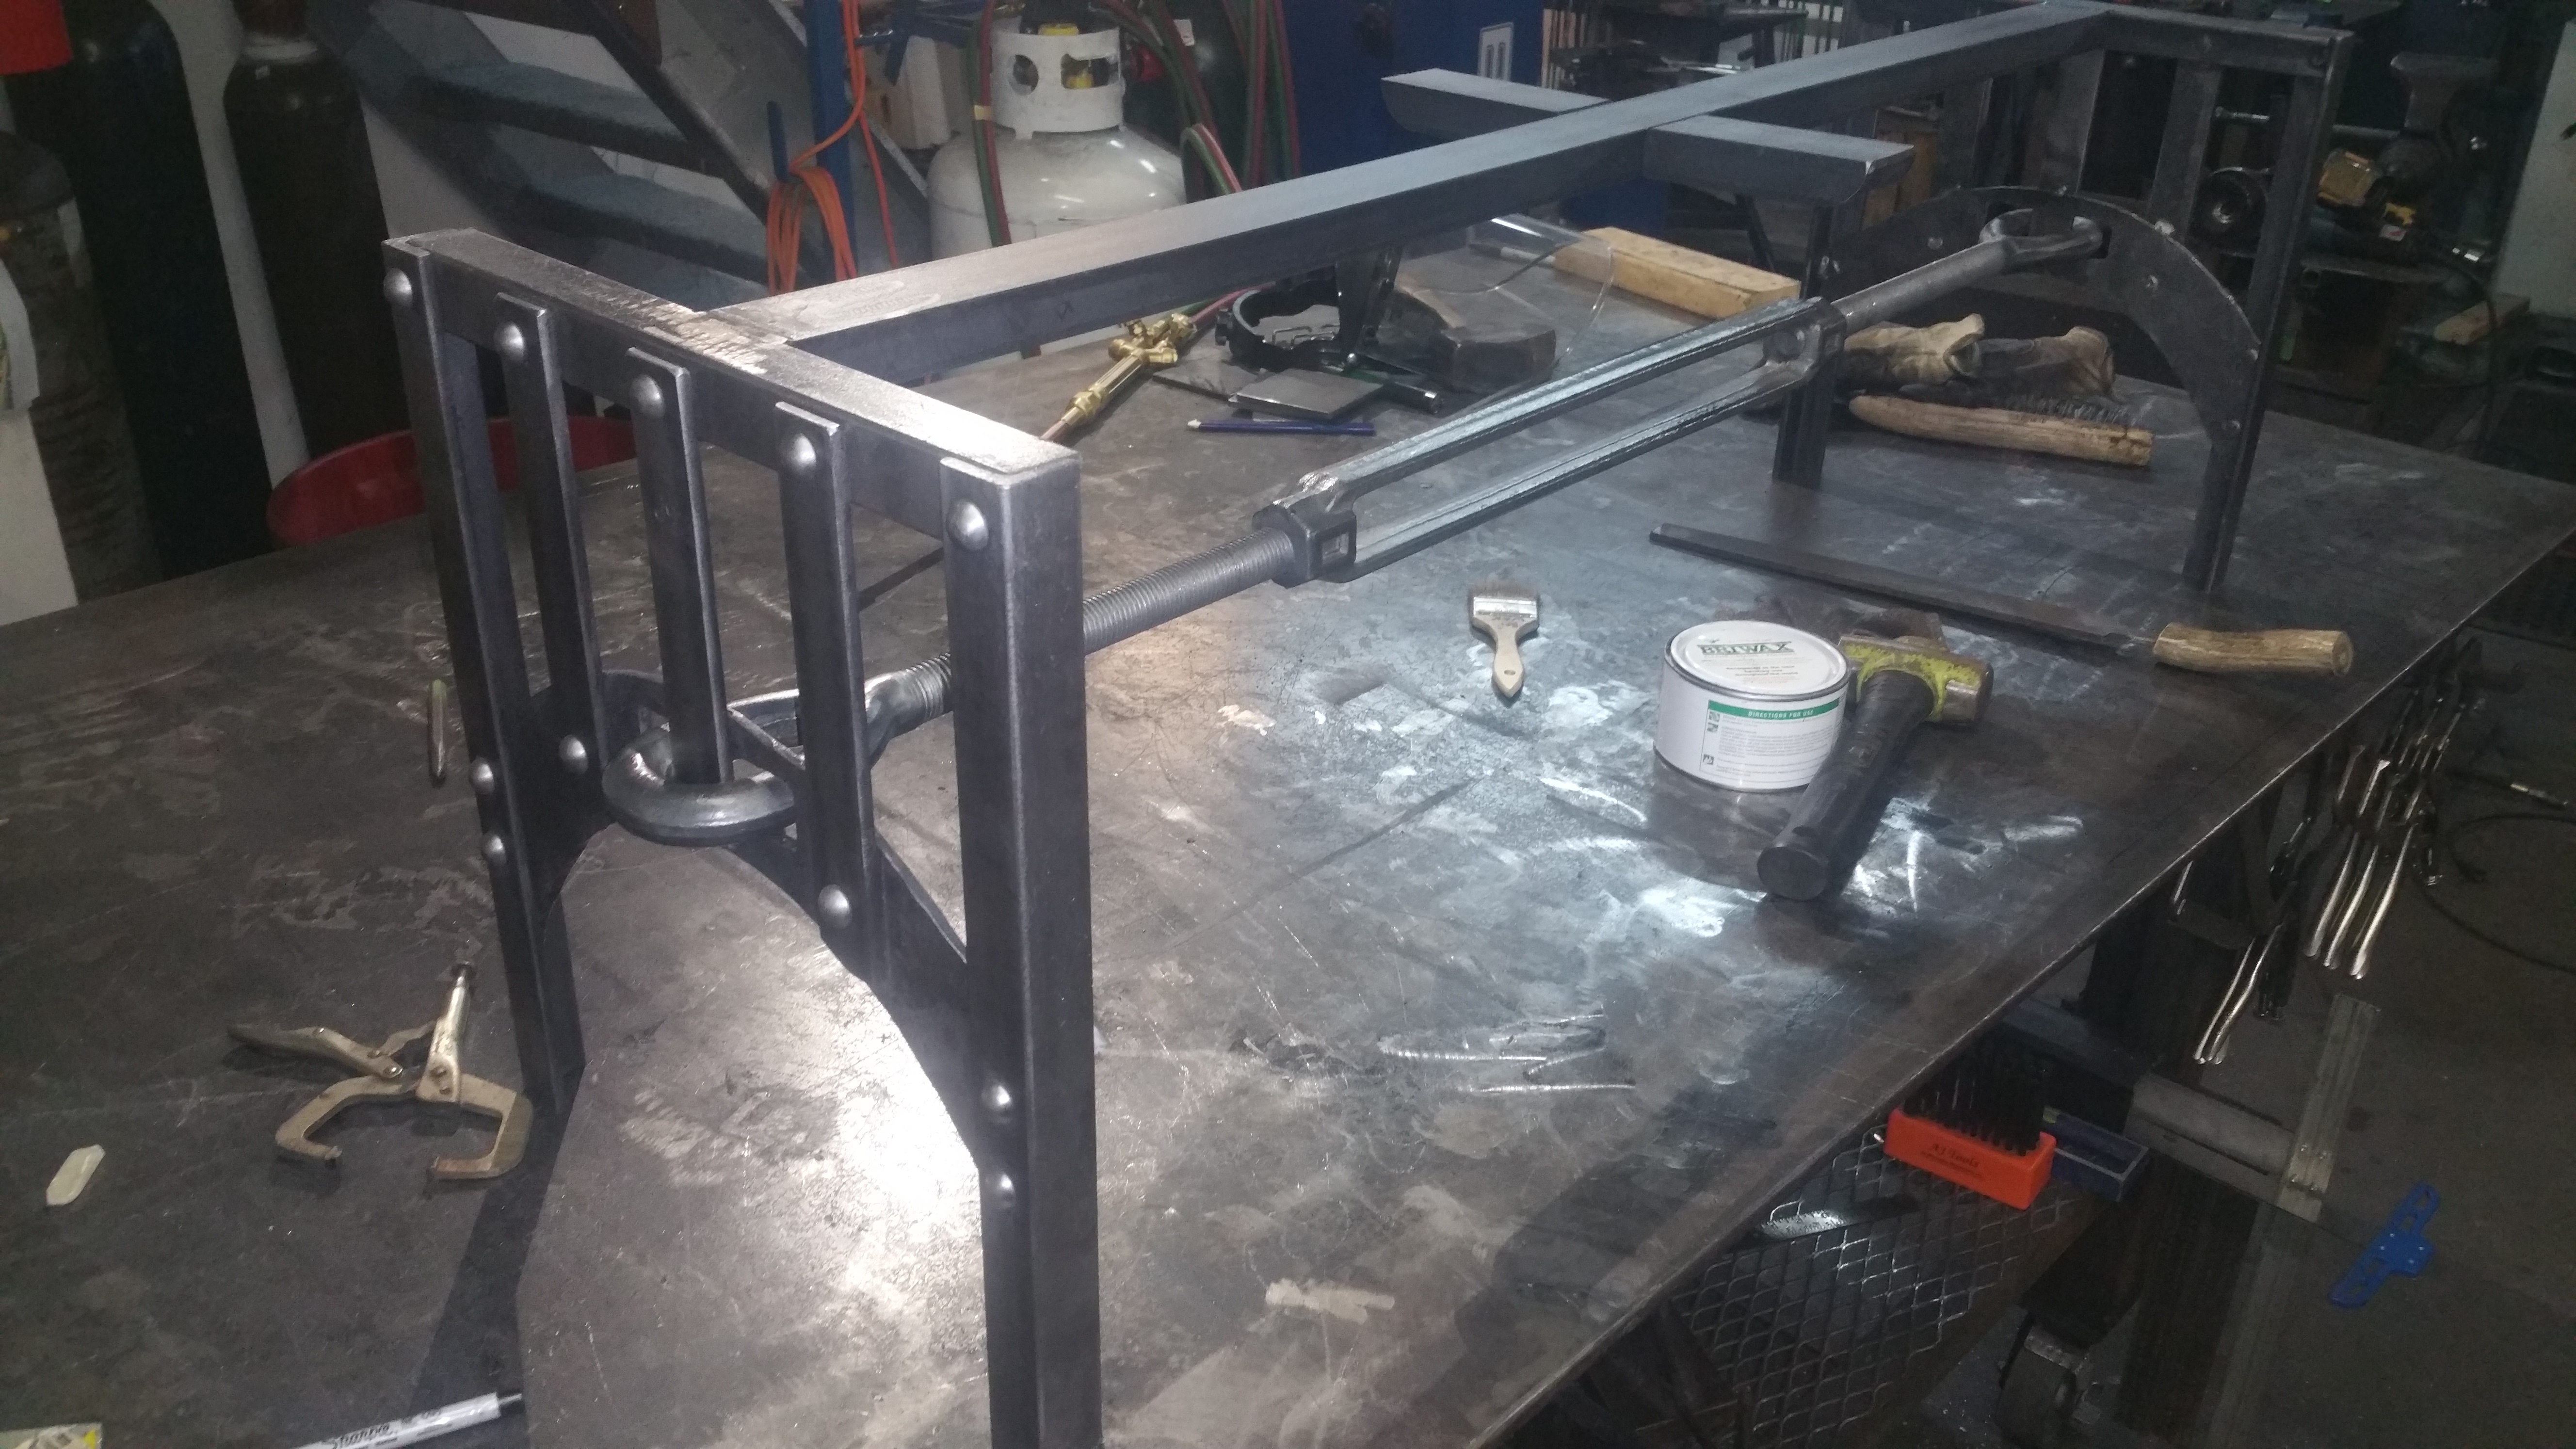
So Spokane has a bridge right over the Falls and a customer brought me a 4ft turn buckle and wanted some thing that looked "old Iron bridgey" but also wanted to be able to see the turnbuckle. So here it is....id have only used rivets but the customer wanted back up so it is welded.....even tho those old iron bridges where all riveted. lol. the most challenging part of this build was arching the 3" x 1/4" flat bar....the hard way.....it took a lot of work because the customer did not want a thinned edge.....from hammering the outside edge to help it curve....its hard to believe I know.... but it is 1/4" all the way across the arch.....As I forged I had to forge the extra steel from the inside edge across to the outside edge... this was a very painstaking task and those 2 arched took me over 3 hours to forge but....The arch is 3" x 1/4" all the way across. It don't look like much but it one of the best forgings i have produced with that level of difficulty.It was pretty tight arch because the base is only 14" across so and it took 20" of bar stock....so its pretty crunched up.... moved a lot of steel with the hammer and fire. I originally was just going to build a wedge to hold the turn buckle in place but the customer wanted the center strap to just pass thru the eyes on the turn buckle. So I removed the center strap and used a longer strap to pass thru and secure the turnbuckle.

-
Your heart and twist look good. The transition of the rod from the heart to the twist and then parallel is very clean. Nice Job.
-
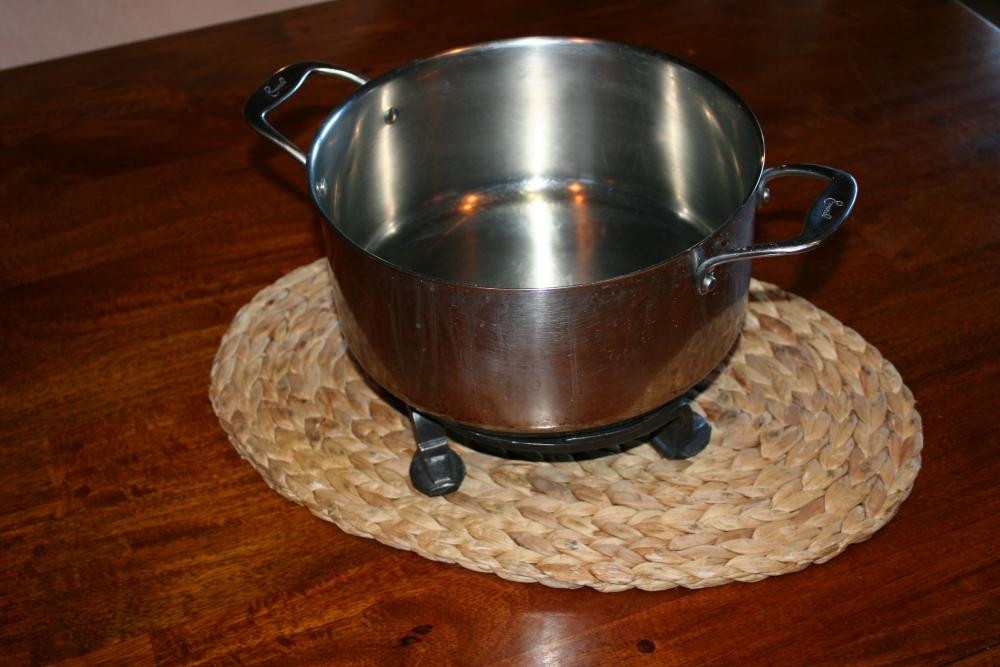
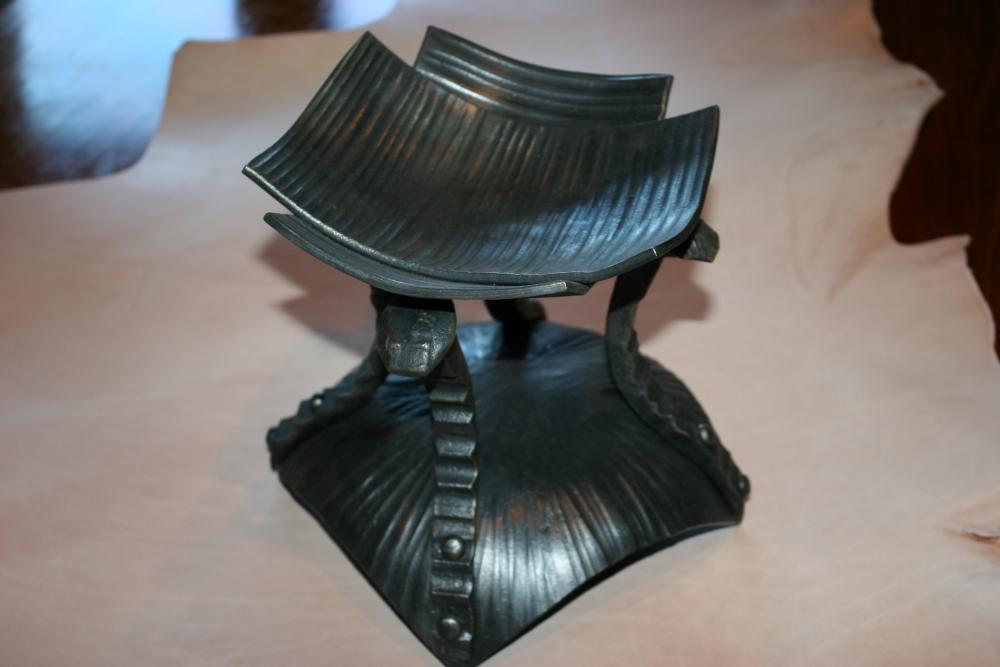
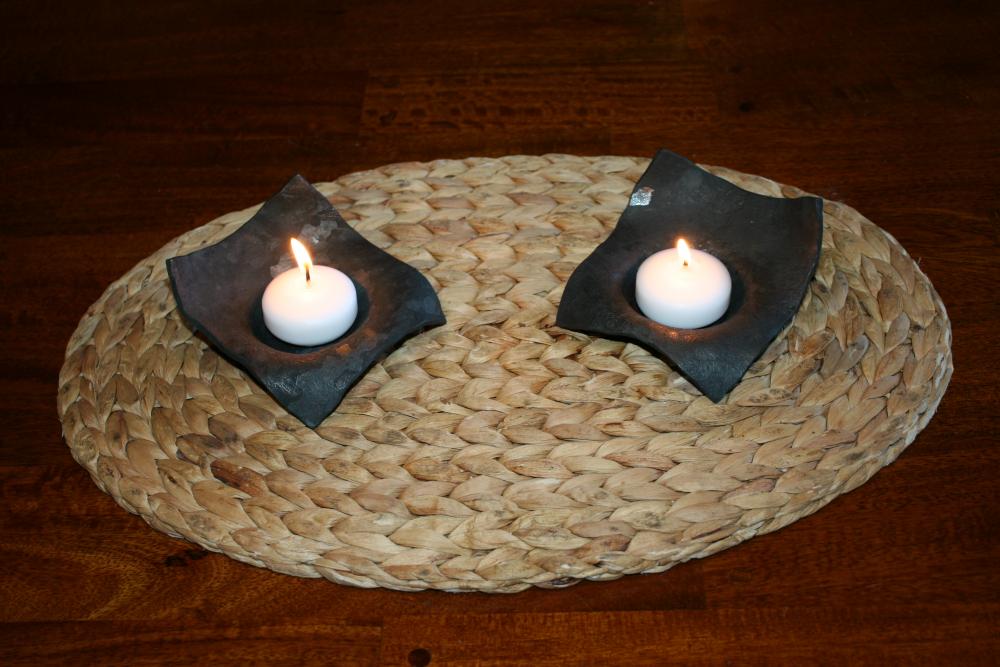
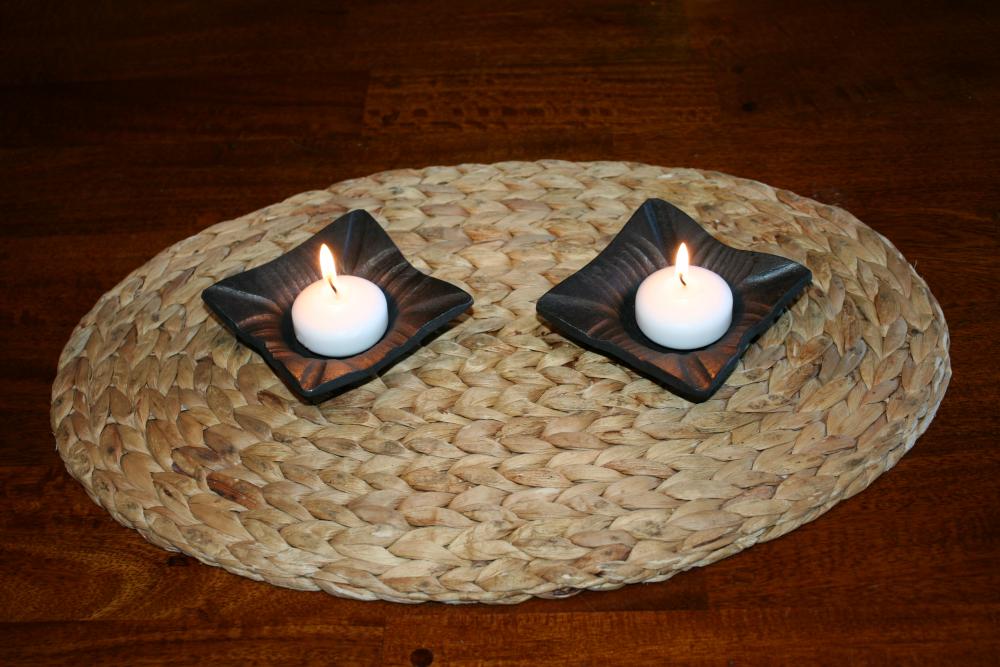
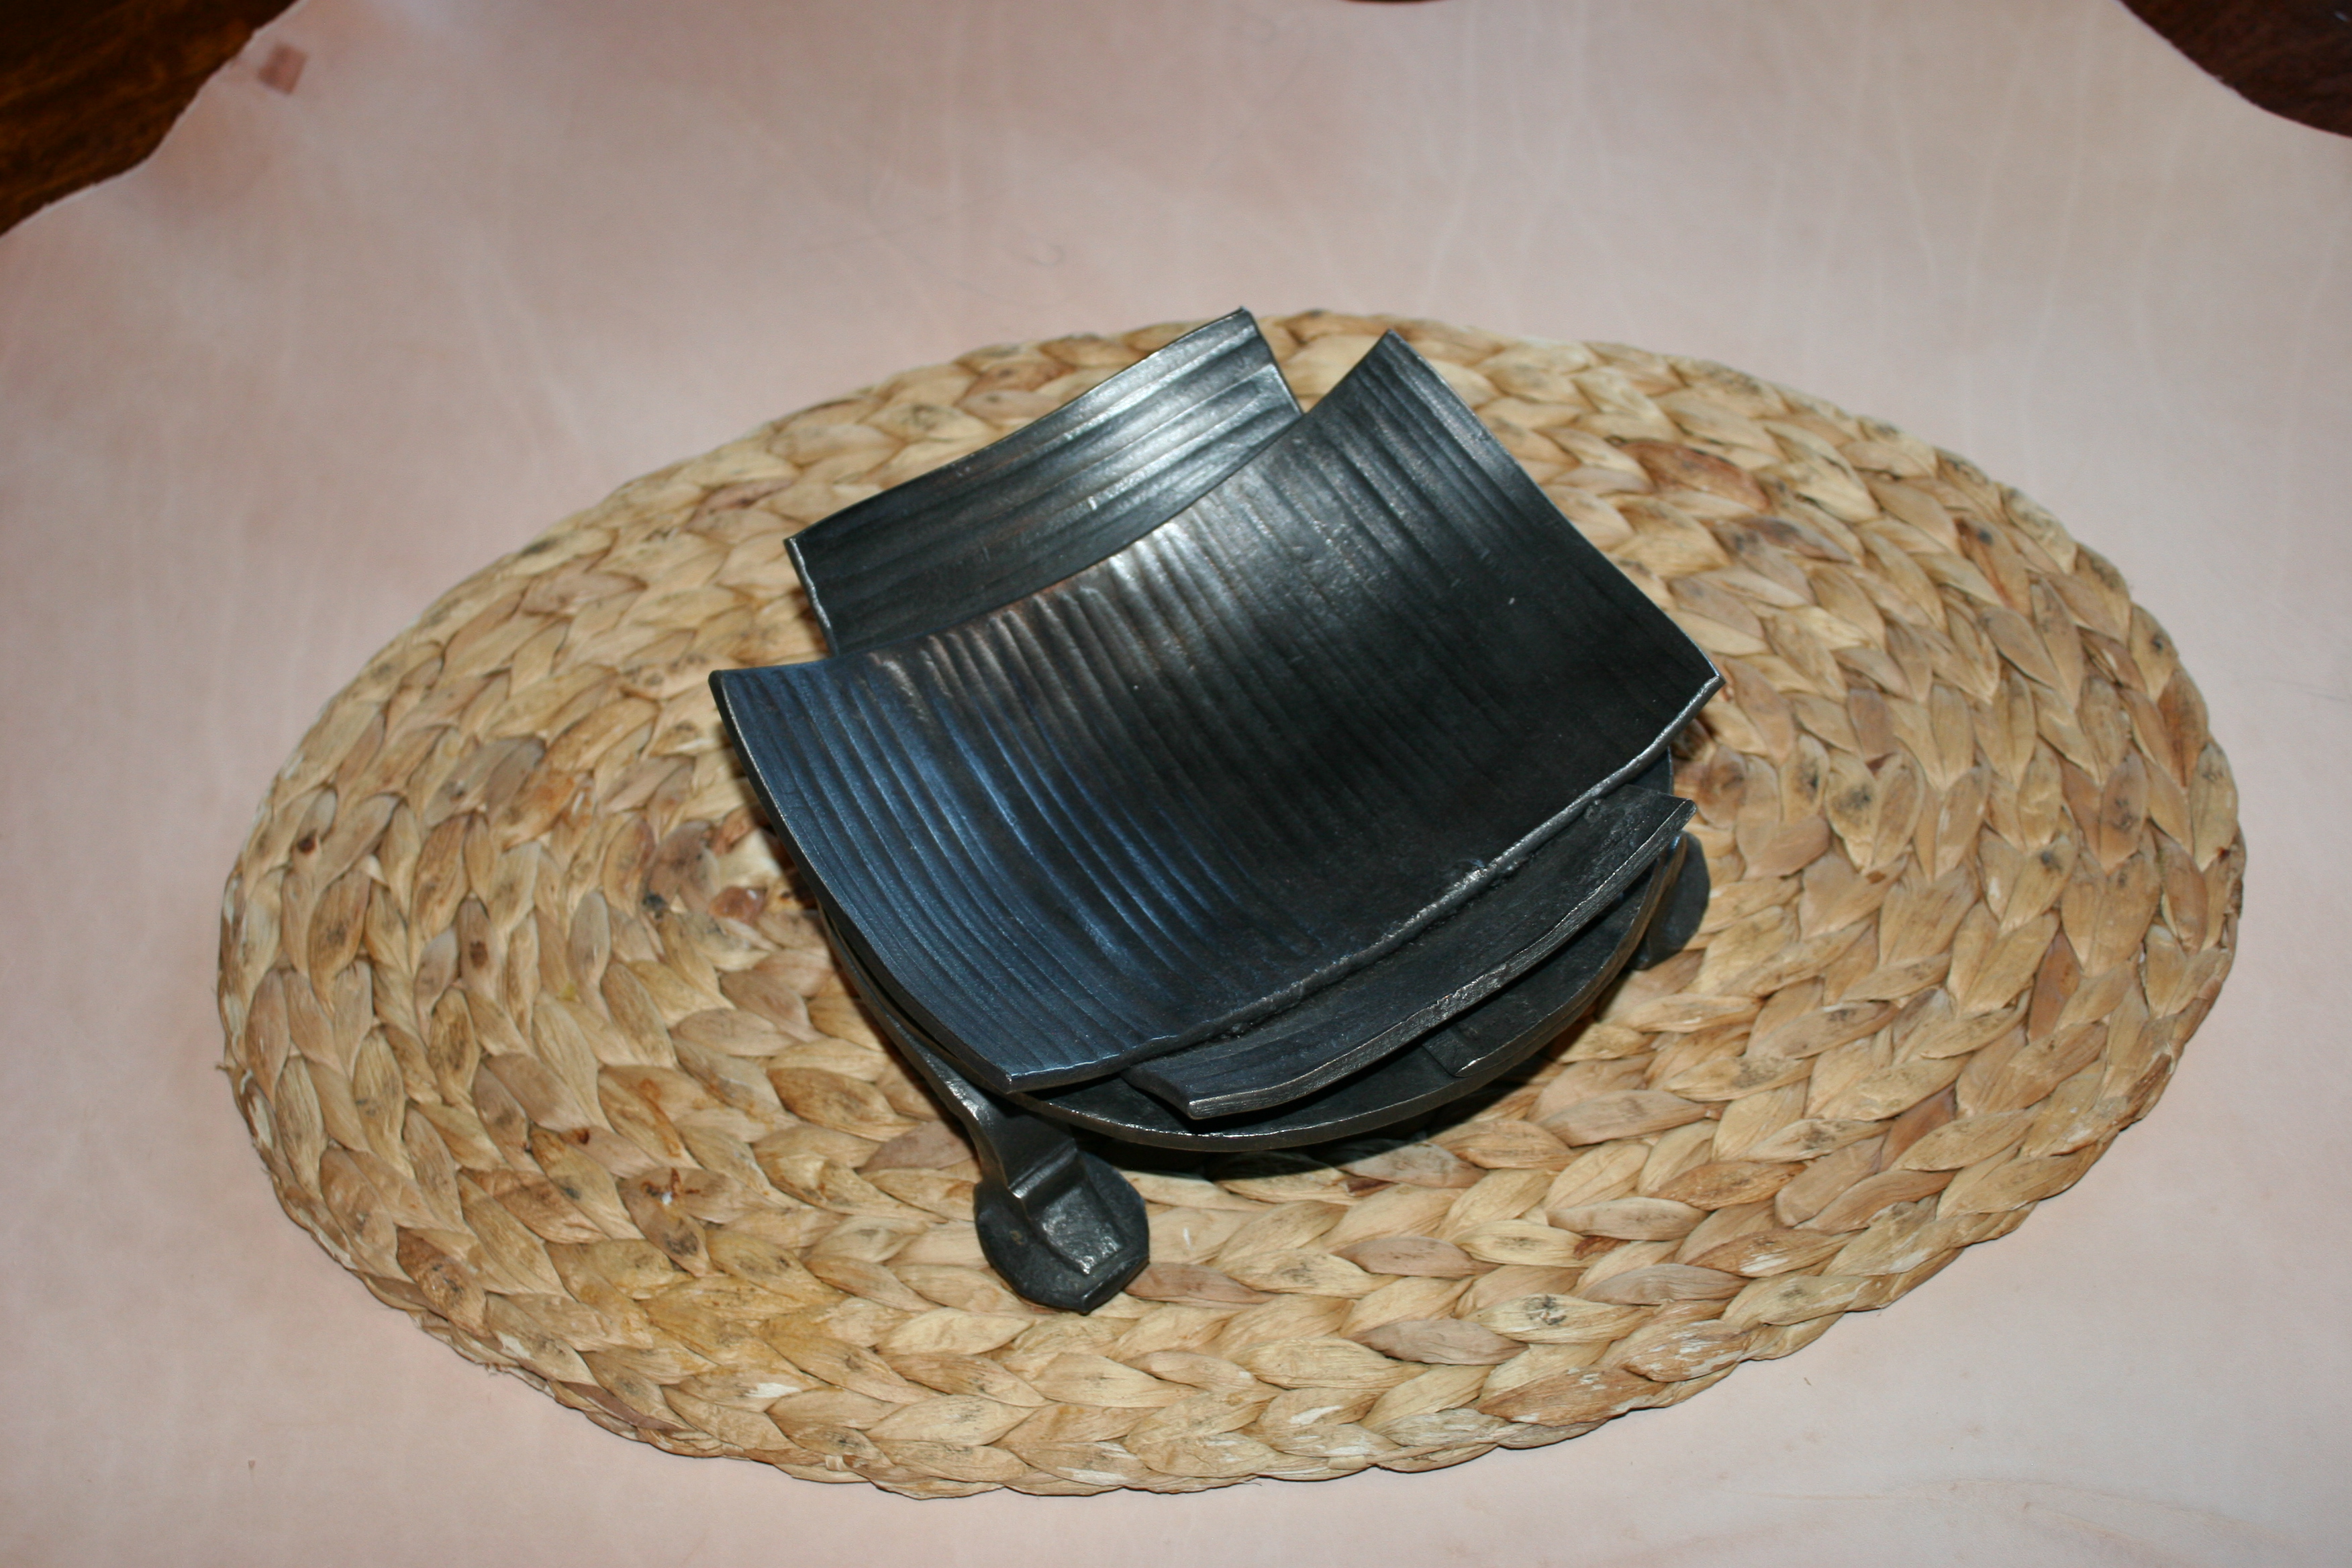
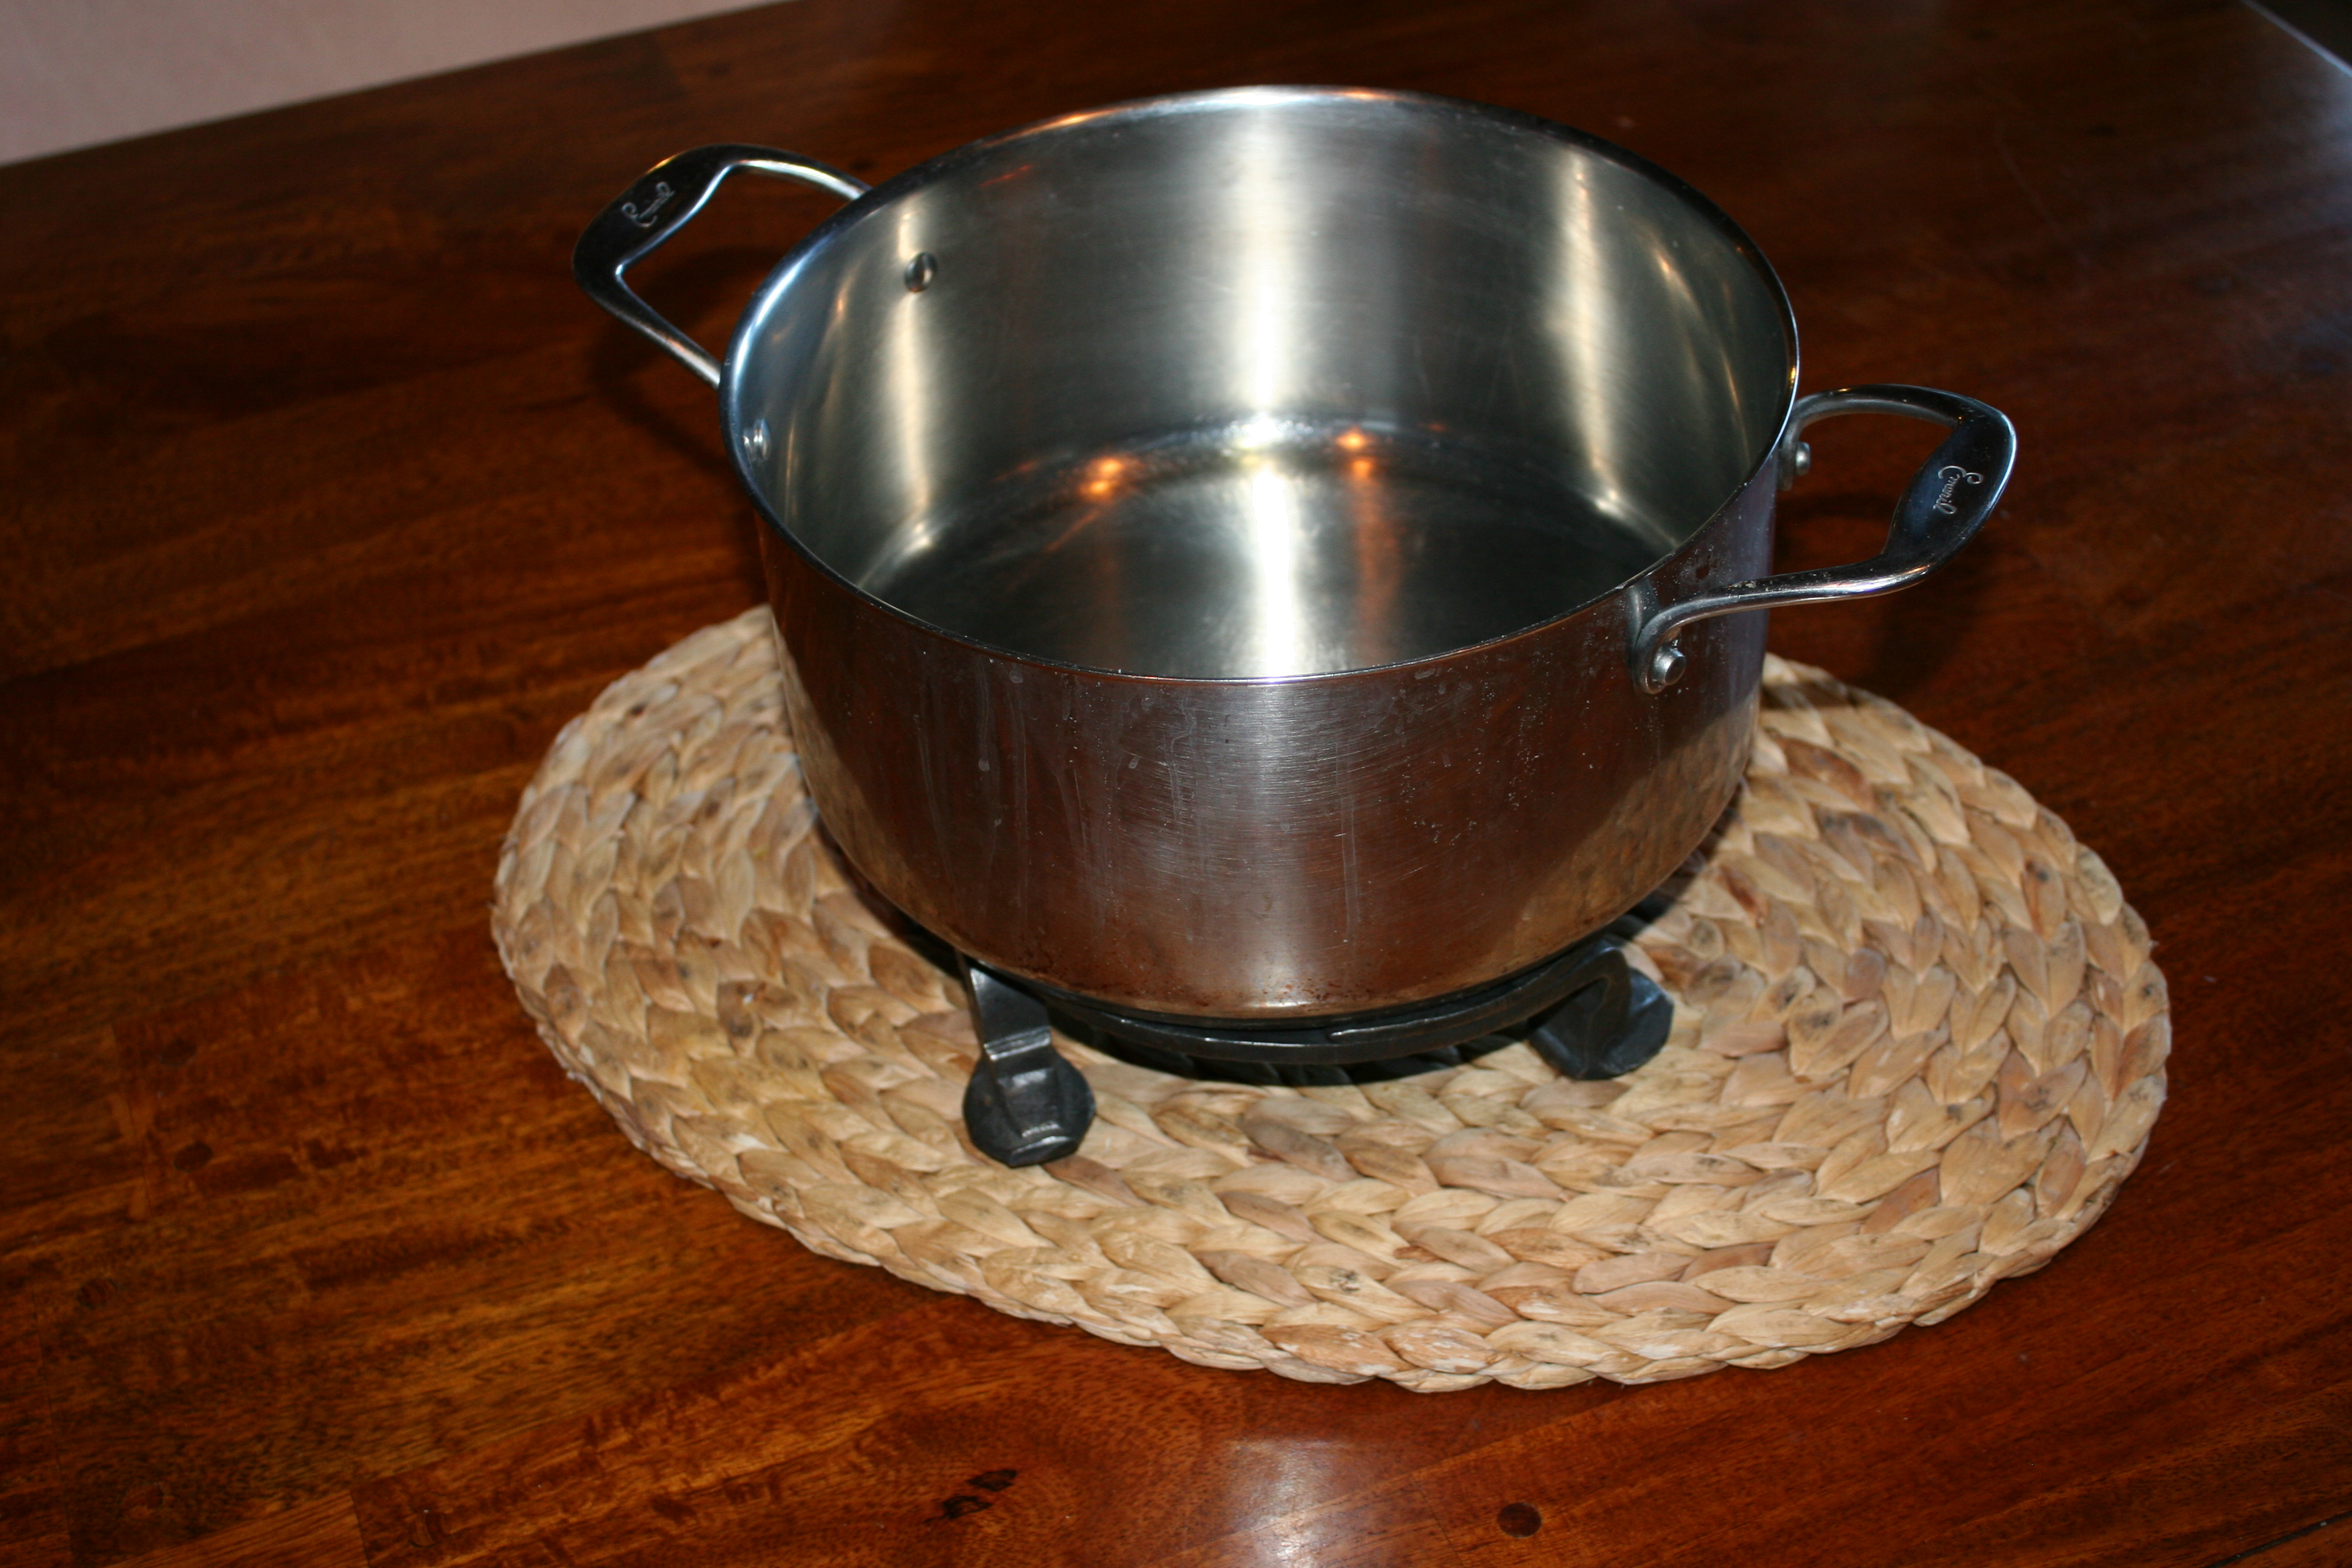
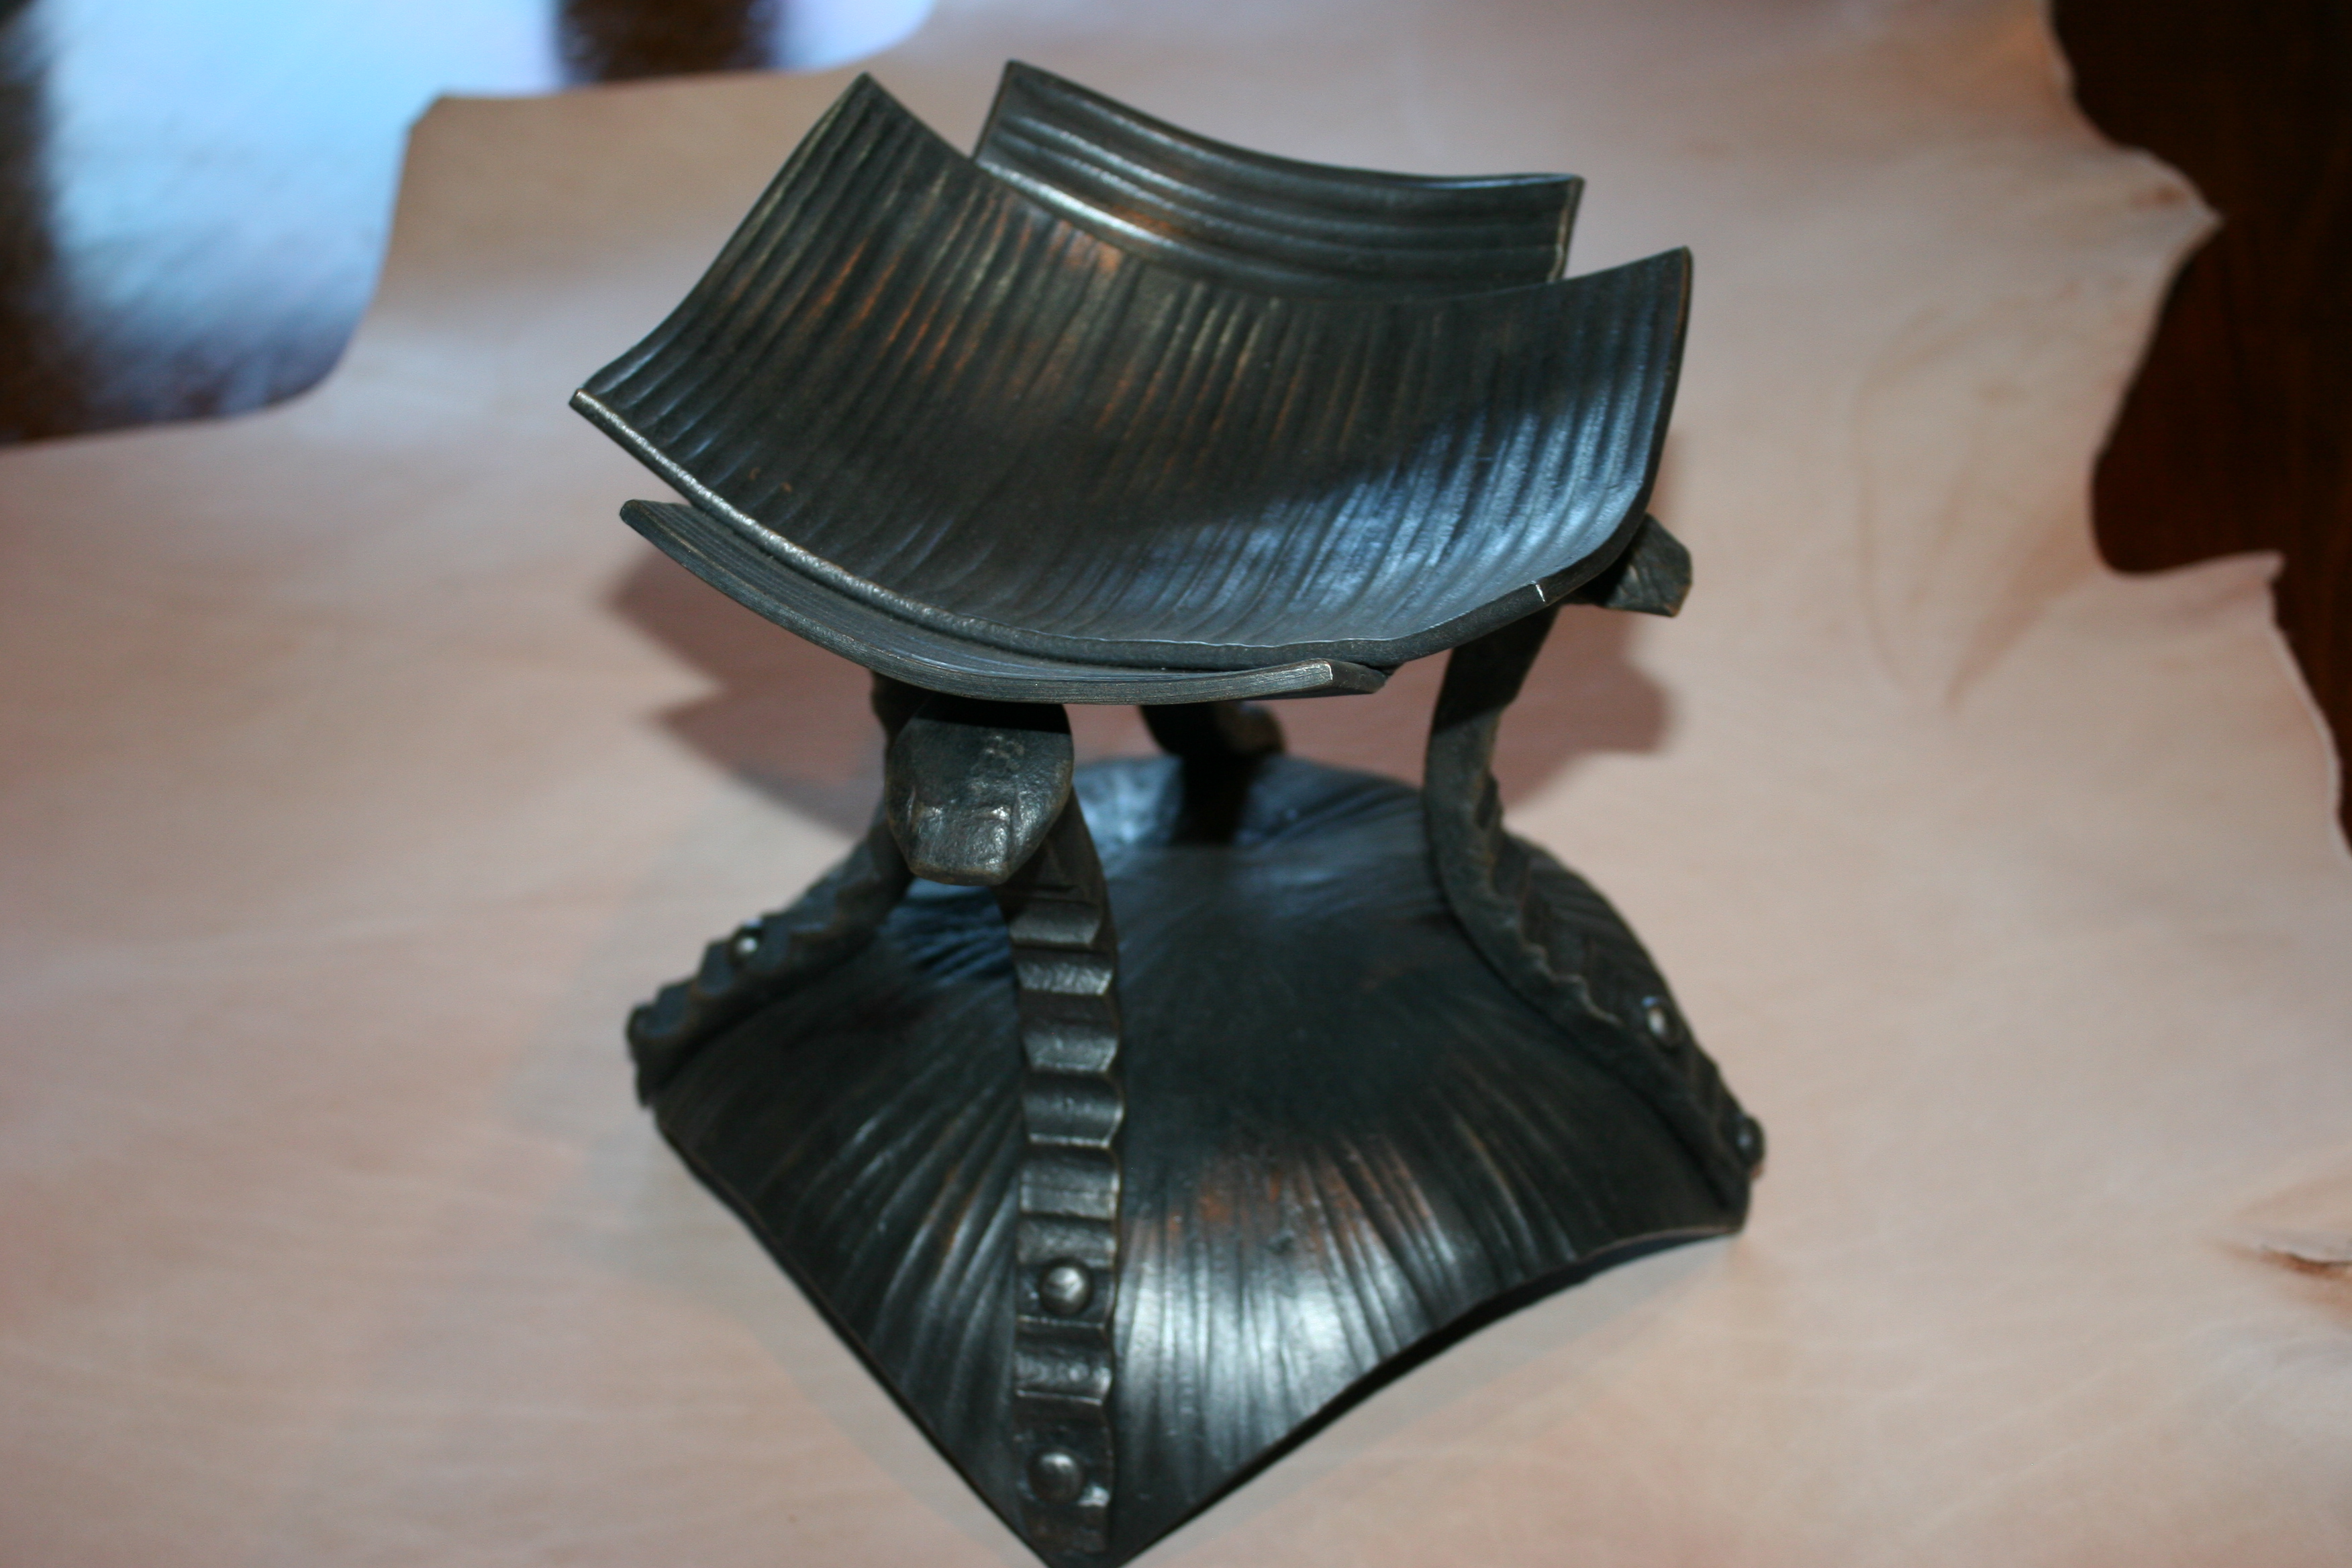
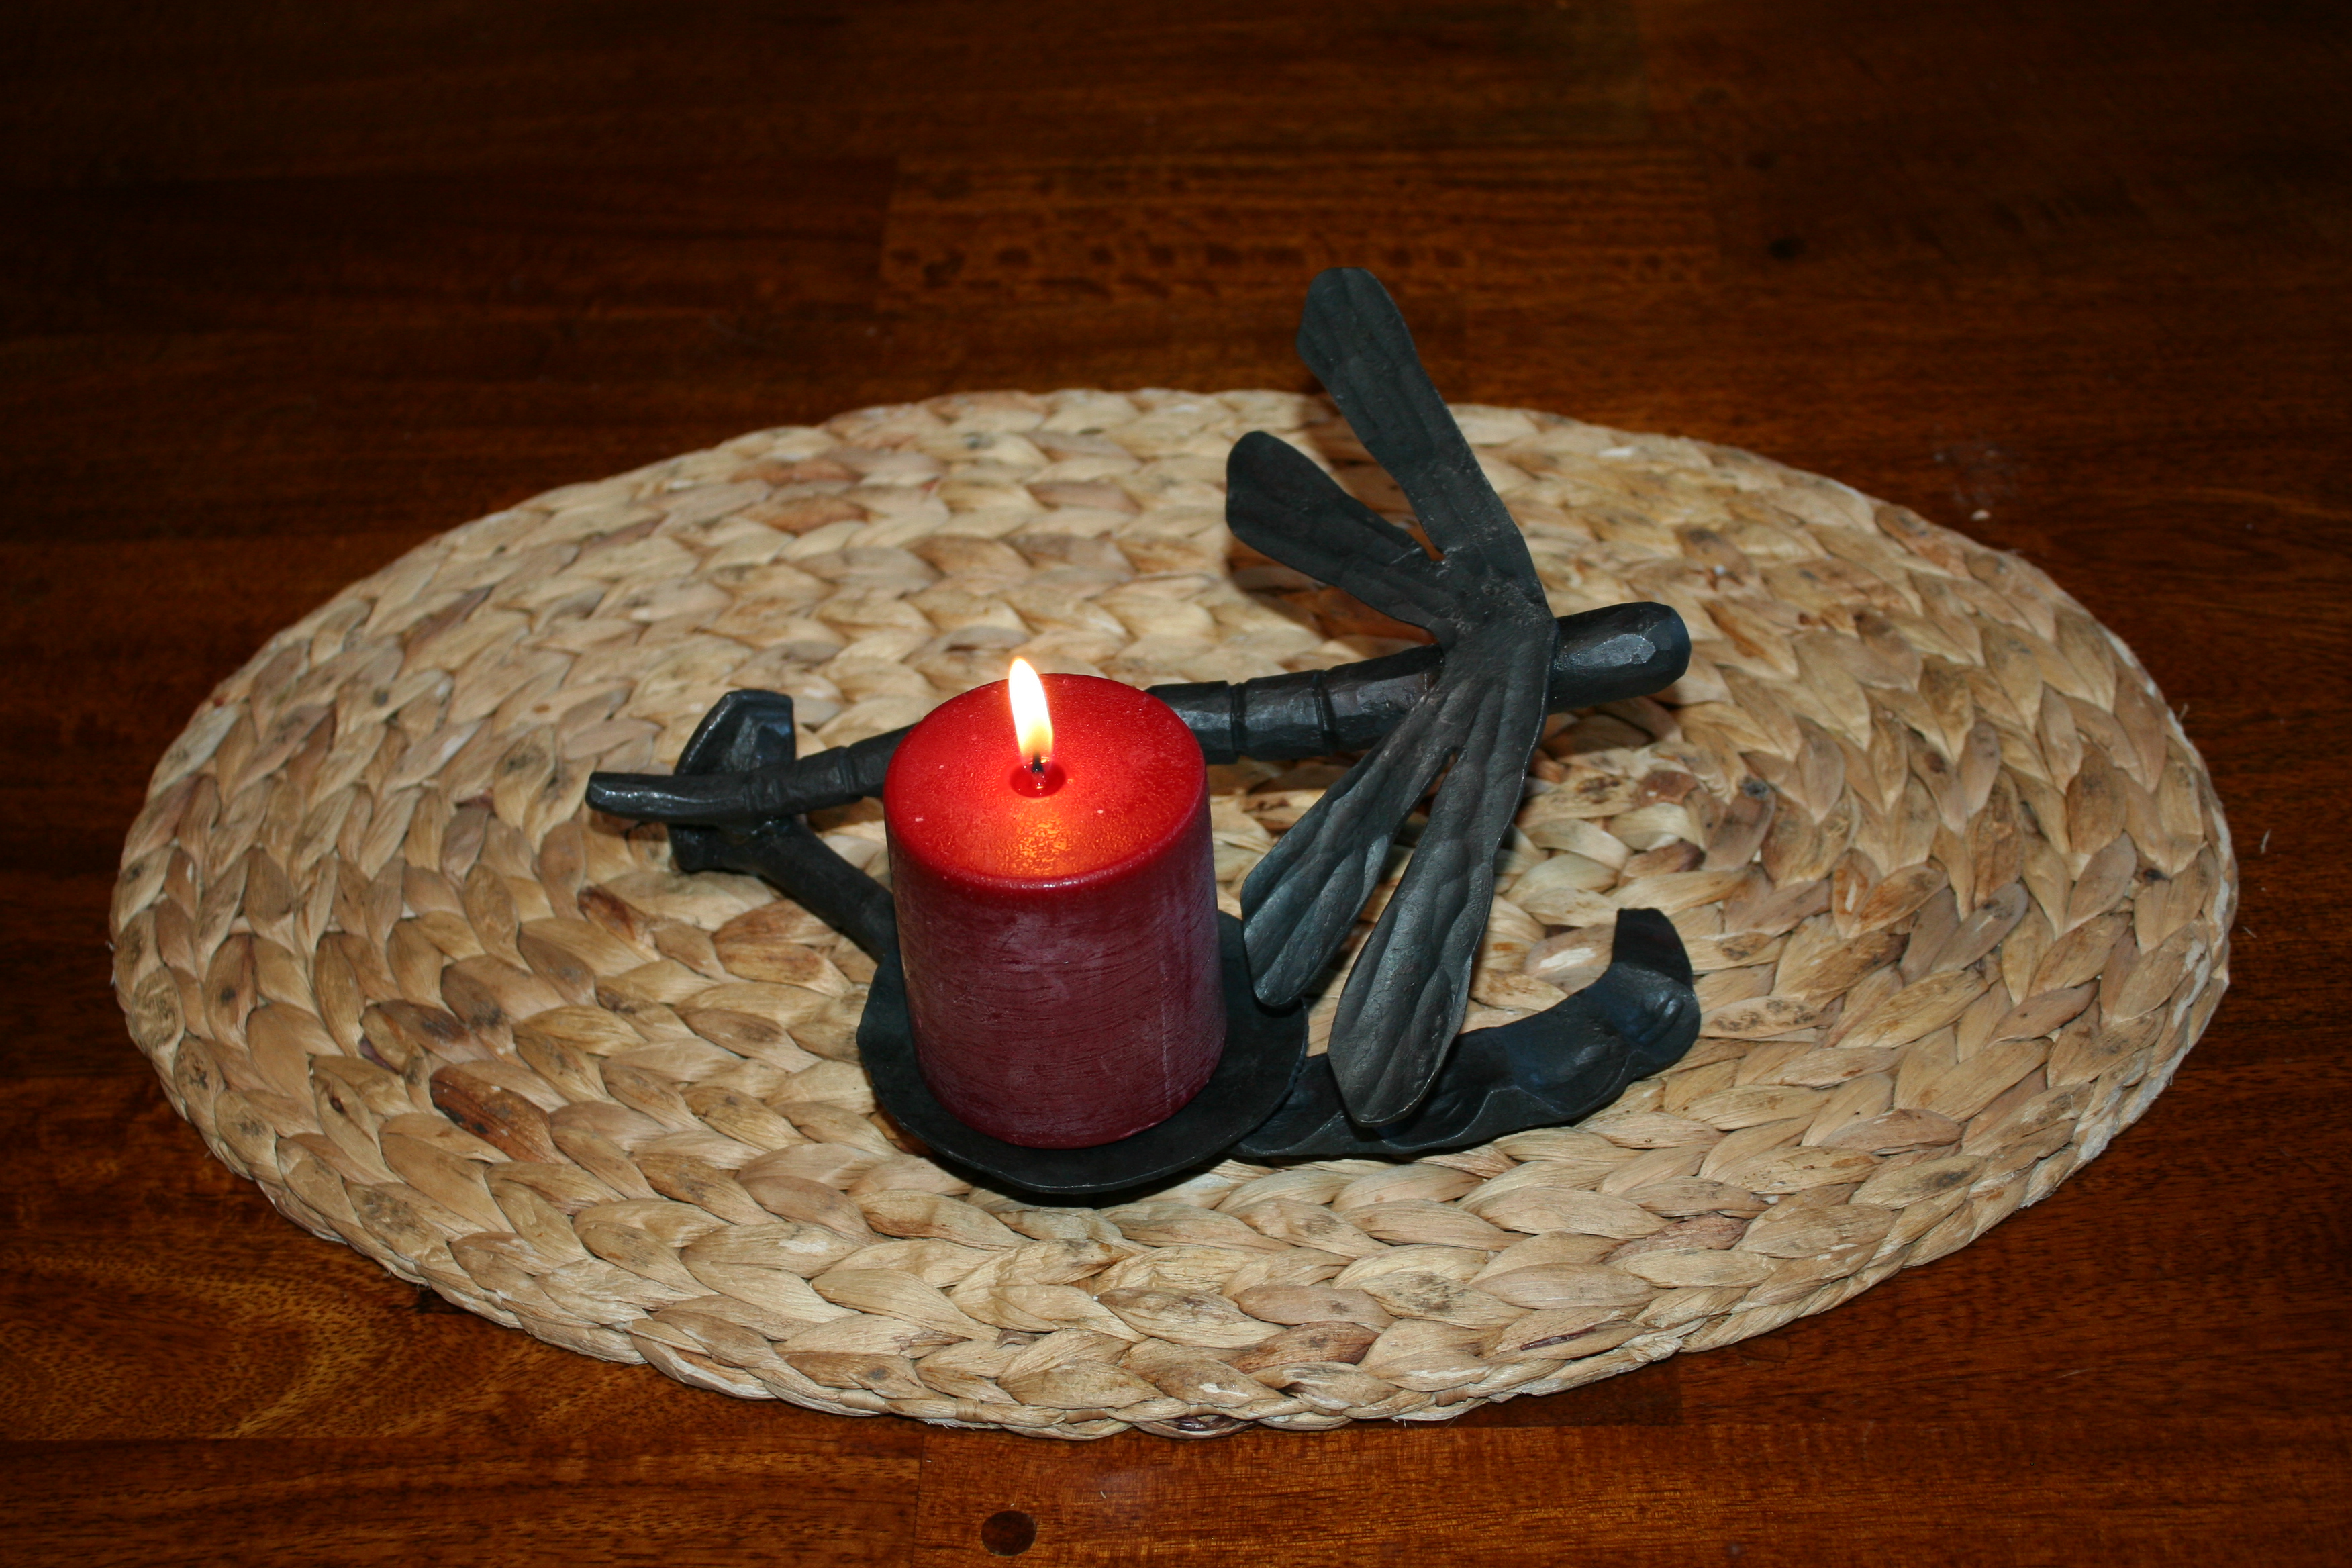
This was 2 projects that I made this summer. I will have to come up with a new item to forge but I wanted to contribute and hopefully this new topic will inspire everyone to keep the dust off their anvils...
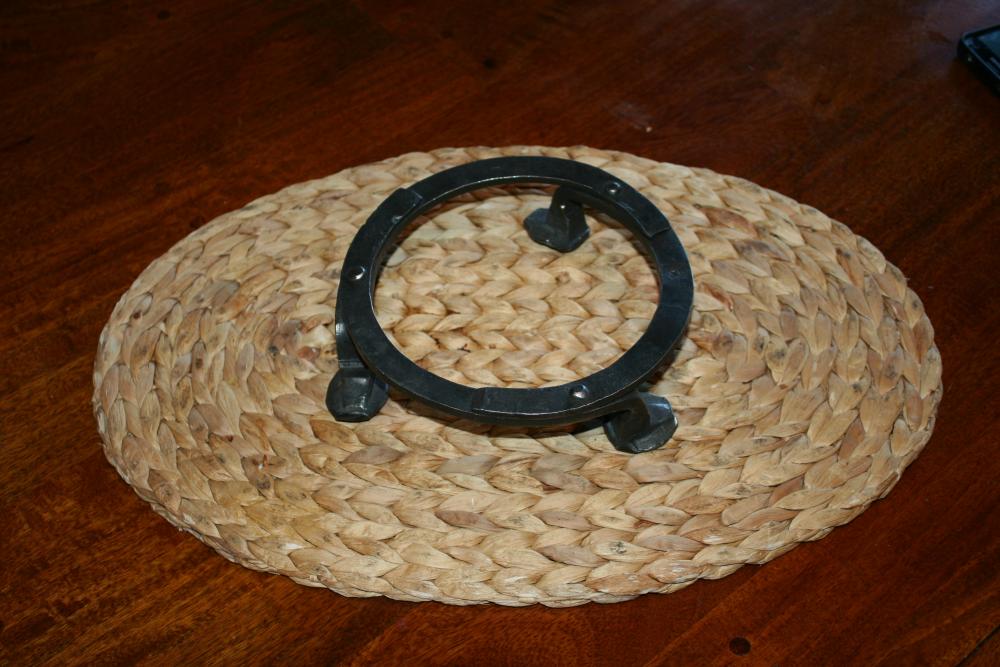
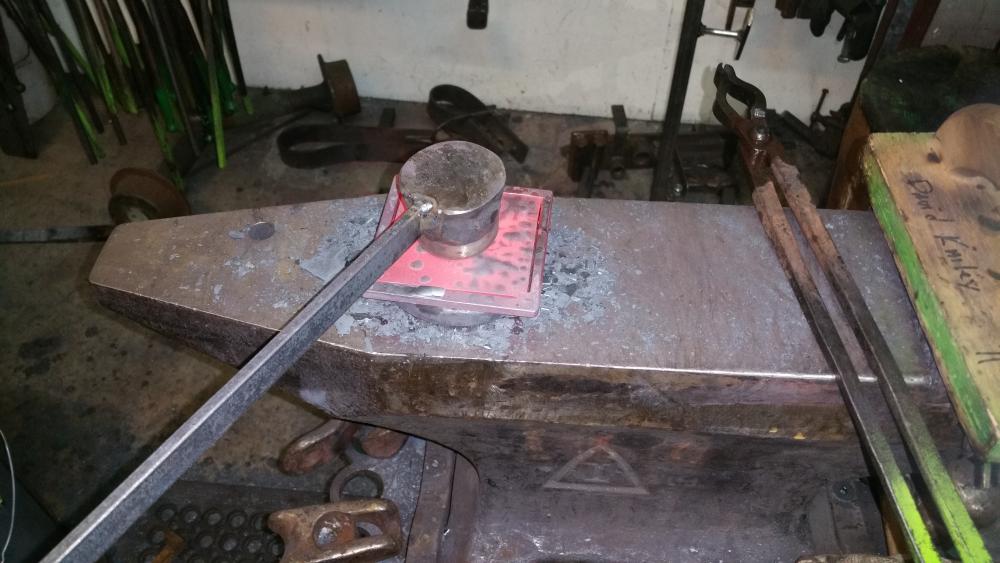
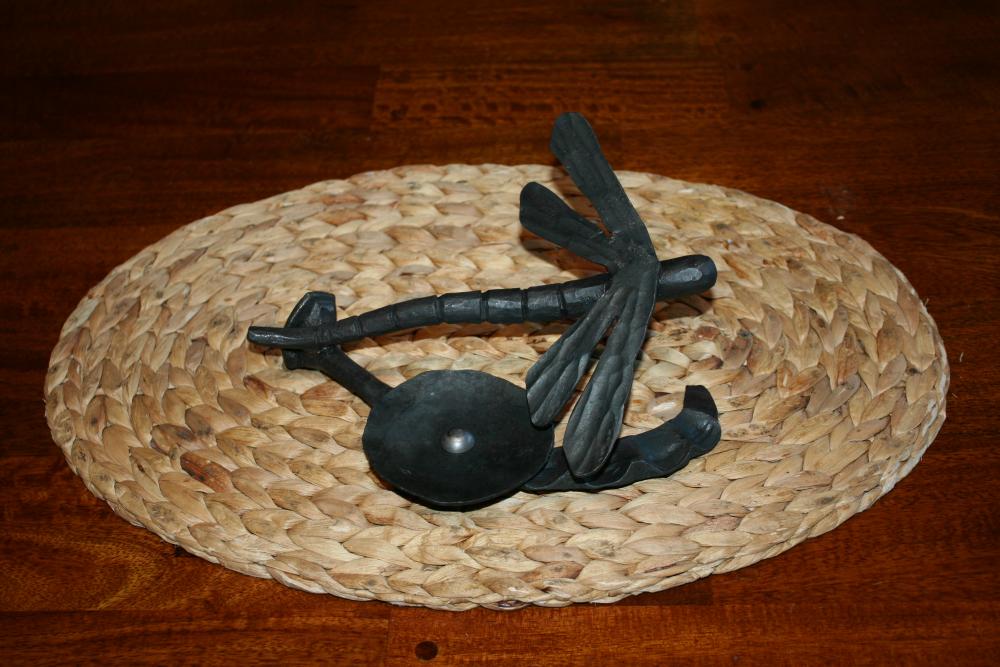
the Trivet was forged from RR spikes drawn out and then curved they were riveted together to form a circle, the feet are the heads bent down at 90 degrees. the bowls are forged from 2 pieces that are 8" x 6" with a cross peen texture. I welded them together and used a wood swedge to form the bowl.
the elevated bowl is forged the same way, but I used an 8" x 8" cross peened dome and riveted 4 rr spikes to it which hold the bowl

-
These look fantastic. Well done.
-
On 3/2/2017 at 11:27 AM, bigfootnampa said:
The curve certainly does make for a weaker structure than a straight brace... but these are massively built. David's strength estimates seem conservative to me.
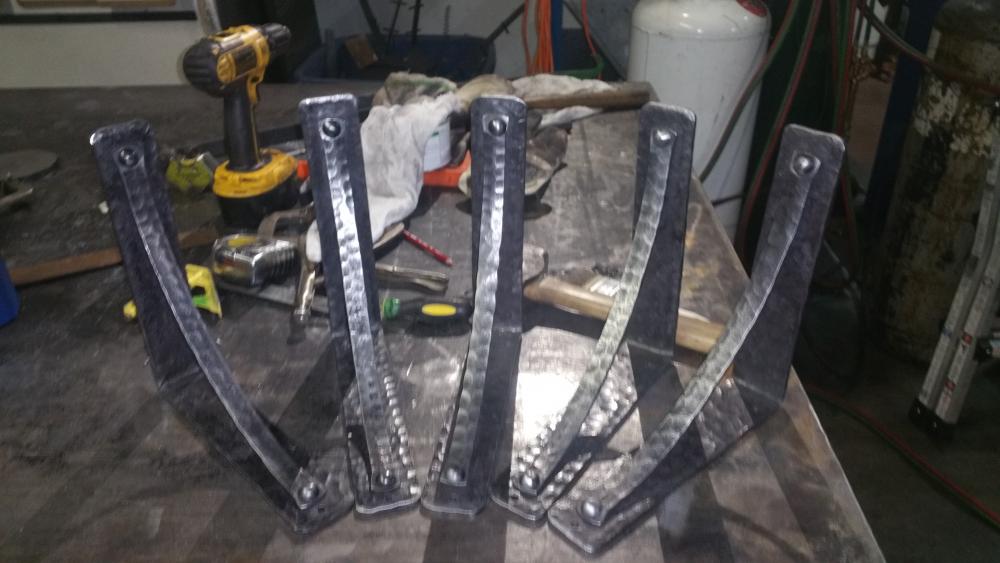
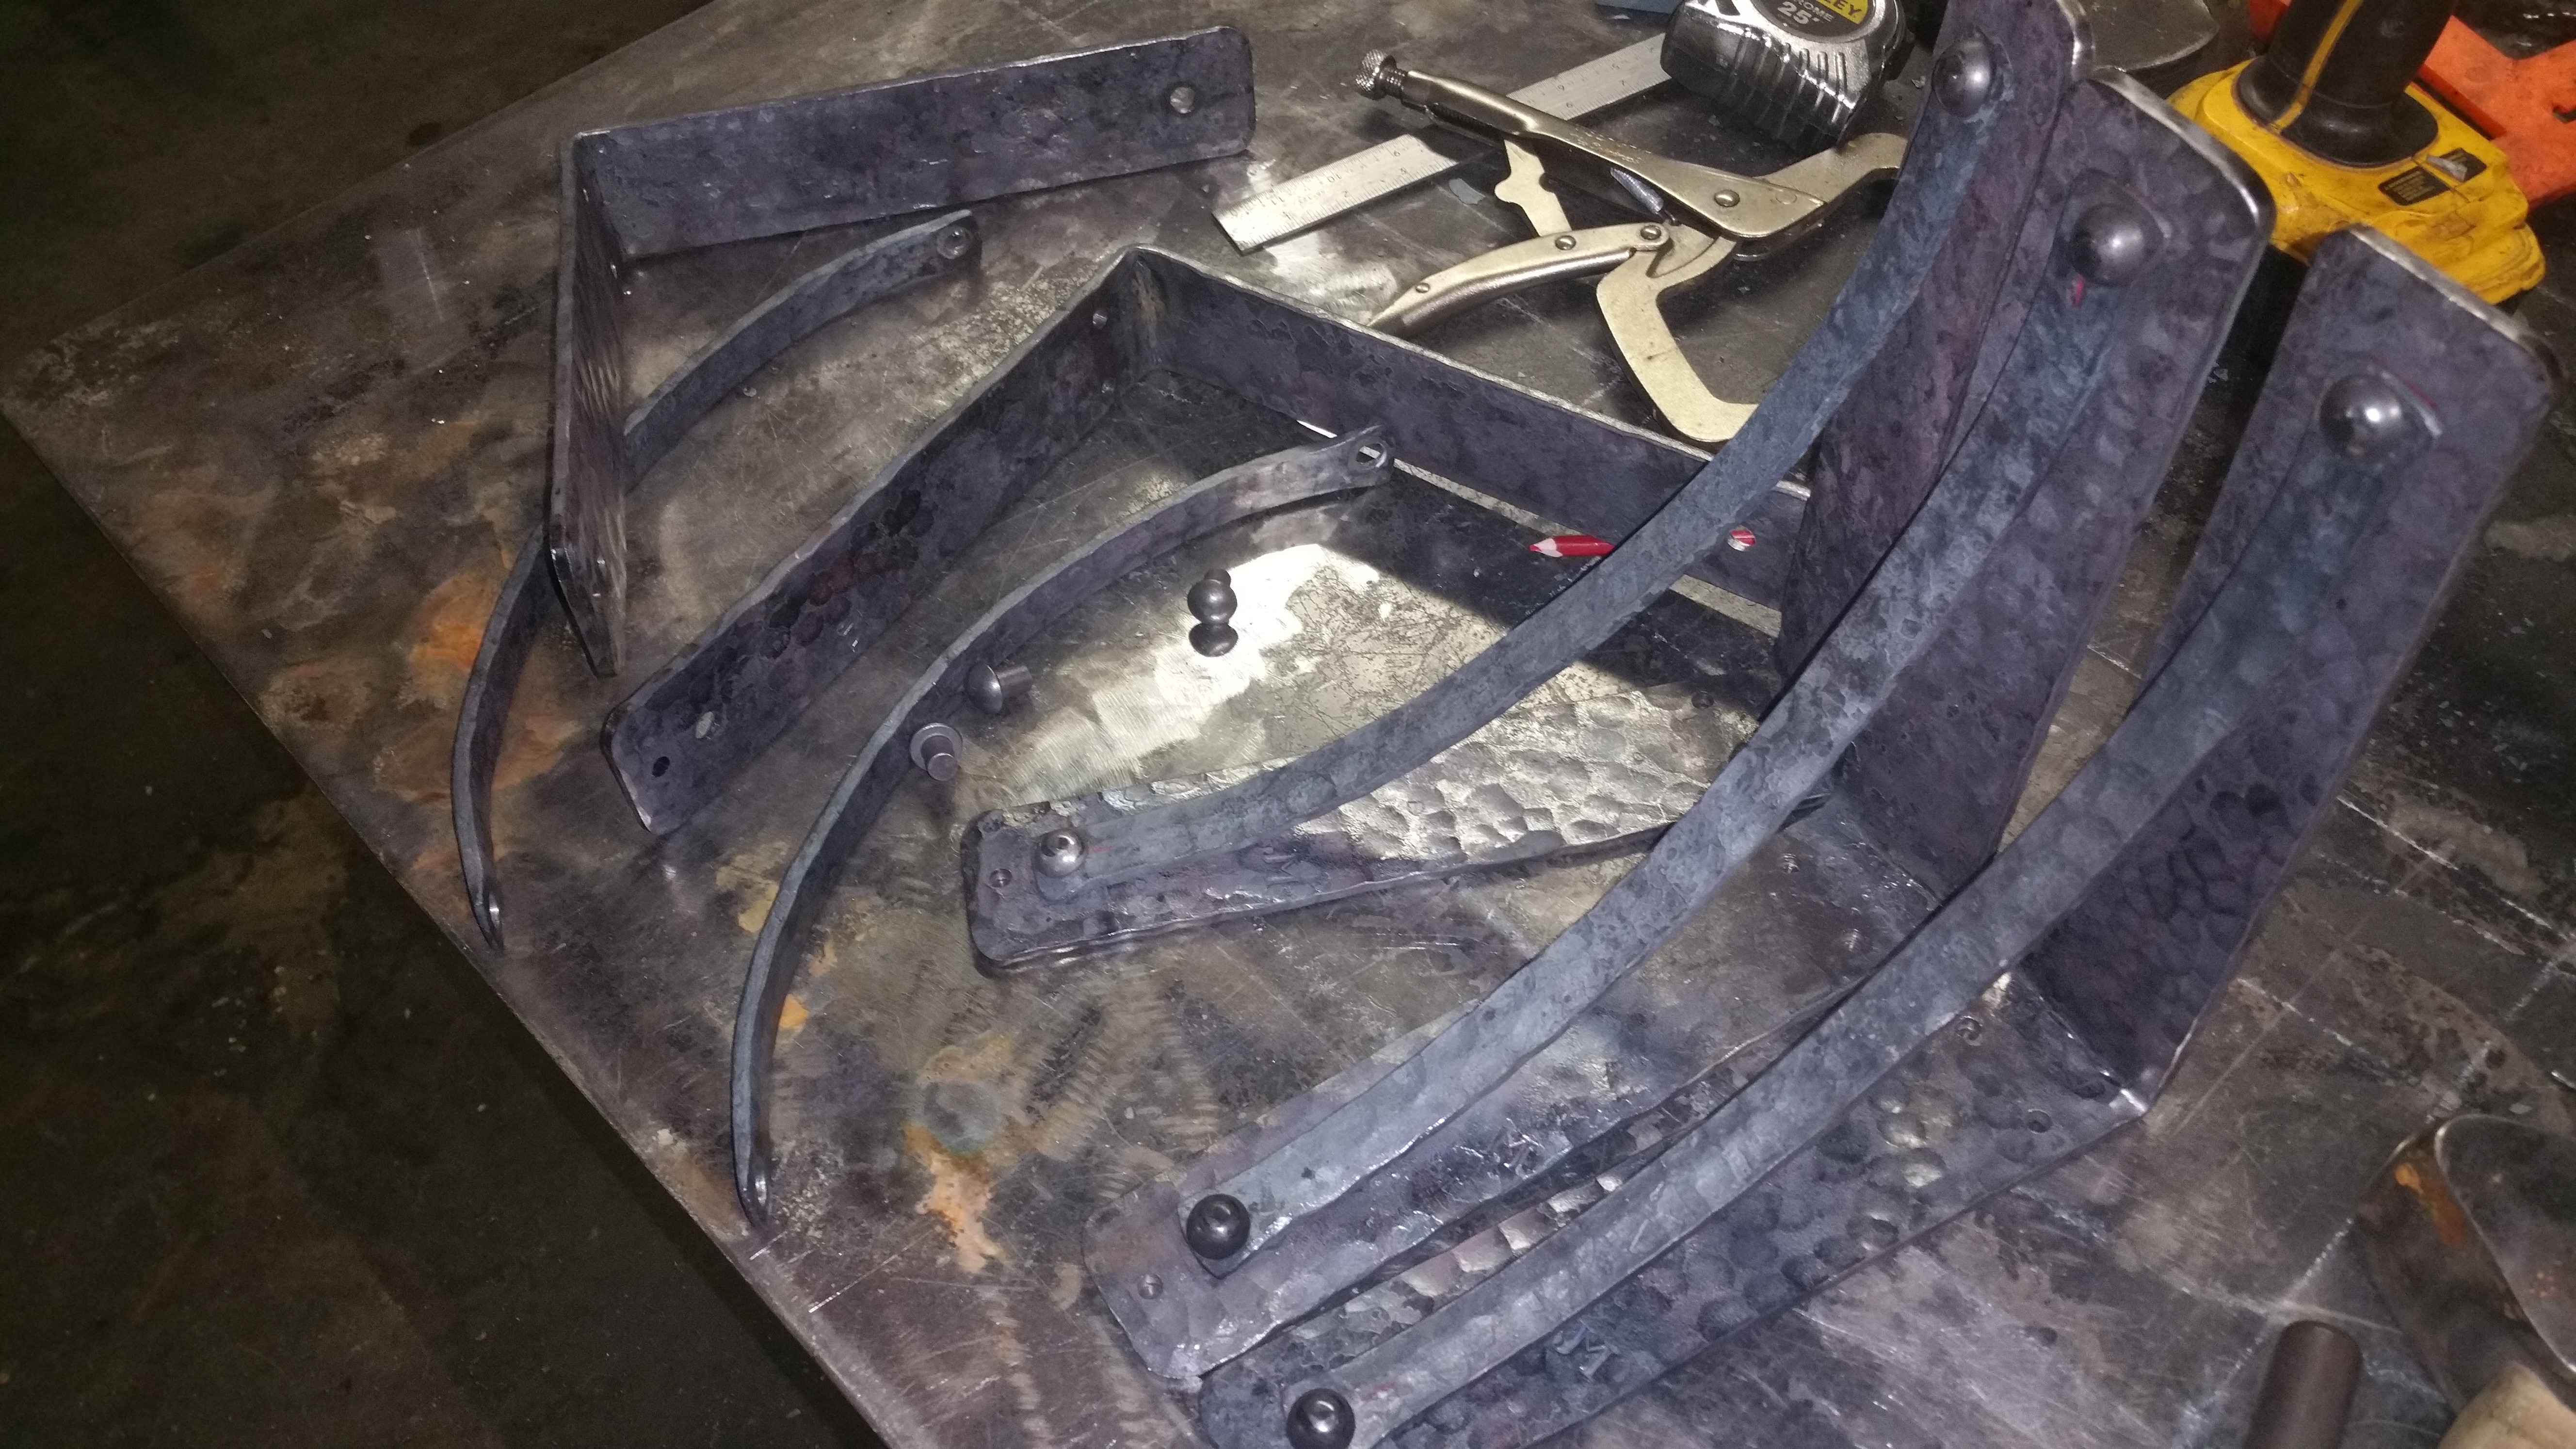
I definitely am conservative in my holding weight. But I have had people ask for me to build them things to hold....?????lbs and I did that but then they load it up with ?????lbs plus 150% lol...... I am not an engineer so its better to over build and stay conservative.
-
The l bracket is 2" x 1/4" and the support is 3/4" x 3/8". I would guess they would hold 300-325lbs with no problems
-
On 2/24/2017 at 1:24 AM, RobbieG said:
Yep those are some really nice work, I may have to borrow that framed design if that's OK? Very creative
barrow away my friend
-
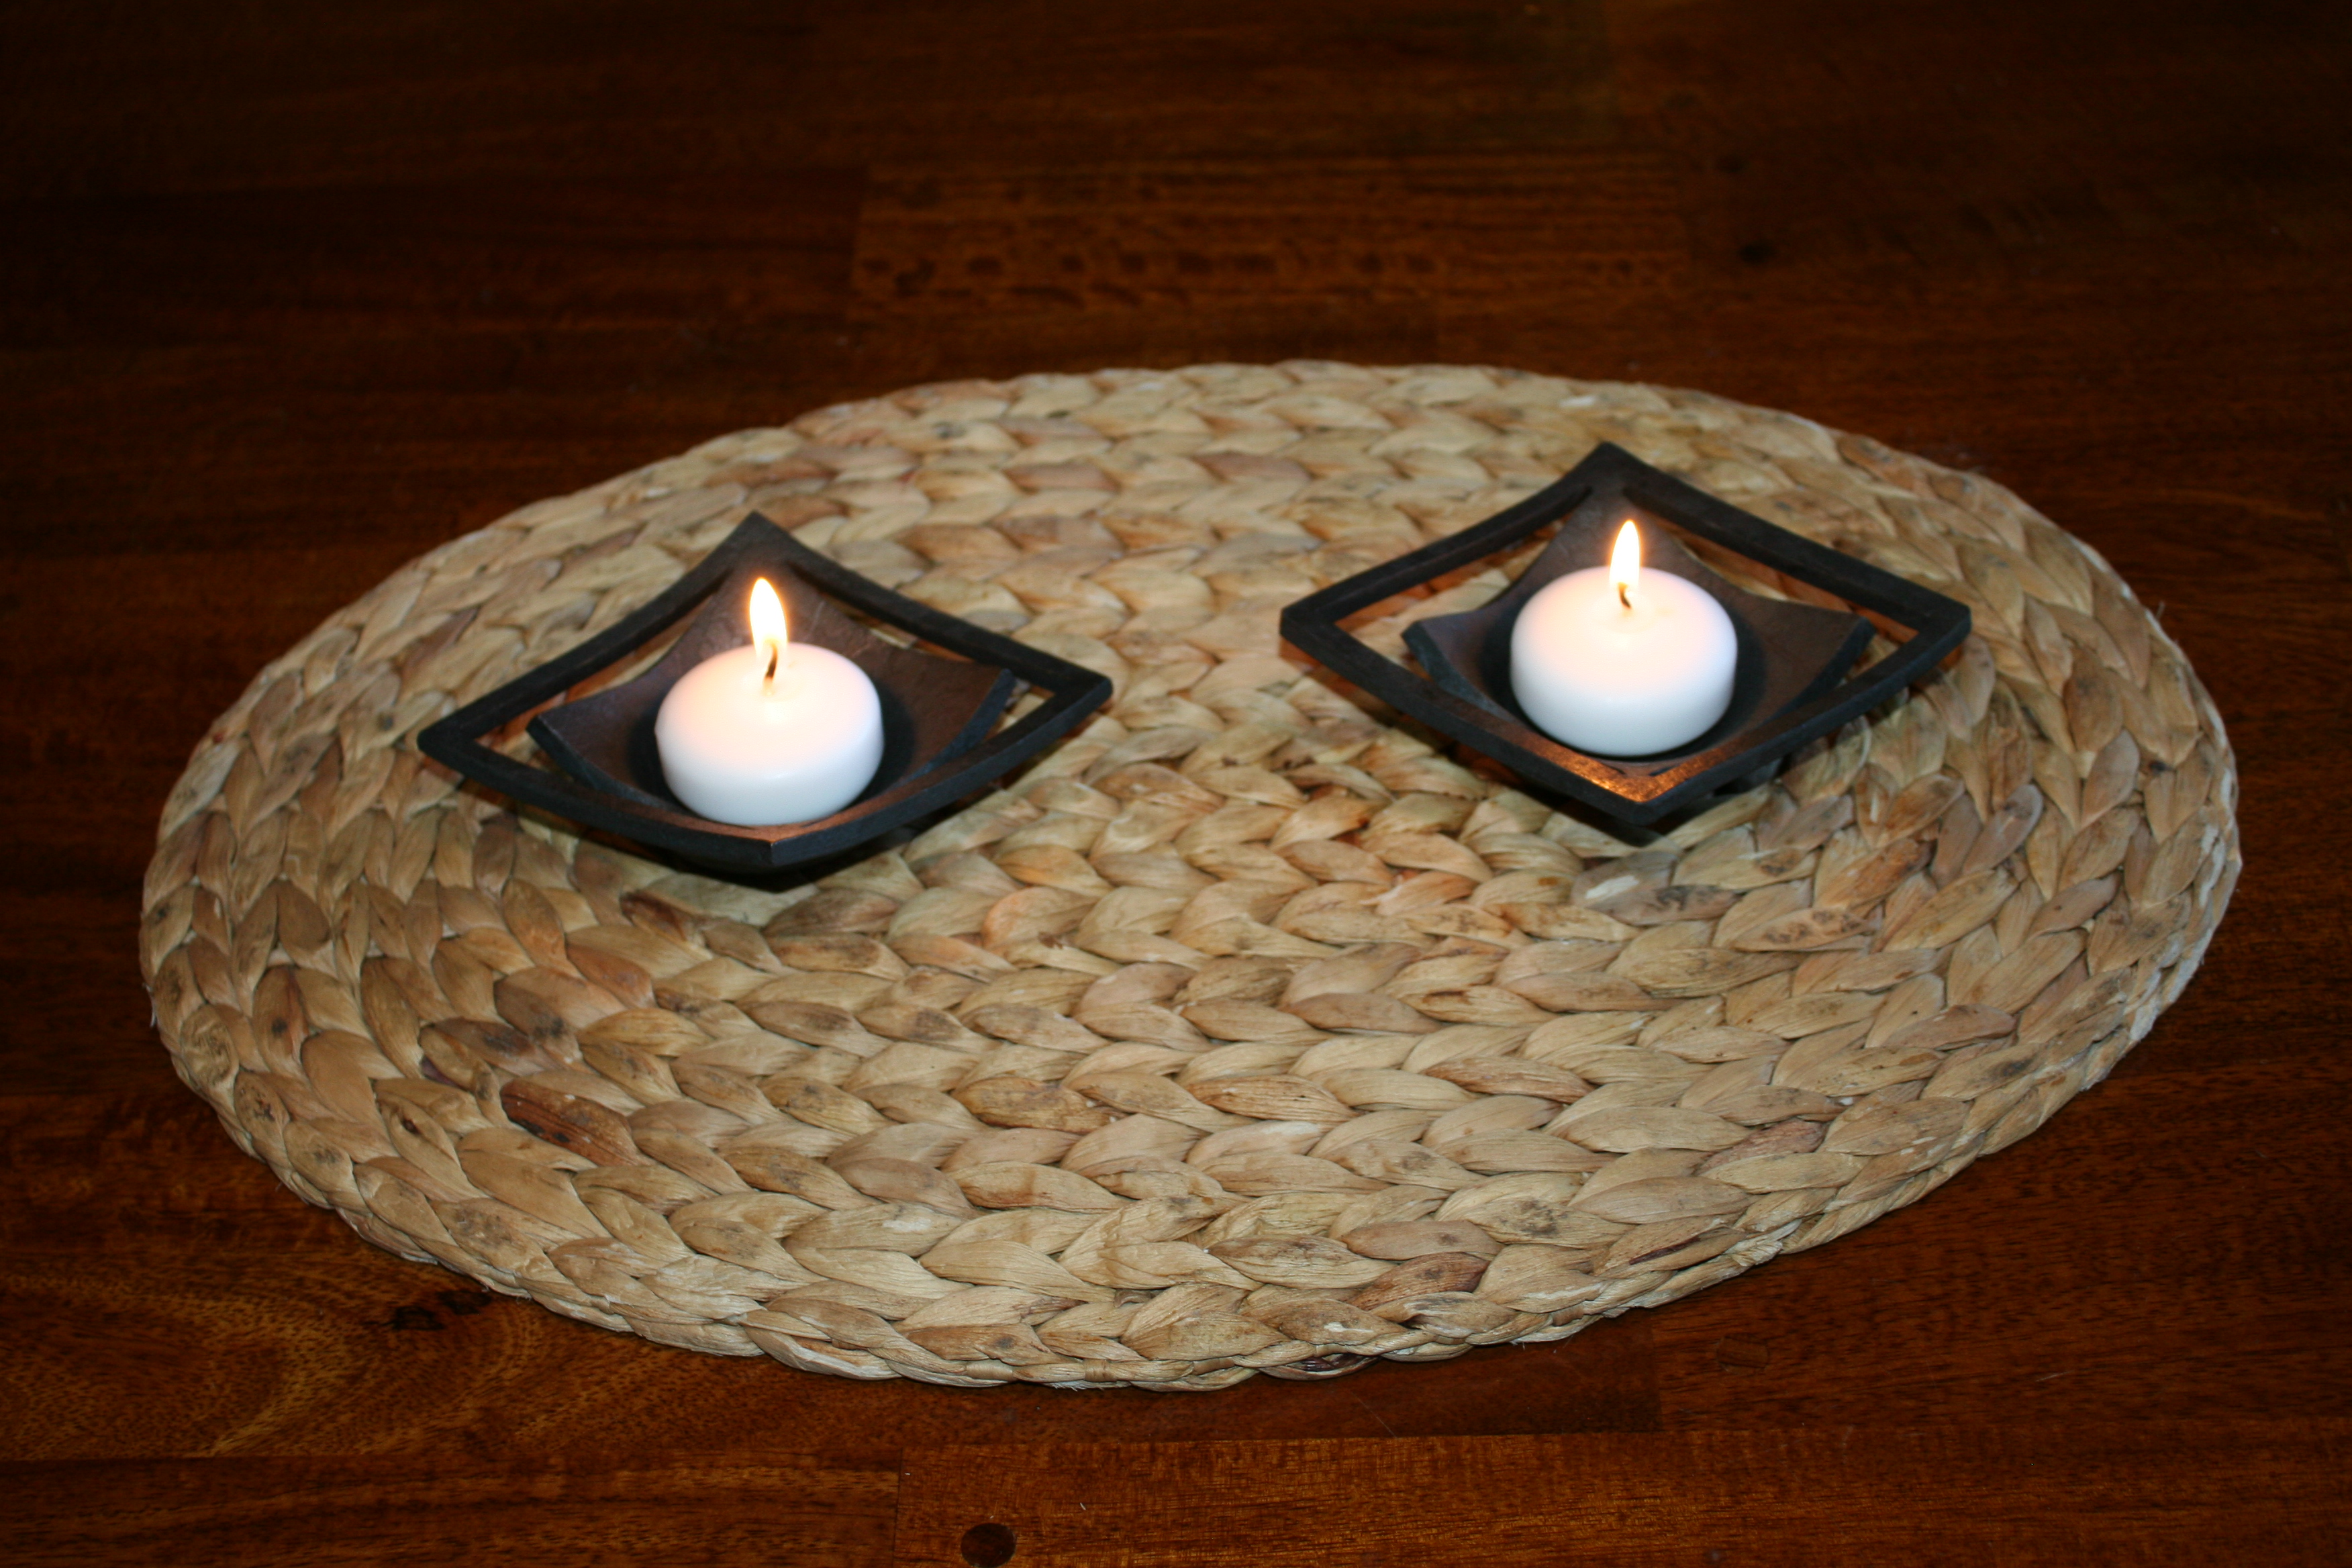
Couldn't sleep last night so I drove to my shop and forged some tools and then these candle holder, cups


-
$50 each....... so 20 x $50 = @1,000.00
The original order was priced out at some corbels the customer saw on line, machine made, and they were $50 each.......I knew I could match the price so I did. The next guy owns a house on lake CDA in Idaho......So no need to lower my price even with the order of 20.
On 2/22/2017 at 0:52 AM, ausfire said:Roses take a while to make. I sell mine for about $60 and they sell quickly. I don't do many now as there is more demand for things that give better return for the time spent. Maybe I should change my avatar to a bottle opener!

Ausfire,
Yah I have done the wrap around rose and the plasma cut 5 piece rose.......both take a while.....35-45 min there about. $50-60 is about all I can get they sell here also but people always seem to want the rose.......with....some kind of other element... Thats great and all and usually I can push the price up closer to $100-$120.... but not everyone likes the same element.... but that is really were the profit is because the add element usually is very fast to produce 5-15 min for an added $40-$60
-
22 minutes ago, Daswulf said:
sounds like the roses that I make. if I post any on FB I need to make a ton more. I cant keep up. If it's worth it Great!
Lol. I guess my roses are a bit diffrent. I post one and everyone wants one until I price them out. Id have to get $40-50 a piece. I'd like to see how you make yours.
-
On January 17, 2017 at 4:13 PM, Marc1 said:
Don't simplify that. If you are comfortable making them, they look very nice to me. Particularly the left one. The heart needs a bit of detail. One observation ... if you are selling this, I would supply the fasteners with it. A bright new phillip head screw will look out of place and ruin the piece. Ideally you can make the nails for them by hammering the head of a nail with a ball peen hammer carefully all around in the vice, or supply a blackened slot screw with it.
Maybe some cool pyramid head lags
-
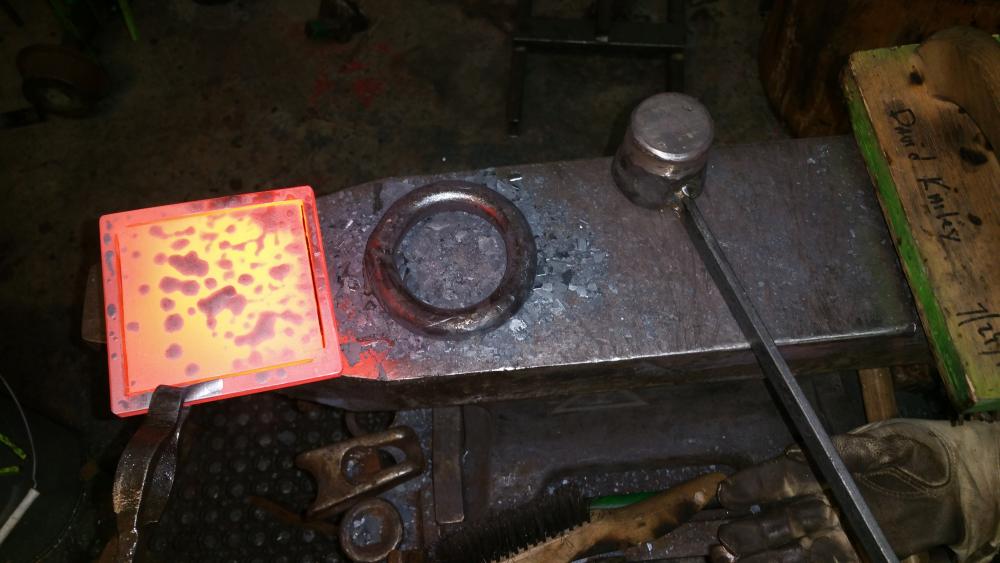
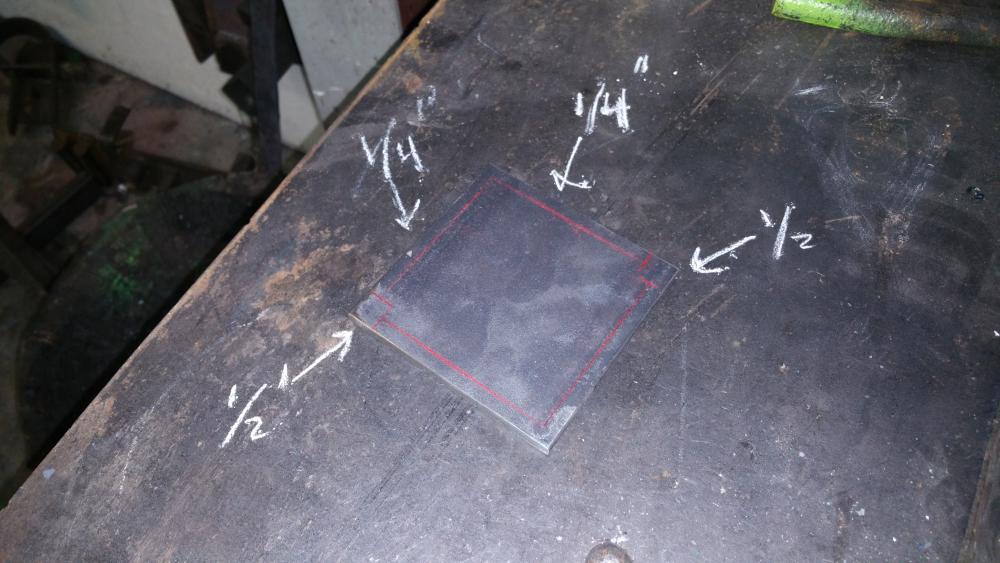
I use a 3 legged stand with a hunk of rubber under my anvil and threaded hold downs.......i use a 1/2'" plate with all my tool holders plasma cut into the plate. very durable.....look up my posts and there should be pics of it on the sight
-
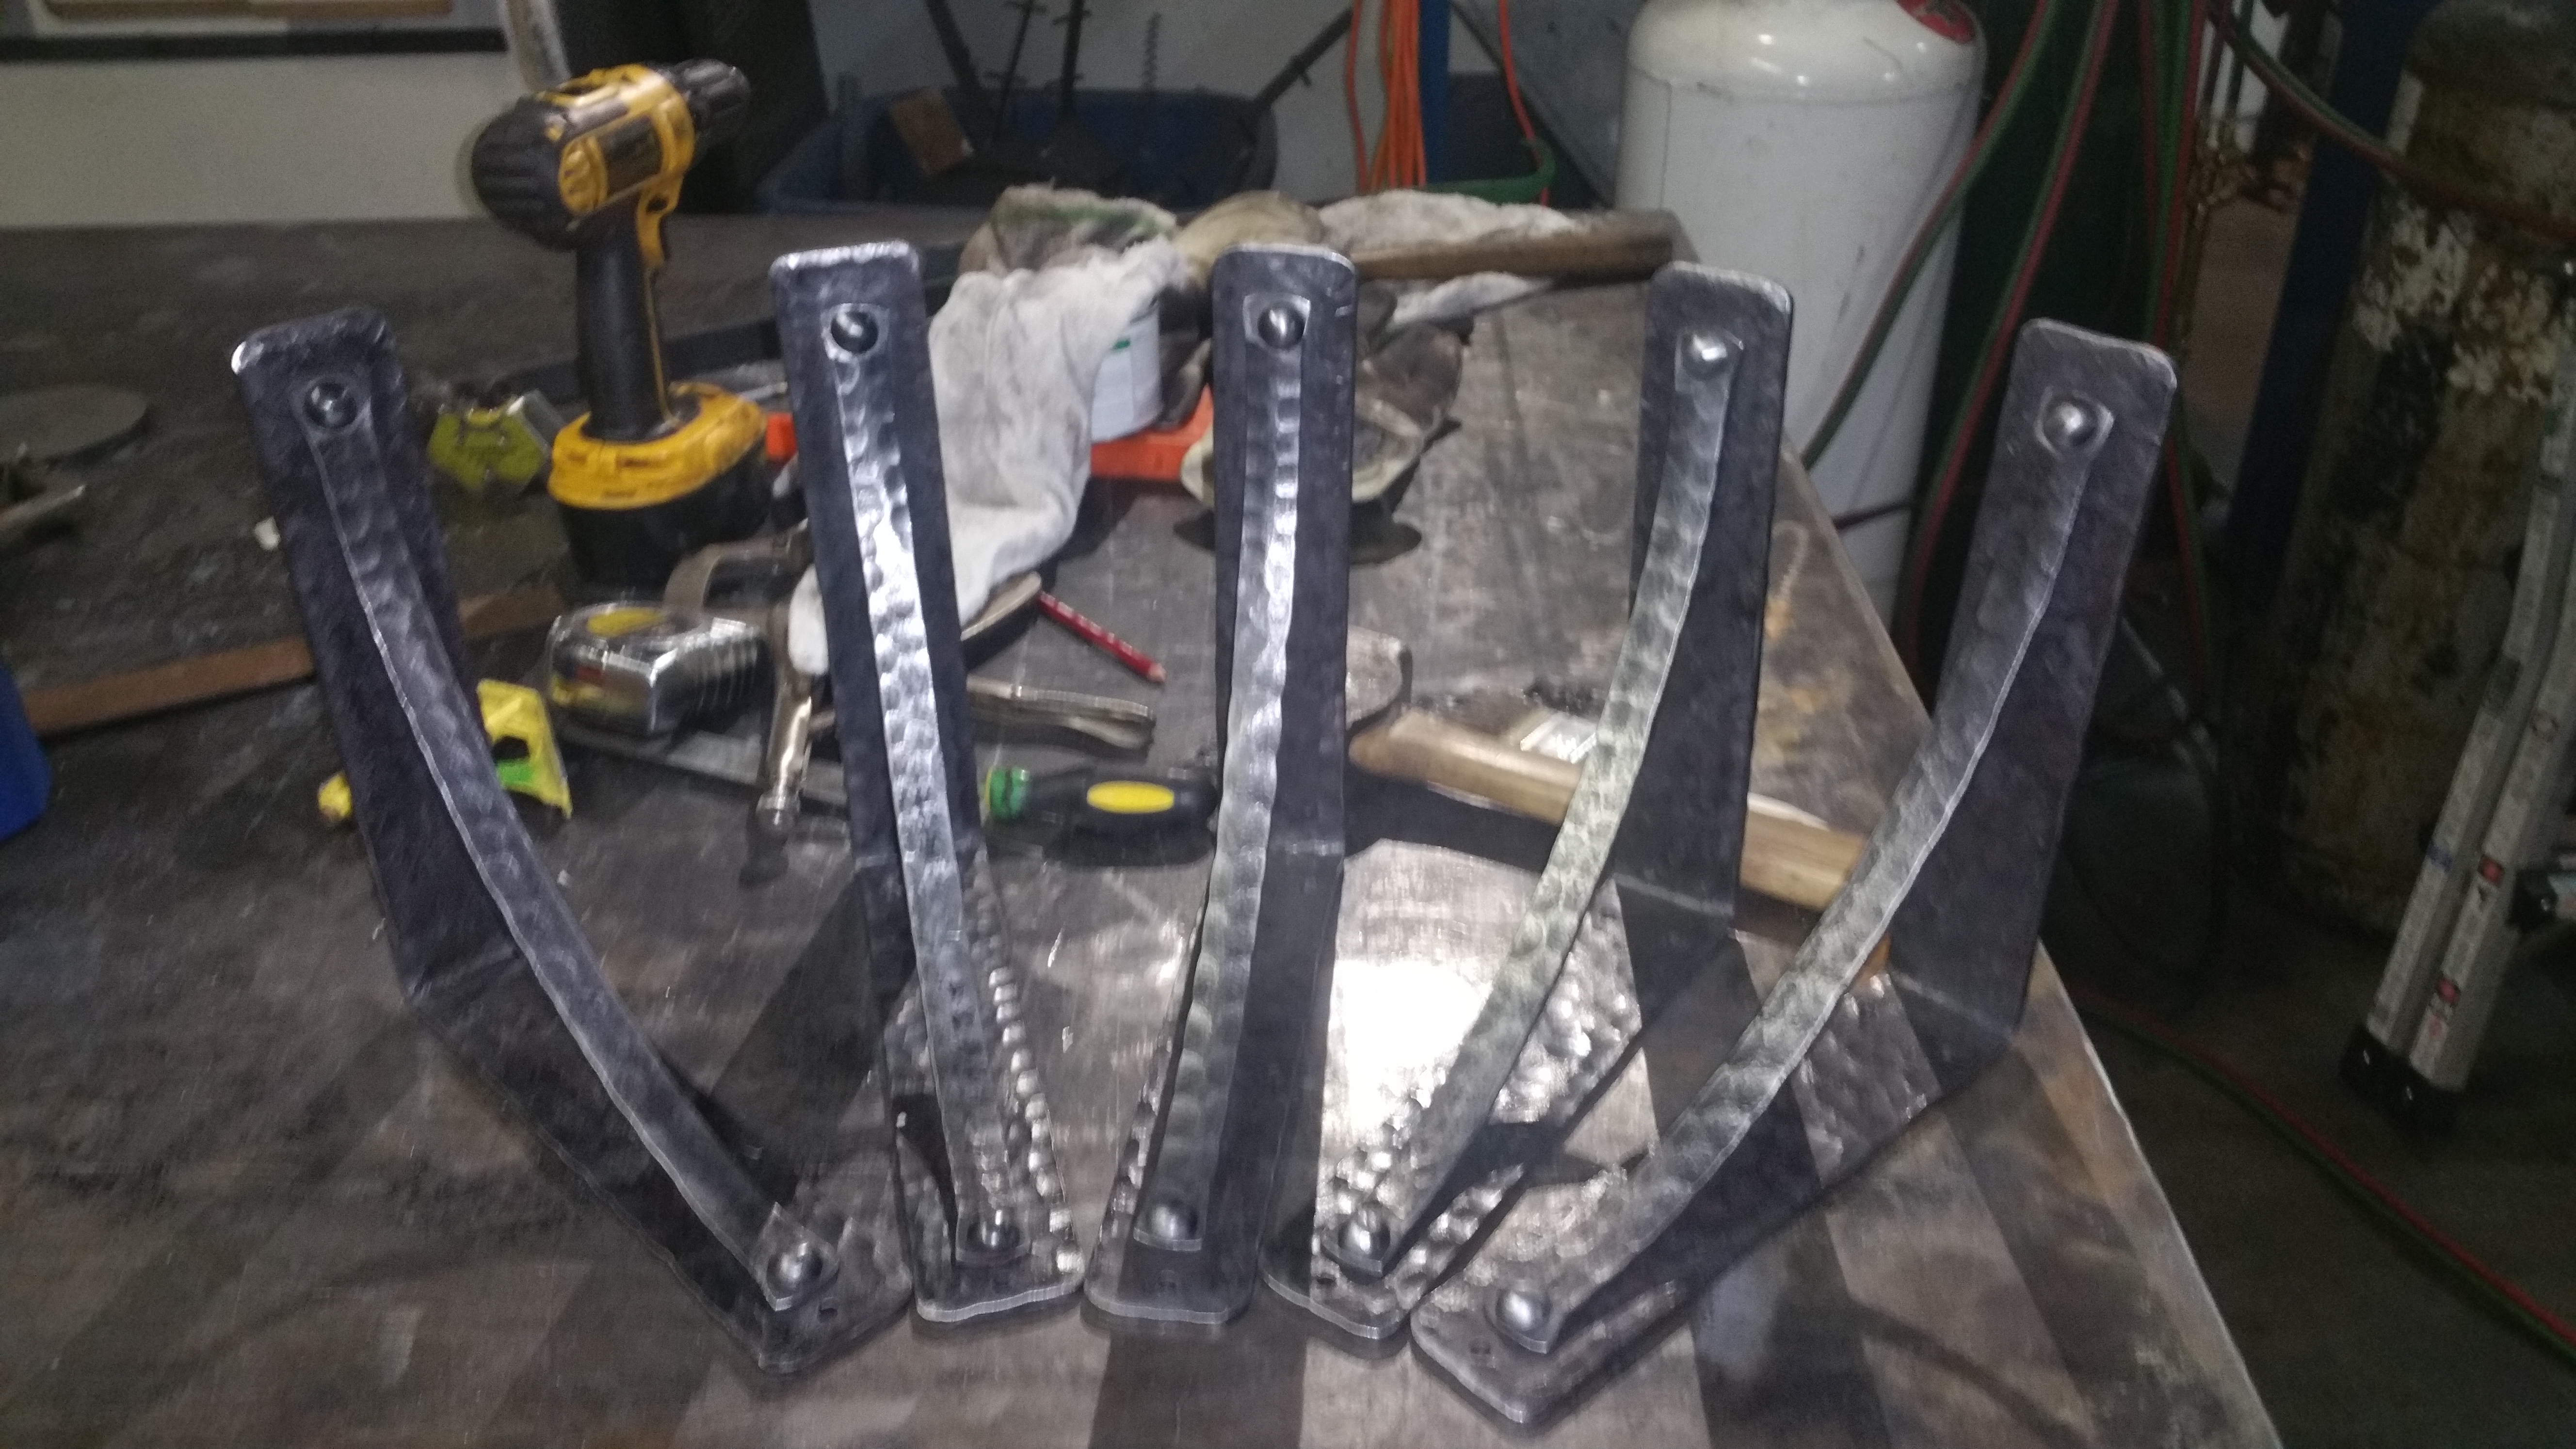
Got an order for 5 corbels......then another for 20.
I always post what I am up to on IG and FB......I have had people say so of its not worth posting, its to easy to make,........ bla bla bla.......it dosen't show case my skills....
Well these are about as simple a corbel as a guy can make......customer ordered 5 of them....easy $250 job. I posted them today at 1pm and then I got a call from a guy 450 miles a way...... he saw them cause his buddy follows my IG account.....he loves them and is putting in a set of wall shelves..... he ordered 20 of them at $50 each....... easy 12-14 hours of work maybe $50 in materials...... nice little payday to keep the lights on and the doors open.

-
19 hours ago, BlasterJoe said:
So just doing the math you are looking a 28 12hr days? How long did it actually wind up being? Amazing work. Love all the fine detail. You could probly look at it for years and still see something new. Great job.
It took me about 275 hours over 2 months.
7 hours ago, JeepinJoe said:For stairwells, openings must be less than 4". In the US many States use the IBC building codes. 2012 IBC building code says you should not be able to pass a 4" sphere through any opening.
In the US yes this is what is required. This railing meets the code requirements. Oddly it replaced a railing the hat 5" gaps between the pickets and that railing was installed in 1998 15 years after the house was built........So as always there are upgrades and remodels preformed that go on in homes because many things don't require a building permit and so there is never an inspection......but I always like to follow the code.
-
So my buddy has 2 boys, one boy is 3 years older then the other..... so he is your typical bossy, kinda cocky older brother who can do it better, faster, and all the things that come with the job of the older brother. I have always liked a good practical joke as well a good lesson on humility.......Being and older brother myself and being raised in Montana I was humbled and taught many good lessons during my 27 years there......I think its my obligation to pass this knowledge along.
So anyway 2 brothers. They have come and forged iron a few times and it is of course easier for the big brother to move the steel as he was about 25lbs bigger then his little brother. but I told the the boys they both needed to strengthen their arms, a good way to do this is beating on an old tire.....(not mounted and full of air) everyday for 15min every 2 hours or at least until they cant lift the hammer anymore. Little brother was very committed to this, after 3 weeks his right arm was noticeably much stronger and toned........But I like to really teach a lesson because both boys were instructed to work out their arms but the big brother did not. Leaning of course on his size and felt he didn't need to be stronger.
The boys came to forge iron and so I planned a project using 1/2" bar stock..........I gave a 12" piece of mild steel to little brother and a 12" piece of 01 stainless tool steel to big brother.......you can imagine the efficiency in which the buffed up little brother moved his iron....but I really wanted to drive to point home that hardwork pays off, and that big brother may want to reconsider messing around little brother anymore. It has been reported that both boys go out and work their hammers on the old tire. It definitely showed in their ability to move the steel when they come and forge iron. They are now 18 and 15, I figure here in about 5 more years I'll let them in on what happened that day in the smithy......but I doubt it
-
Man those RR clips are burly........
-
Man I really this piece. It's fantastic, great job forging life into your piece.
-
nice job on the s-hook basket.
-
On 11/29/2016 at 9:00 AM, ThomasPowers said:
If they continue to loosen up will the handles be so heavy that they will open by themselves?
I asked the same thing. but the sample I was sent dose not have that issue. But I was concerned about this as well. that is why I ground a bevel on the latch and angled the hook side so it kind of friction fits and holds its self.
-
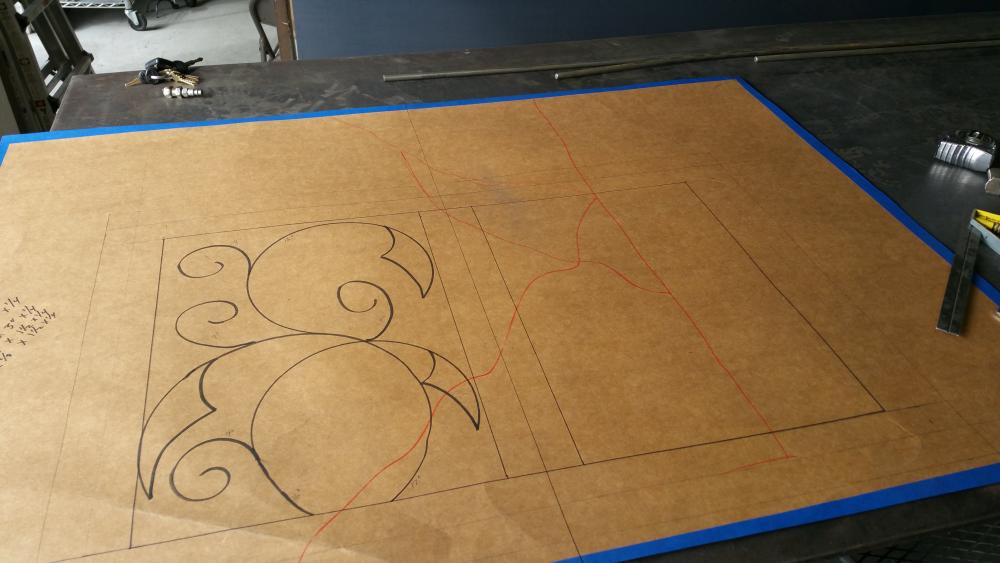
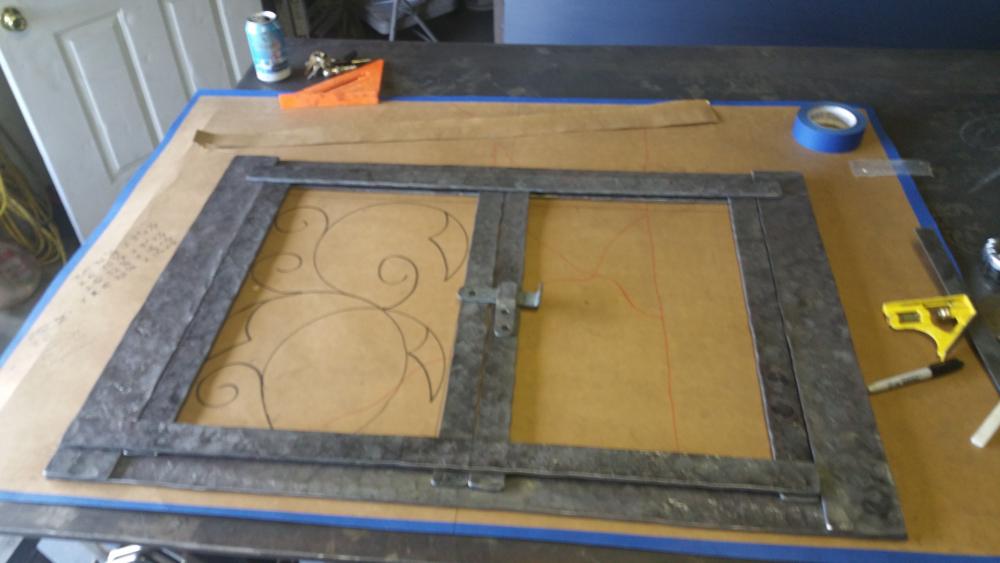
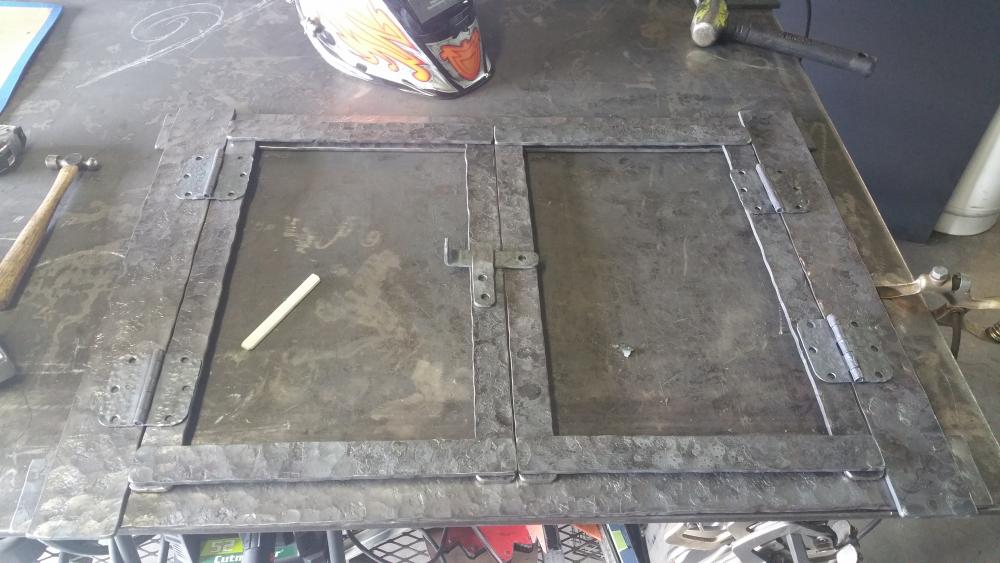
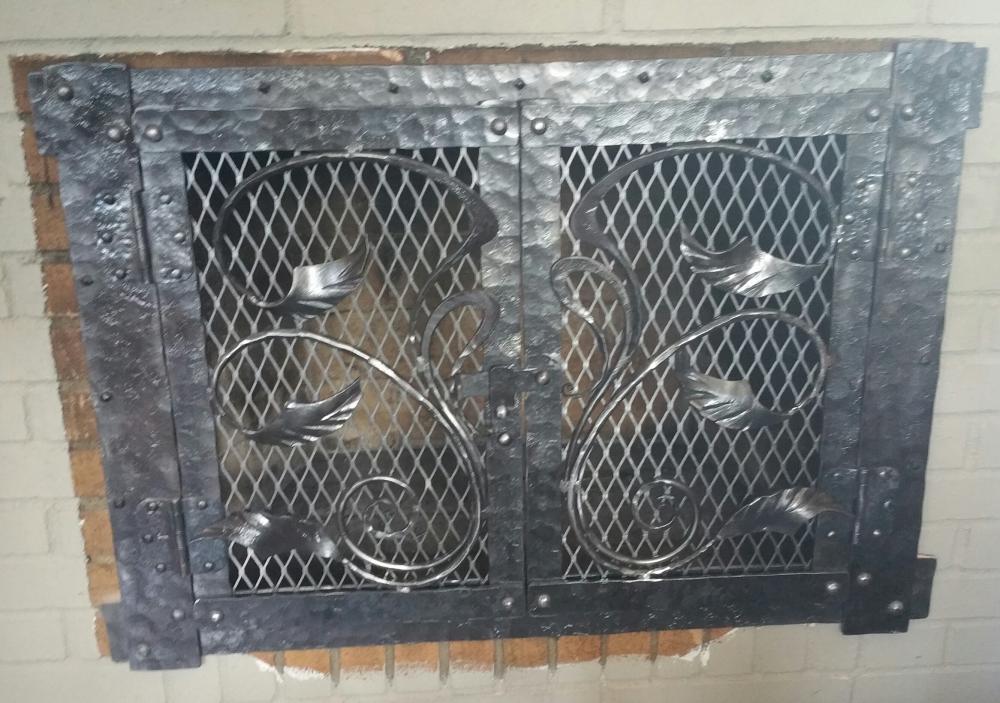
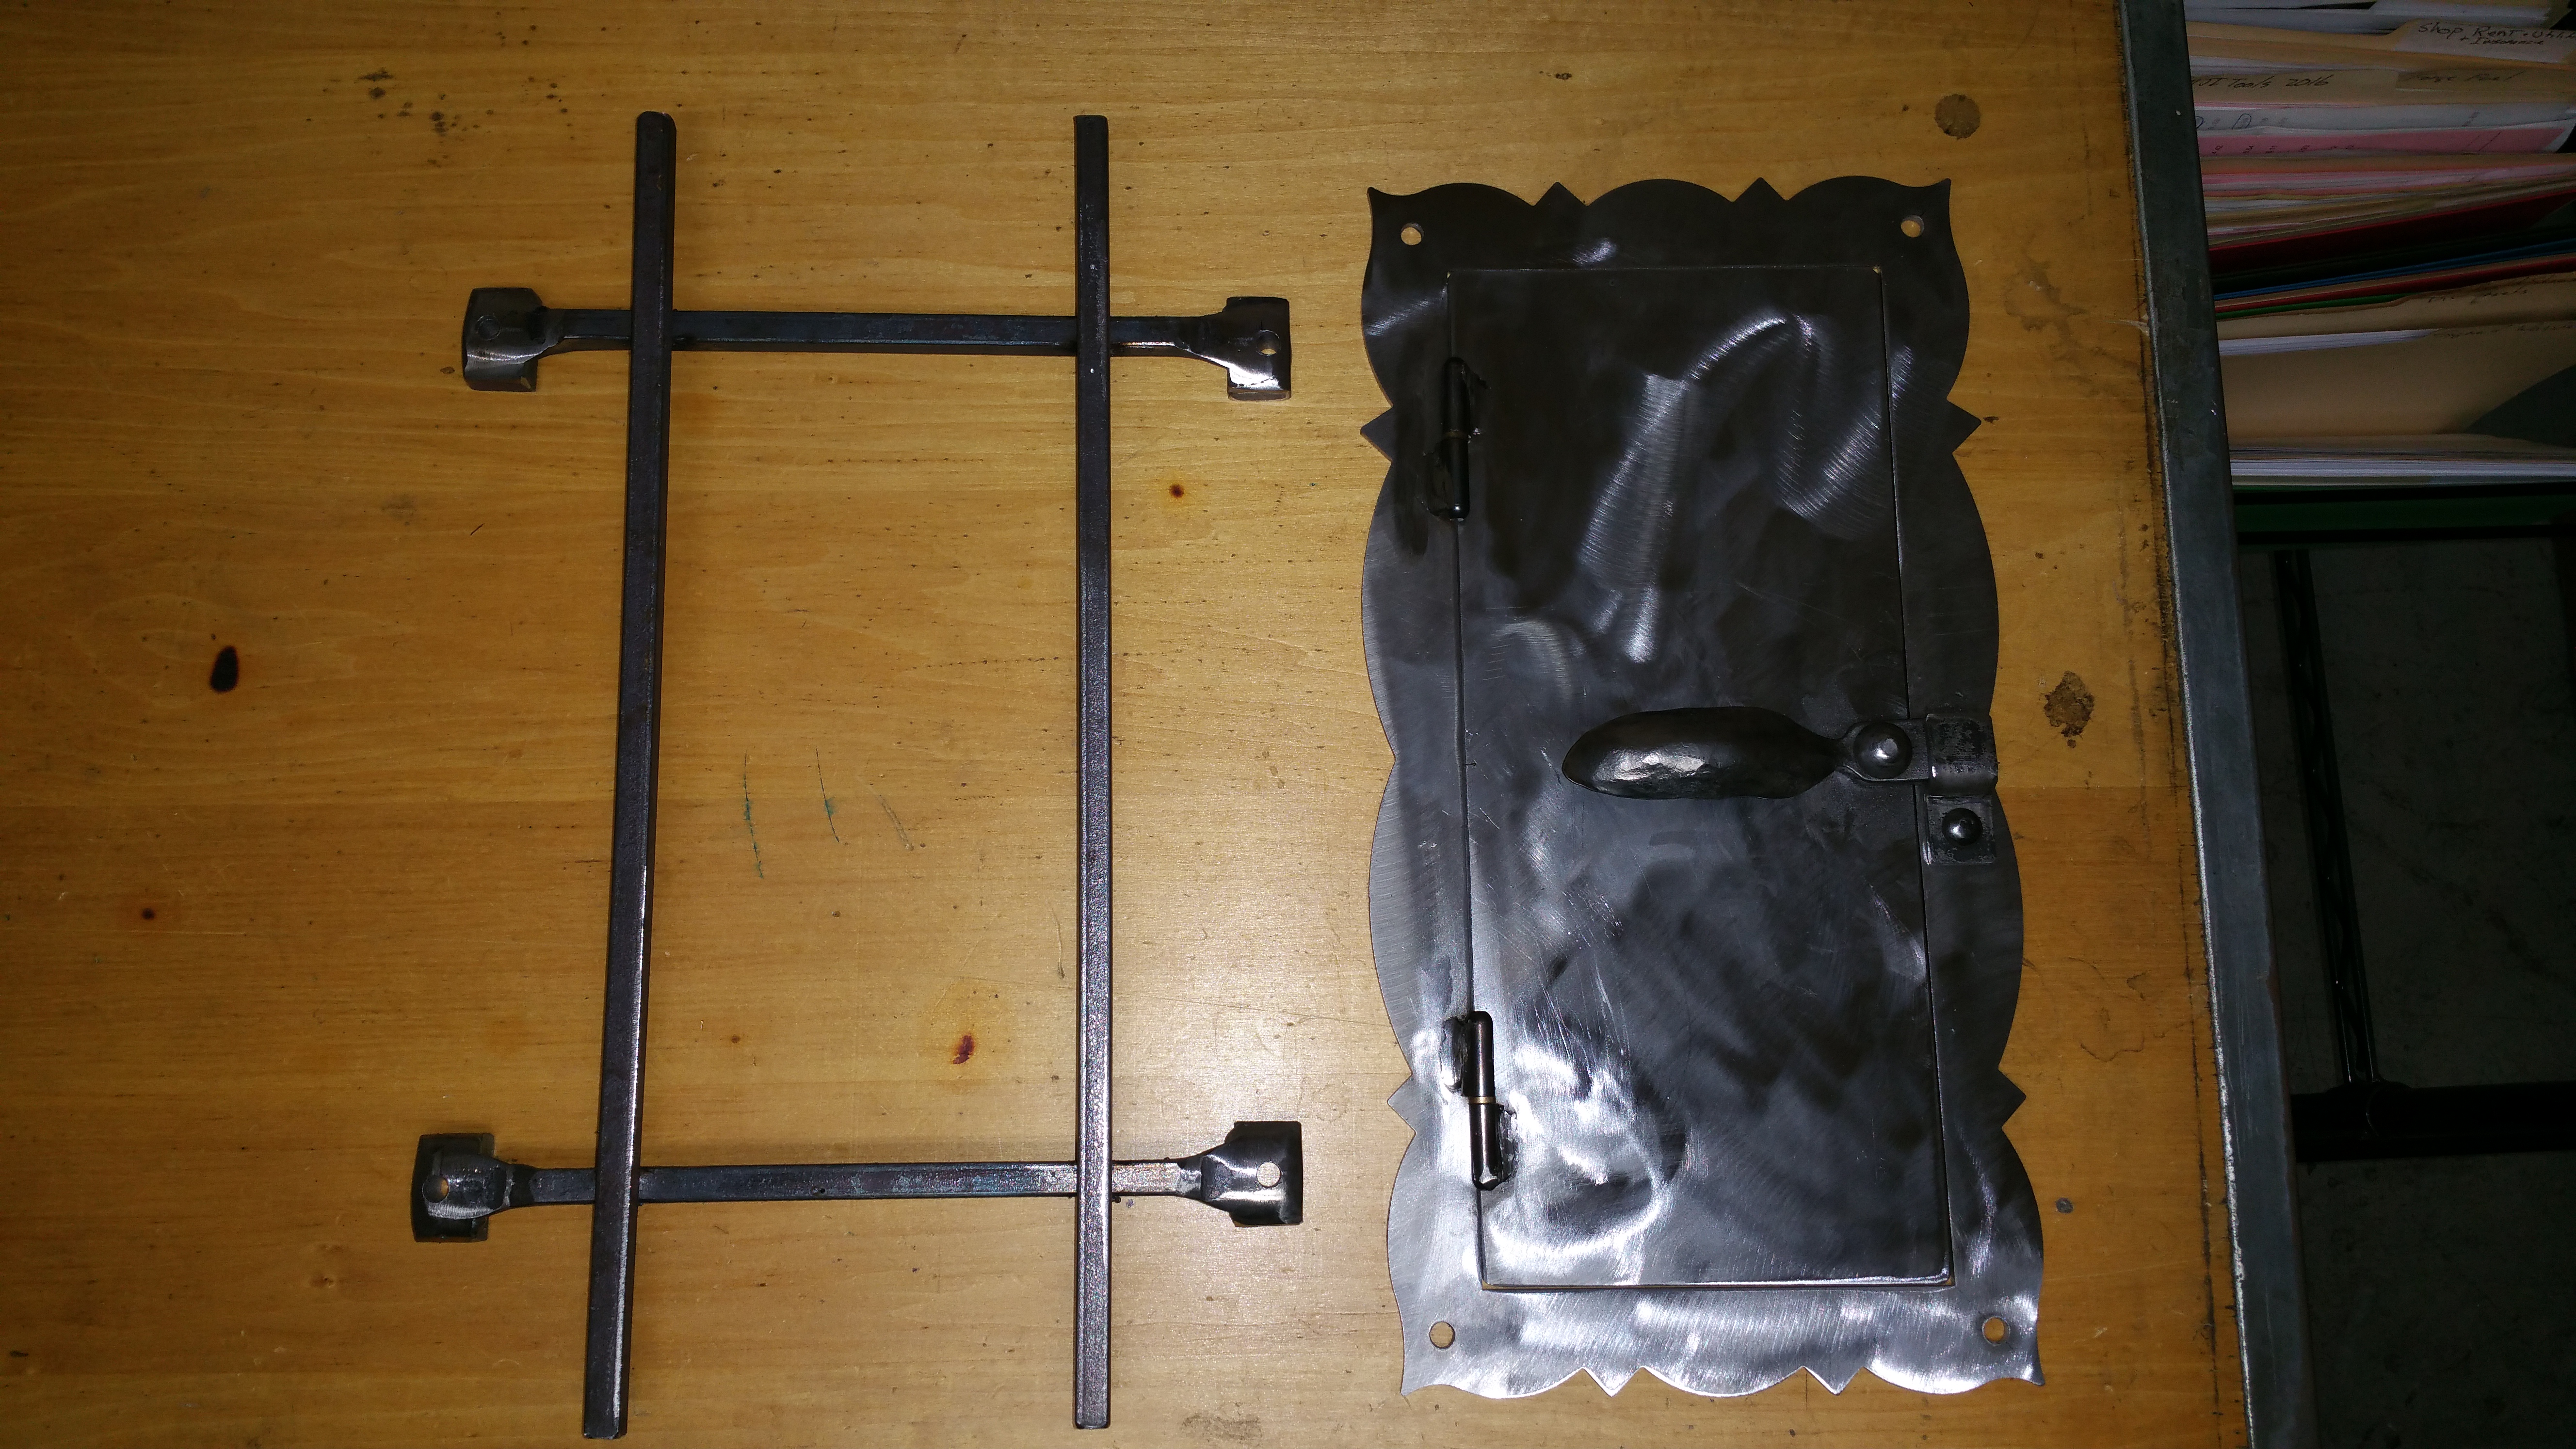
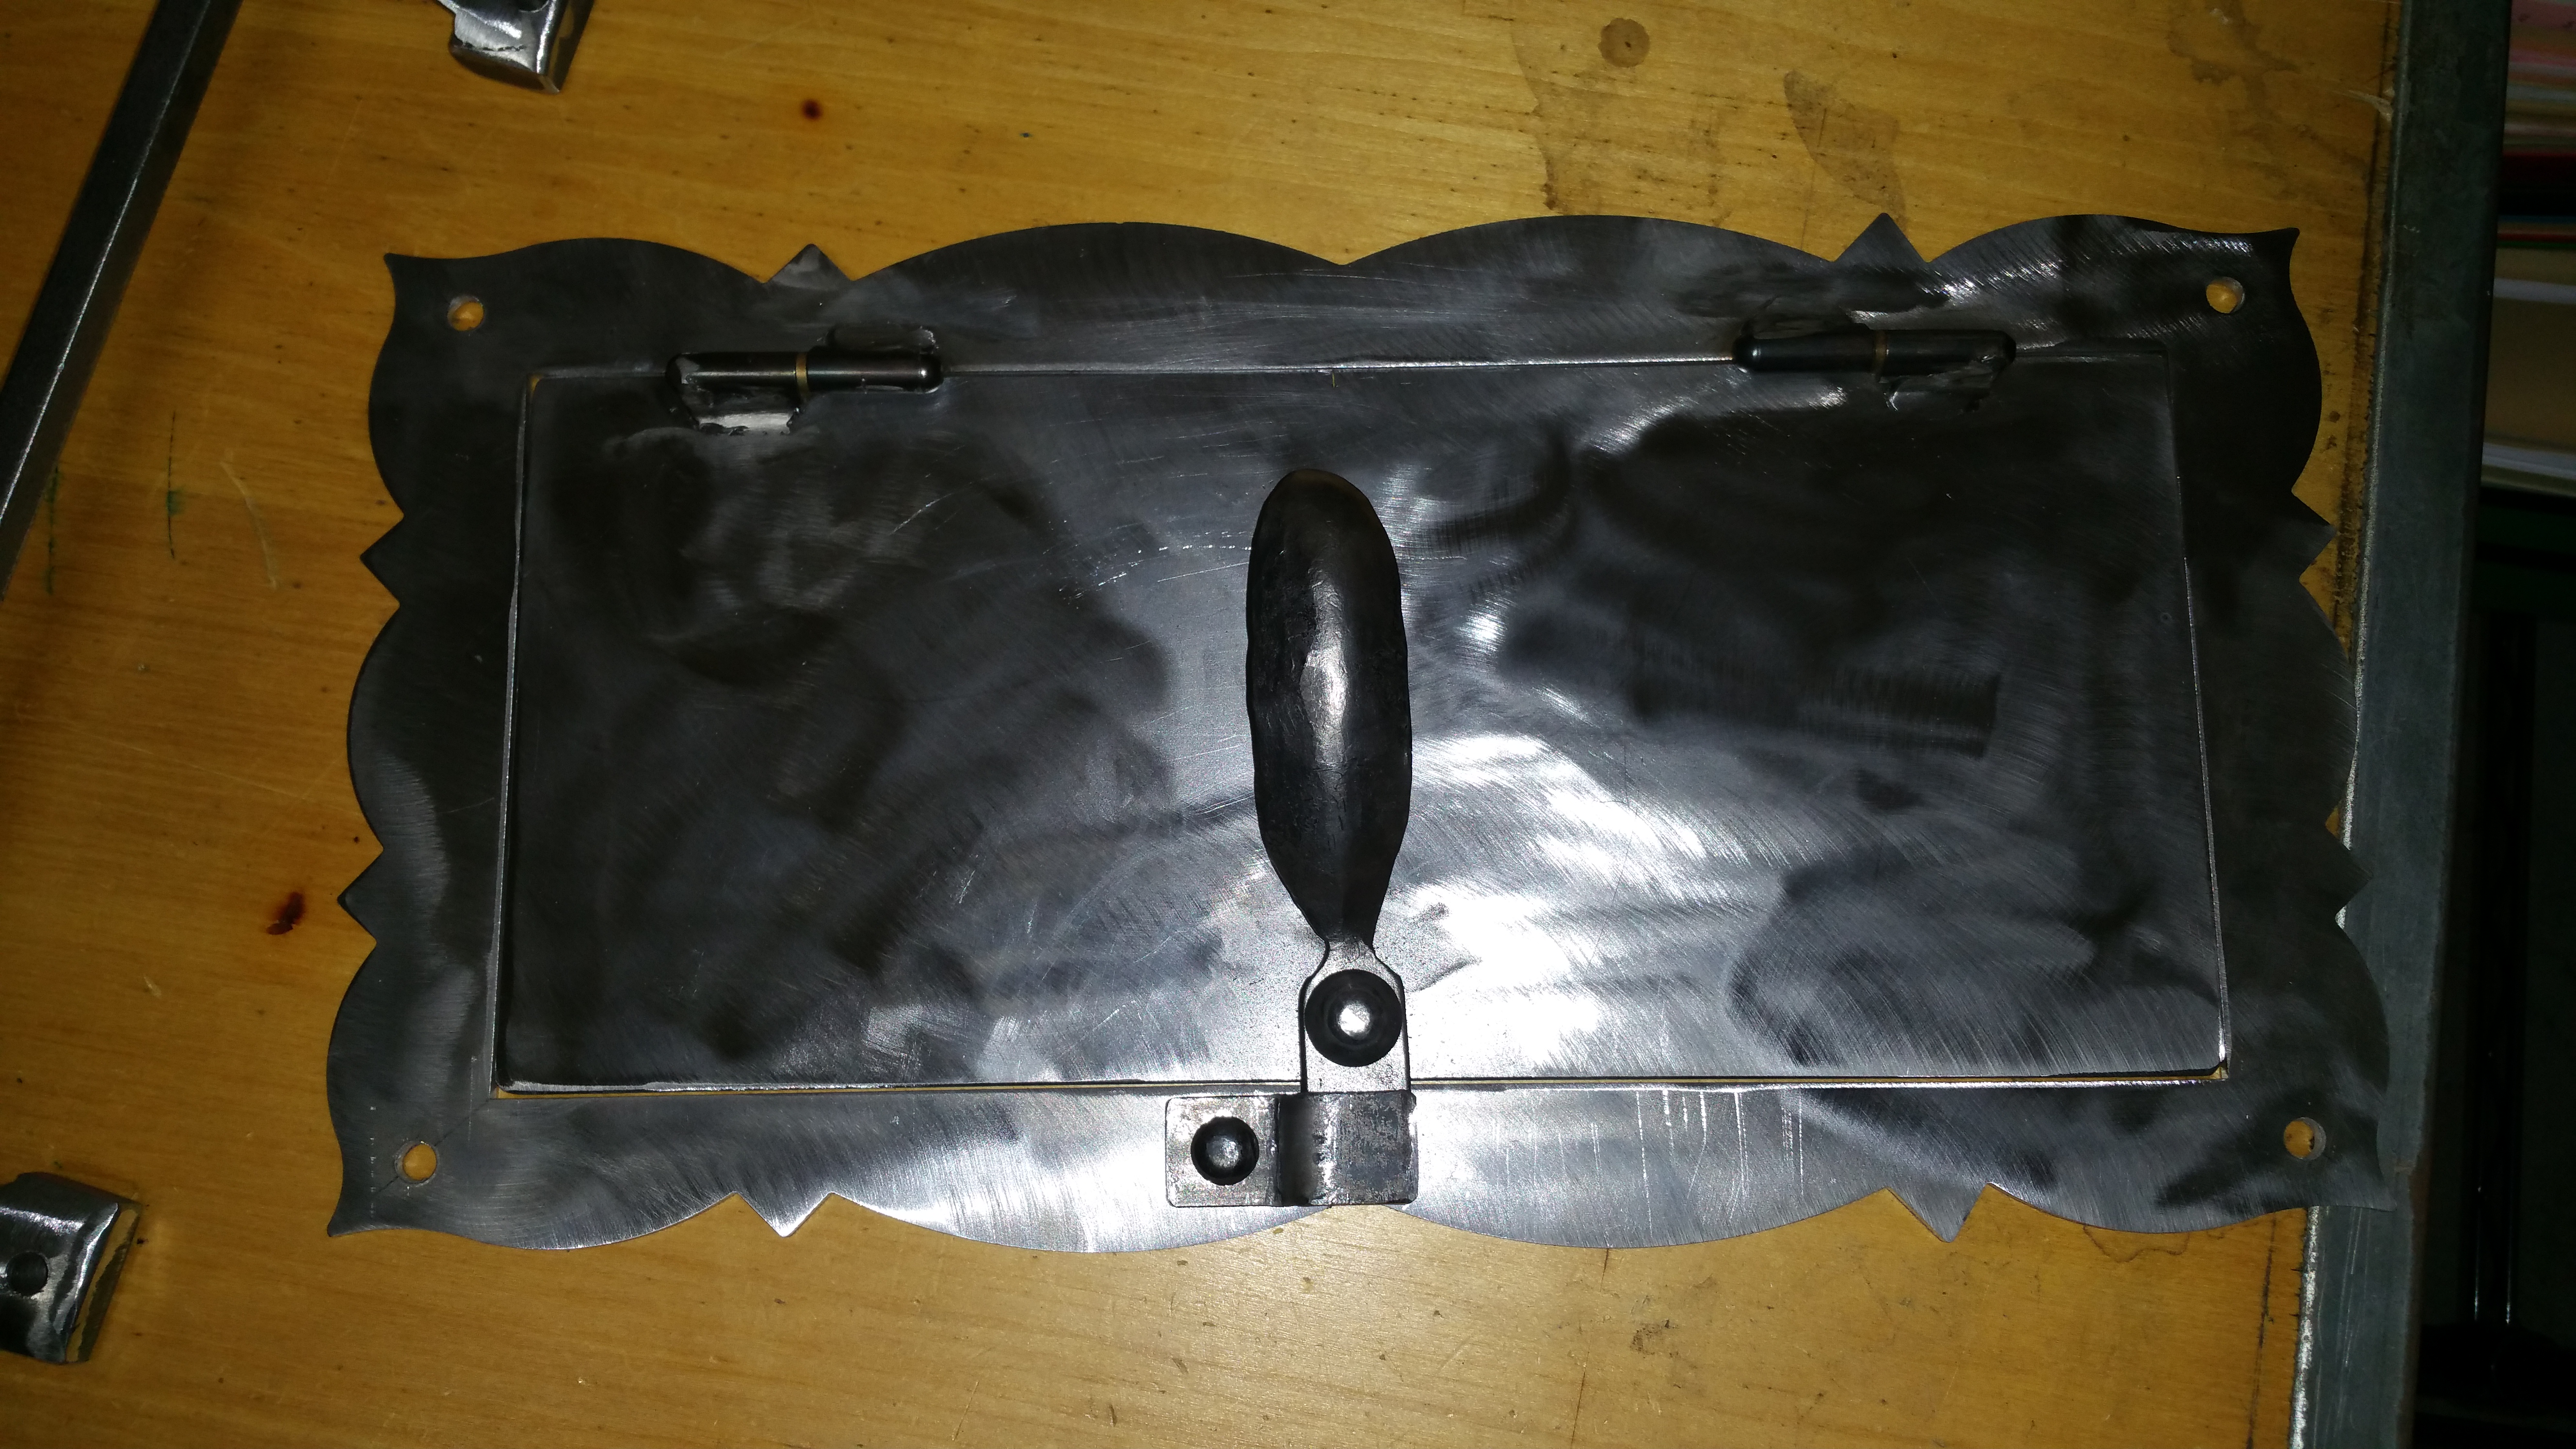
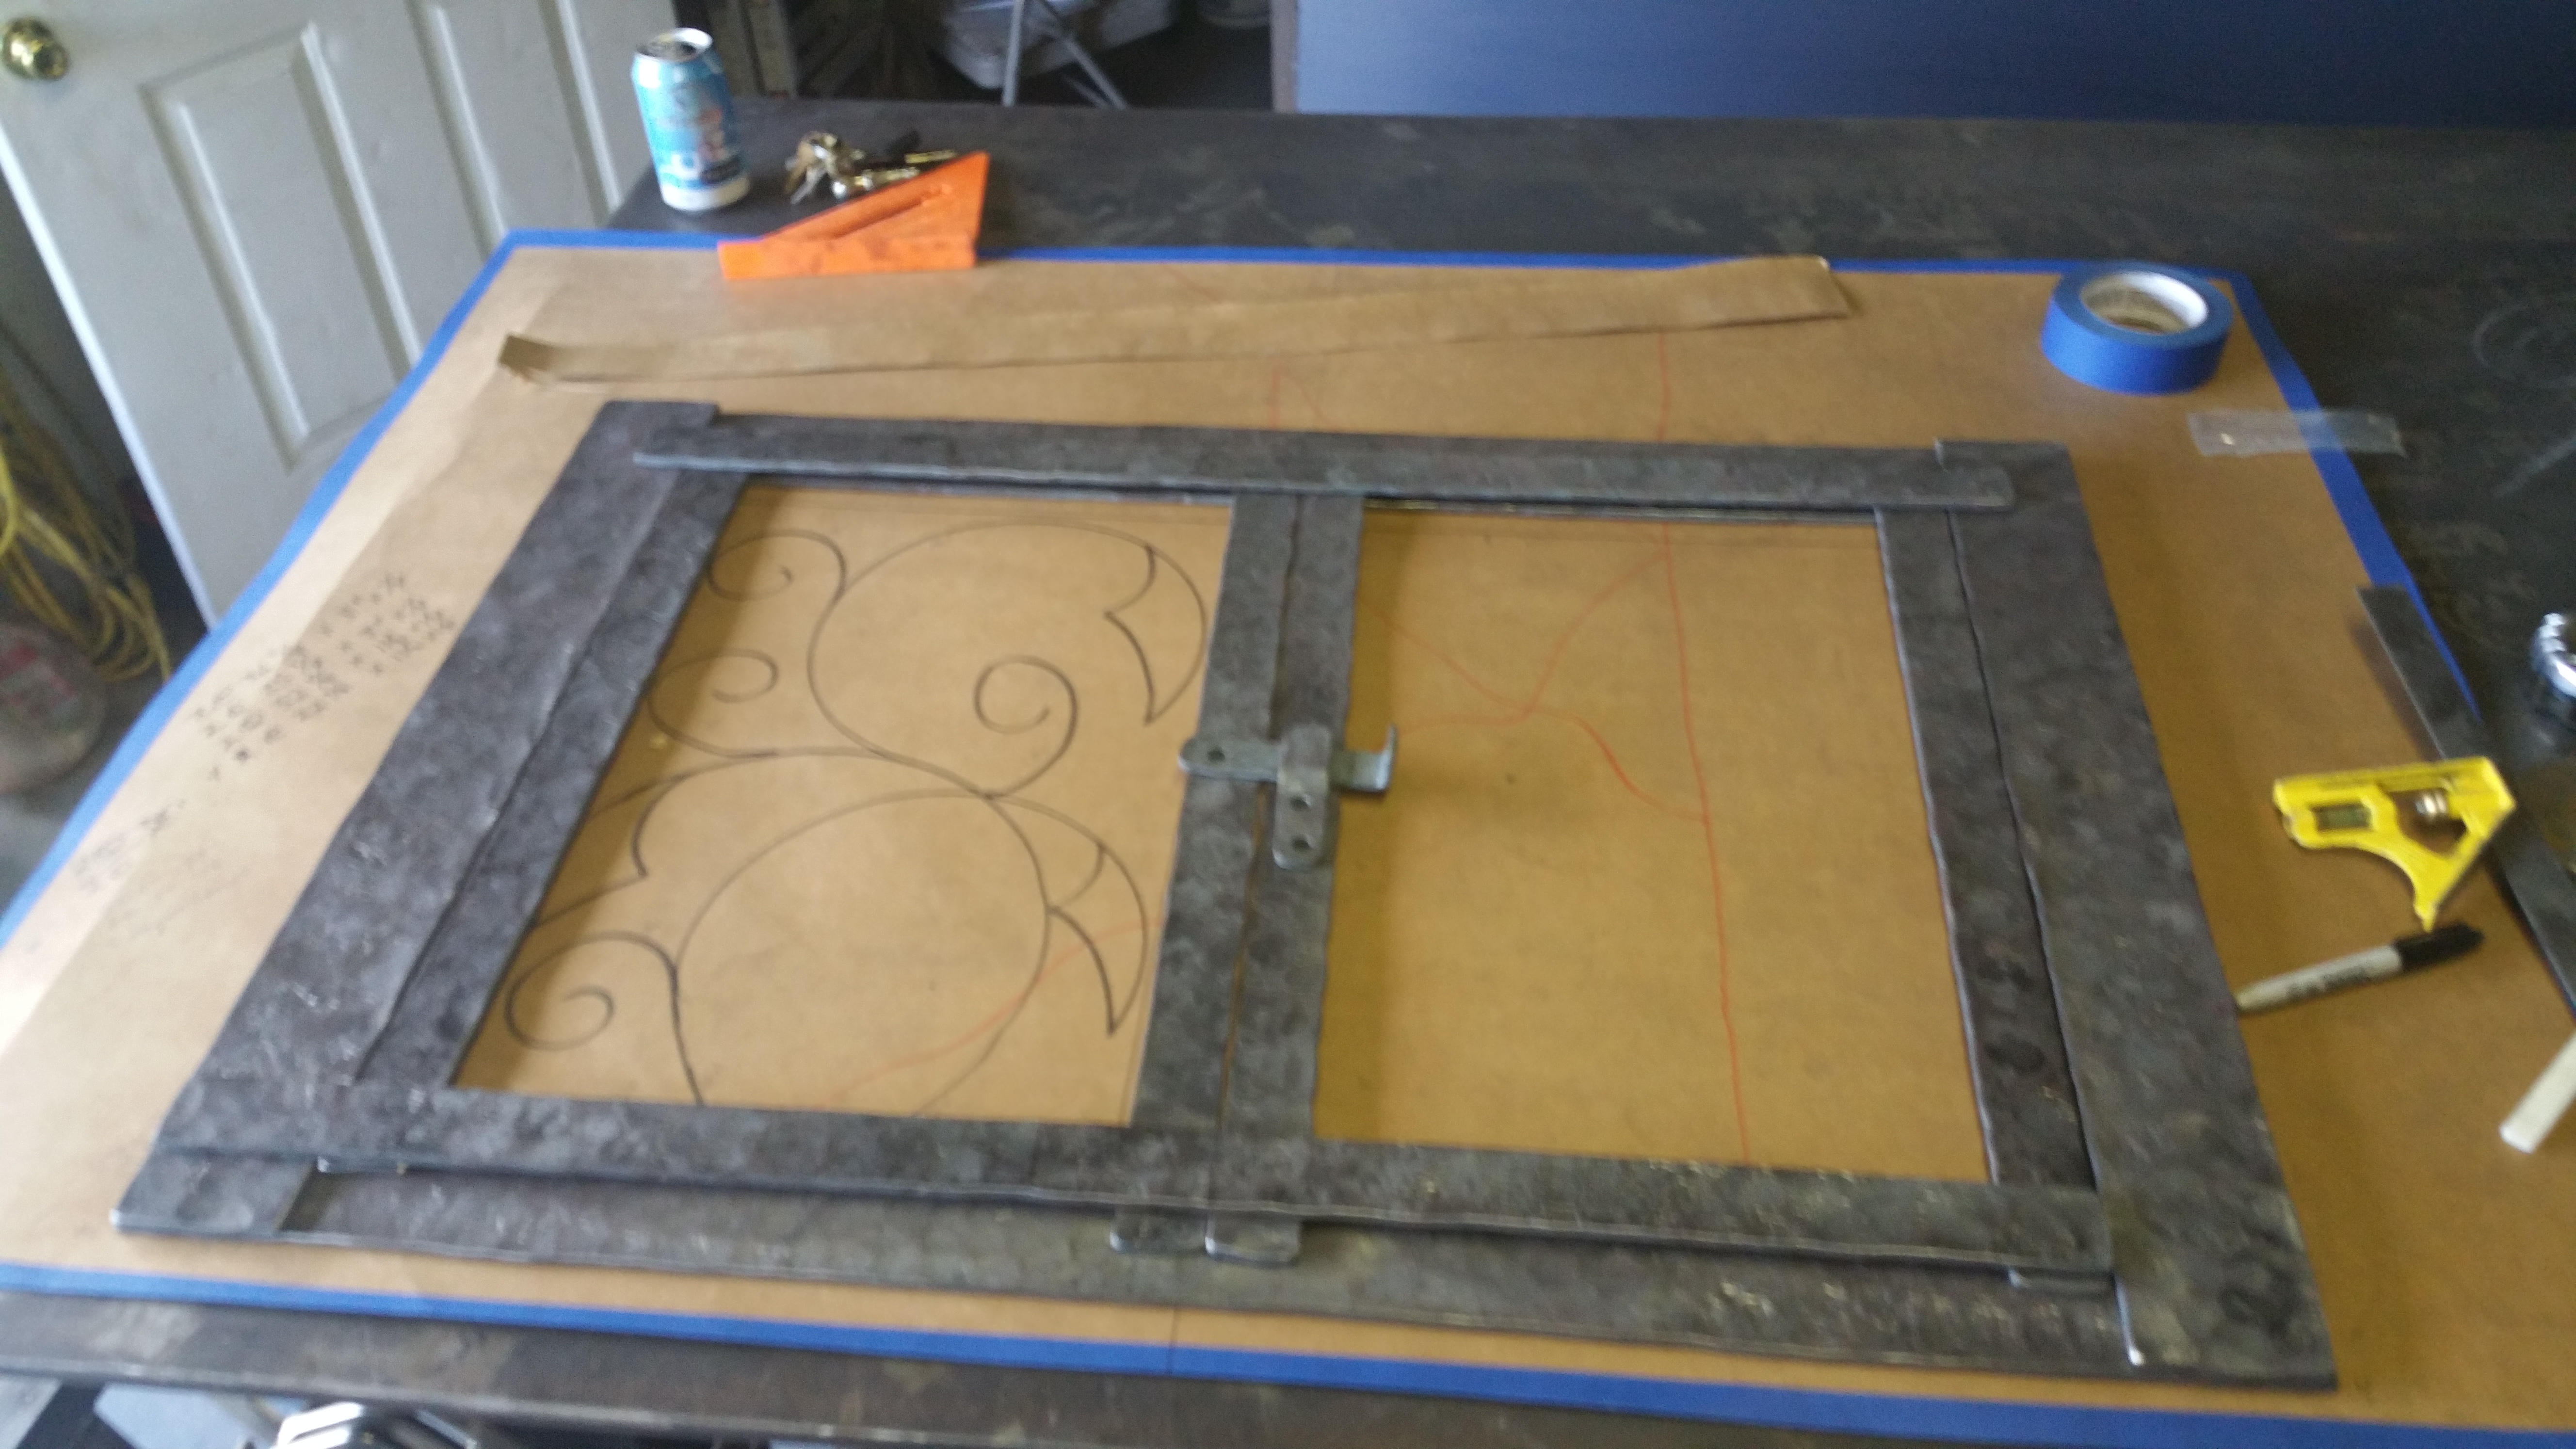
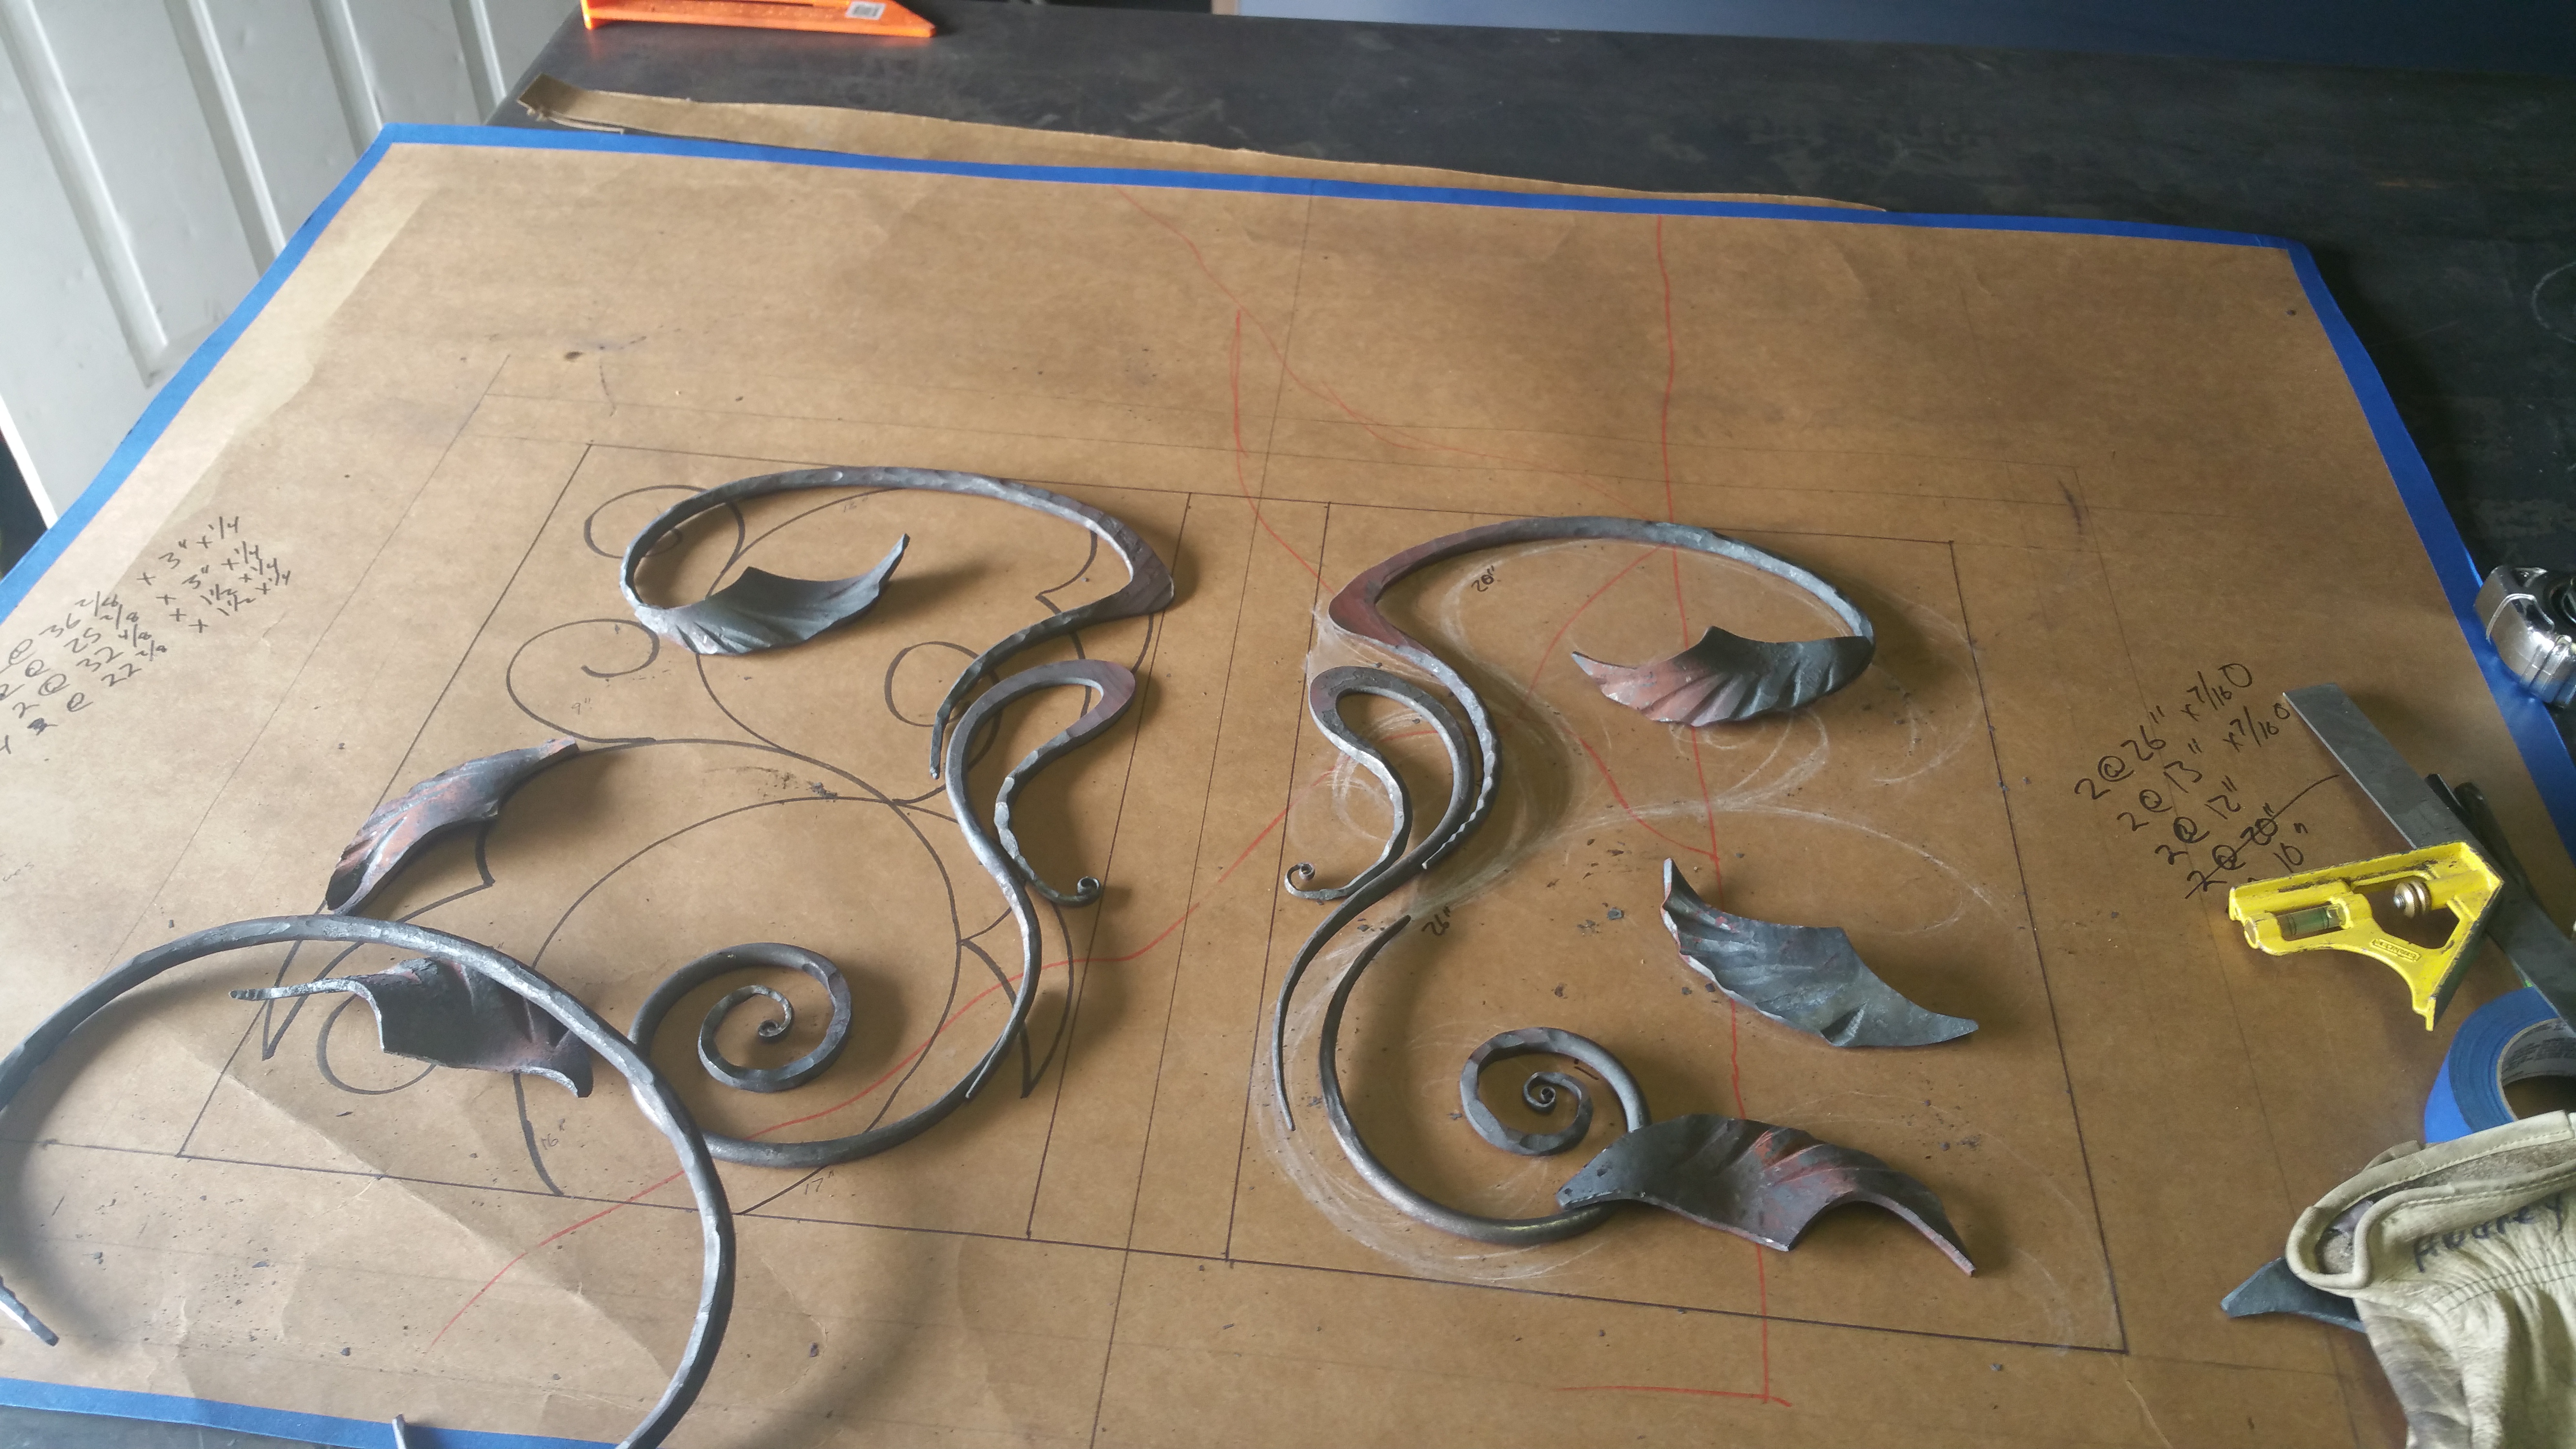
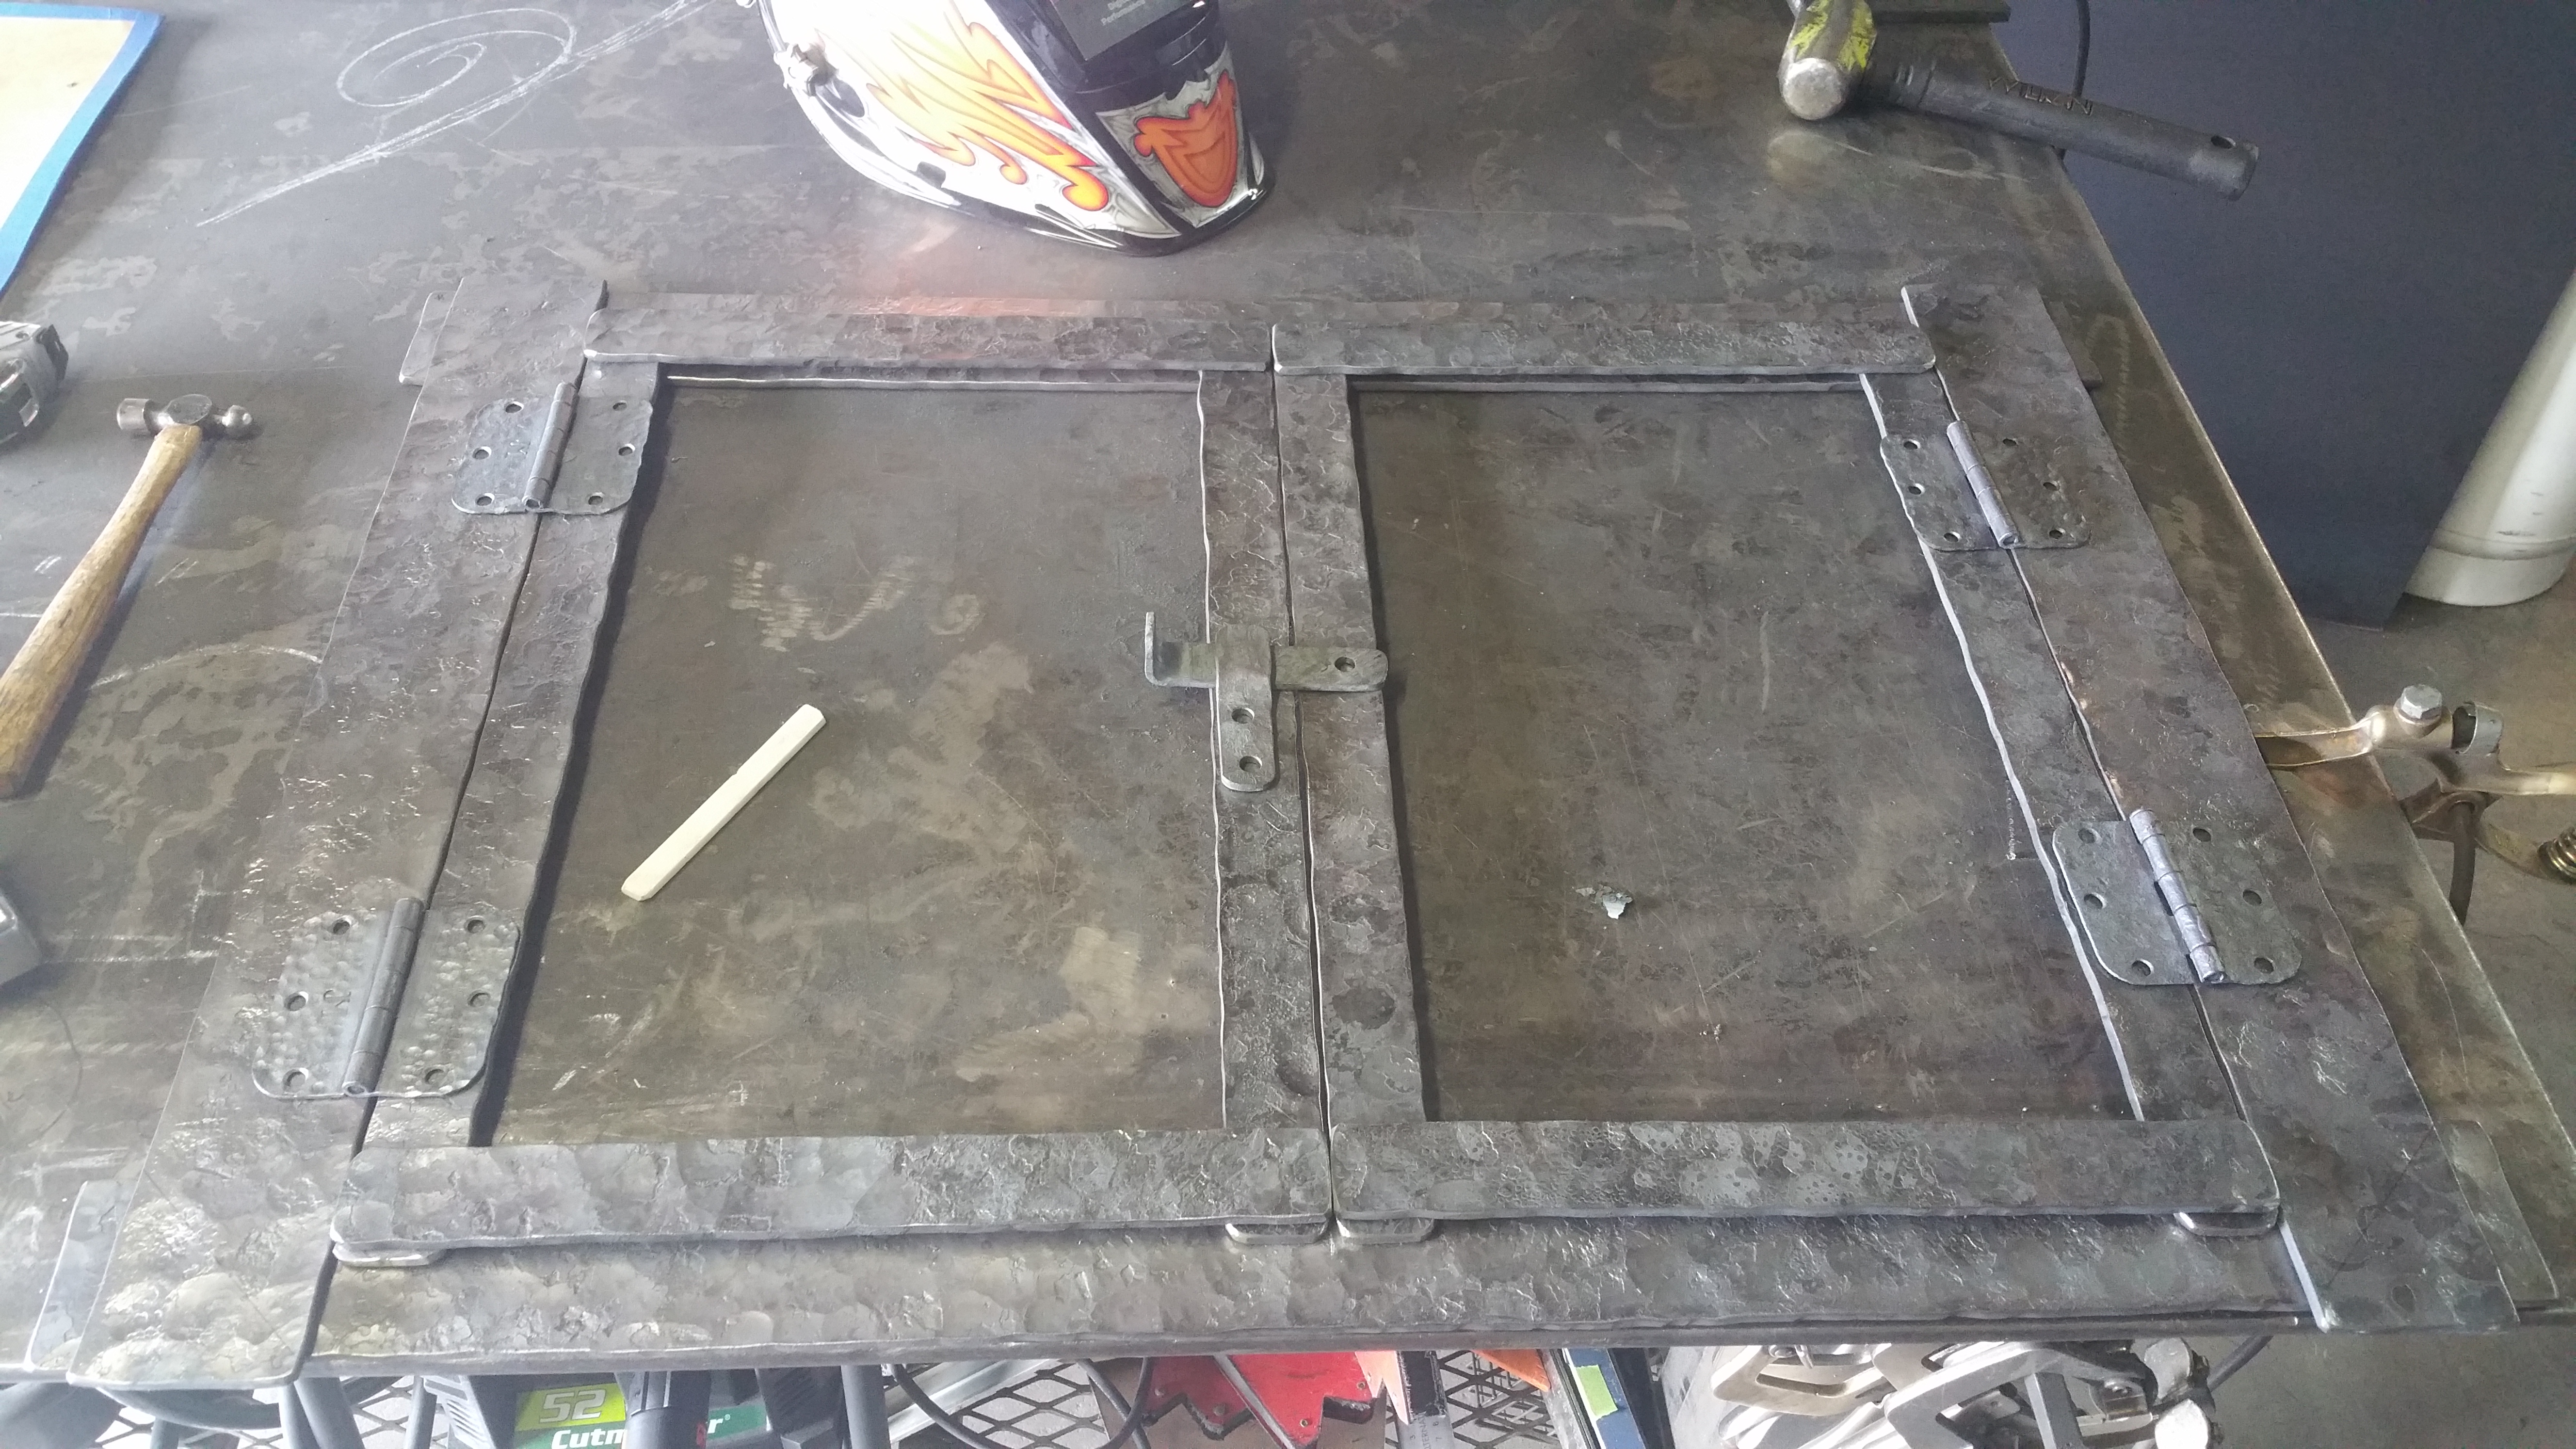
I was commissioned to reproduce a latch set for a customer in Arizona, and a Speakeasy door and grill for a local customer.
Small 7.5" x 14" door and grill

Plasma cut 14 ga, weld on hinges, with a squirrel tail handle latch set.

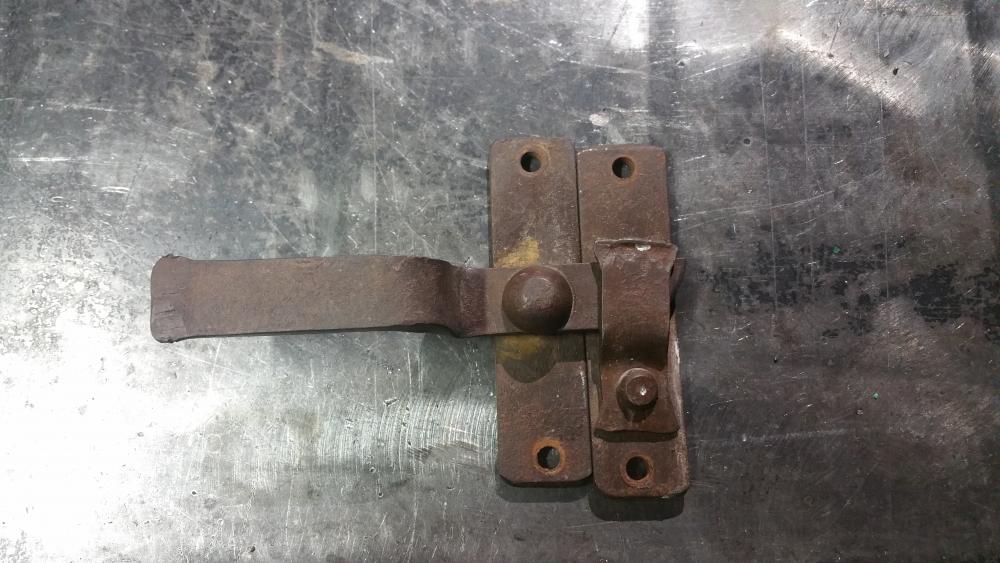
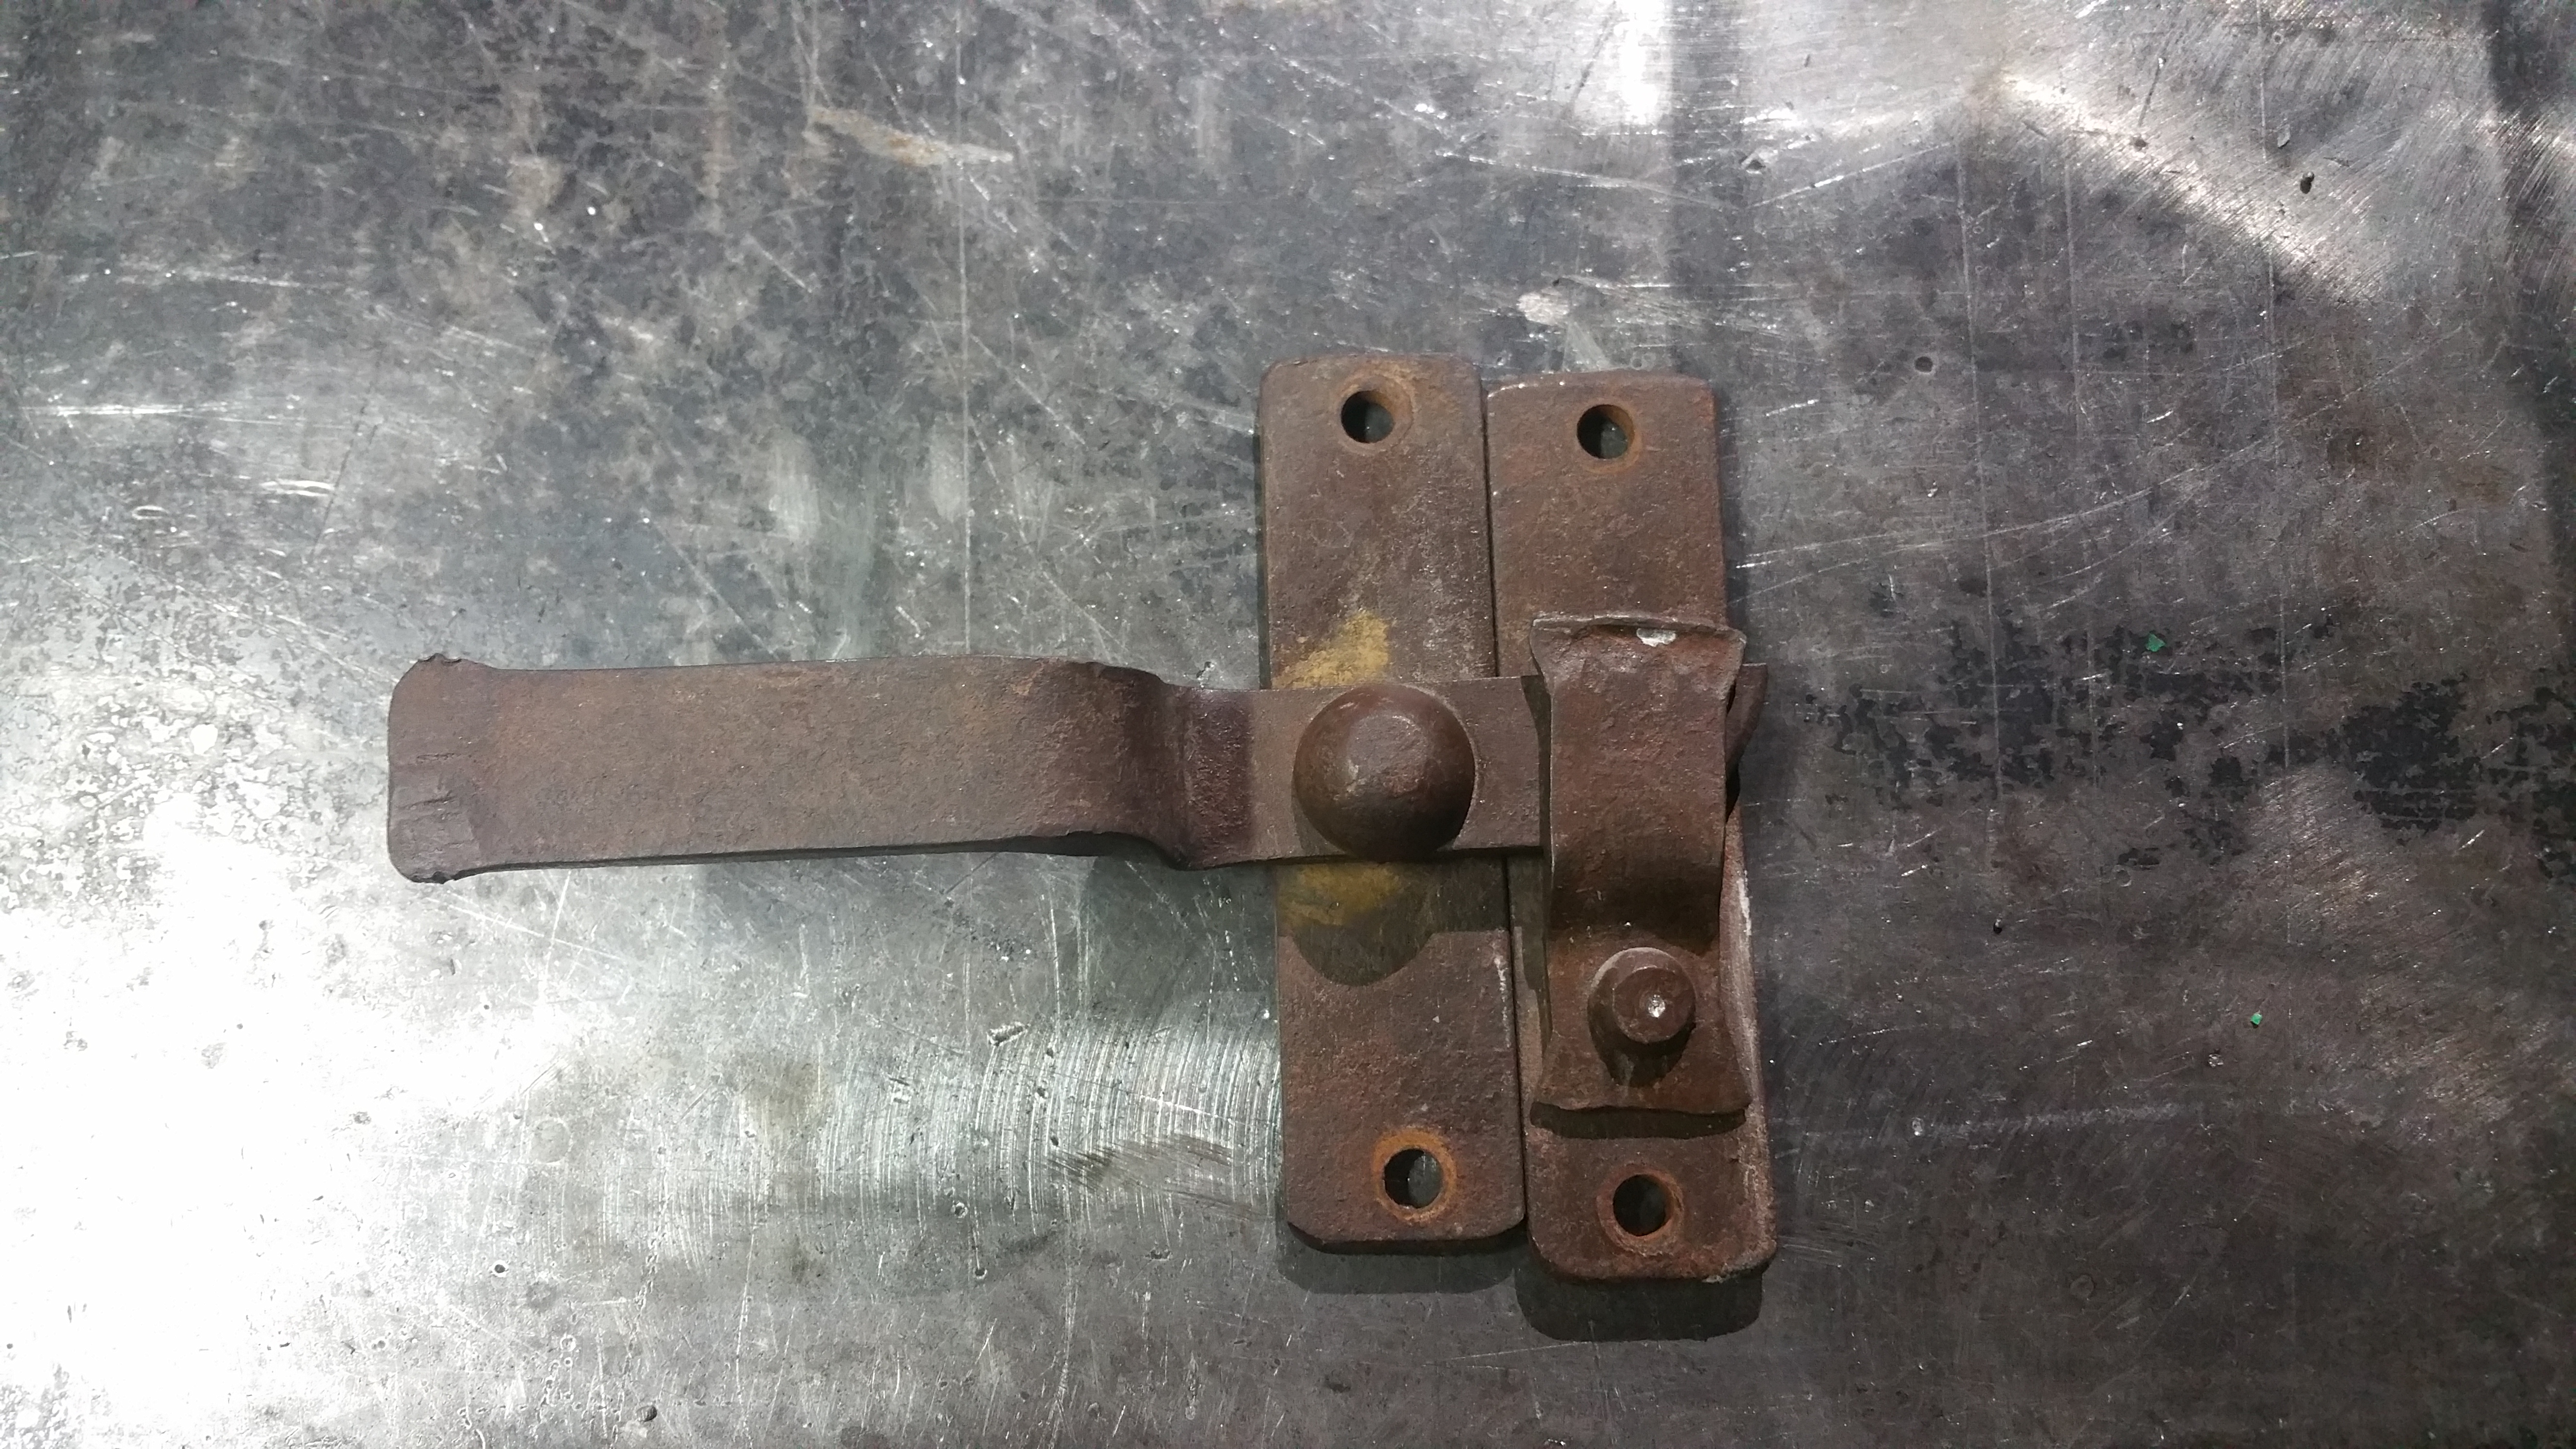
This is the original latch set I was asked to reproduce. Its a bit crude but the customer really liked it. the end of the handle and the clip are slightly forged out and then there are very thin fuller marks on the ends, so i duplicated that. I was not able to match the 3/8" rivet because the ones made now have a slightly smaller head. I did grind an angle on the latching end of the handle because the clip is angled and this allows the latch to friction fit nice and tight, so the doors do not rattle. I had 2 hours tooling up a couple jigs, and about 5 hours cutting, forging, drilling holes, assembling,....... I had to heat all of them up to orange heat so the unforged parts would scale up and be wire brushed, for a more consistent look that the customer asked for, the orange heat removes all the mill scale and so the rusted patina will take more evenly over the piece. I used scale dust on the piece to work the handle loose from the mounting plate its riveted to. Scale dust is very abrasive and effective at getting the handles loosened up so the function nicely.
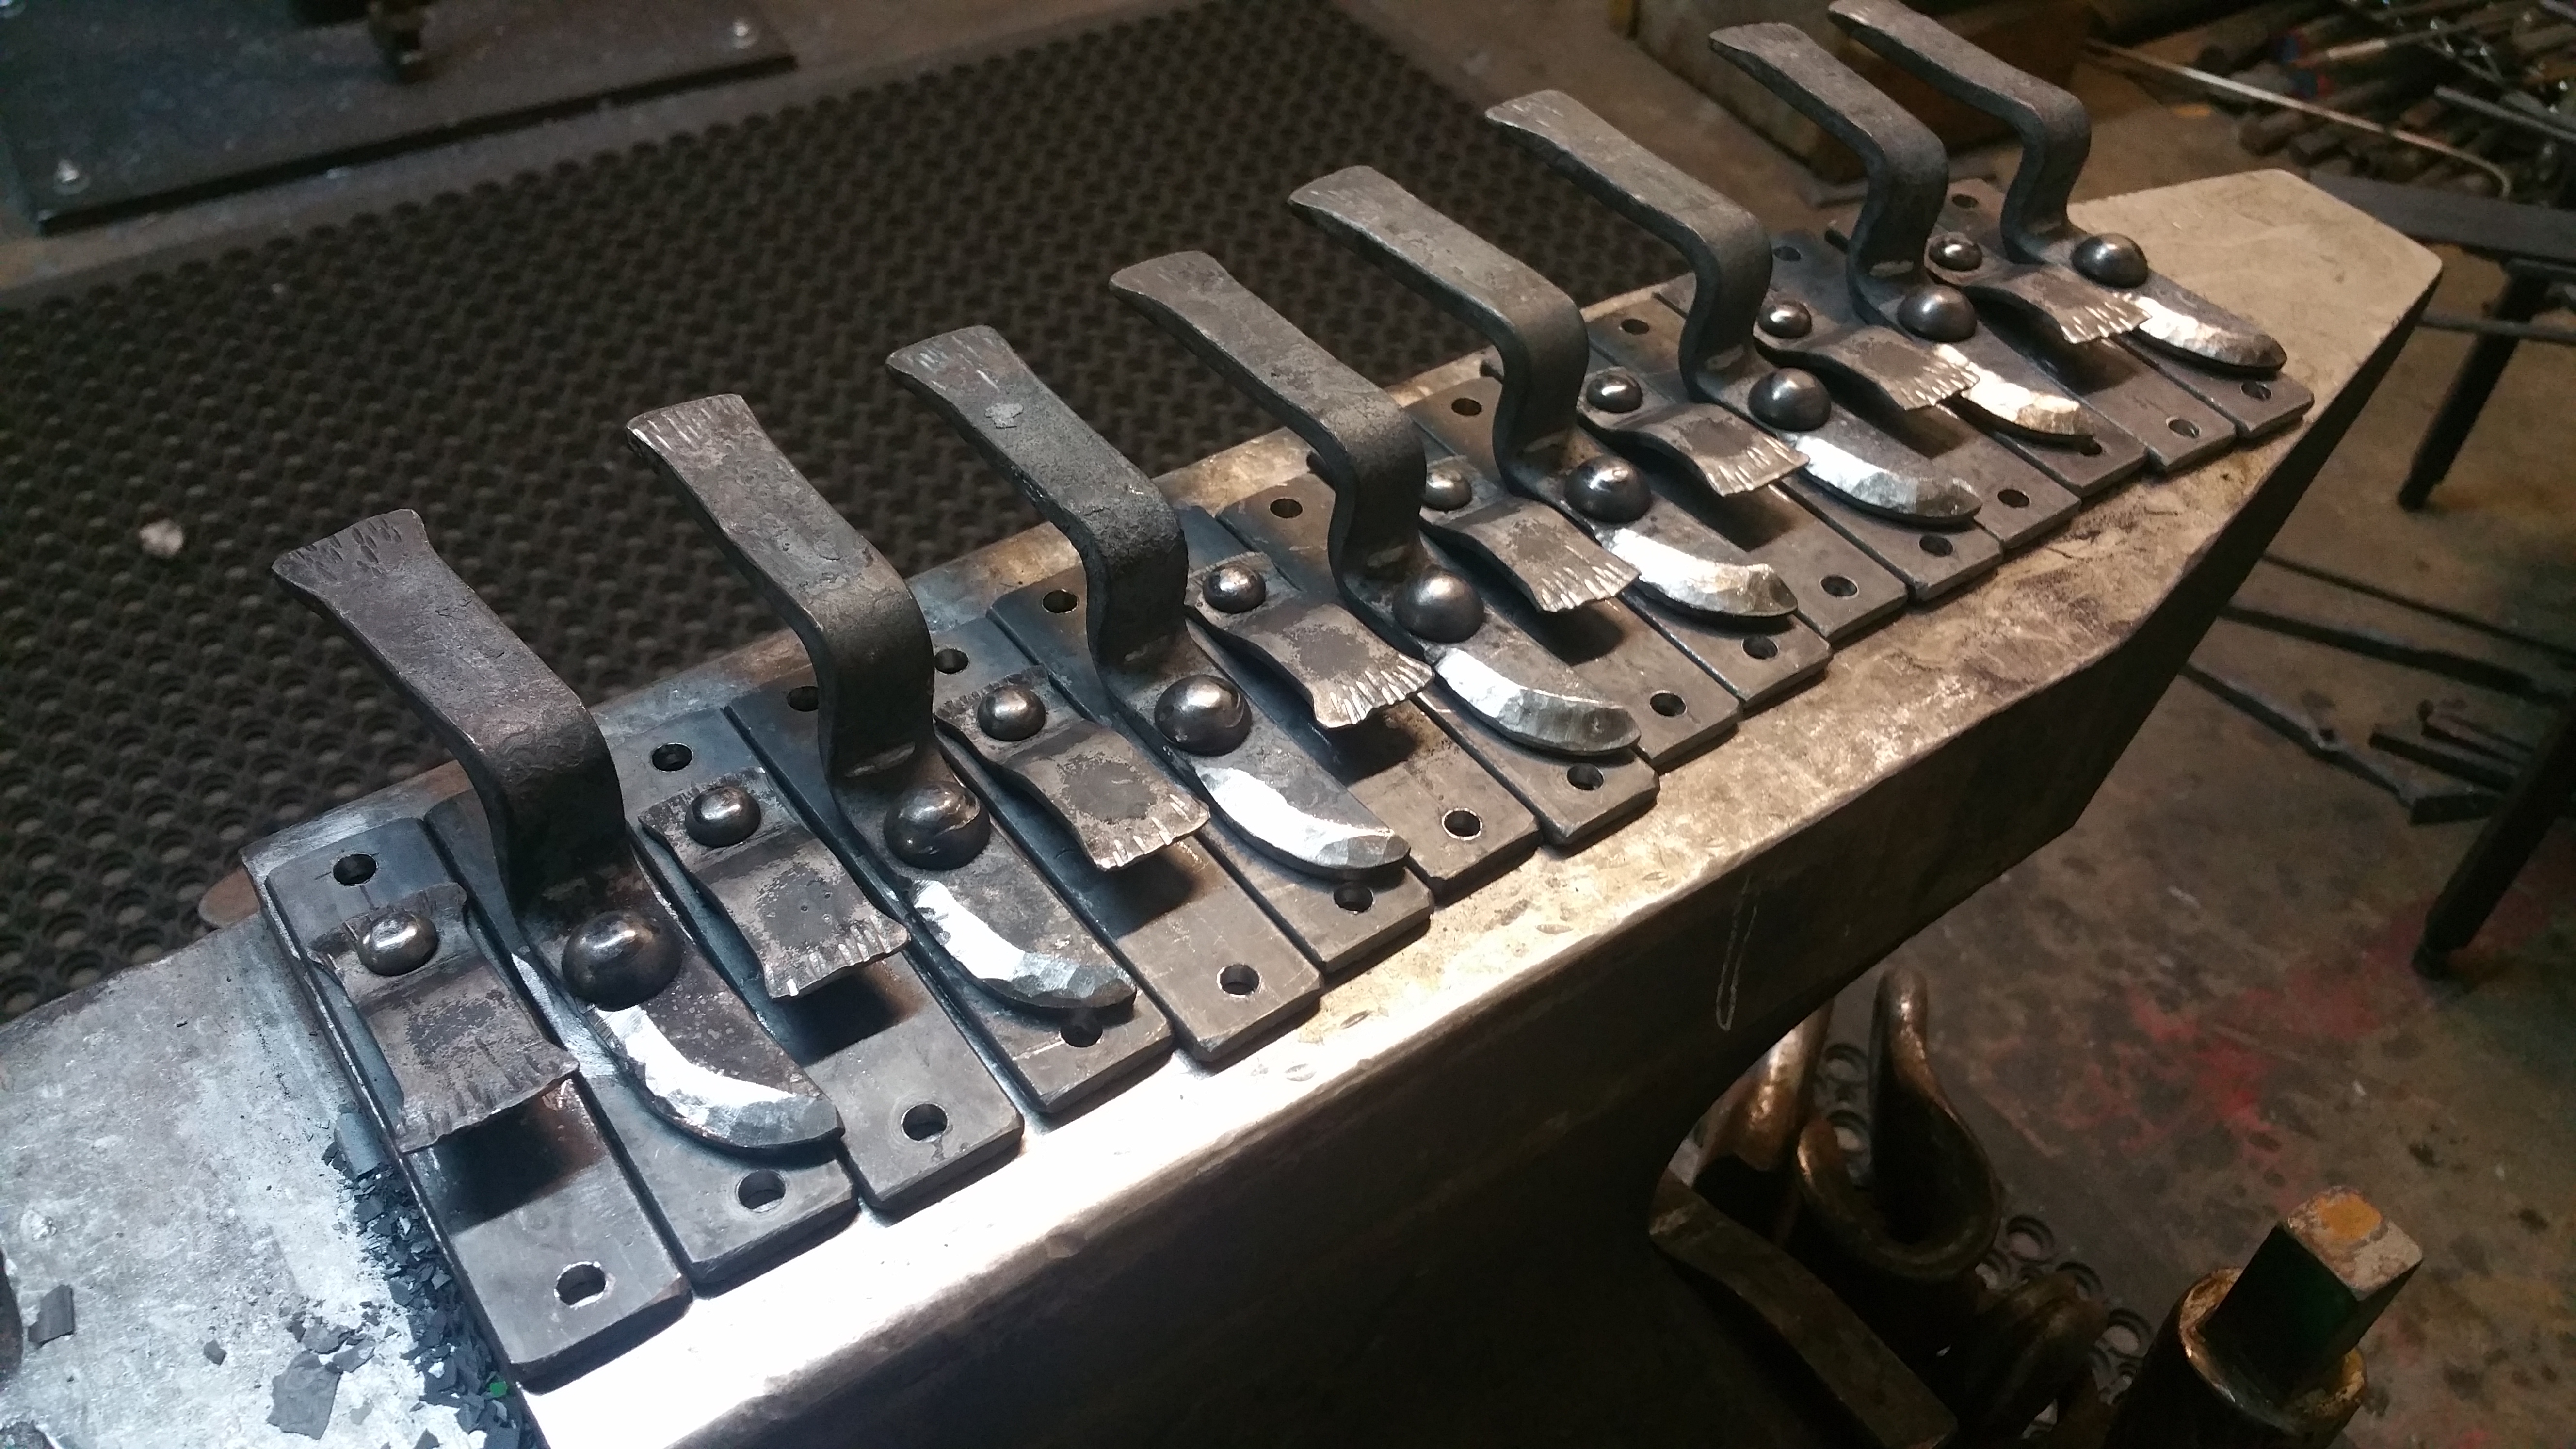
8 sets forged and riveted together.

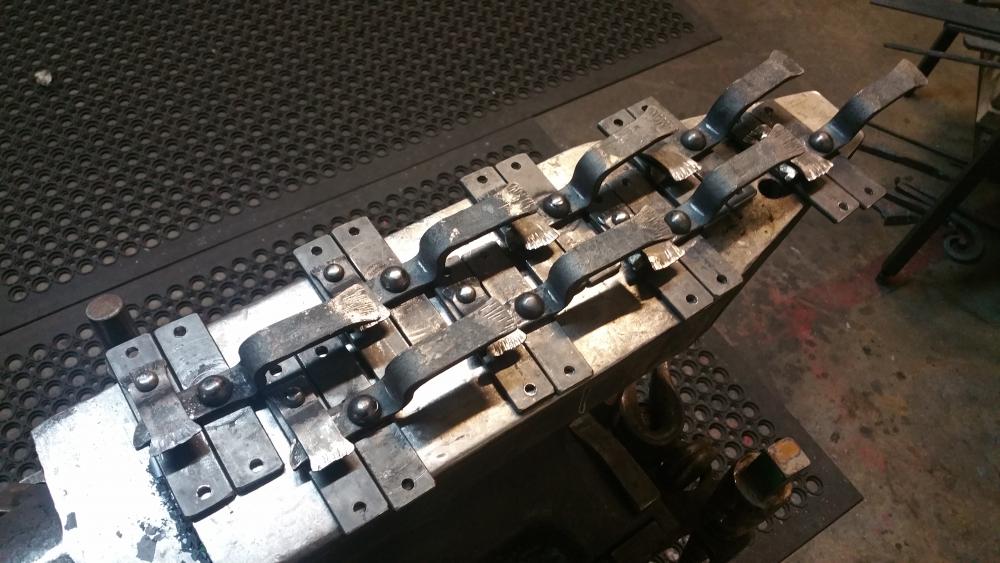
Tomorrow I will pull them out of the muriatic acid Spray with hydrogen peroxide to rust them, then apply wax to darken the rust up to match the original.
-
22 hours ago, Michael Cochran said:
I didn't get the 'dragoon' either but I figured it was because the leaves look similar to dragon wings.
On 11/14/2016 at 5:18 PM, Frosty said:You know the more of your work you show us the better I like the way you visualize things David. I don't get the Dragoon part of the name but there's a lot I don't get about art names. The design, work and quality I get though.
I have to agree with Thomas It'd have to have a spark arrester screen or my insurance company would send goons out to break our legs.
Frosty The Lucky.
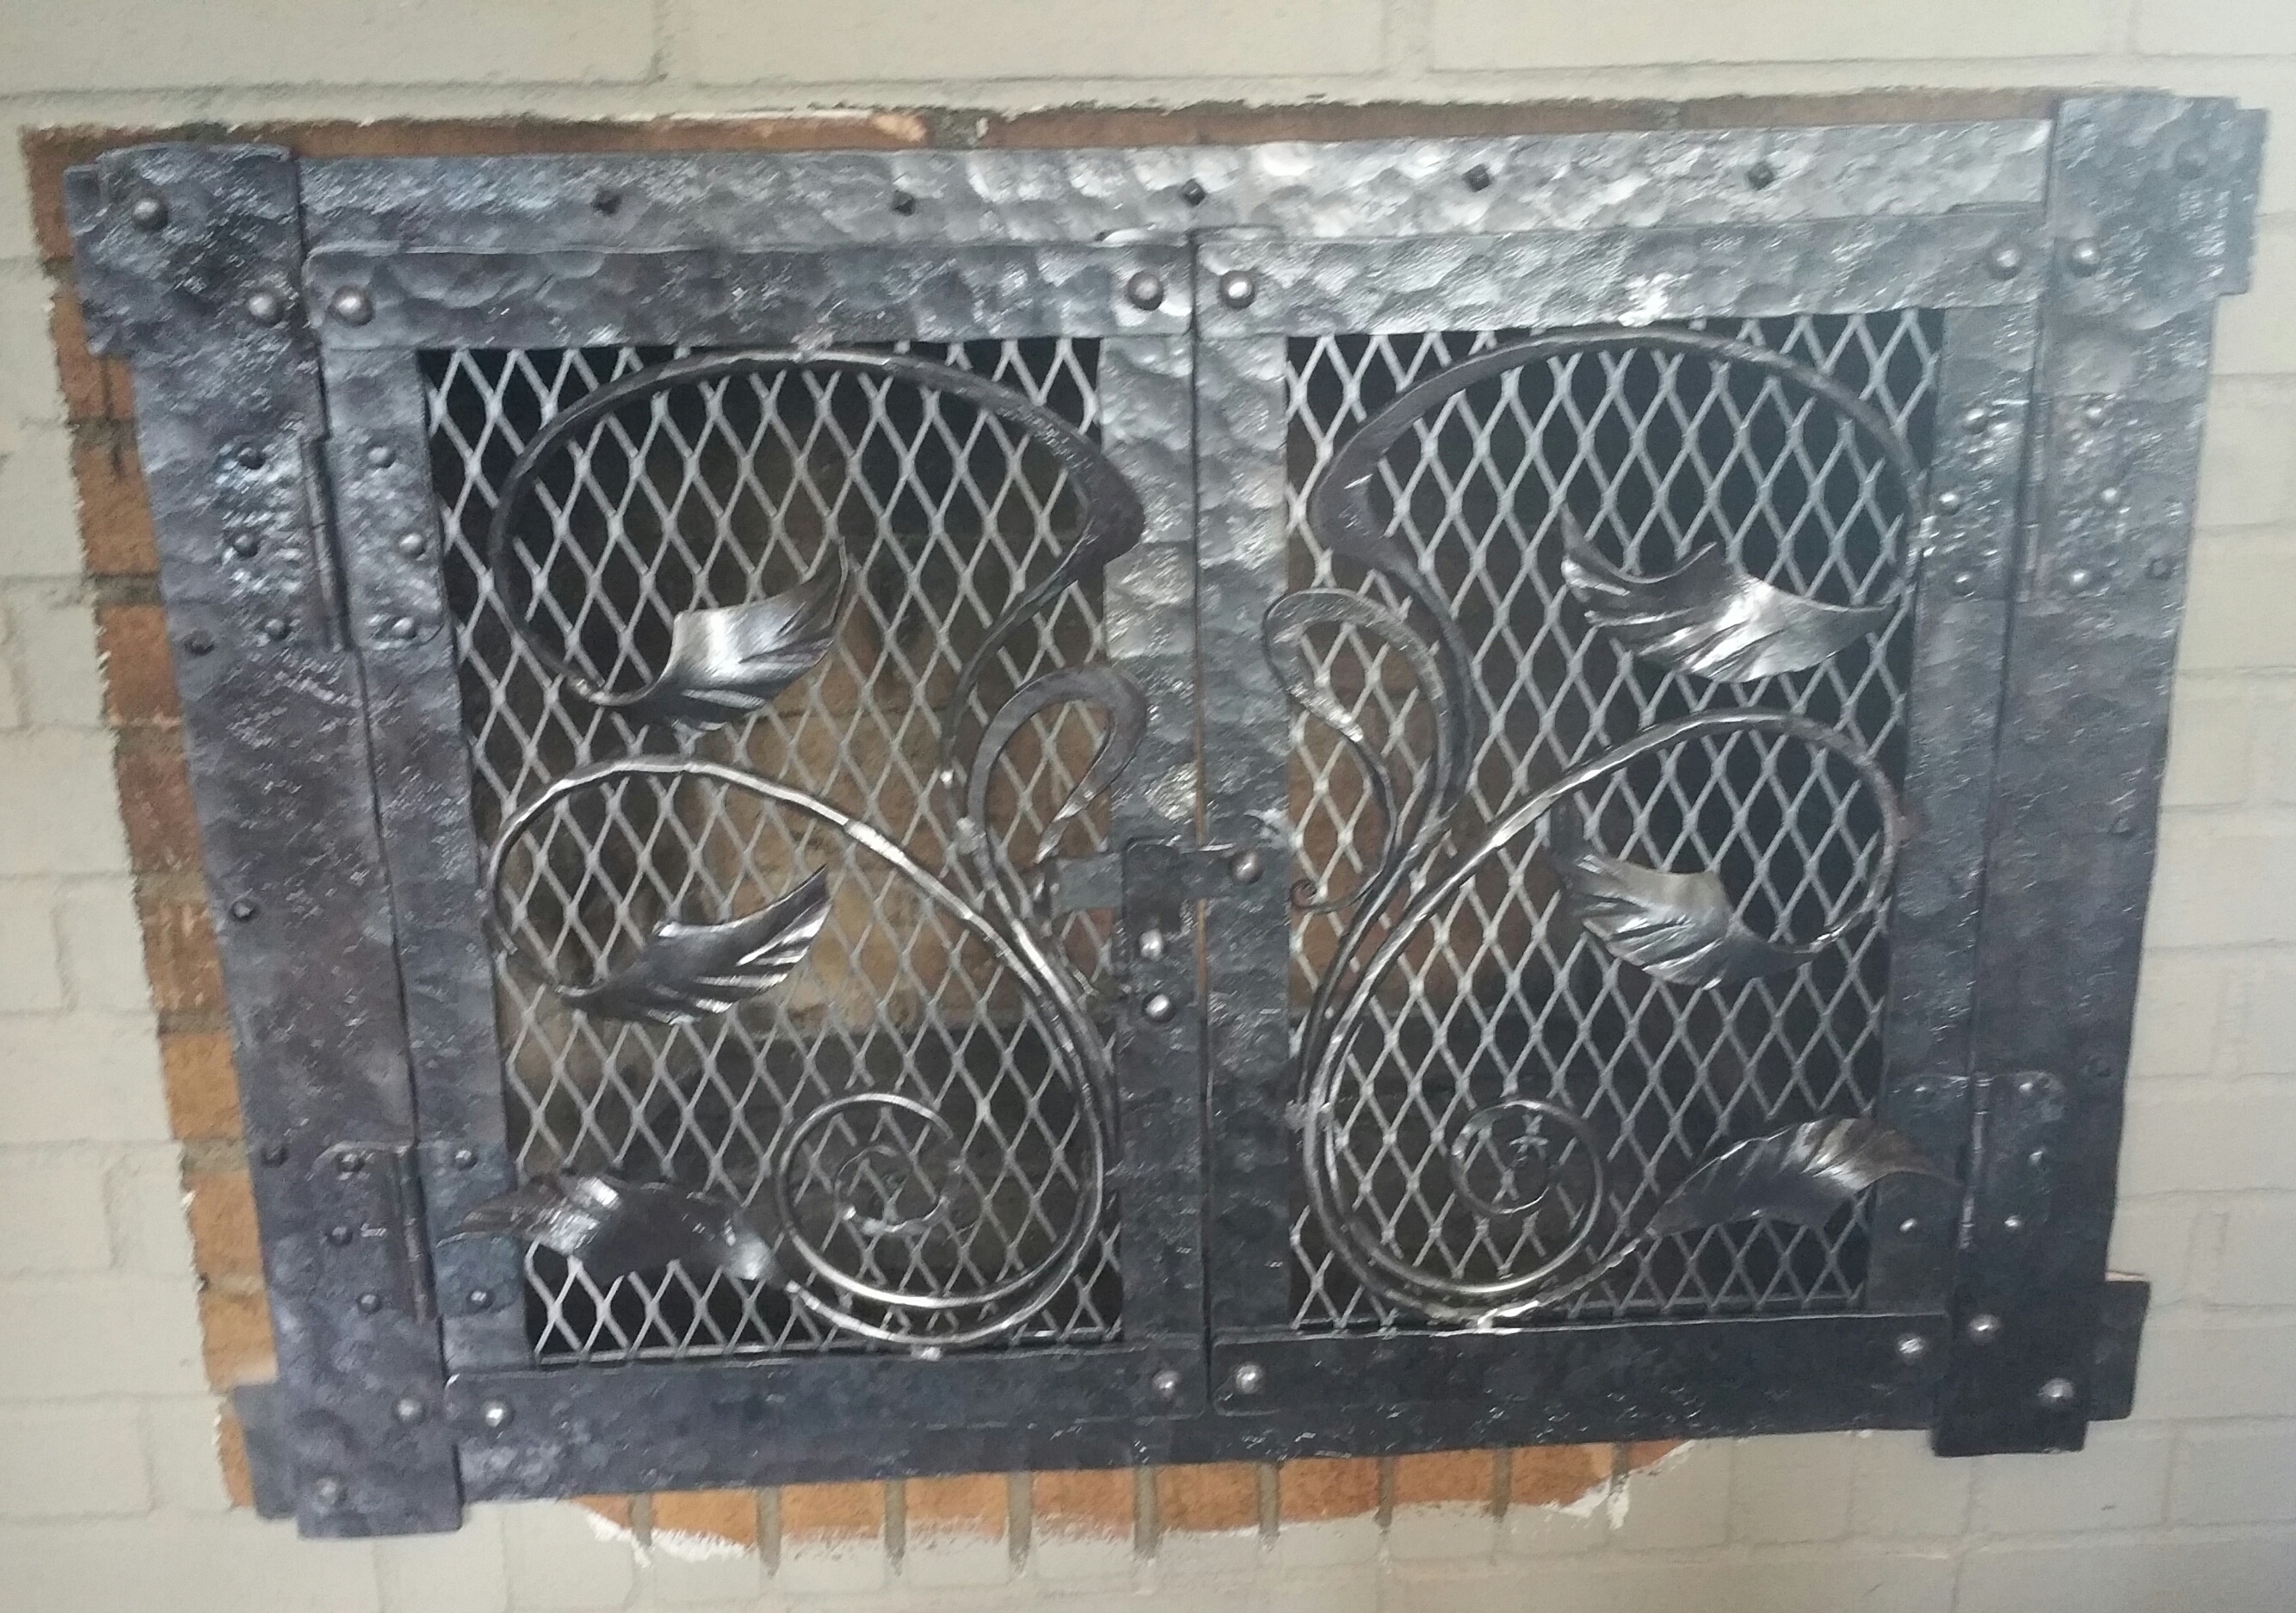
On 11/14/2016 at 3:36 PM, ThomasPowers said:Is there something smaller behind the expanded metal? We heat with wood and so our woodstove gets a lot of use and I would like a bit more of a spark screen than just the expanded metal.
I don"t like expanded metal much either..... but bare/stainless 1/4" screen is very expansive and has to be shipped in it would have cost $125 even if i ordered it online...... again it was a gift and they hardly ever burn anything in the fire place. I already had invested a lot of time and material and just could not afford the smaller screen. but it was just tacked in so it could be replaced easy. The dragoon leaf is taken from the side profile of the head gear dragoons wore as part of their uniform..........I like the shape but had to call it something and "side profile dragoon head gear leafy thingy" just became very laborious and it just kept getting shortened down, down, down.........dragoon leaf......it comes in 3 diffrent textures so stay tuned.......lol.
-
3 hours ago, ausfire said:
Some great ideas for the rail spikes there. I like the set riveted together. A lot of drawing out there ... can't imagine you taking a power hammer to your shows. Do you make the parts at home first and assemble them at demos?
I drew them out at the demo site. I use the round corner off the side of the anvil, it has very little surface area so your able to get deep penetration with few hammer blows which really gets the iron moving i can draw a RR spike out twice its length in as little as 3-4 heats. But i absolutely use my power hammer if i am in the shop.
The deep fuller marks across the RR spike hooks I use a hardy tool. I lay the iron across the hardy and hit the back side its very accurate and pretty easy.
-
This was a gift to a friend for his 25th wedding anniversary.
Took about 26 hours to forge, assemble and install.
Its outside my normal design and look but I figured hey its a gift so they have to like it.......what better time to throw the dice and play around with something different.
I built it, so I ain't painting their brick. lol


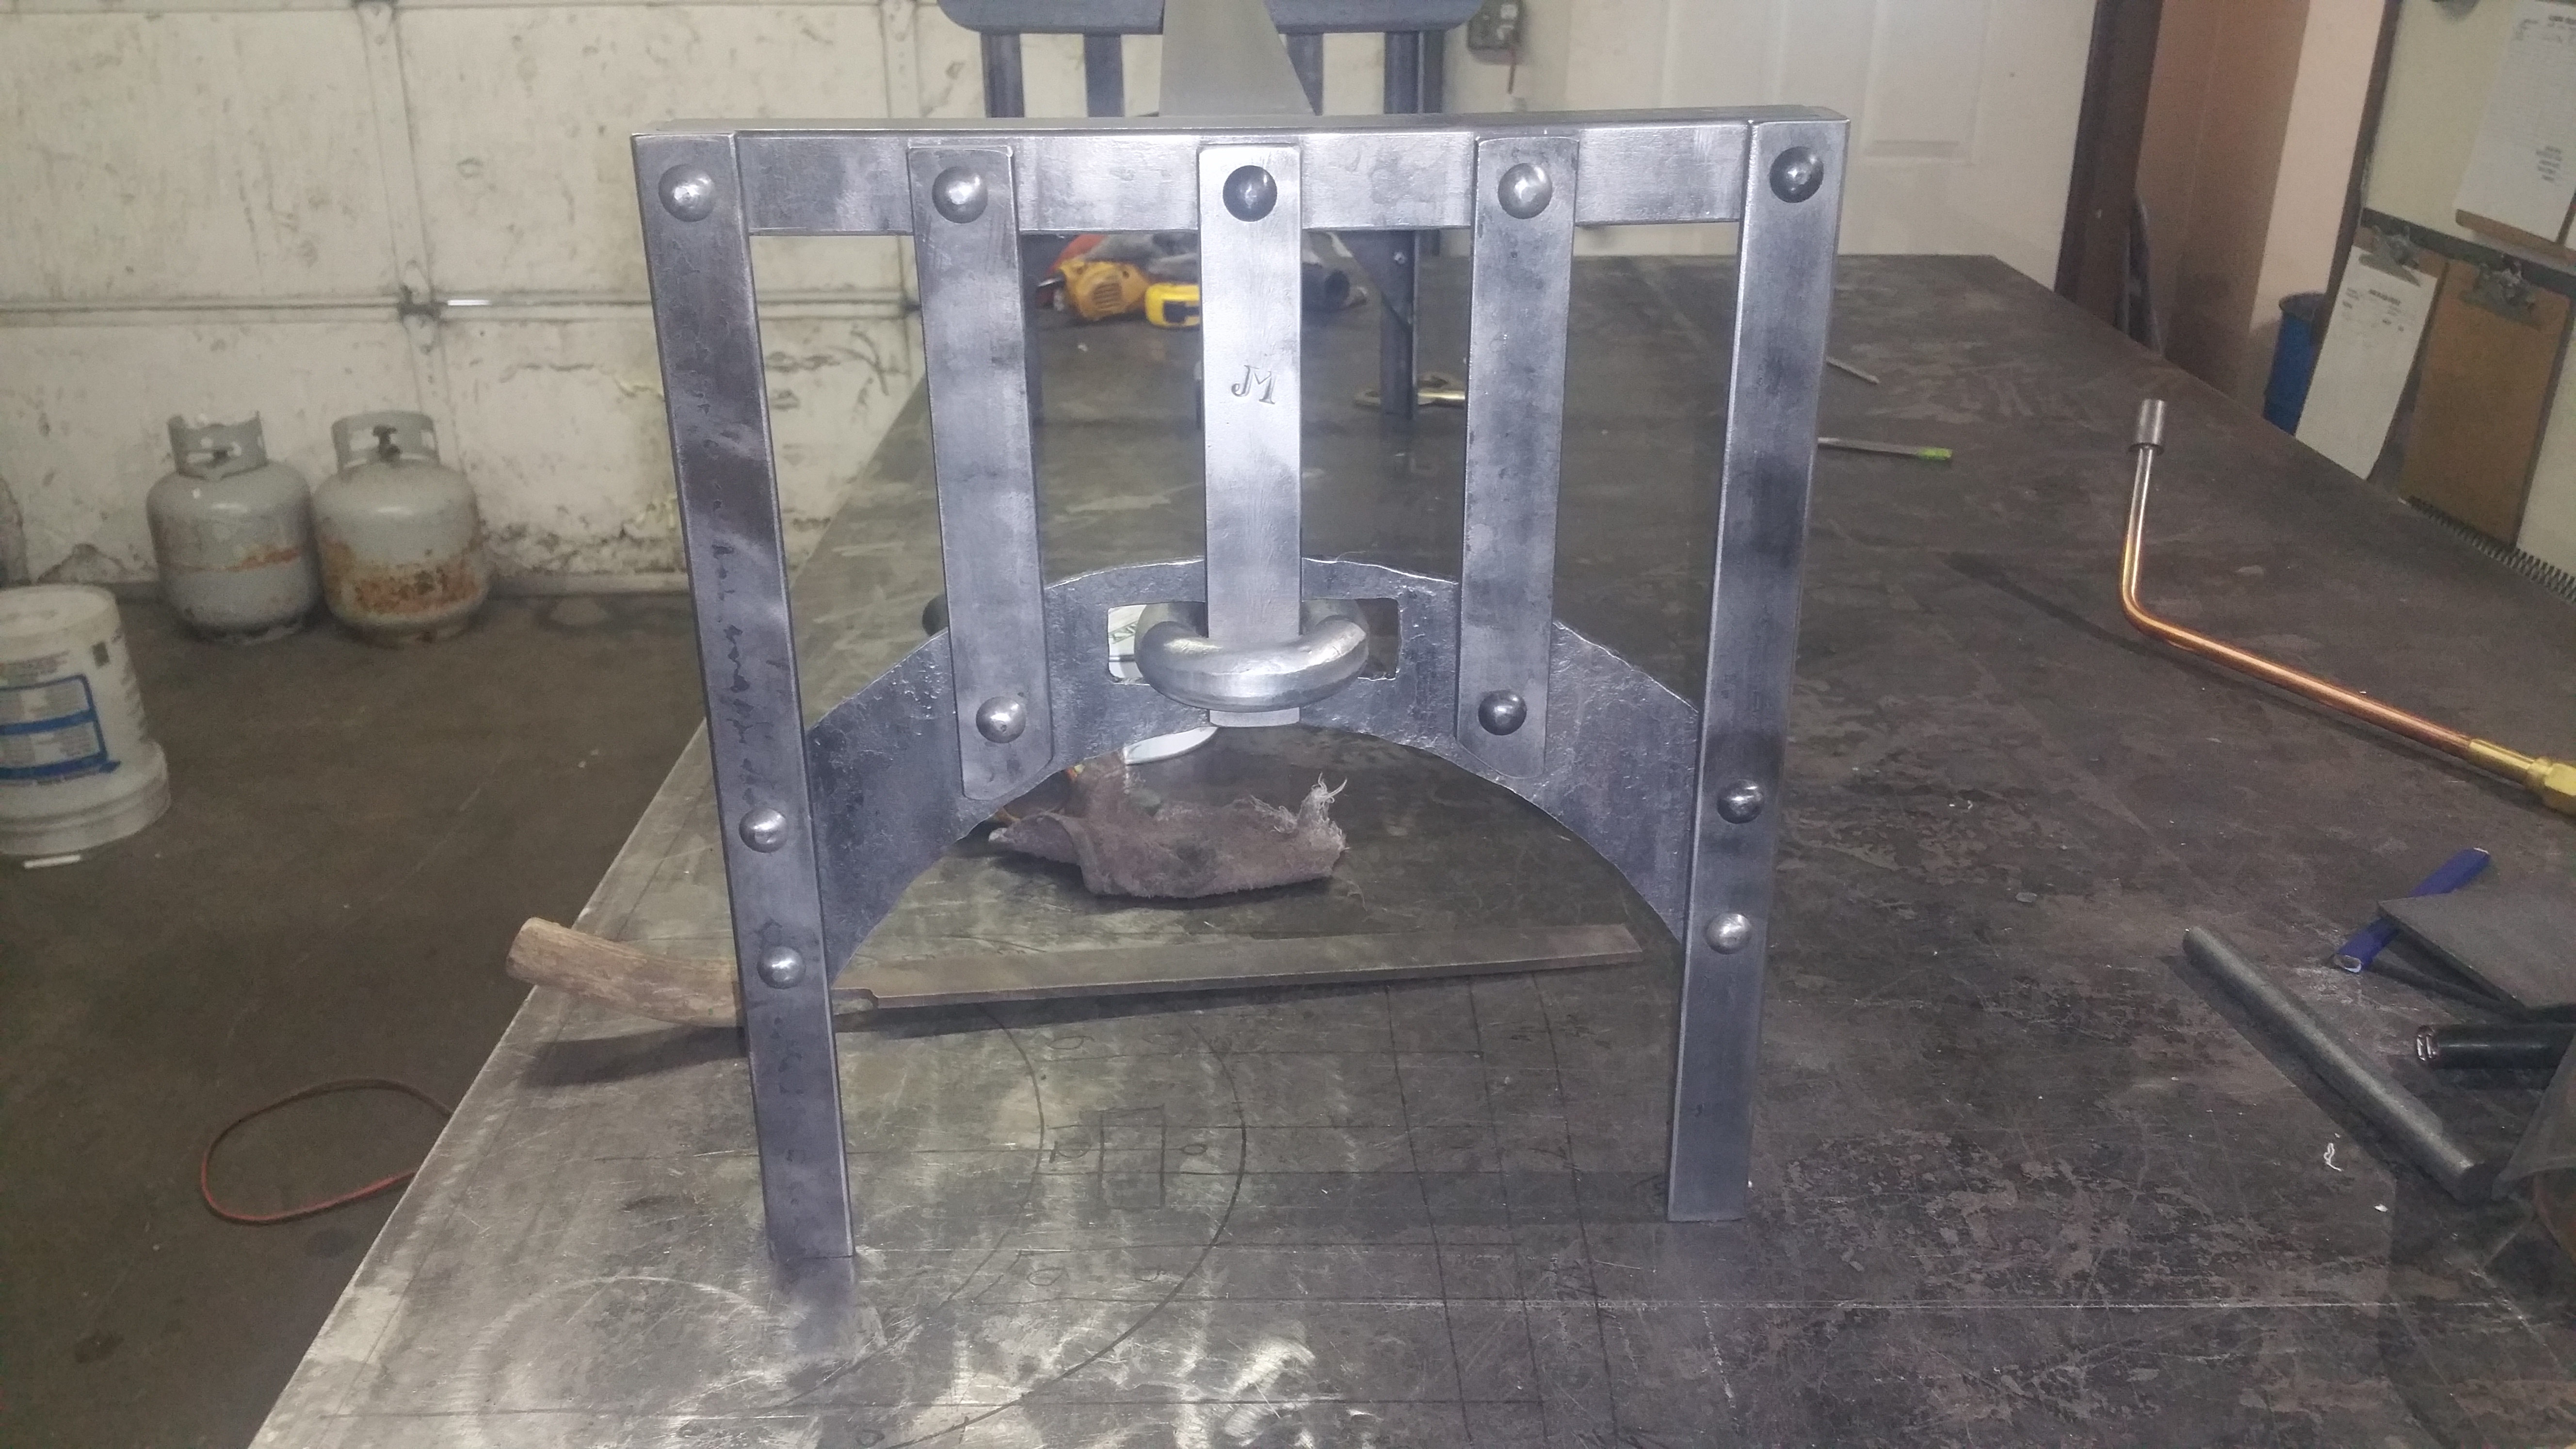


Bridge Turnbuckle inspired bench base
in Member Projects
Posted
Joe,
The picture is the piece completed......i just waxed it. Gotta let that beautiful steel radiate its glory.
I would have trusted them also not that its really viable but the welds on the back side are a bit of a bummer for me to see.