

David Kailey
-
Posts
276 -
Joined
-
Last visited
Content Type
Profiles
Forums
Articles
Gallery
Downloads
Events
Posts posted by David Kailey
-
-
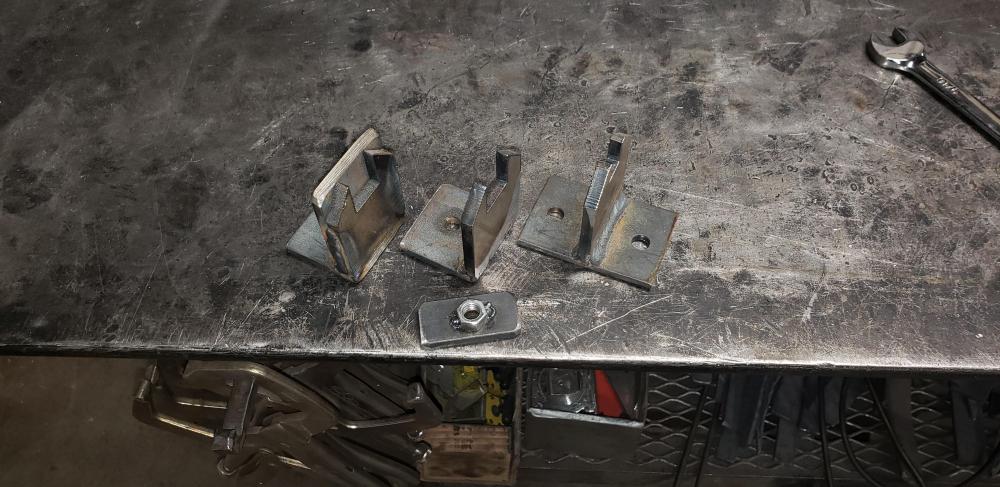
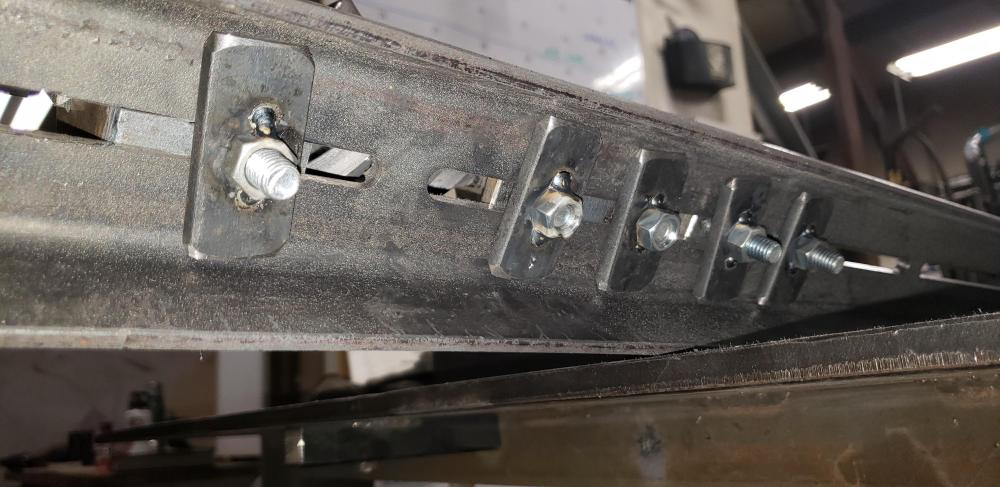
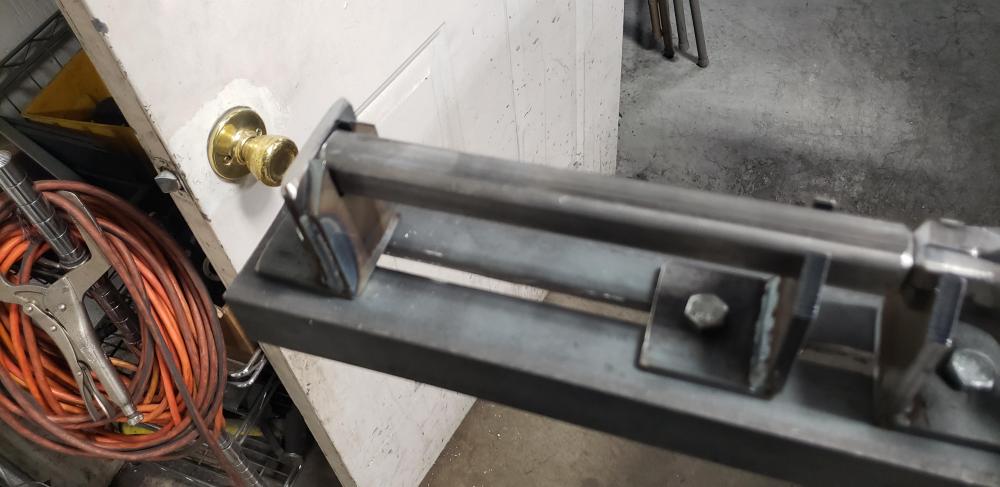
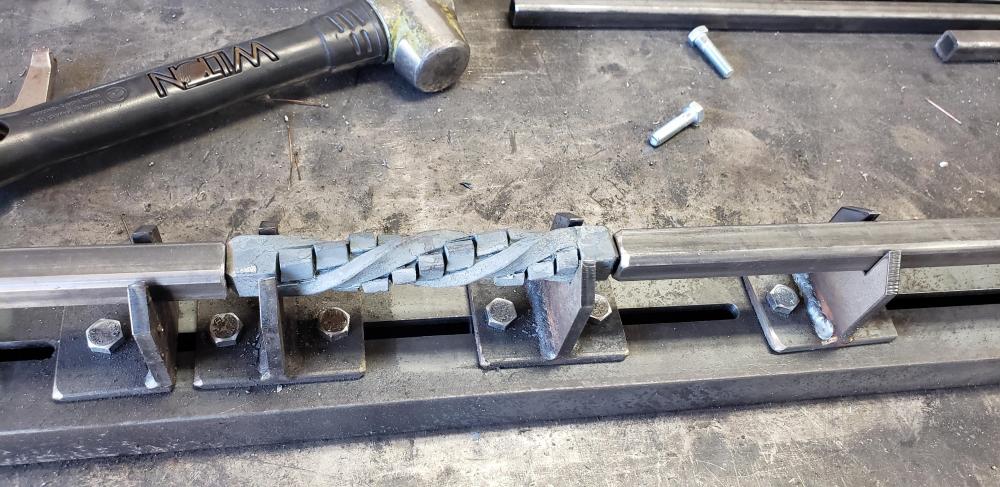
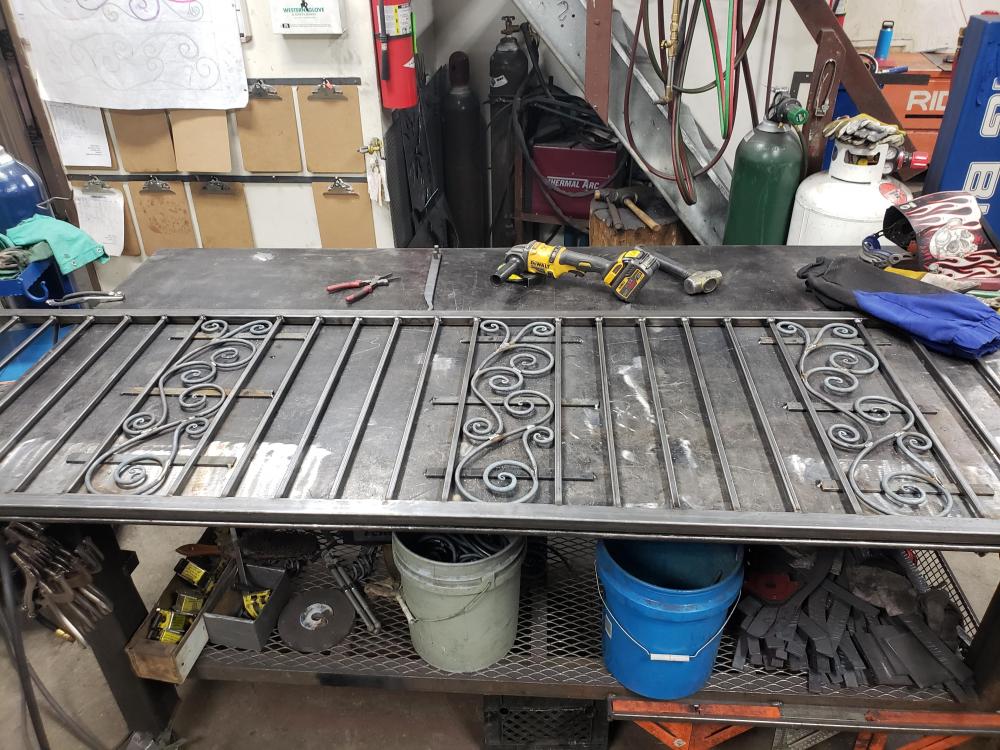
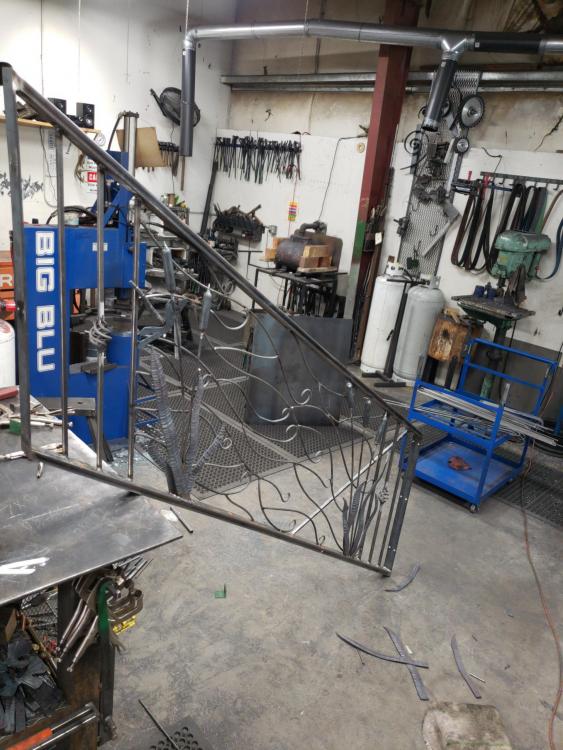
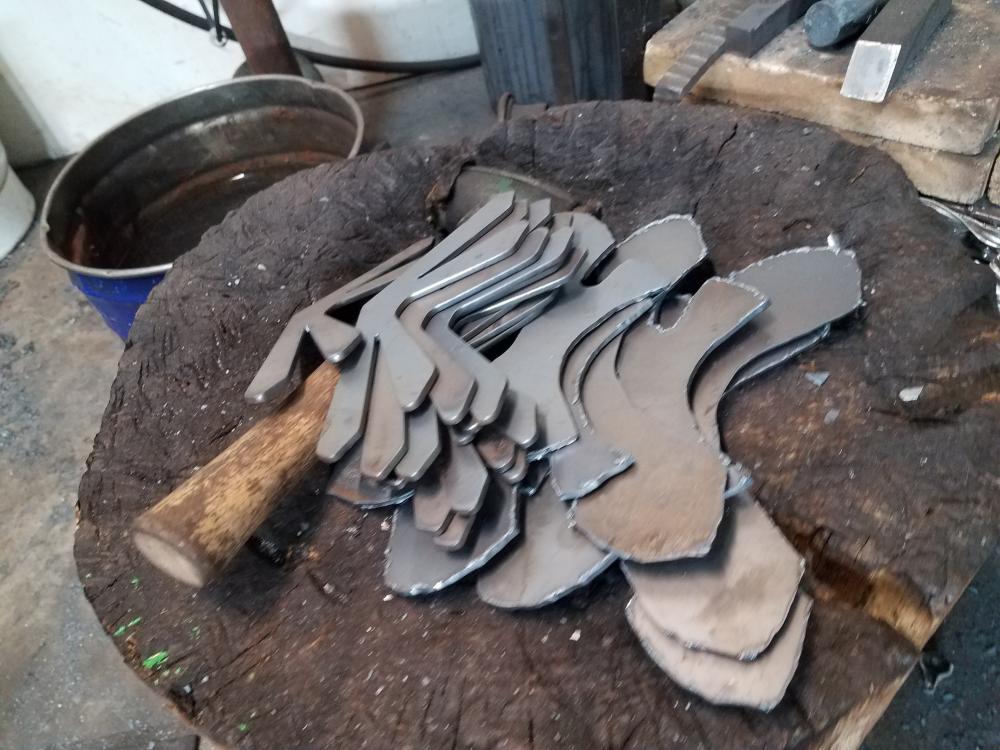
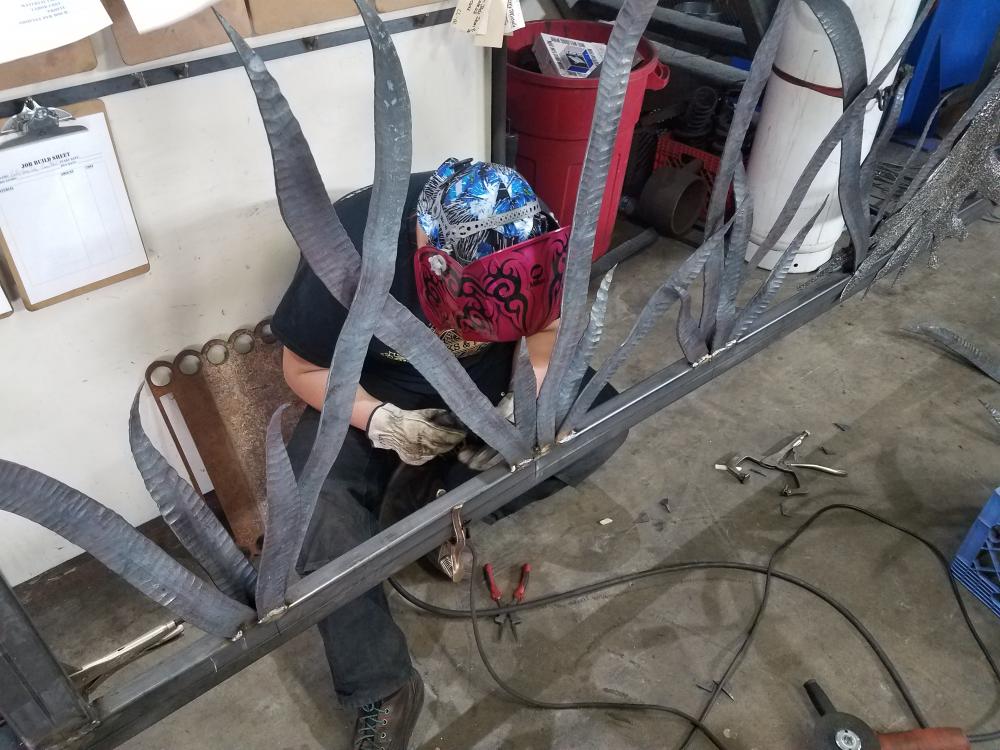
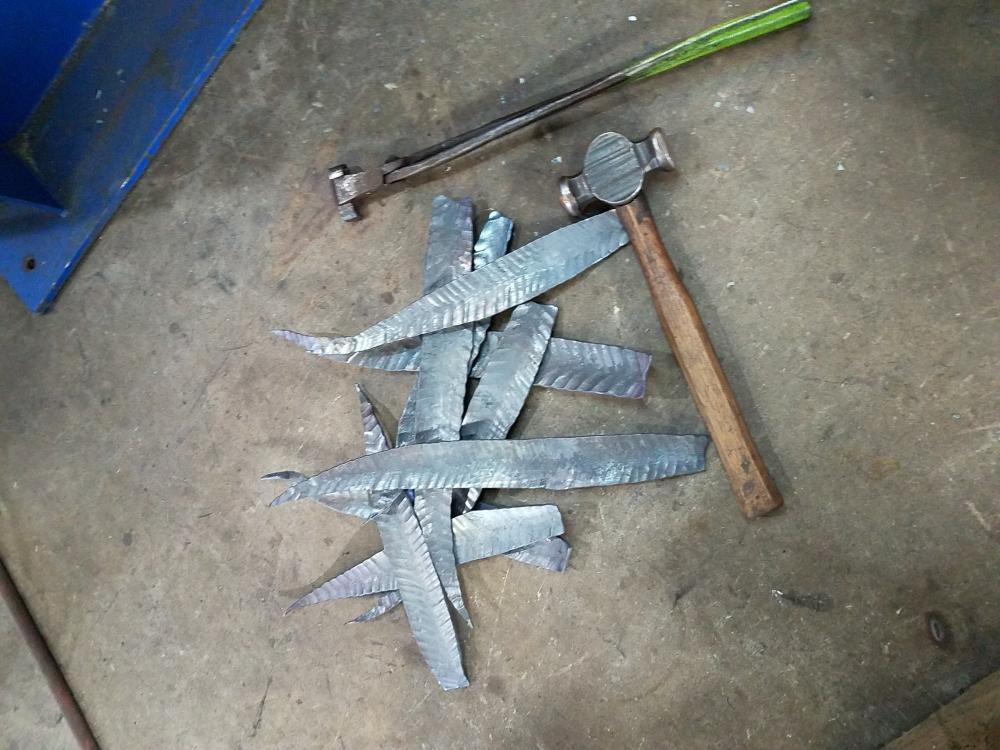
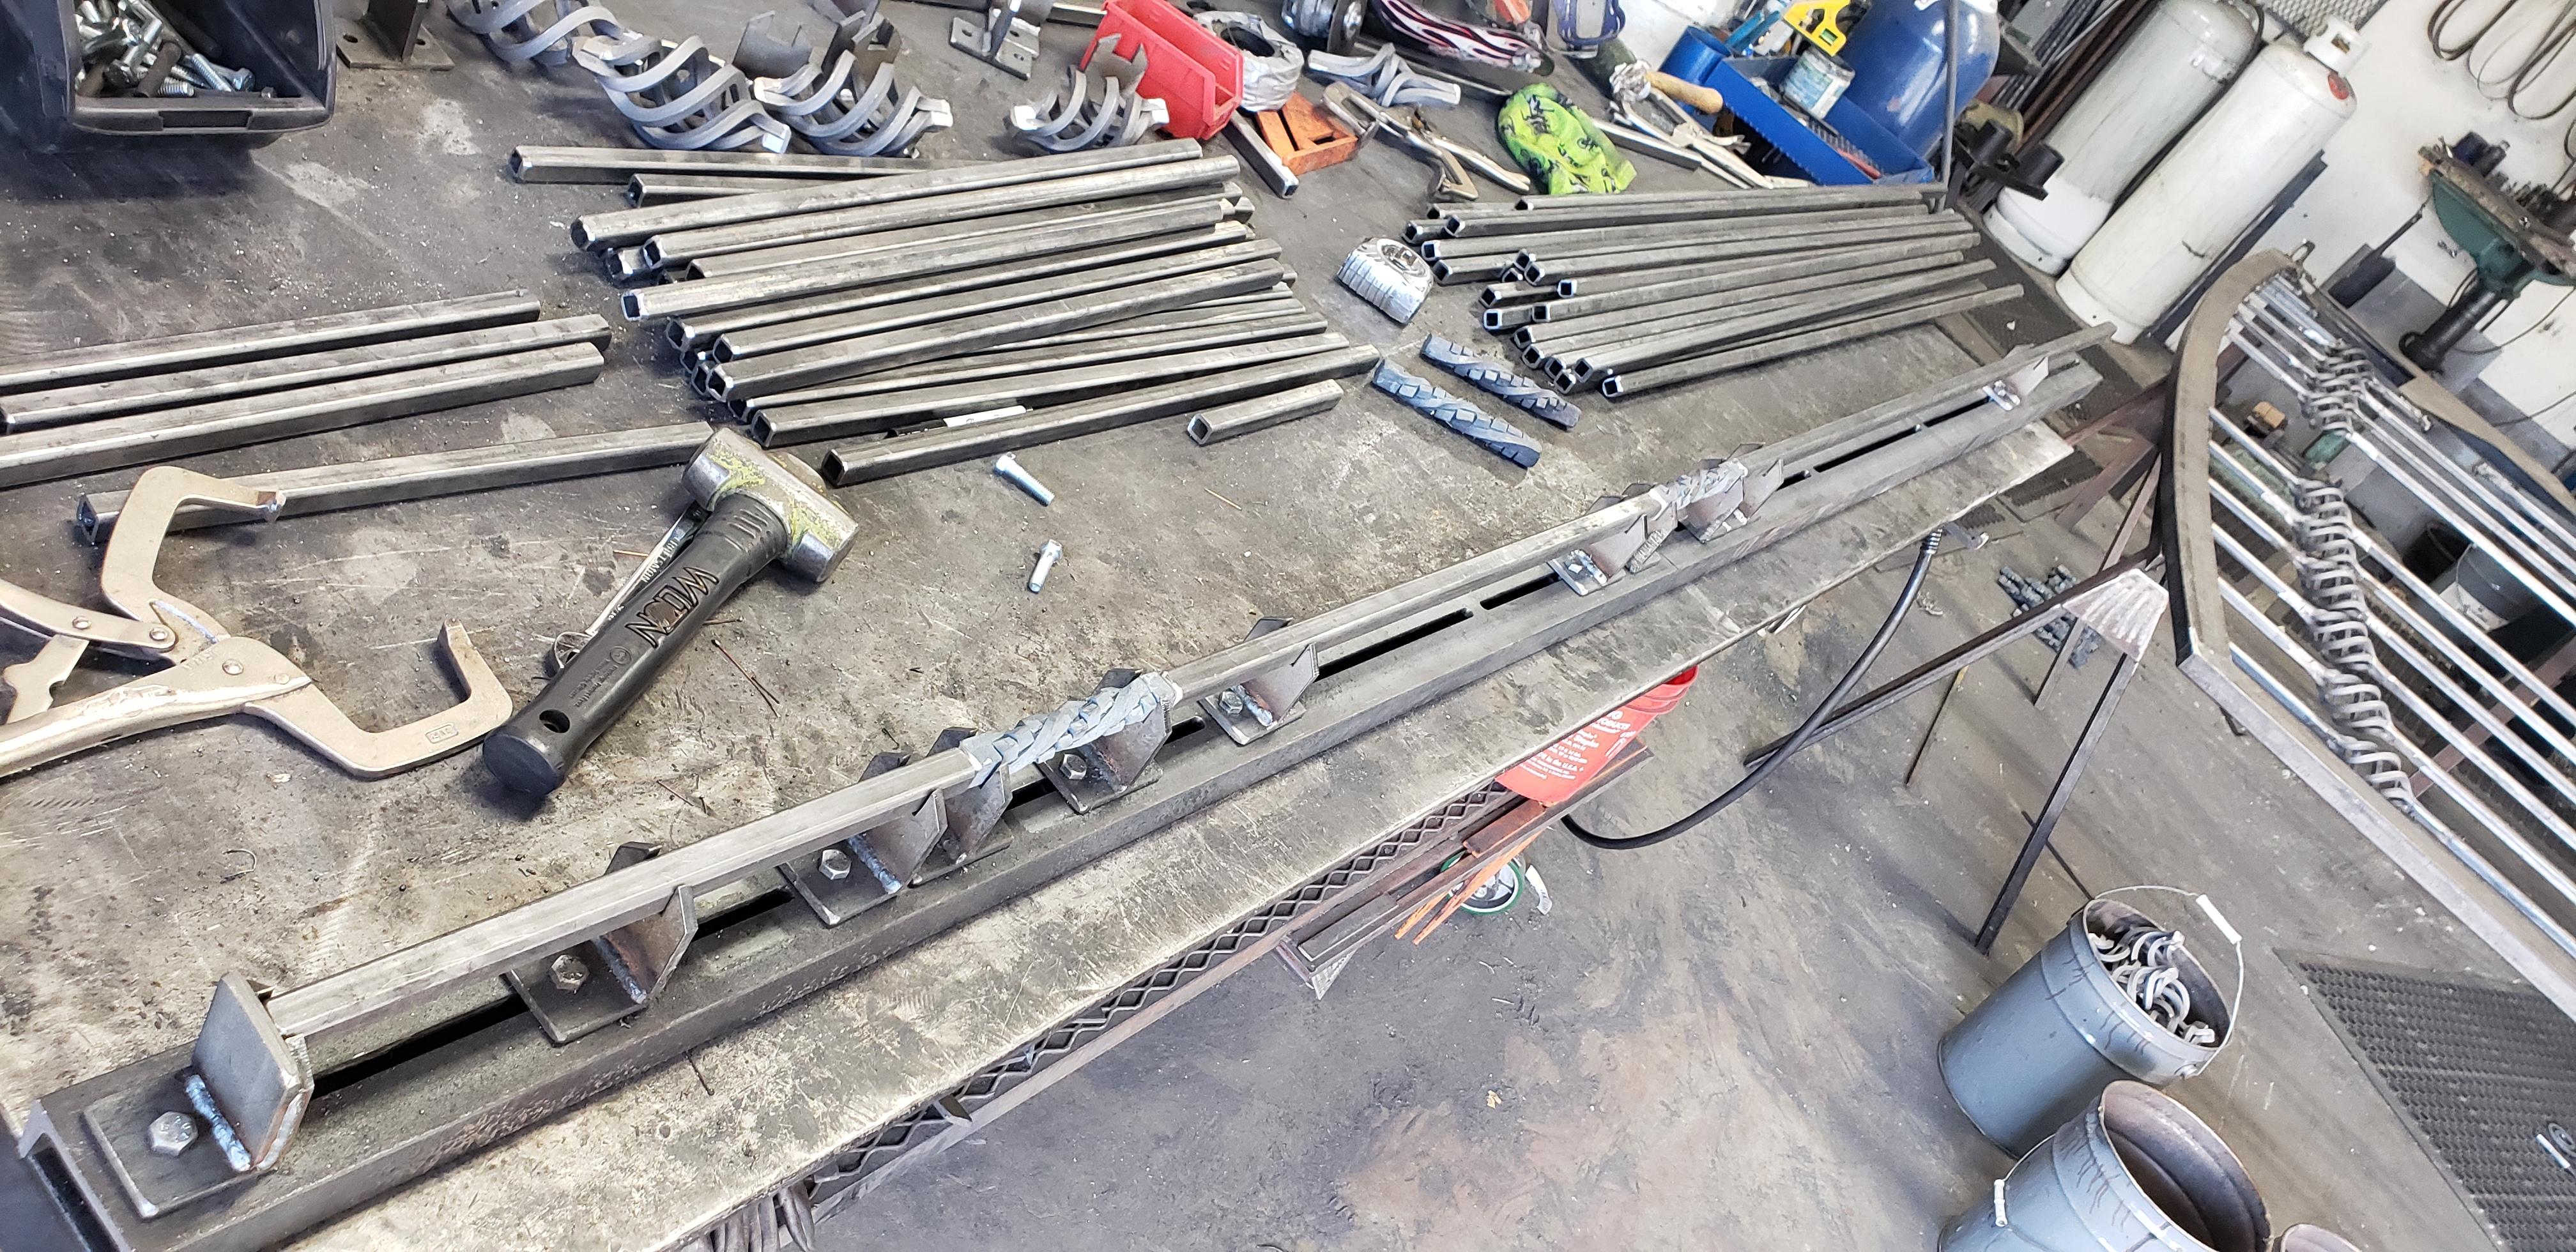
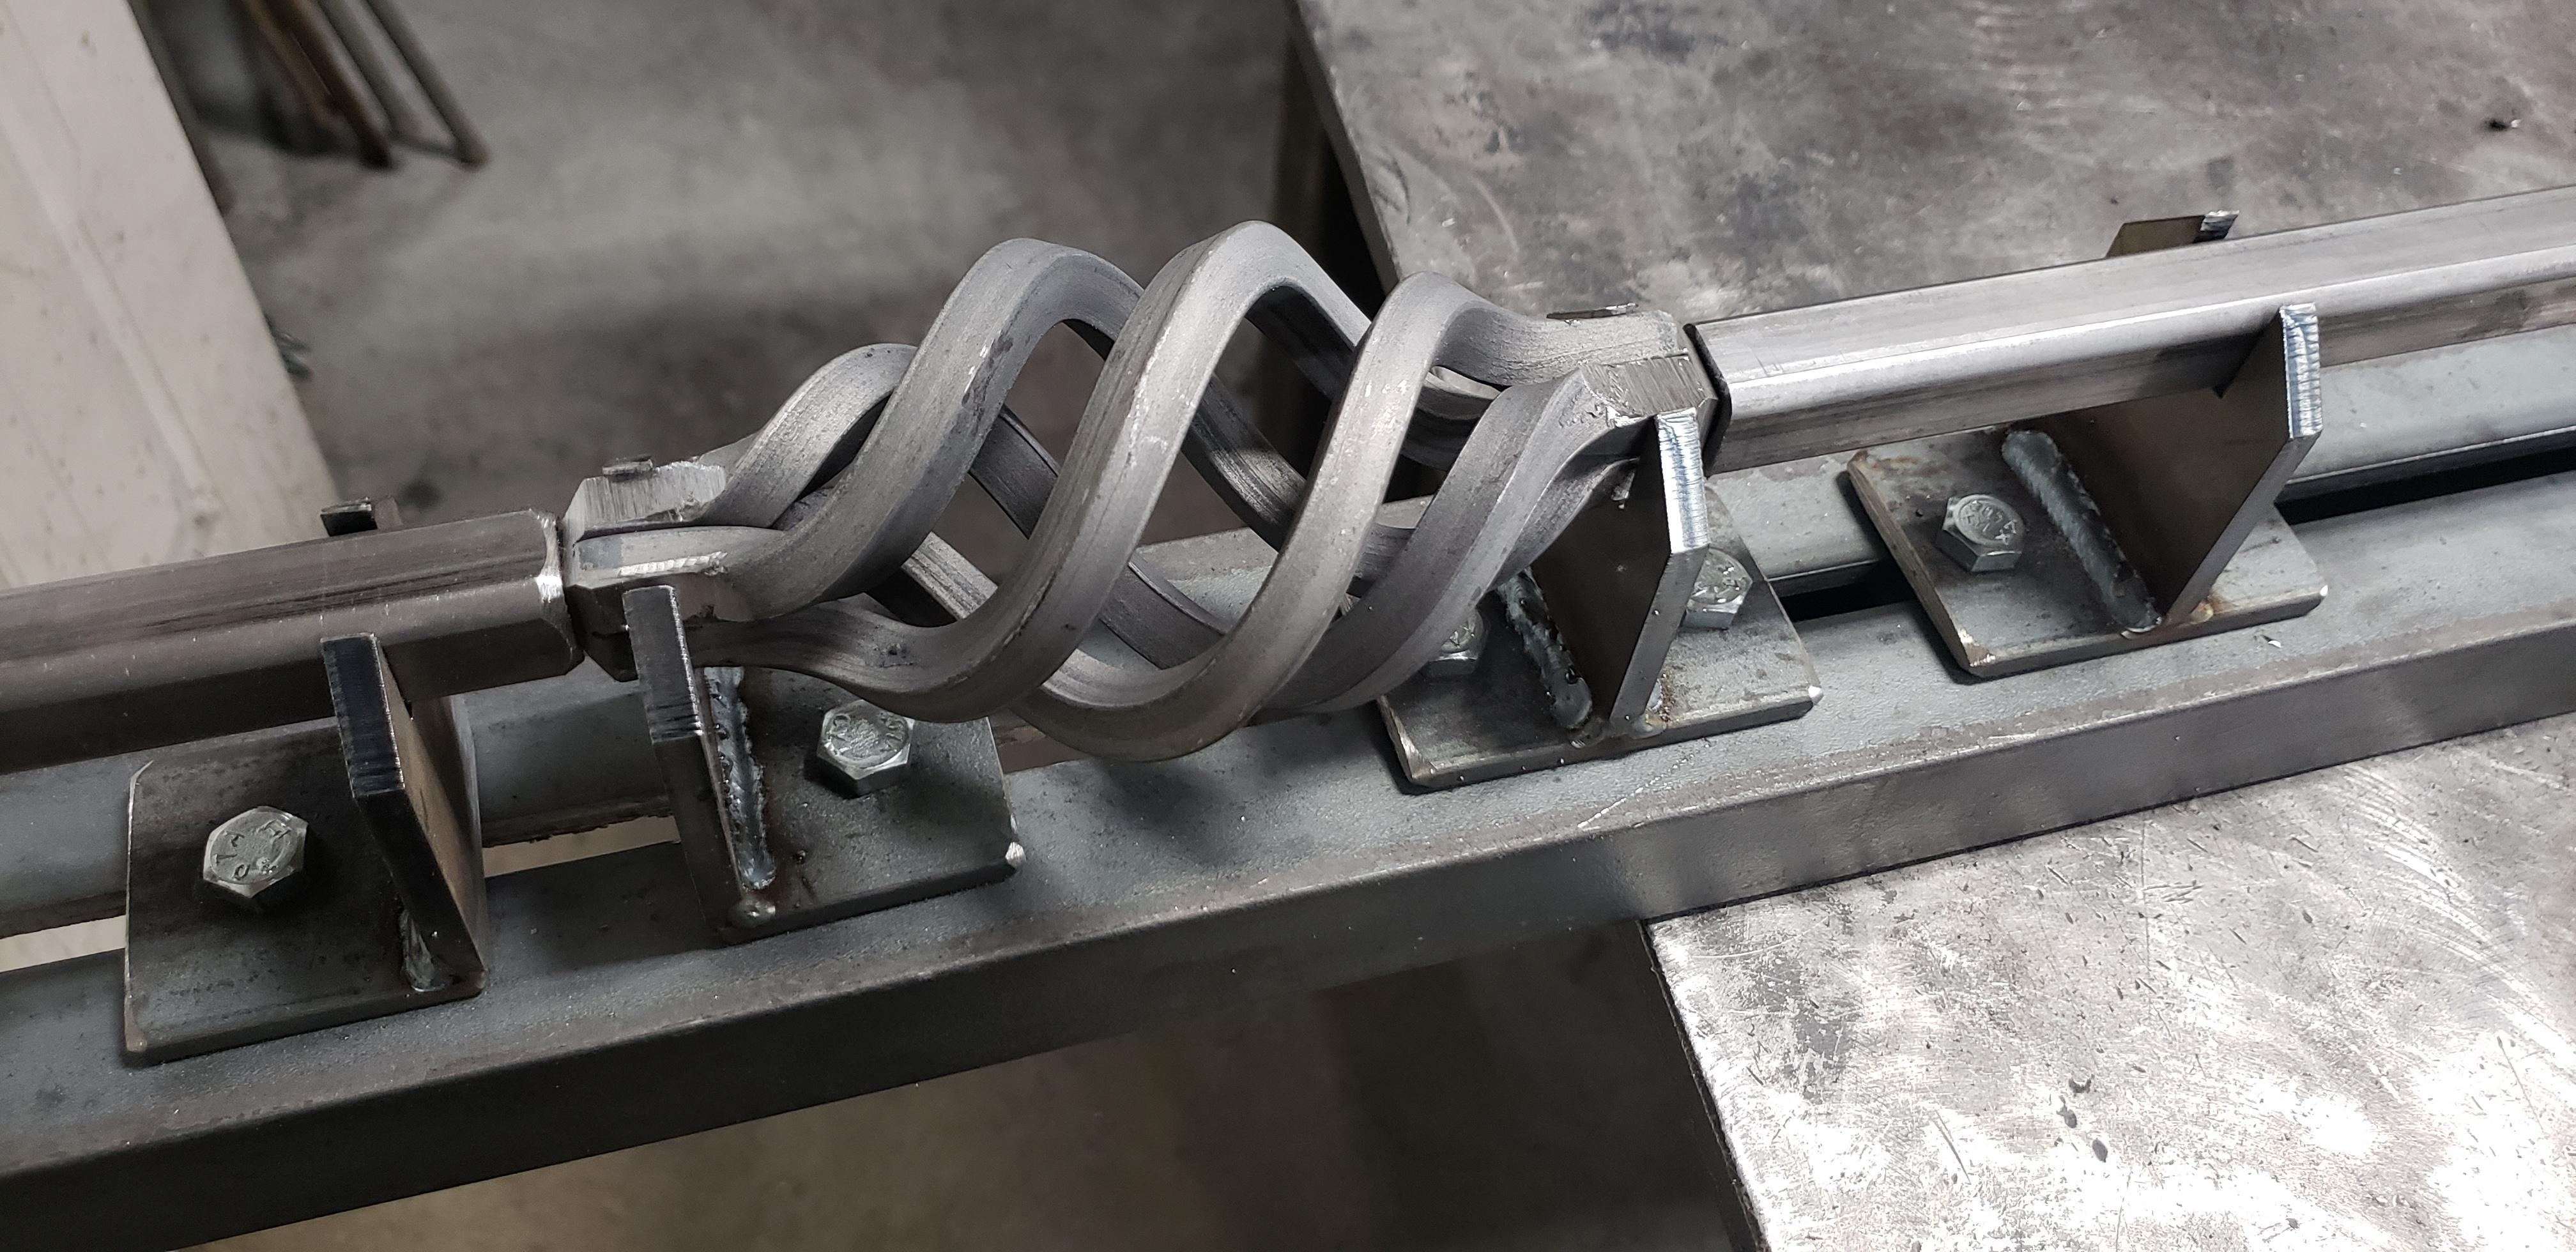
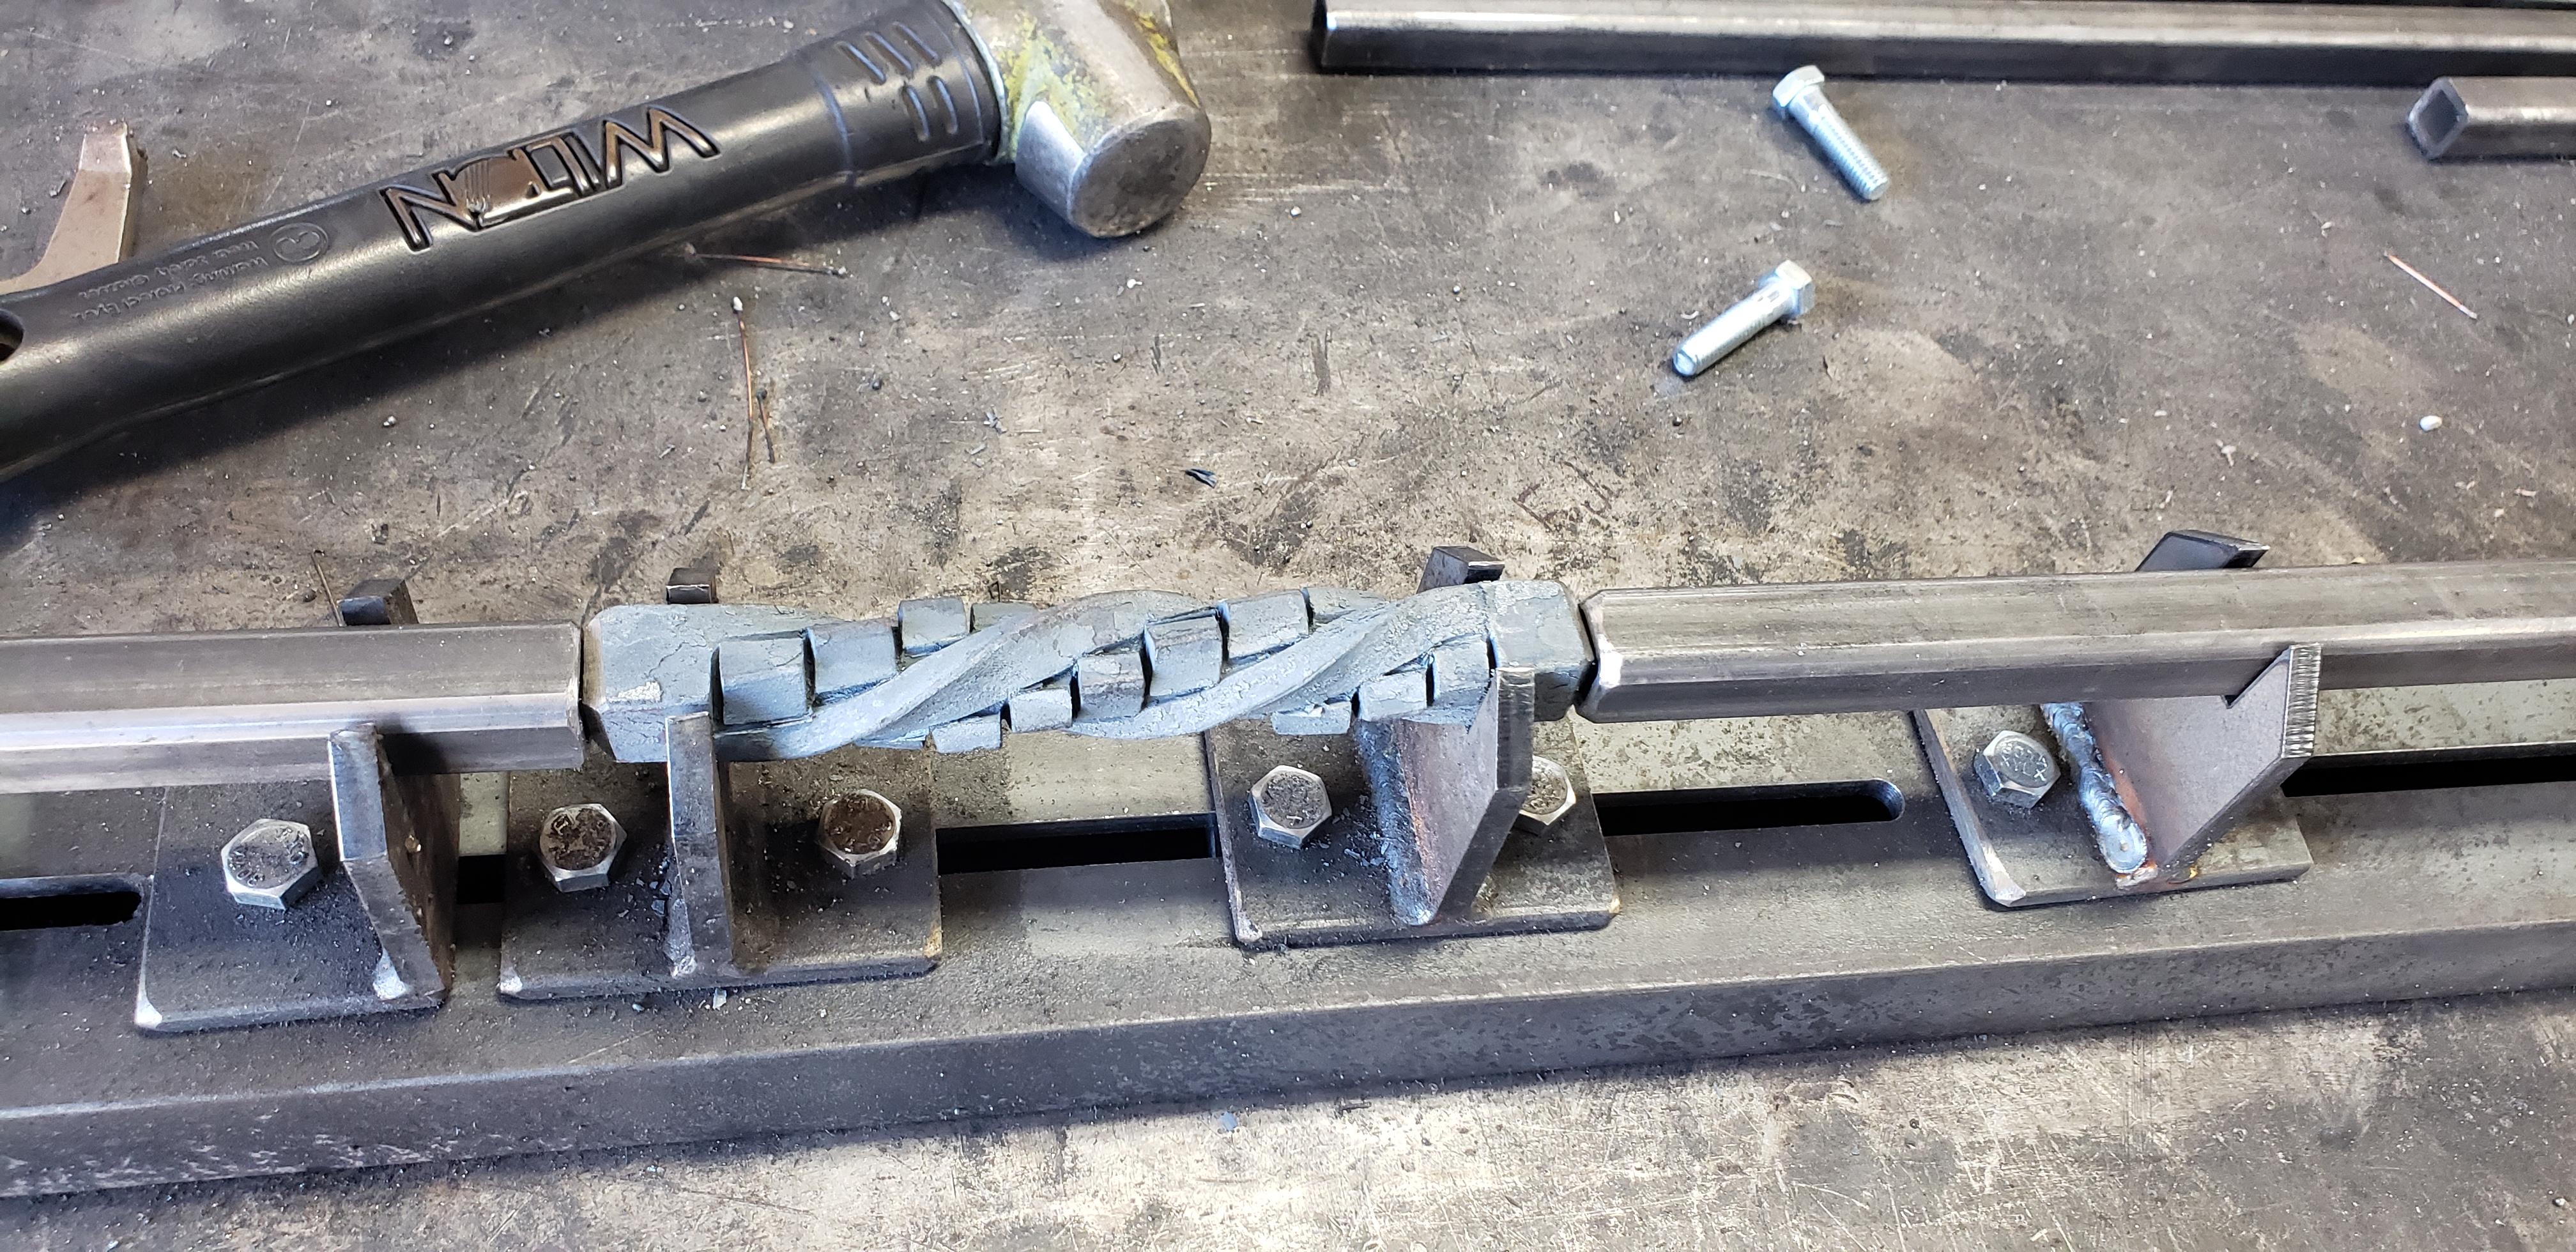
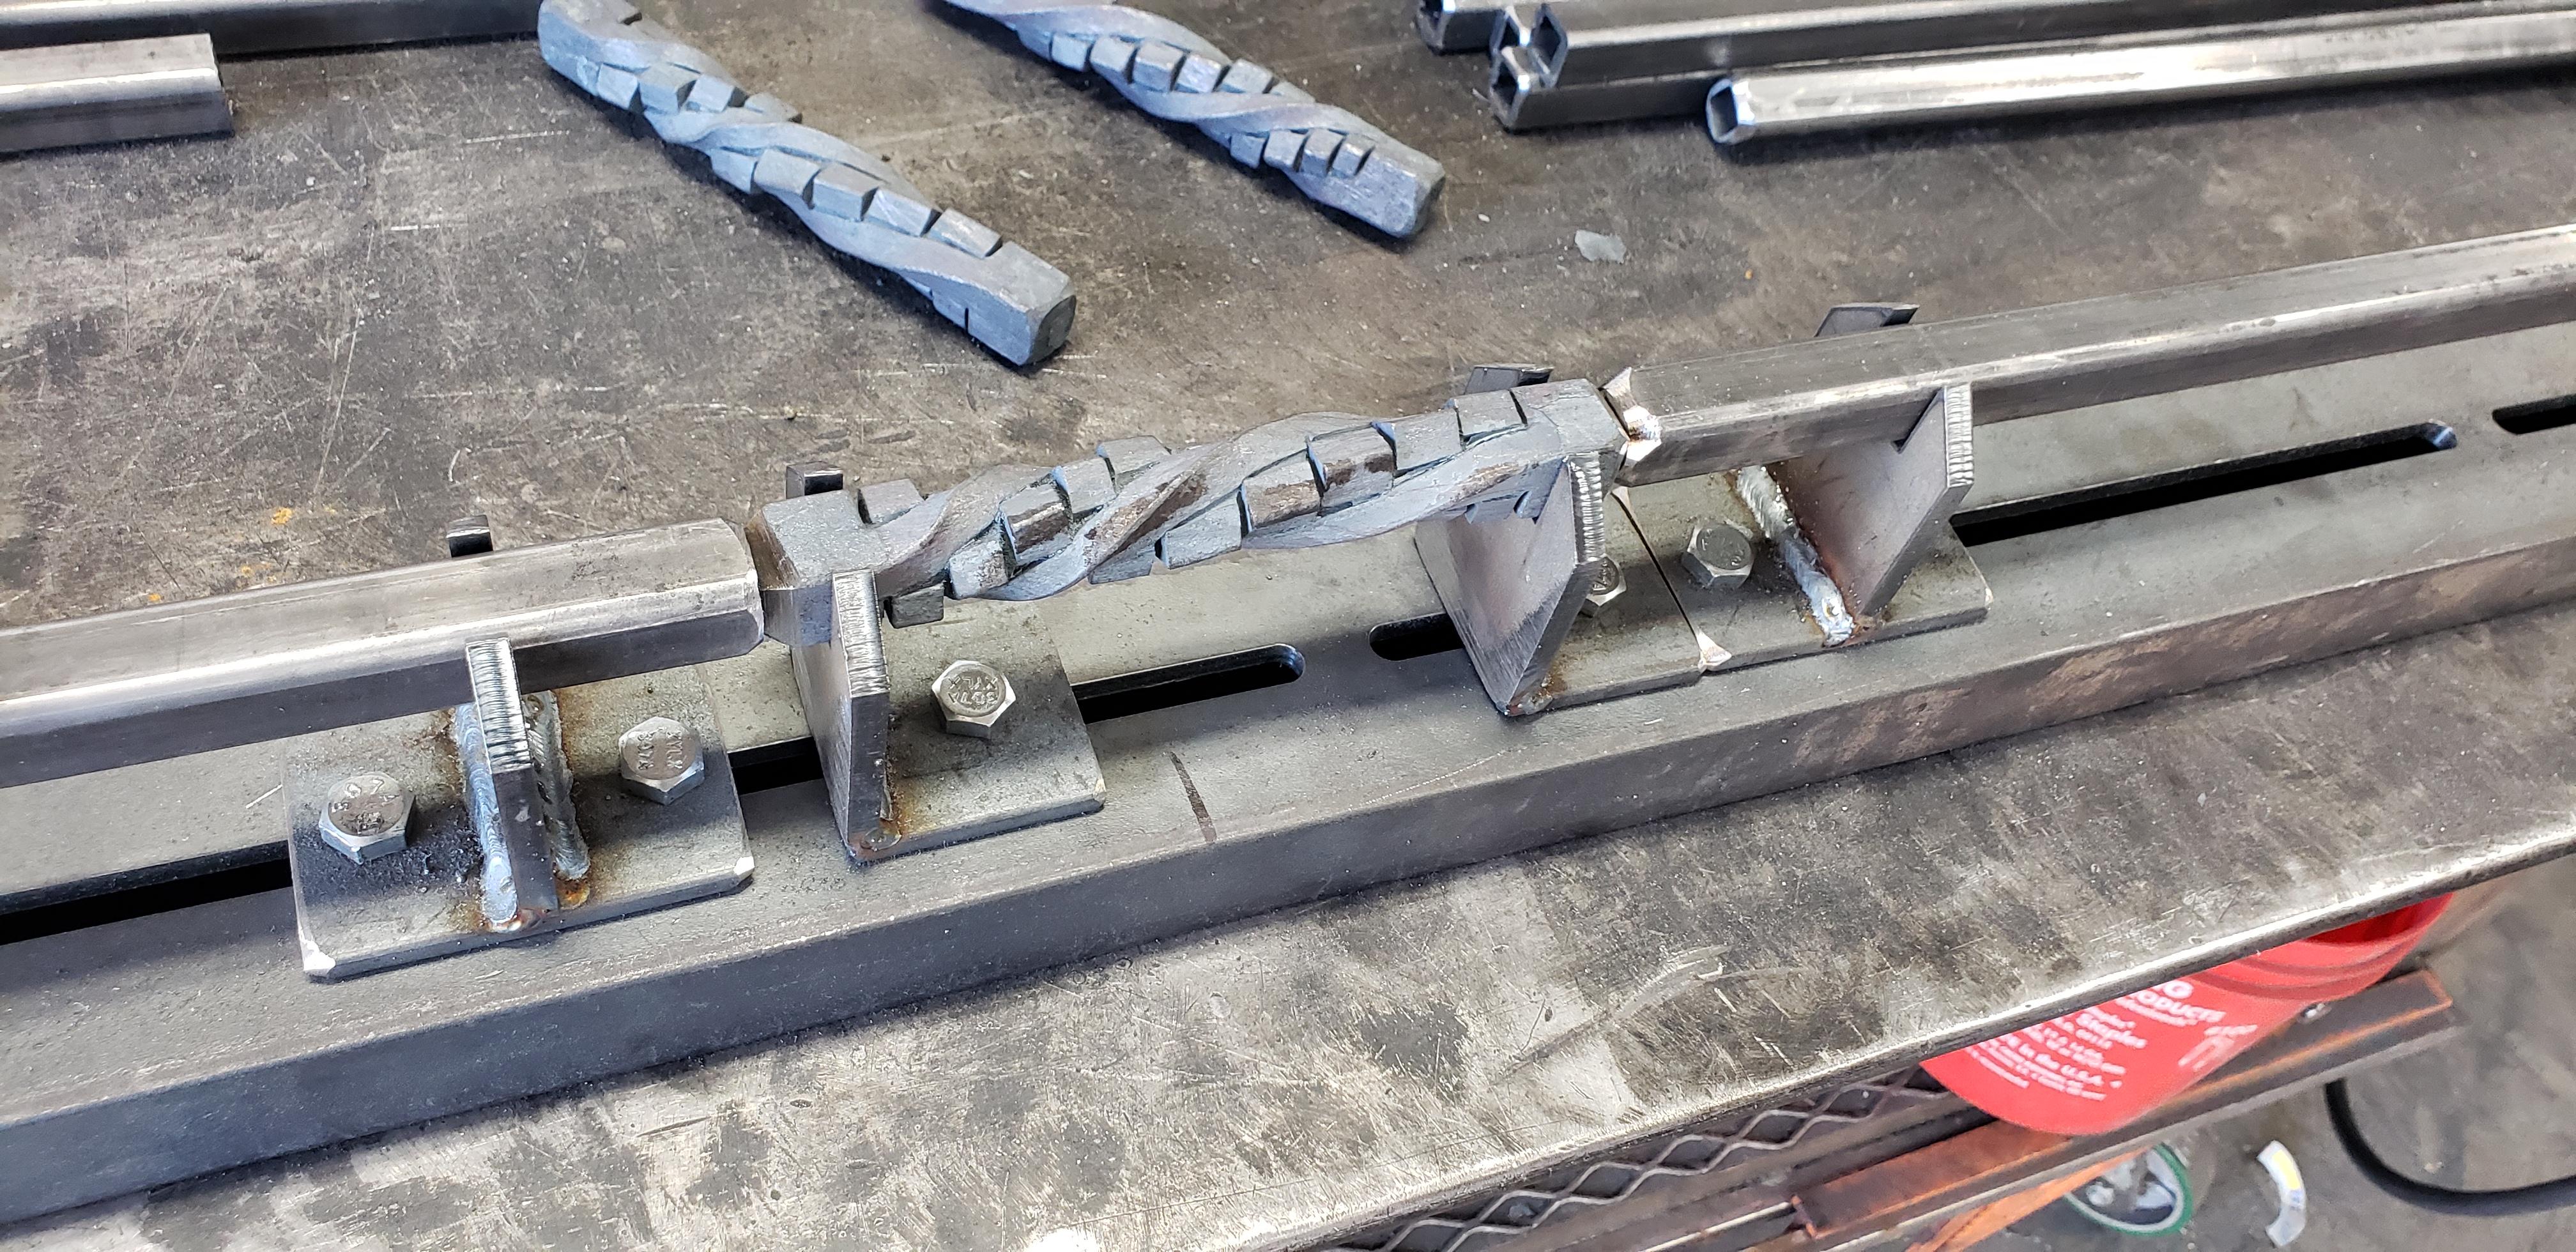
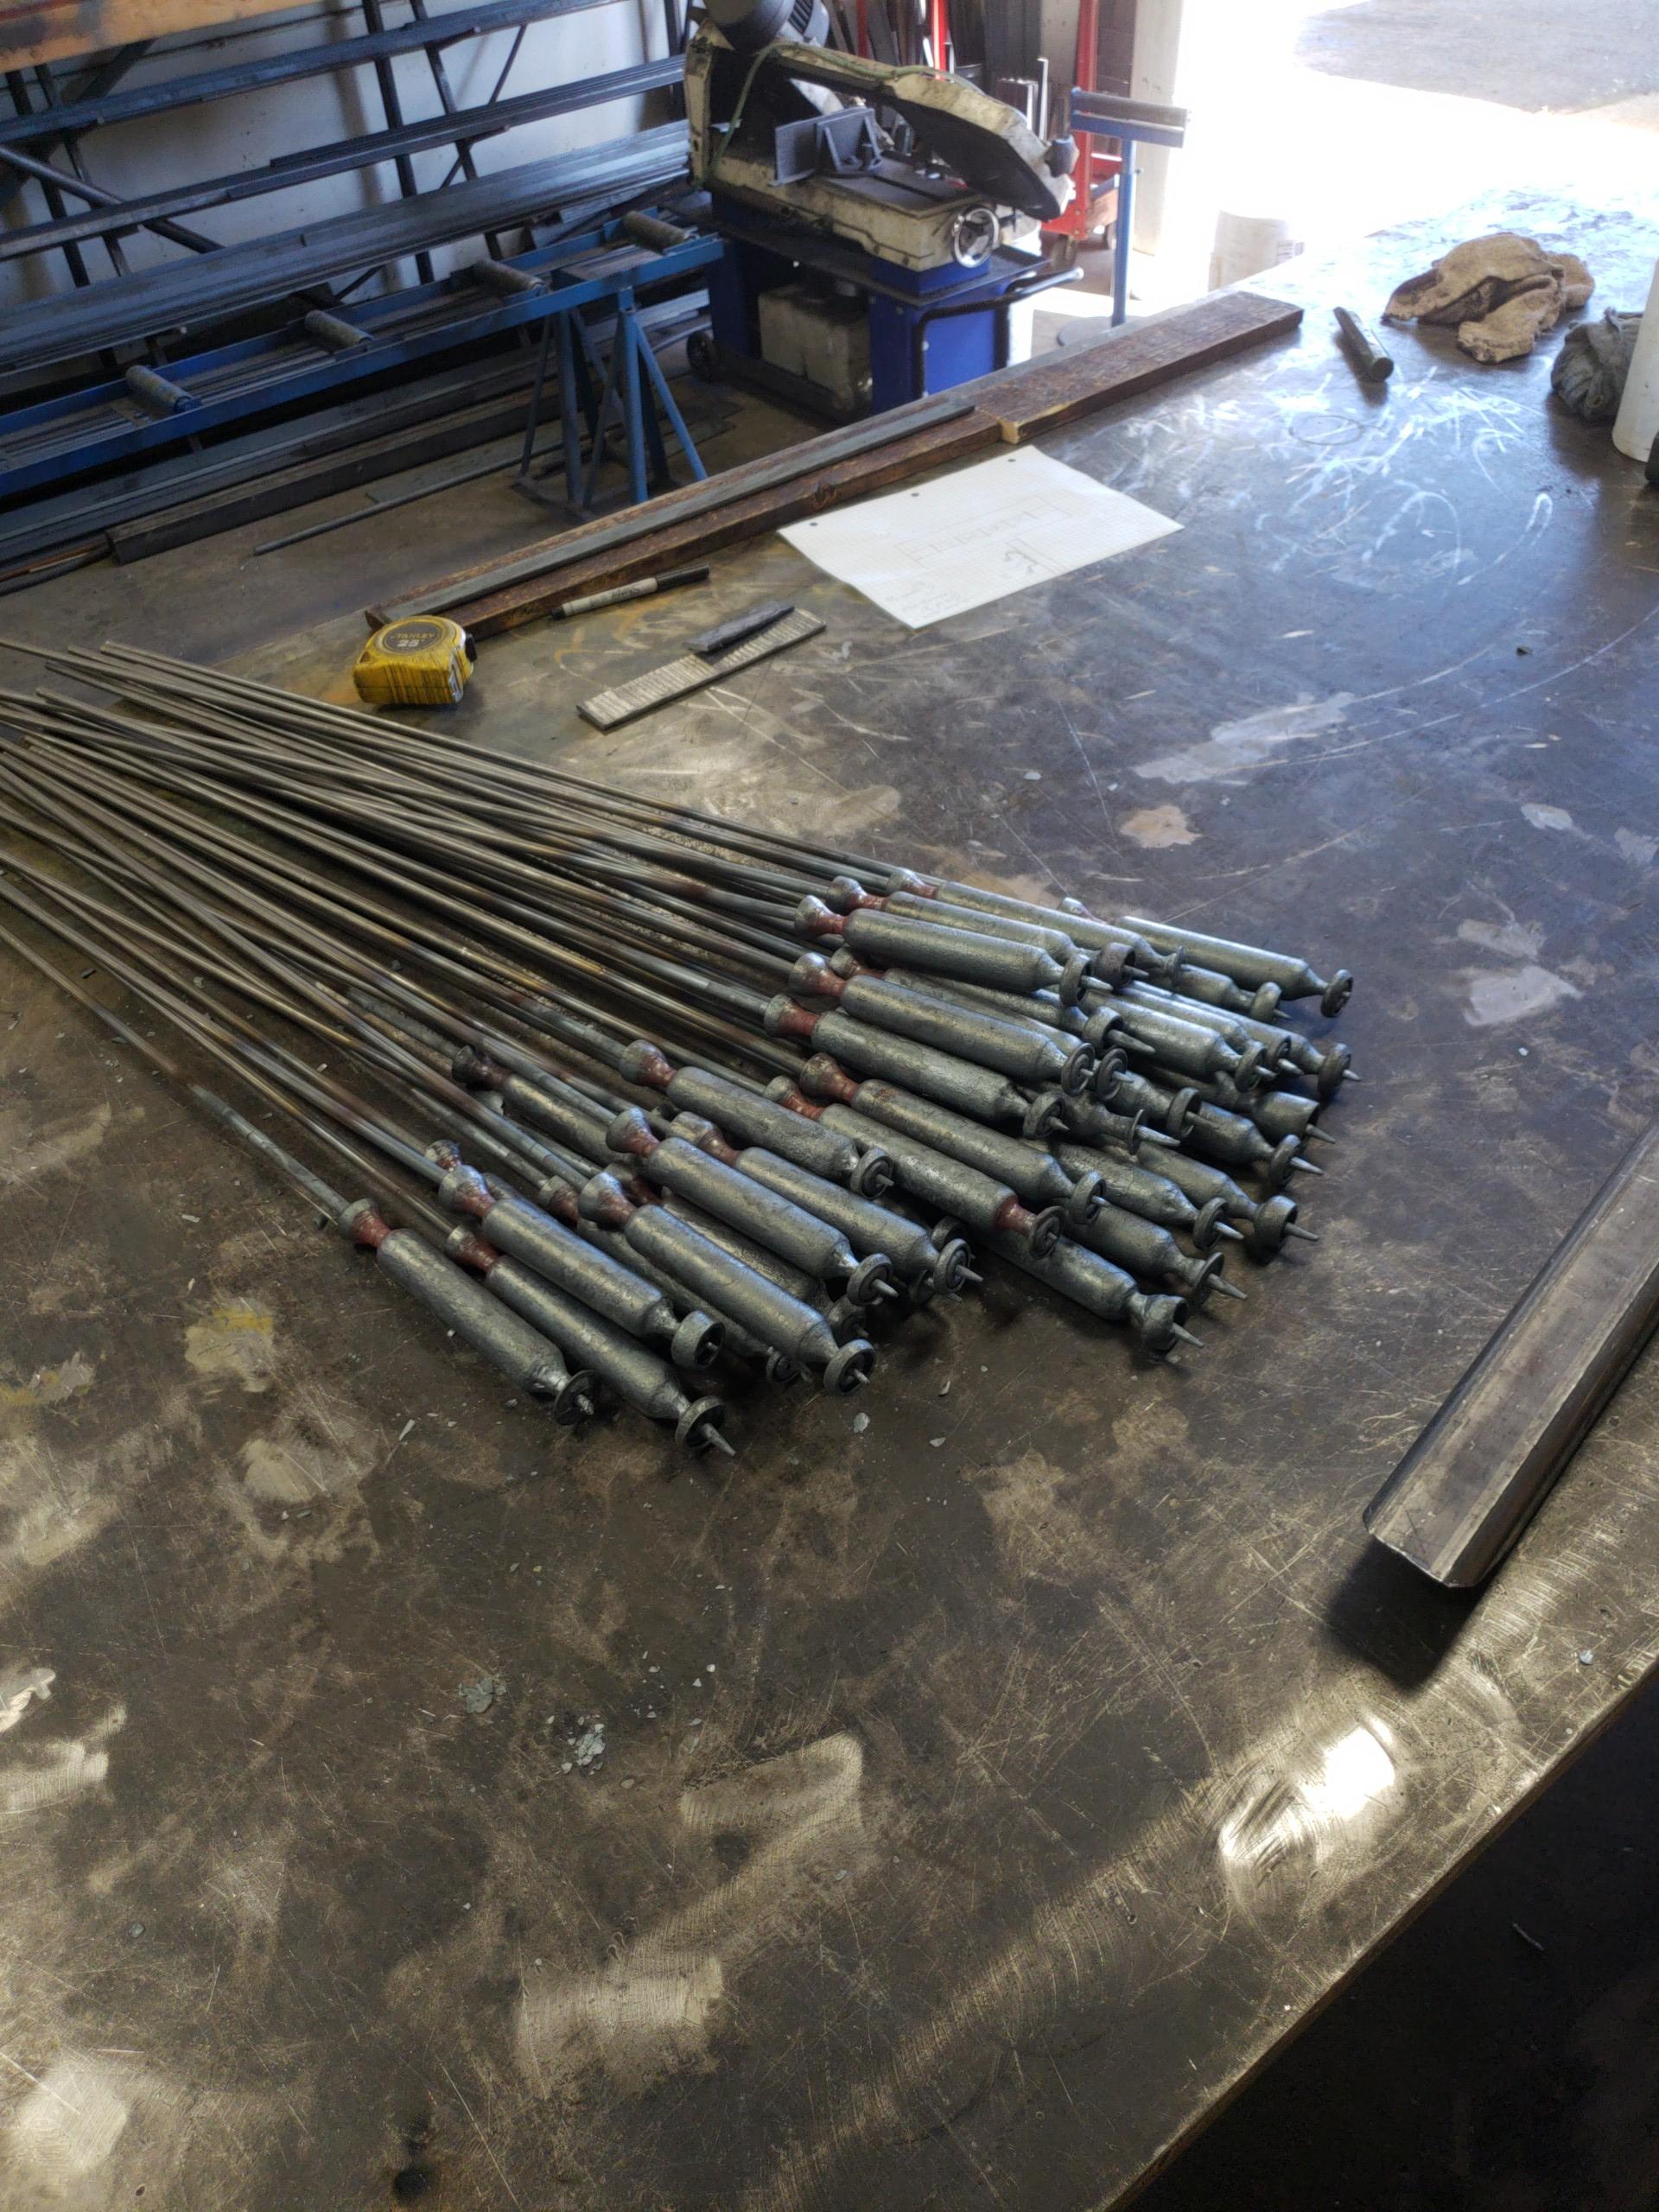
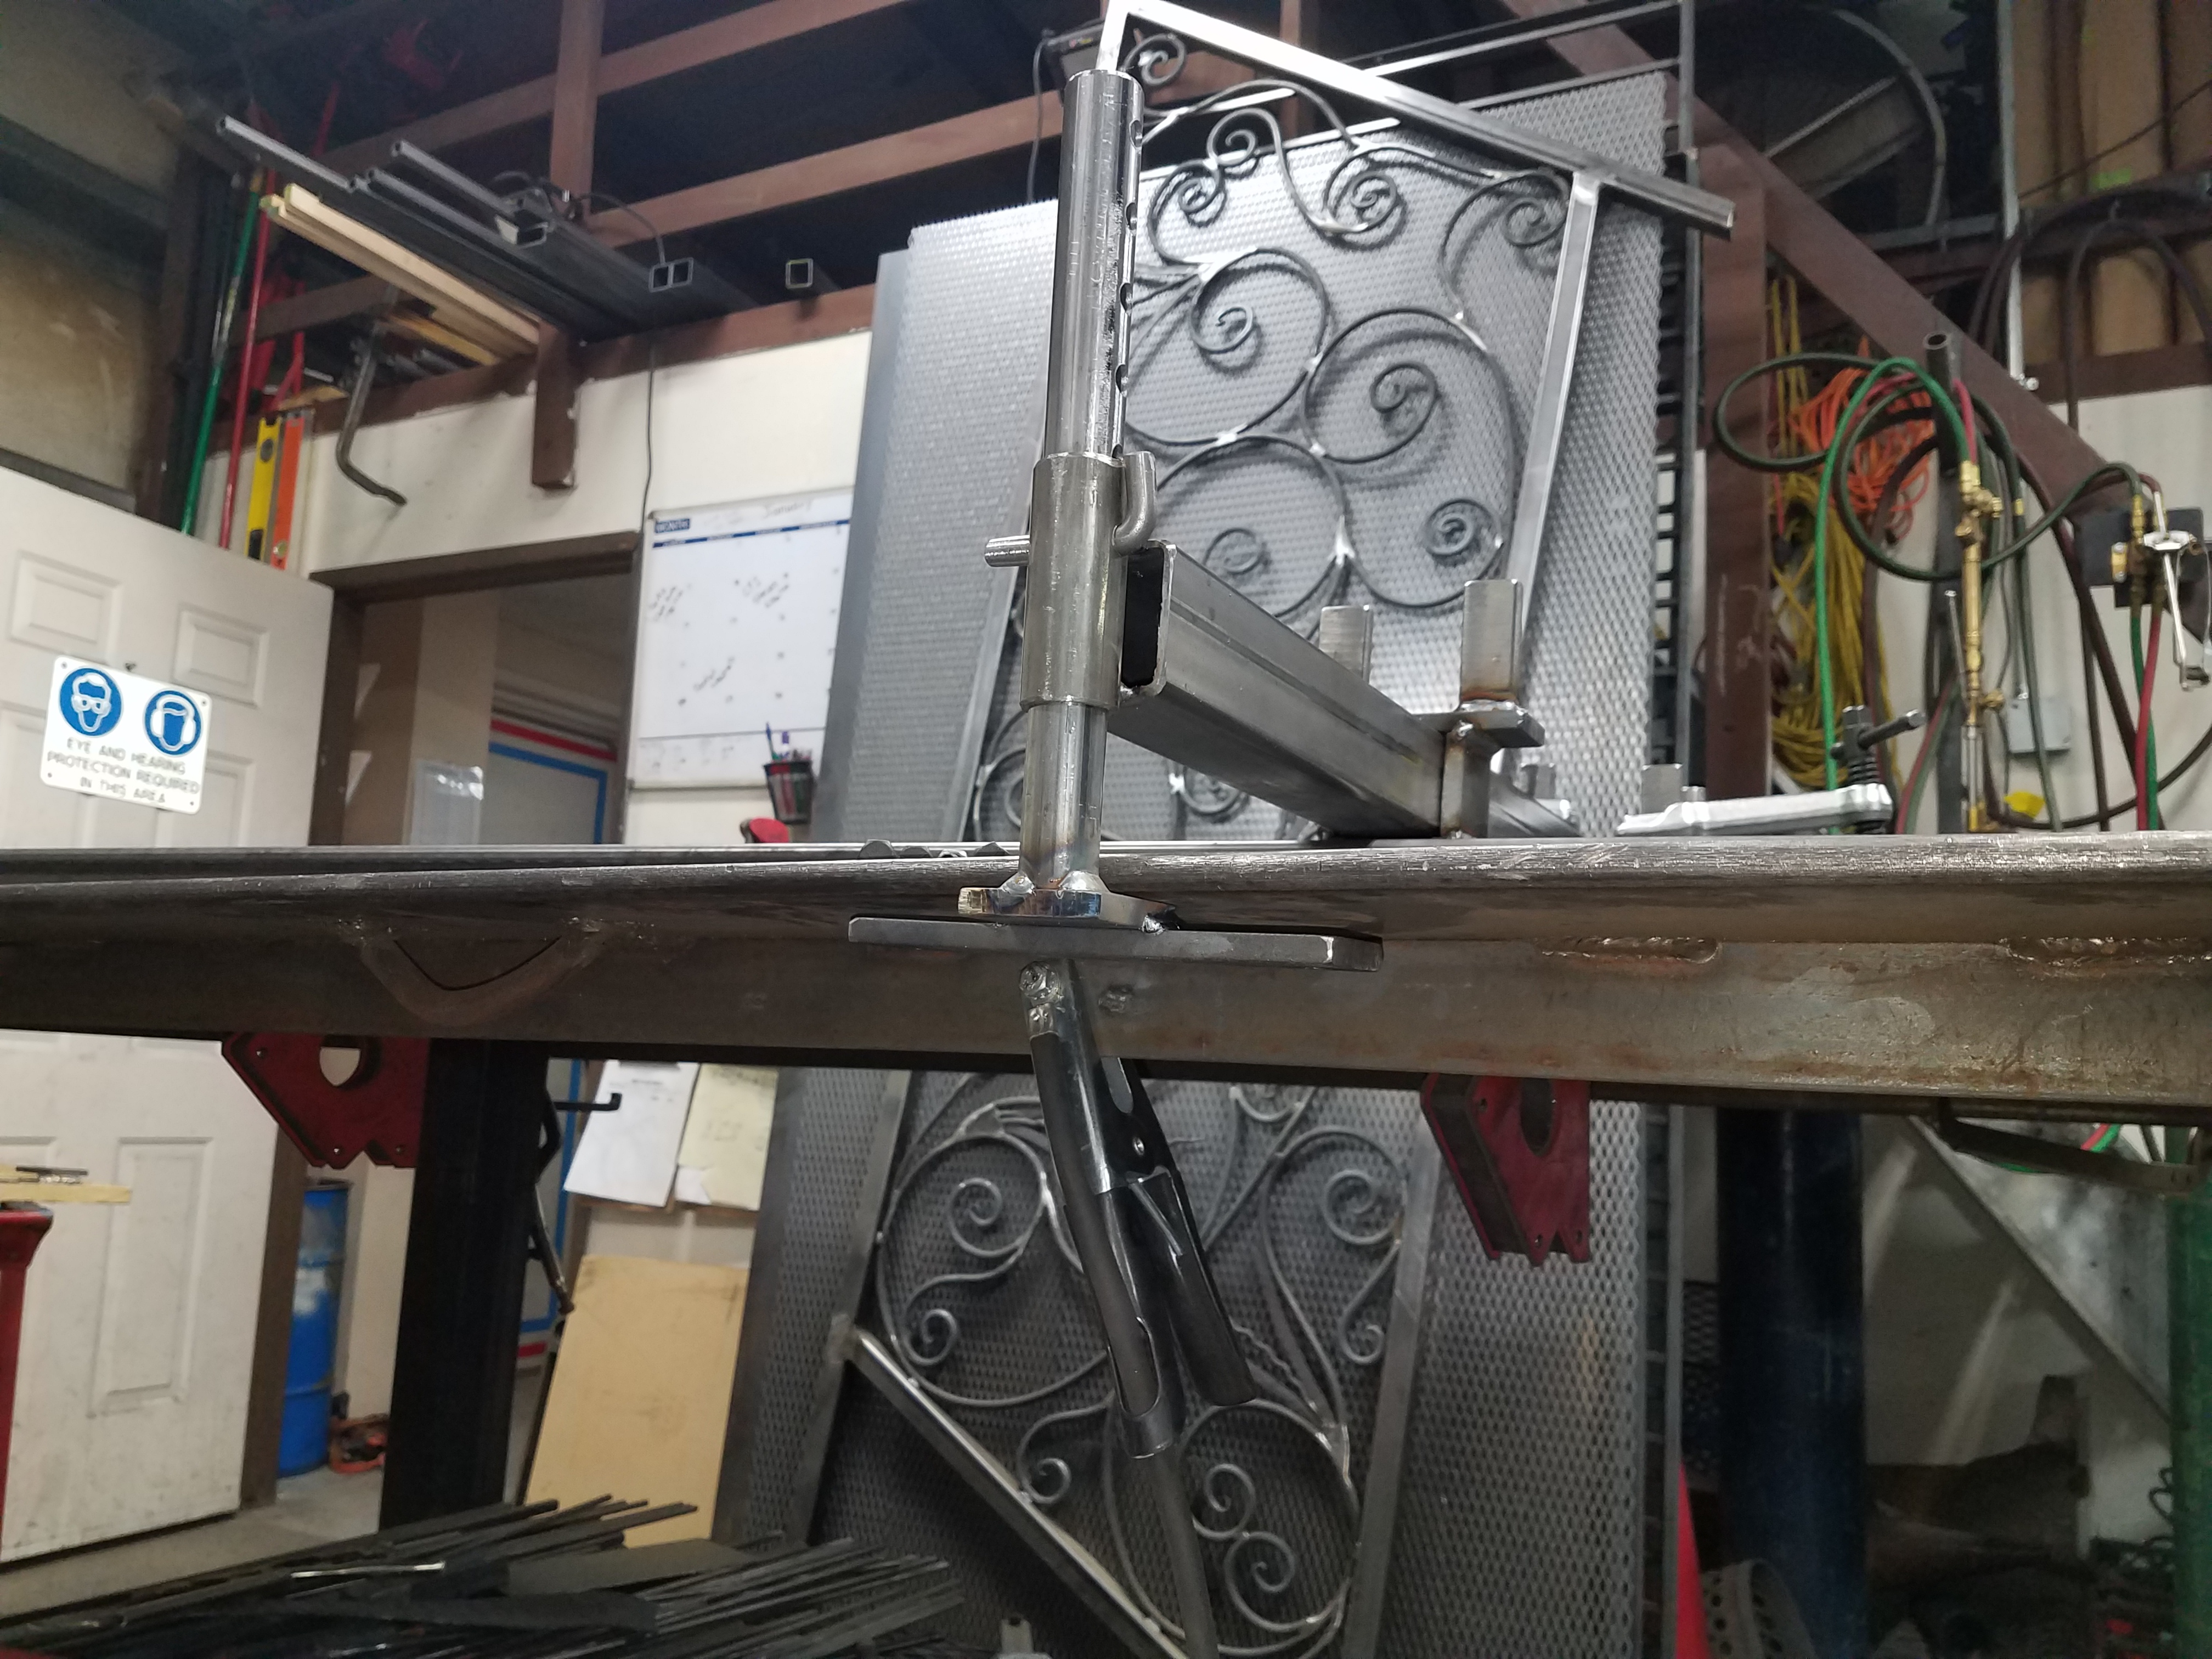
So a lot of the railings and gates I build need to be light or trying to meet a budget. So I use a lot of tube for pickets. but I still need to add twists, baskets and other decorative elements to the pickets. I use to use angle iron as my jig to keep everything straight but I always had to make a new jig and I was constantly having to clean out welding bb's and accidentally tacing the picket to the jig....... they worked but were a pain. with this jig I can set my stands where they need to be and I have clearance to weld, never have bb's settling in the jig where my steel lays, can weld pickets from 12" to 9ft. I build 1/2'" and 3/4" stands. I used a piece of 3" x 1.25" x 1/4" channel.


-

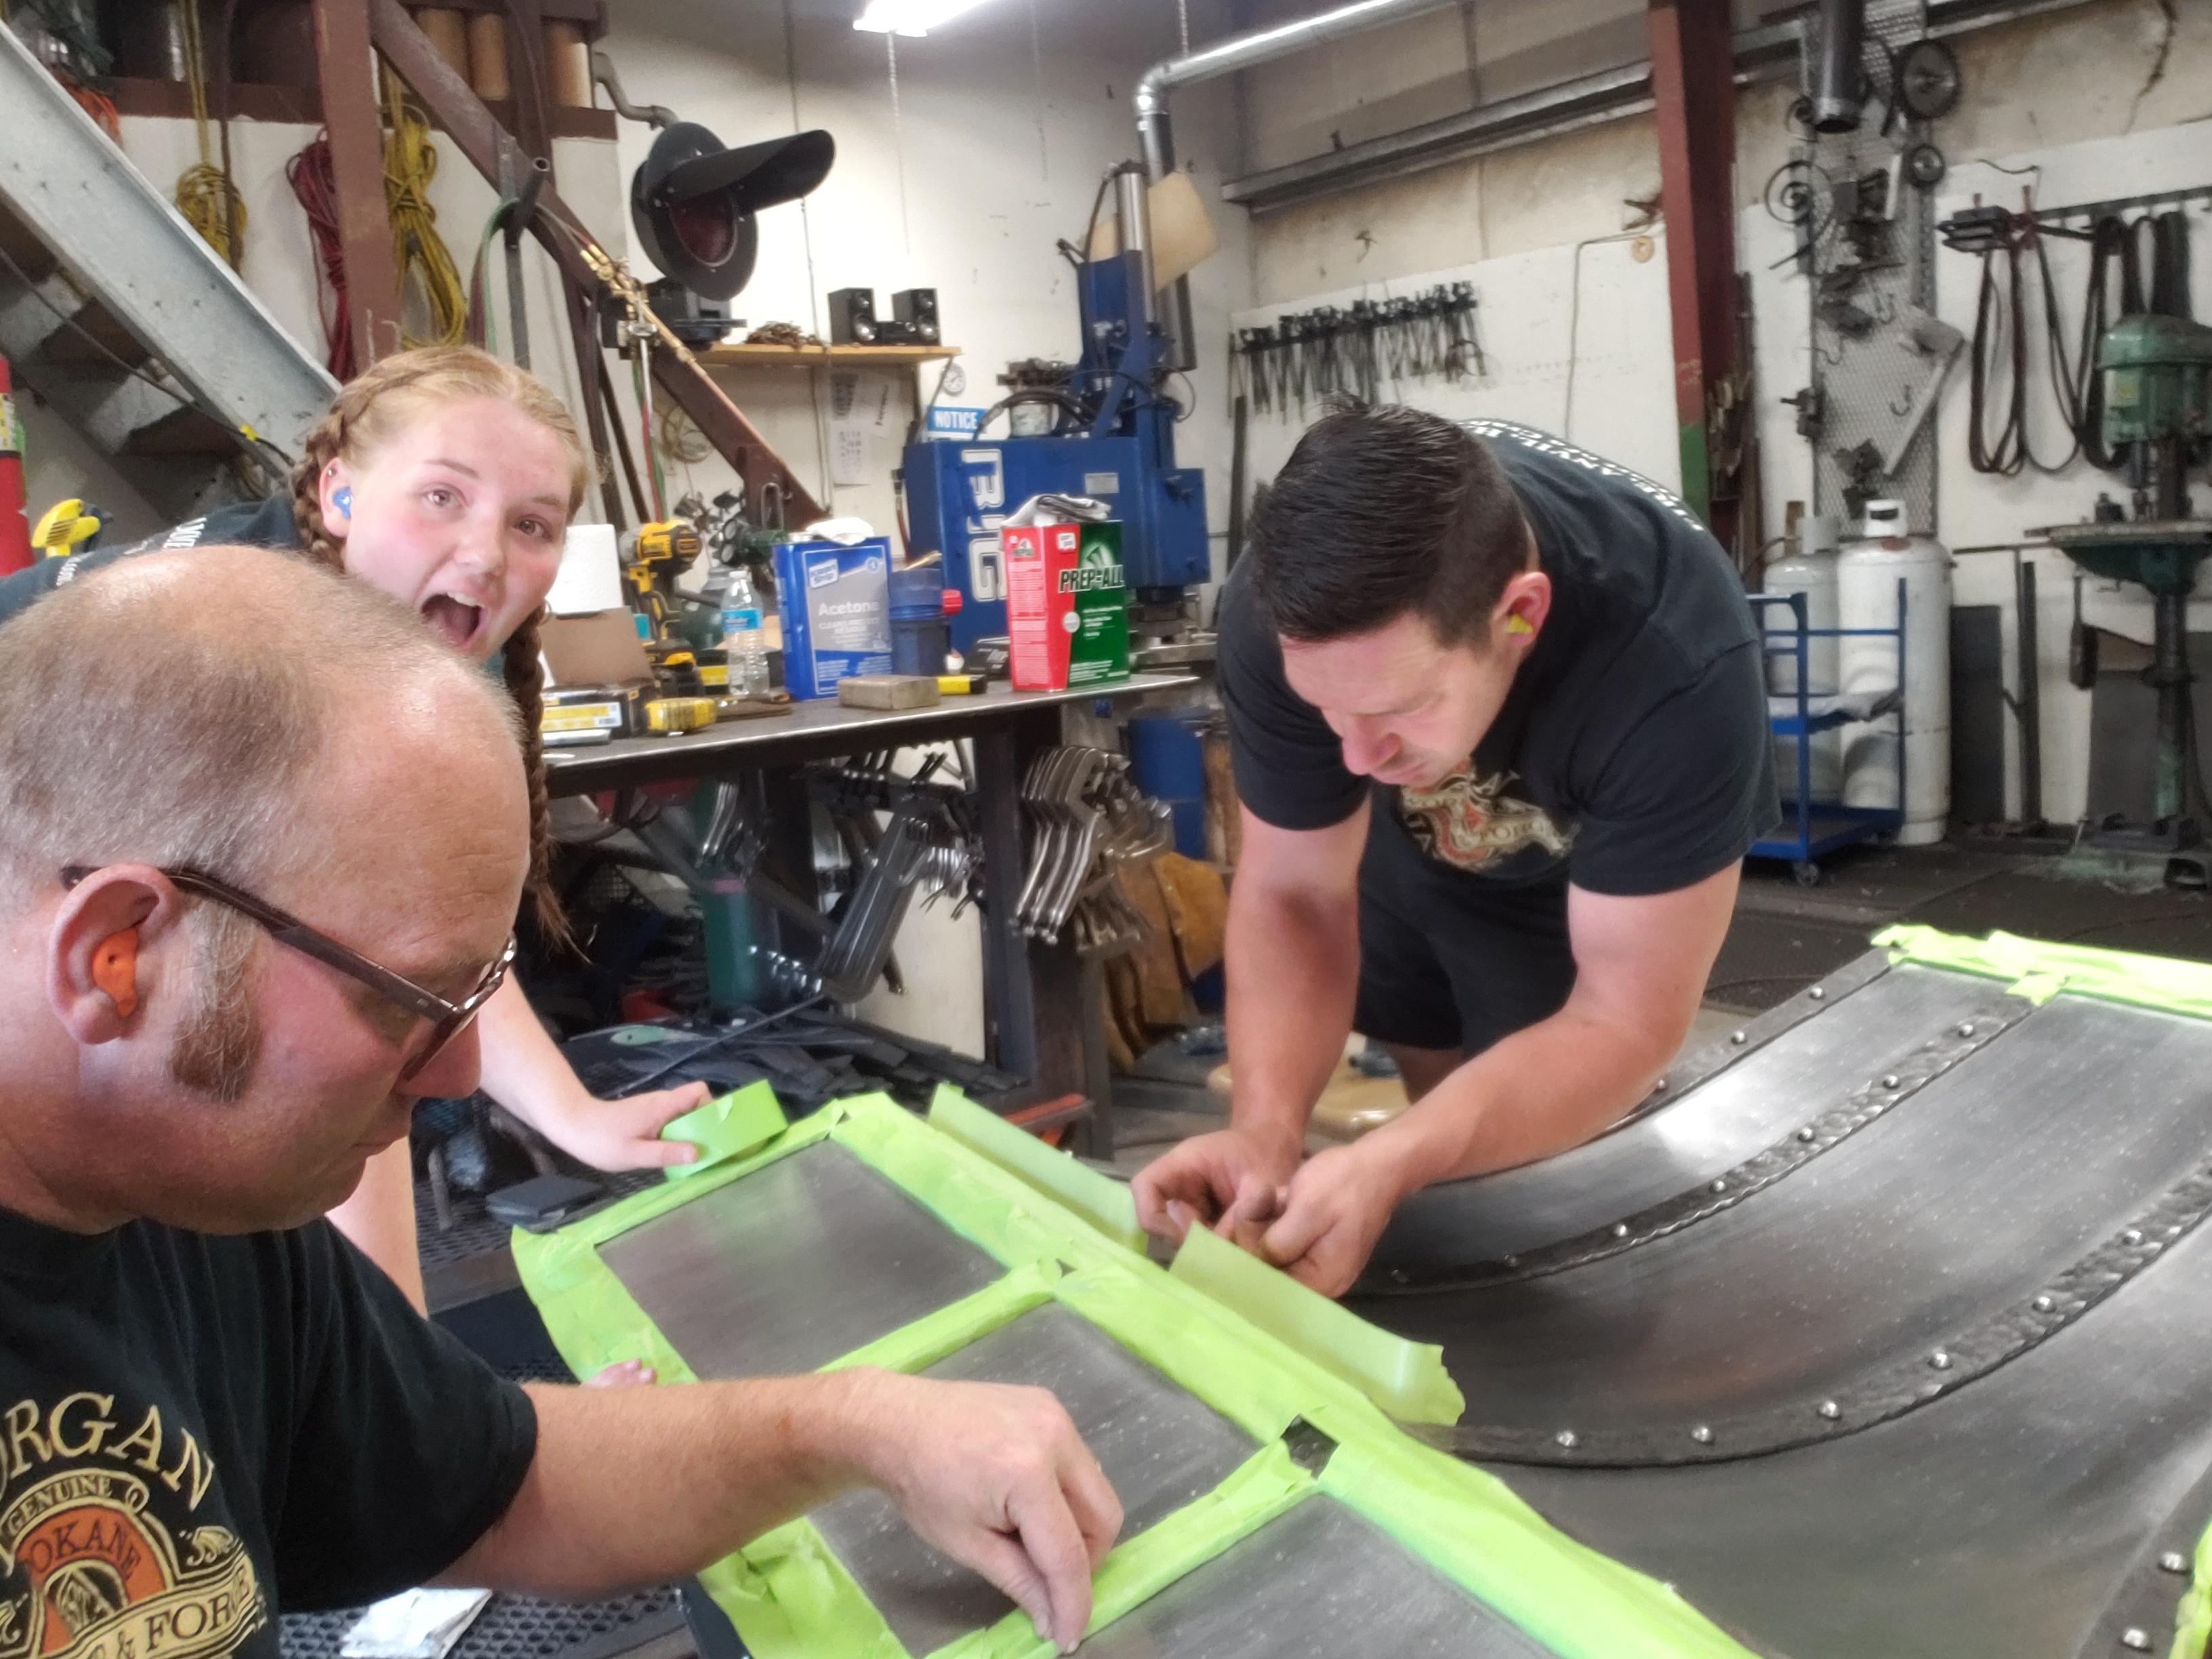
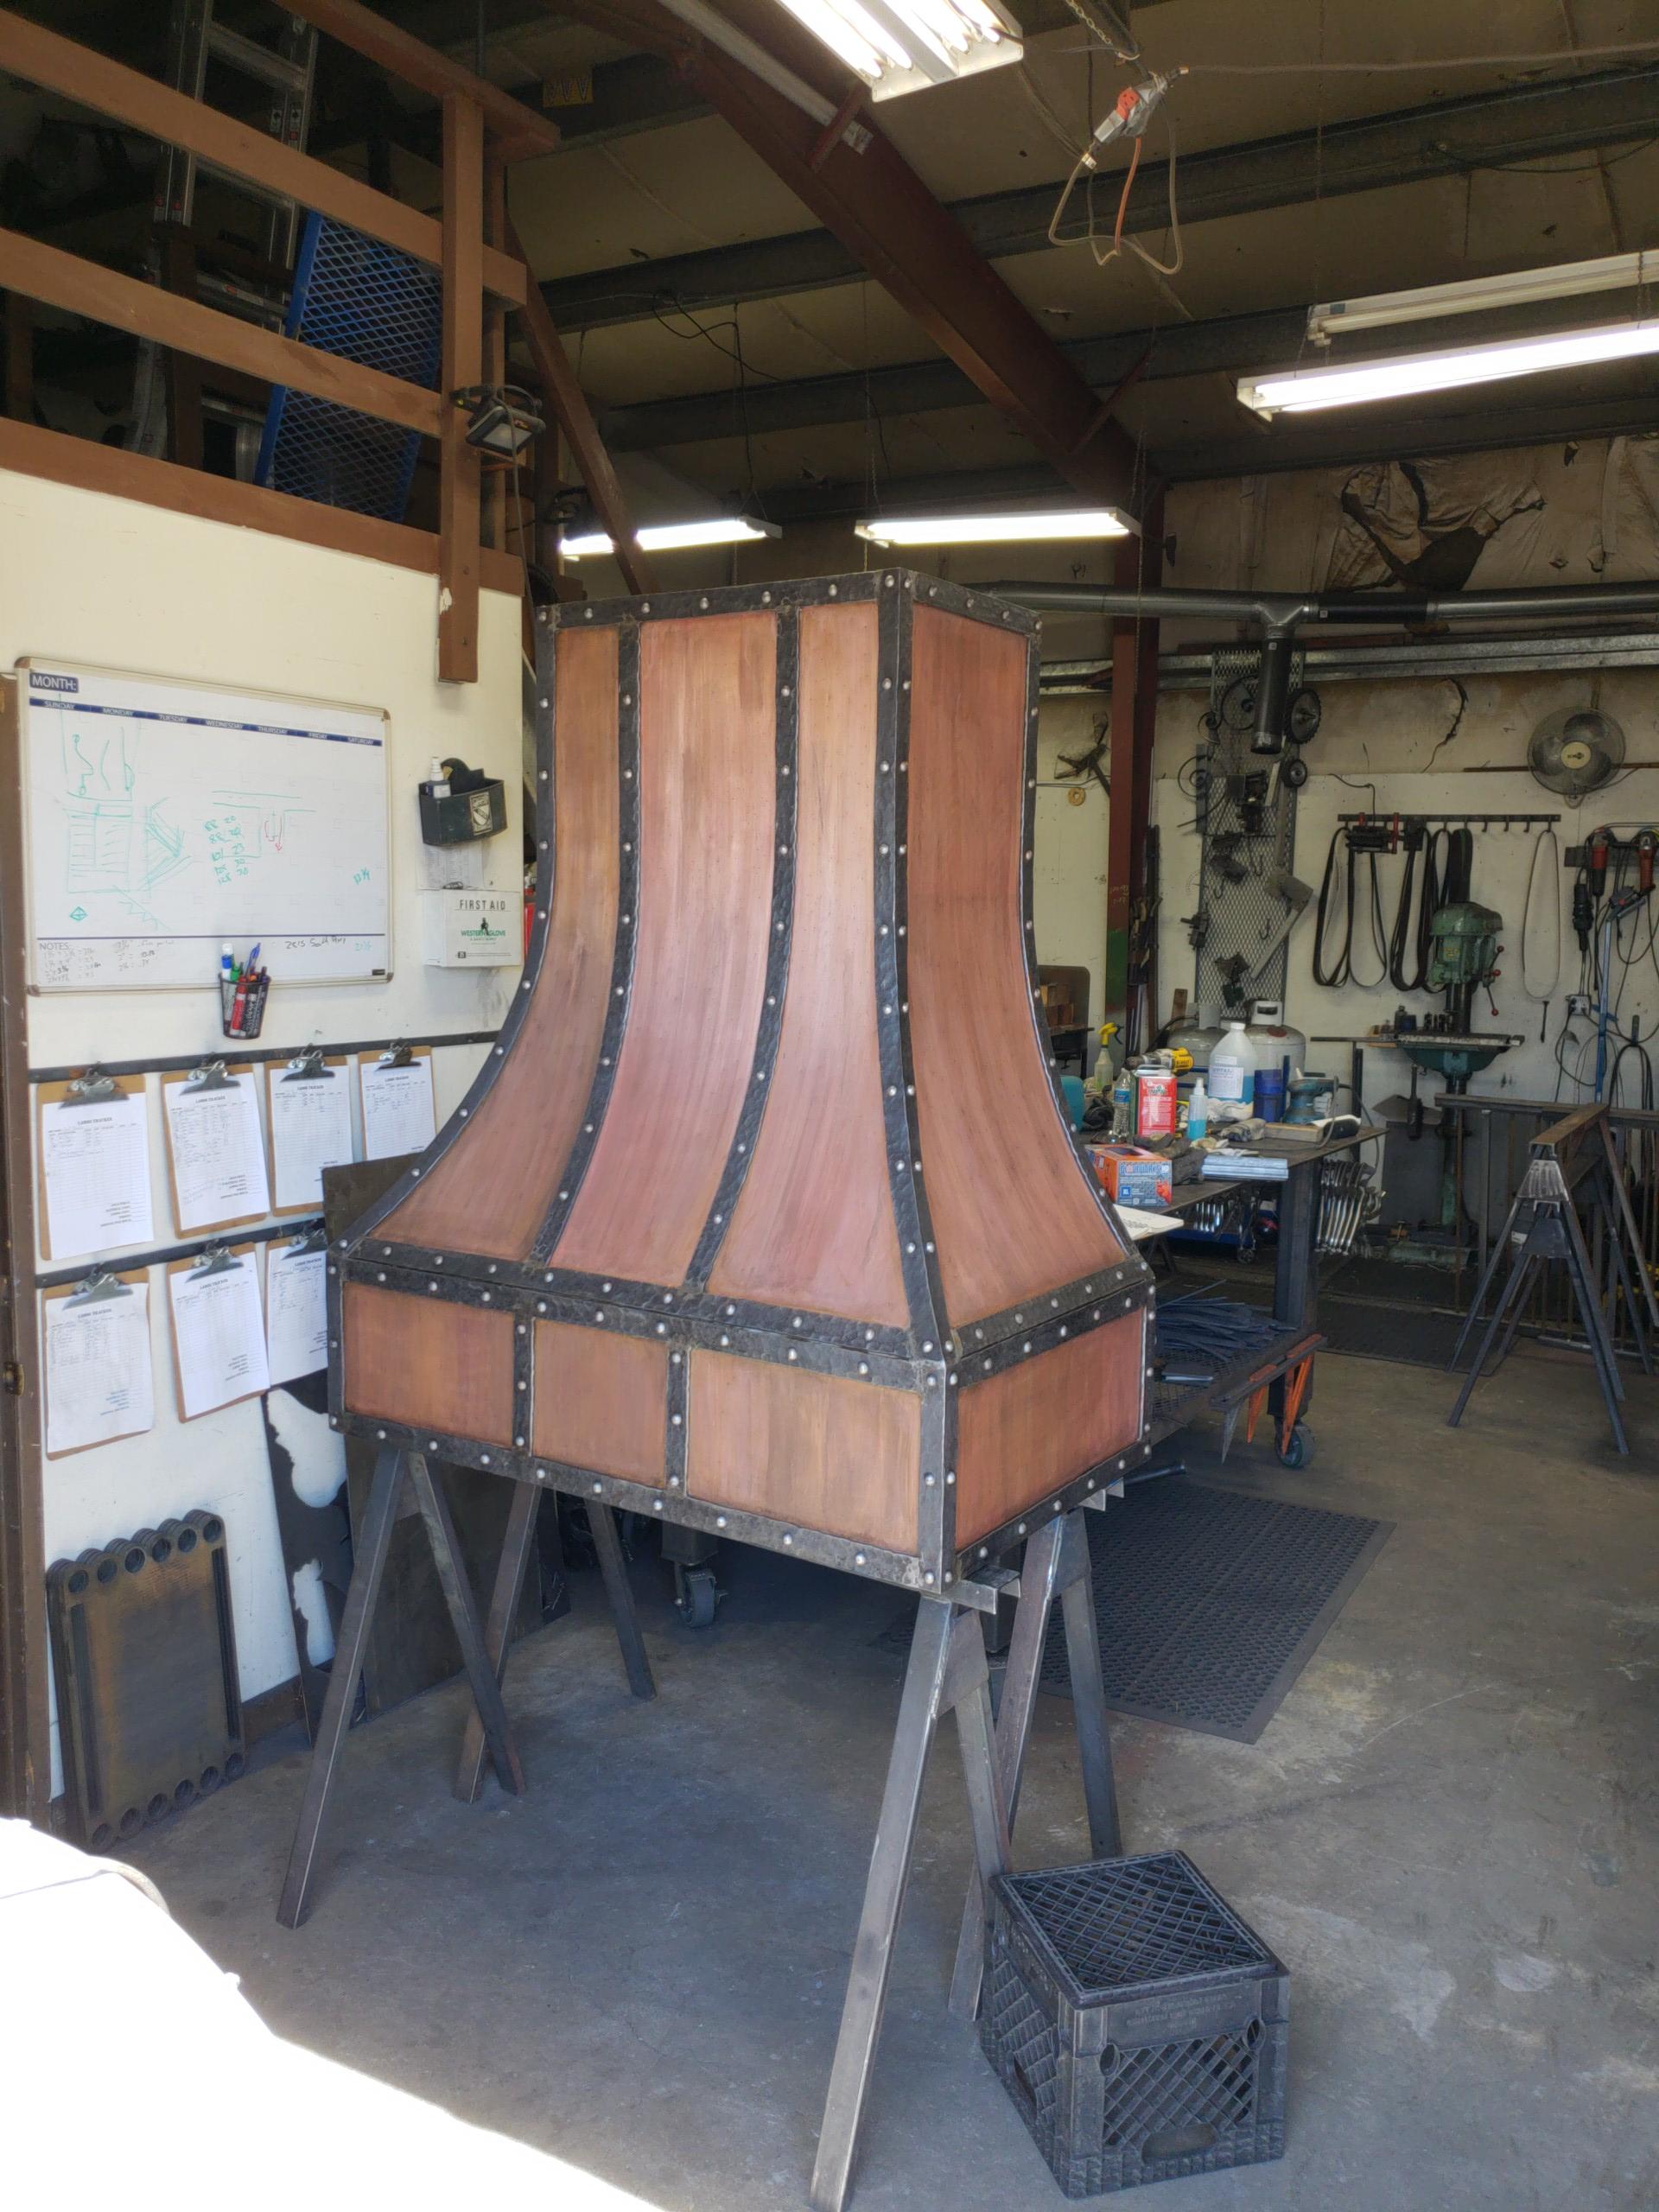
Fitting the strap
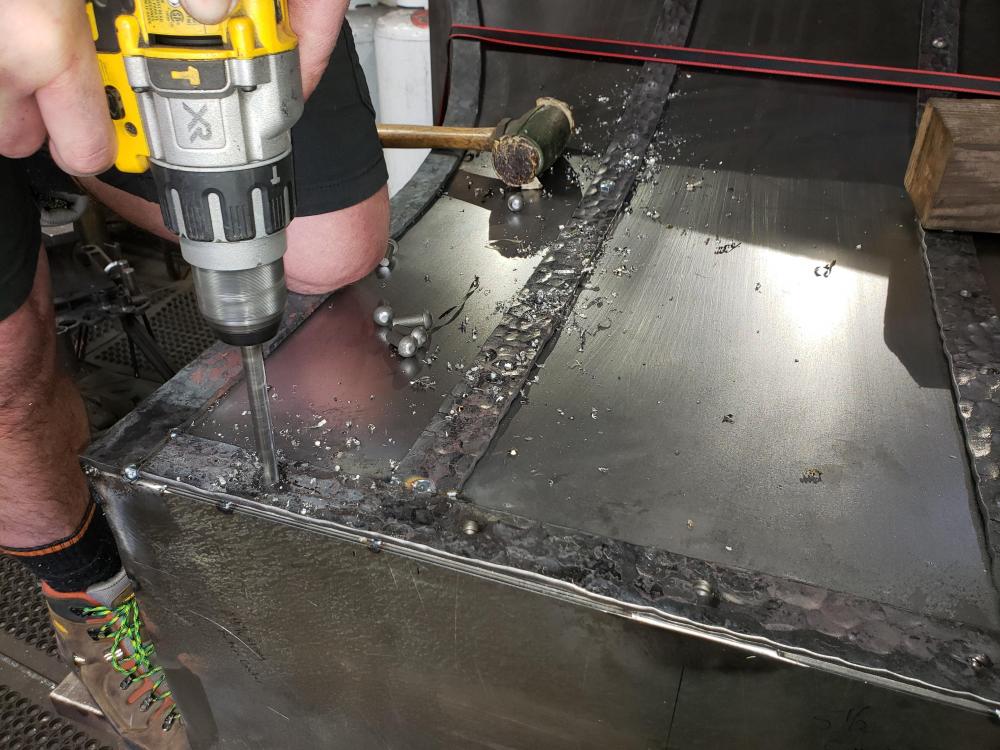
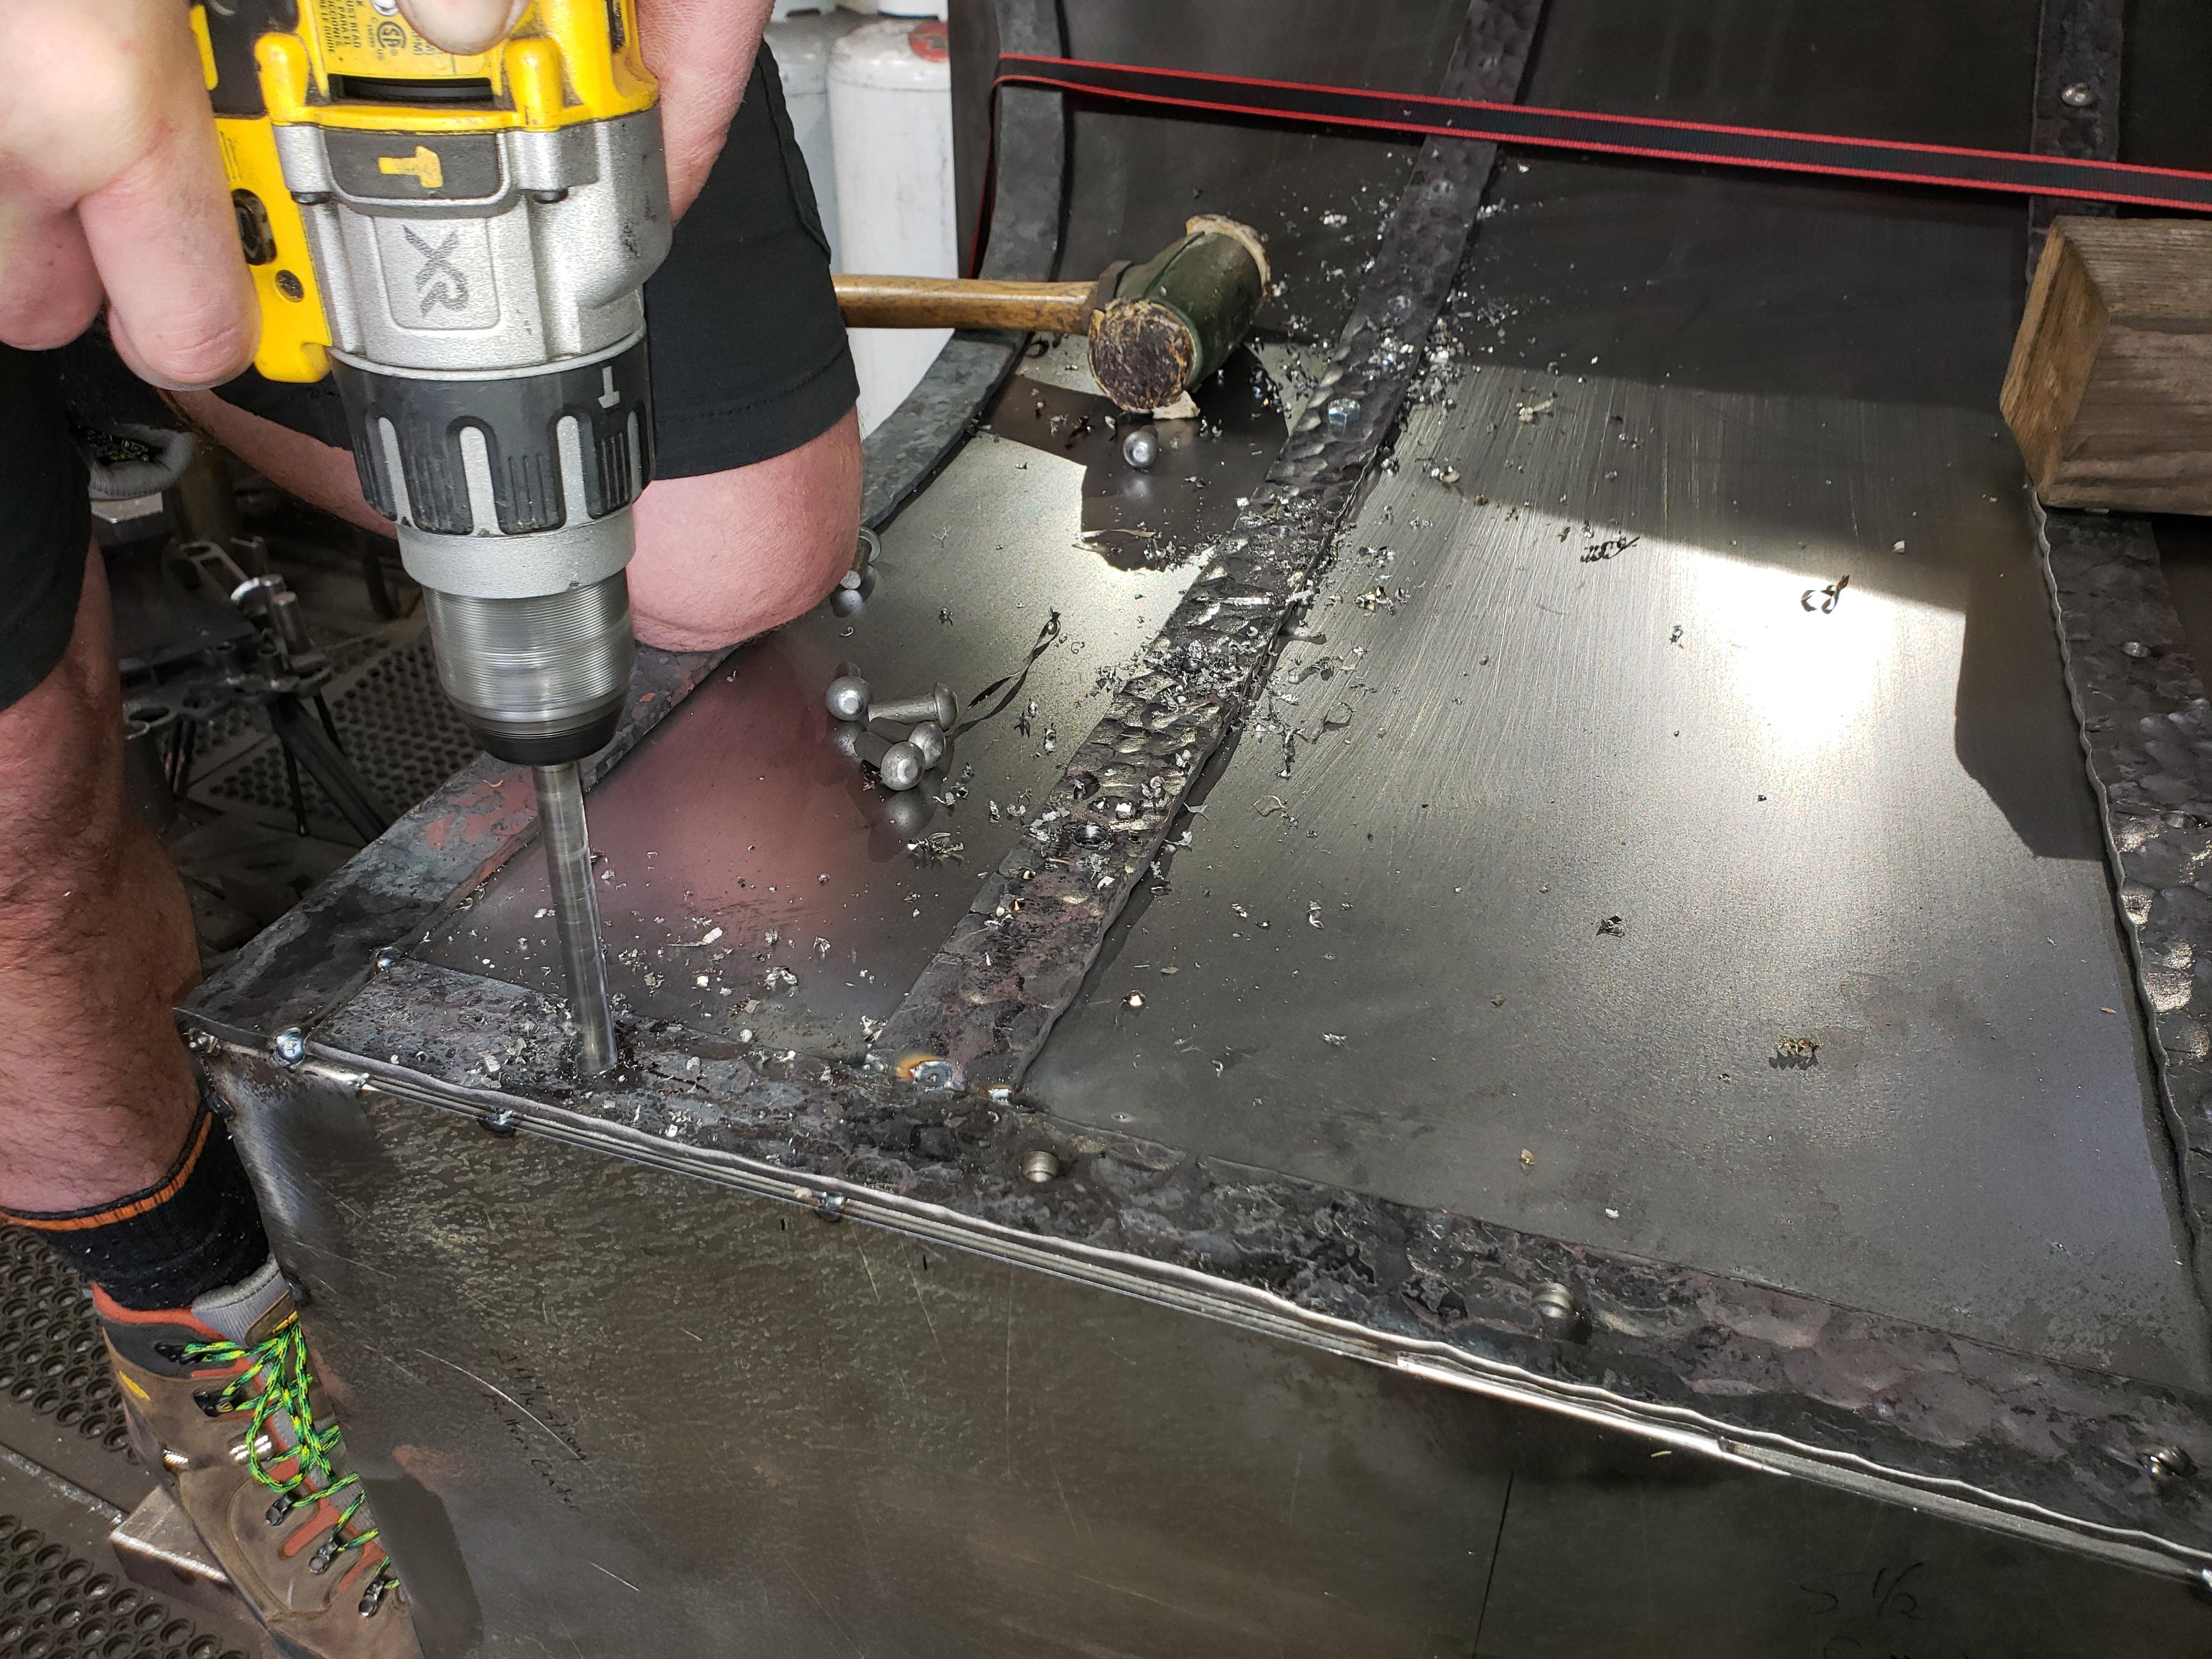
Used the drill press to drill the strap but had to hand drill the over 250 holes in the 10 ga sheet metal body.
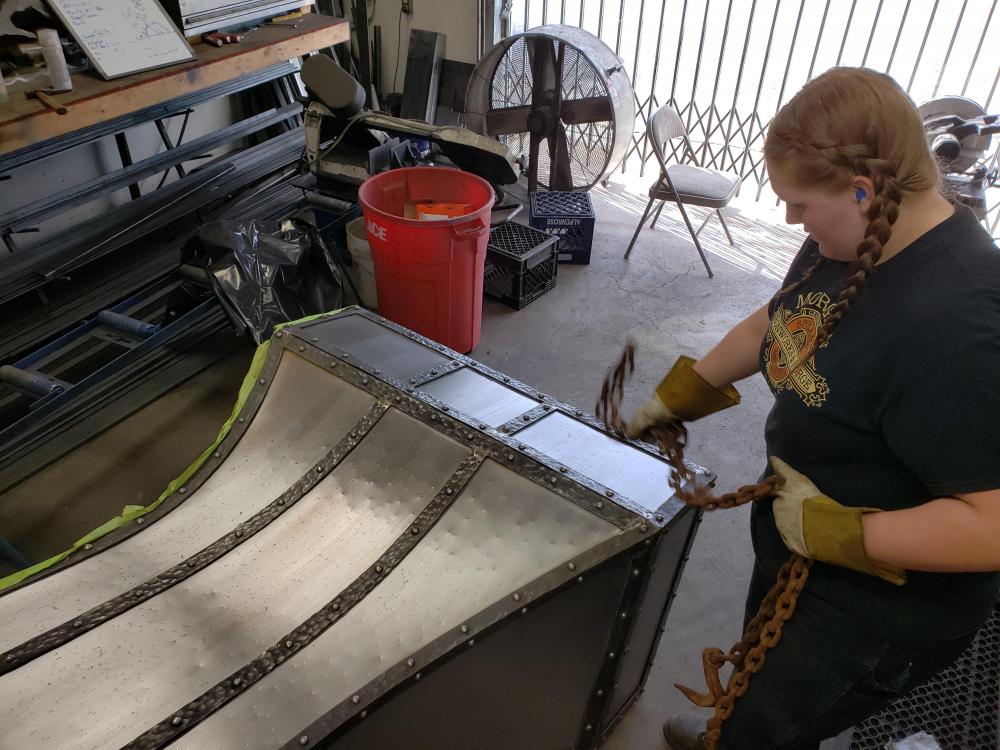
Mady using logging cain to "texture" the sheet metal body.

Masking the stap off cause the customer decided they wanted the hood chemically copper plated.
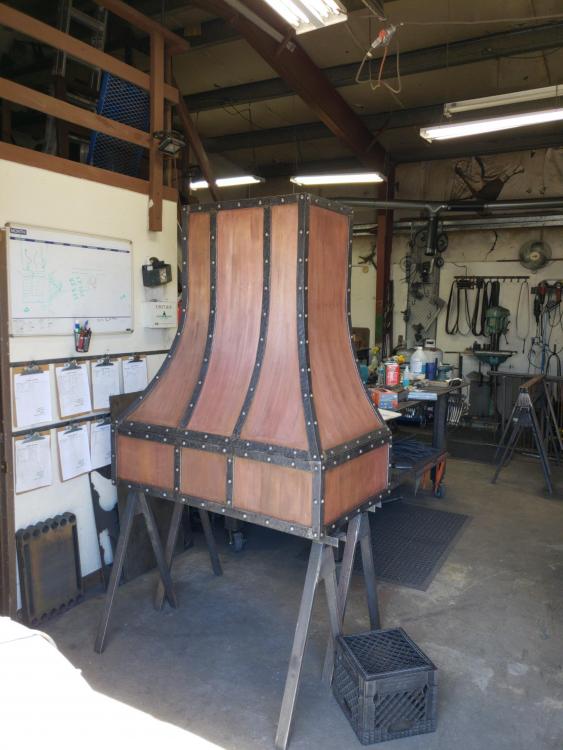
Finished Hood
-
-
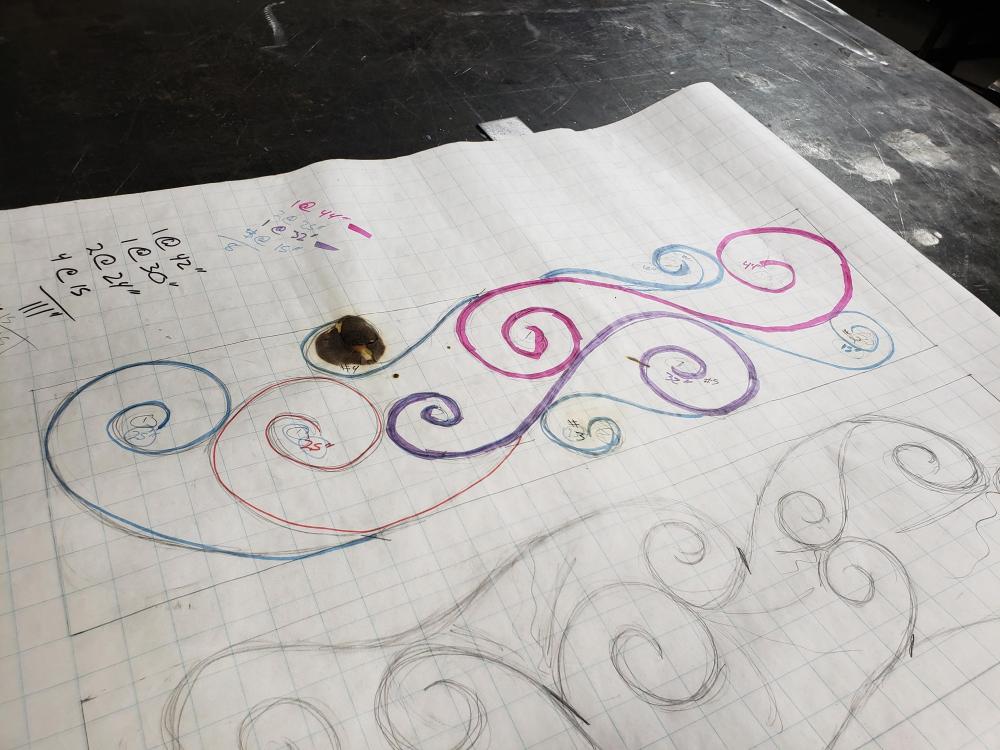
Rough sketch of the scroll panel design

0ver 500 scrolls forged and ready to be trimmed and welded to form the panel

All of the panels are ready to be welded into the fence panels
Completed fence panel
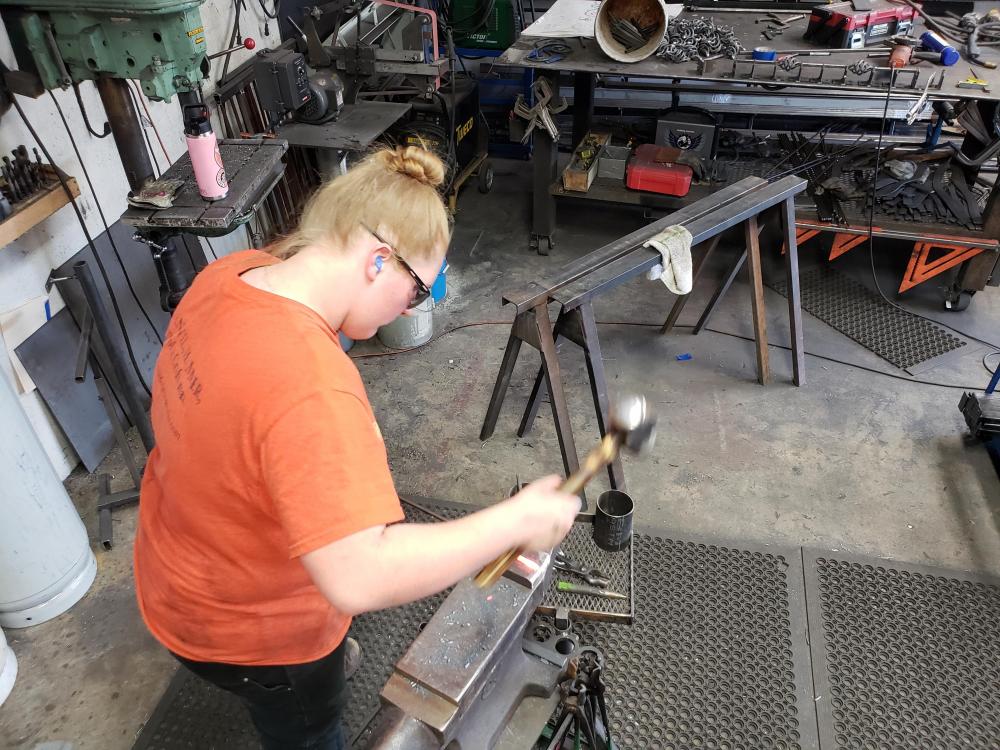
Mady now 15 years old spent 2 days forging points on the 500 pieces of 5/16" found bar so they could be forged into the scrolls we need.
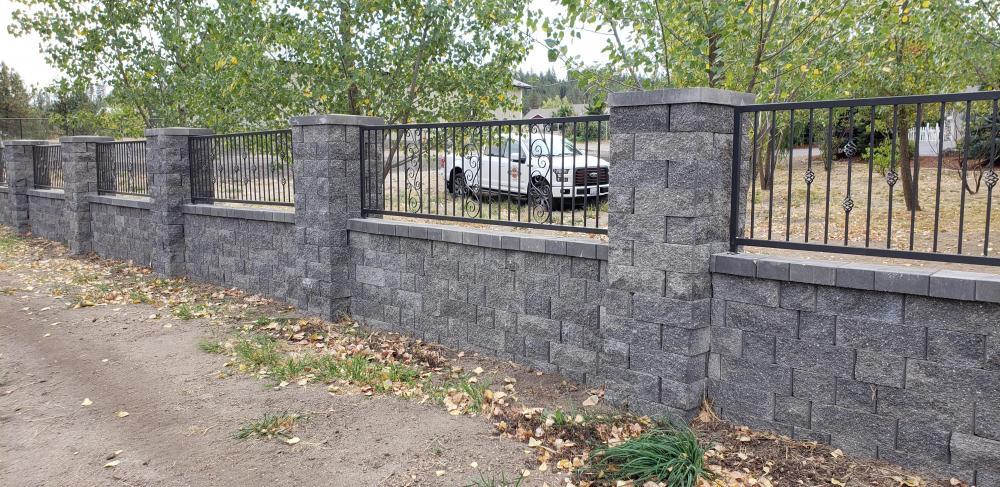
panels on the block wall
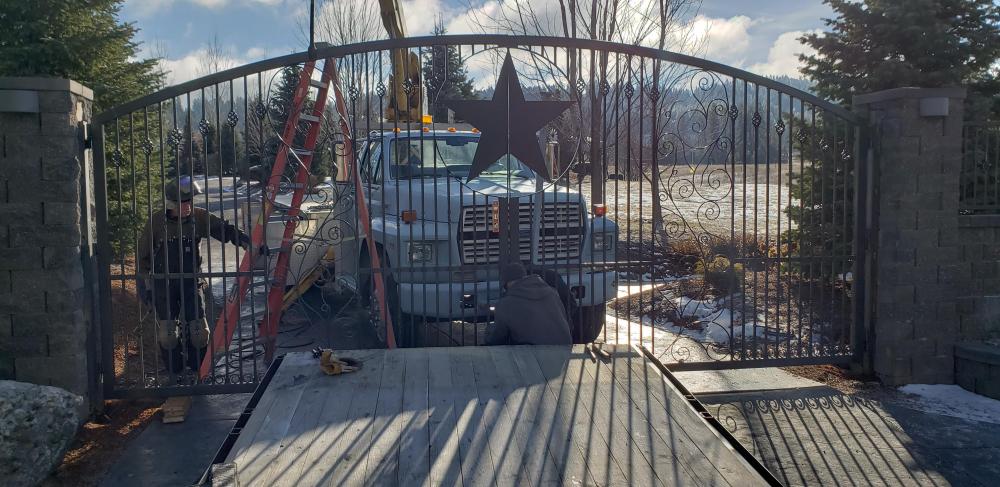
Installing the 20ft gate

5 ft personal gate
-
-
I use a good antispatter.... not sure on the name but the jig gets a good coating before i use it. better then a cold chisel. lol
-
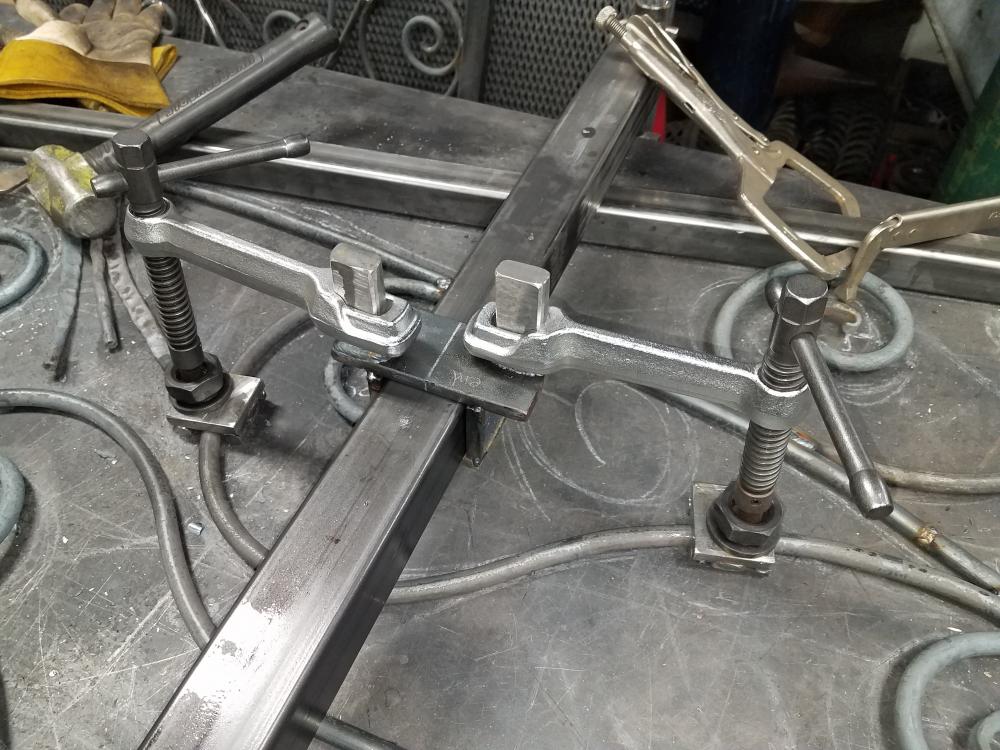
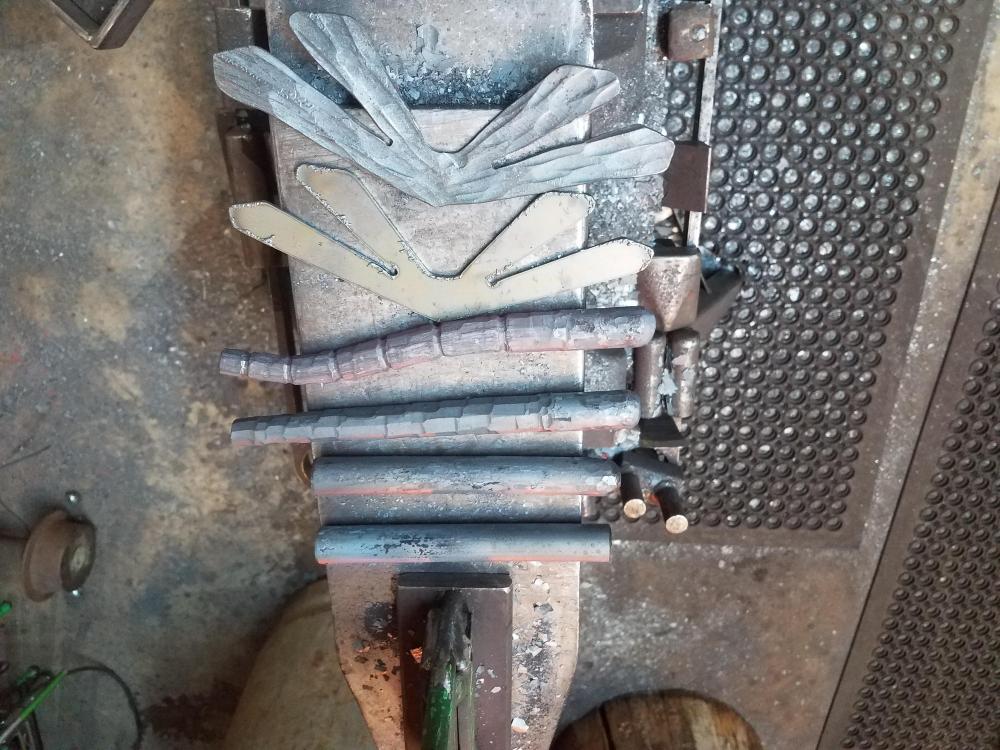
I use a lot of tube to save on weight and material cost. So I have to weld baskets, twists, and other decrative elements to make a picket. But it's a pain to keep them straight and weld them with out dealing with slang getting on the jig and having to be cleaned all the time or accidentally welding it to the jig. Then having to build a new jig next time cause that job has a diffrent design.
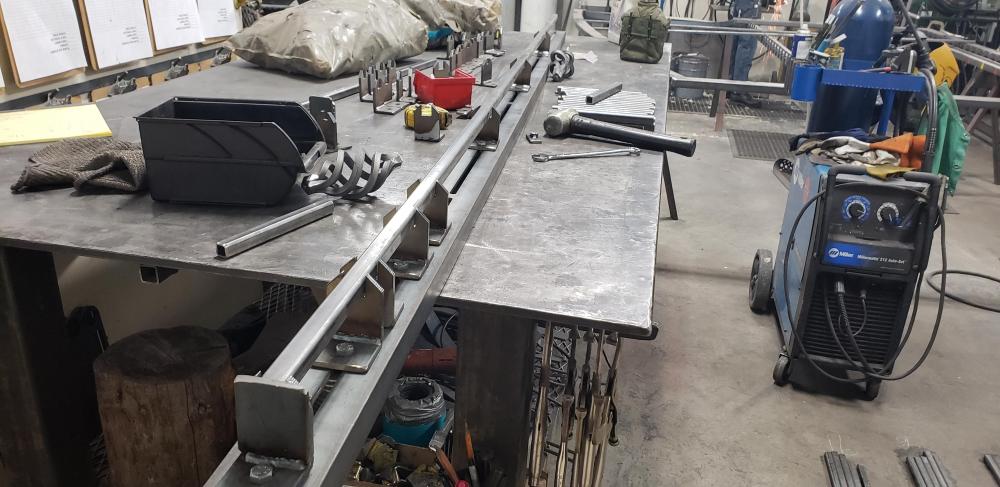 This is the answer for all my issues. I took a piece of 3" x 1 1/4 channel and had a 3/8" slot milled in it 12" long with a 1"gap between them to help keep the strength of the channel.


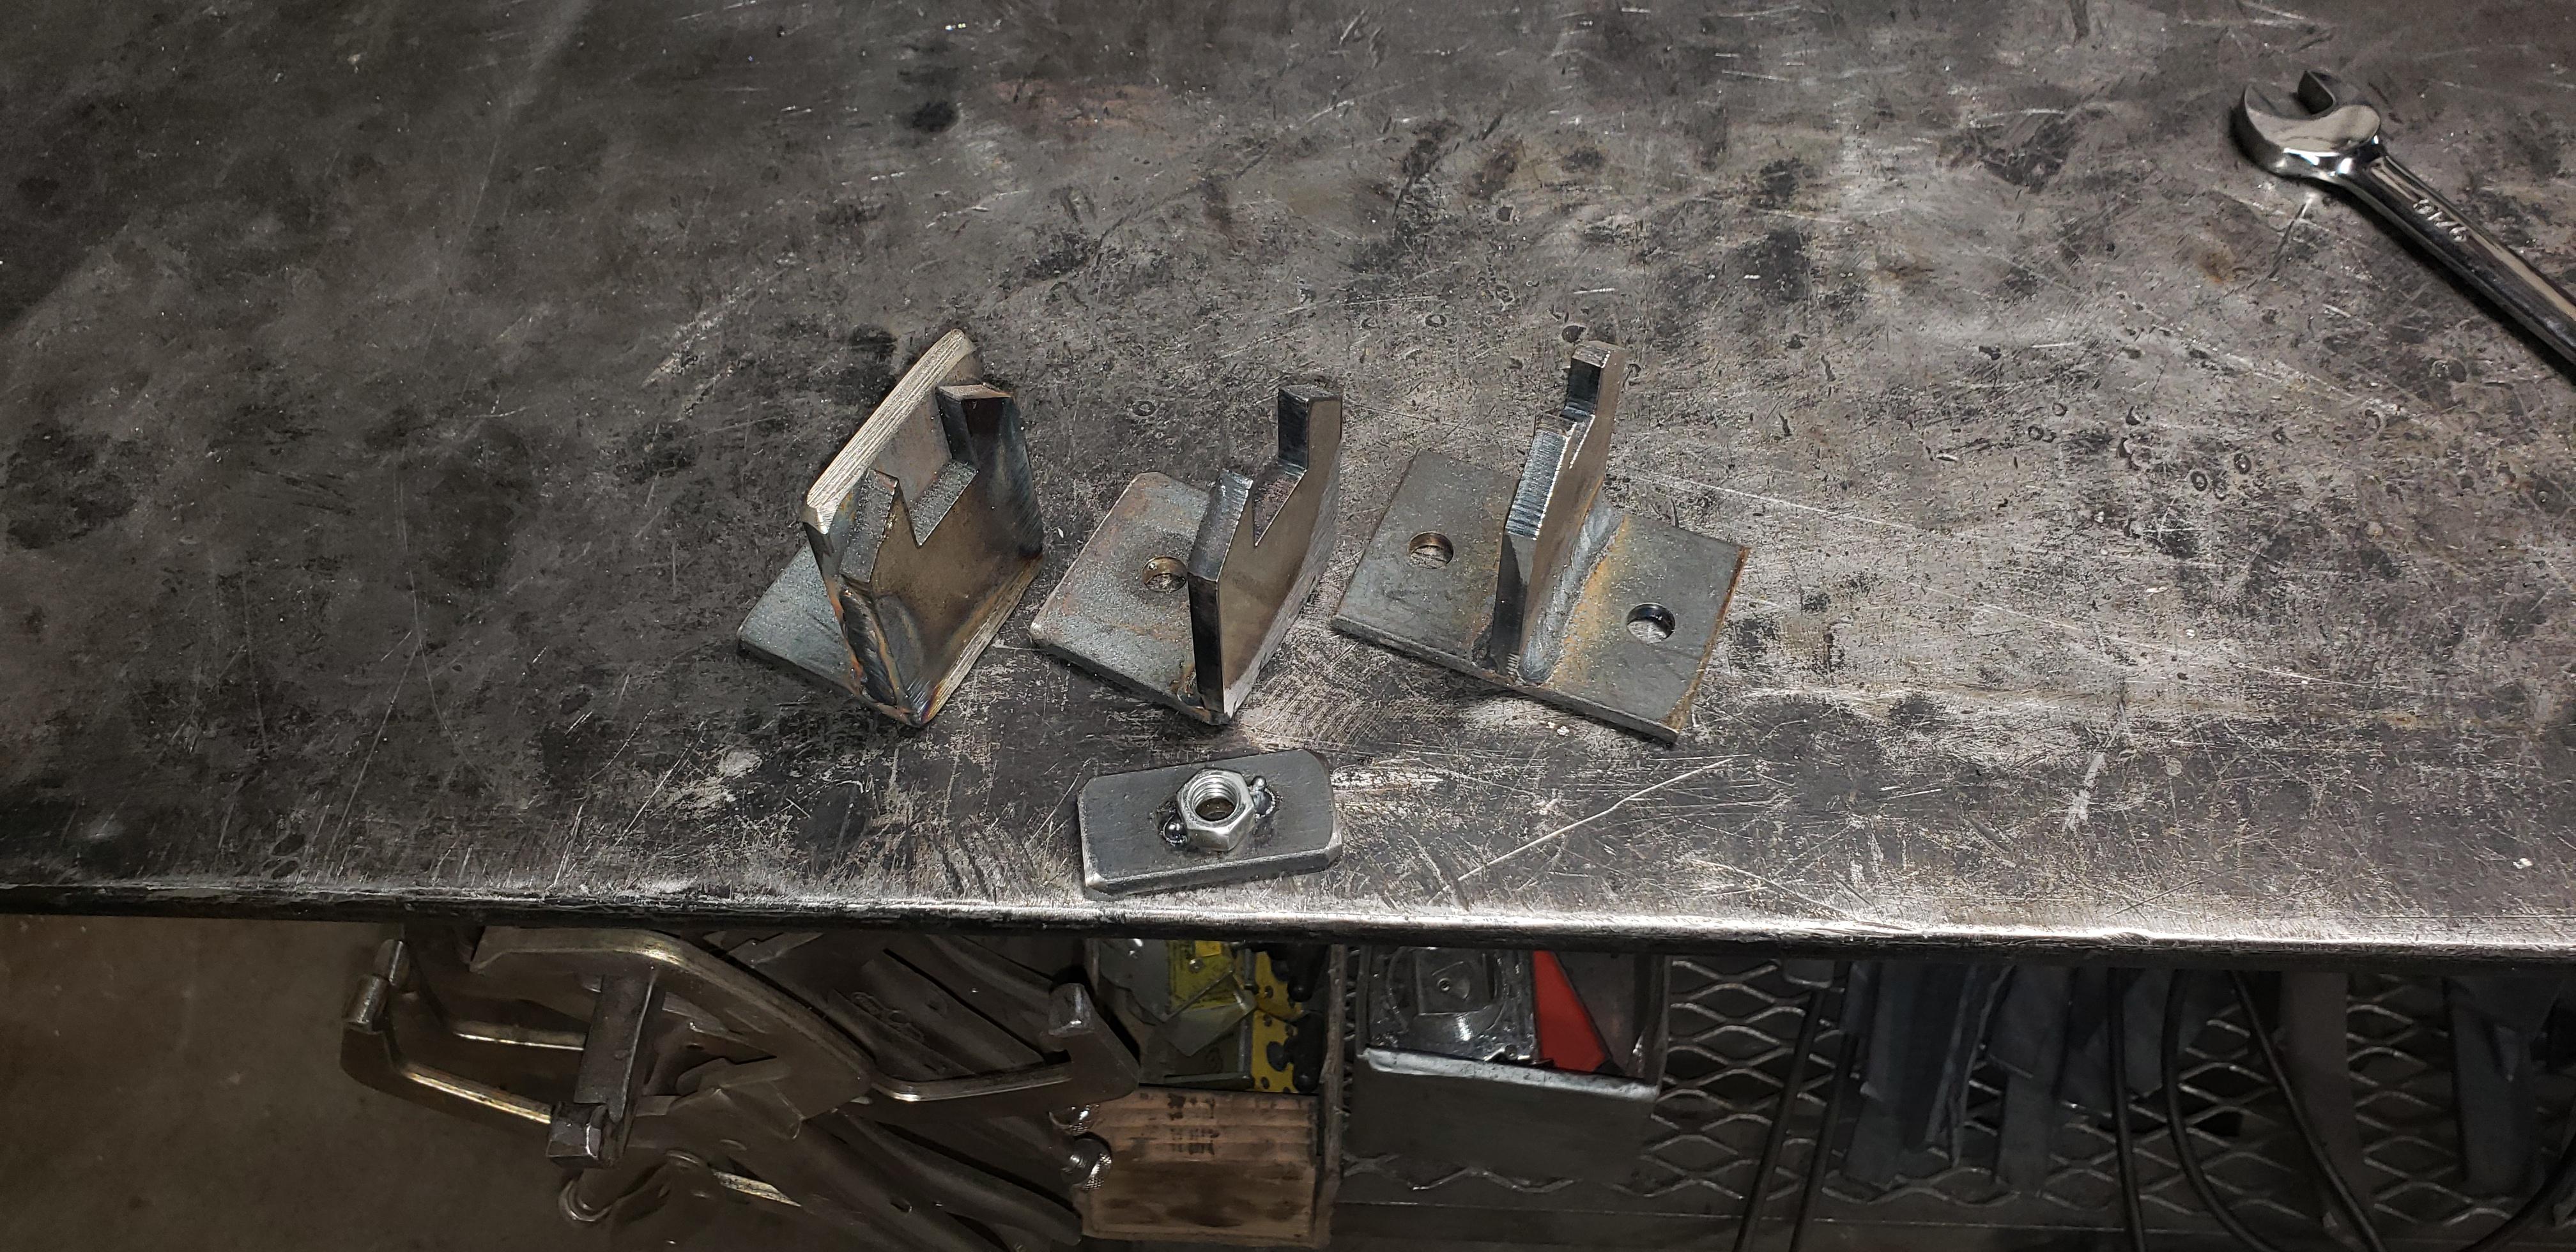
I had standoffs cut out with 1/2" thru 1" then welded bases on them.

I use flat bar with nuts welded to them the flat bar can rotate in the channel and so I only need one wrench to tighten them.


I have clearance to weld 3 sides and can adjust the standoff to any configuration.
-
I powdercoated it a dark hammertone gray
-
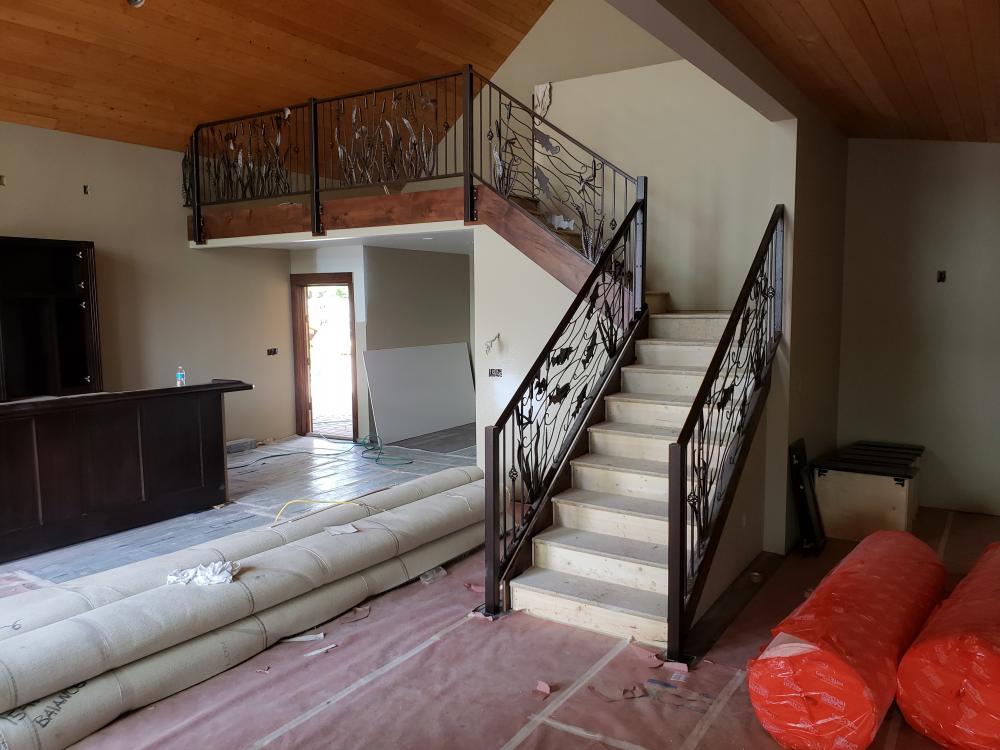
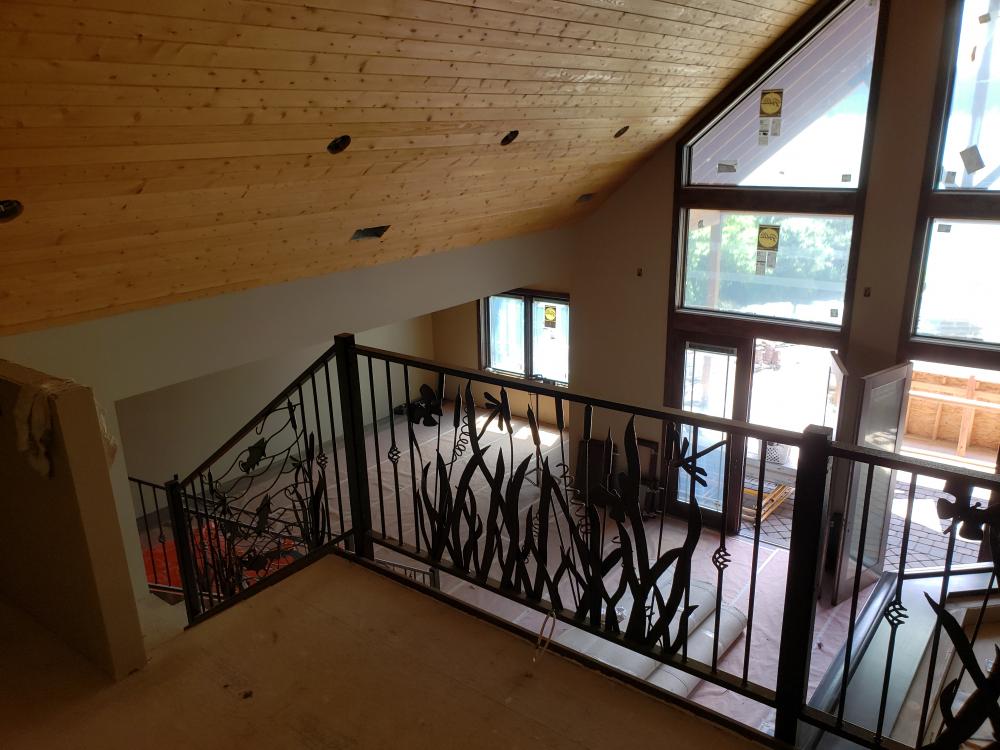
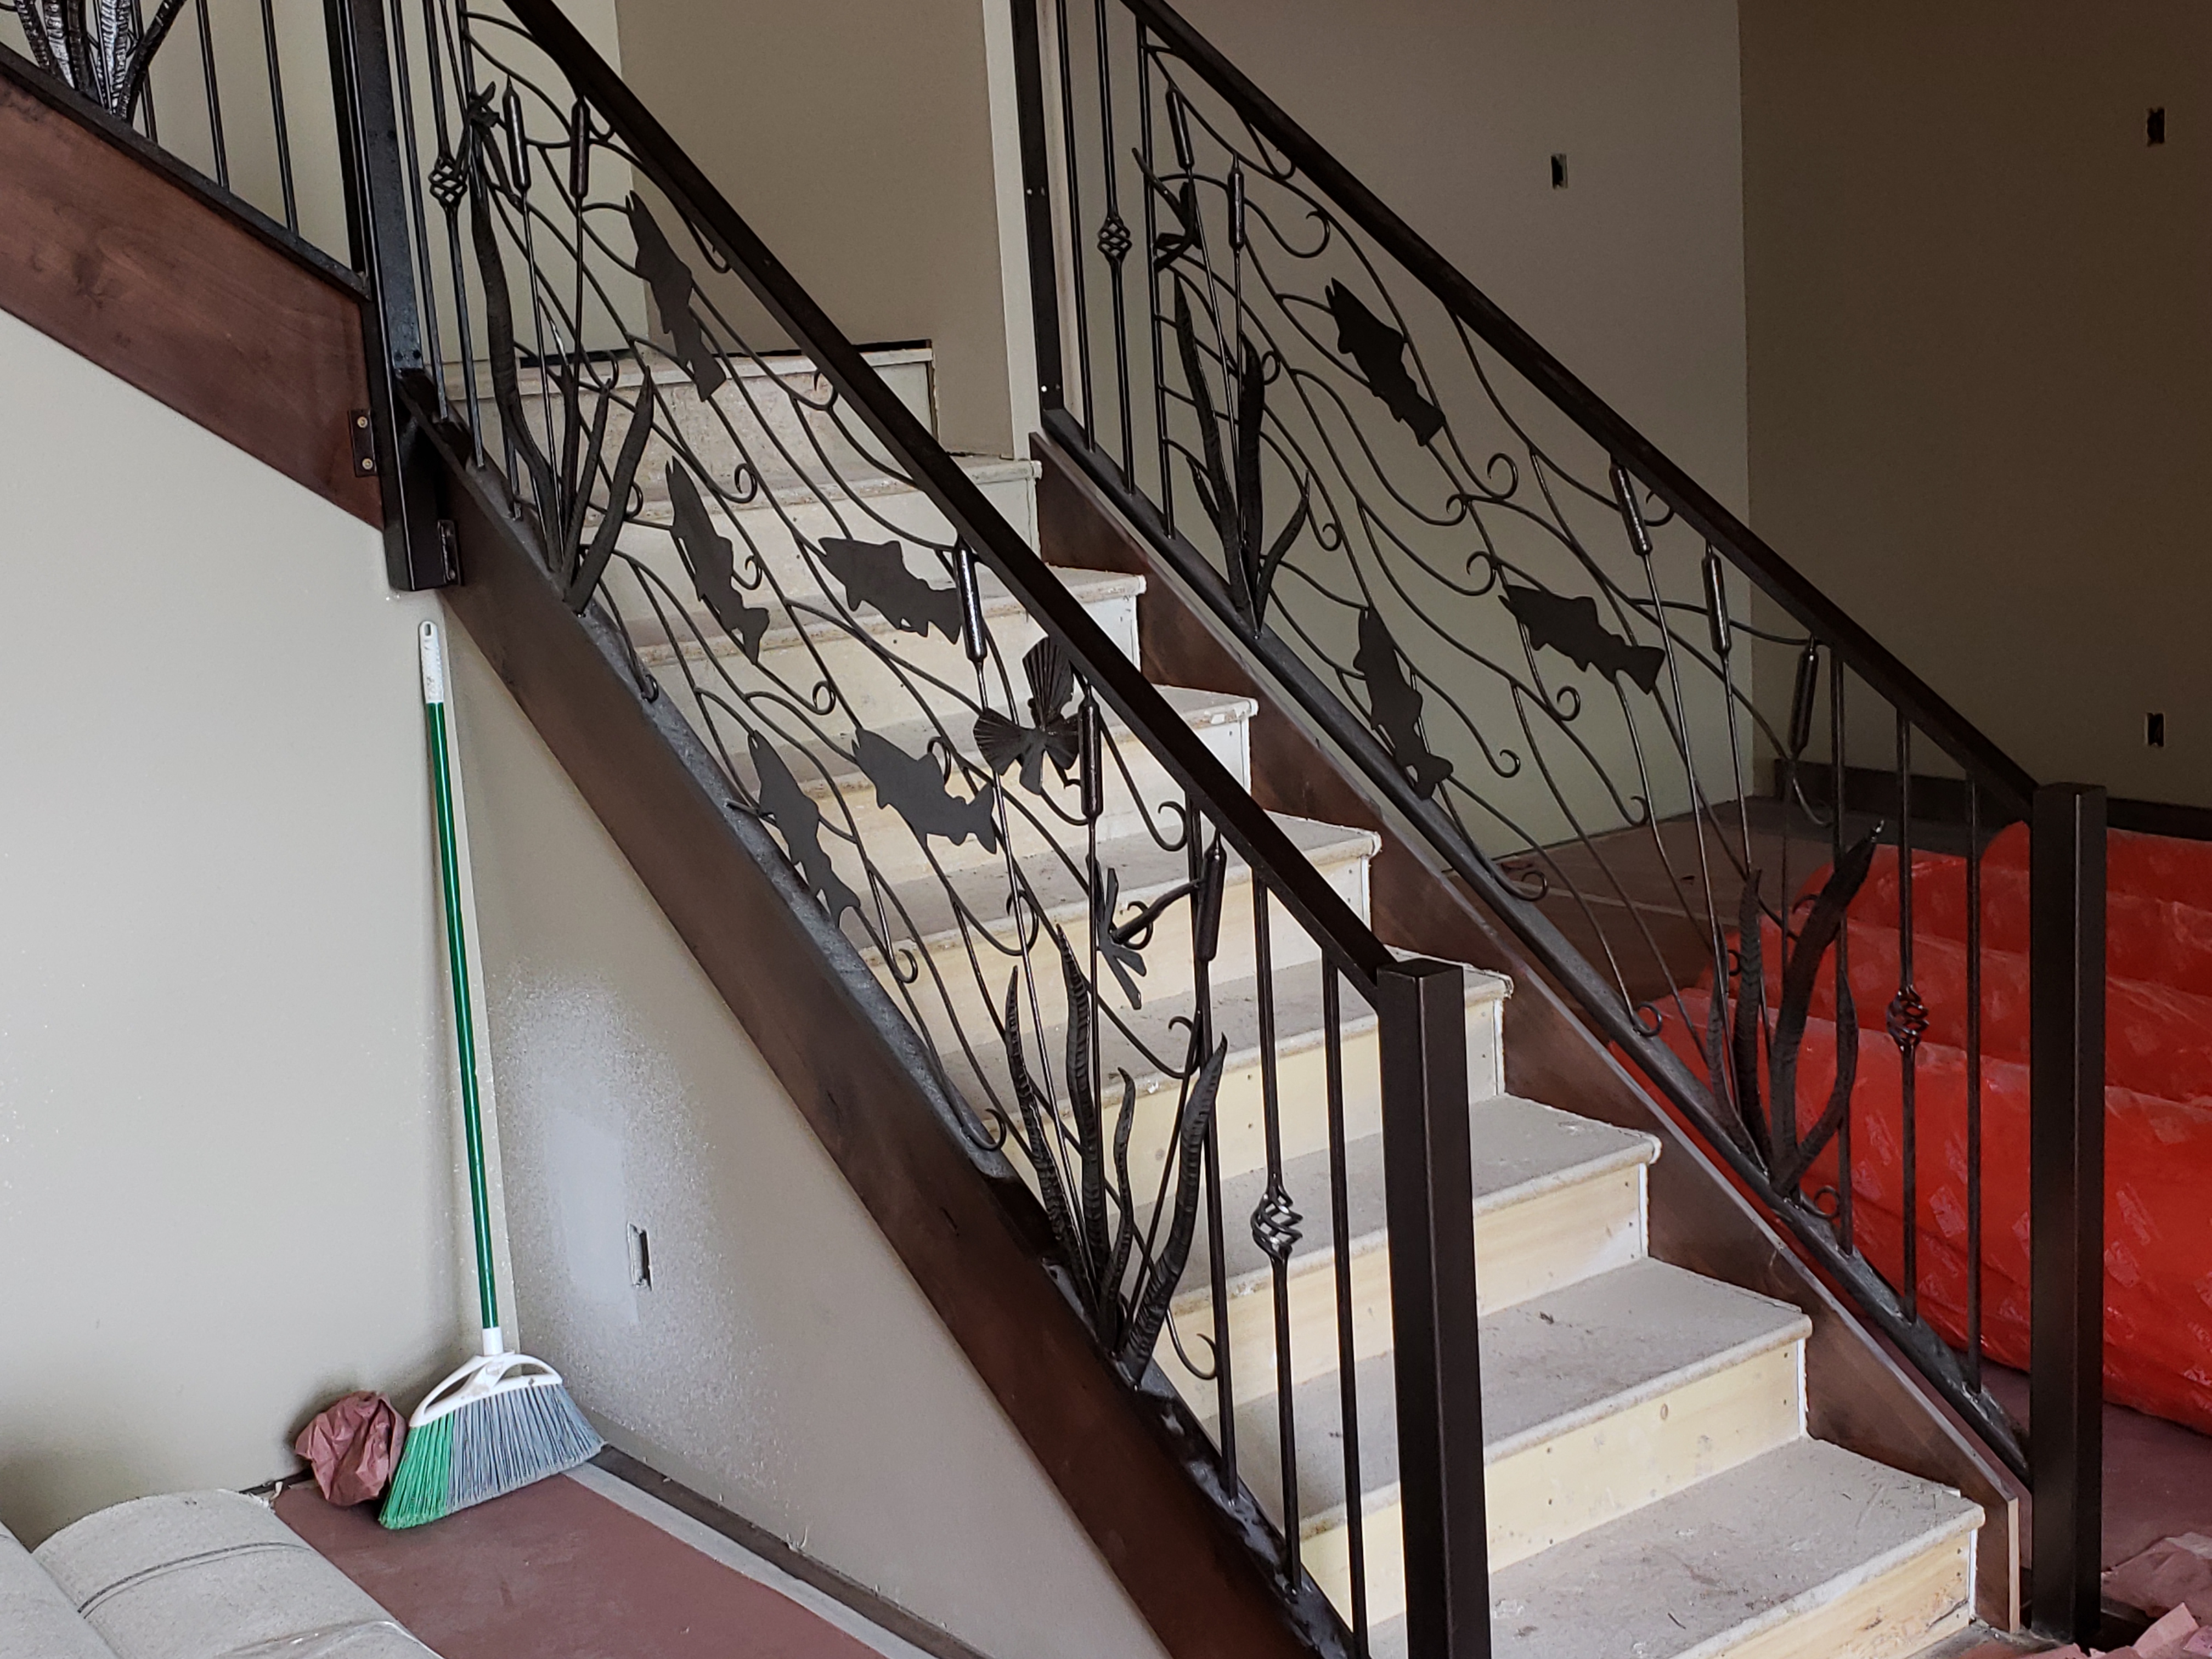
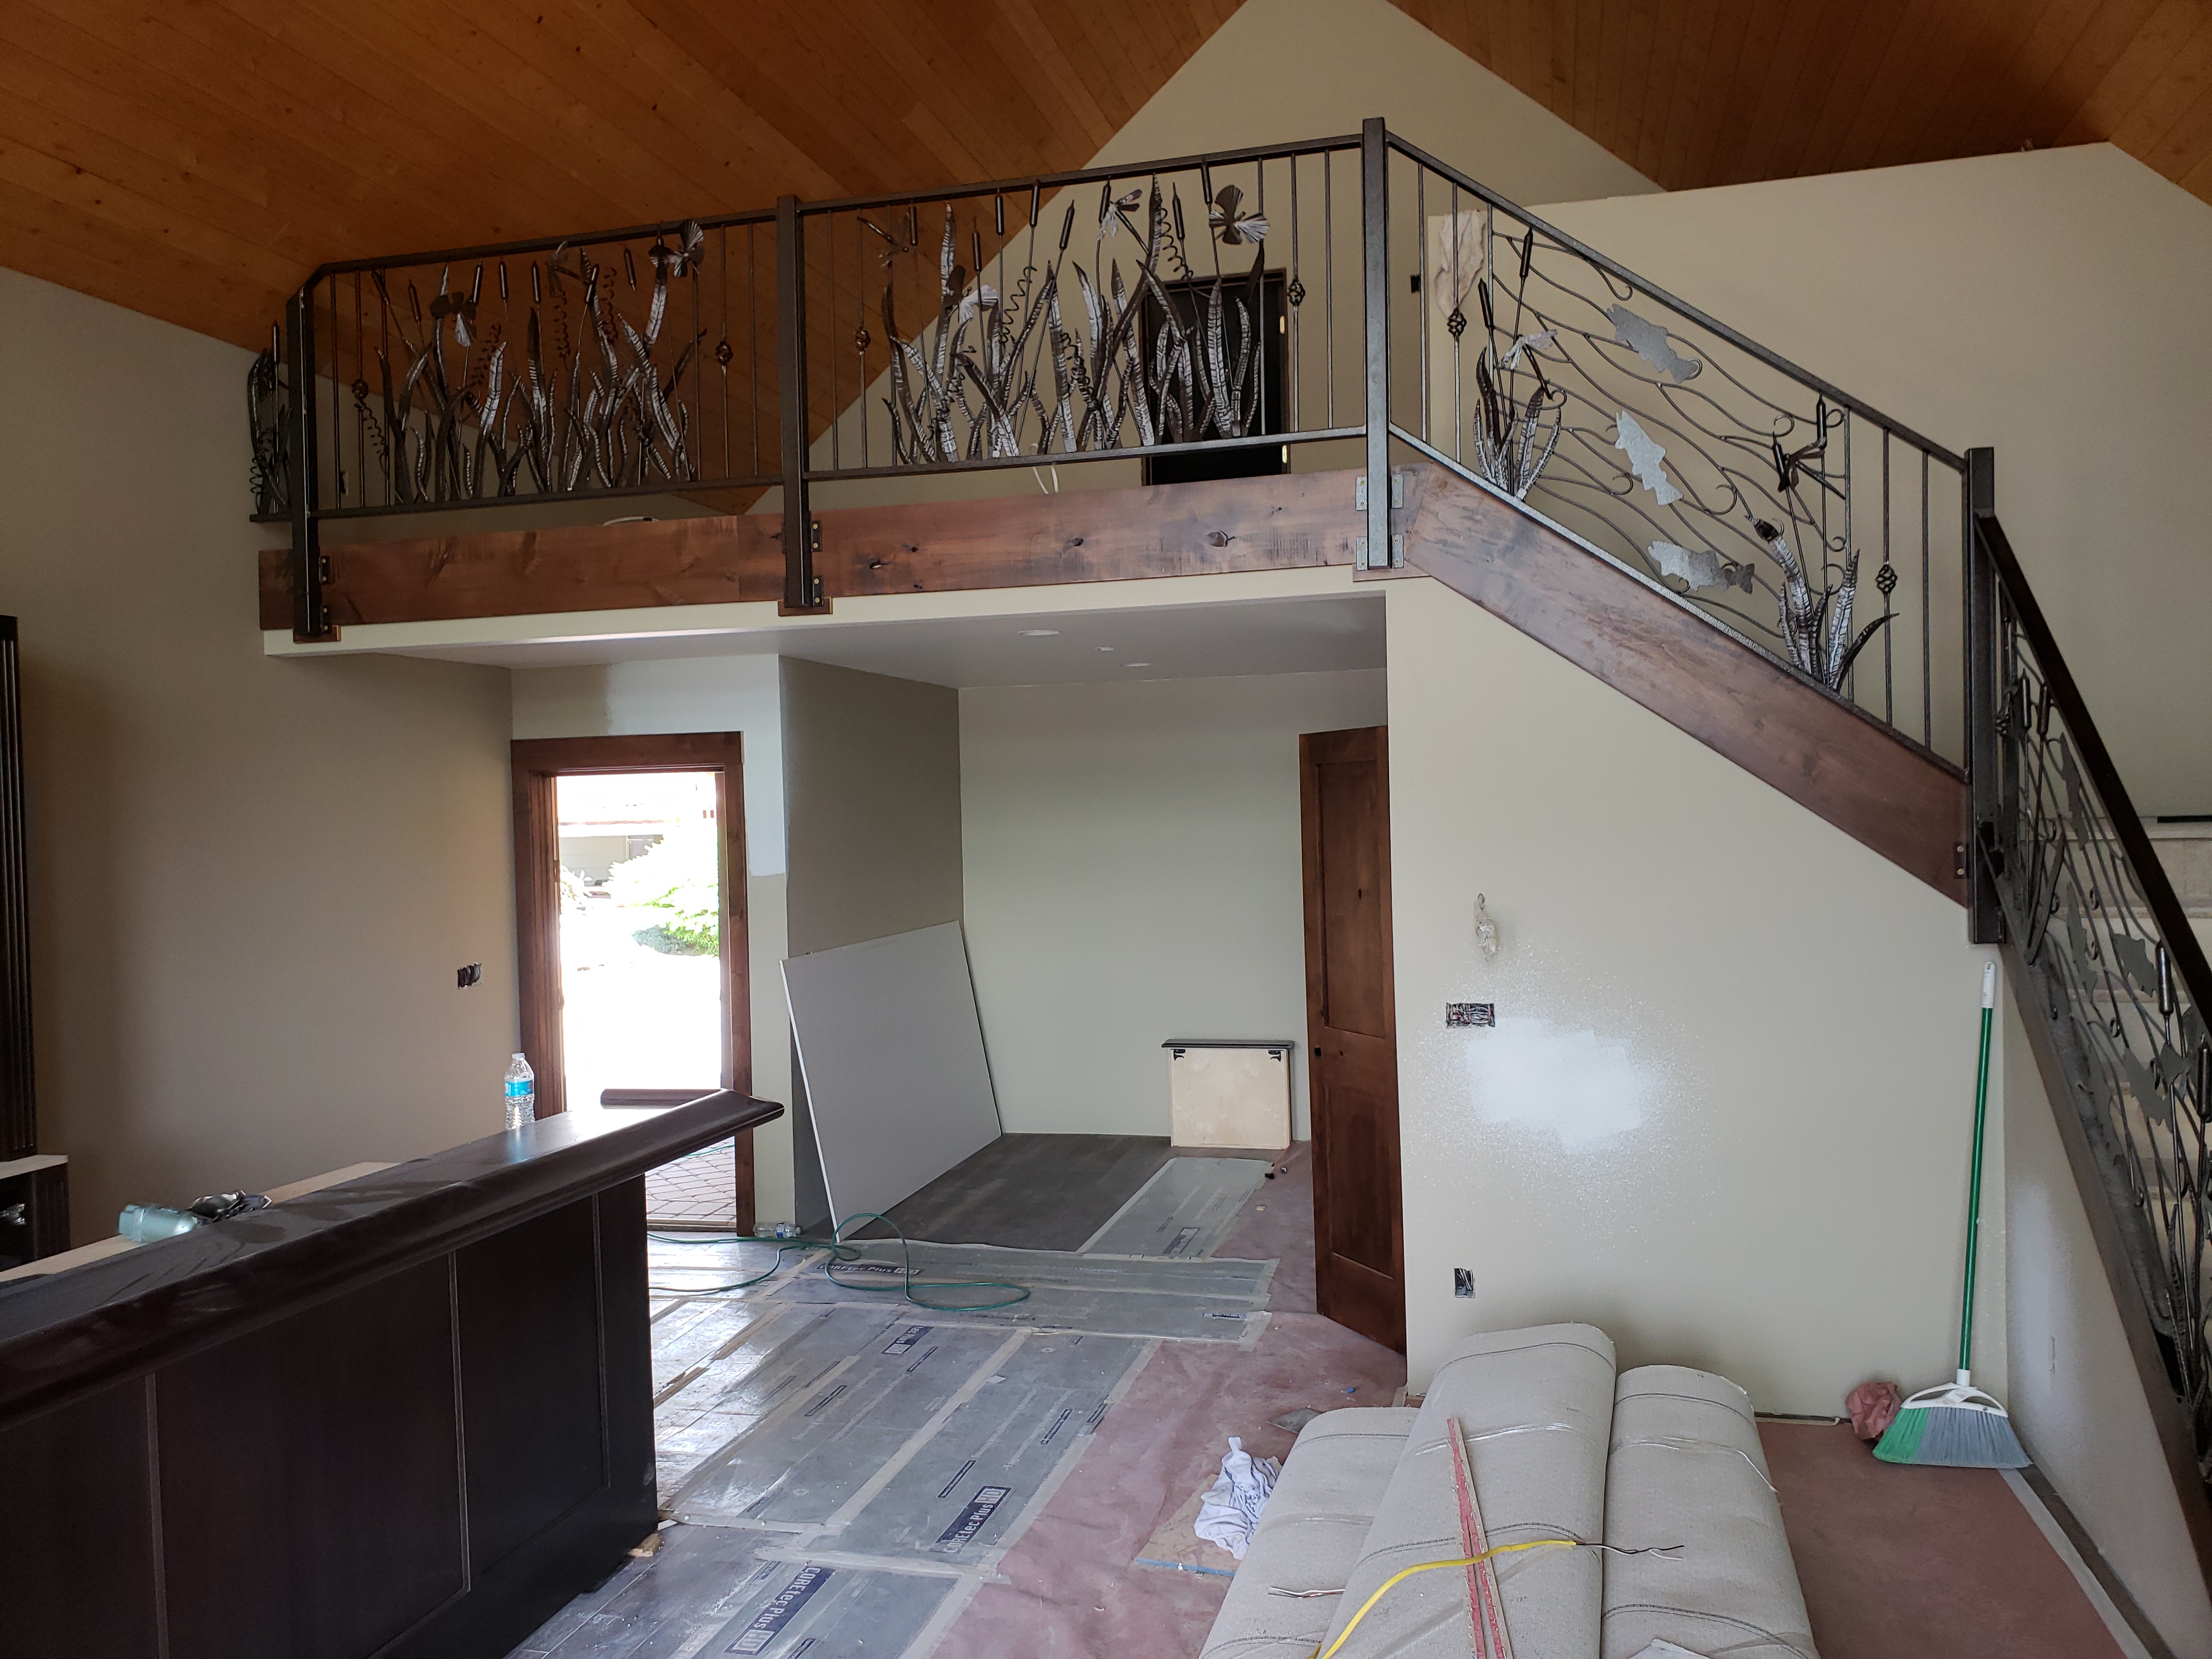
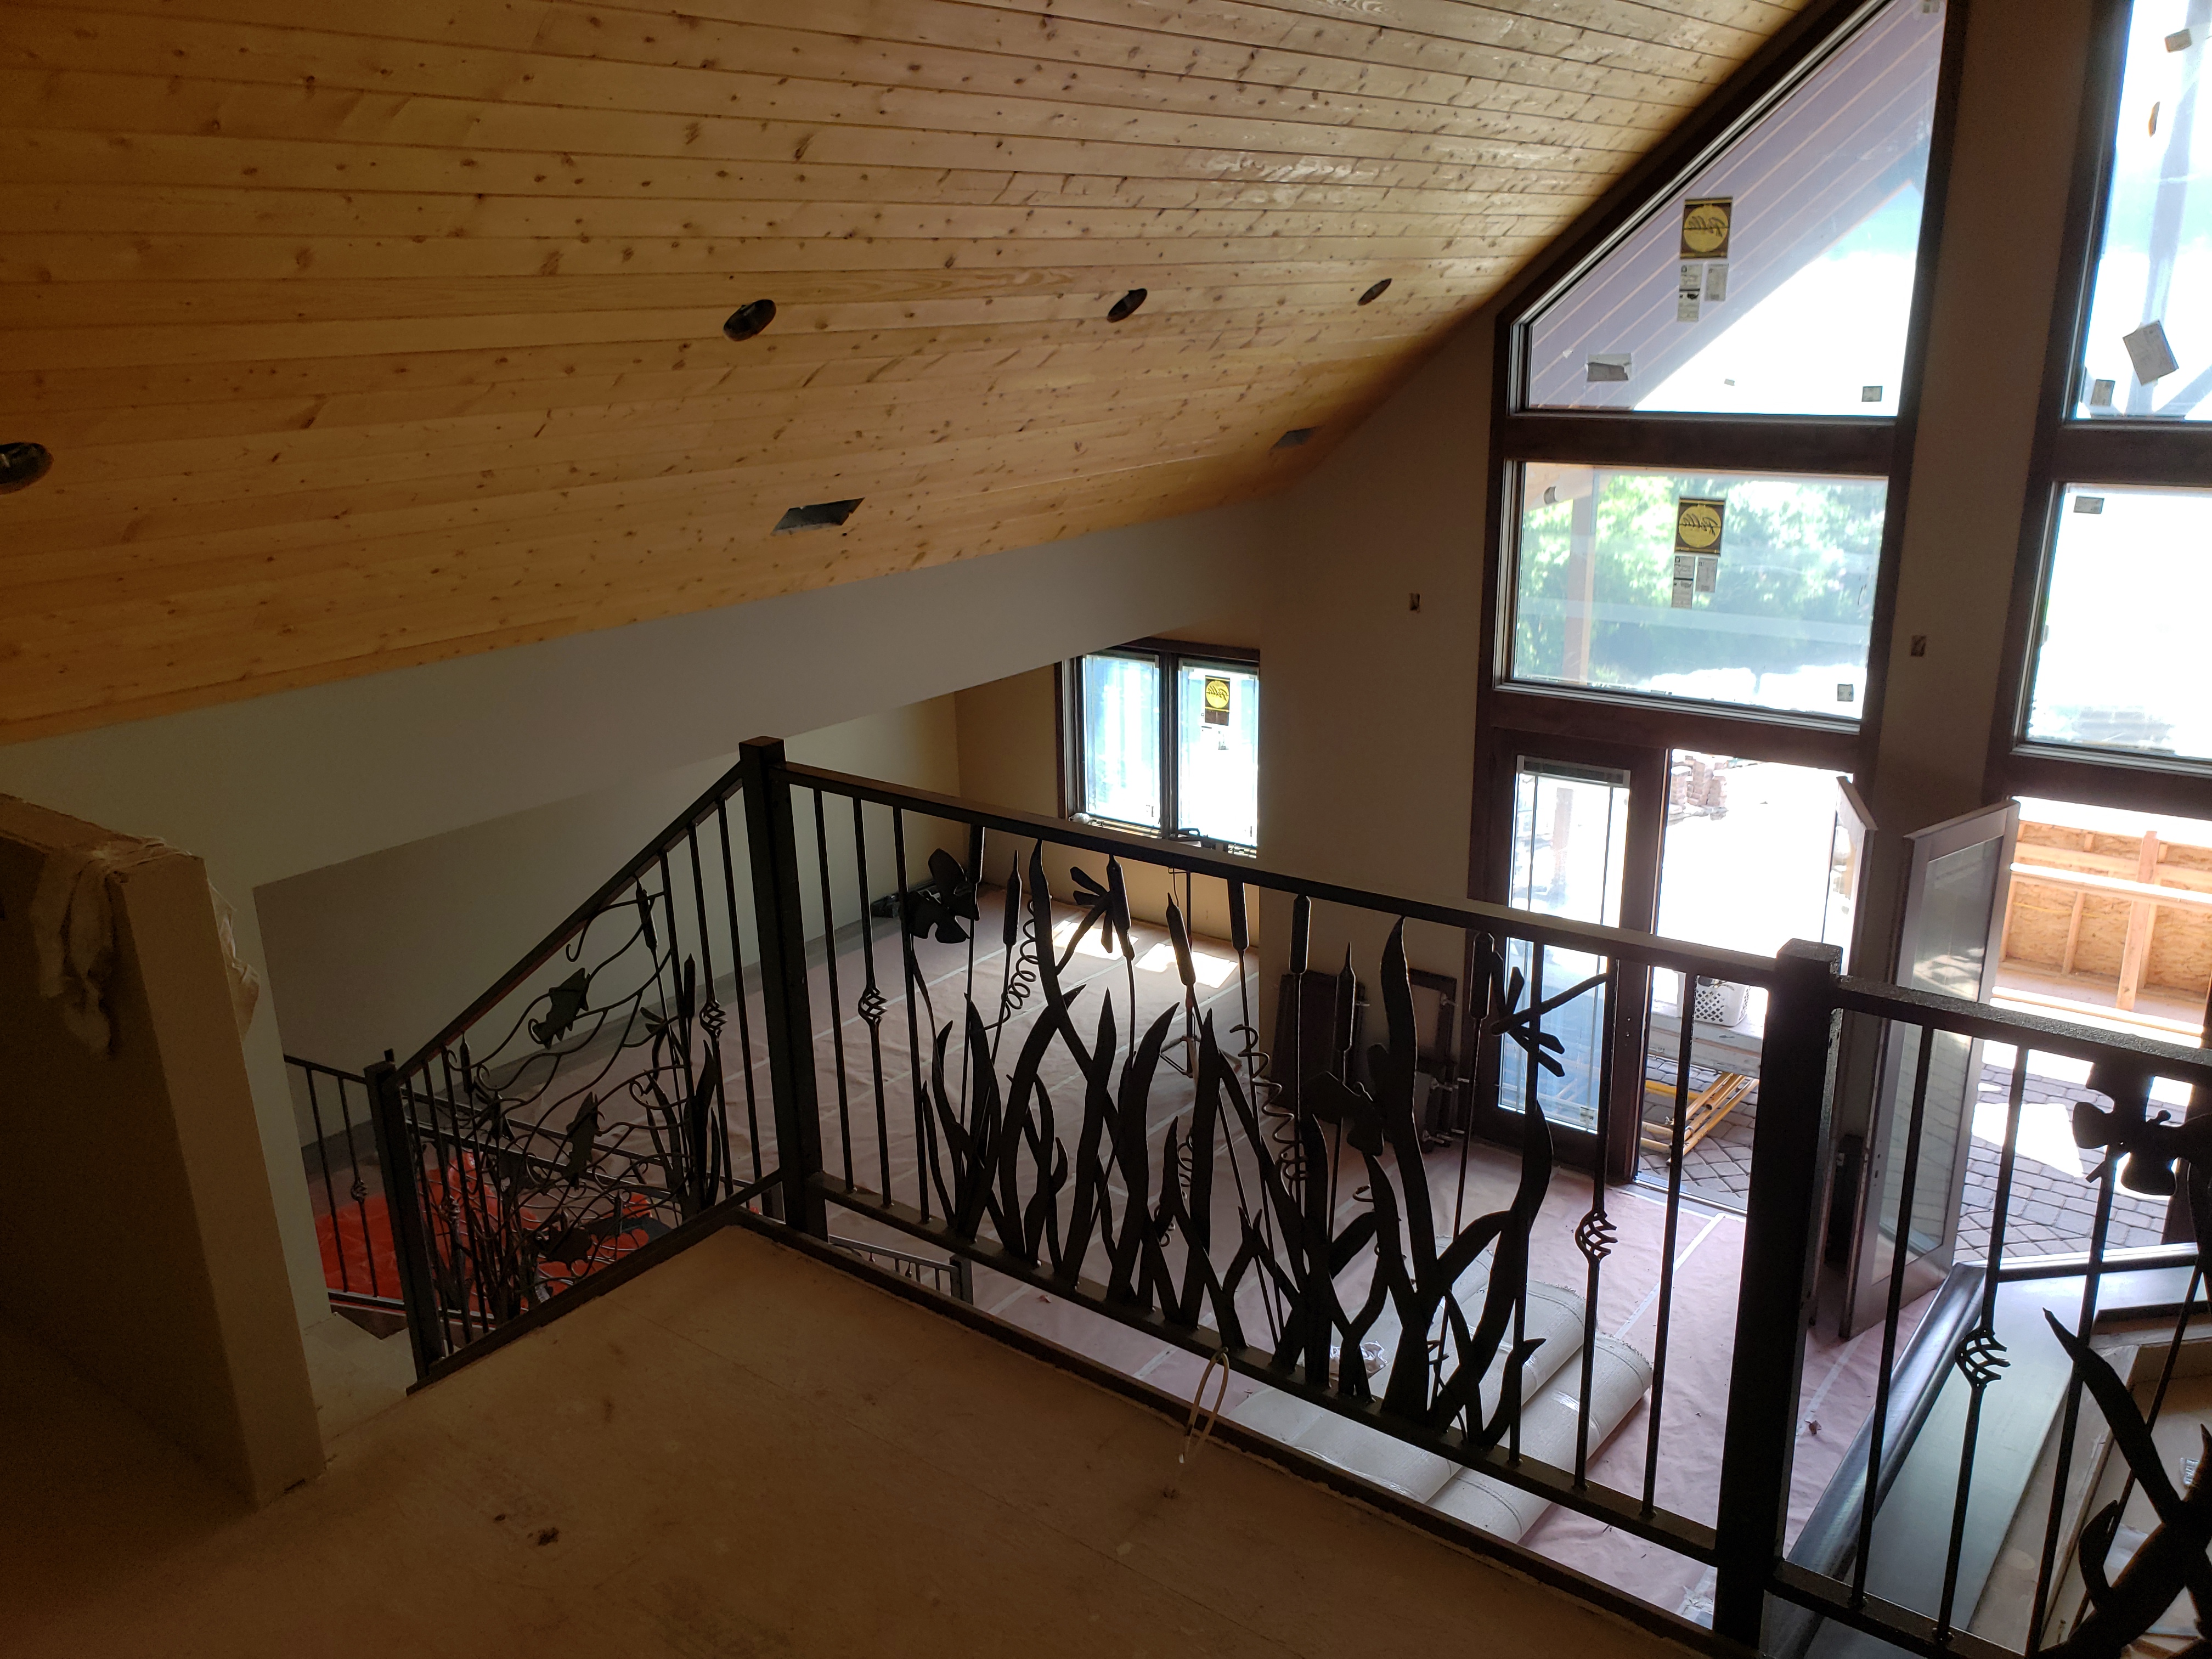
Just finished and installed this railing last week.


-
Just finished and installed this railing last week.
-
Columbian?
in Vises
On 3/11/2018 at 10:35 AM, ThomasPowers said:Columbian post vises are noted for having unbeveled legs in their more recent production, (I've had one I sold that still had the complete stamping on the back of the back jaw: Columbian, Cleveland OH so I know it was one). I Believe that some of their earlier ones had beveled legs---is that what you mean by "corners"?
Yes.
-
Columbian?
in Vises
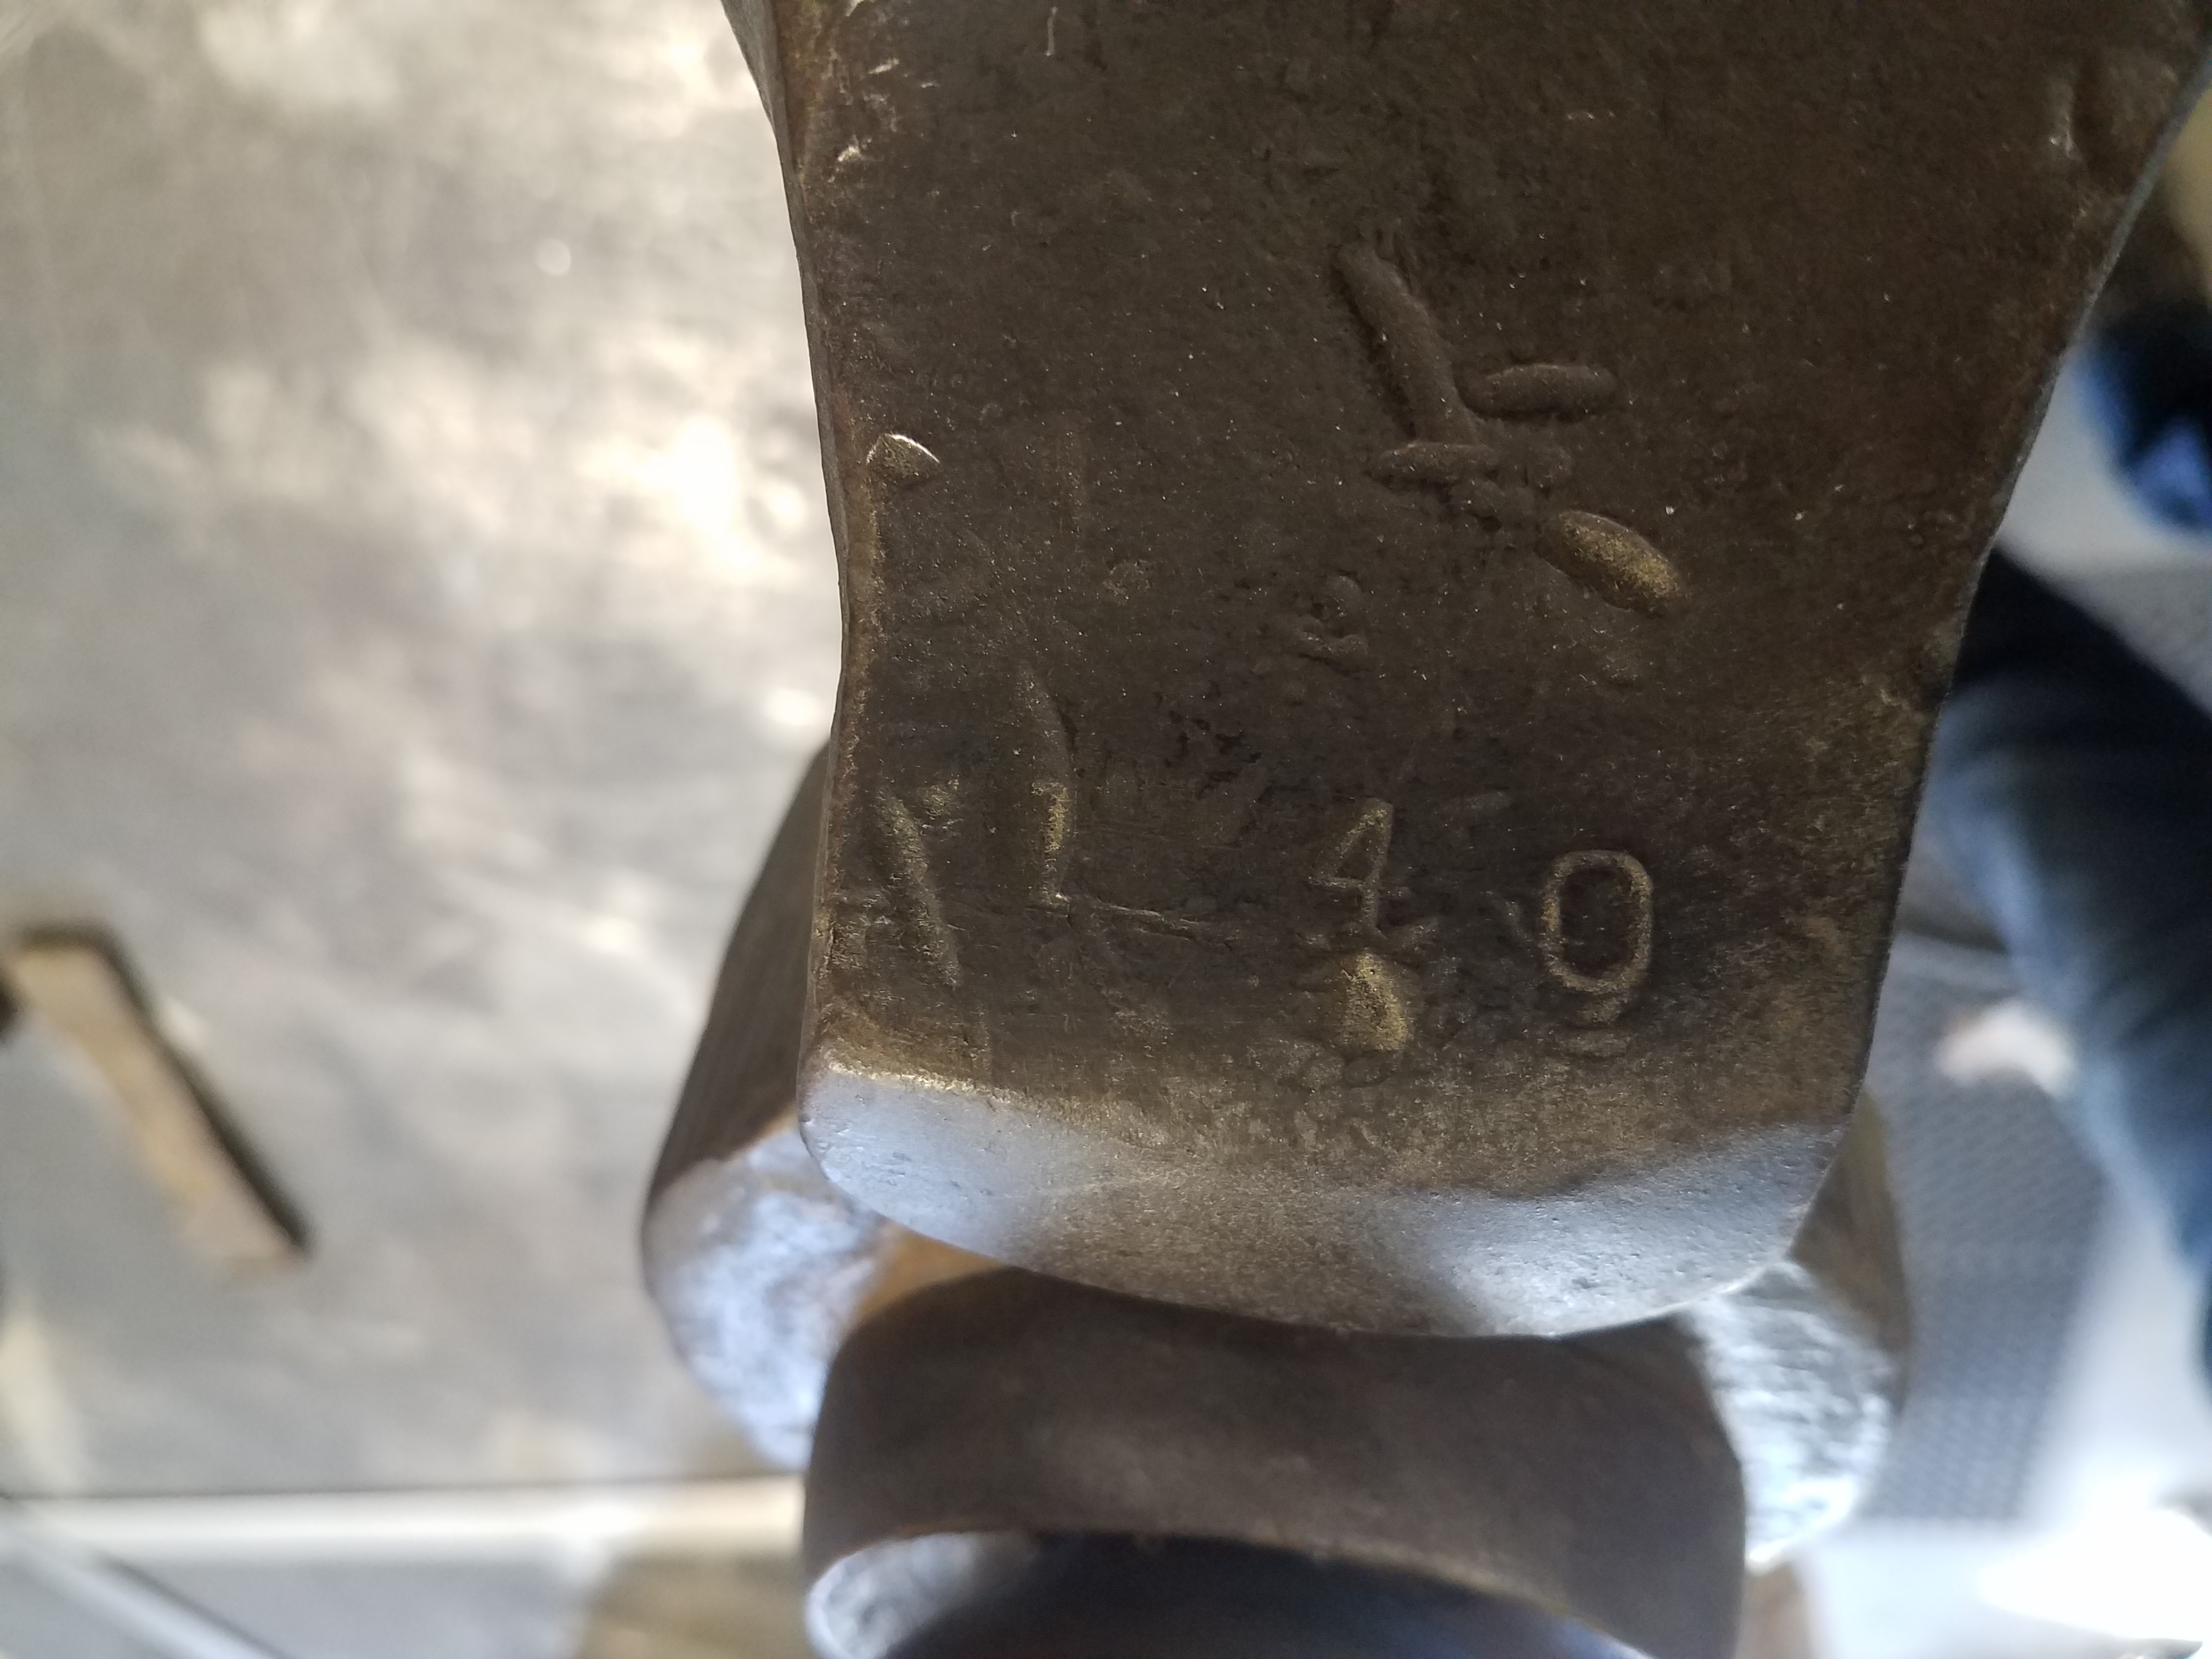
The fact that none of the corners are knocked down i doubt it is a columbian.
-
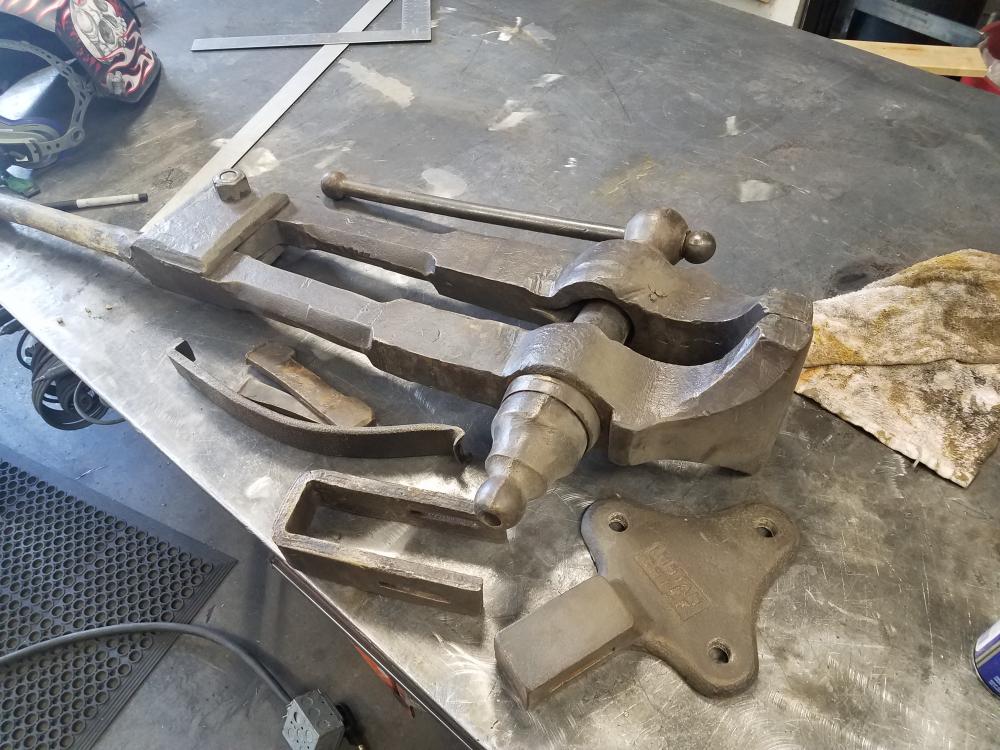
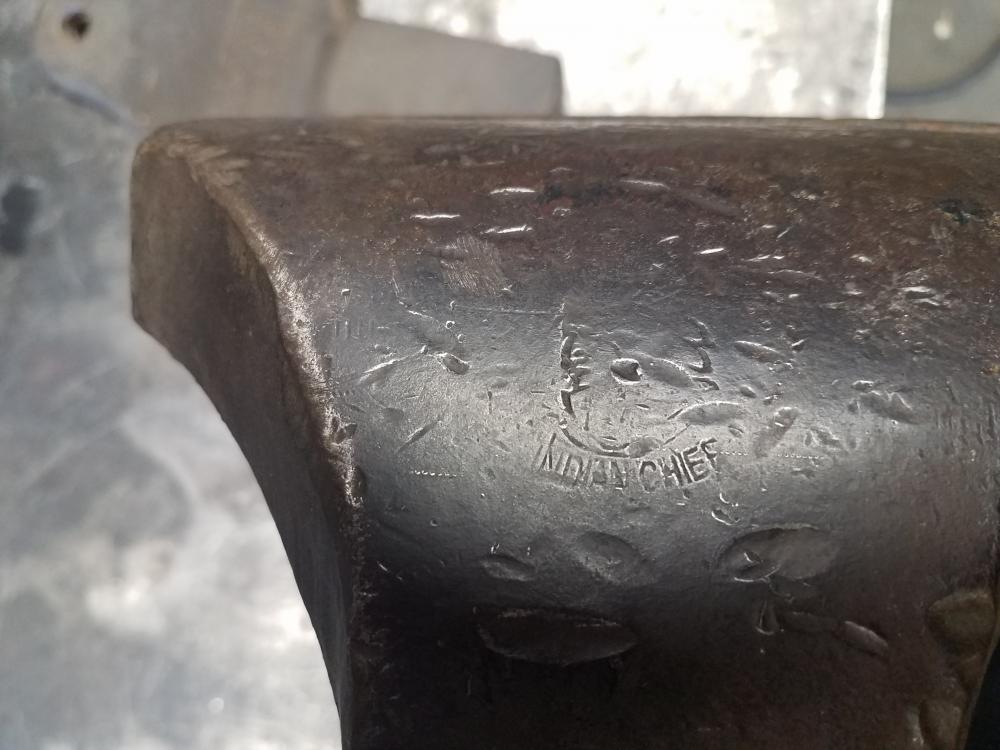
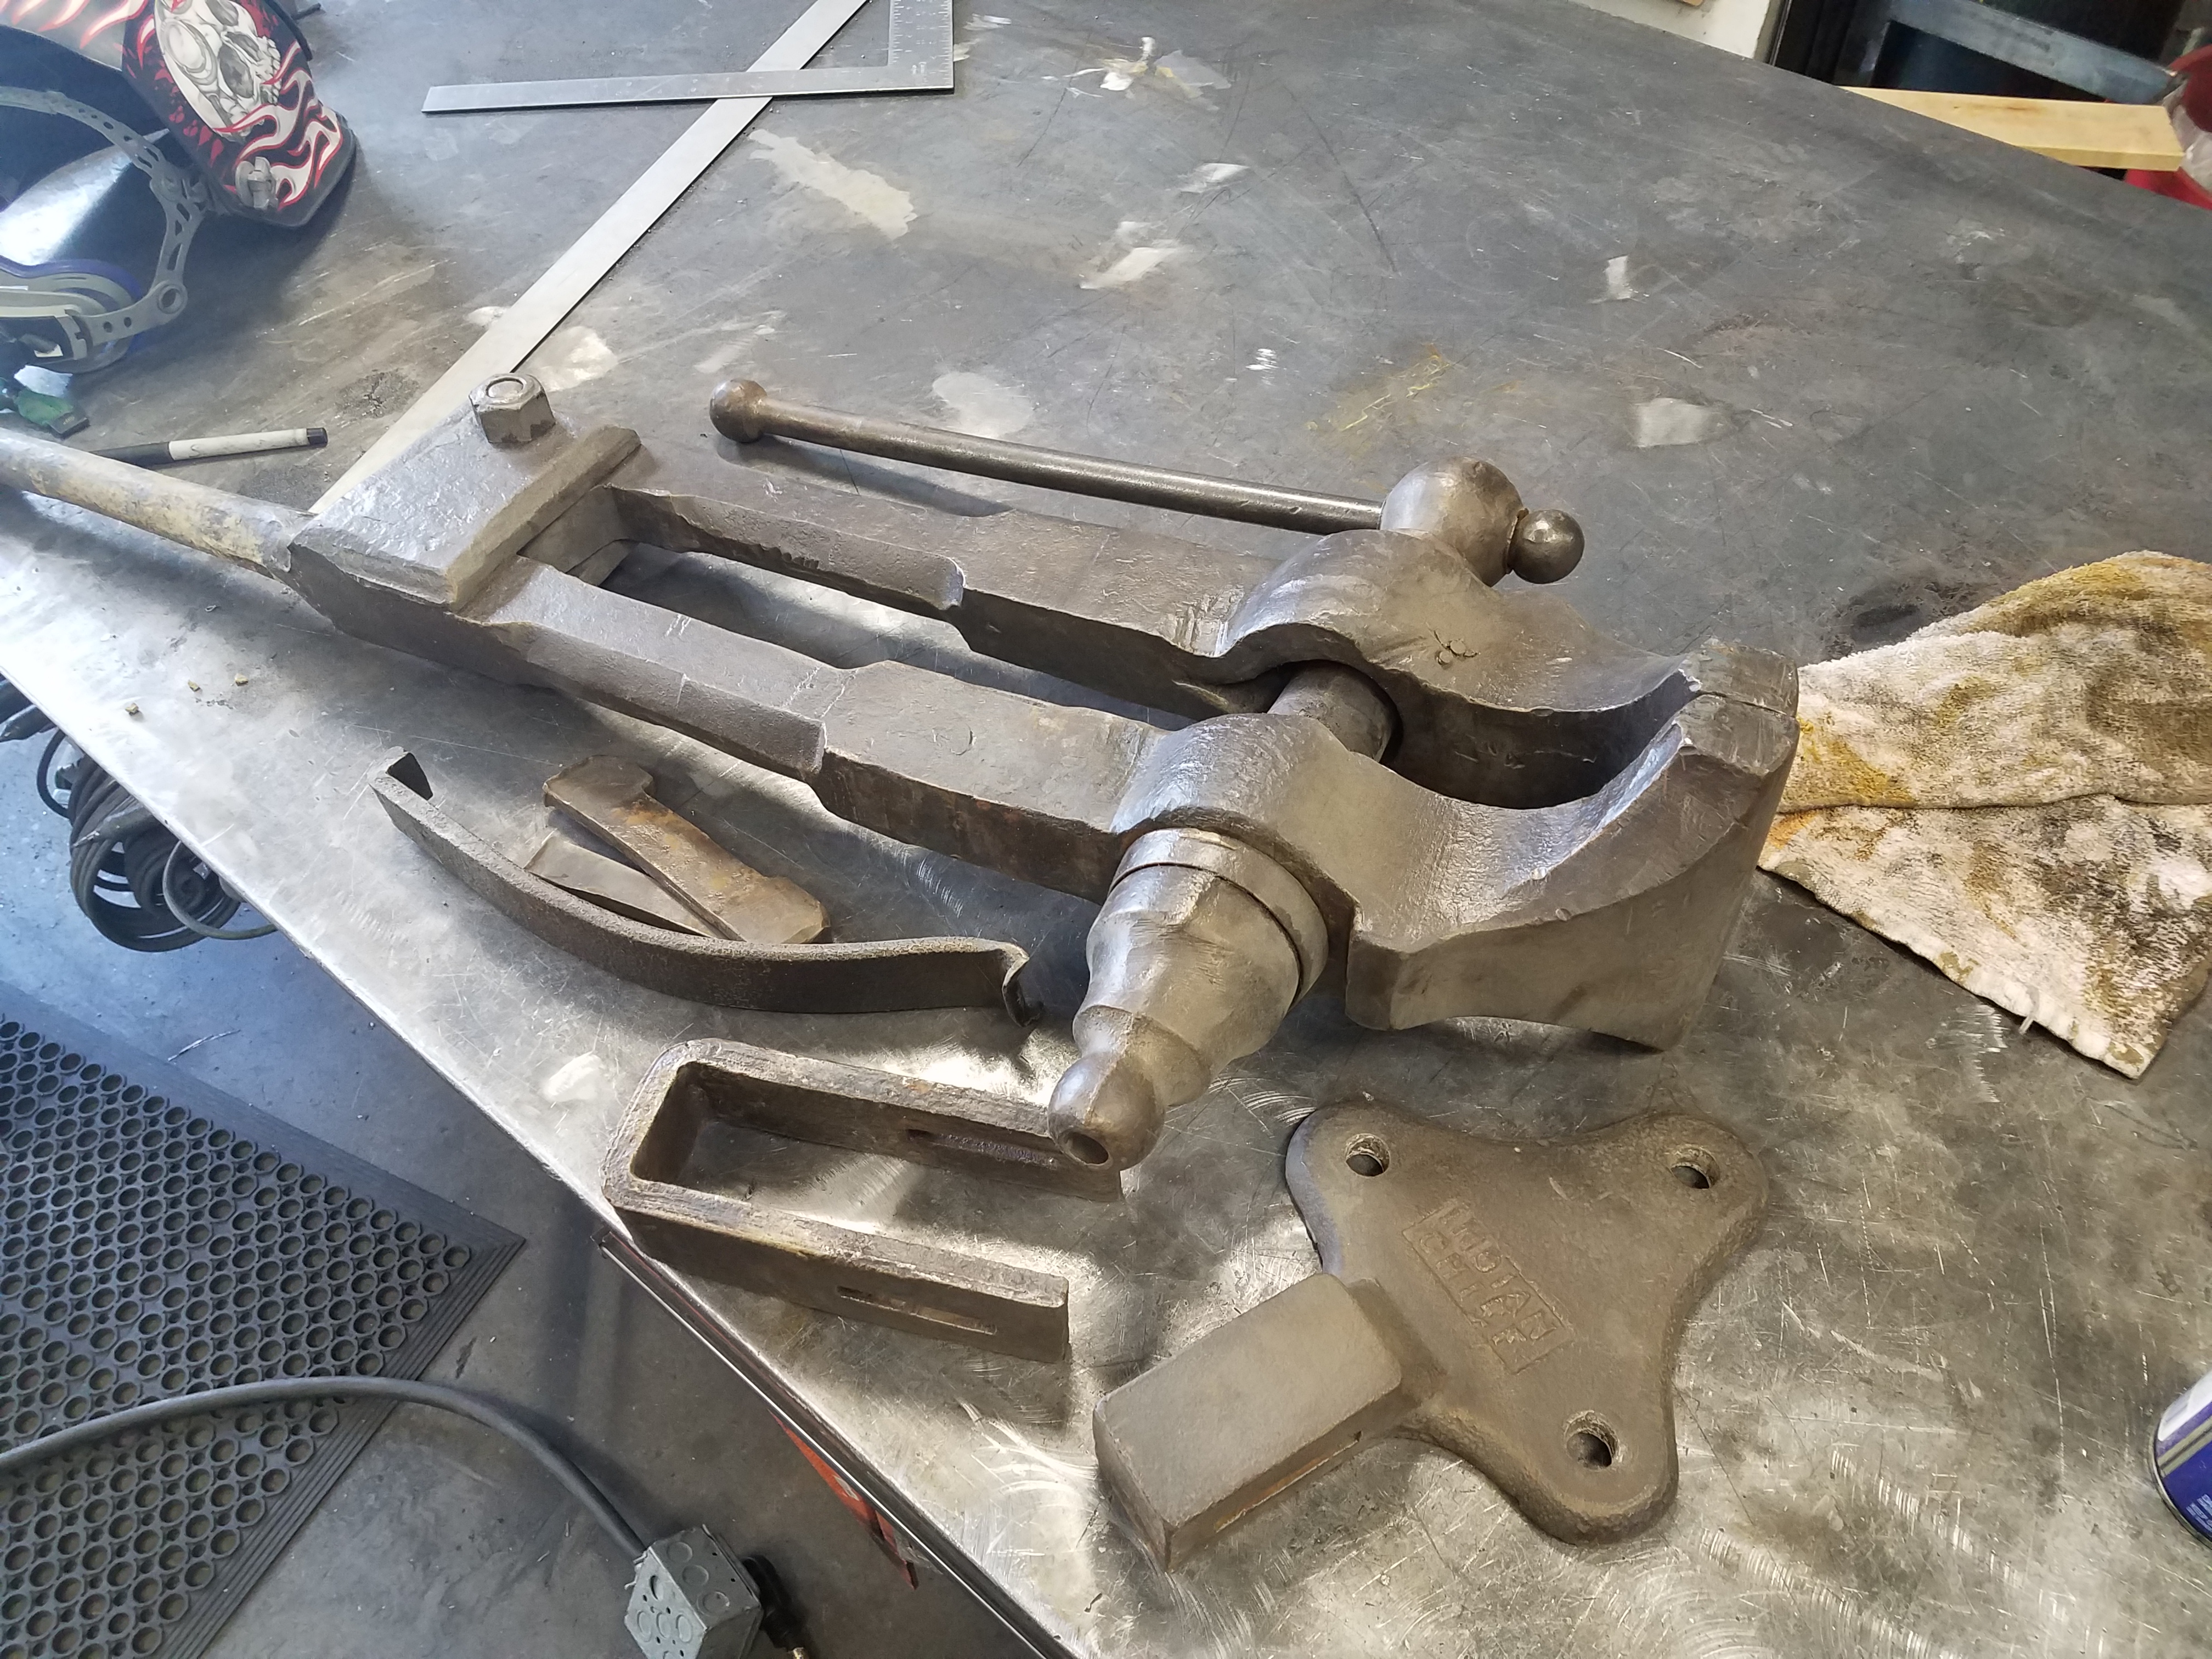
Scored big with this one.
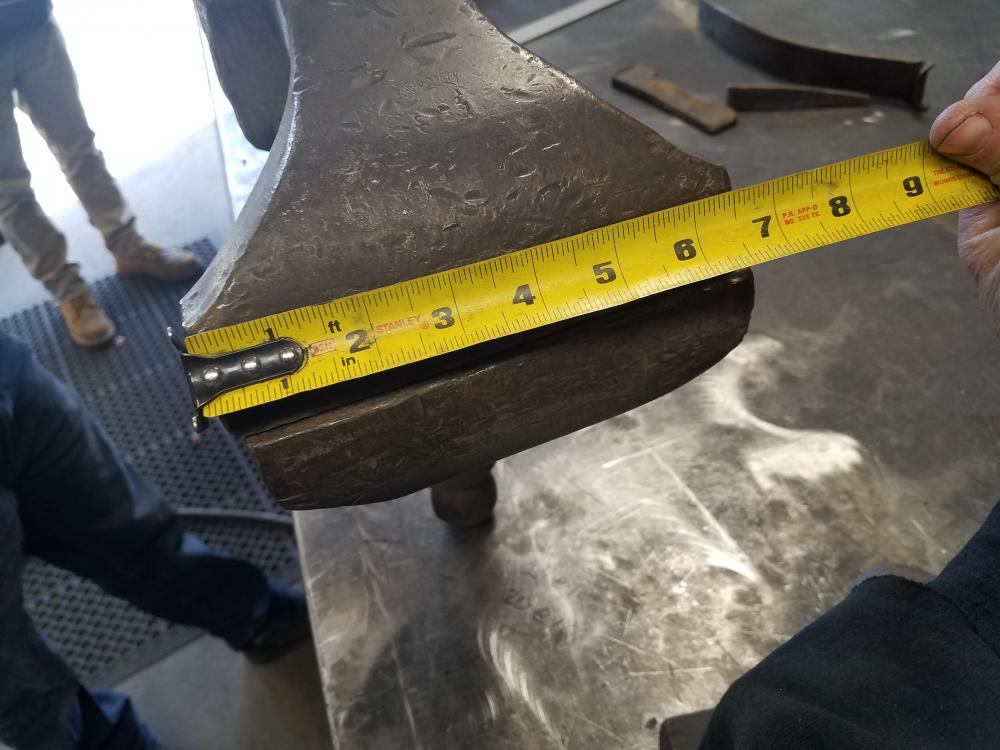
The pic is at a bad angle but it is a full 7" vise. It has a oiled gold patina from the anti rust coating they use to put on them. This thing is gorges. Its a #140 7" vise it makes my #125 6" look tiny. Honestly I cant believe I found a 7" vise let alone an indian chief. It show so little sign of use I am shocked. What are your thoughts on value and rarity?
I picked up 7" 6" 5 3/4 vises 2 champ 10" 400 blowers and a champ 8" blower. Cost me $900.

-
On 2/27/2018 at 6:03 PM, Beardedblacksmith said:
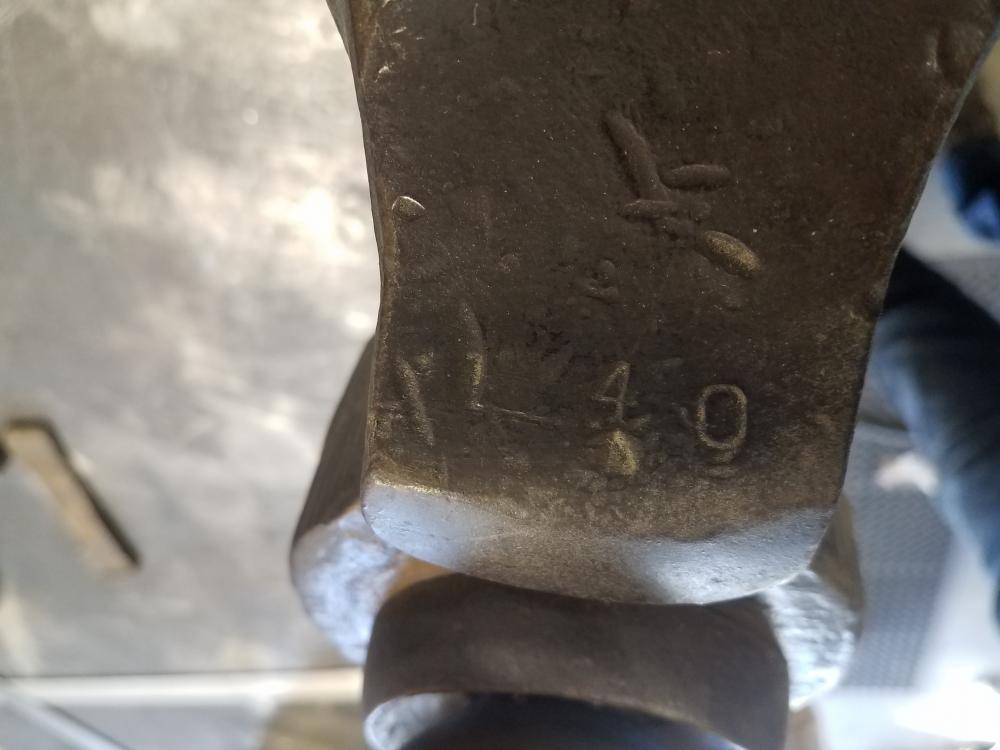
Sweet I was thinking one of those 2. Where would the markings be at?
The mount plate wilk say it or half way between the jaw and screw. Dont sand the paint cause the indian chief mark is very light and easy to sand off.
-
On 5/12/2017 at 9:25 PM, Buzzkill said:
I use a 3/16 nozzle
My blower uses less then $1 a day in electricity...... so says my electrician
-
On 7/26/2017 at 9:28 AM, George Geist said:
Tool steel is very expensive and unnecessary. For most uses of that tool, cold rolled will suffice.
leaf springs off a truck at a junkyard, they sell for about .25 to .30 a pound..... which is cheaper then new mild steel. In my experience the top of the mild steel mushrooms very fast compared to the leaf spring which is usually made from 5160 high carbon steel
-
On 5/25/2017 at 7:31 AM, JME1149 said:
That looks like a nice layout, and you have some good ideas I will be borrowing. I like the hammer rack and the angled legs for the stock storage under the bench.
I'm curious about the hood over the gas forge. Is that a powered exhaust? For the fumes or the heat?
yes i have an exhaust fan, I don"t get to many fumes from my forge, but welding smoke and heat is the main reason.
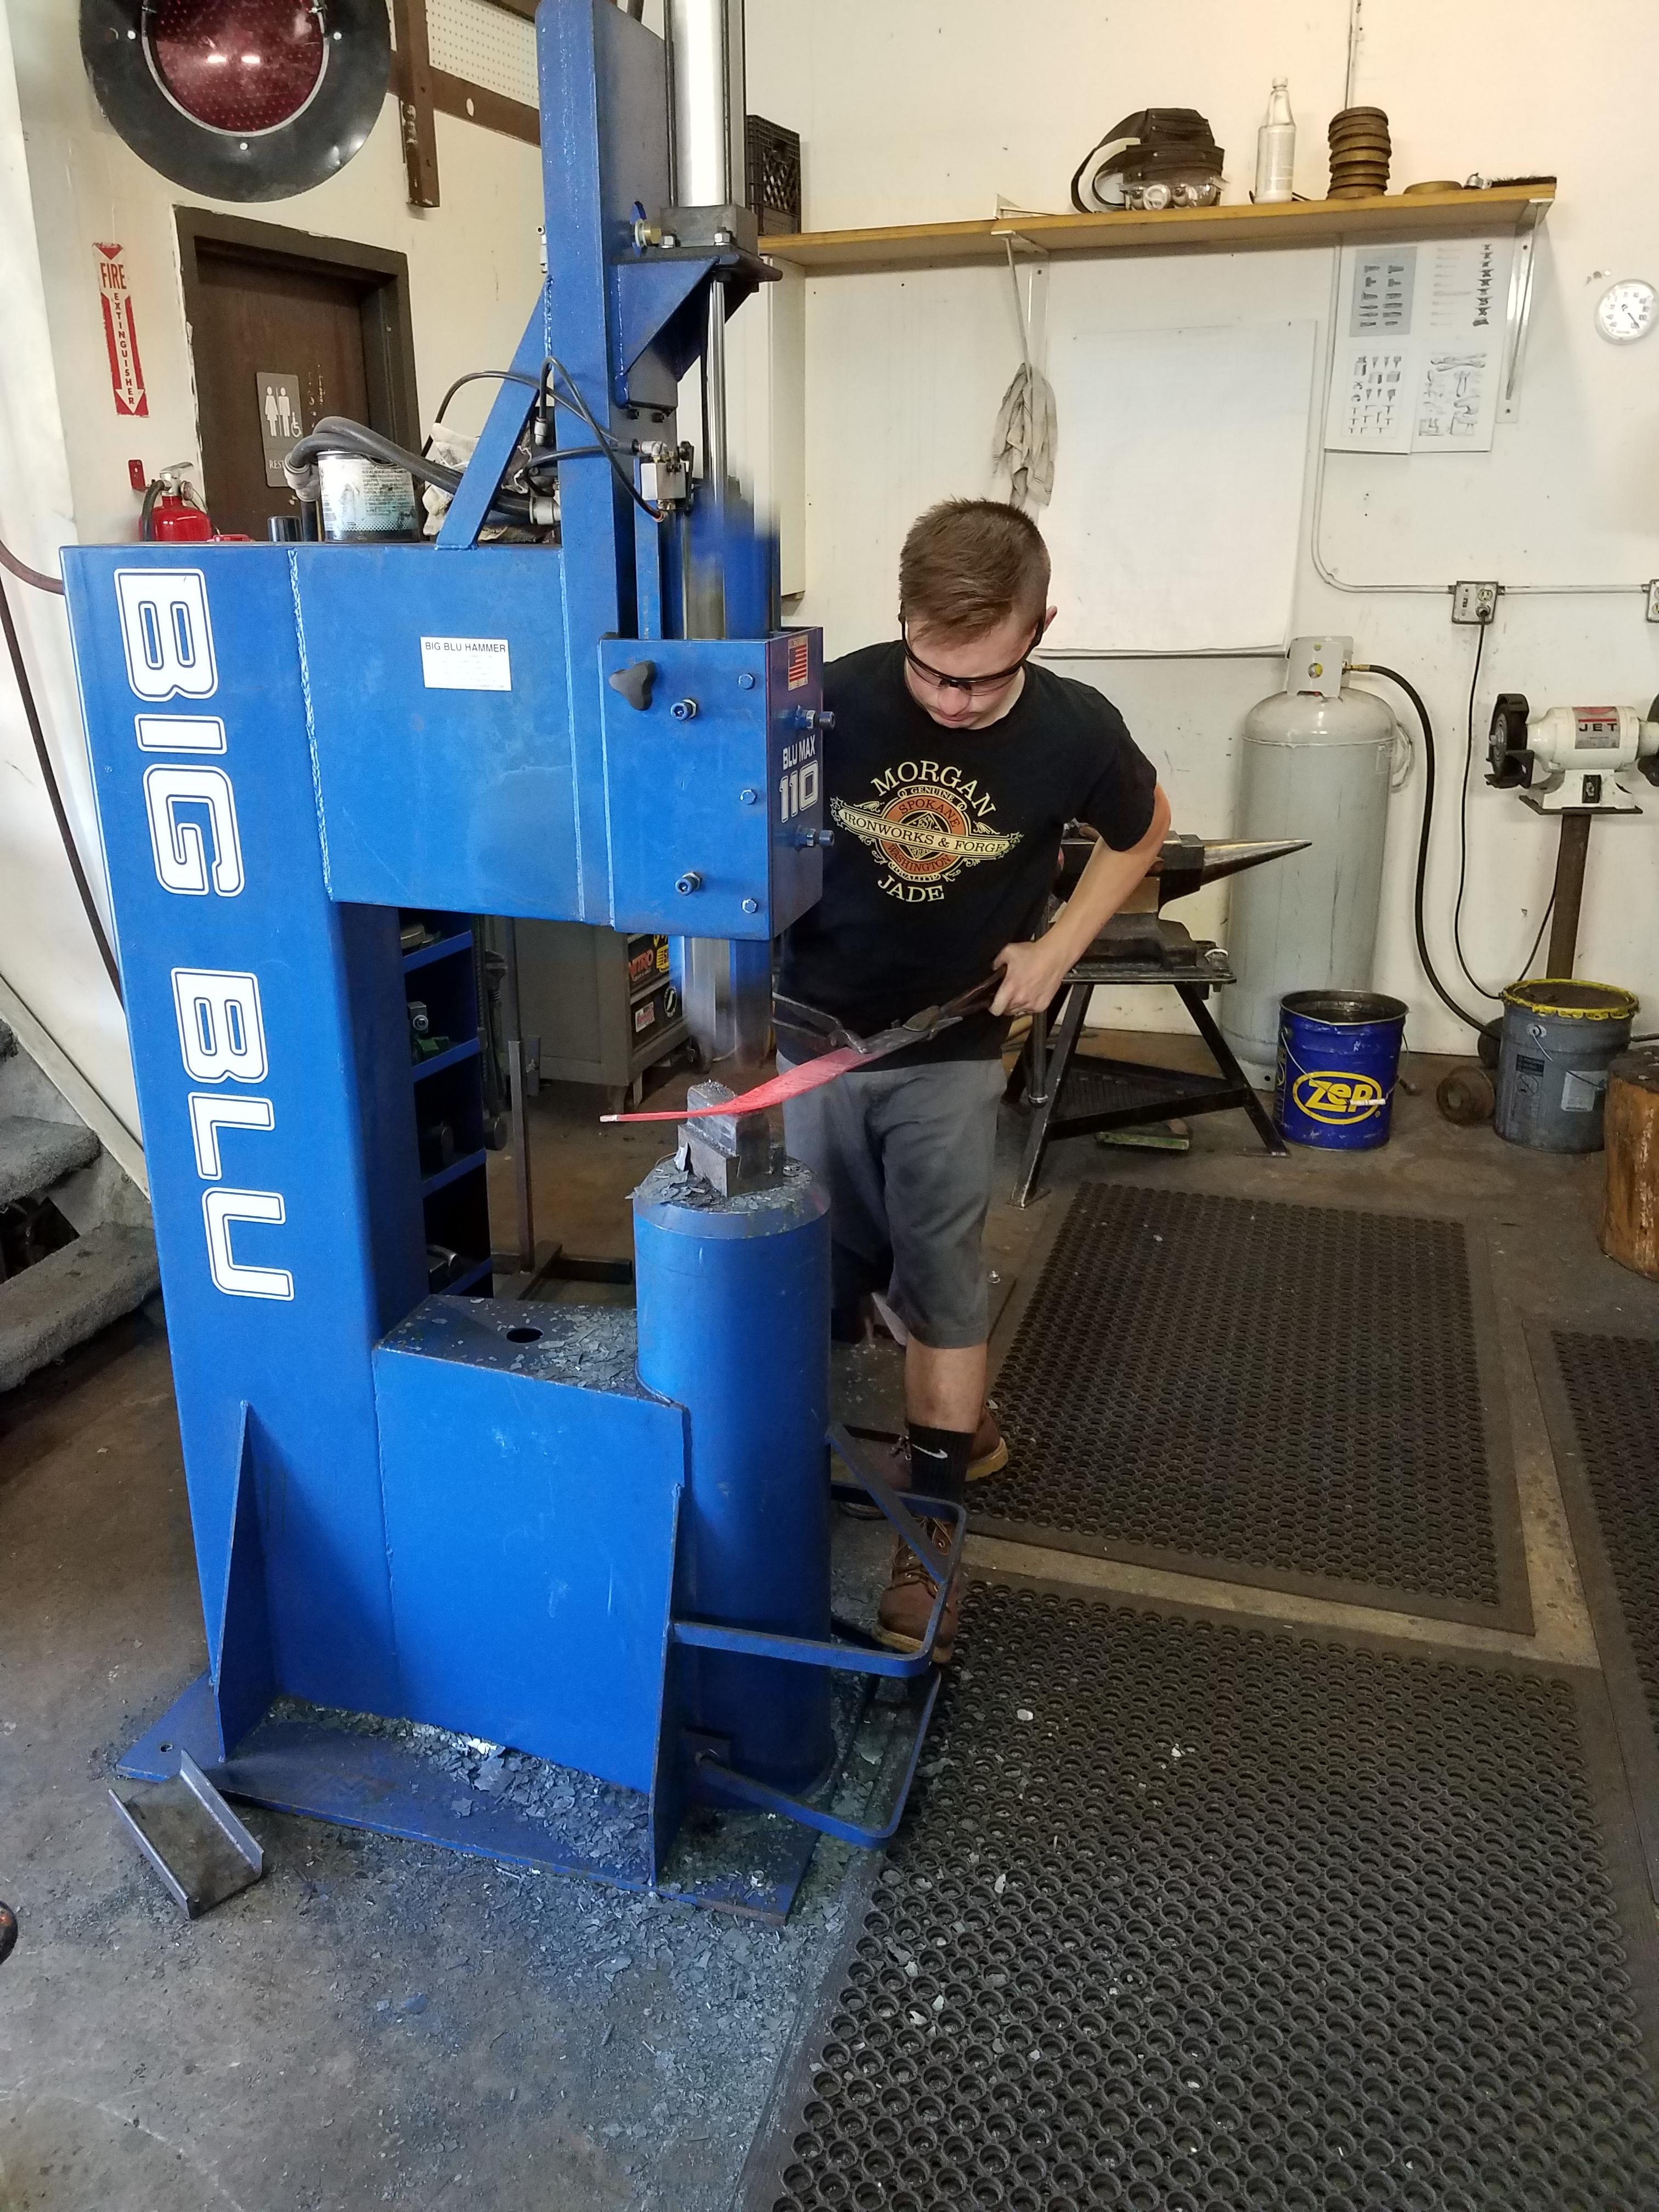
On 5/24/2017 at 3:47 PM, Hammerfall said:How do you like your Blu Max?
It has been a great hammer no issues and easy to to build dies for.
-
Take 2 pieces of half inch flat bar, weld angle iron on one side of each piece, clamp them in the vise, drill holes for the size rivets you want to make. Drill the holes to the length of rivets you want, clamp the viced pieces together, insert your stock then hammer down the first side of your rivet, then you can open the vise to easily remove the rivet. I will look for a picture and post it.
-
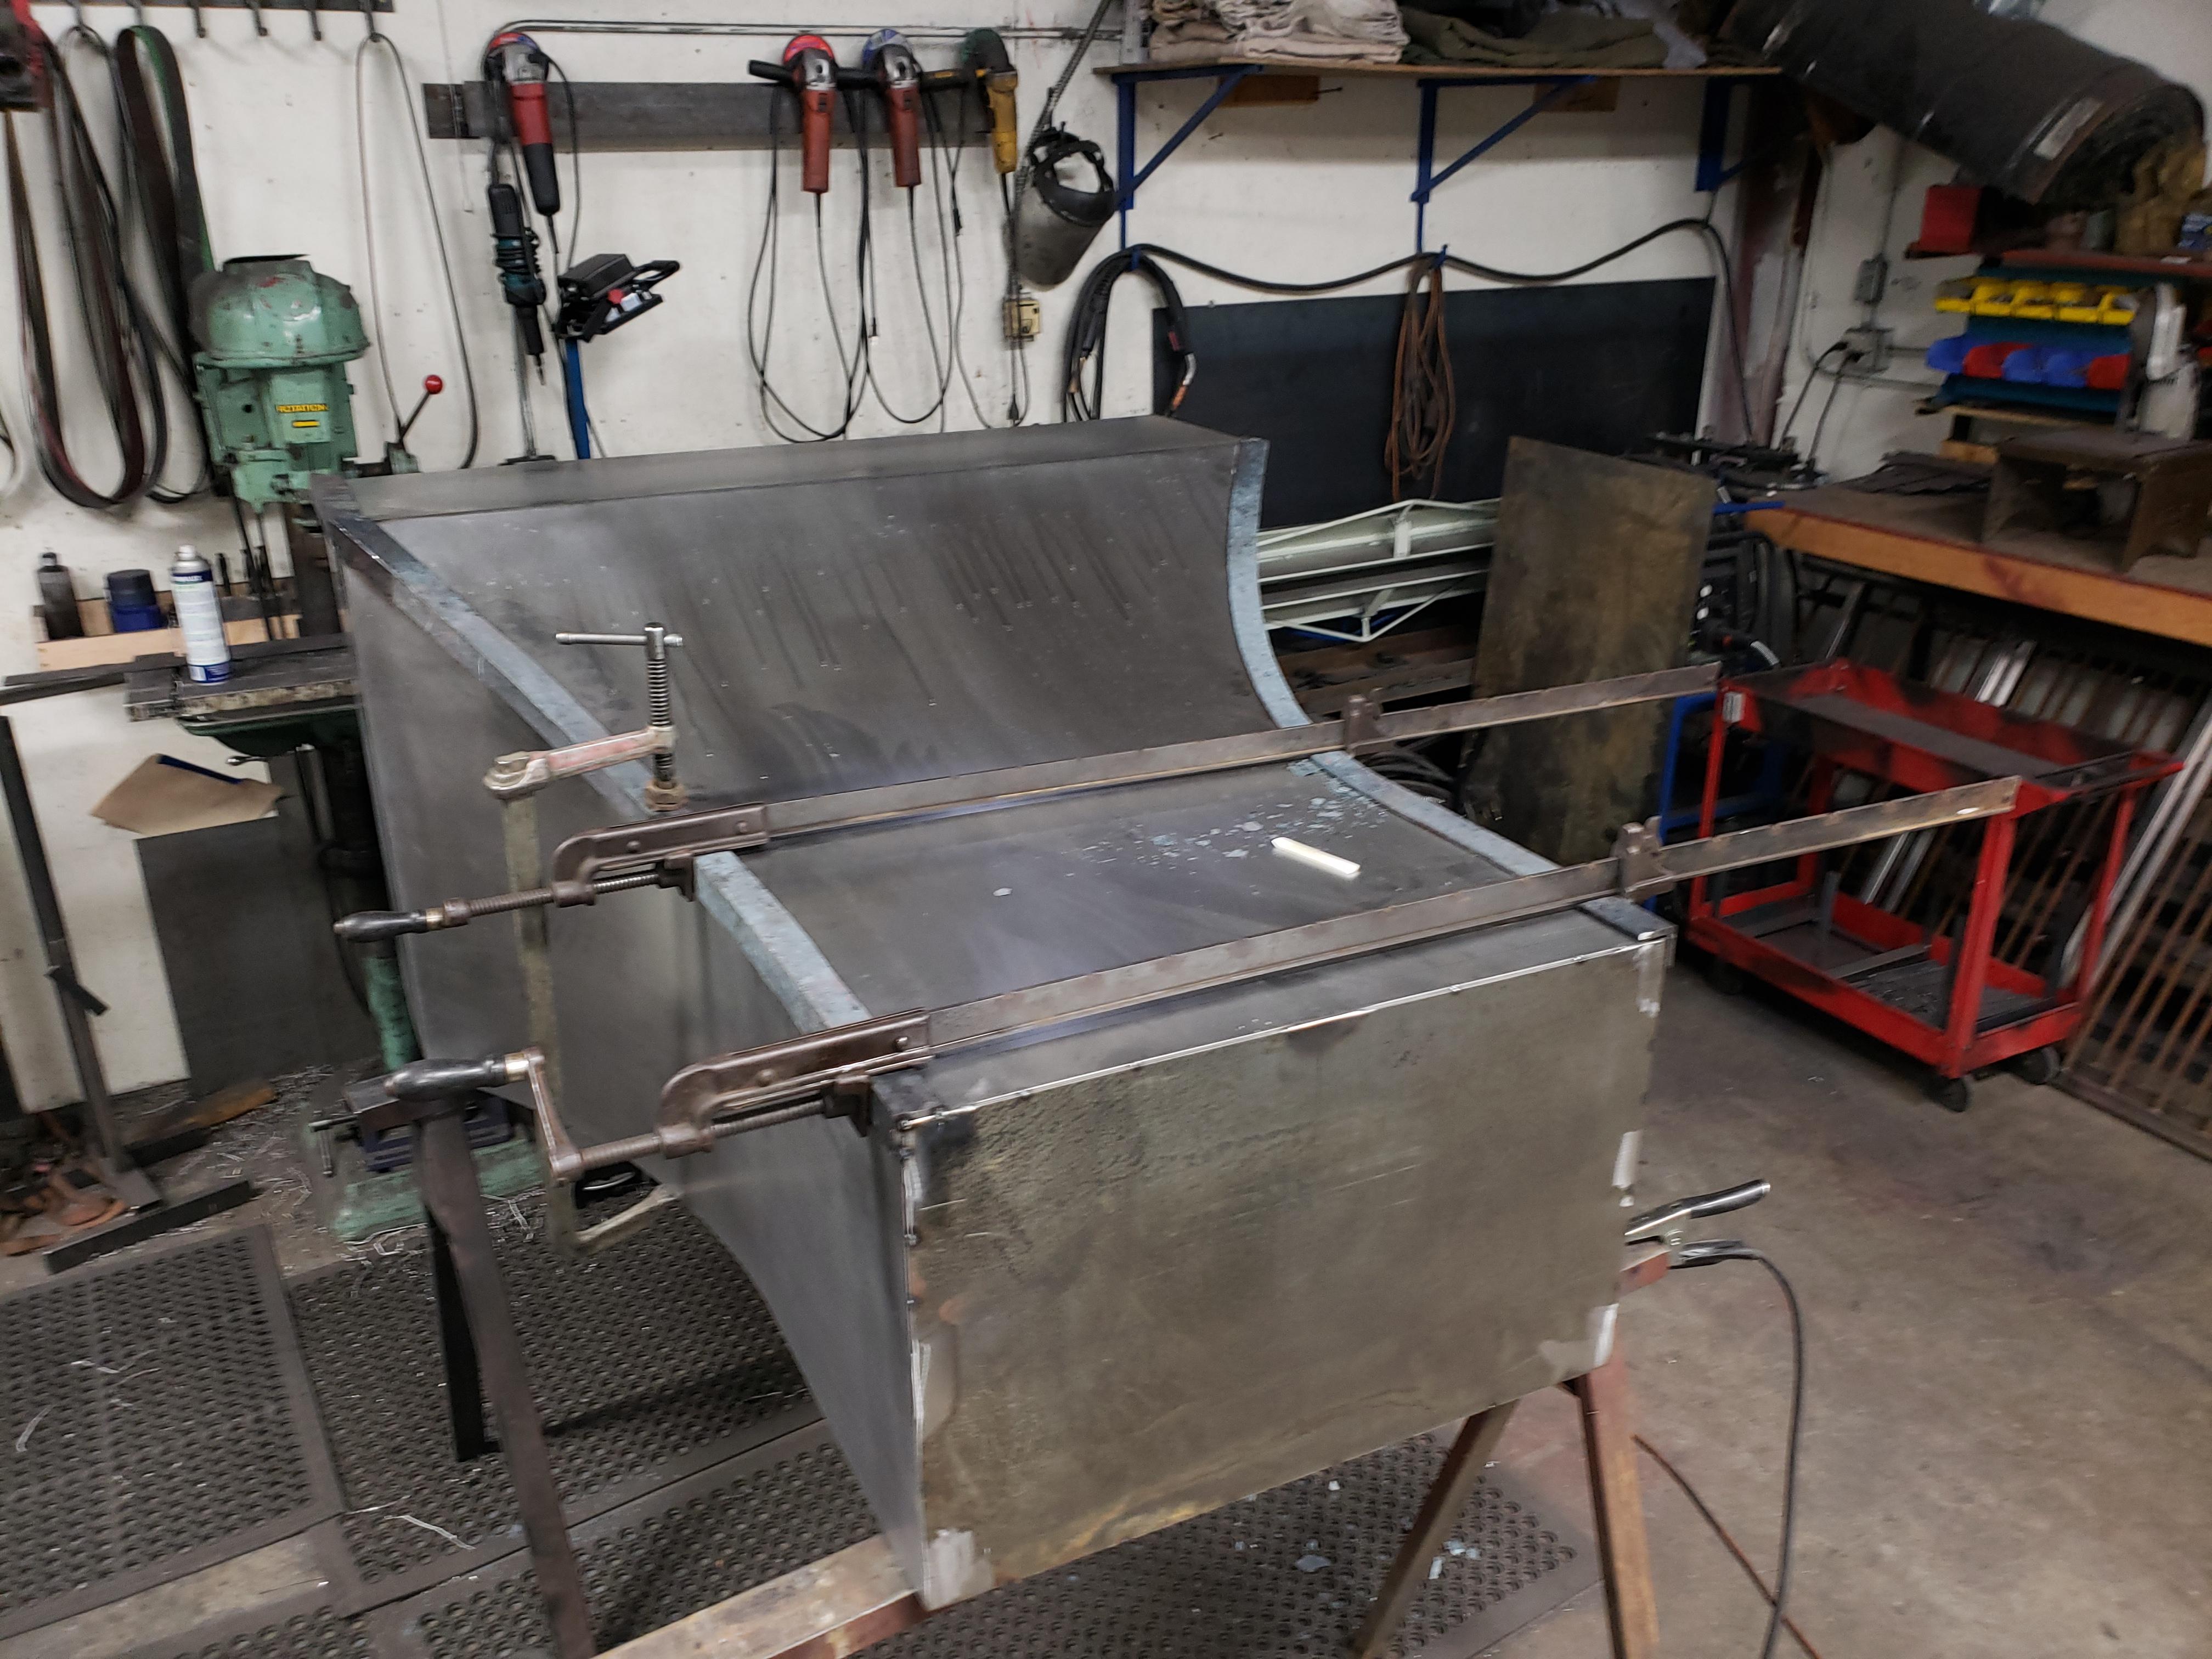
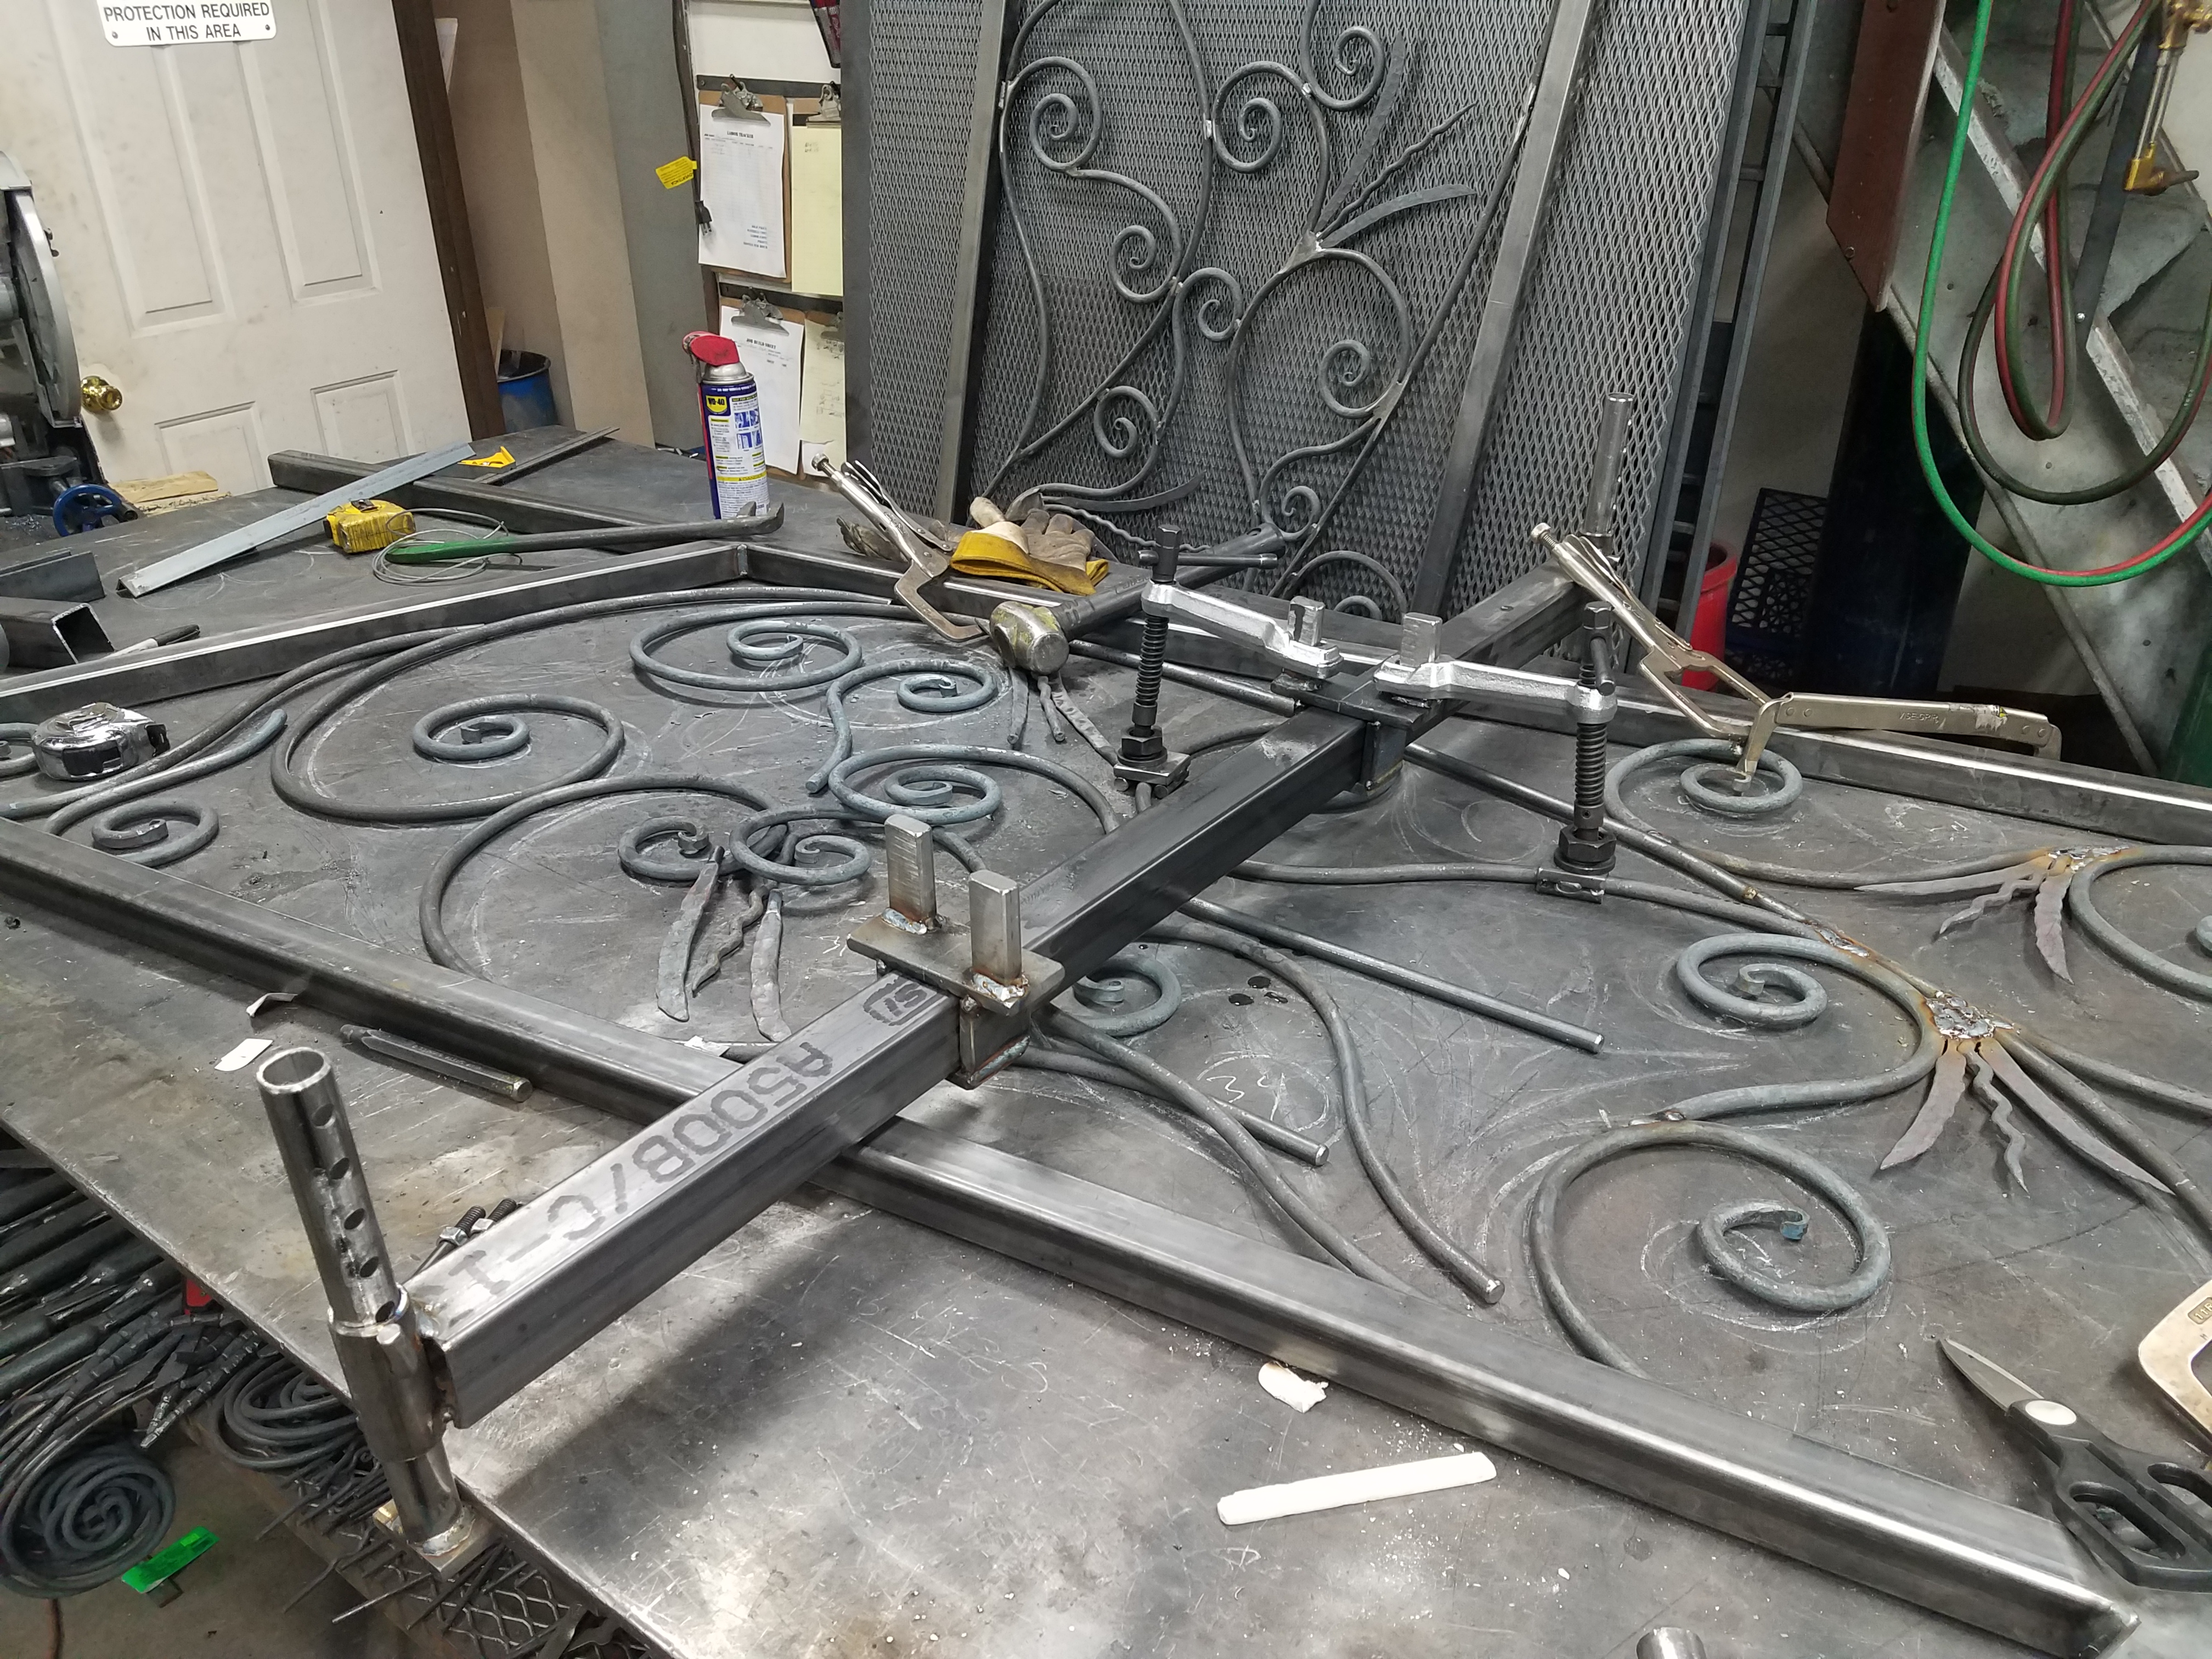
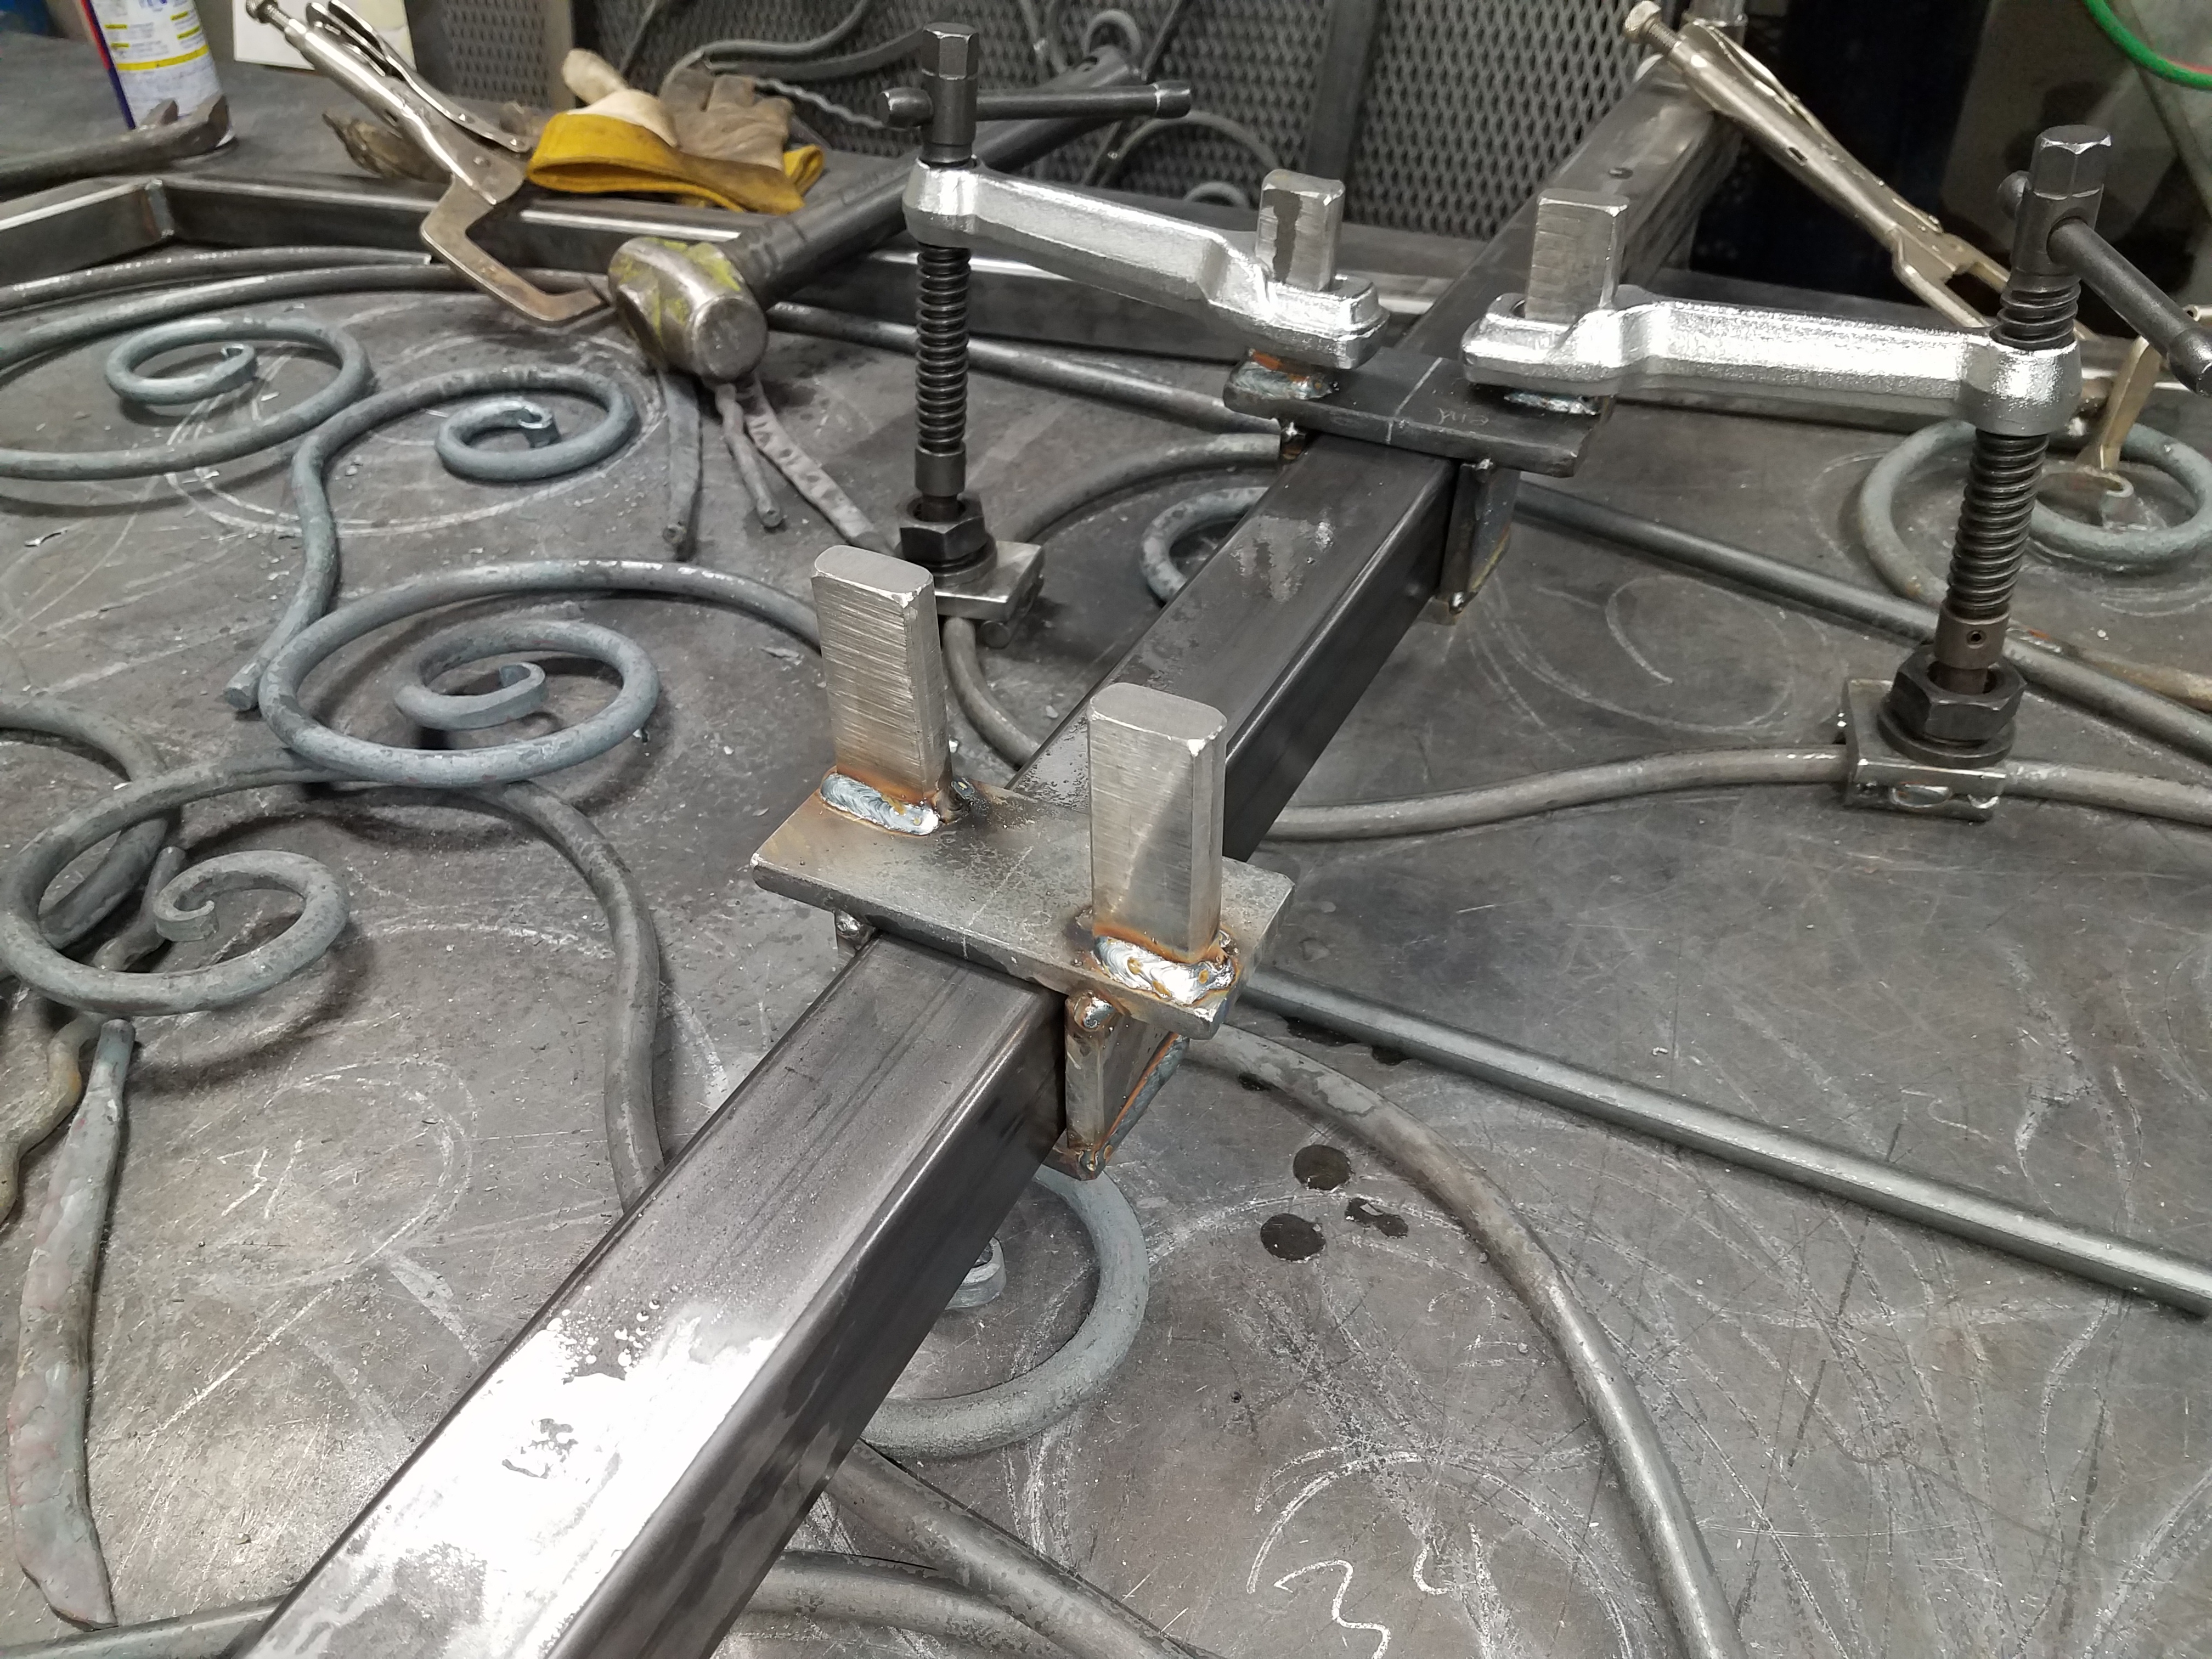
So I built a 4x8 ft fabrication table, but trying to clamp anything in the middle of that table is just not possible. I have clamps that rach 12 inches but the leaves a 2x6 ft no mans land. this is my solution.

So I have this project, scrolling and bending the round stock it not difficult but keeping everything perfectly flat proves to be difficult the more bends and longer the piece is but it is easier to adjust everything once it is welded together or while I am welding it. But so time it requires a lot of pressure to get the steel to line up flat so it can be welded. So I have a piece of 2"x2" tube that spans the width of my table.
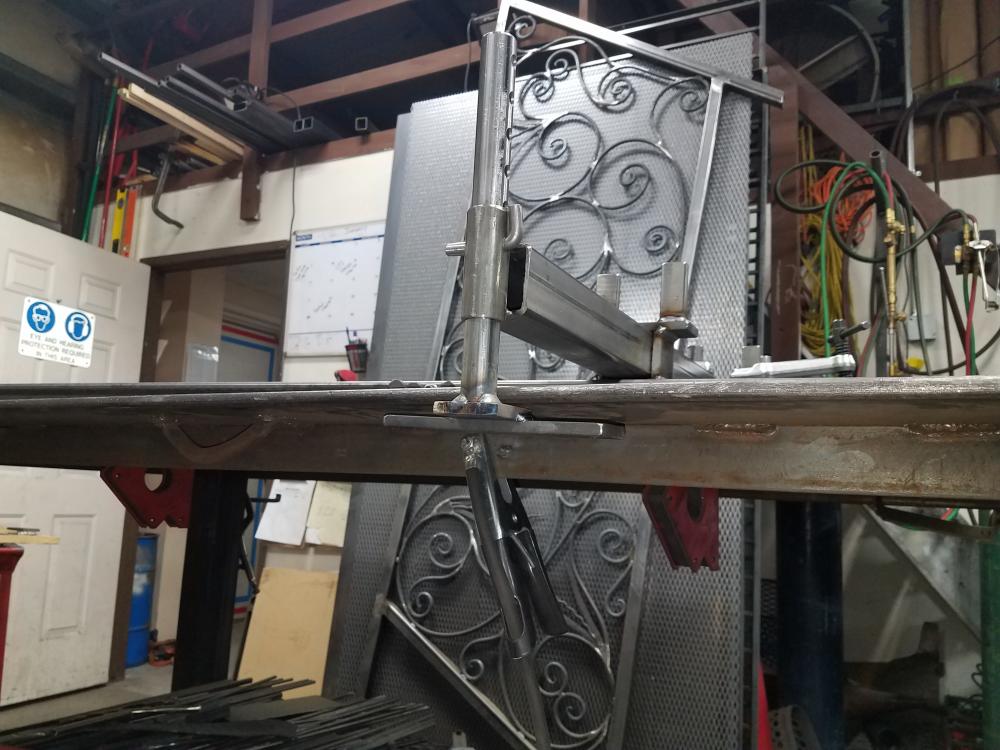
I had to widen out the foot that goes under the table so that if I only clamp off one side it leans over to the point that the screw of the clamp limits out. I had to add a tab on the top side of the table, and 1/4" tabs on the bottom foot so that it levels it out. The pipe on the foot has 1' adjustments so that I am able to clamp anything from 0 to 7 inches off the table.

I built 2 sliders that move so I can set up over any area on the table. I forged down some 1" bar stock, to match the stock on my Bessy clamps. This allows me to use the slide arm section with the screw. I also build several plates and clamp foots to suit the stock I am fitting.
-
4 hours ago, ThomasPowers said:
In your location? Great!
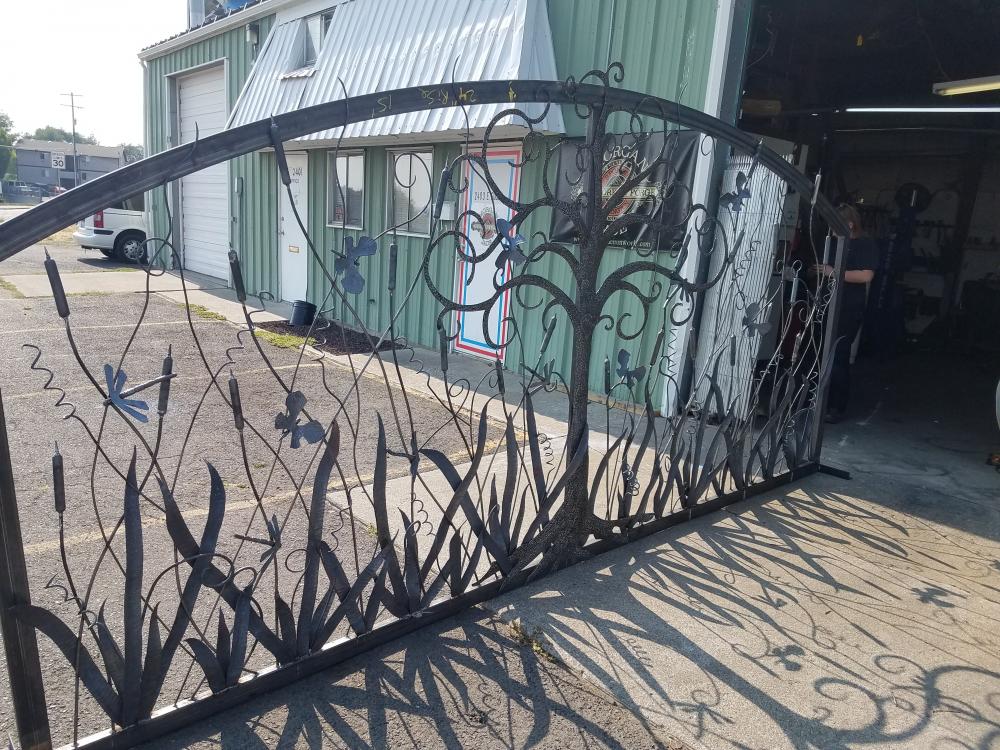
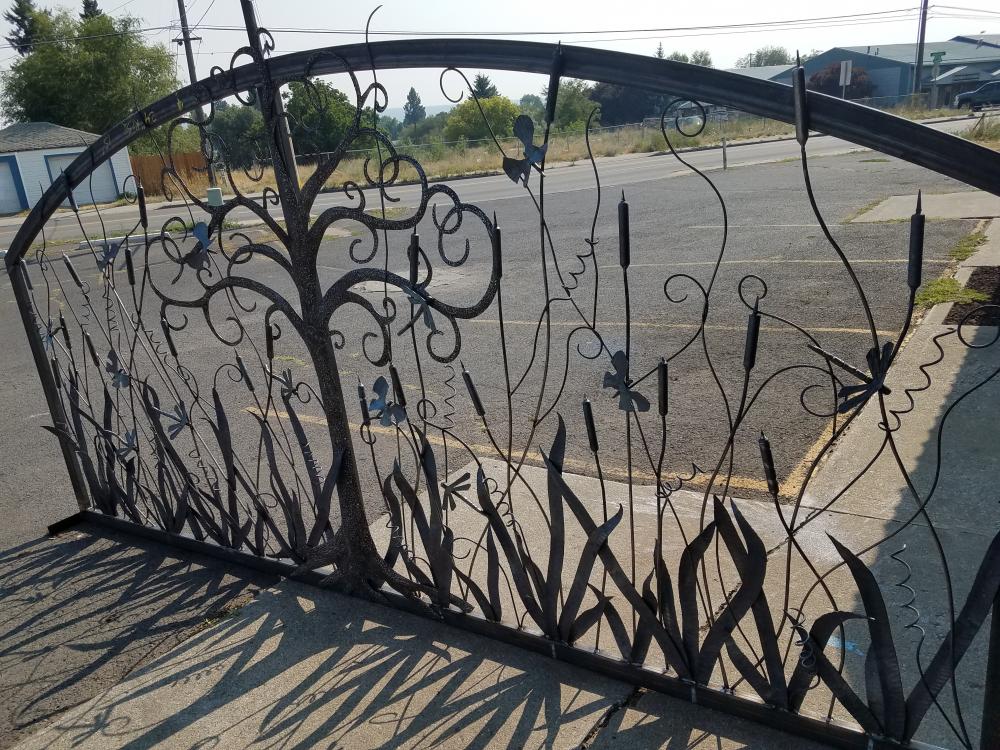
There is no 4" issue for the gate, and it is being installed at a property to the NW of Spokane, Wa, that sits on the Little Spokane River.
On 8/3/2017 at 7:58 PM, Frosty said:I have to assume this is going to be on rolls in a fence or wall. It's a beautiful piece of work. Summer in Spokane is always hot so I only have limited sympathy for you there. I don't know who it's for but it's going to be a neighborhood or community show piece.
Summer is also why you don't need to worry about me dropping by in summer. My sister lives in Boise, the folks used to live in East Wenatchee so, yes I've experienced July in Spokane.
") Still, you MIGHT get a call one winter day.
Still, you MIGHT get a call one winter day.
Frosty The Lucky.
It is actually going to be a swing Gate. It weights in at only 550lbs
1 hour ago, careful_eugene said:Superb piece of work, I love the texturing on the tree. What finish will you use?
The customer wants either silver vein or copper vein powder coating.
On 8/3/2017 at 8:09 PM, Gergely said:Real nice work, David! That tree is amazing with its thorough texturing. But the whole thing is, too.
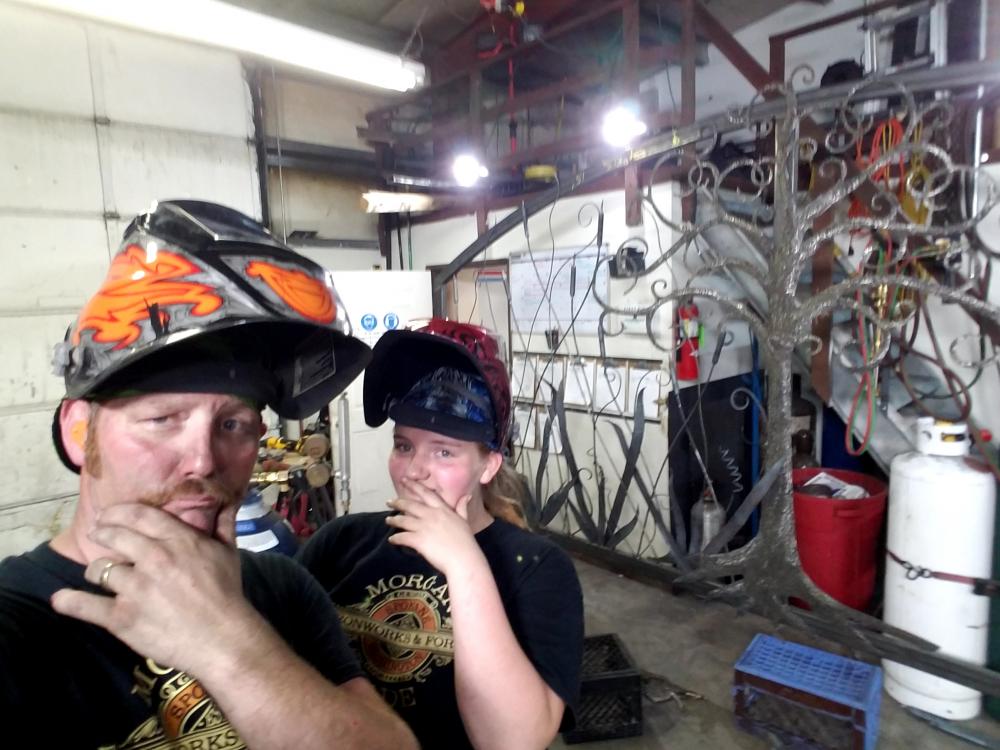
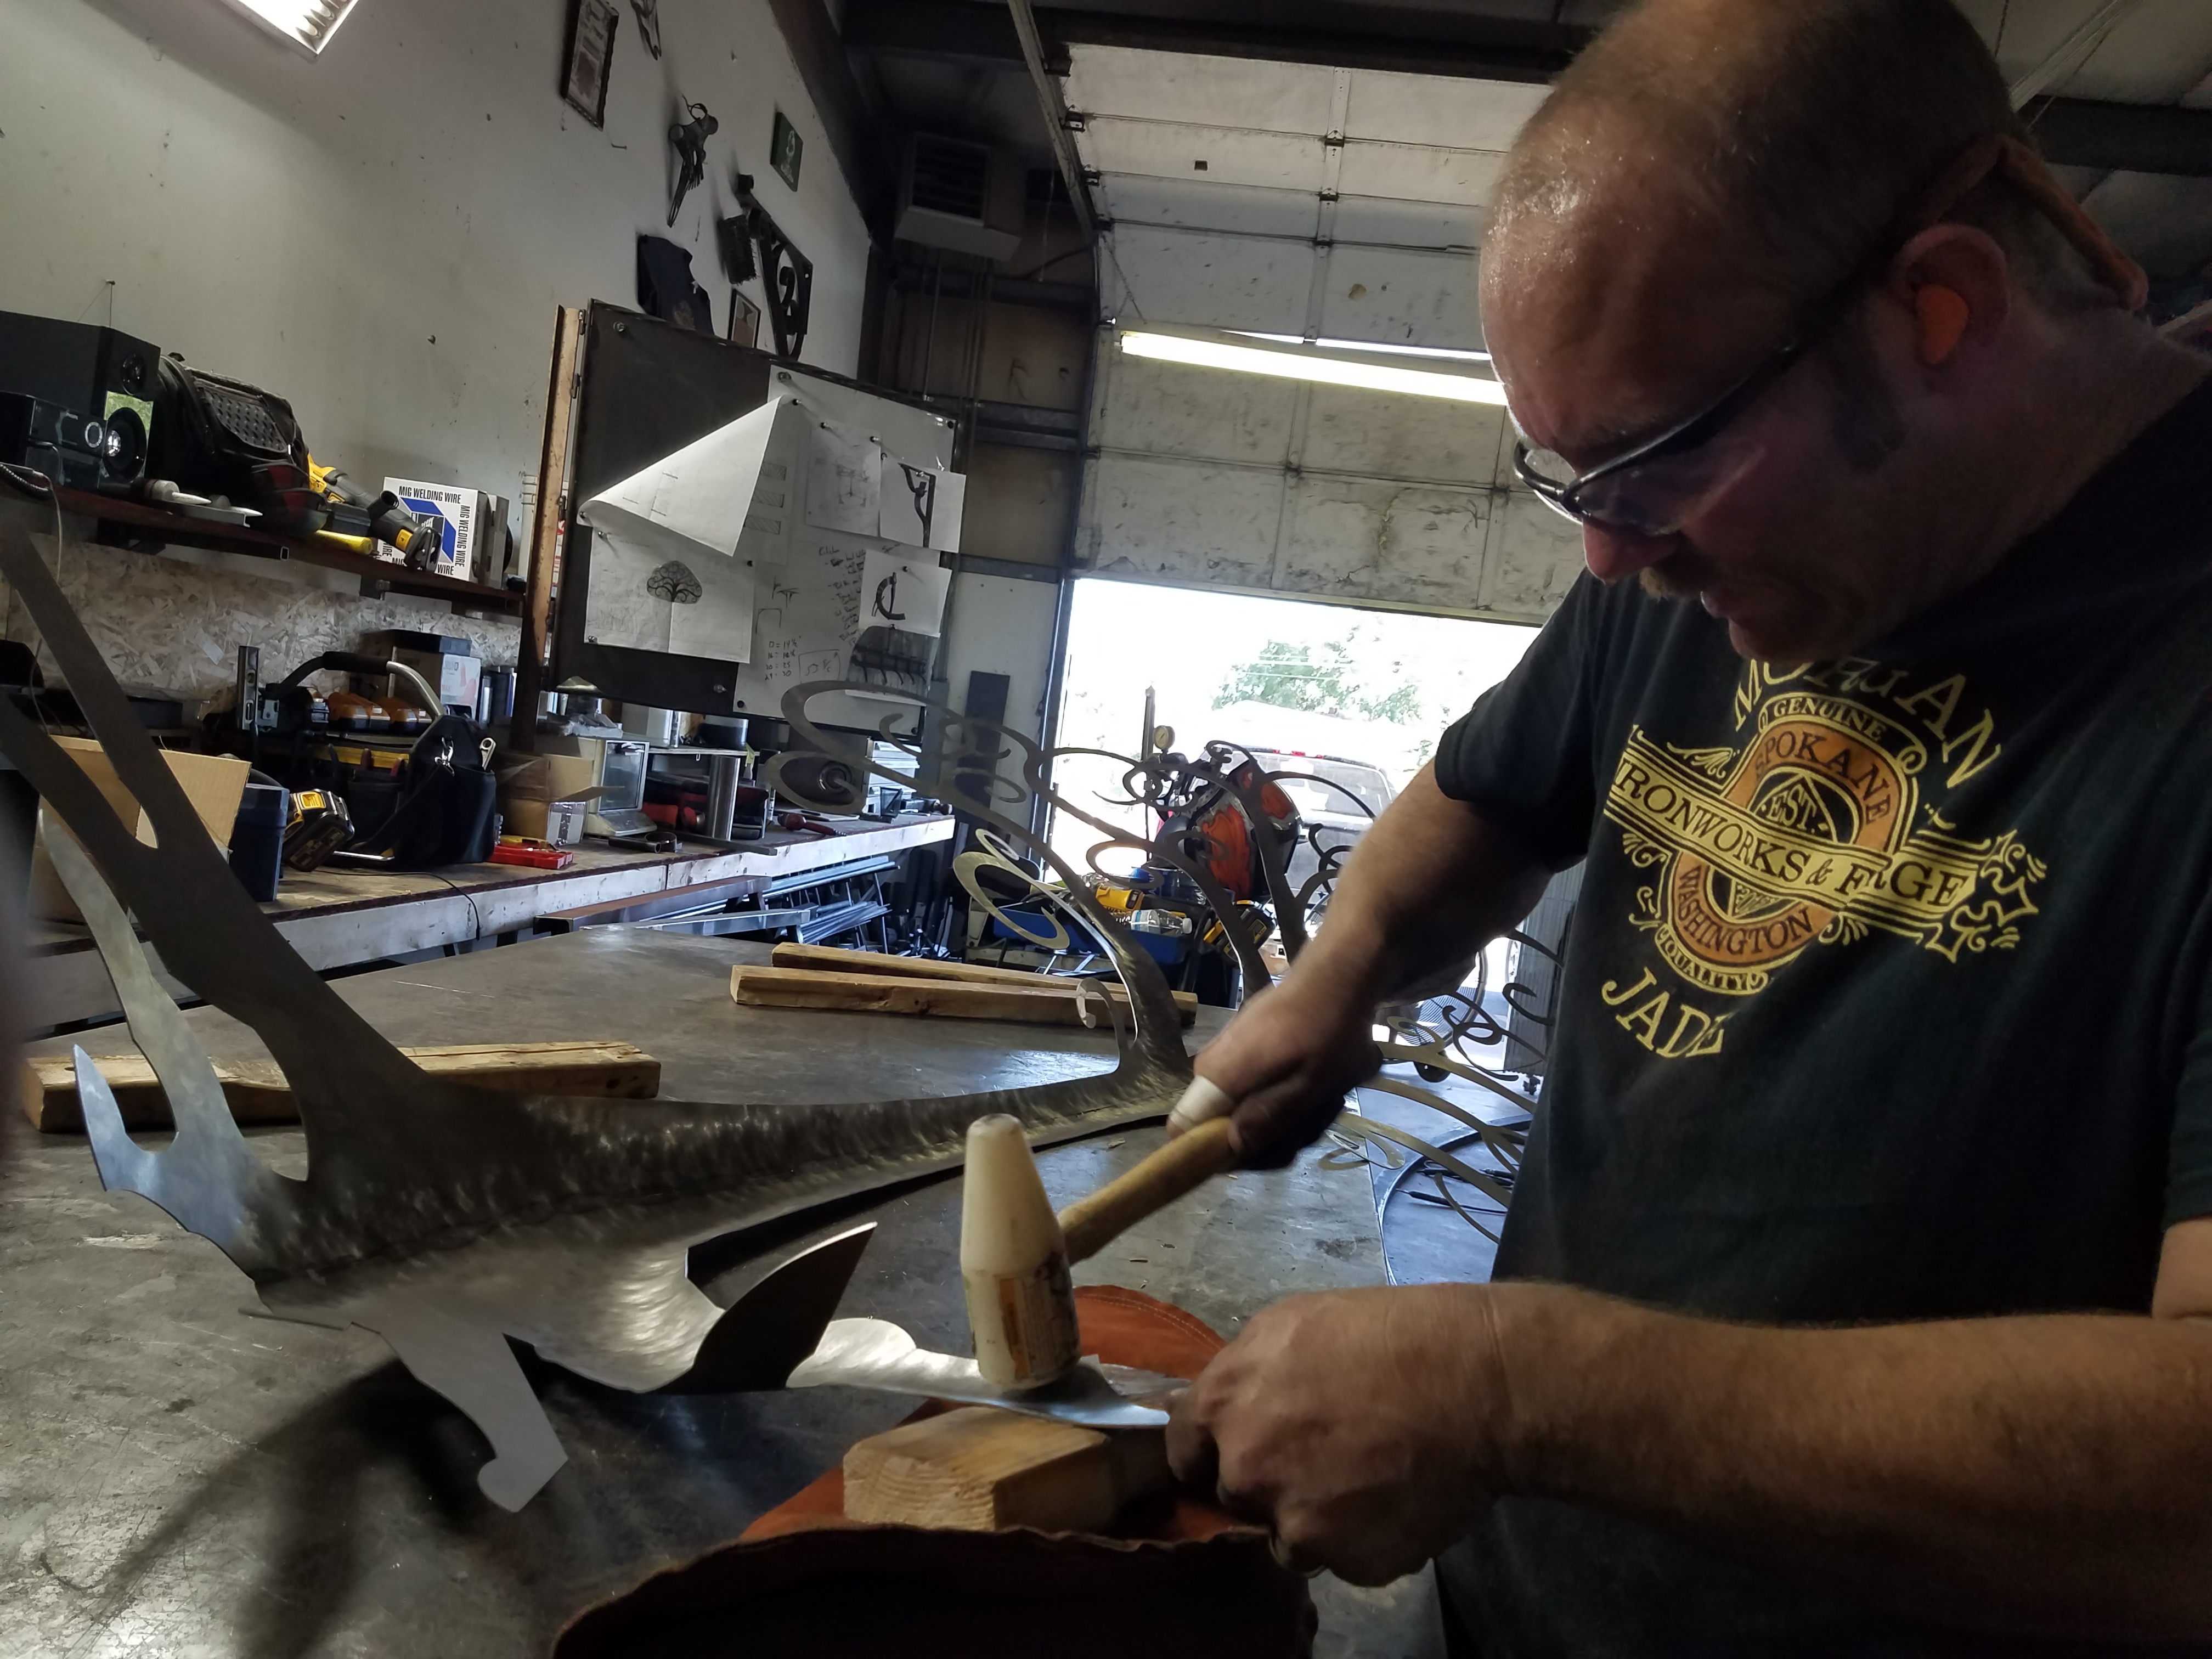
I especially like the picture where you have the tree on your shoulder while hammering a branch
") Looks very comfy!
Looks very comfy!
Bests:
Gergely
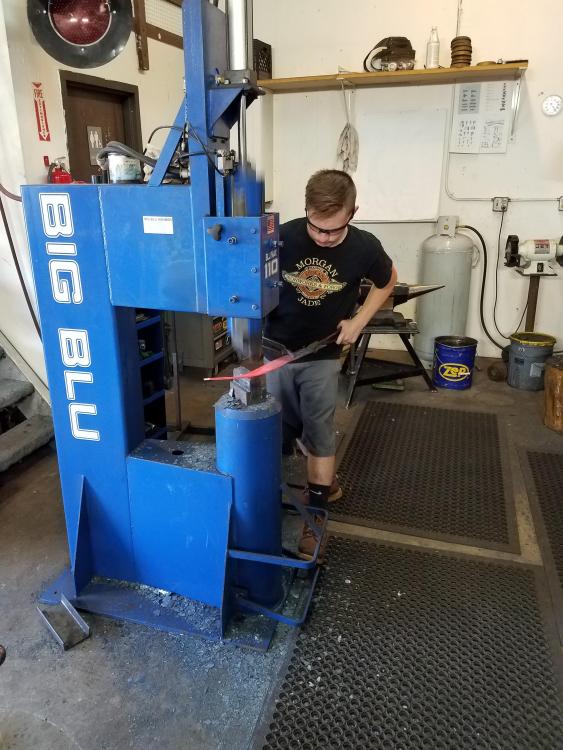
Lol. It was several hours of hammering the tree into wooden swedges, due to the fact that it was all done cold and there was not much of a break from hammering, I did manage to get some very severe cramps in my hand and forearm which may have been the result of the look on my face. Frankly with the outside temperatures being 93-105 over the last 4 weeks and having so much forge work to do which kept the shop around 120 plus....... it was actually pretty comfortable because we did no forge work so it was only around a hundred in the shop that day. Thanks for checking out that work.
-
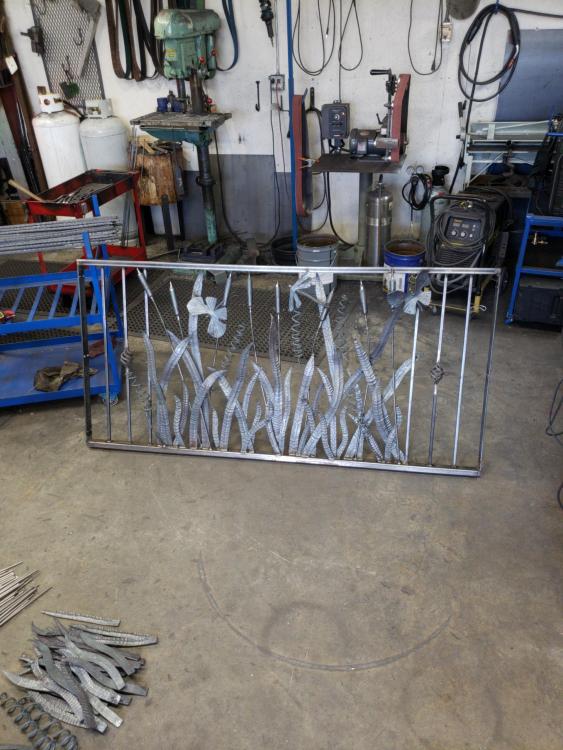
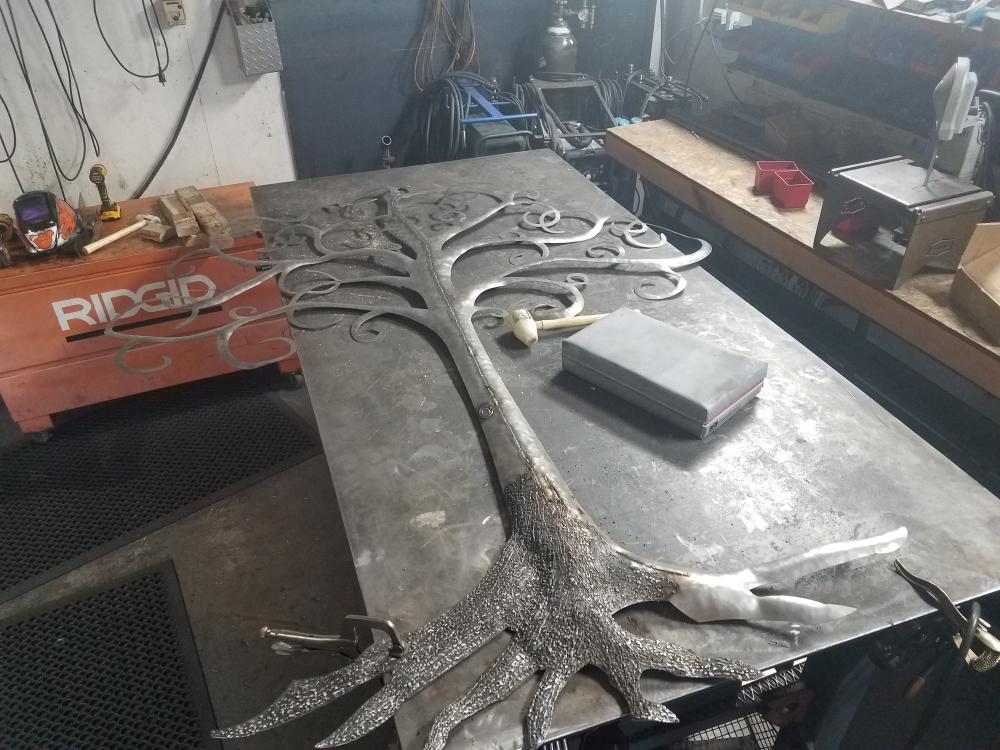
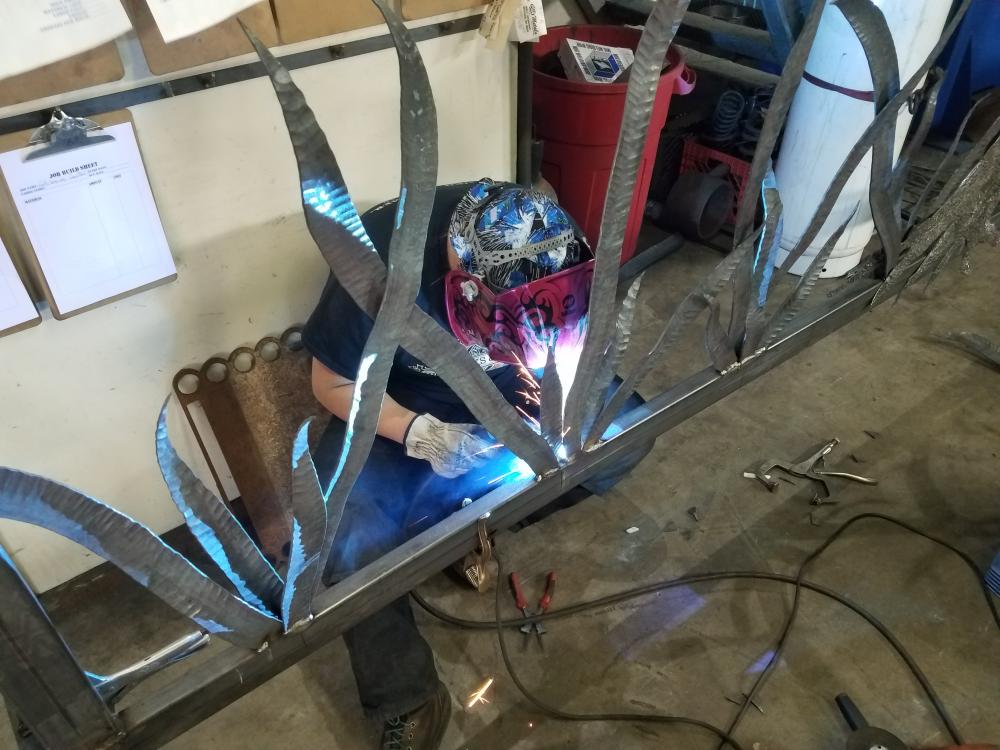
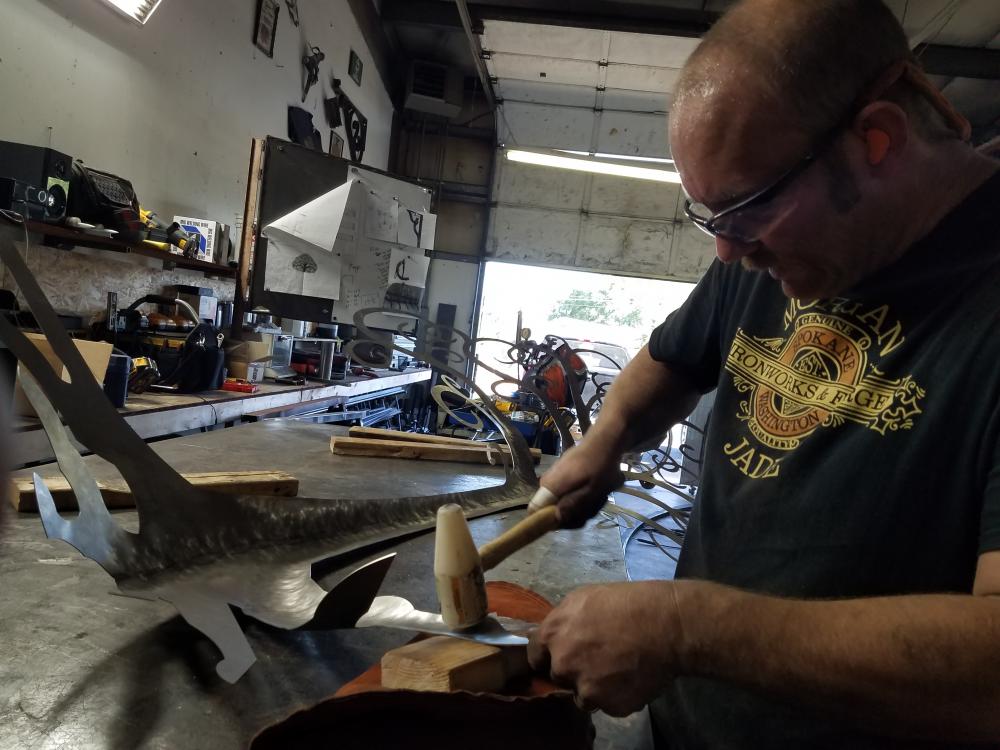
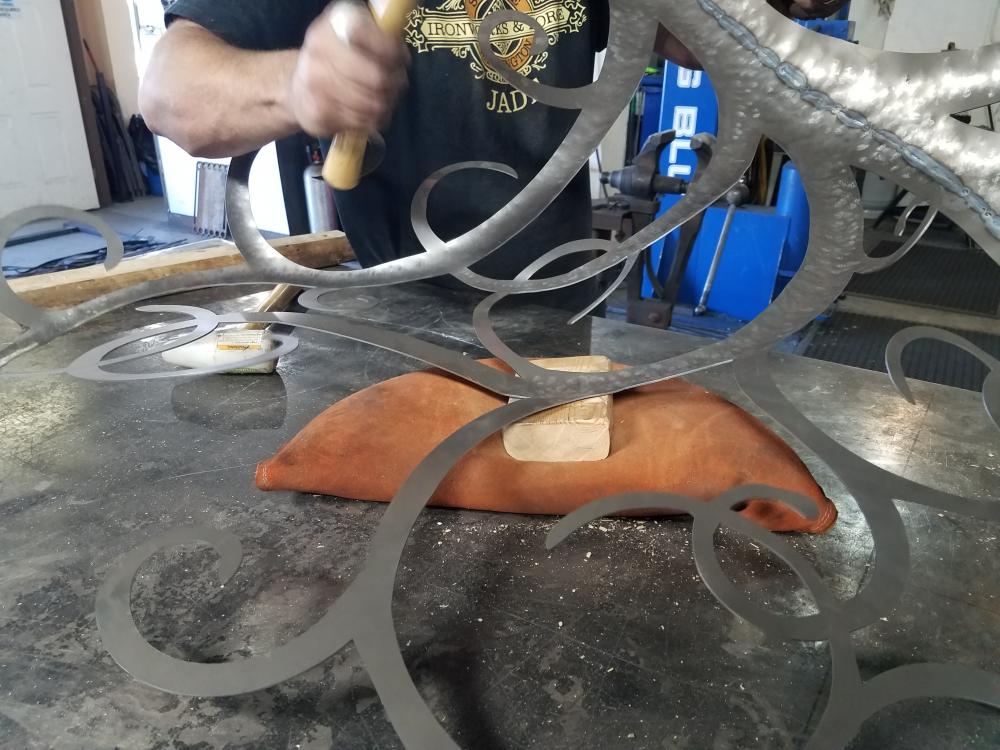
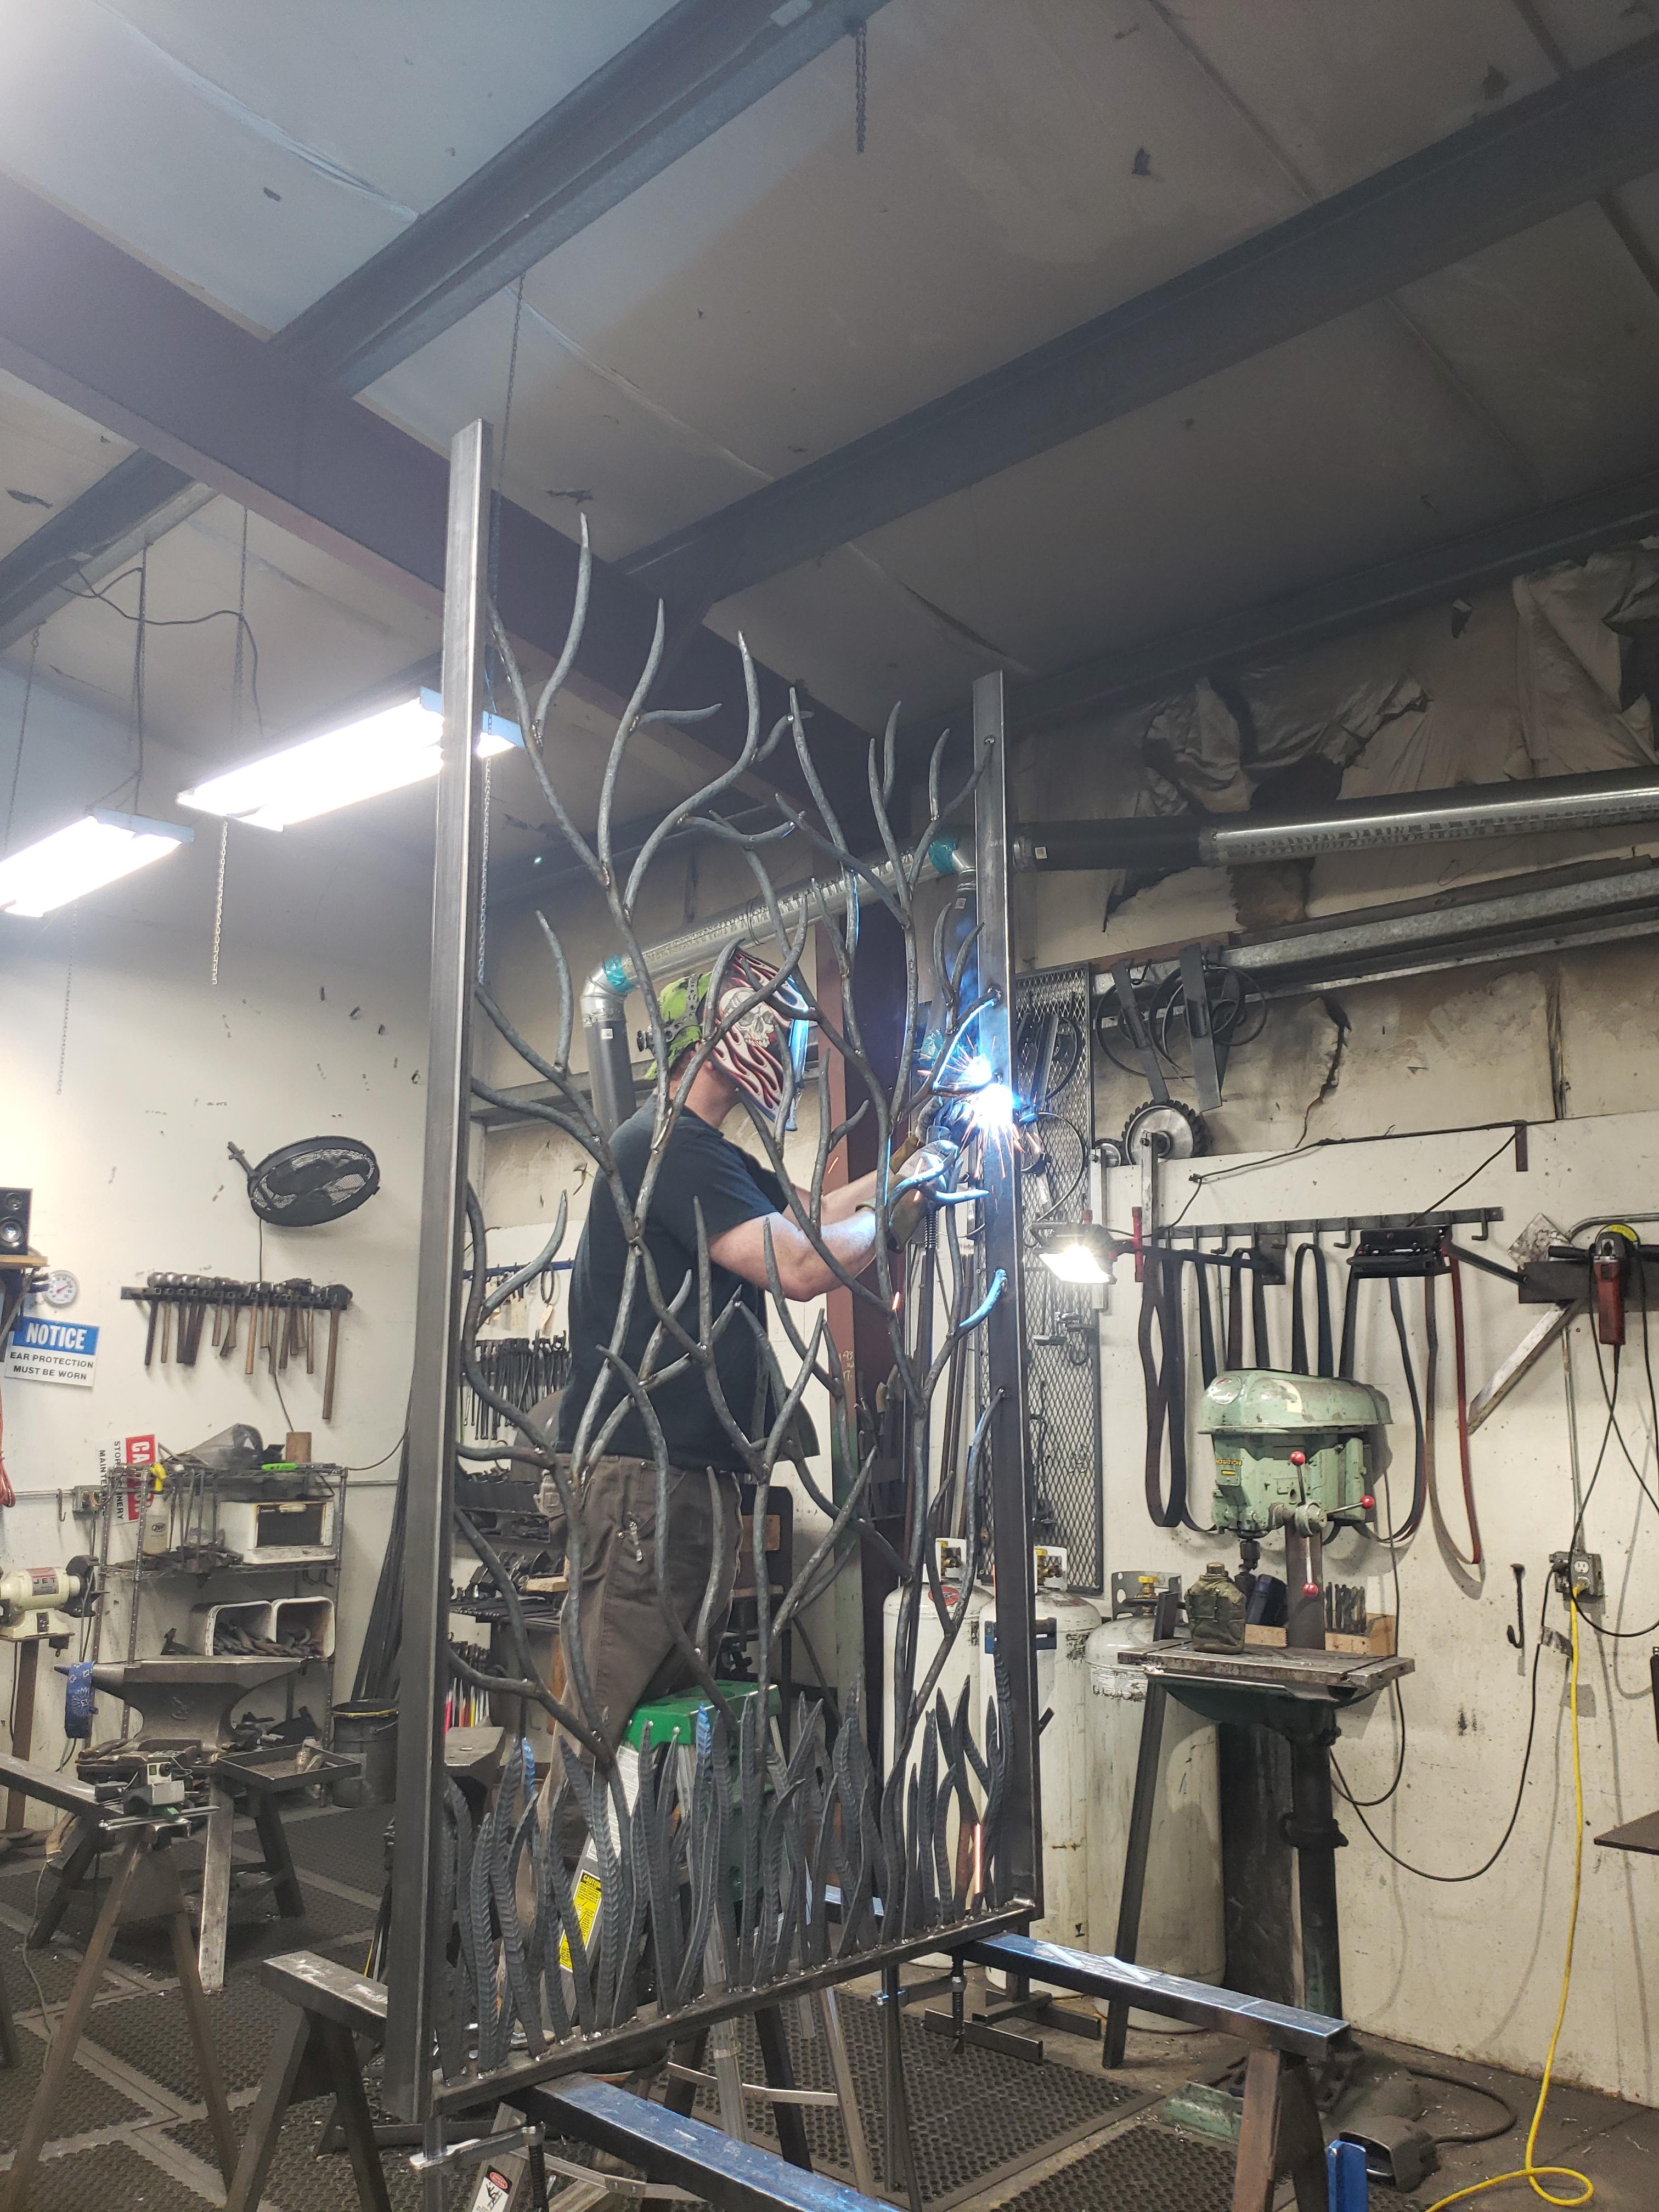
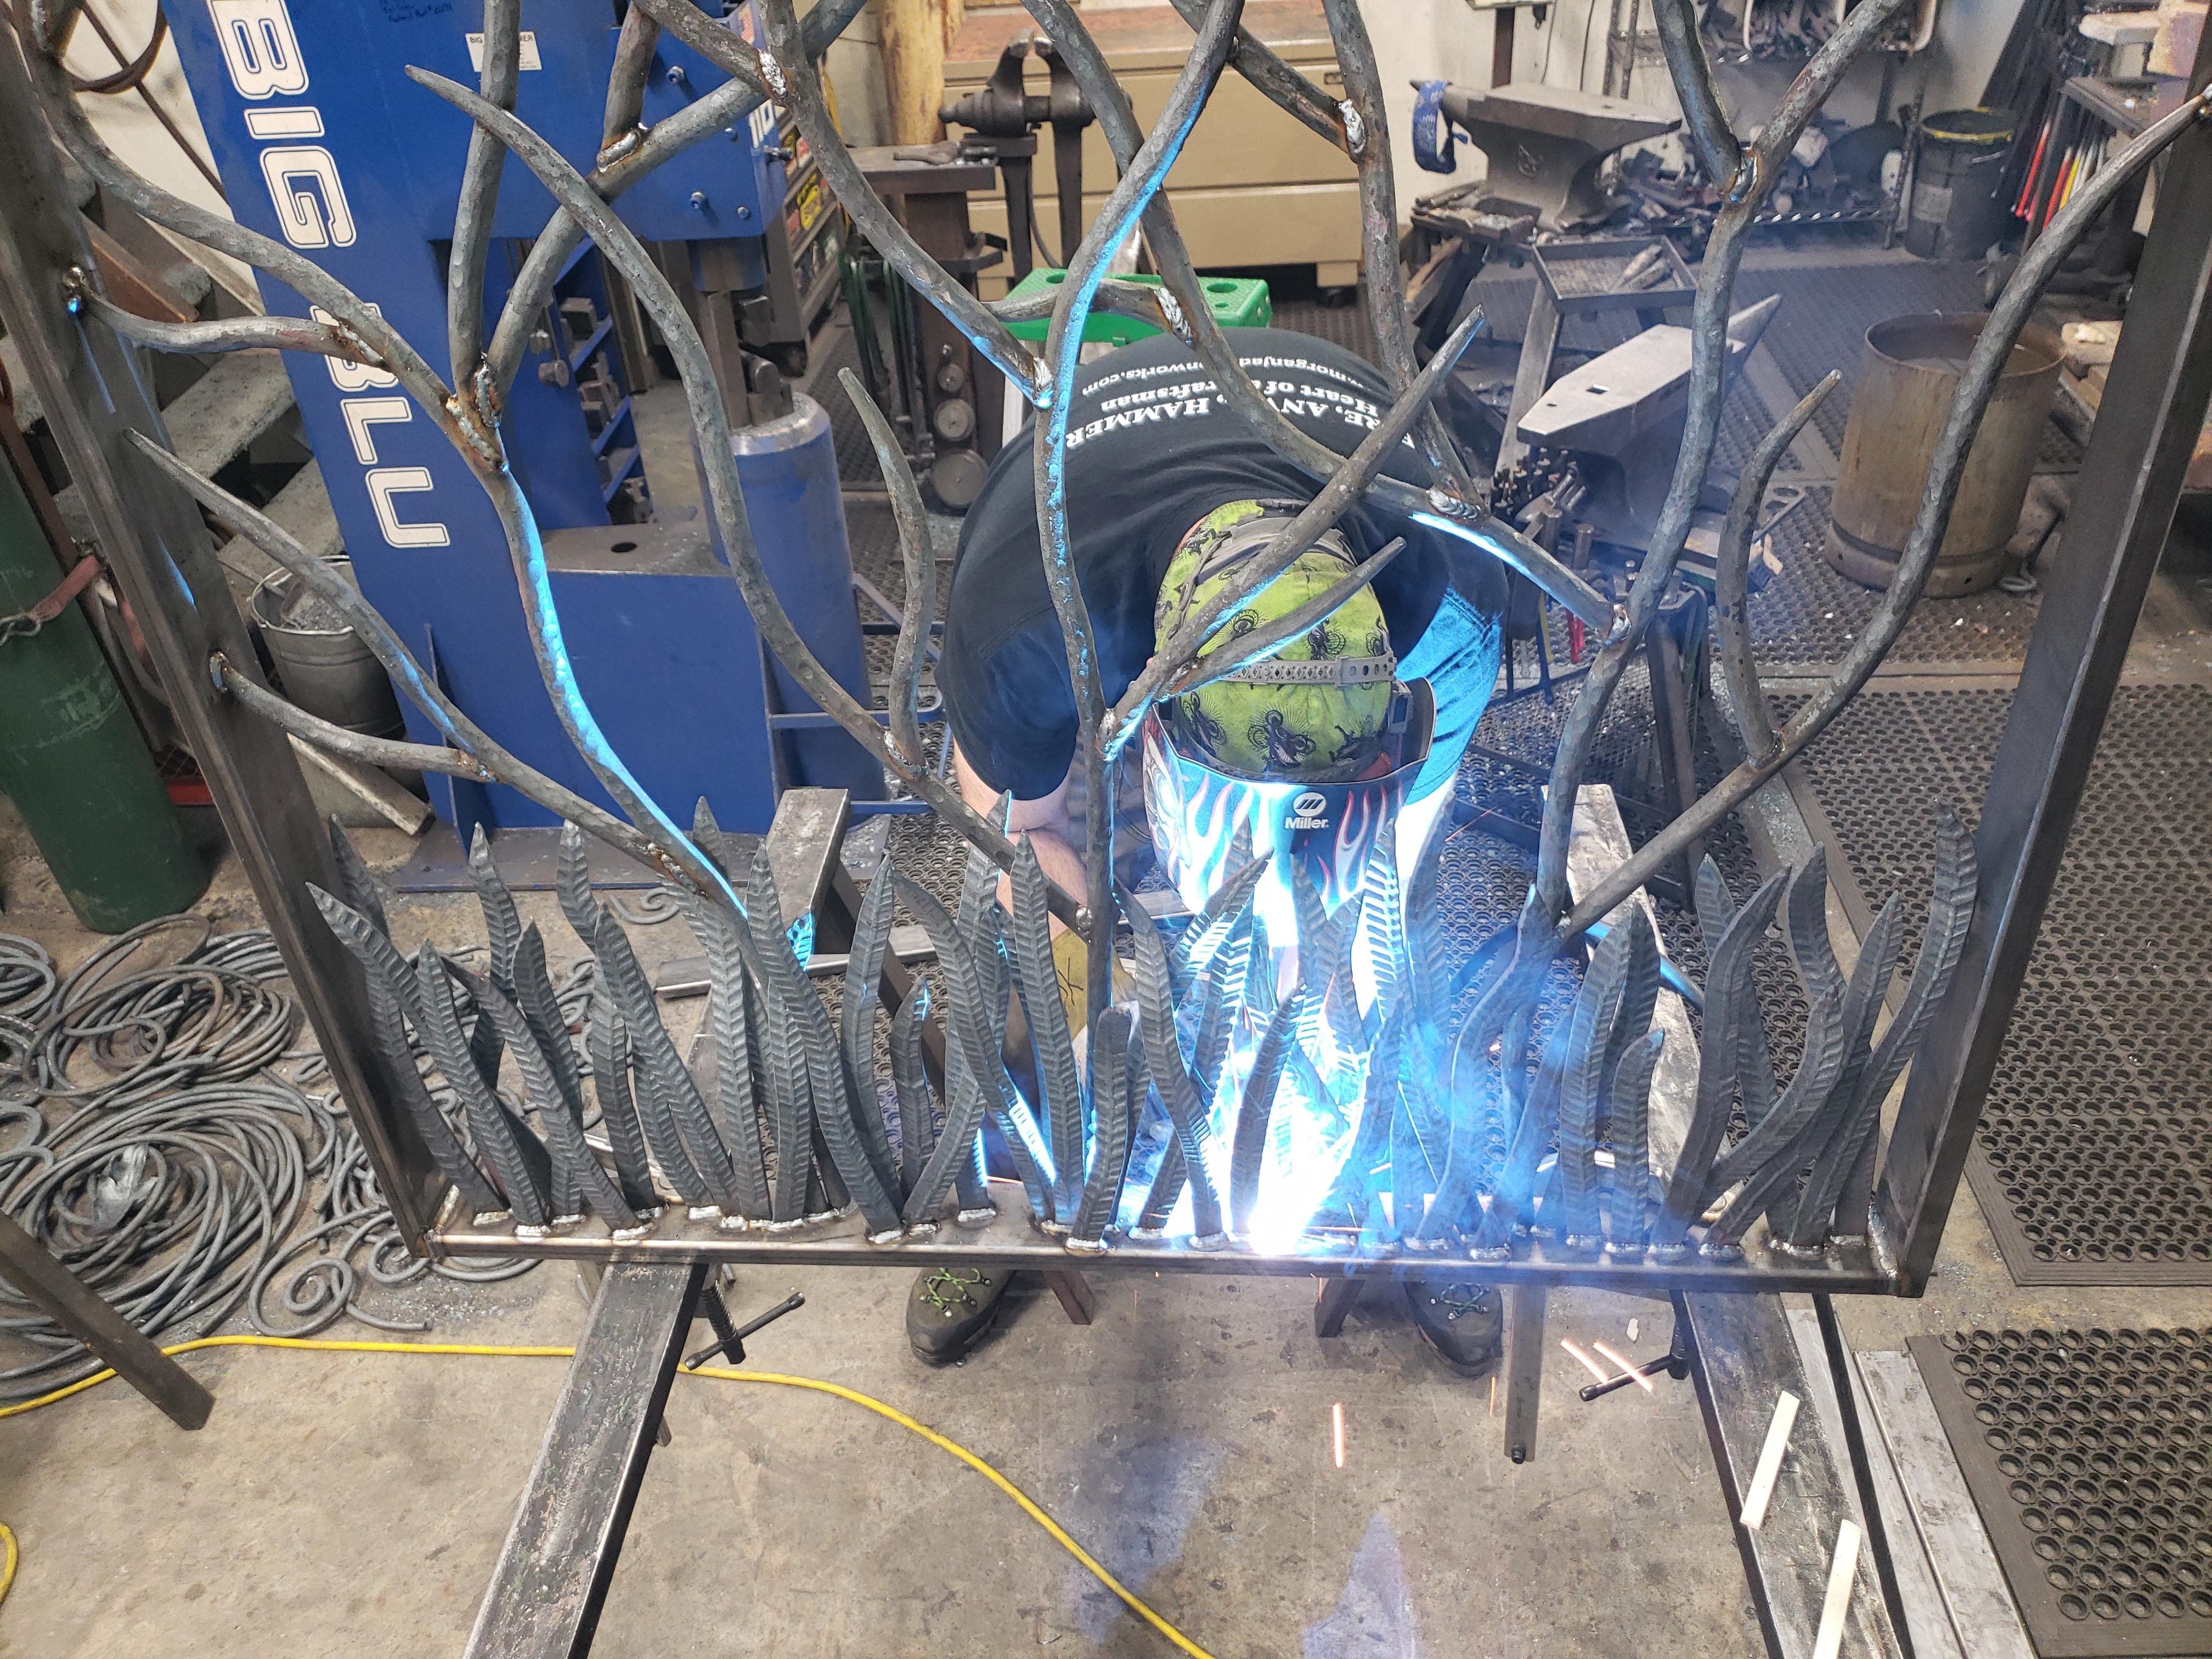
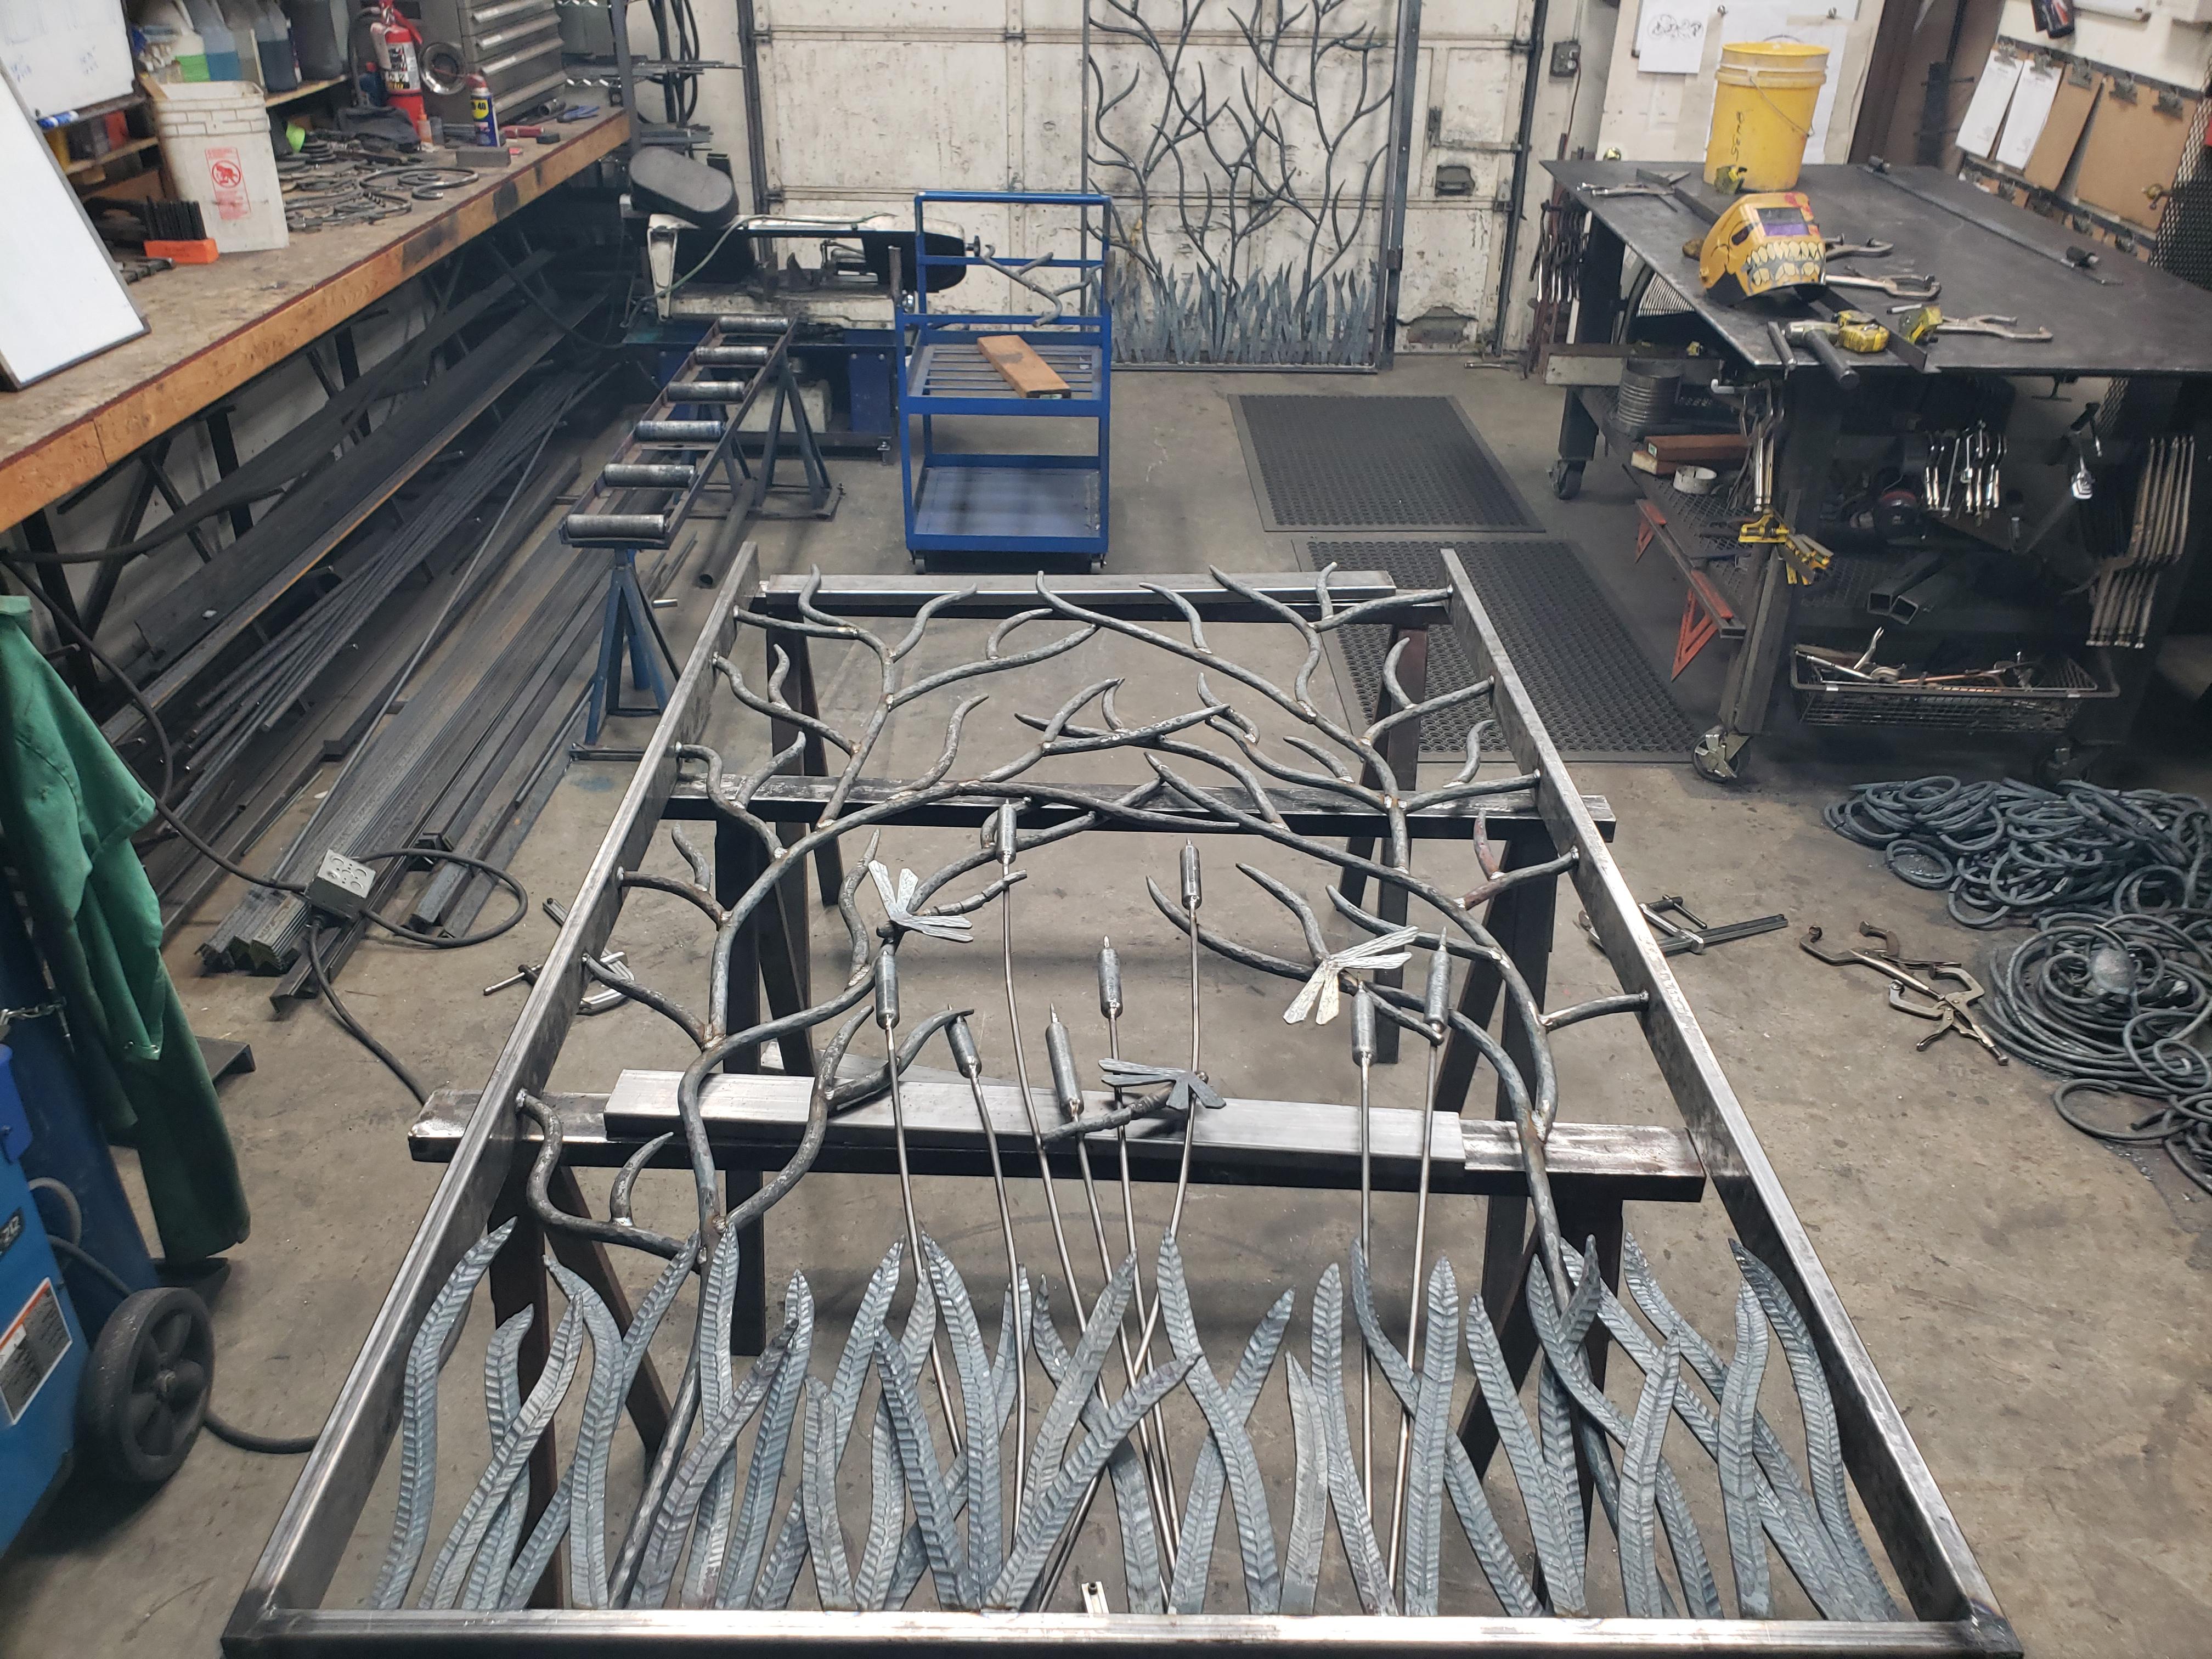
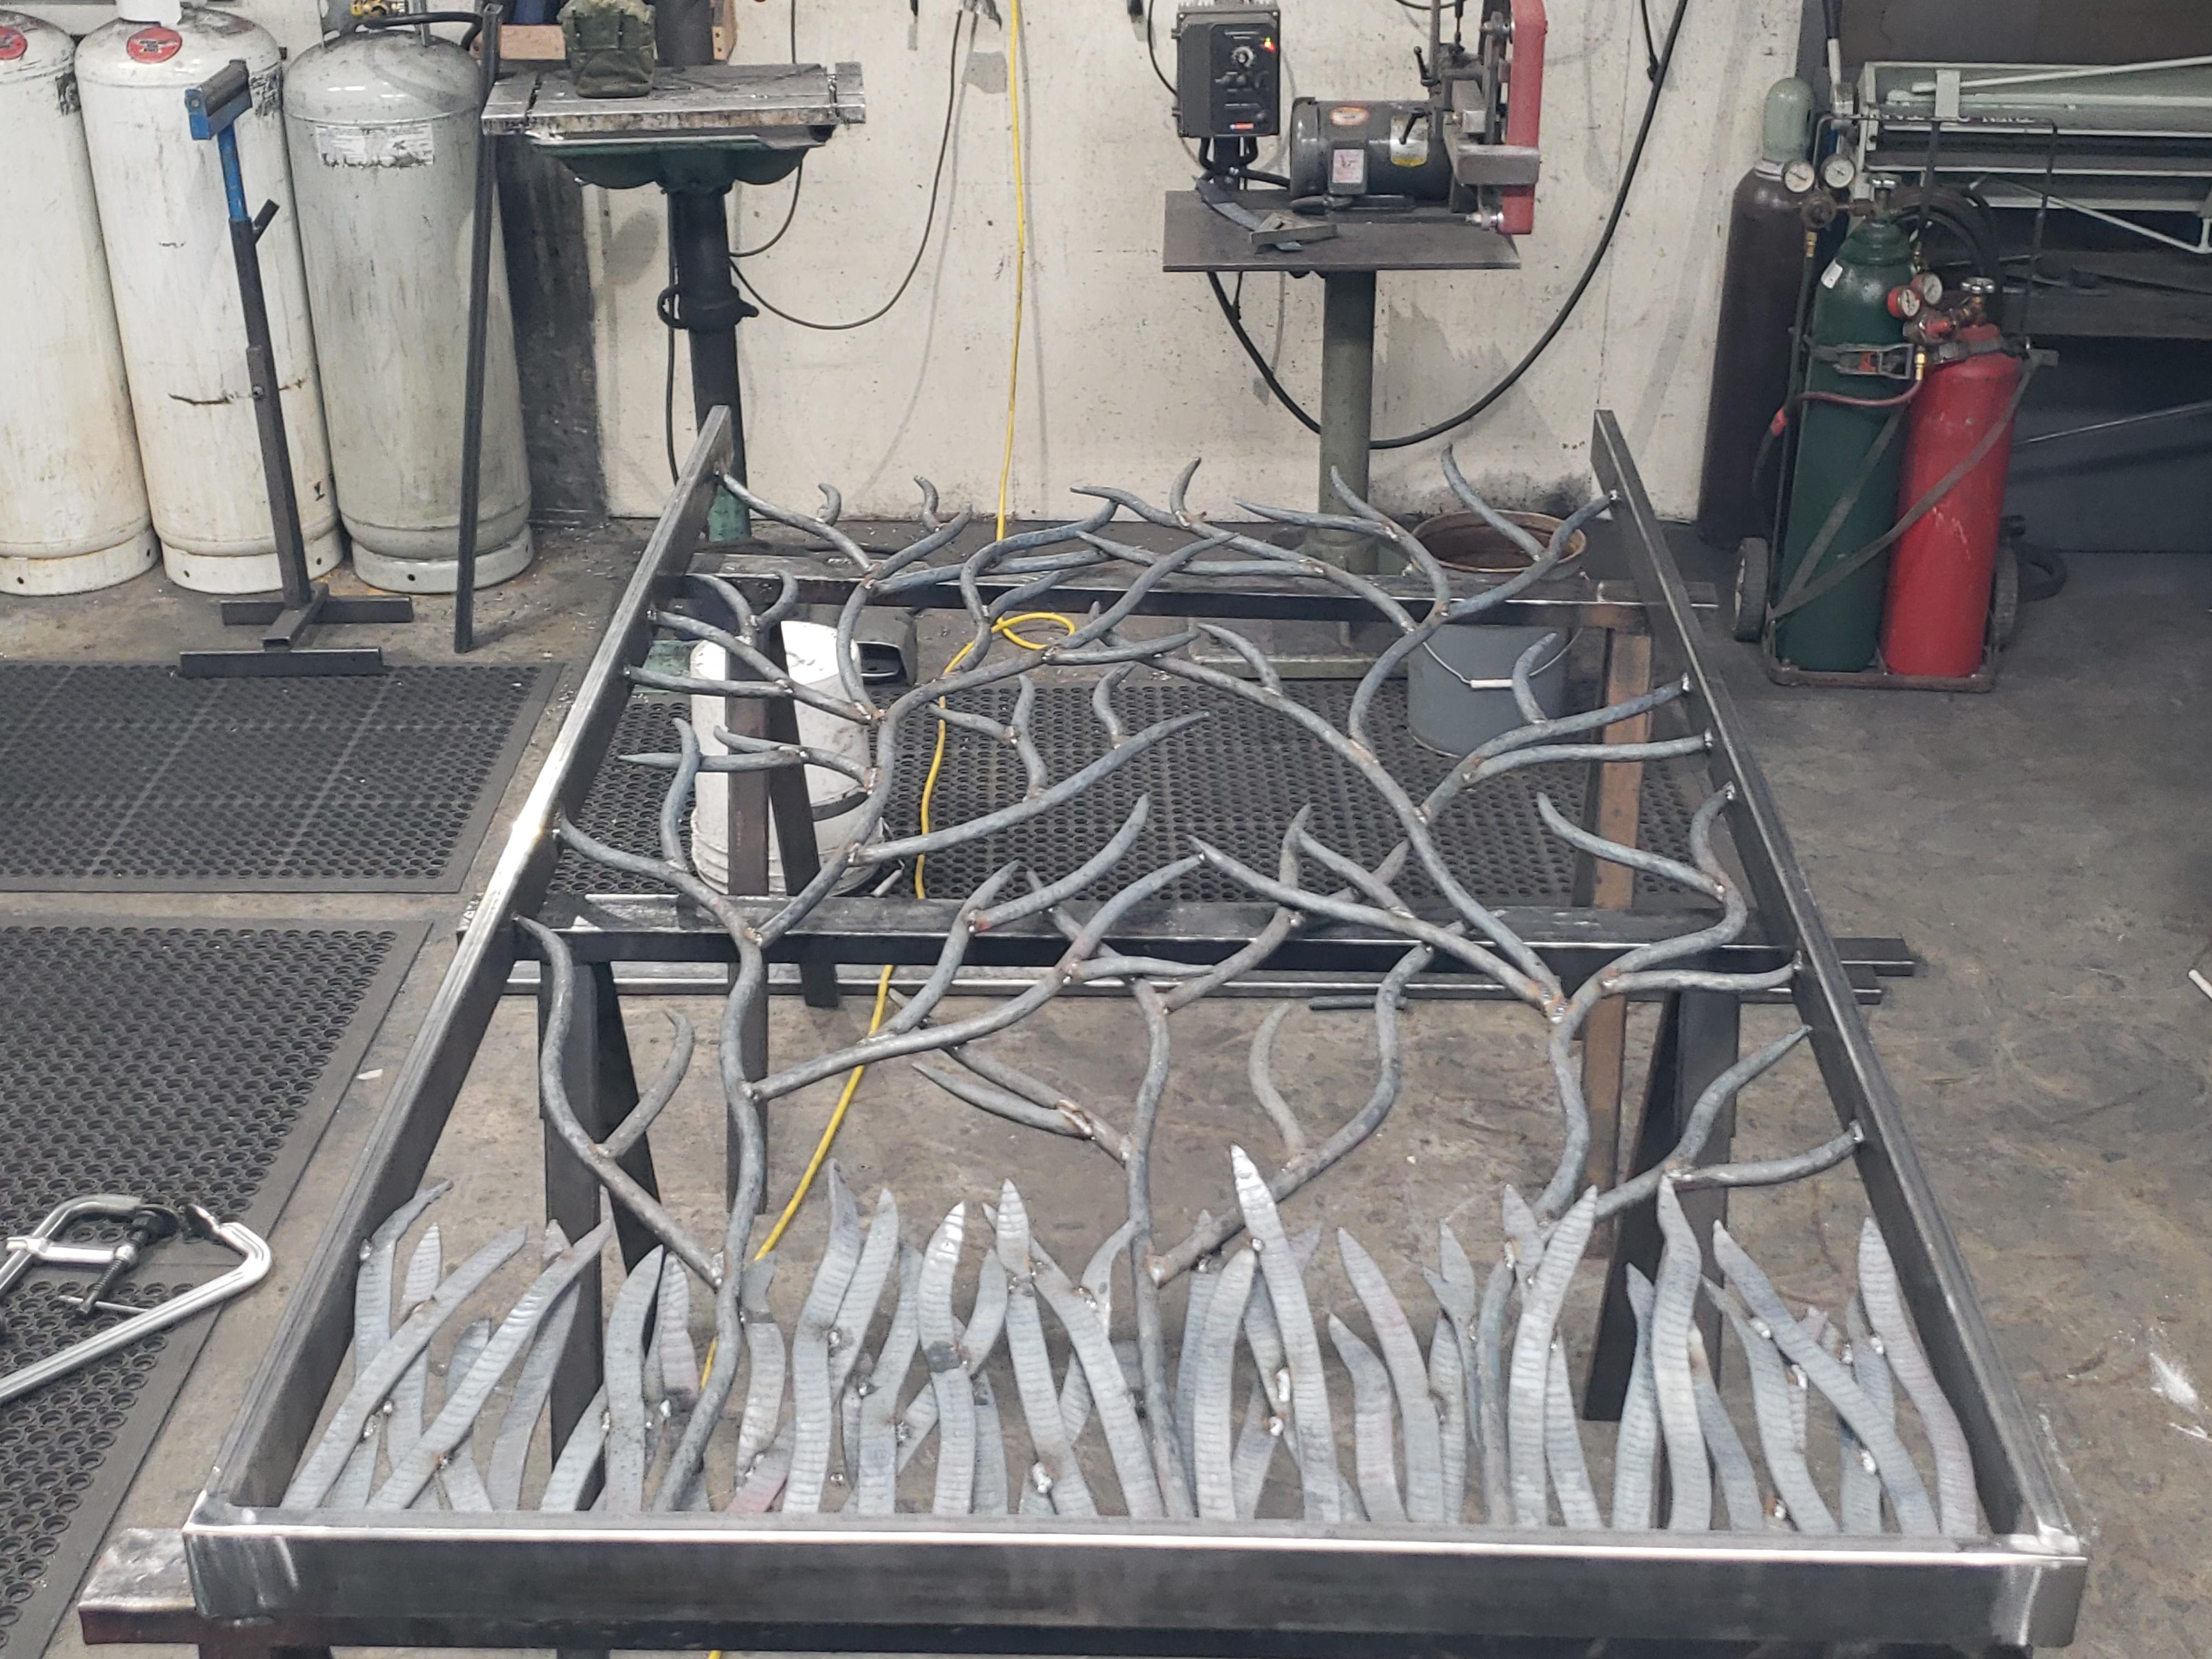
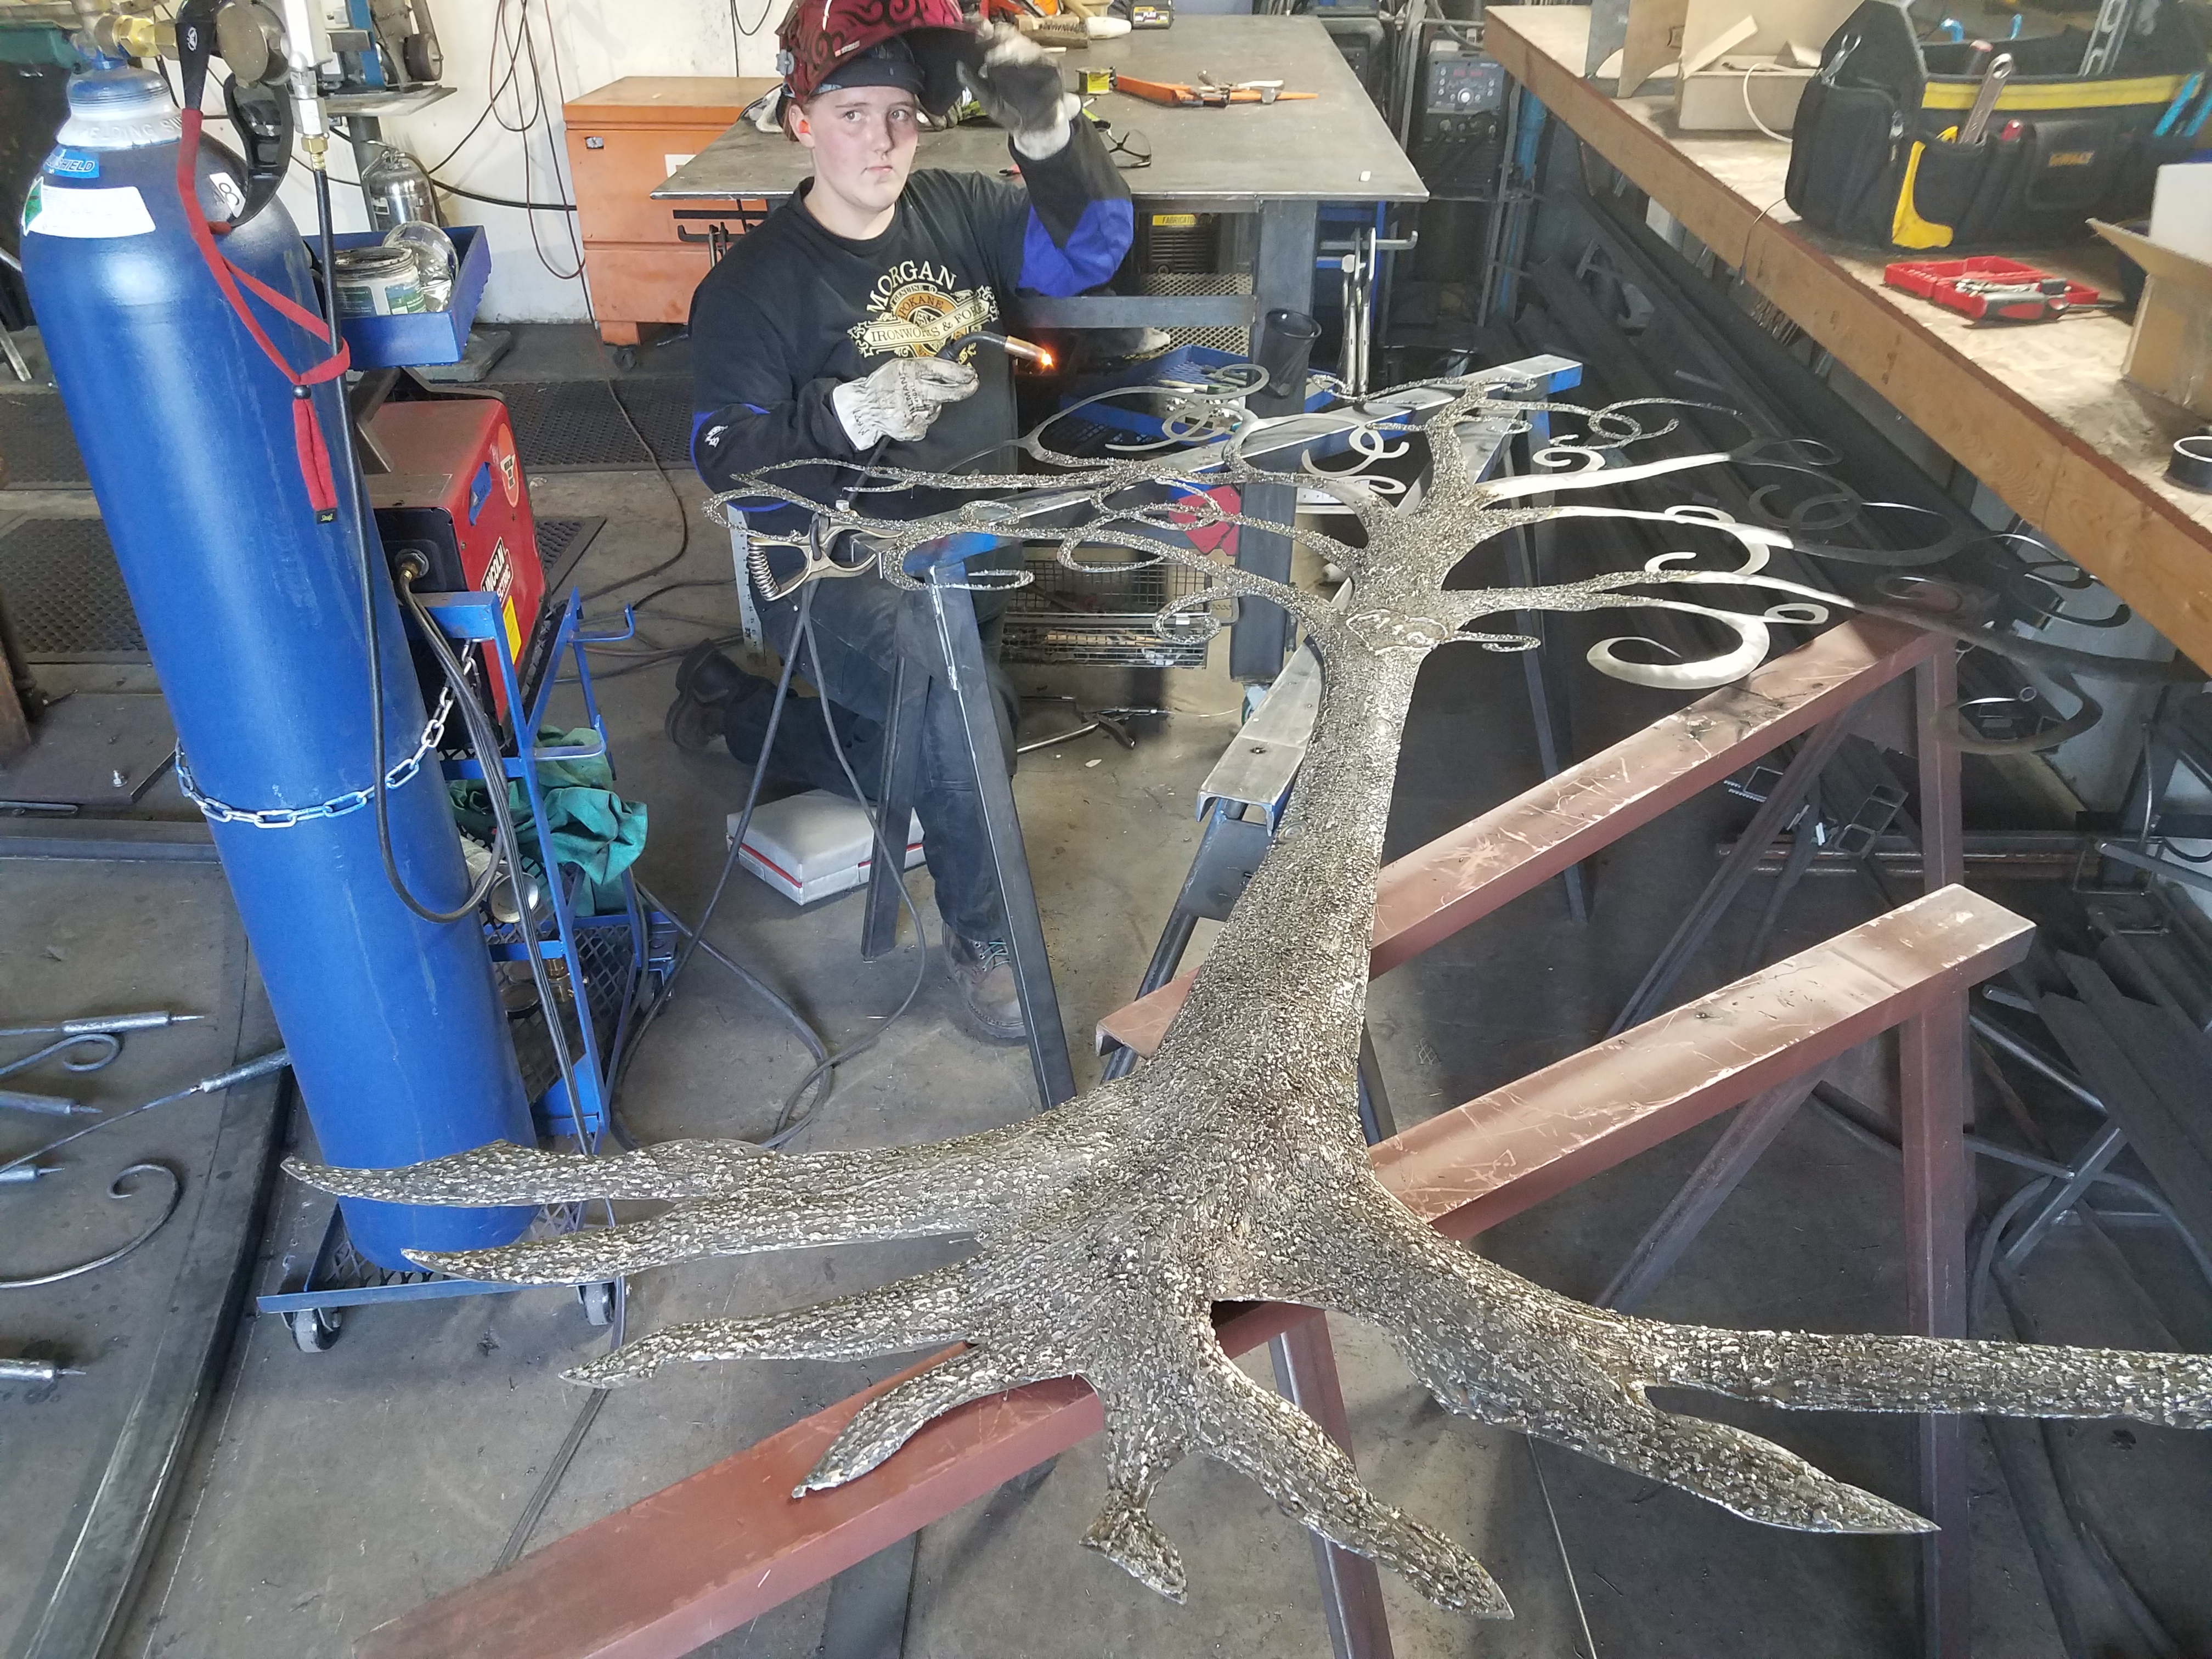
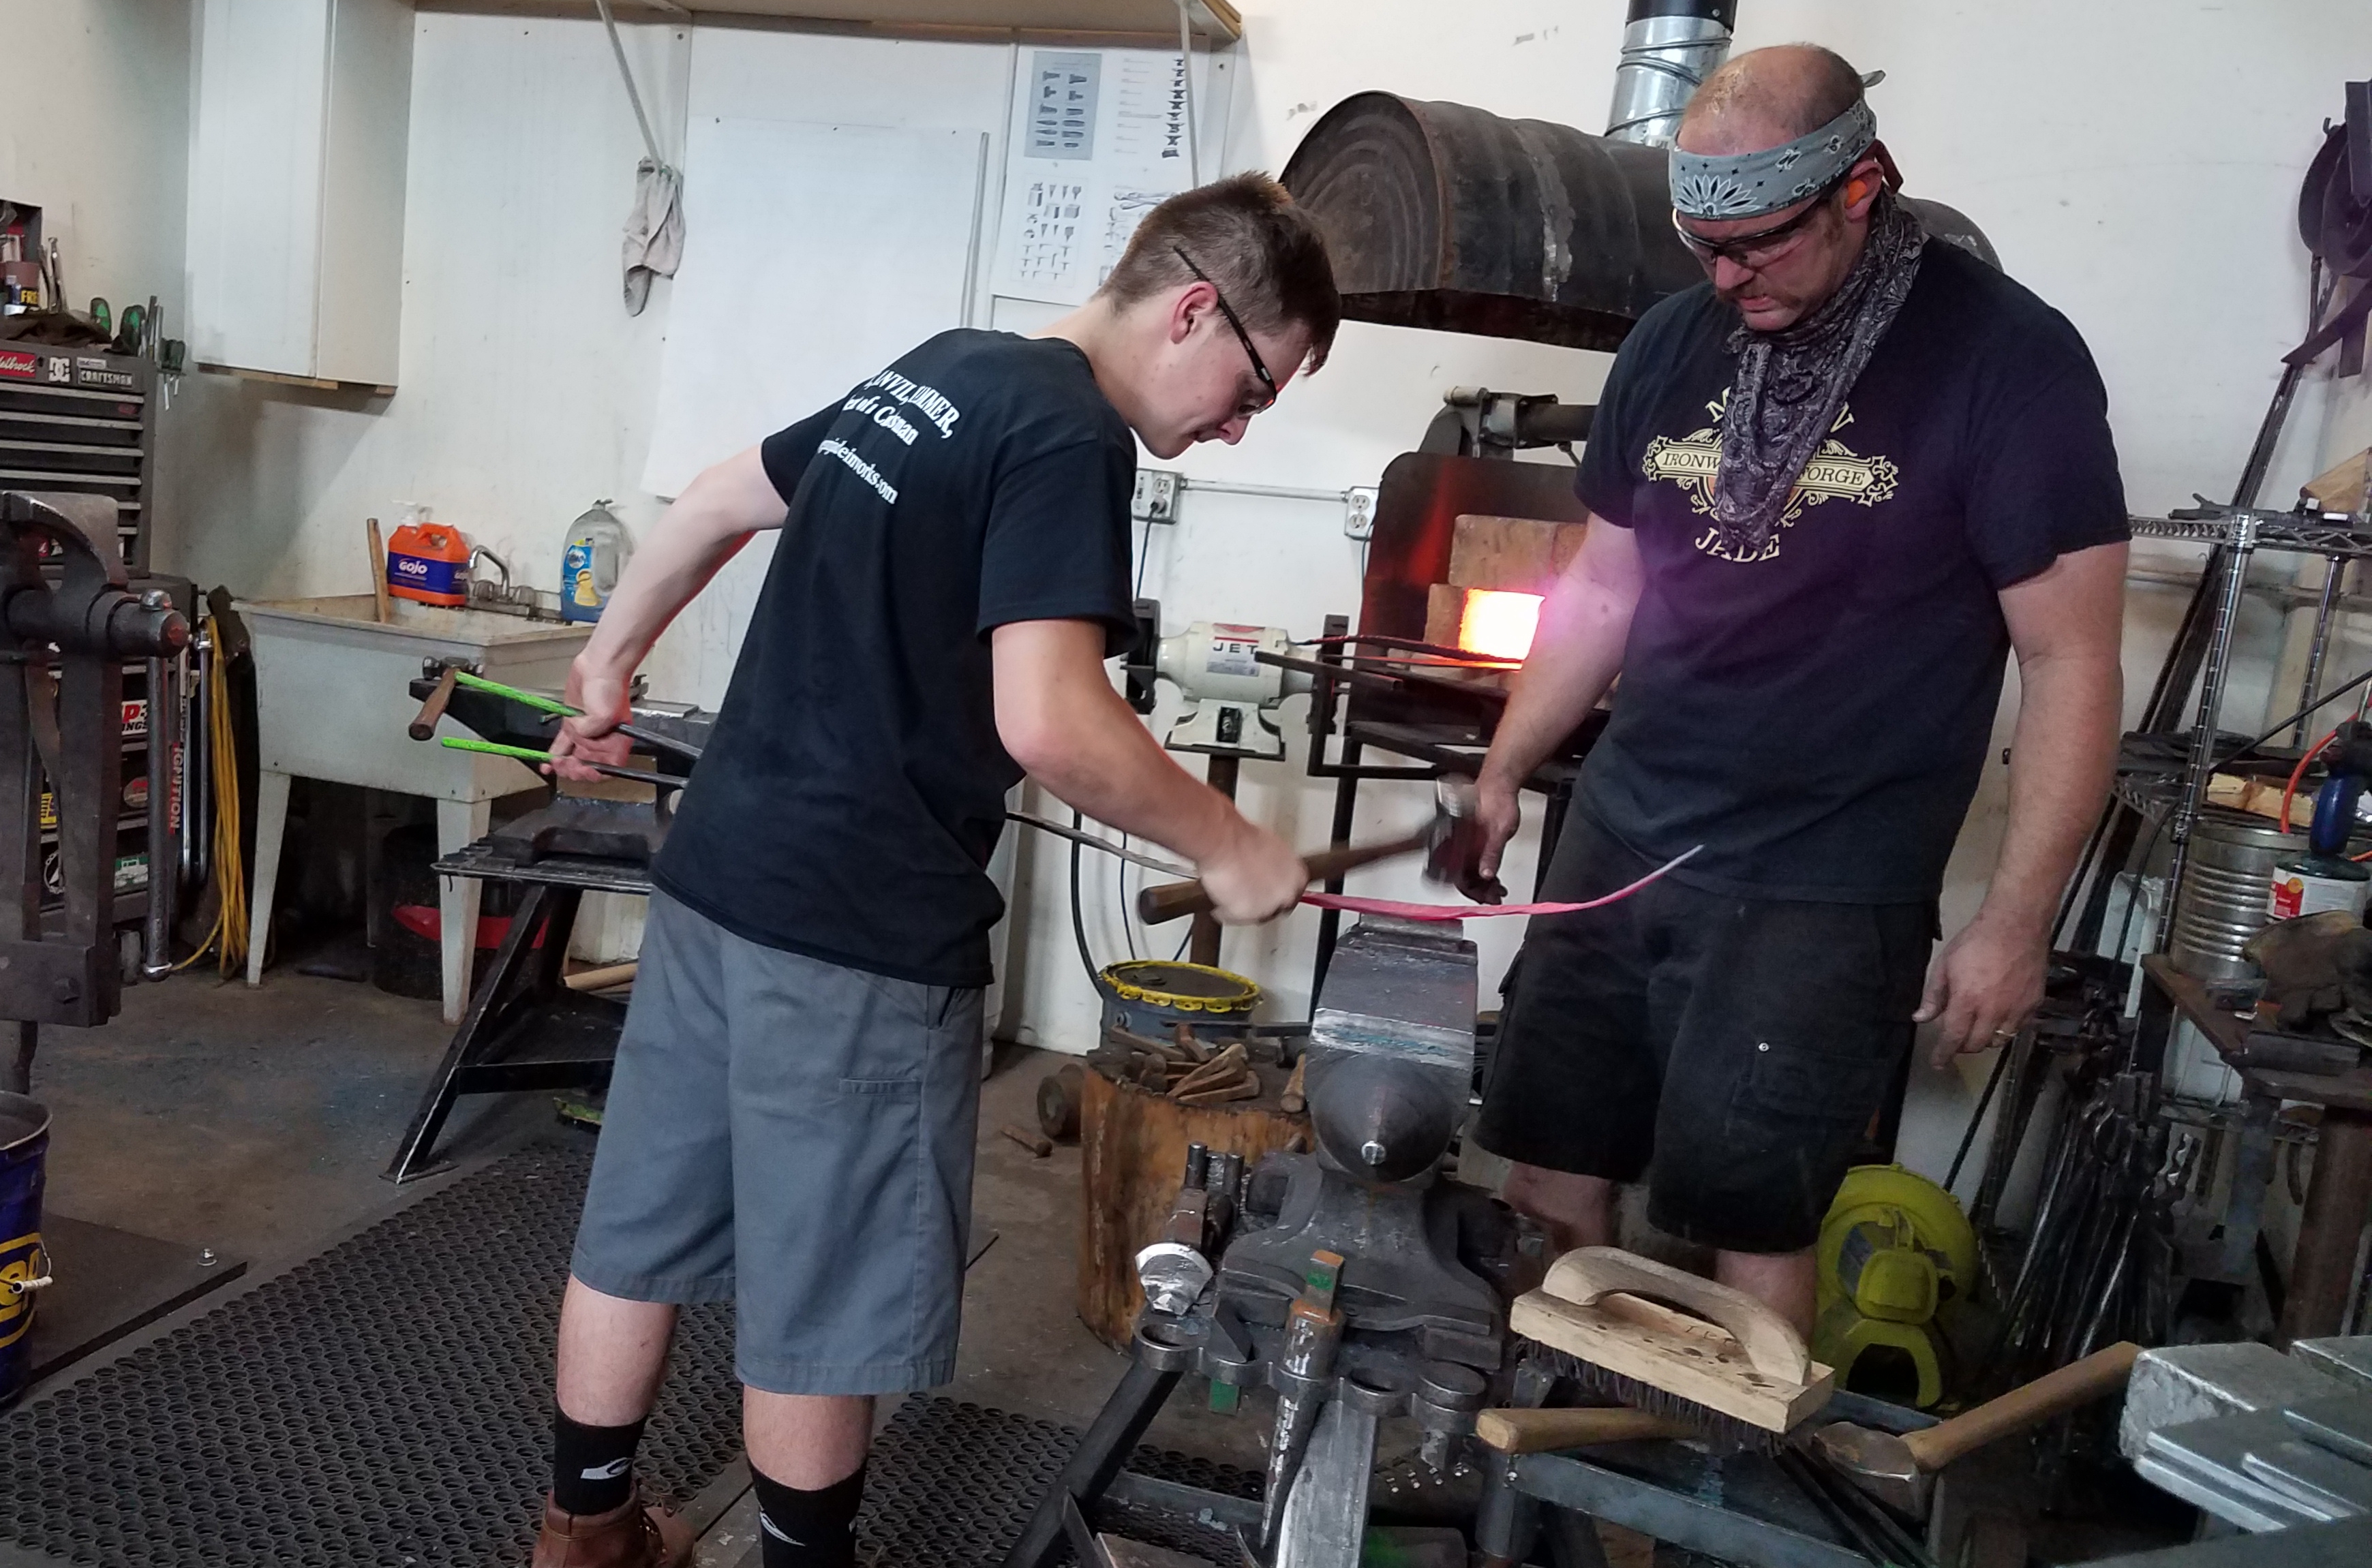
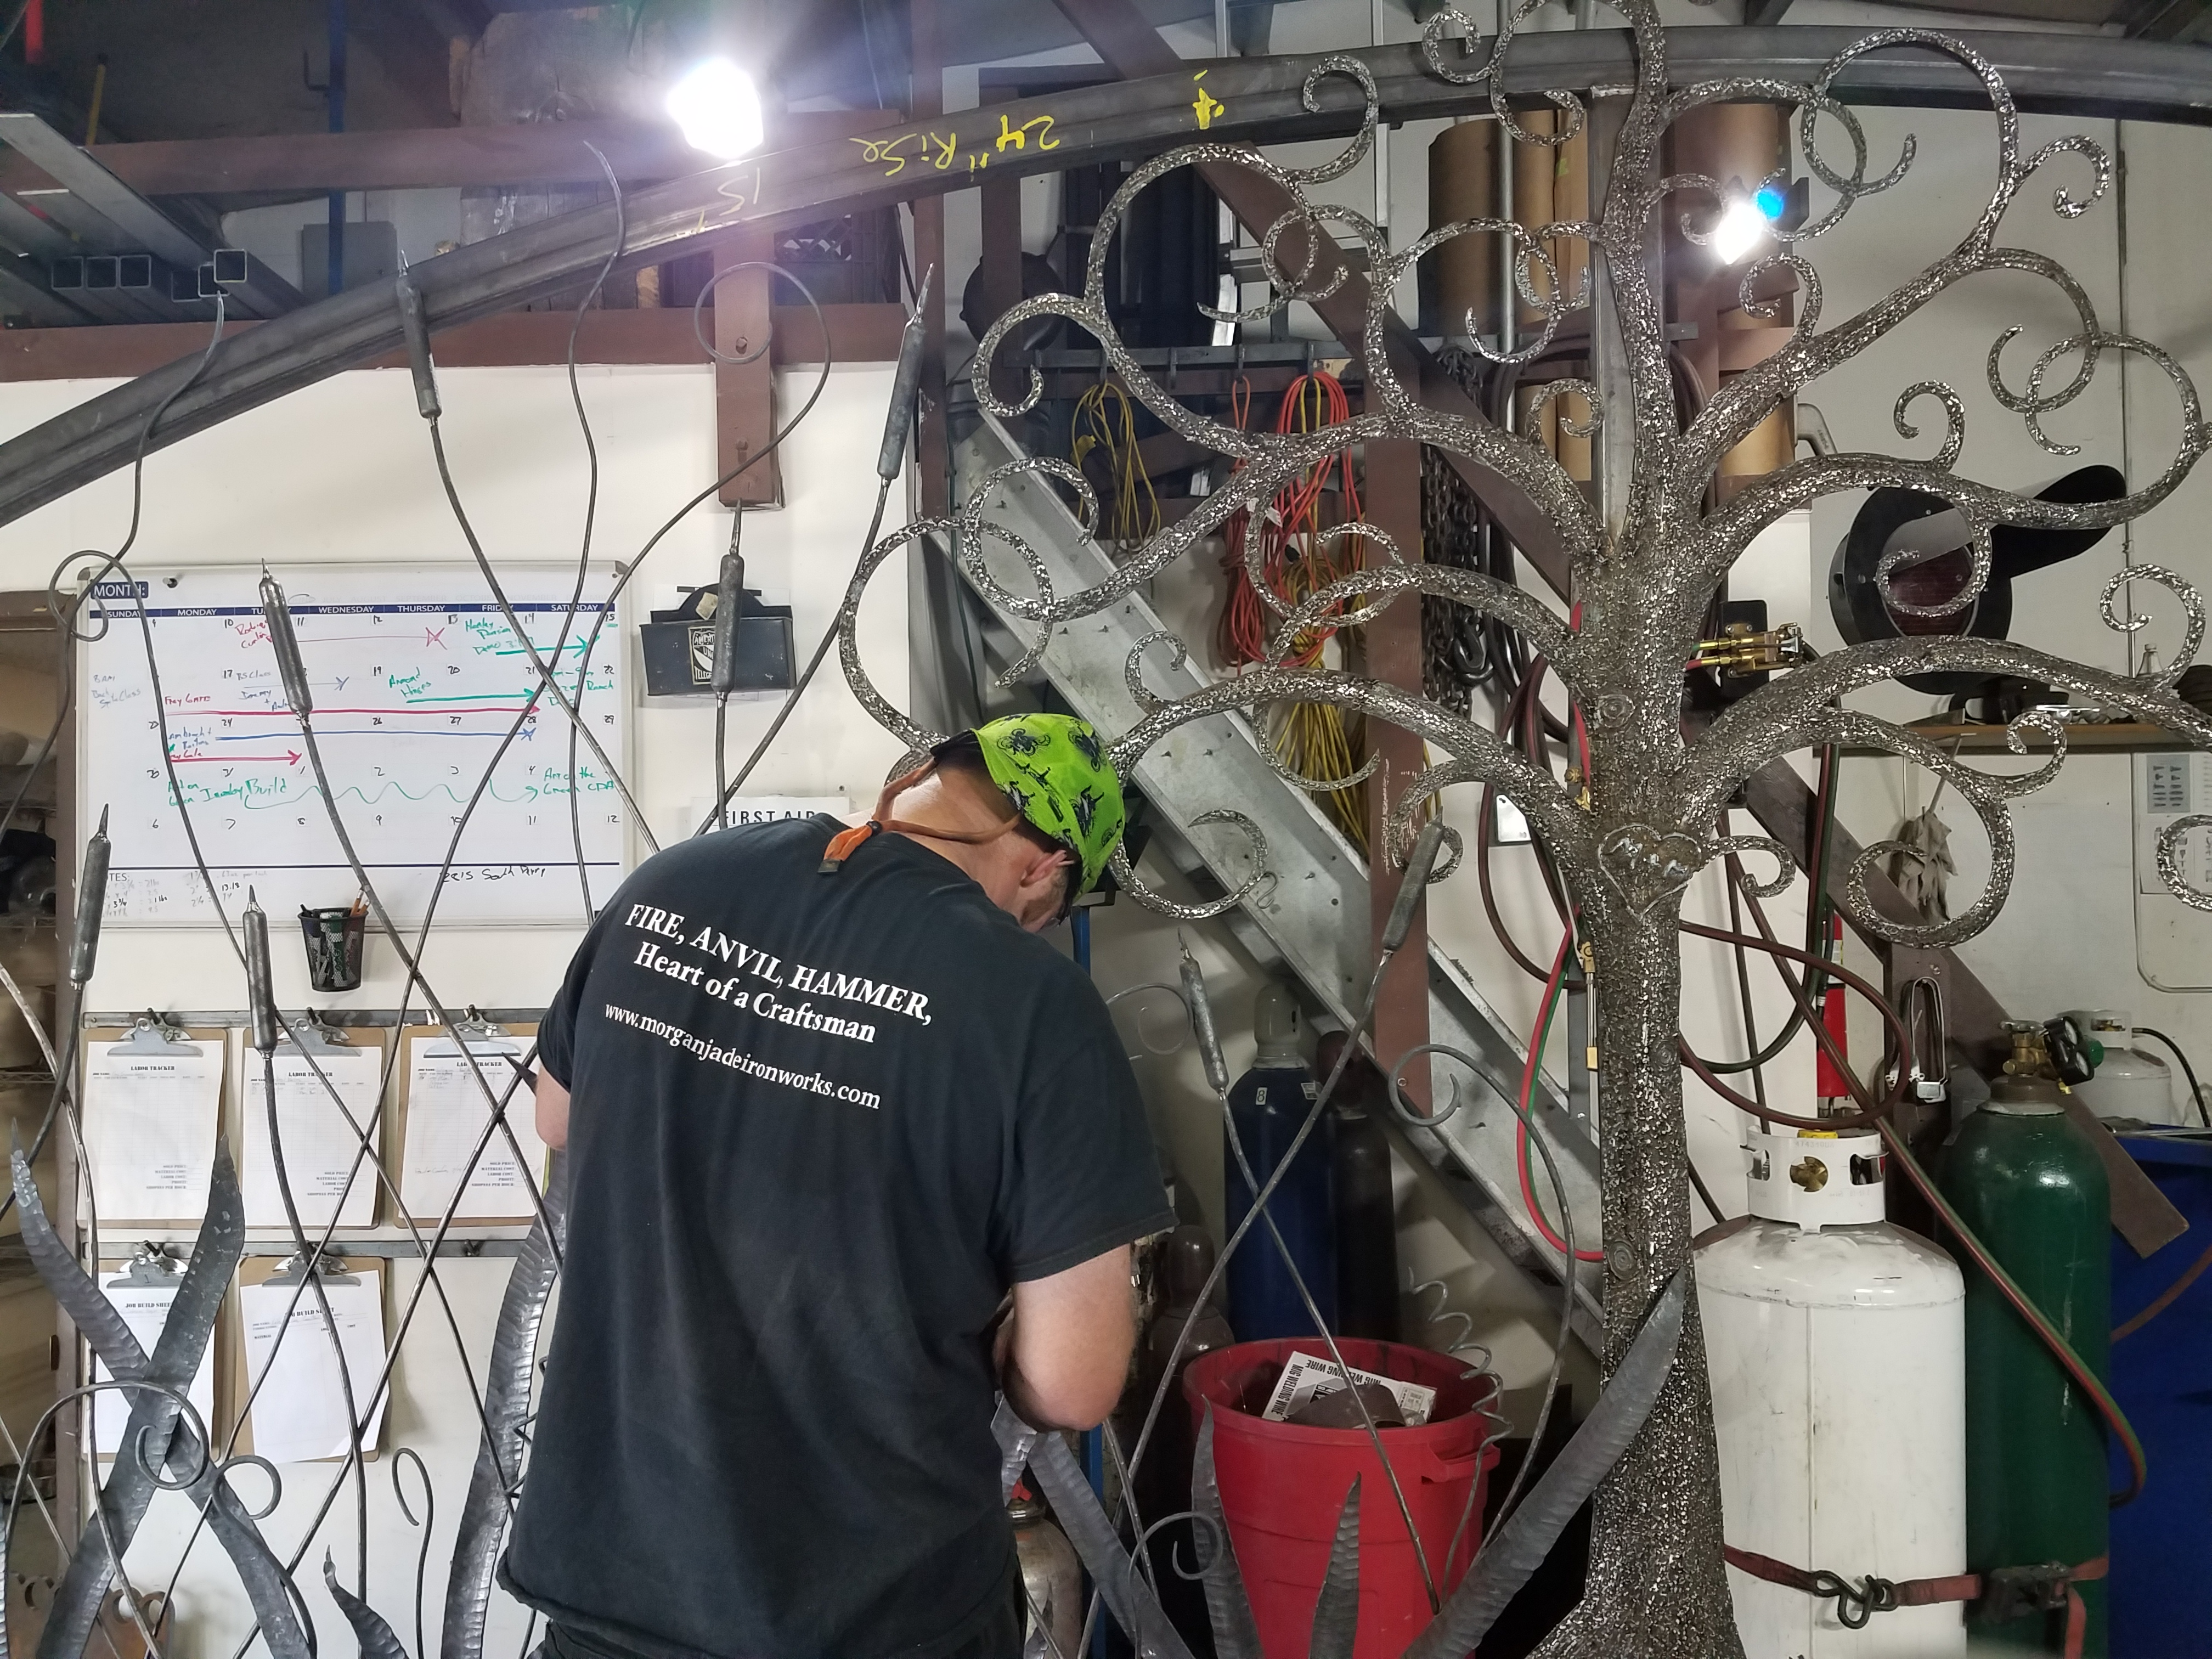
So i started with 700lbs of steel.....240 of it for the gate frame. I then forged for 38 hours while the outside temp was between 90 and 104, with my shop holding at a steady 125-130 degrees. I then welded for 18 hours..... The gate is raw right now and has 20 hours of work to clean it up and finish it up. May daughter and 2 friends who come and forge with me Nick, and Ethan helped out with several aspects of the process.
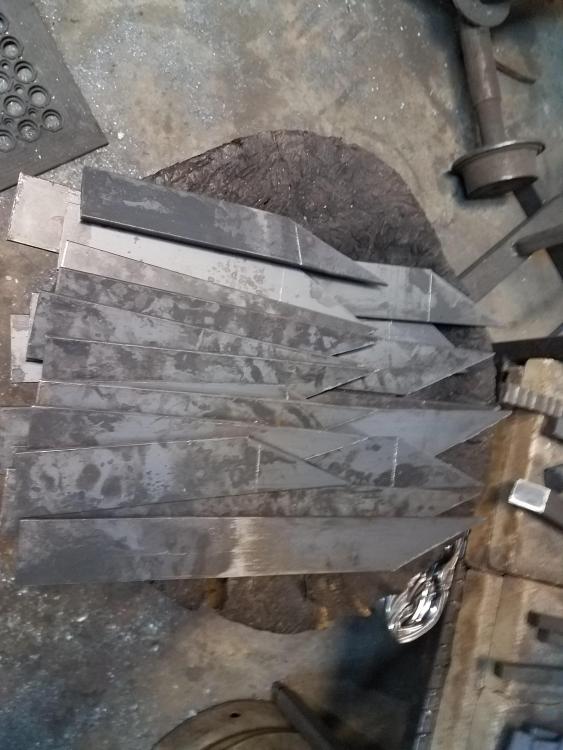
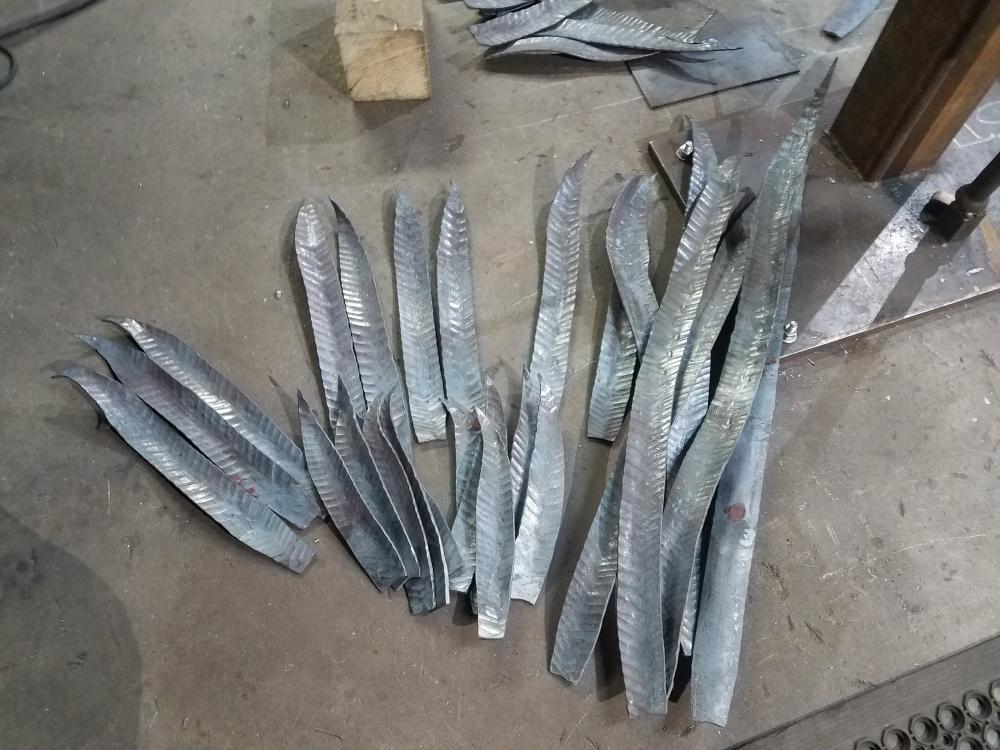
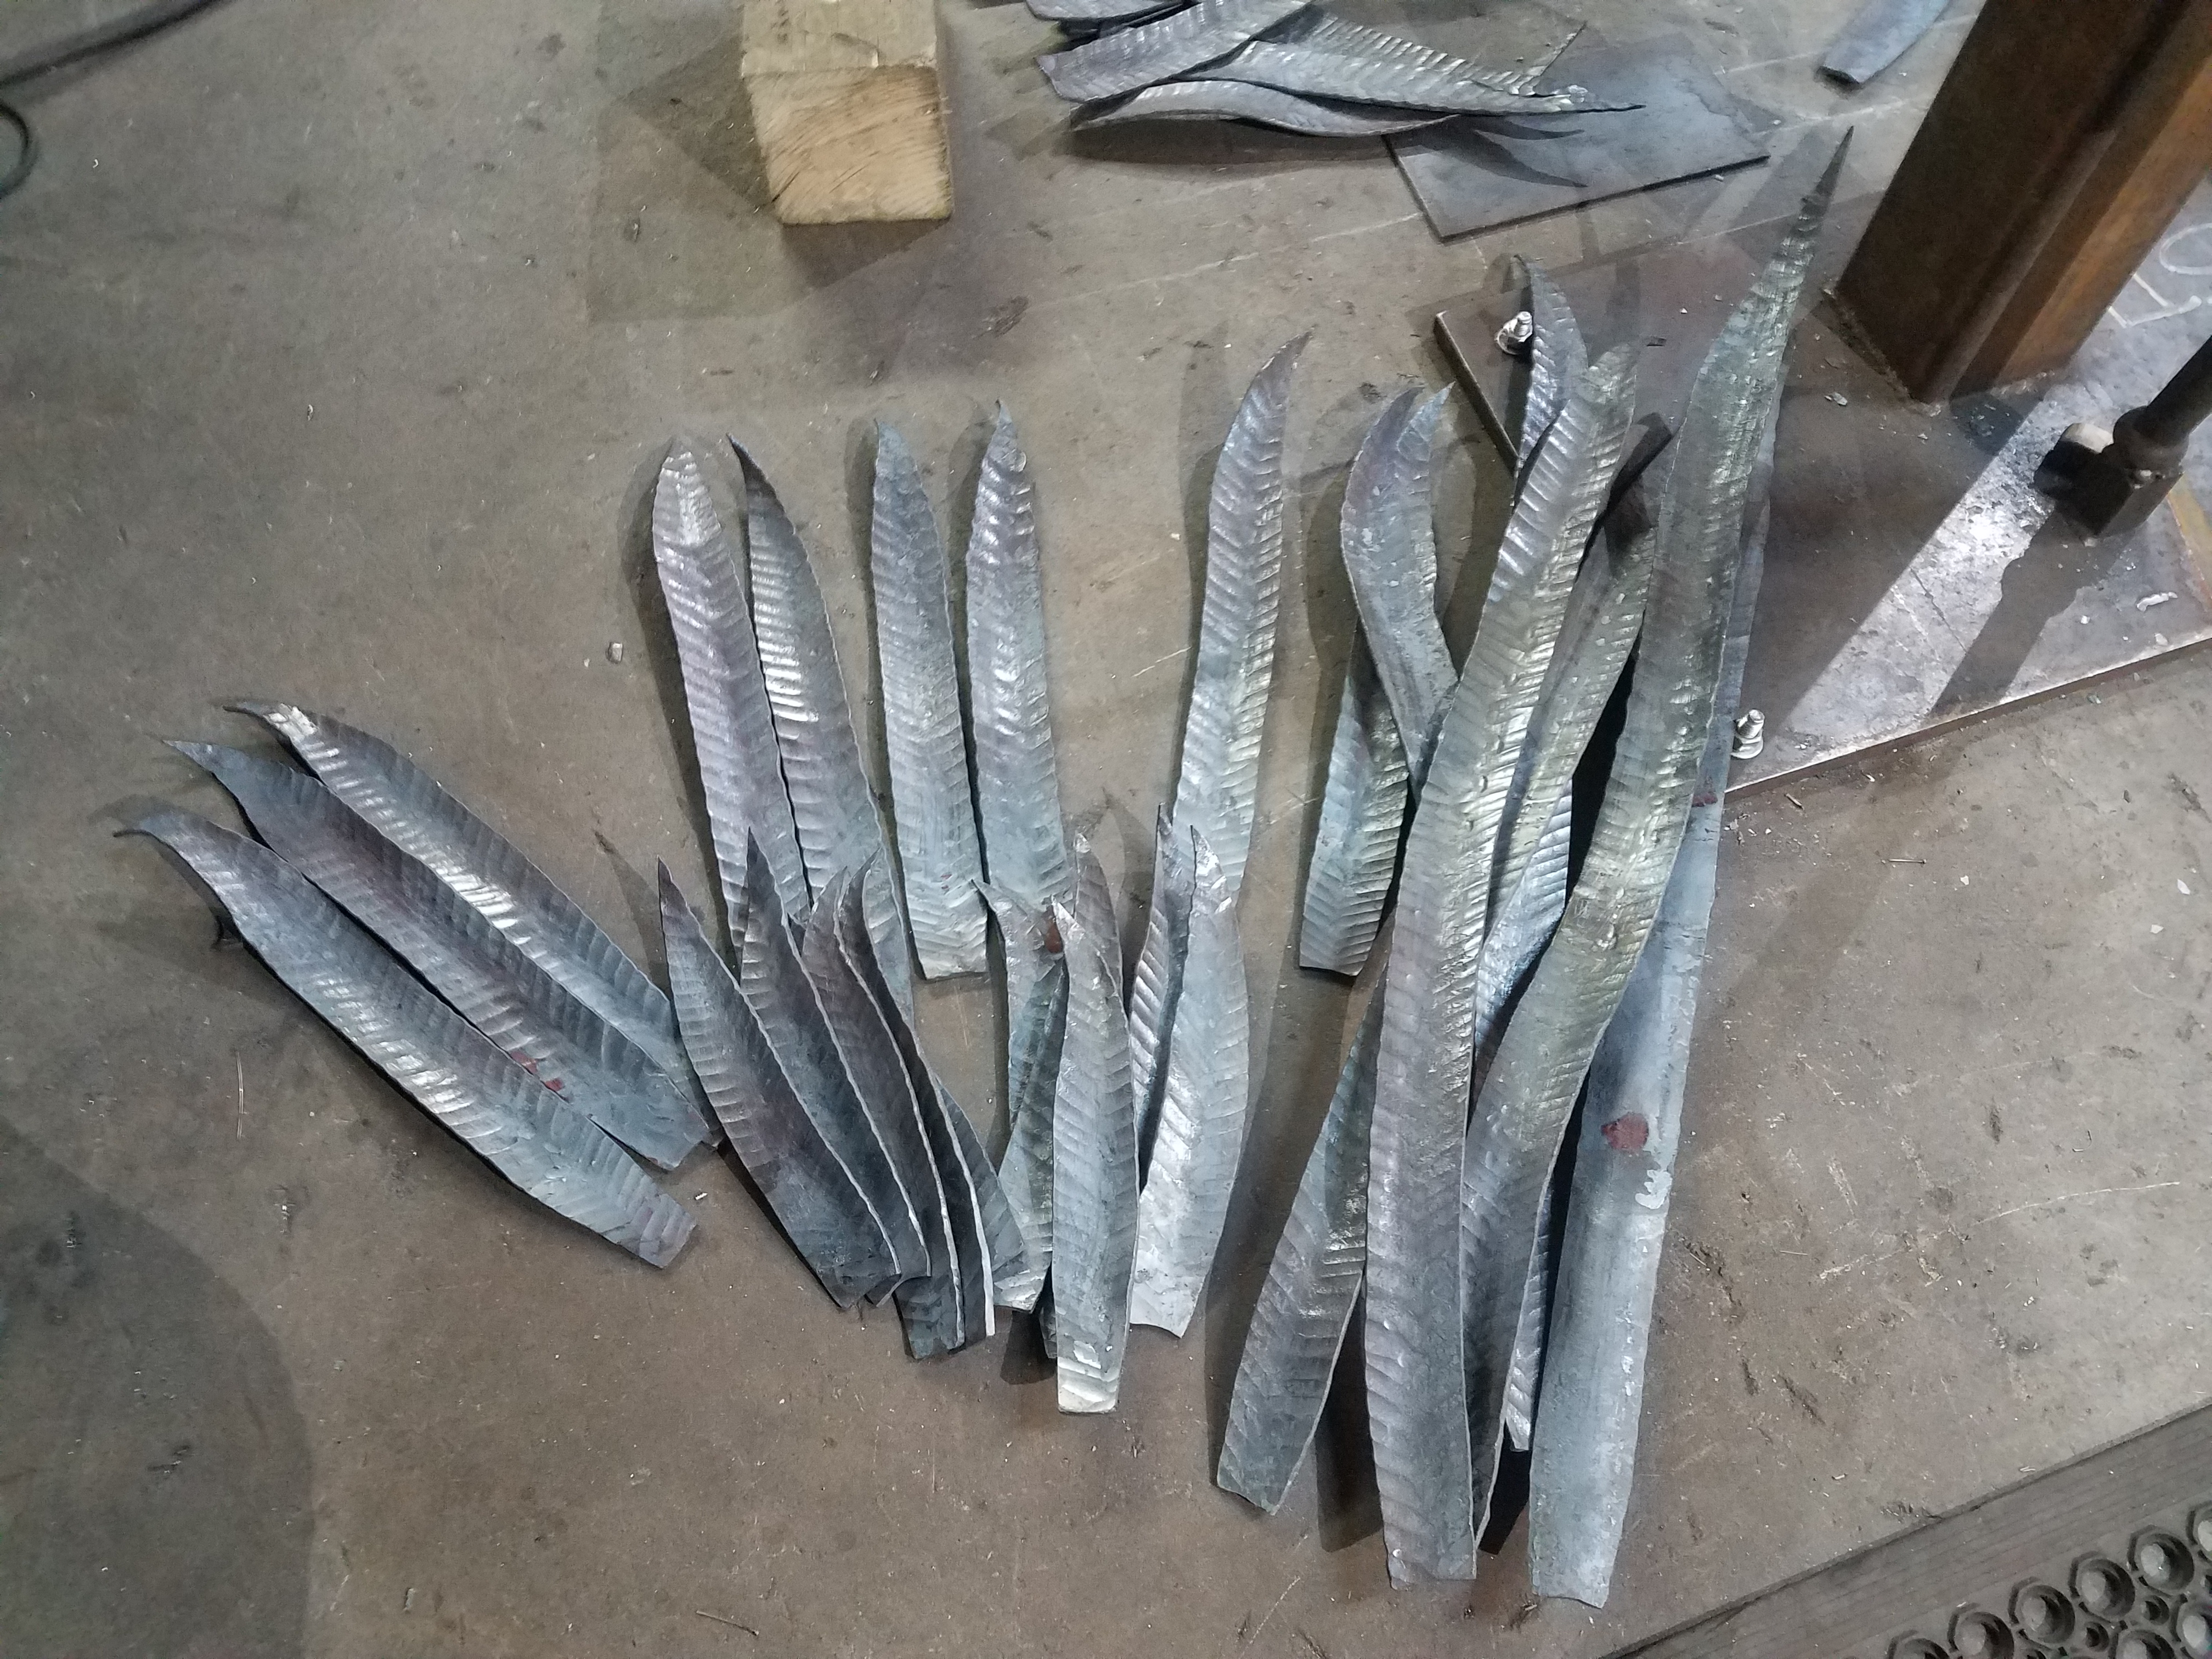
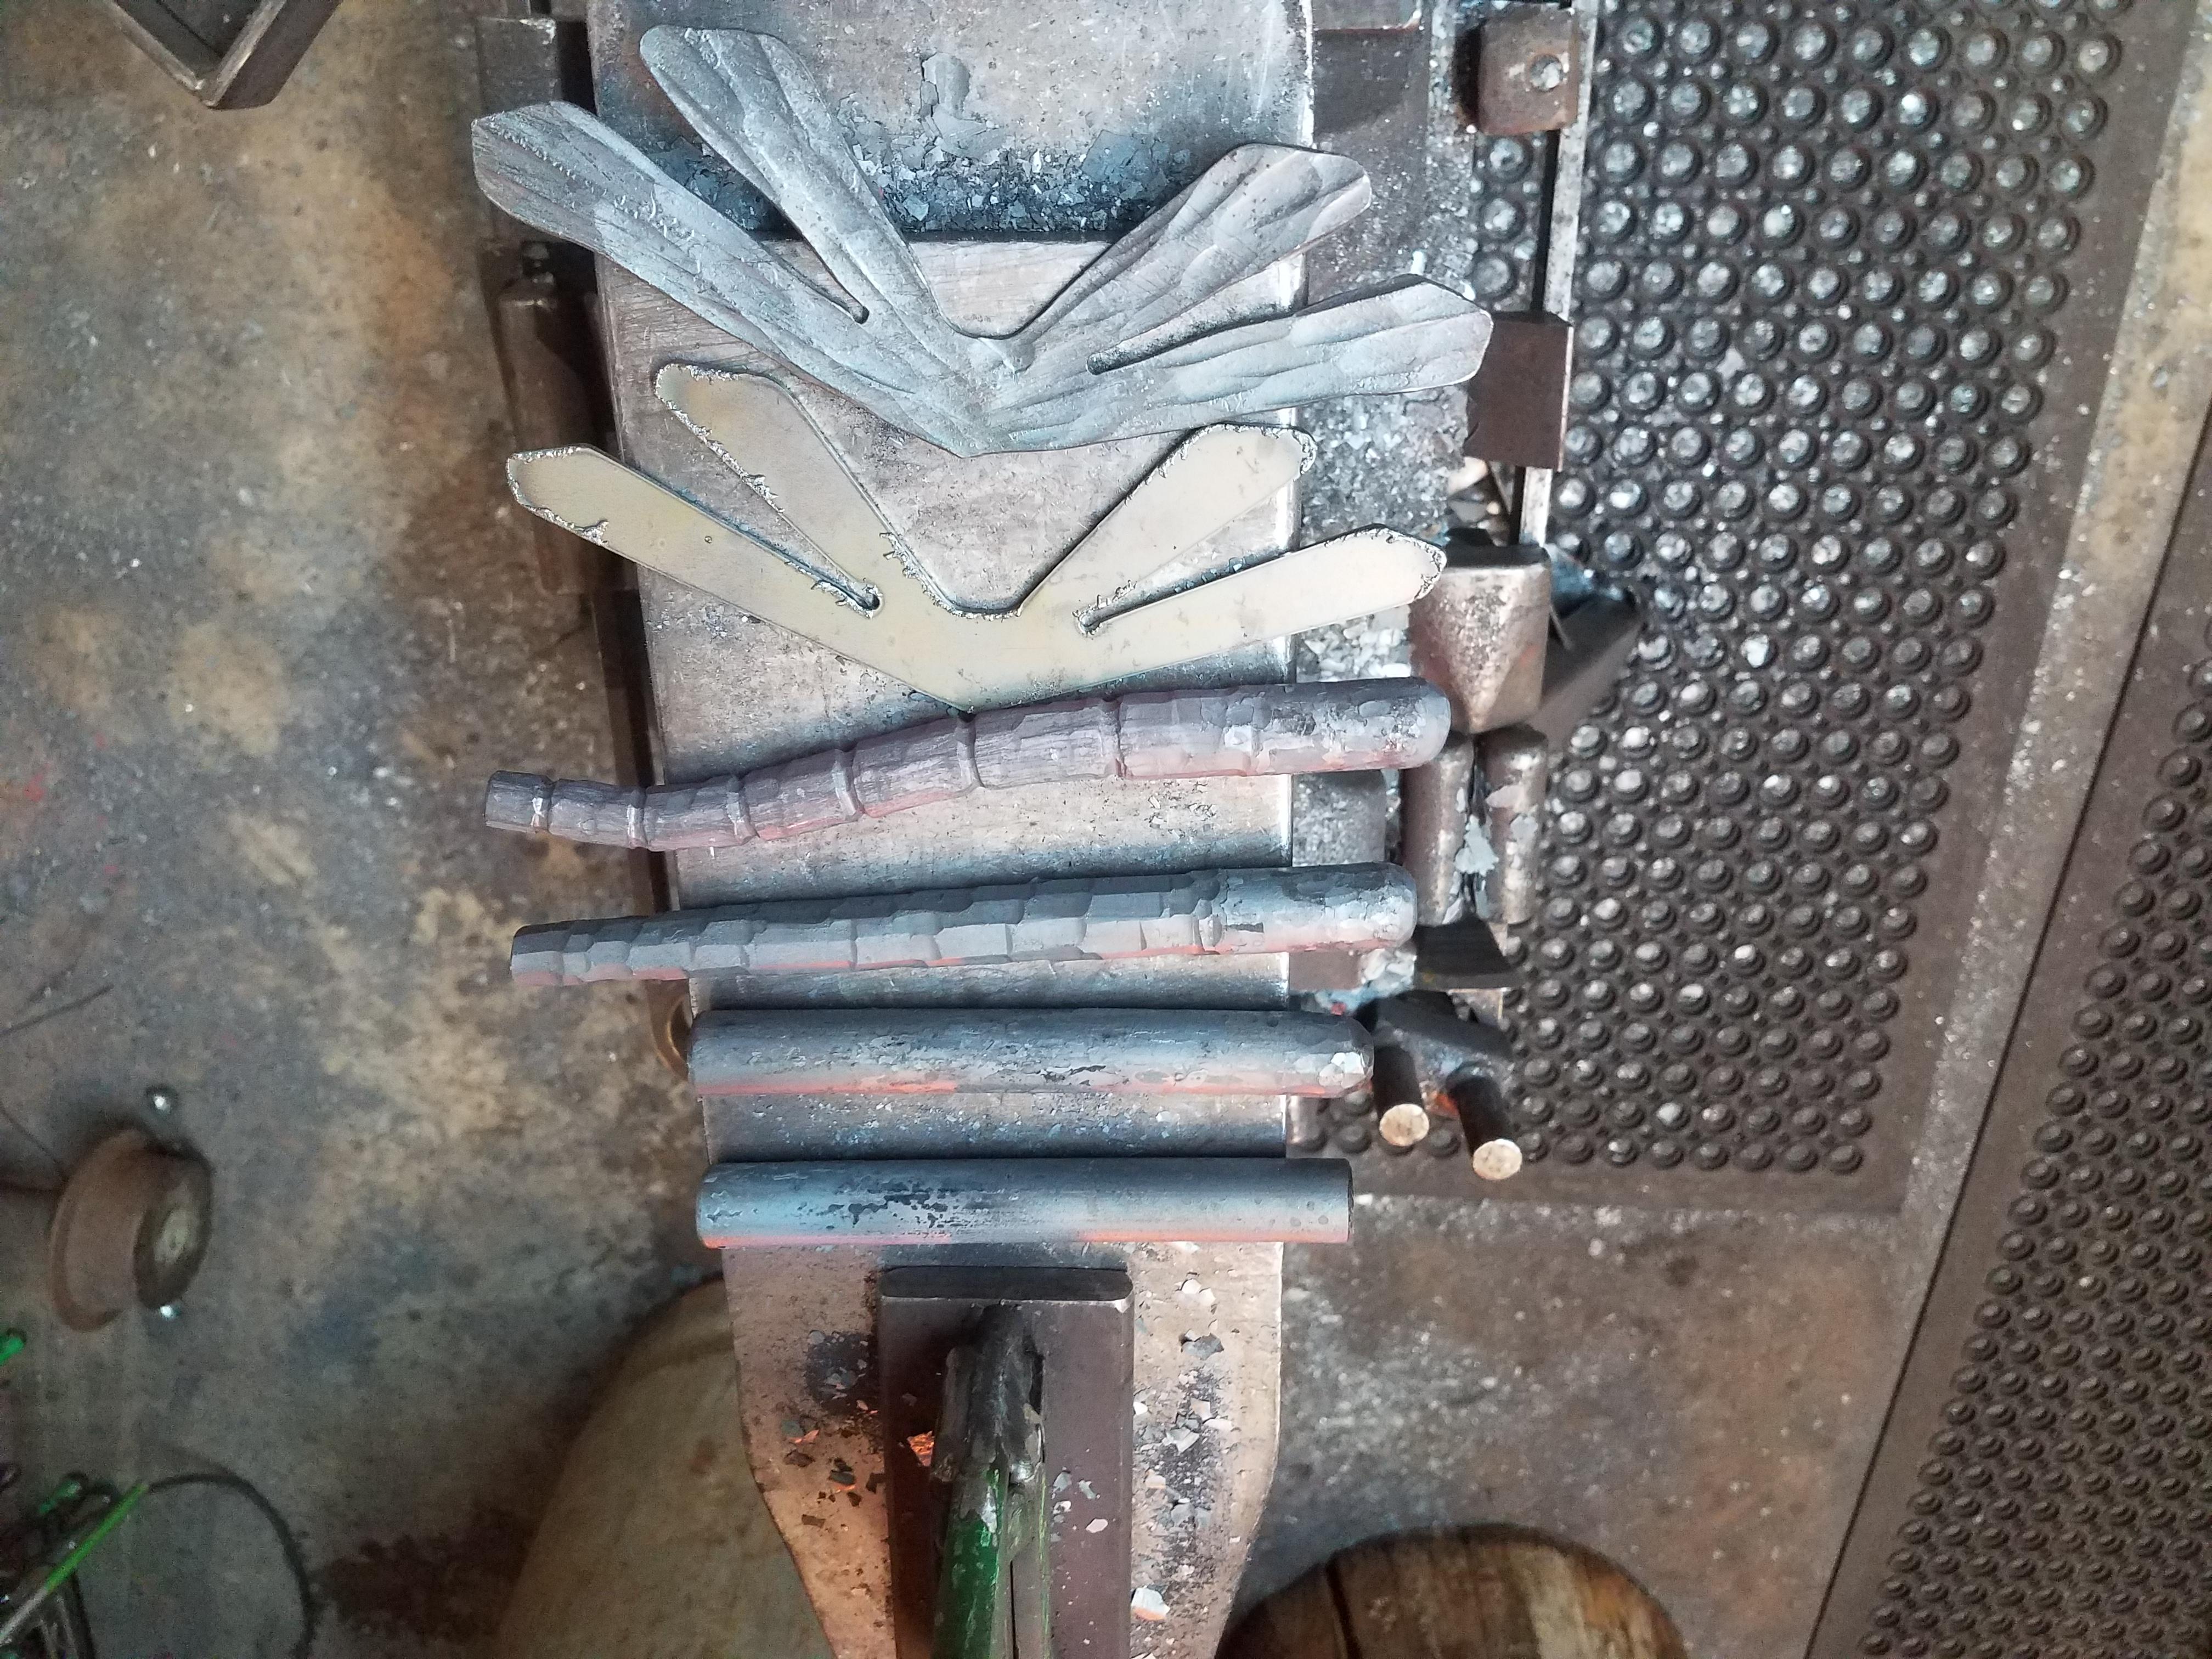
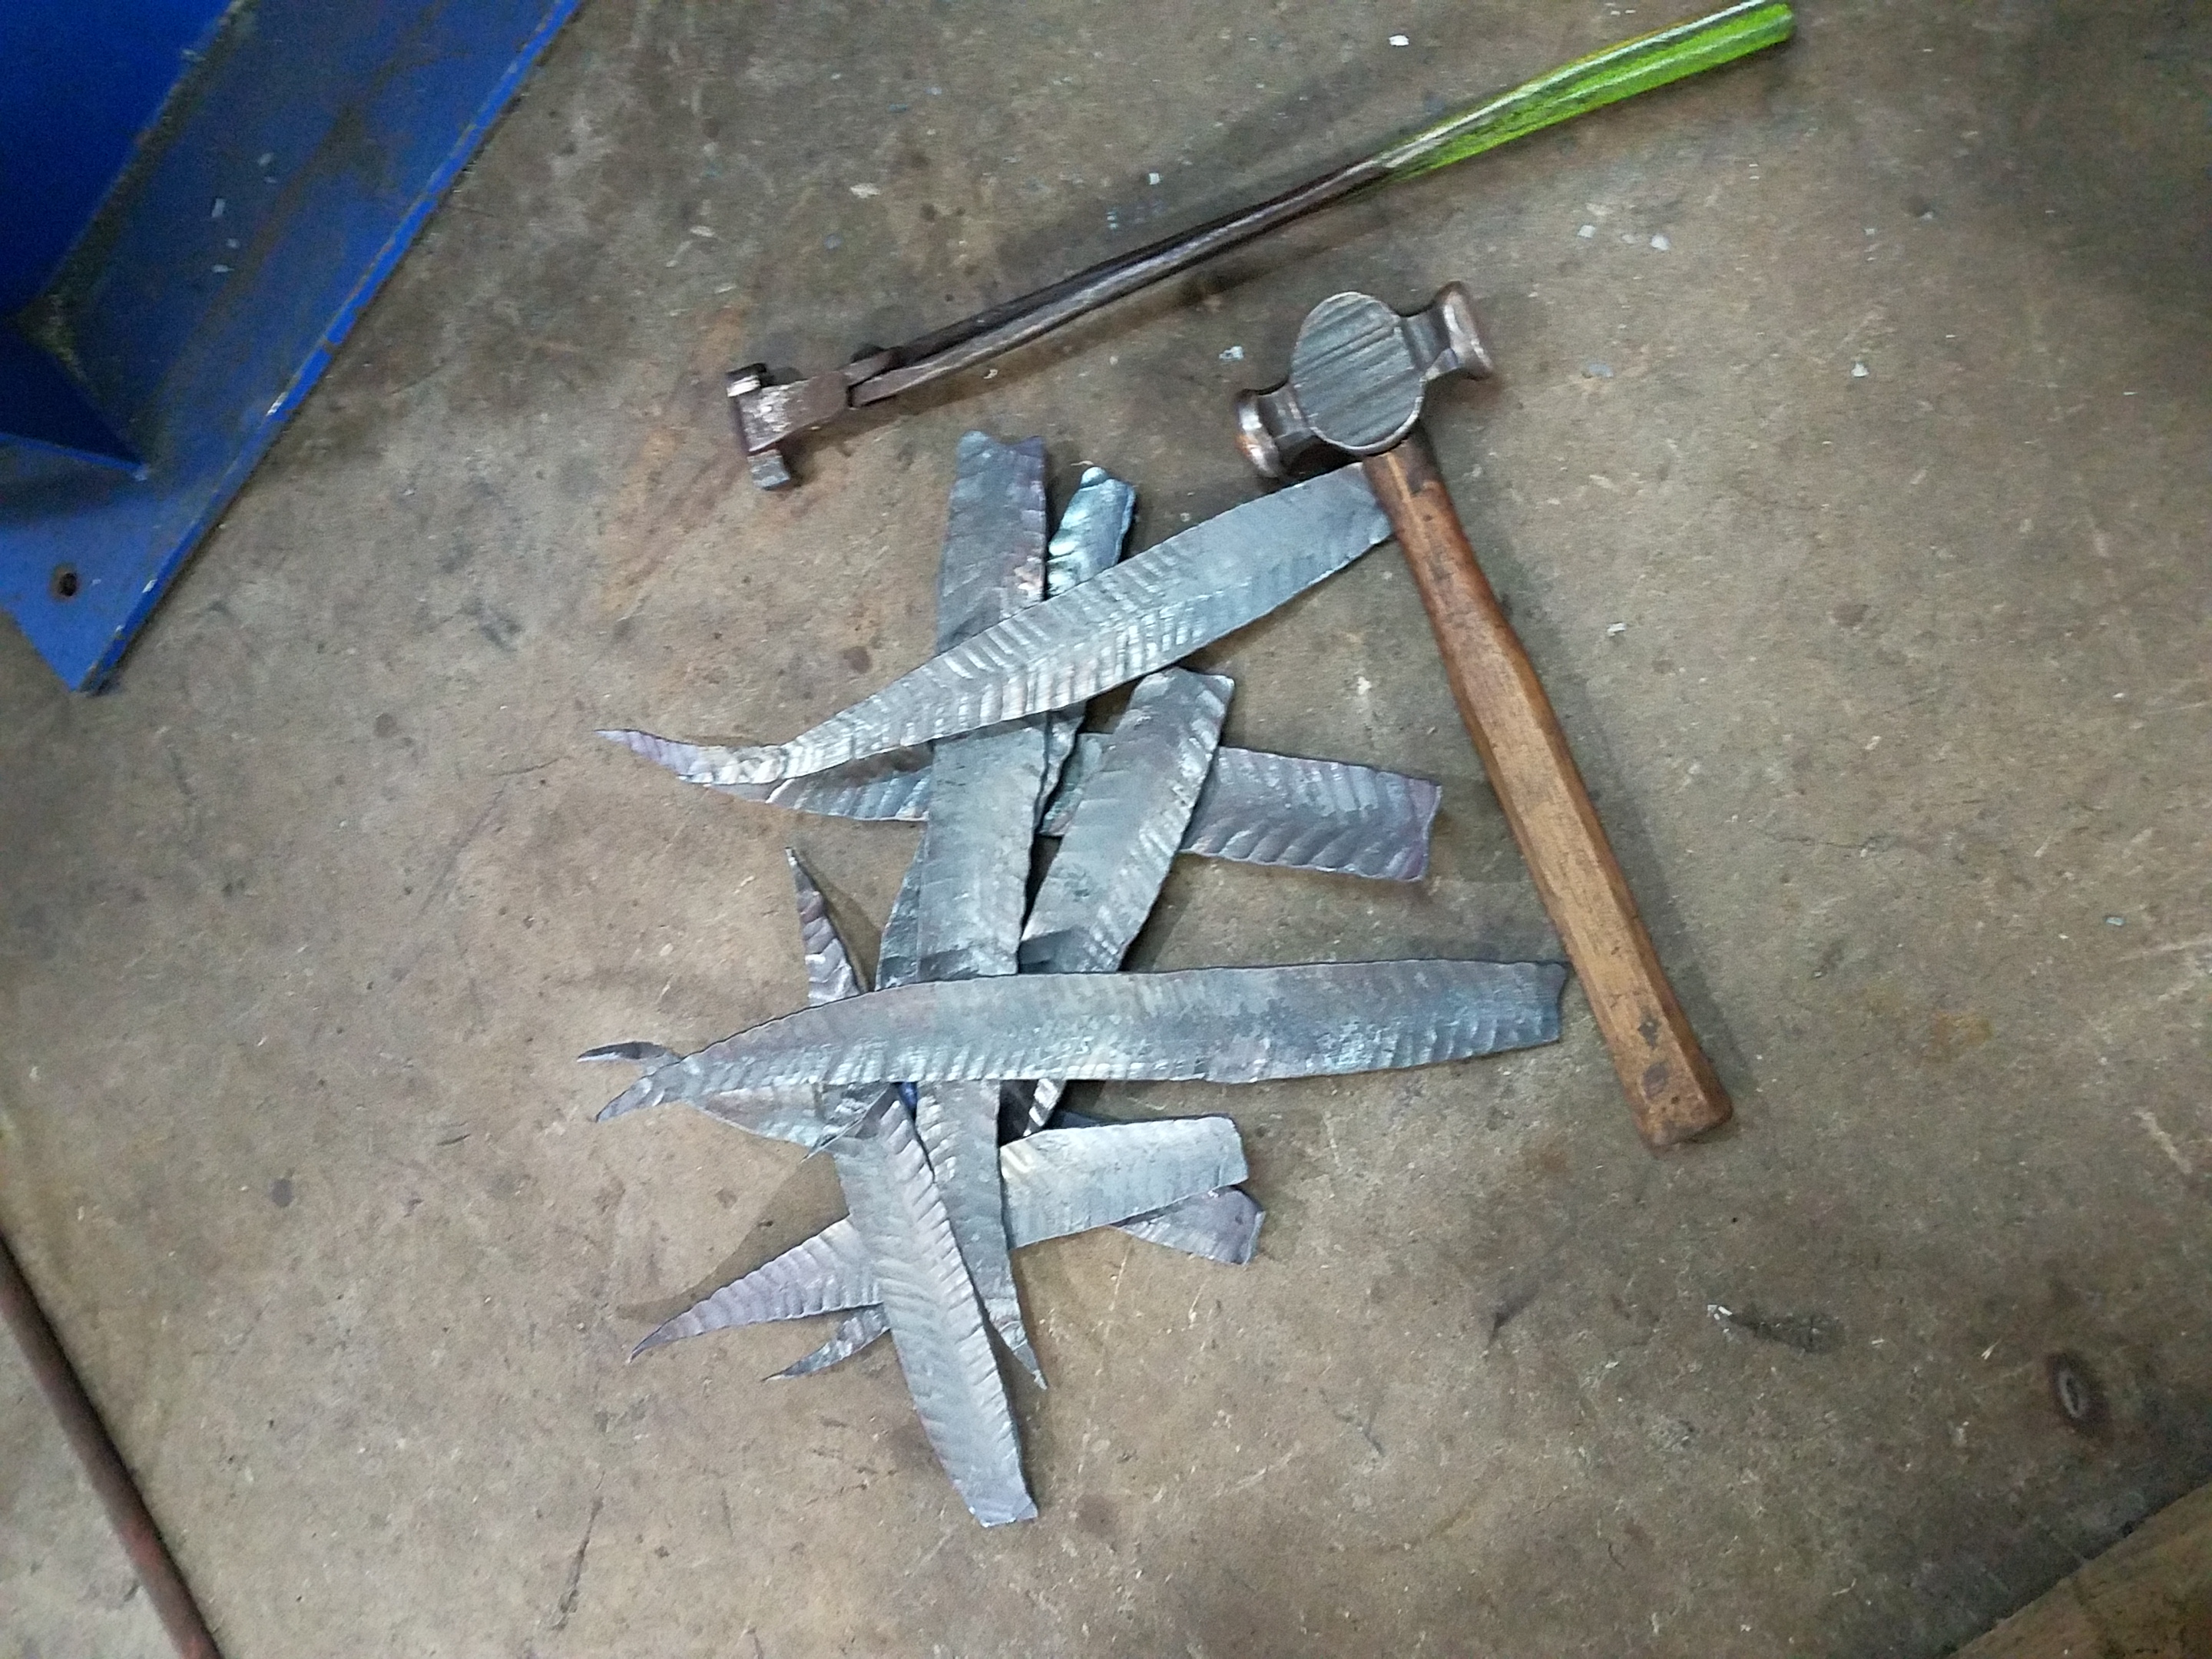
This is 2" x 3/16" flat bar cut with a 3" angle on one end. I would put a small taper on the square end and then knock the point to the center. Then using crown dies to shape and texture the cattail leafs. Over 80 were forged at different lengths..

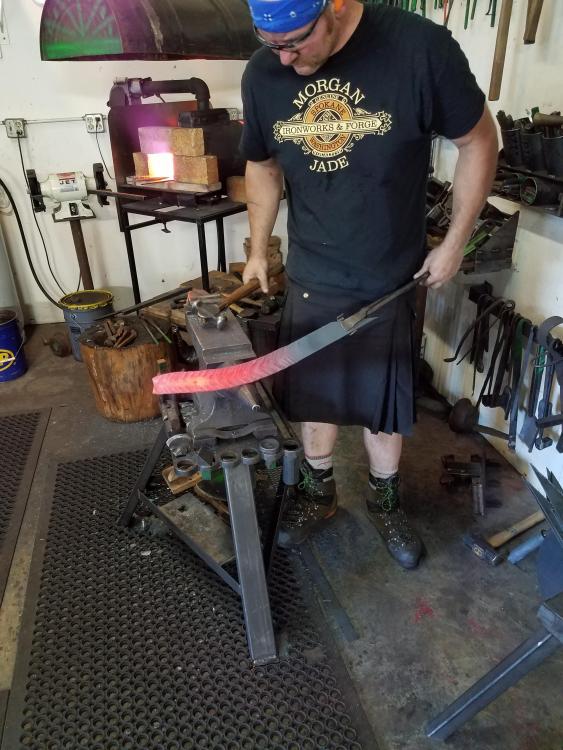
The center was a plasma cut tree, we cold hammered a it into a a rounder shape and then did a knock down weld texture. My daughter Madelynn did 90% of the texture herself and It looks fantastic.

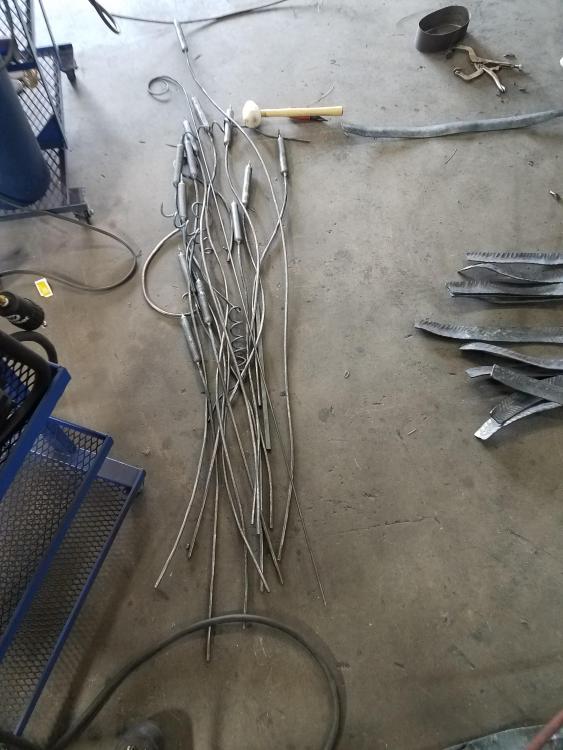
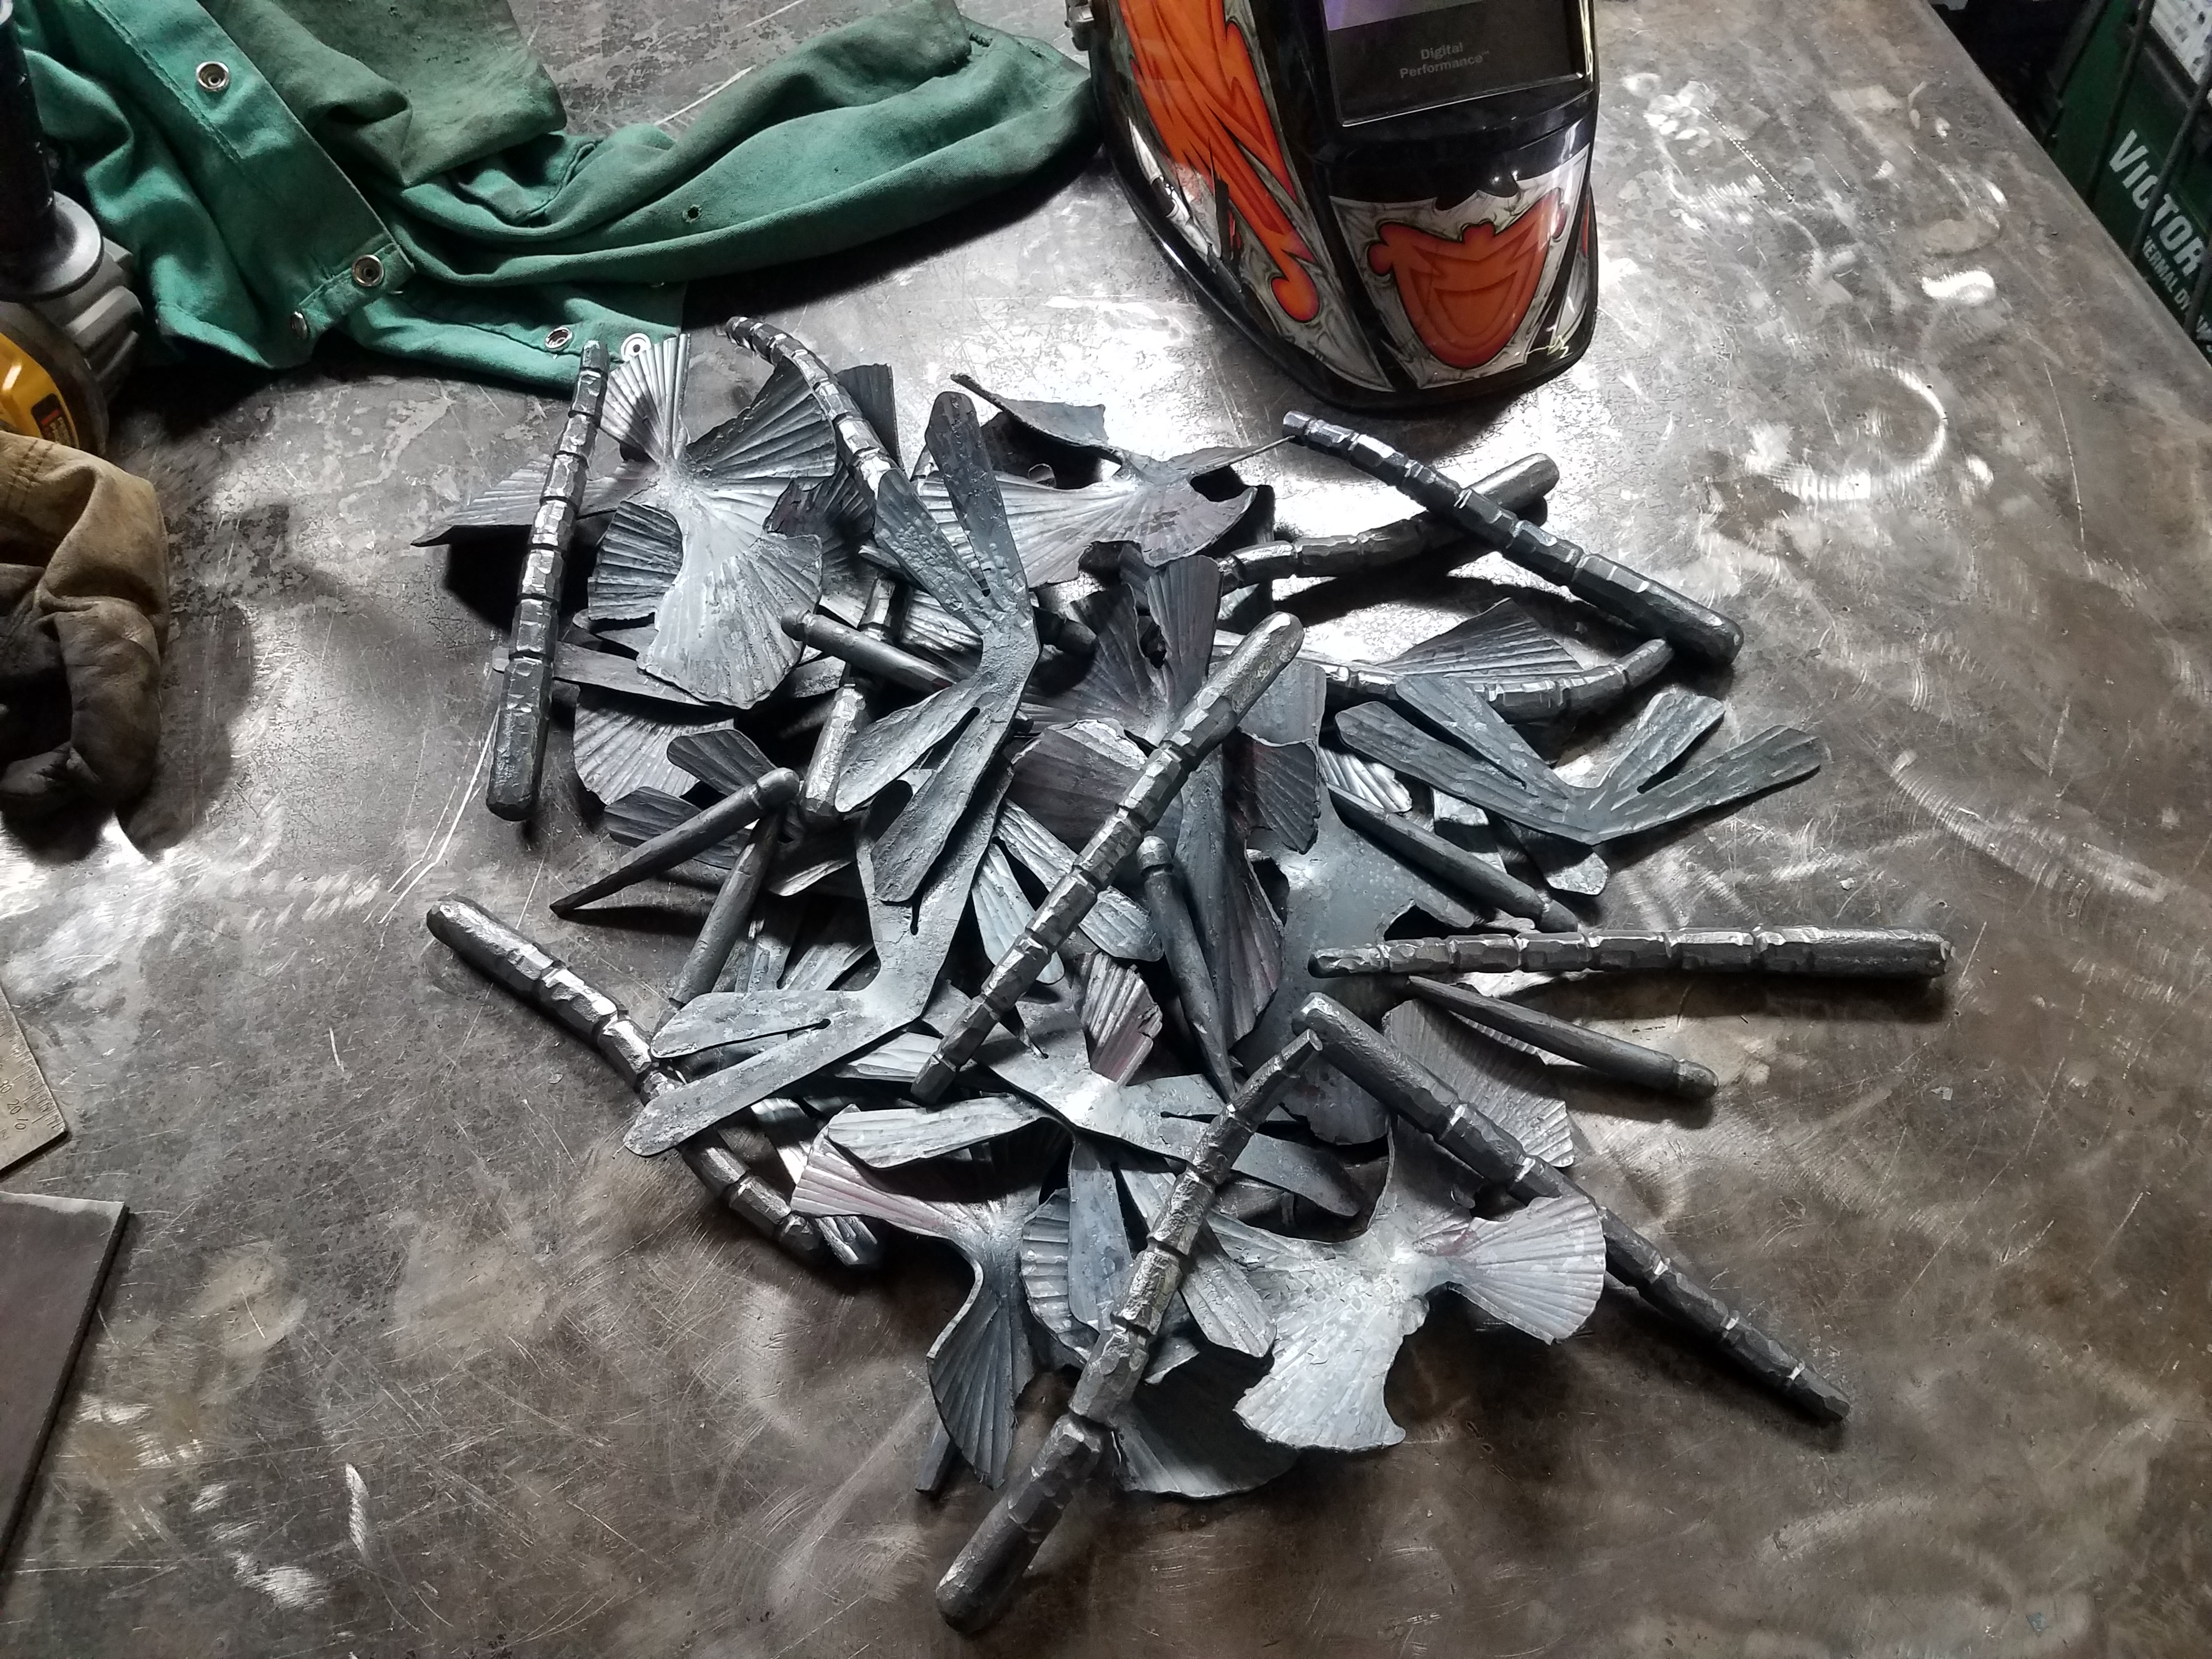
Next we forged curly Q's, delyo"s, cattails, dragonflies, butterflies, and some odds and ends.
.
Welded up the 1.5" x 3" frame and then cut fit and welded all the components together. I still have a lot of clean up and some structural welding to do.
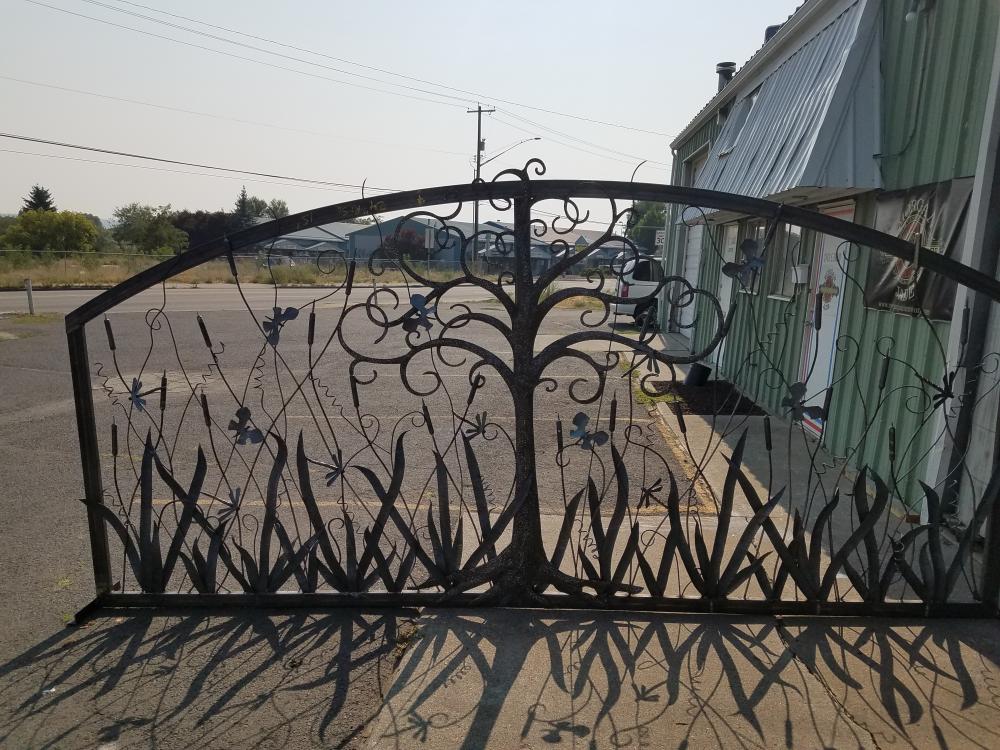
Here are some more pictures of the build.


-
Its just the price of doing business now, I have started to refer customers to a designer/engineer or tell them I need plans to work off. Its now my job to save them money it to provide them a bid for what they want take it or leave it.
-
Hace a lawyer draft your liability release and definitely make sure you get an insurance policy but it has to be specific for Education which means that you teach and demonstrate. One more line of defense is to set yourself up as an LLC and then lease all of your equipment to the LLC from you personally so that way if they sue your LLC they won't get your equipment and all your family belongings and stuff for can't be gone after
-
My dad had a No 1 kodiak brown bear trap when I was a kid, It was the biggest spring jaw trap i have ever seen, He did not weld it but he made a permanent clamp for the springs. It hung next to the front door with a sign that read. Tax collectors please press for immediate assistance .


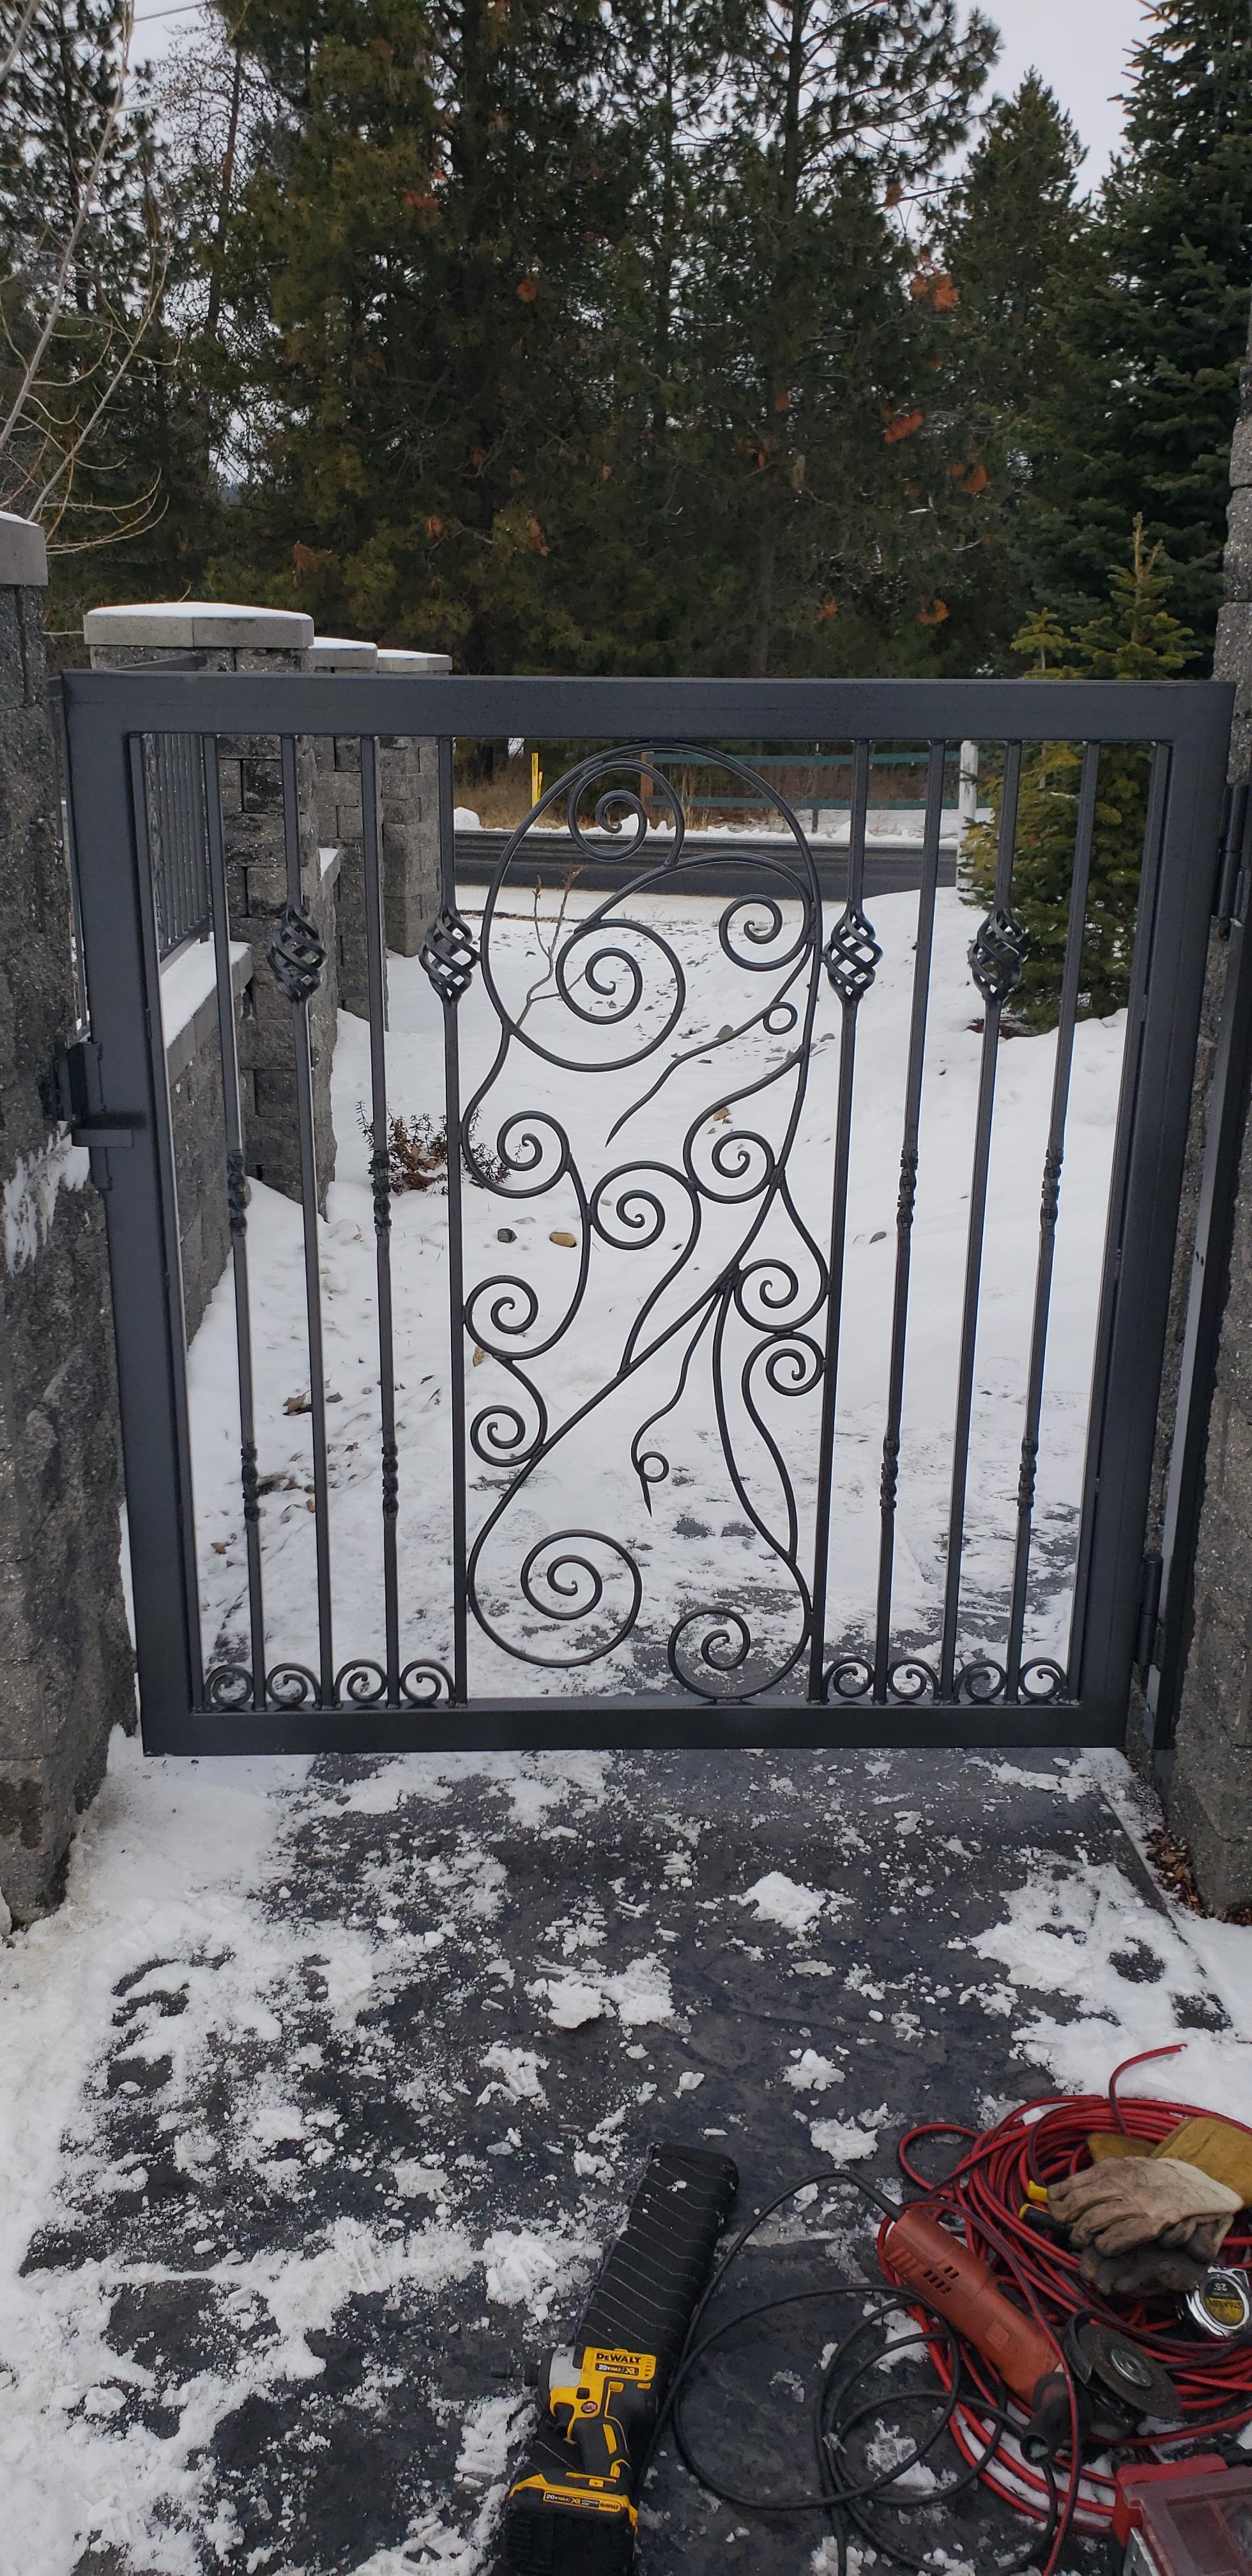


2- 5ft man gates for lake front property
in Member Projects
Posted
We do have a 4" code but it's only required for railings, gates, security window coverings that are 30" or higher.