

Unforgivun
-
Posts
208 -
Joined
-
Last visited
Content Type
Profiles
Forums
Articles
Gallery
Downloads
Events
Posts posted by Unforgivun
-
-
YYF, download the FREE program called "Fotosizer". It's pretty simple to use, (I can do it). I resize to about 600 pixel X 450 pixel. That will give you a starting point. Then you can resize to suit you. It works great and it's FREE!!!
CurlyGeorge said that in another post Hope it helps.
-
I had to look it up the other day, because I had been told "cast iron's bad to hammer stuff on, mmmkay" and then I kept seeing stuff on kanye & sons being made of ductile iron like this cone or this leaf swage. So after some research it turns out that what makes regular old cast iron more apt to crack if hammered on is the shape of the graphite used to make it. Its either in flake form or just powder, no real shape to it. So when it creates the texture of the cast iron, it creates it almost like slate rock and thus when its impacted it forms a fissure. Ductile iron uses a Sphere shaped graphite and thus has an inner structure somewhat like a sponge only with teee-niny little holes. So its a lot more elastic than regular cast iron.
Heres the wiki link that I learned this mojo-jojo from Ductile Iron Wiki -
Don't know what you plan to make; but it you intend to make edged tools or other high carbon stuff having a quenchtank so close to the firepot is like storing your shotgun shells on top of your wood stove!
For some reason open quench tanks seem to exert an almost magnetic influence on non-magnetic high carbon steel and *MANY* smiths will have a tale of how an almost perfect blade or tool that was almost done after hours of work have managed to find an open quench tank and crack into unusable pieces...
Thanks Thomas... This means I can lower the sort of permanent footprint of the forge mounted into my garage.
I don't really know what I plan to make, at this point I'm still learning and constantly see a few things of different variations that I'd like to make. So if its just easier to use a bucket with a lid, then that seems easy enough to me. :) -
Yup, if nothing else, it gave us a horn :)
-
Clay is cheaper, less durable, difficult to repair but easy to replace, vs cast iron.
If you can get broken bags at the local big box you can line several forges for $2.
Cast iron or welded mild steel is more permanent, and especially if you measure your fuel consumption in tons per year will be easier to deal with.
Phil
Ok, setting costs aside (i have what I need for either application) would it make sense to bring a pipe up and then use a brake drum in the center of the sink? I know its not required, but it would give me and area around the center in which I could sit tongs and such (small area)
I think (not sure really) but I think it would add alot less weight as well, maybe not as much insulation for the sink against the heat though. I like the idea of the brake drum lasting for a long time for a simple forge, but also like the idea of the sink not getting so hot it falls apart INSIDE my shop -
Good deal... Is there any particular advantage of one over the other?
-
double posted on accident :)
-
Hmm, I was just planning on the pot being the clay mixture. Do I really need a cast pot like a drum or rotor? I have access to all types of those, I just didn't really think it was necessary with that much clay.
-
Check out the Hofi style chimney.
http://www.iforgeiron.com/page/index.html/_/blueprints/uri-hofi-series/bp1048-side-draft-chimney-r175
Dave, (Fireyfurnace) built one and took pictures.
http://custerfamilyfarm.com/blog1/index.php?blog=4&s=Hofi+hood&submit=Search&sentence=AND
Phil
Ty Matt and Ty Phil... I might just go the old school route and keep the sink whole then, clay one side and use the other as a quench basin. I'm really liking the side draft Idea, and at first glance I thought it would have to stick 4' out of the garage, but it looks like I really just need to clear the edge of the roof. It looks so much cleaner as well. Neat little box there and nothing huge up top. -
By the way, I'm envisioning a side draft chimney. That's what I'm familiar with. If you're thinking of an overhead hood, I think it'd have to be much larger than sink sized.
Hmm, might be right, I was hoping since the fire wouldn't be the entire size of the sink that it might work, also, I was planning on putting about a 75cfm fan in it (yes its a bathroom fan, but Its still an "idea" atm the moment) and was thinking that should pull a good bit out. Maybe not though. Might be best to test it out outside on Jeff's forge first. -
Are you planning to attach a chimney of some sort that vents outside the shop? I ask only because you mention the shop not being airtight, and I'm not sure exactly what you're getting at.
I am planning on attaching a chimney. Some people assume garage means both attached to the house and tight enough to hold in CO2, mine is neither, but I plan on installing a chimney anyway, just figured I would use the other half of the sink as a hood and mount it above.
This is a fairly shallow sink as well, 5 1/4" or so. -
Currently I go to my brother-in-law's house and we use his forge whenever I want to do something hammer related. I would like to build my own and have some ideas that I was hoping to get some feedback on. They might be bad ideas, I dunno.
I'm currently interested in making a coal forge out of an old stainless sink. The plan is to cut the sink in half (its got 2 identical sides) and use one side as the forge and one side mounted up top as a hood and put it inside my less than air-tight garage. The forge side would be clayed using the mixture that I see Phil has committed to memory and mounted against the wall.
My garage is another DIY project and the entire structure is made from steel pipe welded together. The outside is covered in a buttler type corregated steel (somewhat heavy 14g).
So, is there any reason not to use the sink bottom? Is that clay going to be fine for it? Should I put a layer of clay on the wall behind where I mount the forge?
Thanks for the help in advance :) -
This pic has already been put into the "brazeal anvil rising" thread which is where I got the inspiration on how to make this anvil.
It started its life as a bottom die plate in a plant that makes parts for Mercedes.
Its 2" thick, 6" tall, and 14" wide, it weighs in (originally, I dunno about now after its been used and replaced) at 62lbs
Has a hole on either side that run all the way through, hole is a neat 1/2 inch round.
It still needs a little work, we're planning on using a flapper disc to soften the edges a bit and make attachments that will drop into those holes. Including small sections of pipe to use for bending and such. I've read a few times where some people like having a true round for a bend than a horn to prevent twisting. I dunno about all that, but for me it will be done out of necessity
Anyway, don't knock it too much, Its all I have atm!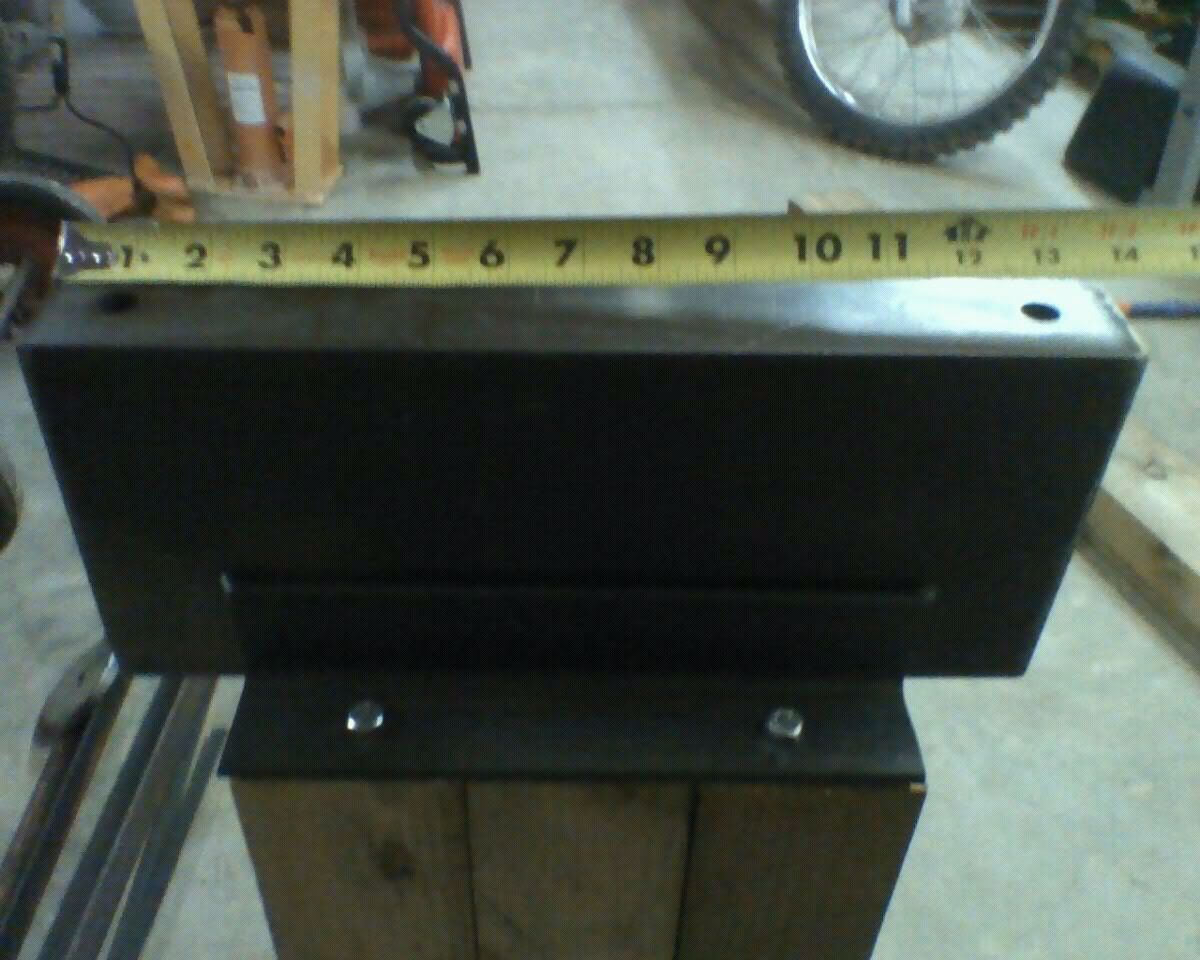
-
Well, there's all types of stuff on these forums. This is the forge that Jeffro1205 and myself use. I would like to point out that I had absolutely nothing to do with the creation of this forge. Jeff did all the cutting, construction, etc.
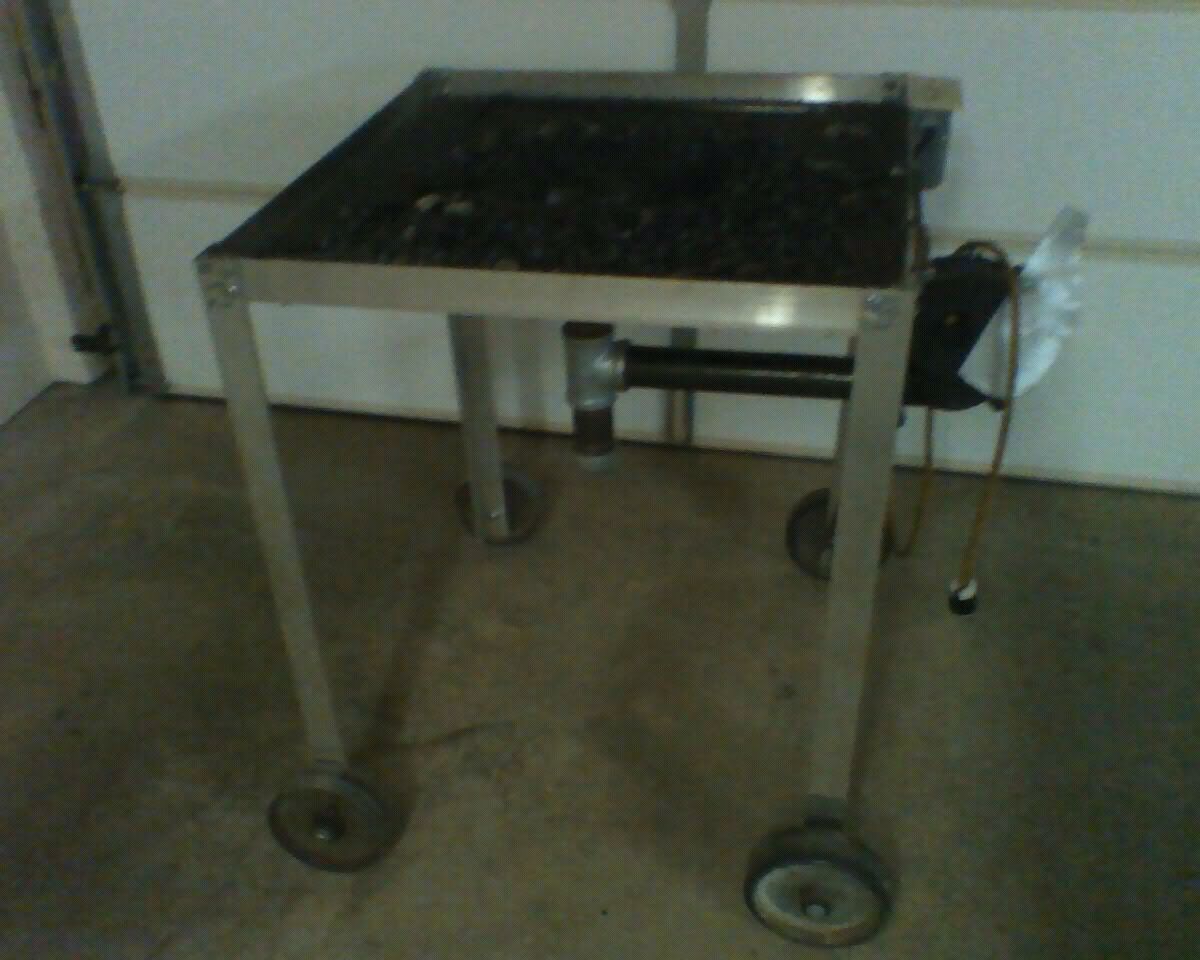
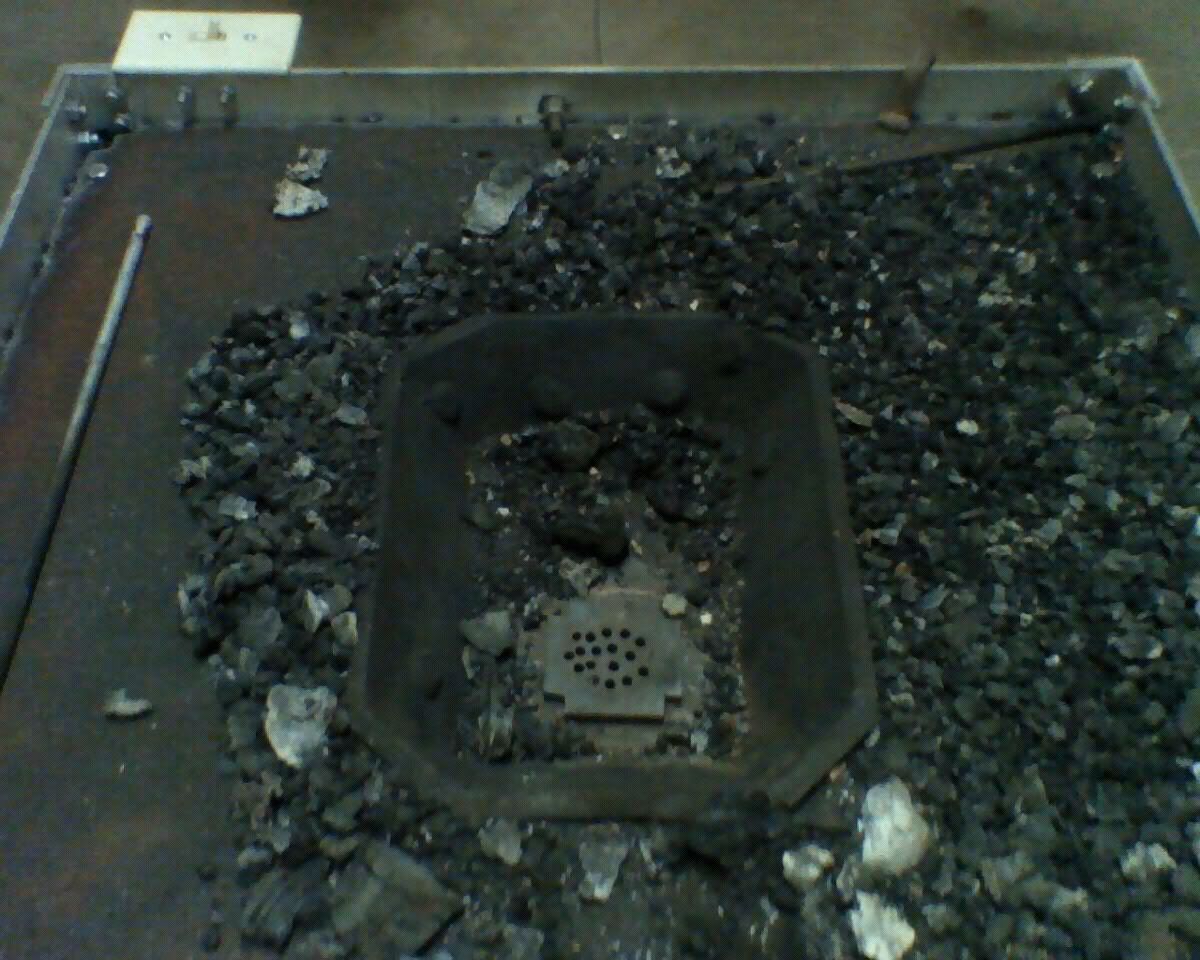
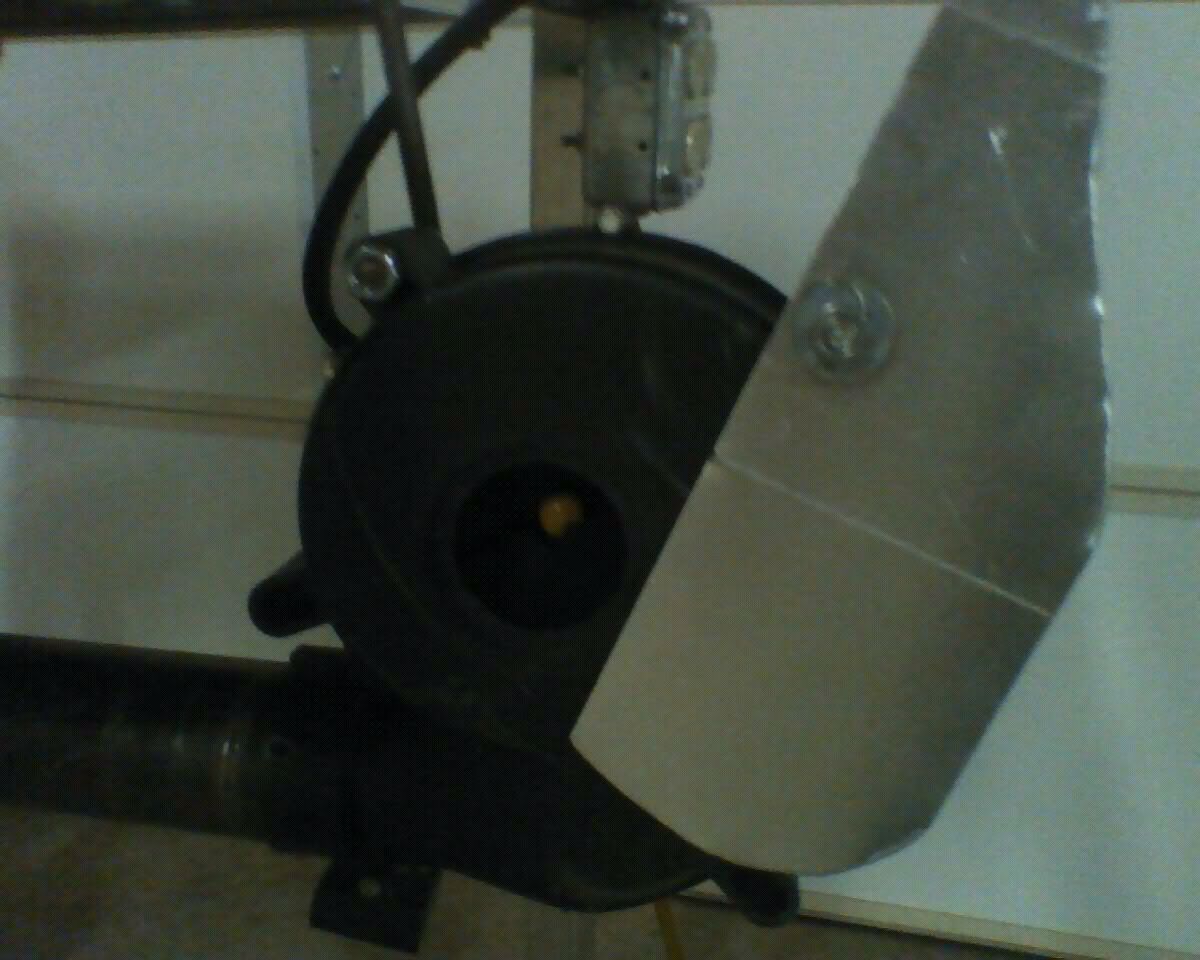
Let us know what you guys think, we're always open to constructive criticism :) -
I know this is an old thread, but its what gave me the idea to build this anvil so I figured I'd post a pic.. Its narrow, not super tall, but it'll do
2" Thick
6" Tall
14" Wide
Base is hard treated 4x6 timbers (it measures 10 1/2" wide x 6" thick
held on there with 2" angle welded and bolted.
The holes you see on top there go clean through to the bottom -
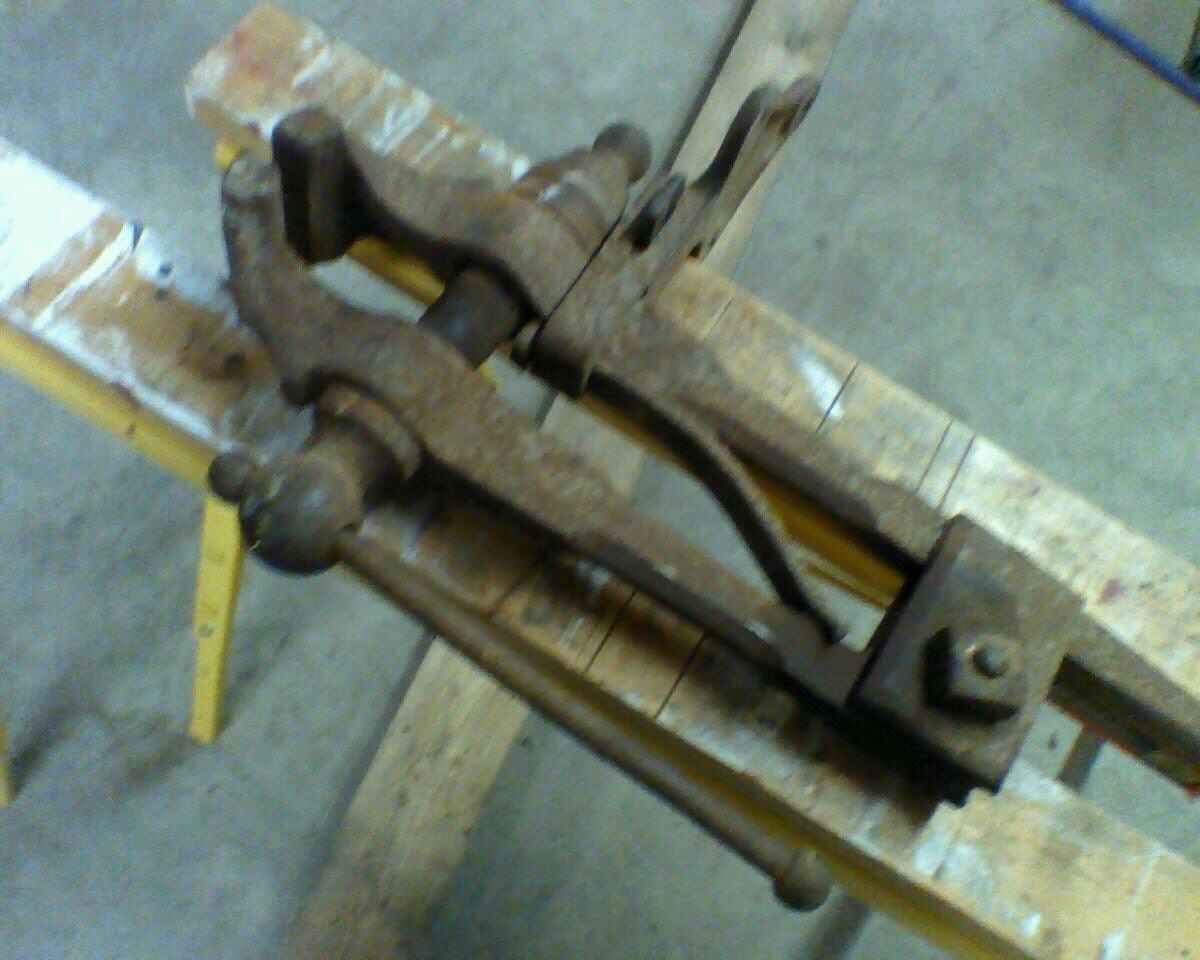
The Afor mentioned post vise
-
OK!
Got a picture Finally!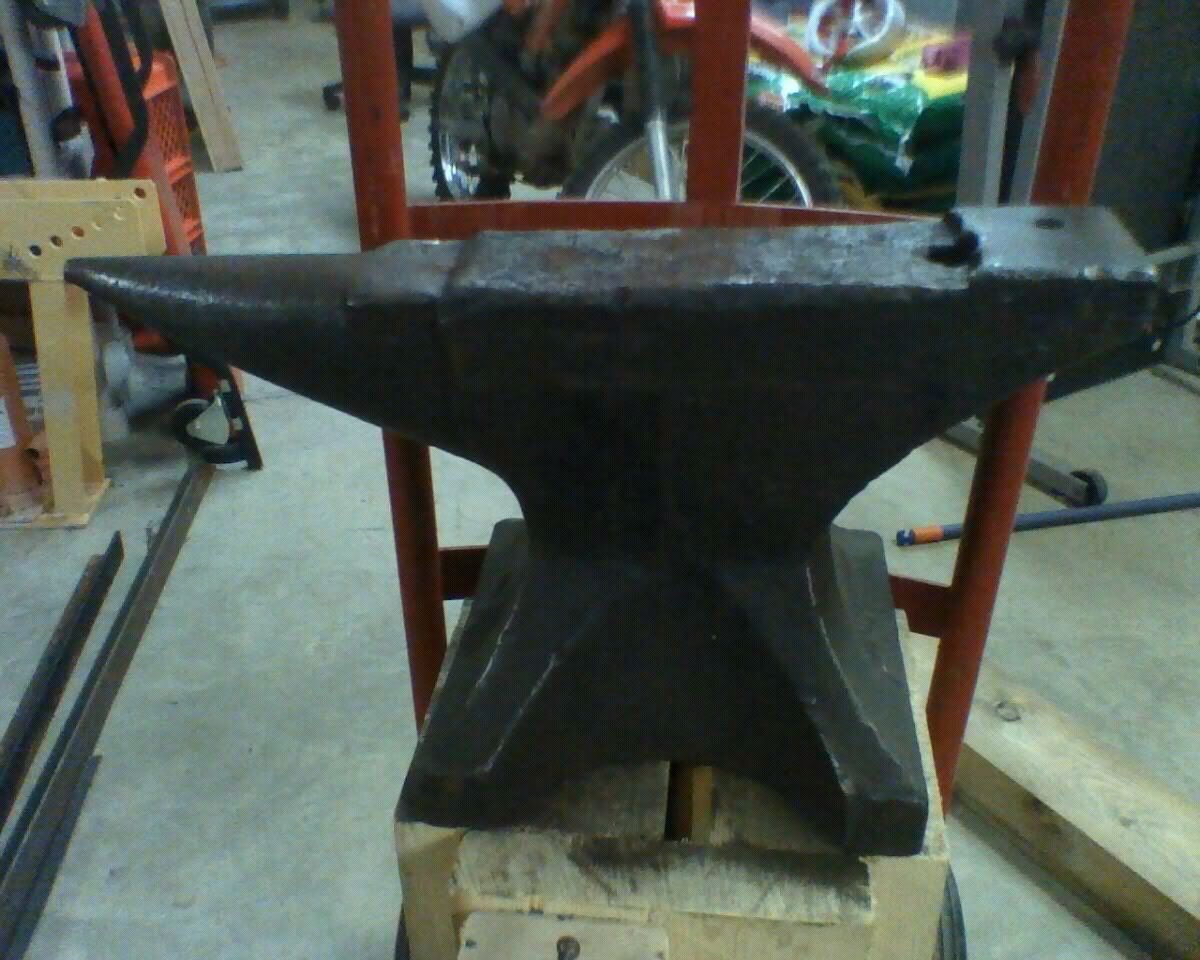
-
I don't know, I thought since maybe the champion 400 was a hand crank that maybe the 600 was 110v
-
Harold, as an Eagle Scout and former scout camp staff member I applaud you!
XXXXXXXXXXXXXXXXXXXXXXX is a good place to start.
I recently helped out with some boys trying to get their metalworking badge. Between a meat hook and a pair of easy tongs they cover their requirements. If you have time (in a camp setting you would) it would be really nice to give them options.
Sooo, maybe
Meat Hook
Tongs
Flag Holder
Flint Striker
Candle Sconce
Candle Stand
Wall Hook (hammer in or hanging)
belt buckle (could maybe be tied into leather working badge)
Java Monkey (add a twist and this covers everything except that they have to make 2 items)
I'm not sure of the camp environment really, week long etc, and how much they're going to have to pay in order to take the class. If its enough, it would be really nice if each boy got their own set of cooking ironsthat combined with a java monkey has them covered.
Good luck with it.. PM me if I can be of any assistance. -
Just sort of wondering Thomas.. I know you don't have anything against fisher, so I've gotta ask what fault you're taking with the little anvil. Not that I'm second guessing or anything I'm just wondering if there's something I'm not seeing wrong with it that maybe I should be looking for. I'm still a novice at some of this and just thought I'd ask.
I know we use an 80lb fisher with a face way more banged up than that one and it does fine for light work (wall hooks, meat turners, tongs etc) I was happy as a lark to see it in the garage too simply because it meant we had a HORN! A real horn! hehe. Before that we were using small sections of pipe vise gripped to the side of our piece of rail. -
So glad I read this, the anvil we just made is a bottom die turned on end to make a small brazeal style anvil. The edges are exceptionally sharp and I was wondering if it would be a problem due to marring and such. It's only 2" wide so I won't be able to put much of a bevel on it, but I'll atleast be able to soften that edge a bit.
Pound, I haven't done any blades to this point but I've seen rail spikes drawn out to full 18" steak turners... Making one into a small letter opener might leave a lot of material unless you draw it alot. -
I'm sure I'm just not looking in the right area, But at the moment I'm really interested in making my own tools for some reason. I know material wise It's probably not any cheaper than just buying one. My primary concerns at the moment are more tongs (I've found several instructions, tutorials etc, and worst case scenario, they can just be welded) and then I'd really like to make a nice little hammer.. maybe 2 - 2 1/2lbs or so. But I haven't been able to find a really detailed set of instructions about hammer making.
I also know that if I'm still working on forging tongs and such, making my own hammer probably shouldn't be high on my list. Lots more practice first. But someone once told me you learn faster if you enjoy what you're doing. So I'm going with that method
Thanks for the assistance guys, and Francis, those hammers look awesome to me. -
Its a nice setup Frosty. I'm diggin' it. I'm hoping Jeff's cleans up that nice. Any chance of getting a pic of the bottom of the stand?
-
Heres an add on Craigslist in Alabama for an 80# fisher and a champion 600 blower if anyone is interested.. for $300
We already have an 80lb fisher and are looking for something heavier fella said he'd take $150 for just the anvil as well.
Opinion about an anvil Please
in Anvils, Swage Blocks, and Mandrels
Posted
I'm just starting out too, and had the opportunity to purchase a few farriers anvils and have turned them down thus far. If I was gonna spend that much I think I would add a bit more and get the 120# Legend anvil from anvil brand. http://www.anvilbrand.com/p-716-anvil-brand-legend-120-lb-anvil.aspx It's not much more expensive and it has a much better setup and a thicker waist than the farriers anvils. It says they're out of stock at the moment but I was told if I called them around 8/2/11 that they should have some ready.
Thats IF I was dead set on purchasing a NEW anvil.
Before I did that I believe I would go to SearchTempest.com and put in my zip code and do a search for both anvil and blacksmith. Might be surprised what you find within an hour or 2's drive.
In the mean time find something heavy and steel and put some hot metal on it and whack it with a hammer