
Stormcrow
-
Posts
1,095 -
Joined
-
Last visited
Content Type
Profiles
Forums
Articles
Gallery
Downloads
Events
Everything posted by Stormcrow
-
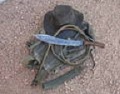
This is the one that actually started me on the path to making full tang tomahawks. I'd been working on forged prototypes with nylon handles for a while, but still had questions in my mind, particularly about the handles. Then the SEAL who has become my best customer asked about me making him a full-tang 'hawk, and it solved the issues I was having but meant that I'd need to do a major shift in my approach and work out the logistics for building it. He asked about it late last winter, and I finally got his 'hawk to him in December. Part of that wait was making sure I had it right, part of it was having one that would match his order being bought off my table at the Blade Show in June, part of it was waiting until I could have a sheath with it, and part of it was his work keeping him busy and away from e-mail. But, I just heard back from him and he is happy with his tomahawk. So, here it is. :) 12" Wrecker (pry spike) model in olive drab with sharpened inner beard. His was the first sheath I made for them, before I got the tooling together for the other two models. He got it with the shoulder sling and IWB bands. This shows the 'hawk better, but is taken before I moved the IWB bands to their final position. Here's me using it to demonstrate the shoulder carry. Note that there's a lot of adjustment to pull it up tighter, and that I moved the IWB bands from being on the corners to the inside of the shoulder sling later on. Not one to sit still on his time off, he told me he's been wearing it by the shoulder sling on a few hikes and barely notices it's there. He also sent me a picture of a display case that his future brother-in-law made for him for some (not all) of the blades he's gotten from me. I joke with him about charging into battle wearing a kilt made of my blades. :D
-
 Elemental Ironworks - There's only so much you can do with a tomahawk design. That being said, I'd rather you took it for inspiration rather than do a direct copy. Which sounds like that's what you're wanting to do anyway. :) Take a crack at it. Peter - Thanks!
 -
4140 Cracked when hardening
Stormcrow replied to Ancientsword's topic in Heat Treating, general discussion
Thingmaker3 - I should have just been patient and left it in the oil. The other did fine, as did the one I built to replace the cracked one. 4140 is good stuff, but it doesn't need rushed. -
4140 Cracked when hardening
Stormcrow replied to Ancientsword's topic in Heat Treating, general discussion
Did a Google search on "blue brittleness" and did a bit of reading. Interesting, but not a phenomenon I've personally seen in 4140. Like I said, I temper 4140 for the applications I need in the 535 to 600 degree Fahrenheit range, and have used the resulting tools extensively and hard without anything but satisfaction in the result. -
It took a while to get there, but the Marine stationed in Okinawa who ordered it finally got in the Woodsman 'hawk I shipped before Christmas. :) 12", desert, sharpened inner beard. 1/4" 4140 steel, canvas Micarta, and flared stainless steel tube rivets. He also got a bare Kydex sheath with it. Here's hoping it serves him well!
-
4140 Cracked when hardening
Stormcrow replied to Ancientsword's topic in Heat Treating, general discussion
What problem? I tempered my power hammer dies at 600 degrees and axes and tomahawks at 535 with no issues whatsoever. That's the first I've heard of anyone thinking there's a problem tempering at that range. -
4140 Cracked when hardening
Stormcrow replied to Ancientsword's topic in Heat Treating, general discussion
I would not use water on 4140. That may seem like a big chunk, but you can still crack it by cooling too quickly. I build my power hammer dies out of 4140. I quenched them in slow commercial quench oil. One of them cracked when I took it out of the oil after five minutes and cooled it the rest of the way with water. Tempering will not hurt anything. Cheap insurance. For an anvil, I'd do between 535 and 600, if you can. Or you can try them as-is and see how they do. They may already be heat treated. -
That came out good! One of the best video-game-inspired blades I've seen. :)
-
This is the first piece of mine to make it up to Alaska. 12" Woodsman (hammer poll) model, unsharpened inner beard, black Durabake and natural tan canvas Micarta. 1/4" 4140 steel, flared stainless steel tube rivets. The customer ordered a sheath with the shoulder sling, double adjustable and quick-detachable.
-
Wrecker 'hawk with bare sheath
Stormcrow replied to Stormcrow's topic in Axes, Hatchets, Hawks, Choppers, etc
Thank y'all! :) -
This one went out to the customer a few days ago. 18" Wrecker model with pry spike, sharpened inner beard, black Durabake and Micarta. 1/4" 4140 steel. He plans to have a buddy build a leather sheath for it, but went ahead and got a Kydex one without carry options for the meantime.
-
I think you did a bang-up good job there. :) I've done my share of splitting wood with wedges, but generally gravitate towards using a maul.
-
First integral wood insert - drop point tear drop knife
Stormcrow replied to TheoRockNazz's topic in Knife Making
That came out quite lovely. My criticism would be that the wood seems kind of plain for the rest of the knife. -
This is a pair I made some time back, before starting work on tomahawks, and I just haven't put pictures up yet. They're both 5160 with leather sheaths. The first's blade is about 7" - 8" (I forgot to measure before mailing it), with mesquite handle slabs and brass pins and flared tube lanyard hole. The second is a Benghazi Warfighter model with a short false edge and natural canvas Micarta. The customer wanted to dye the leather himself, so requested it undyed.
-
This batch has all been finished up and are on their way to their respective customers. Here's a brief glance as they were waiting for sheaths to be built: I'll post the finished pics in their own threads. I don't plan to document all the batches of 'hawks like I did this one, but I wanted to show some of the steps along the way. Now onto the next batch! This is a big one as there are two double orders and one of the long Wreckers is going to be a demonstration model for myself. About half of the grinding is already done. This pic shows them all post-normalizing.
-
December axe class at Bushfire forge
Stormcrow replied to basher's topic in Axes, Hatchets, Hawks, Choppers, etc
There's a pretty wide variety of shapes there, and they all look good. Cool! -
I had a customer who lives nearby come to the shop today and watch as his tomahawk's sheath was made. He ordered a 12" War Chief (combat spike) in black, with a sheath. He also brought tasty breakfast tacos! :) 1/4" 4140 steel, canvas Micarta handles, flared stainless tube rivets. The sheath is Kydex, bottom-eject, ambidextrous, MOLLE-compatible, jump-ready with multiple carry options. He chose to add a quick-detach double adjustable shoulder strap and IWB bands. And here's how I built the sheath. I had templates waterjet cut to build the Kydex molding forms, lay out holes and slots, and trim the overall outline. Still takes time, but the results are consistent and work well. I'll do another video in the future showing the sheath's various carry options. http://www.youtube.com/watch?v=E7vZMkFwBLw Four more 'hawks waiting on sheaths and sharpening, then on to the next batch!
-
It was a short day, but I got some good things done. Micarta sheets after sandblasting and before being cut up on my table saw. The bottom sheet with the cutouts is 1/4" mild steel, used to make some tooling. After cutting into handle slabs, I used my handle template to drill the rivet holes. There are always little tricks to any process. After a while, I figured out how to drill the holes without having to shift the C-clamps each time, and drilled two slabs at once. Then I countersunk the holes. Then I bolted the handle template to the individual slabs and used a trim bit on a router to trim, obviously. :) Followed by a 45 degree bevel using the other router. The handle template is built so that the Micarta is trimmed leaving the butt of the tang exposed, providing an extra impact surface and protecting the Micaarta from damage if someone should do something like, oh, throw the darn thing. Tomorrow I'll round the edges of the bevels, rivet the handles on, and sharpen, all going well. If I pop my coat tails, I could probably do some sheaths too.
-
Chinobi - Yours are coming up pretty quick. :) Homeshow - There's nothing overly innovative there. A lot of thought and a lot of looking to see what other sheaths were doing and deciding what I needed for mine and how best to build it. But nothing really new on my part except maybe the detachable sling, and that's not a particularly groundbreaking achievement if it is. :) I plan on shooting a little video showing how I make the sheaths soon.
-
Thanks, Steve! Bikecopxxx - Nah, this is some kind of cold or allergies. I never used to have allergies, but San Antonio has a whole bunch of mountain cedar in the hills to its north, so when the wind is right it wreaks havoc. I've heard that a lot of folks that move to the area develop allergies they didn't have before. So, not sure what it is on my end, but it started the day of the last cold front sweeping in from the north. :) Frosty - I don't have it down to the minute (this is the first batch with all of the major equipment set up) but I figured out what I wanted to be able to do per week and am on schedule in spite of a few short days and spending time on material processing that won't be a factor every time. I noticed after putting the video together that it didn't look like I was hitting as hard as it felt like I was hitting. I'll probably do some more with it, and will definitely be shooting video of the finalized 'hawks being thoroughly tested. I did it before with my nylon-handled prototypes, though it was not a public video. The weight reduction slots have been something of a question in my mind, and I'll likely add some cross bracing on the next batch I have cut. It hasn't been any sort of issue with the testing I've put it through, but I don't plan on stopping testing, either. SOG's tomahawk came out with a rabbet tang on a wooden handle, and the first time I saw it I knew it would be breaking at the their rivet holes on the first or second hard swing. Sure enough, they had a major recall. They still use the rabbet tang design and get away with it by using fiberglass-reinforced nylon handles, but it's still a bad design and will still break at the same point with enough force (there's YouTube video of this happening). Yet it's the most commonly carried 'hawk by our servicemen because it's cheap and available and looks kewl. SOG didn't do the kind of testing they needed to in order to sell a product with a soldier's life in the balance, in my opinion. I feel like I have or I wouldn't be selling it, but I will continue to seek improvements. You're talking about powdercoating. The finish is an area where I will be continuing to look into if it can be improved. The Durabake has done well, but I'll see what else is on the market that might do better. There's a big sandblasting and coating business just down the road from me and they do powdercoating, I think. I'll do a little research and see if it makes sense for this application. Any coating will take damage with the kind of usage these 'hawks are intended to withstand. I was surprised at how well the Krylon on a couple of the prototypes held up.
-
This one went out to a patient customer this past weekend. 18" overall length Wrecker model (pry spike) with a sharpened inner beard. Black Durabake coating and Micarta with flared stainless steel flared tube rivets on 1/4" 4140 steel. He is one of the first customers to receive a sheath from me, something that delayed me starting to work on orders by probably at least a month while I built the tooling to make them and tried it out, working out the little tricks inherent in any process. It's Kydex, bottom eject, ambidextrous, MOLLE compatible, jump ready, with multiple carry options. This particular one was ordered with optional second retention strap, quick-detach double adjustable shoulder strap, and MOLLE locks. Hope it serves him well, and I appreciate him sticking with me while I got everything off the ground. :)
-
I got Micarta sheets sandblasted and cut into manageable sizes today. I also cut the slabs for this batch, though I haven't shaped them yet, and cut the stainless steel tube rivets. More pics tomorrow.
-
Here we go, whacking on the handle with a six pound sledgehammer to check the strength of a spot a couple of folks had thought might be a weak point, then chopping a nail. https://www.youtube.com/watch?v=S9DyU-W4tK0 This isn't a demolition edge, either, it's a wood chopping edge. What can I say, I love 4140! :)
-
Frosty - The production is broken up enough it's hard to put a time to it. The individual operations move fairly quickly, though there are several points such as normalizing and tempering where there's minimal involvement on my end and I can be working on another project of the next batch. The coating is Durabake, a gun coating product. Got this batch Durabaked today. I need to build a better spraying setup, but I rigged this up as a temporary solution and it did all right. Everyone in this batch wanted black, except one. About to bake in the kiln. Cooling off afterwards on the normalizing rack. And the whole heat treatment setup. Three phase kiln on the left used for tempering and baking on the finish, Evenheat used for hardening to the right of that, normalizing rack to the right of that, tomahawk quench oil in the black barrel, and canola oil for quenching bush swords in the square tube quench tank. Tomorrow the plan is to get Micarta sheets sandblasted and cut up, and possibly shaped into slabs and on the 'hawks. I also shot a little video showing durability in response to a handful of people who have asked me about if the top rivet hole on the short 'hawks is a weak spot. The video is uploading and I'll post it when finished.
-
Thanks, MacBruce. It's taken me a long time to get here. I spent much of the summer and fall trying to convert an old kiln from knob controls to digital before finally throwing in the towel and laying down the money on the Evenheat. And after that, a lot of time, effort, and more money building tooling to make Kydex sheaths for these suckers. More pics soon! off site sale links and post removed