JGRAFF
-
Posts
94 -
Joined
-
Last visited
Recent Profile Visitors
5,559 profile views


-
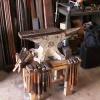
I understand your concern but it's not a disk. Its a forged ring or collar I made to snugly fit the foot of the leg. The picture is kind of deceiving. I have some leveling feet on order now. I will take some better pictures when I get them.
-
Thanks! The table top is a nice size (24" x 24" x .25"). it was a vibration fixture I built a couple of years ago at work. When the testing was done they let me take it home. Its been sitting in the corner collecting dust. So I cut the really short legs off and one of the four walls, built the frame under it and mounted my vise. The table is pretty heavy and having a large footprint helps with bending. But, "hard" bending is not happening. I was thinking about anchoring down or just hanging a ton of weight on it, but that silicone trick might just work! Any other ideas and or suggestions on getting this other vise freed up?
-
I thought everyone would get some enjoyment out of these, so I’d like to share. The first is my newly mounted post vise. I love it and it is xxxxxxxxx! I just got done fixing the mount. The only problem I have is the screw is pretty striped when the jaws are opened past 5-6 inch. So it will need to be repaired soon. Also i want to add some leveling screws to the legs. My garage floor is nowhere near flat. The second is another 5.5" jaw vise. But this thing is completely seized. I haven’t had a ton of time to fool with it. But i think some long soaking and maybe a torch and a BFH will be in its near future. Next is a cute little thing. Not very practical for anything I do, but still nice to have.
-
Double post, Sorry.
-
Thank you very much. I just happy as hell to be forging again. :-D
-
Update.....finally I’m back up and running. And I am loving these burners. They are so easy to tune and get running properly. Thank you to all those that have assisted me in this build. The only problem I have encountered since rebuilding the burners is when I close the front door it acts like it can’t breathe well and the burners huff and puff a little. Not bad, but I now know if I close the door I need to crack open the rear opening to allow it to breathe. I also took your advice and replaced the rubber tubing with copper tube and compression fittings. Works great and looks great. Can’t ask for any more than that. JGRAFF
-
My avatar... 1939 257lb-er. Awesome anvils!!!!
-
I think im going to be fine. I fired it up and it ran pretty good! I might grind out the id of the open end of the of the wye. Also i can't imagine the mig tip being tapered having any affect. Mine is still .035".
-
I was just informed that the zburners made by Larry Z use 3/4" tube with a 1" wye fitting. Is this true? Can anyone confirm or deny? CRAP!!!!! I got 3/4" wyes!!! Hopefully this will still aspirate correctly.
-
Here are a few pictures of the SS burner flairs / flame holders i made. I bought a few SS pipe nipples (316/316L 1" Pipe Size X 6" Length) cut them down to 3 inches. Then i flaired the end by hammering it down over the ball of a ball-pein hammer until the opening was 1.25". :rolleyes: Hopefully this will work. Does anyone know how far i should slip the flair onto the burner tube? Is there a scienctific method or guess and check?
-
A soft hose is never a good thing..... ;- ) Good point. Thanks for the advice.
-
Update...... I am almost ready to fire it up!!!!!. I just got the SS flairs made late night but I still have to find some SS set screws to attach them to the burner tubes. So these pictures are prior to the flairs being installed but it sure does looks good!!! Plus putting it together allowed me to check for leaks up to the second ball valves. And go figure... I had a leak. So I pulled out the JB weld and laid it on thick around the joint. You can see it in the last picture right after the T-fitting. Once it all dried, it works great, at least up to around 20 psi (the highest my gauge will go). I decided to go with barbed fittings and propane rubber gas lines to feed the burners because that was available to me. At my 9-5 I work closely with the maintenance dept. and there are around 15 forklifts in operation and propane parts are readily available. Well, I still have my fingers crossed that this works. Hopefully I will fire this bad boy up tonight and give another good update soon. Thanks for all the help thus far. JGRAFF
-
Working on my ss burner flairs right now. Should have a better update soon!!!
-
Well, I’ve made a decision........ I’m tearing the forge burner assembly apart and starting over. I want to go with a more "tried and true" burner design. I am gathering parts as we speak to put together two Zoeller Forge Z-burners. Hopefully I can get all the parts together soon, so that I can start swinging a hammer again. I also like the idea of bench tuning the individual burners. I will report back as soon as I start reassembling. Thanks to all that provided guidance. Thanks again, JGRAFF
-
I would assume natural gas, but i don’t know. The seller just told me they were from an "old furnace". The average ID of the burners is probably around 1 inch. After the bell portion the ID is about 3/4" and at the end it's about 1.25". The total overall measurement (from orifice to nozzle) is about 8 inches. By "flame holder" do you mean some sort of stainless steel flared tubing? If so, no. Also, your next question was something else i was worried about. First of all, the burner in cast iron, and as i said in the previous sentence, there is no flame holder at the end. The end of the burner is about 0.25" up inside the wool and refractory. Bad?