wd&mlteach Posted November 2, 2012 Share Posted November 2, 2012 Quote Link to comment Share on other sites More sharing options...
Steve McCarthy Posted November 2, 2012 Share Posted November 2, 2012 Why not make another mold and cast the actual drip pans? I think the steel candle holder with aluminum drip pan would be an interesting contrast. Quote Link to comment Share on other sites More sharing options...
wd&mlteach Posted November 10, 2012 Author Share Posted November 10, 2012 Casting the cups was an avenue that I never explored. It might be a nice option as I have AL, Brass, Bronze, and CU. One pattern could have many options. However, the end product would be quite a bit thicker than the 22 g sheet. Quote Link to comment Share on other sites More sharing options...
Robert Yates Posted November 10, 2012 Share Posted November 10, 2012 well done awesome show also. Sam Quote Link to comment Share on other sites More sharing options...
wd&mlteach Posted November 11, 2012 Author Share Posted November 11, 2012 Thanks Sam, I thought somebody might like to see what I do. Most of the patterns I have are antiques left over from the 50's. I use to have the kids cast one to teach them the casting process. However, most of the kids would toss them out in the trash as they left my class. It took me a bit to figure out what to do with them so that they really cared about their project. Quote Link to comment Share on other sites More sharing options...
Robert Yates Posted November 11, 2012 Share Posted November 11, 2012 WD, as long as they are learning the process of it you can remelt them and do other projects. for many casting small items are most interesting to young folks . Sam Quote Link to comment Share on other sites More sharing options...
tzonoqua Posted November 11, 2012 Share Posted November 11, 2012 Great illustration of the casting process, we do this at the school I work in too, it's great fun and the students love it and are engaged with the process. I do think though that you could very easily find something simpler that would be good for dishing candle drip trays in and have saved yourself the hassle of casting (although I realize that it's not really the point) I used to use a very simple former- section of round stock made into a ring, and used that on the anvil, (or you could use an offcut of pipe and file/grind the edges round) and hammered the dish into the circle, you could even weld the circle former to a back plate with a section to drop into the hardy hole, or use in a vice. Quote Link to comment Share on other sites More sharing options...
wd&mlteach Posted November 11, 2012 Author Share Posted November 11, 2012 Colleen you are correct there are numerous ways to get this done. For me this took about 2 hours to do once I had the whim. I have since made a few dishes from the form and it seems to be holding up fine. I bet if I made a hundered or so it might start to change, but for now it is working. The operations that you suggest are they formed hot or cold? Not the welding of course but the actual cup? Also if you have any of these forms done I would LOVE to see a picture of them or at least a link to where I can find them. Quote Link to comment Share on other sites More sharing options...
tzonoqua Posted November 12, 2012 Share Posted November 12, 2012 We did some alu casting today with the year 12s, and managed to demonstrate it all in one (one hour) lesson, packing the mold, and pouring, but of course not breaking the mold open as was just poured! The methods mentioned you can form hot or cold, depending on thicknesses. I don't have any pics handy, but will try to take some tomorrow when I get to the workshop. Quote Link to comment Share on other sites More sharing options...
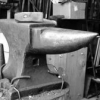
tzonoqua Posted November 13, 2012 Share Posted November 13, 2012 ok, here are some pics of the formers- ring and pipe offcut! Quote Link to comment Share on other sites More sharing options...
wd&mlteach Posted November 13, 2012 Author Share Posted November 13, 2012 Your descriptions were spot on and the photos back it up. Thank you for posting and good show! I enjoy the simplicity of this method and the variety of pipe that one can find. I think for my students though, it would take a bit more to master the art of the hammer and not to drive the cup though the pipe. Or to put horrible dents in the thing. A side note today I thought about chucking up a piece of steel and turning the same shape. I have not gotten there yet but when I do I will post. Thanks again! SF Quote Link to comment Share on other sites More sharing options...
tzonoqua Posted November 13, 2012 Share Posted November 13, 2012 Yes, very true, I have students who come to my shop for a taster in metal arts, a few of them do that exact thing- hammer it right down into the former, not easy with the ring, but the pipe offcut for sure! I keep the pipe offcut so long because I also use it as a former to make rings, and candle holders as well, otherwise it could be quite short. Love to see your results at turning! Quote Link to comment Share on other sites More sharing options...
Recommended Posts
Join the conversation
You can post now and register later. If you have an account, sign in now to post with your account.