mnidoone
Members
-
Joined
-
Last visited
Everything posted by mnidoone
-
Gonna have to "scrap" it up as a scrap idea lol
-
As far as I understand it, its the plate that sits on the railroad ties and gets the spikes driven through.
-
Thanks for the advice. Reading through it makes me a little apprehensive now because its so inconsistent
-
I've recently come across some hopeful scrap steel that COULD be good quality. But I've encountered an issue. Its all CARC coated. Everything I've found about it just says danger don't clean, don't cut, don't weld. Does anyone have any ideas for how to remove this stuff safely?
-
I think at the very least we all have a good facet of the truth because theres nothing in your statement i disagree with either. Getting into this work has been enormous for me. Got me off the computer and has helped keep me from the drinks.
-
I have minimal illusions to what i need. My ideal anvil setup would be a 6-10 inch round S7 or H13 round with enough length to get 100-150 lbs , a stump with a stand alone horn (believe its called a cone mandrel) and finally a mount for a hardy and pritchel hole. (Previously mentioned idea about tie plates as a start)
-
I would kill for either of those options, but my job leaves me little to no time to explore those as options. I do have an opportunity this monday so long as these spots are open. So I'm hoping monday winds up productive
-
Just some thoughts about it I've had 1) military requires alot of dedication, hardwork, patience and a few precise acts of violence. Similarly blacksmithing also does. 2) blacksmithing is an art where you express yourself through very strong physical actions (comparatively to most other art) 3) the military hardens men and women to seek out those much stronger but smaller communities that provide real life insight. Not just a best friend to say you did good then talk bad behind your back. They are more the talk bad to your face and good behind your back. Similarly to much of the Blacksmithing community. 4) it is a phenomenal stress reliever and as the ages go on the OPTEMPO of the military gets rougher, and people in the military are actively looking for outlets. Blacksmithing is one of those few with a relatively low OVERALL expense rate compared to how much you can do. Those are my thoughts as to why military fall into blacksmithing so much. Have literally 0 data to support this. Just things that made sense to me.
-
Michael Nidoone SSG, currently serving in the Army for hopefully another 10 years. Have served at the 101st, 4th ID, in 1-29 IN battalion at Fort Benning (moore) and am currently back in the 101st. I actually got introduced to blacksmithing through an amazing non profit founded by a few retired service members, called Healing Flames Forge. When I'm not there, I'm at work, when I'm not at work I'm with my family, and past that I'm building my backyard forge.
-
I've been slowly picking away via email at alot of the machine shops, construction companies and other odds and ends shops that might have scrap steel, just waiting on replies as I branch put more and more. Appreciate the understanding of the hardy, i had always understood it as just the slot for the tool, so anything that went into it was a "hardy tool" i still have to reach out to the rail road maintenance shop here. Would be amazing to find an anvil! But I'm more hopeful of finding a scrap block of steel to repurpose (I'm also more a fan of the saw makers anvil patterns and would love to do that and design a bick\cone to use in that block.) but for now its a horizontal railroad block and hopefully some tie plates to use for a hardy and bottom tools. I'm still trying to get a sketch that doesn't look like my 3 year old drew it, but my ability to draw is about as good as my hammer making abilities. Its functional, but it makes the infamous blob fish pleasing to look at
-
At the core I just need something to mount hardies (hardy's?) as well as be able to perform some ultra basic drifts. I do want to be able to do some larger drifts later on (like hammer or axe drifts) but for now with my home setup I just need to get a hardy hole and a couple jack hammer bits from a rental store to make a bottom hot cut. I would like to make a pritchel in it for a hold fast. The tie plates I have access too have nothing on the bottoms last I checked, but i also won't be able to check until next weekend. But those are some good points, I'll check that before I explore more. @frosty I'm a huge fan of the spare\scrap metal ideas. I love to repurpose things, I'm just running into alot of brick walls trying to get companies to not blow me off right now. One recycling center basically gives me free use, but its the military base family housing center so its not often I can get my hands on anything larger then 3\4 in stock. Let alone a plate or large square.
-
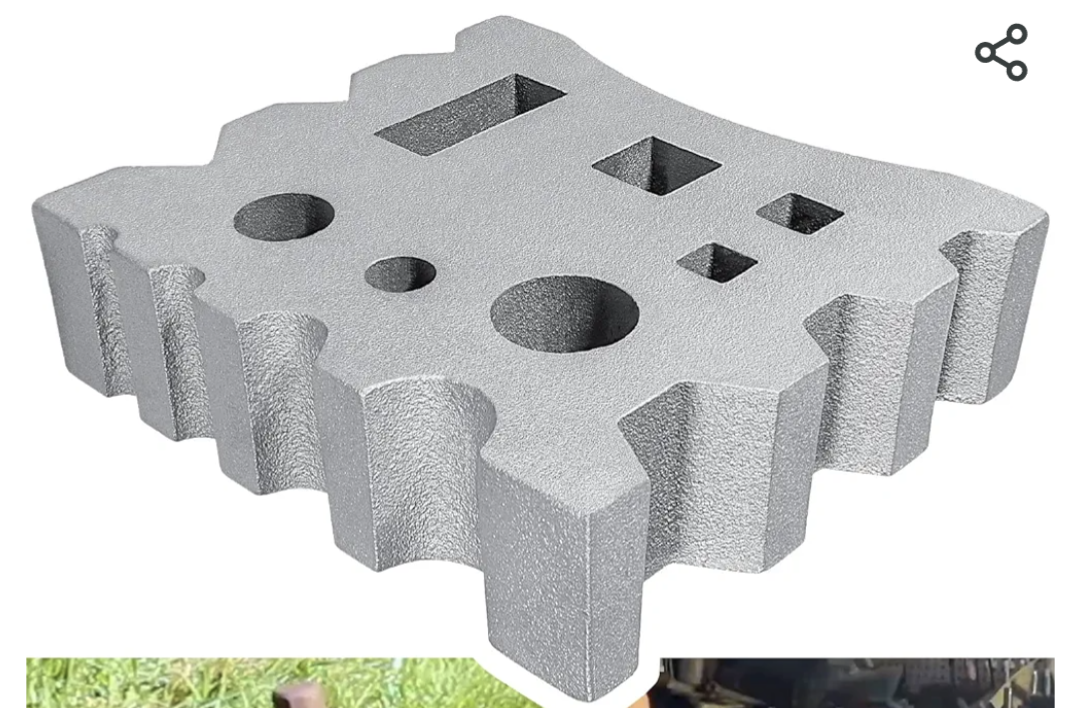
Stake plate would be a more appropriate description. Mainly just something I can use for hardy tools, as well as whenever I'm drifting and need to support the project while allowing the drift to go through. I was thinking of 2 tie plates welded (just the surrounding edge) with the bottom faces touching each other. Then adding a longer slightly more narrow rectangular hole, longer and wider rectangular hole and finally an assortment of rounds between 1\4 inch - 1 inch. It wouldn't be a true swage, so i apologize for the misuse of the word, i just had no other word to describe what I was thinking Stake plate would be a more appropriate description. Mainly just something I can use for hardy tools, as well as whenever I'm drifting and need to support the project while allowing the drift to go through. I was thinking of 2 tie plates welded (just the surrounding edge) with the bottom faces touching each other. Then adding a longer slightly more narrow rectangular hole, longer and wider rectangular hole and finally an assortment of rounds between 1\4 inch - 1 inch. It wouldn't be a true swage, so i apologize for the misuse of the word, i just had no other word to describe what I was thinking Found a picture of the properly made finished idea I had. Not worried about the swages on the sides, just the myriad of shaped holes.

-
So I was actually investigating into a way to do this. I was thinking of welding two tie plates together then drilling a hole into the hole roughly where the round and hardy hole will be. I like that I'm not the only one with this idea, but would 2 tie plates welded together be overkill? Another thing I want to use it for is larger round and rectangle holes for drifting (kinda like the oversized blocks, think they are technically swage blocks, that have a series of round, rectangular and square holes for all different sizes of drifts.
-
I mean to be perfectly honest, I'm in the dumb stage of blacksmithing. I'm trying to reinvent the wheel to see if something new might work. I'm also enjoying the creativity of it. I enjoy failing if I learn something new. I still have enough S7 right now to try and recreate this 2 more times in different variations. But this design inevitably is a variation of a hammer eye punch design I saw from Torborn Ahman on youtube. His was more narrow and more akin to a center punch. Perfectly cylindrical in its taper. But as i started working in the octagon I wondered if this might work as it is. Best worse case I cut the welds, and work it down thinner. Worse worse case I'm out a chunk of S7 and learned a new valuable lesson.
-
Kind of the idea I was going for. End stage is this is punched and drifted, then squish the sides a bit of the hammer to make the eye a bit more oblong (oval) and fine tune the side walls and balance of the hammer with a hand driven drift.
-
Definitely wish i would of forged the peen first. Would of made the balancing and overall length of the peen a little less.. elongated? Appreciate all the advice of ideas and where to look. Got some reading and watching before my next attempt
-
Trying to use it for hammer eyes right now, but now I wonder if i made it too big.
-
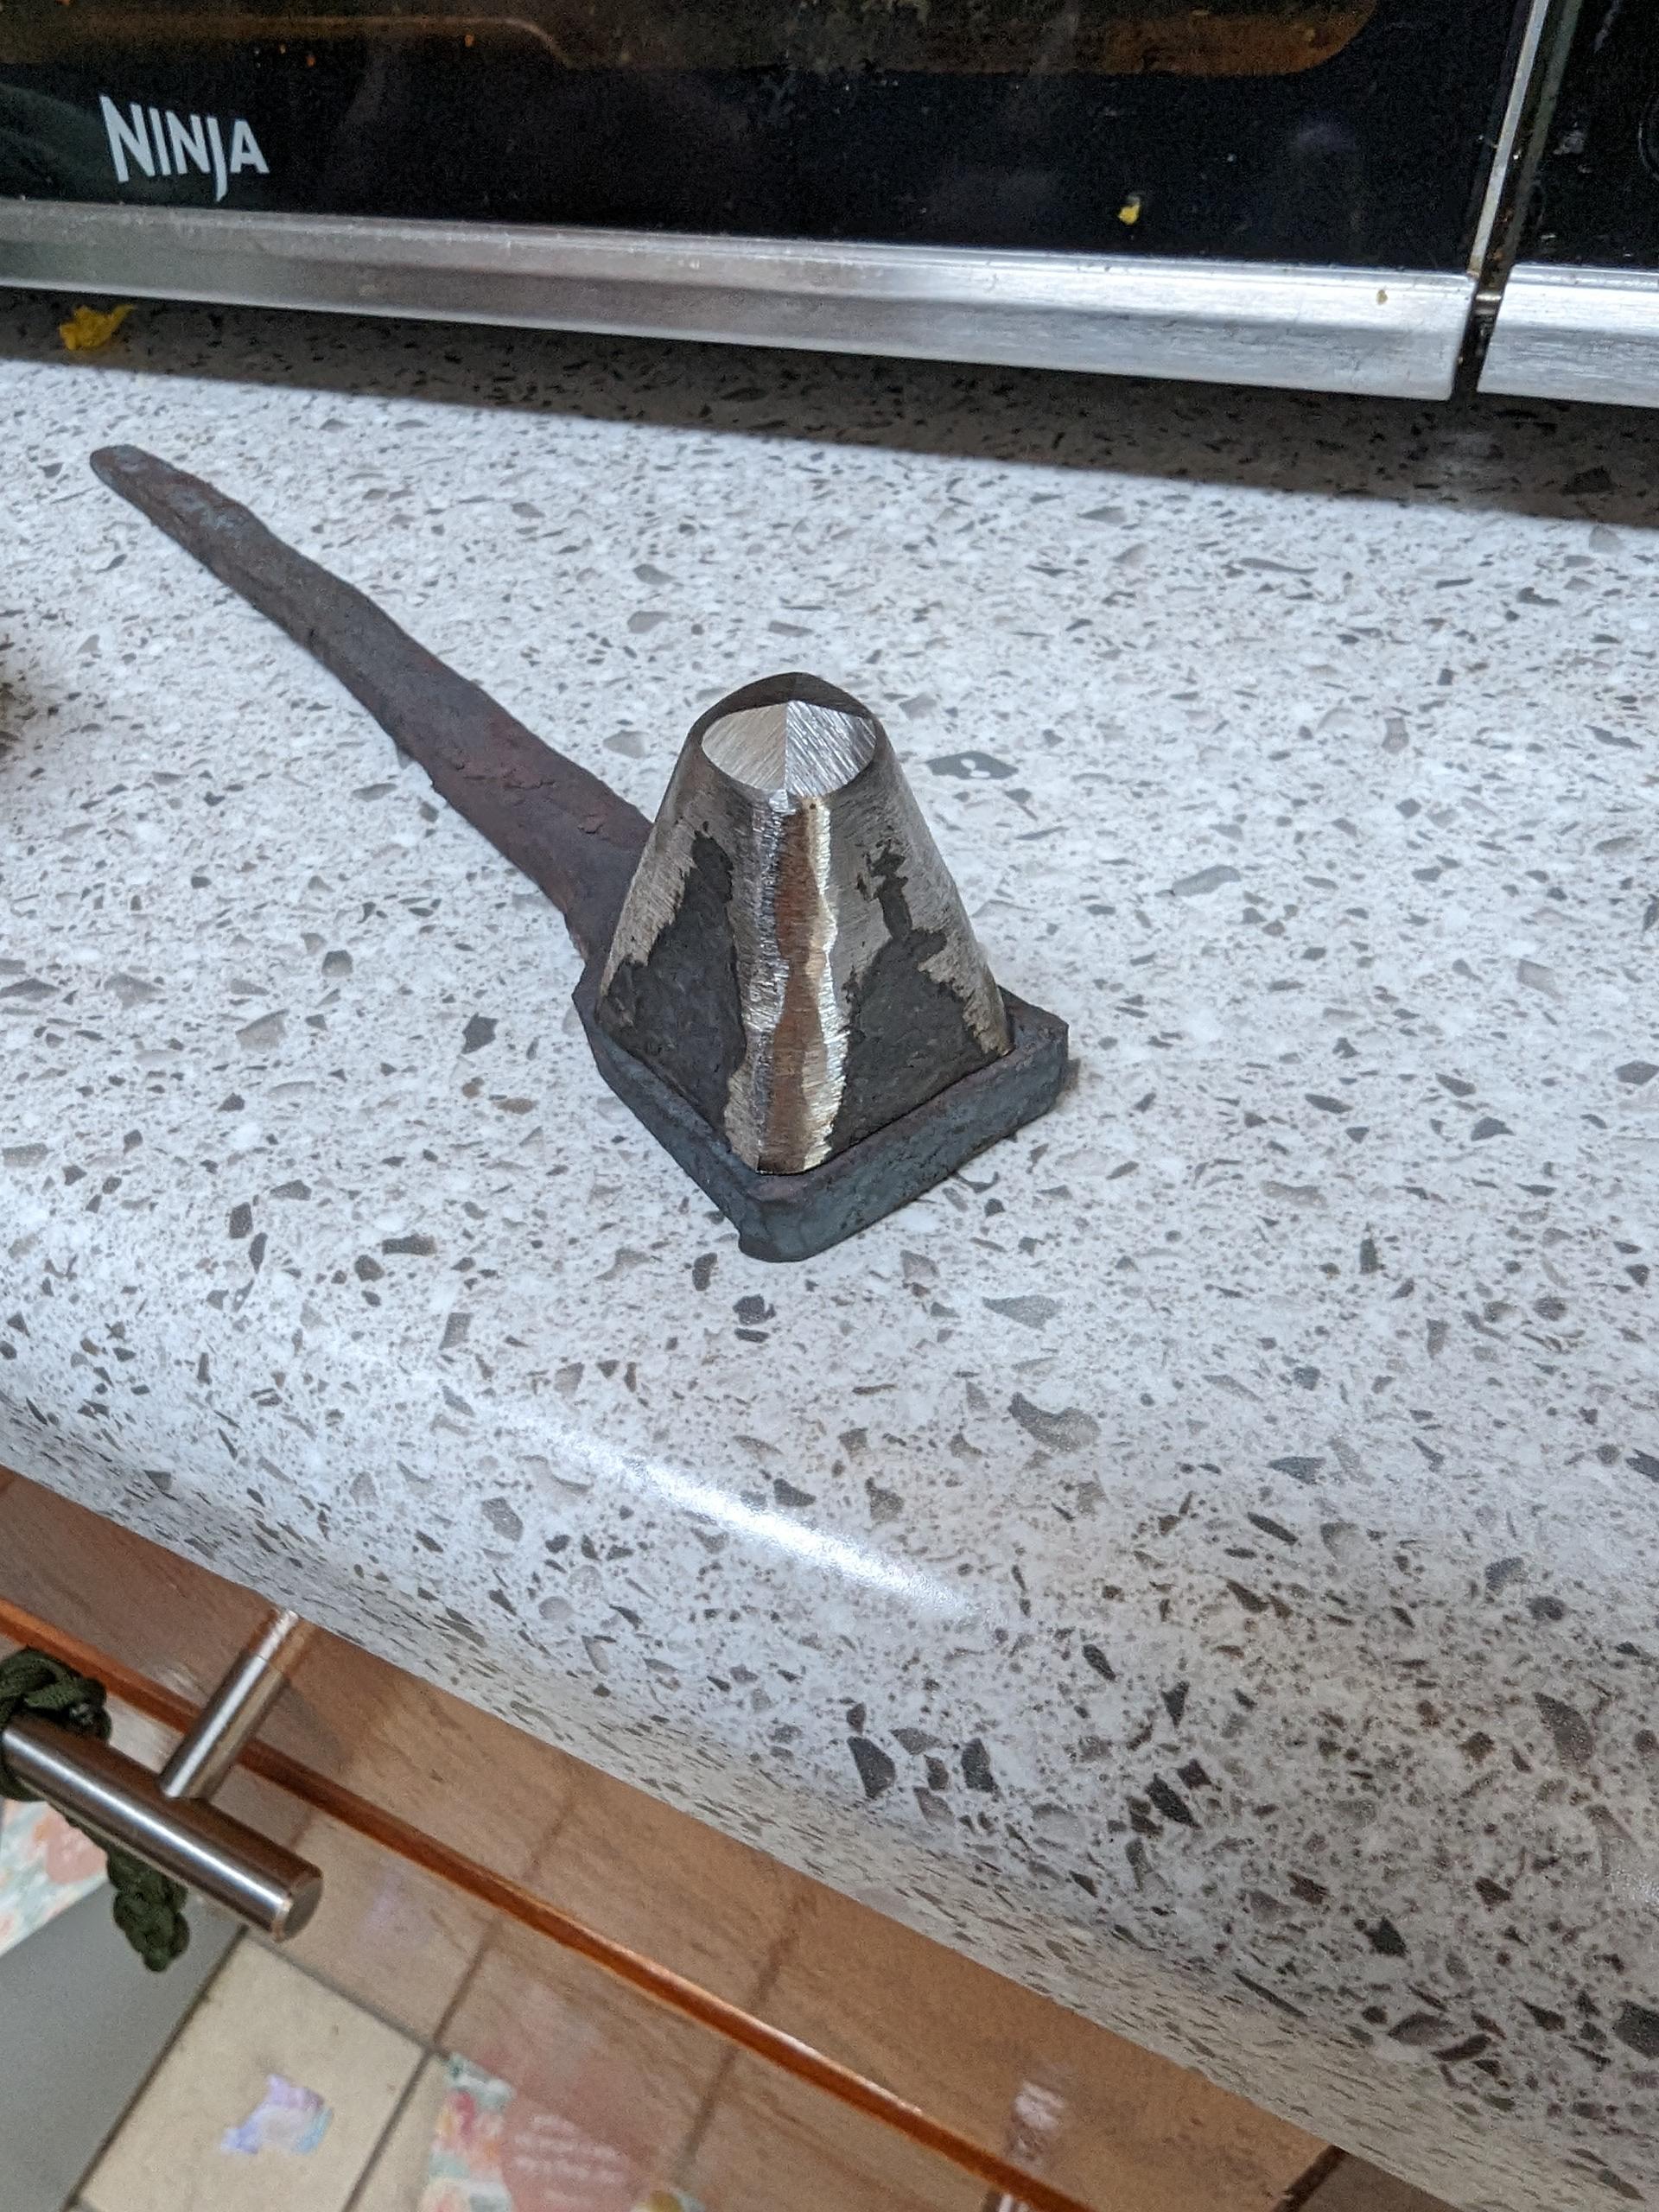
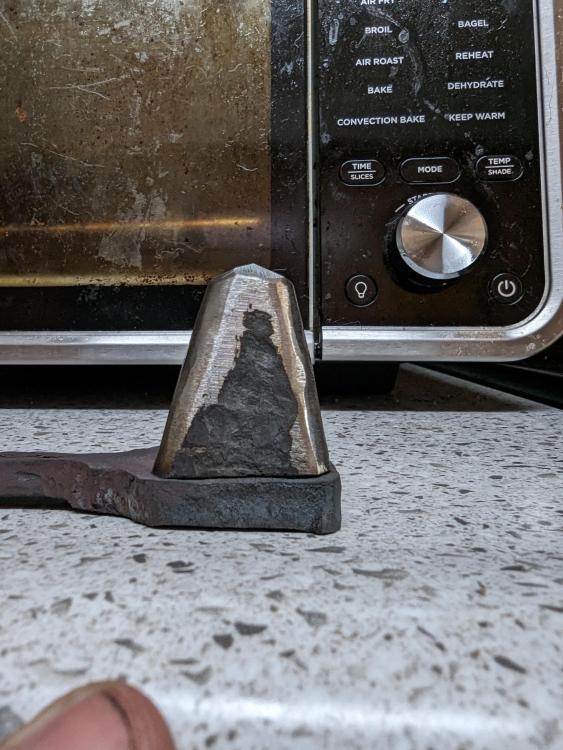
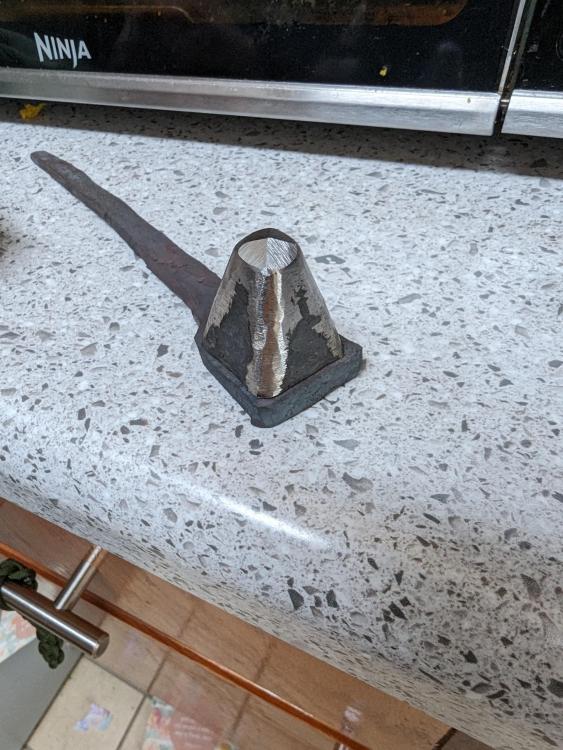
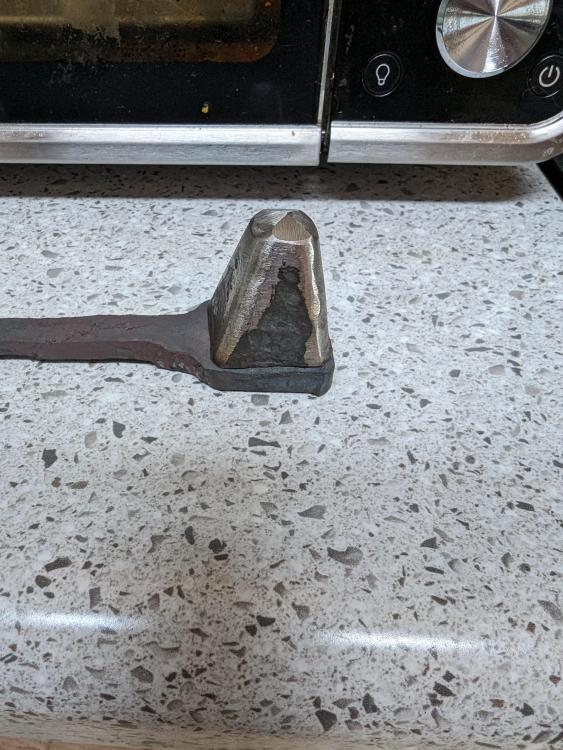
This is still a WIP. Some notes about this 1) still not welded together 2) still needs more grinding on the base of the punch as its currently not sitting straight 3) the handle and sacrifice plate are still in need of alot of grinding to clean up. Also might add another length to the handle via welding. I misjudged how much metal I would have. 4) S7 is the punch metal, and mild steel is the sacrifice plate and handle. 5) I will preheat the S7 Punch before welding to the mild steel 6) tip of punch is .61 inch Base of punch is 1.21 inch 7) this is as close to perfectly round as my naked eye can get it from the tip to half to the base Total length is approximately 1.75 inchs. Looking for suggestions on what else i should do to improve this.
-
I'll try to get pictures today, but it took just a little sanding work to correct this issue, as well as a pretty sizeable wedge. Theres still a small gap present at the bottom, but thats likely because of the bad drifting which was a result of the 2 off center eye punches that i connected by a small diameter punch. For latticino, i definitely forgot to mention. I 100% should of prepped more tools before trying this, but I didn't know what I didn't know, and now I do. I'm currently making a power hammer die that will make a much cleaner eye this time.
-
I never would of thought of predrilling. Thats an awesome idea, thank for that! I did do a fairly good prepunch mark. It was about 1\4 in deep, I'll explain in the following line why it STILL failed (user error lol) I don't have a coal forge. I was using the ribbon forge my mentor uses. Hes prohibited from using coal because of the zoning commission for his non profit. We did use his hydraulic press, and a not so straight and older chisel as a punch. It was the idea of one of the other guys which i figured, if it worked it would be great. Worse case scenario it would be totally blown up. It didn't have a catastrophic failure, but it did screw up. So after that i just settled with if i can make a USABLE hammer I'll be happy. I can definitely see it looking more like a fuller then a straight peen hammer, but no matter how hard I tried, i could not figure out how to temper it enough, or anneal to retreat it. So i settled with it being a hammer. Which in all honesty after finishing the handle and using it, I'm really happy with it overall (besides the occasional unbalanced rebound.) its a little harder then i would like, so i just kind of have to feel it out, and test it on some hardened scrap to make sure its not going to projectile some shards of steel. Before I try my next one I'm going to take a small piece off and really play with it to find the tempering and annealing parameters. Don't know what steel it actually is but its not the typical 1084. It almost seems to act like an air hardening tool steel. On a side note though, i might try and make a hot cut top tool out of the second piece.
-
No worries frosty, appreciate it! I know only a couple on Tennessee area, mitch owner of little dipper forge (can't recall his last name, but i believe hes the founder of an organization here in TN.), Robin Duane owner of healing flames forge and Kim Breed. They are all fairly local and all have offered me some tips or advice at one point or another. (P.s. thanks for all your help that you didn't know you gave me on burner design. I was just about to commit to building one of your burners.) The hammer itself turned out much nicer after properly fitting the handle George. Well.. proper for me at least. Not the greatest fit, but its snug and solid. I actually used it to whack a power hammer die I'm trying to forge out right now. The hammer is a little unbalanced on the rebound sometimes because of how off center the eye is, but altogether is a perfectly functional hammer, and definitely ready to be used at my makeshift home forge.
-
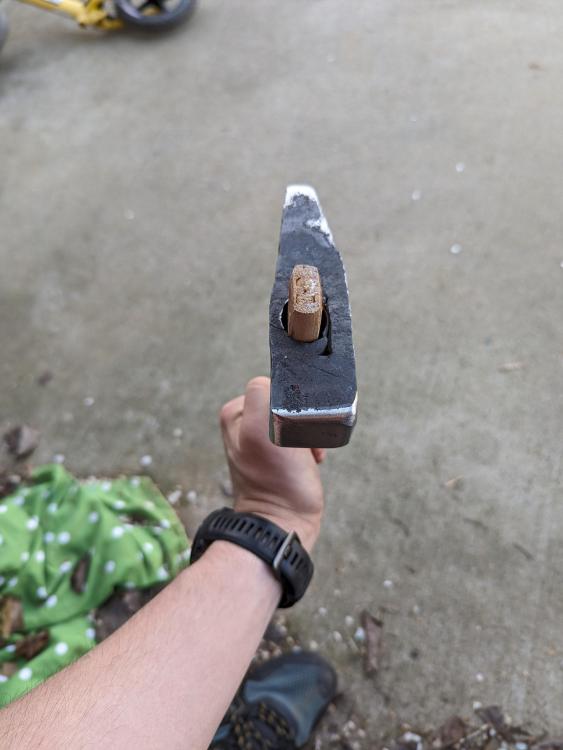
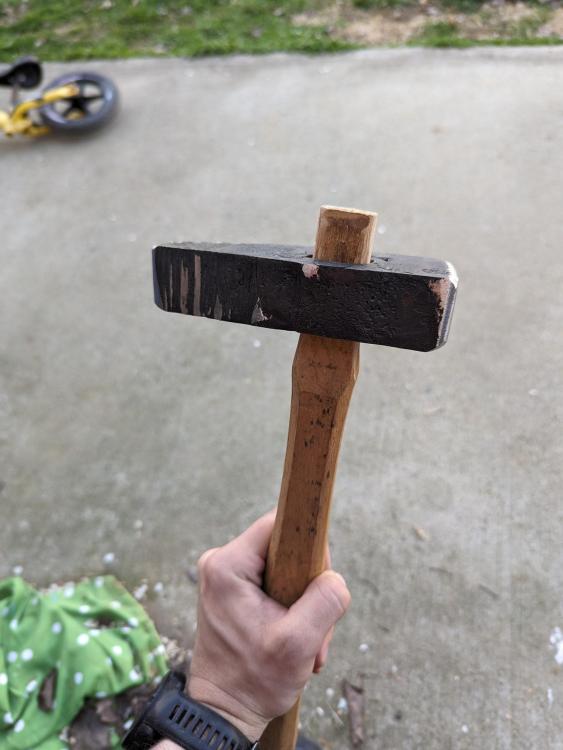
Its not sitting very 90 its off kilter a little bit, but I'm working on the handle more. The handle is the biggest thing throwing it off I need to work it a little more on the front end.
-
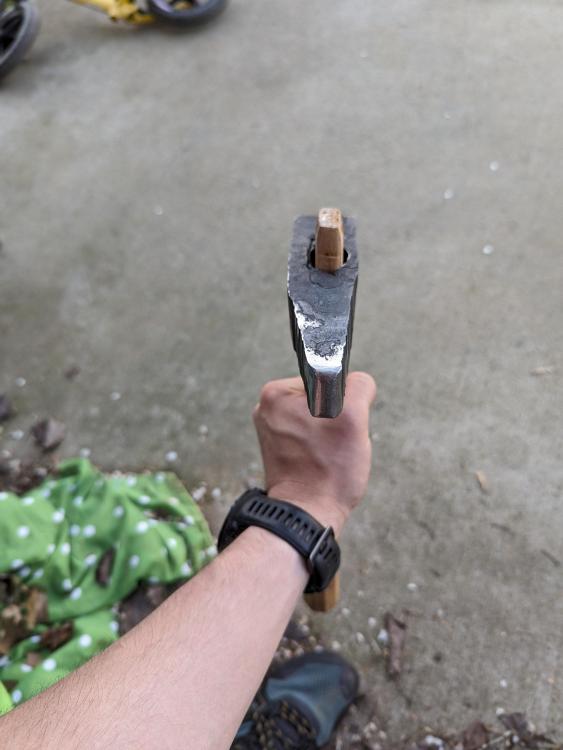
So I'm super amateur at all these skills. I've been in the craft for less then 4 months (cumulative time). I've just enjoyed challenging myself and trying to make usable tools. What you see here is a rail road track head (i guess you would call it, the thick portion that the train wheels would ride on) turned into a straight peen (so far my all time favorite style of hammer.) Please understand this was very much a project i committed myself to no matter what happens, seeing it through unless it catastrophically failed. So its uglier then the back side of a hyena. I've learned alot of lessons from this project I'm going to use moving forward. But overall please rate my hammer. Are there any secrets you learned that made a better more balanced looking hammer? Some lessons i learned. 1) if your going to use a press and a punch make sure the punch is straight before you start jamming it in. 2) when using a power hammer to make a peen, (pein?) take your time to get precise hits. 3) make sure you have a drift for your handle style (thats the biggest reason for the large gaps in between metal and wood.) But all together I enjoyed the process and am happy with what I made. Side note. This isn't 100% complete. Still need to finish sanding the handle and then fixing it with wedges and glue.