mb44kar
Members
-
Joined
-
Last visited
Everything posted by mb44kar
-
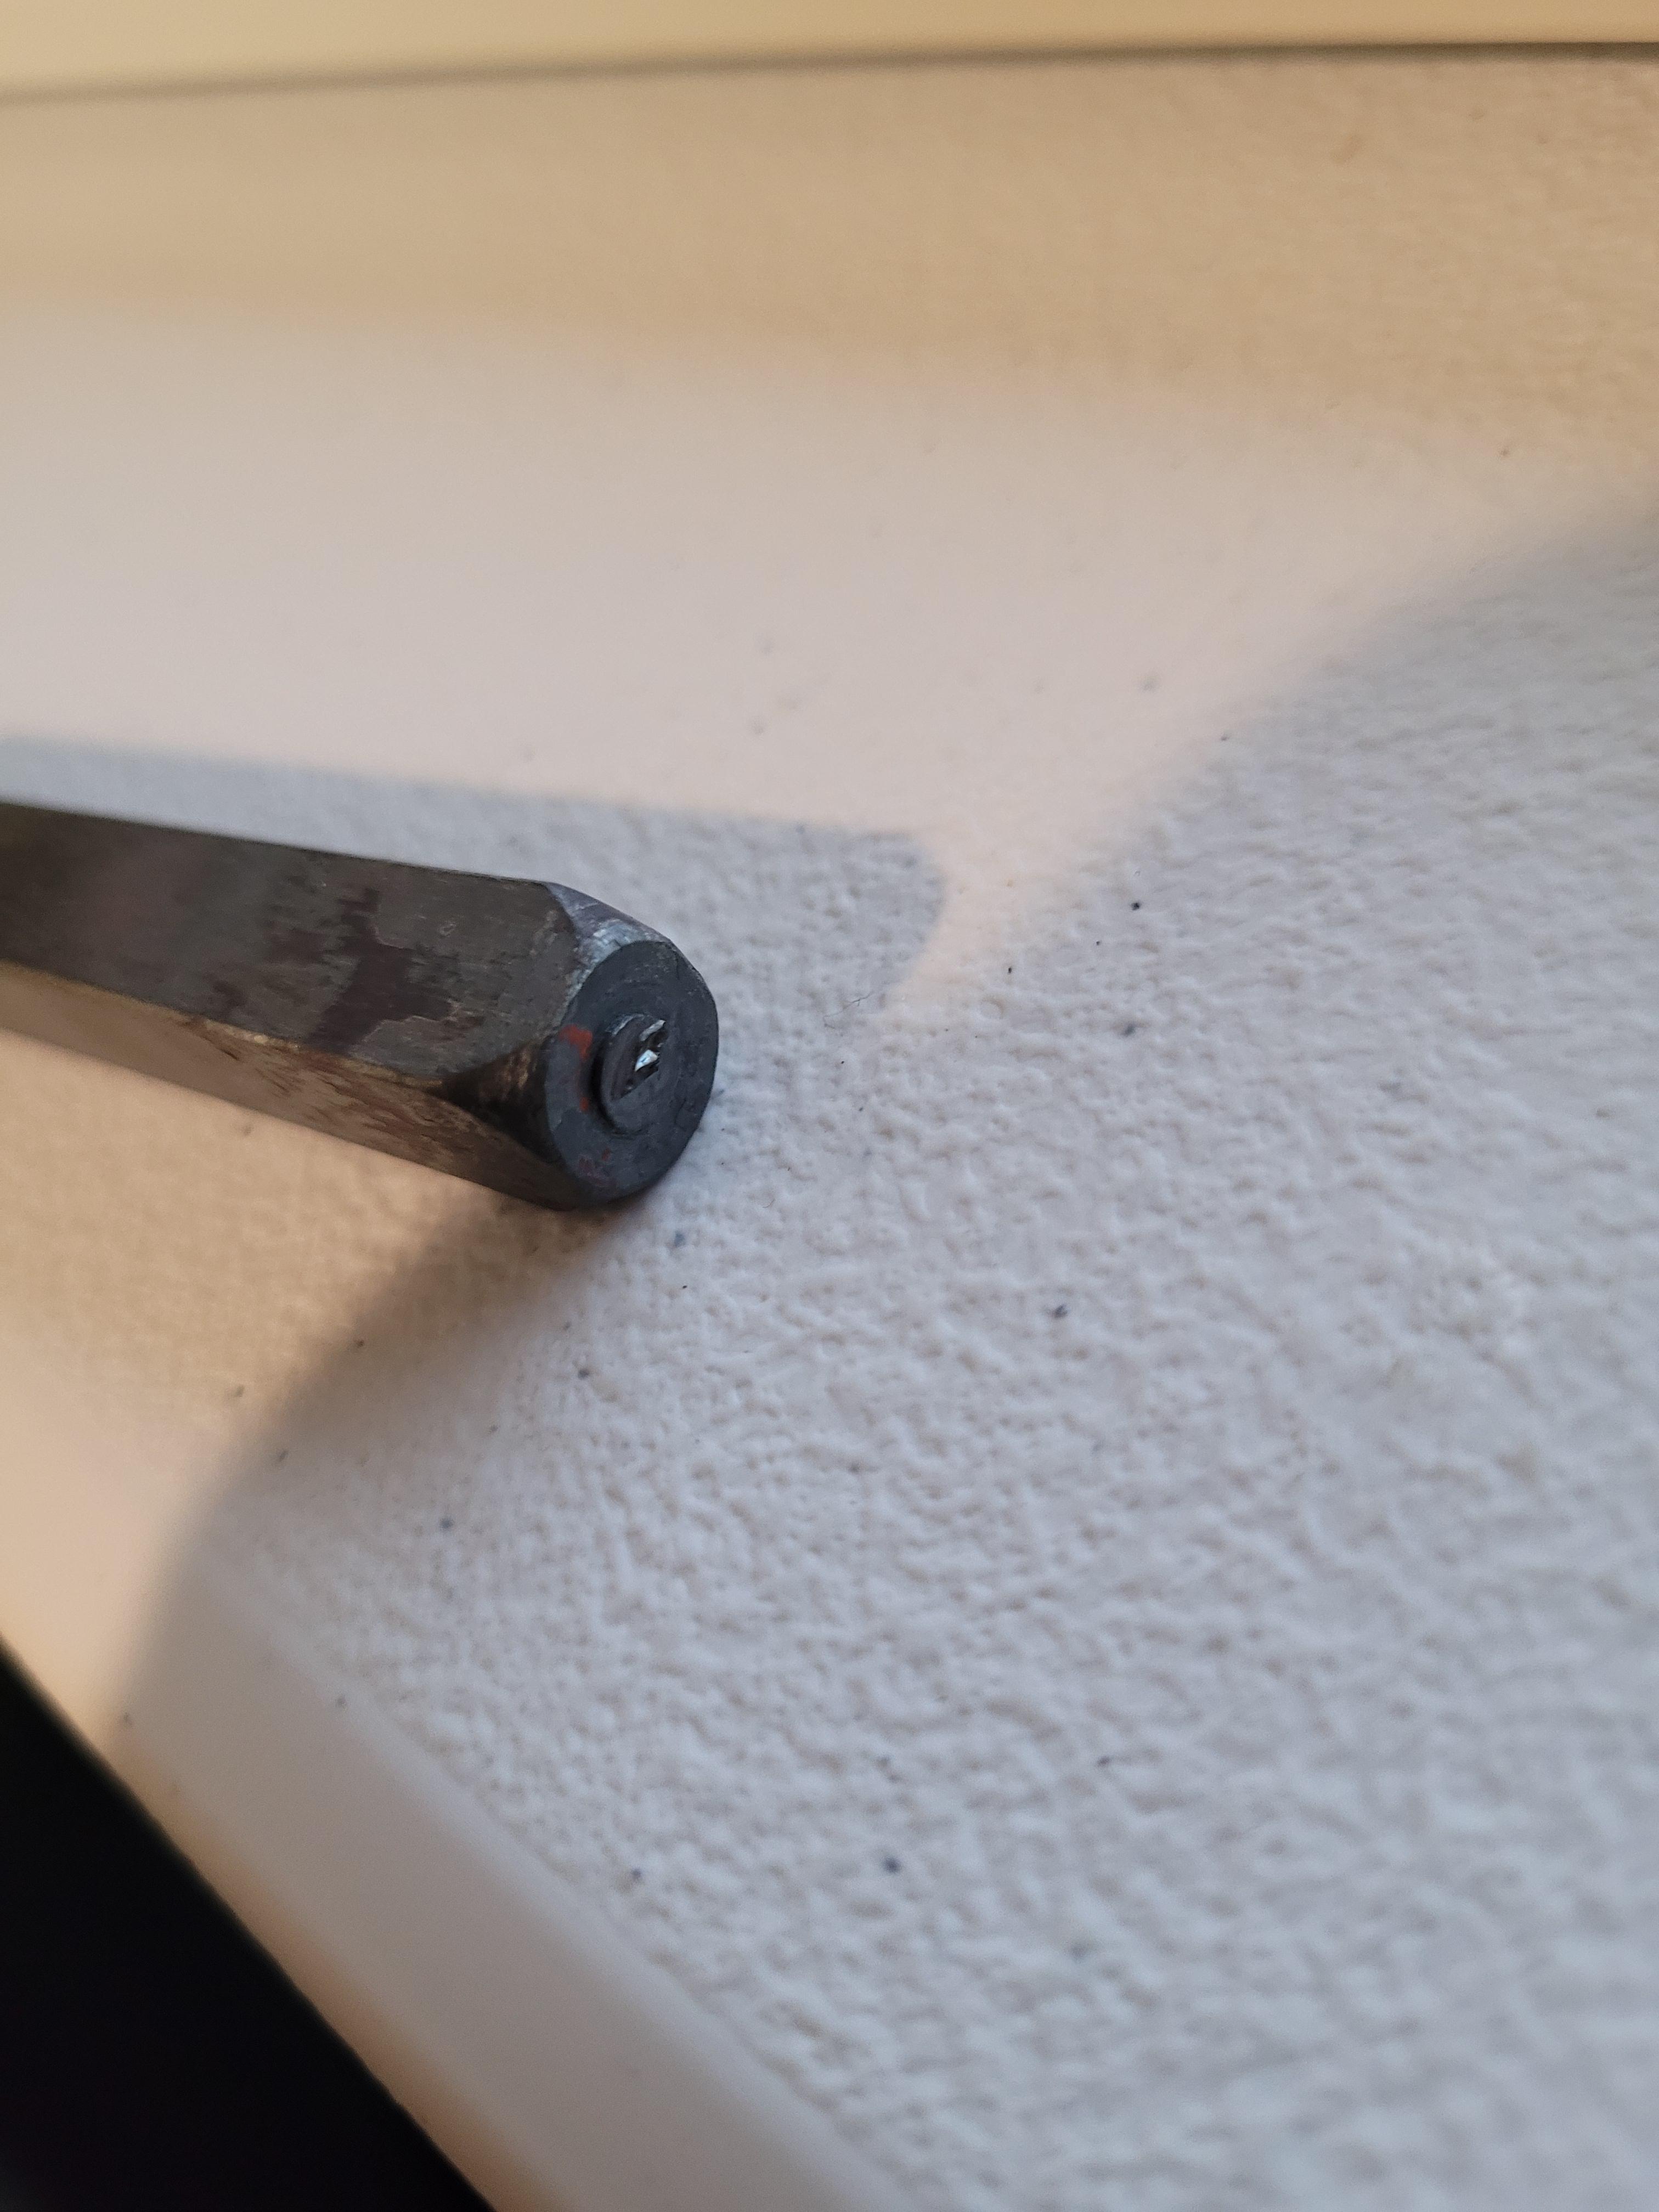
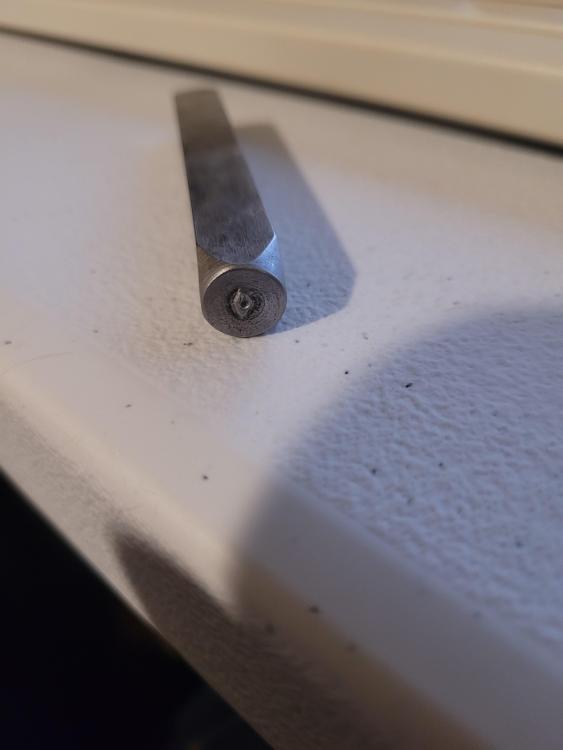
I did not understand your description Frosty, but I hope you will find my new lathe turned and broached jig satisfactory, even if very overkill. I wanted to mill it but the lathe is just so much faster. Dies have to be round now, and have a cross-drilled hole to locate the impression square to the 3/8" square-broached hole. This was my thought at first too, but I actually got full depth (~0.035 - 0.040", same as a commercial stamp seen in the pics below) this time around using my new machined holding jig. I knew I should have machined instead of fabbed it first time around, but it was worth a try being lazy. While I would seriously like to get my hands on a 500-1000 lb. board or belt drop hammer, a 5 lb. sledge did the trick with 3 hits, with the jig just sitting on the anvil and heated using a mapp torch. It did take having a preformed nub on the end, though, just turned up on the lathe. The shape didn't fully form as seen by the imperfect impression, but it got full depth and seems to only be missing the last 10%. The impression on the die was also not perfectly centered which led to the stamp sitting slightly off center and one tiny bit was off of the preformed nub so it didn't get added, but much better than the last die. After quench in oil (no tempering yet) I tested the stamp on aluminum bar and on a small block of 1018, seen in pics. Pretty good performance but I want that last 10% of the shape, hopefully the difficulty doesn't ramp up exponentially (and hammer weight too) with each extra %.


-
I like to make things way overkill! What if 5 years from now I suddenly wanted to make 10,000 of these one-off stamps (by hand)? Kidding aside, I can actually get off cuts of A2/D2/H13 in round bar and square bar of considerable size much easier than I can get similar sizes of 1080 or 1095. The guide is a tight fit at a yellow heat, some of the heat on the face has definitely dissipated by the time I strike on the back end. It takes a second or two of fiddling to get it in the guide, then a second to switch hands to the hammer and the other holding the guide and die, then the strike, usually 2 or 3 hits in quick succession. I've been heating the whole thing in a small propane forge, with the pattern face towards the heat source so it heats up that half to about yellow but the back is not yet red. The stamp blank is allowed to bend due to the guide/holder rocking back during the striking, as it is only held onto the die by 2 bolts that are on the same axis, so plenty of freedom to rotate along the bolts' shared axis. But definitely true that if I were able to strike very truly straight then this degree of freedom would not matter too much. This is what I aim to fix in the next iteration of blank holder. With this other good suggestion about heating the blank while in the holder, I will try to add a port or a large opening for the flame to go through the holder and hit the blank. The current holder has some dead space between the end of the part that grips the blank and the die itself, open to air that can be used for heating. I was also thinking maybe a treadle hammer is the way to do this and get serious force into it quickly. But that's a whole other can of worms to open up, building a treadle hammer in the middle of this project . I'd probably want to make one of the heavier style, with a solid round/square ram and the roller wheels around the ram, with a full welded frame. Maybe give the ram 50 or 60 pounds. Again I love to build overkill. I have even thought about building a larger drop-style hammer, just because it would be cool I think. Many thanks for your help Frosty, I will try to mitigate my bends with better rigidity in the holder first, but treadle hammer is next on the list.
-
I did, I was against it at first because I didn't want flame that close to the die block. It's D2 so not resistant to hot work and the impression would bend and wear with use. But If I'm going to remake it anyway, maybe I'll give this setup one last try that way before remaking it all. I drew up some much simpler plans for the die and holder, making them cylindrical since all this is way faster on a lathe than a mill. Only added difficulty from that is keying the cylindrical holder to the round die block. But I'll give both a try.
-
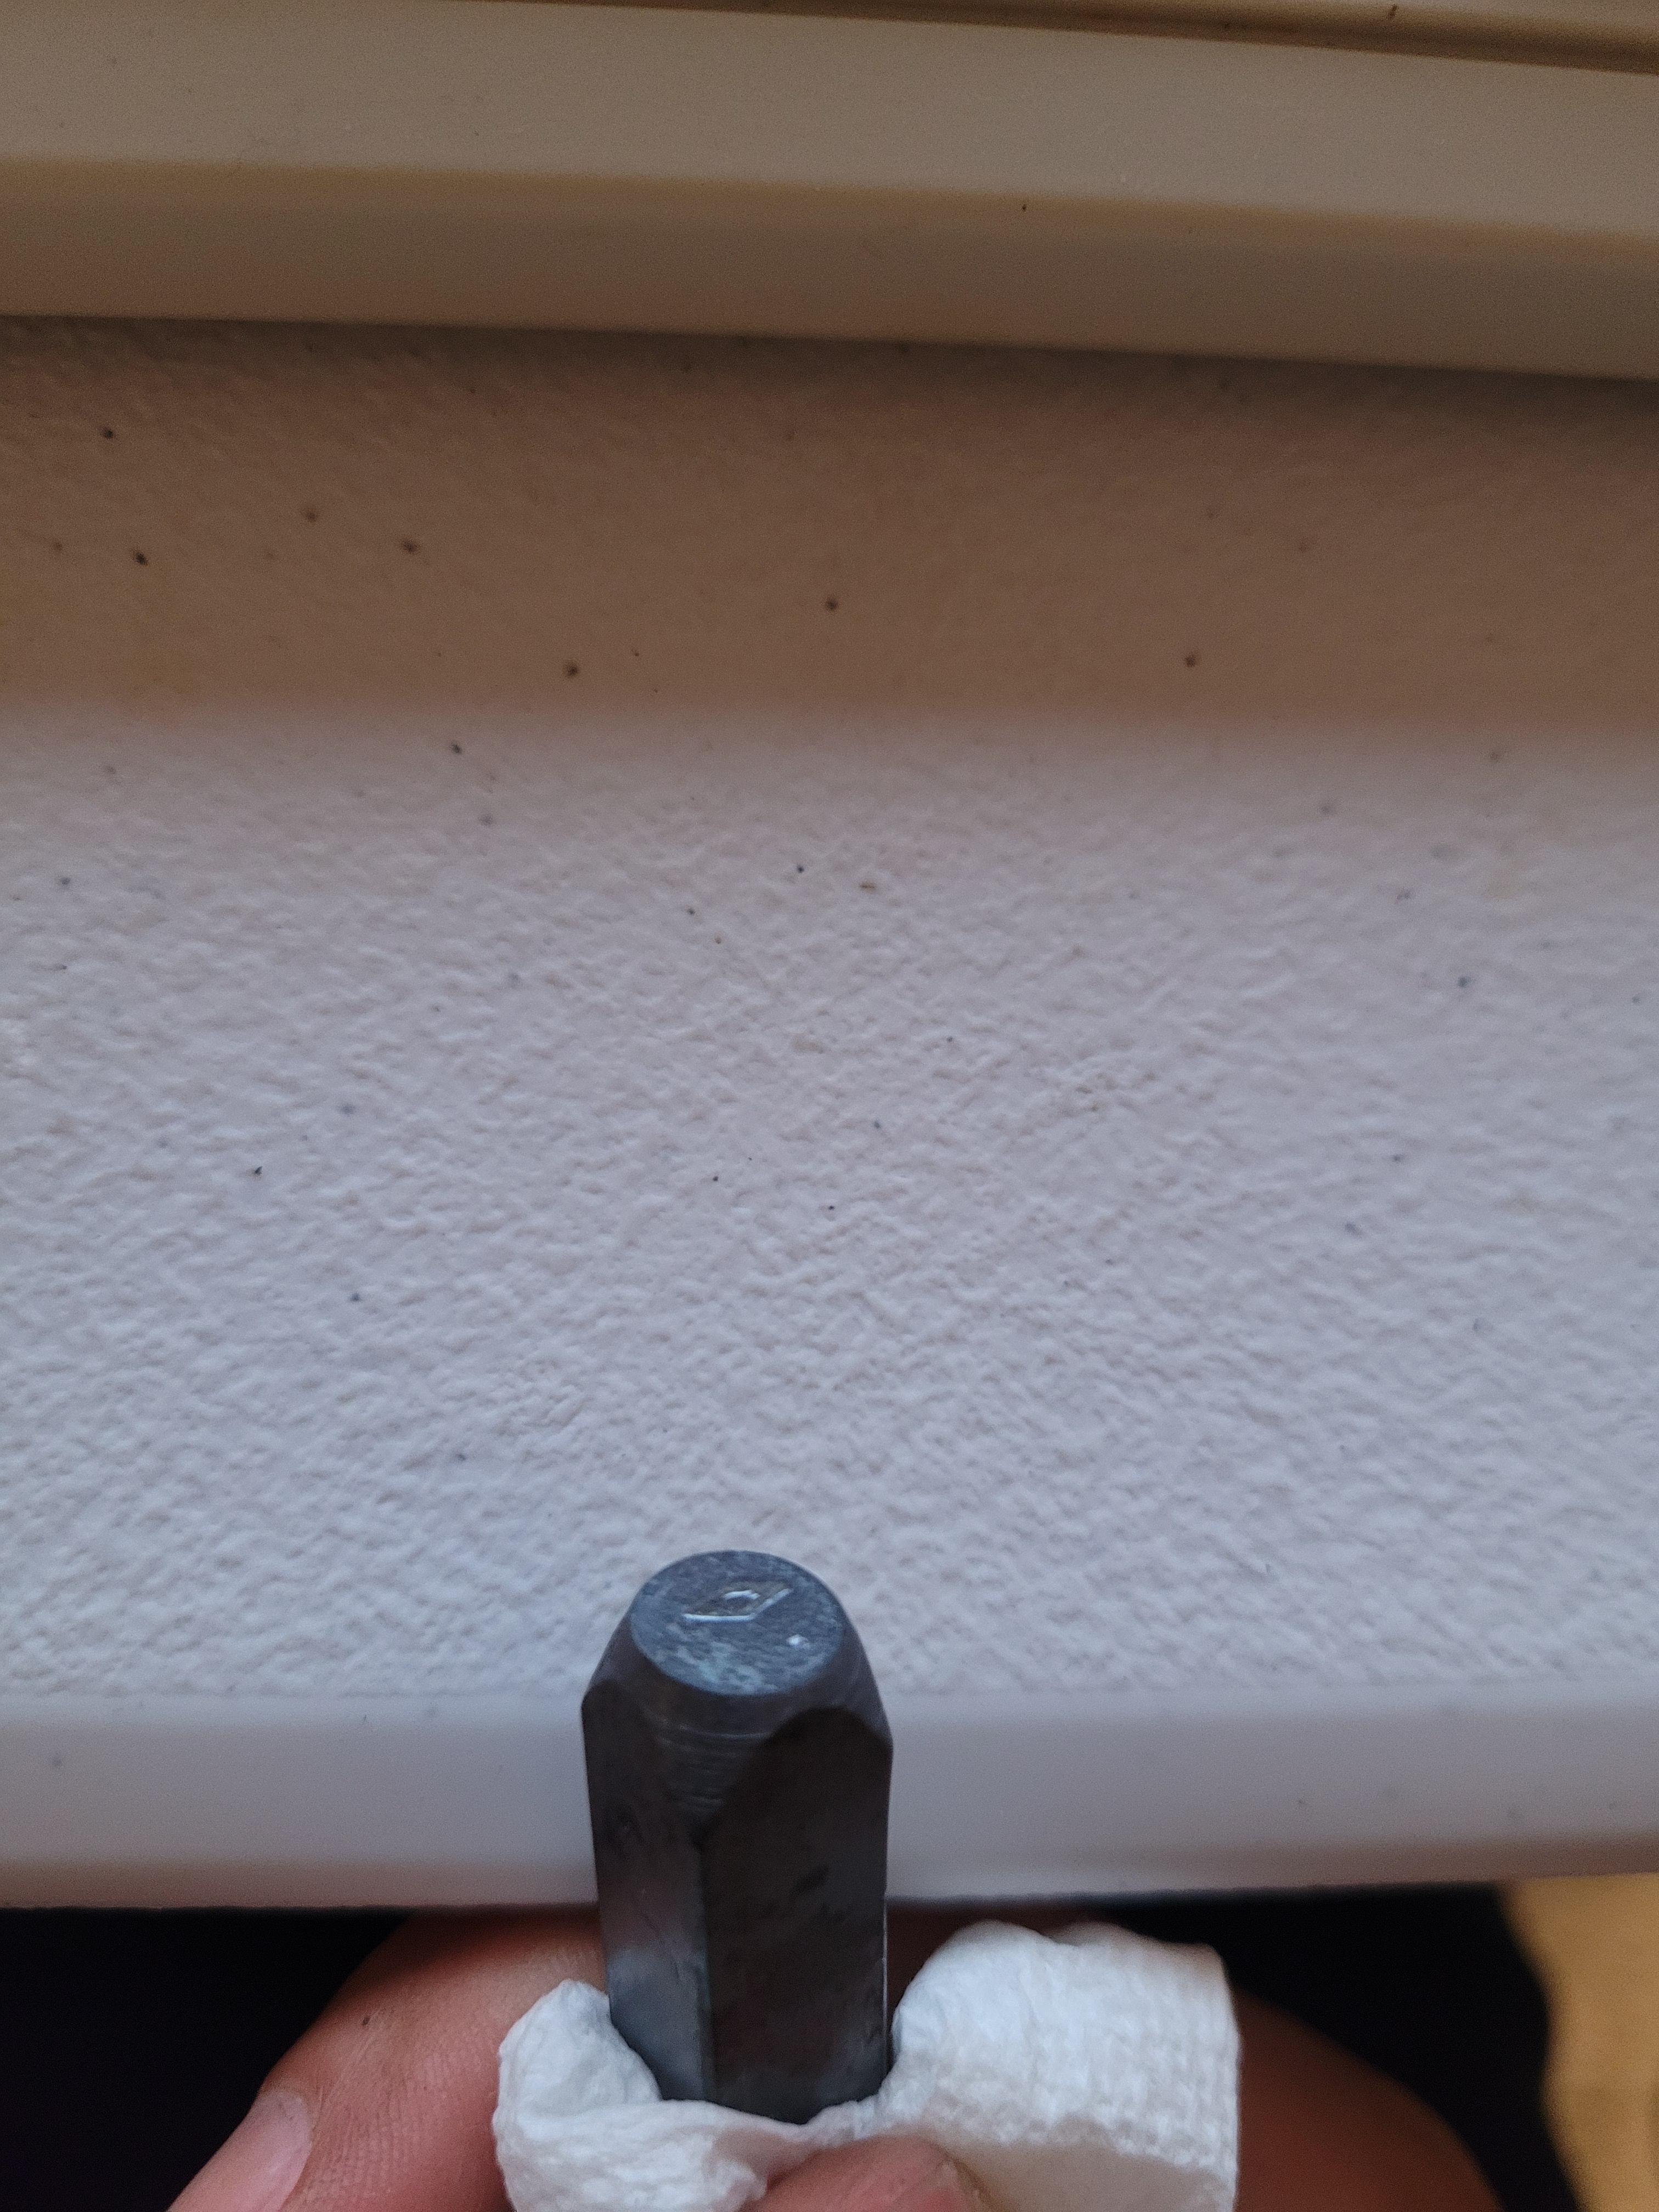
Okay here's the latest two attempts, I wasn't able to keep at this too much till now. The light colored example was fairly successful in that the stamp blank fit into the holder when hot, and nothing untoward happened during the process. This was after using a much smaller nub than previously shown, with a much deeper center-drilled portion which may have been too much given that a circular divot is still visible in the final product. But in terms of correct amount of material, much closer. The dark colored one never got quite into the holder, as it was an annealed prior attempt that was re-machined and still had some bend/bow from the first attempt. It still has its pre-forming nub intact. Just shows how tight the fit can be, even though the holder's square hole is about 0.016" oversize, after being in the forge the gap is more like 0.002" on each side I think. Blanks can bend too easily in the holder, as its connection to the die is pretty horrible and prone to rotate about the axis of the bolts. I need to mill another die that has dovetails, and machine (instead of fabbing) a proper holder that has mating dovetail surfaces. I also have yet to drill those heat-holes in the blank holder, but with these results (and how often blanks will have their faces come out at an angle), I need to remake the holder anyhow.


-
Will do. Currently experimenting with metal stamp forging via hammering blanks into engraved and milled die blocks. Certainly don't need a quarter ton anvil for that, but the bigger surface area is nice. I've also forged a 1-1/4" x 4' pry bar from 4140 on that Peter Wright, helped to move a Cincinnati #2 horizontal mill, weighing in at 6500 lbs. That looks very similar, cool to see those somewhat incomplete forge welds on the bottom of that Hay Budden. I see no weight nor logo on the right side of mine, but I'll see if some corn starch makes it show up. Maybe could be that the heavy weight anvils were marked differently?
-
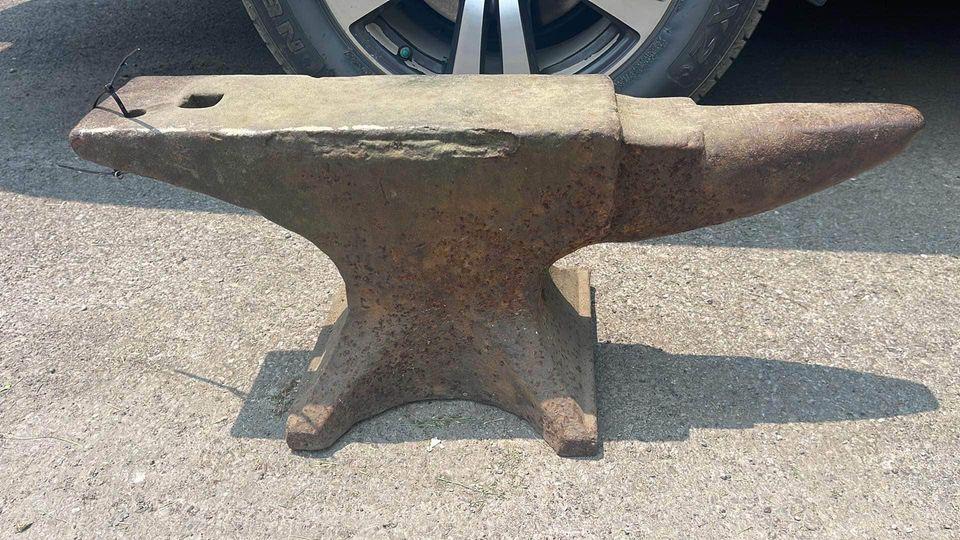
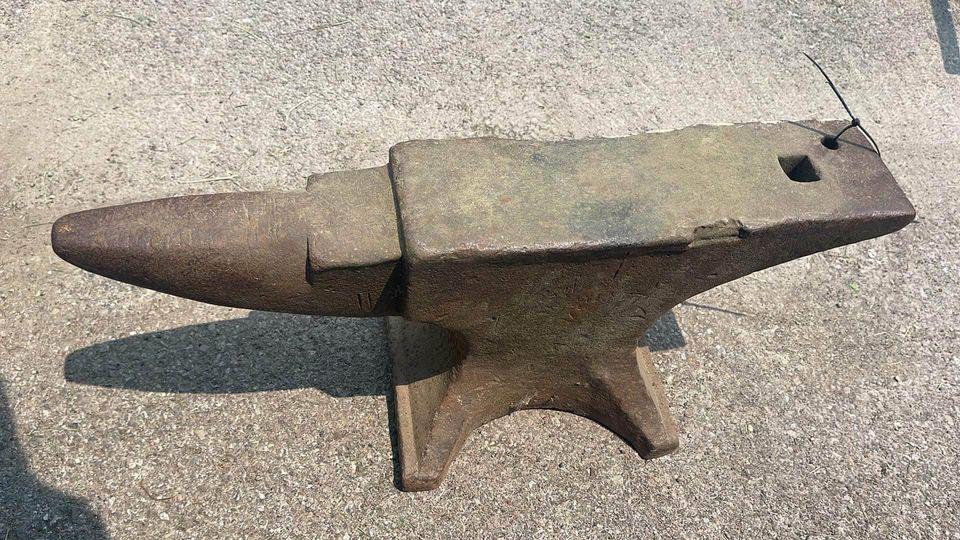
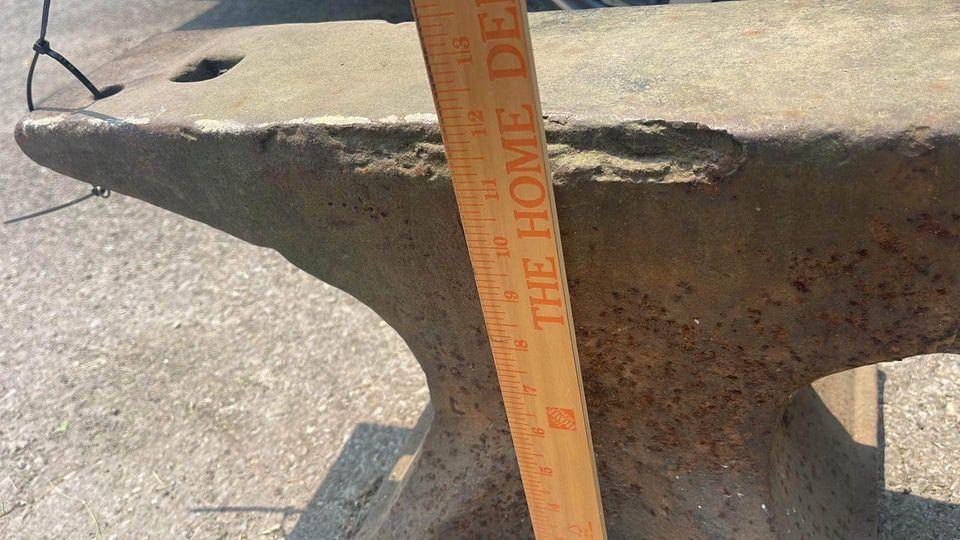
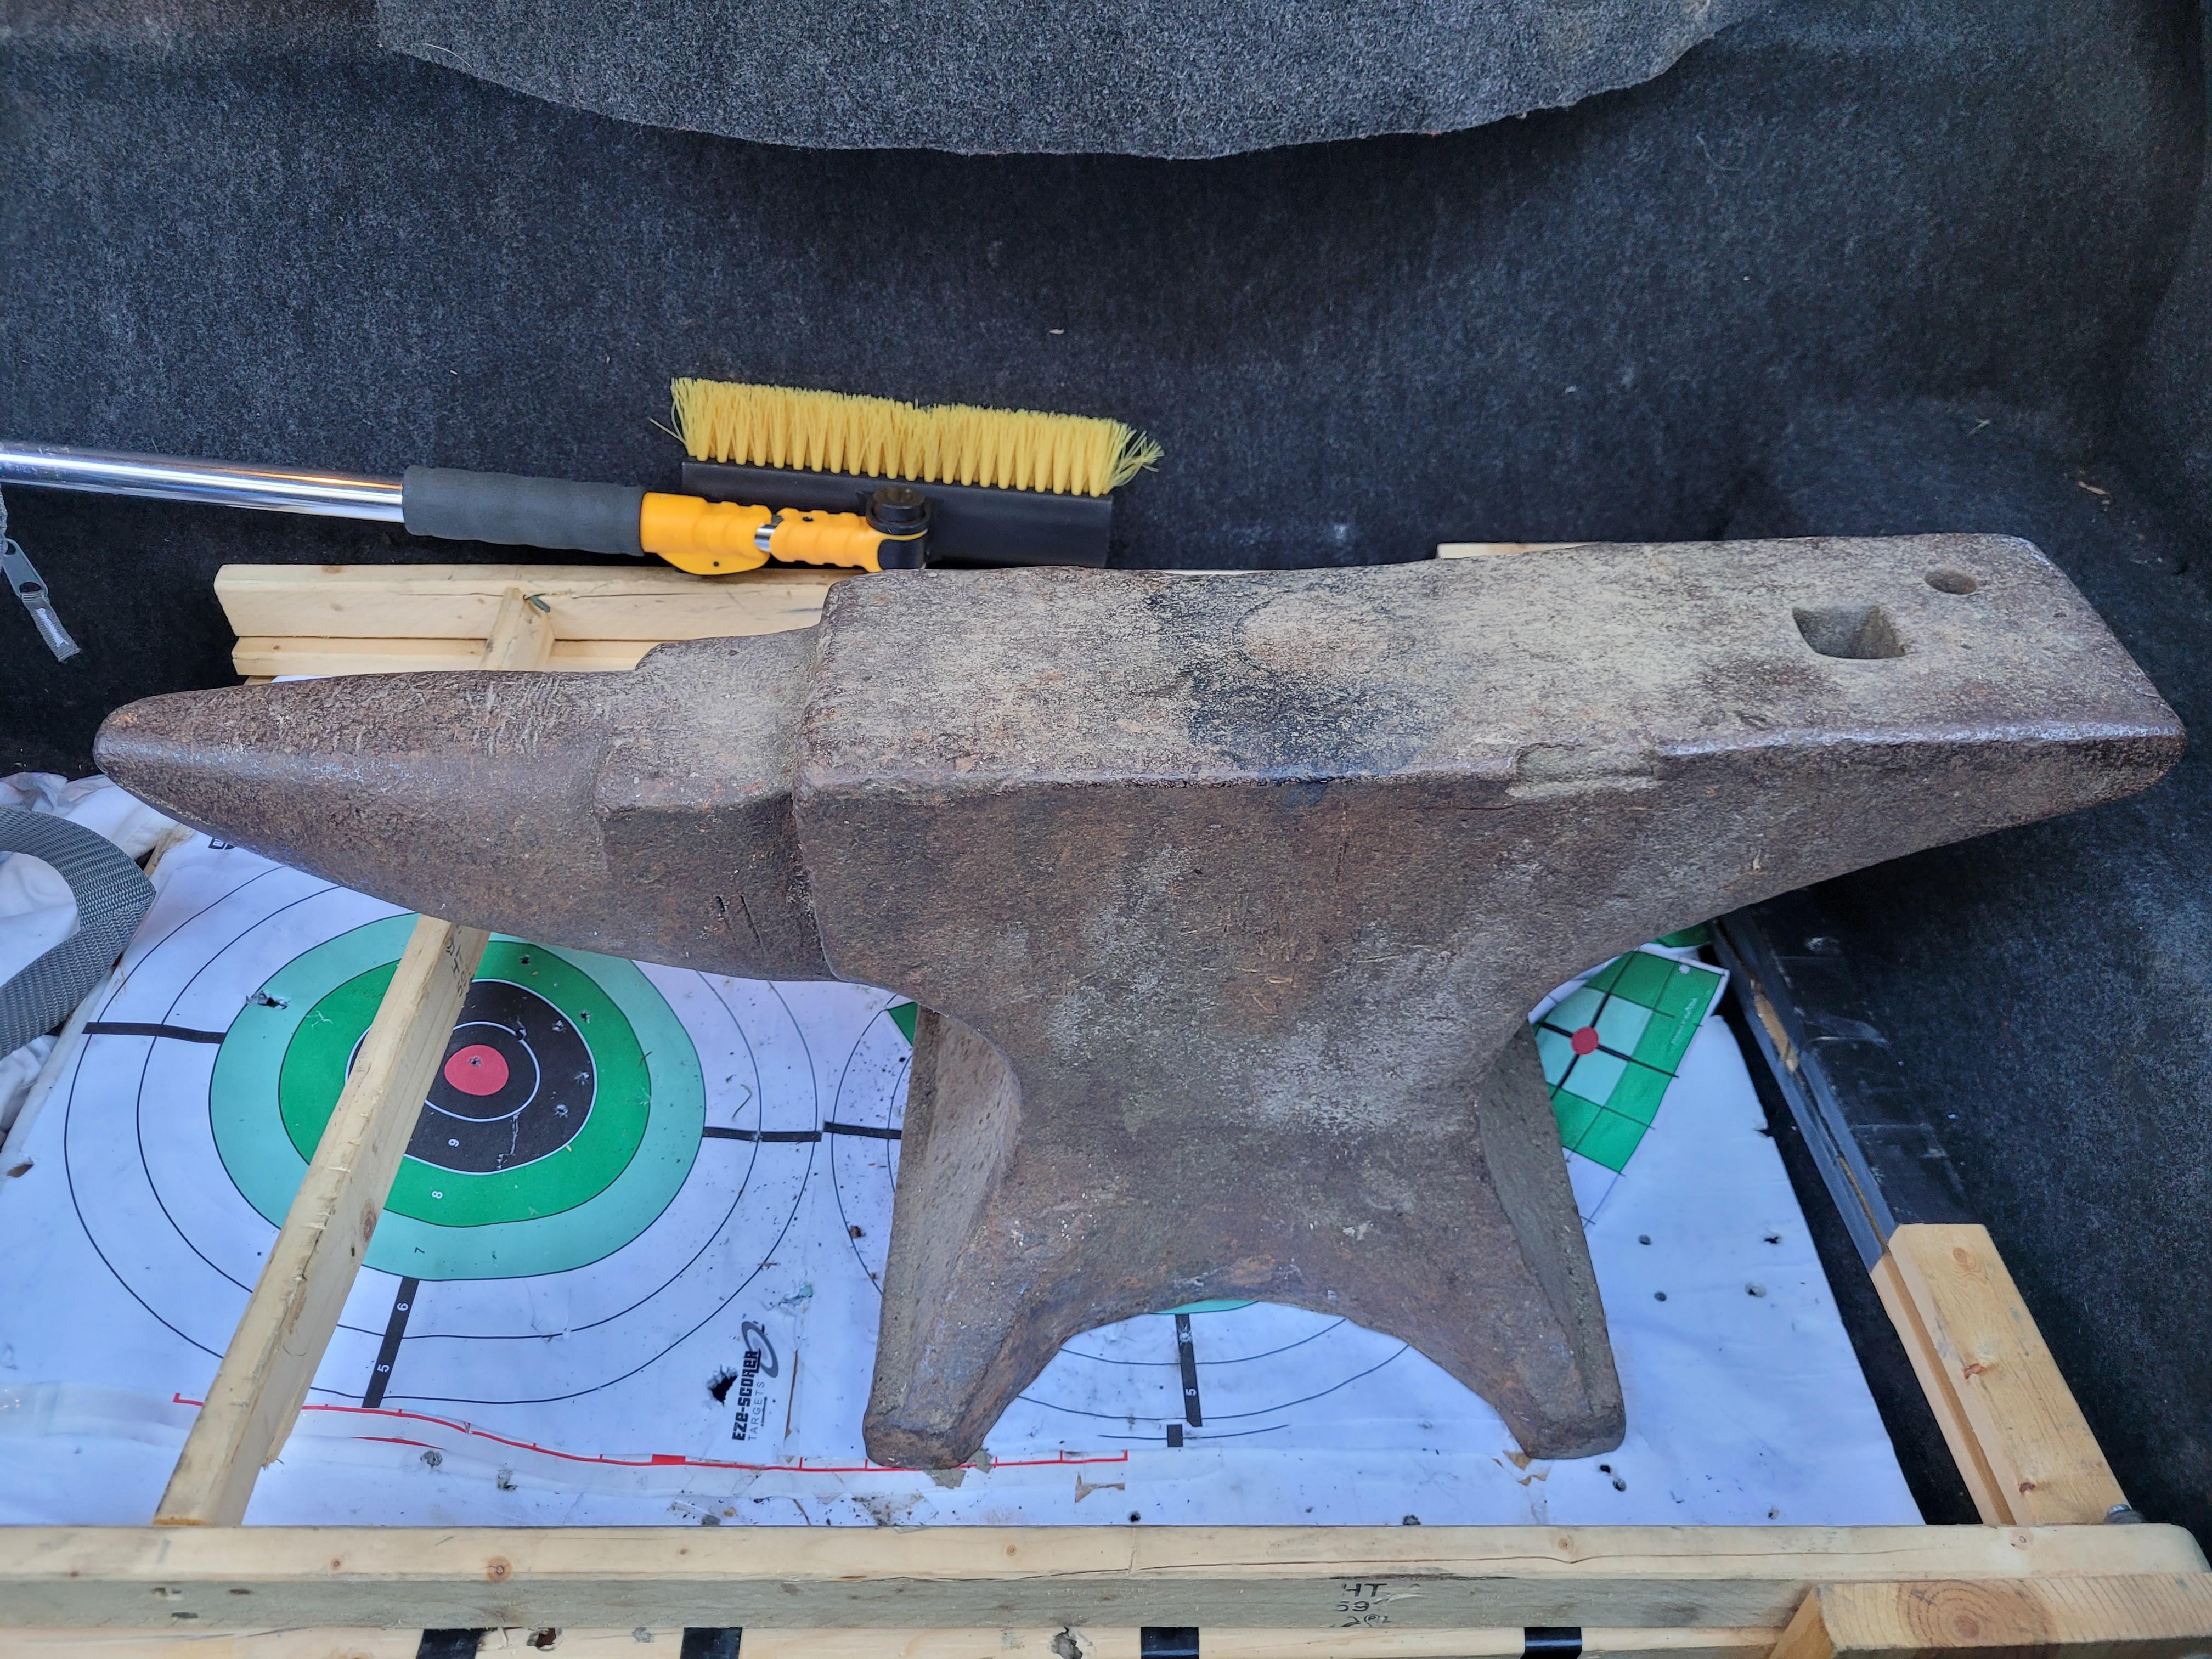
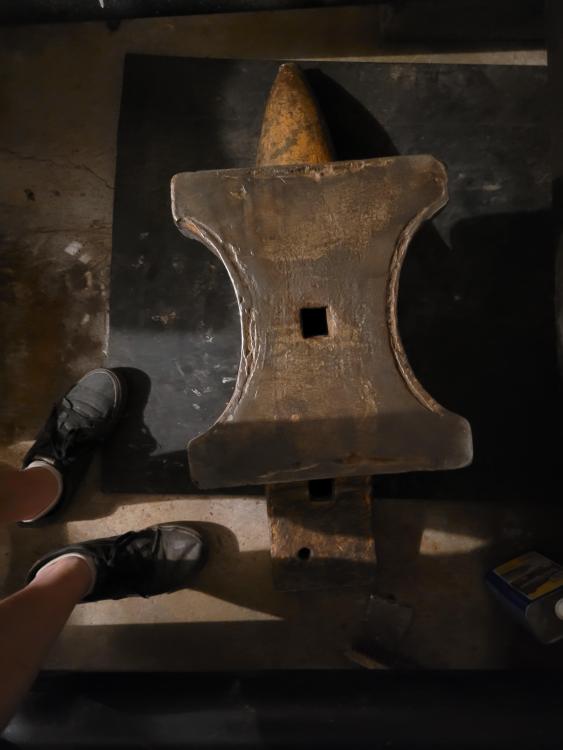
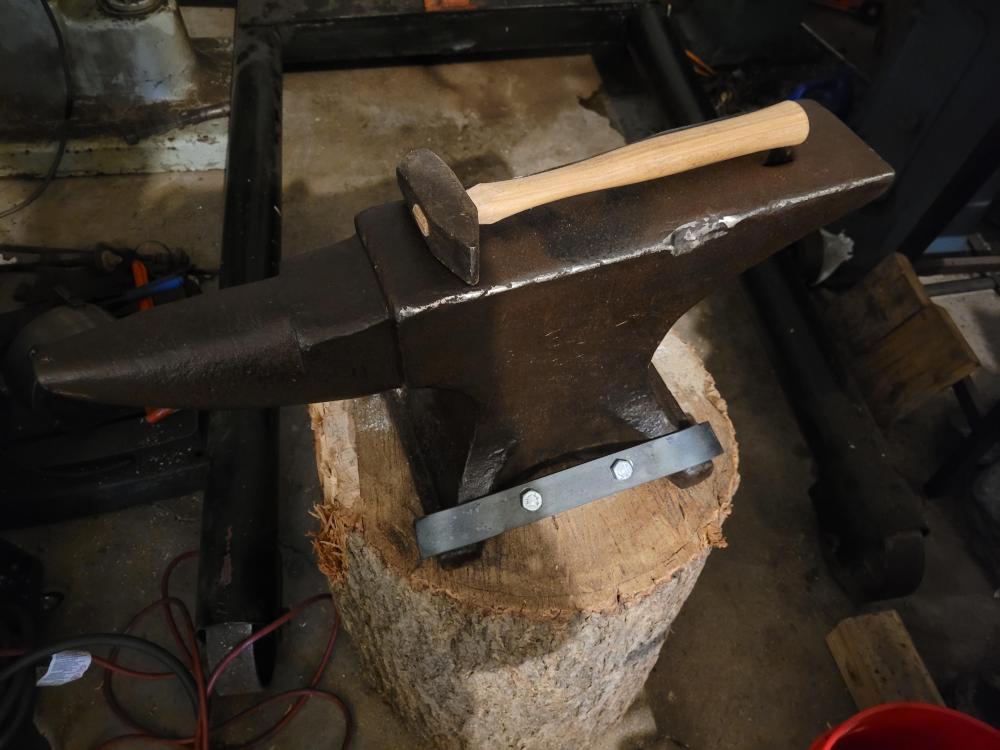
I am replacing my old 208 lbs Peter Wright, chipped edges and all. The horn and flat on top are perfectly serviceable as are some sections of the edge, and haven't impeded me in any way. But I found an anvil advertised at 475 lbs. and couldn't help myself. I best be honest with myself on that one. On the crane scale I have for my engine hoist it came in at about 410 lbs. No skin off my bones! It is just barely at the weight (and weight distribution - majorly top heavy) that I can walk it around nicely even now mounted to a ~100-150 lb. log. I believe it to be either Hay Budden or maybe possibly Arm & Hammer but the bottom of the heel isn't quite as rough as the A&H examples in Postman's "Anvils in America". The bottom being flat with a slight border suggest Hay Budden I think. There was a "2" on the front of the foot, left side when facing the horn from the front. It took a few weekends of paint stripping and wire wheel, but it's somewhat clean now and it's going to get beat on anyway now, just wanted to show it off first .


-
I should probably do this but the size is just about right for the application (stamping a knife). And would require figuring out how the positioning on my pantograph works more than I currently understand it. But it would give me an excuse to make a new die out of H13. Speaking of, where do you guys source your H13 from? Yeah, it's going to take a few tries to guesstimate it properly. I tried drilling out the center of the nub that first time both to remove material and to pre-shape it a bit, but even after heating in the forge and letting it cool in the forge after turning off the propane, it was still too hard for my HSS center drill. A smart way is probably put some play-doh or something similar in the die and then scrape off the excess, then scrape out the amount that fills the die and form it into a cylinder and measure that.
-
Pictured are the results using the nub shown, after facing off the last attempt (which took some annealing despite not being quench-hardened) and dressing the sides. Definite progress but the pre-forging nub needs better shaping, probably not as much length I hadn't gotten a chance to do this yet, I will try a few small holes.


-
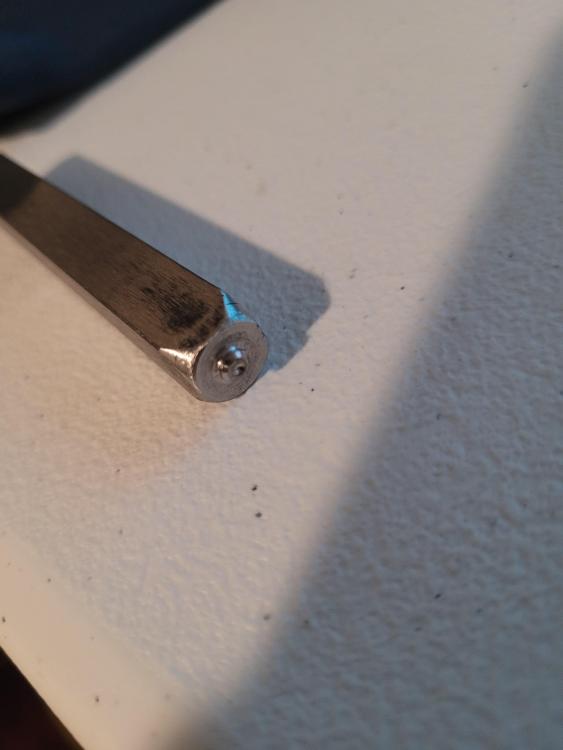
Yes it was completely flat, just faced off in the lathe and then given that slight taper. I'm turning these blanks from 3/8" O1 square stock. I didn't think about giving it a starting form like that, really good idea. Probably I'll leave a nub approximately the width of the diamond when facing the blank, and maybe smooth the edges over so it doesn't have a hard corner to force into the die. Then the hammer blows won't have to push back the entire face of the blank, they'll just have to form the nub into the die. I'm probably also dealing with the stamp holder sucking heat out as I fit the blank down into it. I left a 0.005" slip fit after welding (using a small square file), also taking into account the expansion of the blank by about 0.011" at 1800 degrees. Let me true up this test blank and give that dimple idea a try.
-
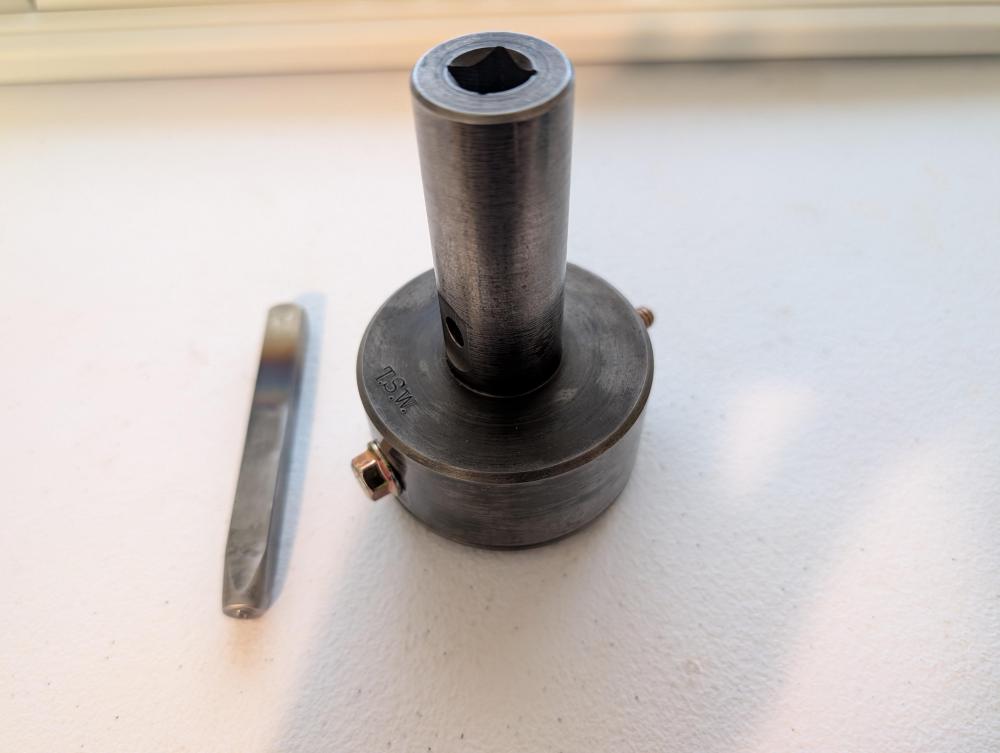
I recently gave myself an interesting problem - I wanted to be able to manufacture metal hand stamps, the kind hit with a hammer for marking metal, in the way they were made before CNC. Nowadays I get the impression they are hardmilled or milled and then hardened, using a vertical CNC mill. And I've seen one-offs done with an angle grinder and dremel. But looking into it online, some posts on Practical Machinist seem to indicate that before CNC they were made by hot-pressing into a master die block. So a master die block made of some heat-resistant tool steel would be engraved (maybe via pantograph) and then hardened, and then the blank stamp would have its front end heated to forging temp and pressed into the die block engraving. Maybe touched up afterwards by light grinding or polishing, no idea there though. I've tried to recreate this: I milled myself a pantograph attachment for my milling machine, and engraved a D2 block with a shape I want a stamp of (in this case a diamond, traced off of an old Black Diamond file). I hardened the D2 block and made a stamp-holder (forged and welded 1/4" mild steel plate) which attaches to the die block and holds the blank stamp. I've tried several rounds of heating up the blank and hitting it into the die block on my anvil, both with a 2.5 lb forging hammer and a 5 lb sledge. I know ideally the die block would be H13 but I didn't have any on hand when starting the engraving. Here are some pics of my journey. Showing the engraved die block before heat treat, turning the stylus in the lathe to fit the diamond I wanted to copy, the setup on the anvil and the stamp blank holder attached to the die block. Last pic is the result so far after using the sledge. It stands proud of the surface by more than enough to feel with the finger tip, probably 0.010", but I need way more than that. I'm wondering if anyone here knows much about this manufacturing process before CNC came around and how to get better results. Is this impossible with a hammer and anvil, do I need a big drop hammer or a hydraulic forging press? Maybe a better way to heat the blank than a MAPP torch? I was thinking it would be nice if I could get an induction forge and have the coil built into the stamp holder so that the blank passes through that and gets proper yellow hot right before the hammer blow, minimal heat loss from time spent getting into the holder. But those are out of my budget for the moment I think. Anyway let me know what you think!


-
Not sure if this is known already, but figured I'd let others know if not. I sent an email to Mr Volcano's customer service, asking about when the Hero forges would be back in supply on Amazon, I was looking to get one as I was getting tired of the firebrick and MAPP-torch forge. I just got a reply from them. The gist of what they said is that they will no longer be manufacturing forges, but will continue to supply forge materials and tools, like the satanite, kastolite, rigidizer, and steels/heat-treat oils. They said the heightened market competition made it too challenging for them to sustain their operations in a fiscally responsible manner. Very sad to hear personally, I was looking forward to getting one. But I'm happy to use their rigidizer and satanite on one of those super cheap forges with a silly Amazon name.
-
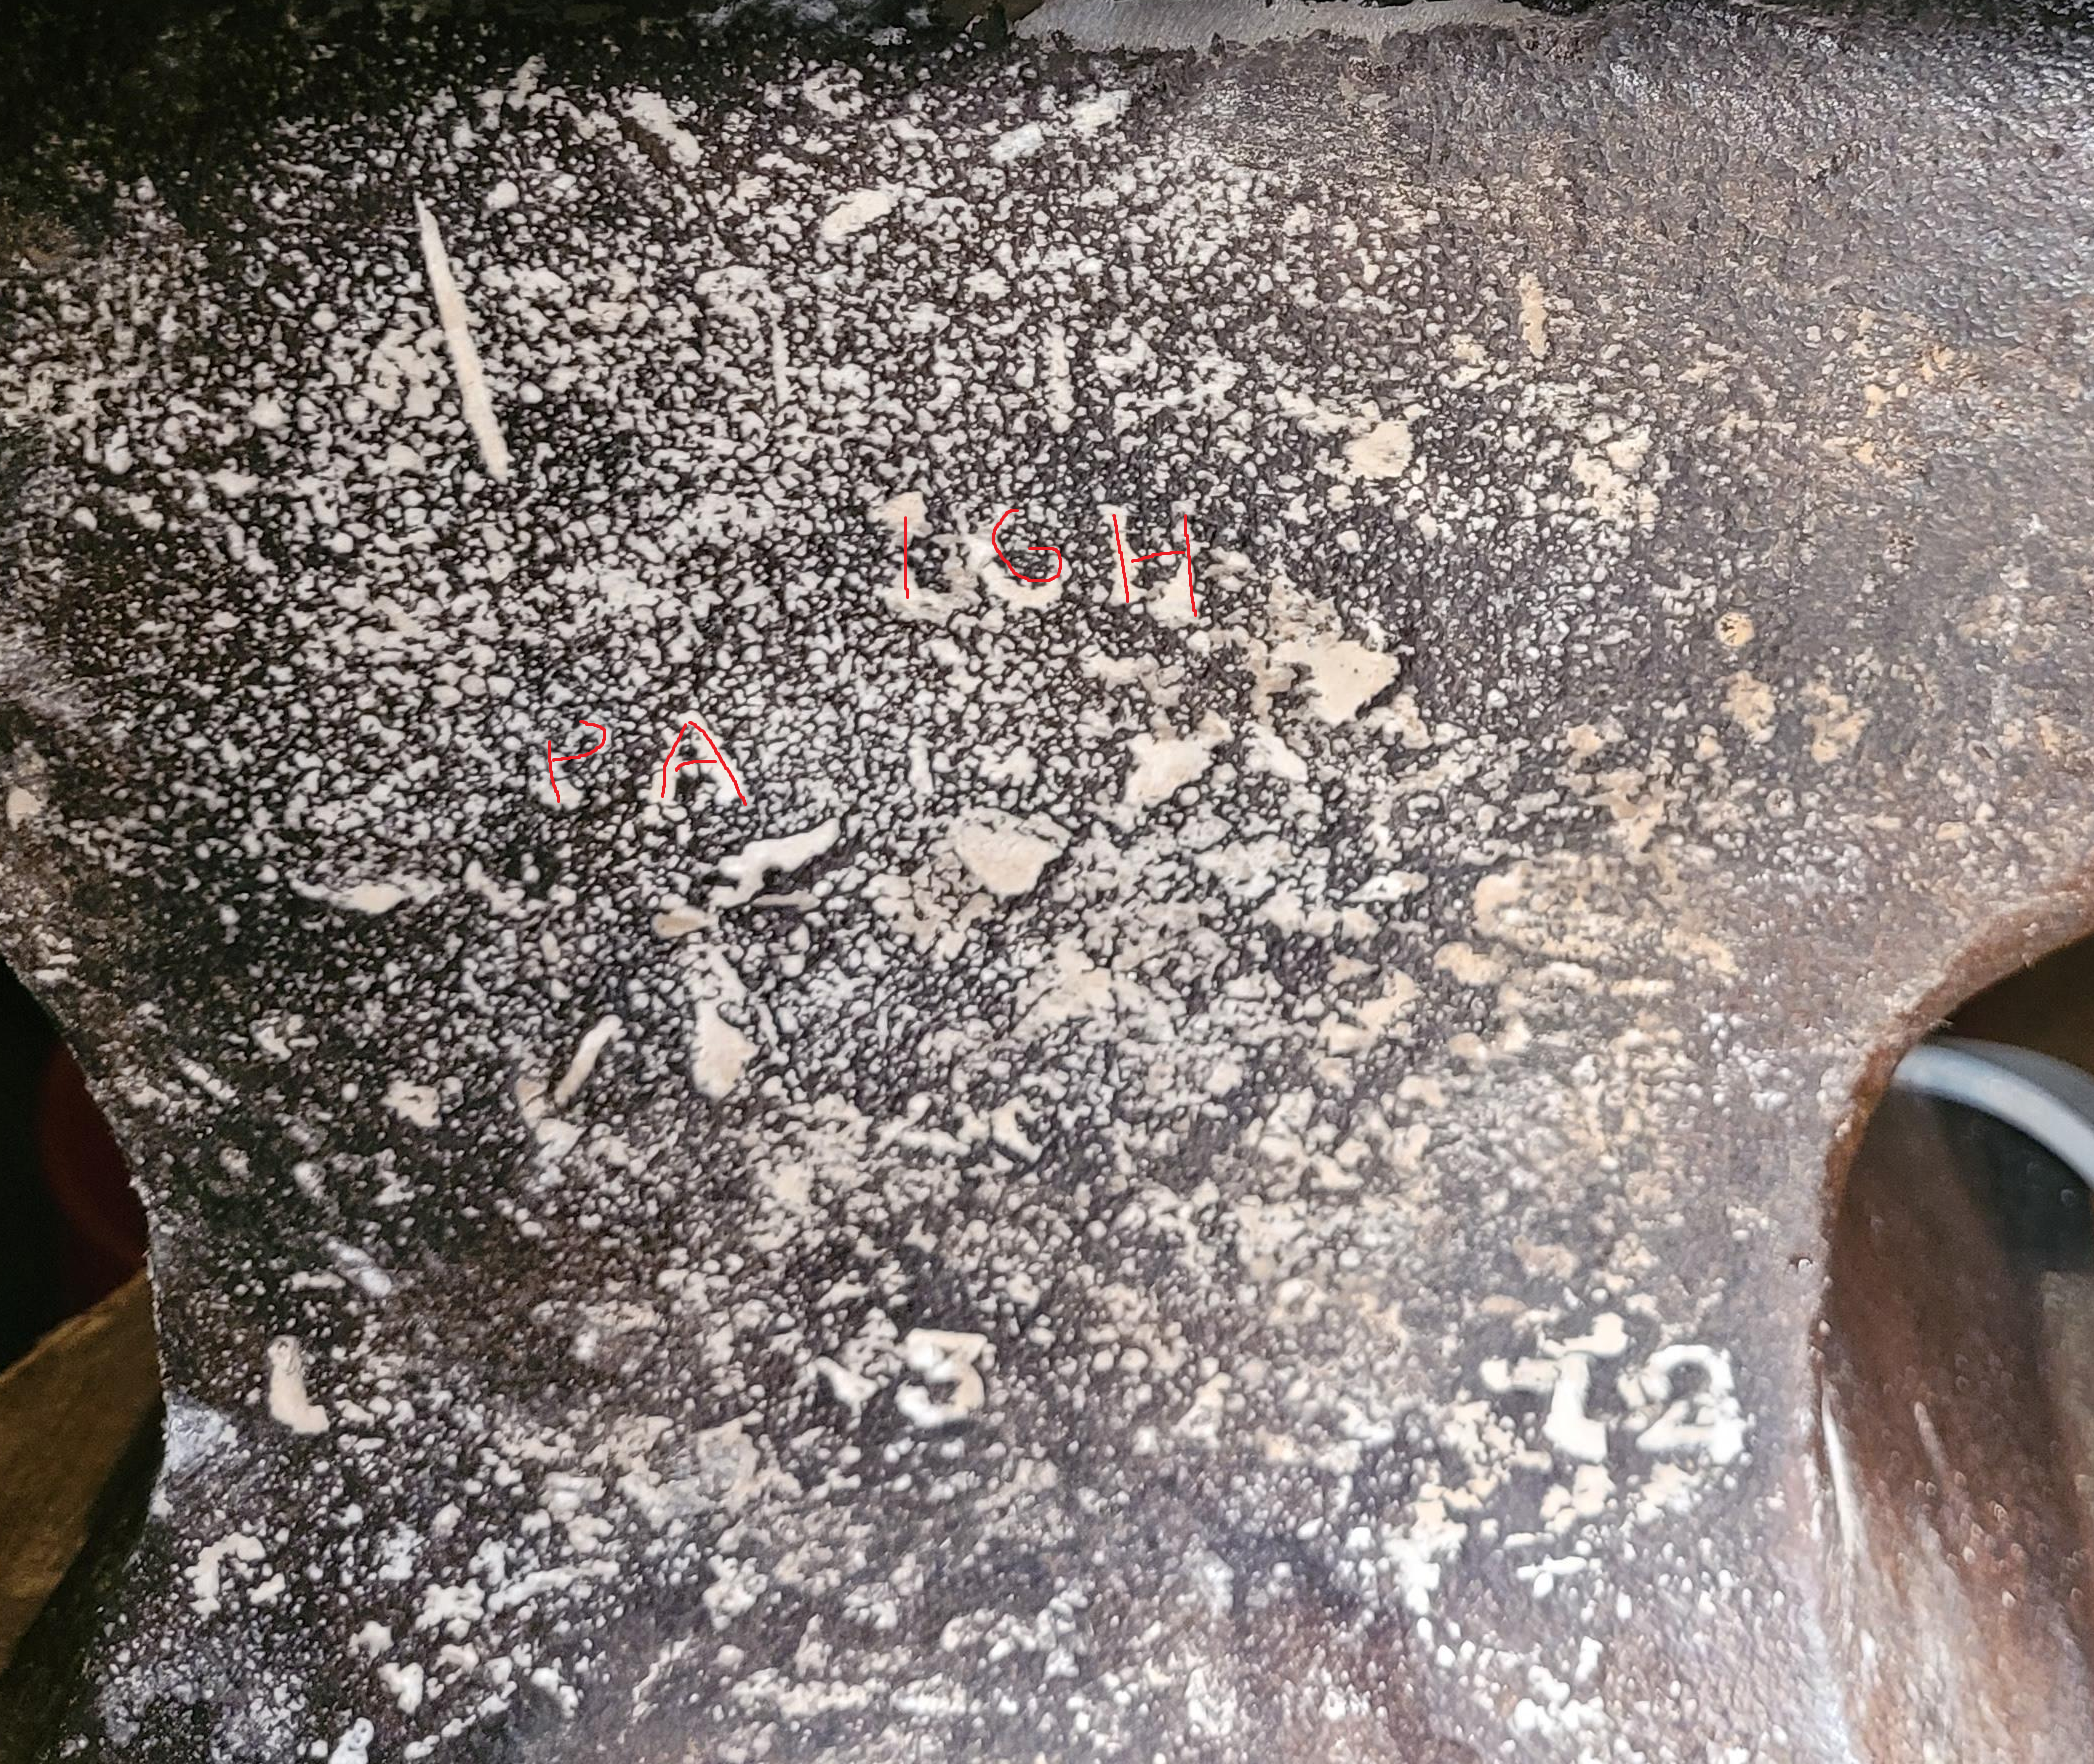
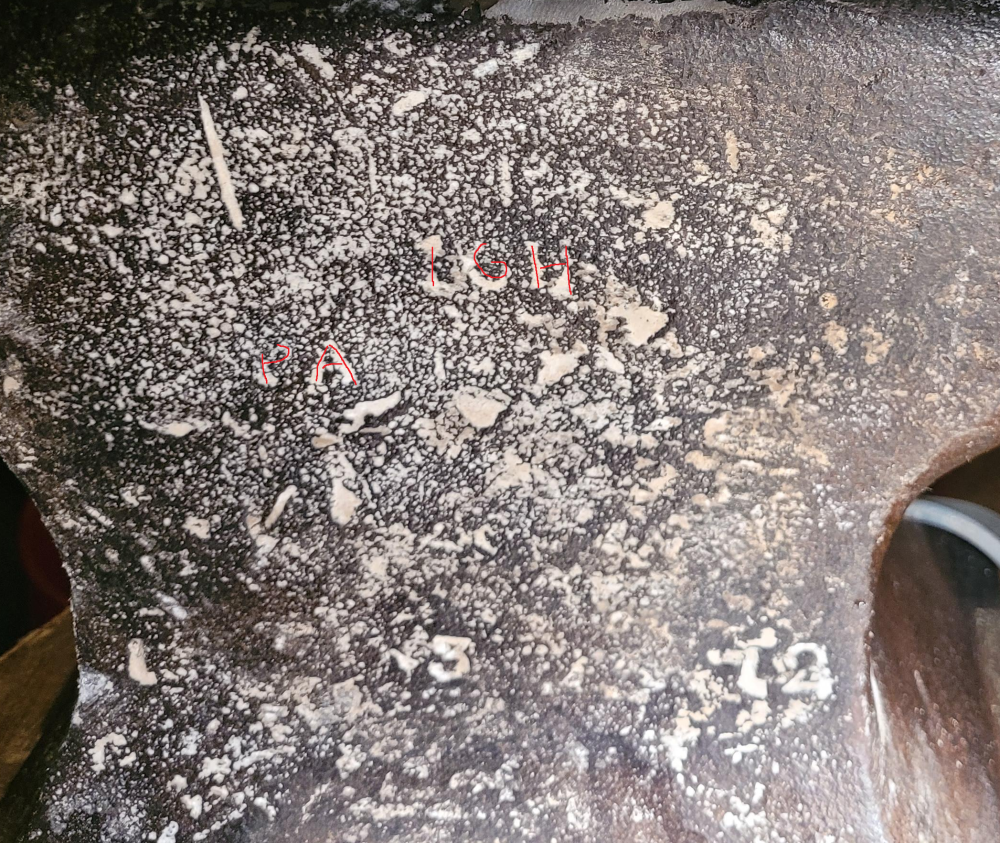
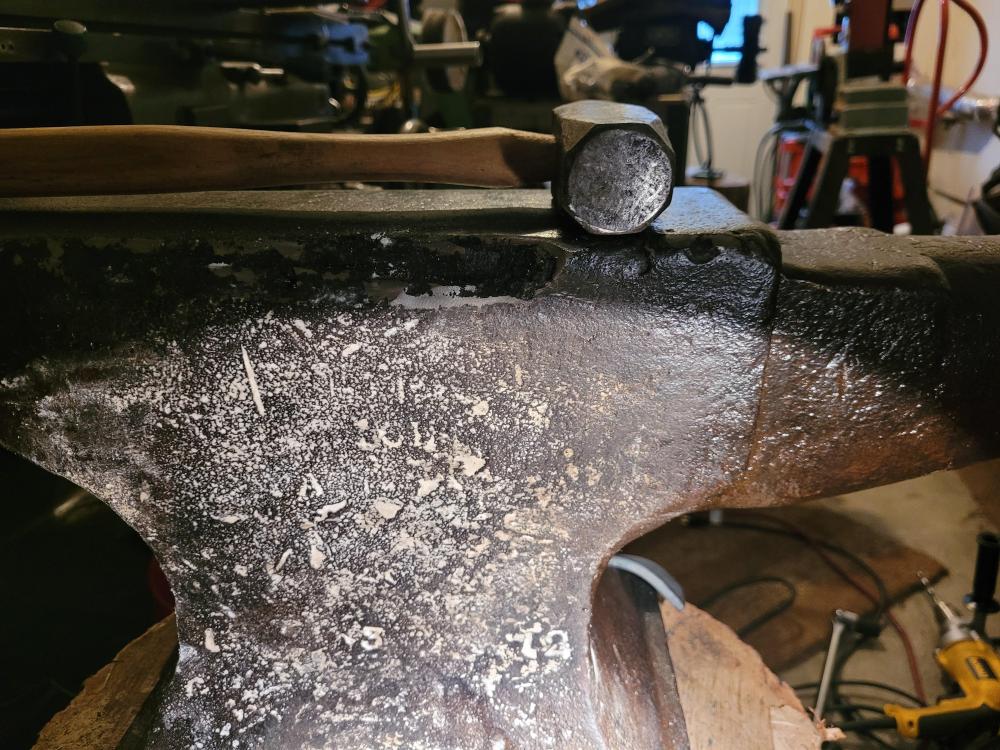
Sorry for the pics being so unclear, it's tough to get the right angle and also not have the powder get into every tiny crevice. I think I can see "IGH" center, and just below the A. This looks like it's a Peter Wright from this, also the font of the numbers seems to match for whatever that's worth. What convinced me was the thumbnail from this fellow's video (not affiliated in any way): But I'm just guessing still. No matter what it is, I'm going to put a hammer to it. I bought a used jackhammer chisel and I'm going to try to make a hardy tool from that.
-
A bit I think...Let me know if you can make anything out, I threw some baking powder on it. I spent the Sunday this weekend picking up some free oak and black walnut logs from a golf course. Got the anvil mounted to the big oak log today, and I'll use the black walnut for handles and the like. I also very lightly dressed the edges with a flap disk and coated the body in hydraulic oil because the transition to Spring brings out the sweats in metal here in Ohio.

-
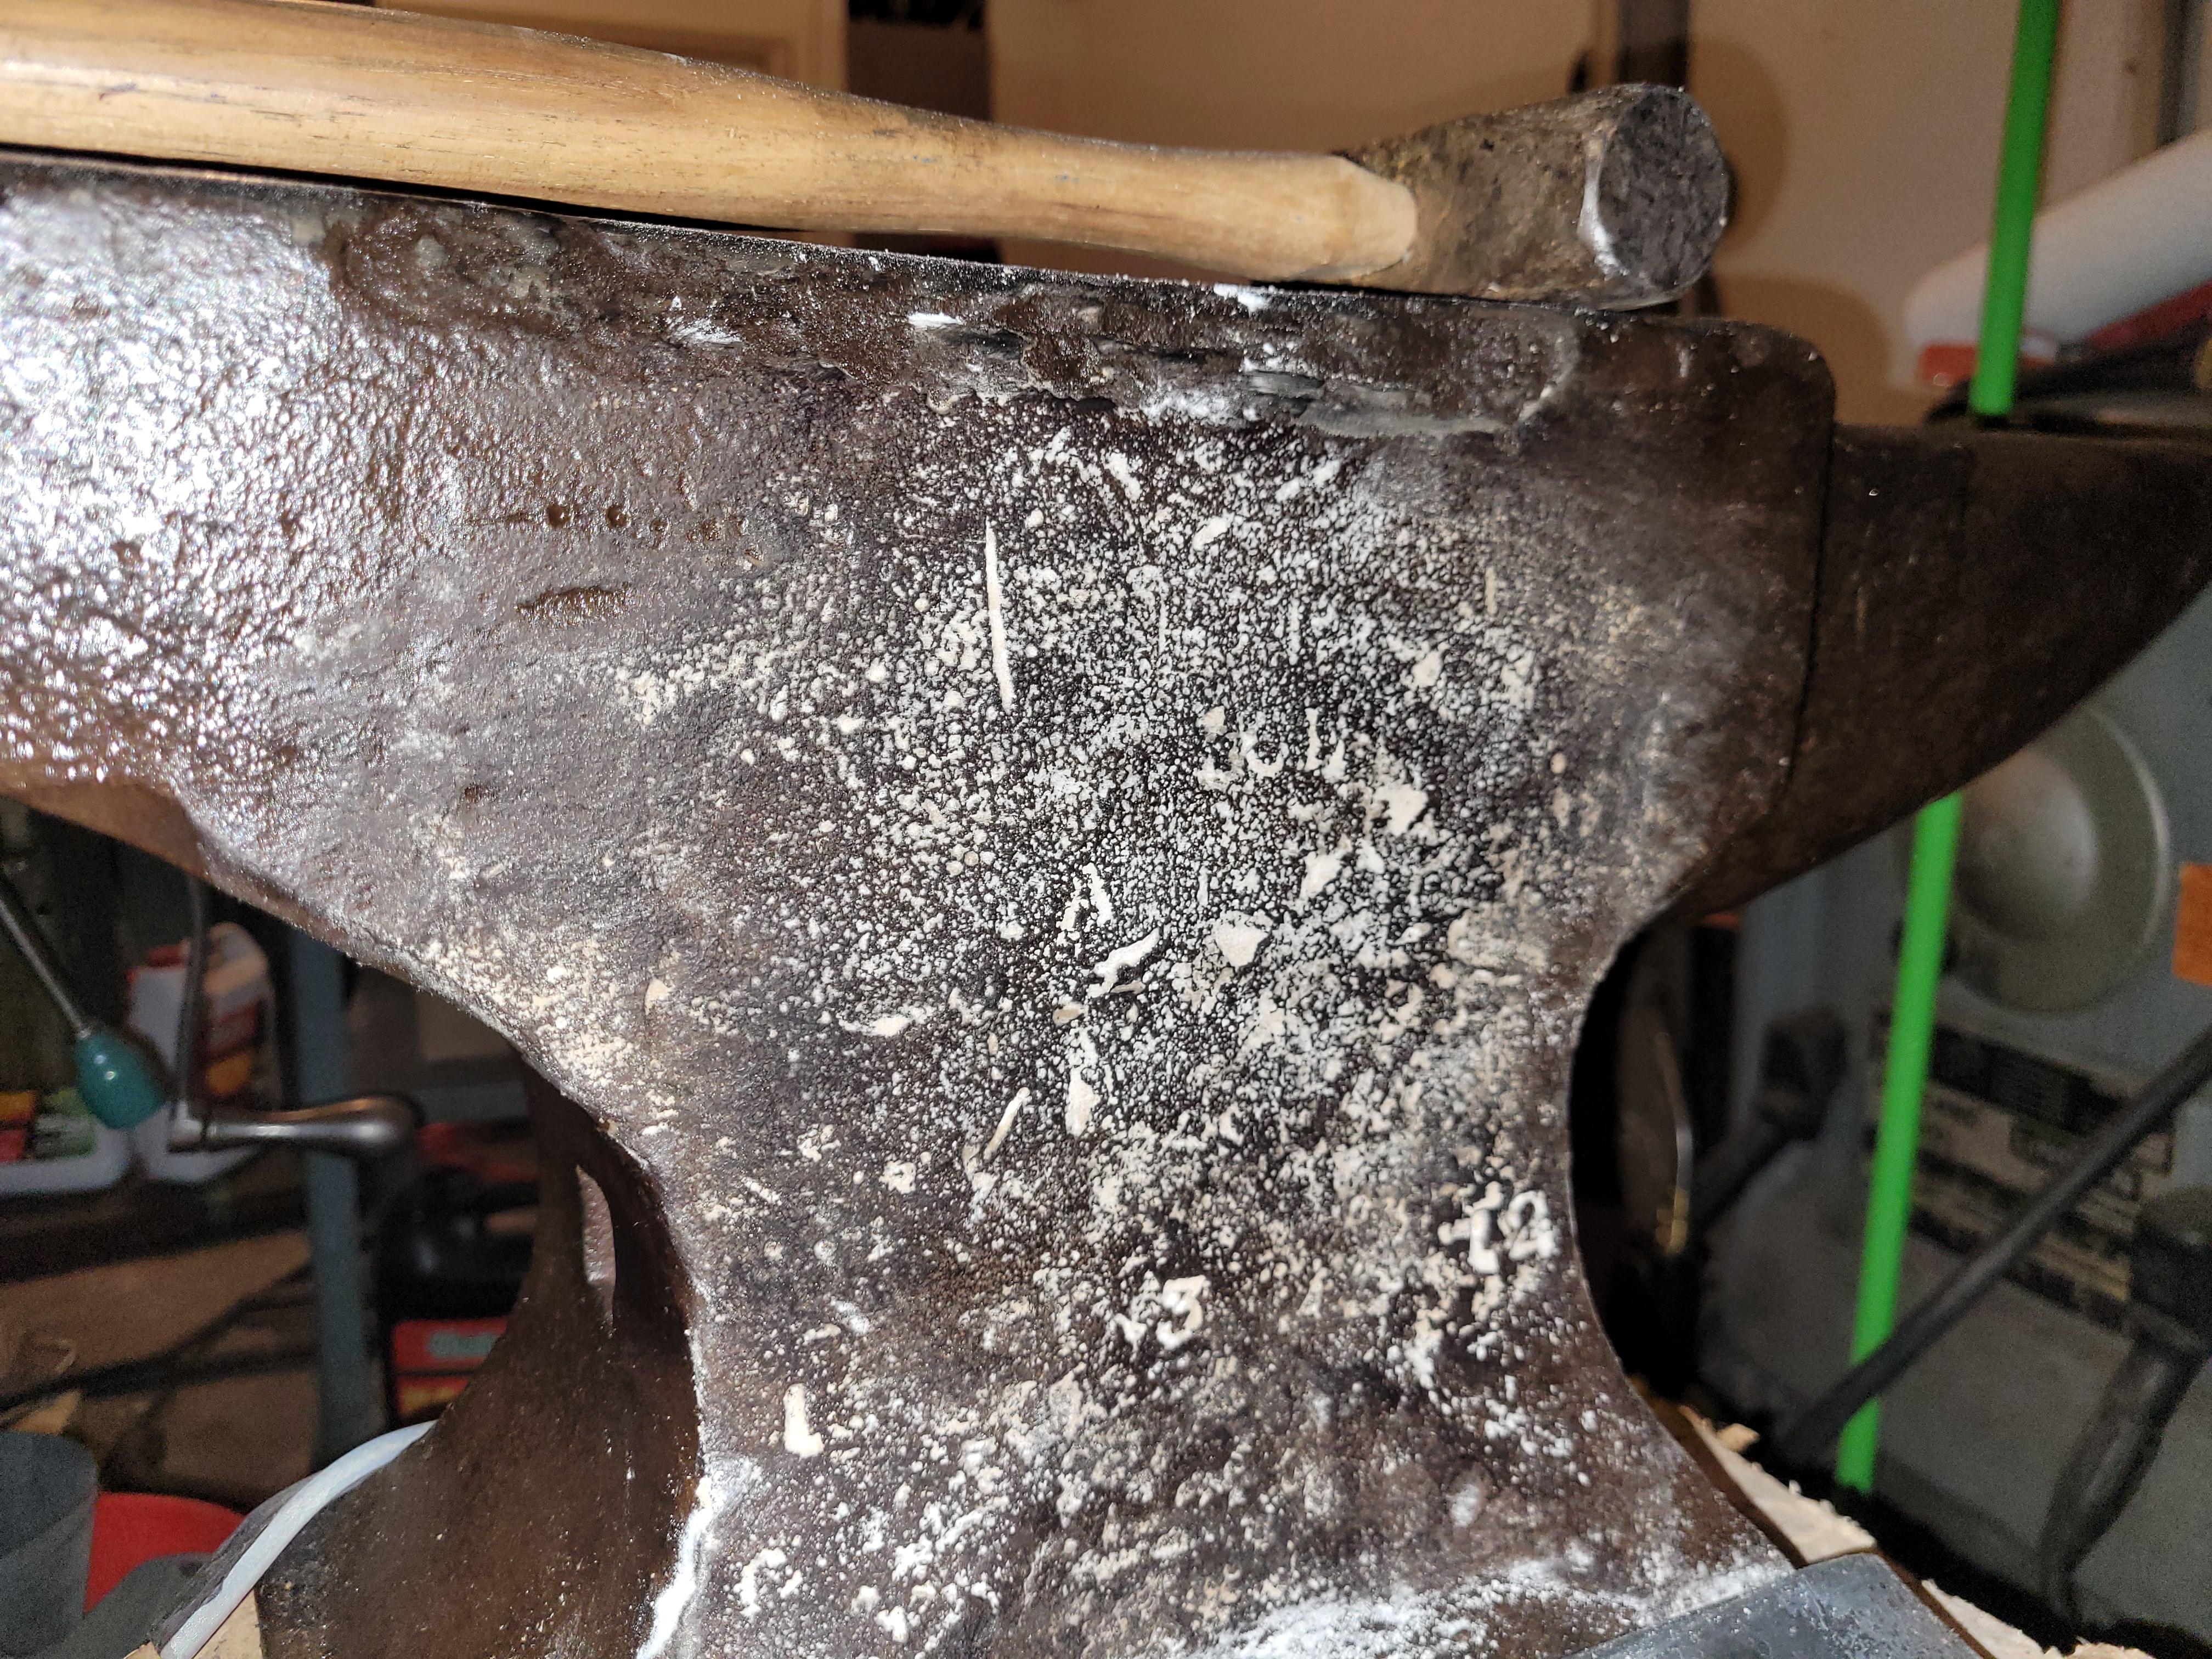
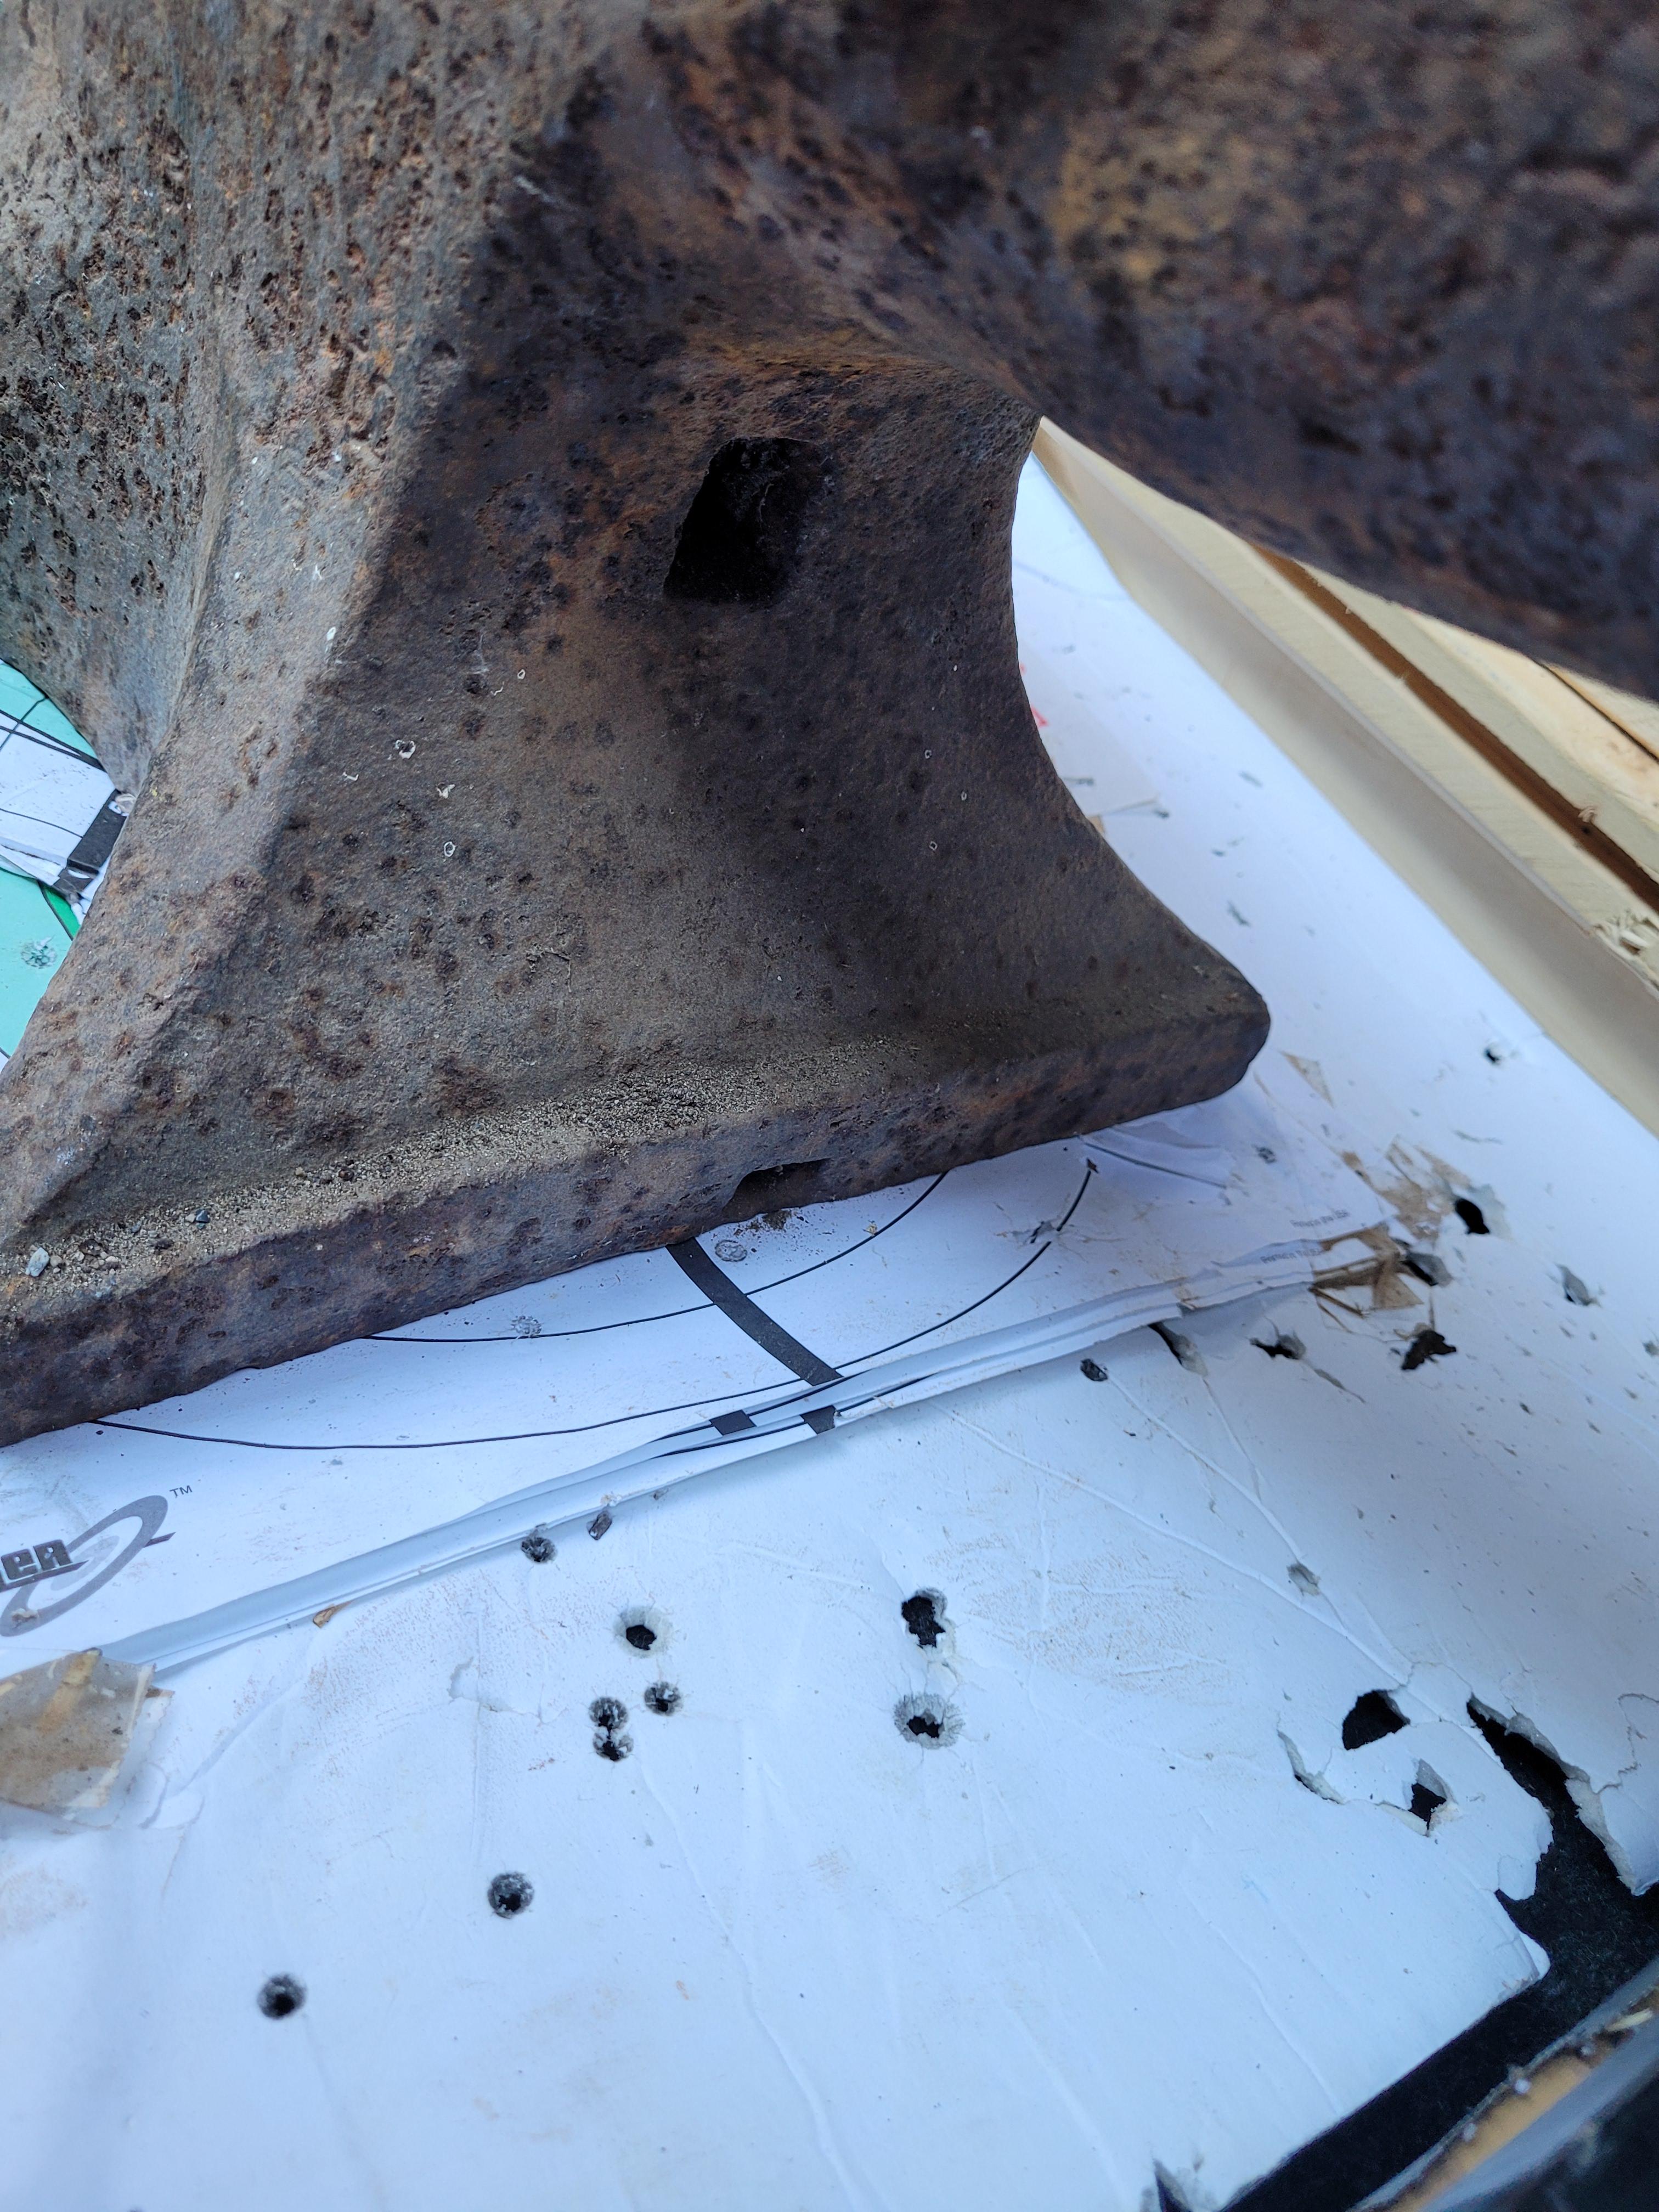
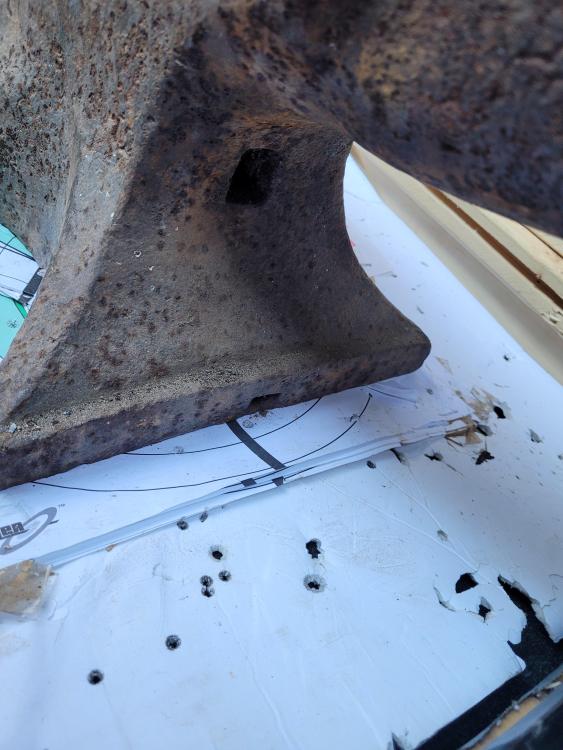
I don't mean to interrupt a good breakdown of FIF... but clean-up has revealed a few things on this anvil! It has a flat bottom (does this indicated a manufacturer? I have seen lots with sunken/relieved bottoms) and there is what might be a circular logo with an A in it. See attached pics

-
Gotta respect that, lathe is the most fun machine tool for me. Glad to hear it was money well spent on my part. Makes sense, thanks. Too right, I don't hold any bad feelings about the experience. Still just surprised how small these suckers are for their weight. I'm used to moving 1-2 ton machine tools so this was a walk in the park. With all the FIF bashing, I wish I had actually watched it, might have gotten into this earlier! And with way weirder expectations...I heard of it but just never got the chance to get into the series. I got interested after making a knife for my dad (and starting one I'm currently working on for my mother) the abrasive way and seeing lots of forged examples. Also, learning about how the Garand receiver was forged 8620. It seems like a good way to supplement my machining capabilities, forging parts to a point where they can be finish-machined, maximizing strength from grain alignment but also getting precise results.
-
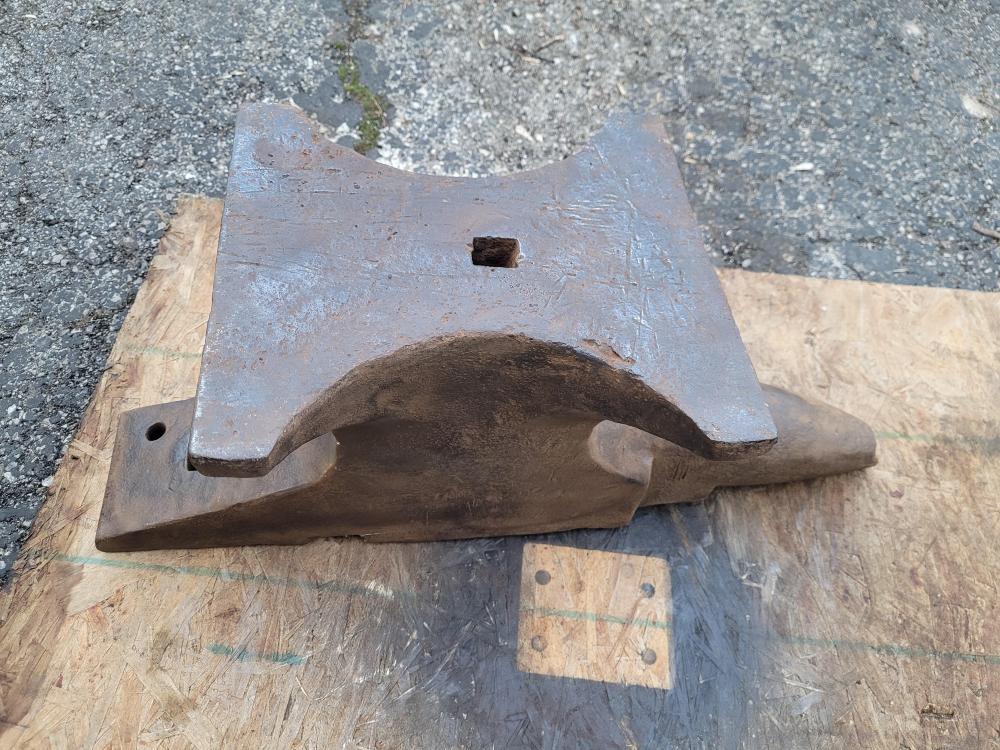
Understood, I'll get a 3/8" ball bearing for any testing. Based on what you've said my plan is to wire brush it off all over and then lightly blend in the chipped edges with a flapdisk. It will take me some time to shed the machinist's precision when considering the anvil face, I have a dial indicator that reads 0.00005" so I can worry over surface finishes on the lathe. Non-knotted wirebrush, noted. Just seeing the "mouseholes" around the base makes me think it's forged, and the "step" in the feet of the base make me think Peter Wright (from my weekend of Googling..). But I think I saw a picture of a Trenton with that same step at some point...I'll probably go for the wax and also try the powder trick, thanks. Thanks for the corrections, guys. The seller said they had it on a scale that read 250 lbs, either their scale is off or that seller is a piece of work. Either way, I paid closer to $4/lb. Oh well! Still seems like a great starter so I won't mind the price. This at least explains why I could deadlift the anvil without having been to the gym for a long while. COSM is pretty close by, I'll give it a look! Thanks for pointing these out.
-
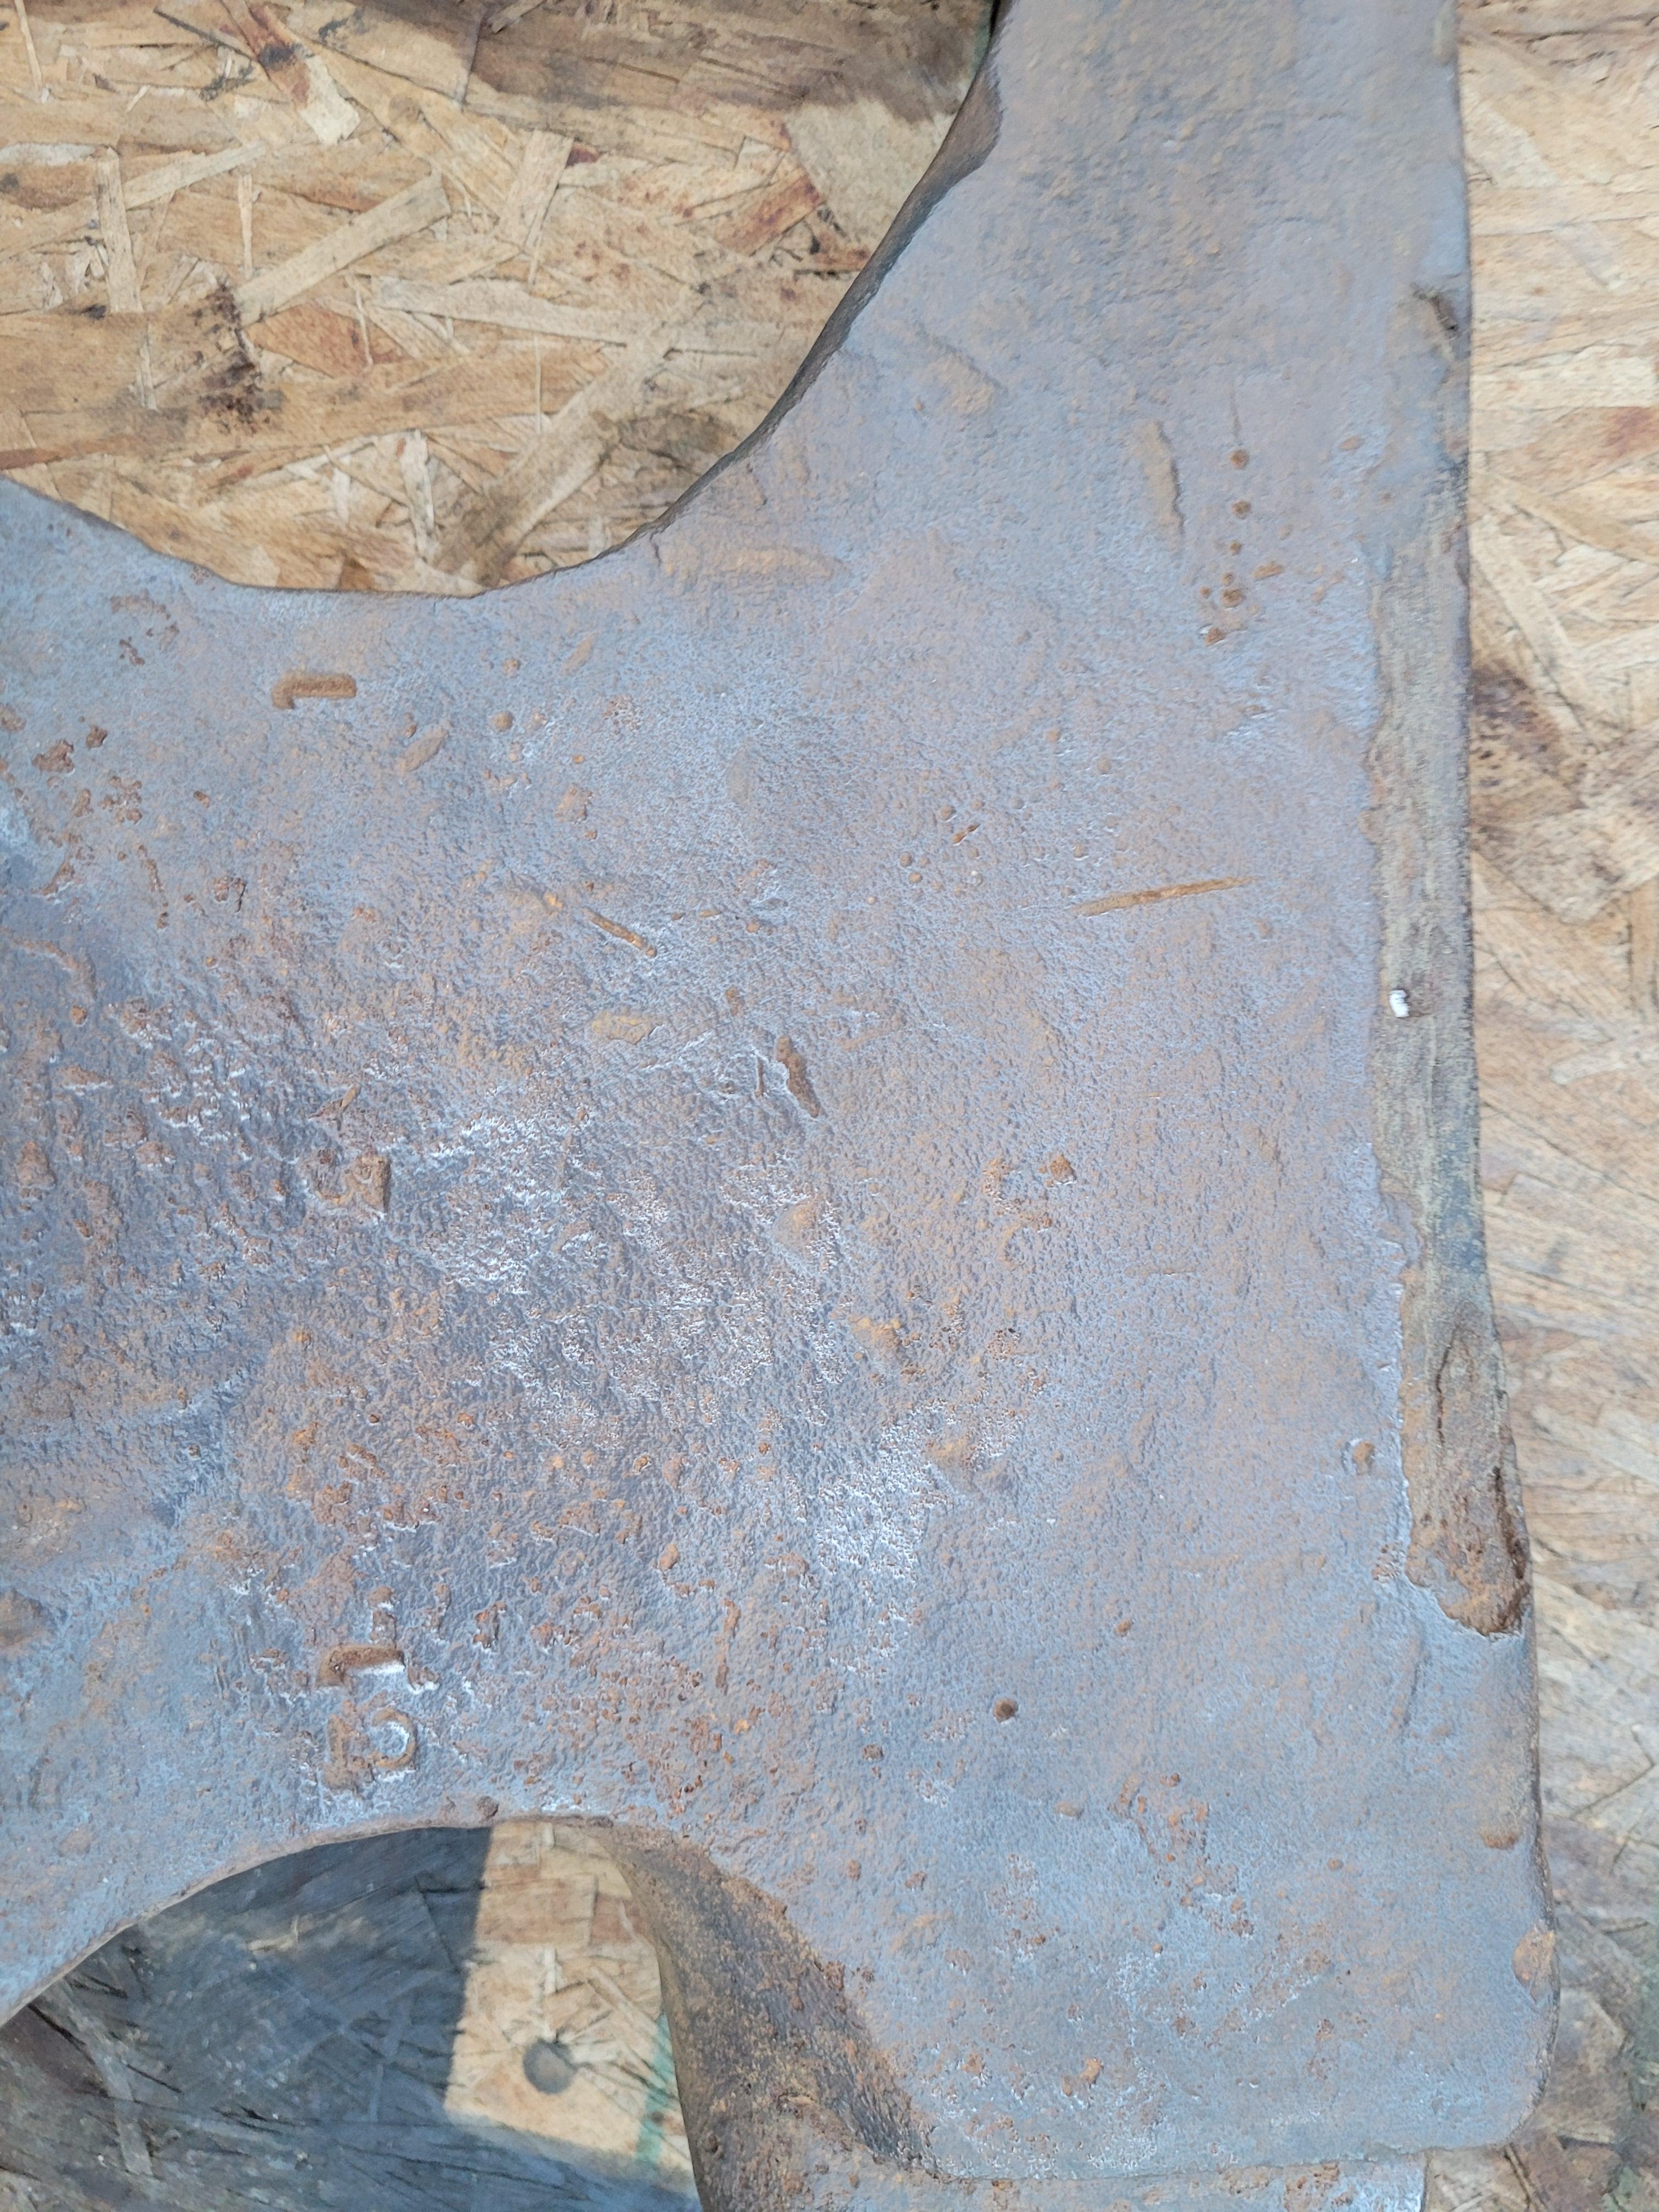
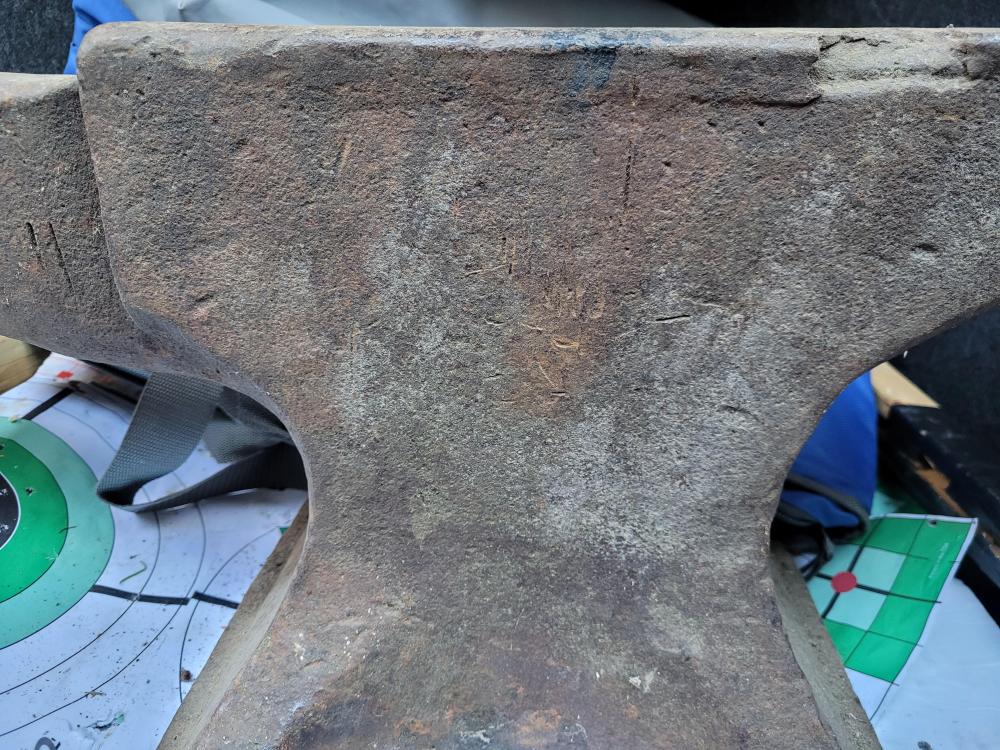
Hey Frosty thanks for the words of wisdom. I didn't even plan on wire brushing the face, at least not with my powerful 9" angle grinder. Maybe I'd trust a drill wire brush attachment with that task, something that wouldn't have near enough power to do any harm. I've also got a 1" ball bearing on the way but I won't drop that from any serious height on it. Unfortunately I have to wait for a coming move before I get this situated on a stump or wood block and get to really using it. But it does free up that stainless stock for mill work if I want. I did the tap test as I said, up and down the face and on the horn and tail. To my untrained ear, there were no dead spots but you're right I could be missing subtleties. I'll do a pseudo drop test with that 1" ball bearing while it's still in my trunk (it'll probably sit at a self storage, with a coat of oil, between now and my move) and see. True, thanks. I added my location but it for some reason has no space between the town name and "Location". Isn't there another strategy for getting sharper edges where you make (forge? mill?) a block with a knob that fits in one of the face holes? Hardy hole, that's the term. And a last question, the numbers near the waist, to me it looks like "L 3 70" or "L 3 72" Are those meant to be the weight or year of manufacture? Thanks again guys.
-
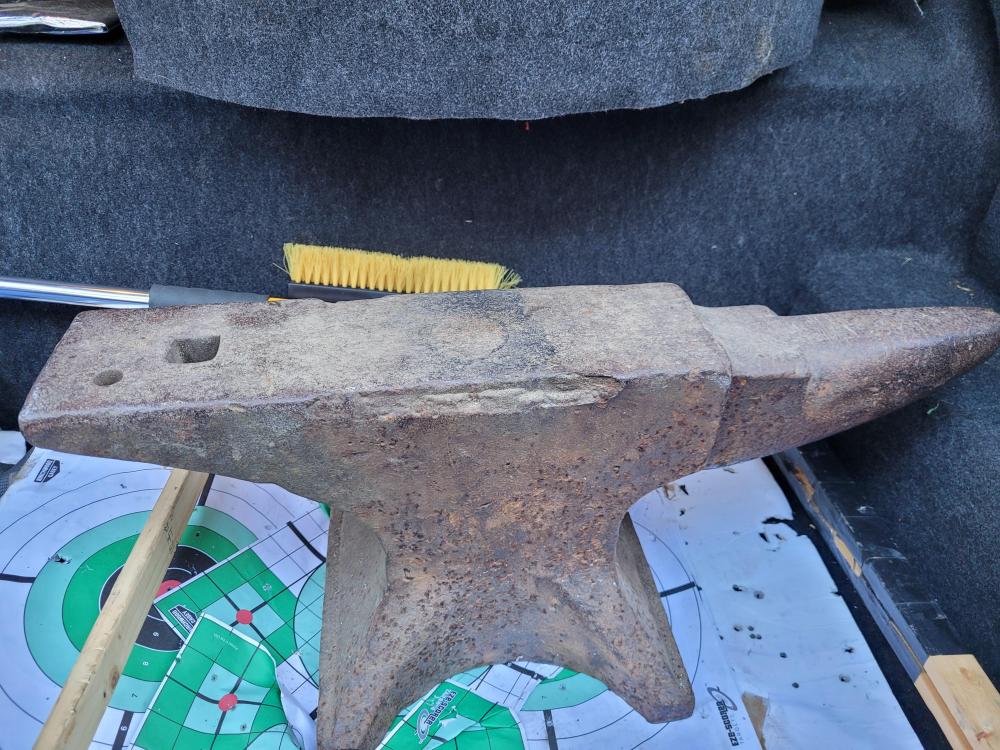
Here are some more shots after I got it into my trunk. ...Disregard the mess of a target stand in there. This is in central Ohio, for reference.


-
Hello, glad to be on this knowledgeable forum. I'm more of a novice machinist with some minor heat treating experience (in plain carbon steels). I've made a 1095 stock-removal knife and plan on another soon using some 1.3% plain carbon steel, but I also found some 6150 steel for cheap and have been attempting to forge it for a few days now. I have been using my heat treat oven as a forge, and a 75 lbs block of stainless steel stock as an anvil. I was getting tired of the bounce from that, and how much it would move side to side. Having planned to pick up forging at some point, I decided I may as well see if any anvils are in my area. I was out looking today and found a ~250 lb anvil for $3/pound, which I've heard is good. I picked it up after I tested the sound with a hammer and it rang decently. I can't find any maker's marks on it, can you tell who might have made it? I also picked it up thinking I might be able to weld the face where edge bits are missing, or maybe mill it down. I should have realized then, but welding is a no-go because it would temper the surrounding area. Are these missing edges a deal-breaker and was I a dang fool? It's going to be better than my block of stainless steel for sure, but I got too excited at the price.