

Savlaka
-
Posts
57 -
Joined
-
Last visited
Content Type
Profiles
Forums
Articles
Gallery
Downloads
Events
Posts posted by Savlaka
-
-
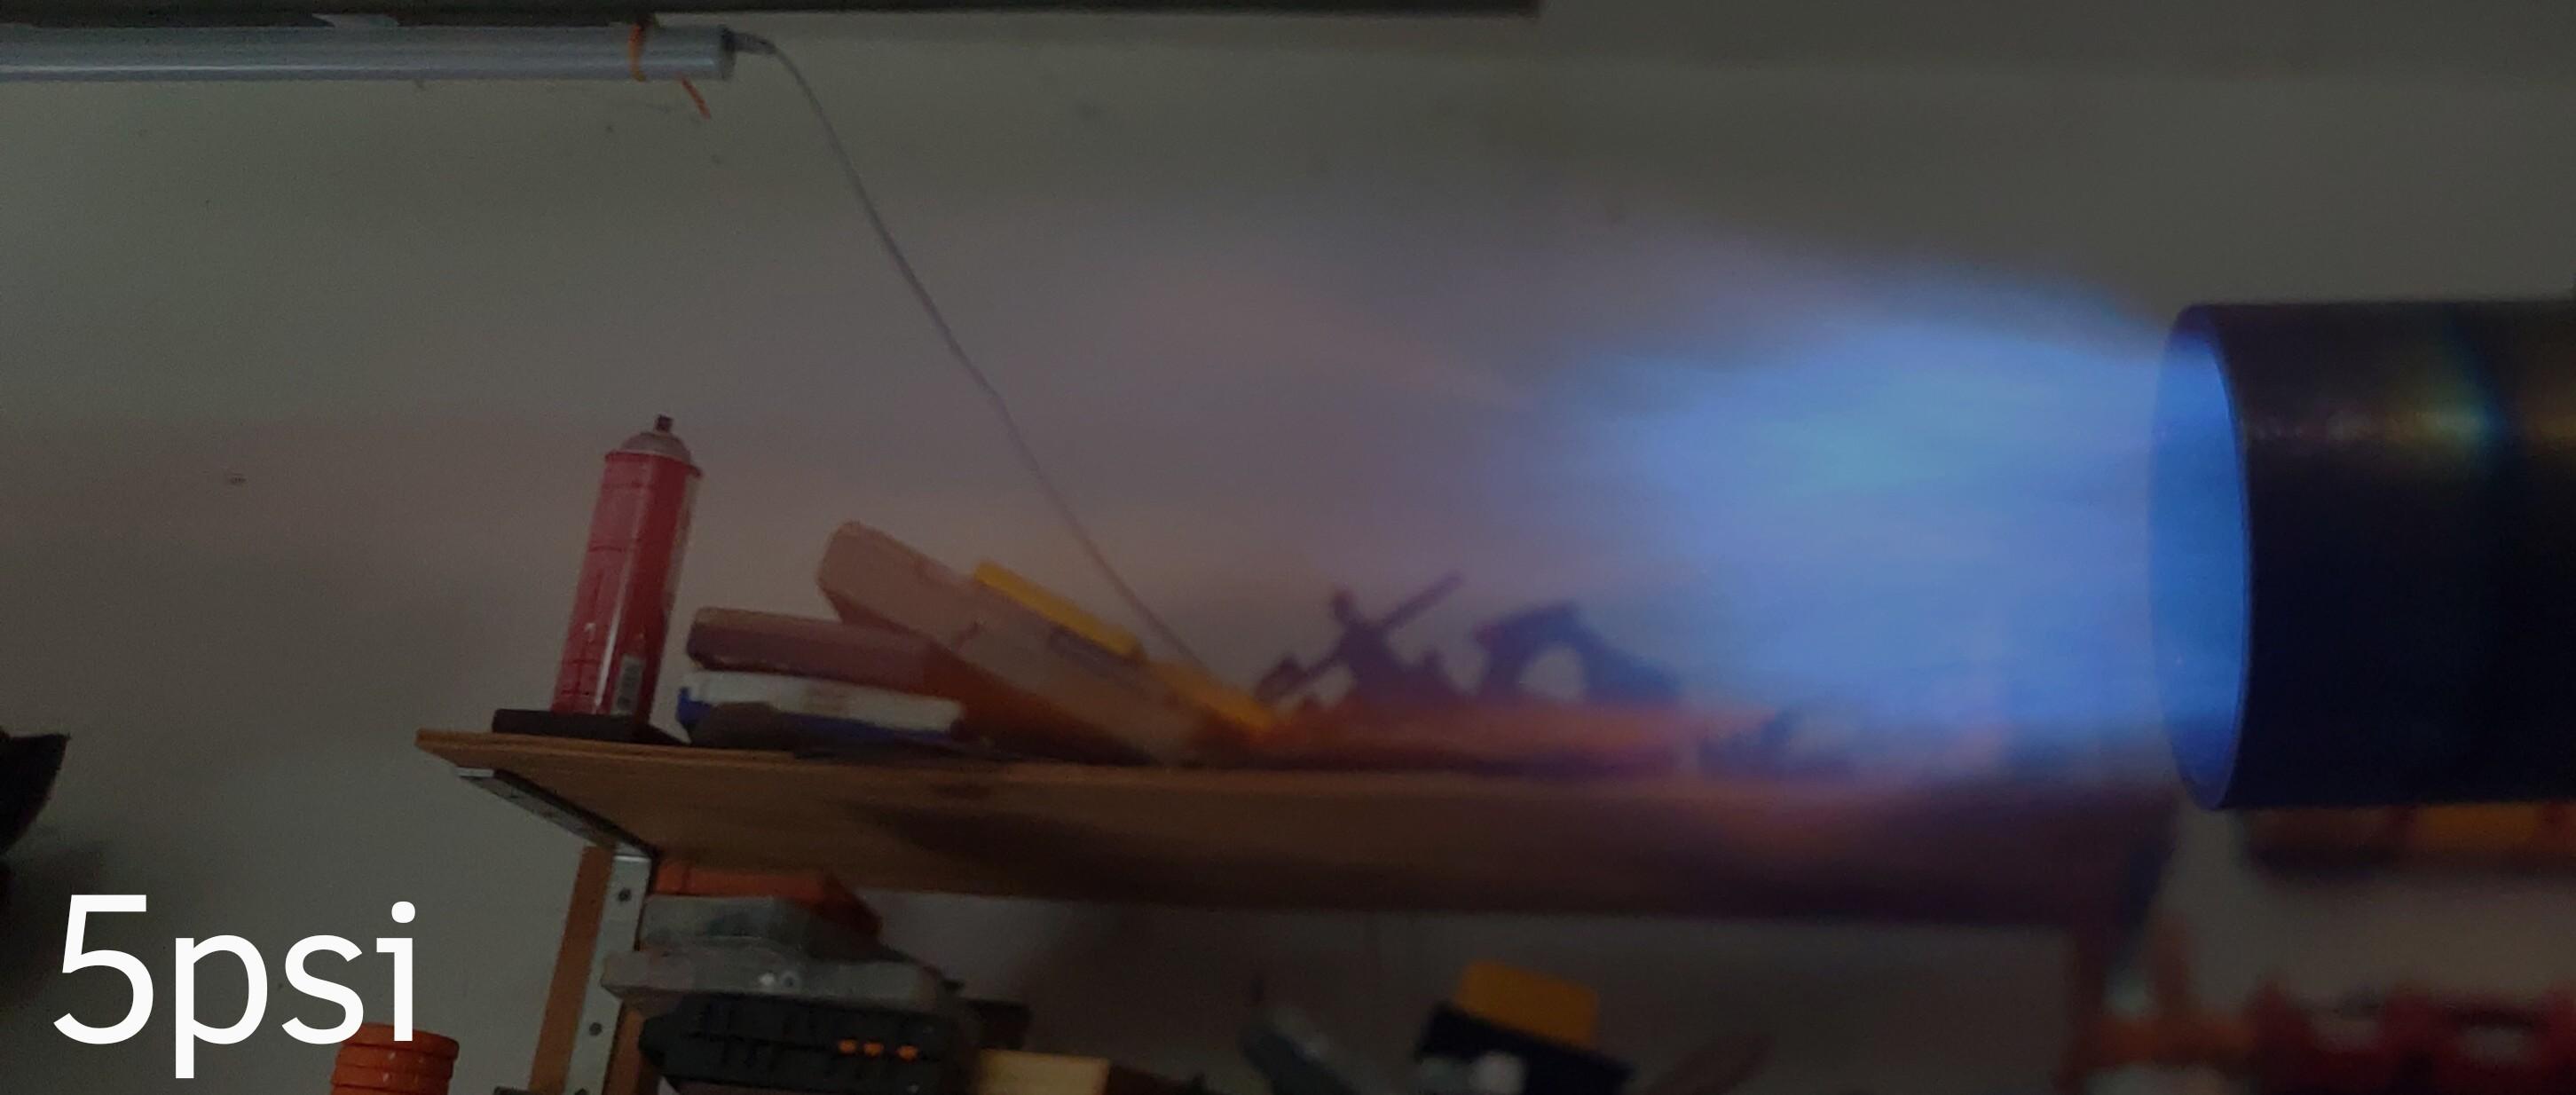
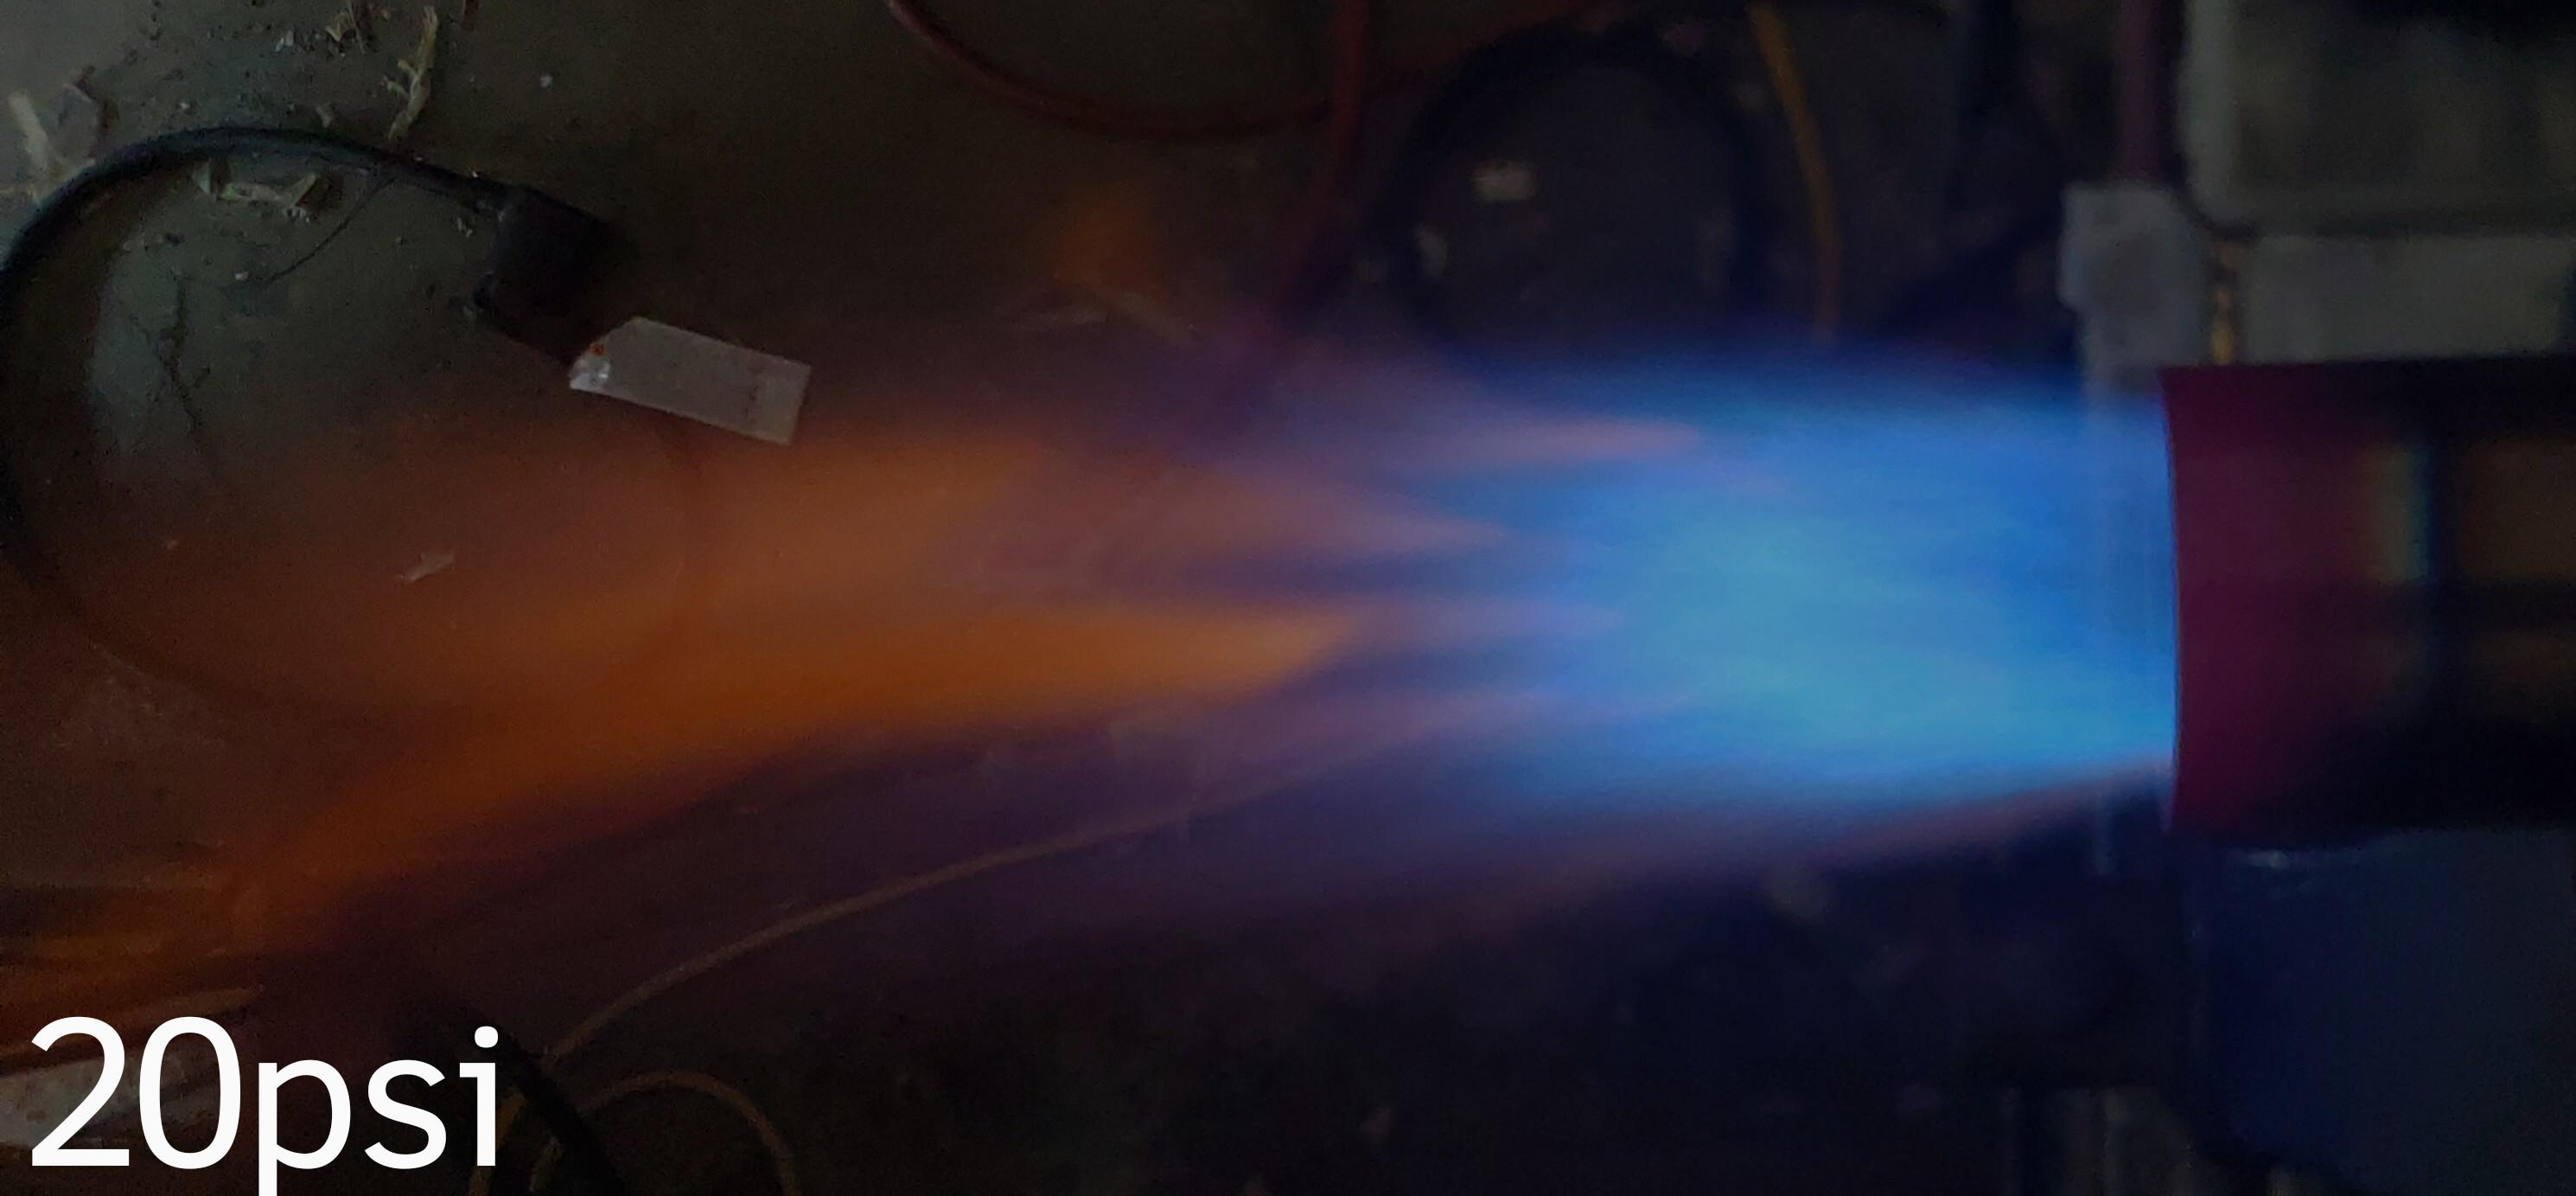
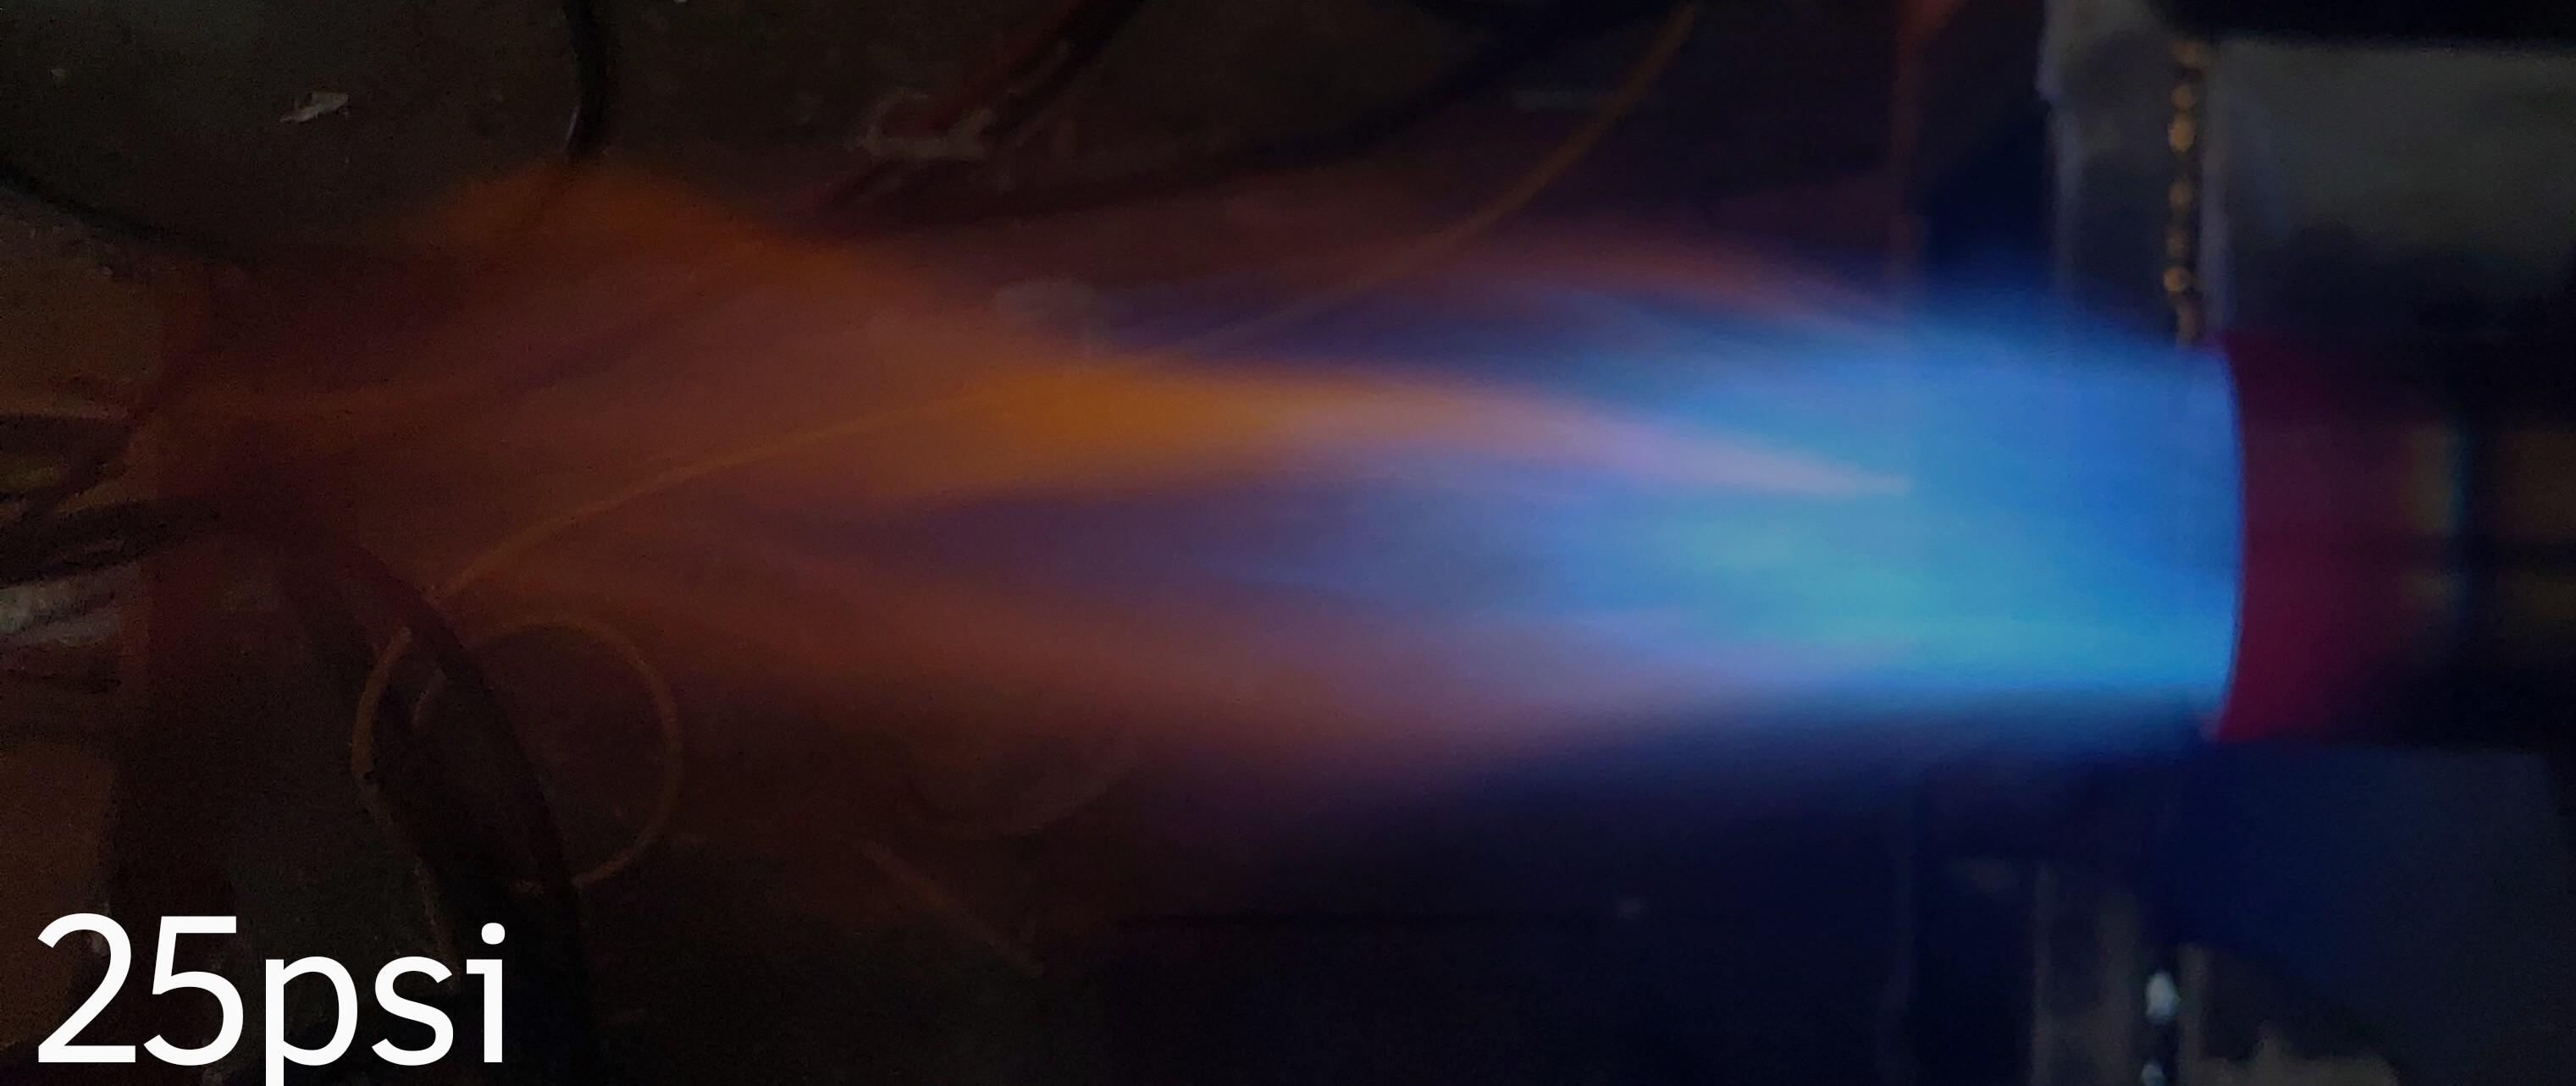
Tossed together a simple nozzle to run a few tests on the burner as it is:

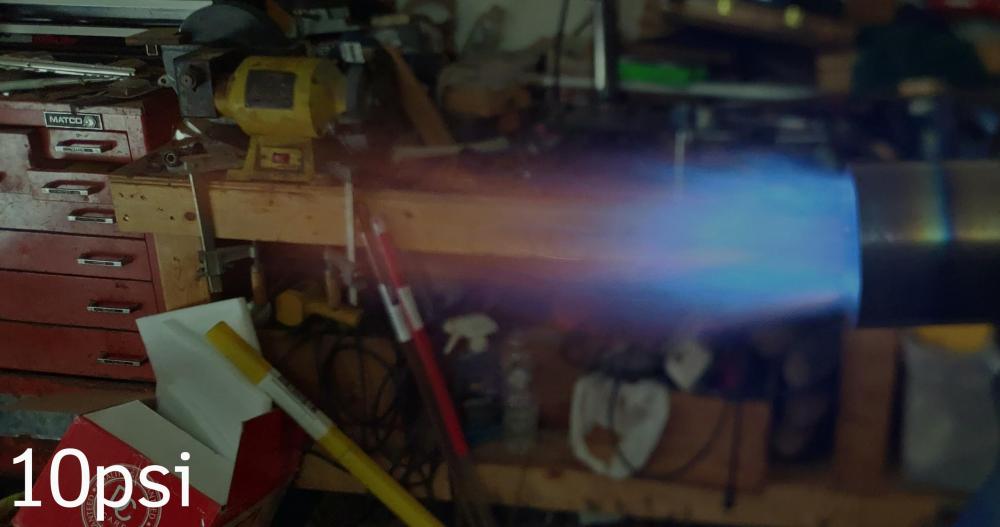
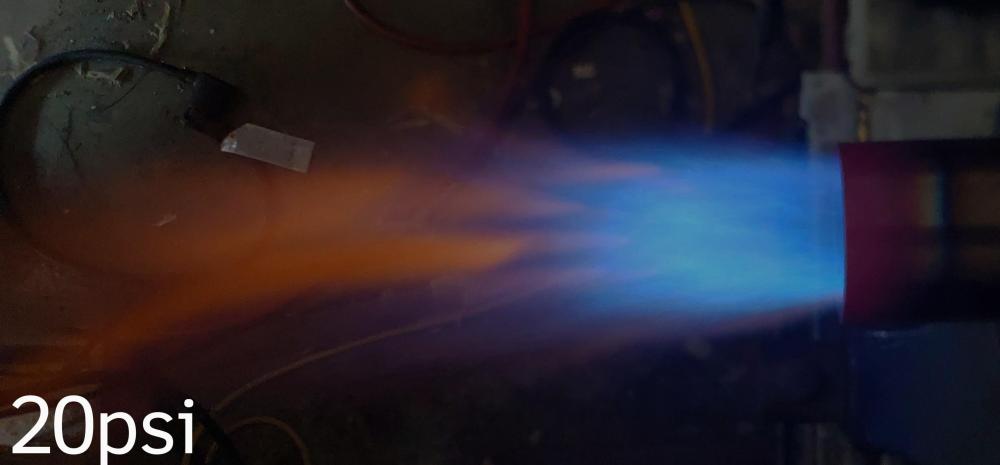

I'm using an old fuel gas regulator for a torch set... This one works up to 25psi, while the regulator section is in good shape the Guage's are a bit worn out, so they don't read very well below 5psi.
This is running the .030 short type 11T mig tip.
My camera really brightens the colors a LOT... I had to edit the exposure to the minimum to get these remotely close to what they actually look like. At 5 psi visually it's dark transparent blue, and actually hard to see even with the lights off and the garage door only open about 24". But the camera really made it look bright blue/white before I edited the shot - that's what I get for a camera that works well in low light conditions... LoL.
-
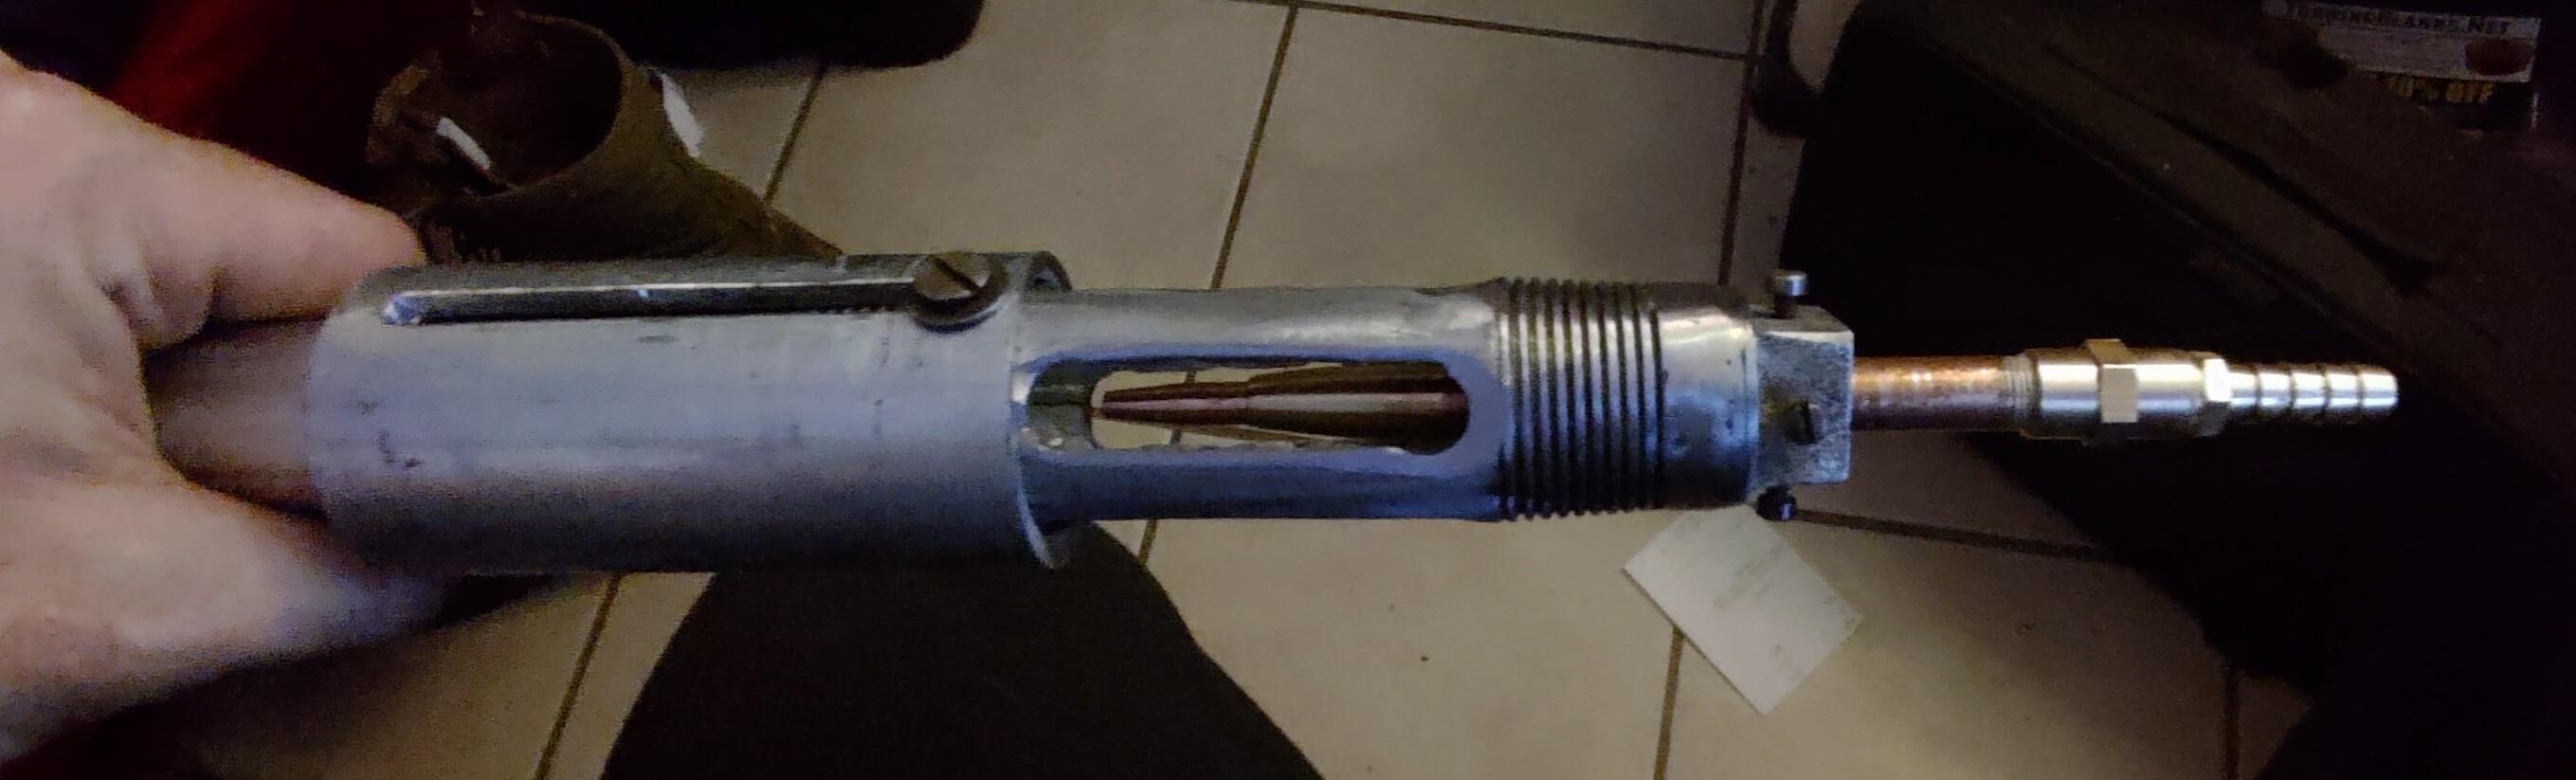
Got in a bit of work on the burner prototype during the evenings this week. It's a bit rough but should work... this is in line with figuring out my final design, I expect some problems with this first one and I'm hoping to figure out what construction methods will work best for me, and the tools I have.
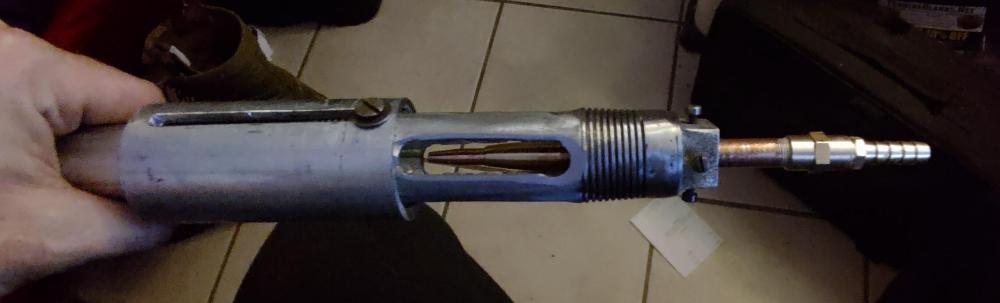
The slots are still not pretty, the only drill press I have right now is a piece of crap 8" bench top type, with a lot of runout (visible amounts) and no way to fix it. It's fine for what I bought it for, woodworking, just kinda crap for any real precision work.
Speaking of Wood... I wondered if I could make the air intake and jet holder from Hardwood? That section of the burner should not be getting hot enough to damage something like IPE or Brazilian Cherry (very hard and dense wood types). I have a fairly good selection of woodworking tools to cut and shape it with... Hmm, I Might have to try that out...
I made two jet tubes, one for 1/4-27 (14T) sized tips and another for 6mm x 1.0 (11T) tips As I already had a pile of the 11T type tips for my welder.
I haven't put together the nozzle yet. And I need to get my tanks filled before I can test anything anyway. Perhaps this afternoon or evening I'll get a chance.
I think I'll be doing the two of these as I've been to get up and running, and then use what I've decided I liked to build a more finished product for the next forge. I finally found a metal supply store that will sell in small quantity's that's Semi- local (1hr drive) interestingly enough it's not 2 miles from the only actual Hardwood lumber yard I could find.
------------------
Mike, frosty,
I'll be around... I looked at a number of fourms before choosing to join this one, and you two were part of that decision. I respect the time and effort you both put into forge and burner design and I can see that your normal suggestions to people are good ones and based on plenty of experience... I don't expect to always follow that advice, wether because I can't find the material, don't have the right tools or just want to try something I think will be better for me... Even if it turns out not to be.
Every craftsman has to work with the materials and tools they have, and also has a personal method to reaching an end product. What works for one, may be the most fustrating thing to the next one.
For small items like these burners, I'll build a rough version, play with it, then use what I learn to make a better version. My old Gas forge used a design based a 1" Reil burner, with a few things done different for my tools and materials, it worked fairly well though after reading through the information available now (the last one I built in 2003 I think) I can see I was running a bit lean with that one.
I've found that making a tool that works now but will only last so long, is better for me than trying to make the perfect tool that'll last me years the first time, often having a workable tool now helps me make that better version later...
-
Mikey -
I hear you and frosty on the subject of a kiln shelf, what I'm running into is not being able to find anywhere local that sells High alumina type shelves, the one "store" (it's more of a school than store) I found only carries the carbide types and also told me that the next nearest place I might try is over 100mi north of me. the 3 online stores i tried are all charging an outrages amount to ship them -$52 in shipping $15 in packing for a $30 shelf that I might be able to cut to size. while firebricks might not last as long I can get a box of 6 hard type 1/2 thick or 4 insulating type full size 2700 degree rated bricks for under $40 delivered. I planed on needing to replace them occasionally, this doesn't bother me, and if I find a source for the shelf eventually I'll replace them with it.
i planned on using a hunk of insulating brick as a moveable wall to close off 1/2 the forge when I don't need the full length.
there's already a few holes in the casing metal, i can add a few more along it's length to vent the steam.
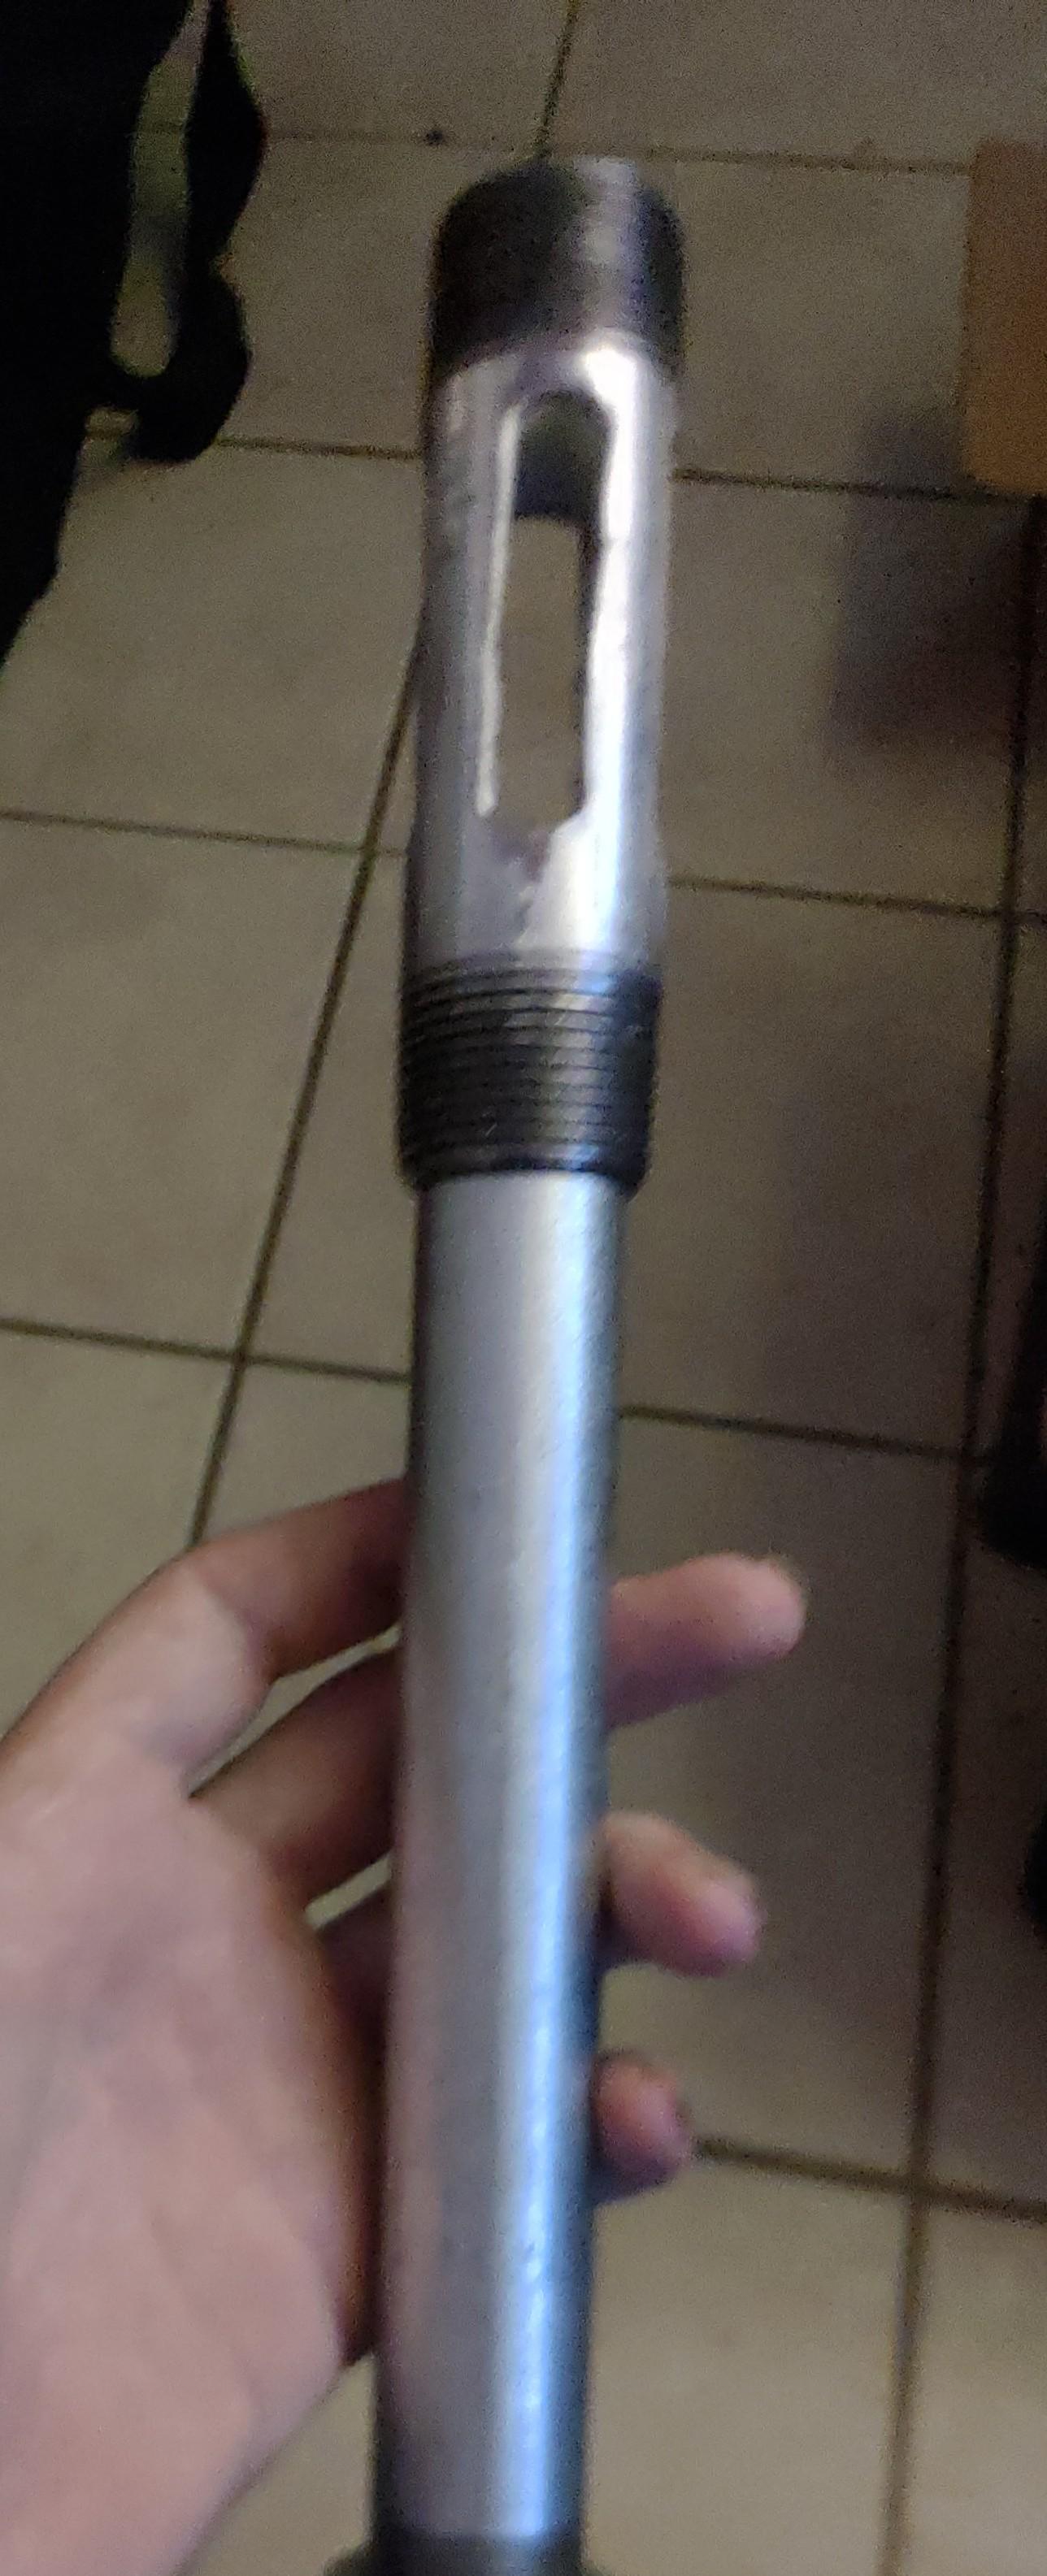
the upper edge of the 3/4" mixing tube is beveled, in that photo i was only friction fitting the parts together the final burner will be welded.
The nozzle types I was looking at was using the reducer I pictured as a starting point to hammer out a tapered nozzle. as i understood the sizing for a tapered nozzle it needed to go from outside the mixing tube to about the outside diameter of the next pipe size...
I also have a straight piece of 1-1/4" SS pipe i can put over a small section of 1" SS pipe - as i understand it you call this a stepped nozzle...
and i do know i don't require one but my experience with the last one i built showed me it was a lot simpler to do most of the tuning outside the forge.
---------------
This particular forge project was started with the goals of getting a working forge back in my shop (so my anvil can stop rusting away from lack of use) and addressing some of the specific issues i had with my last one - namely, 1: The ability to move the forge as needed; 2: shortening the heat up times; 3: the ability to heat treat longer Items. This is only the first new forge I plan to build. once I get this one up and running (and relearn how to work metal), I plan to build a second one along a more traditional shape. specifically for blocky objects and small sized irregular shaped items (hammers, shelf brackets, ETC). and once that one is working I May try out building a set of ribbon burners to rebuild this one with, as they look like they'd actually work better for heat treating (and a molten salt bath or electric heat treating oven is out of my price range)… But since I want something that'll work for now, and let me try and finish or fix a number of old projects that I still have sitting in a box. I'm building this one first.
-
Thomas - "smelter" is the term he uses but he mostly just melts and casts stuff. I never got into that side of metalworking.
Frosty - while I'd planned to use that Simond heat guard material for a base to apply the ITC100. I never actually expected it to make the forge as tough as a solid brick.
Whatever the castable type was that I used last time was super soft, I could gouge it with my fingernail. But with a little care that forge's tube lasted years anyway... I learned to set items into the tube, and to not drag them out but lift them out. I'm guessing it'll be the same with something like this...
It's only about $40-50 to fully replace the ceramic wool, so I figure I might as well try it out.
-
Thanks Frosty.
As to the Simond heat guard - from what I Saw it seems to work like a thin hard coat over the ceramic wool. I don't know if you call that a wash or what... I got it from someone local who bought more than they needed, his was used for a smelter he built. He mixed it with a bit less water than the instructions called for, and basically painted it on kinda thickly, then smoothed it out with a Plastic spreader (like for auto body work). He's been using his smelter for about 6 months now and there's very little damage to the coating despite the use - Even on the lid or the rim of the lower section where it gets bumped occasionally. And the ITC-100 he coated it with is still staying in place too. So I Figured it should do for my needs... If not, well I can always redo the insulation and coat with a different product next time.
-
So after a number of years without one, I'm finally getting around to building a new forge. I'm doing a number of things differently this go around (different from how my last one was- not different from many other people's designs).
My old forge was a Brick monster - two layers of brick thick, with a cast tubular chamber... Impossible to move, and took forever to heat, but stayed hot for a long time.
This time I'm going much lighter in construction- steel body, ceramic wool insulation + coatings.
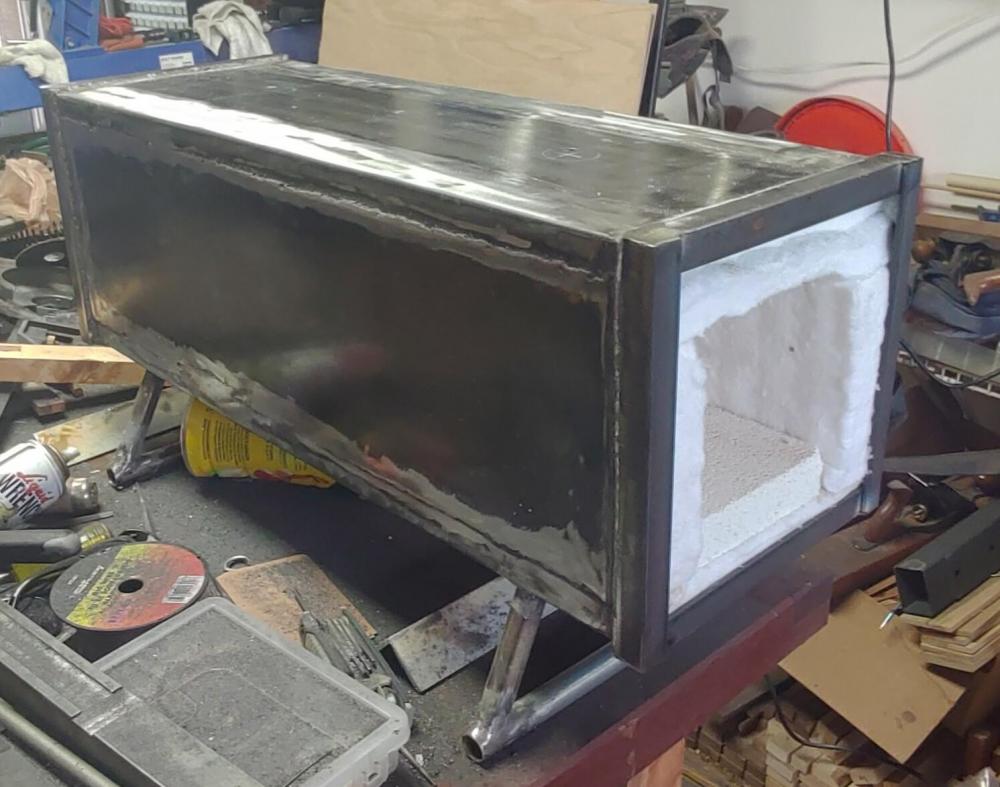
This is the main forge casing and test fitting the insulation to confirm my mental planed size is what I end up with. I still need to build the runners for the door, and the work rest, looking around for some more scrap steel... This has been entirely built from scraps so far, though I'll need to use new metal for the burners.
The internal size is 4.5 x 4.5 x 24" - I plan on using two 3/4” class burners, something along the lines of a hybrid style burner if I understand the terminology I've been reading on here correctly. Most of the time I'll really only use the front section for working the metals, the length is mostly for heat treating longer items.
I have a bunch of colloidal silica from my epoxy work (around 8 Oz by weight) to use for rigidizing the ceramic wool. I haven't worked with ceramic wool before so I did wonder if I can "paint" it on with a brush instead of a spray bottle? as the opening is long and narrow. Or if I can soak the silica mix into wool then install it into the casing then heat it?
After rigidizing I plan to coat with simond Heat guard refractory coating. I'm using this mostly since I have it, found a pail of it locally for cheap ($20 instead of the $45+ it normally goes for). I'm planning on about a 1/8 -1/4” layer over the inside and exposed faces of the insulation.
Then I will coat it with ITC100 - again using this since I got it at a discount ($25 a jar VS The $50+ it normally sells for) and I liked it last time I used it.
The burners are being made from common steel pipe, I'll acid wash off the galvanizing before I heat them up.

This is the initial stage of the burner build, air slots roughly cut out of the 1" pipe, and test fitting to the 3/4" mixing tube... Yes the tube is too long at this point, it'll get cut down eventually. The cut slots are around 2.5" long probably a bit under, I still need to file and grind them to their final shape. The choke will be a section of 1-1/4” pipe that slides up over the slots.

For a nozzle I'm looking at using 316 stainless sanitary weld on reducers. They look like they'll work well and are fairly reasonable in price. I picked up 3/4 to 1” and 1 to 1-1/4" along with a small section of 1" stainless pipe to make a bushing from if needed.
The Jet will be the Oh-so-common mig contact tip in the end of a section of 1/8” heavy wall brass pipe and secured through a 1" pipe plug. Not trying to re-invent the wheel here...
I'll add in updates as I get to finishing sections...
If someone sees a glaring issue with this build plan feel free to point it out.


New forge build...
in Gas Forges
Posted · Edited by Savlaka
Kept making typos
I have .025 tips on order already, Along with the larger 1/4-27 thread size types. They're just not a size I normally kept for my welder, I had .023, .030, .035 and .045 in my welding box to test with. I tested .023, and .035 but it just didn't run right with the 0.23 one- had to choke it over 1/2 to work. For the .035 it was hard to not get a light blue with green inner flame at higher pressures, and it was definitely fuel rich with much longer tongues of flame.
This version looked mostly useable to me, but I still planed to test the .025" tips.