Iswhatitis
Members
-
Joined
-
Last visited
Everything posted by Iswhatitis
-
I have a sledge I was given with a thick walled piece of steel pipe welded to it. I would never have set it up like that personally but that’s beside the point. Metal in general makes a poor hammer handle for forging because of the shock. Some hammers have factory handles that are metal but these have rubber or some other material on the handle that absorbs a ton of shock. With a purely metal handle that doesn’t have a shock absorbing material over it every bit of the shock or energy from every strike transfers directly through the handle into your hand. This vibrates the joints, muscles, and tendons in your body and will probably cause injury if used regularly. Personally I really like good quality fiberglass handles and wood handles. Fiberglass can be more durable than wood and it absorbs shock like wood does. It is also very light.
-
You are talking about the very hard type of brick that isn’t called “insulating fire brick” but just “fire brick” right? Because that is what I have as a throwaway floor. It is just sitting on top of the kastolite. I’m just making sure I am understanding what you are saying. I actually just swapped it out for a fresh one with a coat of itc-100 today. Then I realized I had failed hard heat treating a hammer earlier. I had it glowing just barely and my oil wasn’t quite hot enough yet and of course my tank decides to run out of gas so I took the pluming torch I use to light my forge and was trying to add a bit more heat to the last little flame coming out of my t burners by shooting it into the front of the forge at the hammer head, it was kind of ridiculous and probably looked seriously weird but Once the burners went totally out I grabbed the head which was probably 50-100 degrees too cool and dunked it in the oil and hoped for the best. I went and got more propane and then hot drift tempered it to straw, cooled it, and tryed it against some cold mild and it just felt too soft so I will heat treat it again using water this time. btw: are you supposed to have your water warmed up to a certain temp before quenching like you do with oil?
-
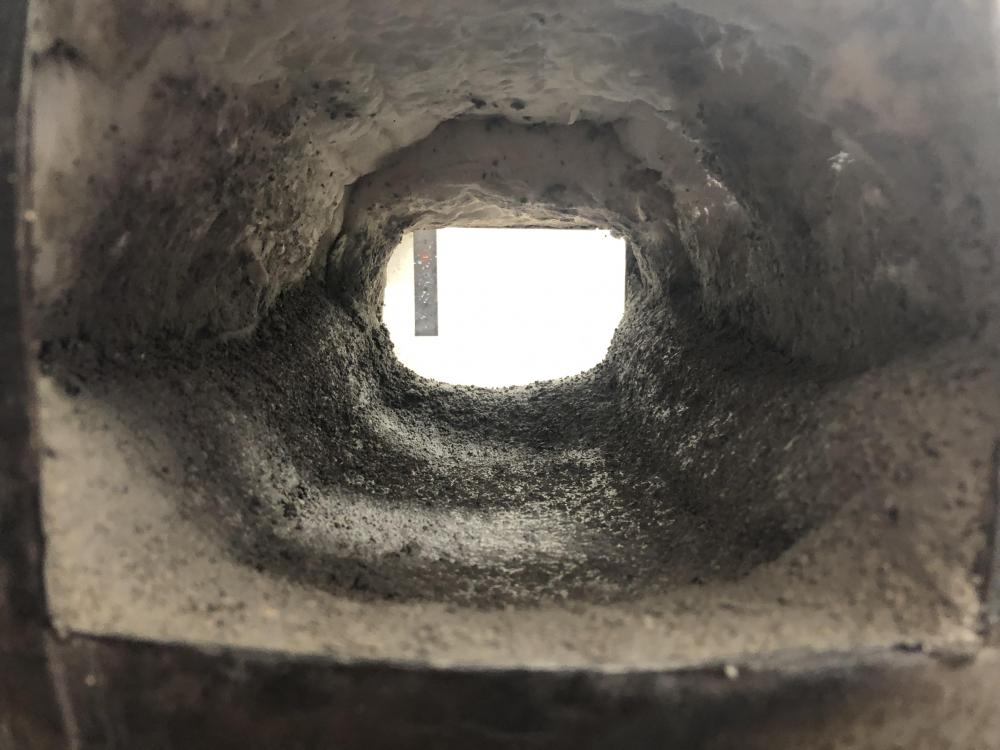
In my opinion it is best to have it both ways. Cast in the floor with kastolite, but make the floor /walls large enough to where you can fit a hard fire brick on top of your floor as a sacrificial floor. My forge is a 20# propane tank for the body like yours and that is how I did it. I am glad I did it this way because my fire brick floor now has a skin of scale on it that softens and becomes sticky when the forge is on which is fine but I know at some point I can just change the hard fbrick to a fresh one and get a brand new floor. I used kastolite as well which is said to be more resistant to flux than most refractory and I plan to weld in my forge in the future but keep in mind that resistant isn’t the same thing as flux proof. My hard fire brick floor is really there for the flux so that it doesn’t start messing up my kastolite floor. btw I had enough itc-100 left to put on the hard fire brick floor plus another hard fire brick for a future swap out which I think helps the efficiency of the forge floor a bit but it definitely isn’t necessary. The itc-100 was really purchased just for coating the whole inside of the refractory to increase the efficiency. I bought a 1/4 pint which wasn’t too pricy and was enough to coat the whole thing. note: when I say hard fire brick I am talking about the ones that are normal size but much thinner, I think about 3/4” but I’d have to look. This way it doesn’t take up much room in the forge.
-
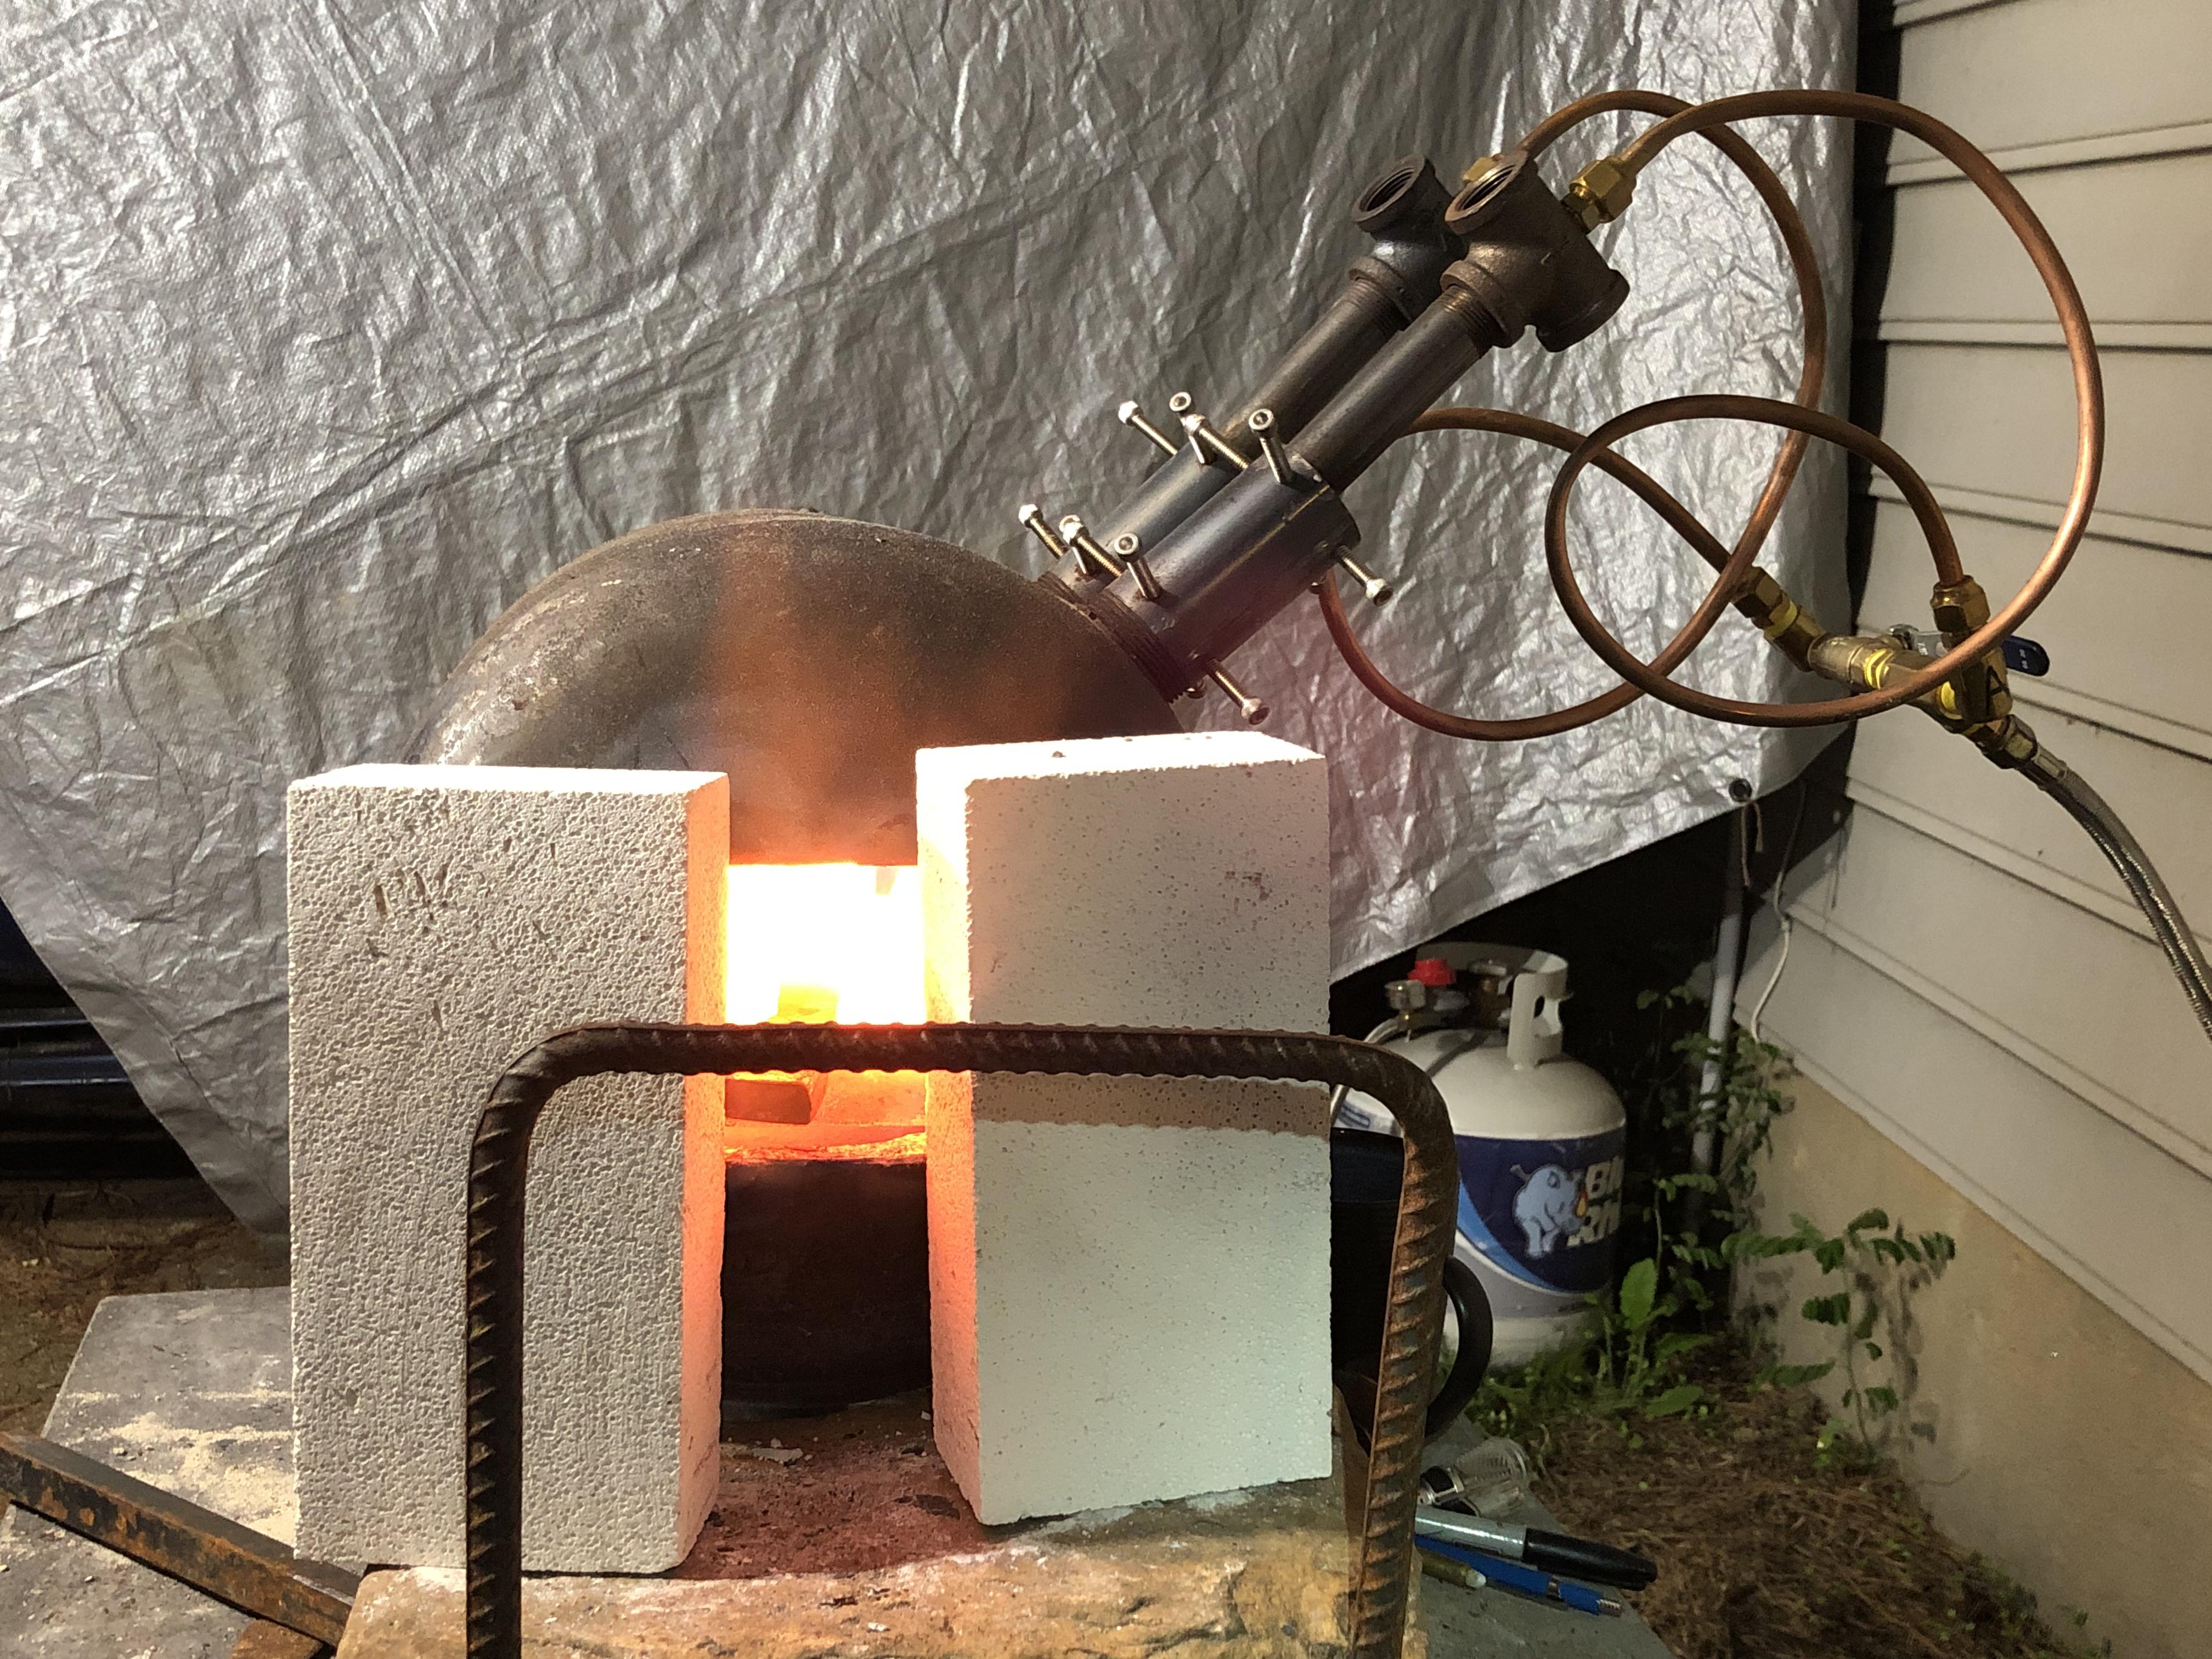
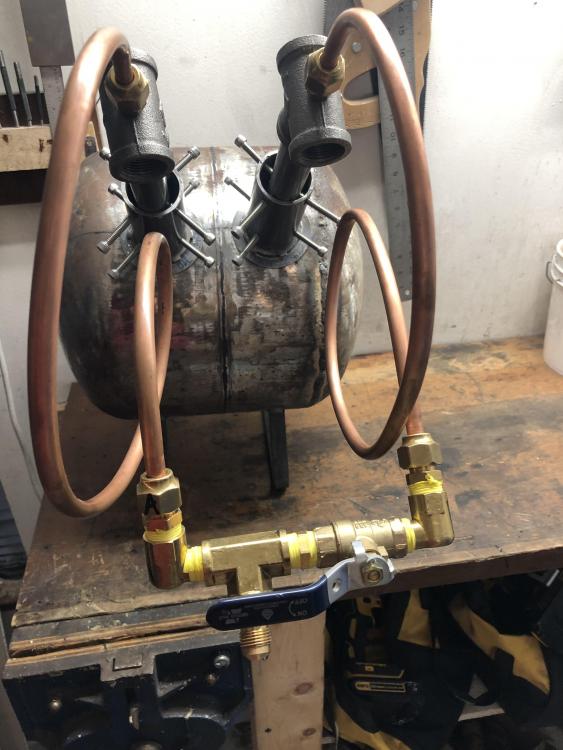
Thanks man and thank you for developing these burners! They are way hot! I can turn this bad boy to 5 psi and flick on both burners for a bit to heat up the forge, then I can cut one off and use one burner still at 5psi to forge regular stuff. I haven’t tried welding in it yet but I can tell this bad boy will weld like a champ!
-
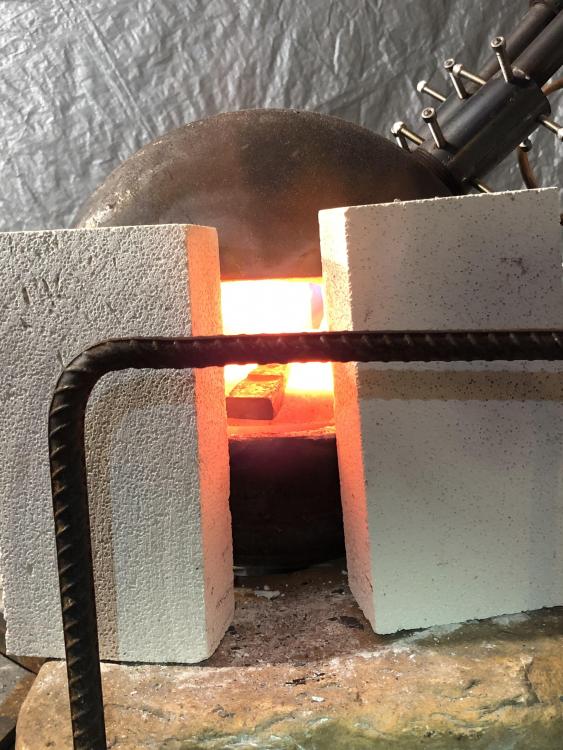
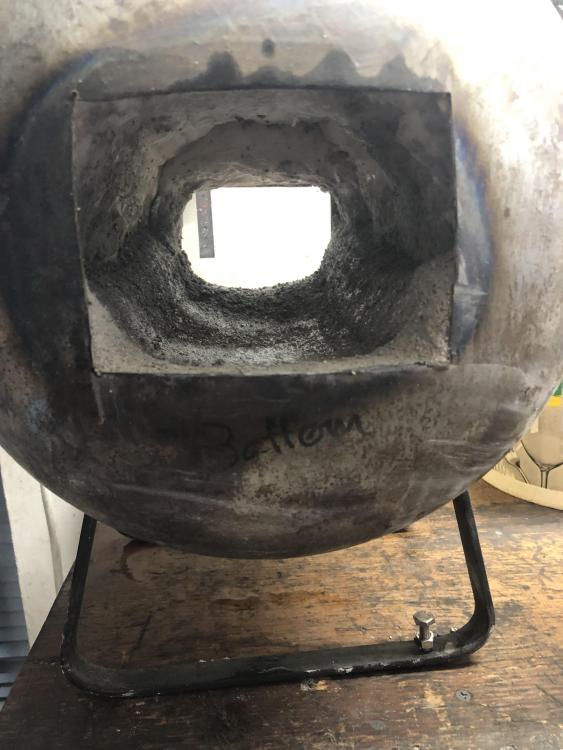
Hey guys I just wanted to update to say that I finished her to the point where I have been using her. Thank goodness for all the great info and advice on this site because it is insane how much better this forge is compared to my noob plaster perlite sand in a paint can forge! anyway here is a couple pictures: I still have yet to build the brackets that the bricks will sit on but I will do it once I go and get some angle iron this weekend. Thank you all!

-
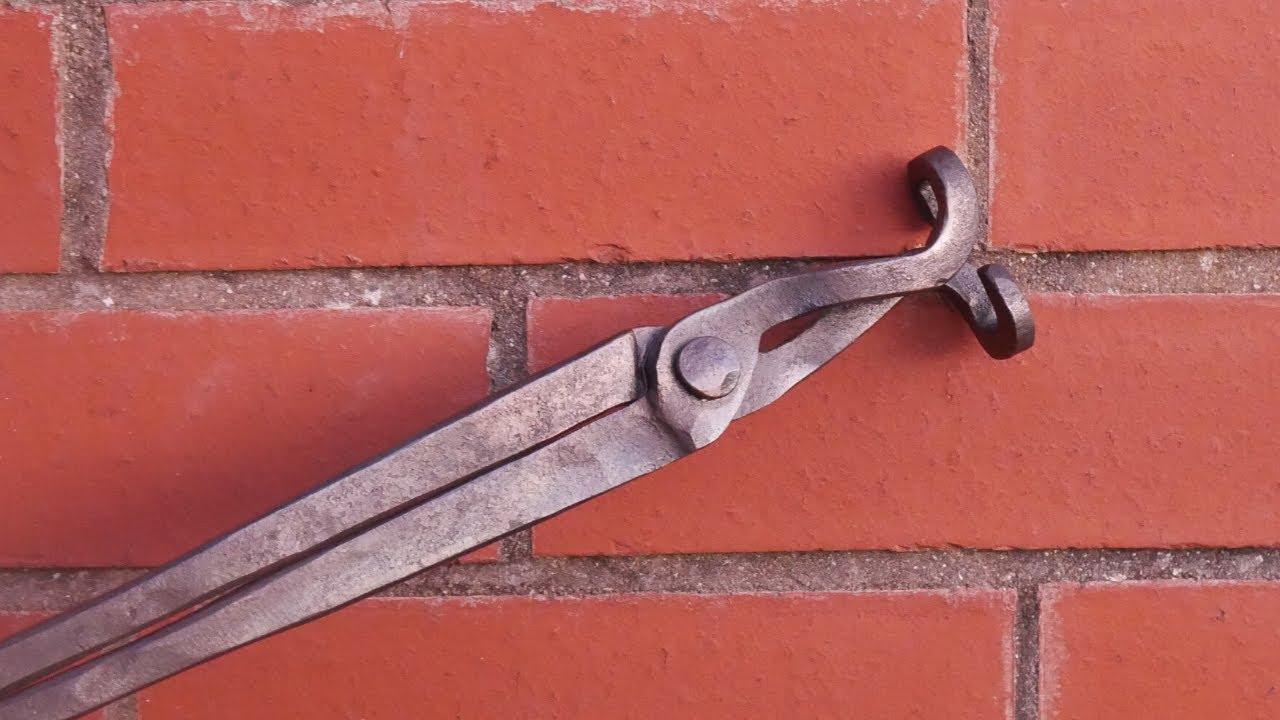
It’s also just such a valuable resource of people passionate about blacksmithing who all together have a huge base of knowledge and are willing to help people and give knowledge freely. Even if it hurts a bit to try to modify my communication it’s worth it. Not to mention the blueprints. Speaking of I am going to make some of those tongs in one of uri hofi’s blueprints which can hold an amazing variety of stock.
-
Awww man I used bad language again so I guess they have to check my posts before anyone sees them, sorry mods! It’s a hard habit to break I apologize for breaking the rules. I did end up bagging it and there is a nice fine condensation on the inside of the plastic bag so I’m glad you confirmed that was the correct thing to do. It should actually be firm enough now to flip and do the top so I will most likely get that done in the next couple of hours so I can let it chill in the bag for a full 24 before I start progressive firing. Thanks again for your awesome expert help JHCC, I’m someone who wants to things as correctly as I can the first time so my result is at least decent despite me being a total noob so having you guys to ask about this stuff is a relief. I’m also pretty slow to understand things sometimes even when it’s spelled out for me so thanks again!
-
So I put the KOL on the bottom half and now am finding conflicting info on whether I should flip it ina few hours once it firms up and do the top, or whether I should give it 24 hrs before flipping it. I also have a question: should I put it in the plastic bag with the wet towel while I wait for it to get firm enough to flip or do I wait until the whole thing is cover in the KOL to put it in the bag???
-
Ok guys, I just finished putting the KOL in the bottom half of the forge, and now of course I go back to read stuff and for the first time I have found some people saying that you should wait a full day before you flip the forge and put the top half on. All I had seen up to this point was “wait a few hours until the KOL starts to harden then flip it and do the top.” well now I don’t know which of the two I should do. Before I read where people were saying that it’s best to only wait a few hours so that the first application is getting hard but still a bit wet so that when you do the top it bonds better to the bottom, but I don’t want to do this and have my floor sag upwards because I flipped it too soon. Every xxxx time I do something I research the xxxx out of it, but when I start doing it I do a bit more research and always find conflicting info to everything I had previously learned causing me to doubt myself. I am also wondering if I am supposed to have it in the bag with the wet towel before I put on the top or wait to put it in until after the whole thing is done. What I am going to do is go put it in a bag with a towel because it probably won’t hurt and when you awesome people wake up you can advise me what to do. Anyway current pics:
-
-
Oh well if that’s the case then all I can tell you is that I bought them from Etsy(don’t have a drill press) from a seller that had hundreds of great reviews for this specific item and that they seem to work really well so far although all I have done is light them inside and outside the forge. They are about 7” long not including the flare or the t. There are a couple things different from frosty’s original design but the reviews seem to indicate that they still work fine.
-
Yeah they are but I wanted to have one coil partly to keep the valve cool and if you try to go tighter than that then the tubing kinks. It may look stupid but it works.
-
Hey guys, I just wanted to post a couple pictures of where I am at with my forge build. I just finished firing the rigidizer today and tonight I will put on the Kast-O-Lite. After the KOL I will be putting a thinner layer of Bubble Alumina on just the bottom of the forge to improve its flux durability. Finally, I will apply a coat (or 2?) of itc-100. You guys have been such a huge help both reading old threads as well as directly answering my questions. Anyway here are the current pictures:

-
Awesome replies thank you. I wasn’t aware that rigidizer had to be fired because none of the forge building instructions I read said anything about firing it with just wool and rigidizer. It’s now very dry and I wonder if it is too late to do it at this point. Buzzkill: I don’t think it will take longer to heat up because of a thin layer of bubble alumina especially since I am putting the reflective coating over it but if it does it hopefully won’t be a big deal. My reason for using it is that according to my research it is even a good bit more flux resistant than just kastolite so I felt that I would be able to go longer without having to patch the forge from wear as a result of welding but the sources I got this information from also didn’t say anything about firing the rigidizer right after applying it to the wool. jhcc: do you think it is worth trying to fire the rigidizer itself at this point? It has been dry for about a week. When I applied it it soaked into the wool and didn’t just sit on the surface so it seems like it should hopefully be ok. The container doesn’t say anything in the directions about firing it, it just says to let it dry at room temperature and that if you want to you can expose it to 150 degrees F to help it dry faster. If it was mandatory you would think they would put it in the directions but I wouldn’t put it past them to leave it out. I’m assuming the reasoning behind firing the rigidizer must have to do with improving the adhesion of the castable refractory because once the kastolite is on, it should prevent any particles of wool from becoming airborne.
-
Thank you to both of you guys. Buzzkill: when you talk about turning one way then turning the other way, are you saying to apply it in 3 different sections? In other words do it in thirds? Also when I wet the ceramic wool, how wet does it need to be? Should I just mist it a bit or should I get it pretty wet? Also how much water did you mix with each pound of kast-o-lite? Or did you just mix it by eye? Dragon: how much water per pound did you use if you didn’t just eye ball it? How much did you wet your ceramic wool before applying the kast-o-lite? Thanks a ton guys! I have a couple pounds of bubble alumina I plan to put on just the bottom over the kast-o, and then i have that it-100 stuff or something like that to put on everywhere last. This will be amazing when it is done. I have been using a shitty coffee can forge with terrible insulation for like six months and the difference this forge will probably make will probably be shocking.
-
Hey guys! I recently got to the point where I’m ready to apply kast-o-lite over the wool in my propane tank forge build. I sprayed the wool with rigidizer a few days ago and it is totally dry. I have read as much as I can find on putting kast-o-lite in forges but can’t find an answer to my question. The way I have read is to apply it to the bottom of the forge, then flip it over after some period of time and do the top. I have also read about doing it in 3 sections. Here is my question: How long should I wait after doing the bottom to turn the forge upside down and do the top?? Also if I end up doing it in 3 sections is the time period I wait in between pieces the same or if different how long? I saw that people recommended putting the whole thing in a bag after putting the kast-o-lite on for at least 24 hours before starting progressive fire drying cycles. One more question: Do I wait 24+hrs and then cure between each section? So in other words would I do the bottom section, wait 24 hours, then do progressive fire curing, then do the second section after the first is fully cured and so on? Thanks for any insight you can provide!!
-
No it’s not but if you replace at least half of the sand with perlite it performs way better than just p.0.p. And sand.
-
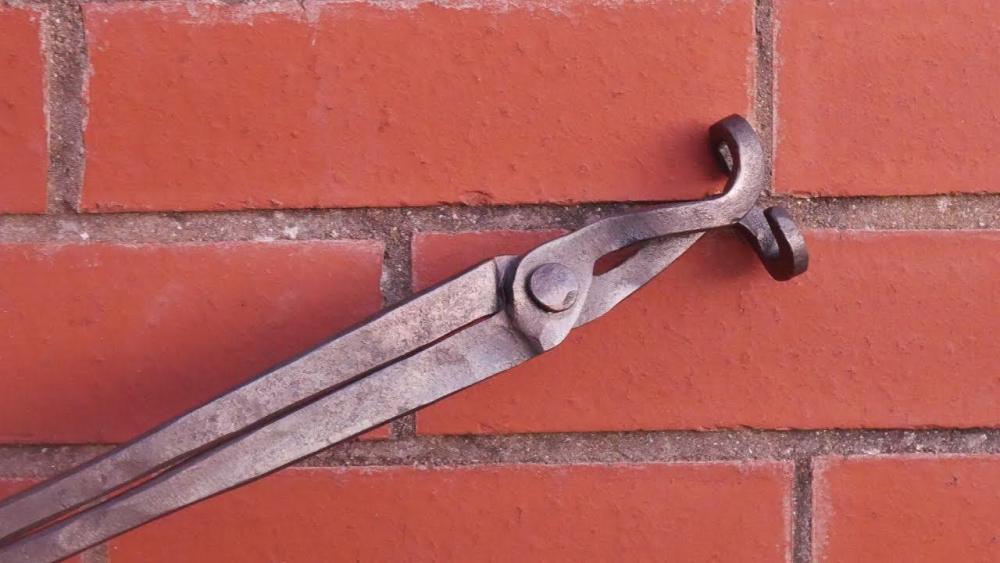
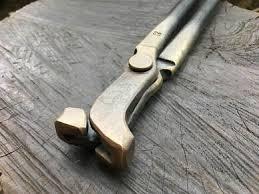
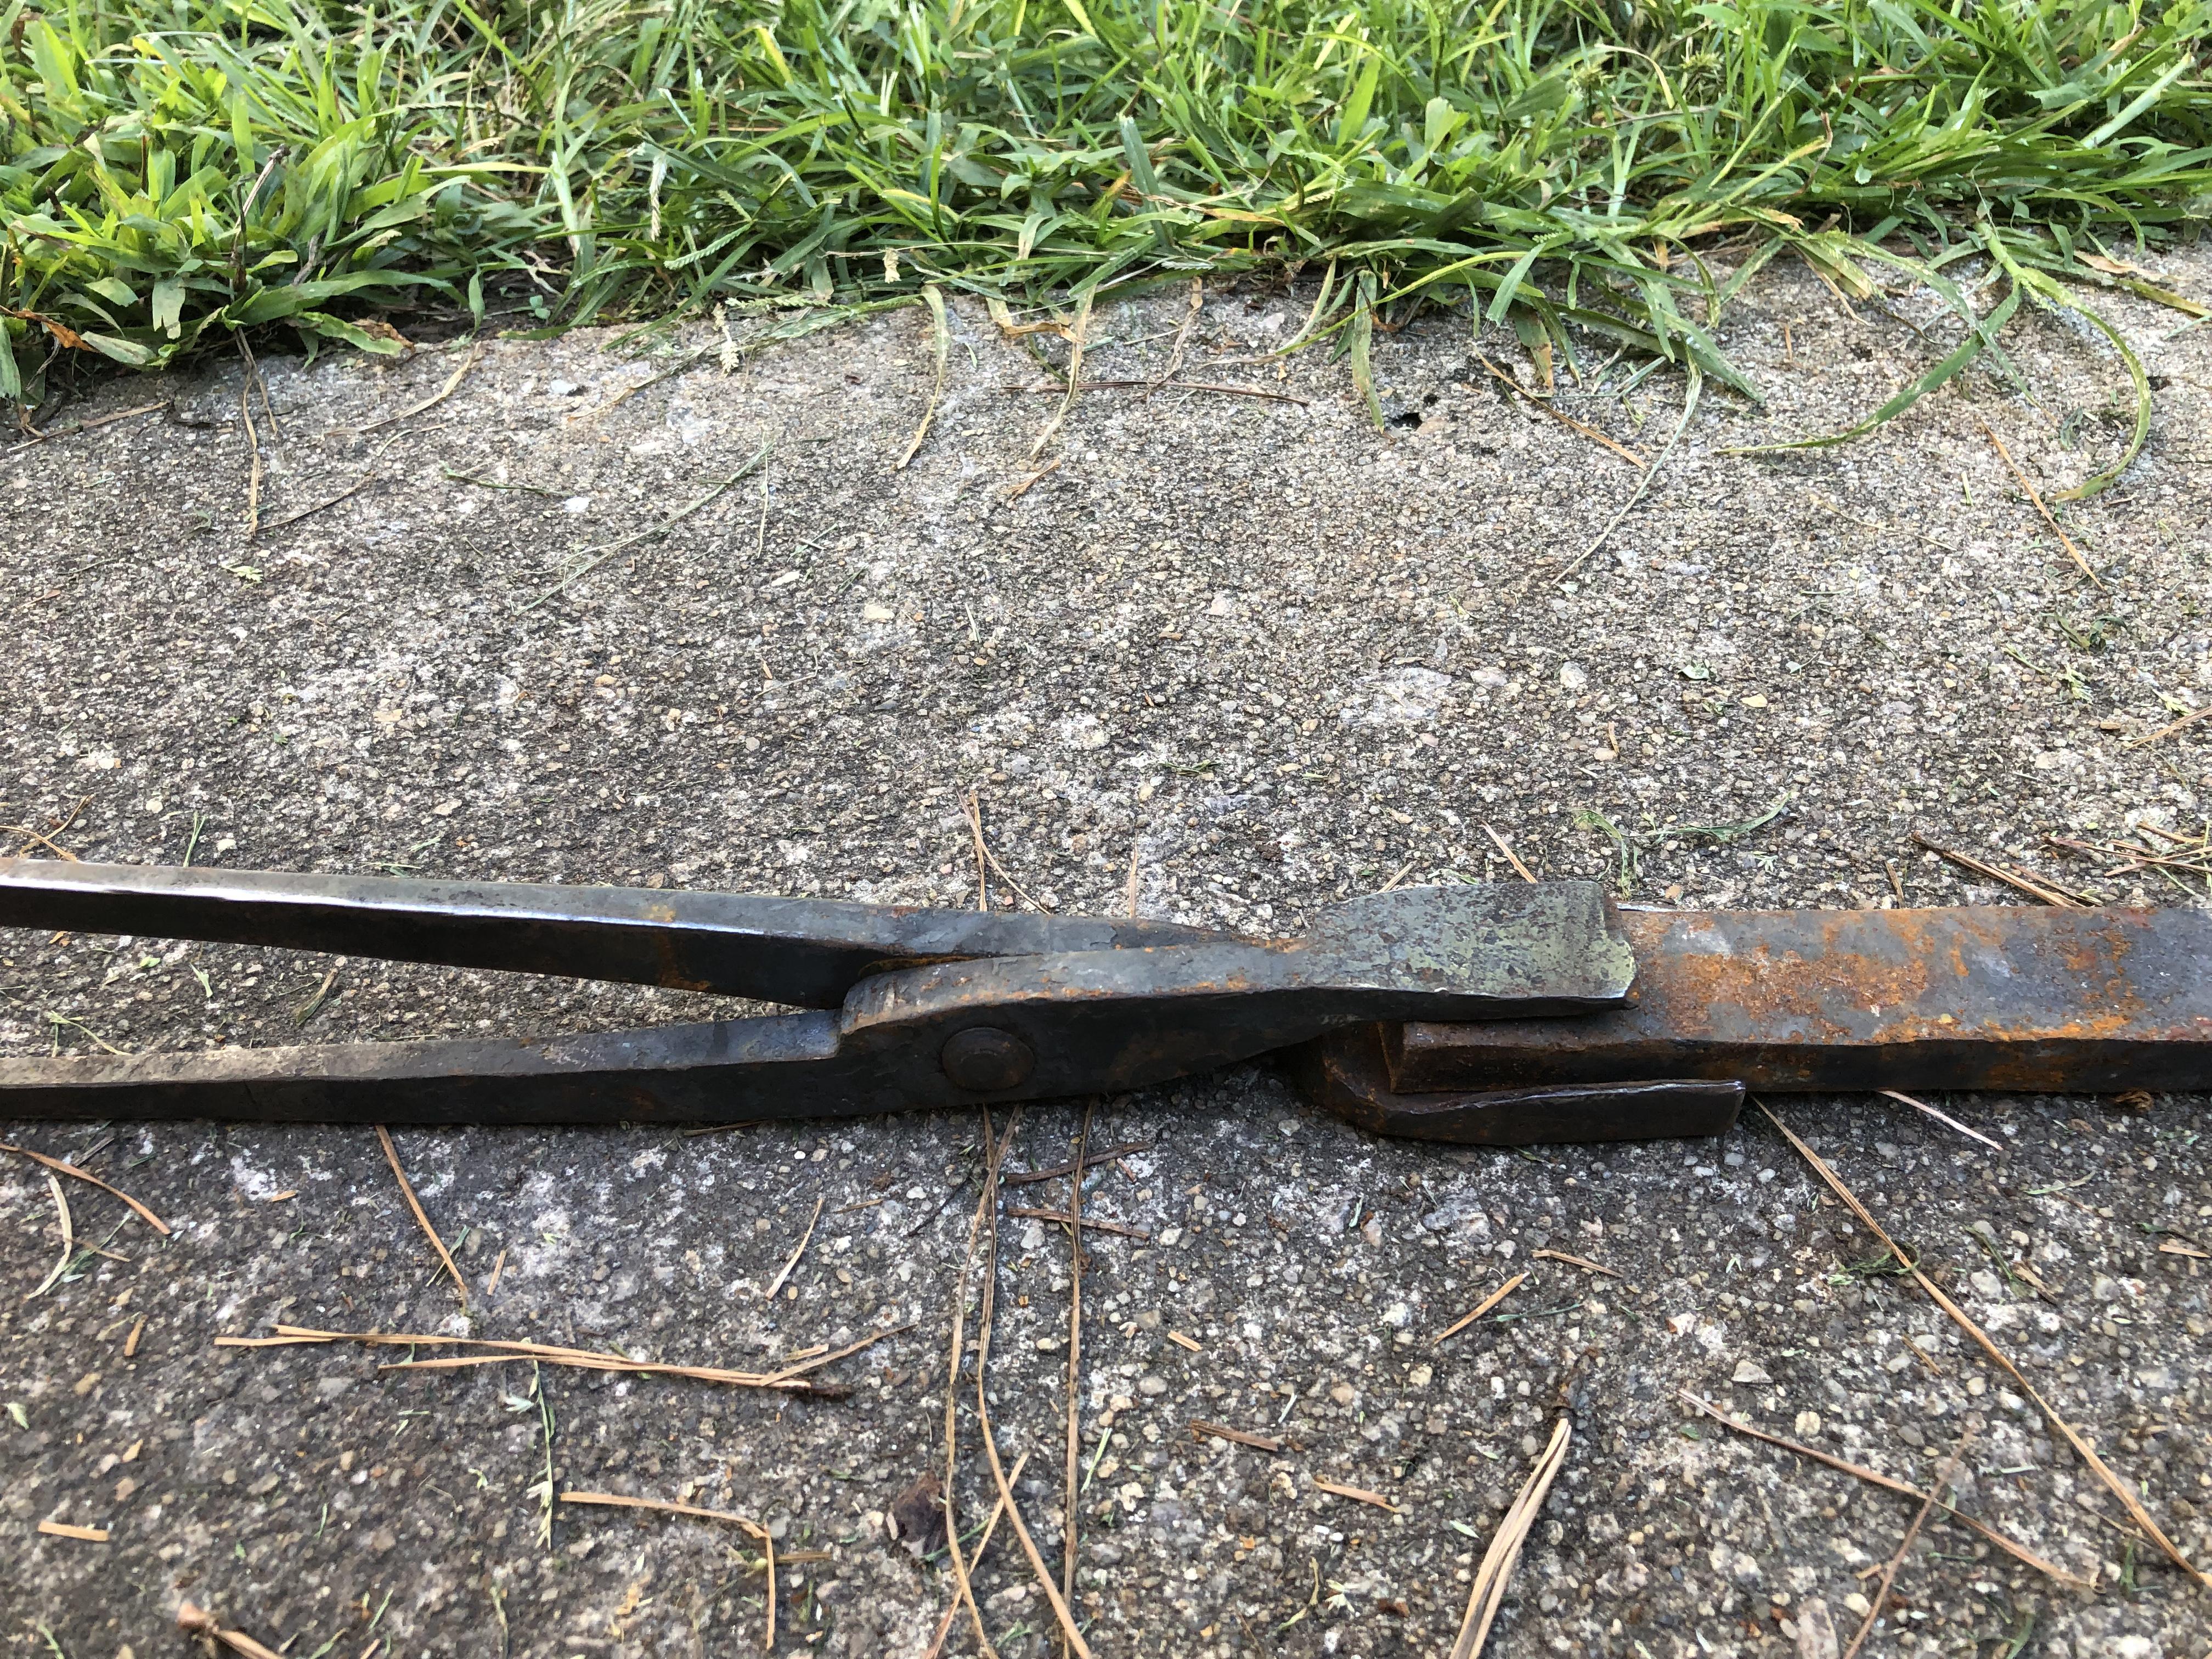
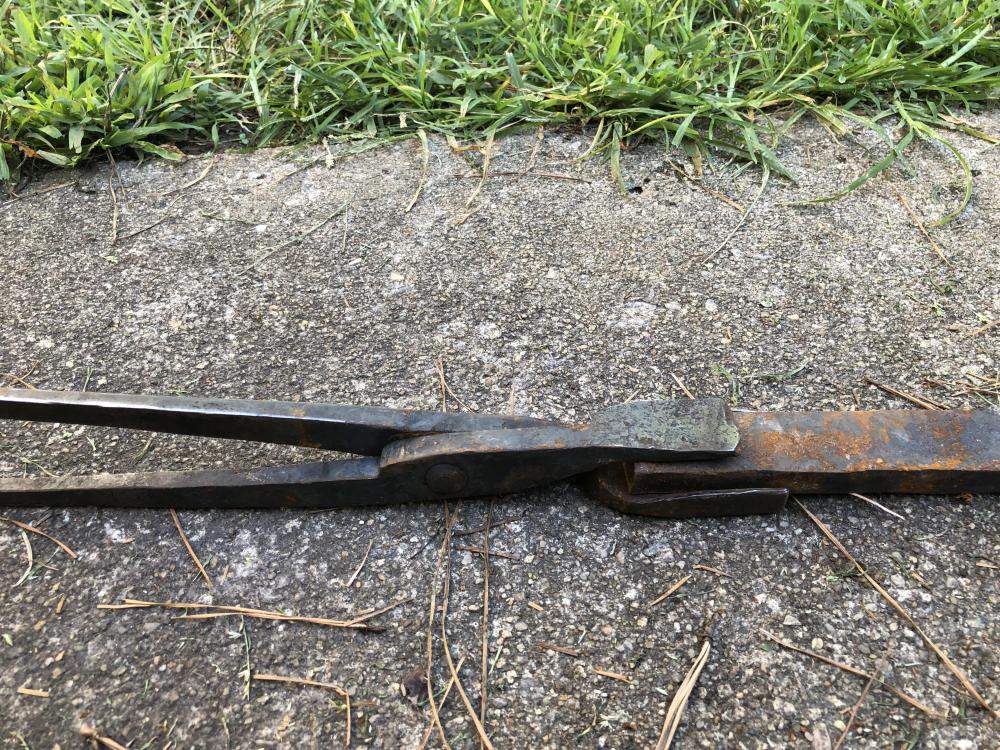
Actually I find that it works pretty well like this. If the jaws were the same length the grip force could be more concentrated at the very tip of the jaws. The way I have it the small jaw pushes more in the middle causing it to apply pressure more towards the center of the area where the work contacts the box jaw which applies a more equal pressure and seems to do a better job of holding the workpiece. Also, the longer the jaw is assuming that the most contact is at the tip of the jaws, the more your leverage is cancelled out, the less holding power. The shorter the jaw, the more of a leverage advantage.
-
Thank you for the suggestion. I will try that out at some point here. I haven't ventured into making tongs out of anything besides low carbon steel, and I do like that I never have to worry about dunking my tongs in water, oil or whatever else, but I do think that light springy tongs made of spring steel like clips sounds really cool.
-
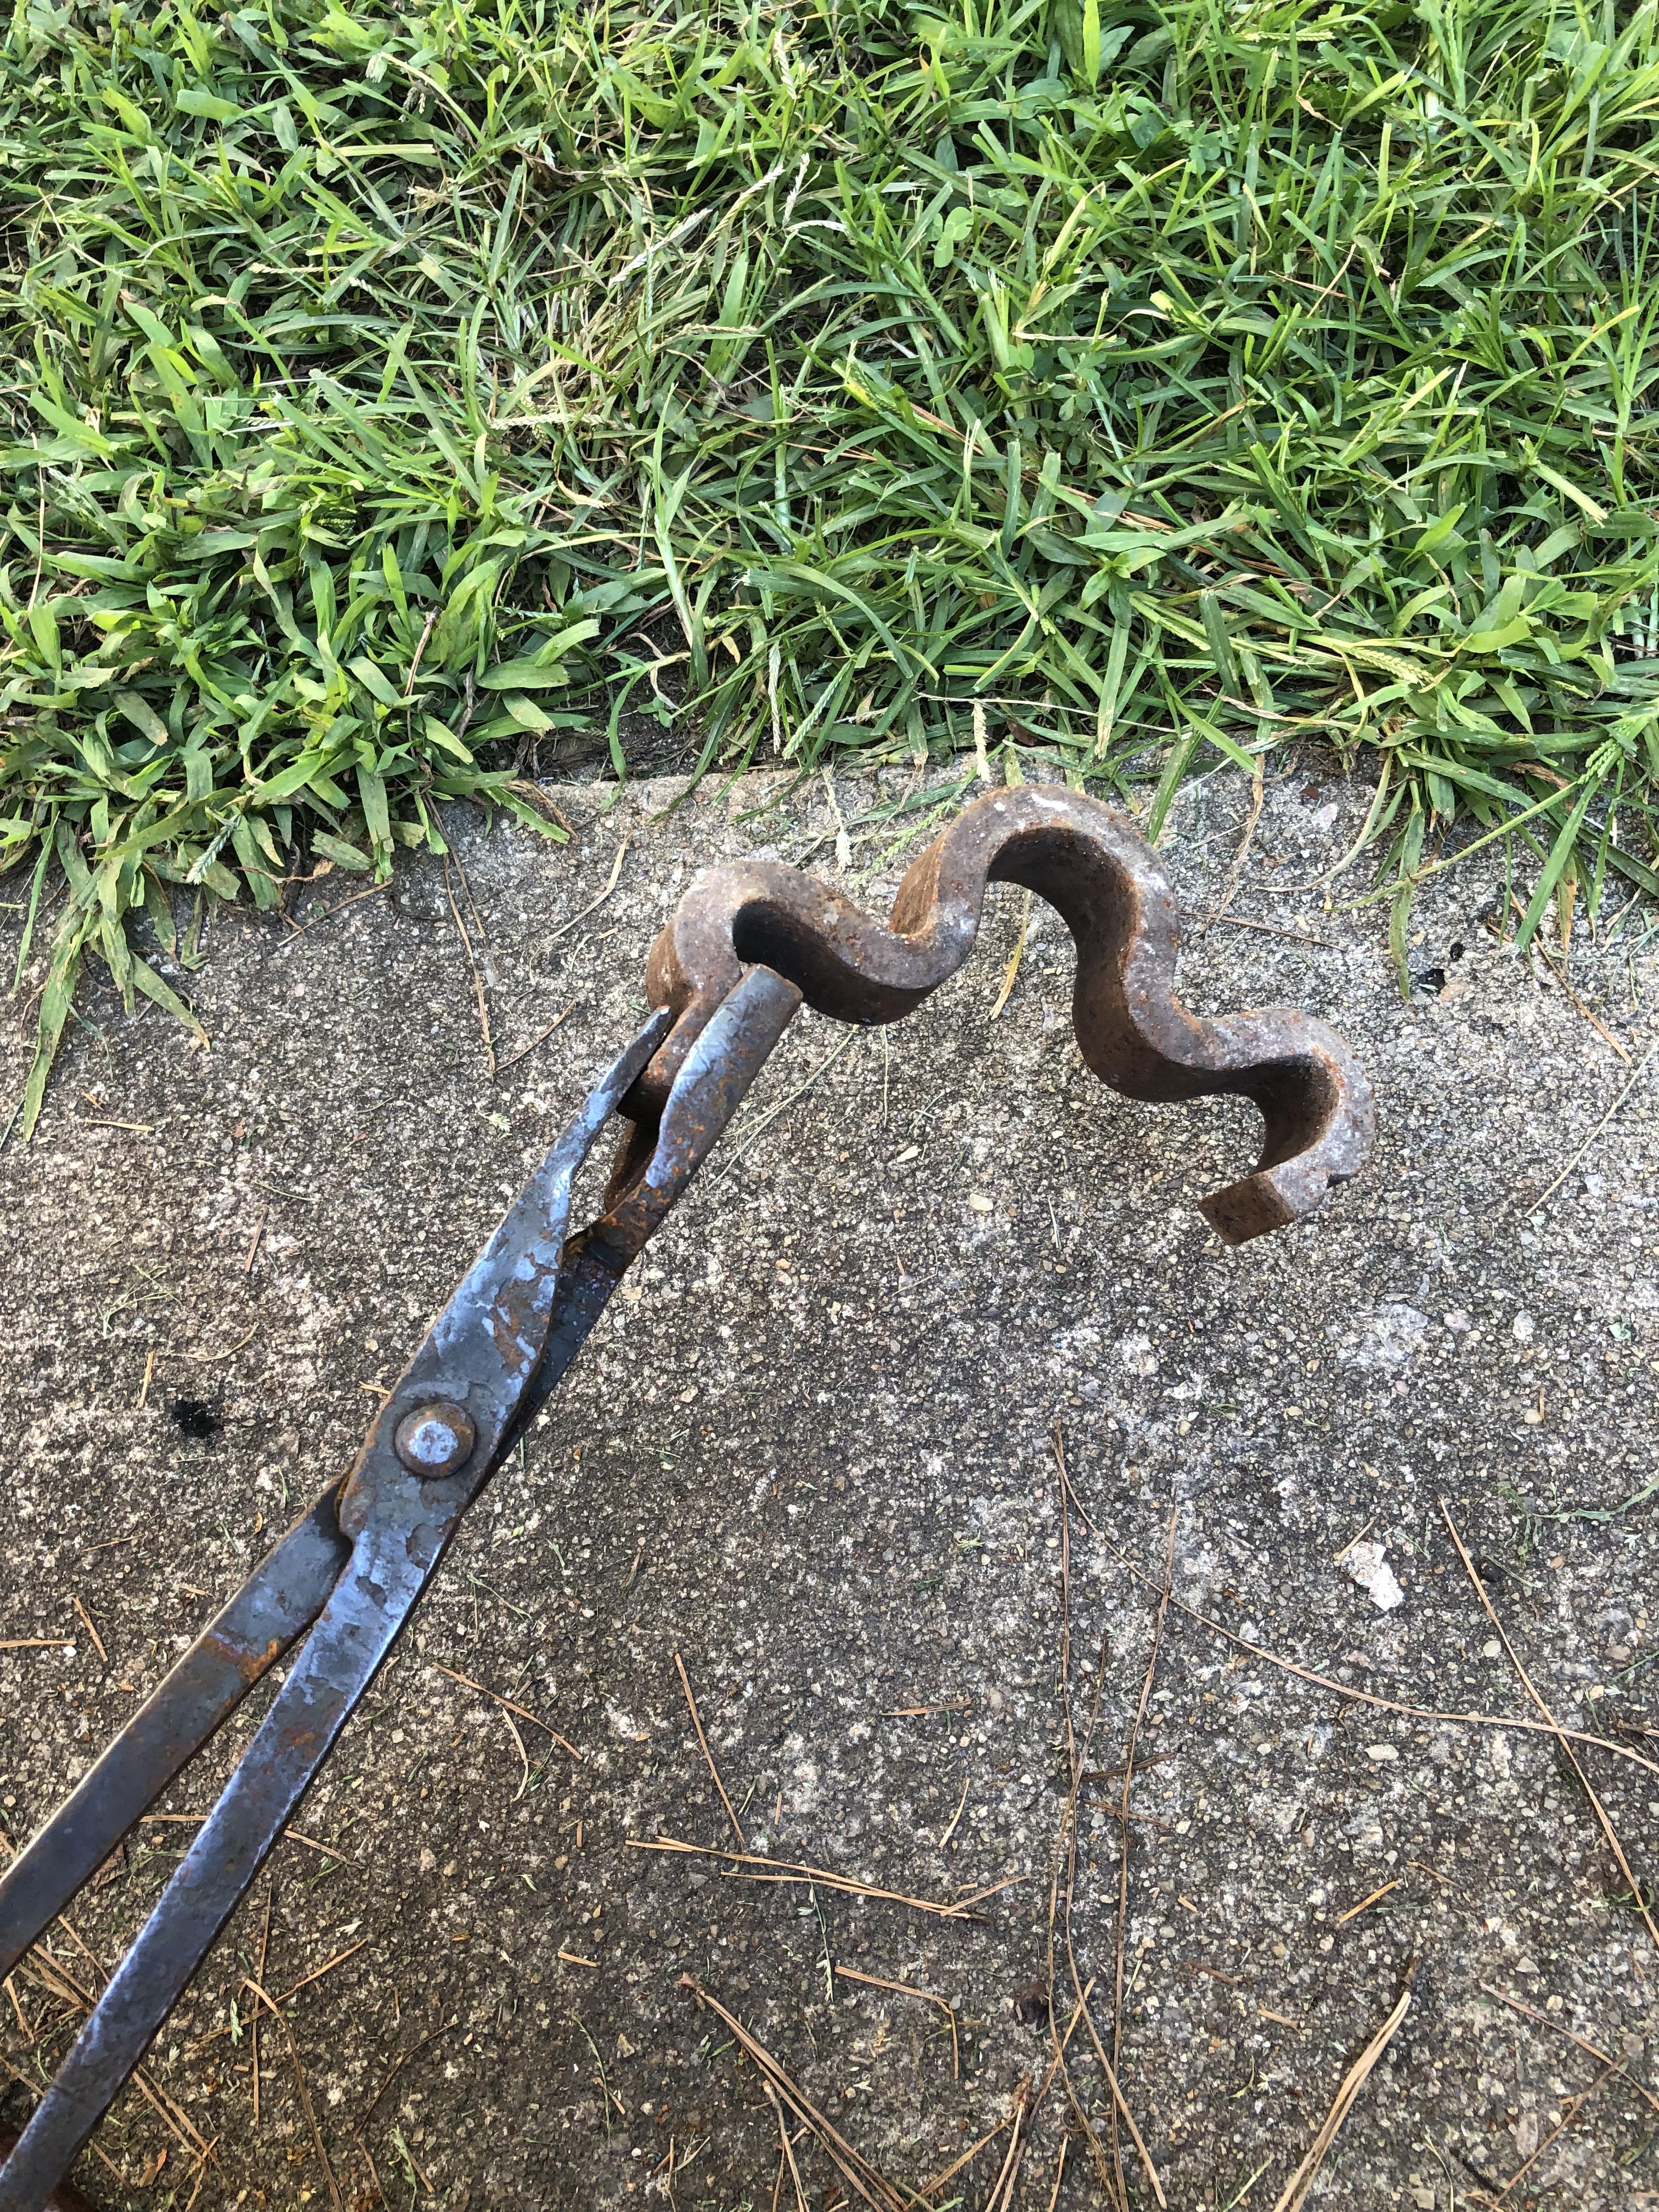
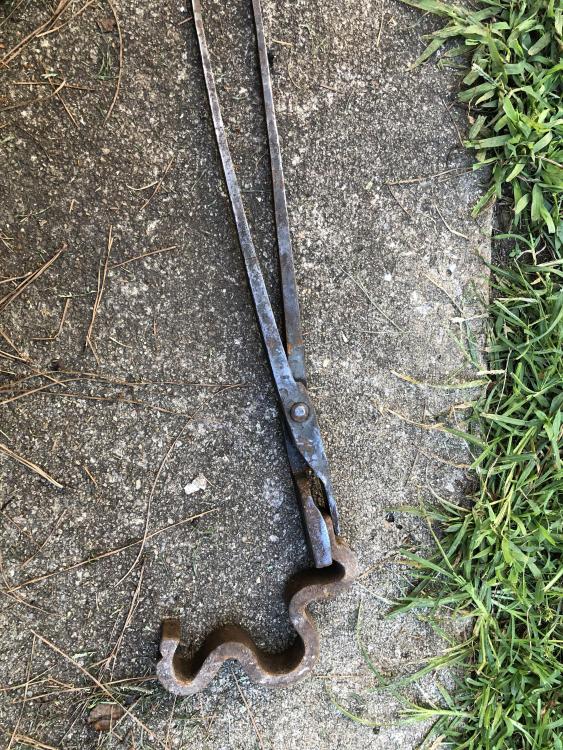
So I ended up going with box tongs after finding some 3/4” square stock I didn’t know I had. These hold up well to use for straightening railroad clips which was the point of making them. I gave up trying to make blade tongs to hold the 1/2” X 1” clips. I will make some blade tongs for thinner stock (like blades) but for steel this beefy box tongs seem to be the way to go.

-
Oops sorry about that Frosty I will try to keep it pg. I have various tools like a bigger crescent that I could probably use but obviously a bending fork or wrench would be better. I may have spoken wrong but the stock I have is actually 5/8” but it’s very close to half inch anyway. What would make things easier for me more than anything else is finishing my darn tootin 20# lp tank forge. It actually uses two of your burners or will when I finish it at least so thanks for that btw. Looks like the consensus is bend it straight but I am still going to finish the super beefed up bladesmith tongs if for nothing else, I already started and they are turning out to be fun to make. thanks to you and everyone else who commented here. This seems like a pretty cool and active smithing community.
-
I have been using vice grips actually but since I am very new sometimes when I hit the piece I don’t have it seated perfectly on the anvil, and if that happens a few times on the same heat then the vice grips sometimes get loose. I learned a lesson and knowing it would probably happen made box jaws that hold the wider side which were obviously not beefy enough but I didn’t think about making a pair to hold the steel on edge like you suggested, that is some good xxxx. I will try them if the extra beefy blade style tongs I’m making don’t work out. The ones I am making aren’t really quite like either of the pictures, they were just the first pictures I found in google of bladesmith tongs. THANKS Man (or woman), glad to be here! My anvil is a pretty small acacciao and the vice I have is just a drill press vice but I hadn’t even thought about using a bending wrench. That’s a good idea i might try if my current solution in progress proves unsuccessful. I am working on a dual burner propane tank forge but it’s not done and I am basically using a paint can forge with a turbotorch I had right now so it would take several heats to do it by bending. I’m so annoyed that it’s so much more fun to forge than to finish building my bigger better forge and keep putting it off even though I have everything I need and I know full well that it will change everything for my forging in a big way. It will be way better. I have a dirt cheap fluxcore I got on Amazon but it does have an inverter unlike most of the fluxcore only welders I have seen esp for cheap. The problem with it is that the wire speed isn’t constant it sometimes hesitates or goes slower for a couple seconds. It does this to the point that even a good welder(not me I’m bad) couldn’t lay down a continuous pretty weld with it, BUT it sticks metal together and is way better than no welder! Those are random pictures I found on google but thanks anyway! Lmao That’s an interesting suggestion but maybe I don’t understand how wolf jaws work but it seems to me they might work ok but wouldn’t work as well as some other types of more specialized tongs. I will have to read up on wolf tongs.
-
So I don’t have stock big enough to build sturdy enough box jaw tongs for straightening out and forging railroad clips(the ones that look like a weird number 3 and are made of 1/2” thick X 1 1/4” wide spring steel flat stock.) So I started searching for a way to use my 5/8” round mild stock to build tongs which will hold up to the heavy hammering it takes to straighten one of these out in a few heats. I was trying to find pictures of a much heavier duty pair of the tongs in the pictures, but couldn’t find any name for them other than blade tongs. Does anyone know if there is another name? Searching for extra heavy duty blade tongs or similar doesn’t yield pictures of anything sturdier of a similar design. I started making them even though I couldn’t find a reference so I will post a picture of them here when I finish them. They will be ugly due to my near virginity to the sweet sexy feel of playing with fire and metal, and beating the xxxx out of it with a hammer. Seriously though forging/blacksmithing seems to be more addictive than drugs. It’s awesome to be able to make something that requires tools you don’t already have with just a hammer and some steel.